Schwalm Costume – Apron Squares (1)

Apron squares were originally apron pockets. However, because the fine fabric around the thick pocket area wore too quickly, the utilitarian pocket evolved into the colourful and finely embroidered squares found on Schwalm aprons. The squares, resembling pockets, were pinned onthe dark aprons near the side edges a little below the waistband. And because they were worn to dances, they became known as Tanzecken – dance squares.
Over time the apron squares got more and more beautiful. Here I show examples from about 1850.
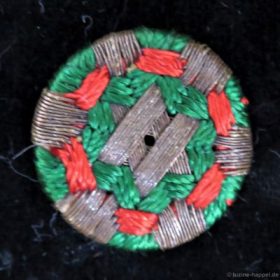
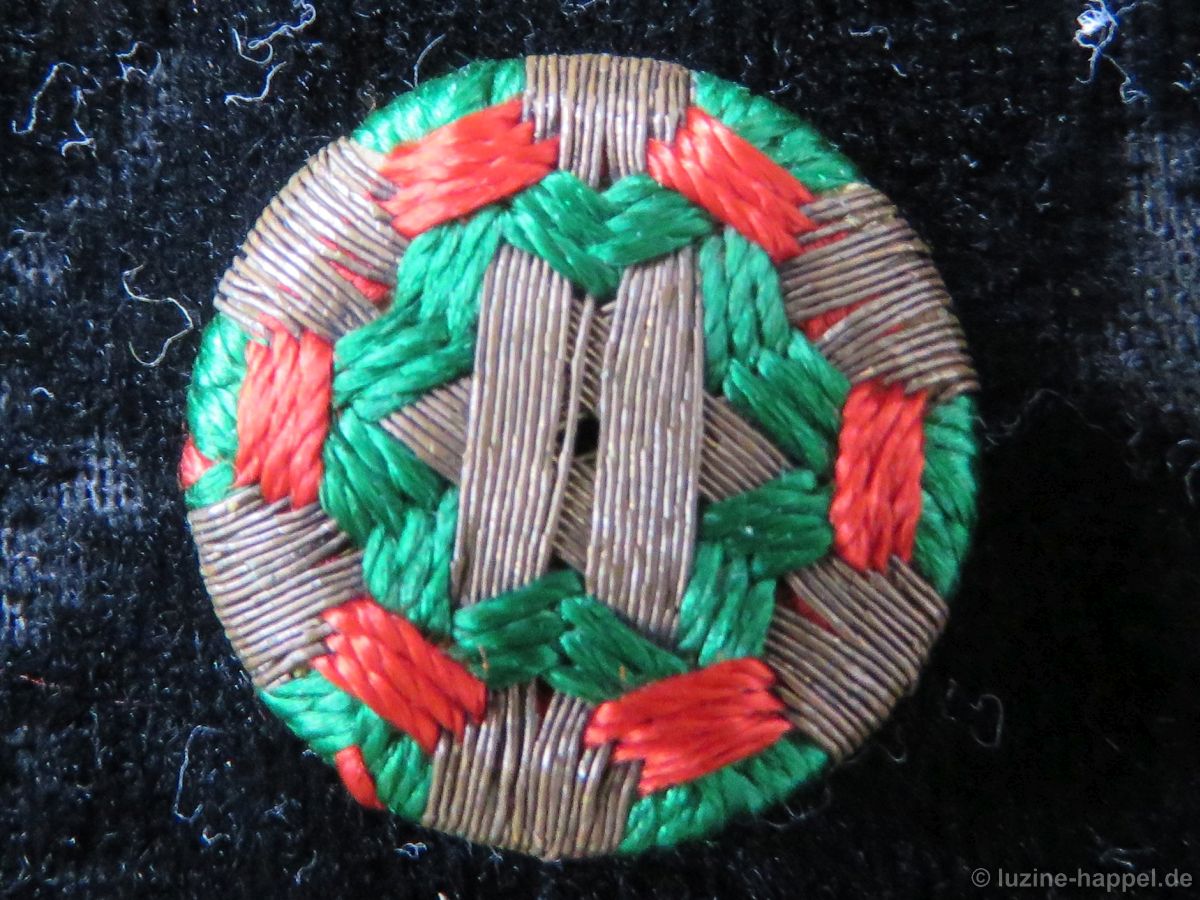
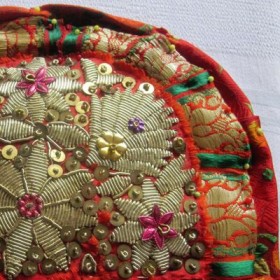
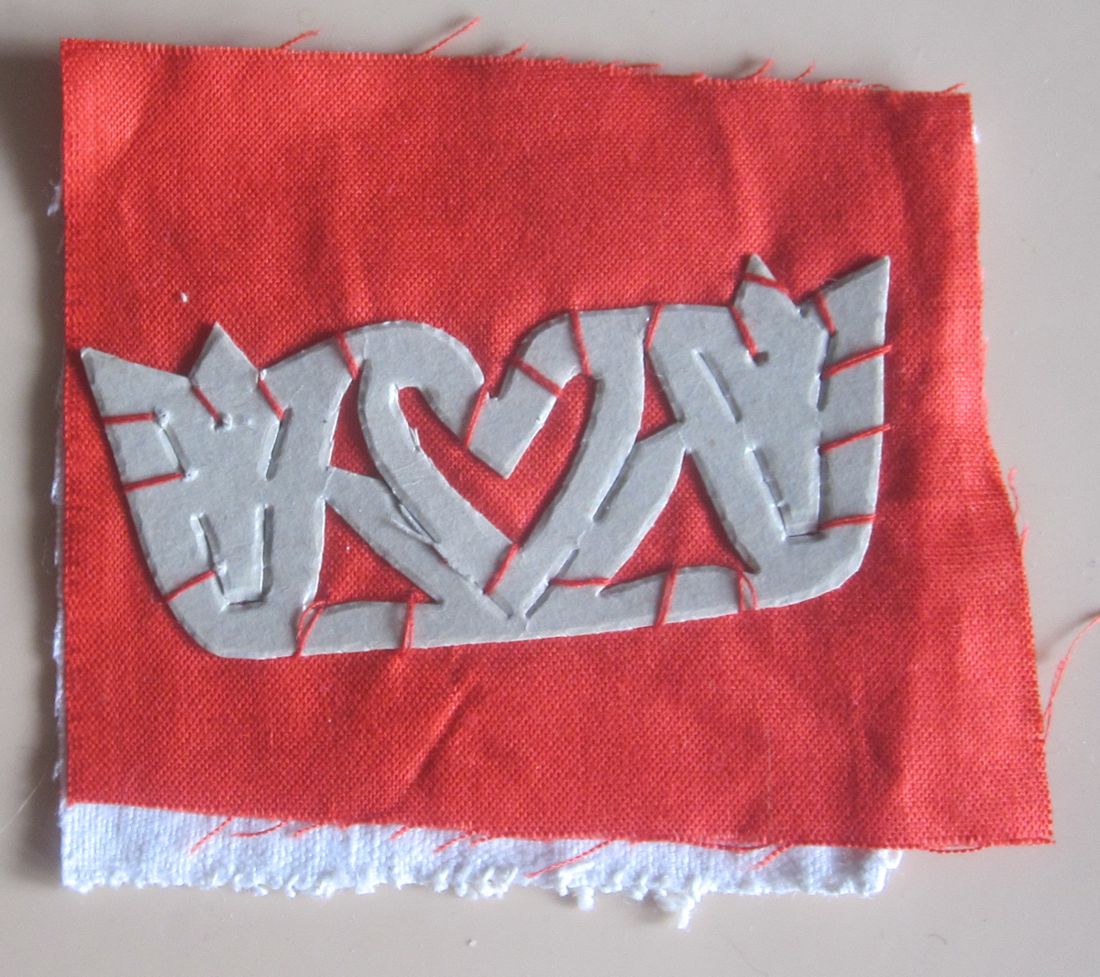
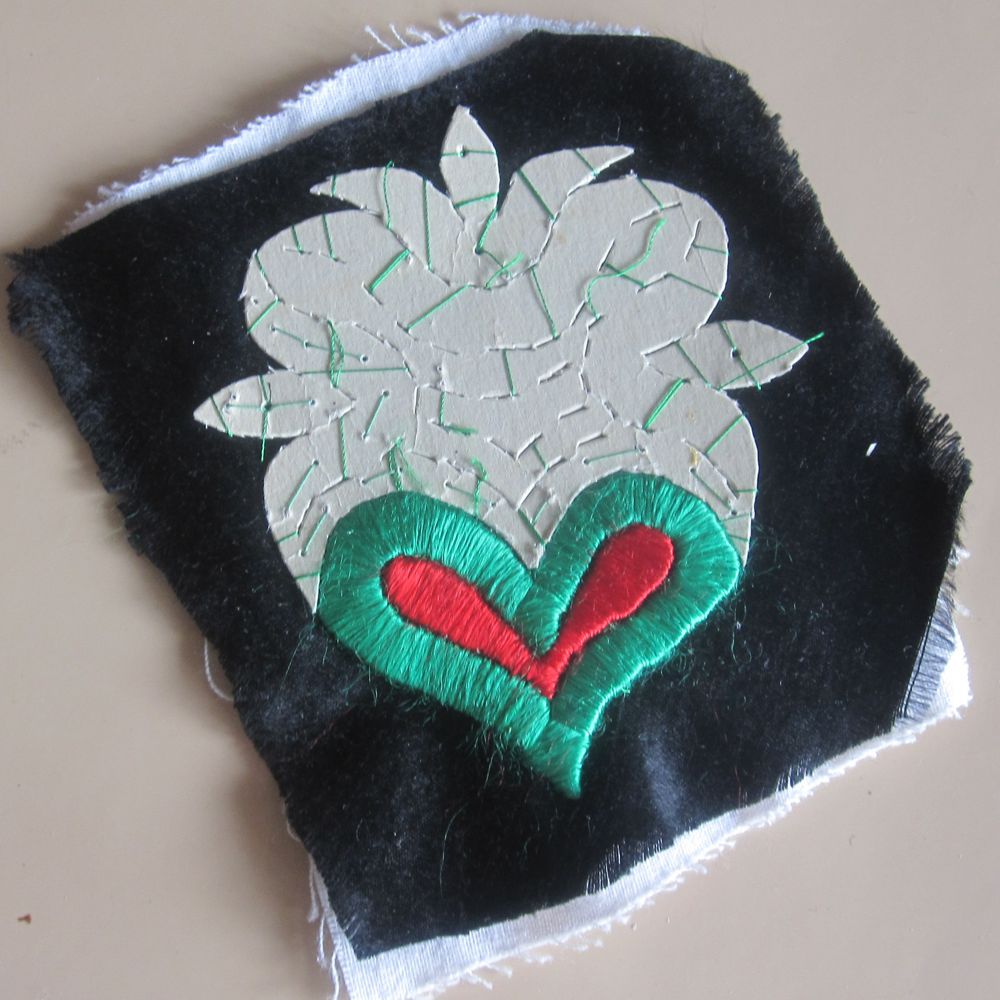
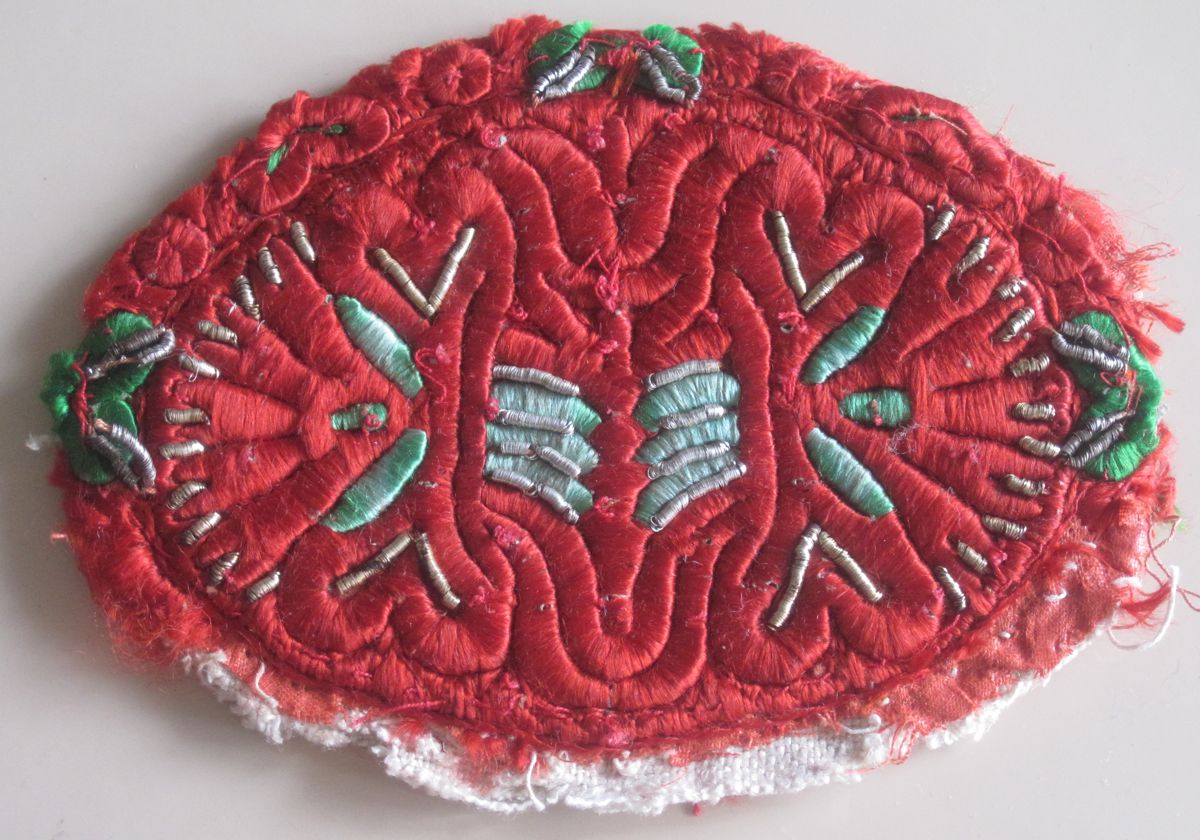
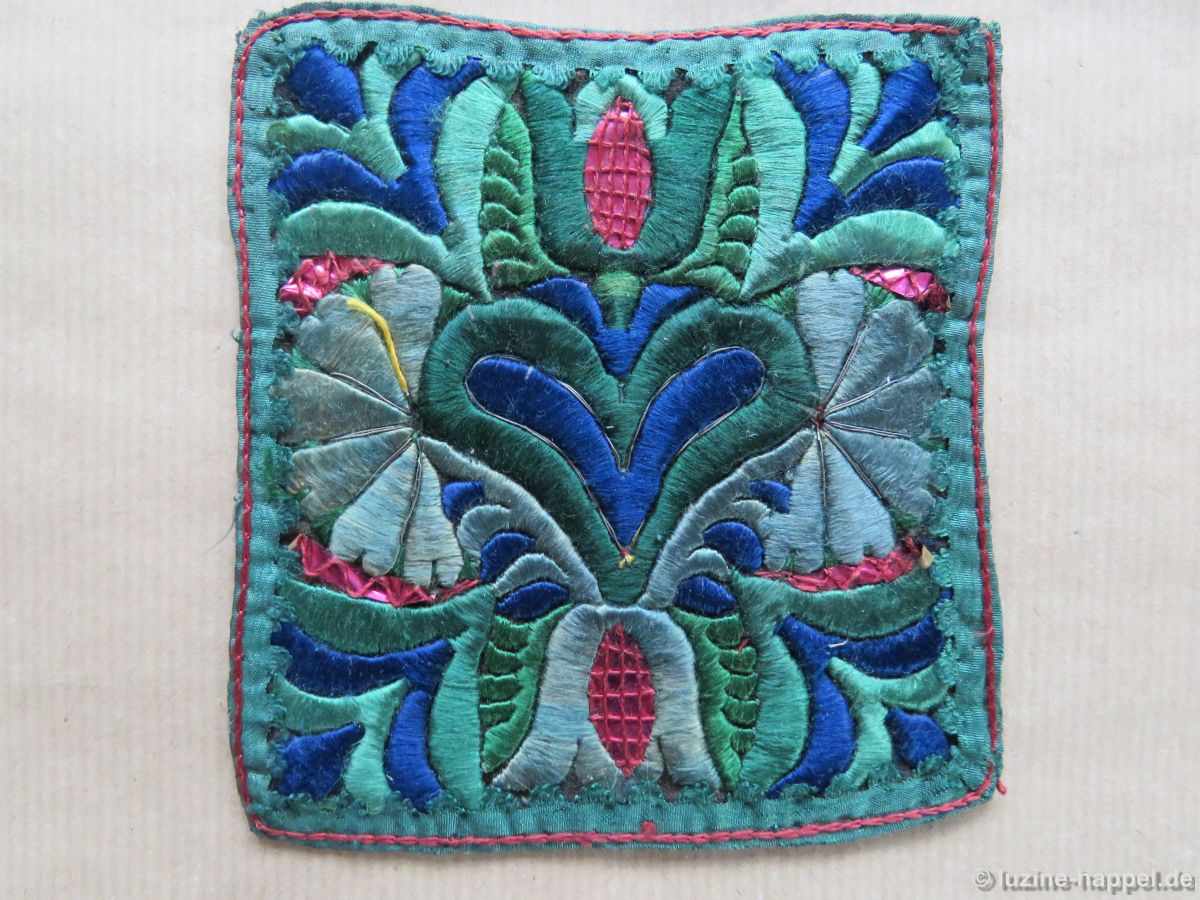
They are significantly less adorned than the apron squares from about 1900. They were embroidered with different colours and in many different patterns. The Schwalm typical motifs (heart, tulip, and star) are found on these accessories. The apron square below measures 16 cm X 16 cm. In general, the early apron squares are smaller with sizes measuring between 11 cm and 14 cm square.
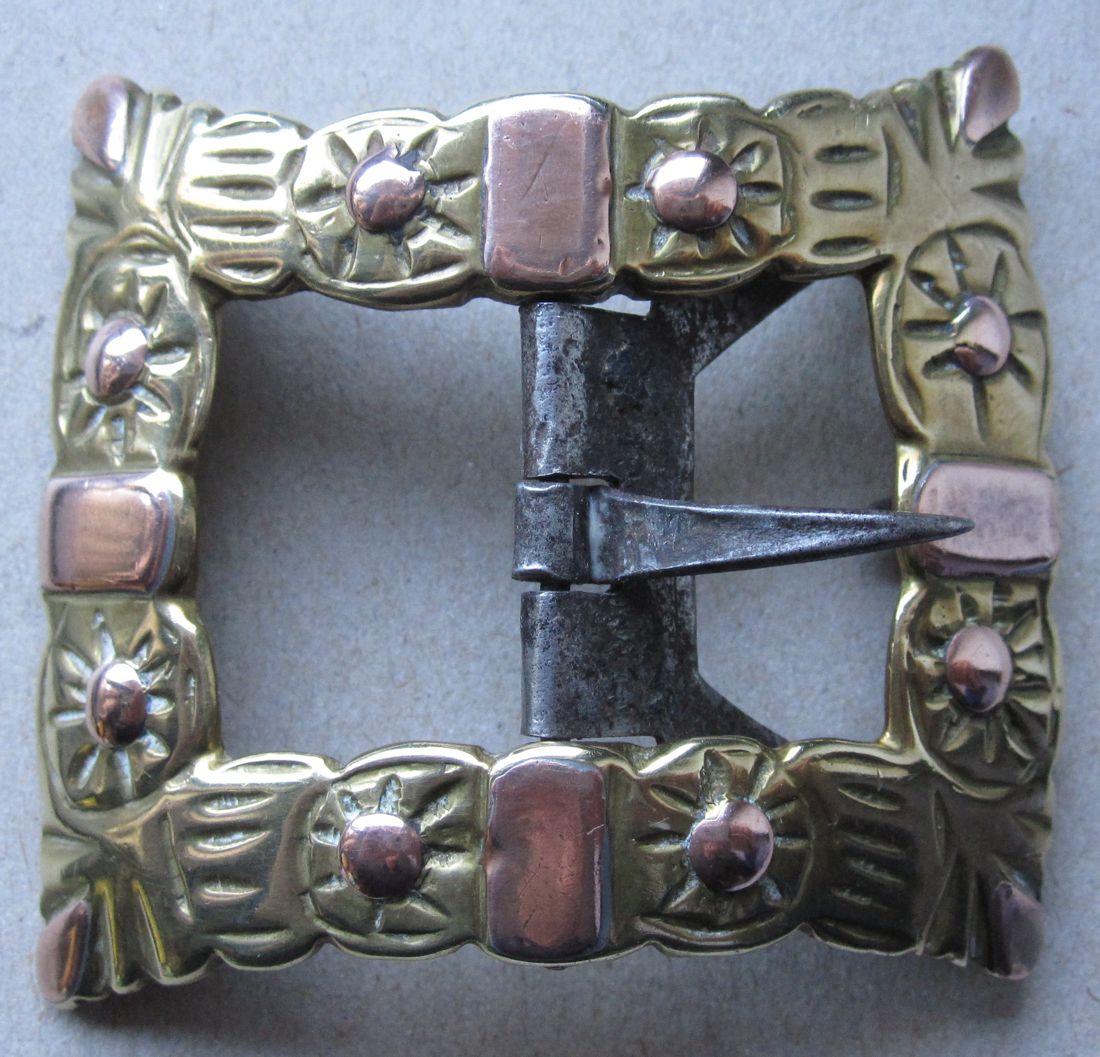
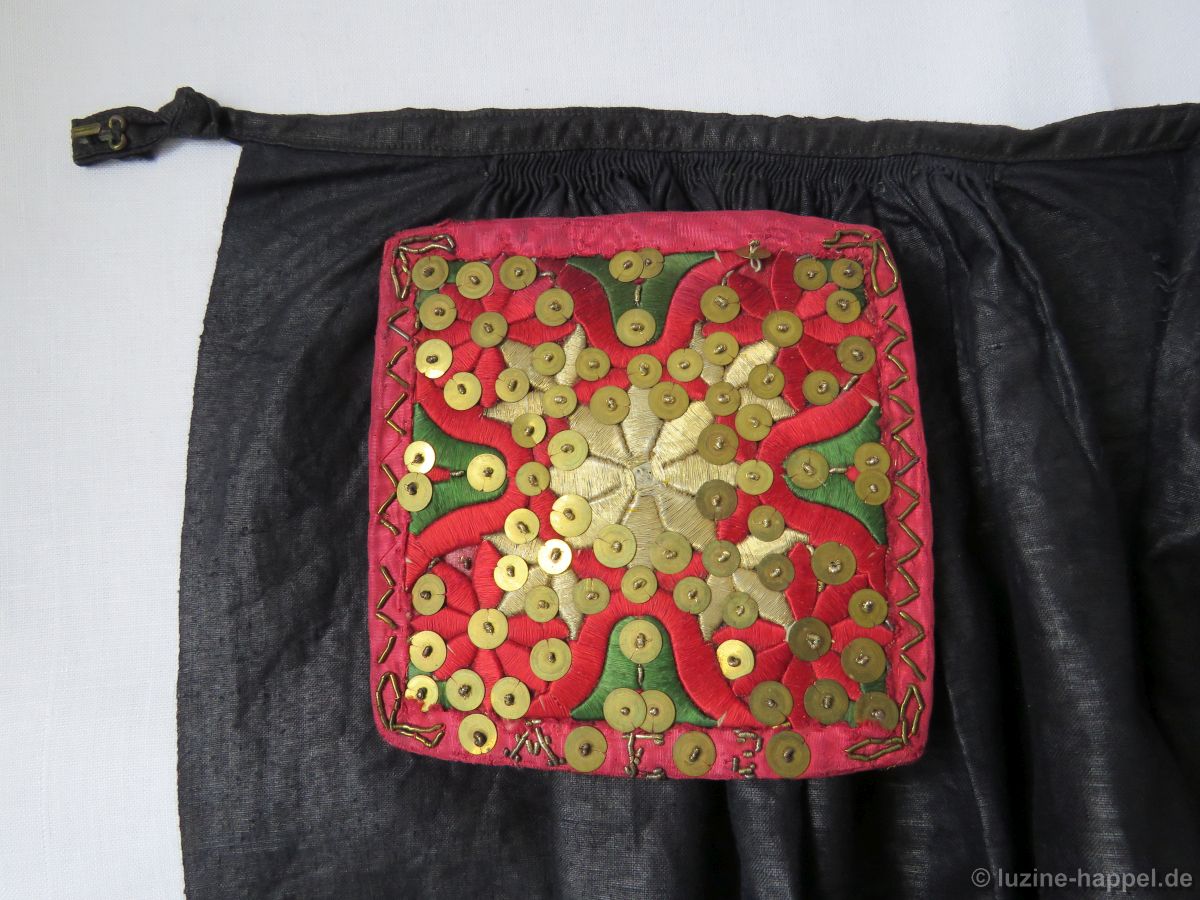
Also the carnation plays a role in the apron square designs.

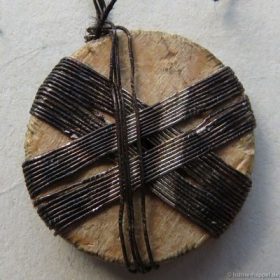
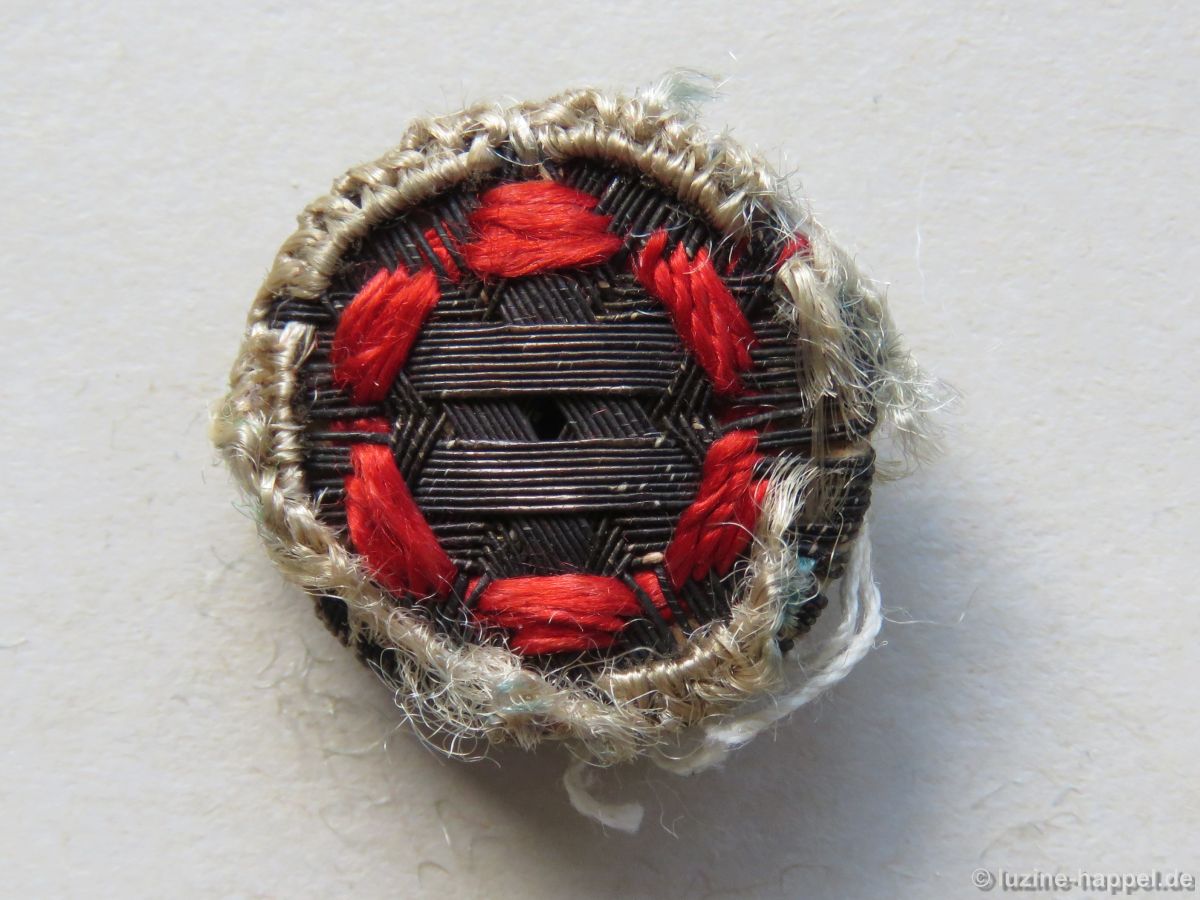
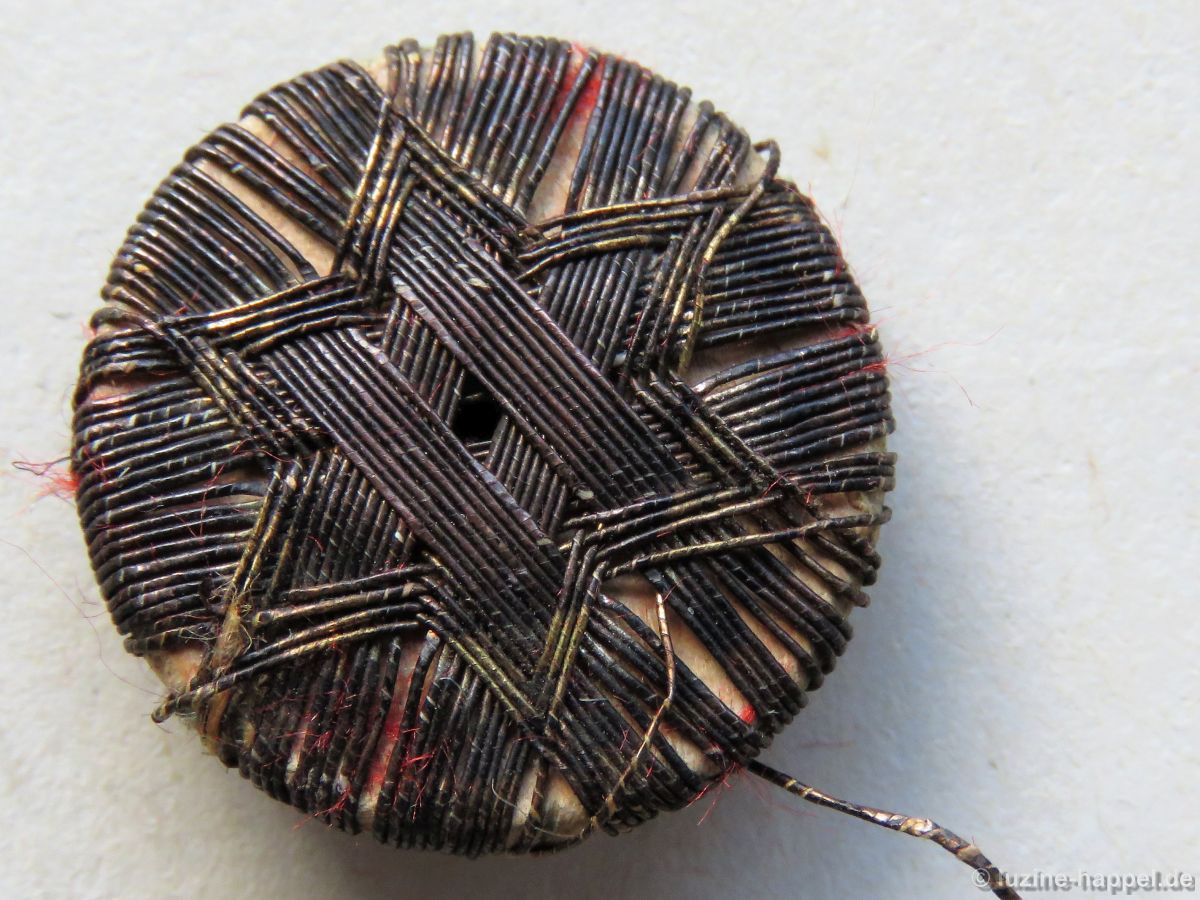
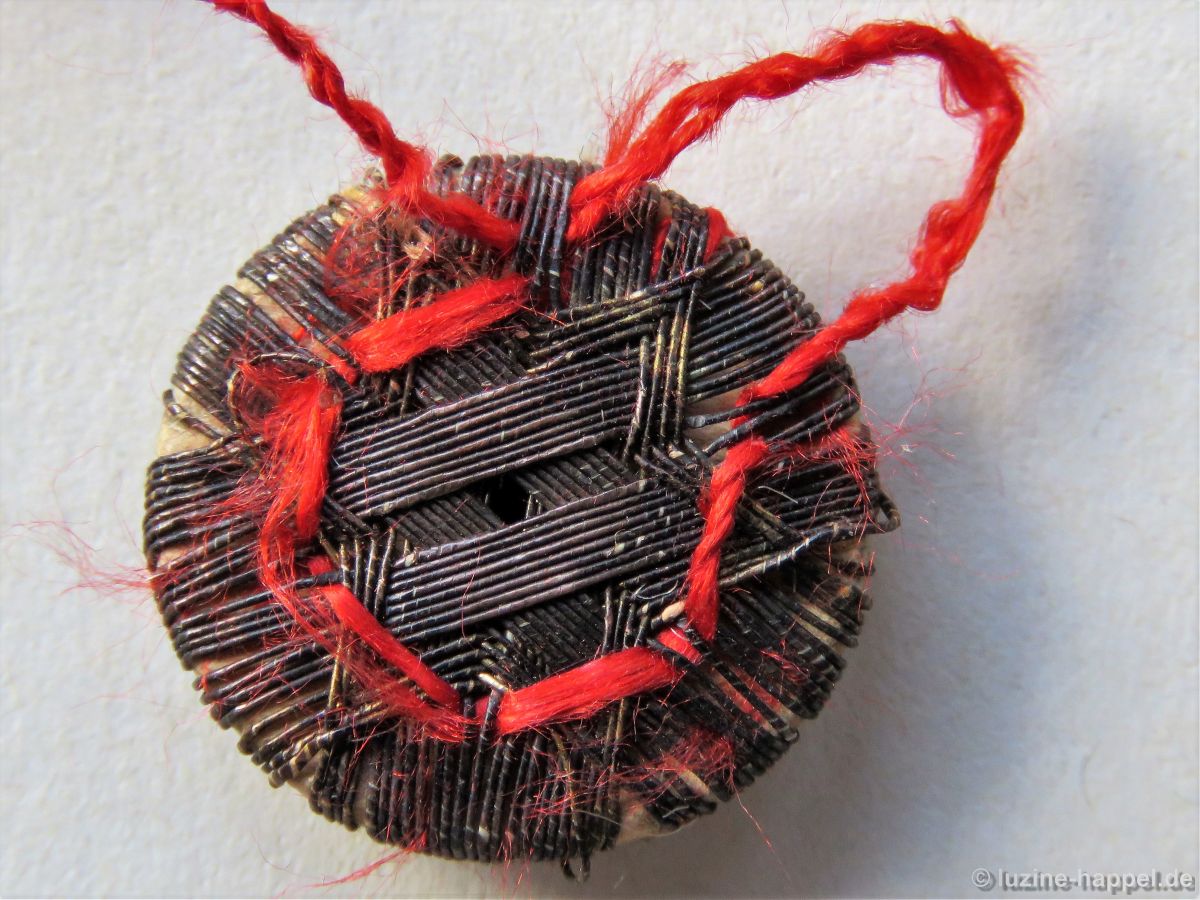
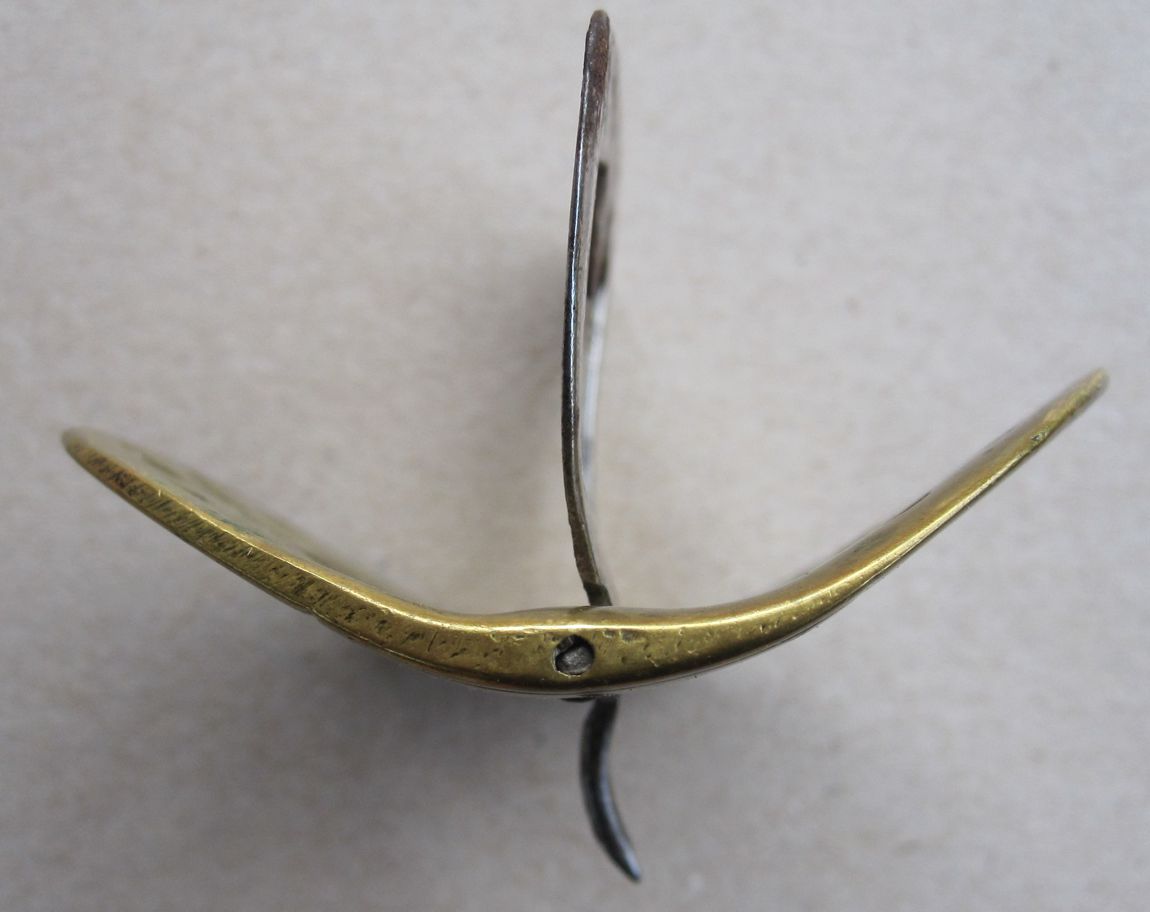
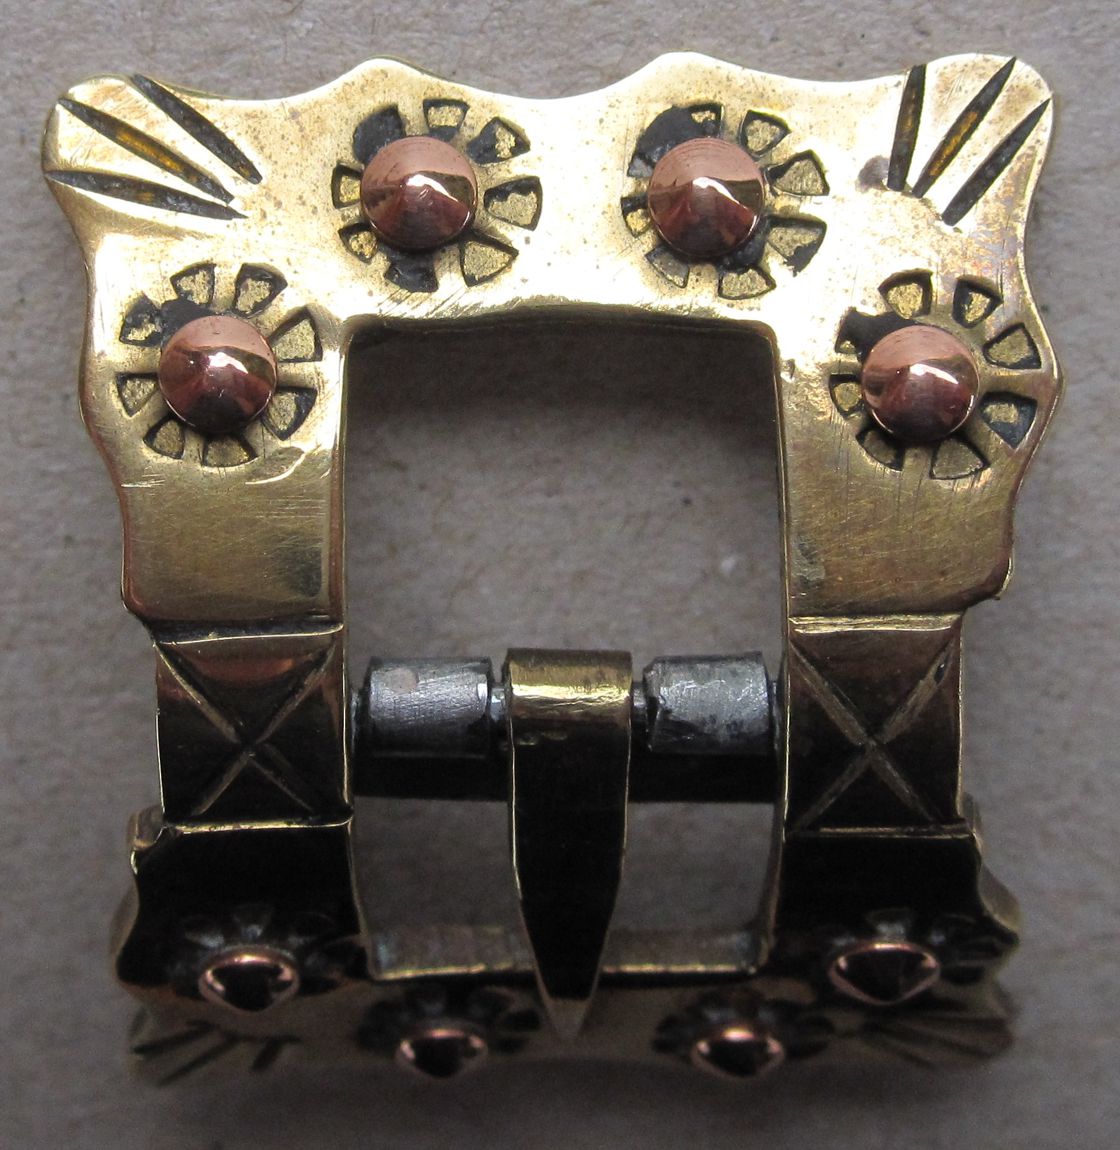
Not all apron squares were true squares.
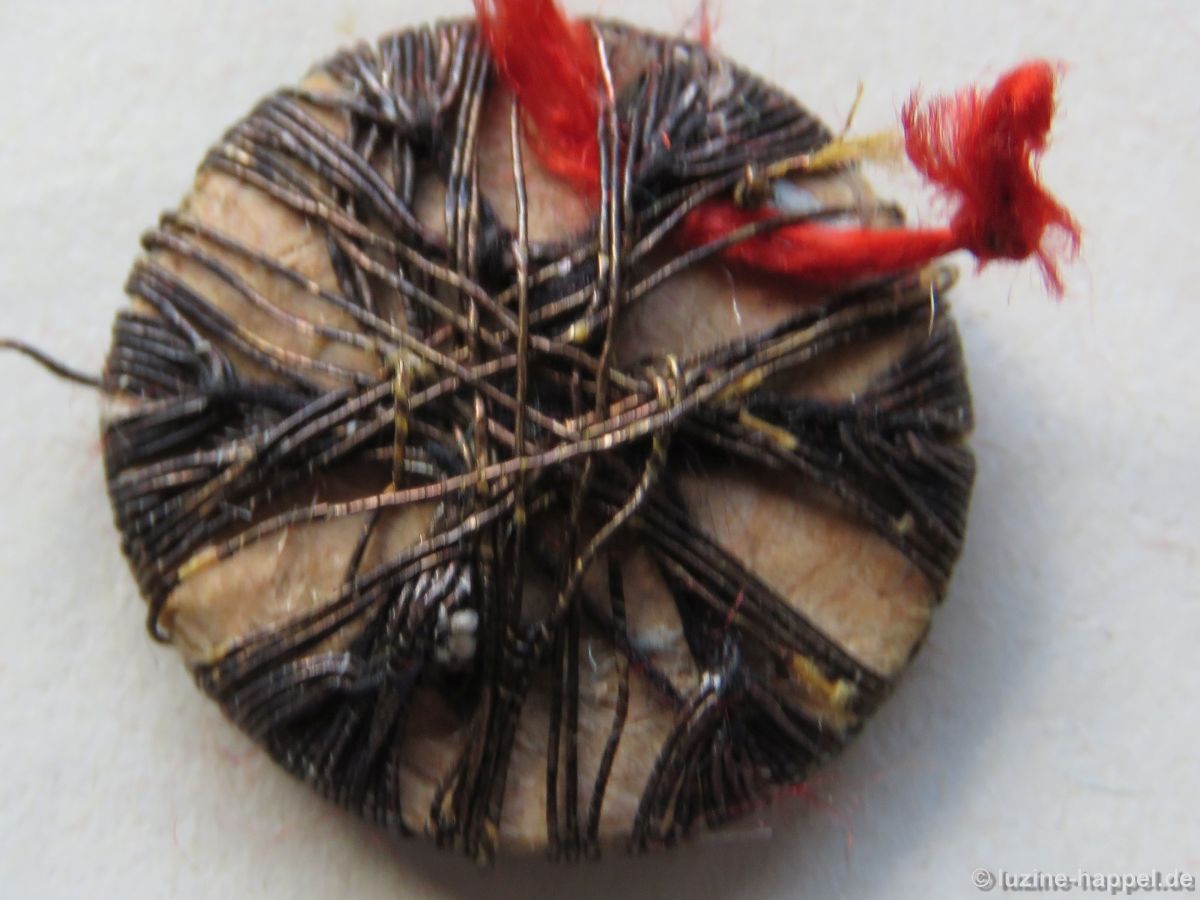
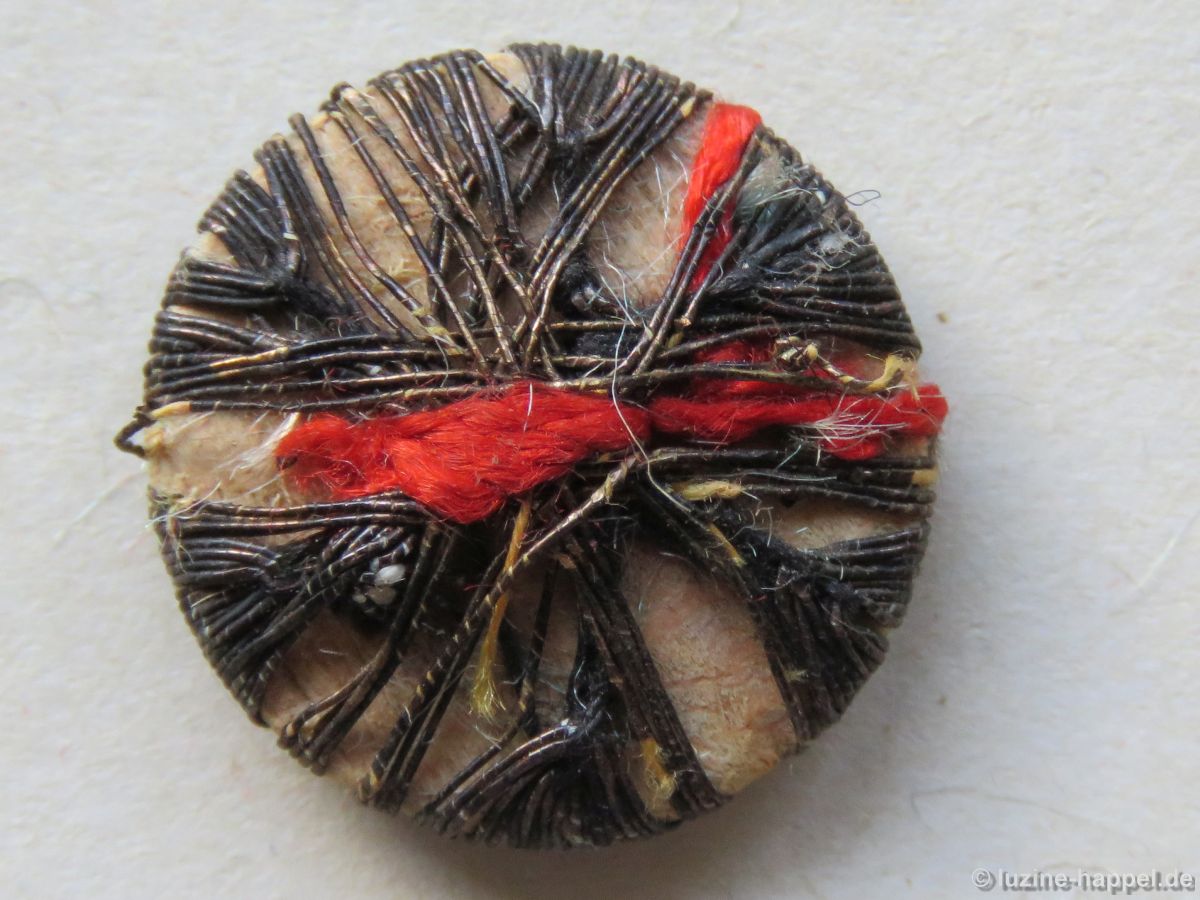
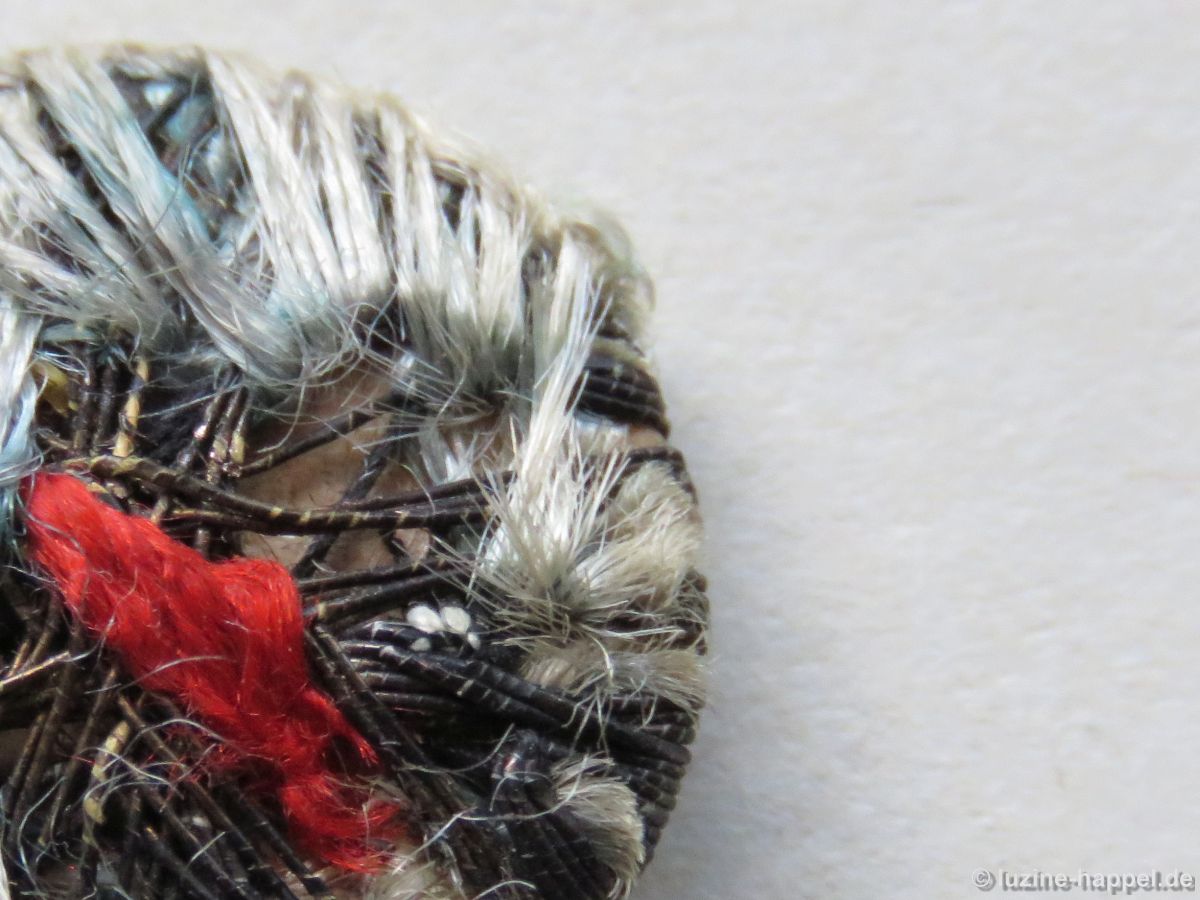
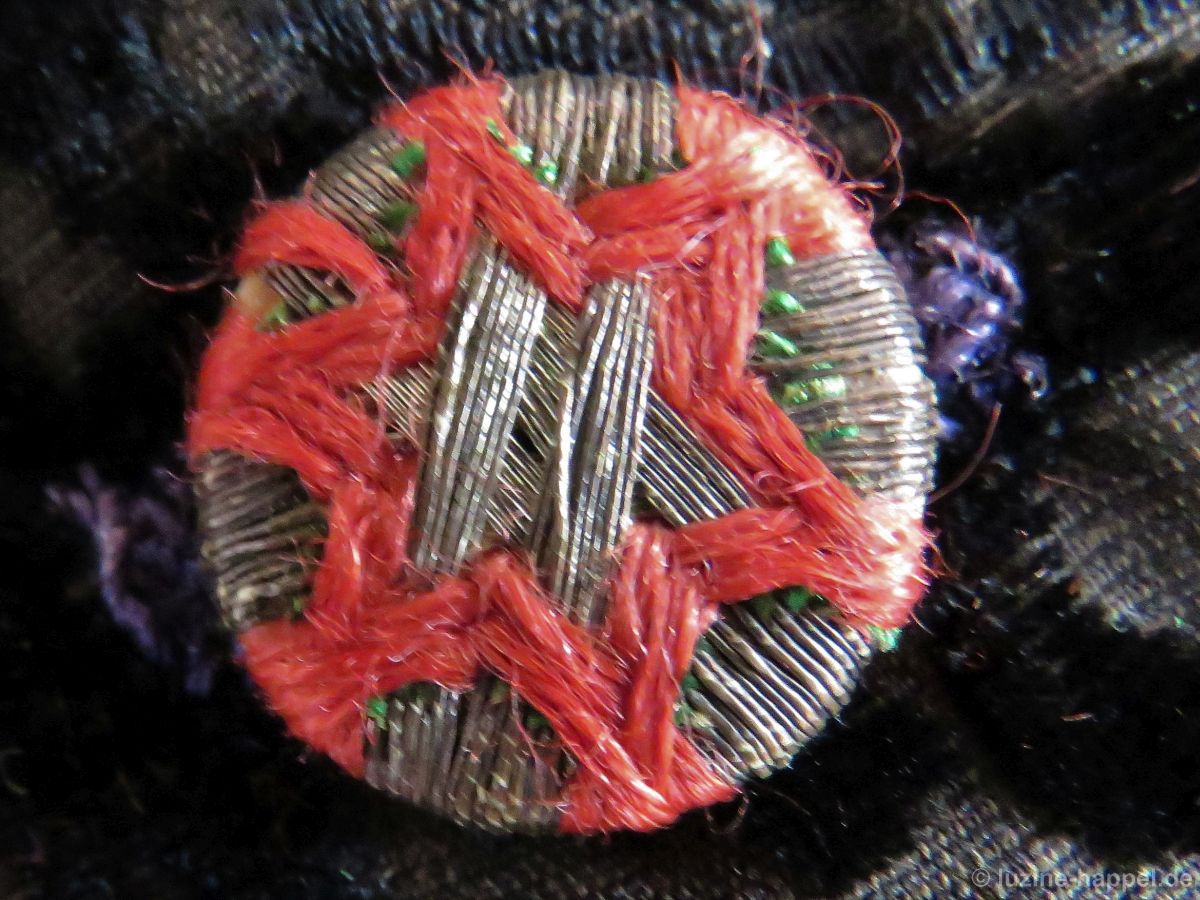
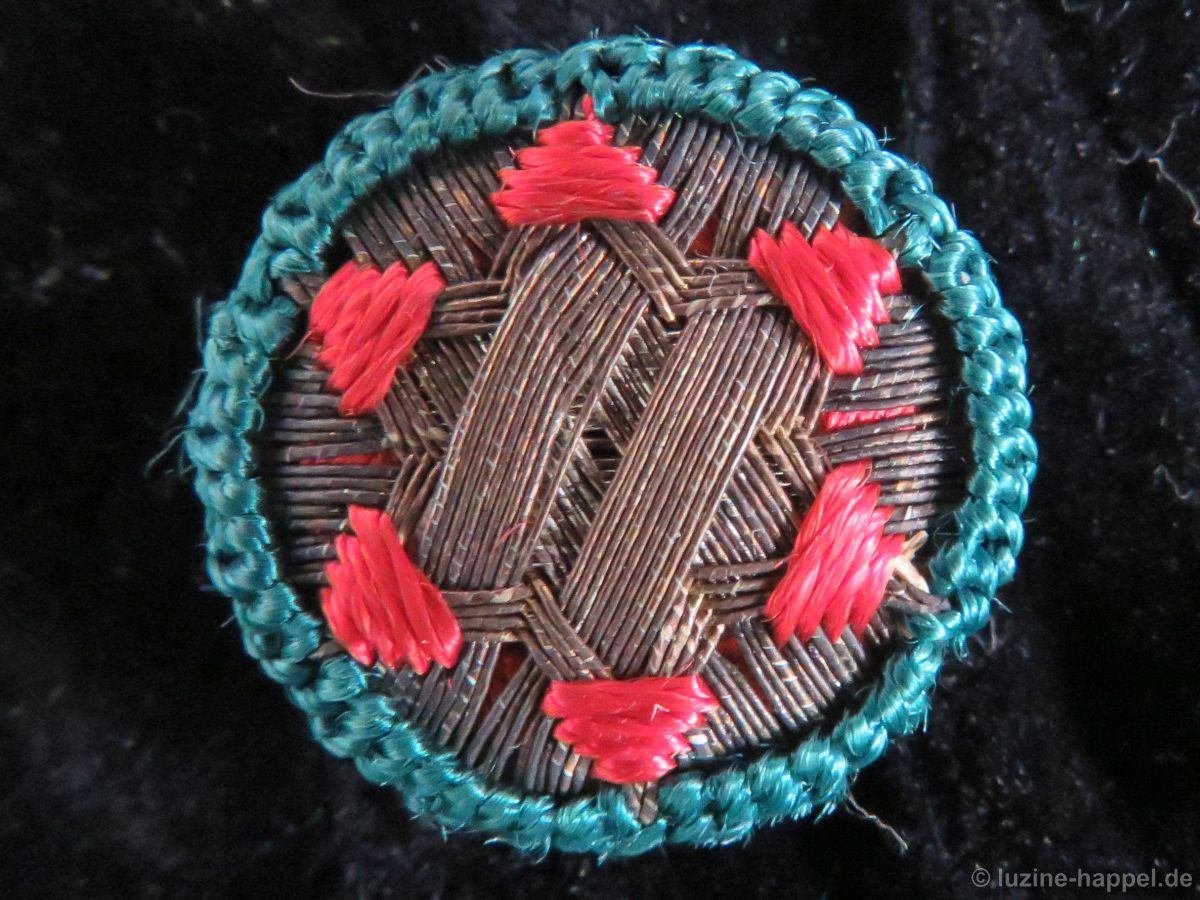
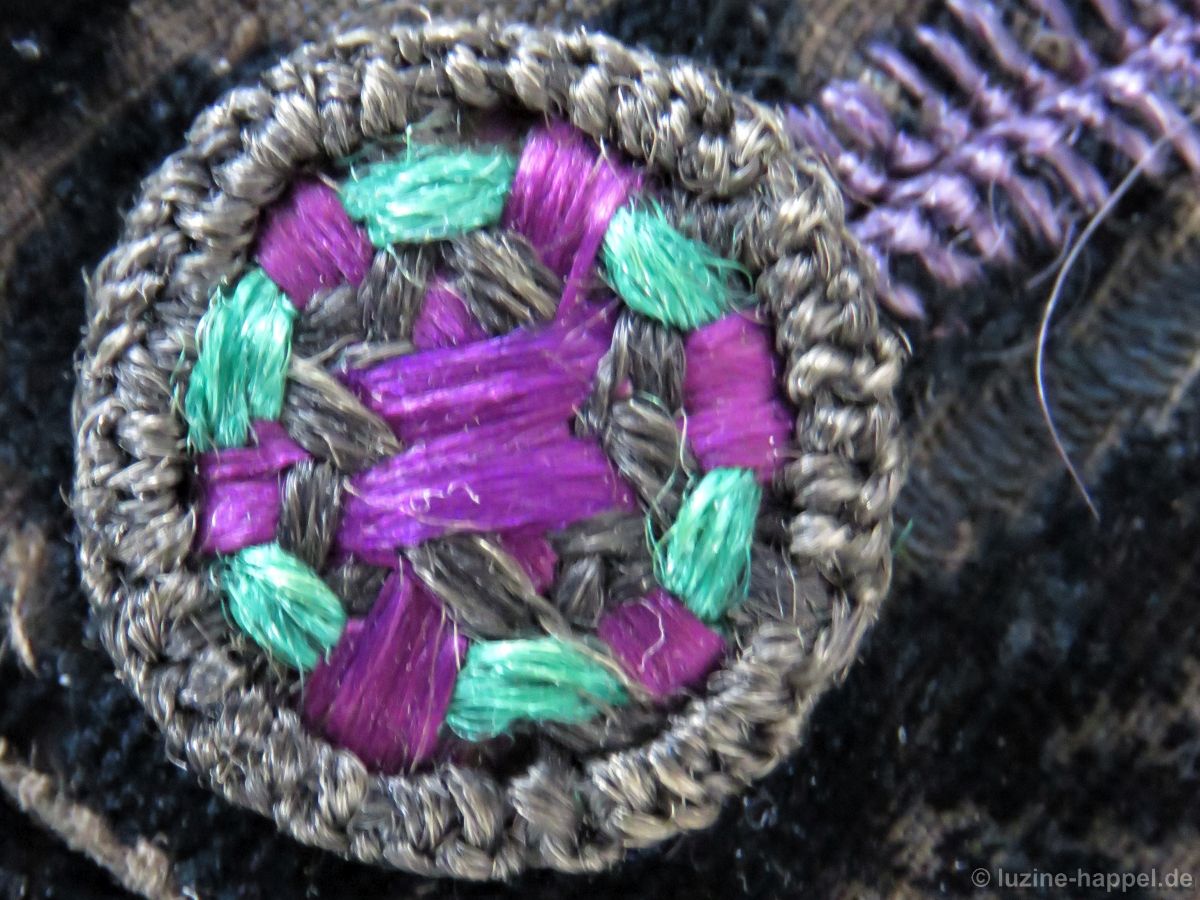
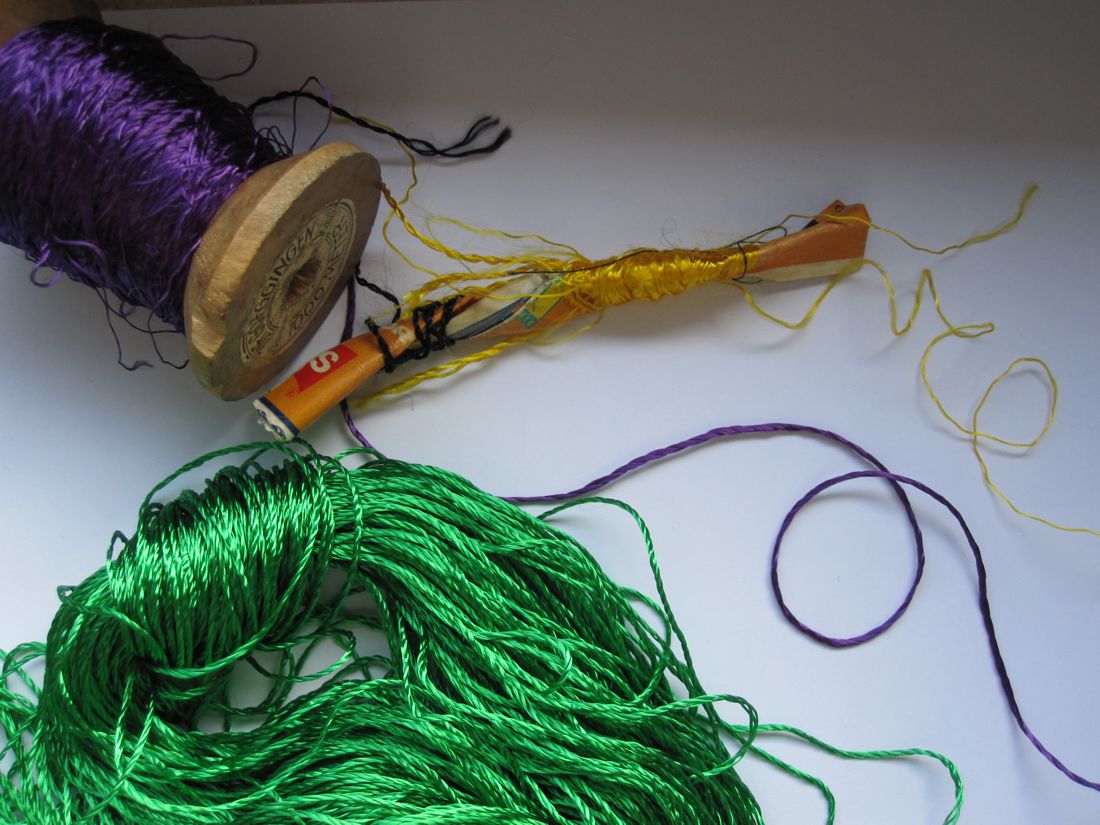
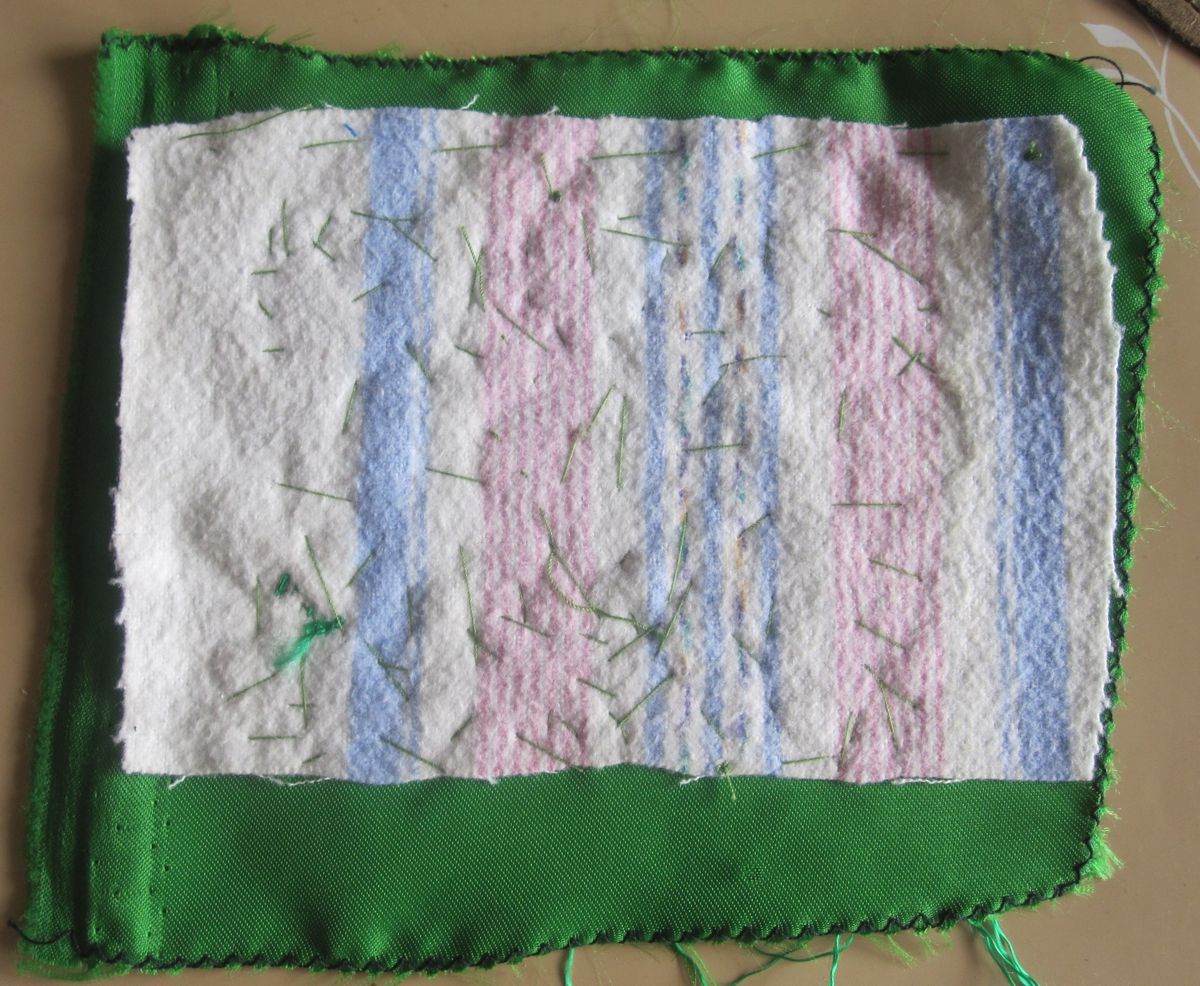
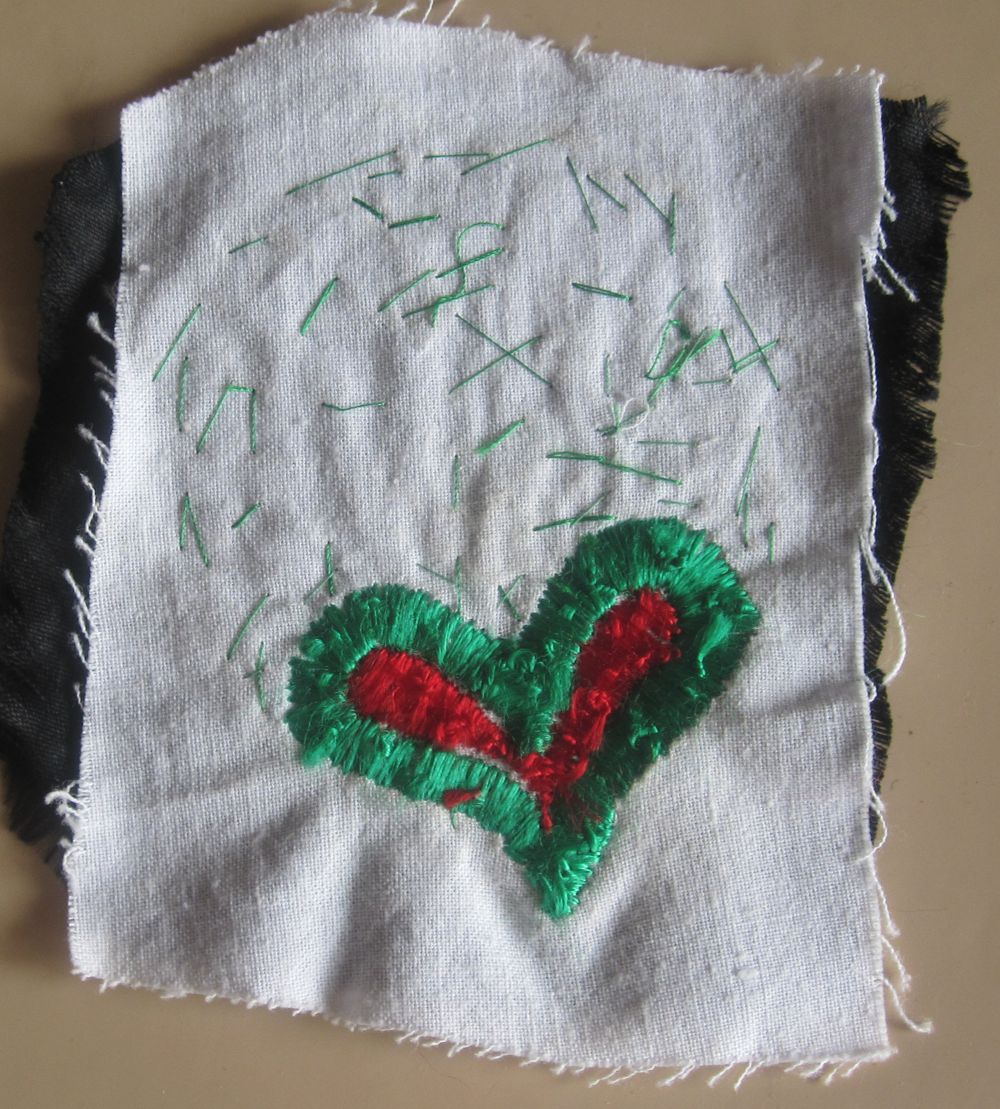
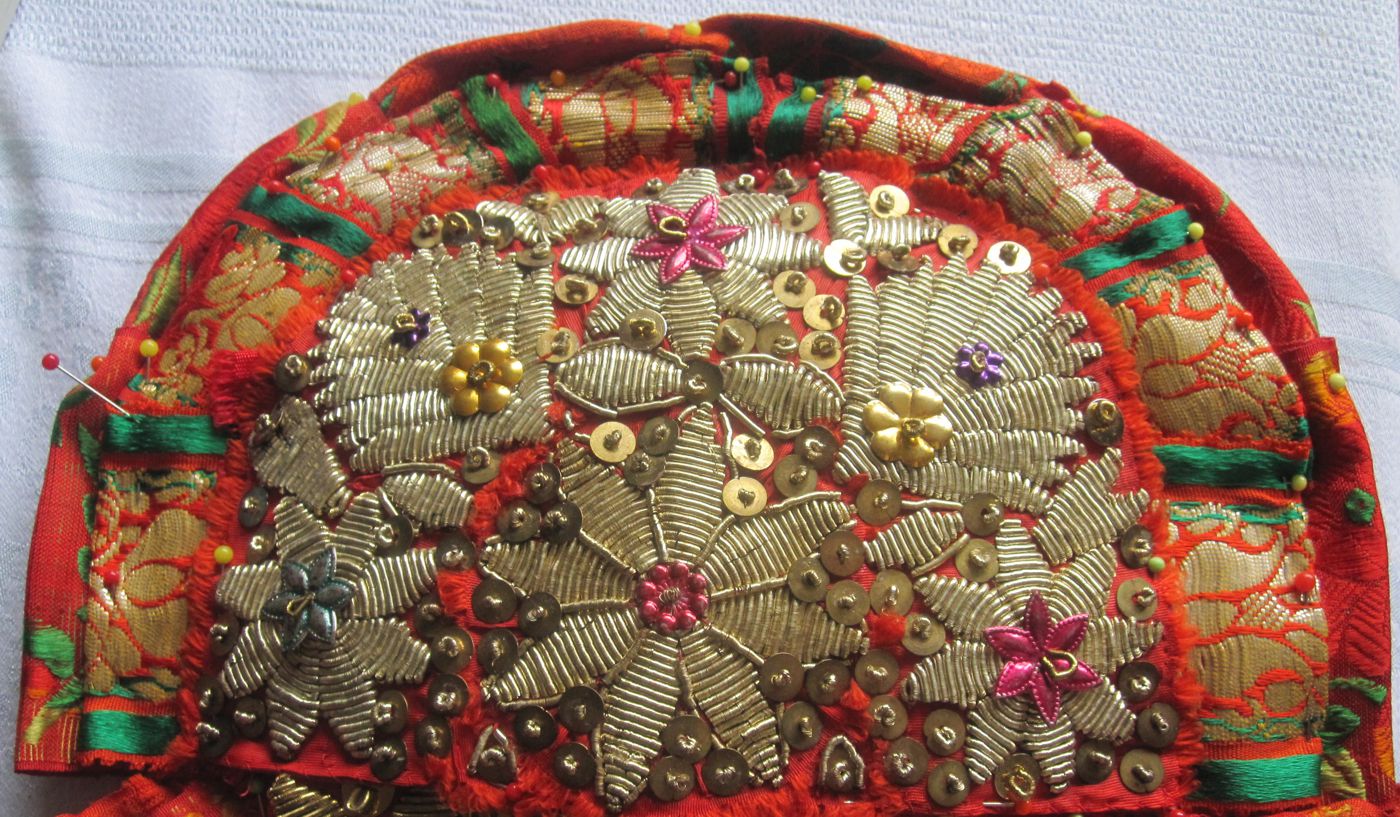
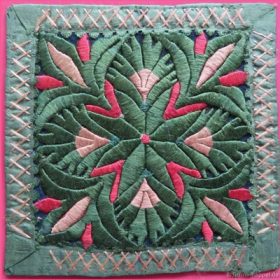
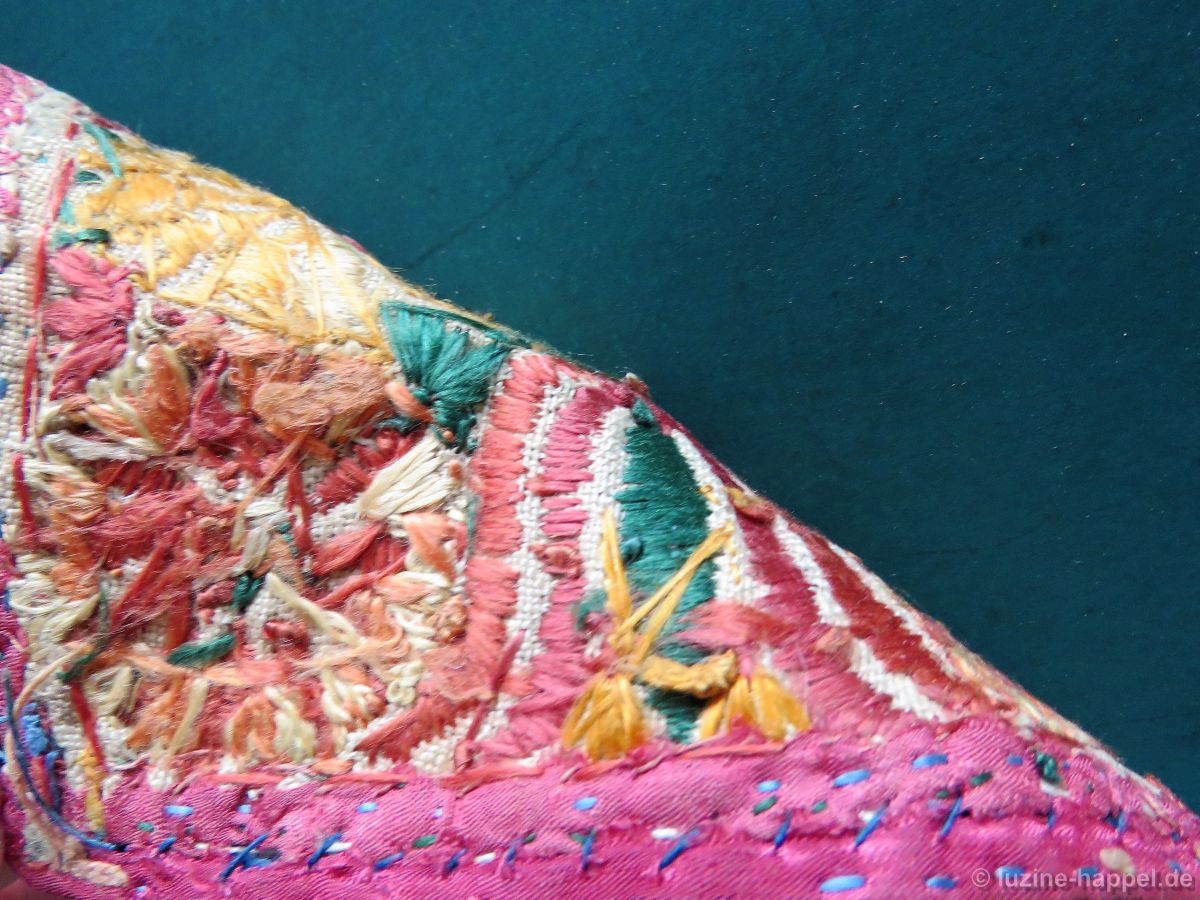
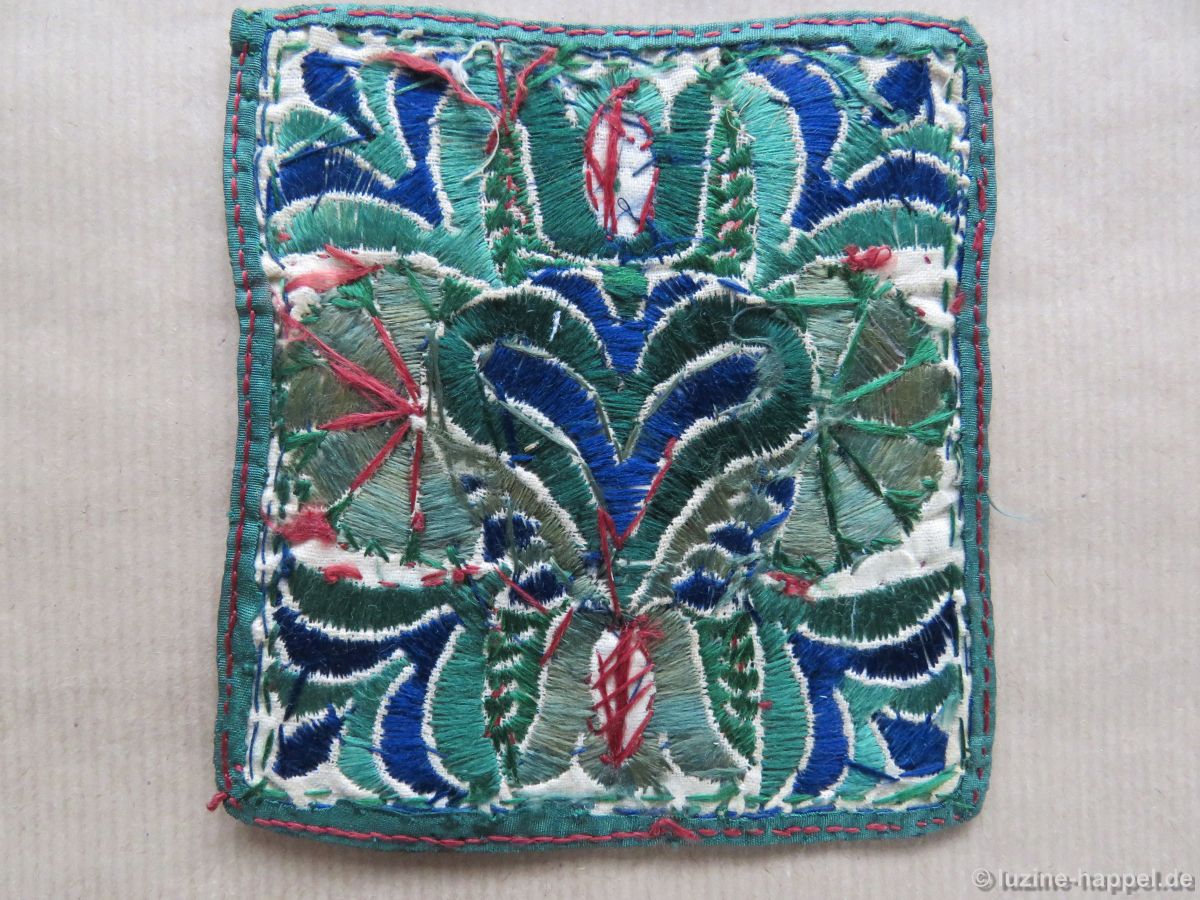
Over time, the colour often faded. One can get an idea of the original brilliant colours by viewing the light-protected back of the above apron square.
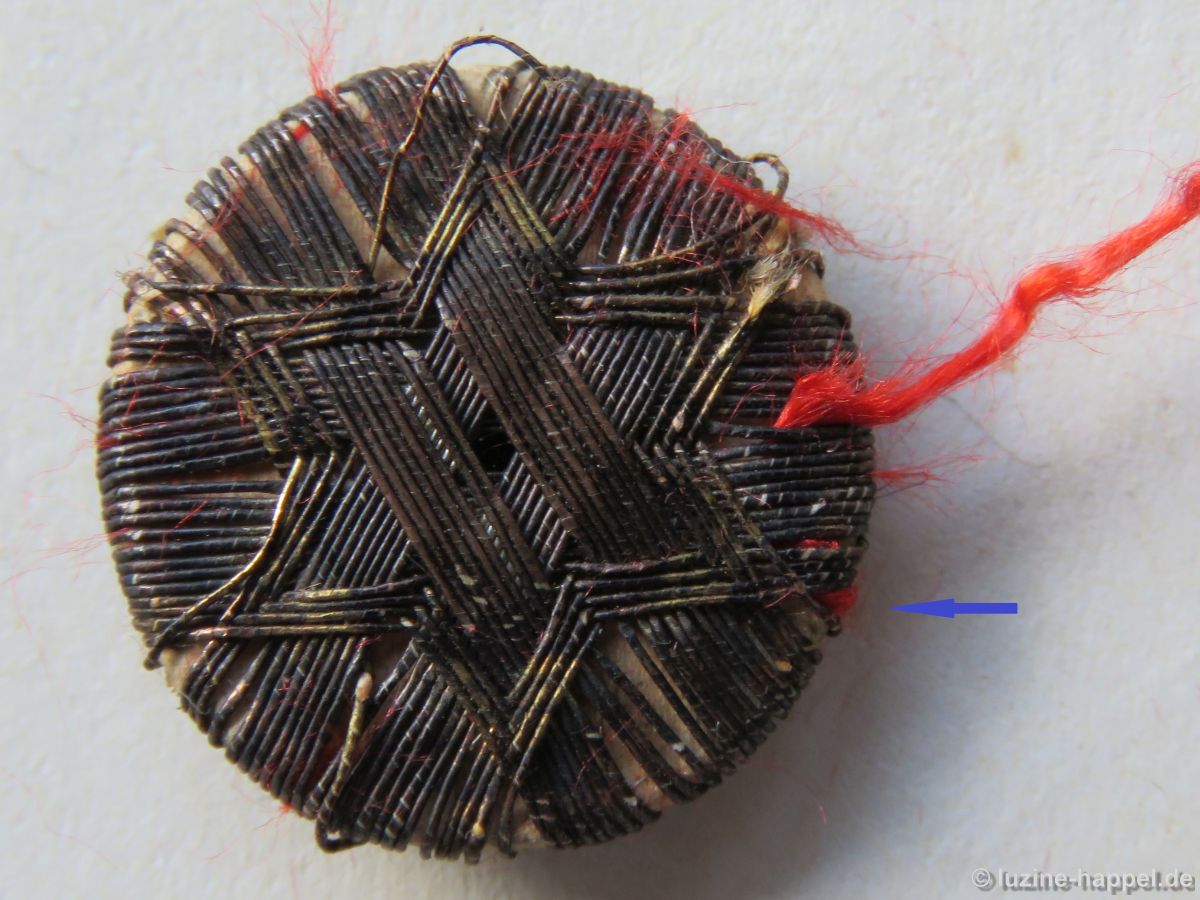
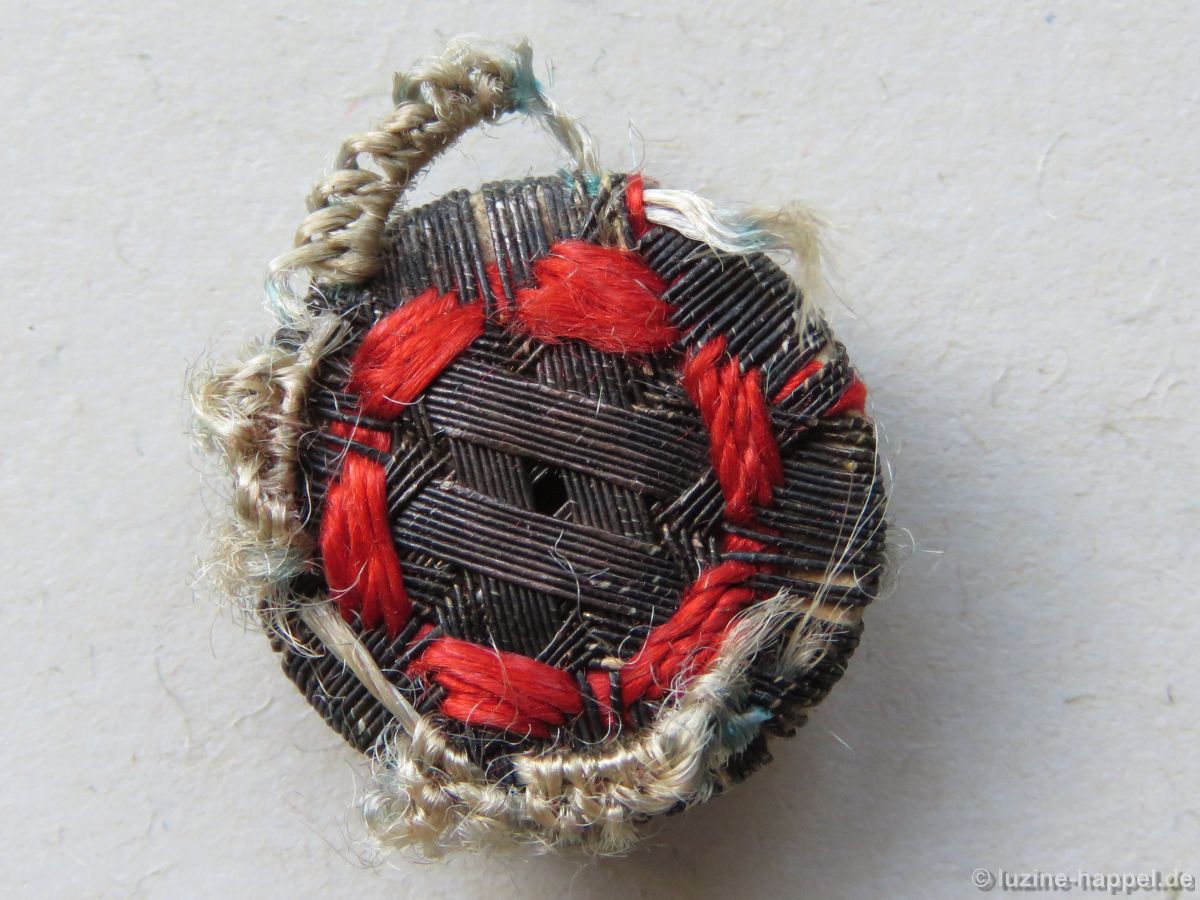
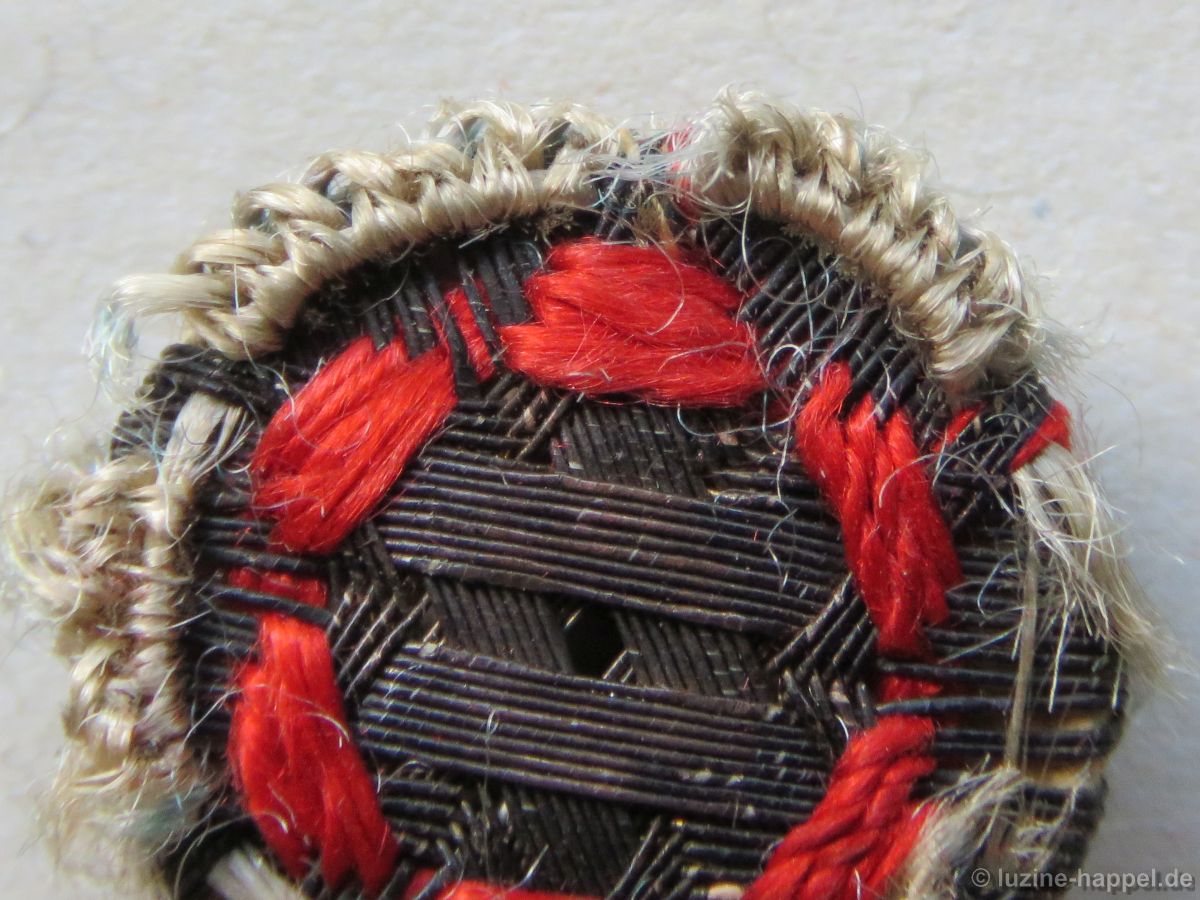
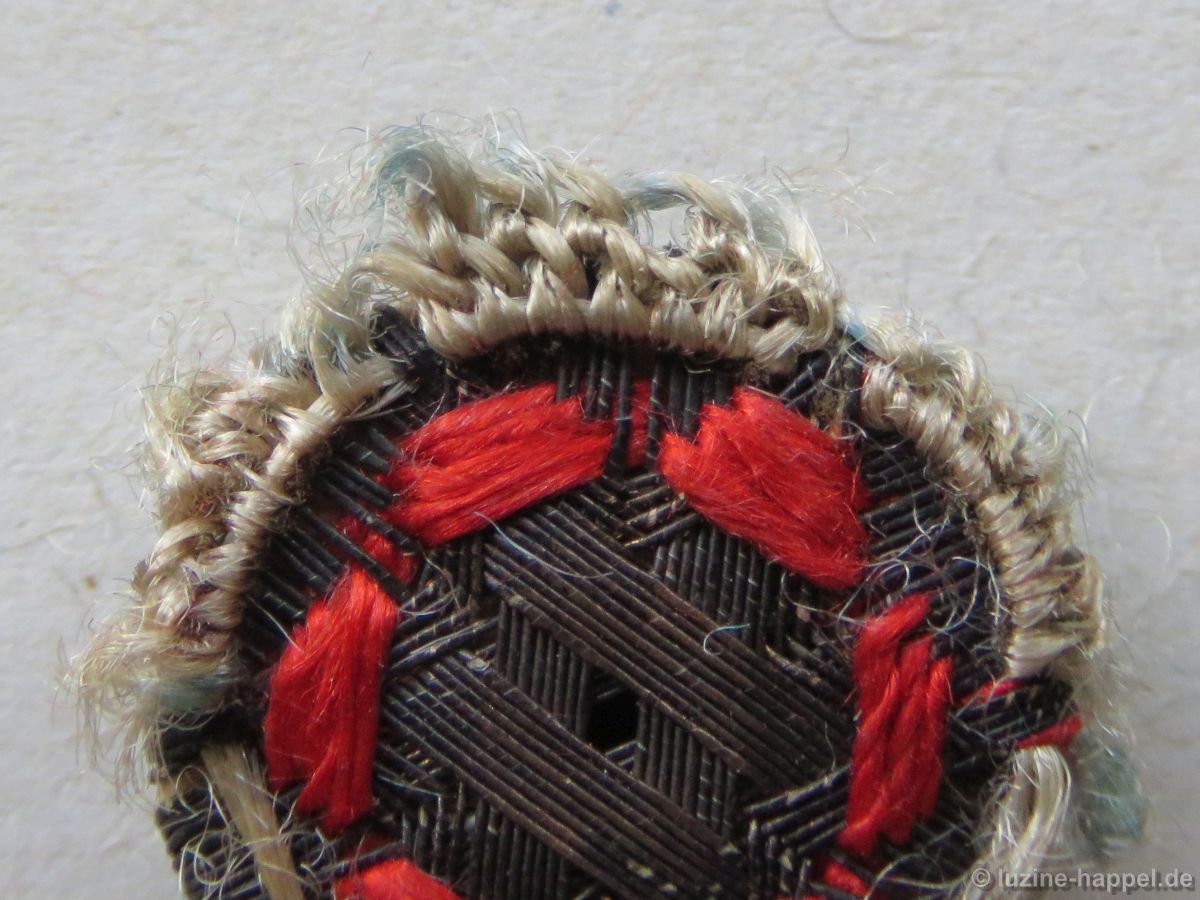
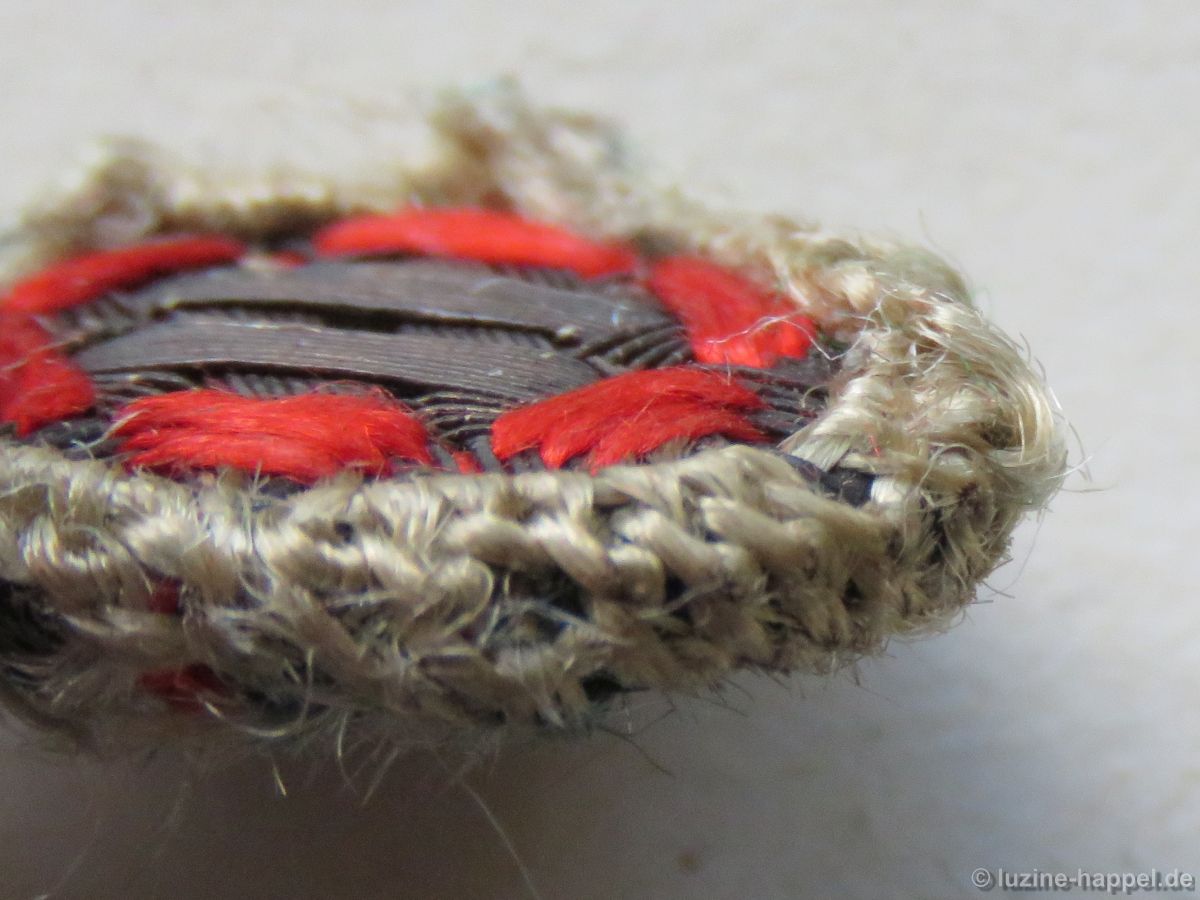
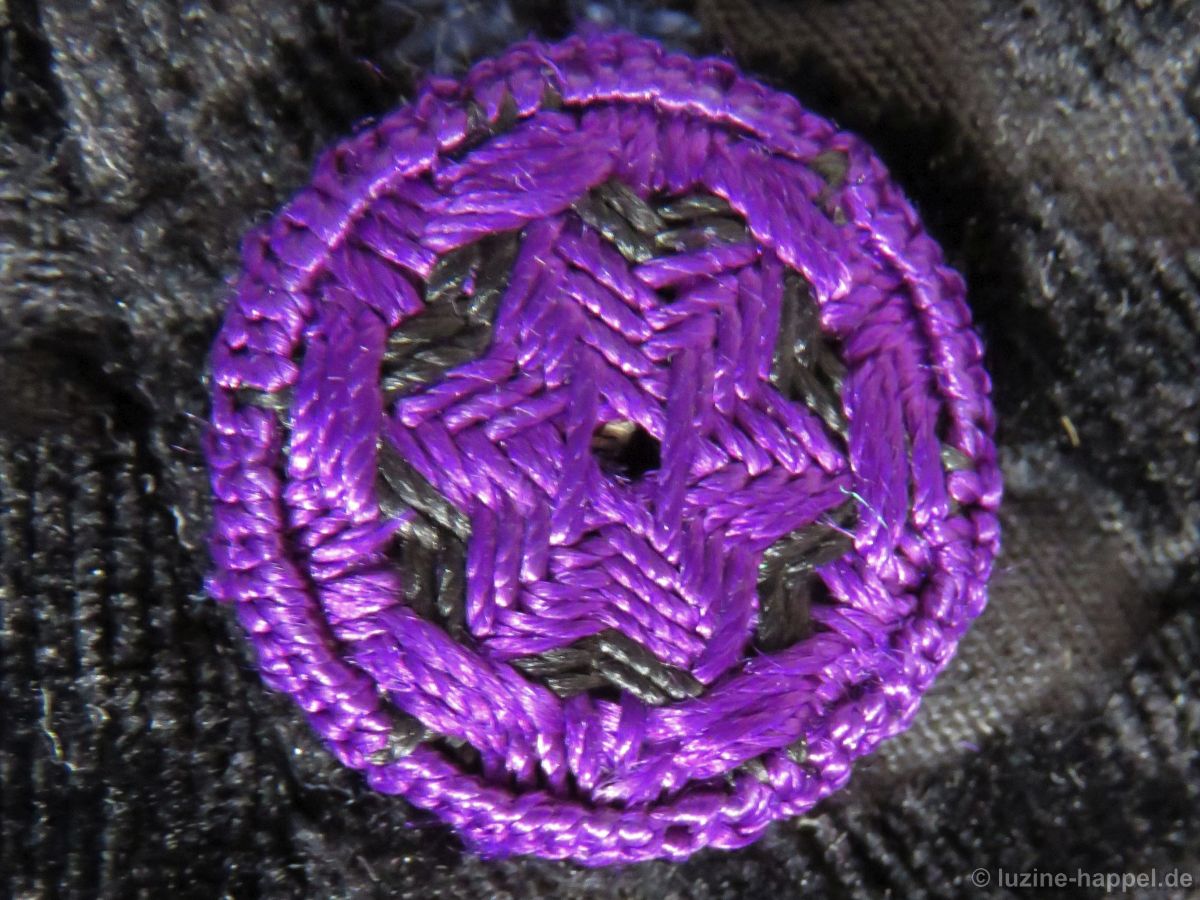
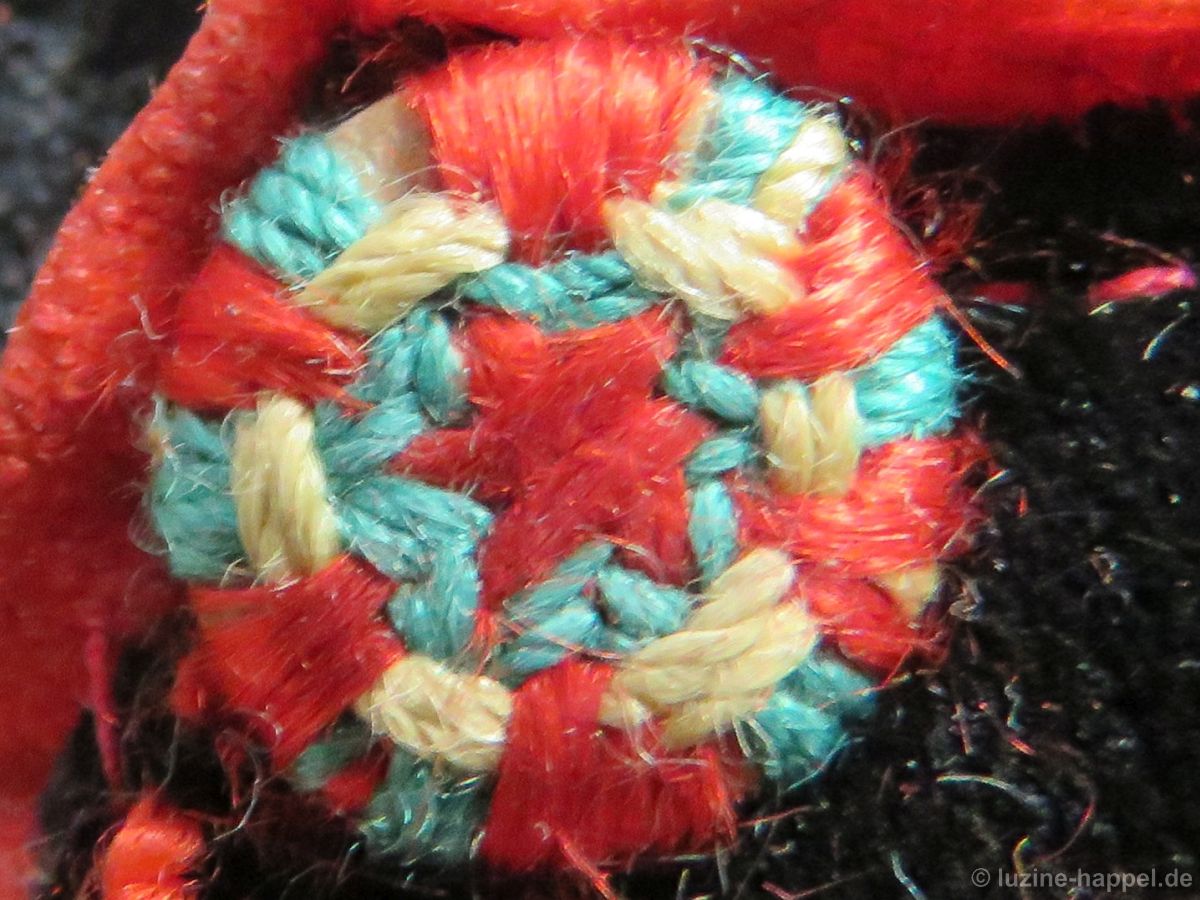
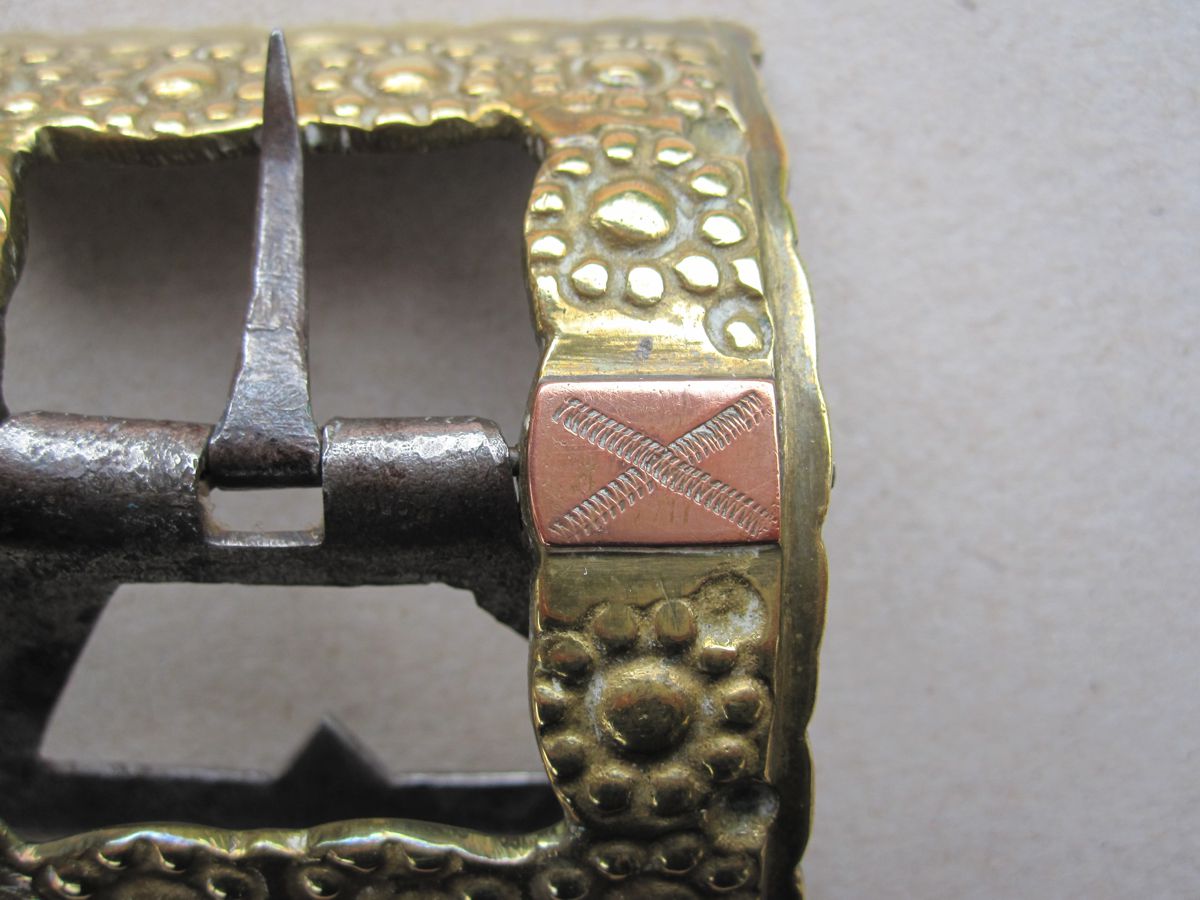
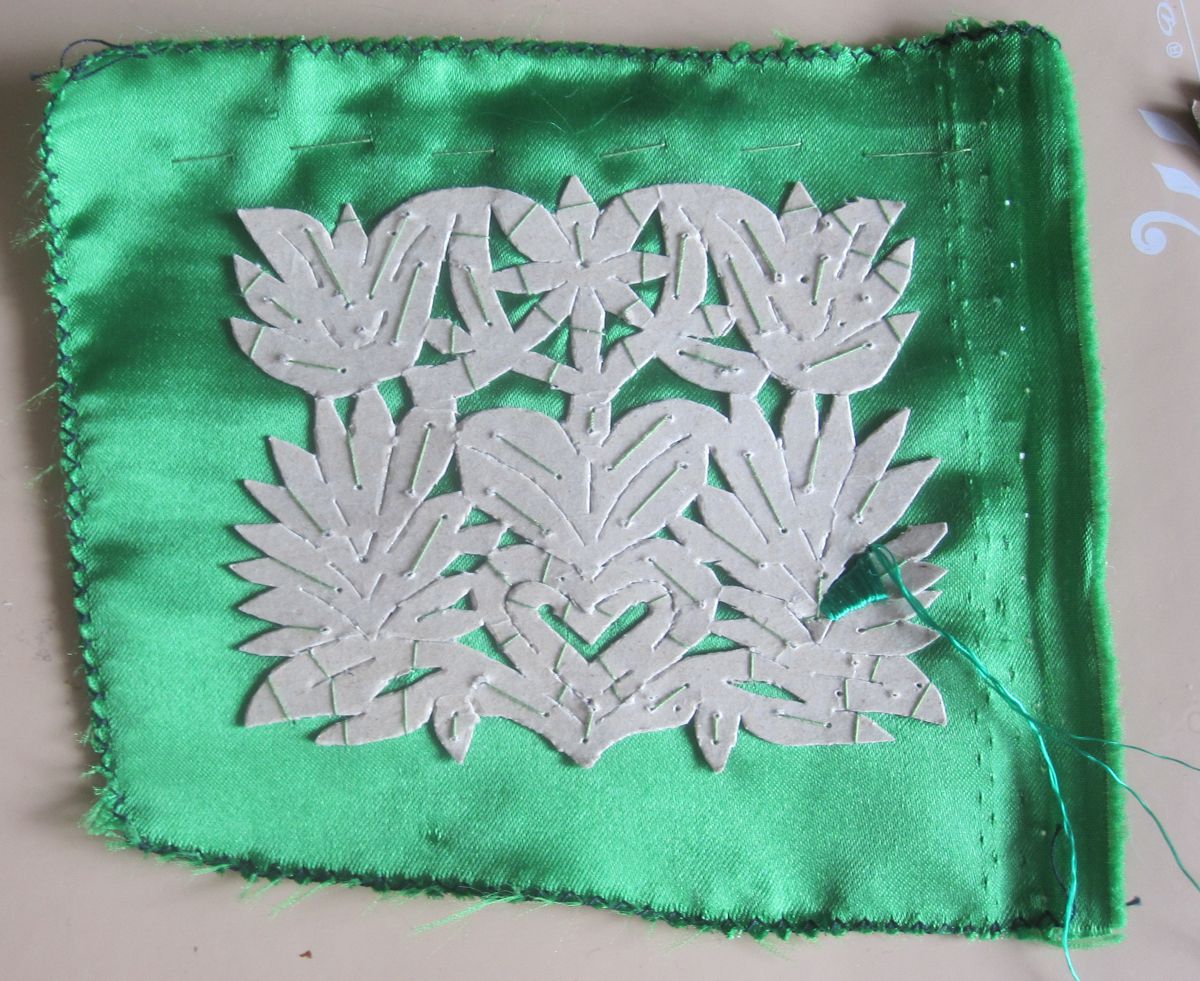
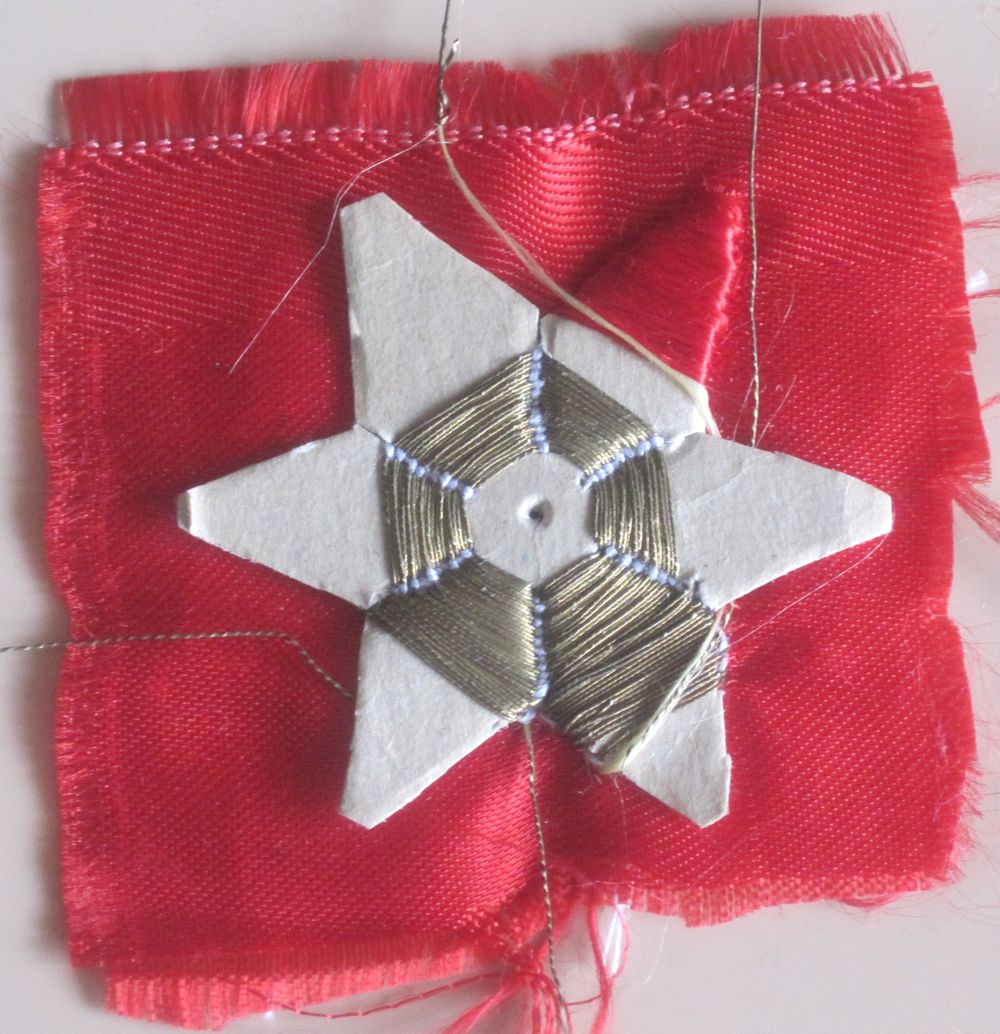
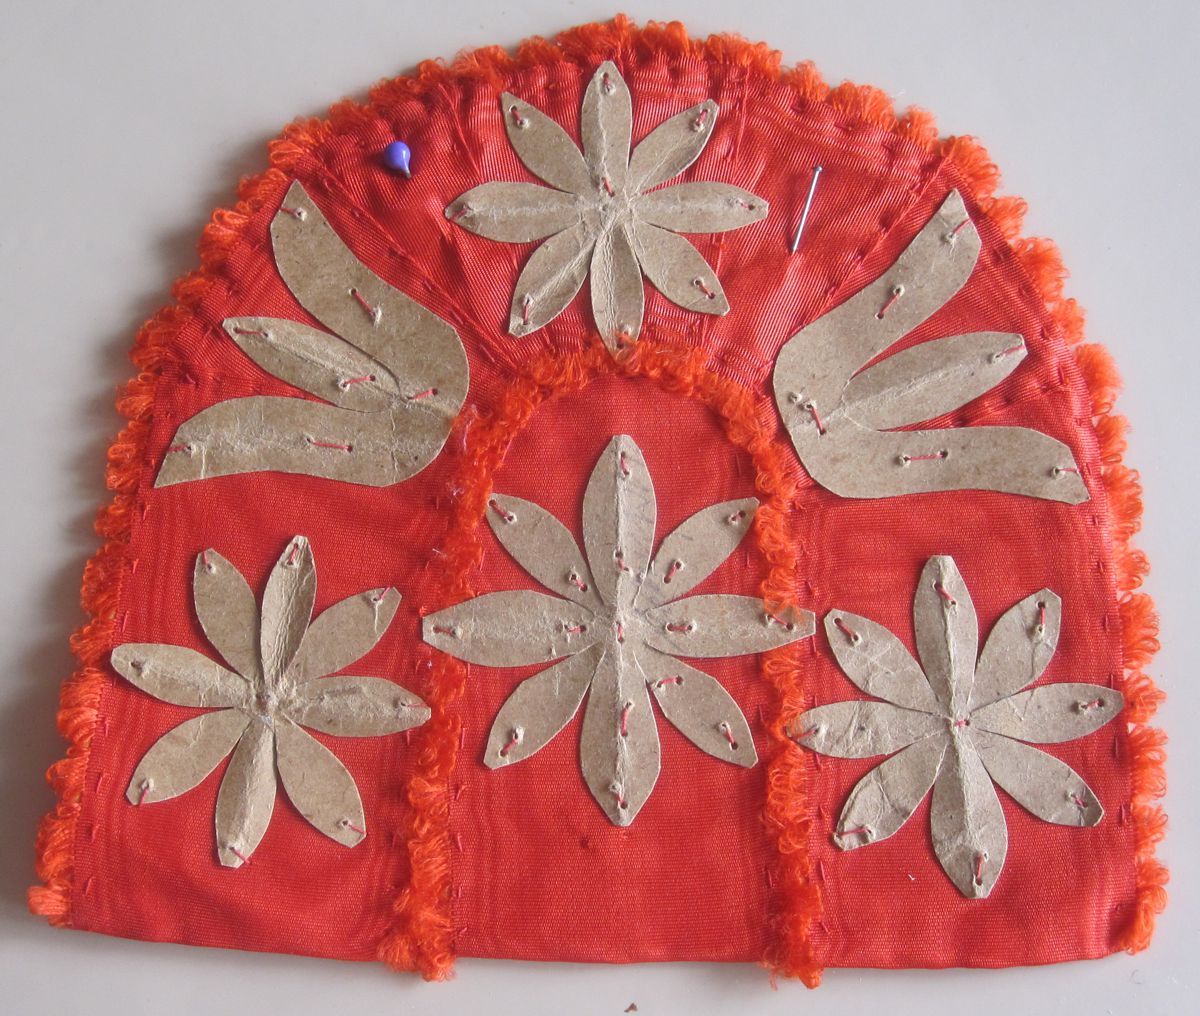
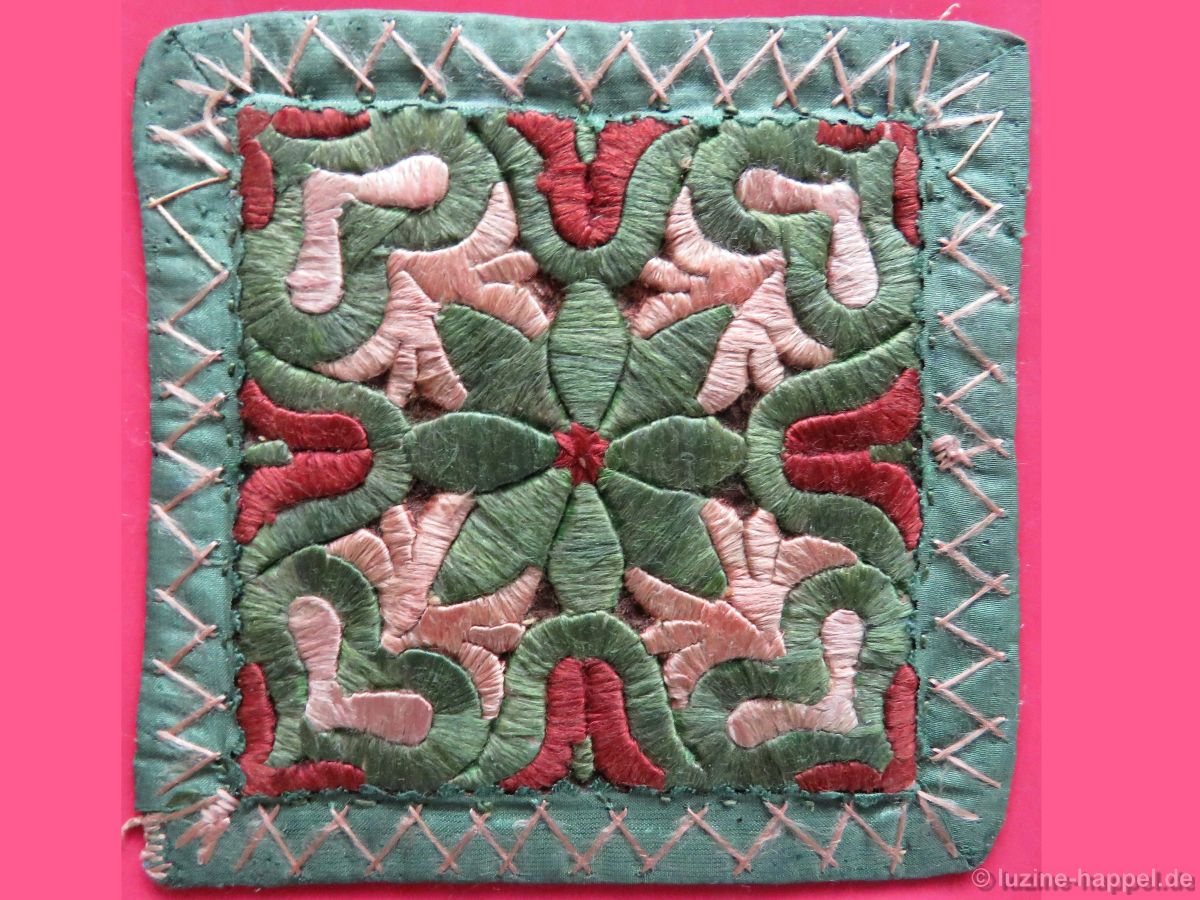
Around the edges silk ribbons were sewn and decorated with Herringbone stitches.
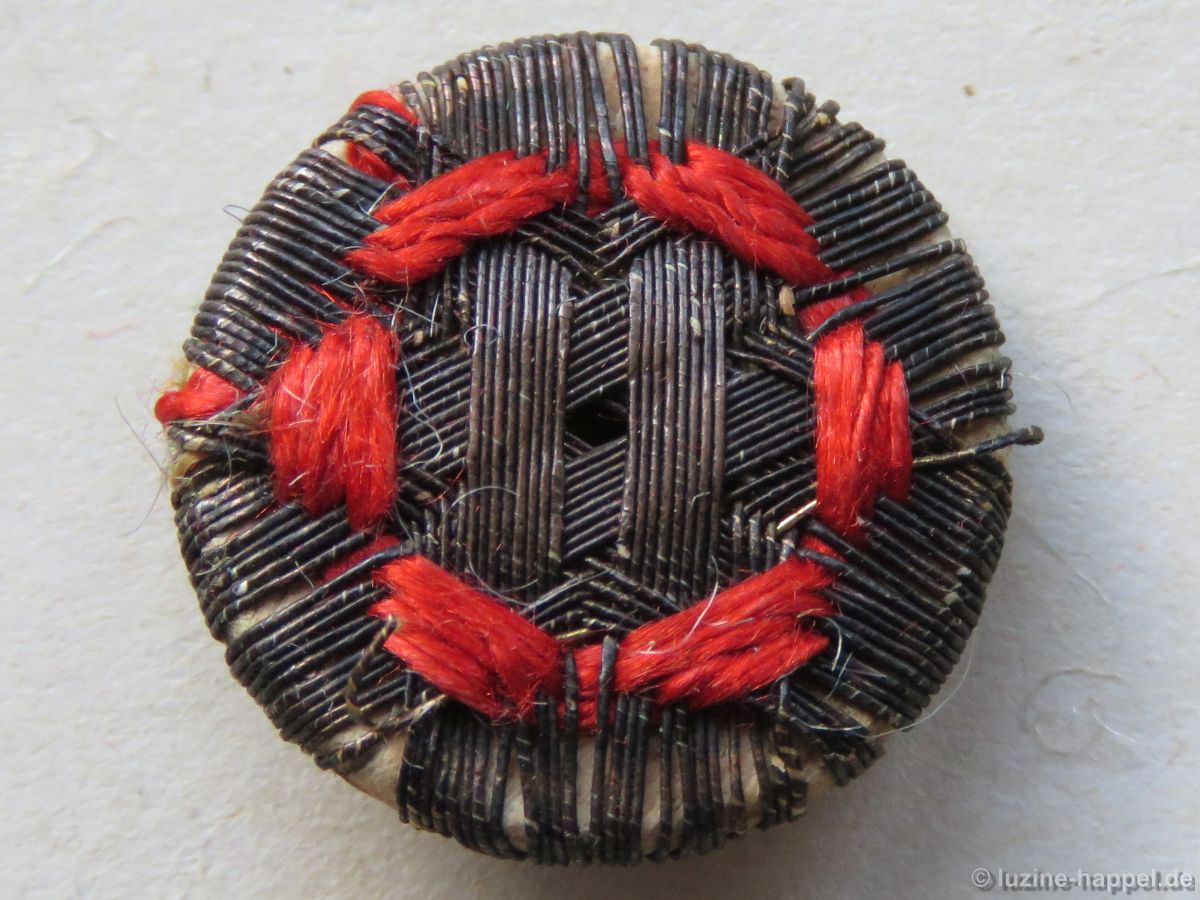
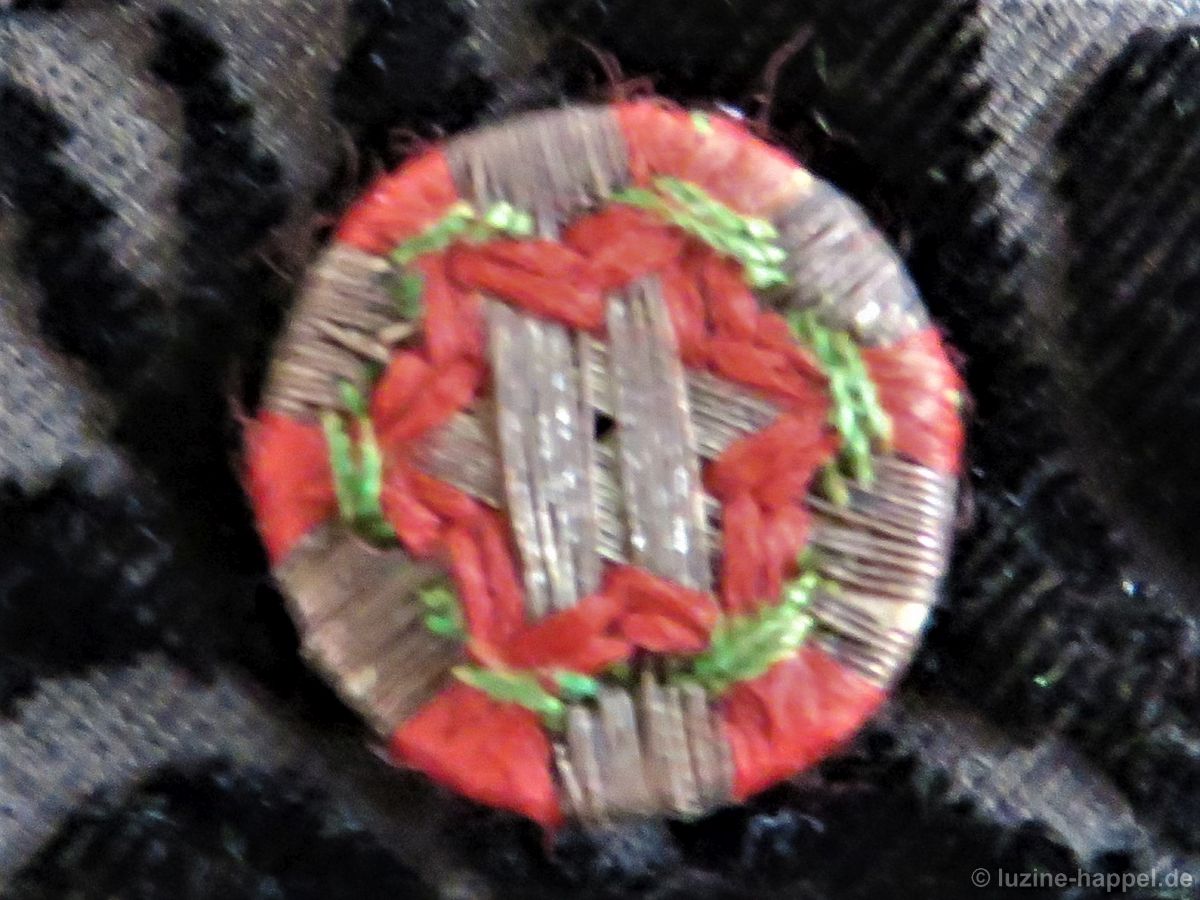
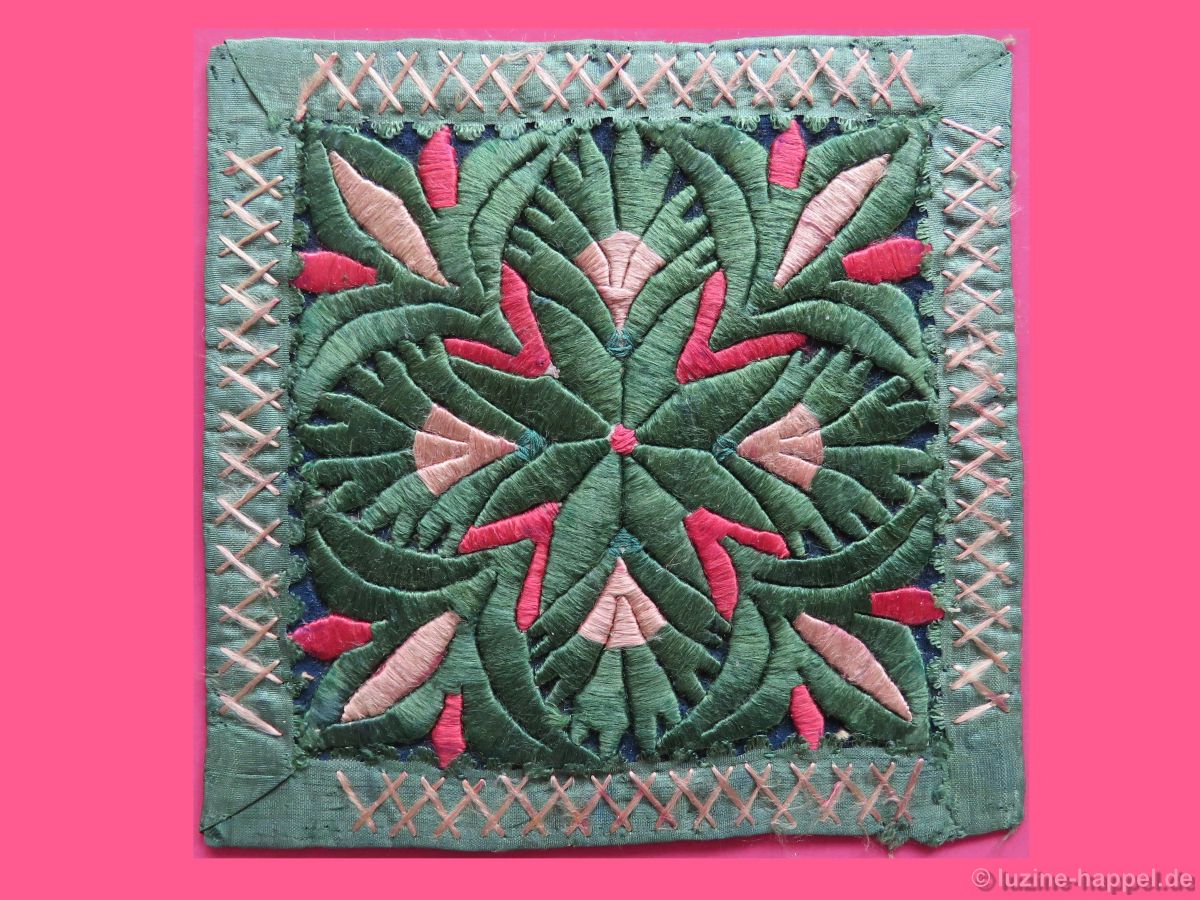
Most patterns were symmetric around the center.
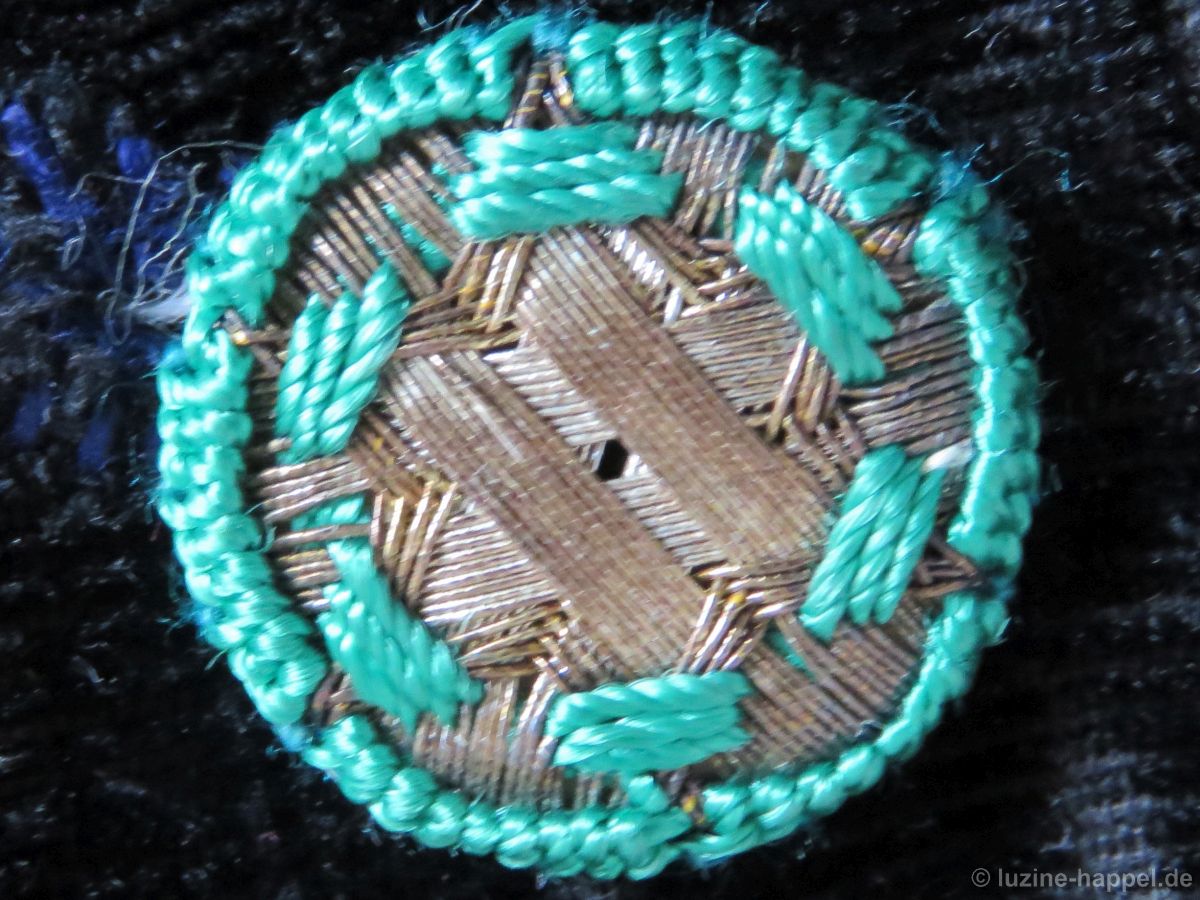
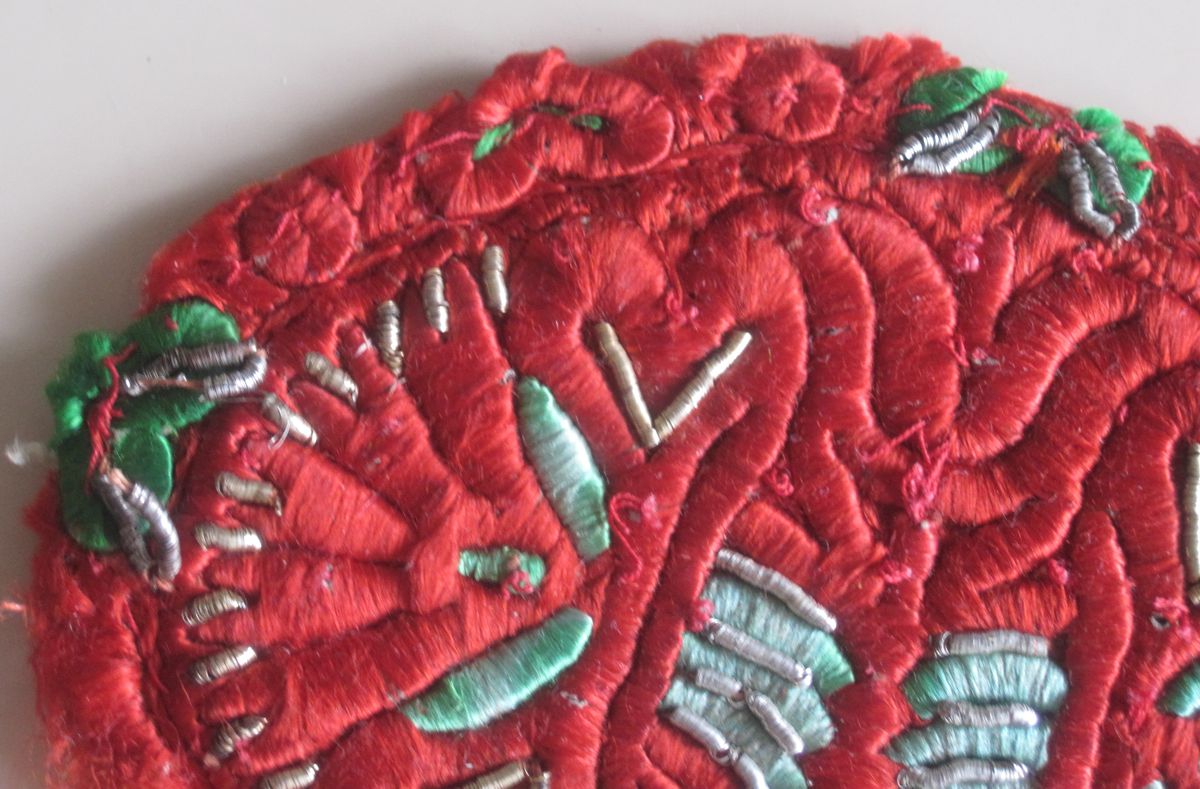
But there are also examples symmetric along the axis.
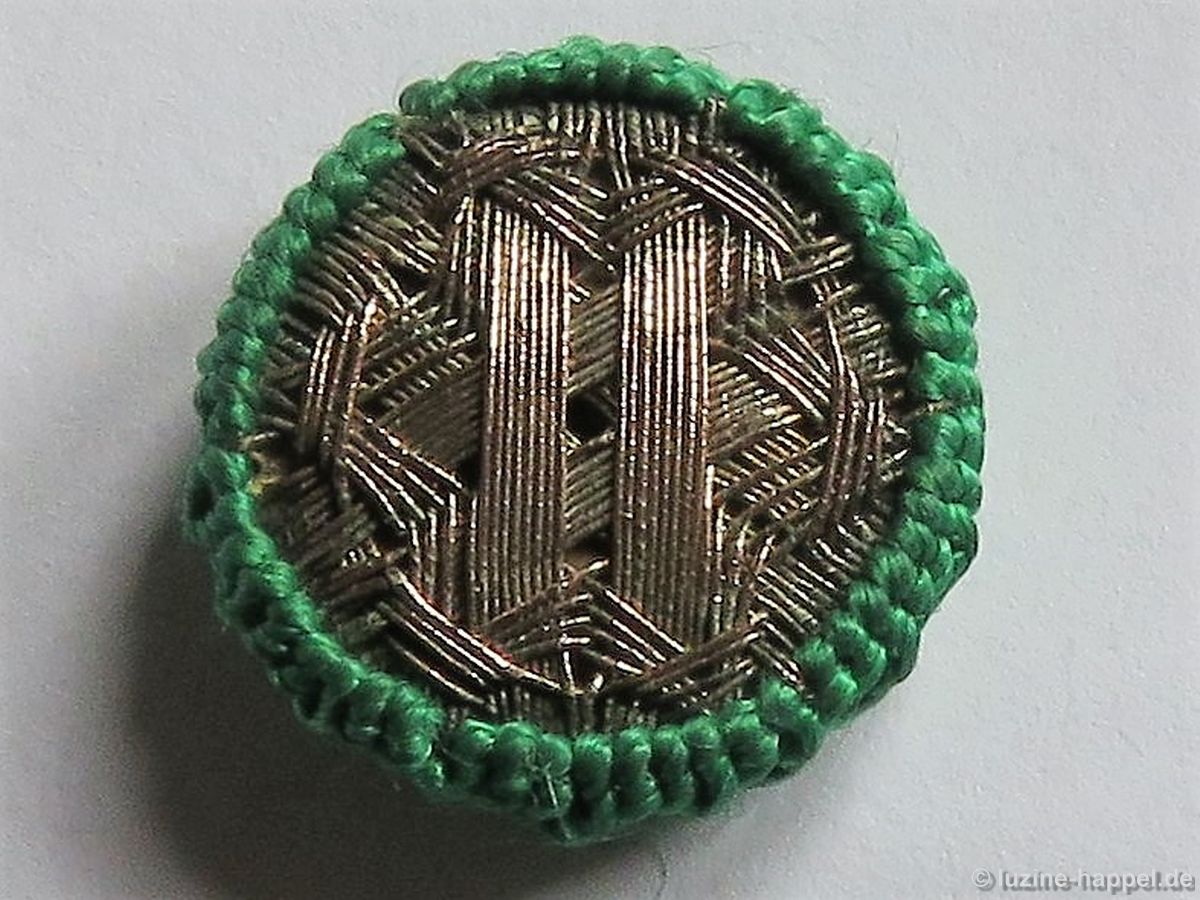
Green and red were the most dominant colours, but blue or lilac is also found.

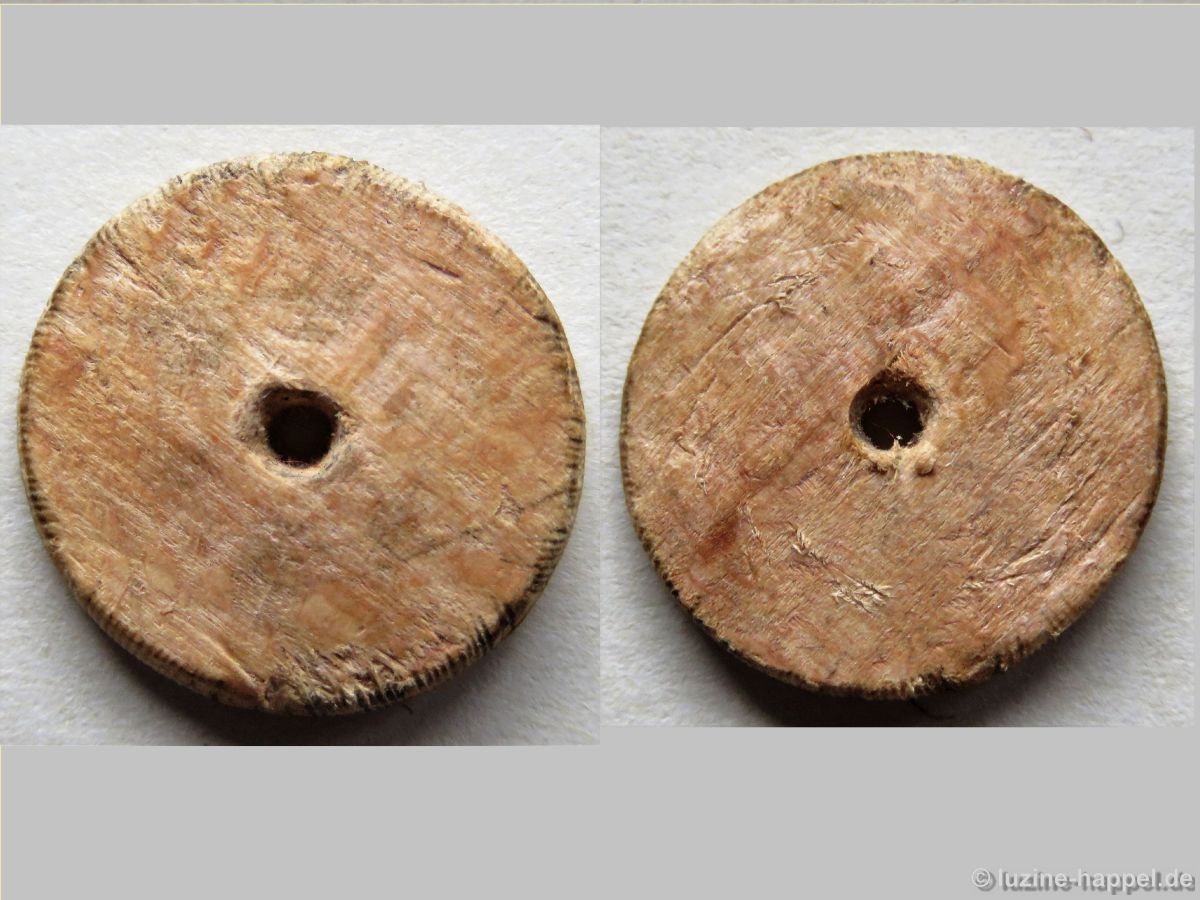
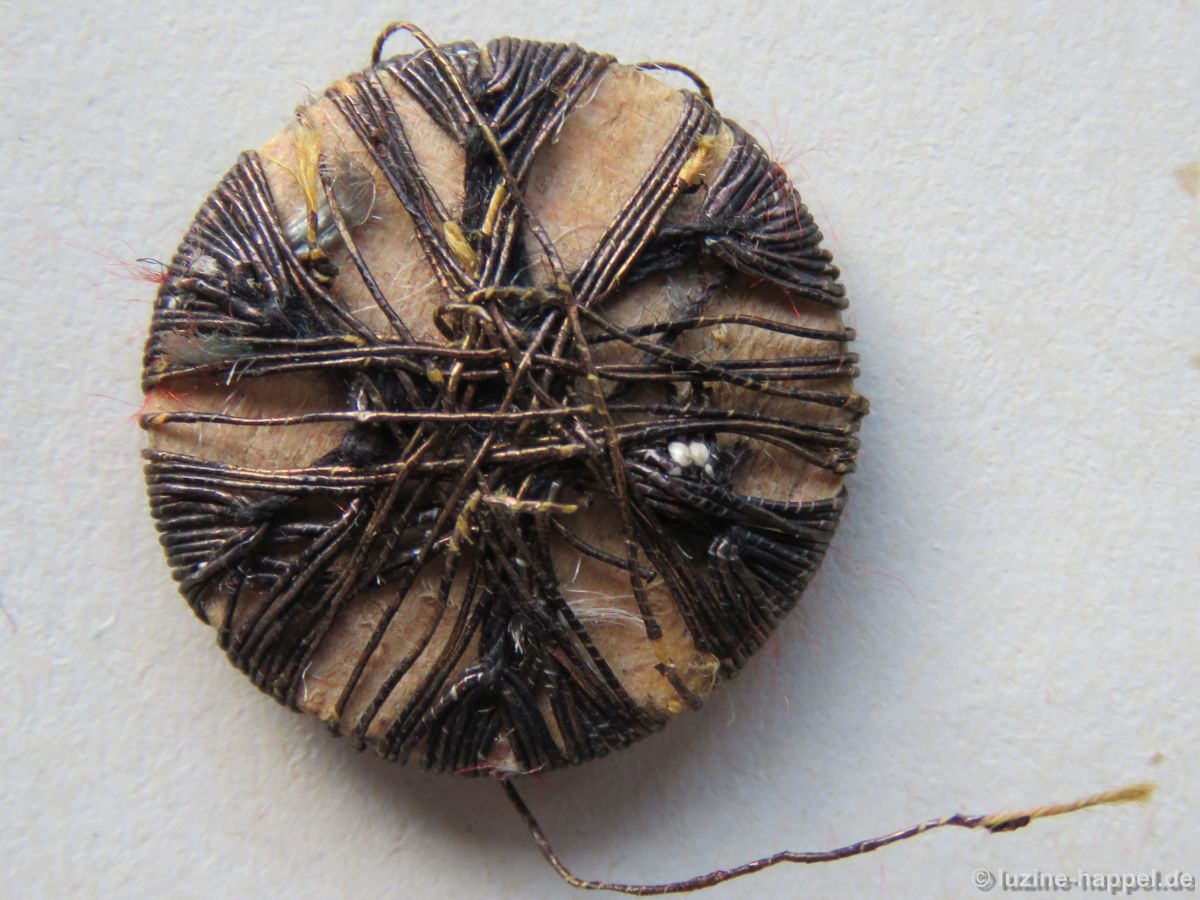
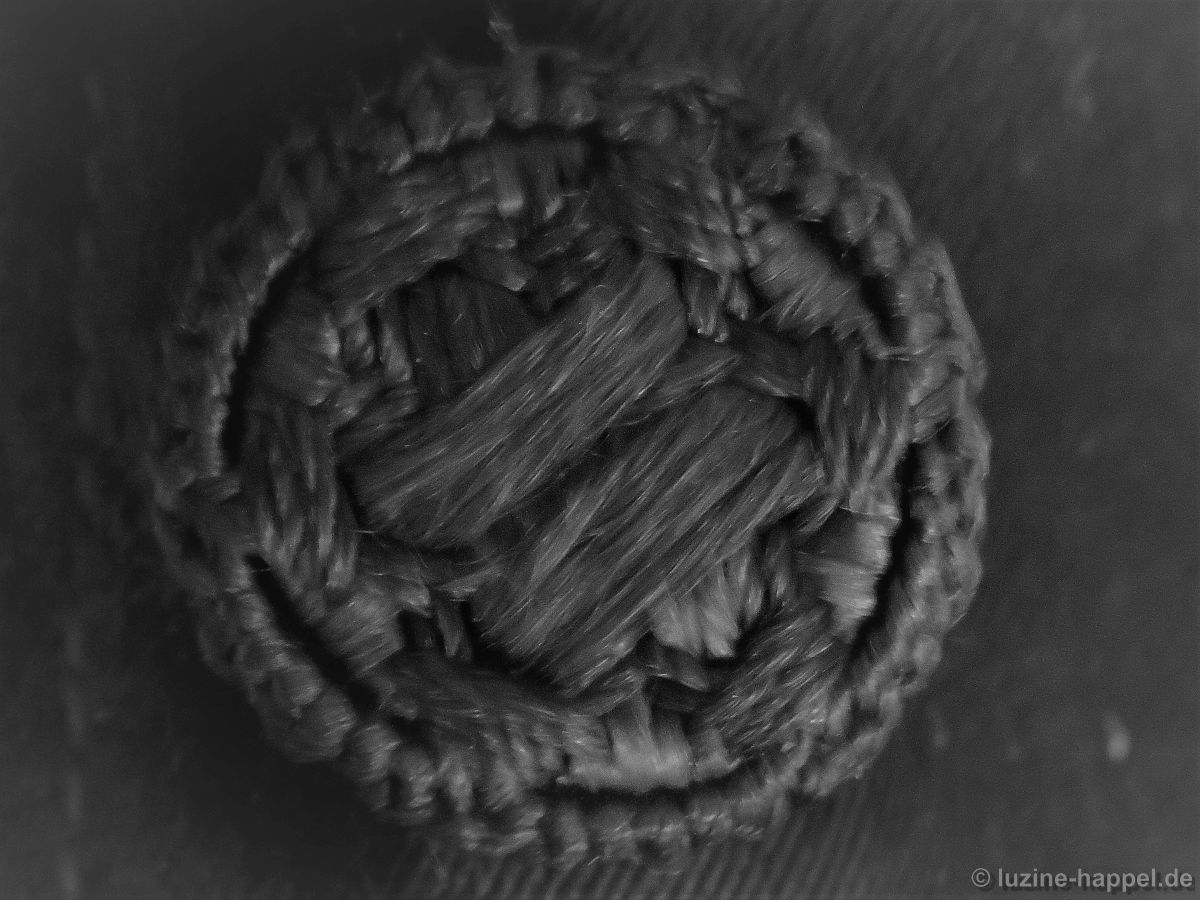
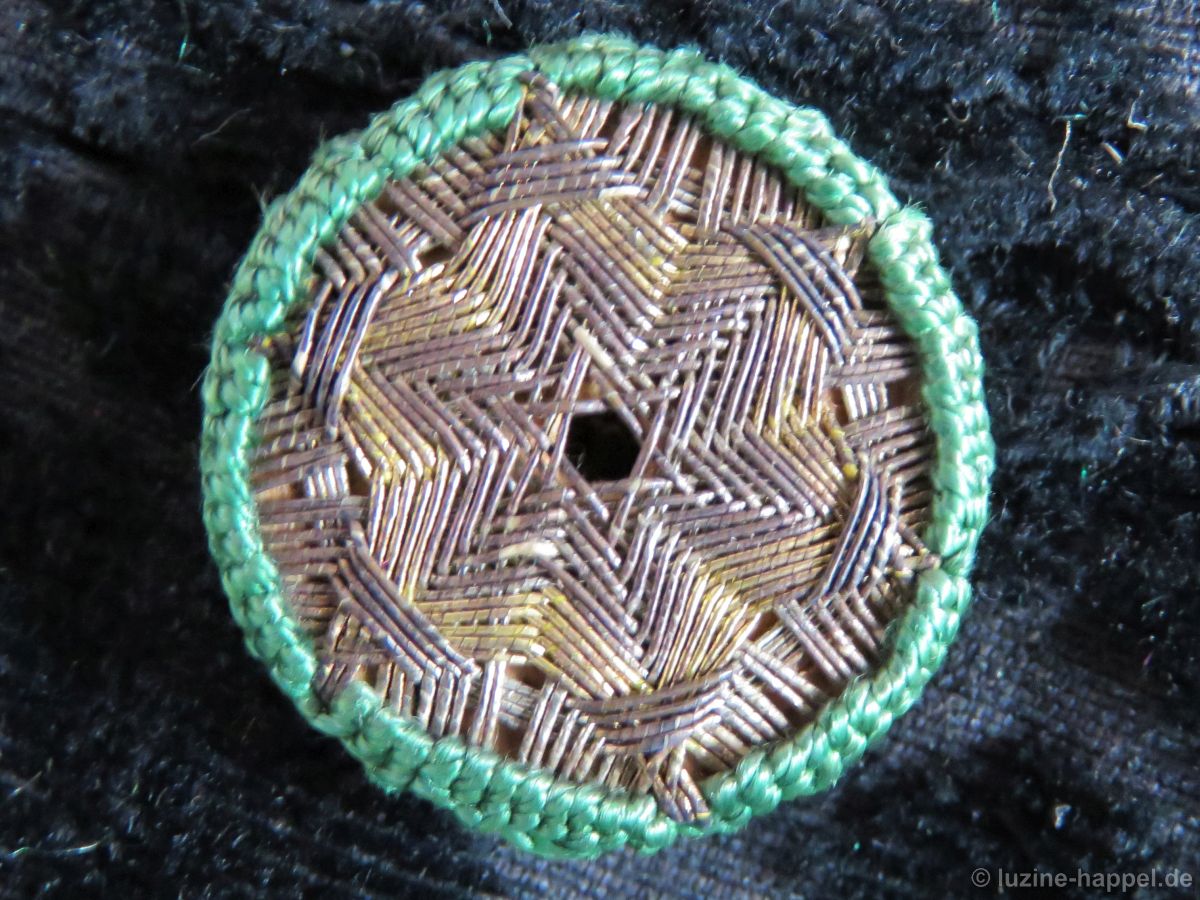
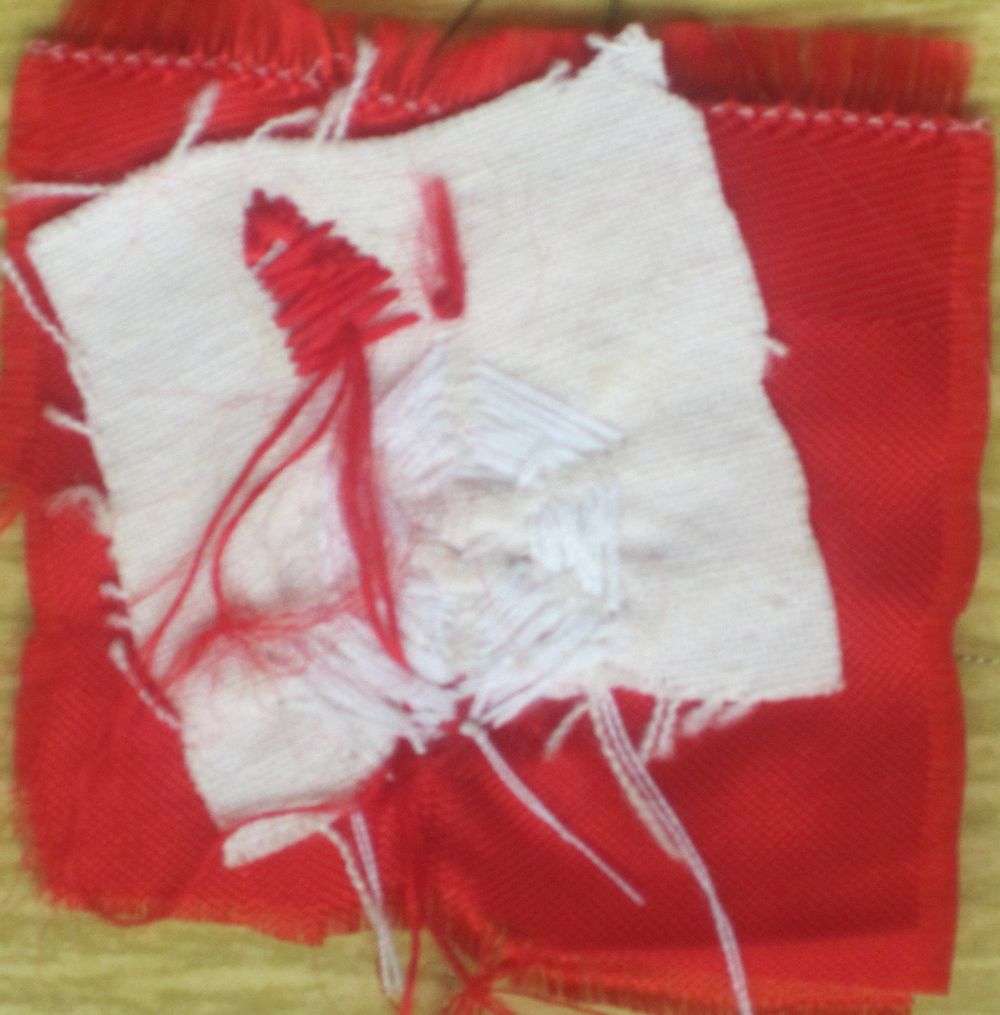
The backs of these older apron squares are unlined making it easy to examine the stitches.
Unfortunately, my collection is limited, and I can only show a few of these early apron squares. But these few give us a glimpse into the aesthetic sense and extreme creativity of our forebears when they created such wonderful patterns and designs.

Unstitching a Schwalm Passementerie Button

I have in my collection a typical Schwalm passementerie button that is slightly damaged. Because it is not in pristine condition, I decided to unstitch it to see exactly how it was made and the materials that were used.
Photos were taken while re-working. They are now shown in the reverse order.
Needed for establishing such a button were:

  • A wooden disc that had a hole in the center
  • Silk threads in red and (formerly) green
  • 4 metallic threads in a length of 35 cm each
  • 1 metallic thread in a length of 90 cm
  • Black linen thread

The tape measure allows one to imagine the fineness of the threads.
The disc has a diameter of 1.8 cm. The wood is from the beech tree. The left image – the front of the disc – shows indentations on the edges caused by the tightening of the wrapped metal threads. I cannot see division marks on the front or the back sides.
To the naked eye a difference in the thicknesses of the metal threads is imperceptible, but a difference can be felt when the threads are held between two fingers. The thread for wrapping feels stiffer.
I found the difference when I untwisted the threads. Both metal threads had different twisted cores that were wrapped with a metal band. The metal band on the thread used for wrapping the disc (white core) was more closely wrapped around the core than on the thread used for the weaving stitches (yellow core).

So the threads used for wrapping were more stable (the top thread in the picture below).
Button making was a stand-alone trade at the time. It is chronicled that a Konrad Plannet, button maker master in Schwalmstadt-Treysa, in the middle of the 19th century needed 12–14 hours to work about twenty buttons. It is hardly surprising because he had to twist carefully and exactly all the necessary threads first.

The ends of four silver threads were knotted together with a black linen thread.
The knot was positioned at the back of the wooden disc, approximately in the middle between the center and the edge. The metal threads were laid around the disc so that all four threads lay densely parallel and beside the center hole.
The black thread is laid to the opposite edge of the disc and there, a small distance from the edge, laid across the metal threads. These were bent back
and laid again across the front of the disc, parallel to the first but this time on the opposite side of the center hole.
On the back the black thread held and tightened the metal threads (using the black thread in such a way also enabled the button maker to conserve precious metal threads). The steps were repeated two times, laying four parallel metal threads outward of the first wrapping and again laying four parallel metal threads outward of the second wrapping. (This image shows that the metal threads were originally silver wires.)
The disc was rotated 30° clockwise, and the steps were repeated once
and again after rotating 30° clockwise twice.
On the back all metal thread bundles were held in place and stretched with the black thread. It is clearly visible that the curve of the first two bundles is closer to the edge than the curve of the second two bundles. And the thread bundles leading from one section to the next were laid in a curve that nearly reaches the center. In this way bulky areas on the back of the button were avoided.
The thread ends were wrapped many times and then cut. The more flexible metal thread – in the picture it looks like gold wire (it makes sense that the yellow core thread was covered with gold wire, the white core thread was covered with silver wire) – got a knot at one end and was slid under one thread bundle on the back.
Emerging directly from the thread bundle, it was brought to the front side. (The red arrow marks the knot.)
On the front side, it was woven over the first bundle of metal threads, under the two crossing bundles, and over the fourth bundle.
Now the working thread is – seen clockwise – lying before a sixteen-thread bundle. On the back it is brought clockwise three sixteen-thread bundles away and now lies – seen clockwise – behind the third sixteen-thread bundle. Unfortunately the brittle thread spread out of place, so I marked the position with arrows. The blue arrow marks the ending of a weaving sequence, the green line marks the thread’s path along the back of the disc, and the red arrow marks the beginning of the next weaving sequence, which is parallel outward the previously laid threads.
Always in the same way the thread was woven and wrapped until a star with a four-thread edge was established.
On the back it looked like this:
Now a red silk thread was fastened with a knot and slid under a thread bundle in the back
to be brought up at the side of the bundle (see blue arrow) and slid under the laid threads (coming up one thread past the middle).
With Running stitches over the points of the established star and under the two middlemost threads of the first laid bundles, a circle pattern is created close to the bases of the star points.
Two more rounds are worked outward with the Running stitches (when they cross the star points) becoming shorter one thread each side and each round.
Here it is clearly visible that the Silk thread was twisted with two thick plies. (It is chronicled that the above mentioned button maker master took 6–8 ultra-fine silk plies for twisting the threads for the Running stitches and 10–15 ultra-fine silk plies for twisting the threads for the buttonhole stitches at the edges.)
After three rounds of Running stitches, the thread is brought to the back and secured.
Now a (formerly green) silk thread was taken up. Six Running stitches were worked in a round near the edge crossing always over fourteen of the sixteen-thread bundles.
Buttonhole stitches were worked on these threads. I count seven Buttonhole stitches in each section.
A second row of Buttonhole stitches was worked (unfortunately this is no longer completely intact)
to bring the stitches around the edge.
On the back the stitches were fastened by wrapping around previously worked threads.
Although considered one of the more simple button designs, a similar, but undamaged, button from the same garment shows the original beauty of these buttons.

How many hours, how much patience, and how much craftsmanship were put into making a single
small button! And the garments of a Schwalm woman needed many buttons.

Schwalm Passementerie Buttons

The buttons for the Schwalm women’s waistcoats and other items of dress were passementerie buttons. The Huguenots brought this button-making technique to the Schwalm from France at the beginning of the 18th century. Materials used were gold and silver wires and silk threads in red, green, lilac, and black (matching the festive costume ); white and yellow silk threads were also used, but only rarely. Sometimes only metallic threads were used, and sometimes only silk threads. One will see silk-only buttons mostly in the black buttons on mourning garments and in children’s buttons. Most common, however, was a combination of both materials.
Threads were wrapped radially around a wooden disc that had a hole in the center. They were held in place with weaving and Running stitches.


Usually the buttons got a needlelace edging, serving as both an additional decoration and to protect the edges.
I found two different ways of wrapping the threads. All wrappings create a six-pointed star pattern on top of the button.

The most common method for establishing a star was to lay threads in two wide parallel stripes left and right of the center and to continue laying similar stripes two more times by rotating the piece 60° and 120°.
The stripes were held in place with weaving and Running stitches of different lengths.
The other method used to create the star was to rotate the button 60° after every two wrappings.
This star was also held in place with Running stitches of different lengths.
The metal threads tarnished over the years. But they can be polished with a special cleaning cloth for silver.


Buttons with a diameter of about 1.8 cm were most common. However, the size of the button changed according to the size of the garment. So, children’s garments had small buttons, and women’s garments had slightly larger buttons.
A damaged button shows the inner disc (image above) and the image below shows a similar, but undamaged, button. It is part of a child’s waistcoat.

Traditional Craftsmanship – The Buckle Maker

The Schwalm buckle shoes were closed with …buckles. They could be bought from a buckle maker.
The buckle maker got the brass blanks from yellow metal foundries in Kassel or Berlin.
Schnallen Rohling
The buckle maker had two tasks. First, he had to make the blanks usable by giving them a “heart”
Herz der Schuhschnalle
and a “tongue” from black plate.
Zunge der Schuhschnalle
These components were movable, fastened around a pin.
festgenieteter Stift zur Befestigung_von Herz und Zunge
Sometimes the buckle maker added a year or a sign of his workshop.
Jahreszahl
Second, the buckle maker had to embellish the festive buckles for holidays with additional decoration. He soldered pieces of copper sheet or copper rivets in bored holes.
Kupferblättchen und Kupfernieten
Often the face of the copper sheets were finely engraved
ziselierte Kupferblättchen
or the area surrounding the rivets were decorated with chiseled marks.
Ziselierung um die Nieten
In the end the buckles were brought to a mirror finish using mineral spirits and chalk.
polierte Schnalle

Traditional Craftsmanship – The Colour Embroiderer

As already mentioned in the article about the template maker, in Schwalm templates were used as inserts for the colour embroidery.
Also needed:

  • a piece of fabric for the basic foundation – primarily linen was used, but later solid cotton fabric was also used
  • a piece of silk fabric in the main colour of the planned embroidery
  • silk threads in the vibrant colours red, green, purple and yellow, as well as black and white sewing thread in matching colours
  • Chenille needles
  • sometimes, added embellishments
  • gold and silver thread
  • gold and silver bullion
  • gold, silver and coloured sequins
  • narrow coloured flowers or stars of metal.

silk threads in different vibrant colours

Seidengarn besteht aus 3 x 2 Einzelfäden;gestickt wird mit 2 x 2 Einzelfäden

Silk thread is made with 3 X 2 strands;
used for the embroidery are 2 X 2 strands

The silk fabric is placed on the linen or coton fabric, and the template is placed on top of the silk. It is secured with some stitches through both layers.

securing the template on the fabric 1securing the template on the fabric 2the backside

The backside is shown in the picture above.

embroidering the templates with silk - front
embroidering the templates with silk - backside

The templates were embroidered by traditional patterns. The stitching is dense; the thread moves through both fabric layers and around template sections, as the above pictures from front and backside show.

rotating frame for template embroidery 1
rotating frame for template embroidery 2

To make the work easier, the template maker, Ludwig Schmerer, constructed a special rotating frame for his wife, Christine. The special frame enabled her to use both hands to embroider. She worked the colour embroidery up to her death some years ago.

embroidering the templates with metal threads - front
embroidering the templates with metal threads - backside

When silk thread was precious and valuable, it was used on the front side only. For the back a cheaper thread was used. This thread couched the silk thread at the edges. This couching method, shown in the pictures above, is also used today for securing metal threads. (Metal threads are too inelastic. They would break by a sharp turn.)

filling the remaining sections

Small remaining parts between the template sections were filled with Satin stitches. Sometimes these were also covered with gold or silver threads, gold or silver bullion, gold, silver and coloured sequins or narrow coloured flowers or metal stars. In the end the fabric was trimmed to the edge and the edges were covered. With further steps the silk embroidered pieces were brought to their respective use.

tiny embroidered templates at the edge

The most superior pieces, such as this very old top of a cap, have additional decoration of tiny embroidered templates at the edge.

silk bands, formed to the desired shape

Special costume components, such as this “board” (Brett) are embroidered directly on to a silk band that has been formed to the desired shape.

finished embroidered part of the board, a special costume component
As always, I welcome your comments.