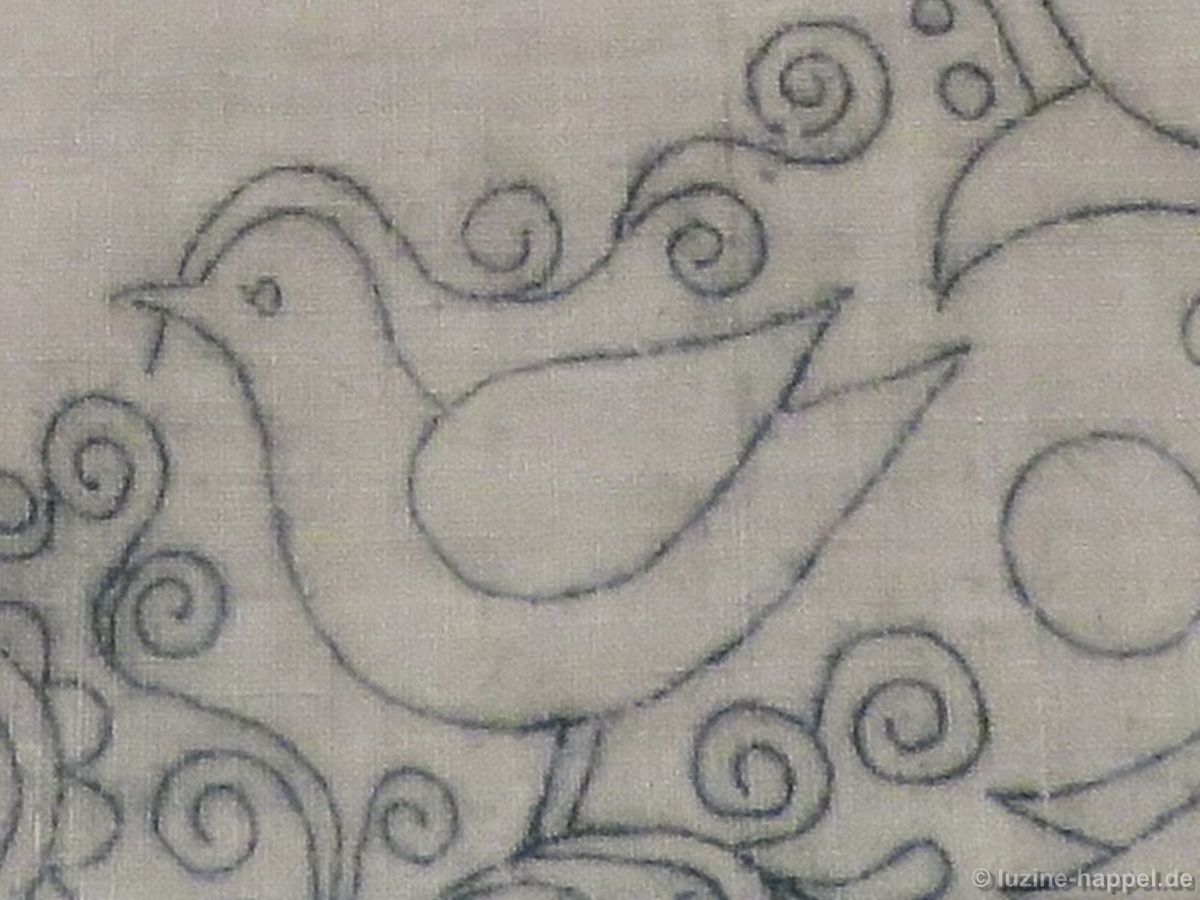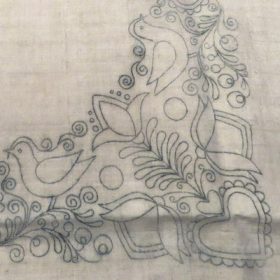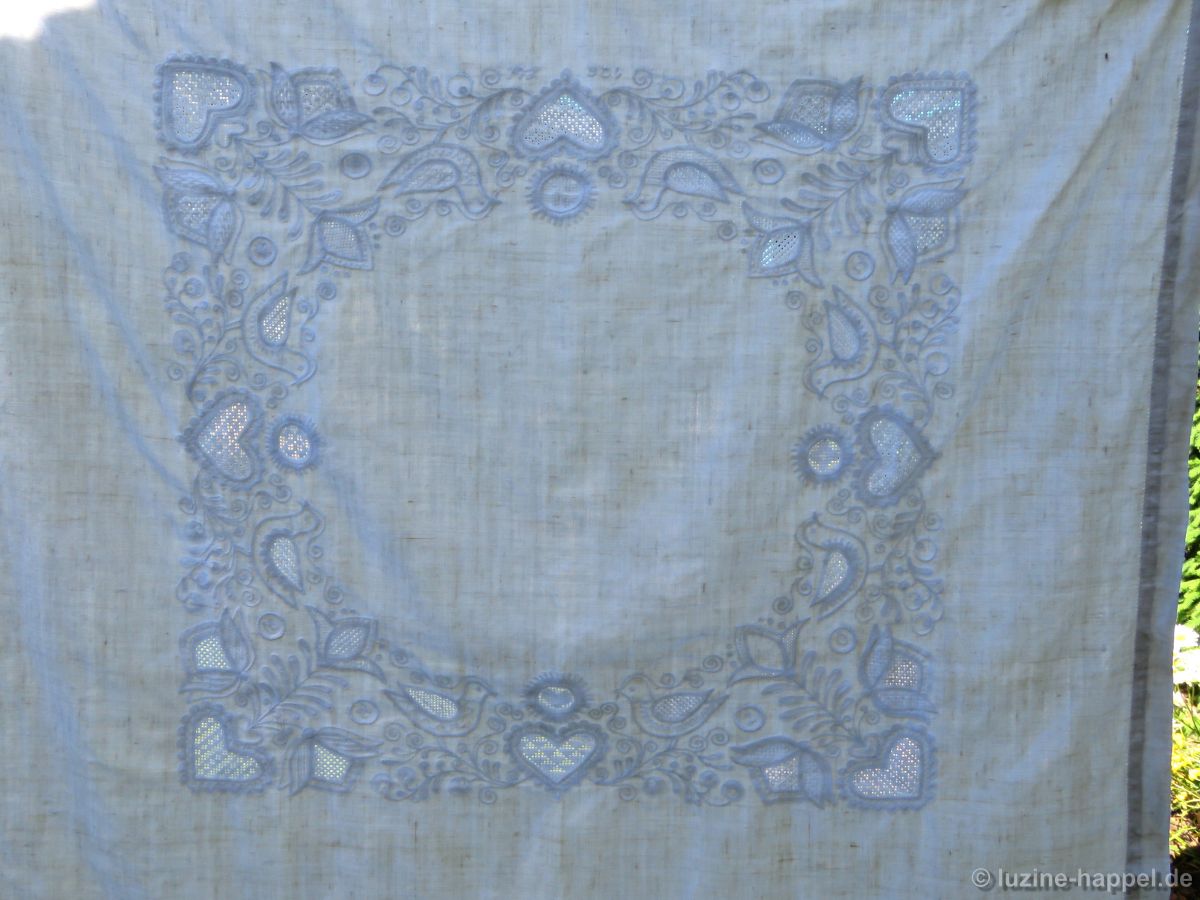
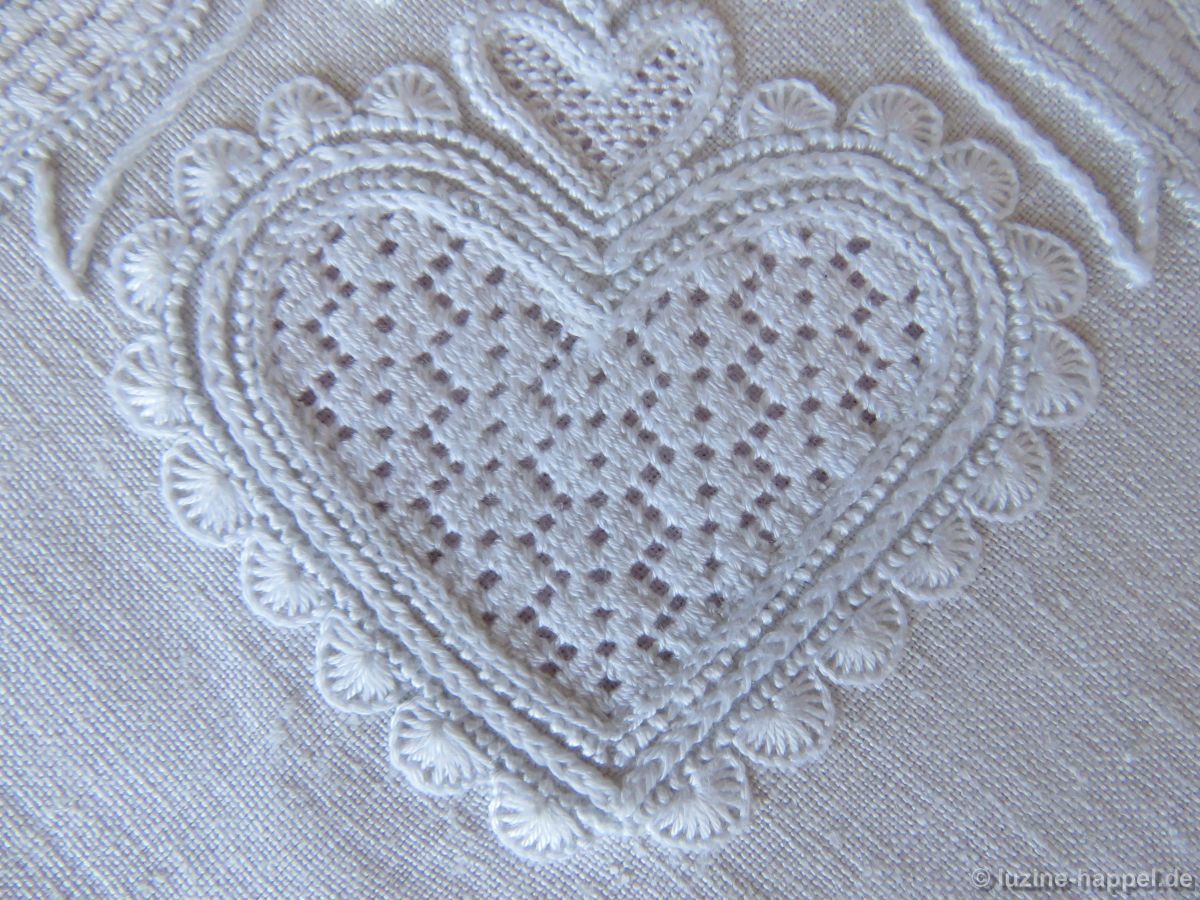
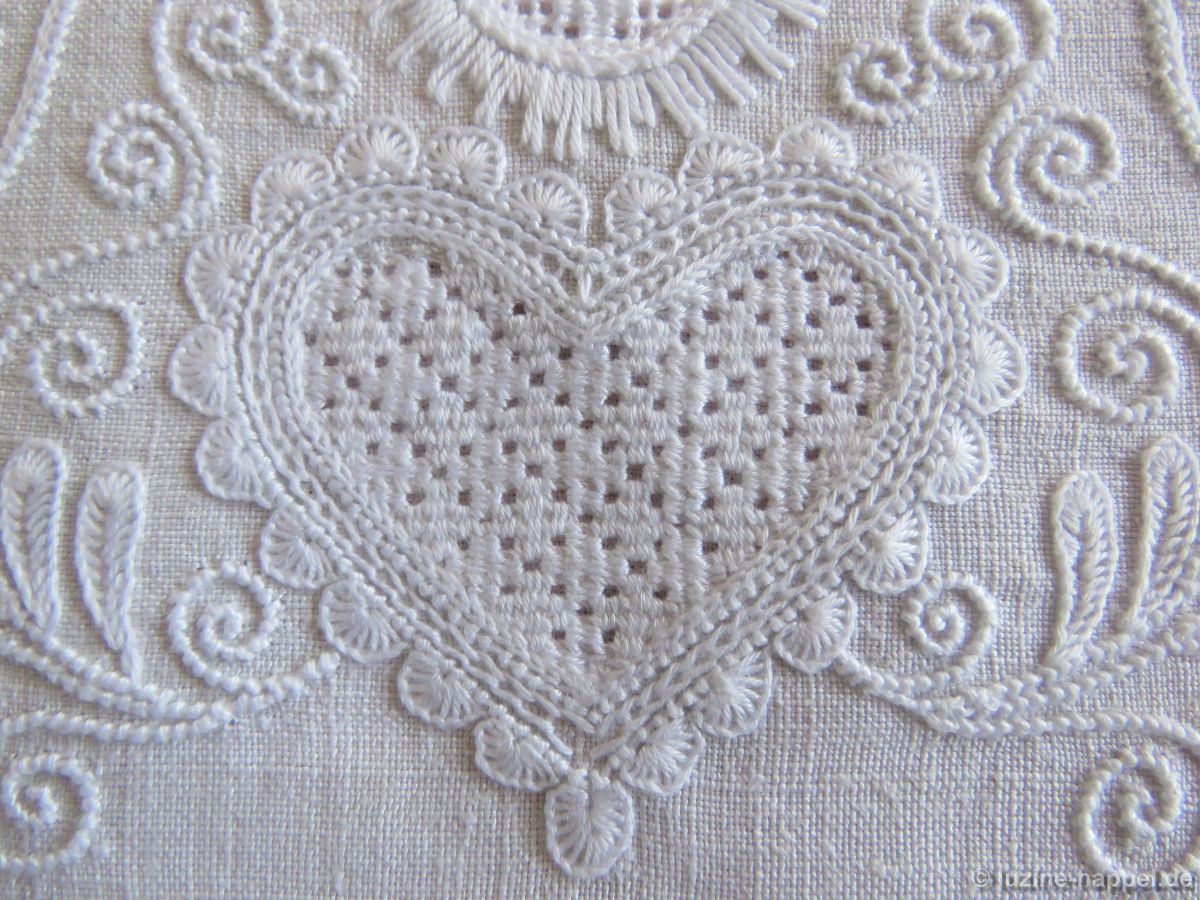
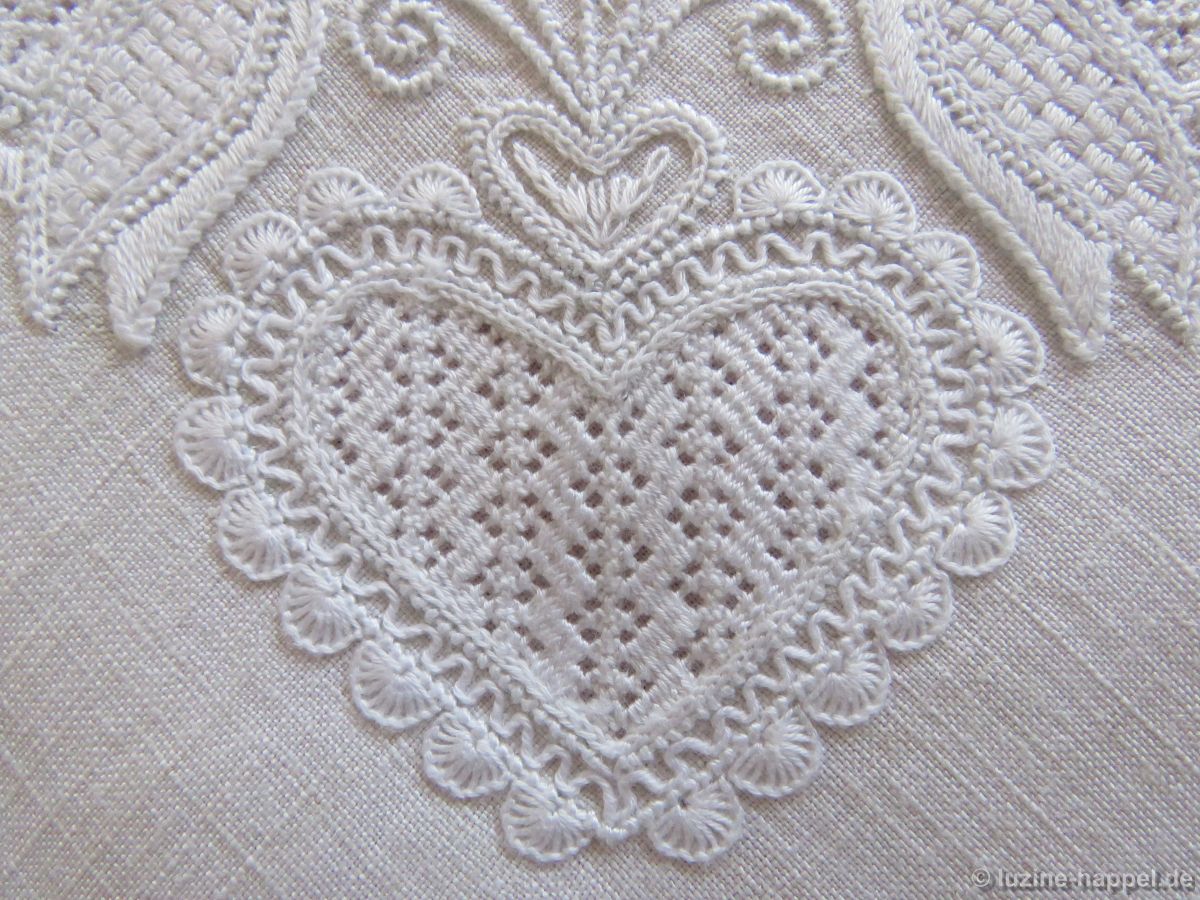
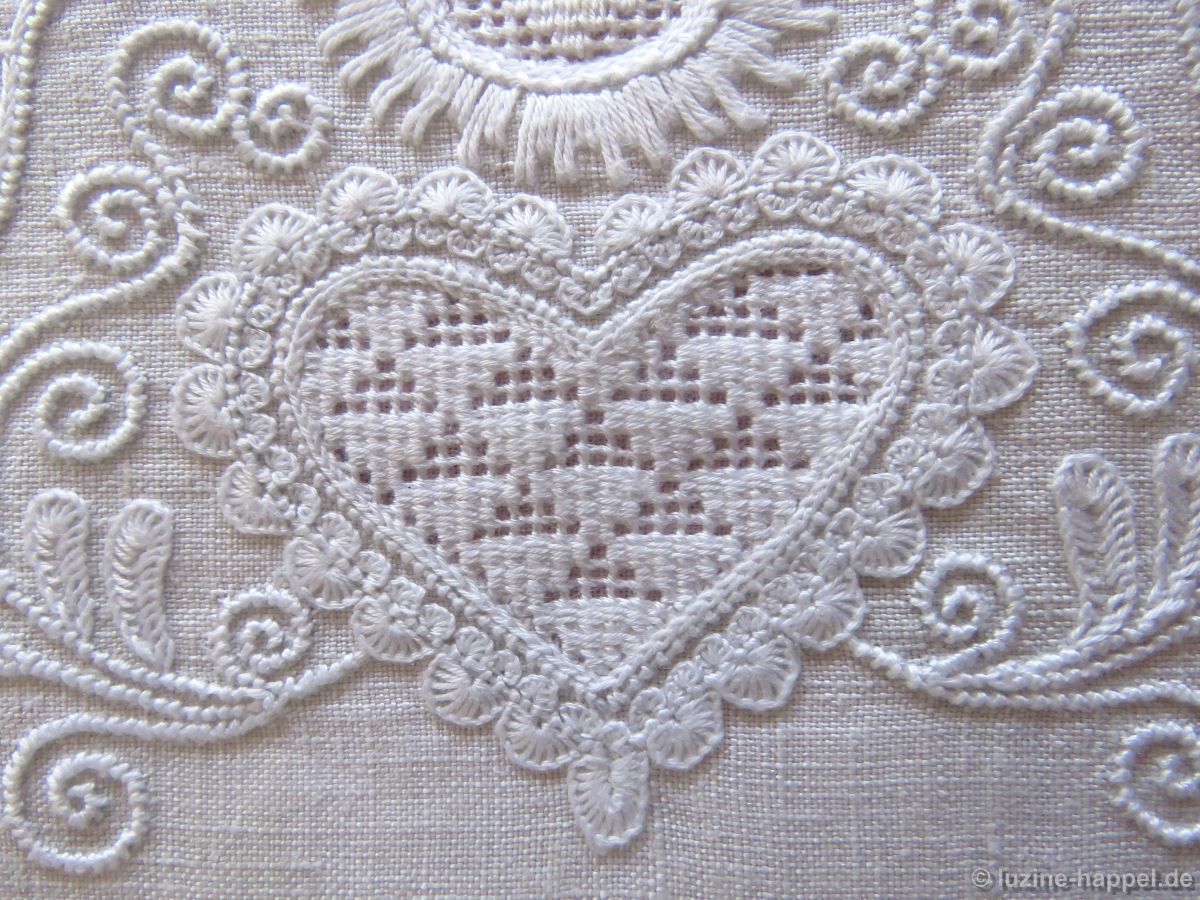
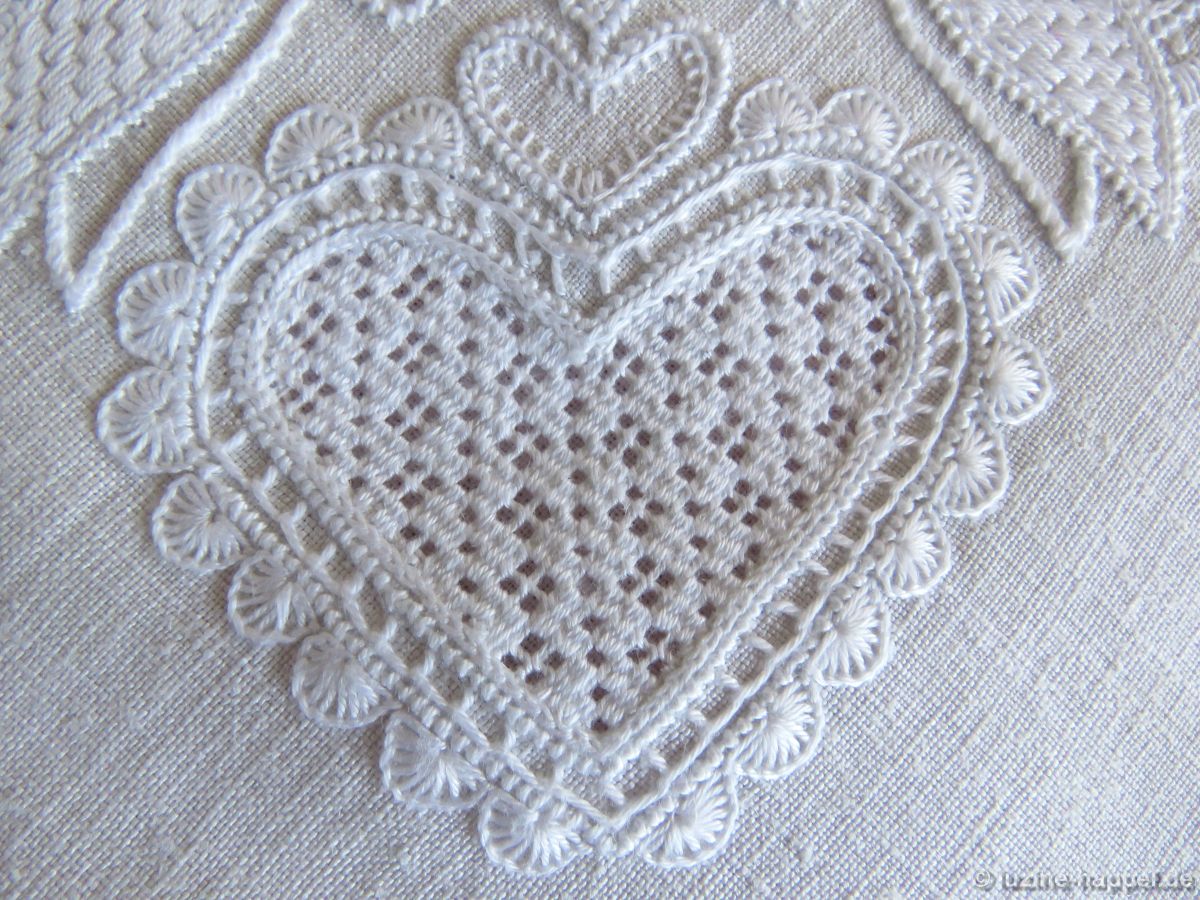
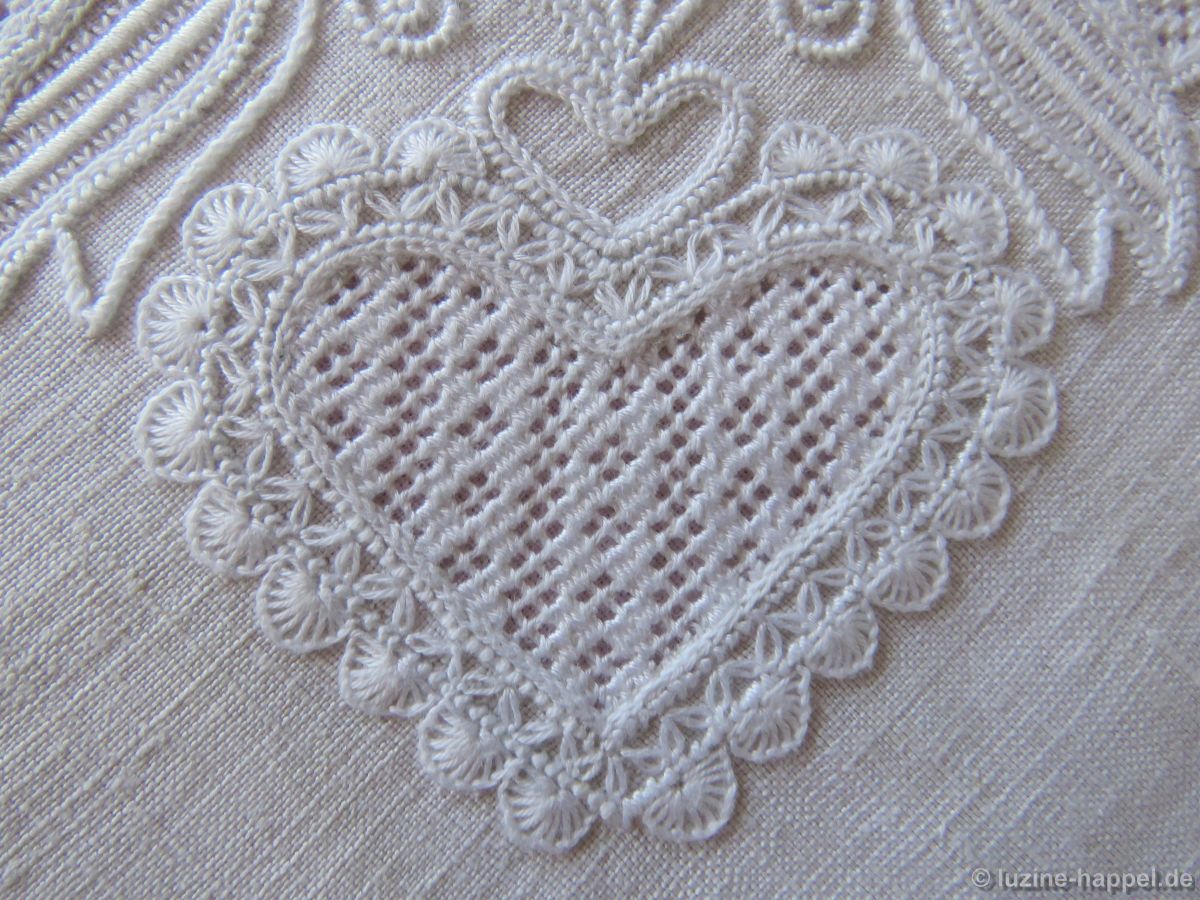
The design of the tea cloth contains a heart motif that appears a total of 8 times, four times along the straight of grain and four times diagonally to the grain. Both versions have double outlines,
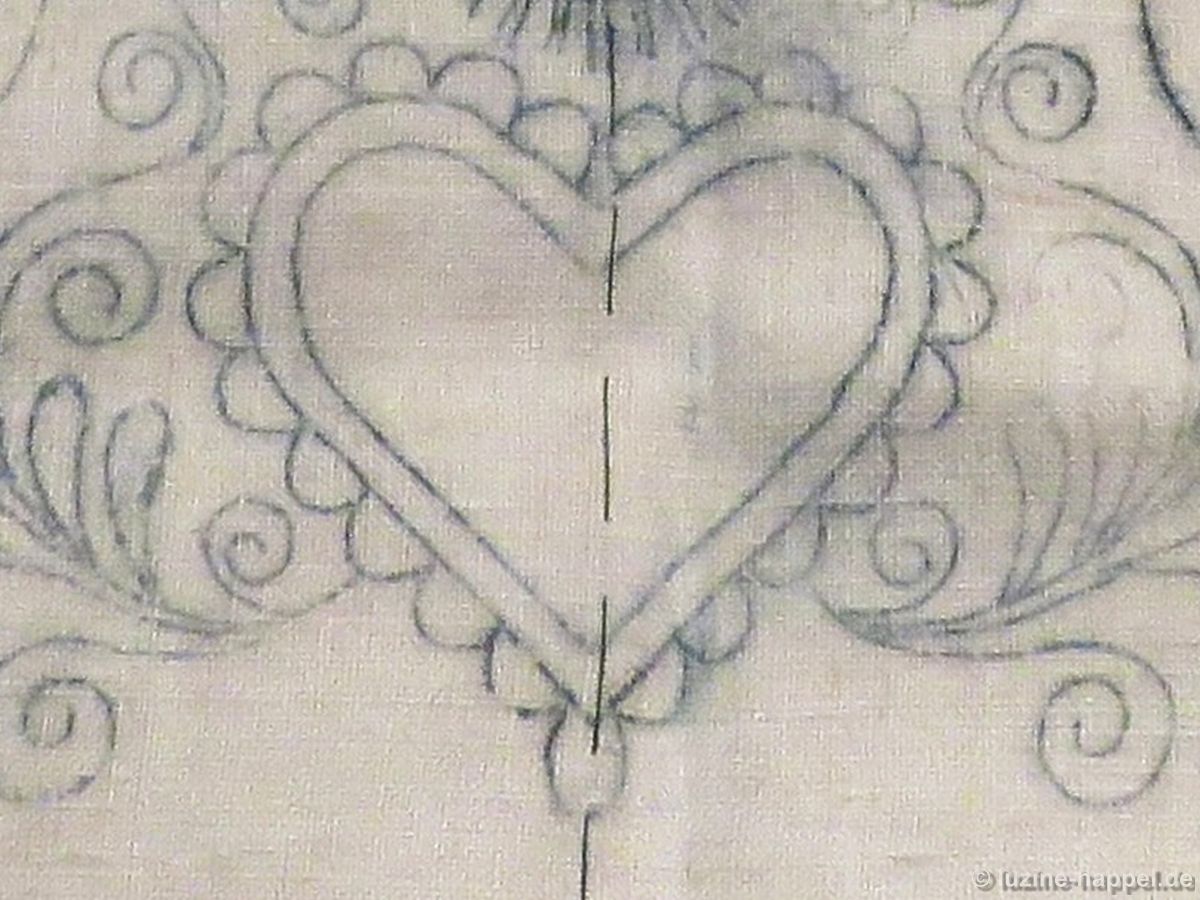
surrounded by blanket stitch half eyelets.

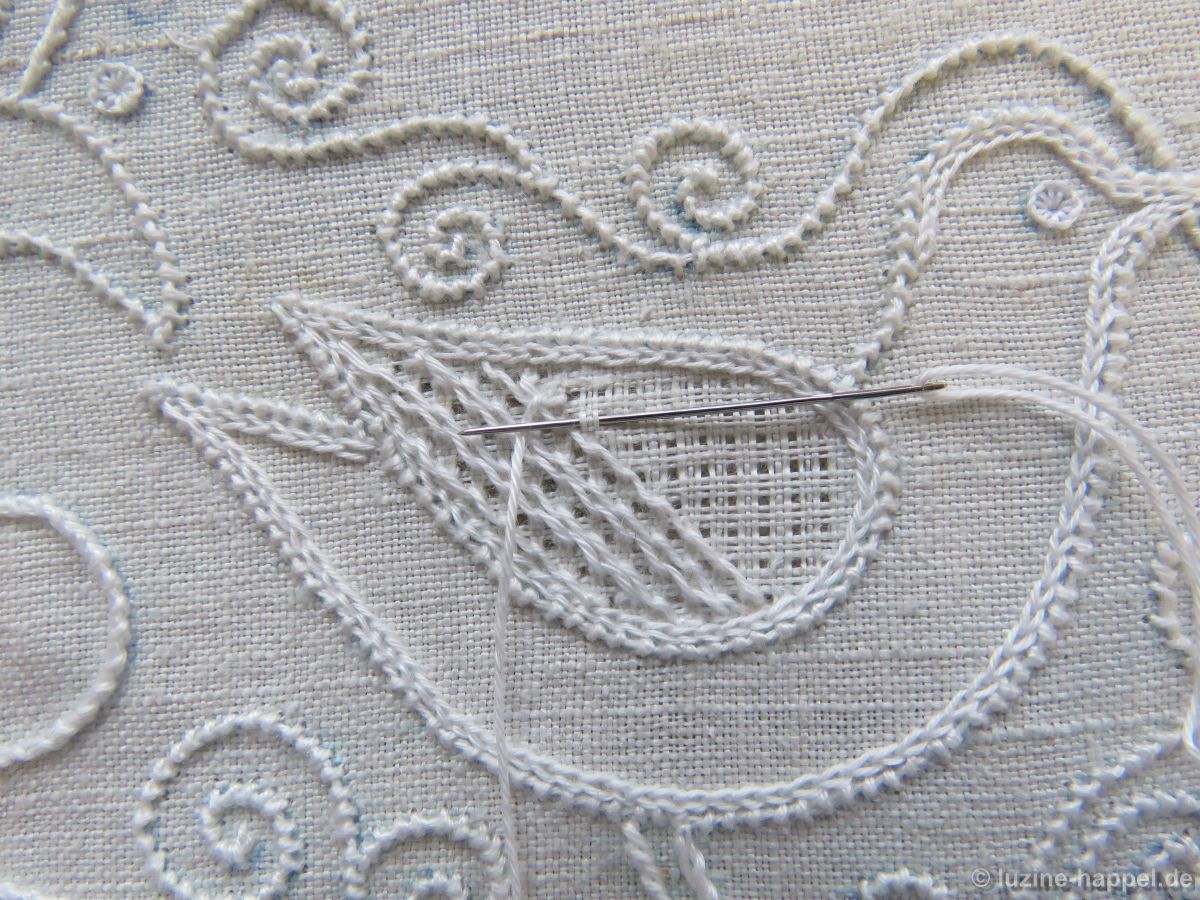
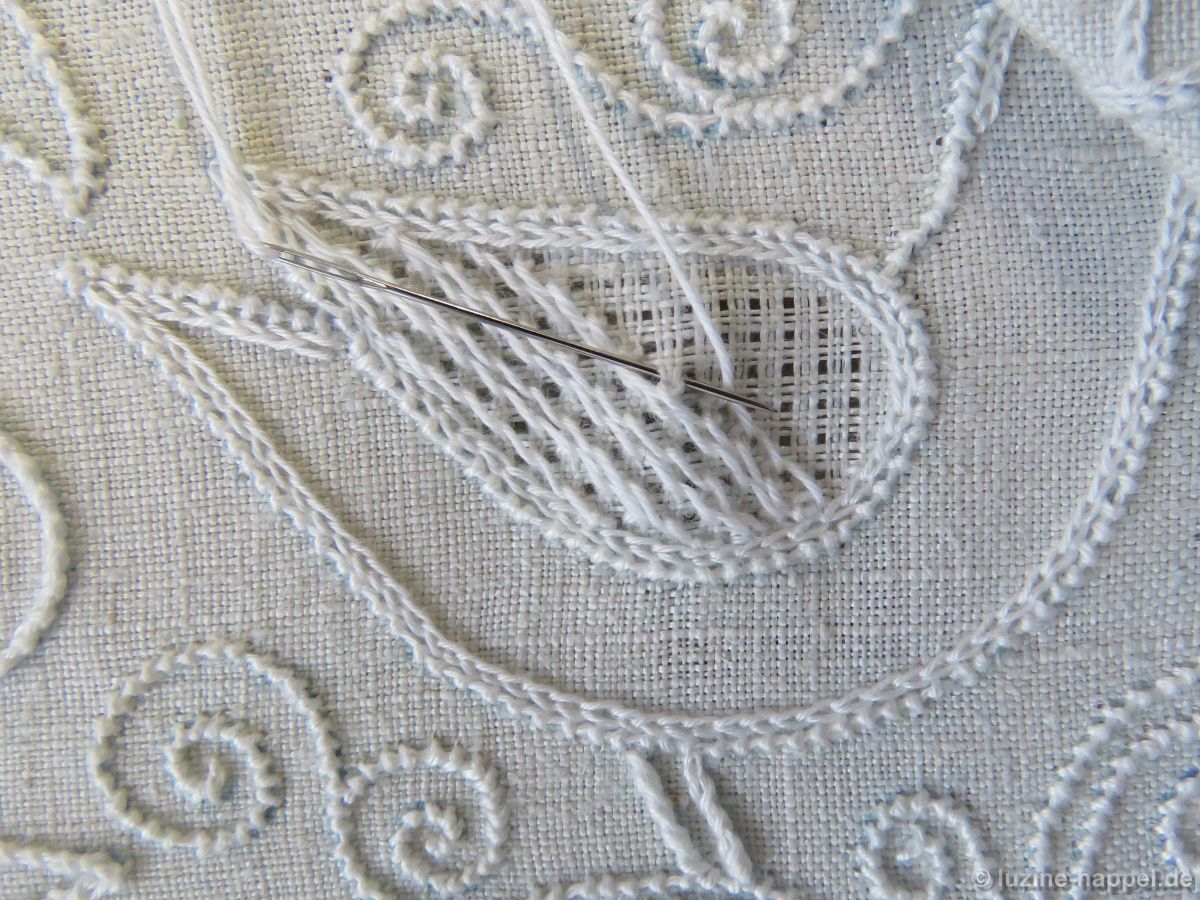
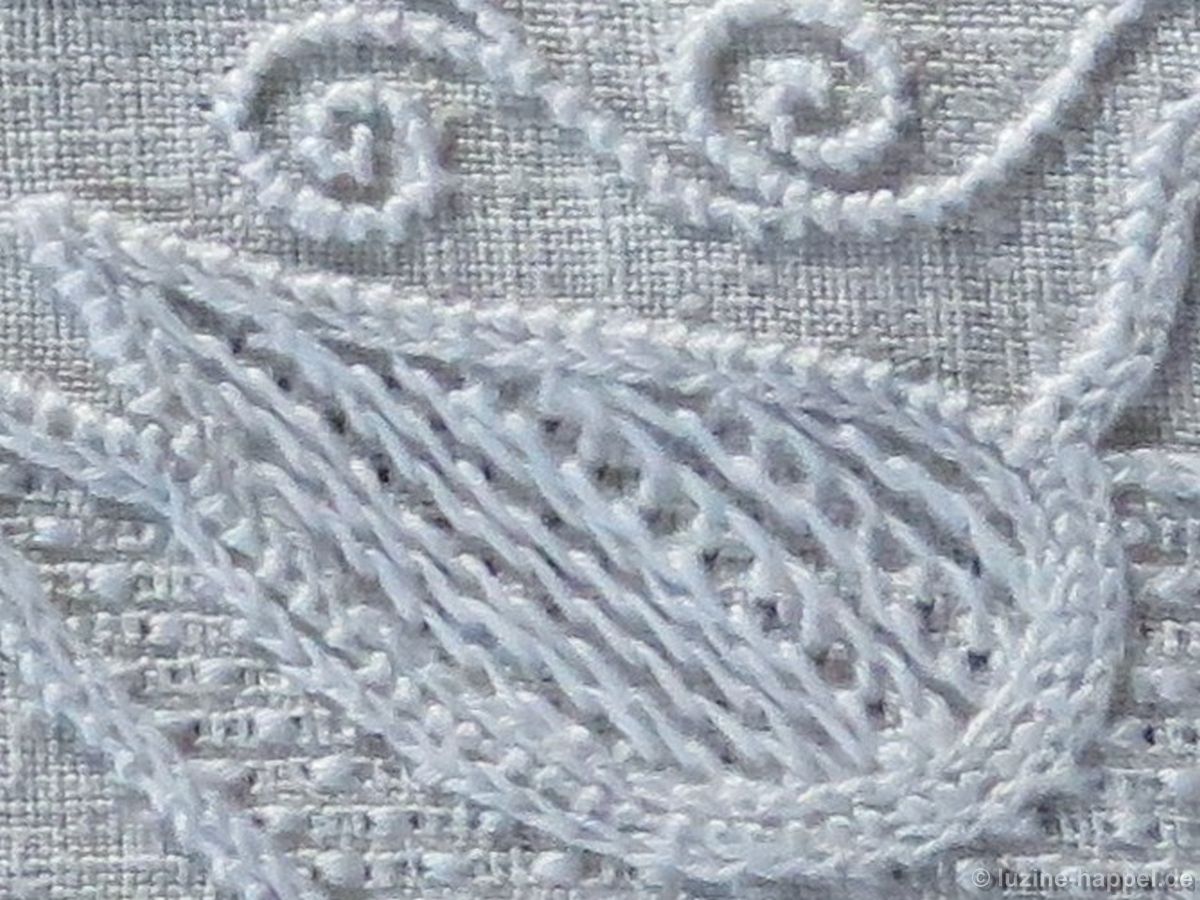
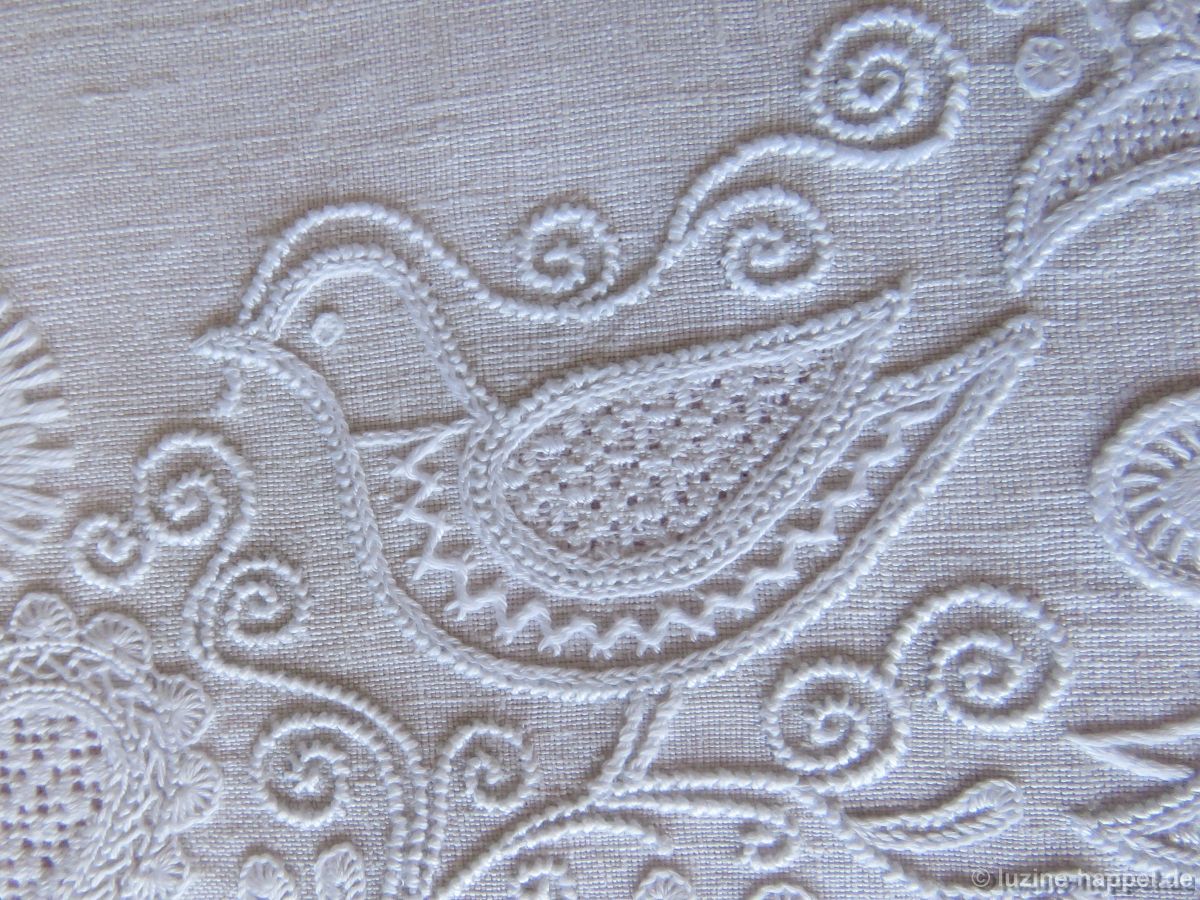
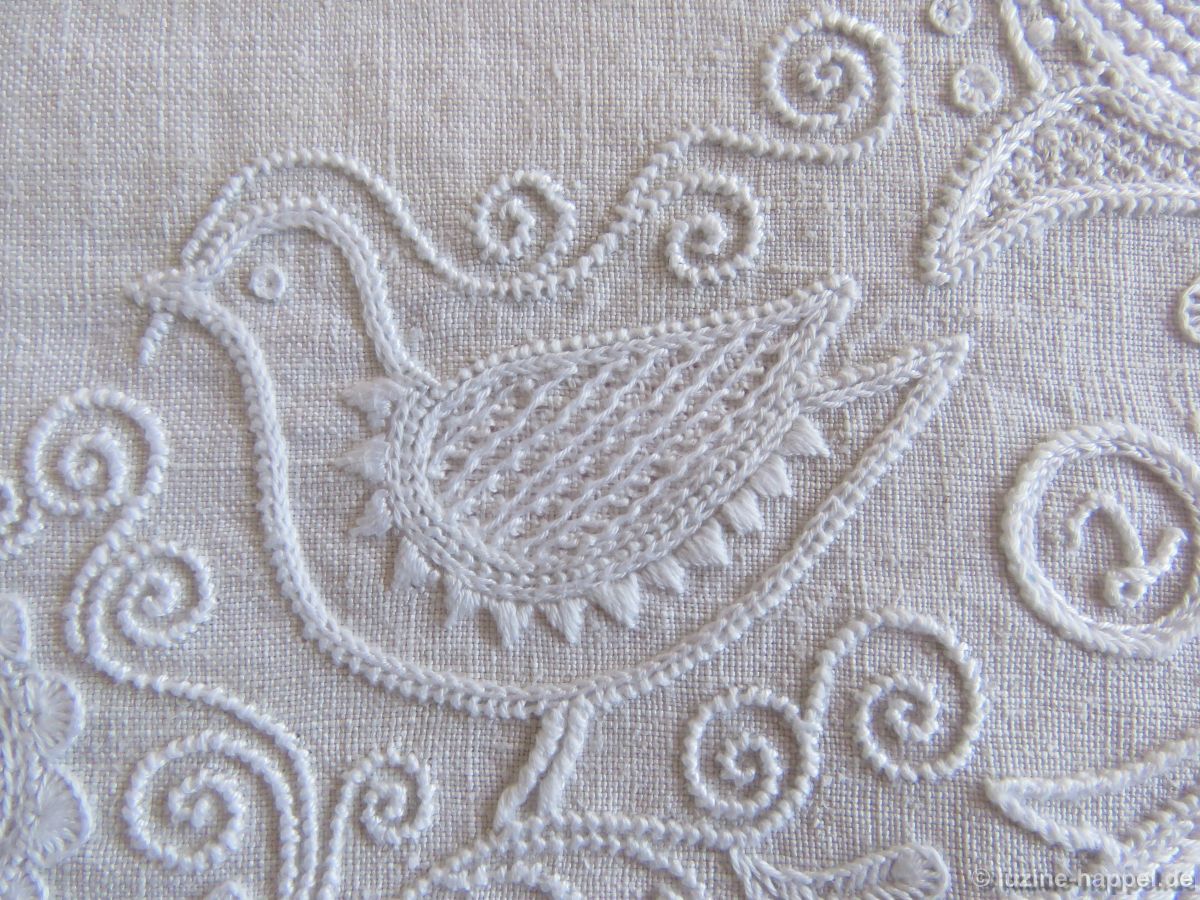
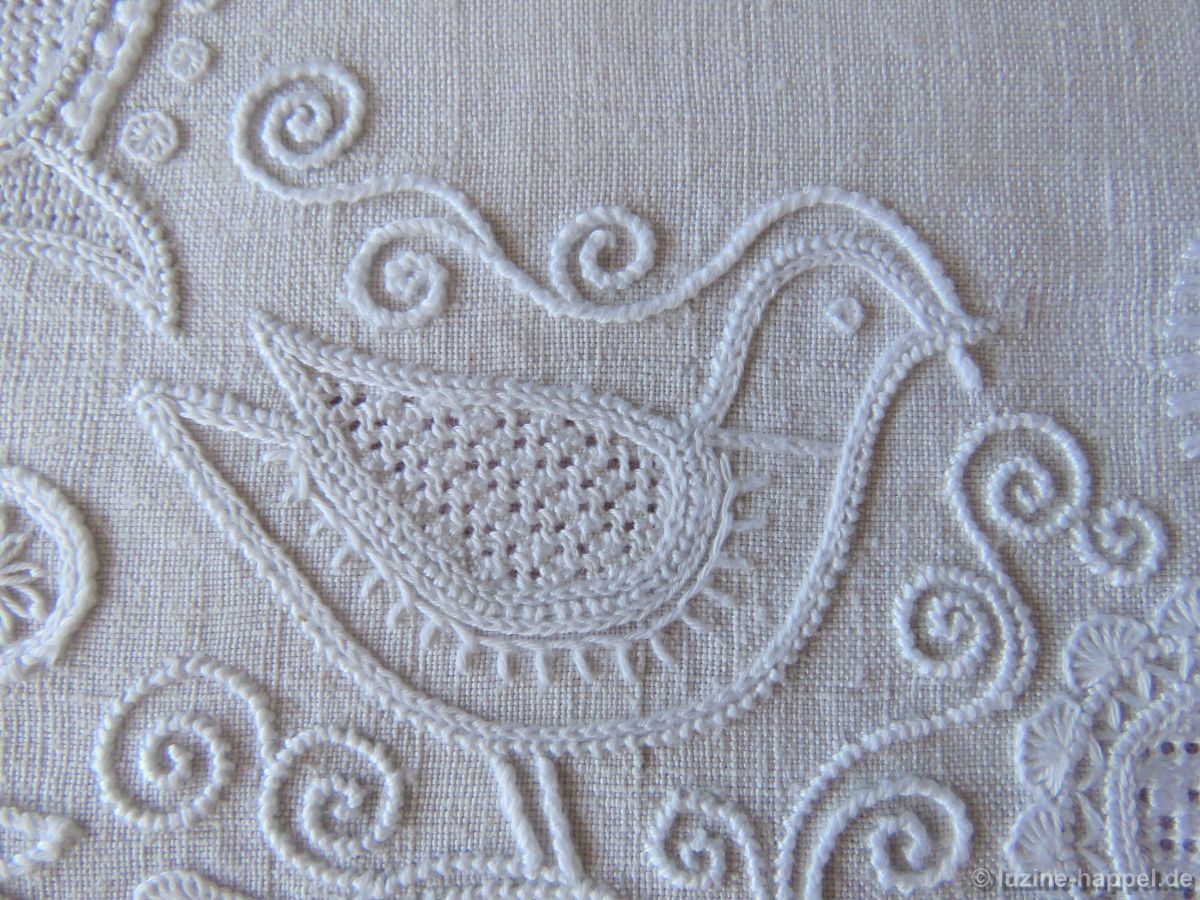
The areas of all the heart motifs were decorated with openwork patterns.
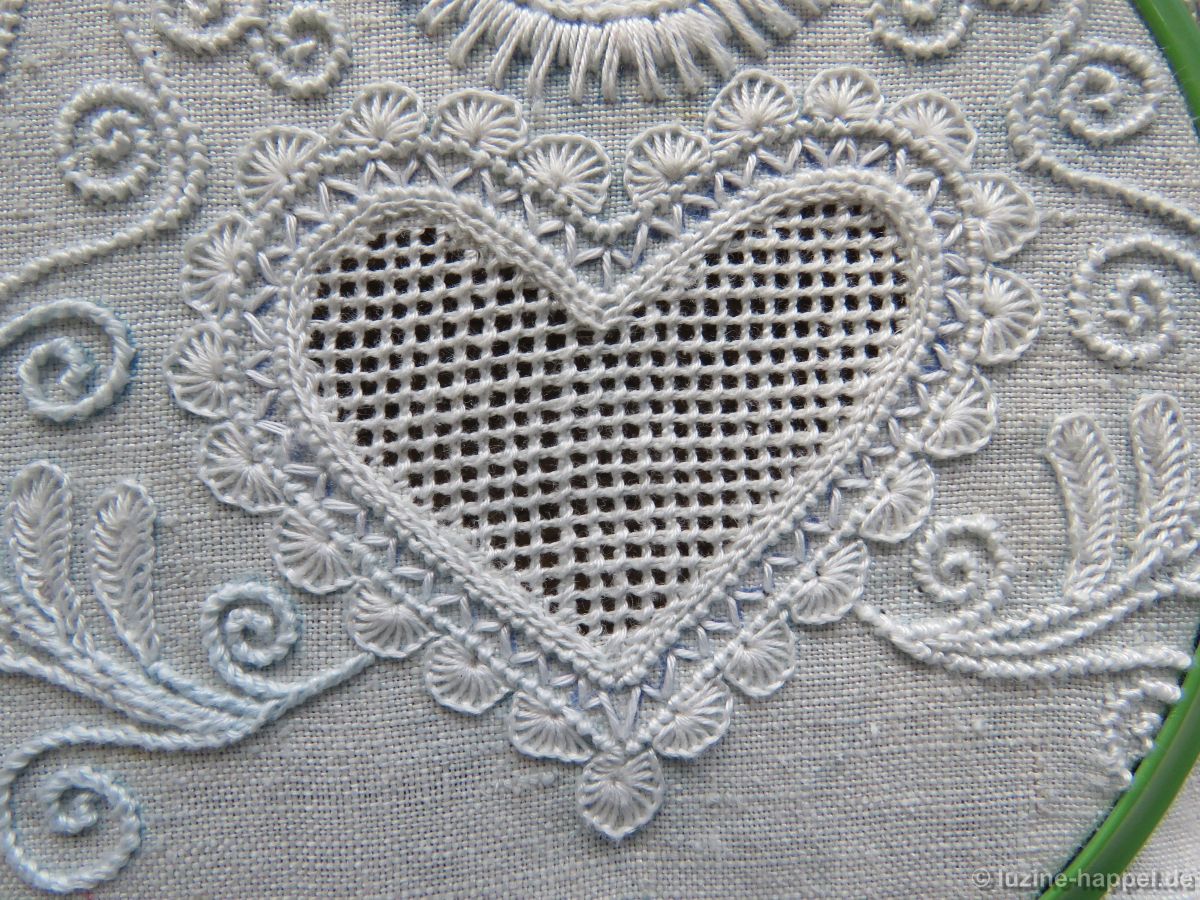
The edge of heart 1 was embroidered with wave stitches/zigzag stitches.
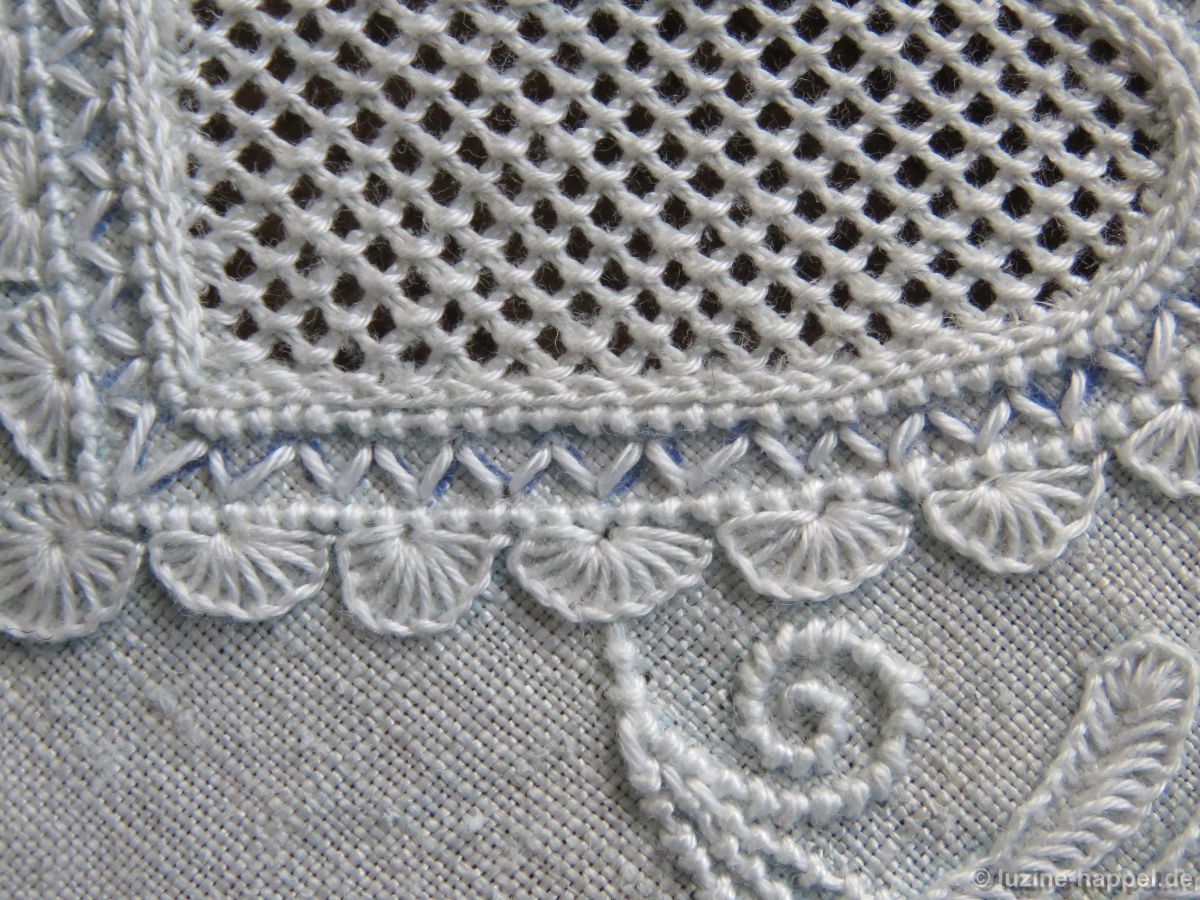
Pattern 147 (Openwork Needleweaving Patterns, page 77) was used as filling pattern.
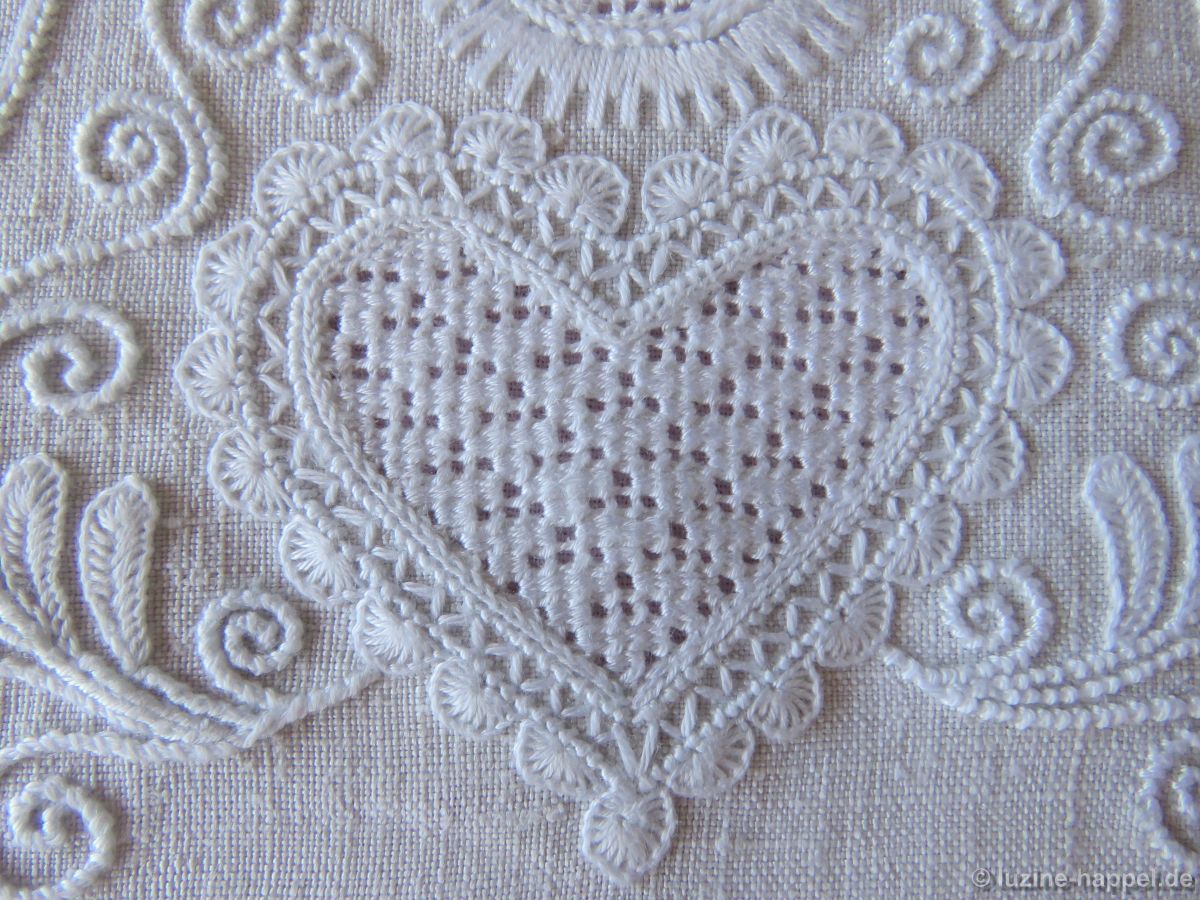
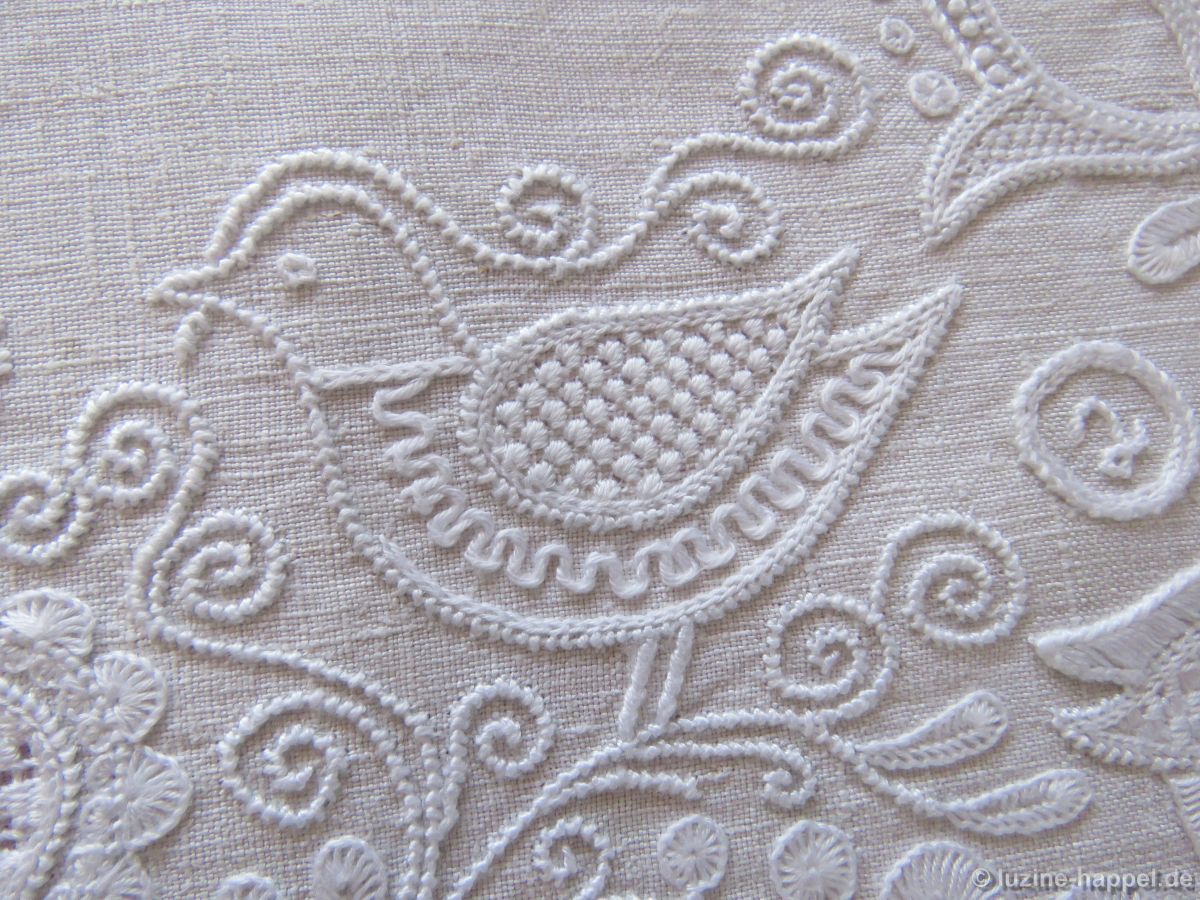
The edge of heart 2 was filled with thick chain stitches.
Pattern 54 (Openwork Needleweaving Patterns, page 30) was worked as filling pattern. The small heart above was given a 2:1 thread-withdrawal pattern and the openwork cable stitch pattern.
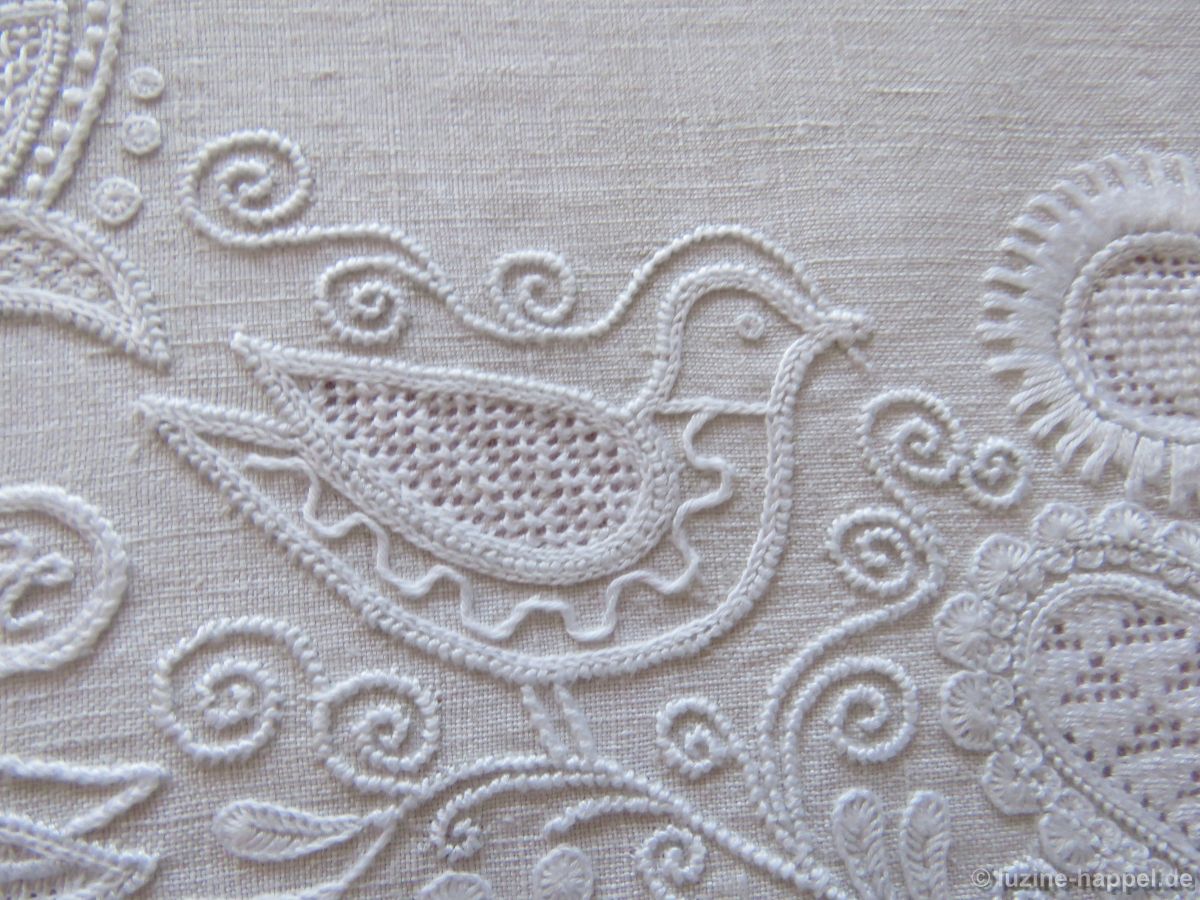
The edge of heart 3 was filled with wide chain stitches.
Pattern 129 (Openwork Needleweaving Patterns, page 68) was worked as filling pattern.
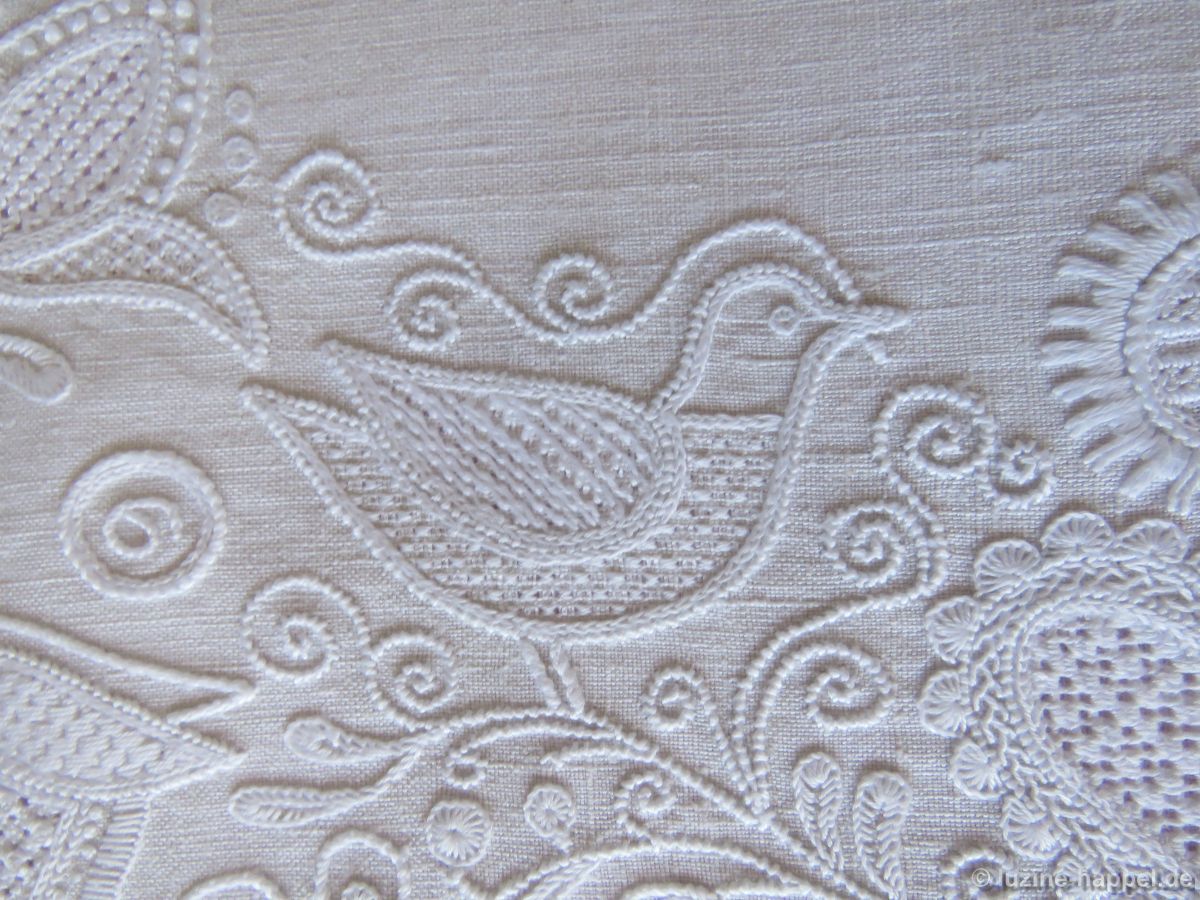
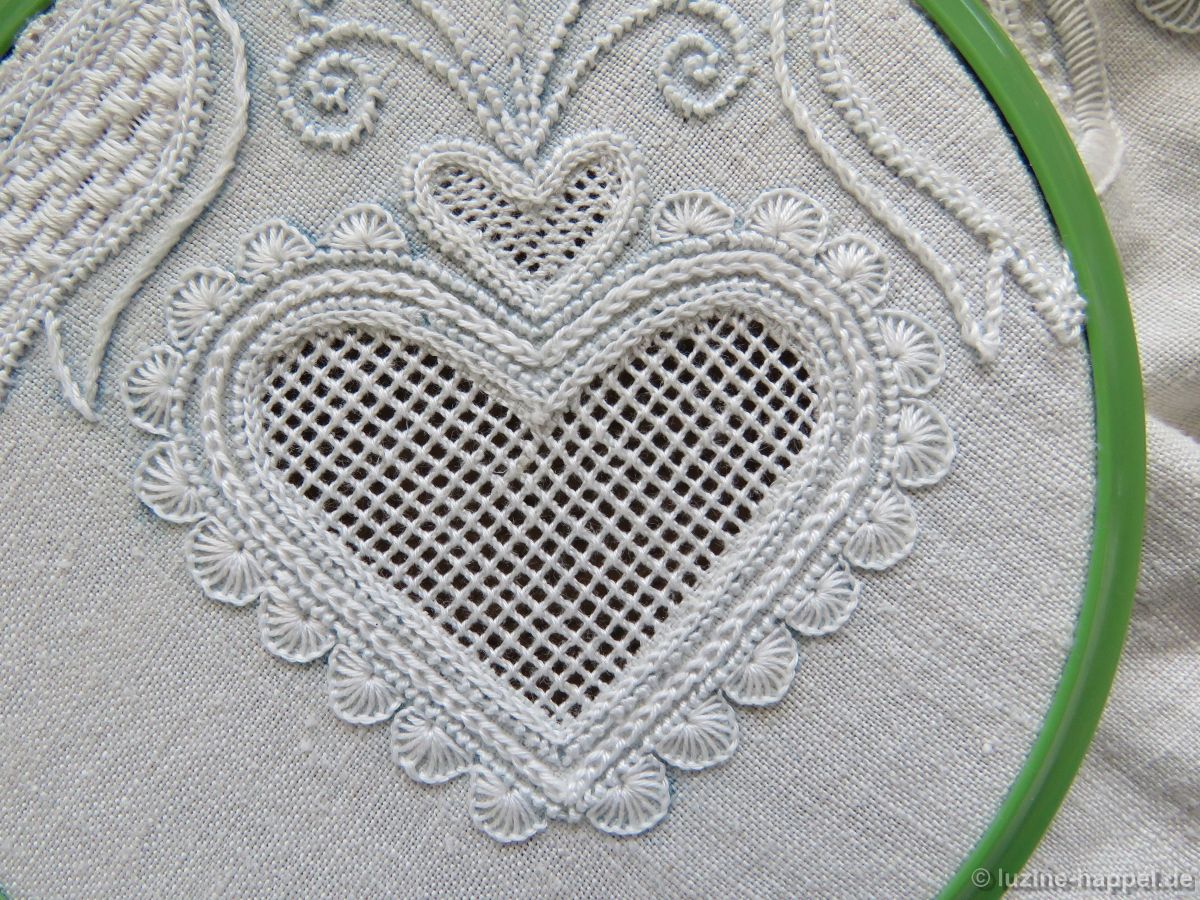
The edge of heart 4 was filled with interlaced straight stitches.
Pattern 56 (Openwork Needleweaving Patterns, page 31) was used as filling pattern.
The small heart above did not involve any thread withdrawal; it was decorated with chain stitches.
The edge of heart 5 was filled with small blanket stitch half eyelets.
Pattern 146 (Openwork Needleweaving Patterns, page 76) was worked as filling pattern.
The edge of heart 6 was filled with blanket stitches.
Pattern 87 (Openwork Needleweaving Patterns, page 47) was used as filling pattern. The small heart above did not have any threads withdrawn; instead, it received only a row of blanket stitches along the coral knot stitches.
The edge of heart 7 was filled with feather stitches.
Pattern 124 (Openwork Needleweaving Patterns, page 65) was used as filling pattern.

The edge of heart 8 was filled with lazy daisy stitches.
Pattern 88 (Openwork Needleweaving Patterns, page 47) was used as filling pattern. The small heart above did not feature any thread withdrawal; instead, it was worked with just a row of chain stitches running alongside the coral knot stitches
The next blog post focuses on the design of the tulips.