Famous: Waltraud’s Richly Embroidered Quilt (1)

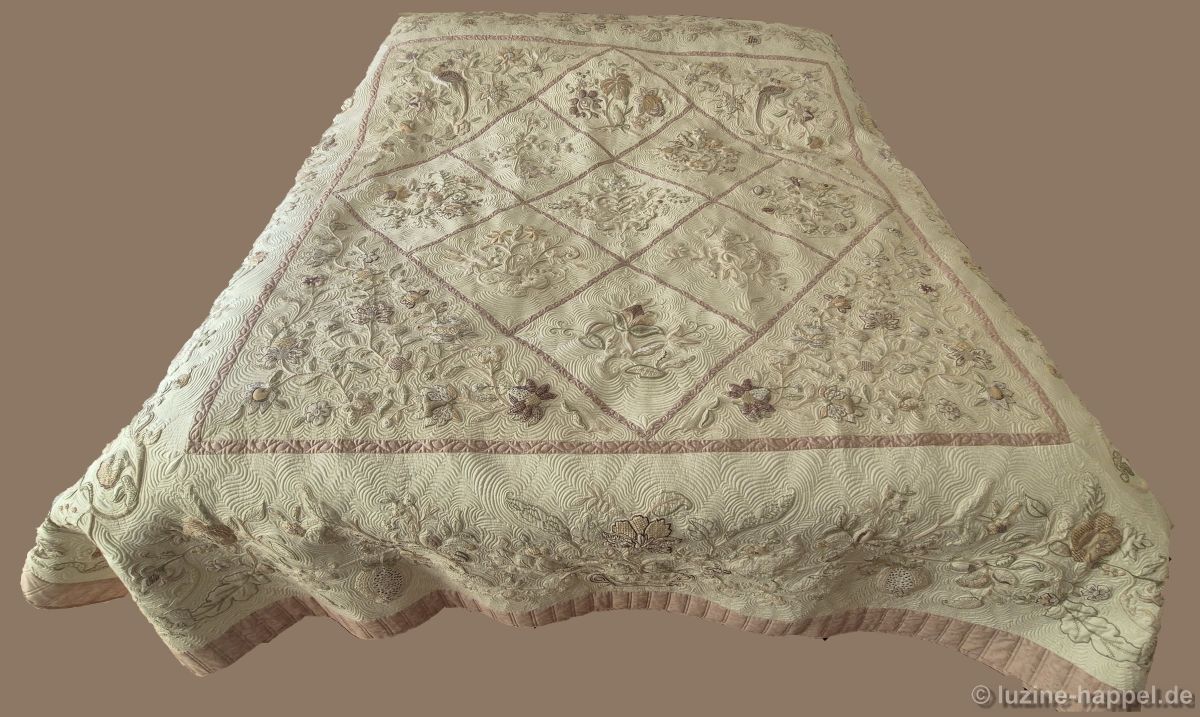
Measuring 280 cm X 280 cm and using 15 embroidery thread colors, a superlative embroidered quilt was created within 14 years.

Why am I featuring a quilt on my blog, which mainly focuses on Schwalm whitework?
I’m doing this to pay tribute to an outstanding achievement and to share my enthusiasm for beautiful handicrafts with others.

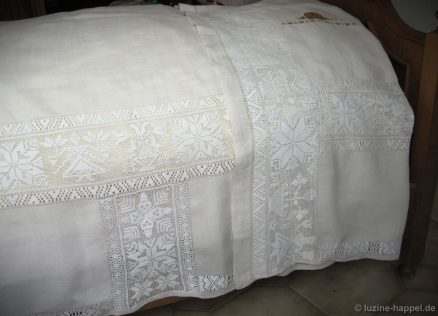
It wasn’t only in the Schwalm region that it was once common to richly decorate textiles with embroidery. However, particularly magnificent and elaborate examples were created there, as can easily be seen when visiting the museums in Ziegenhain and Holzburg.
Bed coverings, for example, were status symbols. A great deal of time and effort was invested in their lavish and exquisitely detailed embroidery. These pieces were used for decades, and subsequent generations also enjoyed these luxurious treasures.

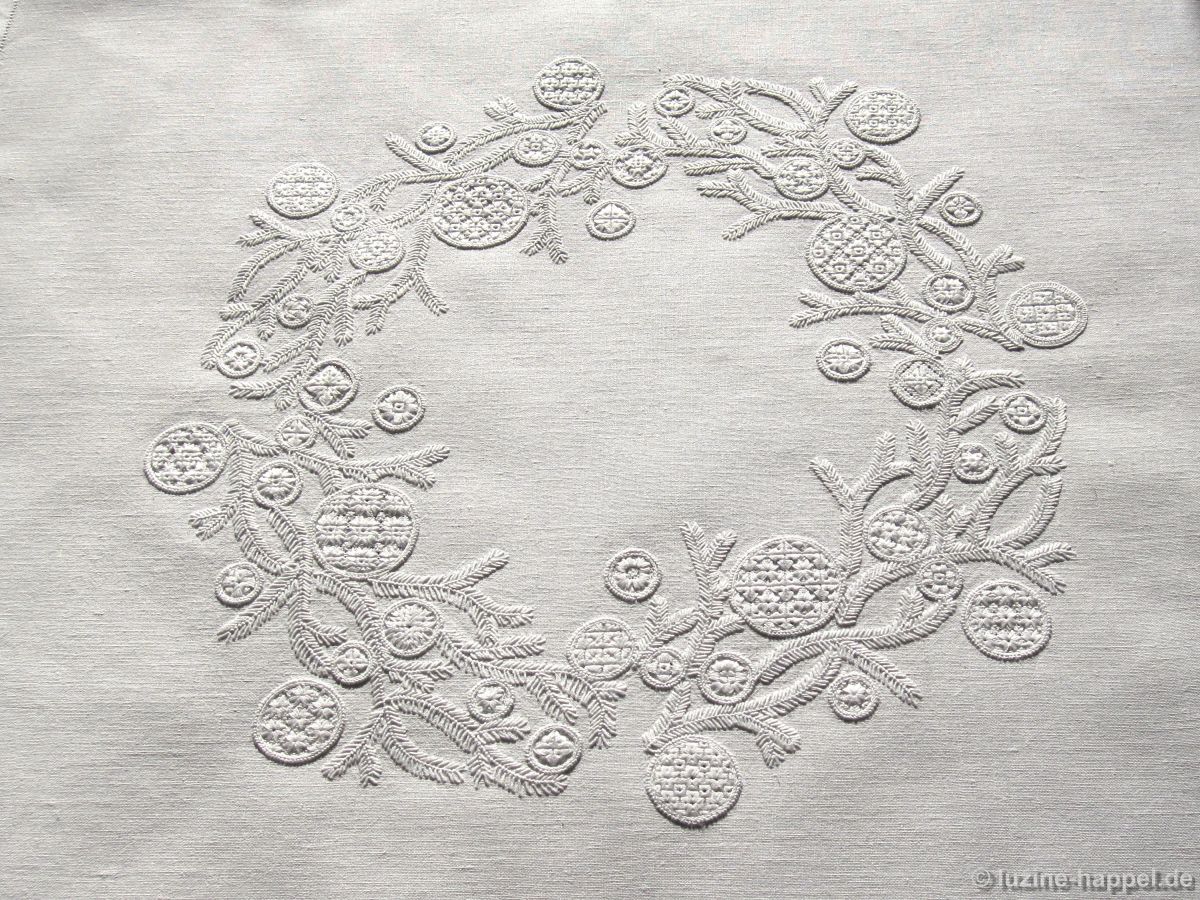
Schwalm Bed Covering dated 1876

Today, such elaborately handcrafted pieces are rarely produced anymore. Times are too fast-paced, and fashion tastes change too quickly.

Therefore, I have not often been able to report on contemporary voluminous embroideries made by a single embroiderer.

There is the imposing, fabulous sampler by Rosemarie Landsiedel-Eicken.
There is the extraordinary bedspread by Gertrude Vorwerk.
There is the dreamy round Schwalm tablecloth by brubi
There is my large sampler, which was originally intended as a bedspread and now serves as a wall hanging.
There is the hand-stitched boutis by Heather Harteneck.
And there is the hand-embroidered and hand-quilted bed covering for a child’s bed by Waltraud Kater from Wagga Wagga in Australia.

When I presented this quilt in 2017, I was also able to show a picture of her large bedspread that was in progress.

Now her dream of a quilt as a bedspread for the double bed has come true – the masterpiece is finished and we are allowed to take a look at it!

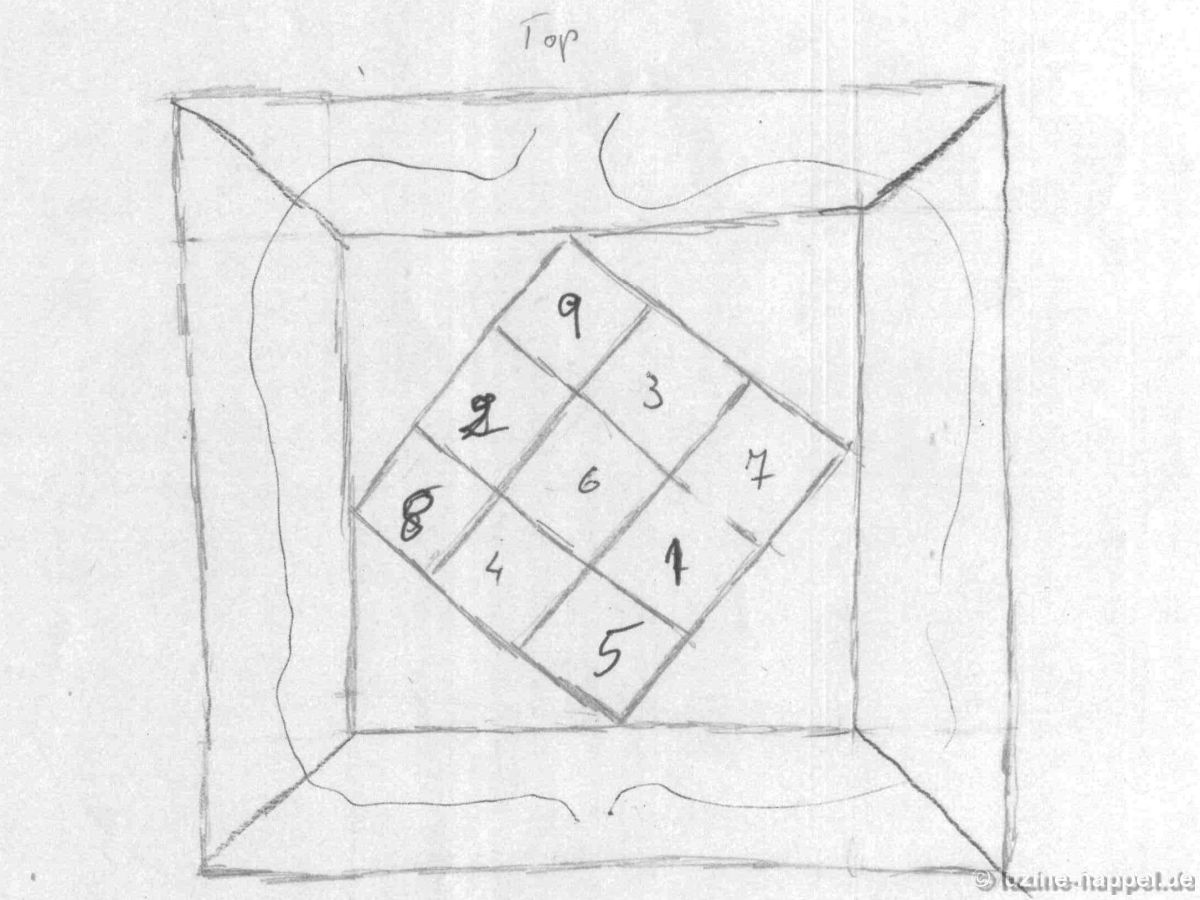
She started it in 2011. She made a rough sketch outlining how the dream project should be put together.

Since Waltraud had no prior experience in embroidery, she first took a course to learn the necessary basics. There she embroidered her first square measuring 30 cm X 30 cm.

Block 1

Eight more squares of this size should follow.

Block 2

She continued her education and independently acquired further stitches and filling patterns through literature.

Block 3

The designs for her quilt were taken from many books and magazines, from photos and also Persian carpets.

Block 4

Block 5

Block 6

Block 7

Block 8

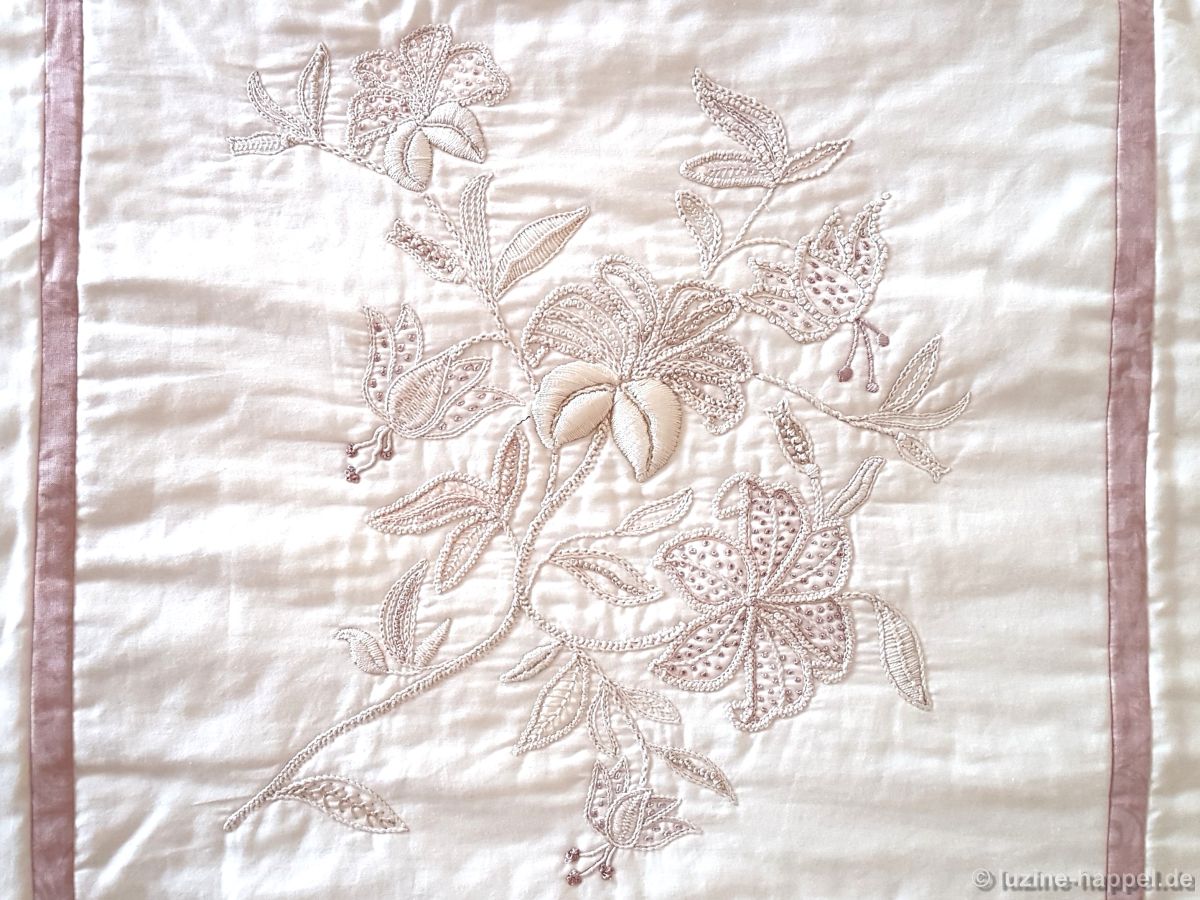
The first pictures reached me in 2012. At that time, she had just finished the center section of the bedspread. She had used a pattern from one of my books. The fabric had warped under the pattern. Looking for a solution, she slit the fabric open at that point from the back and lined it.

Block 9

This made the (burgundy) petals stand out in three dimensions. She repeatedly and effectively used this technique, which was actually born out of necessity, in prominent locations.

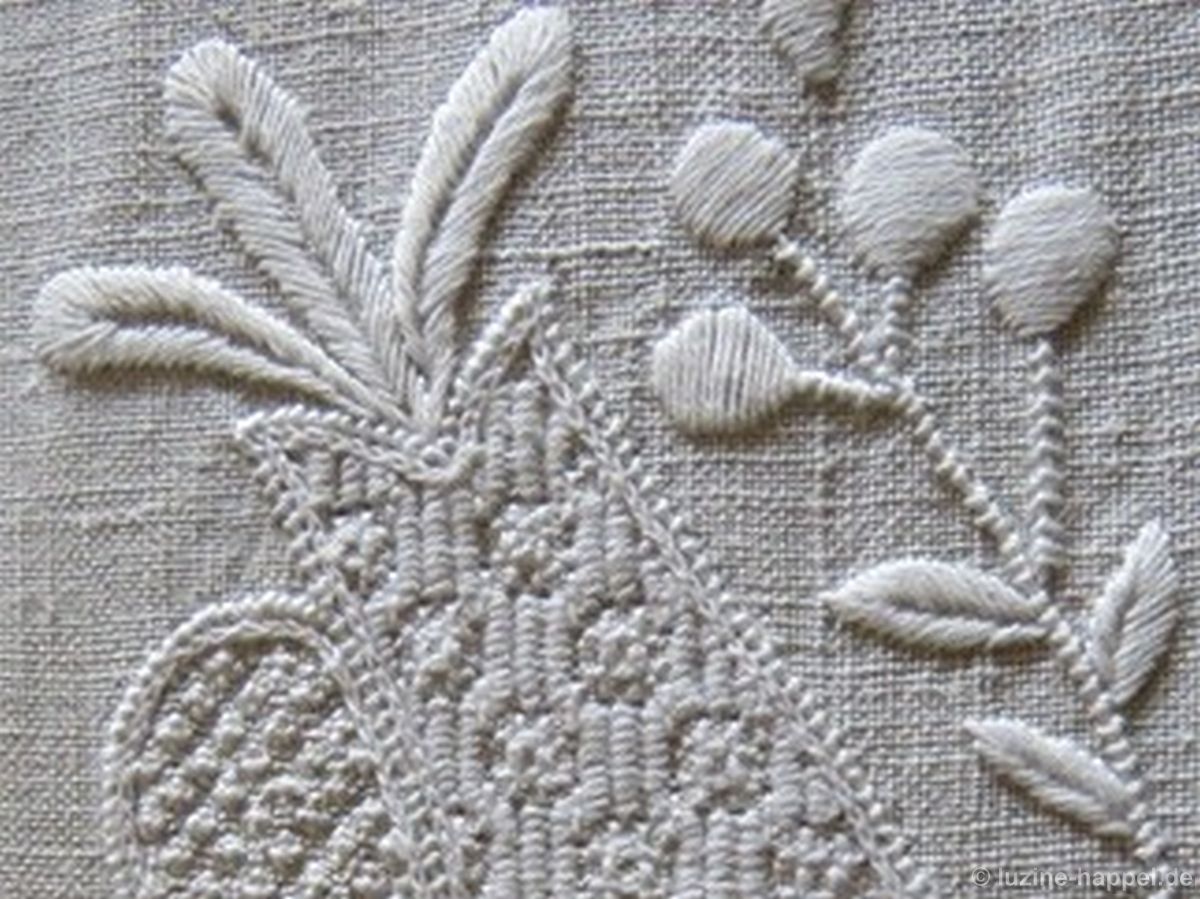
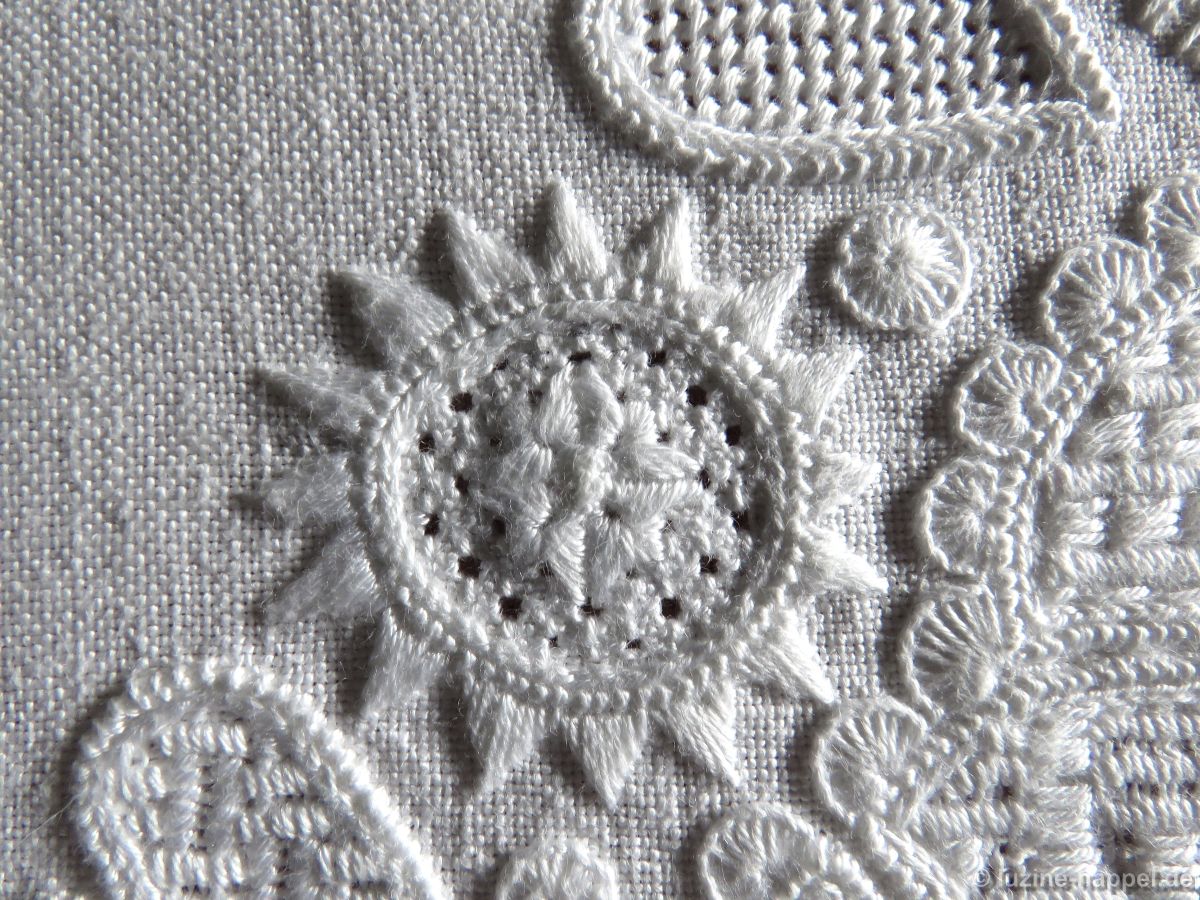
Waltraud put a tremendous amount of effort into creating the patterns and shapes. She consulted many books and other sources. The following books helped her in her search for interesting stitch combinations and fillings:

Mountmellick Embroidery – Yette Stanton & Prue Scott
Crewel Jacobean Embroidery – Hazel Blomkamp
A Fine Tradition – Margaret Light
Early Schwalm Whitework – Luzine Happel

The outlines of decorative fabrics and oriental carpets also served as inspiration.

She gathered a wealth of inspiration and then developed all the blocks, triangles, and borders one after the other. To do this, she copied the patterns from the various sources onto tracing paper with a pencil and, if necessary, enlarged them to the desired size using a scanner and computer. These templates were then glued together to create a 1:1 model of the bed covering.

Afterwards, tracing paper or tissue paper and the fabric for the individual parts of the quilt were cut and given final boundary lines (edges) so that the fabric pieces could be aligned precisely later.

All the outlines were accurately traced onto the paper cutouts from the templates. Then she sketched her idea of ​​the filling patterns into the outlines.

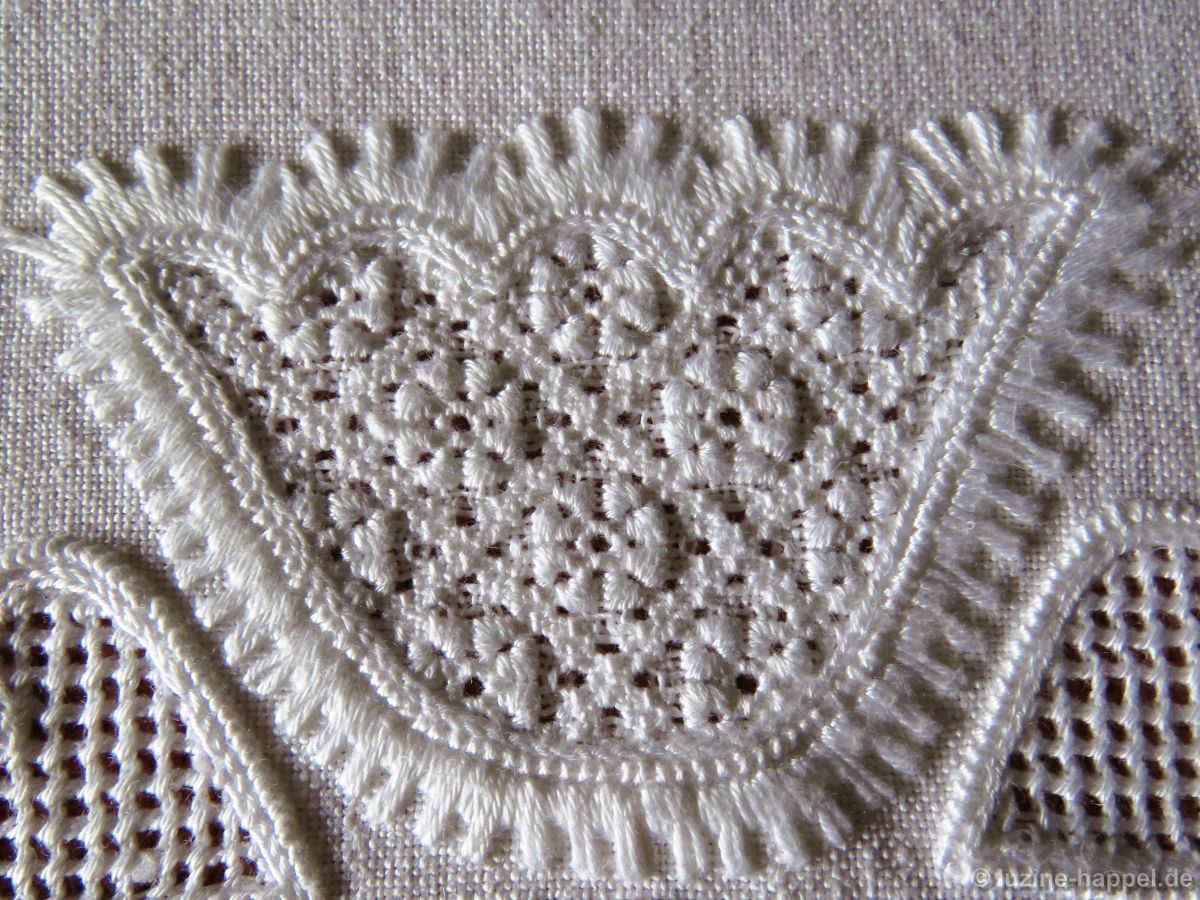
The following example shows a part of the block stitched above – block 9.

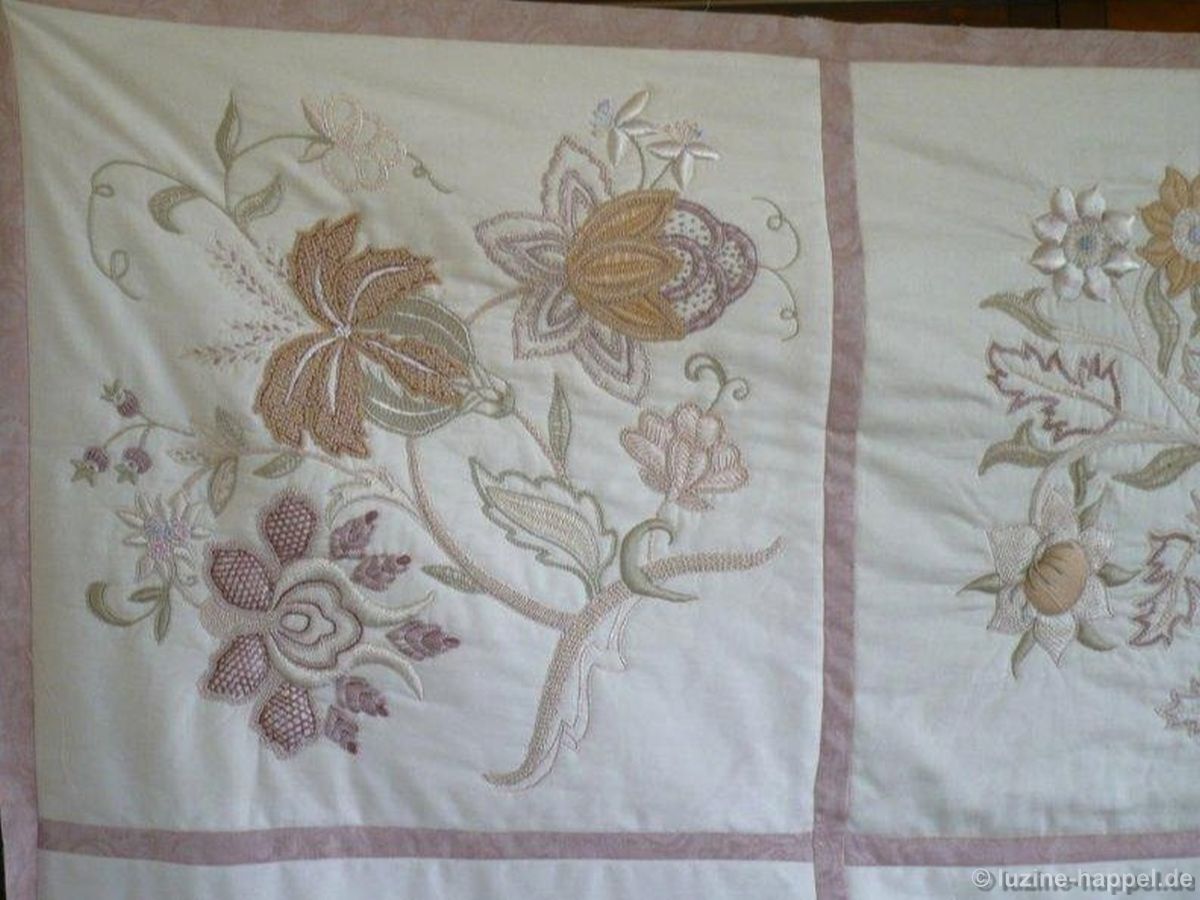
This is also how the 3-meter-long borders were created; that is, the templates were cut in one piece, measuring 3 meters long and 50 centimeters wide. As the penultimate step, the template was placed on the light box, and the cut fabric was placed on top. The final step was then “simply” tracing the patterns onto the fabric with a Pilot Frixion Ball, because the resulting lines can later be removed with heat (with iron or hairdryer).

The nine squares of the central section are joined by narrow, dusty rose-colored stripes, giving the rhombus a side length of 110 cm.

The central rhombus is surrounded by four triangles. Each pair of triangles displays the same pattern in mirror image.

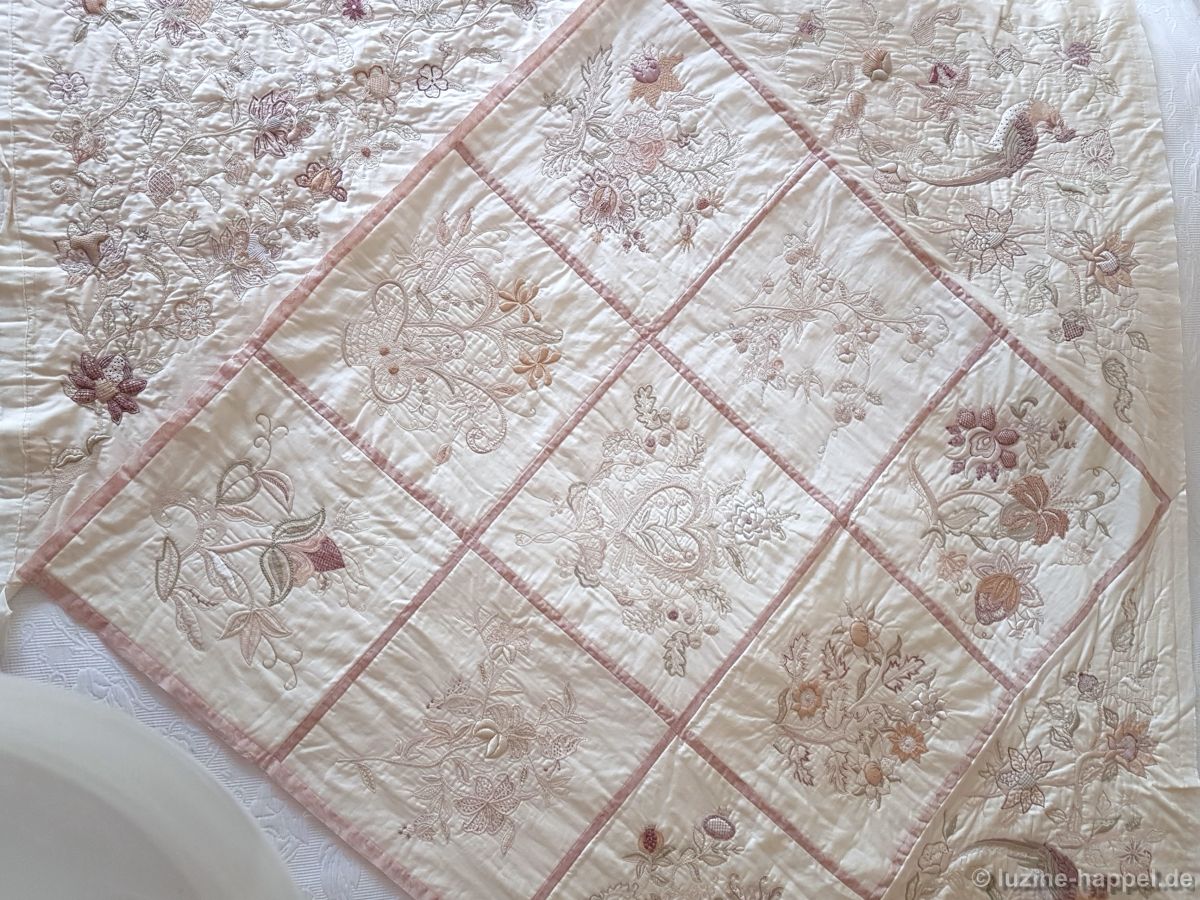
The triangles are connected to the rhombus by slightly wider strips.

In the end, the bottom triangles look like this

and the top triangles like this:

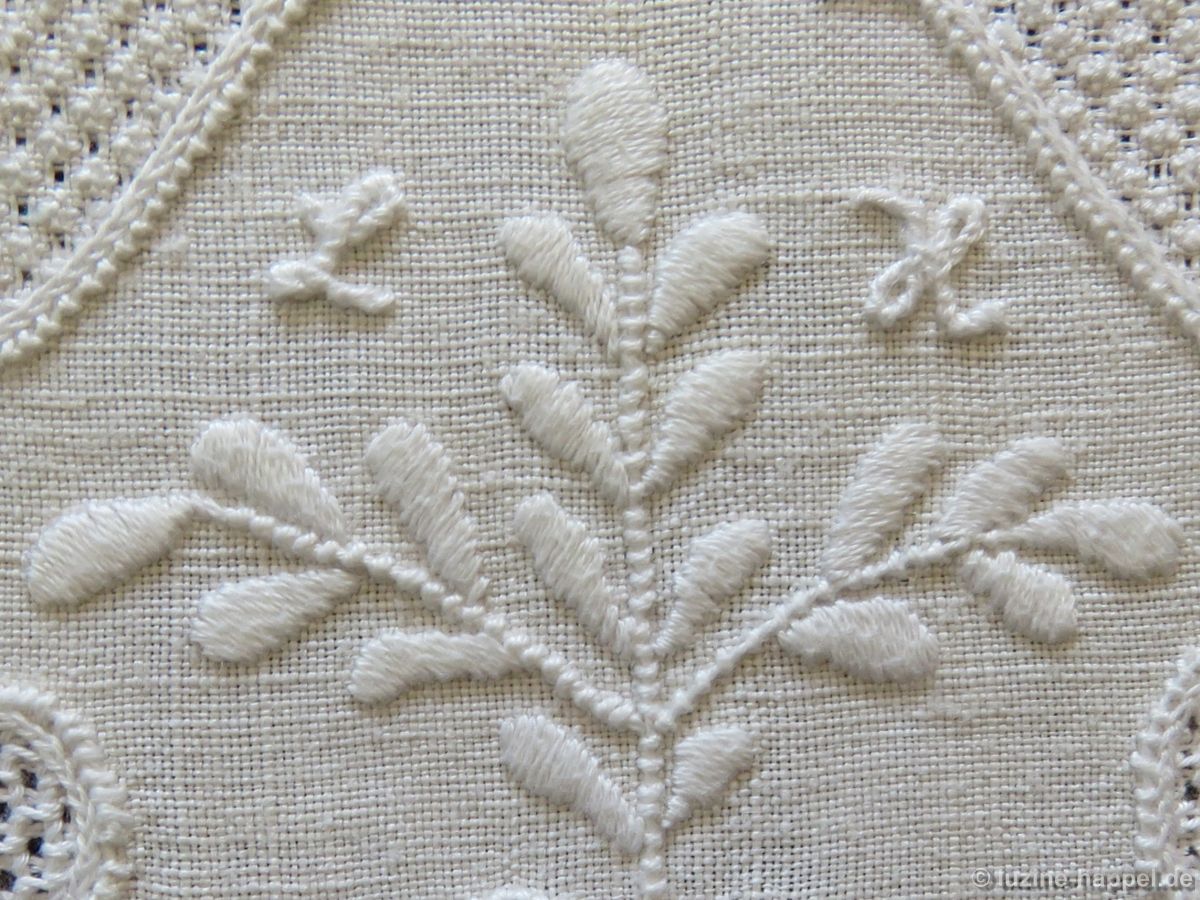
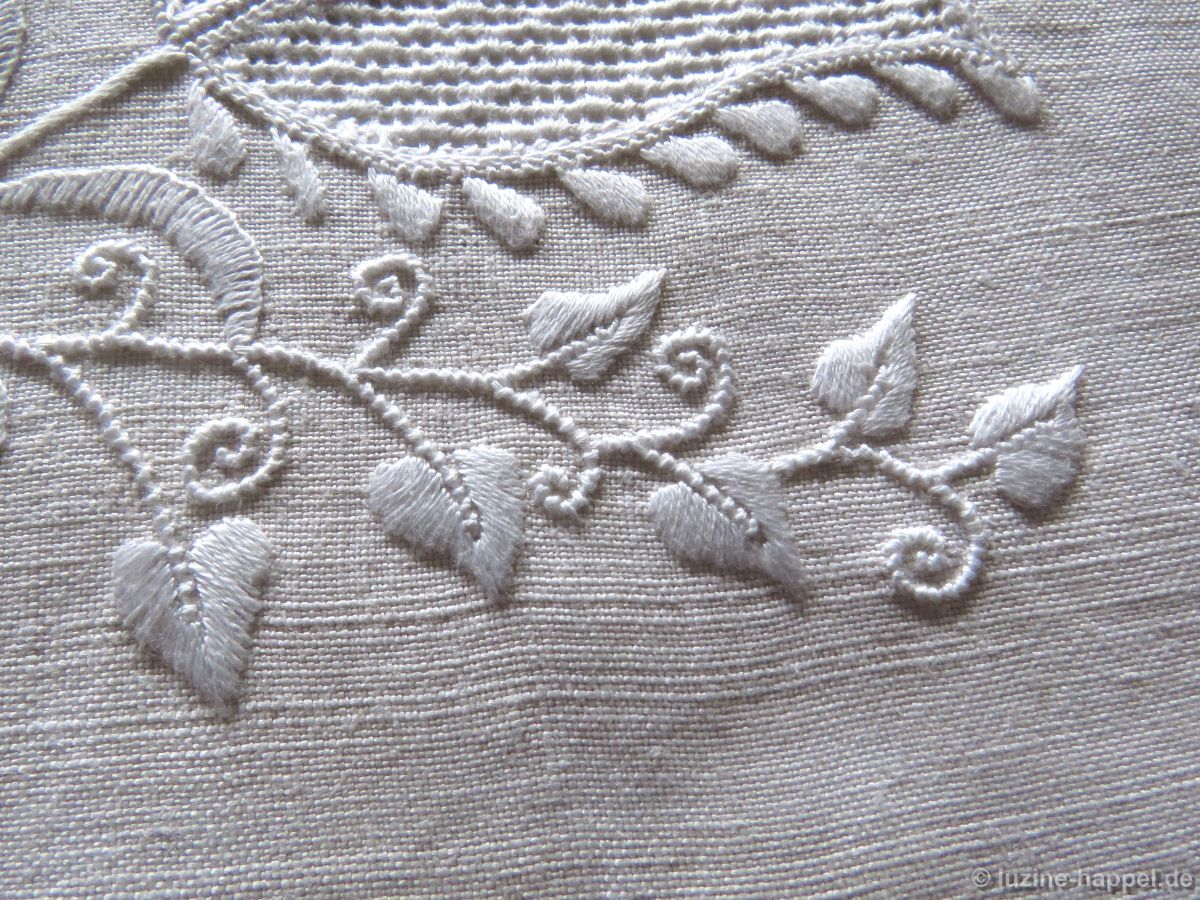
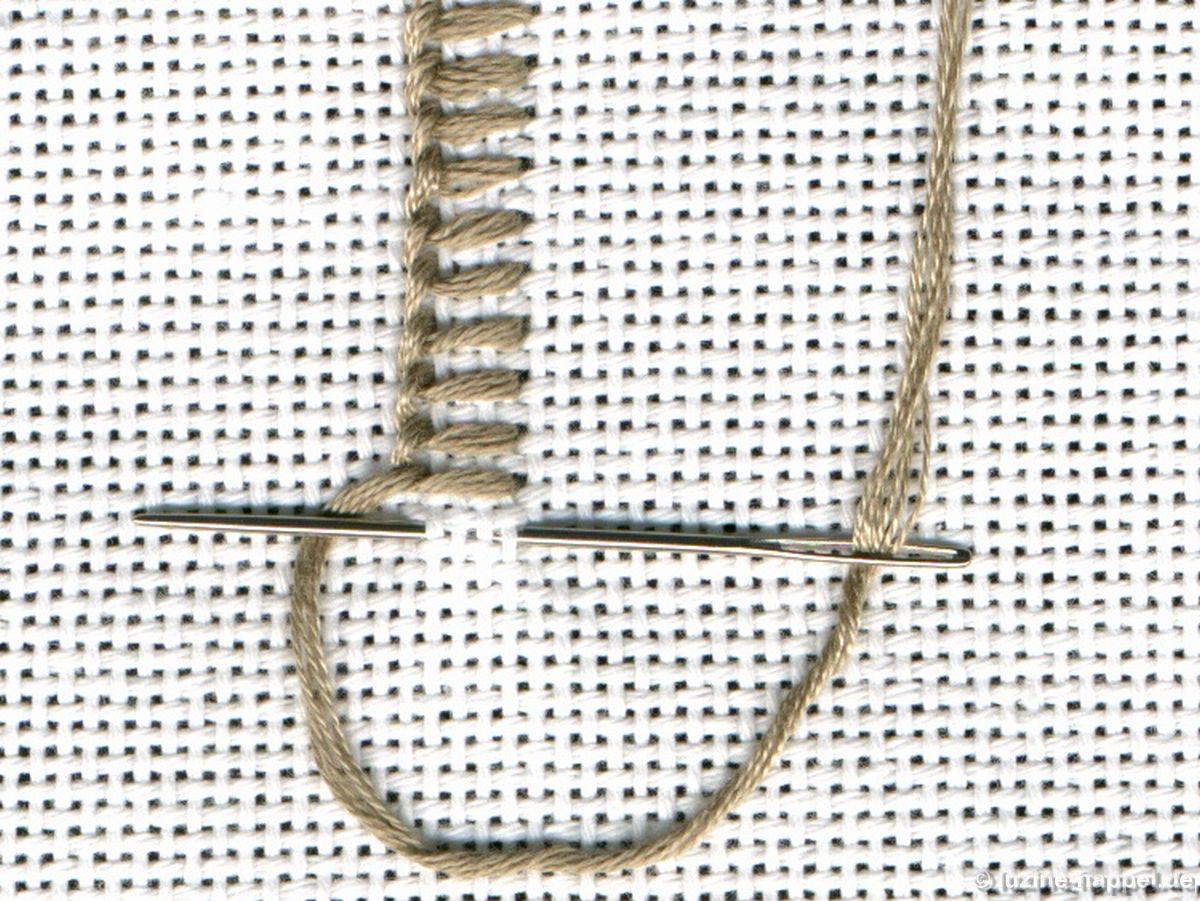
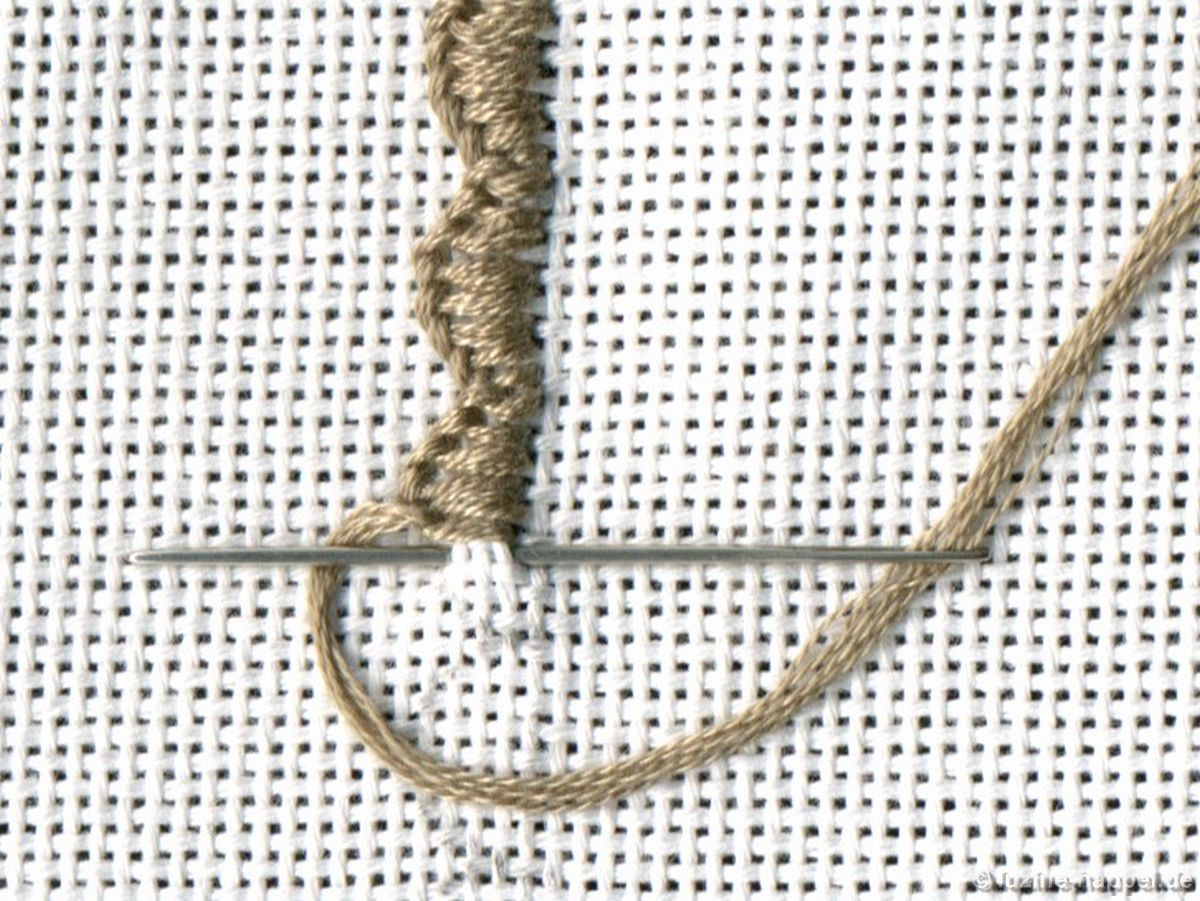
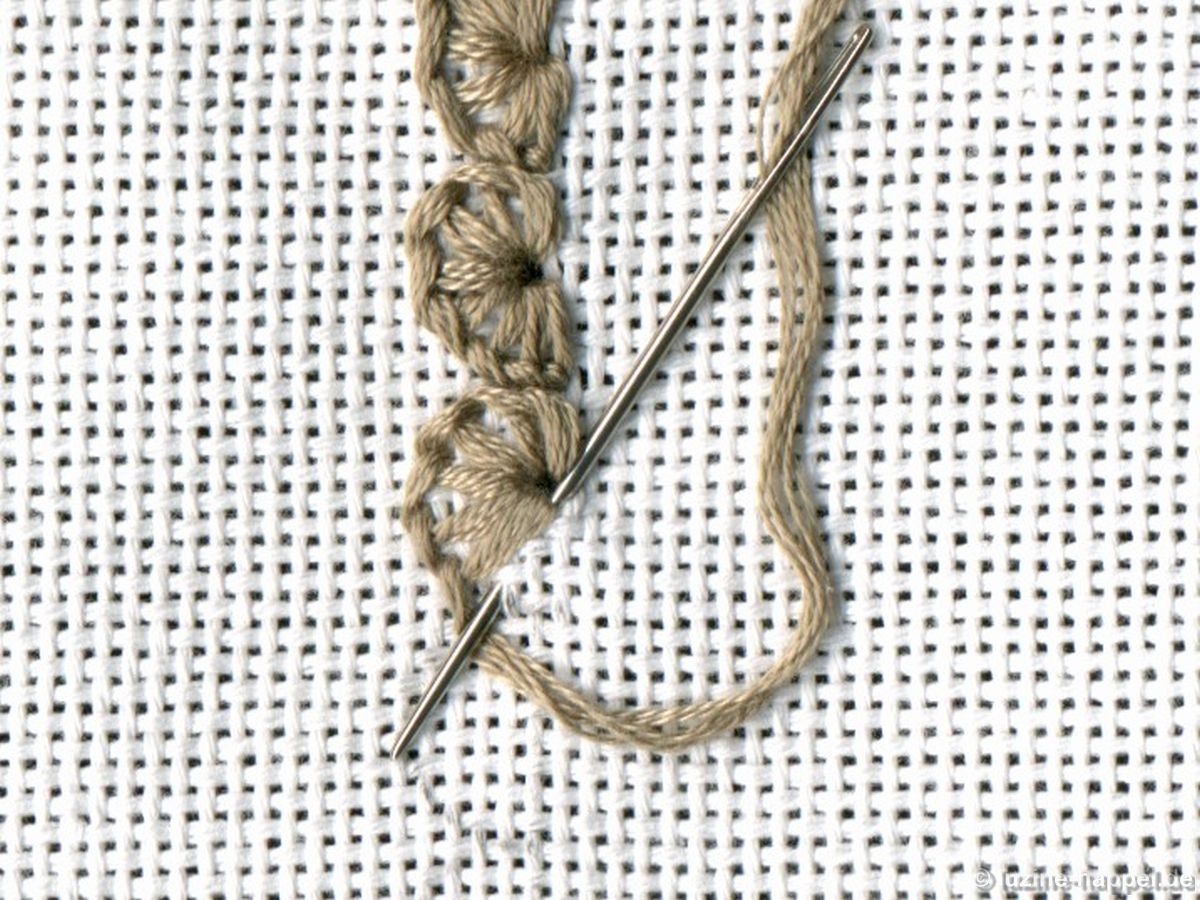
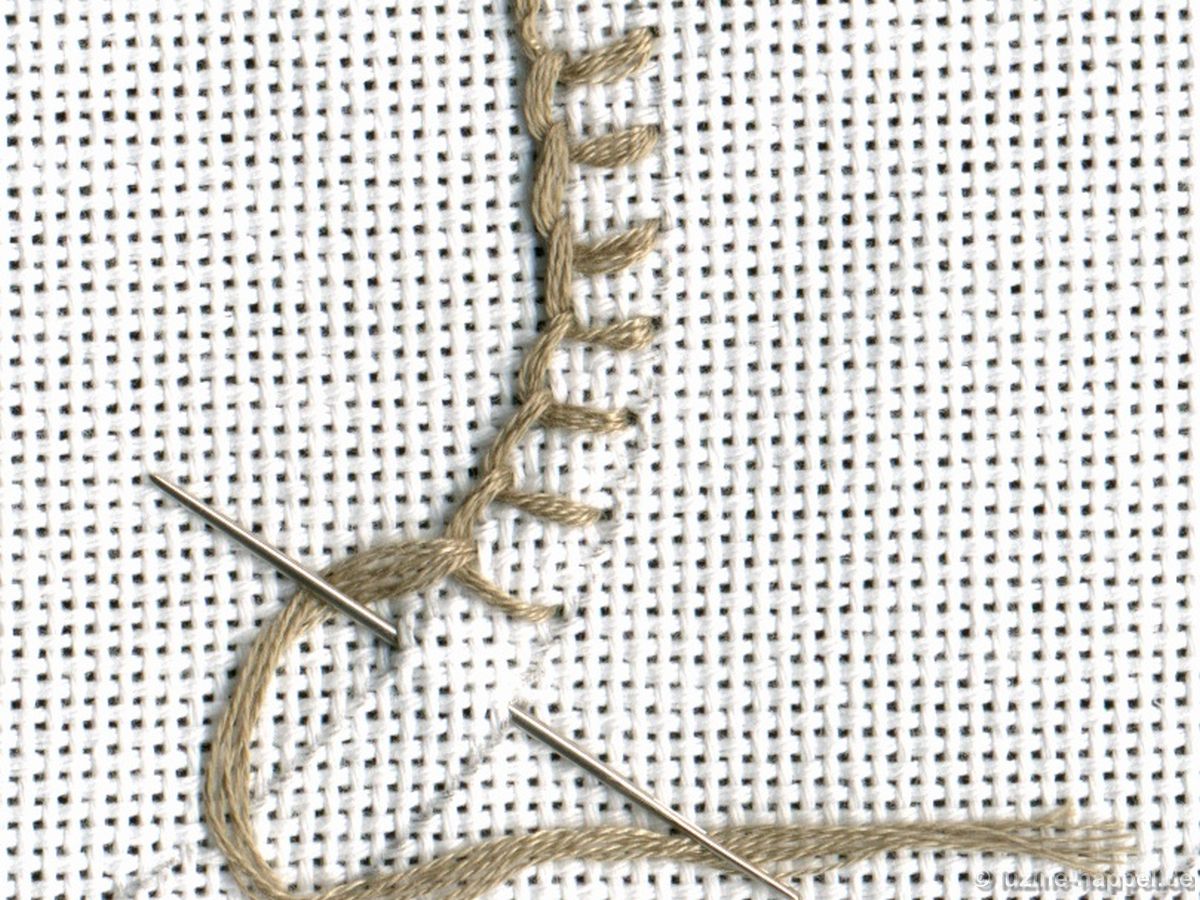
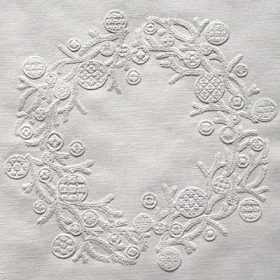
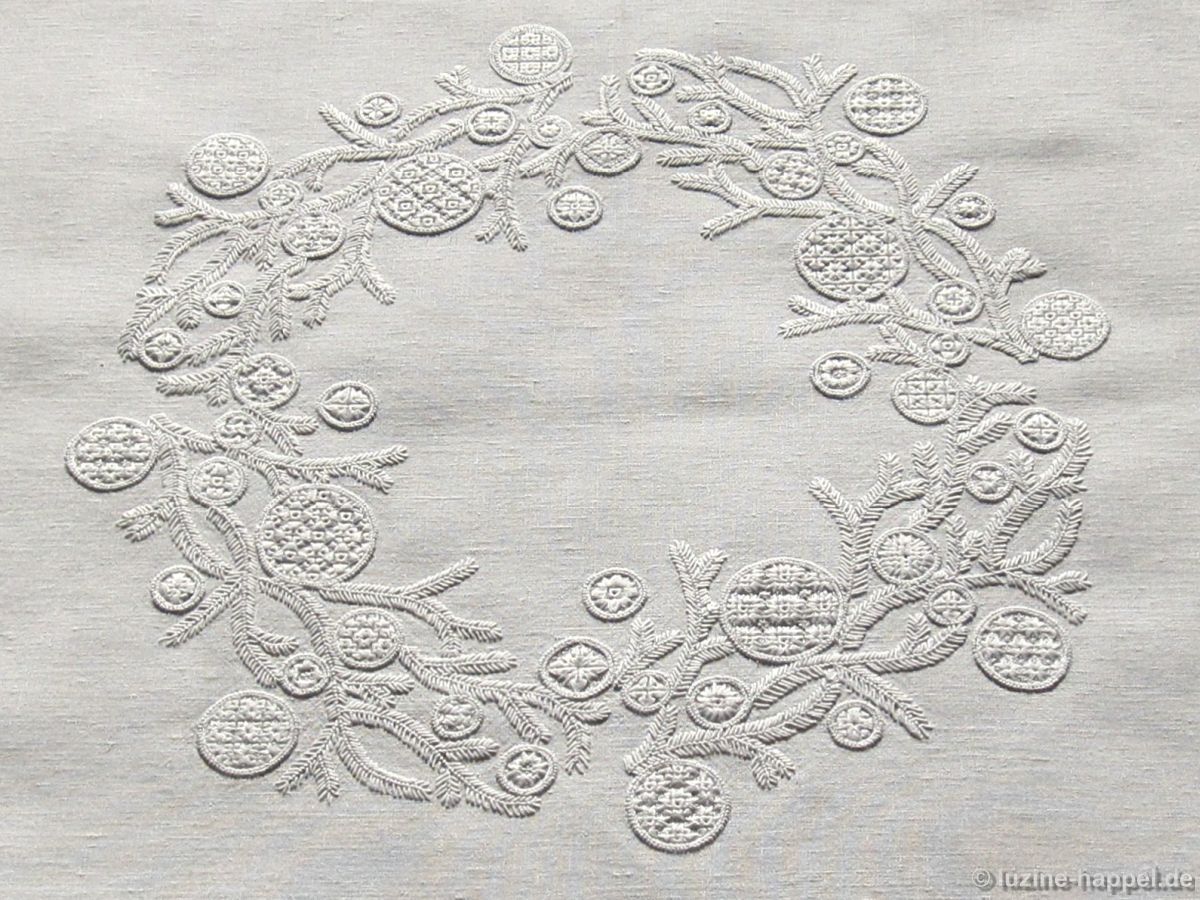
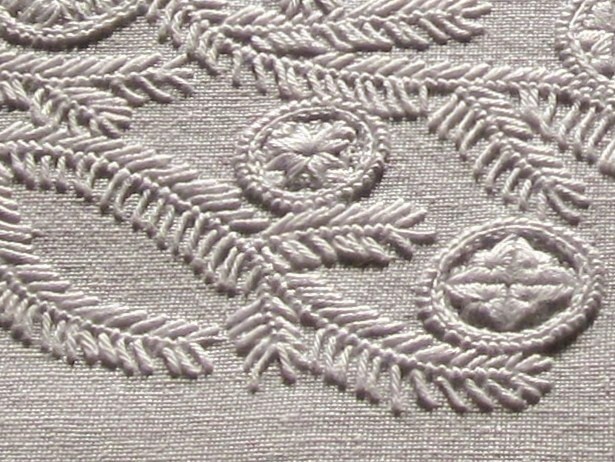
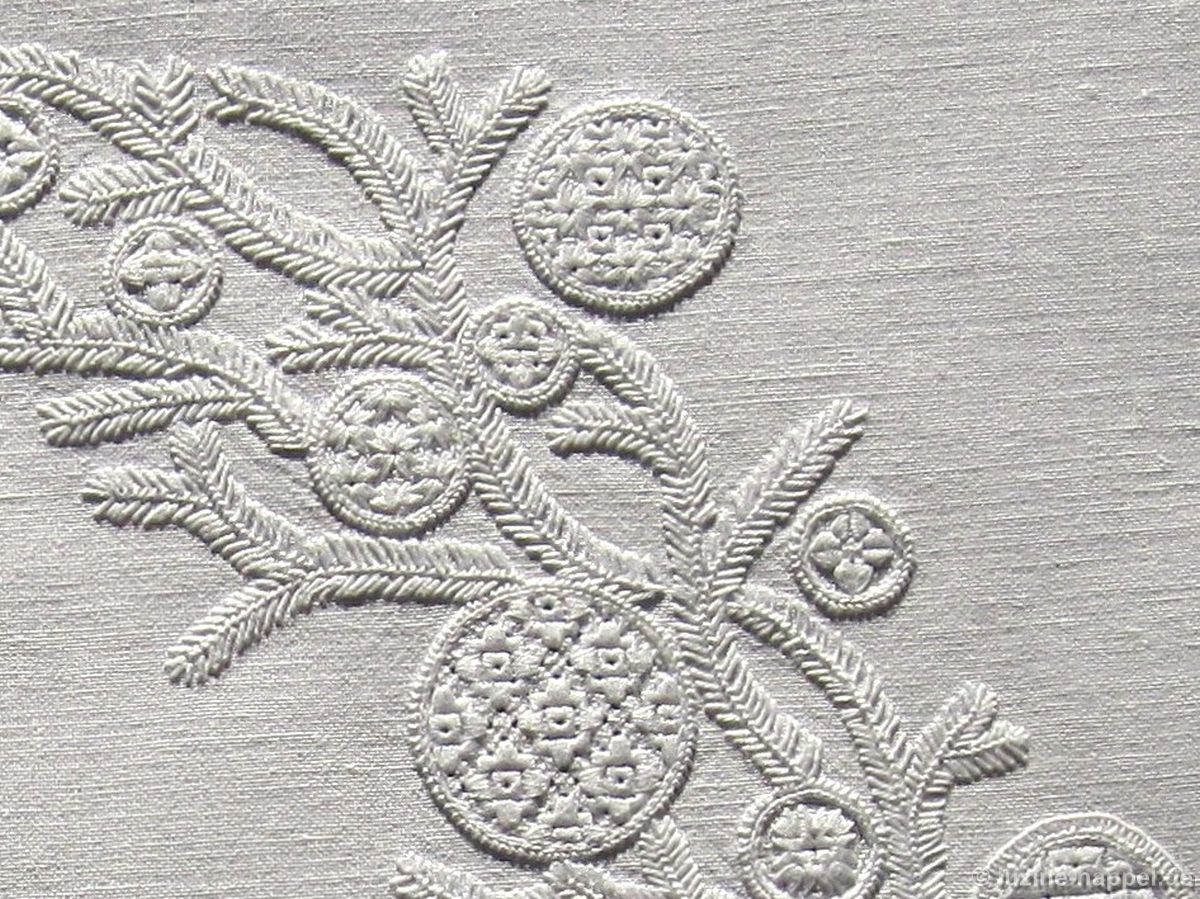
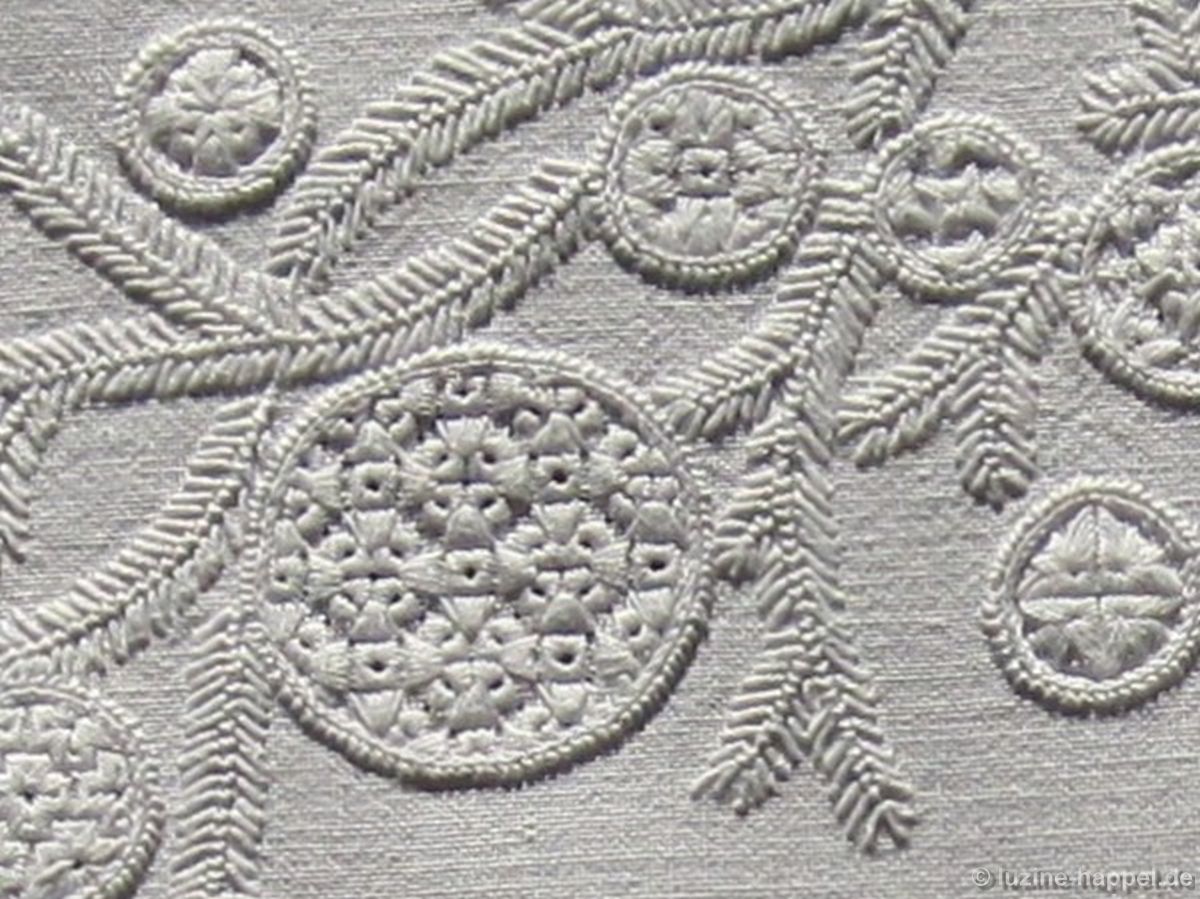
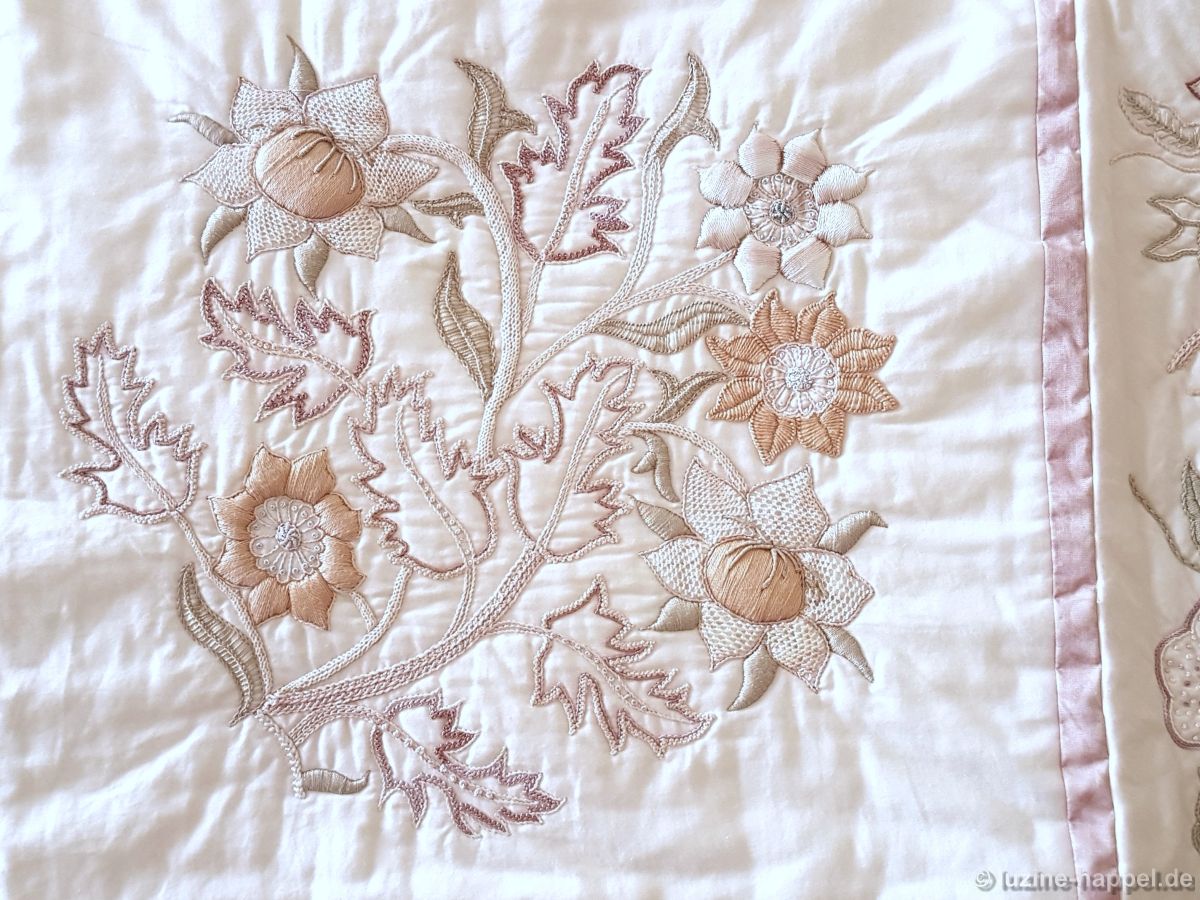
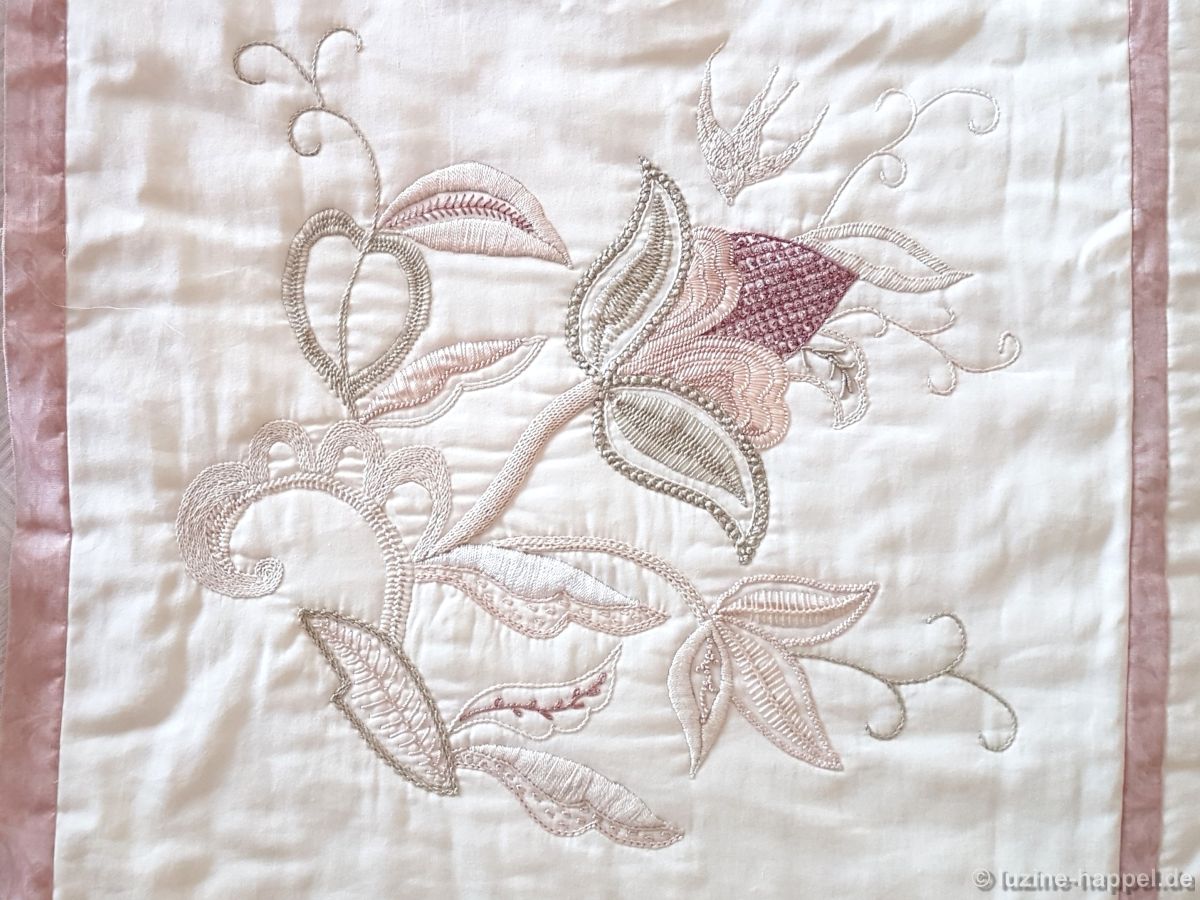
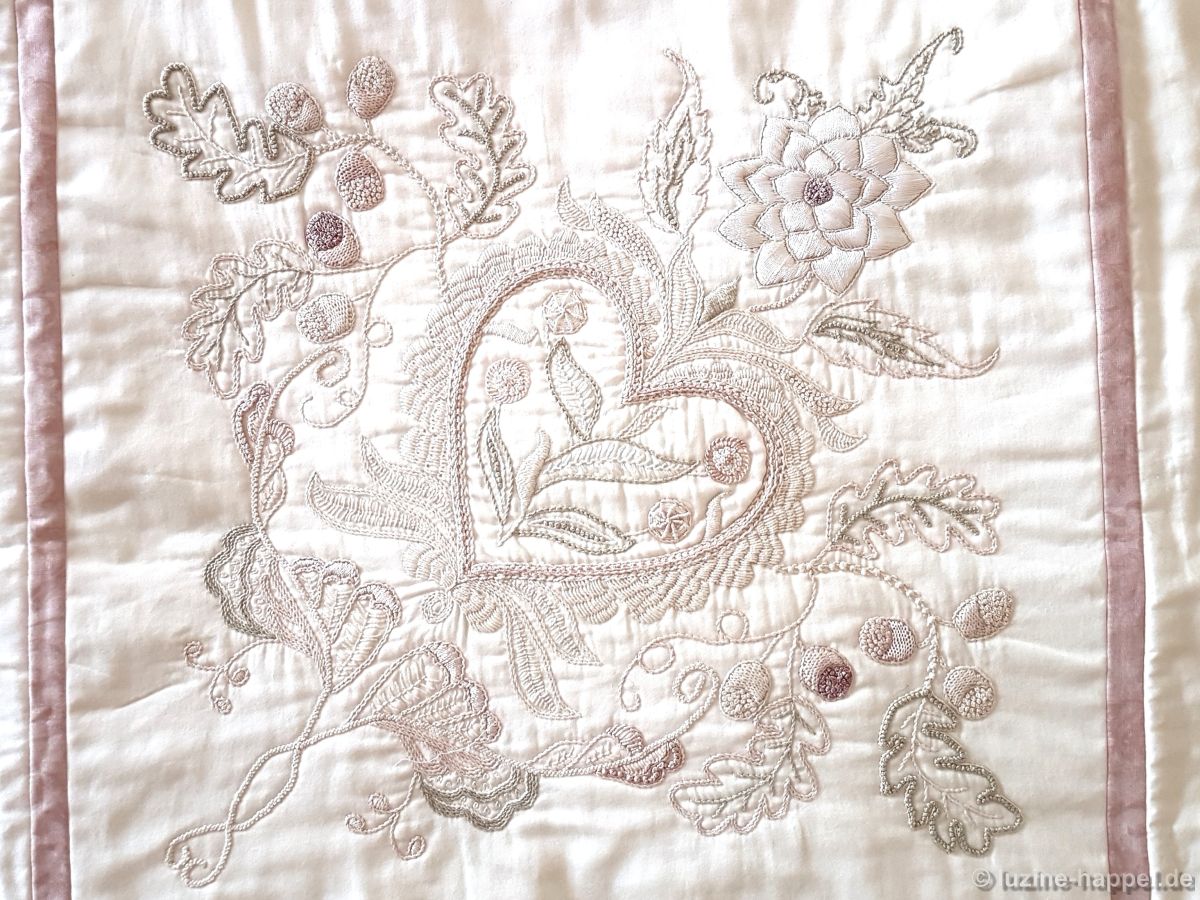
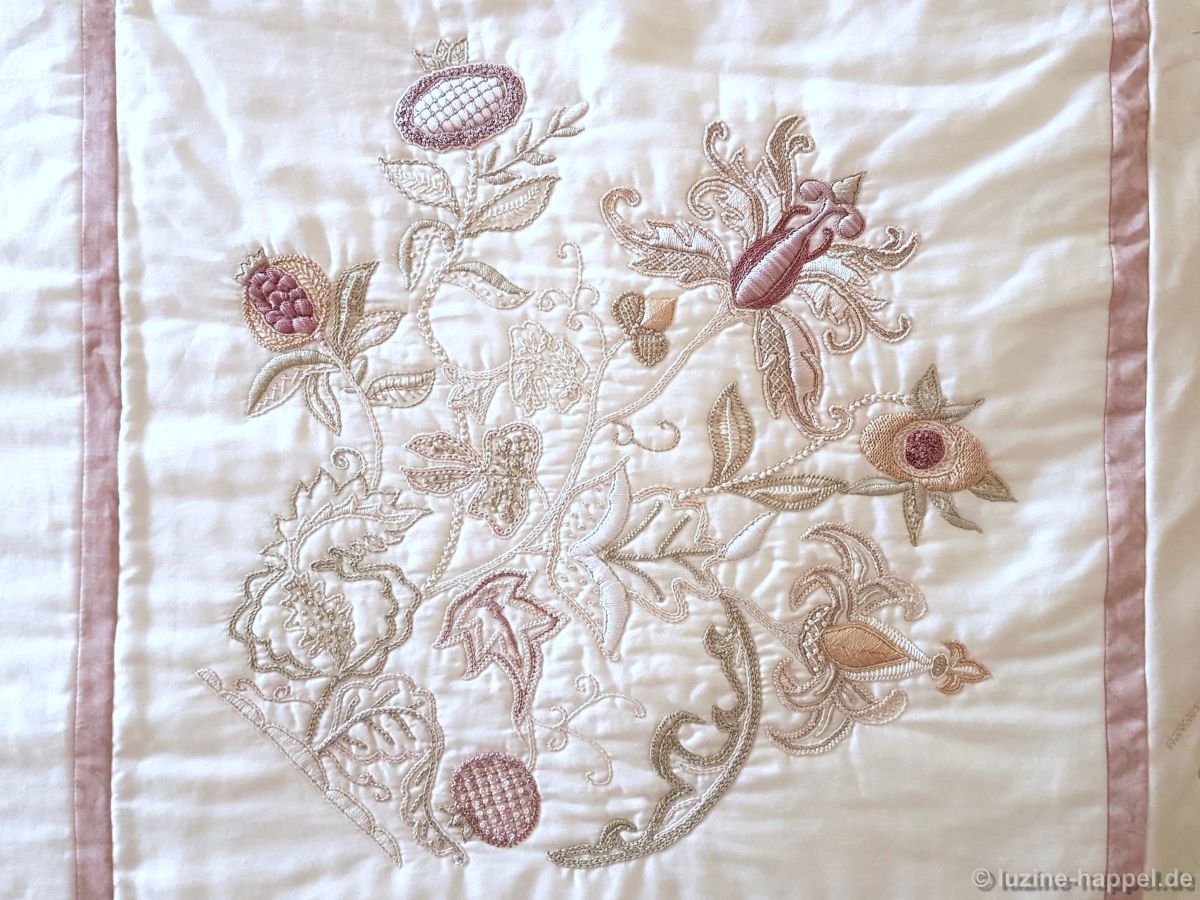
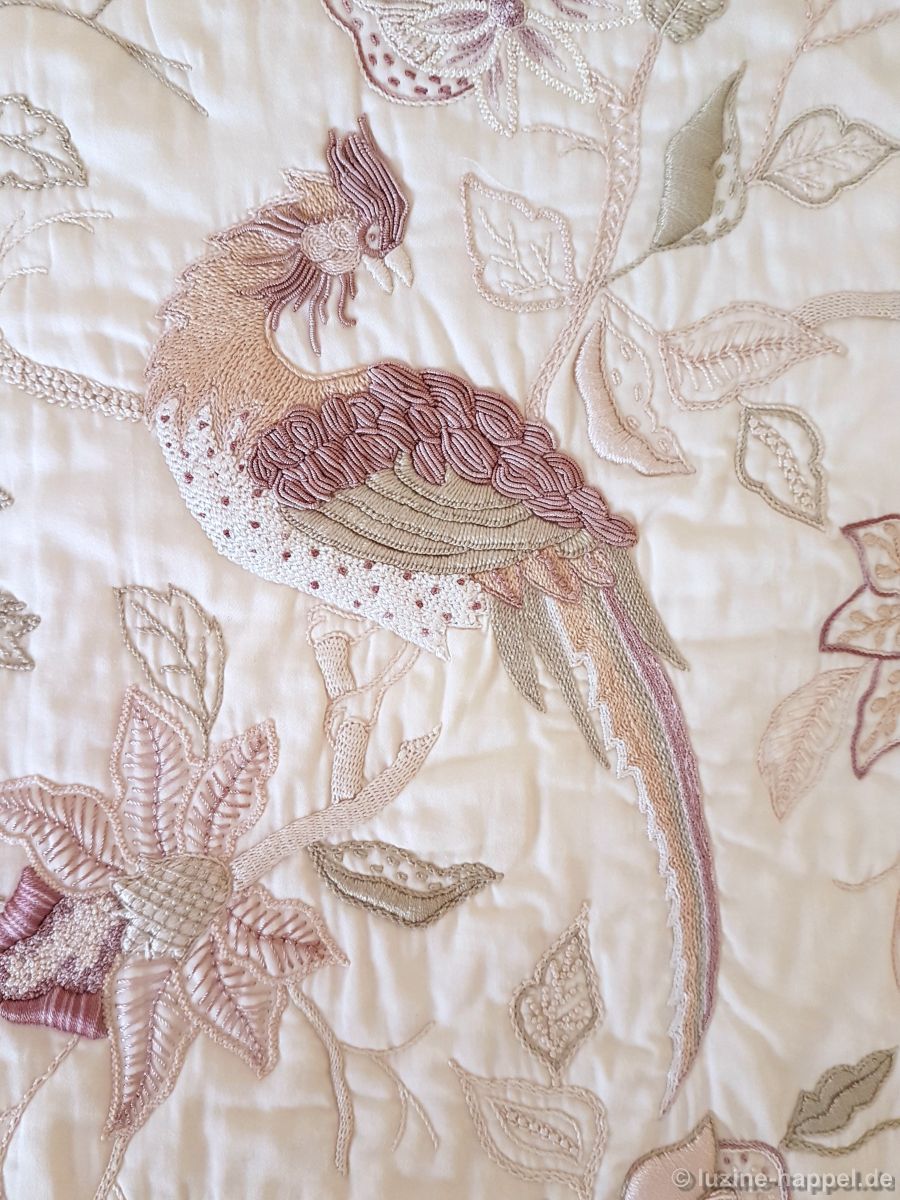
A few detailed images reveal specifics and show the variety of stitches used. (Clicking on the images will enlarge them.)

The story continues in the next post.

3. The Satin Stitch

The 13 basic stitches of Schwalm whitework

A. The decorative stitches

1. The Satin Stitch

Satin stitches extend between two lines/dots, with the lines usually not running parallel.

thread weight: depending on the fineness of the linen, coton à broder thread No. 20 or No. 25
building the rows: mostly from bottom to top
direction of needle movement: from right to left
way of working: Bring needle up on the left/outer line and lay the thread in a loop to bottom and right. Insert the needle on the right side, cross under the fabric between the both lines and bring needle up again in the left close to the previous emerging point.
Pull the needle through and the thread to the left.

The variable length of the stitches makes the satin stitch universally applicable.
In Schwalm whitework they are used for small one-piece

as well as pointed divided

and heart-shaped leaves,

small flowers and small circles.

Similarly, semicircular – often surrounded by eyelash stitches -,

pointed

or radial borders of motifs are created with this stitch.

See also: Schwalm Designs (9) – 2short-2long
Schwalm Designs – Knife Points (3)
How to work small pointed leaves?
Advent Calender 2016 – No. 3 (Coral KNots, Blanket stitch eyelets, pointed leaves)
In the embroidery of the „Horizontal Bird Border
one can find many of the previously mentioned possibilities.

Winter Tree with Berry Bowl

The “Winter Tree with Berry Bowl” is a charming little seasonal motif. The design by artist Gudrun Hartwig leads from the bare autumn tree, through the fir branch-like arrangement with the star-shaped tip and other decorations, to the Christmas bird feeder.

All outlines were embroidered with slanting wide stem stitches (Early Schwalm Whitework, page 5). To emphasize the fir tree character, I chose a pattern from the book Limetrosen II (page 21).

In contrast to the dense and three-dimensional pattern, the star was first embroidered with the delicate rose stitch variant (see: Advent Calendar 2019 – No. 1 Images 3 – 5) and then covered with a spider web(Early Schwalm Whitework, page 61).

The little birds were decorated with chain and blanket stitches.

The titmouse ring was embroidered with individual chain stitches (= daisy stitches) (Early Schwalm Whitwork, page 79).

The apple was given a simple pattern with the “Close, 2-thread weaving” (Early Schwalm Whitework, page 19).

The berry bowl was filled in the lower section with “raised band stem stitch” (Early Schwalm Whitework, page 62). The edge was decorated with satin stitches.

The berries were embroidered as blanket stitch eyelets.

The “Winter Tree with Berry Bowl” also looks very appealing as a window decoration.

You can order the pattern as a PDF for €5. Slightly modified versions are also available, featuring a bird perched on the bowl instead of berries, a drawing showing only a feeding bowl, and a design showing a pecking bird instead of a berry bowl.

You can find more Christmas embroideries, designed by the artist Gudrun Hartwig, here:

Advent Calendar 2016 – No. 23 – “Tiny Fir Wreath”
Advent Calendar 2016 – No. 22 last image- „Hellebores and Star“
Fabulous Pictures in Whitework – “Mother Holle”
Adventskalender 2019 – “Christmas Wreath”
Advent Calendar 2019 – No. 24
Advent Calendar 2018 – No 6 “Garden Angel”
Advent Wreath with Balls

Merry Christmas and a Happy New Year!

2. The Blanket Stitch

The 13 basic stitches of Schwalm whitework

A. The decorative stitches

1. The Blanket Stitch

Blanket stitches extend between two lines/dots, with the lines usually not running parallel. Blanket stitches are used in many formations in Schwalm whitework. They are used to embroider rounded leaves, semicircular, pointed, or radial outlines of motifs, small flowers, and small circles.

thread weight: depending on the fineness of the linen, coton à broder thread No. 20 or No. 25
building the rows: mostly from top to bottom (sometimes also from left to right)
direction of needle movement: from right to left (sometimes also from top to bottom)
way of working: Bring needle up on the left/outer line and lay the thread in a loop to bottom and right. Insert the needle on the right side, cross under the fabric between the both lines and bring needle up again in the left close to the previous emerging point. The looped thread is below the needle tip.
Pull the needle through and the thread to the left.

In this way, blanket stitch scallops are created,

or blanket stitch scallops worked around a center point – so called “half-eyelet scallops”,

blanket stitch tips (so called “knife points”) and

worked around a center point blanket stitch tips – so called “pointed half-eyelet scallops”,

Also eyelash stitches are created using blanket stitches,

likewise the the blanket stitch wheel (so called blanket stitch eyelet).

(The rose stitch is also a blanket stitch, but it is not used as a decorative stitch, but as a filling pattern and is therefore described in detail under this category.

See also:
How to Work a Blanket Stitch Eyelet
Design for Practice Exercises.
Tablecloth for all Seasons – October: Creepers and Grape
Advent Calendar 2016 – No. 7

Advent Wreath with Balls

The motif “Advent Wreath with Balls” makes a lovely decoration for a seasonal tablecloth. The design was created by the artist Gudrun Hartwig.

The fir branches made from coral knot stitches and satin stitches are quickly embroidered.

The circular shape of the differently sized balls offers many possibilities for filling pattern selection.

In this example, they were embroidered exclusively with patterns from the book “Stars”. These patterns have a particularly three-dimensional effect and are suitable as individual stars for the smallest balls as well as magnificent continuous patterns for the large ones.

Of course, you can choose many other patterns. A single branch with a ball is a good choice for a gift bag. Let your imagination run wild!

The embroidery shown here was done on 16/cm-count linen. The wreath has a diameter of 40 centimeters. I have a stencil for this design, so I can print the wreath.