5. The Satin Stitch

The 13 basic stitches of Schwalm whitework

A. The filling stitches

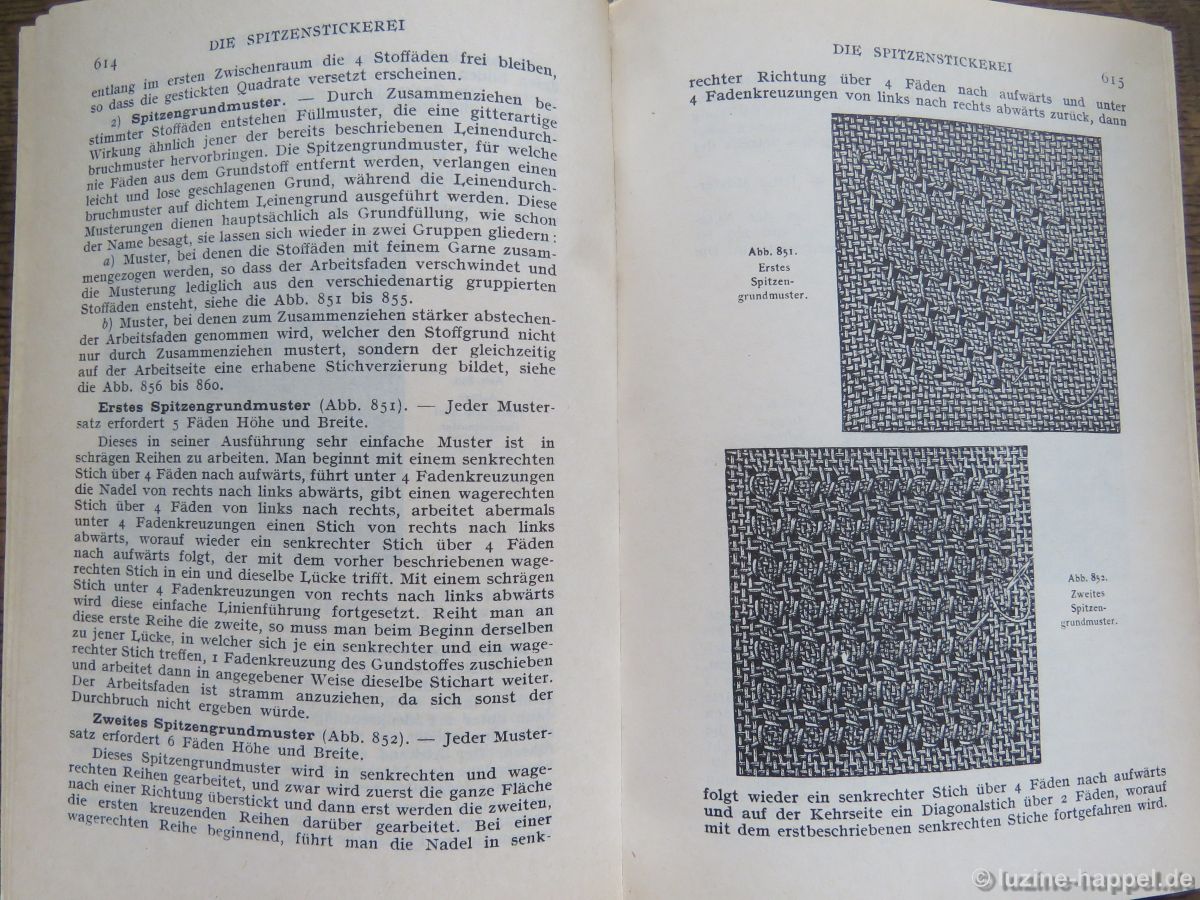
While the decorative stitches did not have to align with the position of the fabric threads, the filling stitches are thread-bound, i.e., they are oriented to the position and number of fabric threads.
To improve the results, threads are removed from the densly woven fabric to be embroidered. For simple withdrawn thread patterns, this is every fourth thread in one direction – either horizontally or vertically. For Limet withdrawn thread patterns, every fourth thread is usually removed both horizontally and vertically. For openwork patterns, threads are withdrawn in pairs between each pair of remaining threads – both horizontally and vertically.
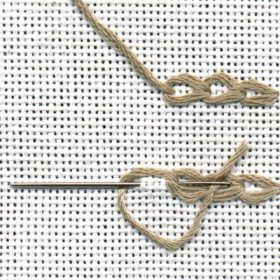
5. The Satin Stitch

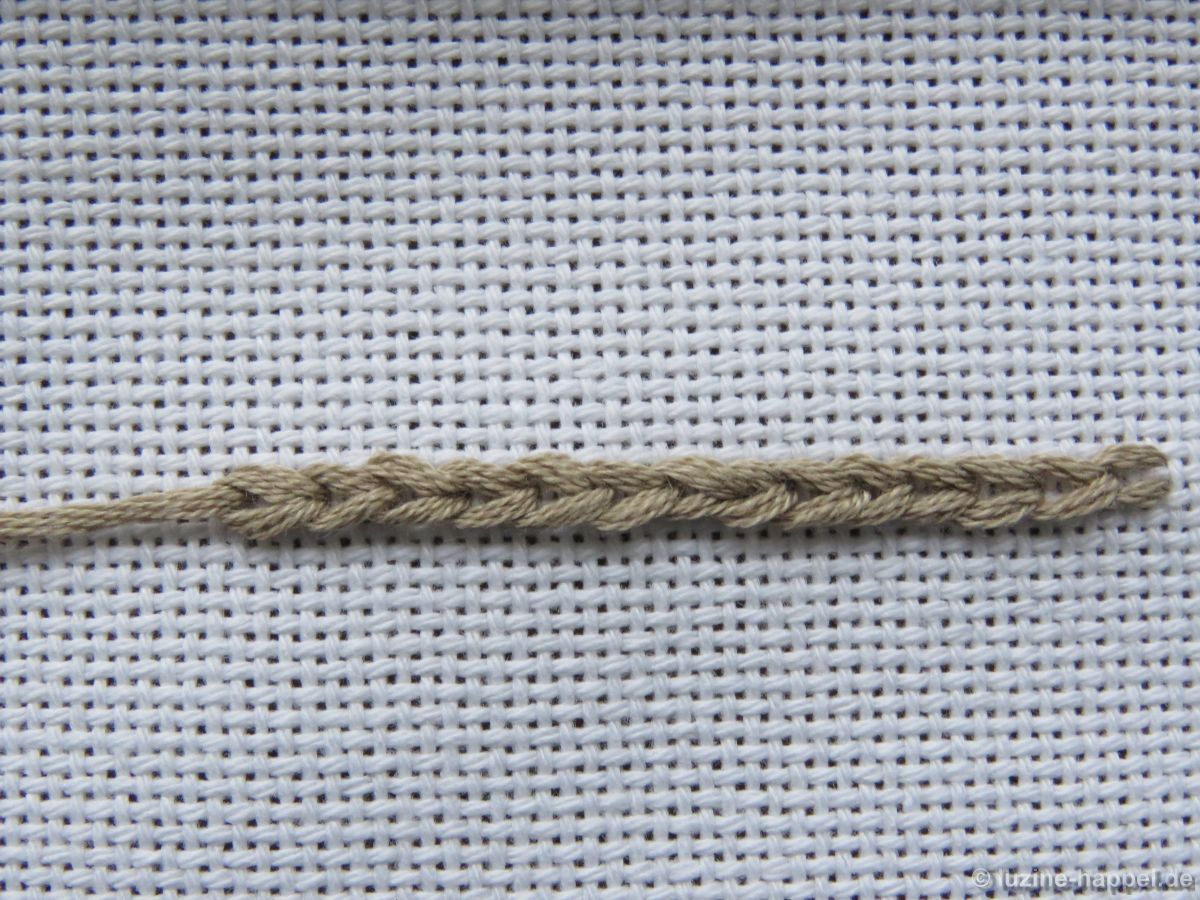
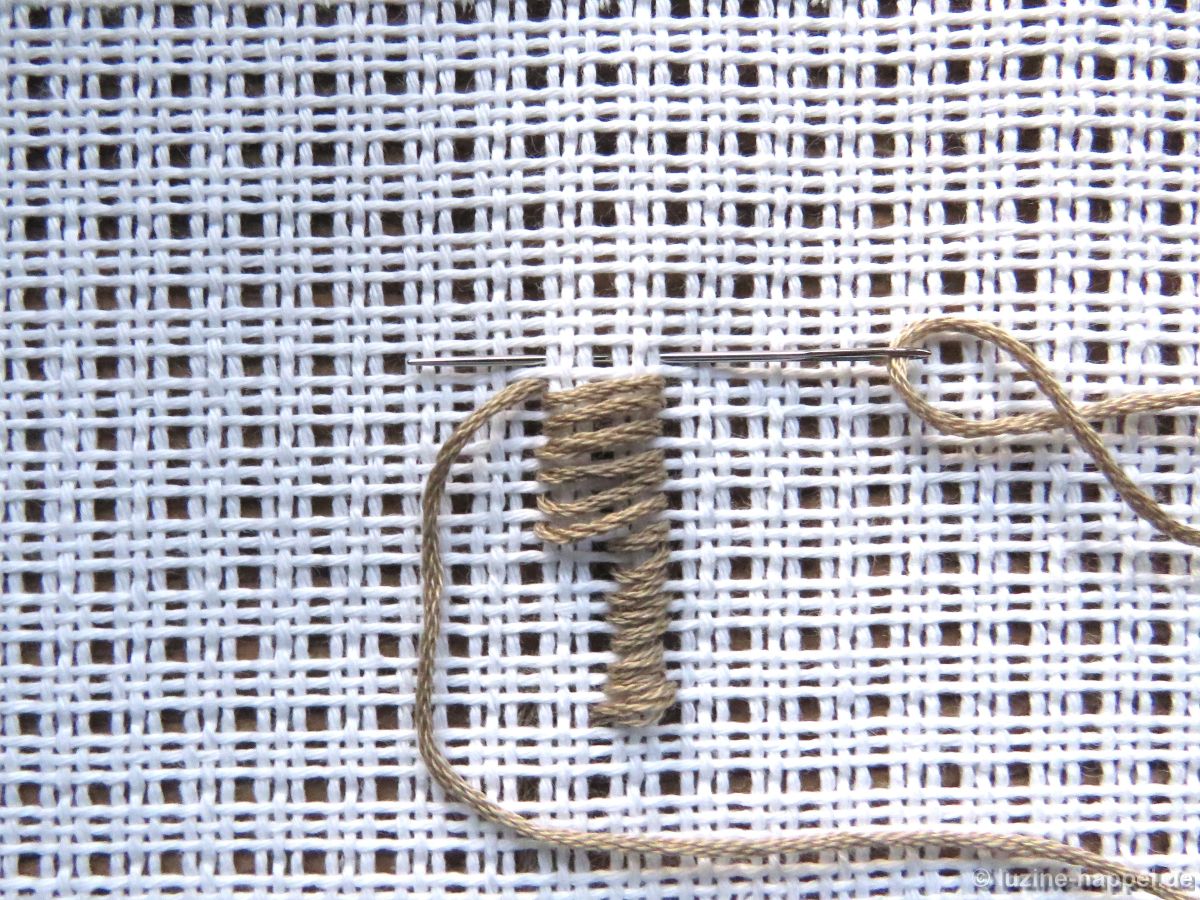
The satin stitch is the easiest filling stitch to work. It is similar to the decorative satin stitch, but unlike this satin stitch, it follows the position of the fabric threads.

It is used both as a simple withdrawn thread pattern

as well as a Limet withdrawn thread pattern.

thread weight: depending on the fineness of the linen, coton à broder thread No. 20 or No. 25. To make the satin stitch stand out, one should use the thicker thread.
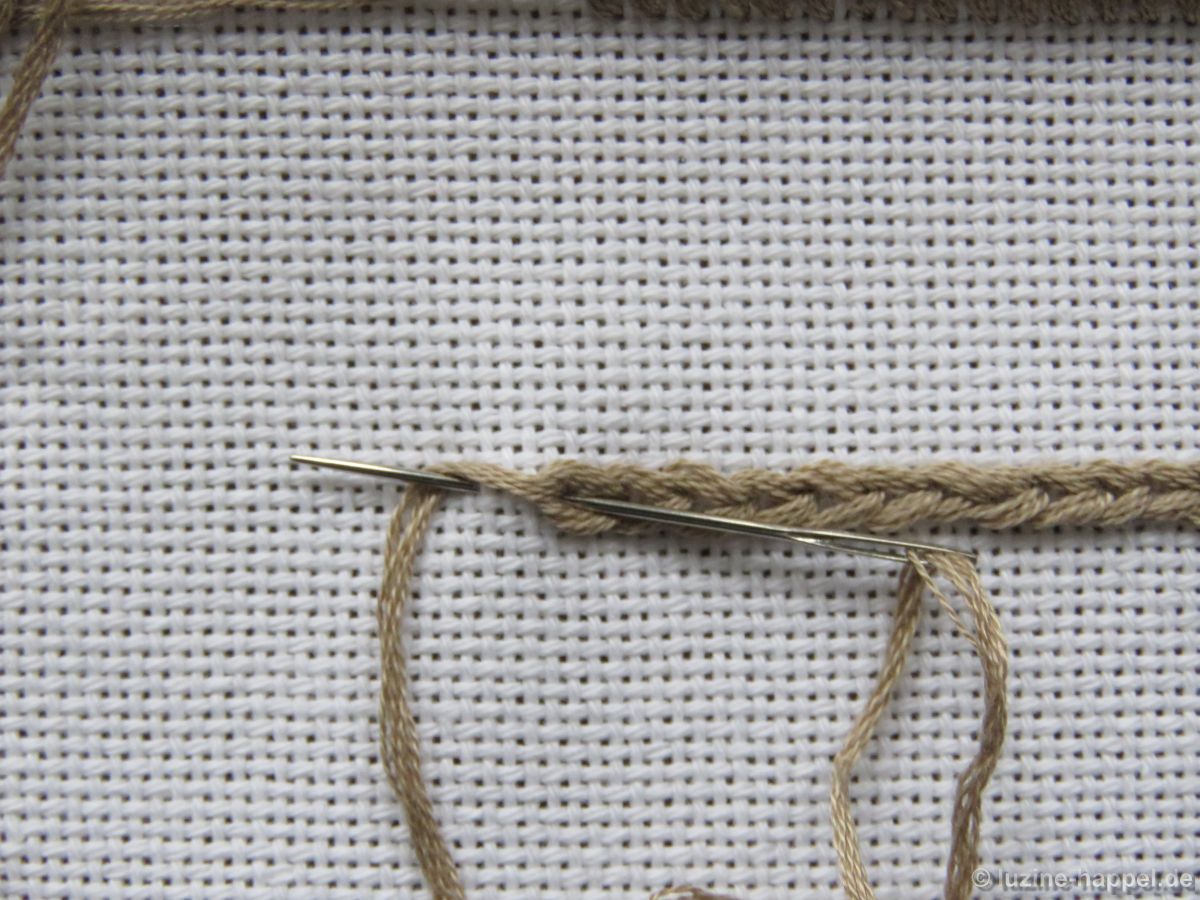
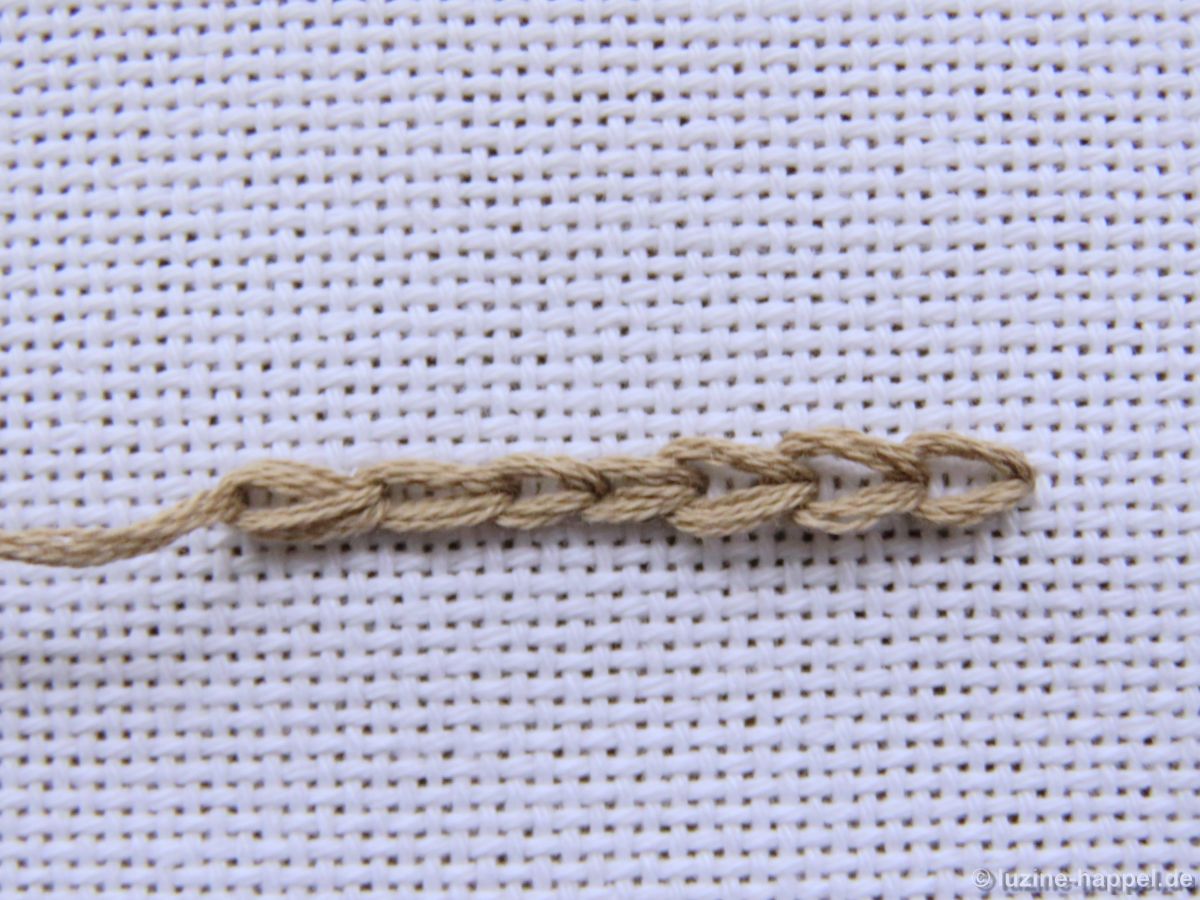
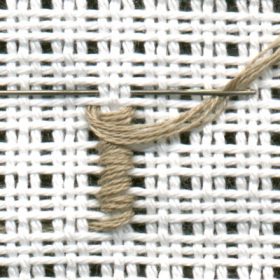
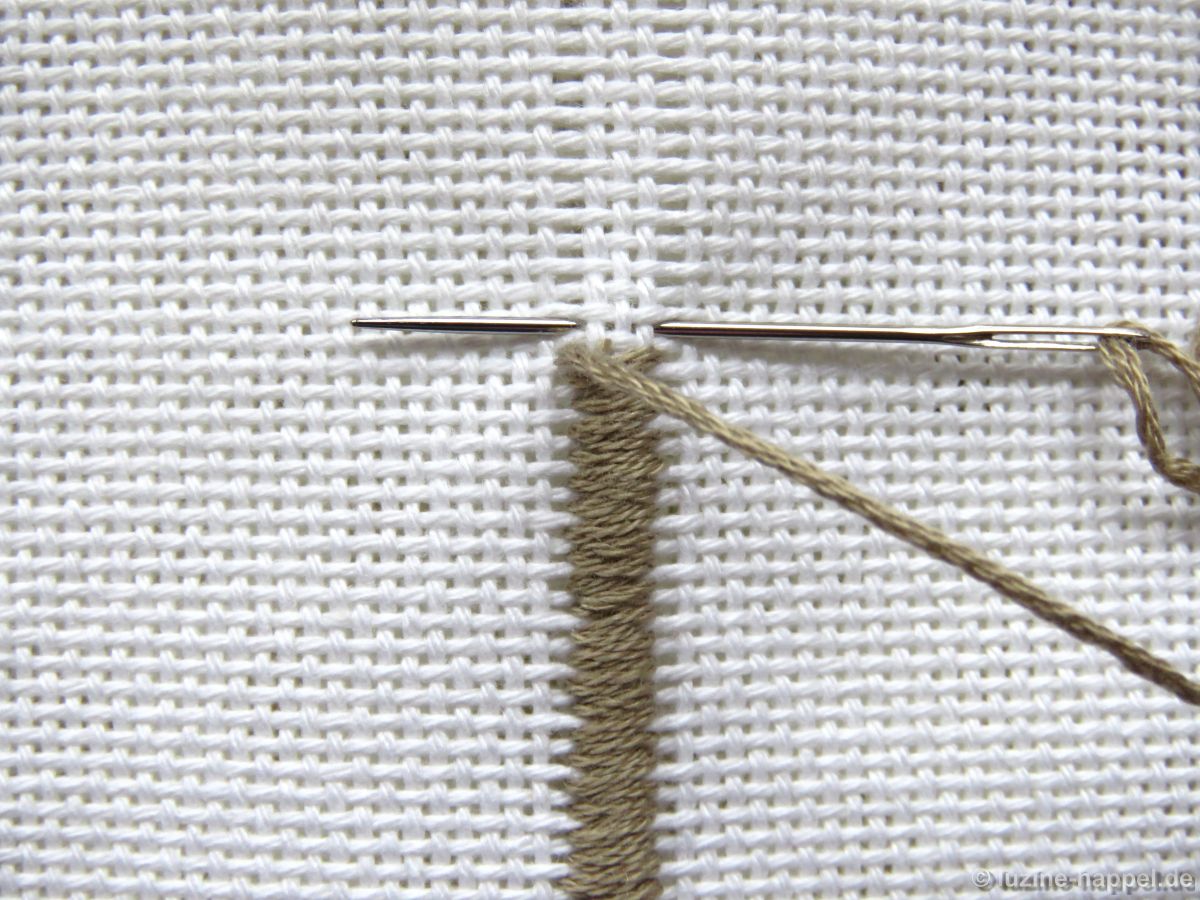
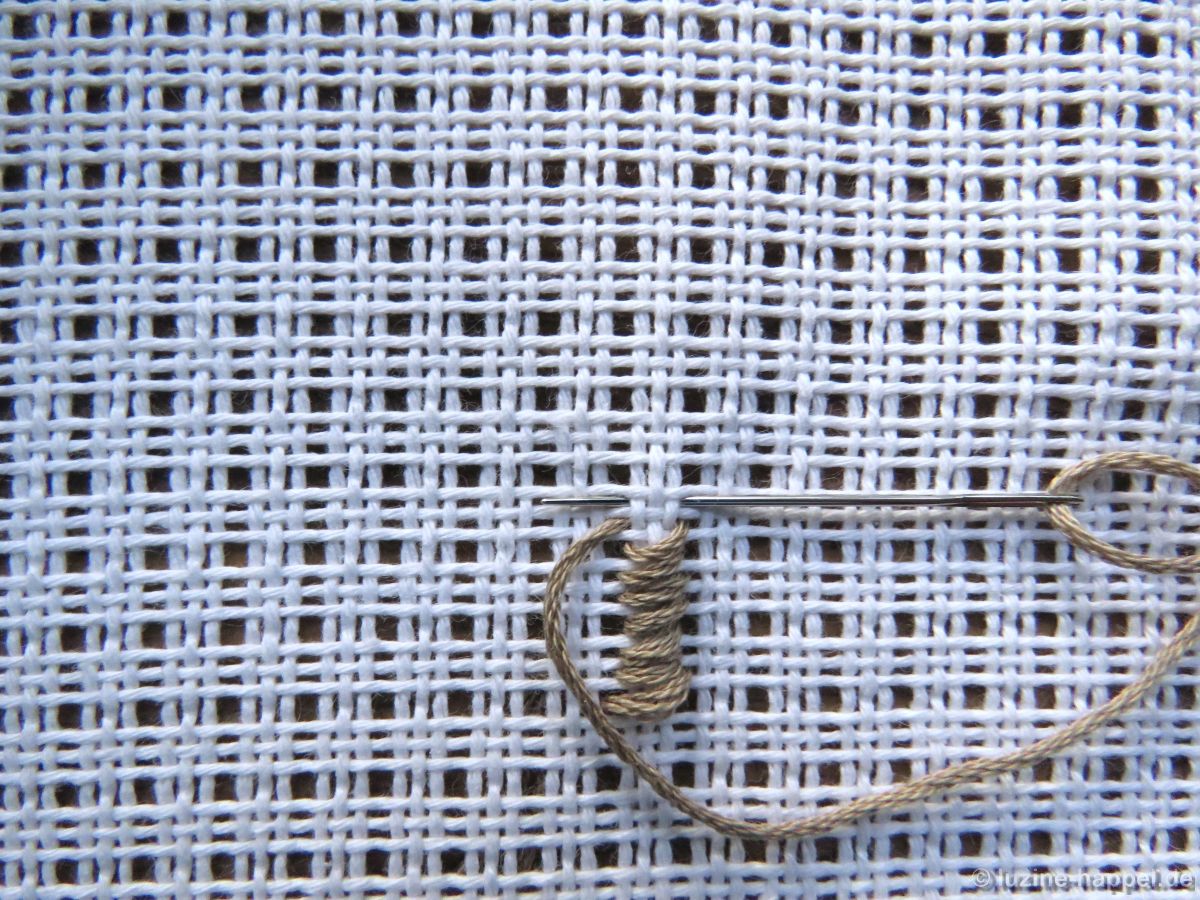
building the rows: from bottom to top
direction of needle movement: from right to left
way of working: Bring needle up on the left line and and lay the thread in a loop to bottom and right. Cross over one fabric thread to top and three fabric threads to the right and insert needle. Cross under the three fabric threads to the left and bring needle up one fabric thread to top of the previous emerging point.

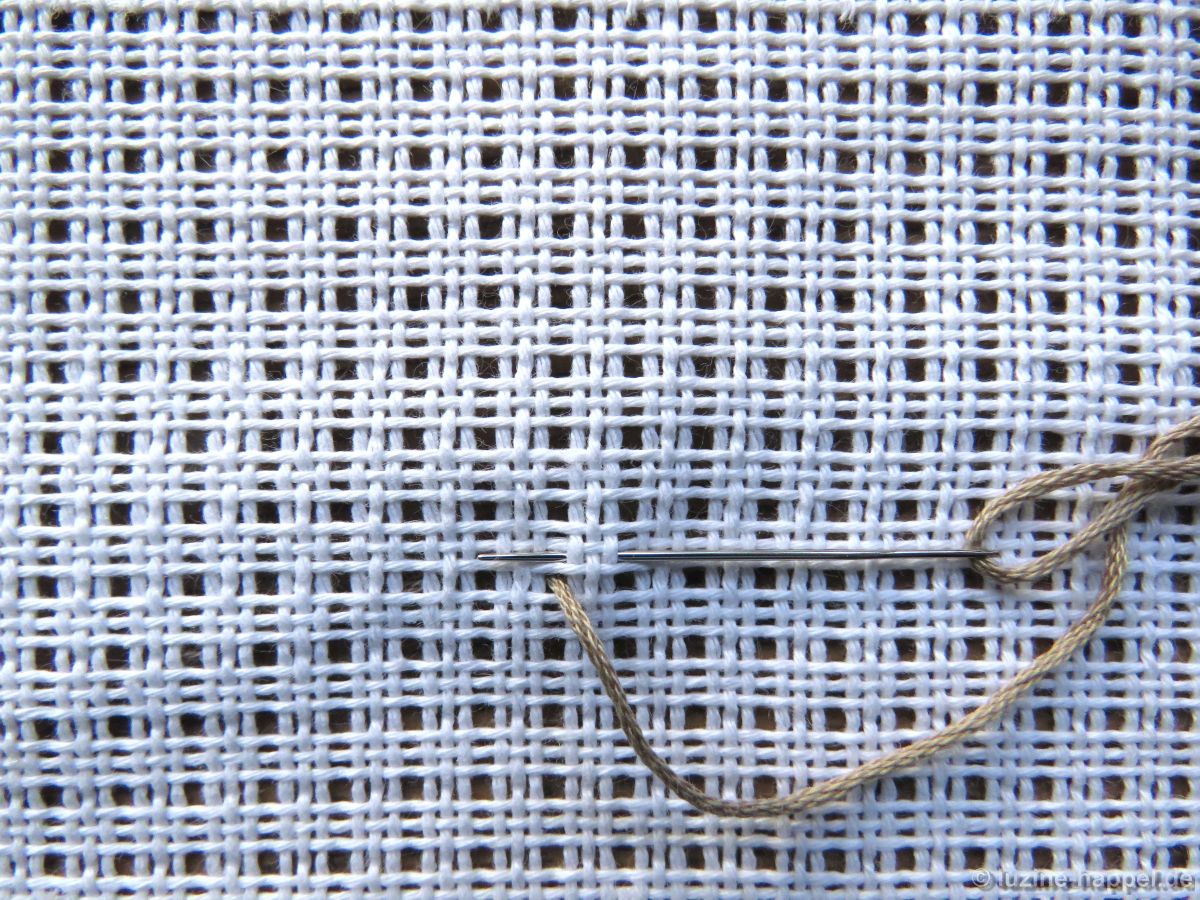
Pull the needle through and the thread to the left. The working thread should be taut, but the fabric threads should not be pulled together.

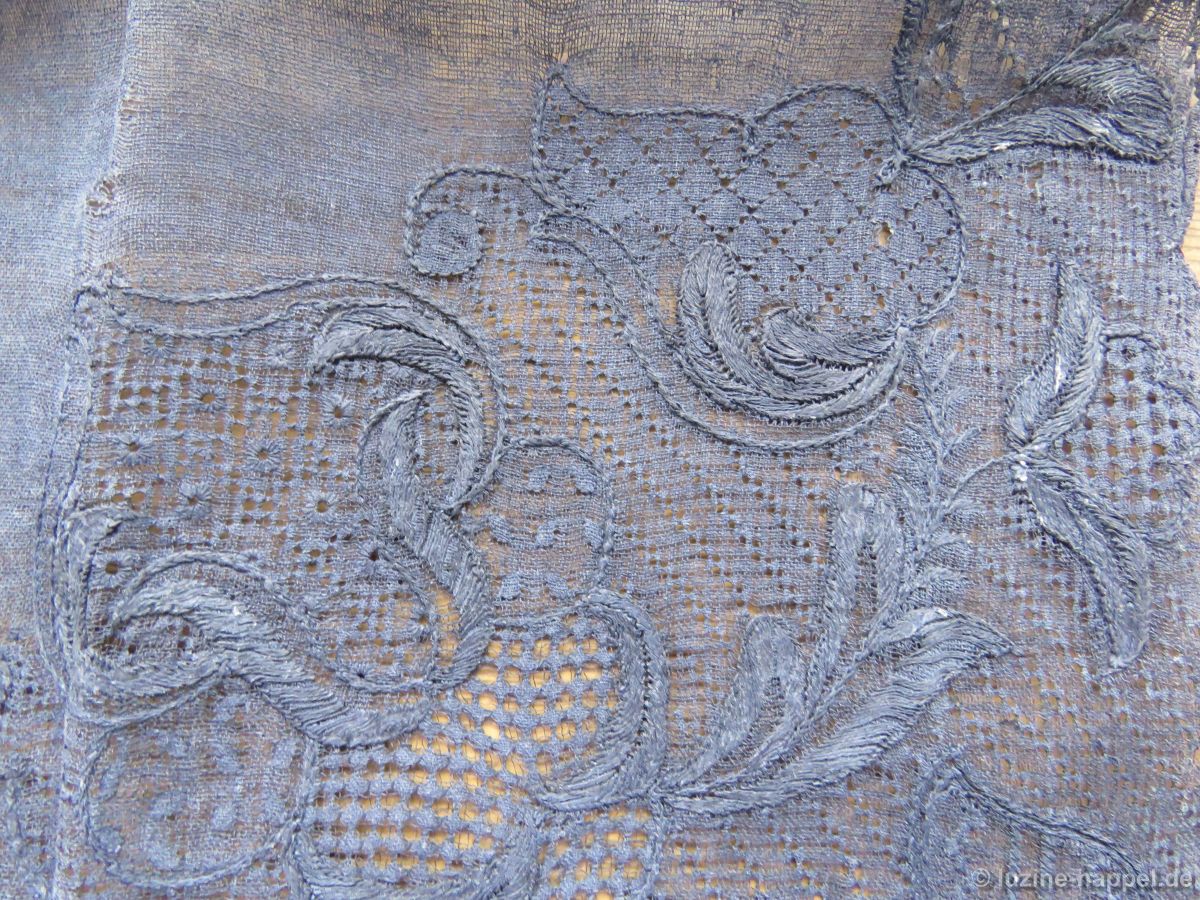
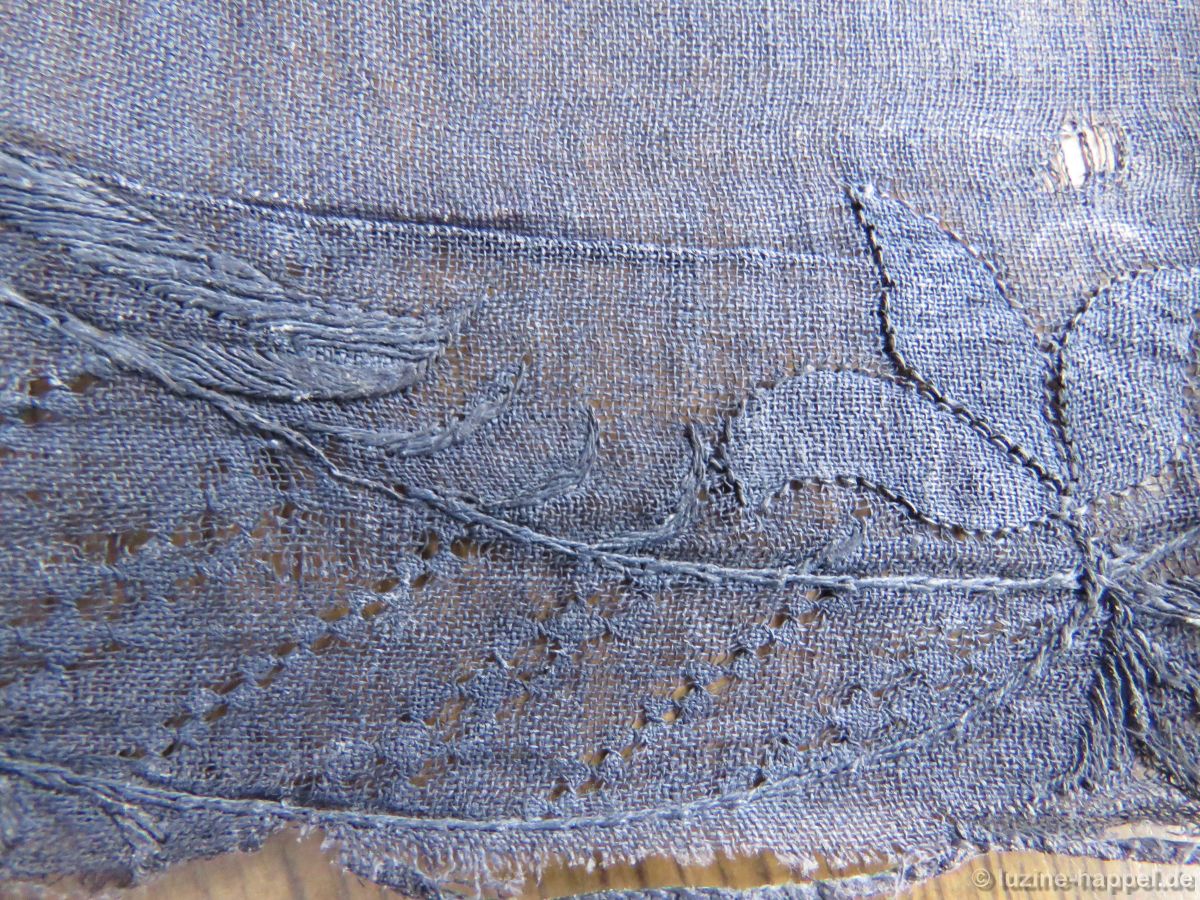
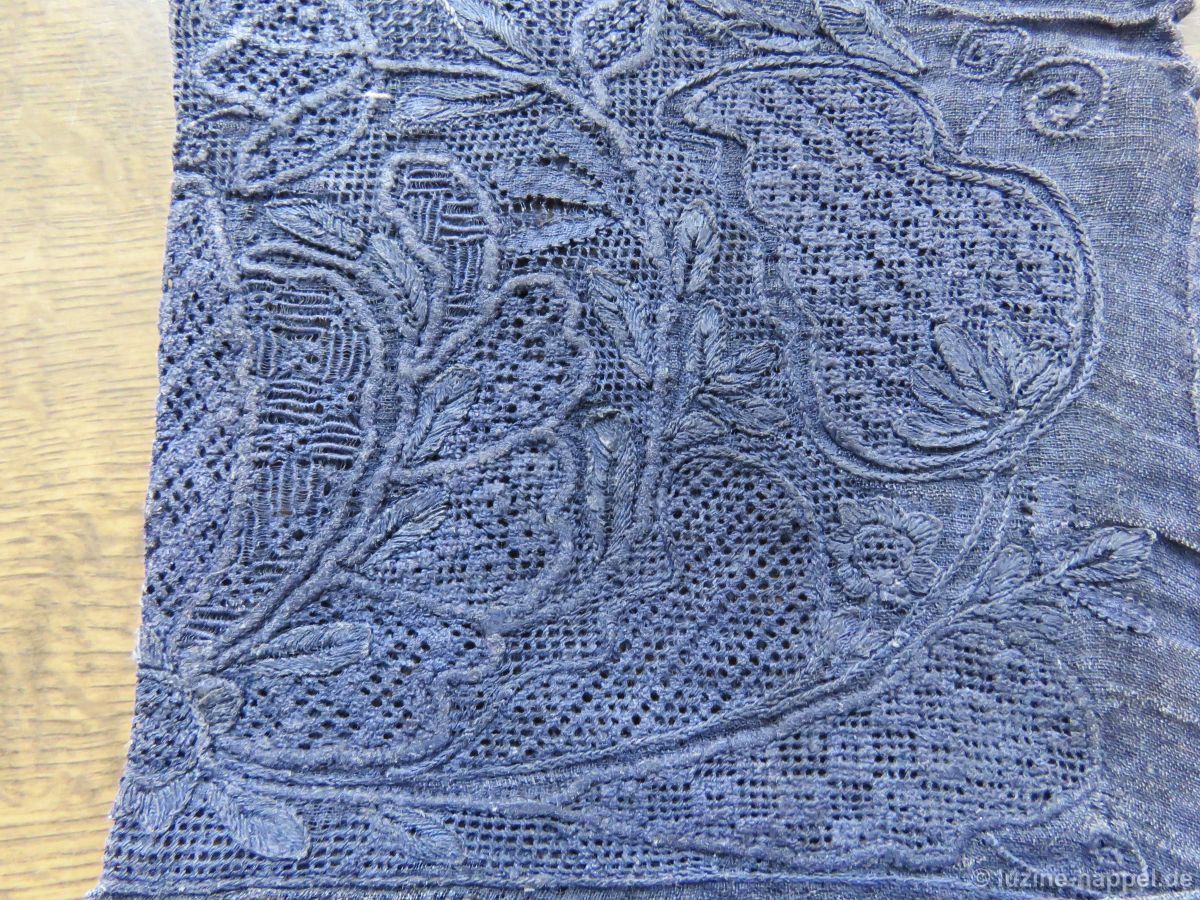
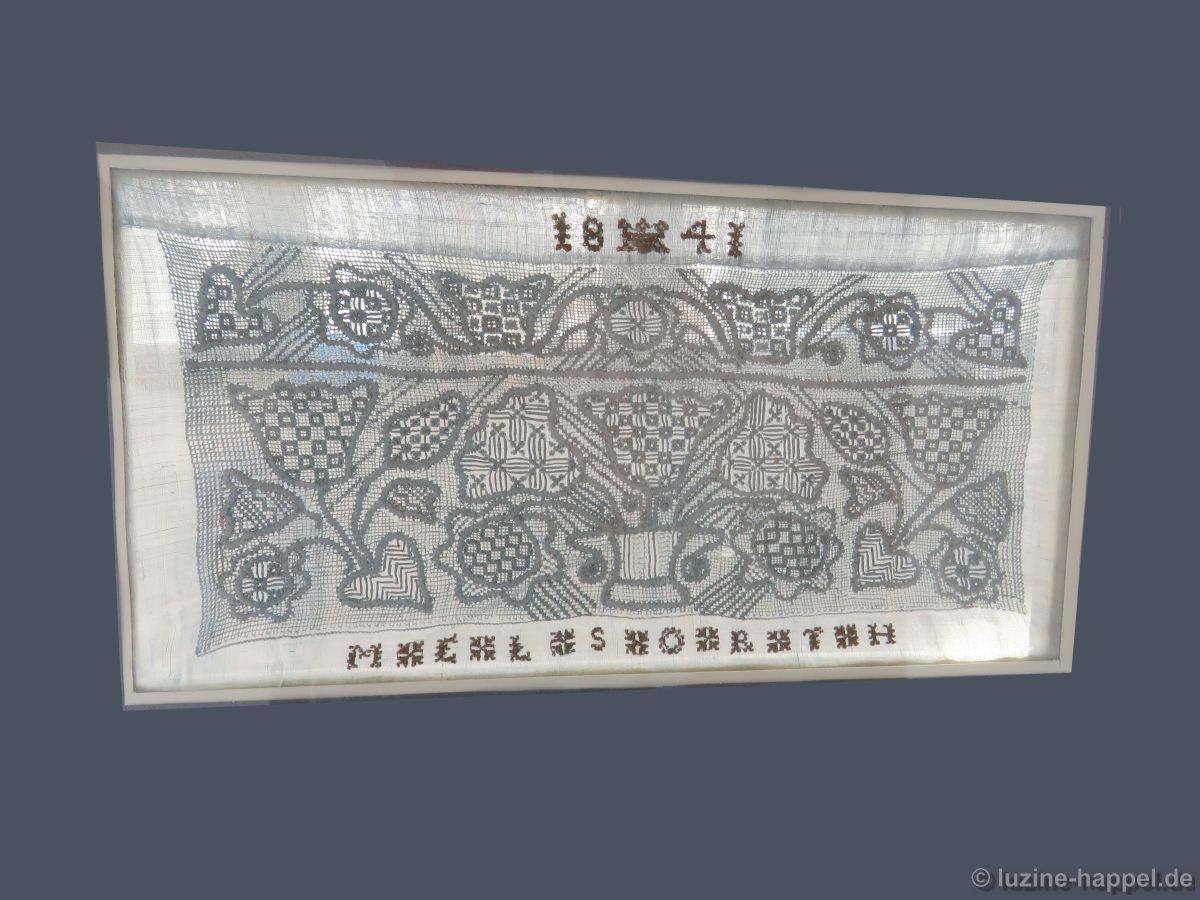
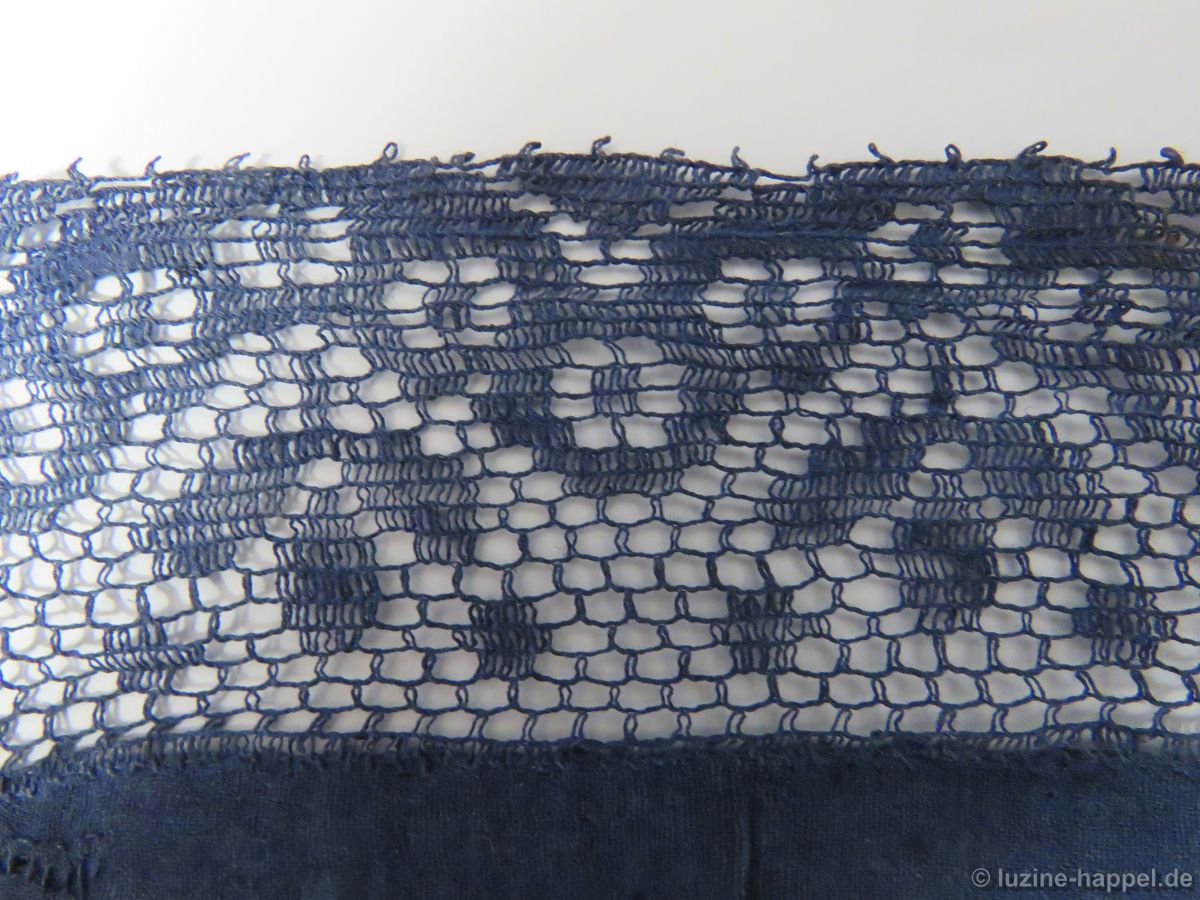
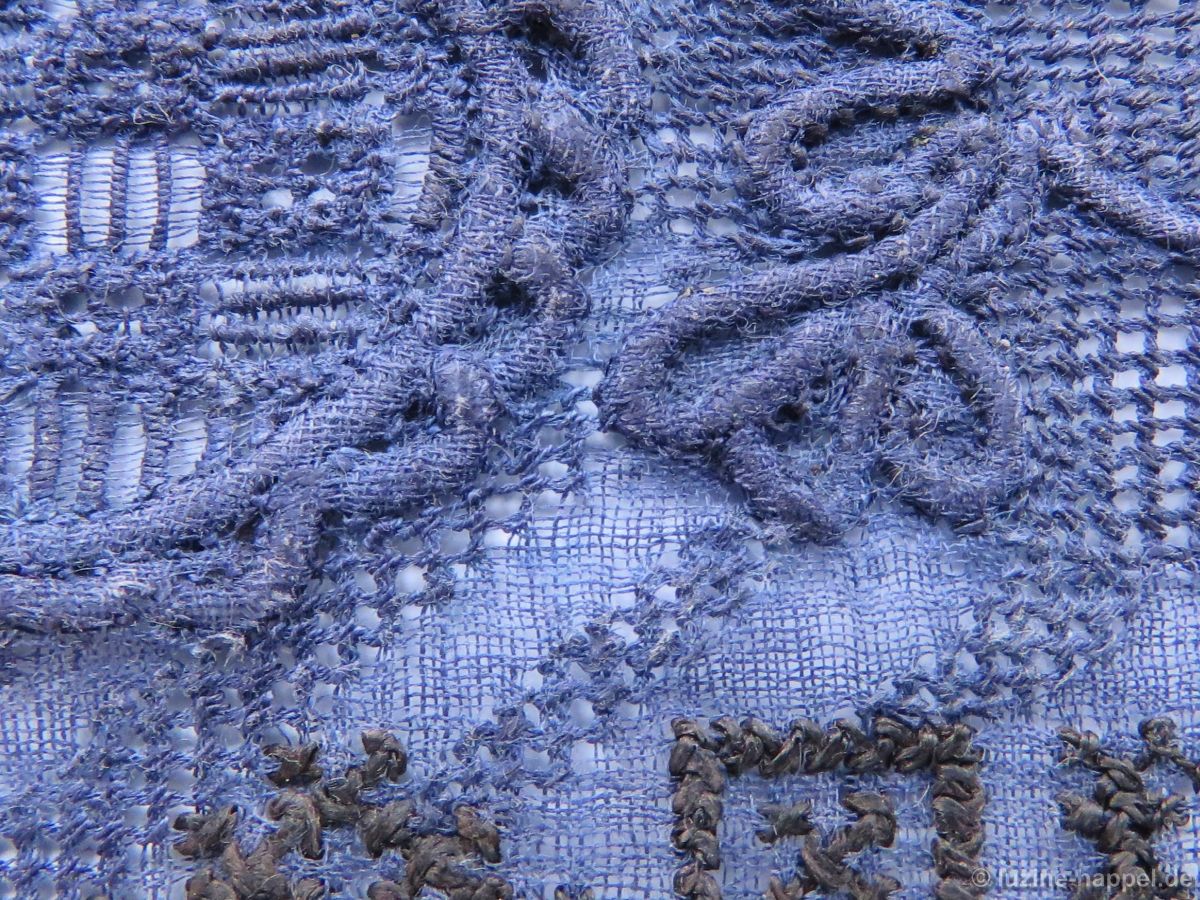
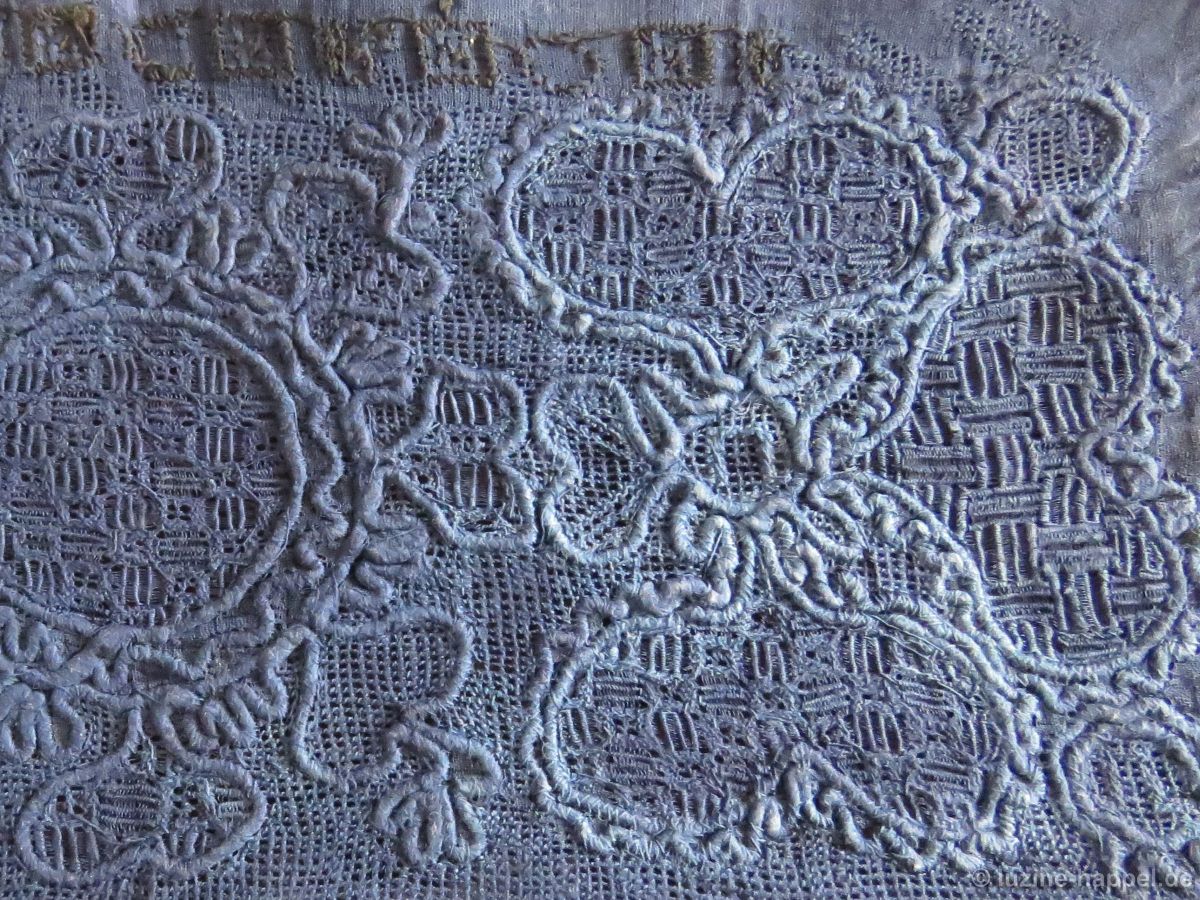
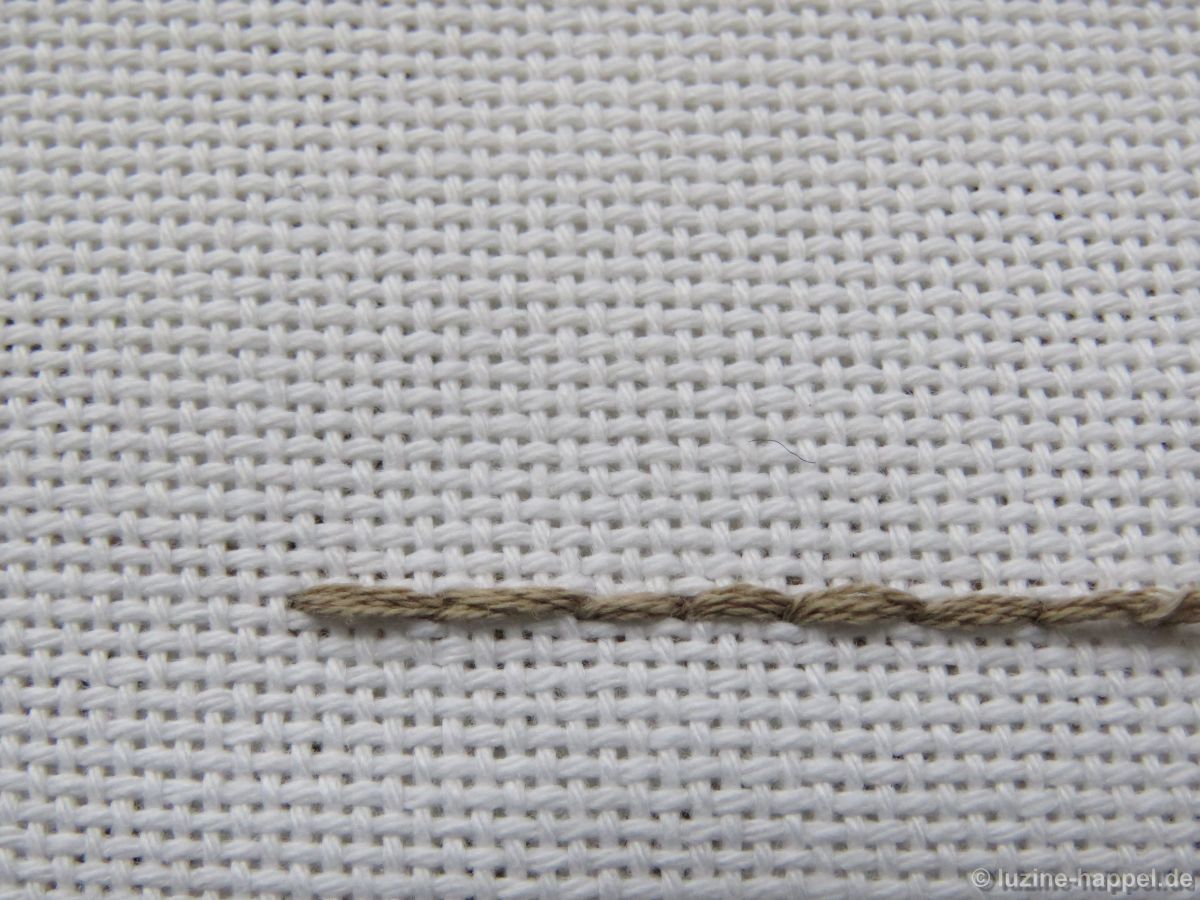
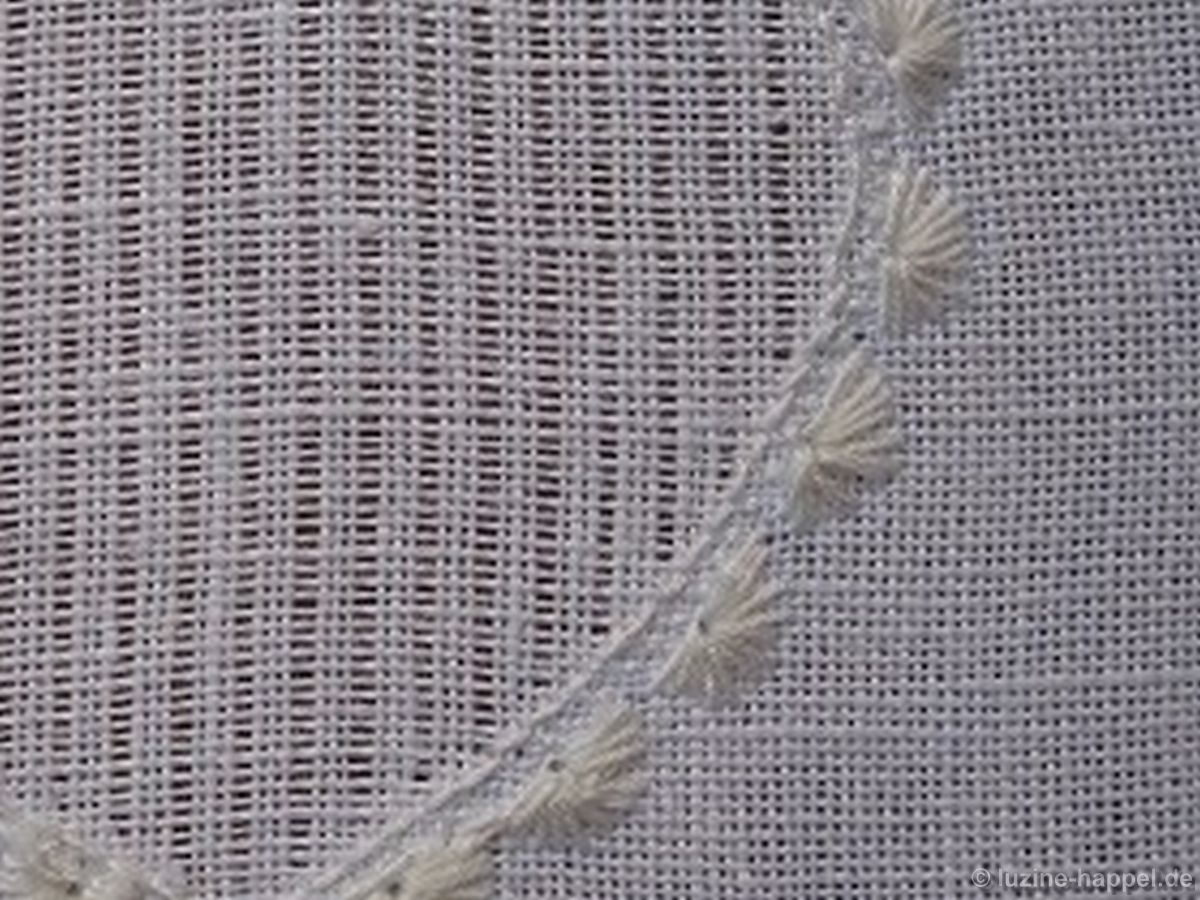
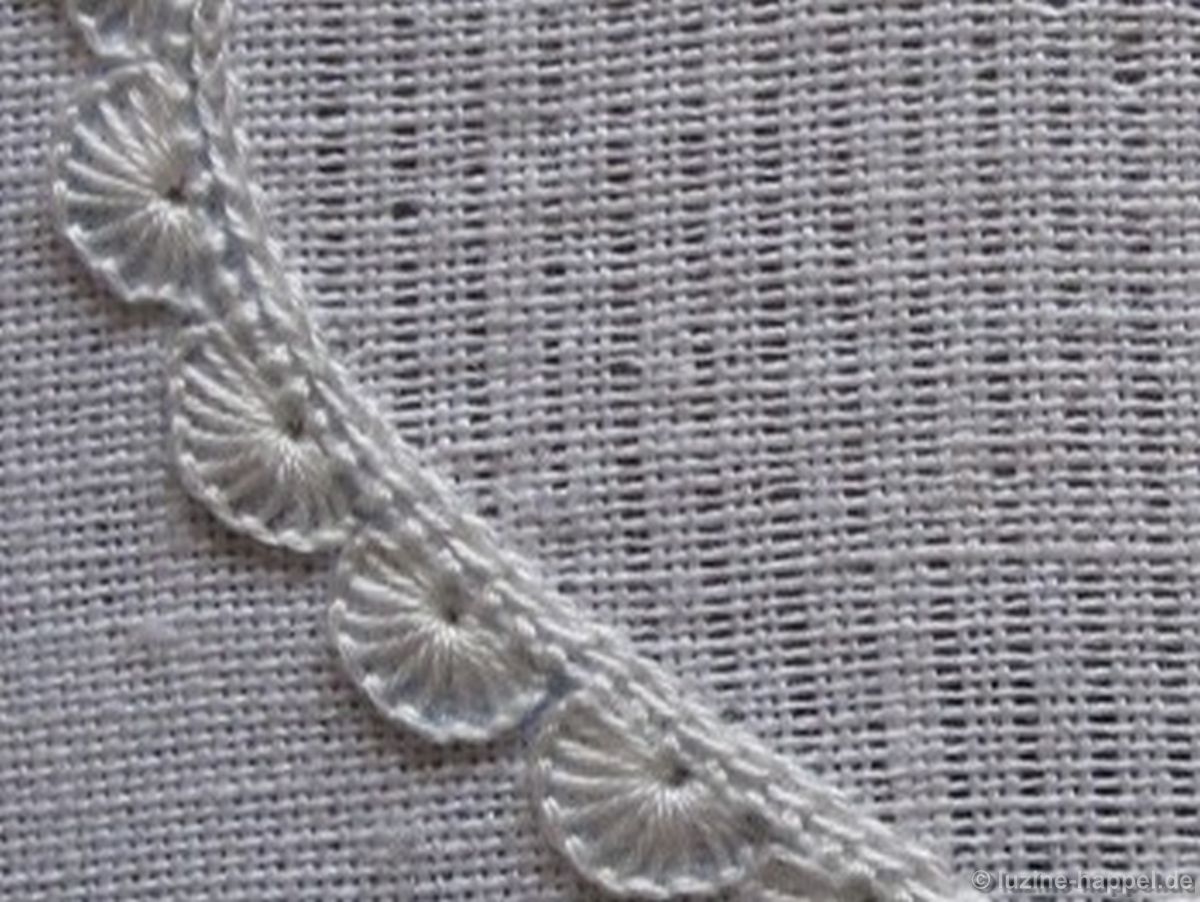
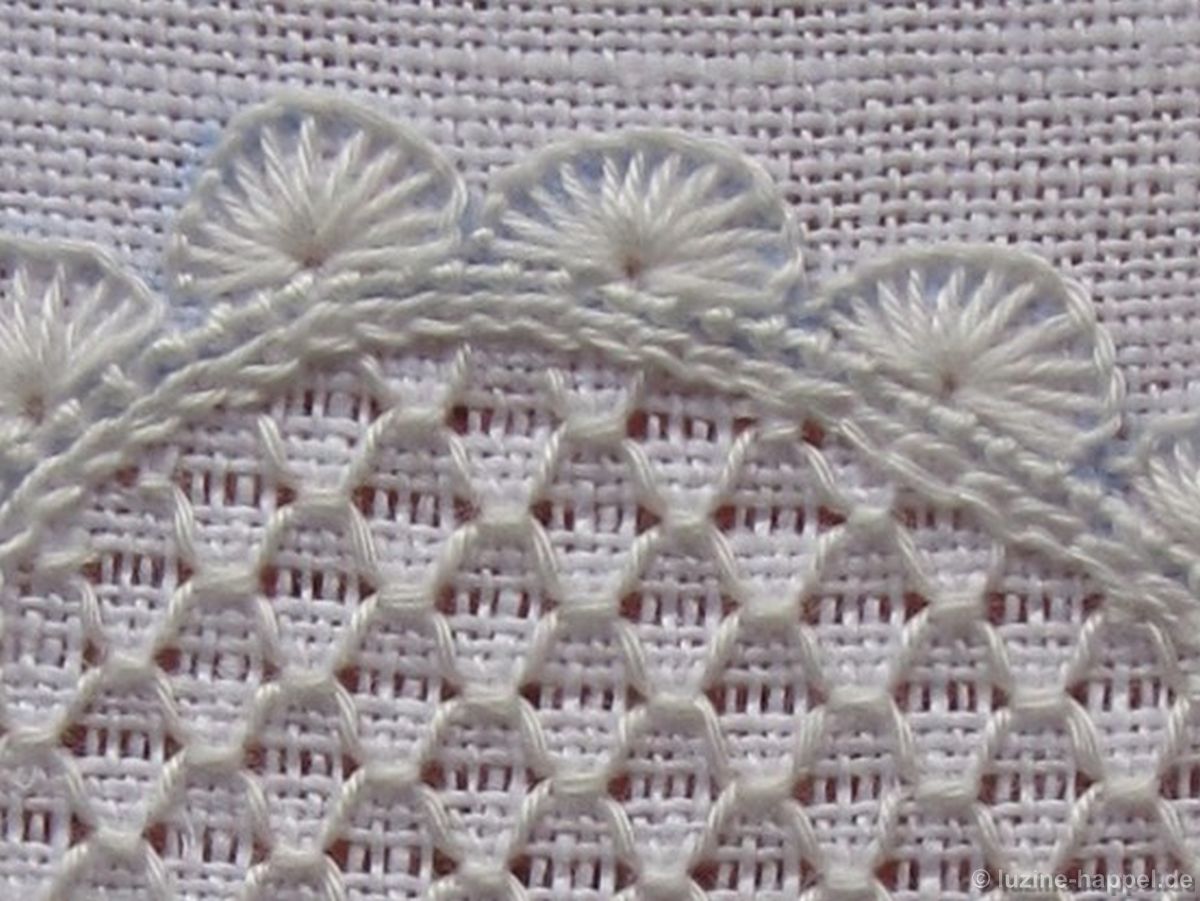
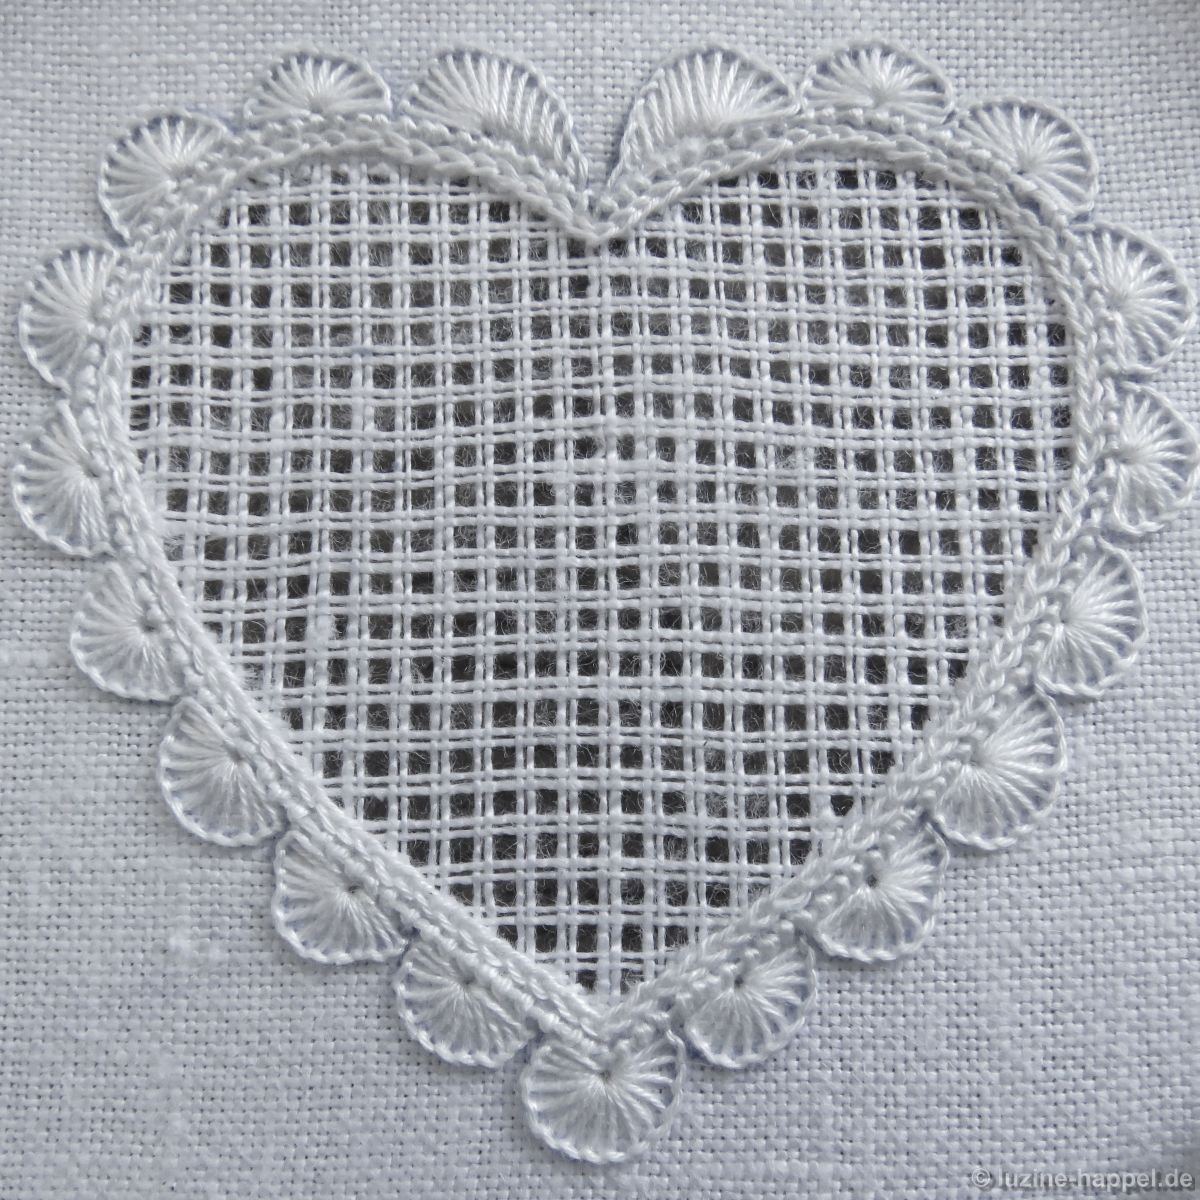
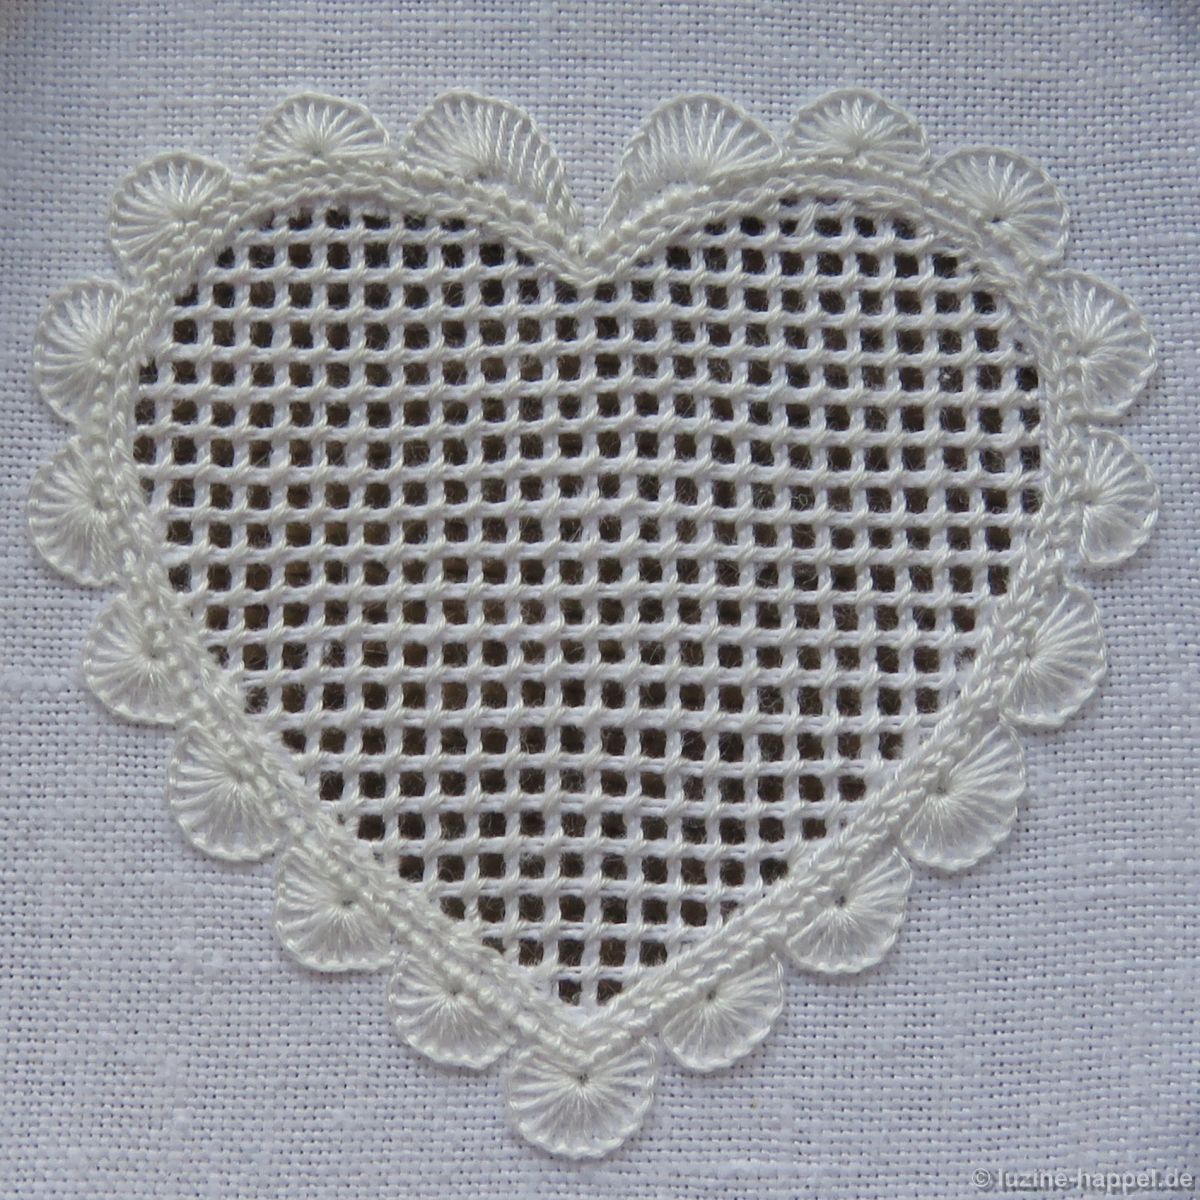
In simple withdrawn thread patterns, continuous rows, the so-called “bars”, are embroidered using this method (see image at the very top).

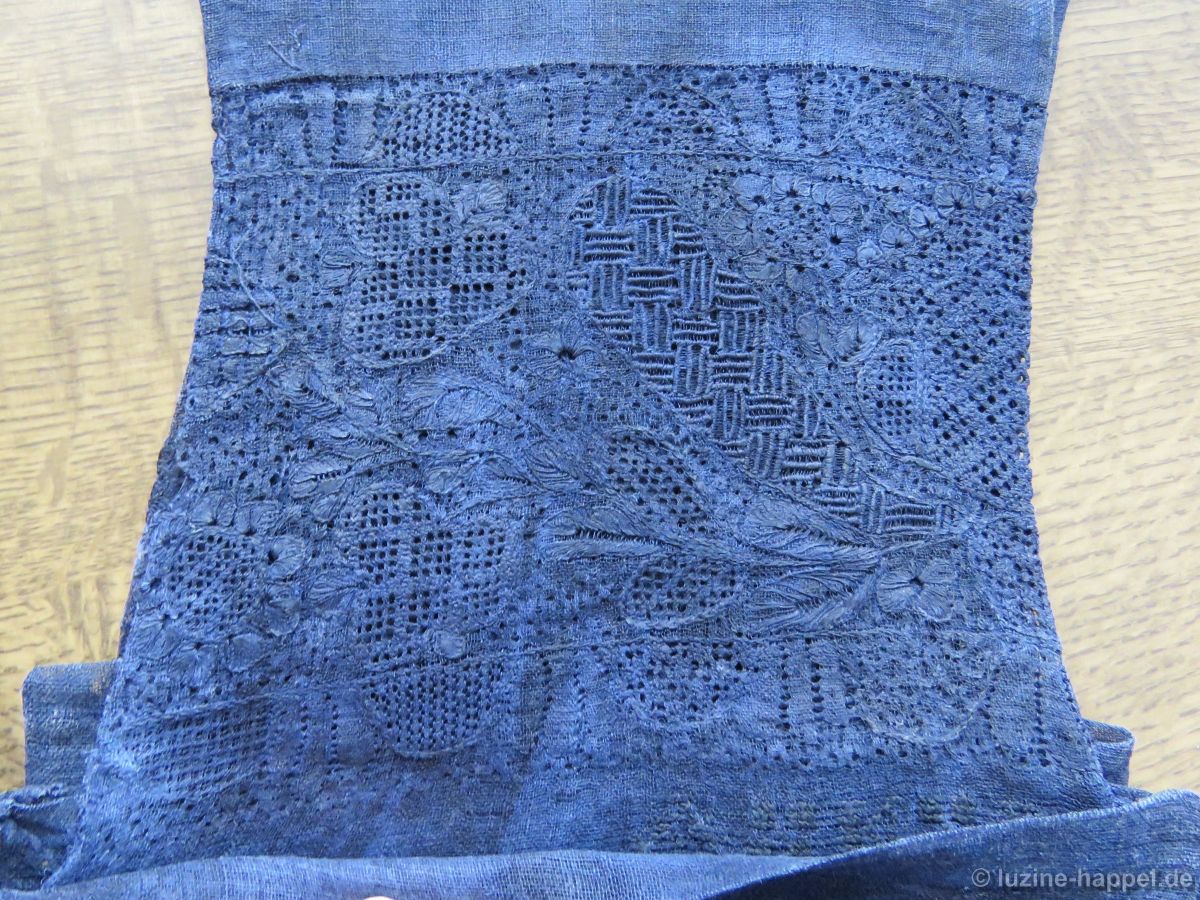
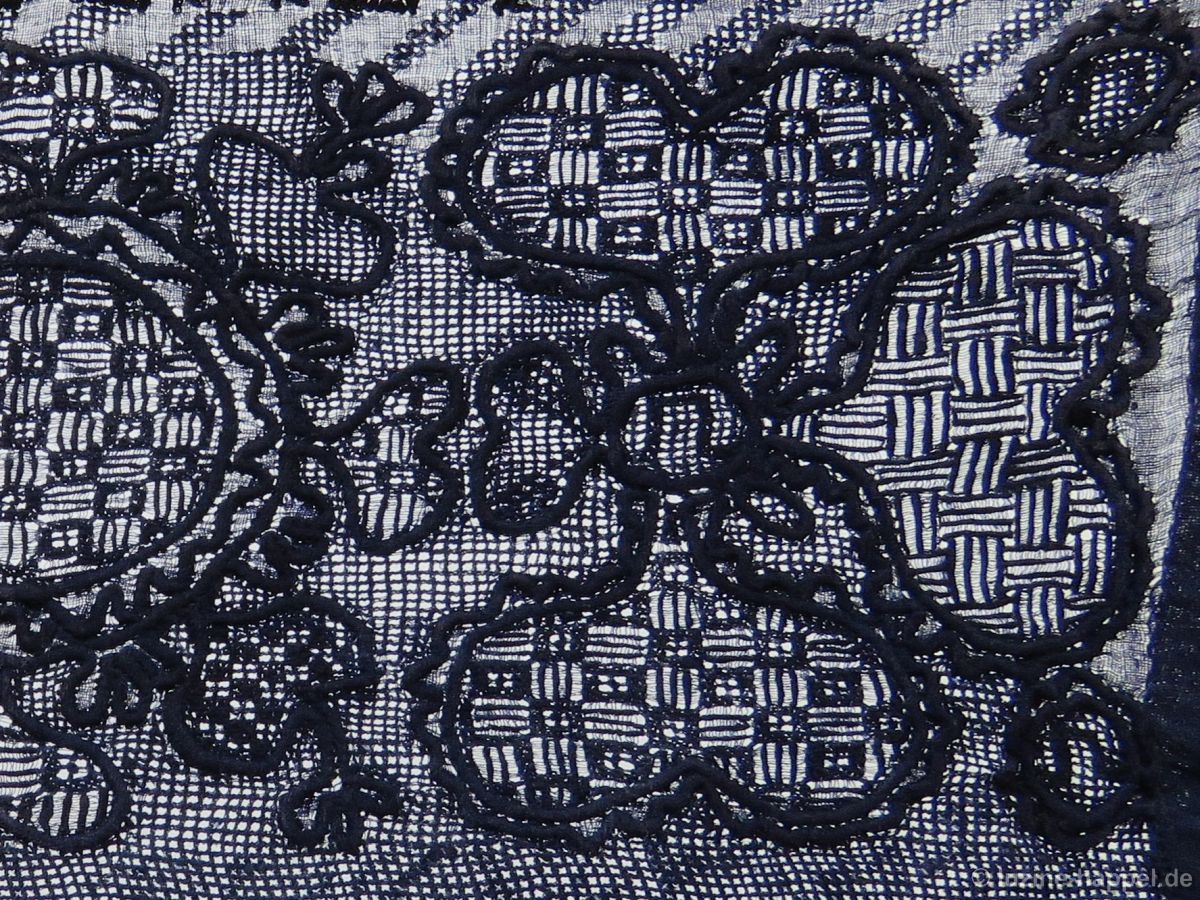
In Limet withdrawn thread patterns, such bar sections can be assembled into blocks,
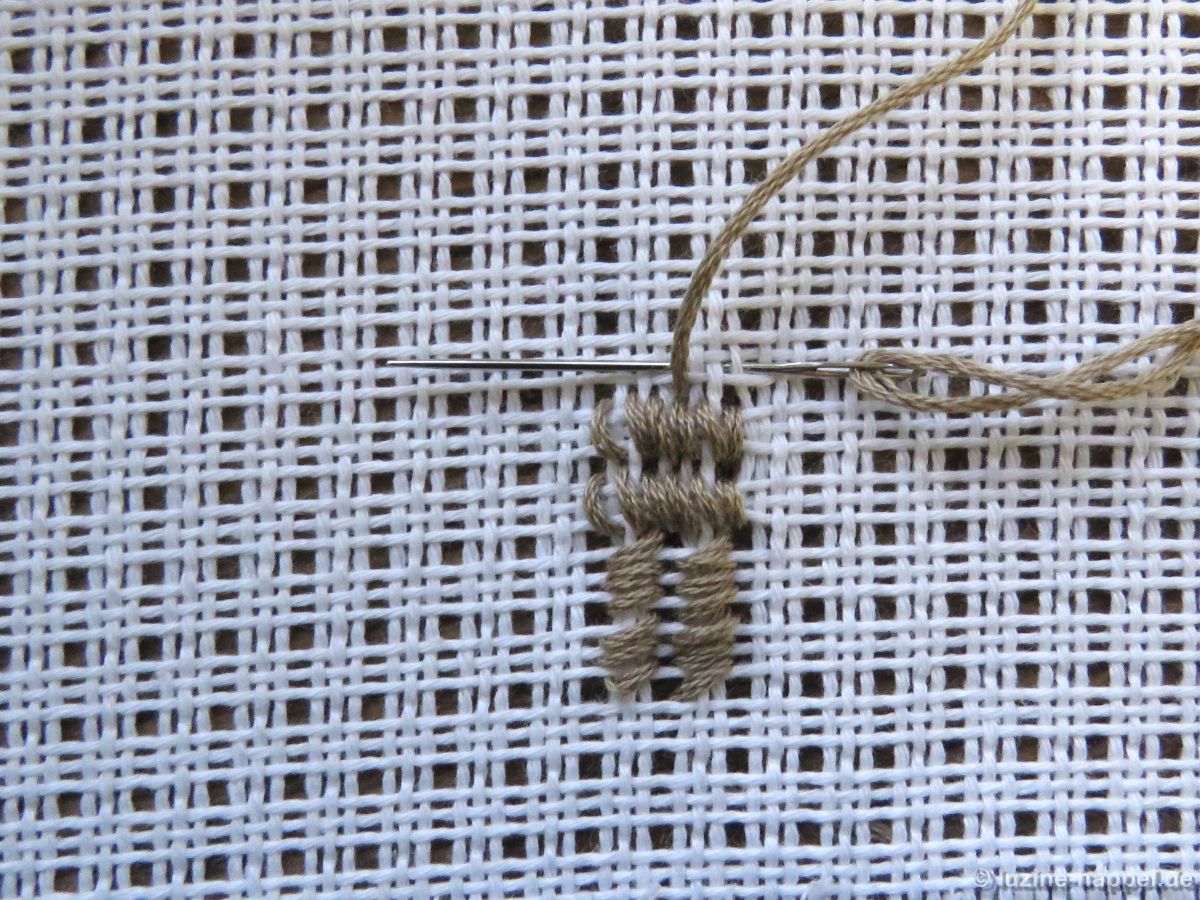
stair-like

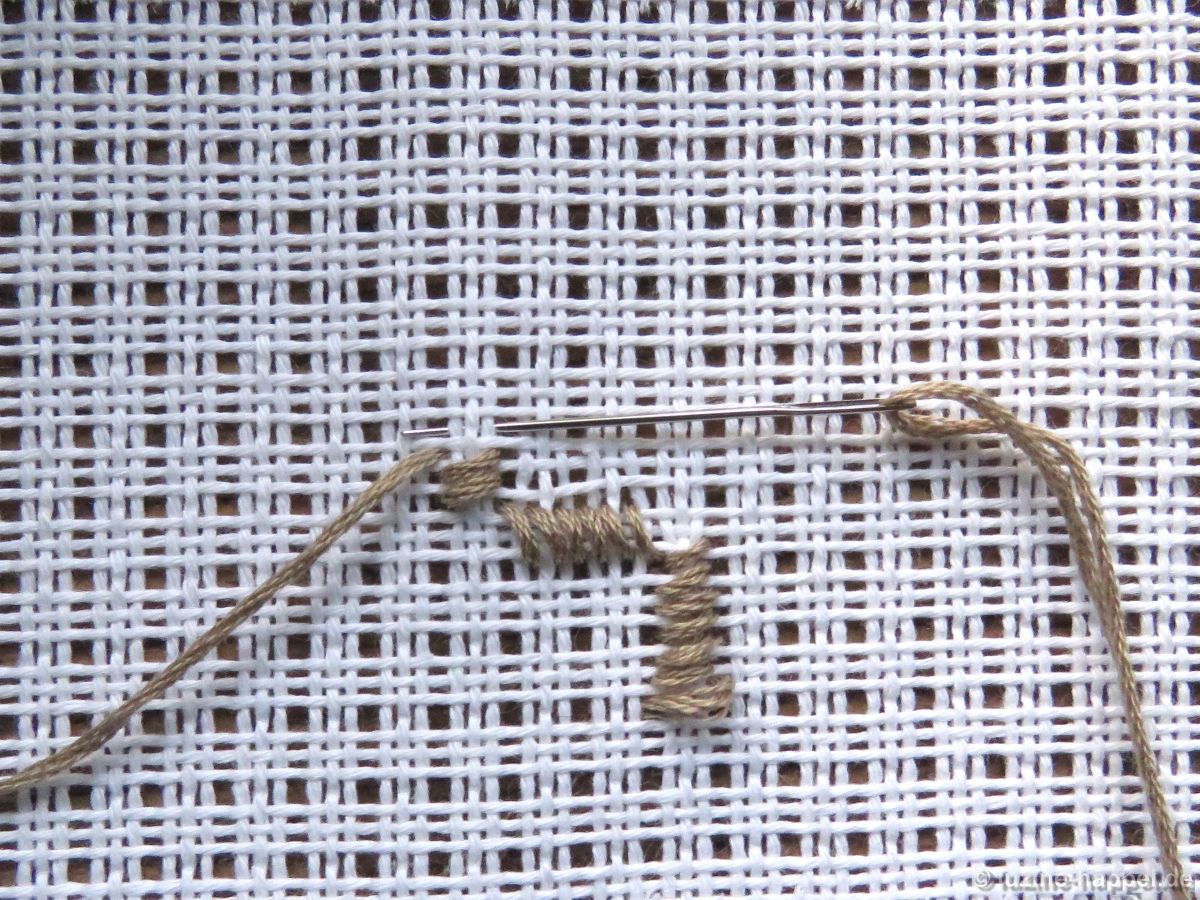
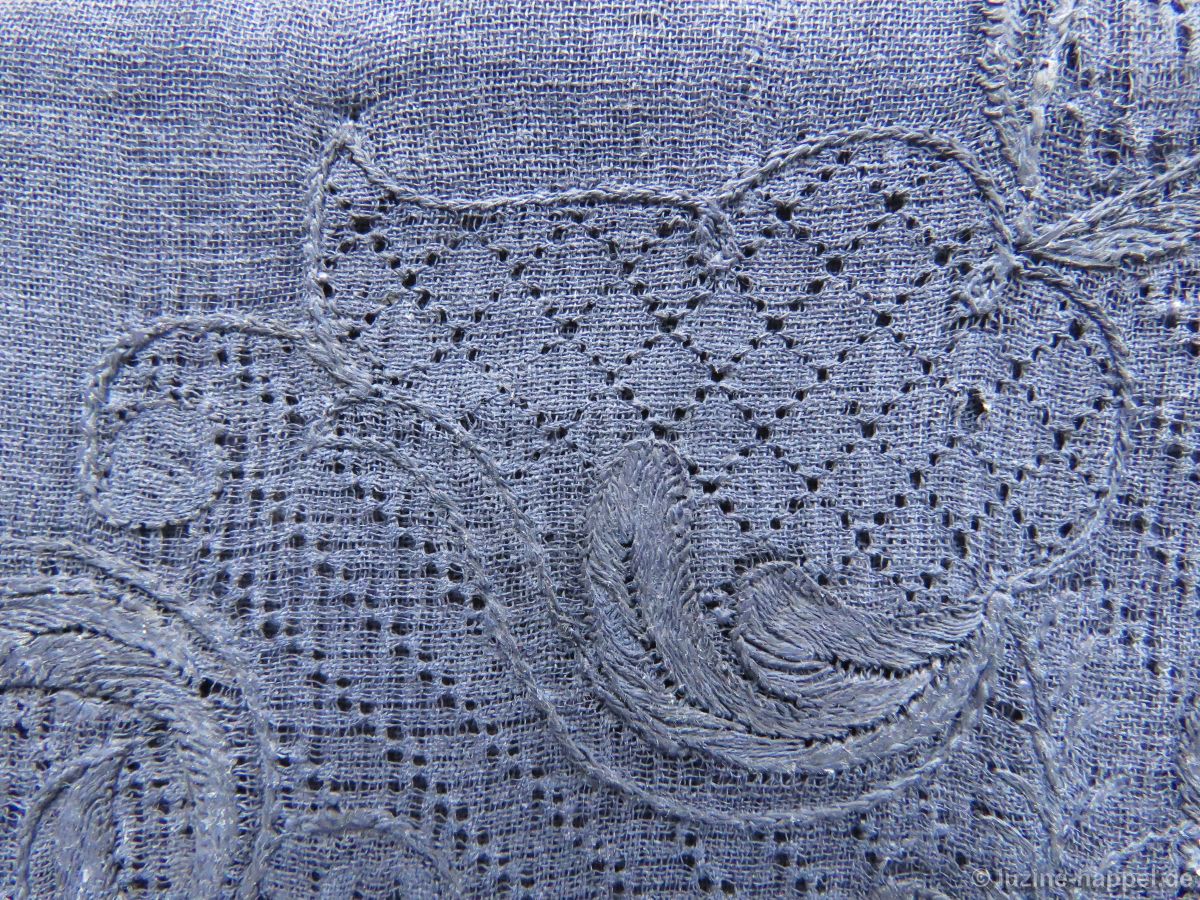
or they can be worked in a stair-like manner and offset from each other, so that squares are formed – the so-called “fields”.

Satin stitches can also be stitched across two squares (6 fabric threads) in width to create further patterns.

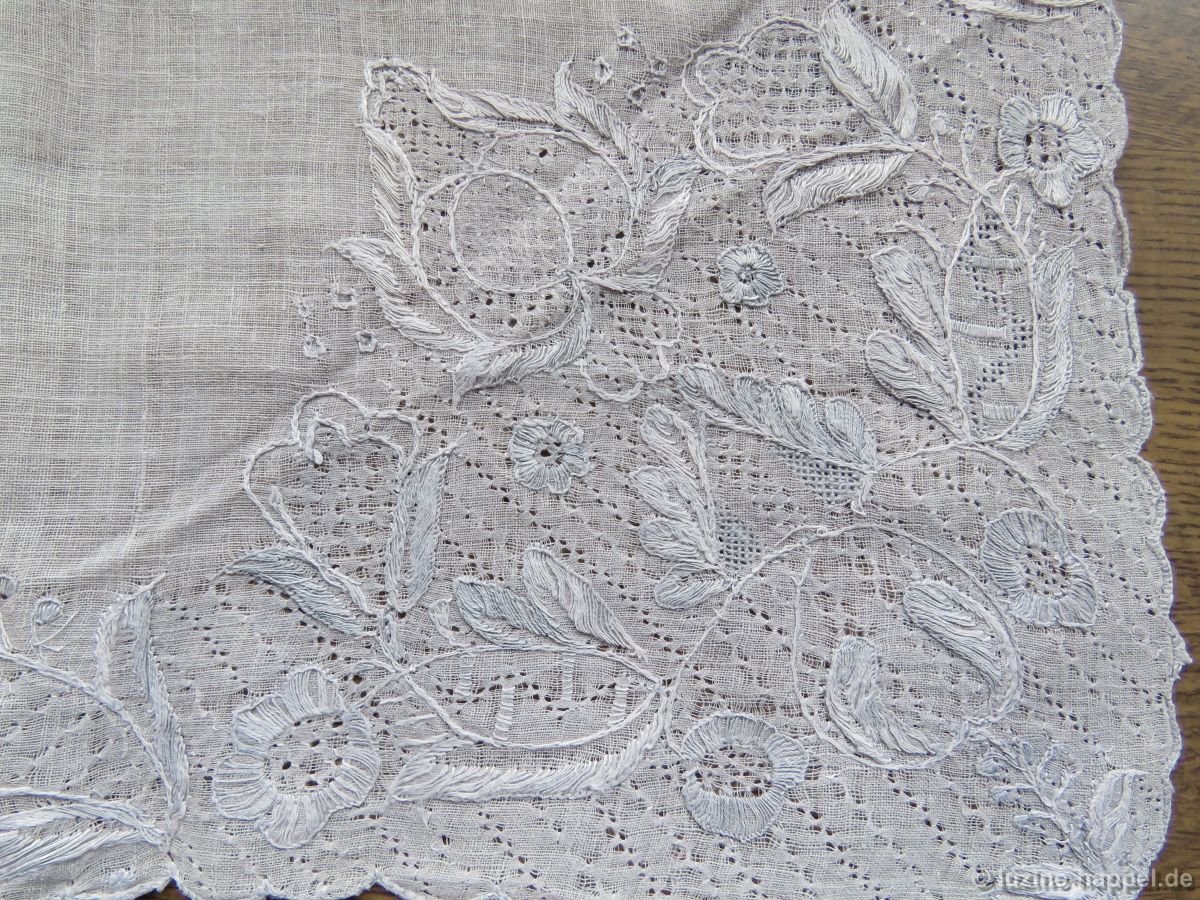
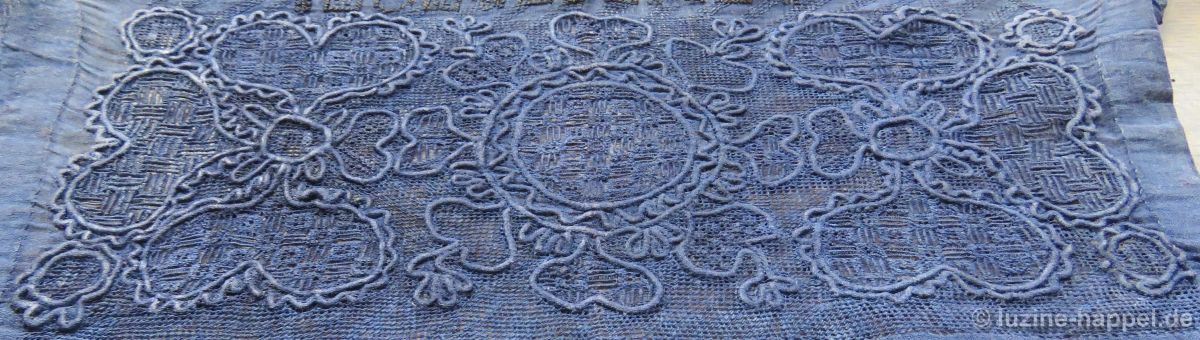
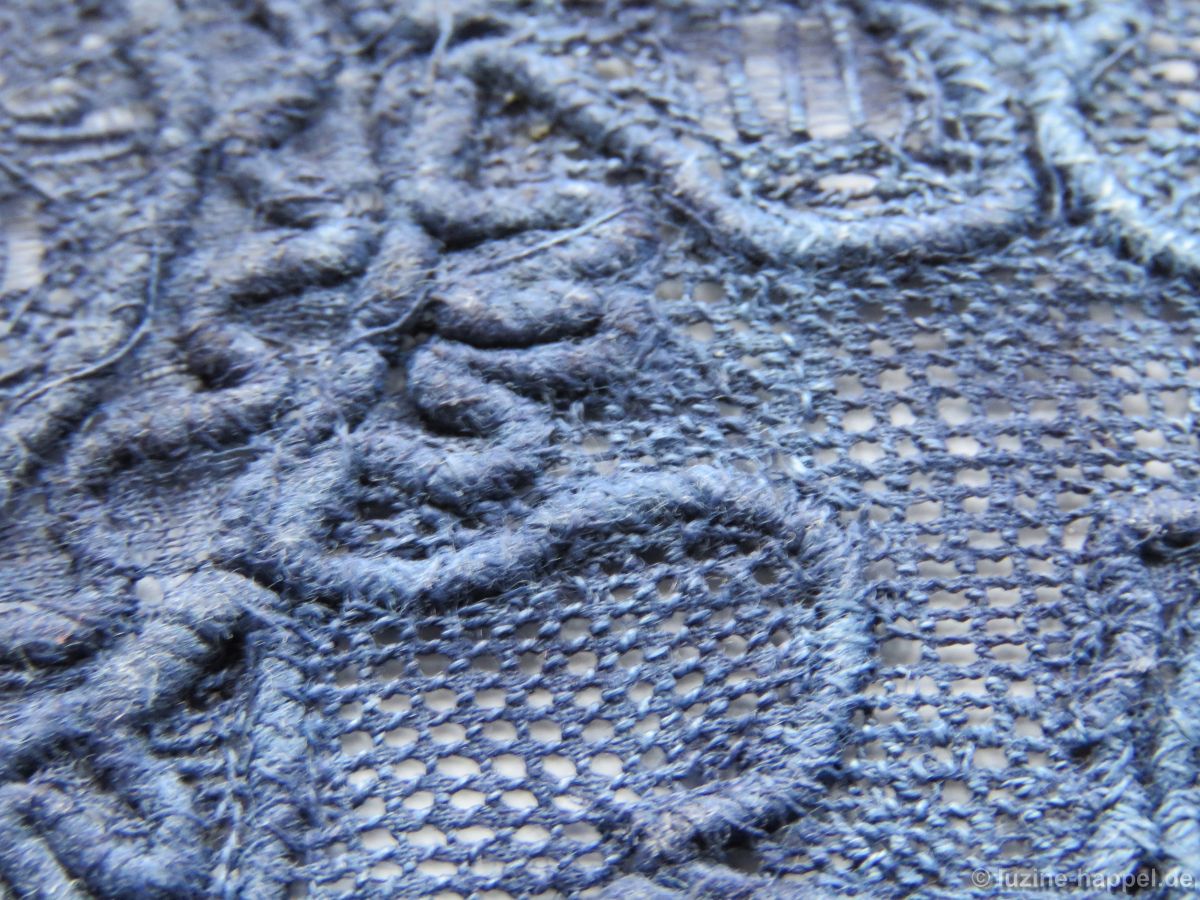
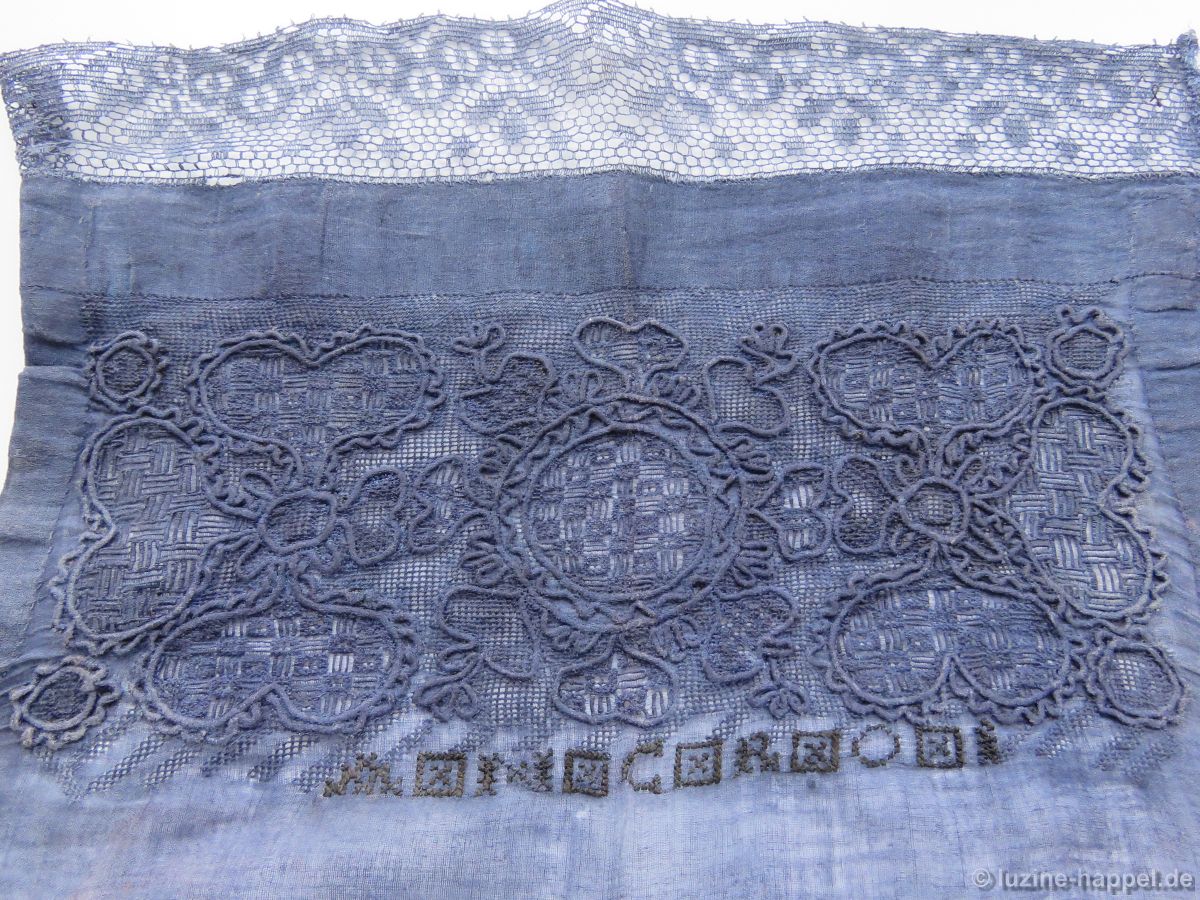
Thanks to all these design possibilities, the satin stitch is an extremely versatile stitch that can be used to achieve a wide variety of effects. My book, Wickelstiche, shows 84 different area filling patterns consisting solely of satin stitches.

Die Kombination von Wickelstichen mit anderen Stichen schafft eine riesige Mustervielfalt. Einige davon kann man in meinem Blog finden:
Filling Pattern No. 444
Filling Pattern No. 446
Filling Pattern No. 447
Filling Pattern No. 448
Filling Pattern No. 450
Filling Pattern No. 451
Filling Pattern No. 469
Filling Pattern No. 472
Filling Pattern No. 473
Filling Pattern No. 480
Filling Pattern No. 548
Filling Pattern No. 552
Filling Pattern No. 573
Filling Pattern No. 577
Filling Pattern No. 580

Eine Wickelstichbesonderheit bietet
Filling Pattern No. 570

For further explanation:
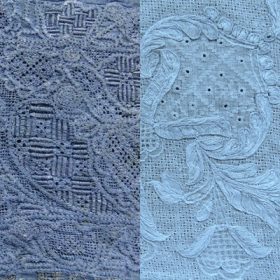
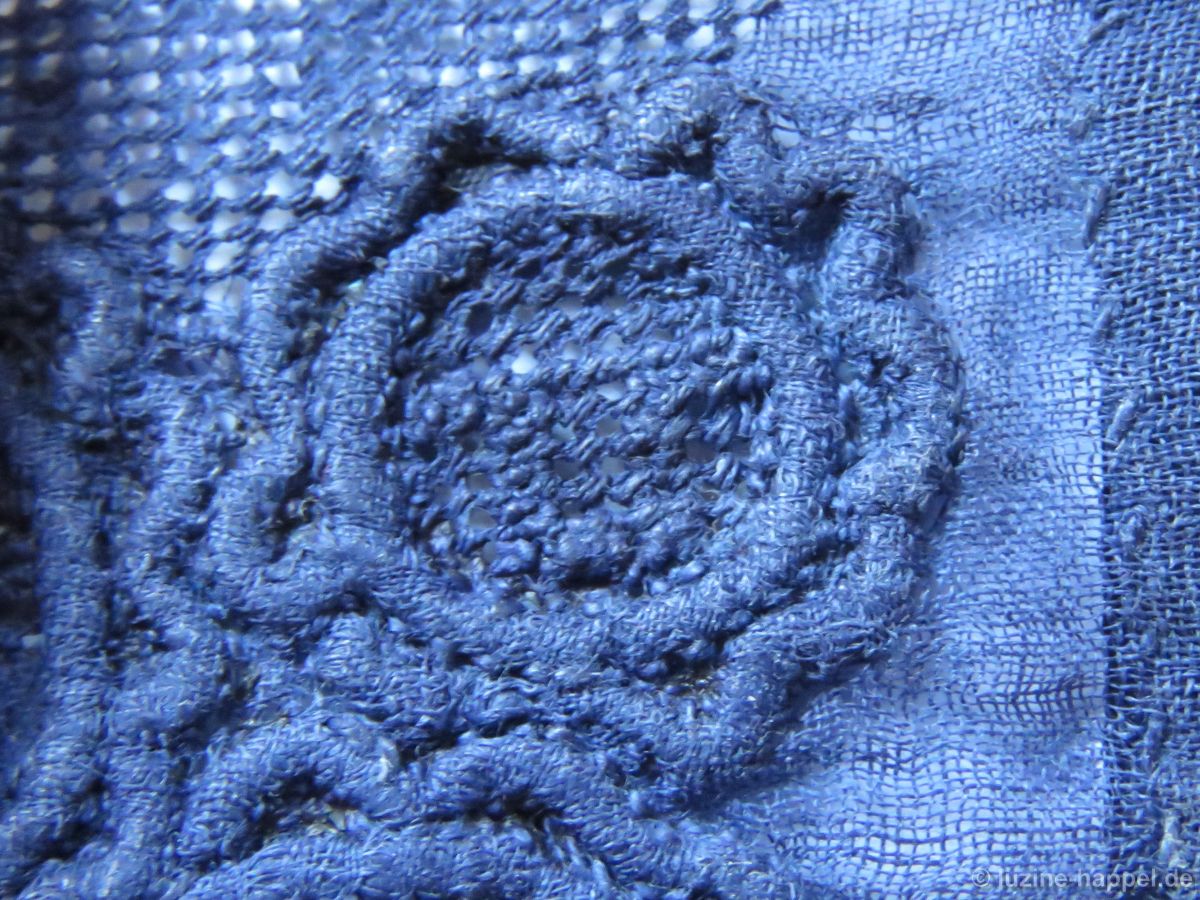
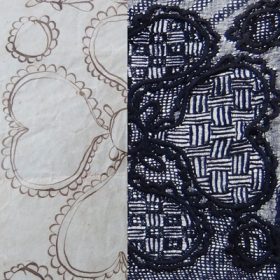
Unlike the use of satin stitches in pulled thread embroidery (left in the image below), in withdrawn thread patterns (right in the image below), the working thread is moved diagonally over each fabric thread, as described above. This is because in pulled thread embroidery, the effect is created by pulling together the fabric threads, while in withdrawn thread patterns, the working thread is the focal point of the pattern. Due to its diagonal position, it does not sink into the groove between the fabric threads but stands out in three dimensions.

Schwalm and Dresden Lace

As already mentioned in the blog post Schwalm Bodice Sleeve (1), Dresden lace was incorporated into folk art at the end of the 18th century and further developed there.
The development process can be documented using a few examples.

Dresden lace includes – besides all the differences that existed in this style – many different playful shapes – mostly flowers.

Stems and motif outlines were created using monastery or chain stitches.
Satin- or blanket stitch elements were contrasted with the patterned areas as points of rest.

Shadow embroidery underlaid the fine, loose fabric and brought additional design possibilities.

Tendrils, if present at all, are only hinted at.

The fabric of the border surfaces was completely embroidered with patterns,

where the pattern stitches were often worked with free space between them.

In the Schwalm, the motif areas initially became clearer.

and its outlines gradually changed.

Satin stitch and blanket stitch disappeared – as could already be seen in the Schwalm bodice sleeve (1).

The pattern stitches were embroidered without spaces and resembled the area-filling patterns used in Schwalm whitework.

Tendrils were used.

The motifs became even simpler and more understated,

the designs are more loosened.

Then the background stitches between the motifs also disappear.

Later, the use of this delicate lace batiste was discontinued for the blue bodices, and thus also the use of Schwalm lace (pulled thread embroidery).

Instead, hand-woven and mostly home-woven linen was used, which was decorated with Schwalm white work (withdrawn thread embroidery) and dyed blue. This was because the densely woven linen was significantly more robust and durable.

Schwalm lace was embroidered only on the blue-dyed parts of the traditional costume – bodice sleeves, bodices, parade handkerchiefs, and bonnets.

In addition, from the end of the 18th century onward, Schwalm white work was used on bed coverings, parade cushions, and door hangings.

See also:
Traditional Schwalm Door Hangings r
Transition from Early to Later Schwalm Whitework (1)
Transition from Early to Later Schwalm Whitework (2)
Schwalm Parade Cushion Border (A)
Traditional Schwalm Bodice (D) Embroidery

If you would like to try making Schwalm or Dresden lace yourself, you can use Weddigen linen #121. It has 20 threads per cm, but its open structure makes it easy to count.
If needed, you can purchase this quality of linen from me.

45 pulled thread patterns can be found in “Danish Pulled Thread Embroidery” by Esther Fangel, Ida Winckler and Agnete Wulderm Madsen.

Thérèse de Dillmont shows 17 basic lace patterns in her encyclopedia of needlework.

17 pulled thread patterns in work samples and embroidery schemes can also be found in Ruth Bleckwenn’s “Dresdner Spitze – Point de Saxe”.

In pulled thread or lace embroidery, stitches can be offset according to each thread of the fabric. However in withdrawn thread embroidery, one must orient oneself to the grid pattern created by the thread withdrawing. This allows lace embroidery to offer a much wider variety of patterns, which often appear less severely.

Schwalm Bodice Sleeve (1)

After the side seam has been opened, the approximately 200-year-old Schwalm bodice sleeve can be viewed in its entirety.

It has a total height of 40 cm, with a 4 cm wide double hem at the bottom reducing the finished height to 29 cm. The sleeve is 32 cm wide at the top and 40 cm wide at the bottom. A 5 cm high bobbin lace trim is attached to the top edge.

Then follows a 3 cm wide hem before the embroidered border begins. The border is 10 cm high, and 11.5 cm high in the area of ​​the initials.

In the backlit photograph, it is clearly visible that the outline pattern from the 1820s was used here and its central part was transferred exactly.

The separate bodice sleeves are made of the finest batiste, a loosely woven, linen-weave fabric – probably cotton batiste. (Investigations to determine the material of the Schwalm accessories made of batiste revealed that it was mostly cotton batiste, but linen batiste also occurred. Batiste was a material that was not produced in the Schwalm region, but was obtained from traders. See Masterpieces in Blue – OIDFA)

The elaborate embroidery is executed in the style of Dresden lace.
At the end of the 18th century – around 1770 – lace production declined in Dresden. However, it continued and was incorporated into folk art, where it was further developed. This was also the case in the Schwalm region. (You can learn more about this in the next blog post.)

Linen thread of varying thicknesses was used as the embroidery material. The threads had to be spun loosely so that they could conform to the desired outlines and the embroidery on the soft base fabric.

To highlight the individual motifs, the line drawing under the fabric were traced with a thick thread and secured with double back stitches.

On the front, these stitches appear as back stitches.

Different patterns are incorporated into the resulting surfaces by pulling the fabric threads together (pulled thread embroidery).

The batiste fabric used has 26/30 threads/cm.

Four fabric threads were bundled together for pattern formation and also for the cross stitches of the initials.

Satin stitches, rose stitches, four-sided stitches and cable stitches were used here.

The background is also almost completely filled with pulled thread embroidery.

After the patterned border was completed, the owner’s initials, A N C R O I, were embroidered next to the border, separated by small cross-stitch ornaments. A bobbin lace trim was added as the edge.

Only then was the white part dyed blue.

Originally, the blue parts of the traditional costume were dyed with woad from Thuringia. This gave them a bright, light blue color, as can be seen in paintings of the time. Later – from around the 1850s – indigo was used for dyeing, which, thanks to the opening of the sea route to India, was now readily available and cheaper than woad. Indigo was used to dye dark blue. To keep up with fashion, some costume pieces that had previously been light blue were now dyed again. This may also have happened to the piece presented here, as clearly lighter traces can be seen in some places on the reverse of the embroidery.

My collection includes several pairs of separate bodice sleeves made of the finest material. Watercolors by the painter Jakob Fürchtegott Dielmann (1809–1885) from 1841 show how such sleeves were worn.

Städel Museum, Frankfurt am Main

Back then, the traditional costume from the Schwalm region looked different than we know it today.

Jakob Furchtegott Dielmann – „Oberhesische Bauersfrau zur Kirche gehend“ – Städel Museum, Frankfurt am Main – auch als „Mädchen aus Wliingshausen“ bezeichnet

Jakob Furchtegott Dielmann – „Stehende Bäuerin im Sonntagsstaat“ – Städel Museum, Frankfurt am Main – auch als „Kirchgängerin aus Wliingshausen“ bezeichnet

The picture also shows the “pulled cap” and the “parade handkerchief”, which were elaborately embroidered, similar to the bodice sleeves.

Chance Encounter

I occasionally browse through my extensive collection. And I made a delightful discovery.

My collection includes very old outline patterns, all from the same source. Unfortunately, they are not dated, but based on similar dated patterns illustrated in Gandert/Miehe, p. 123, it can be concluded that they originated in the 1820s.

The design shown below are also among the samples.

(That it is only a sketch and not a final drawing can be seen from the undamaged paper. The final drawing samples contain many perforations because they were pinned to linen during the transfer process.)

The sketch has a central circle surrounded by eight hearts. Opposite these horizontally arranged hearts are hearts of the same size, spaced a short distance apart. These, in turn, are connected by a small circle around which three large hearts are grouped.

What could have been embroidered with such an outline pattern more than 200 years ago?

With the image of the pattern still in mind, I looked at parts of my bodice collection a short time later. I noticed the similarity in one piece – a Schwalm bodice sleeve in the style of Dresden lace.

Upon closer inspection, I was able to determine that the border of the bodice sleeve is embroidered exactly according to the central part of the pattern.

I also found a match in a second piece – a blue bodice. Although the resemblance isn’t immediately obvious, it’s there nonetheless. Not only is the central border replicated, but the edge borders also show similarities.

What stages might the pieces have gone through in the past 200 years to now meet again at my place?

Now I will open the seam of each sleeve to capture the entire embroidery in a photograph. You can see this and examine it more closely in the next blog posts.

See also:
Traditional Schwalm Bodice (D) Embroidery
Schwalm Bodices (3)
Schwalm Bodices (2)
Schwalm Bodices (1)
The Filling Patterns of theTraditional Schwalm Bodice A
Traditional Schwalm Bodice (B) Embroidery
Traditional Schwalm Bodice (C) Embroidery

4. The Chain Stitch

The 13 basic stitches of Schwalm whitework

A. The decorative stitches
4. The Chain Stitch

To cover the thread ends of the fabric threads that will be withdrawn later, chain stitches are embroidered closely within the coral knot stitches.

thread weight: depending on the fineness of the linen, coton à broder thread No. 25 or No. 30
building the rows: from right to left
direction of needle movement: from right to left
way of working: Bring needle up

and lay the thread in a loop to left and bottom.

Insert the needle in the emerging point, cross under the fabric a small step to the left and bring needle up again inner the loop.

The looped thread is below the needle tip.

Pull the needle through and the thread to the left.
The first link in the chain has formed.

Further chain stitches are added in the established way.

The chain stitches should be placed directly adjacent to the coral knot stitches, leaving no gap between them. If the chain stitches are placed too close to the coral knot stitches, the outer half of the chain stitches may overlap them. This should be avoided.

Chain stitches, like coral knot stitches, are line stitches, but they form a single line on the back

and a double line on the front.

This has the advantage that threads to be withdrawn can be cut close to the chain stitch line on the back,

but the thread ends are covered on the front by the inner half of the chain stitches.

One can also pull the edge stitches of the filling pattern under the inner chain stitch line to achieve a perfect edge finish.

This is also important for the clean drawing up of the basic stitch grids.

To achieve the best possible results, it is therefore important to embroider short chain stitches and to pull them evenly, but not too tightly. This makes them appear more rounded and cover a wider area than short, tightly pulled or long stitches.


1. The Coral Knot Stitch
2. The Blanket Stitch
3. The Satin Stitch