Schwalm Whitework – What is it and How is it Done?

Schwalm Whitework – What isit and how is it done?

October 17 is the International Day of Intangible Cultural Heritage. Bearers are encouraged to use this day to showcase their respective cultural heritage.

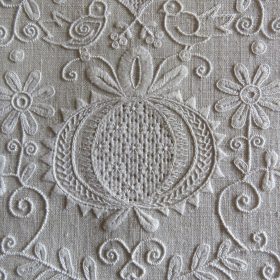
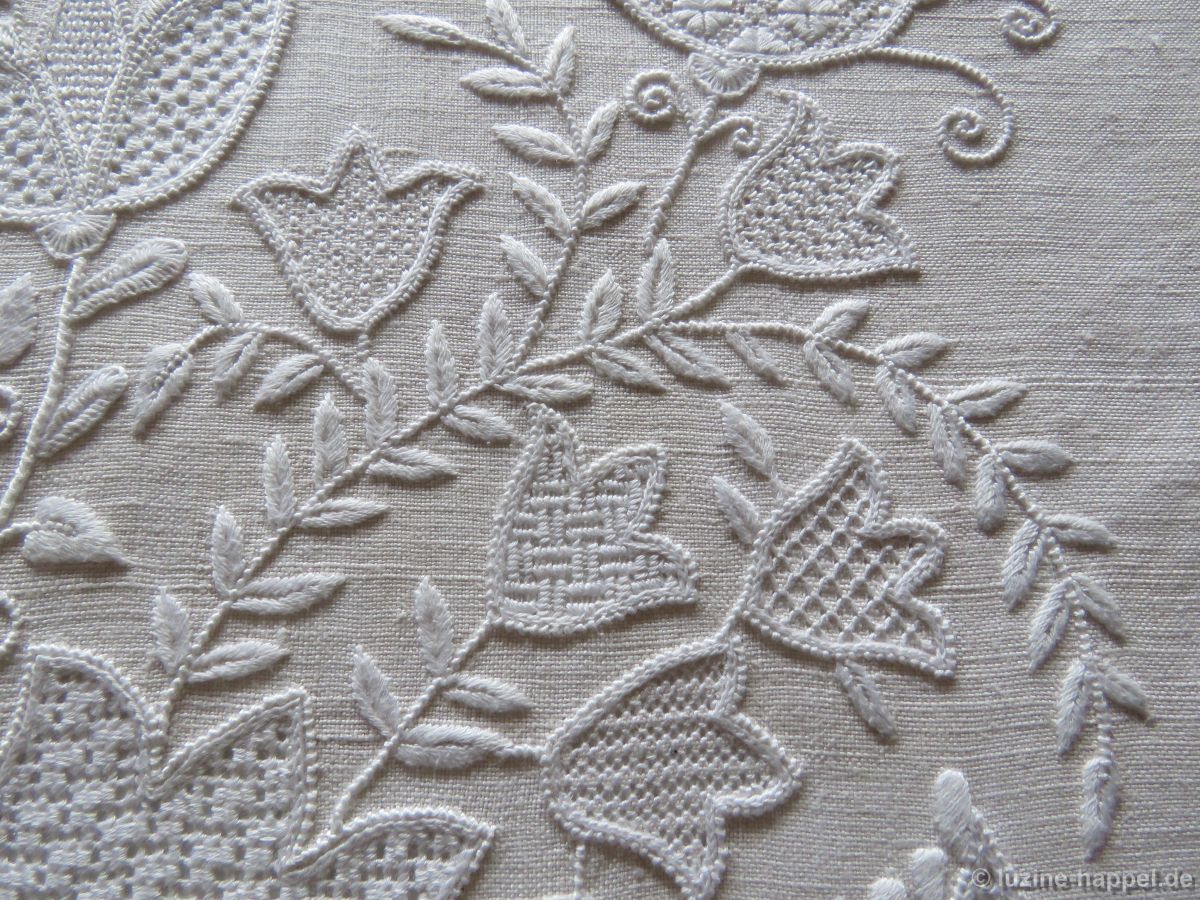
Therefore, this blog post will briefly explain to interested visitors what Schwalm whitework is, how it is worked and what huge possibilities for individual design it offers.

The embroidery got its name because it flourished in the small Schwalm region of Hesse, Germany, and survived there for centuries.

Schwalm whitework is worked with white thread on white linen. It is still not machine-produced today. It is a combination of different techniques.

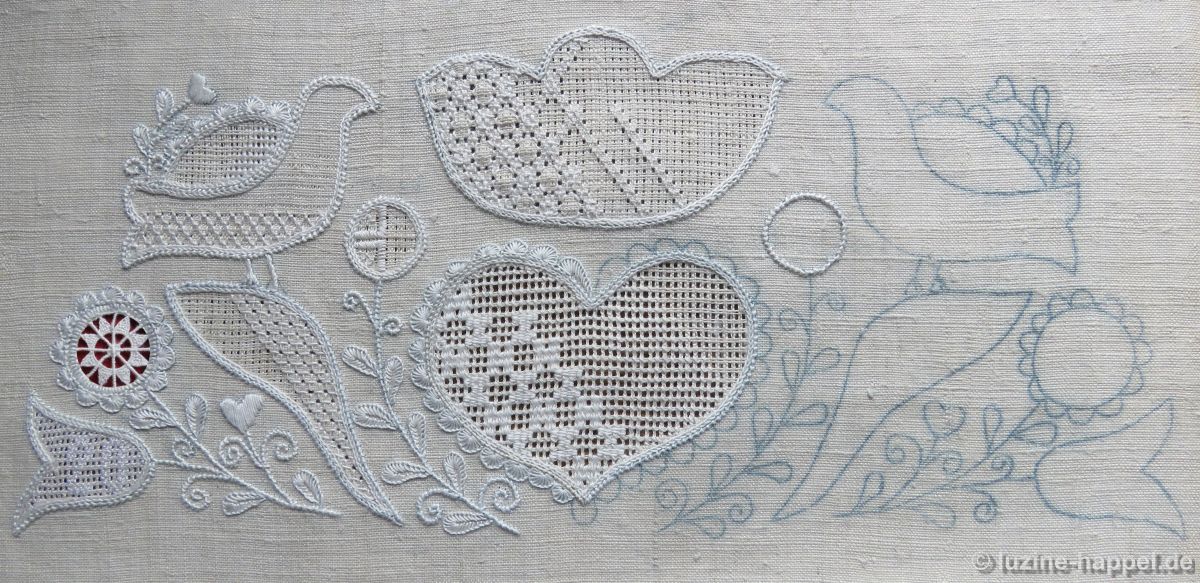
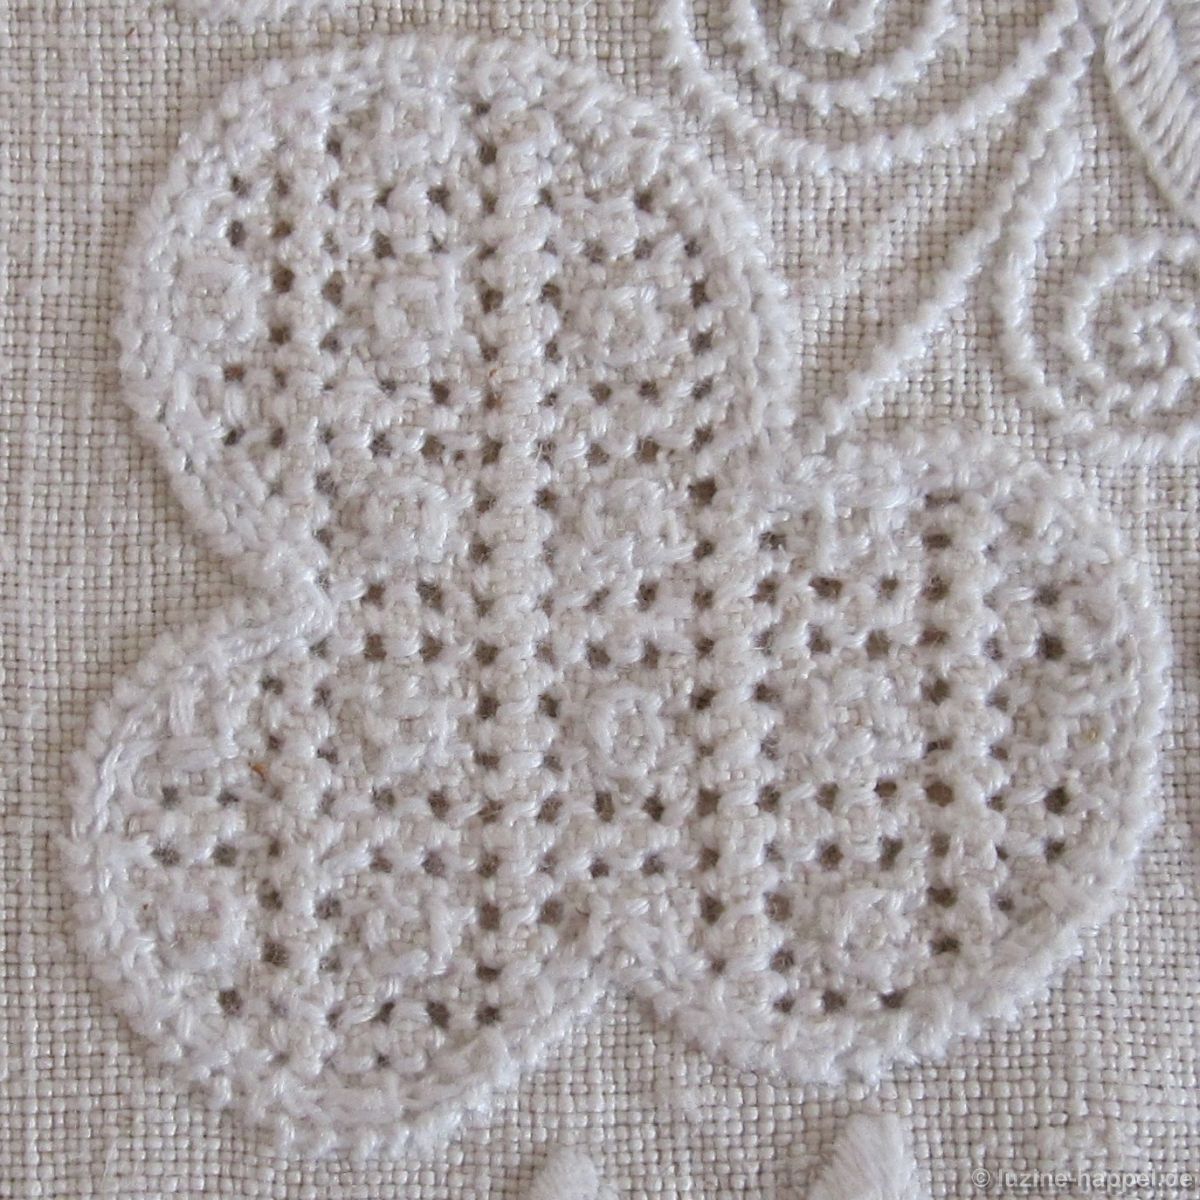
To begin embroidery, one first needs an outline pattern. This consists of large motifs of simple shapes and small elements in the spaces between them.

The fabric remains undamaged in the spaces between the motifs. It is covered with decorative stitches — so-called surface embroidery.

Within the motifs, threads are taken from the fabric. The number depends on the intended pattern that will be stitched into the resulting grid. This technique is called withdrawn-thread embroidery.

The third technique used is cut work. Here, the fabric within the motifs is completely cut away and replaced with embroidery stitches — so-called needlelace.

One only needs to know 13 different stitches to perform Schwalm whitework. By combining these stitches, however, one can access a treasure trove of approximately 1,000 filling patterns. This enormous variety, combined with the infinitely variable outline patterns, makes the embroidery so varied and incredibly interesting.

Depending on one´s mood, one can embroider small items, tackle larger projects, create outstanding embroidery, or even work on collaborative projects.

The career of withdrawn-thread embroidery, the necessary stitches and the difference between the filling pattern categories

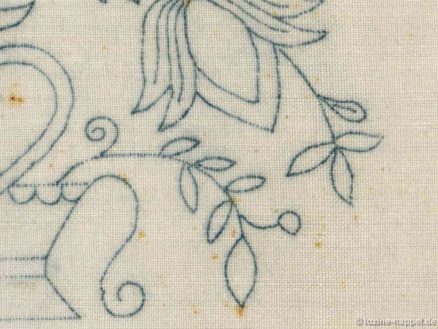
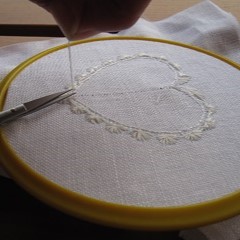
First, the outlines of the desired motif must be transferred onto the fabric.

There are various options for this:
• Iron on using an iron-on transfer pencil
• Recording using a Light-Pad and a water– or heatsoluble pen
Pressing or prickingwith blue carbon paper
Printing using a stencil

(See also: Schwalm Band (1) Design Transfer )

First, all lines are covered with stitches, as they may fade or disappear over time.

One uses coton à broder thread and work with three, sometimes four different thread weights, depending on the fineness of the fabric.

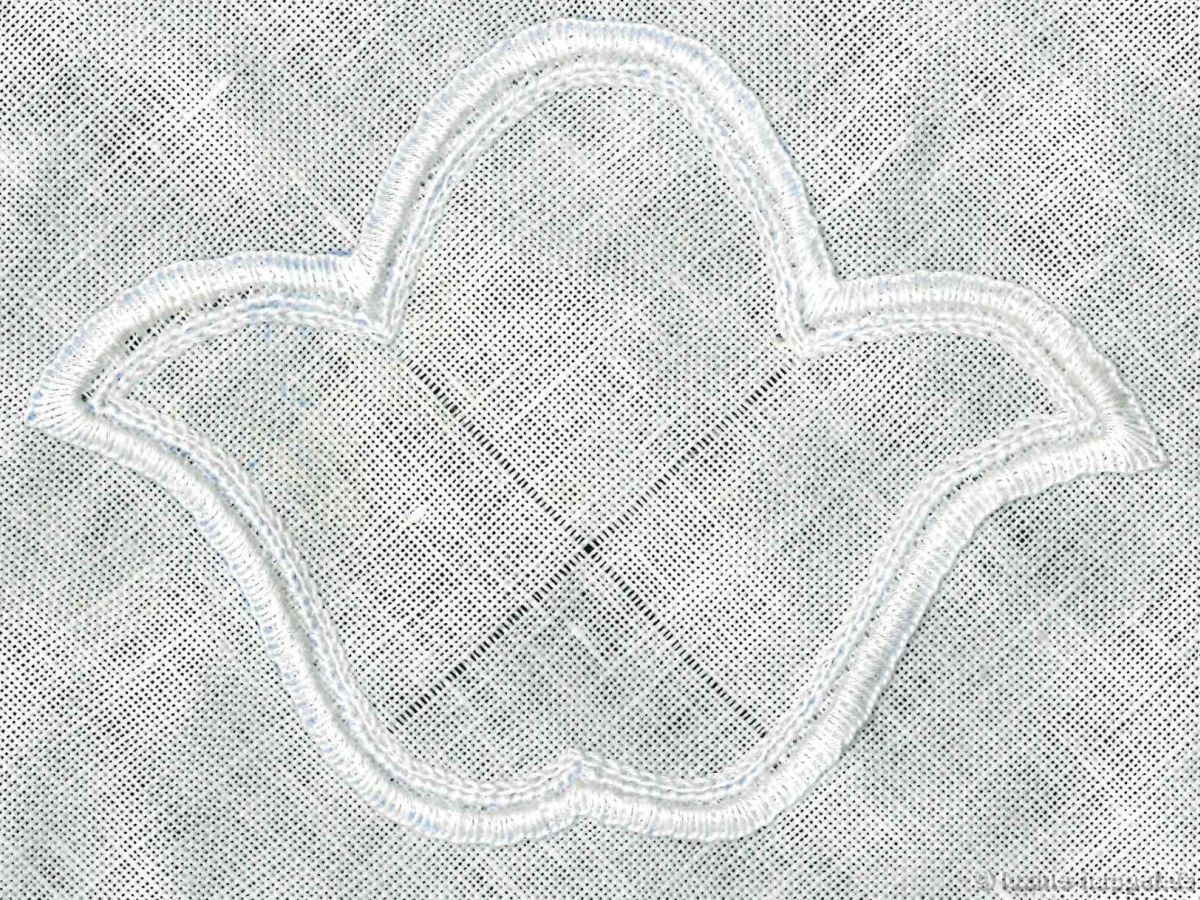
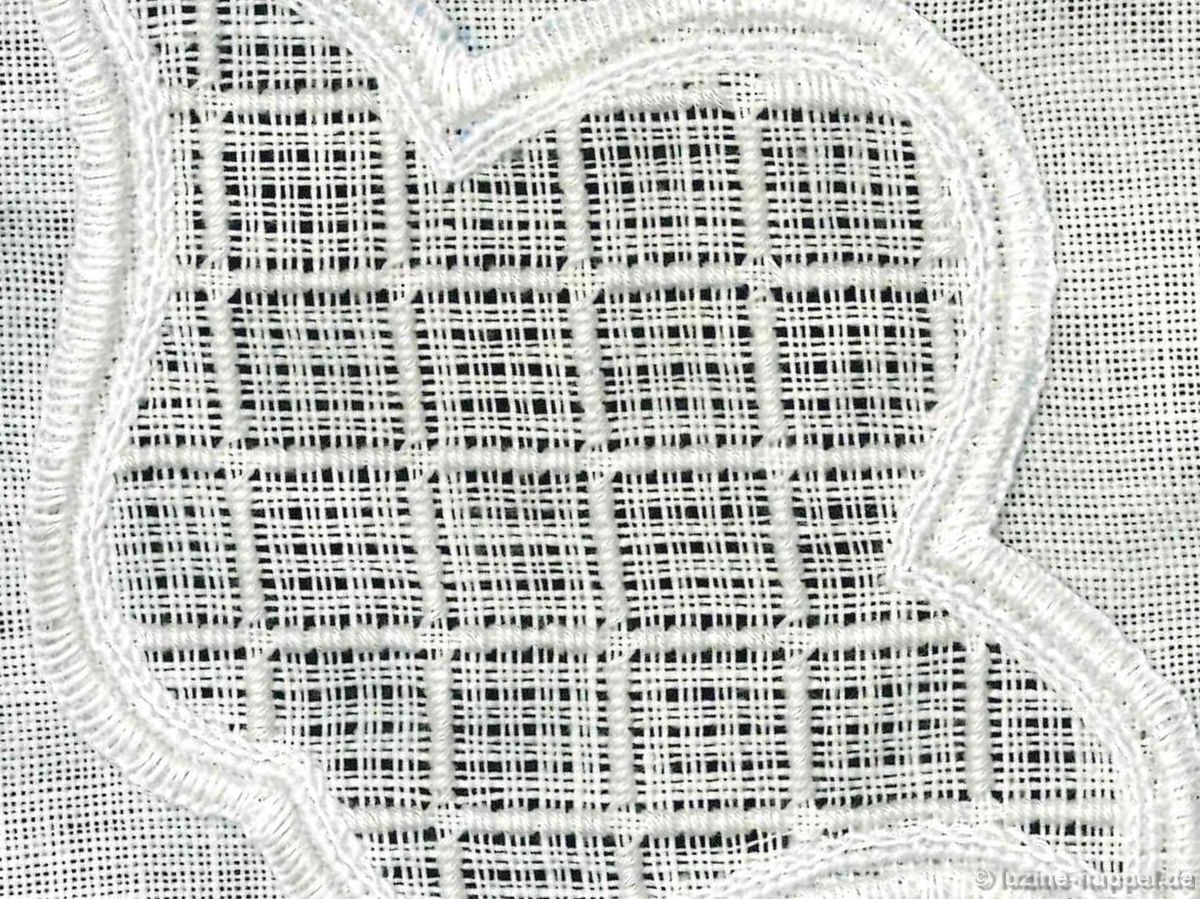
Using the thickest thread, first work the Coral Knot stitches over the main outlines, the stems and tendrils. These serve both to define the outliness and to secure the fabric edges of the motif during subsequent thread withdrawal.

(Since it would be too long to explain all the stitches in detail in this blog post, you will soon find a separate blog post for each stitch.)

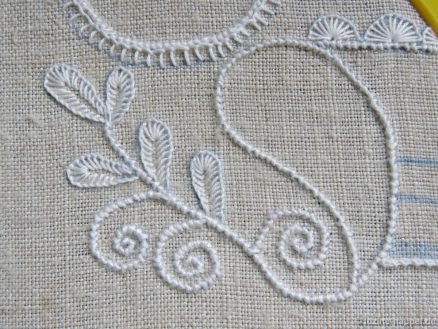
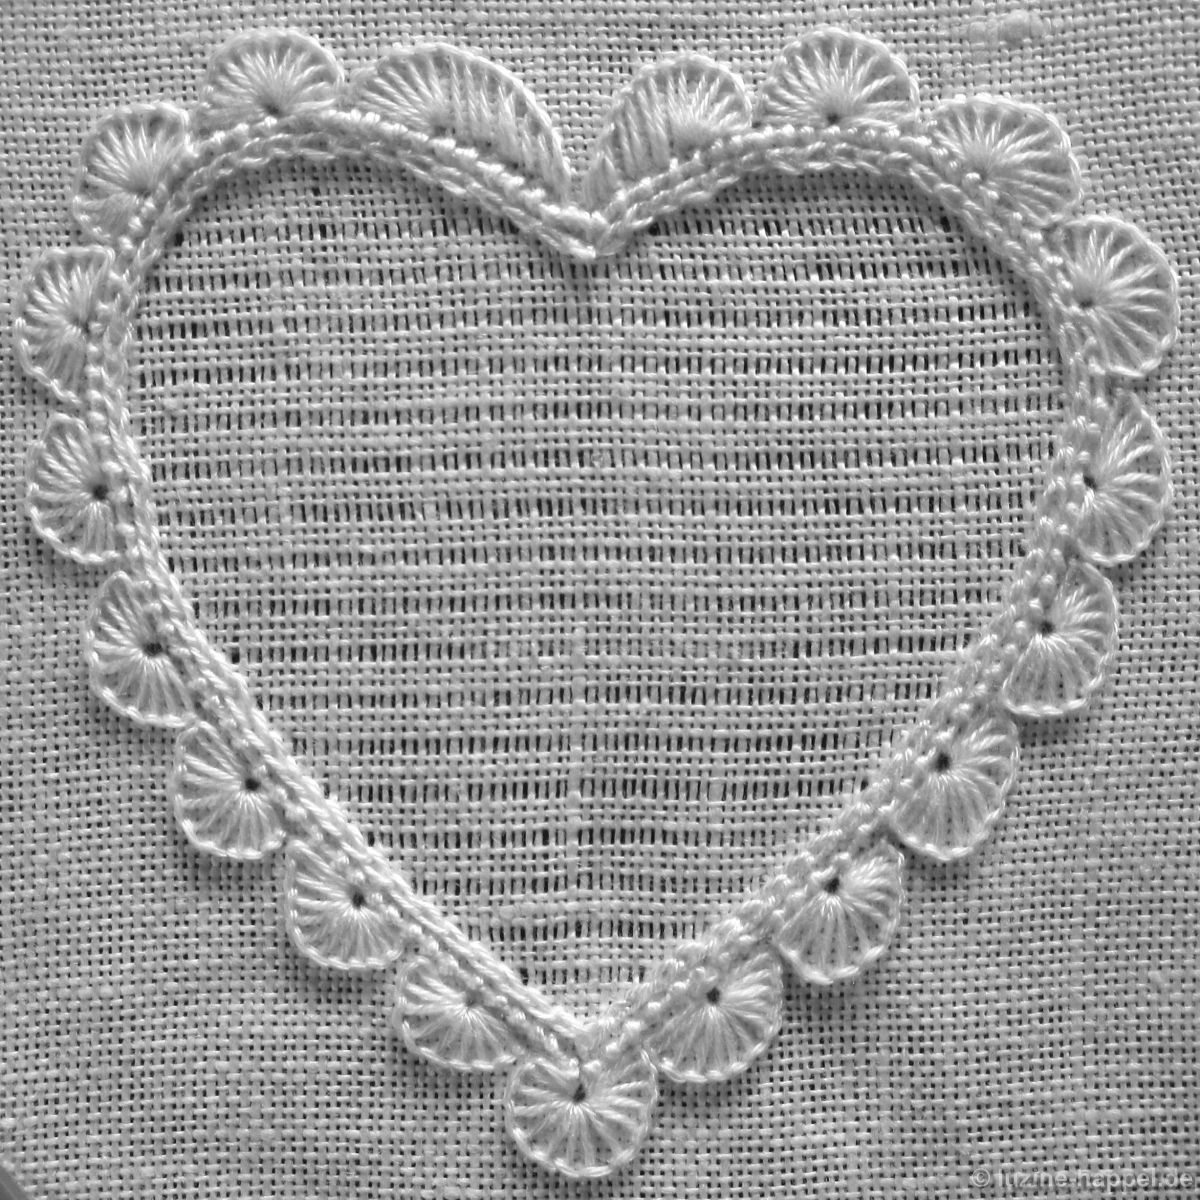
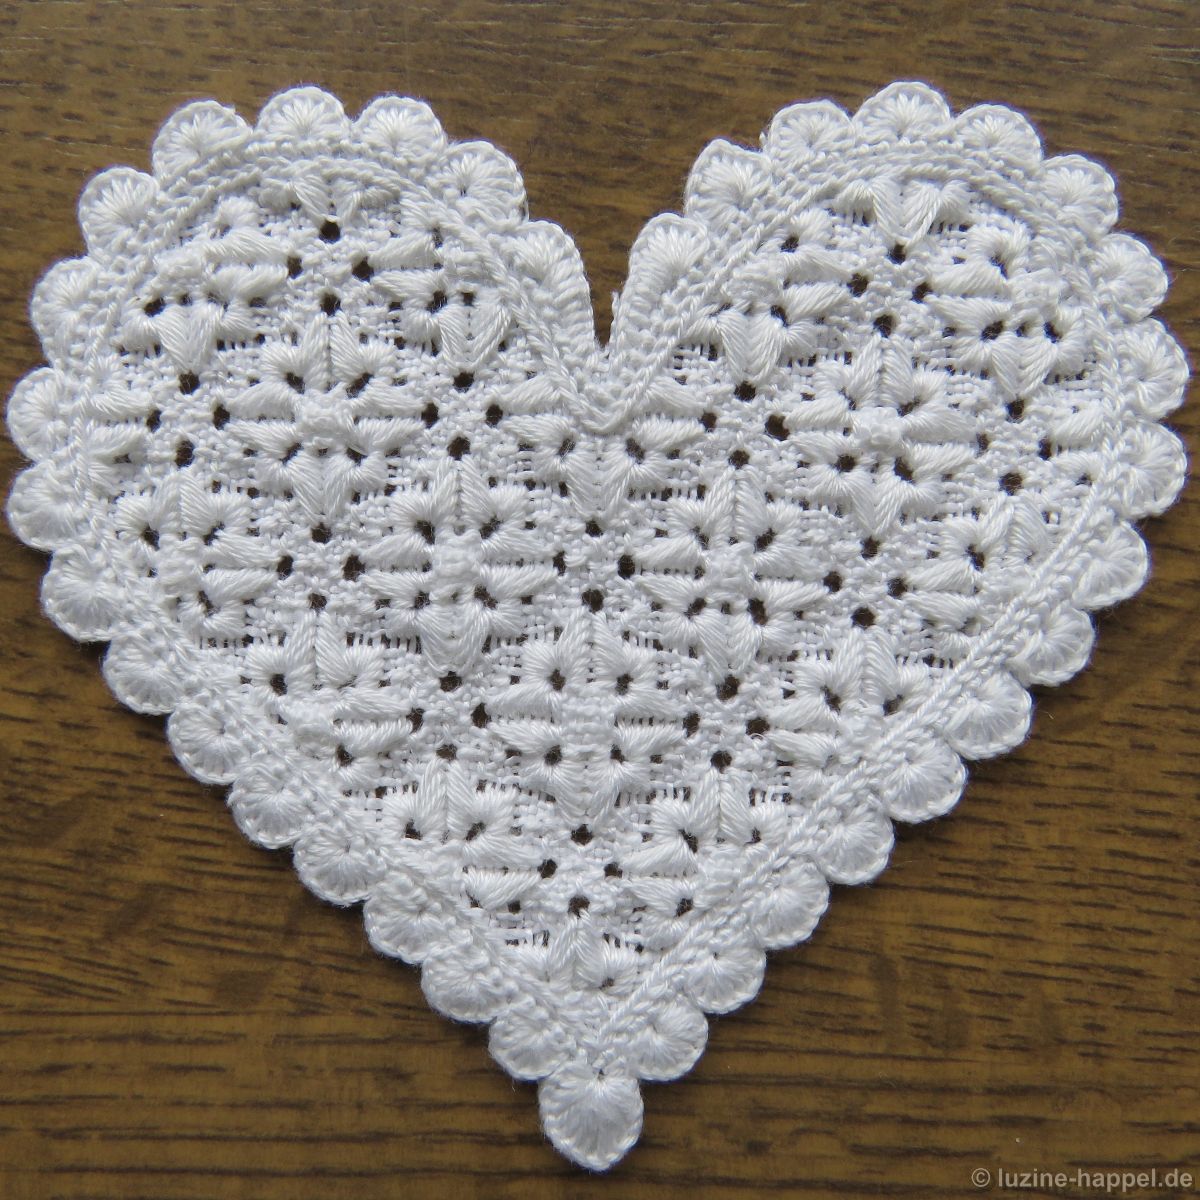
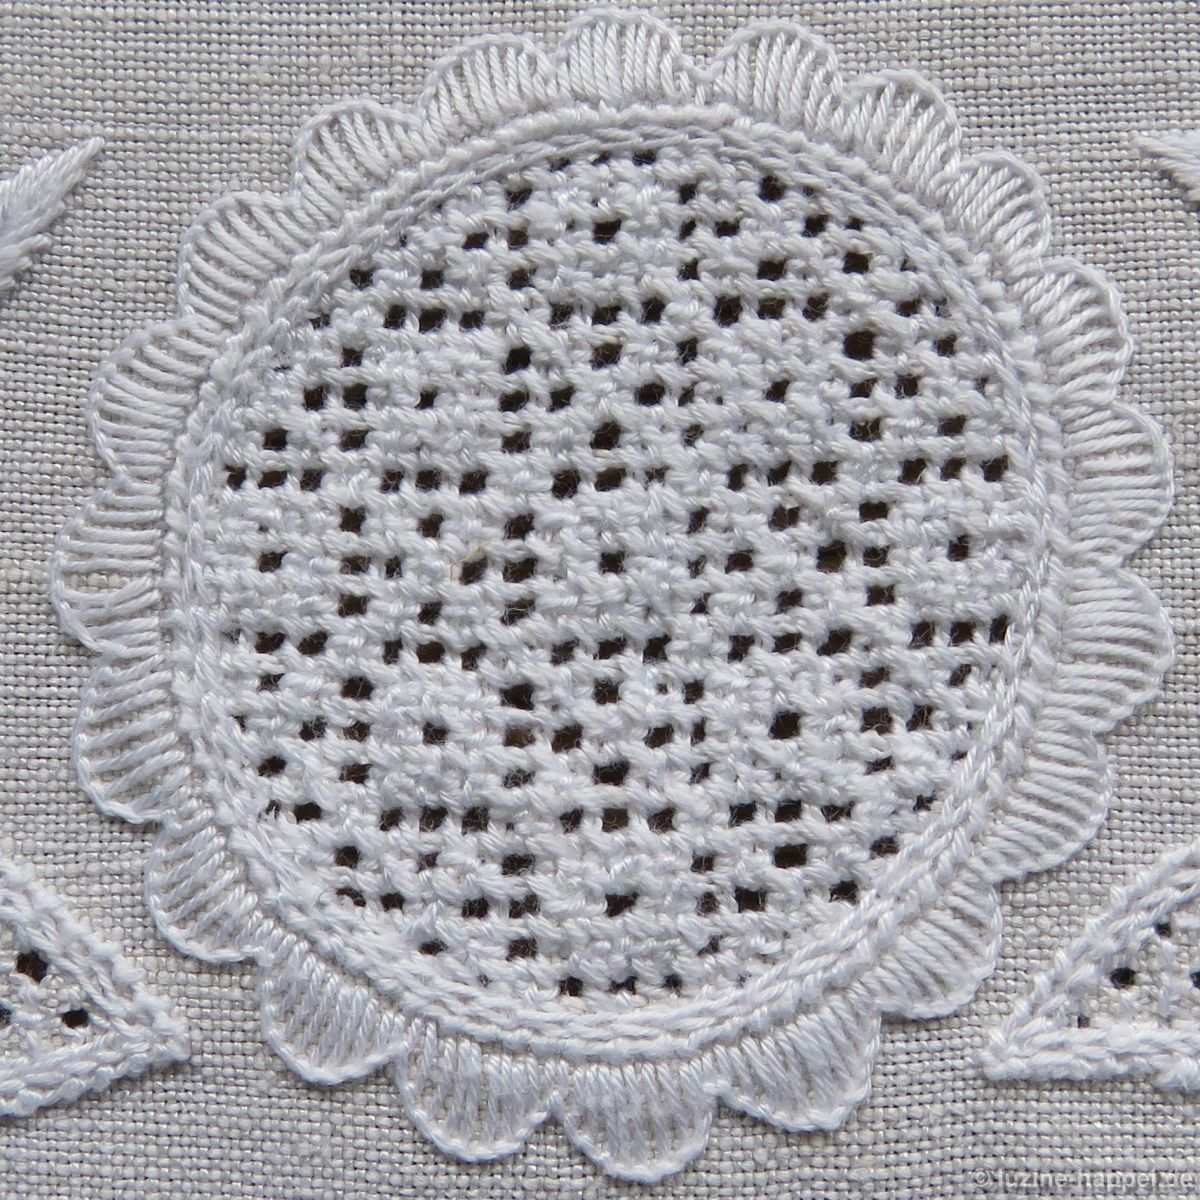
Rounded leaves are usually worked with Blanket stitches, as are semicircular arches (so-called scallops), small circles (so-called eyelets) and triangular points (so-called knife points.

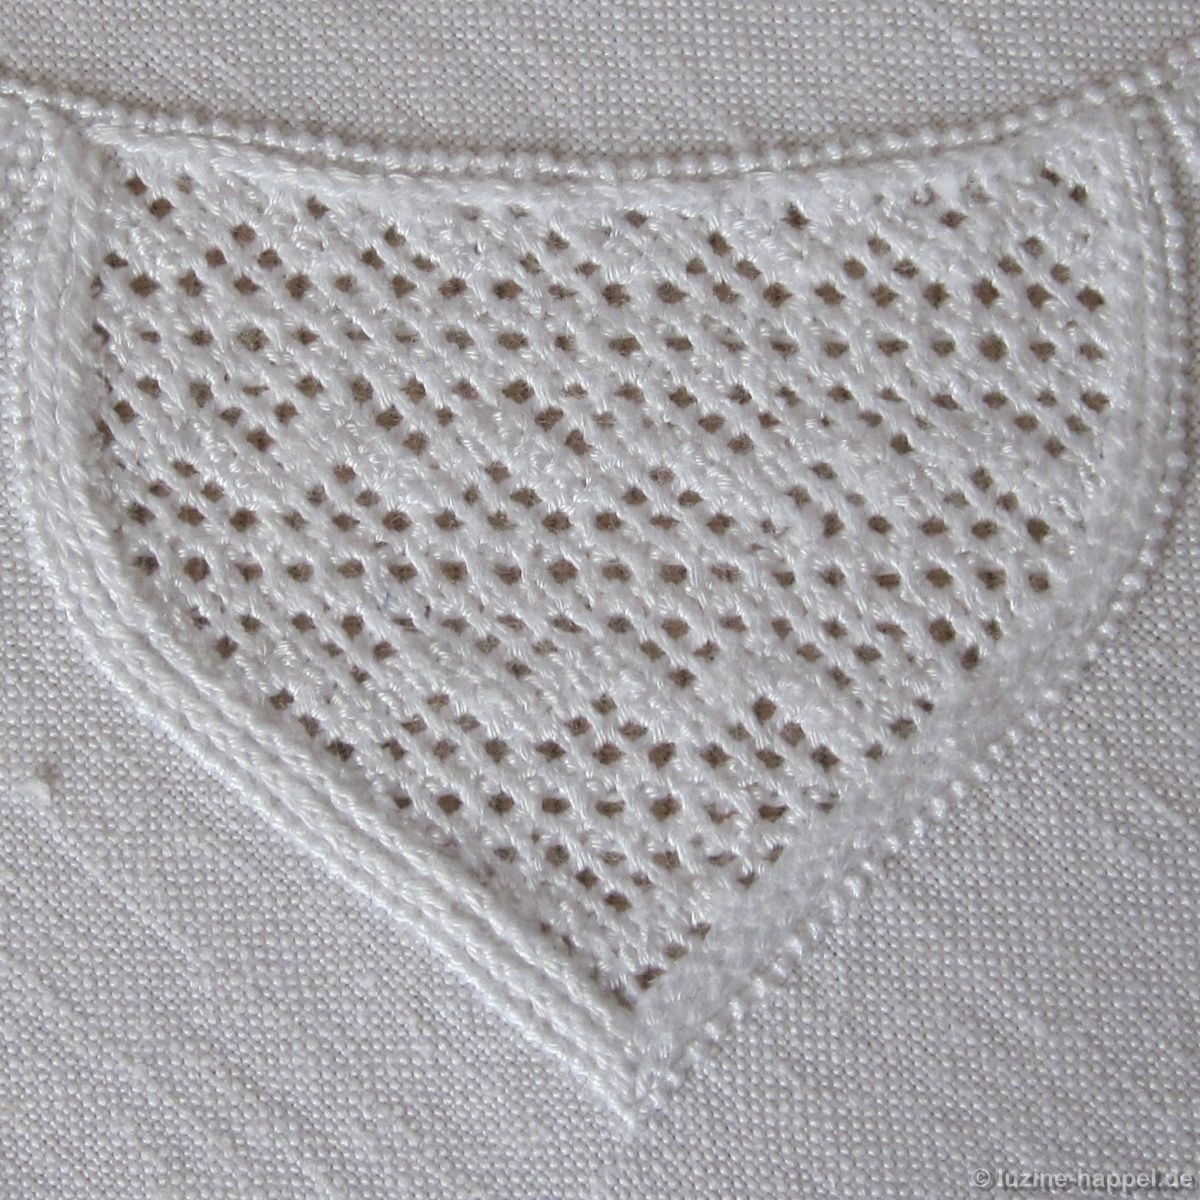
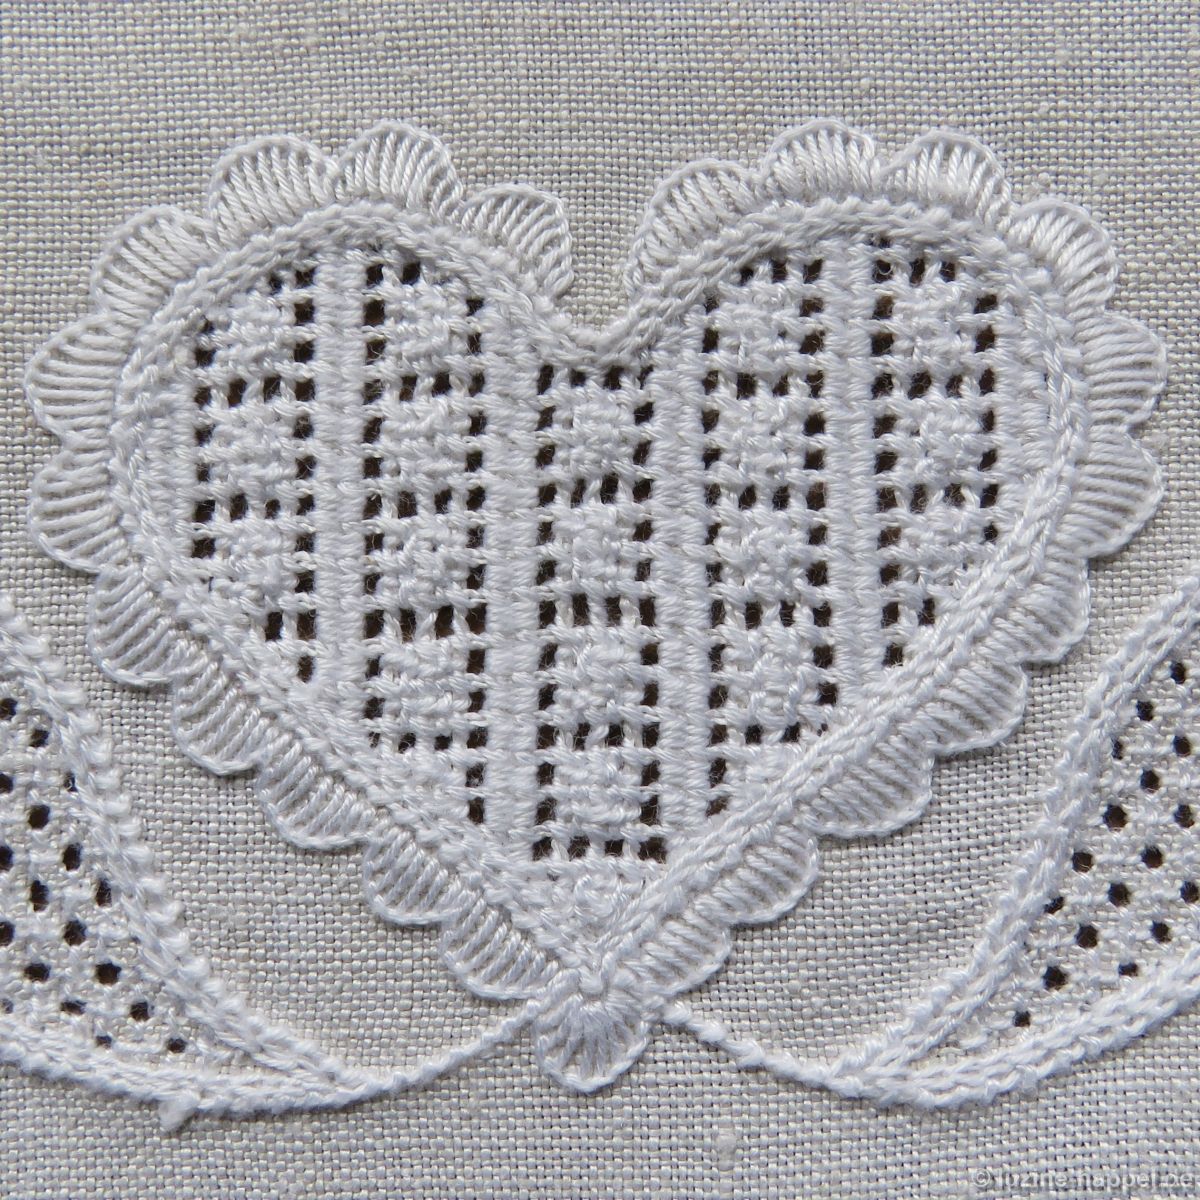
In addition to rounded leaves, Schwalm whitework also includes small pointed leaves, which can be embroidered divided or undivided, and heart-shaped leaves. All of these are worked with Satin stitches.

Once all lines have been covered with stitches, one can begin designing the motif areas.

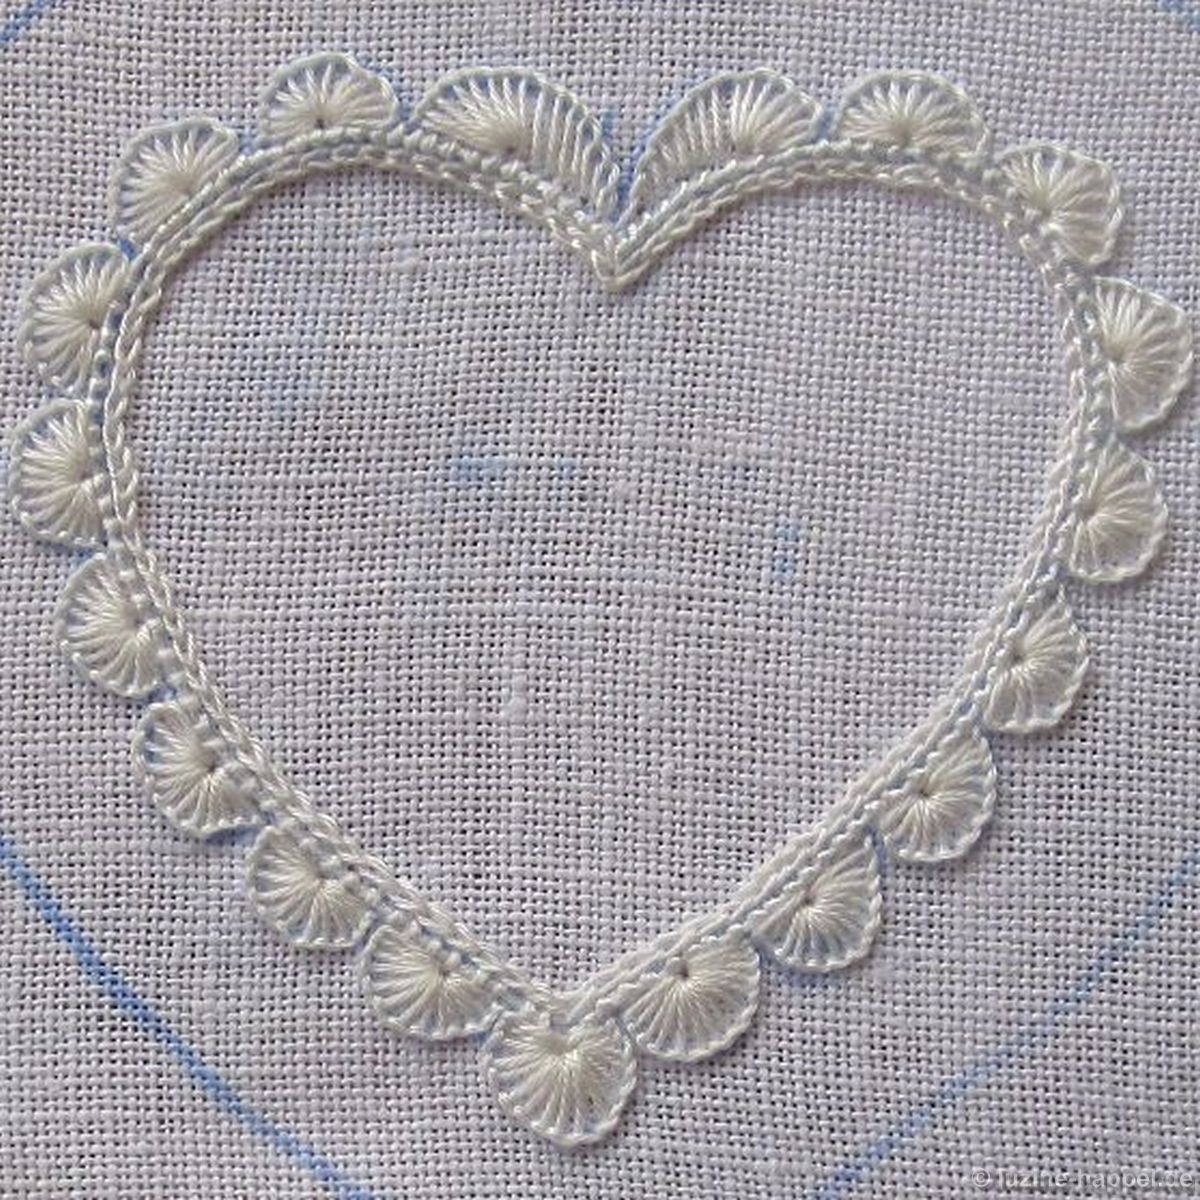
Decorative stitch borders – here: “Blanket stitch half-eyelets” – make the motifs appear more pleasing, but do not necessarily have to enclose all shapes.

In order to cover the ends of the fabric threads that will later be withdrawn, Chain stitches are embroidered close together within the Coral Knot stitches.

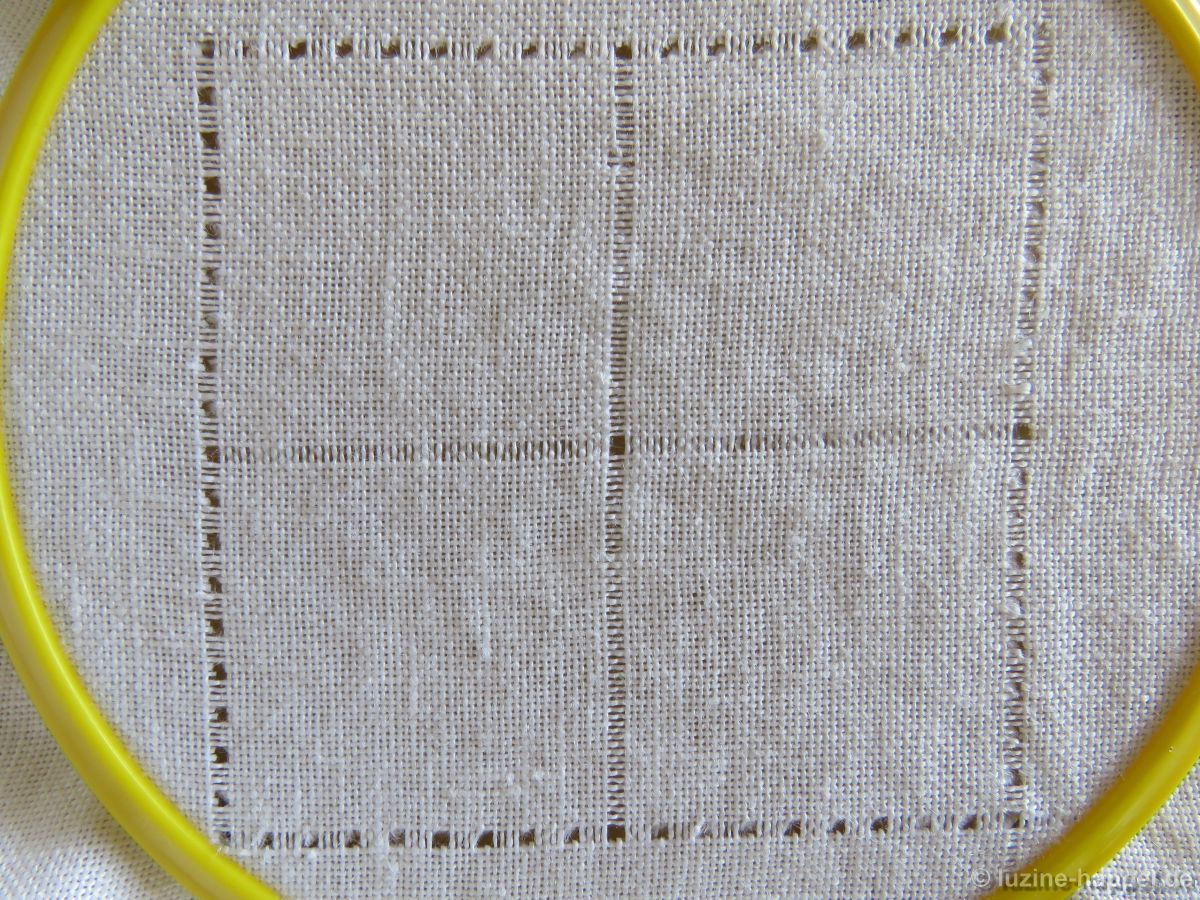
To prepare withdrawn-thread patterns, fabric threads are pulled out from the back of the work within the motif areas and cut close to the Chain stitches.

There are three types of withdrawn-thread patterns – simple and double withdrawn-thread patterns. The latter are divided into Limet- and openwork patterns.

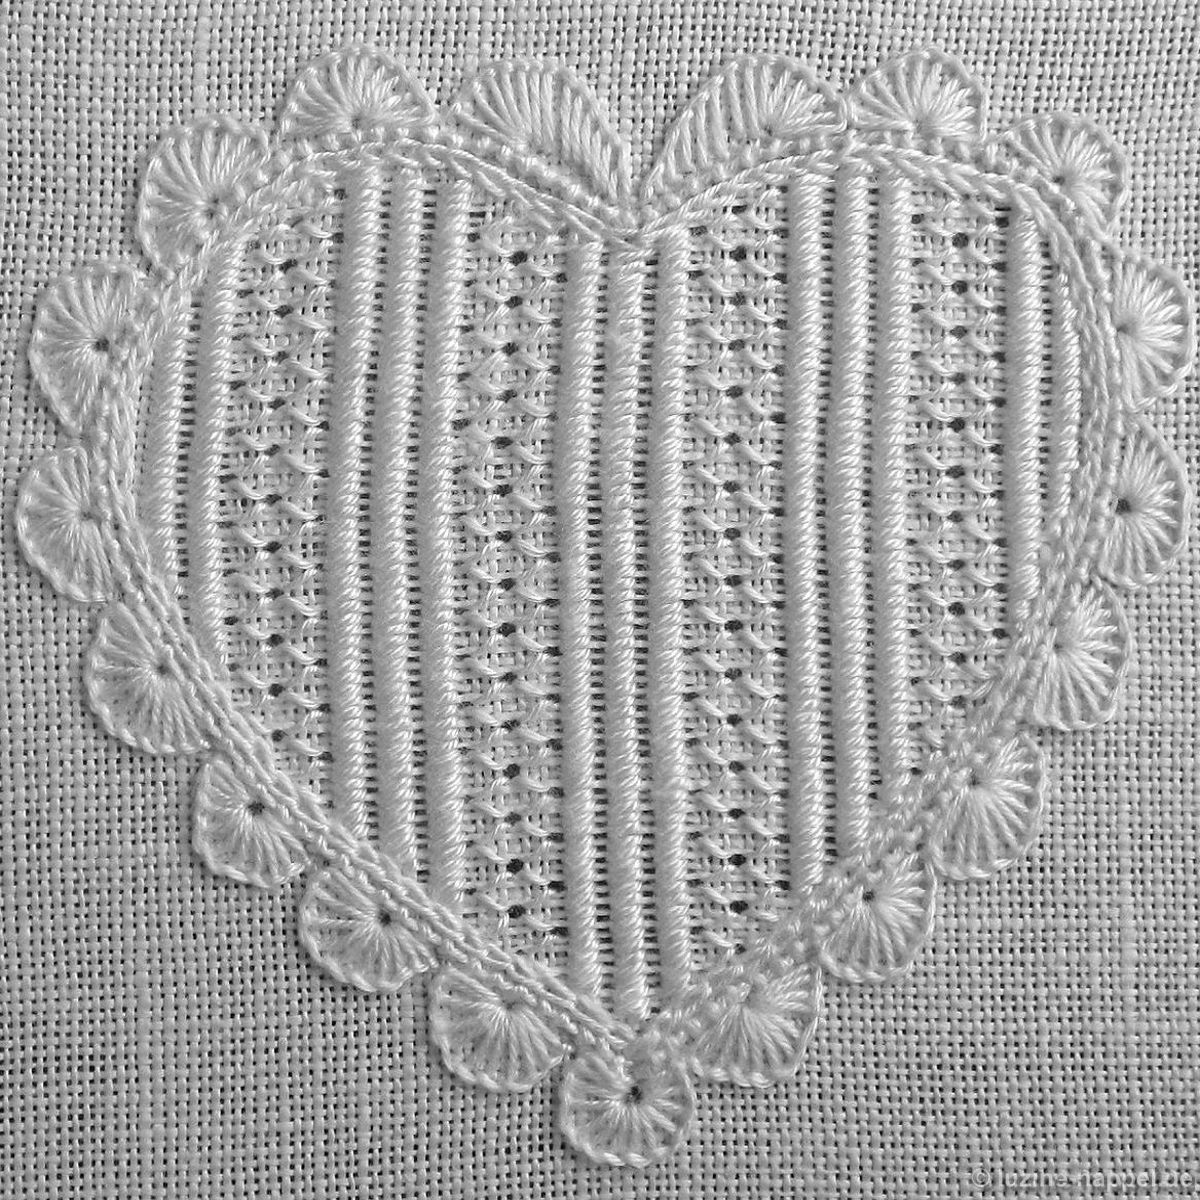
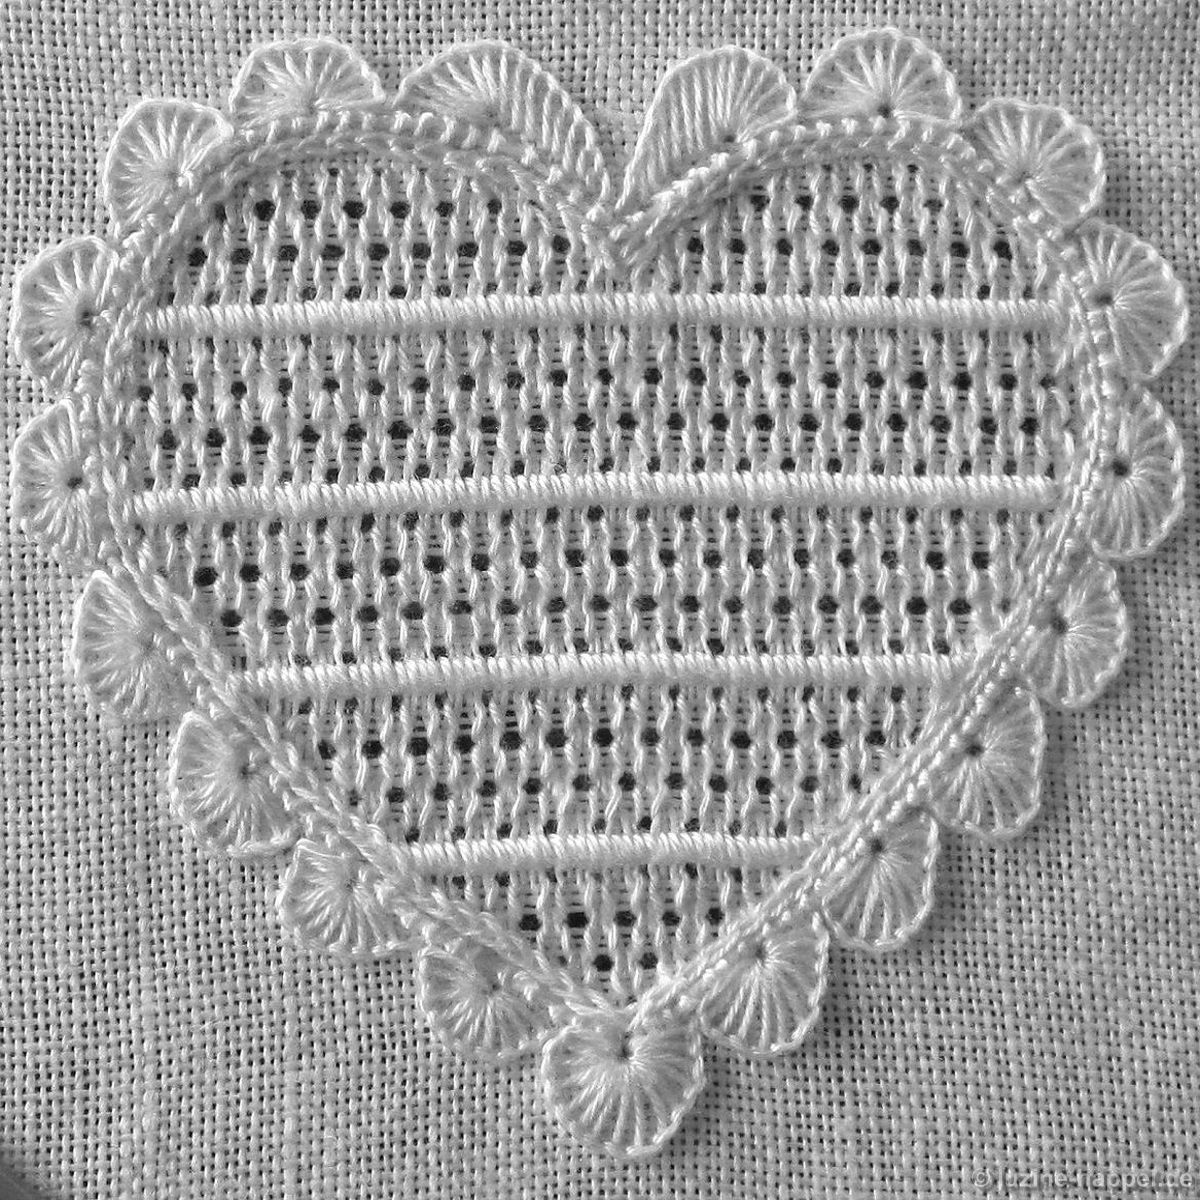
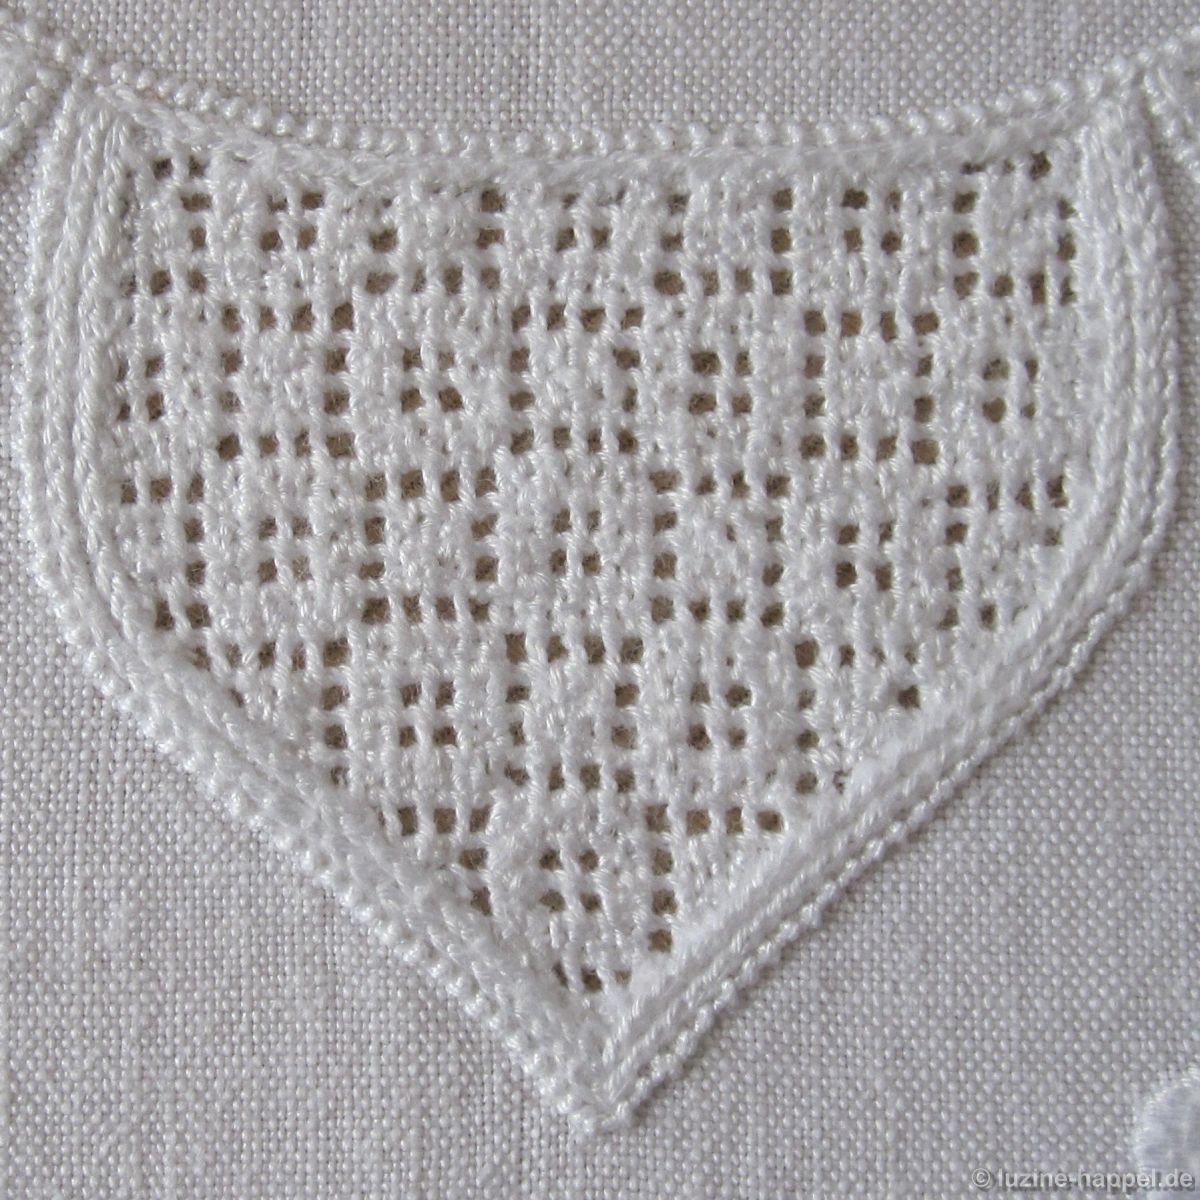
For a simple withdrawn-thread pattern – either vertically

or horizontally – every fourth fabric thread is pulled out.

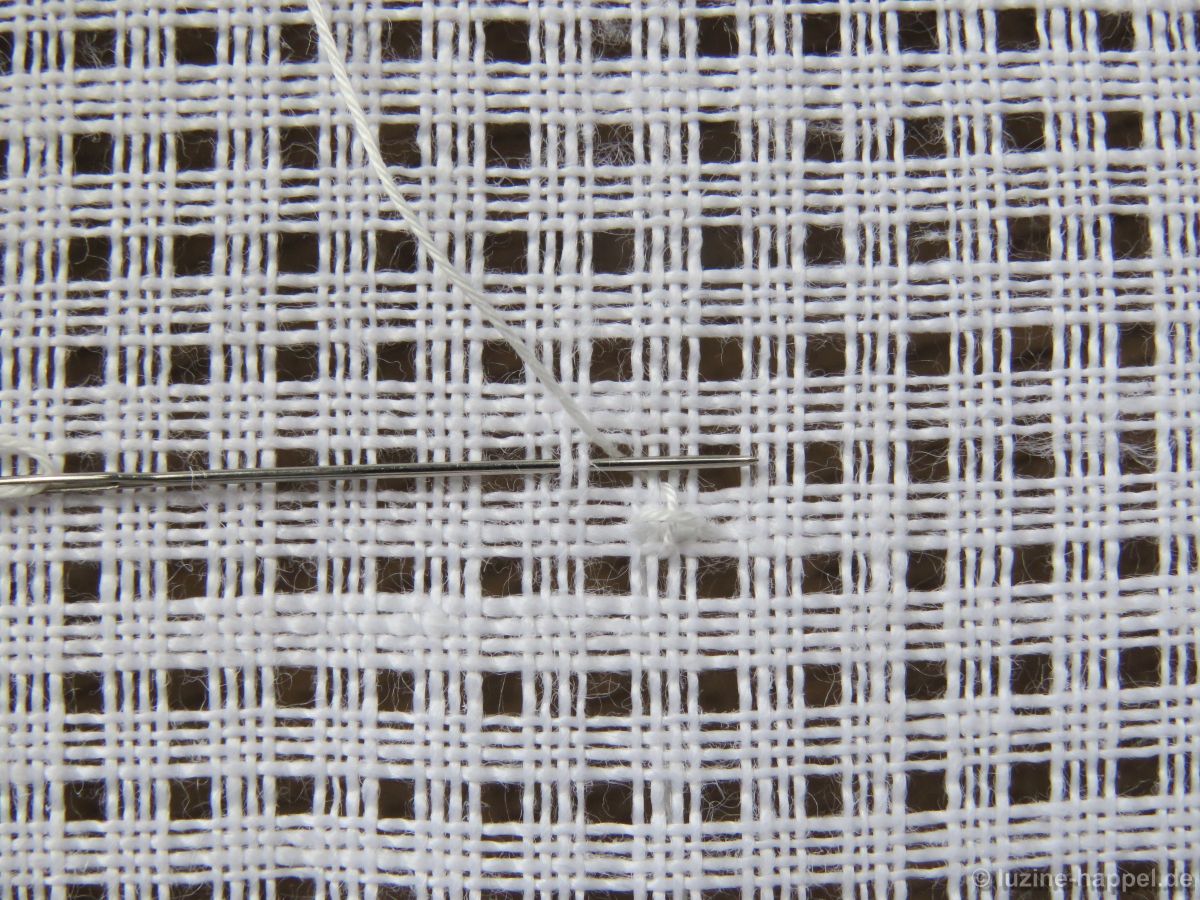
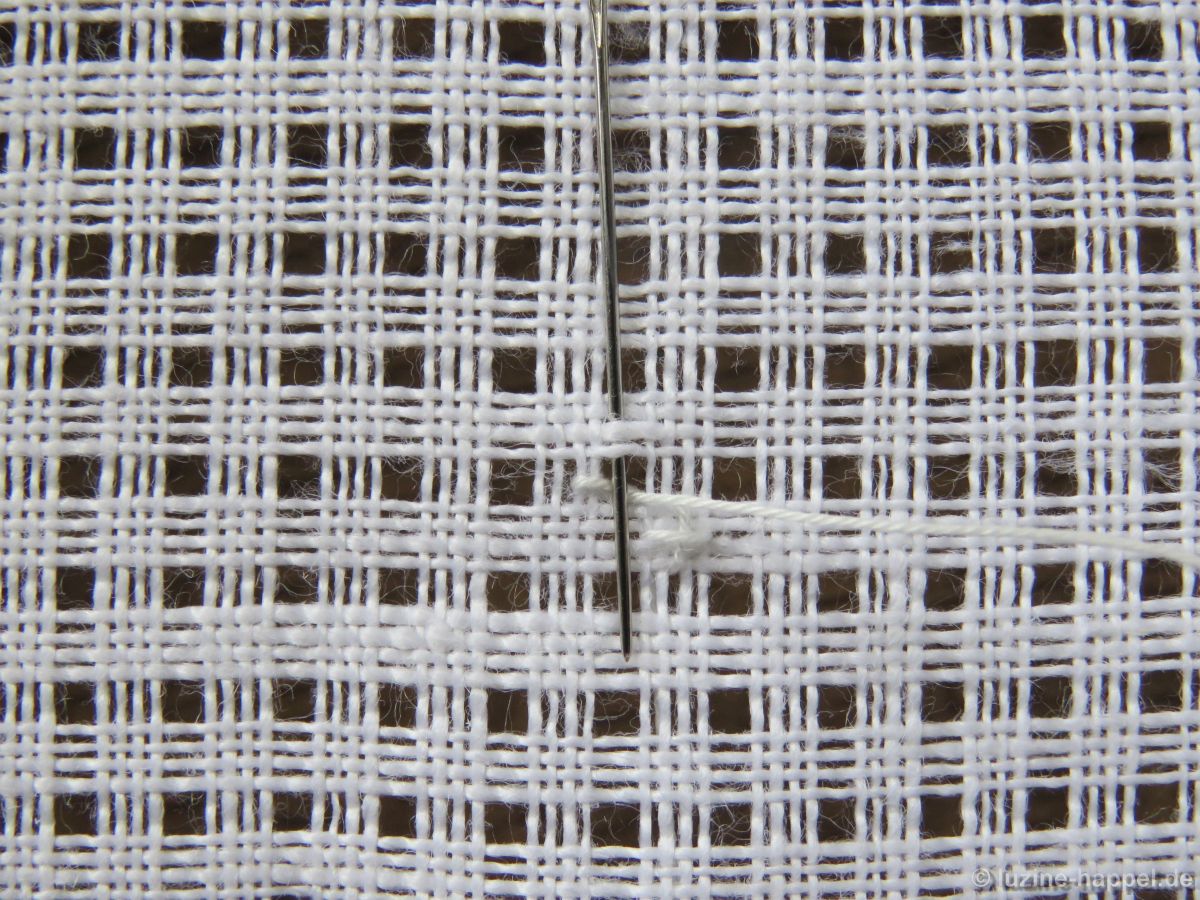
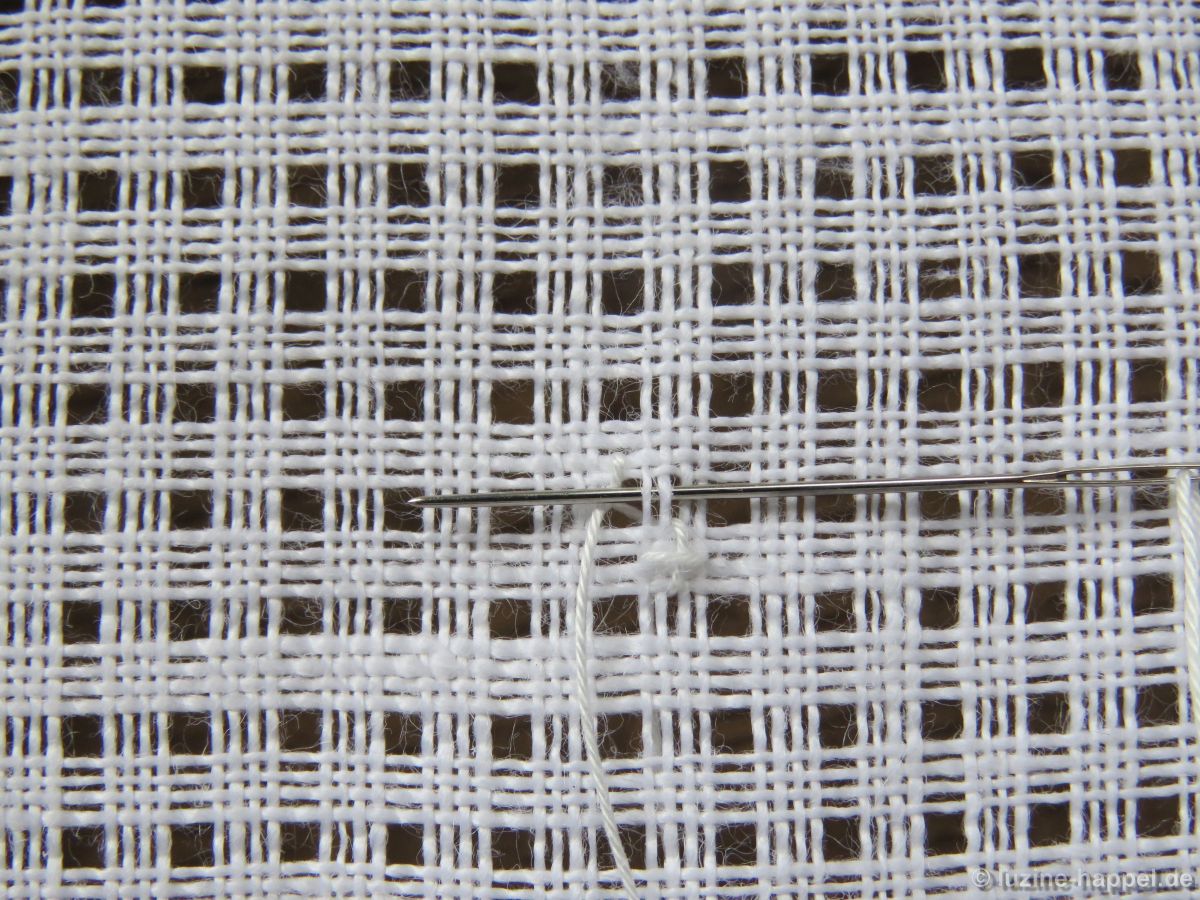
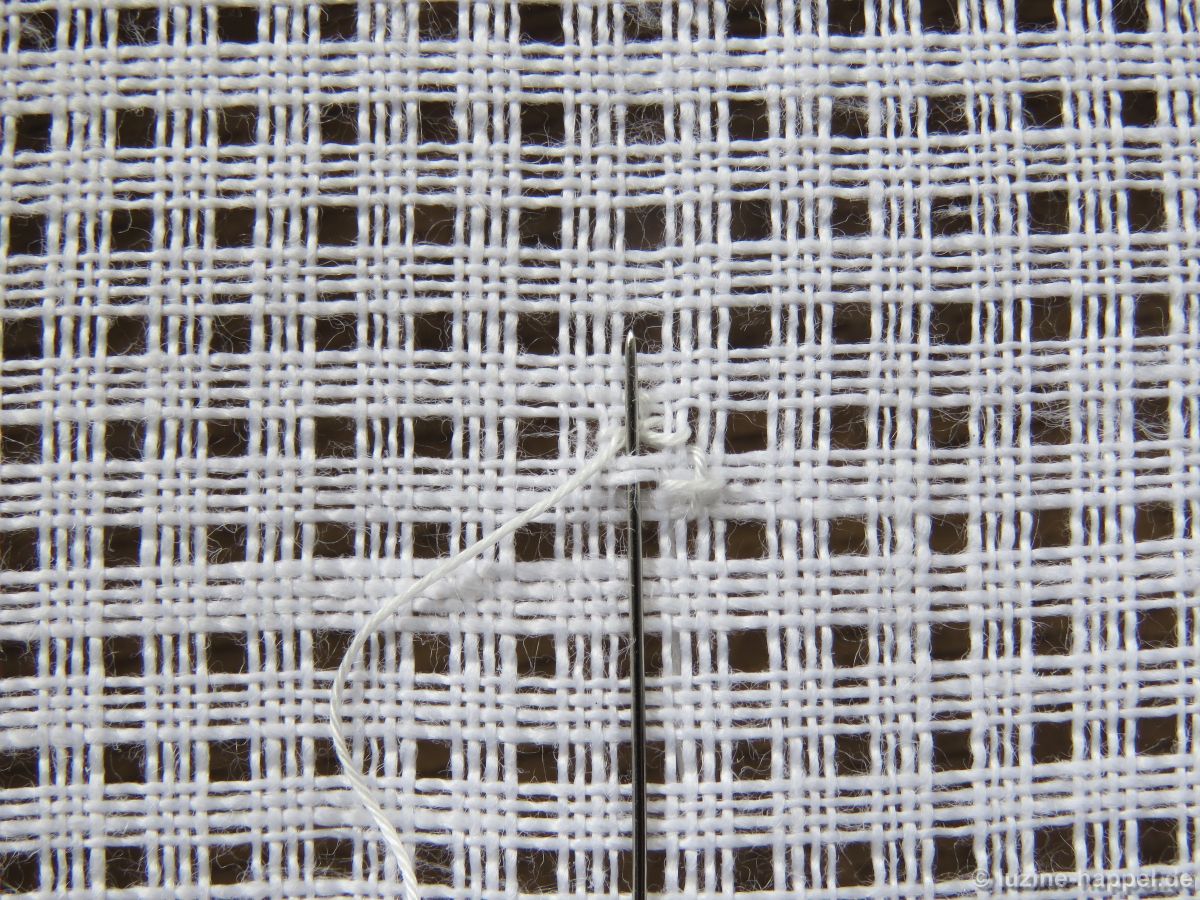
In the ground prepared in this way, one mainly embroiders Wave stitches and

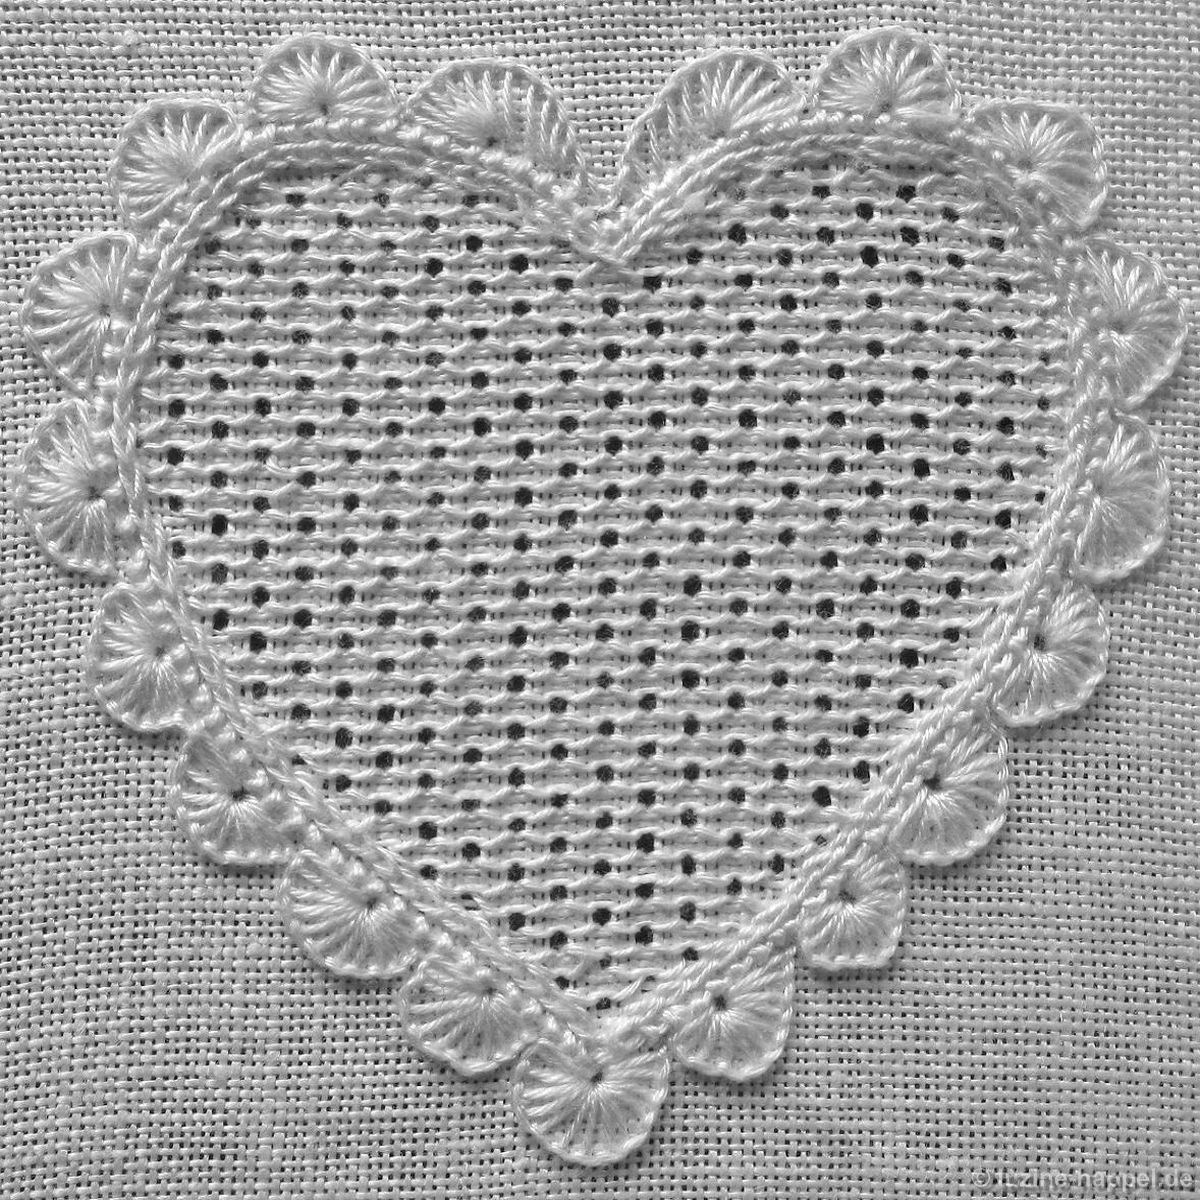
Honey Comb Darning stitches as well as

Satin stitches in “bars” or combinations of these stitches.

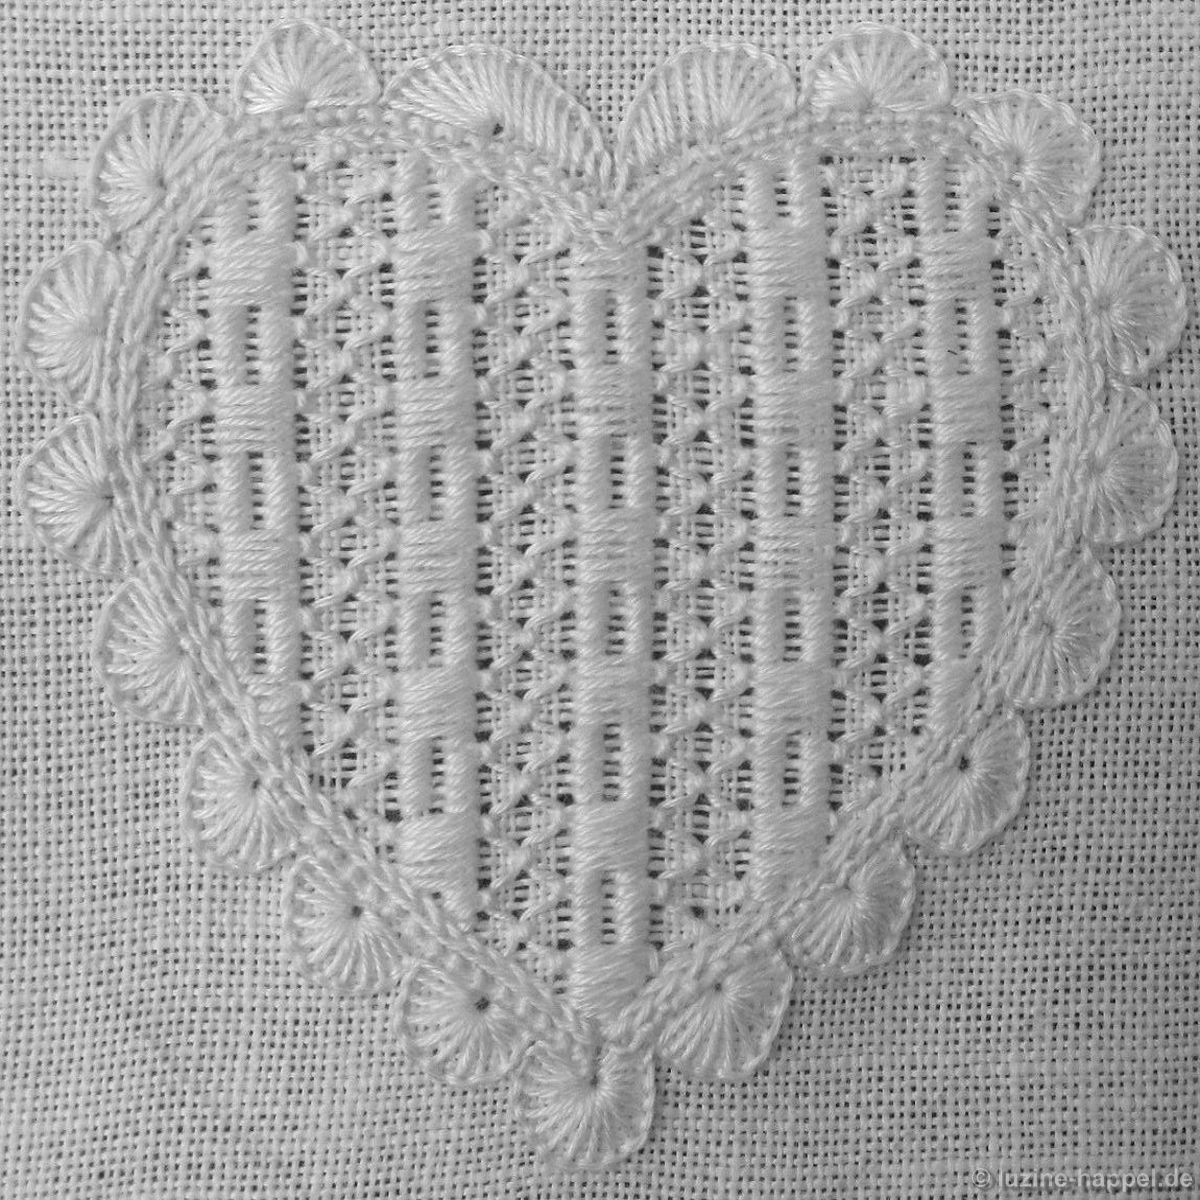
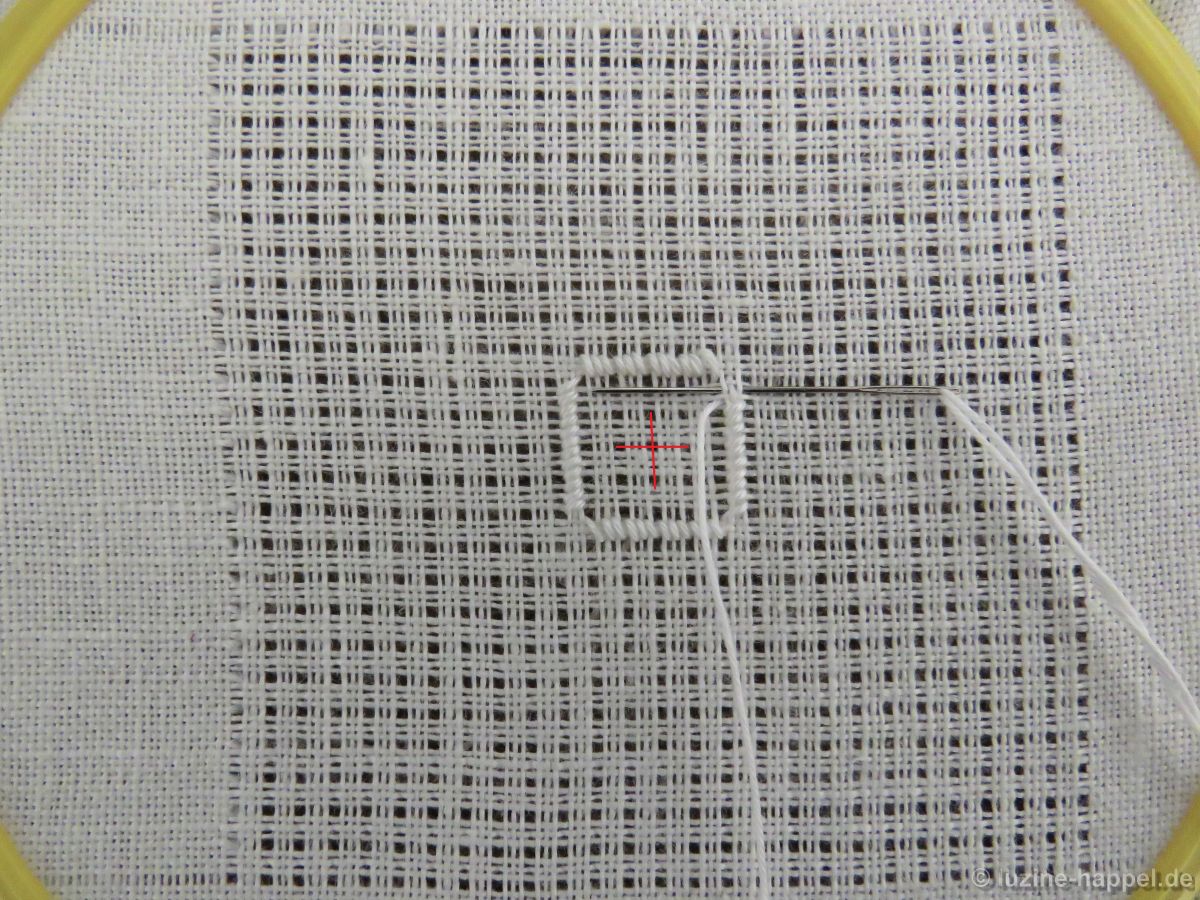
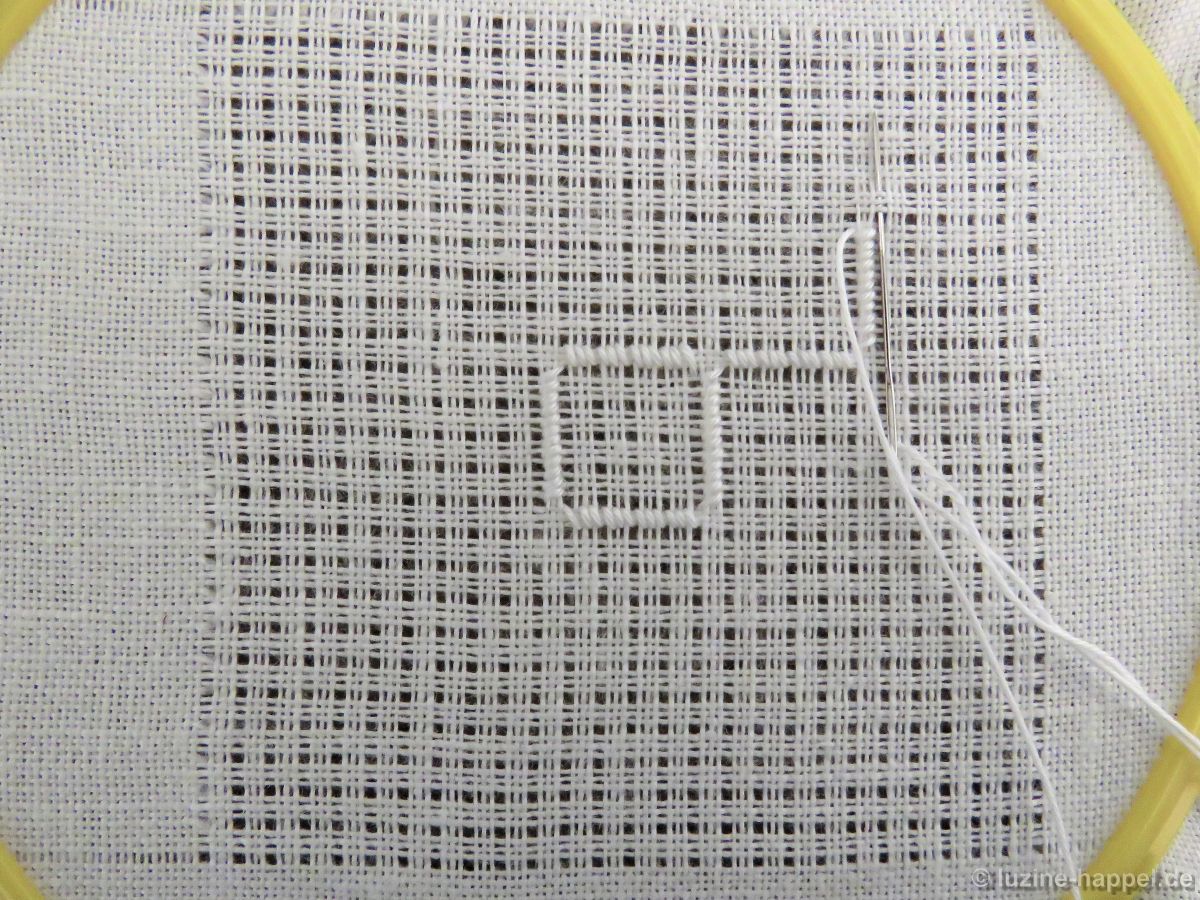
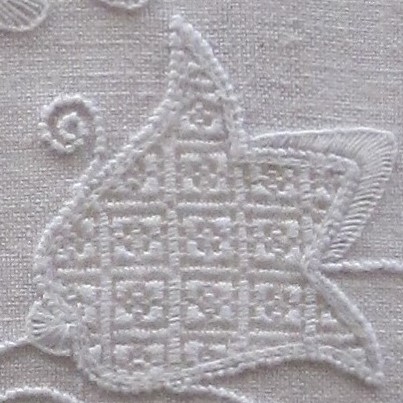
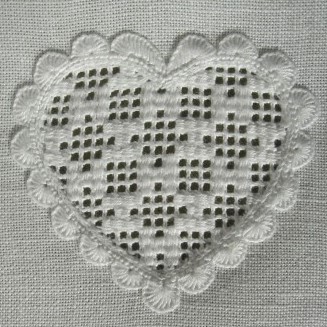
For a Limet withdrawn-thread pattern, one usually removes every fourth thread both horizontally and vertically.

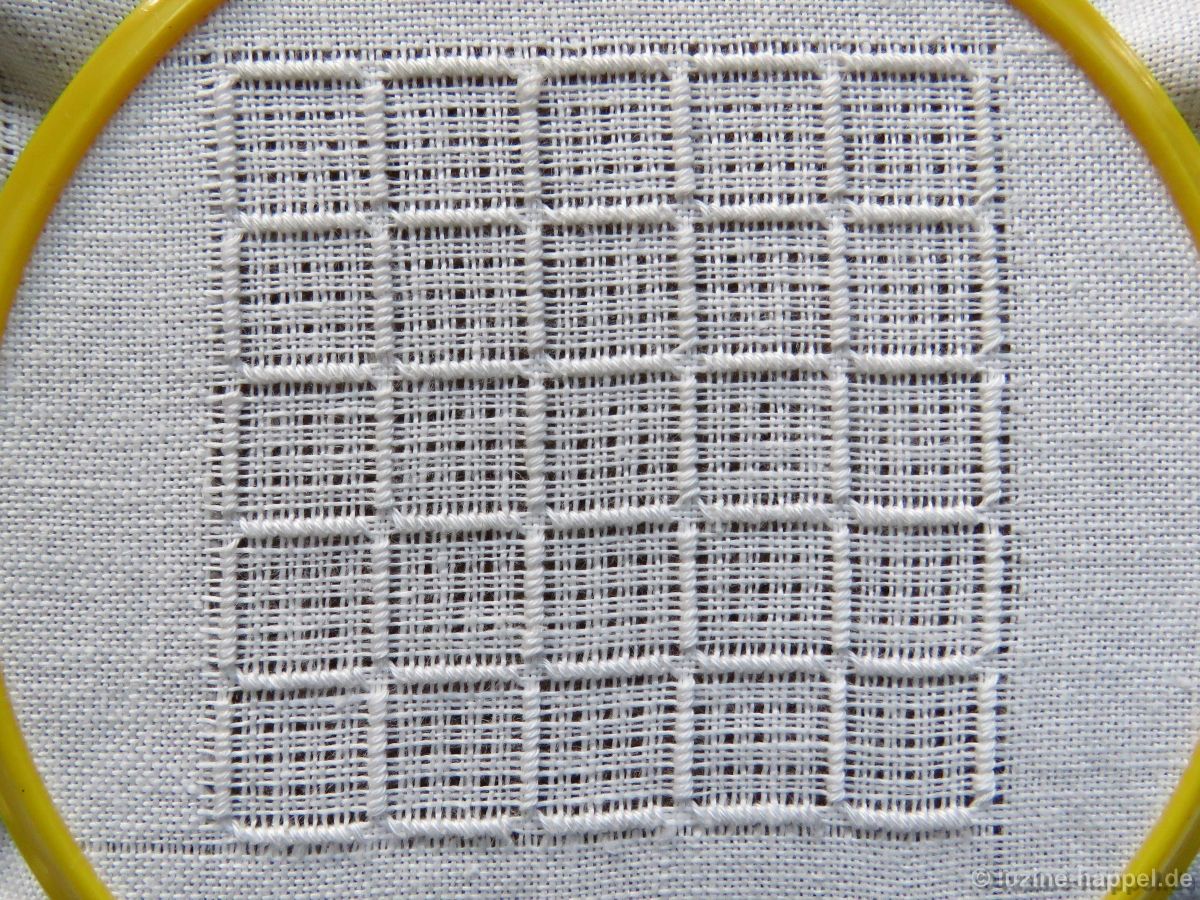
The resulting Limet grid is primarily stitched with Four-Sided stitches, Diagonal Cross stitches, Rose stitches, Square Eyelets, and Satin stitches. Combining these stitches results in a huge number of different filling patterns, which can create completely different appearances.

Construction of a Rose stitch grid in the Limet ground

Finished Limet pattern with Rose stitches and Square Eyelet parts

Limet pattern with Four-Sided stitches and Rose stitches

Limet pattern with Satin stitches and Rose stitches

Limet pattern with Four-Sided stitches and Rose stitches

Limet pattern with Satin stitches, Four-Sided stitches and parts of Square Eyelets

Limet pattern with Rose stitches and Herringbone stitches

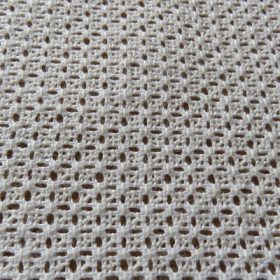
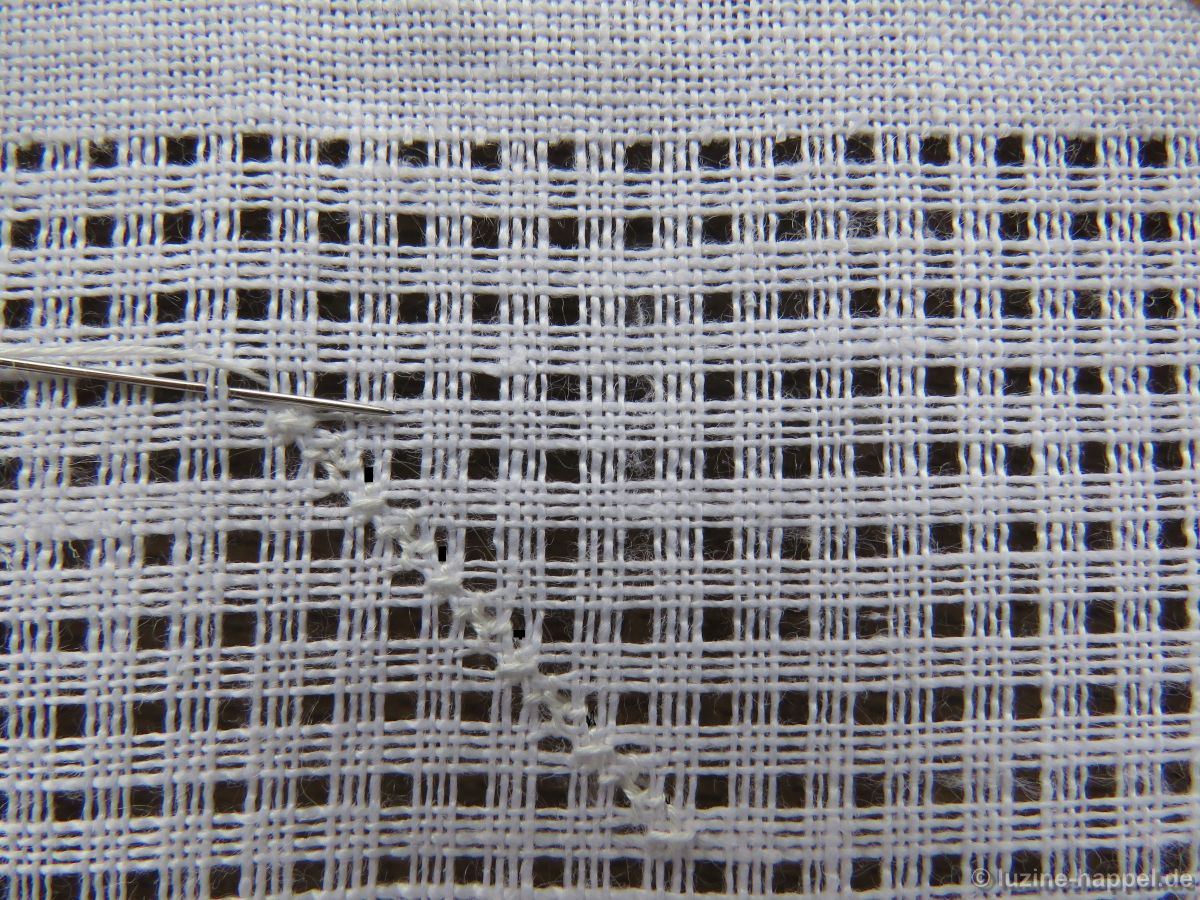
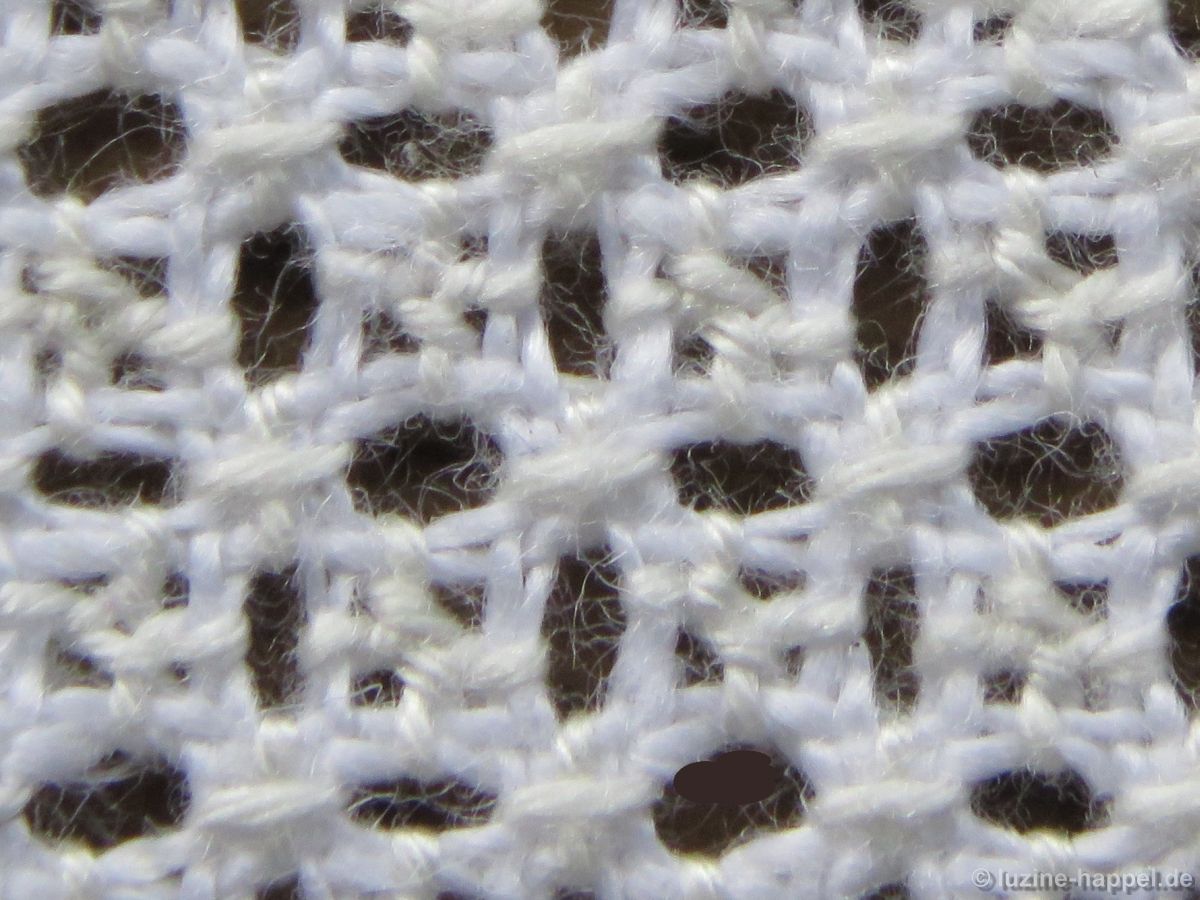
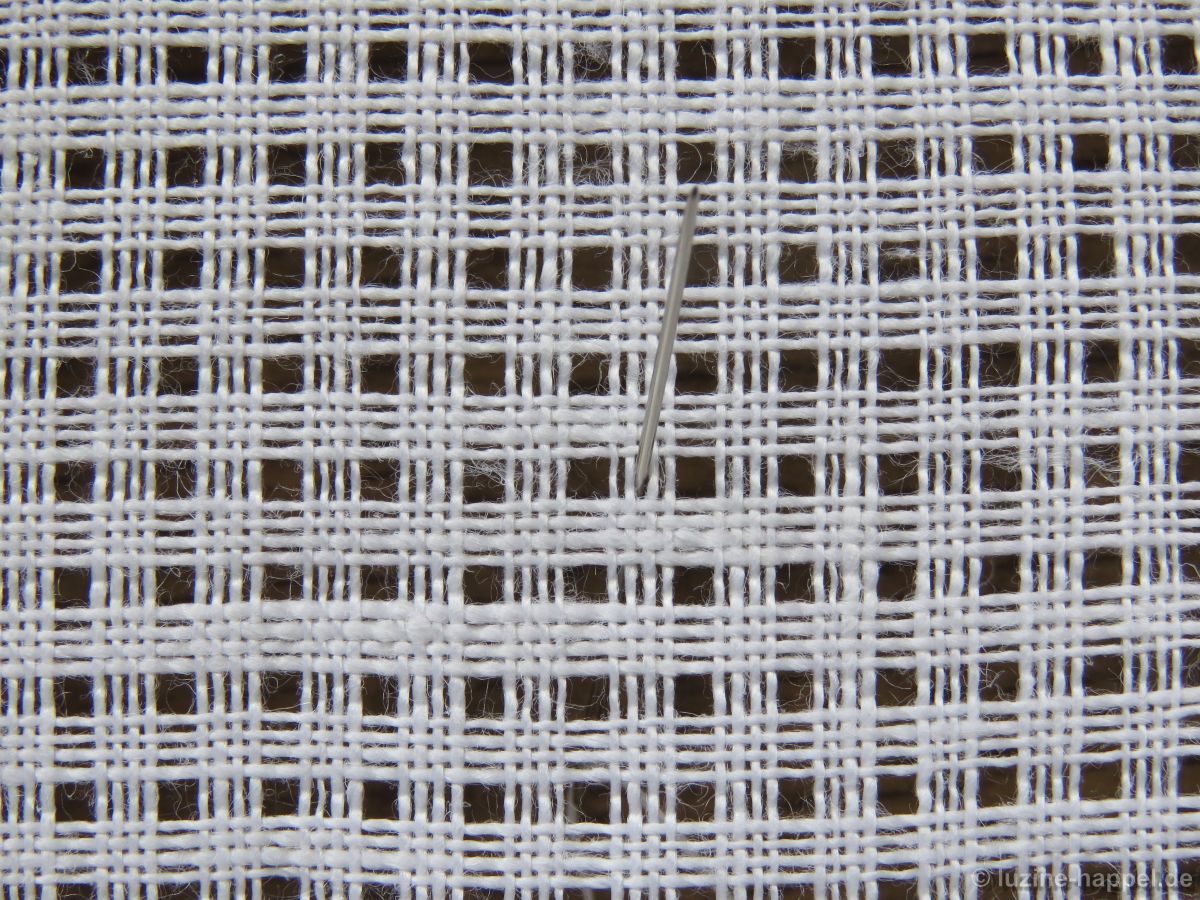
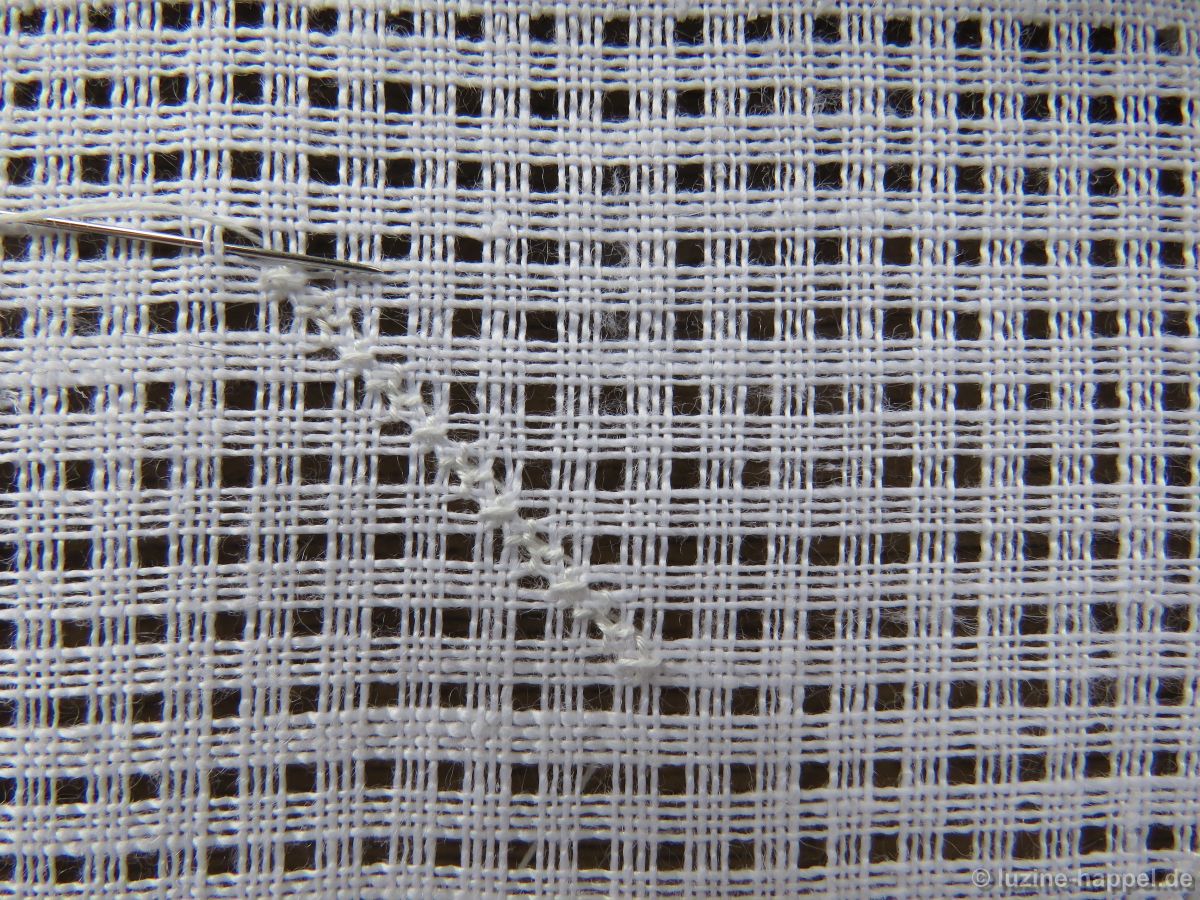
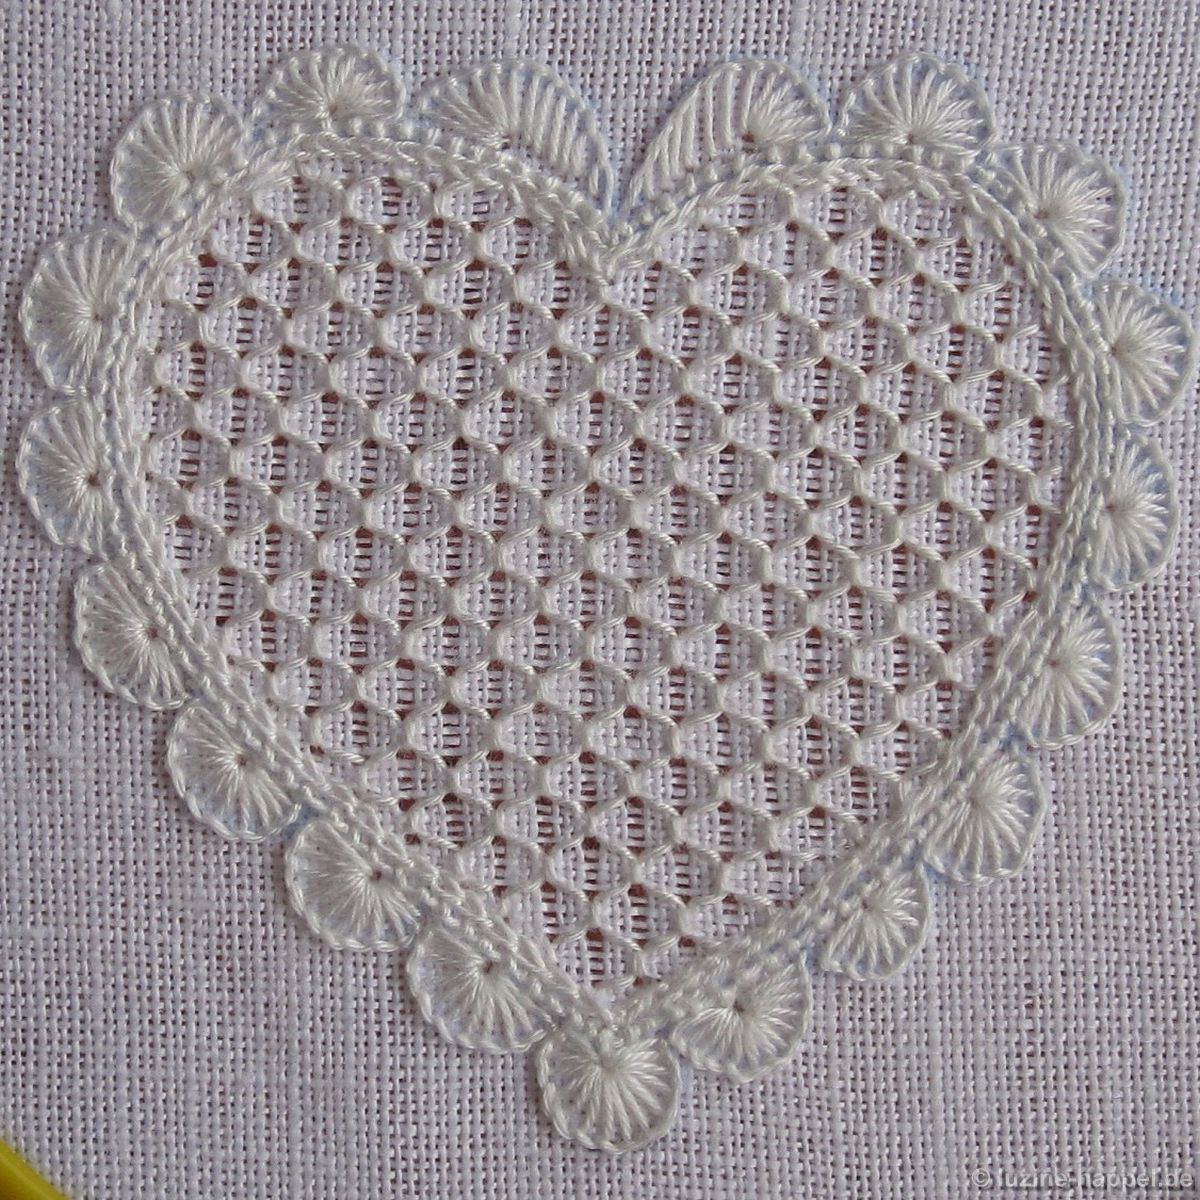
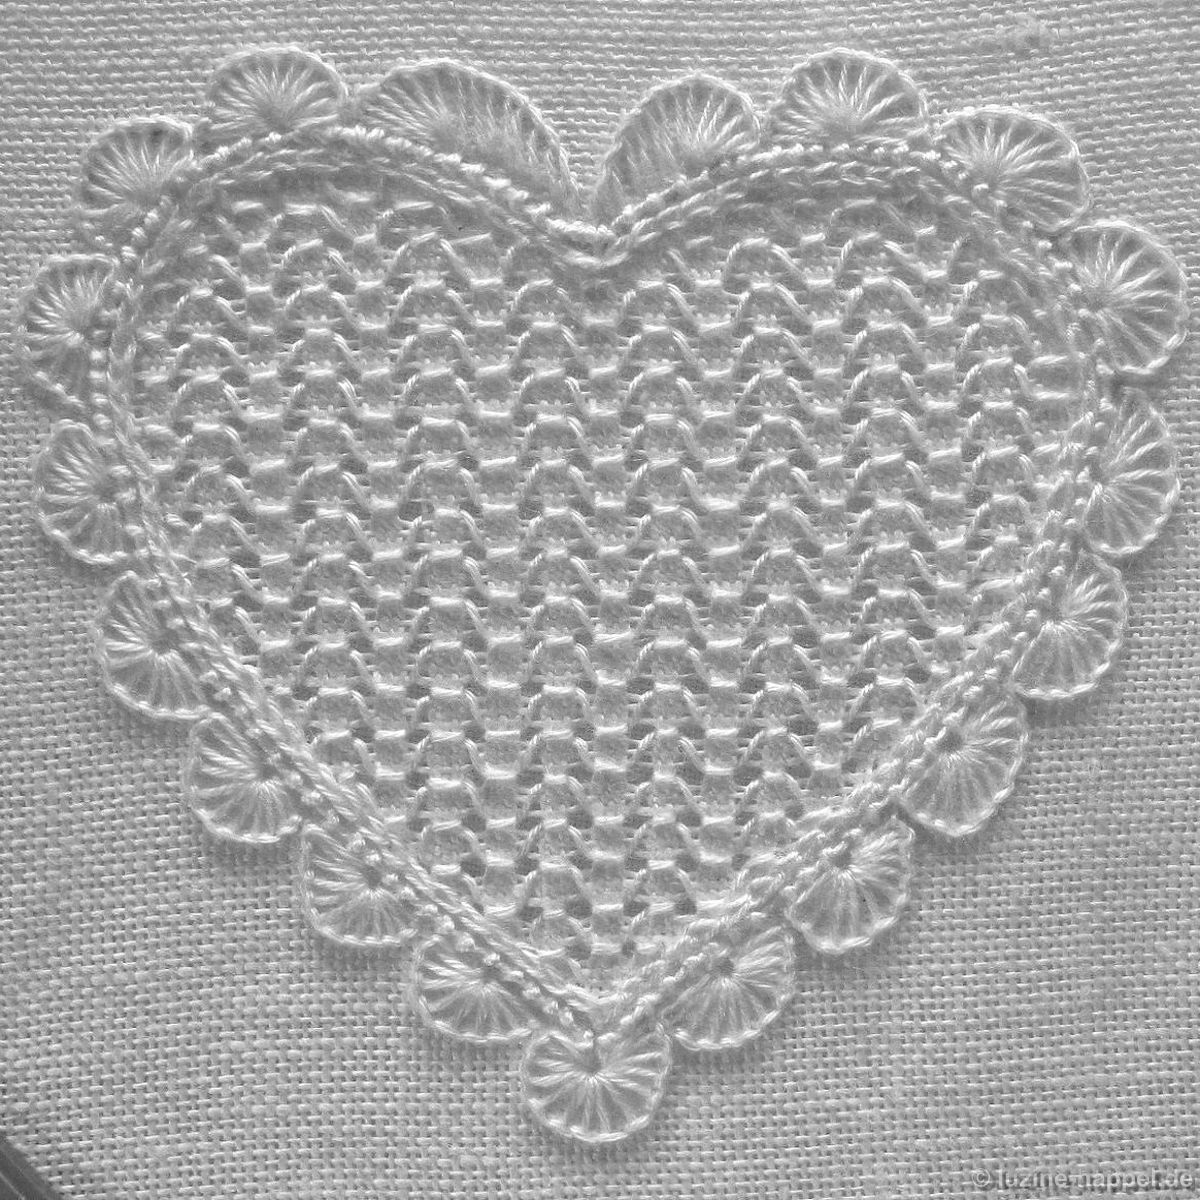
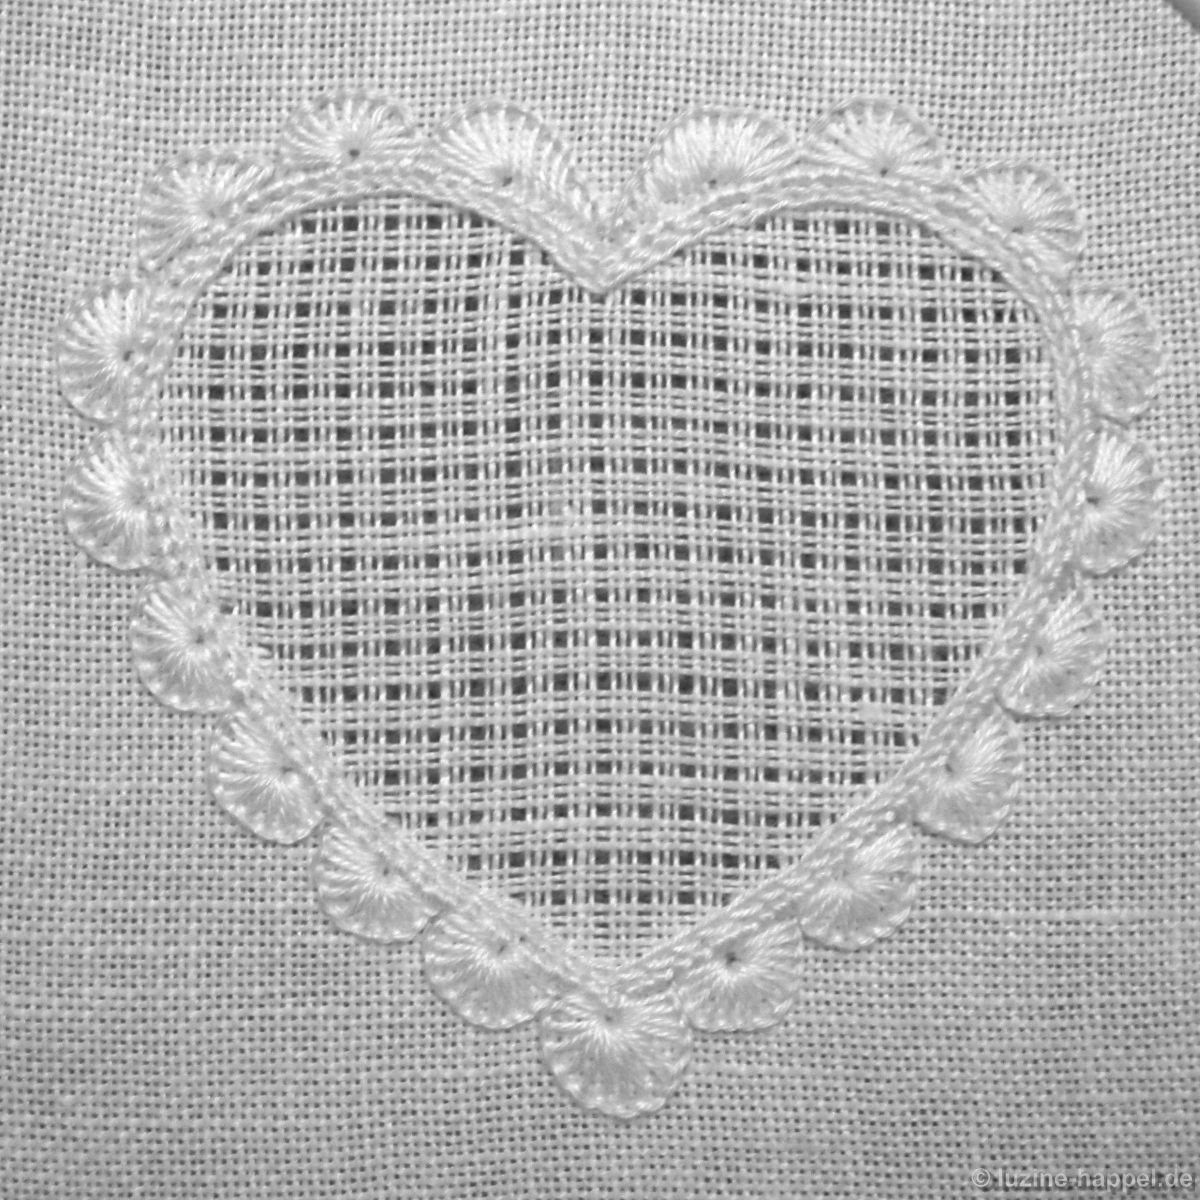
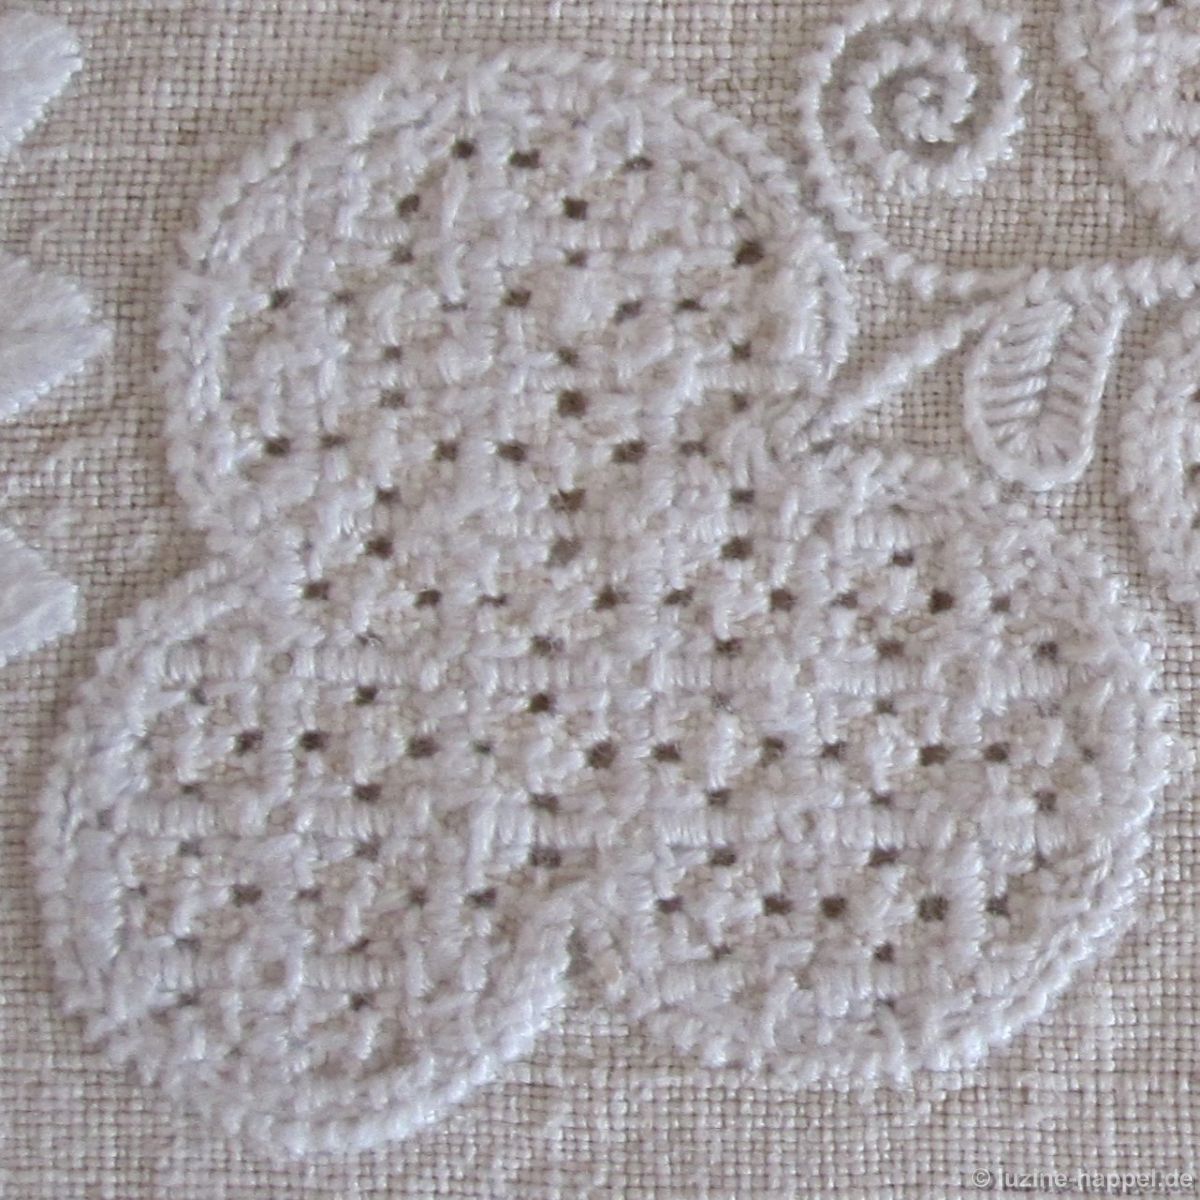
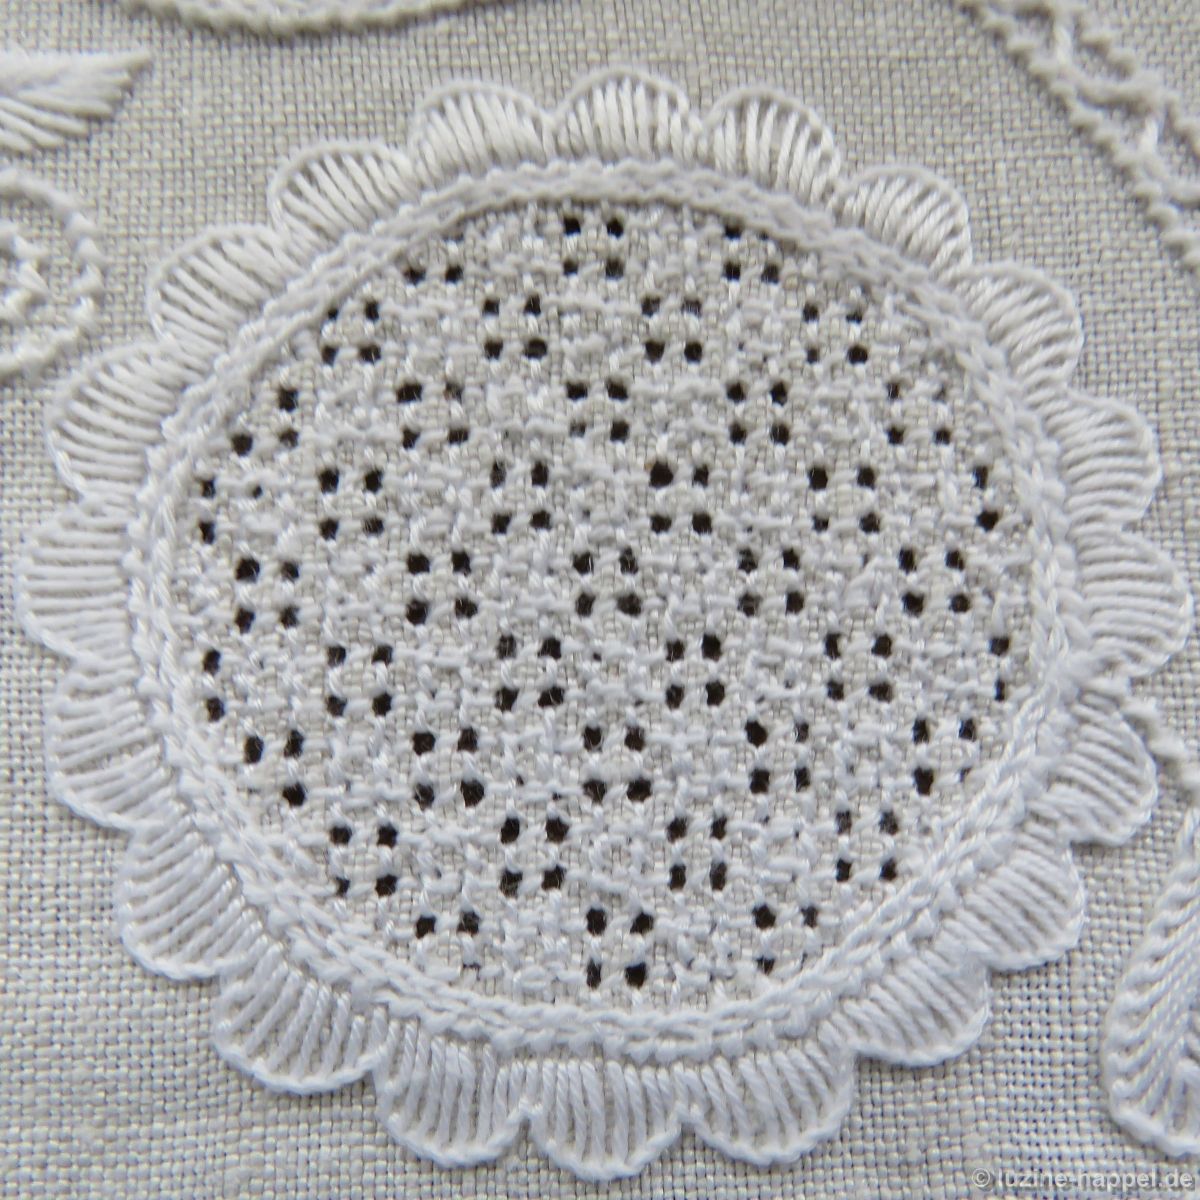
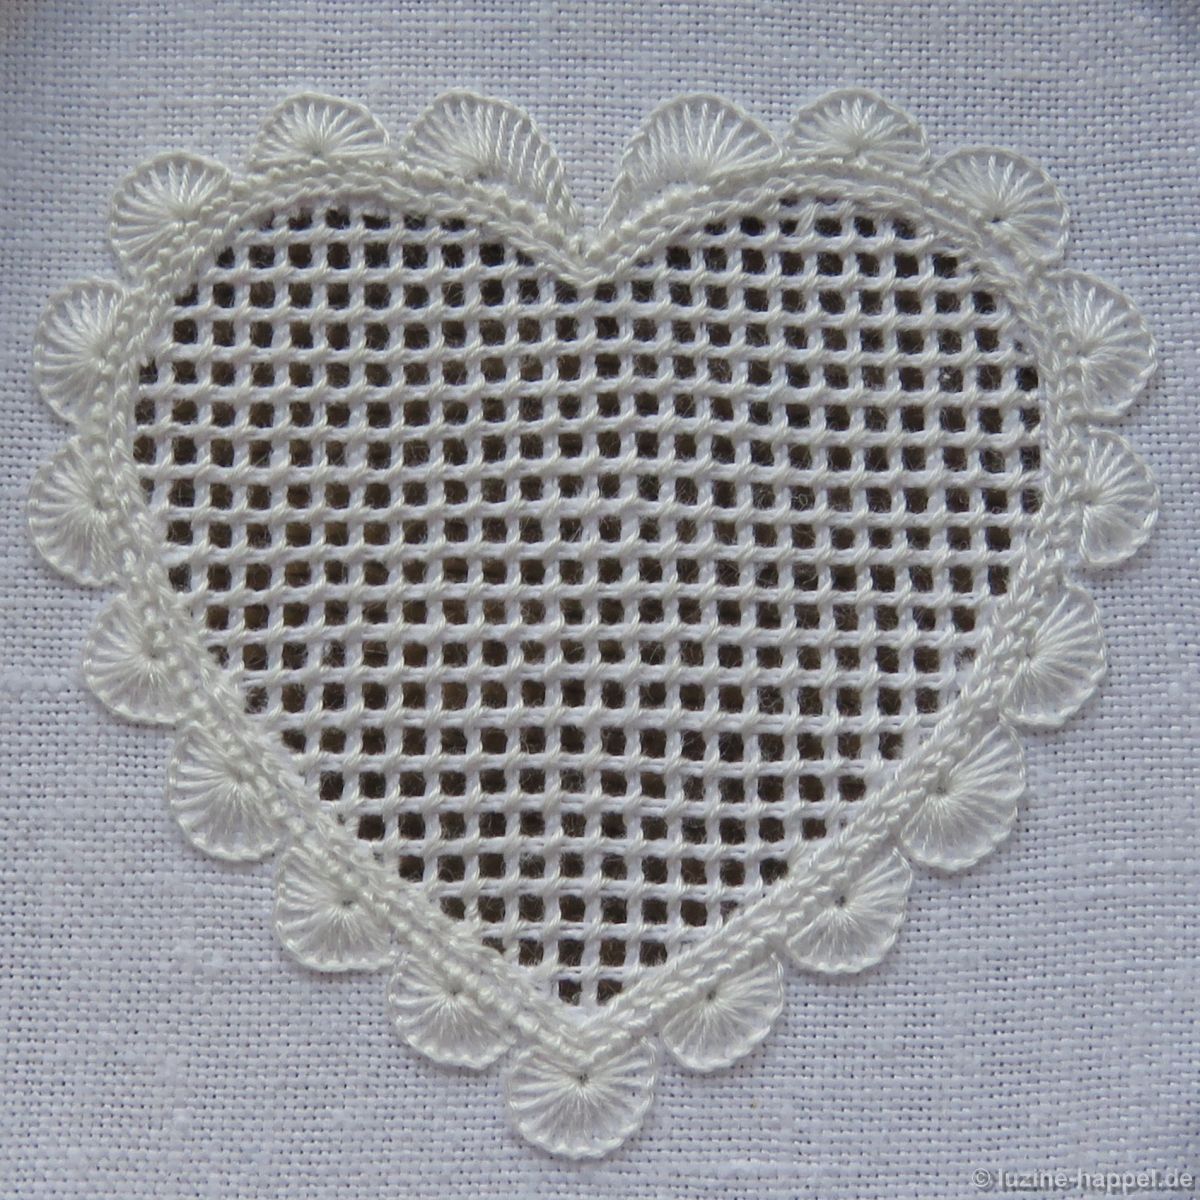
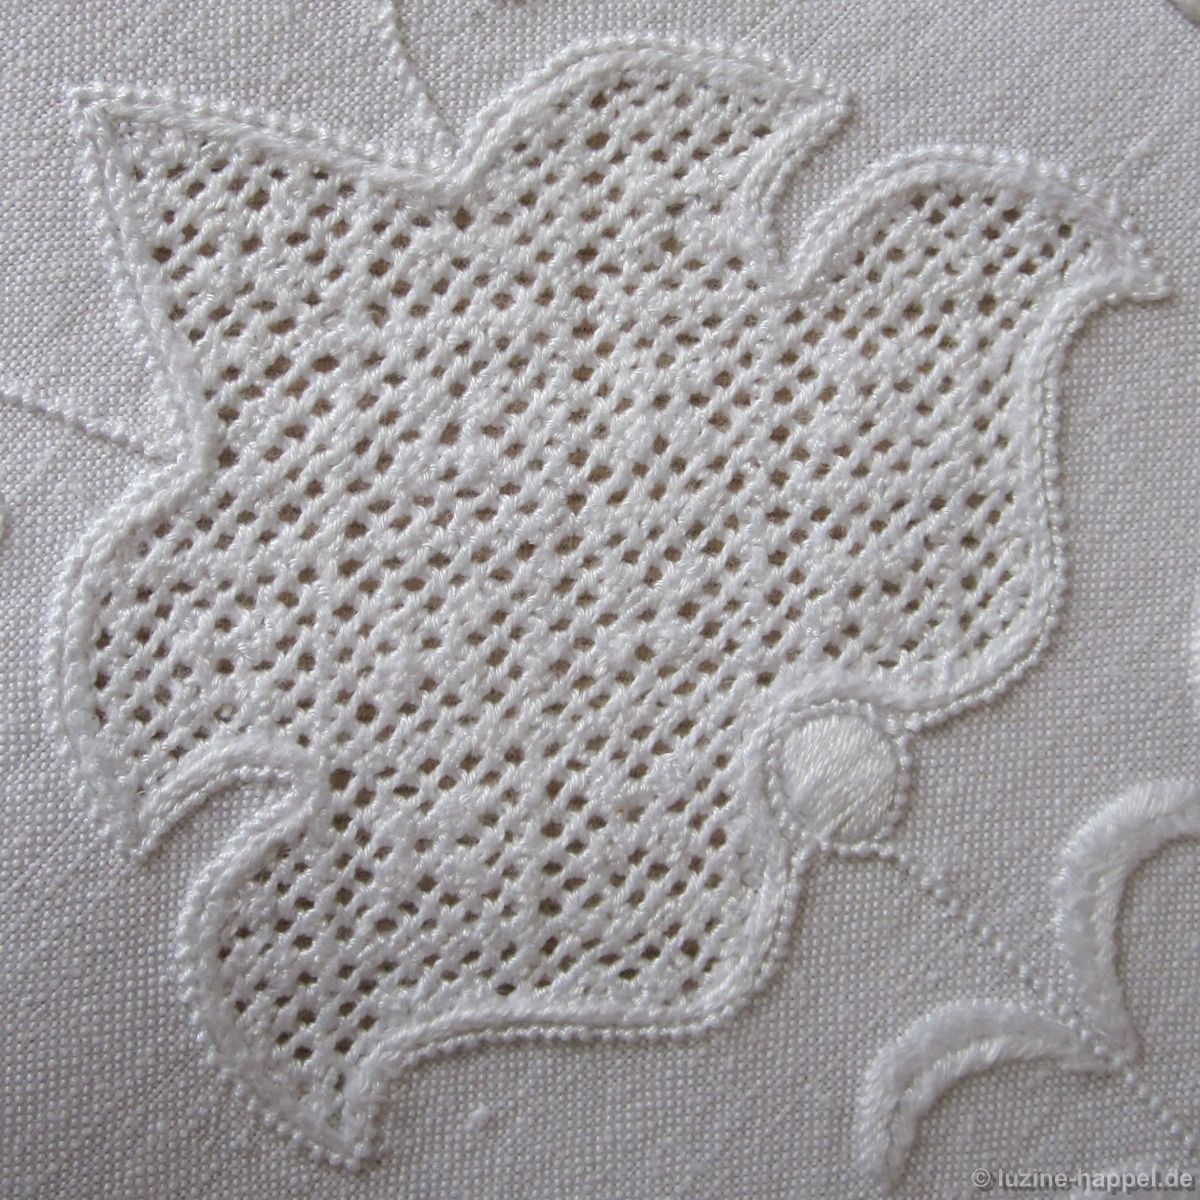
For an openwork pattern, threads are pulled out in pairs between two remaining threads – both horizontally and vertically. Removing half of the fabric threads makes the fabric translucent, or “light” and open.

Some patterns are embroidered directly into this openwork grid,

Openwork pattern with Cable stitches and Rose stitches

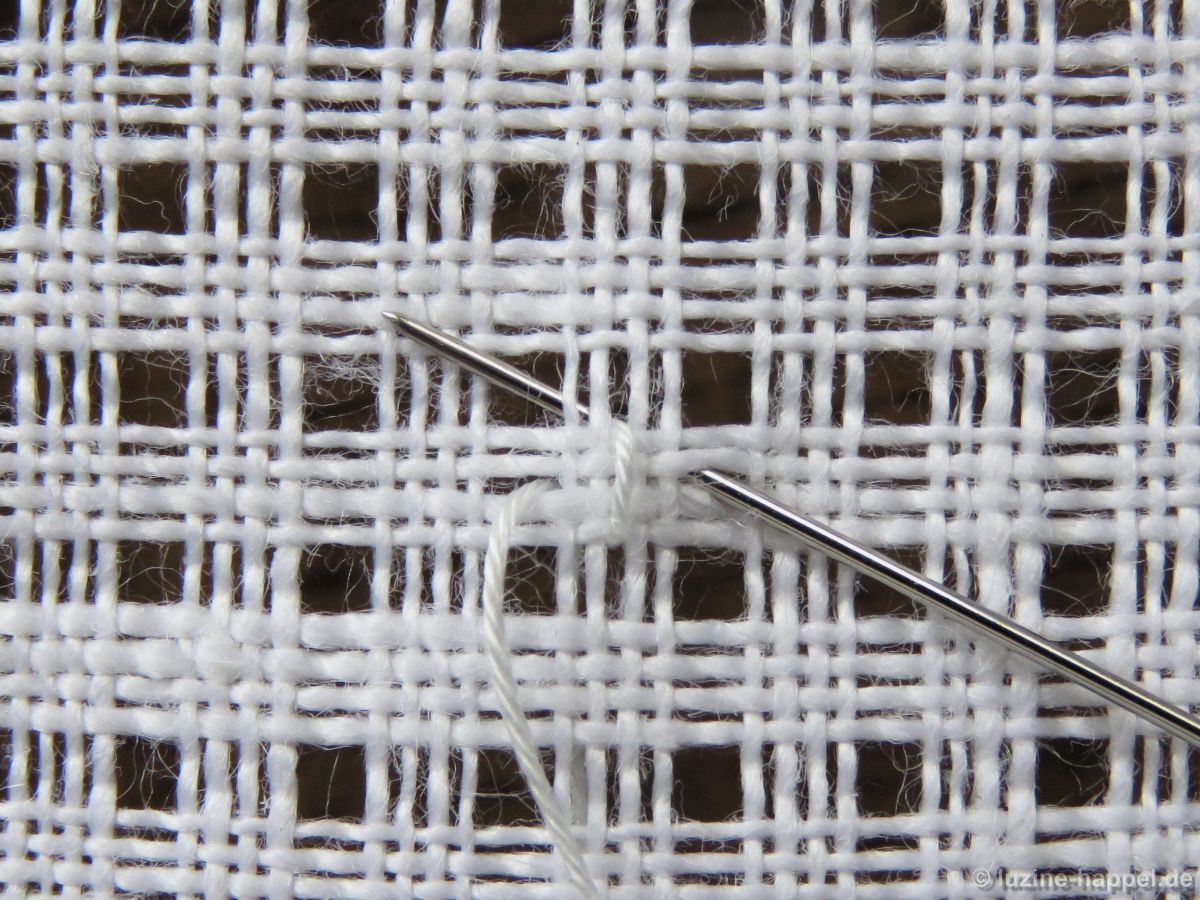
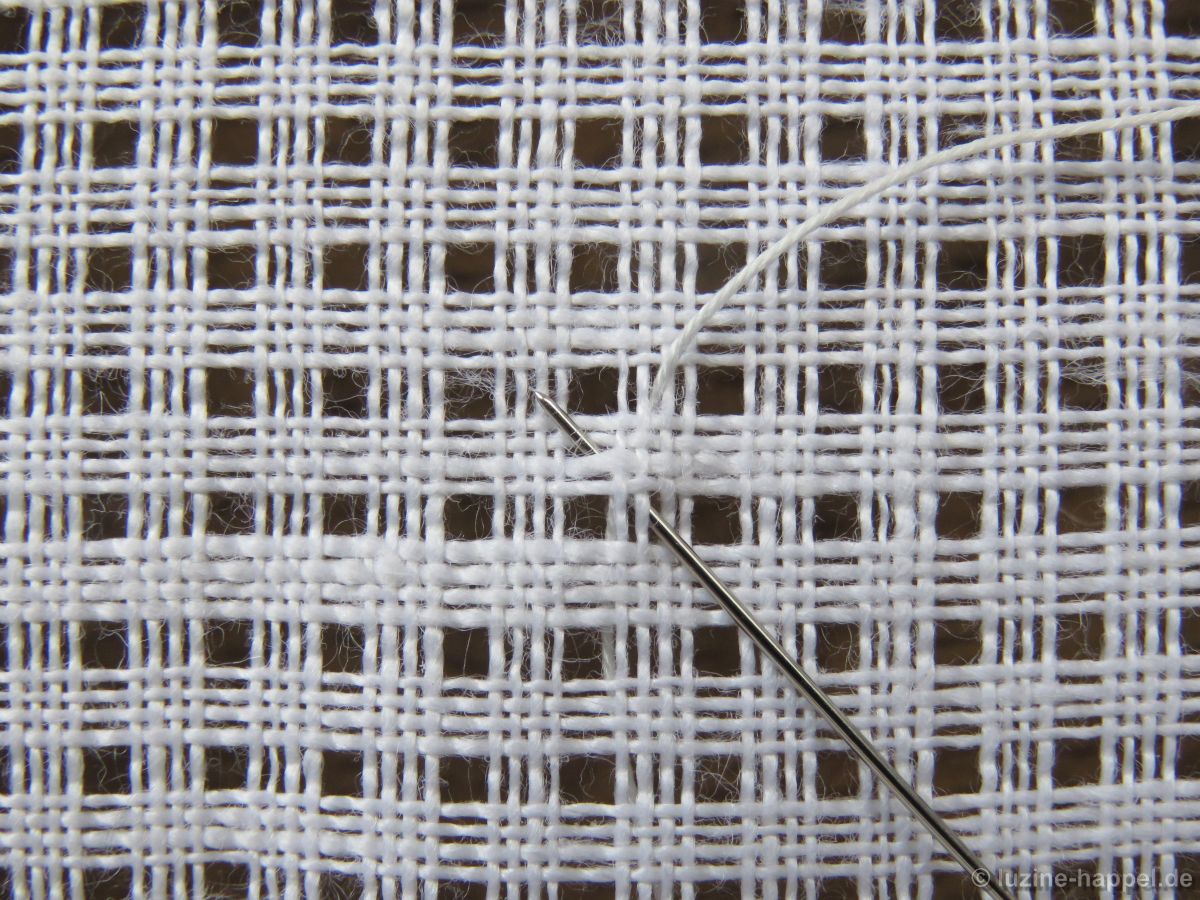
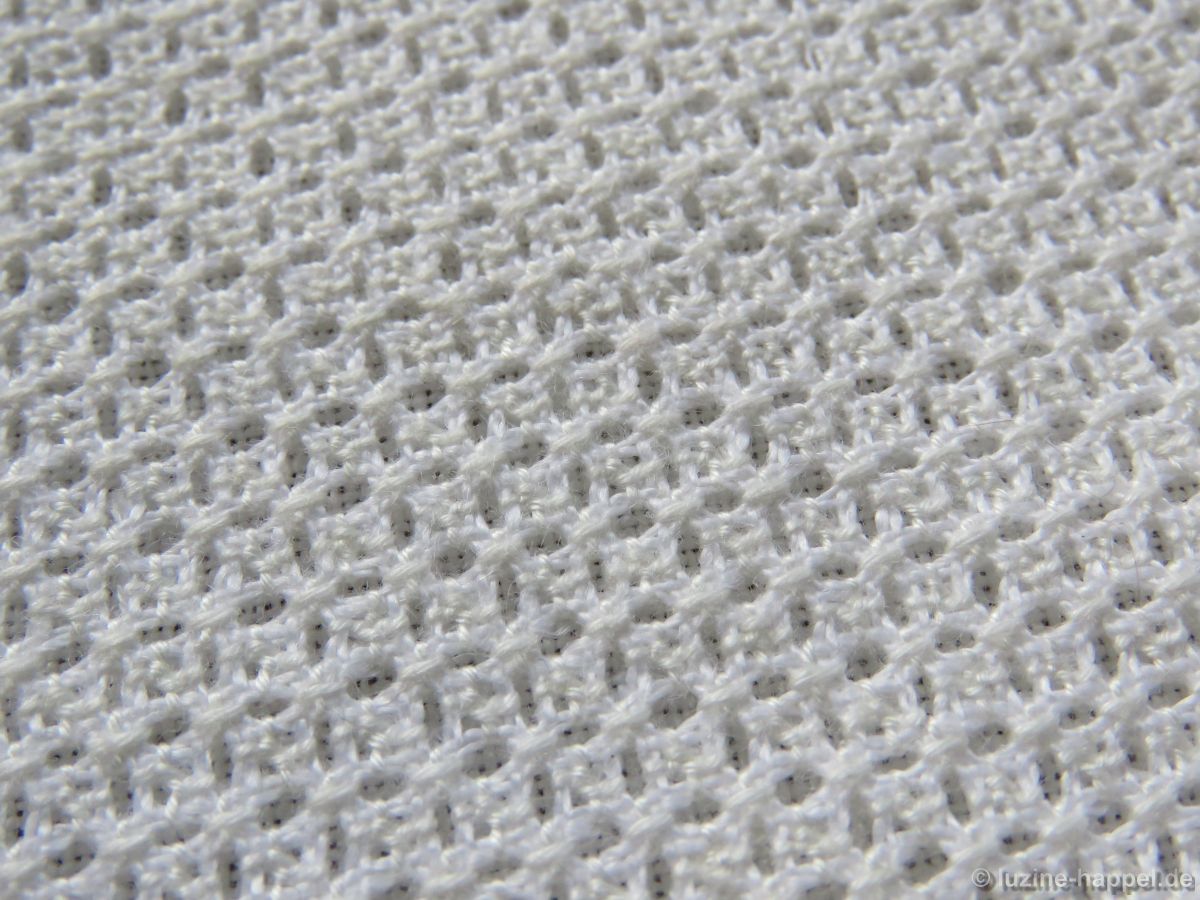
mostly, however, the grid is completely secured with Cable stitches.

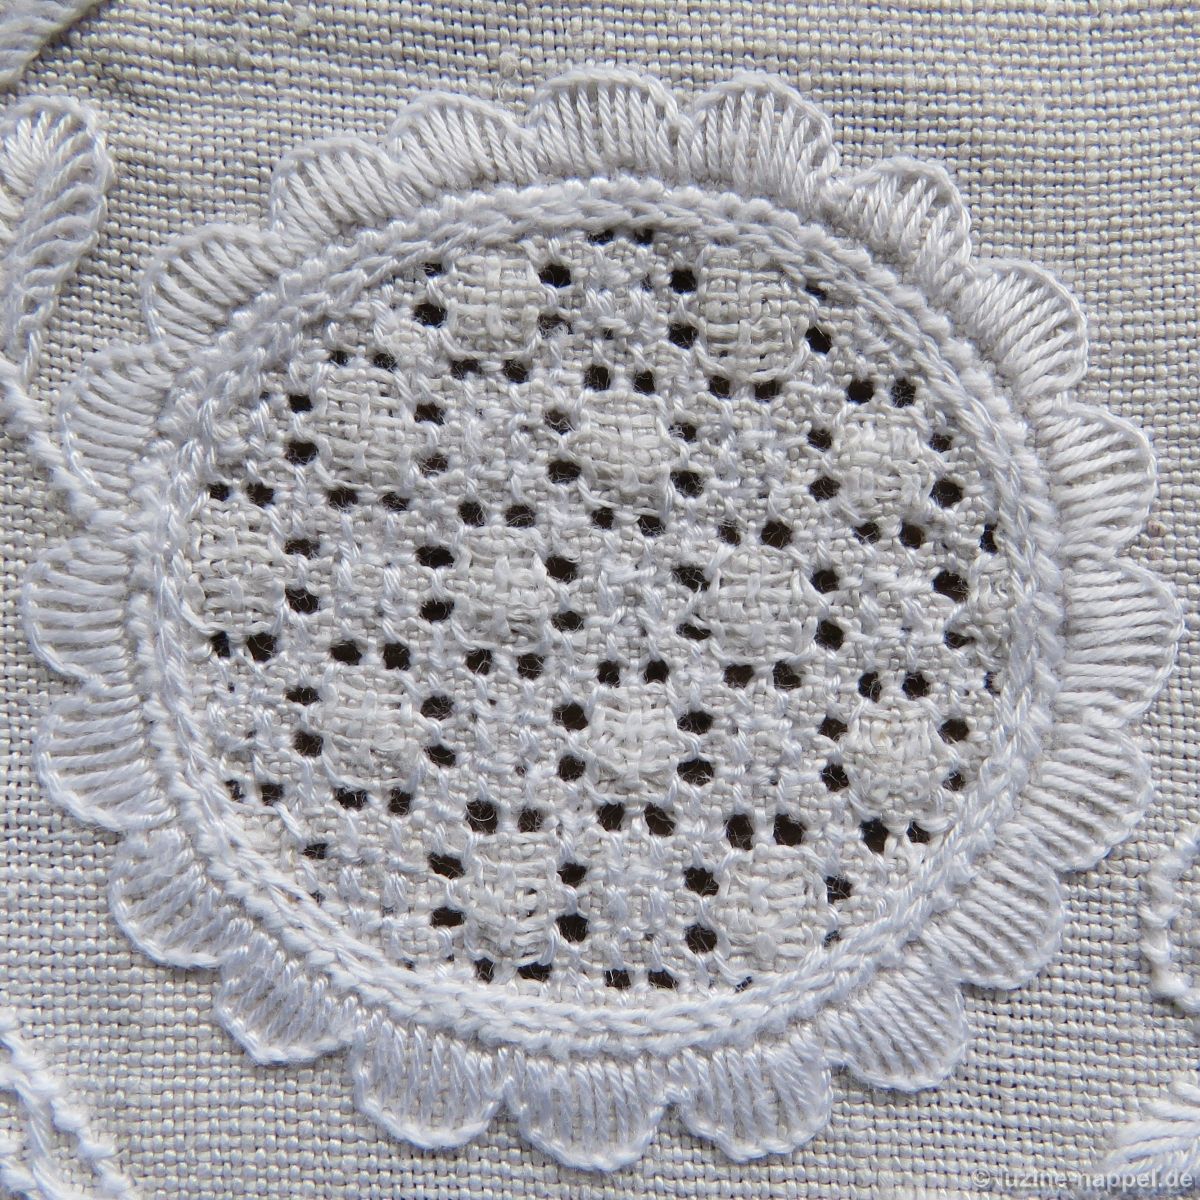
In the openwork grid with Cable stitches usually , Needle-Weaving stitches

or Rose stitches

or combinations of both are embroidered.

There are several hundred openwork patterns.

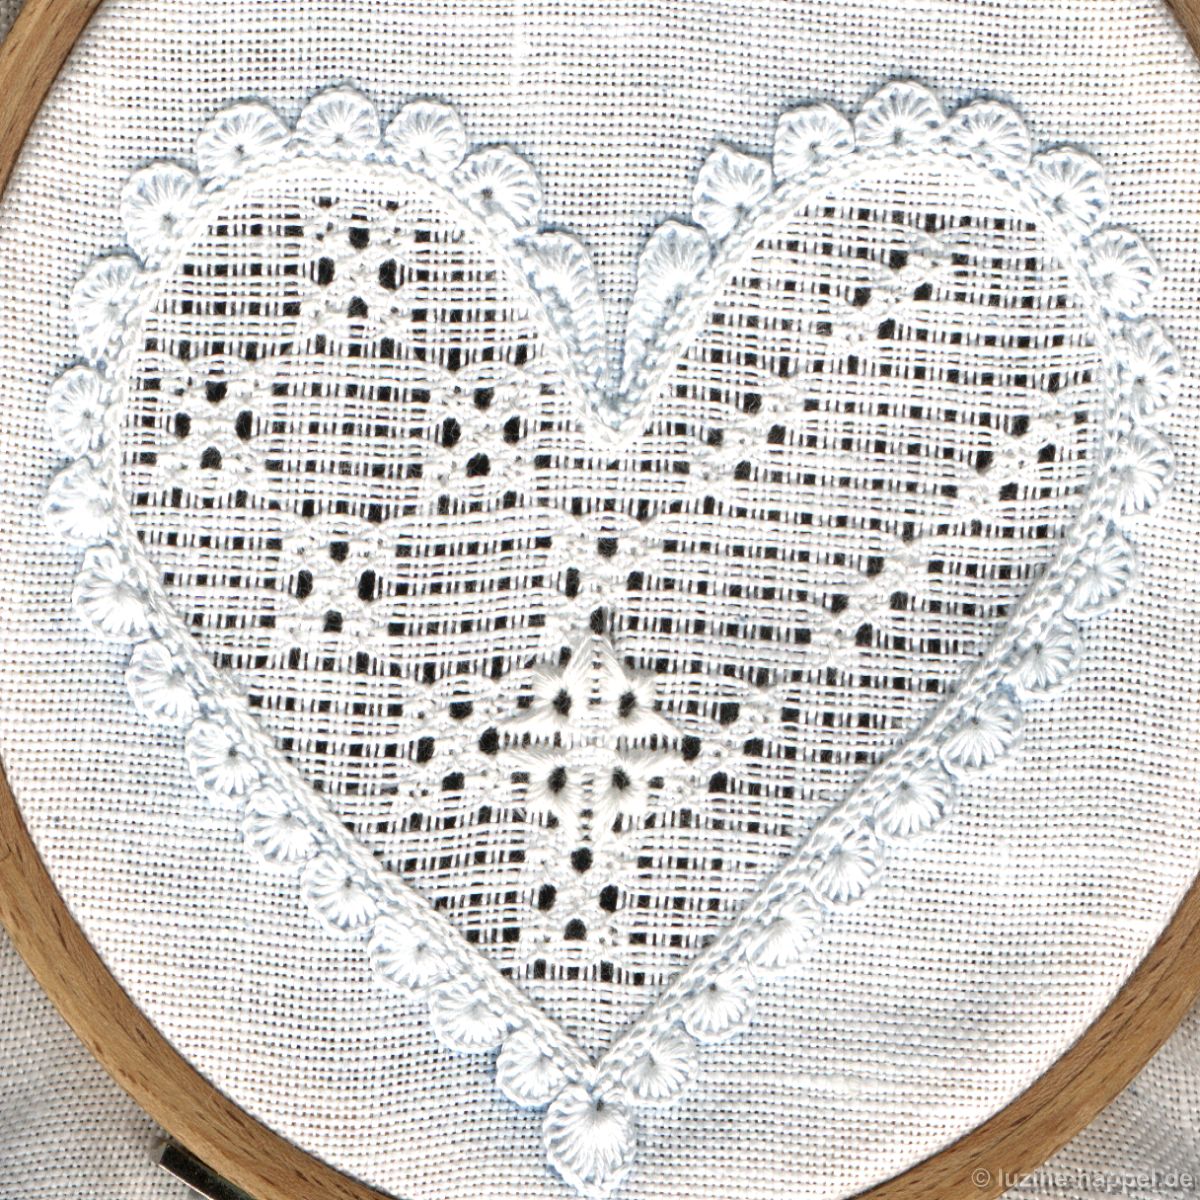
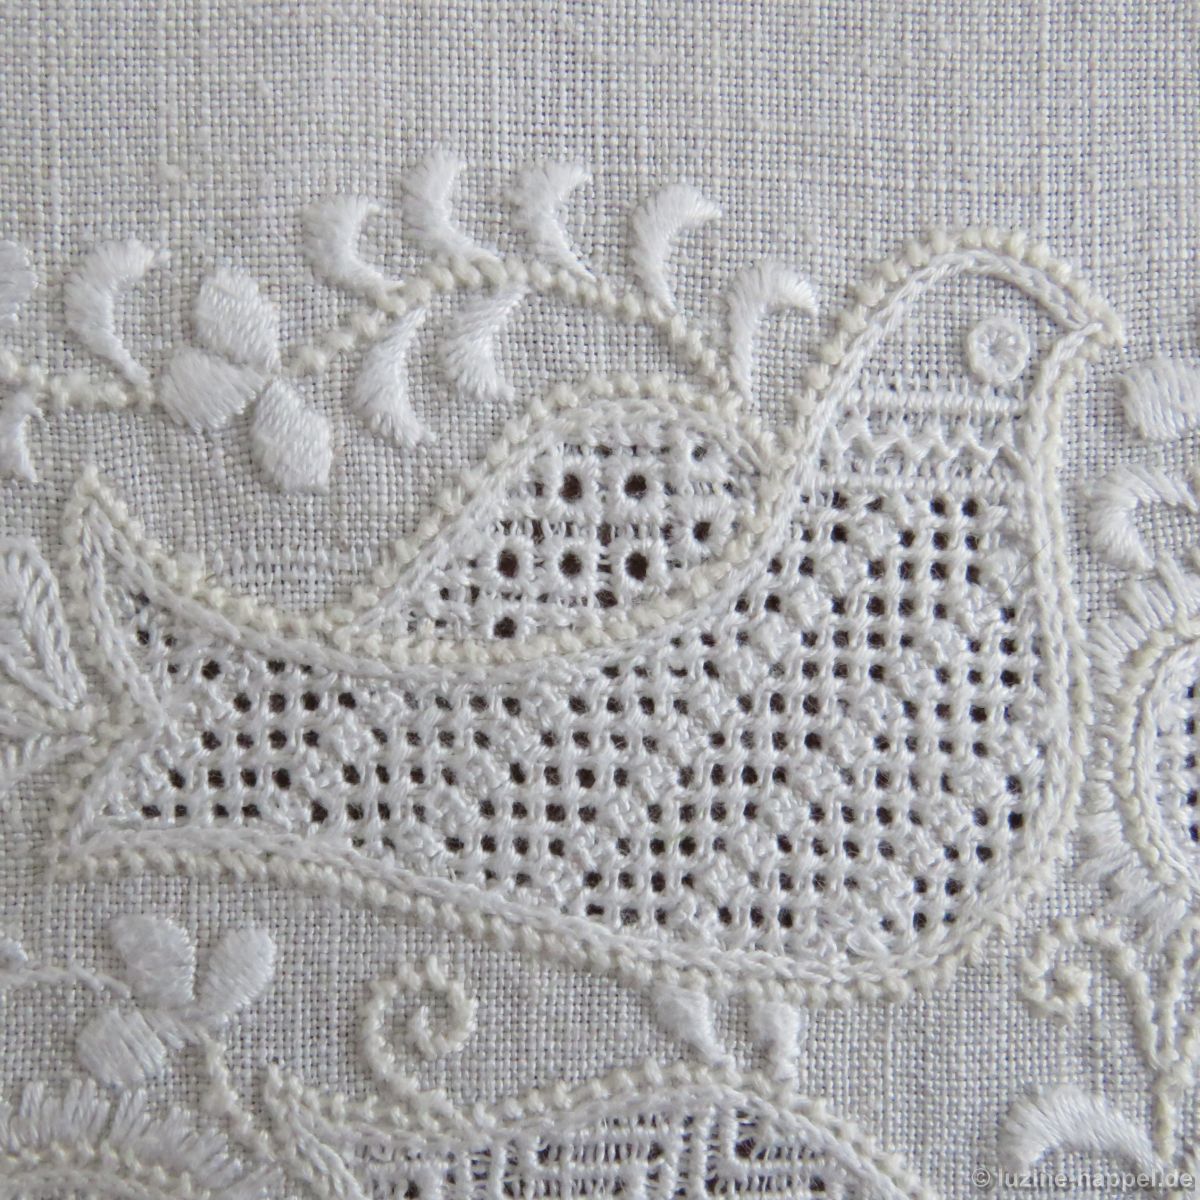
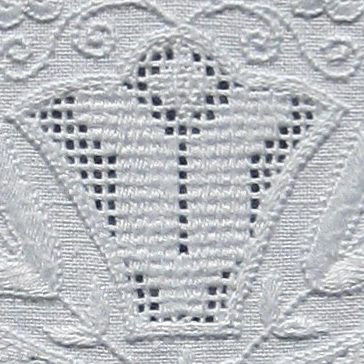
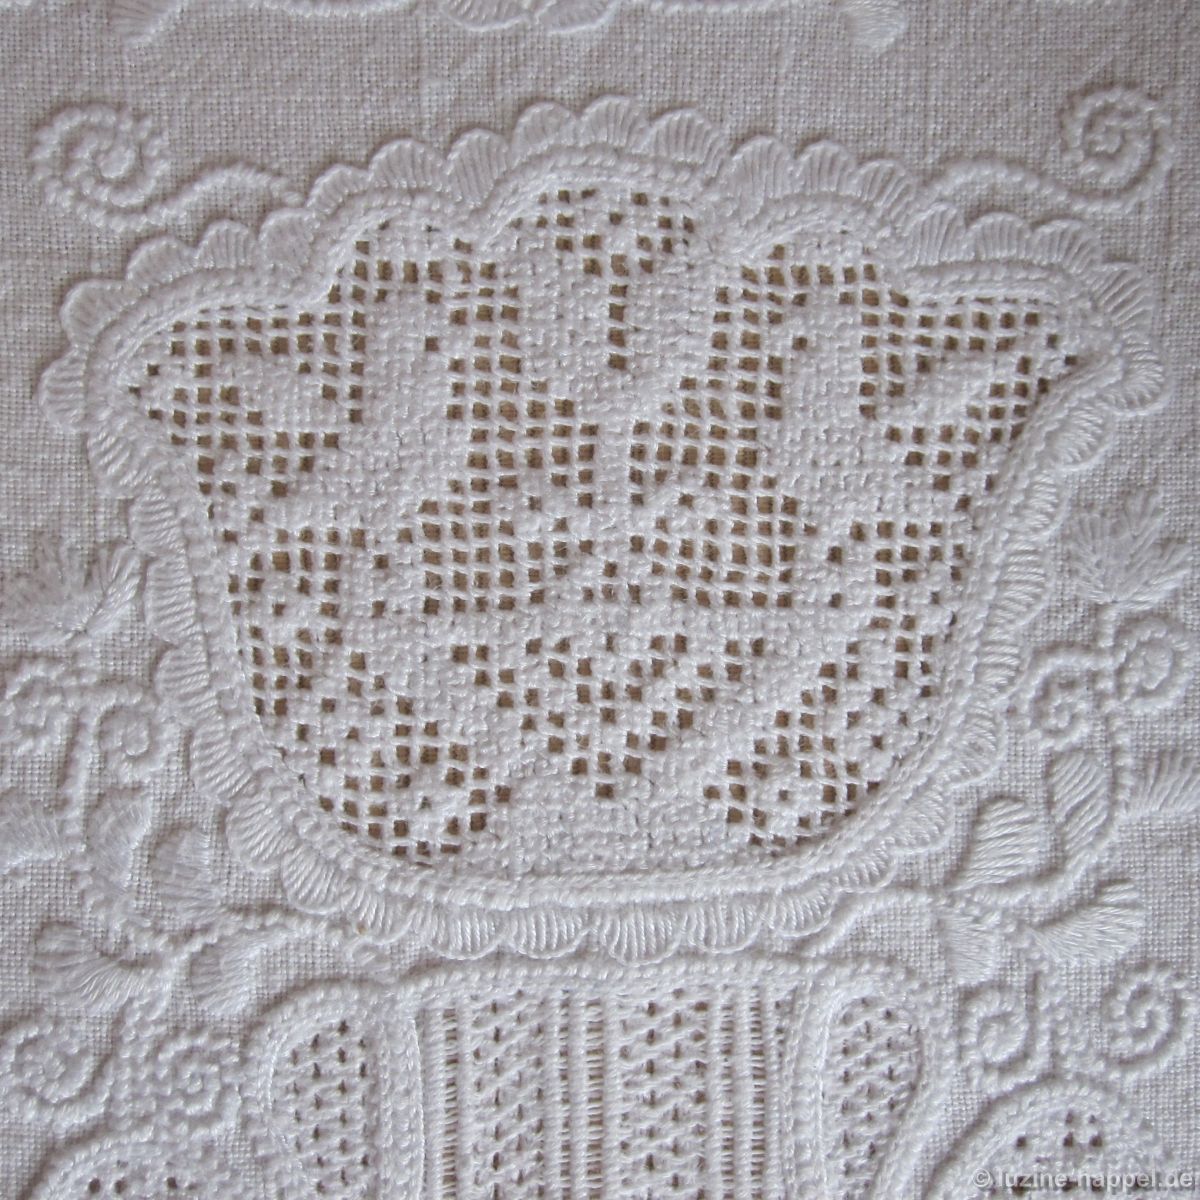
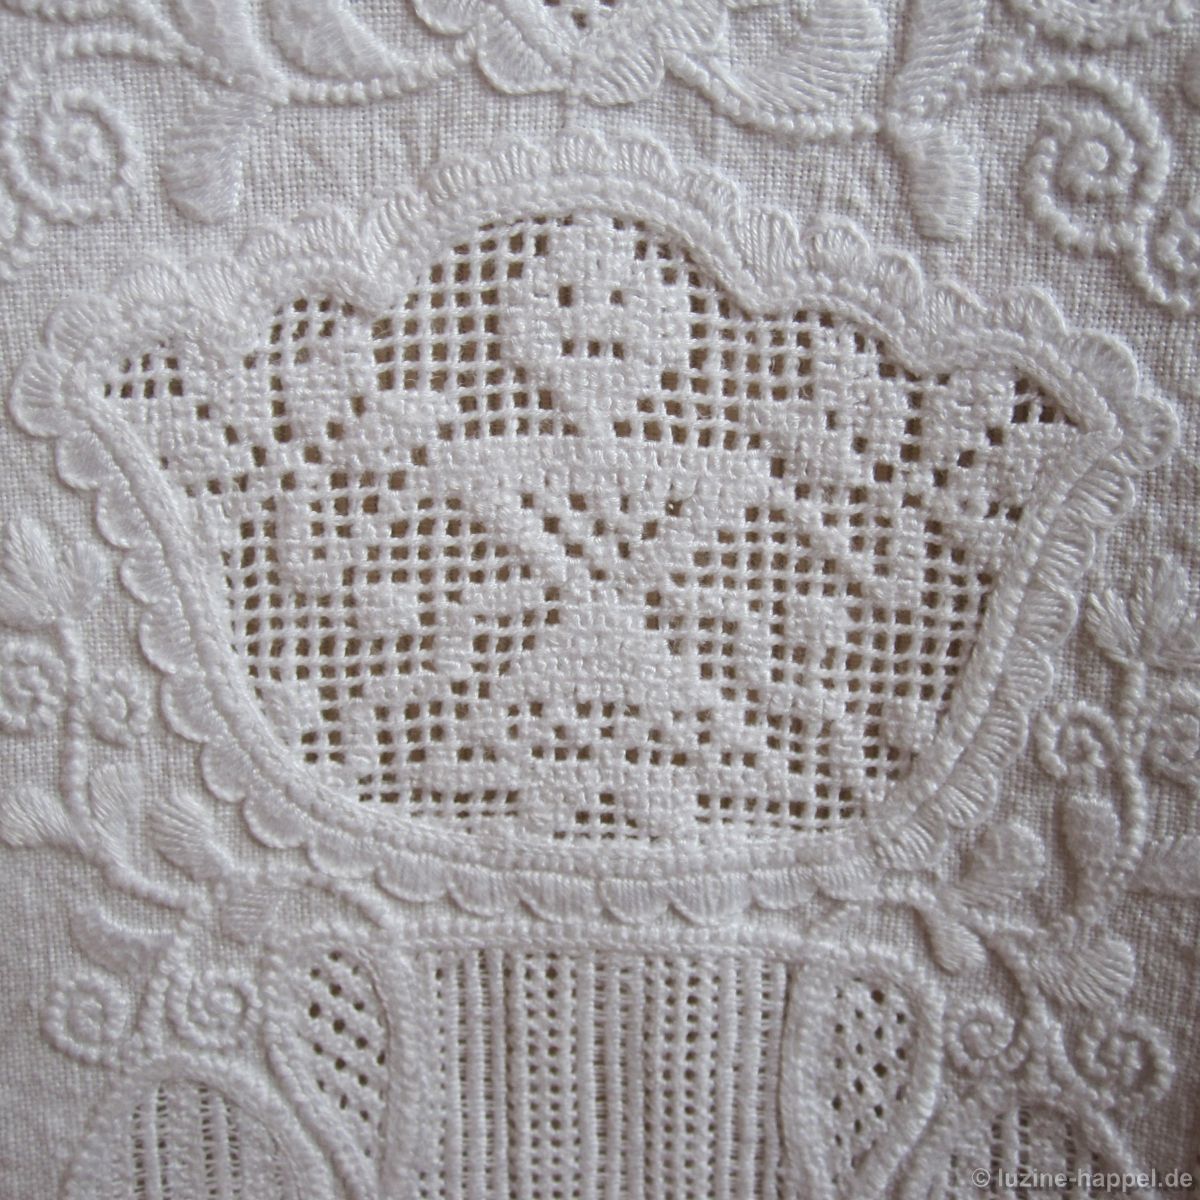
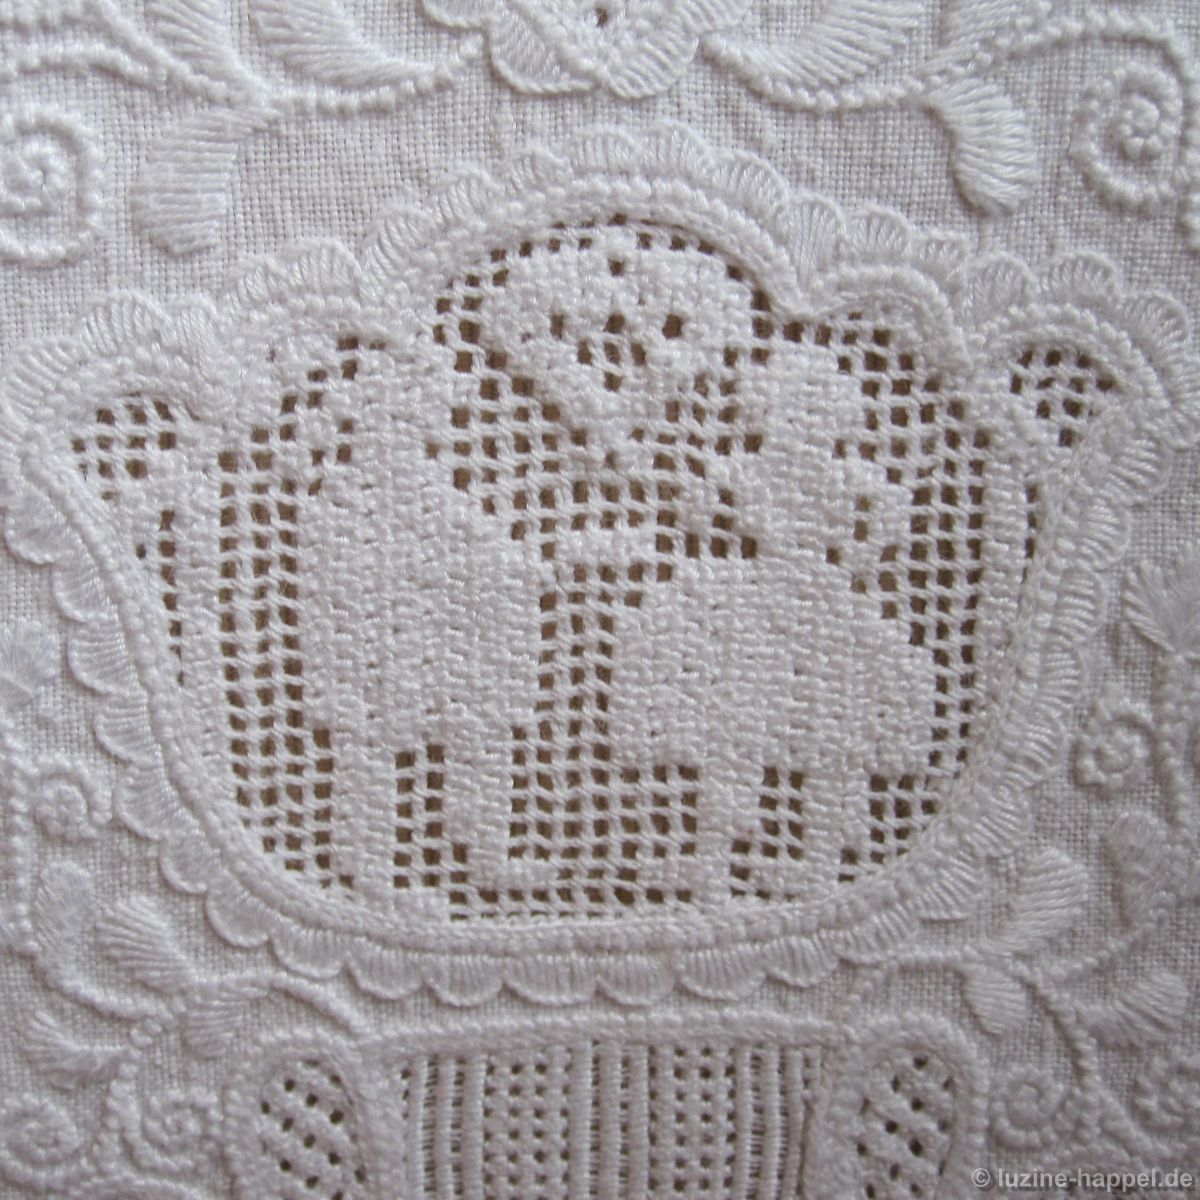
In addition to the endless patterns shown above, openwork grids with Cable stitches in the Schwalm are also often decorated with figurative patterns.

Stars and

hearts

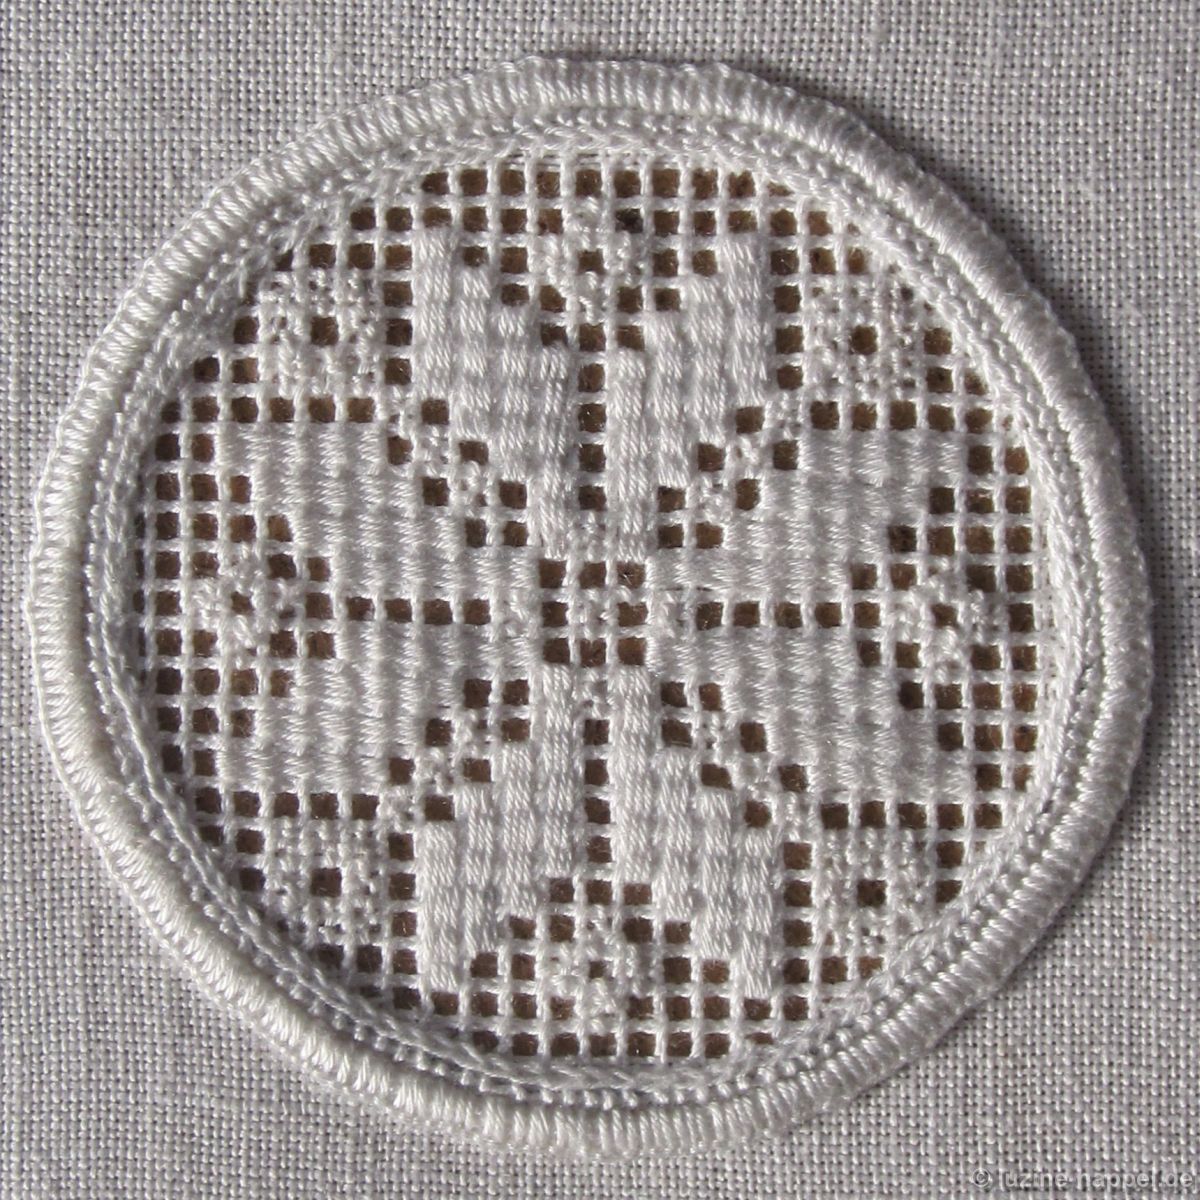
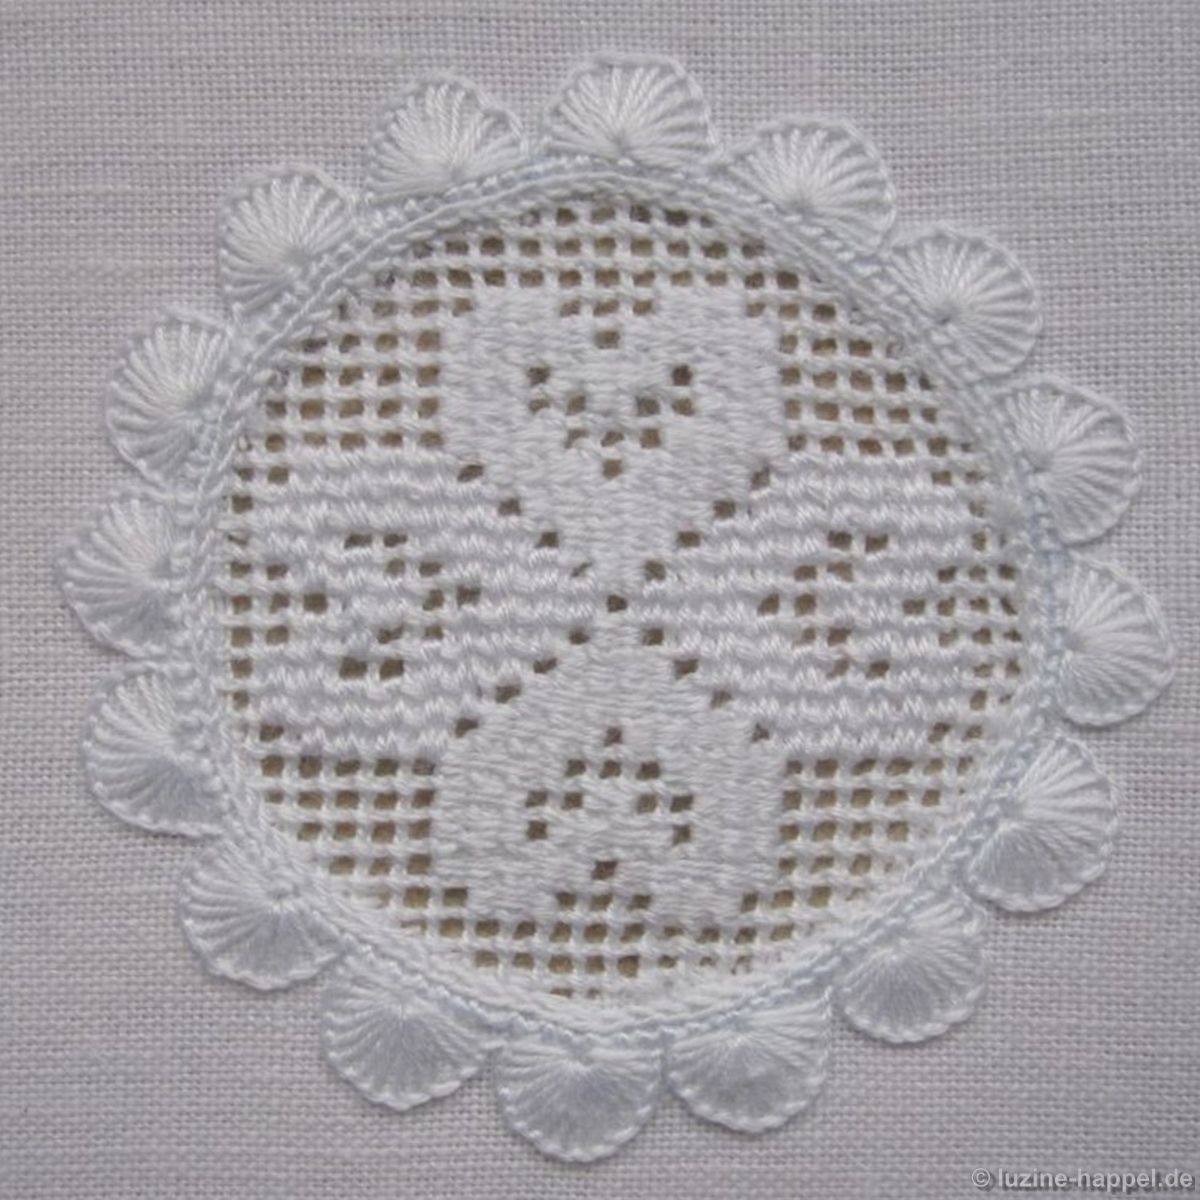
play a big role here, but tulips, birds and other animals as well as males and females can also be found.

In combination with the extremely large number of Limet patterns and the variety of simple withdrawn-thread patterns, one can choose from almost 1000 different area filling patterns.

With the endlessly variable outline patterns, the wide range of area filling patterns and the type of objects to be embroidered, every stitching project can become absolutely unique.
This possibility is once again highly valued today.

The health benefits shouldn’t be overlooked either. Being able to hold a tangible result of one’s work in one’s hands at the end of the day strengthens the psyche. Using both hands is important for maintaining brain function.

An overview of possible Schwalm whitework designs can be obtained through the thumbnails. Clicking on an interesting image will take you deeper into the respective subject matter.

Filling Pattern – No. 580

Filling Pattern – No. 580

category: Limet-Filling pattern
linen used: 13.5/cm thread count
threads used: coton à broder No. 20
stitches used: Satin stitches and parts of square eyelets
center: intersection of withdrawn thread lines (in other shapes or motifs longitudinal axis = withdrawn thread line)
one pattern segment: 20 fabric threads

This pattern for larger motifs can be used for shapes both on the straight of grain and shapes on the bias.

The filling pattern shown here is a practice exercise only. You can see it used in a shape at the end of this article.

First, establish a Limet grid with an intersection of withdrawn thread lines at the center by alternately cutting 1, leaving 3, vertically and horizontally.

Mark around the center point by working Satin stitch bars around an area of 4 X 4 squares (the center point situated directly in center).

Continue working Satin stitch bars over one square (3 threads) in the width and 4 squares (12 stitches) in the length in a stair-step manner

until the entire shape is filled.

Free squares of 4 x 4 small squares have been formed. Square eyelet parts are embroidered into these. Worked is counterclockwise with 56 stitches.
Starting from a corner point, emerge the needle one square(3 X 3 fabric threads) diagonally inwards

and *wrap this corner square

with 7 Satin stitches, each starting from the same point. The working thread is moderately tensioned after each stitch so that it lies smoothly but does not pull any fabric threads together.
After the seventh stitch, bring the needle to the center of the 4 X 4 squares.

From there work 7 stitches between the center and the edge directly next to the previously worked stitches, moving one fabric thread further along the edge with each stitch.

After the seventh stitch, bring the needle straight down one square*

rotate the work 90° clockwise and repeat steps (*)

three times in all.

After the 56th and final stitch, bring the needle to the first emerging point of the next 4 X 4 square by sliding the working thread on the back through existing stitches,

and then work as established until the entire shape is filled

I called this arrangement of quarters of the simple square eyelet and 7 stitches of the double square eyelet “gingerbread” because the formation reminds me of the Christmas pastries popular in Germany.

This pretty pattern can also be embroidered into motifs on the bias, as shown here with the tulip.

To do this, however, you have to prepare the Limet thread grid accordingly. Details can be found in this article

Then continue in the established way.

Now I wish you an enjoyable time. I’m going to take a break now and then get back to you with a newsletter.

Filling Pattern – No. 579

category: Limet-Filling pattern
linen used: 13.5/cm thread count
threads used: coton à broder No. 20
stitches used: Back-, Straight- and Satin stitches
center: center: intersection of withdrawn thread lines (in other shapes or motifs: longitudinal axis = withdrawn thread line)
one pattern segment = 8 threads

The filling pattern shown here is a practice exercise only. You can see it used in a shape in the end of this article.

First, establish a Limet grid with a withdrawn thread line as the longitudinal axis by alternately cutting 1, leaving 3, vertically and horizontally.

Turn the motif 90° counterclockwise and embroider Backstitches over 3 fabric threads each along the central longitudinal axis.

At the end of the row, after completing the last Backstitch, bring needle up one square diagonally to the top left.

Cross under the working thread of the first Backstitch,

insert the needle 2 squares below the emerging point and move the needle up two squares and one square to the right and bring it up there.

*Cross under the working thread of the next free Backstitch,

insert the needle 2 squares below the emerging point and move the needle up two squares and one square to the right and bring it up there.*

Repeat these three steps (*) until the row is finished.
*Then leave a space of one square between a finished row and the next row of Backstitches

and work the row there with Backstitches and the row back with Straightstitches in the established way.*

Repeat these both steps (*),

until the entire area is filled.

When turned back to the original position, the pattern looks like this:

This pattern can be used as both a horizontal and vertical stripe pattern. It also looks interesting if you place it on the motif from top to bottom.

Filling Pattern – No. 578

Filling Pattern – No. 578

category: Limet-Filling pattern
linen used: 13.5/cm thread count
threads used: coton à broder No. 20
stitches used: Back-, Straight- and For-Sided stitches
center: center: intersection of withdrawn thread lines (in other shapes or motifs: longitudinal axis = withdrawn thread line)
one pattern segment = 12 threads

The filling pattern shown here is a practice exercise only. You can see it used in a shape in the end of this article.

First, establish a Limet grid with a withdrawn thread line as the longitudinal axis by alternately cutting 1, leaving 3, vertically and horizontally.

Turn the motif 90° counterclockwise and embroider Backstitches over 3 fabric threads each along the central longitudinal axis.

At the end of the row, after completing the last Backstitch, bring needle up one square diagonally to the top left.

Cross under the working thread of the second-to-last Backstitch,

insert the needle 2 squares below the emerging point and move the needle up two squares and one square to the right and bring it up there.

*Cross under the working thread of the next free Backstitch,

insert the needle 2 squares below the emerging point and move the needle up two squares and one square to the right and bring it up there.*

Repeat these three steps (*)

until the row is finished.

Turned back to the original position, the pattern looks like this:

In this pattern I want to add a row of Four-Sided stitches between the rows of Back- and Straightstitches. Since it is easier to start the Back- and the Straight stitches always from the same side, all of these rows are embroidered first.

To do this, leave a space of two squares between a finished row and the next row of Backstitches.

Work the row there with Backstitches and the row back with Straightstitches in the manner previously described

until the entire area is filled.
When turned back to the original position, the pattern looks like this:

Then embroider Four-Sided stitches from the back over the remaining 3-thread columns.

*To do this, take the three fabric threads above a square from right to left, move the needle downwards and take the same fabric threads below the square.

Move the needle upwards, insert it at the upper right corner of the square and bring t up again at the lower right corner.*

Repeat these three steps.

From the front it looks like this:

Once all the rows of Four-Sided stitches have been embroidered, the pattern is finished.

This pattern is particularly suitable for motifs that taper towards the bottom, such as hearts.

Since this pattern harmonizes with the outline of a bird’s wing, I embroidered a pattern strip – but still set between Stain stitch bars – for filling the wing area.

Filling Pattern – No. 576

category: Limet filling pattern
linen used: 13.5/cm thread count
threads used: coton à broder No. 30
stitches used: Crossing Straight and Rose stitches
center: intersection of withdrawn thread lines
one pattern segment: = 6 threads

After I presented with No. 576 a filling pattern for large motifs, I will now show a pattern for small areas. If one pattern segment of No. 576 had a width of 40 fabric threads, this pattern only has a segment of 6 fabric threads.

Since more threads are left than are withdrawn, I call it a Limet pattern, even though it is not a typical Limet pattern.

The filling pattern shown here is a practice exercise only.

First create a grid with an intersection of withdrawn thread lines in the center,

by alternately withdrawing 2 and leaving 4 threads both horizontally and vertically.

The pattern is formed from diagonal rows of alternating Straight stitches that run vertically and horizontally across the 4-thread squares of fabric,

and Rose stitches, the centers of which lie in the free squares and which pick up 2 fabric threads on each side.

This changes the position of the fabric threads. Small oval gaps are created that make up the pattern at the end.

Bring needle up in the middle of the upper edge of a square of 4 fabric threads,

*move the needle vertically downwards, insert there and bring needle up two fabric threads diagonally to the top left.

Move the needle horizontally to the right, insert it and bring it up in the free square on the left above the square of 4 fabric threads.

This is the center of the first Rose stitch, which started with a stitch to the left

and continues counterclockwise.

With the fourth stitch – unfortunately not visible here in the picture – you also have to pick up the sliding thread on the back so that the newly created holes remain open and clearly defined.

From the end of the Rose stitch, move the needle diagonally to the left to the middle of the upper edge of the next 4-thread square.*

Always repeat the steps (*)

and embroiders row after row,

until the entire area is filled.

Only after washing does the pattern developes its full effect.