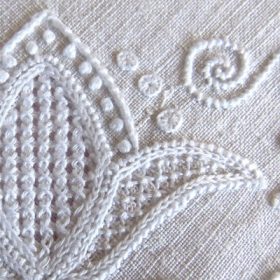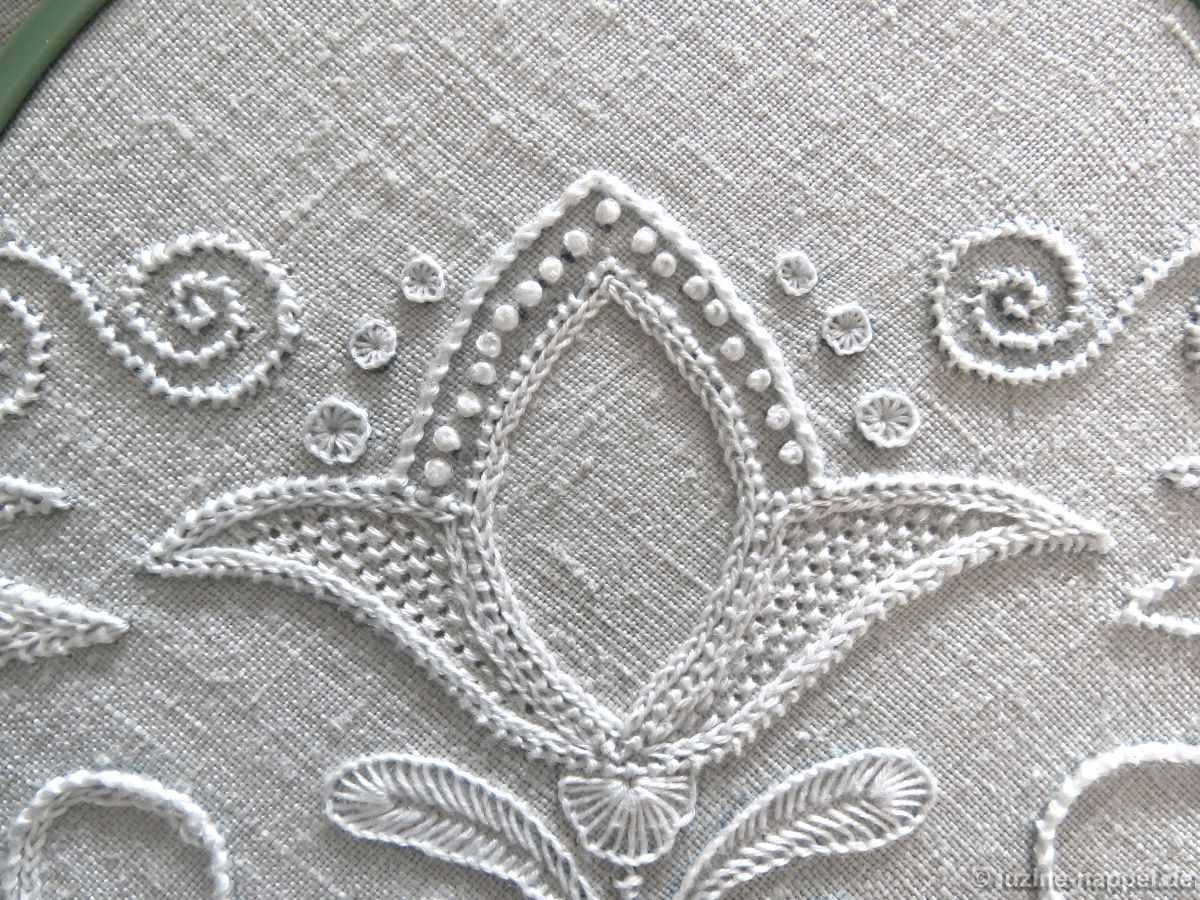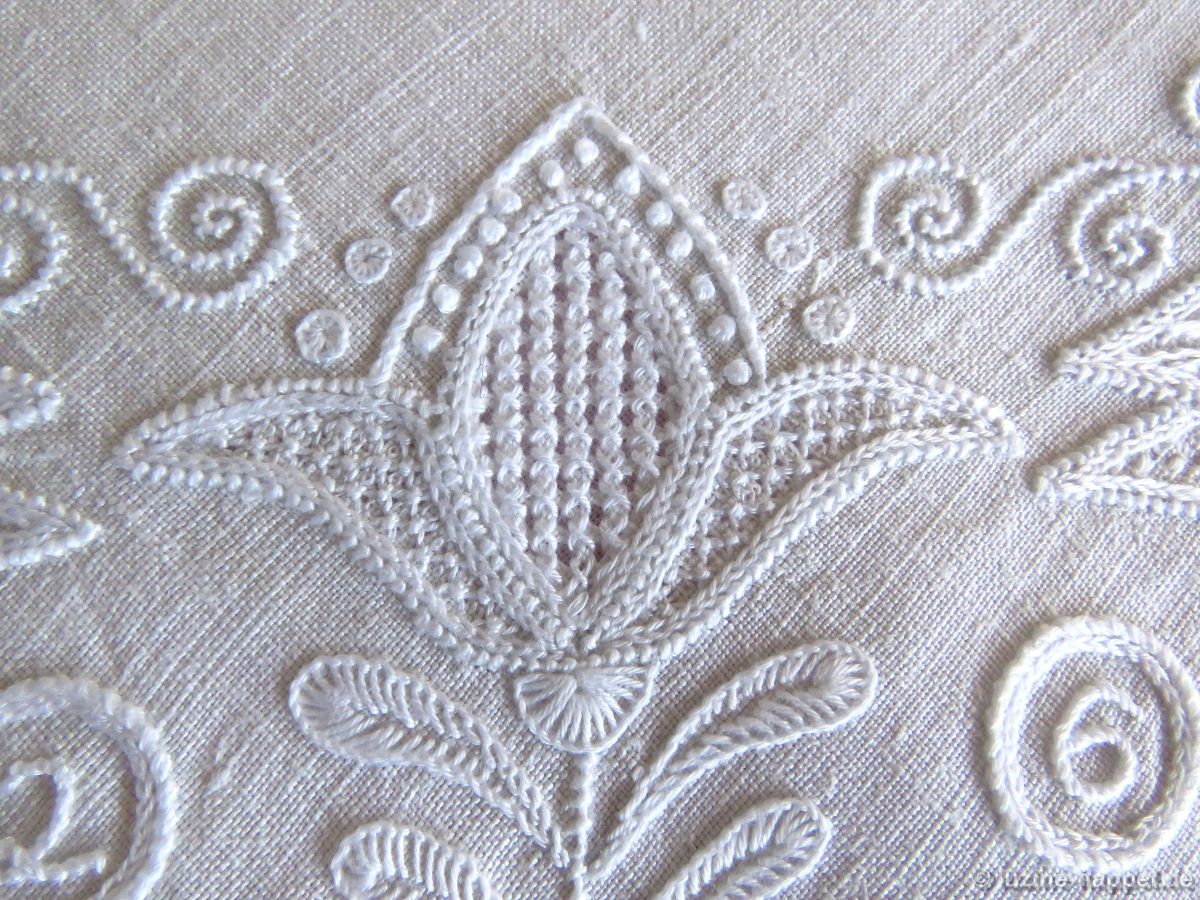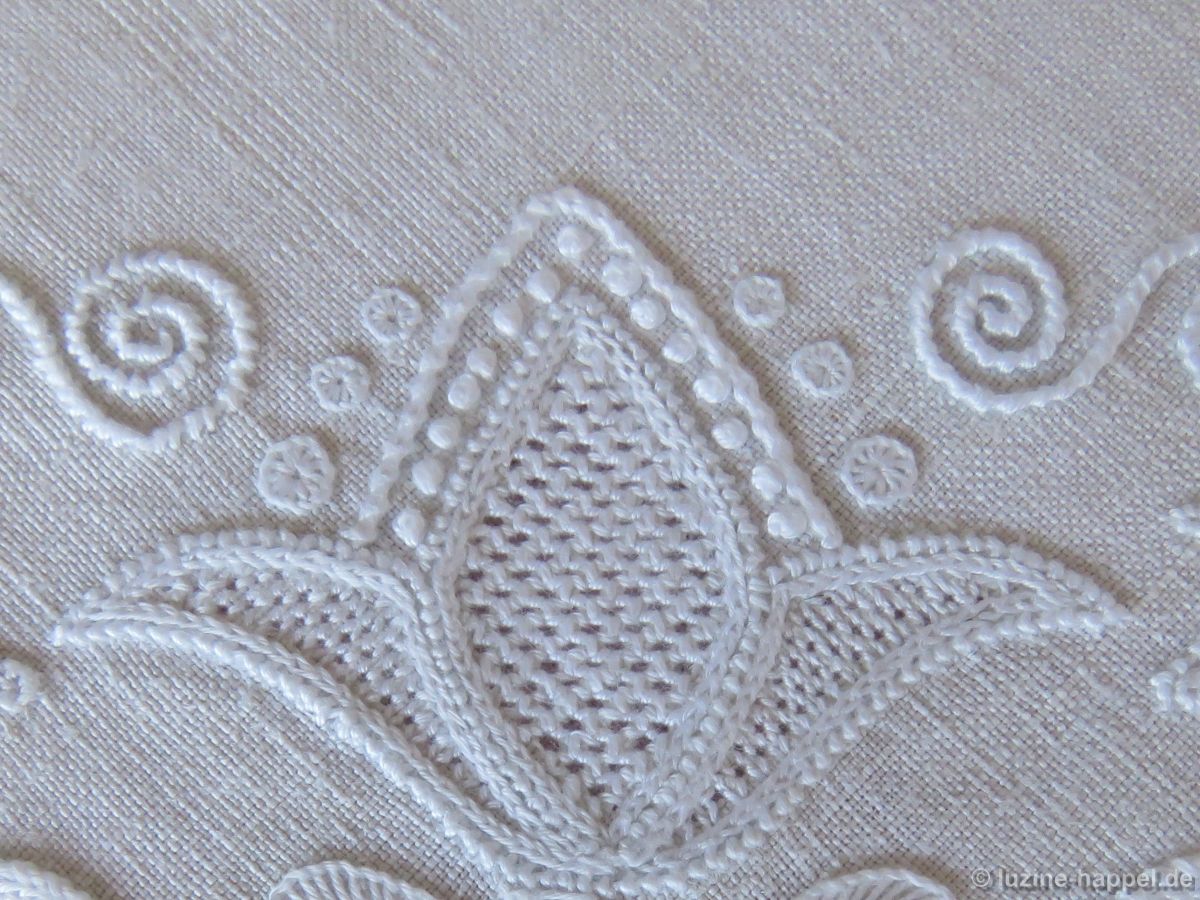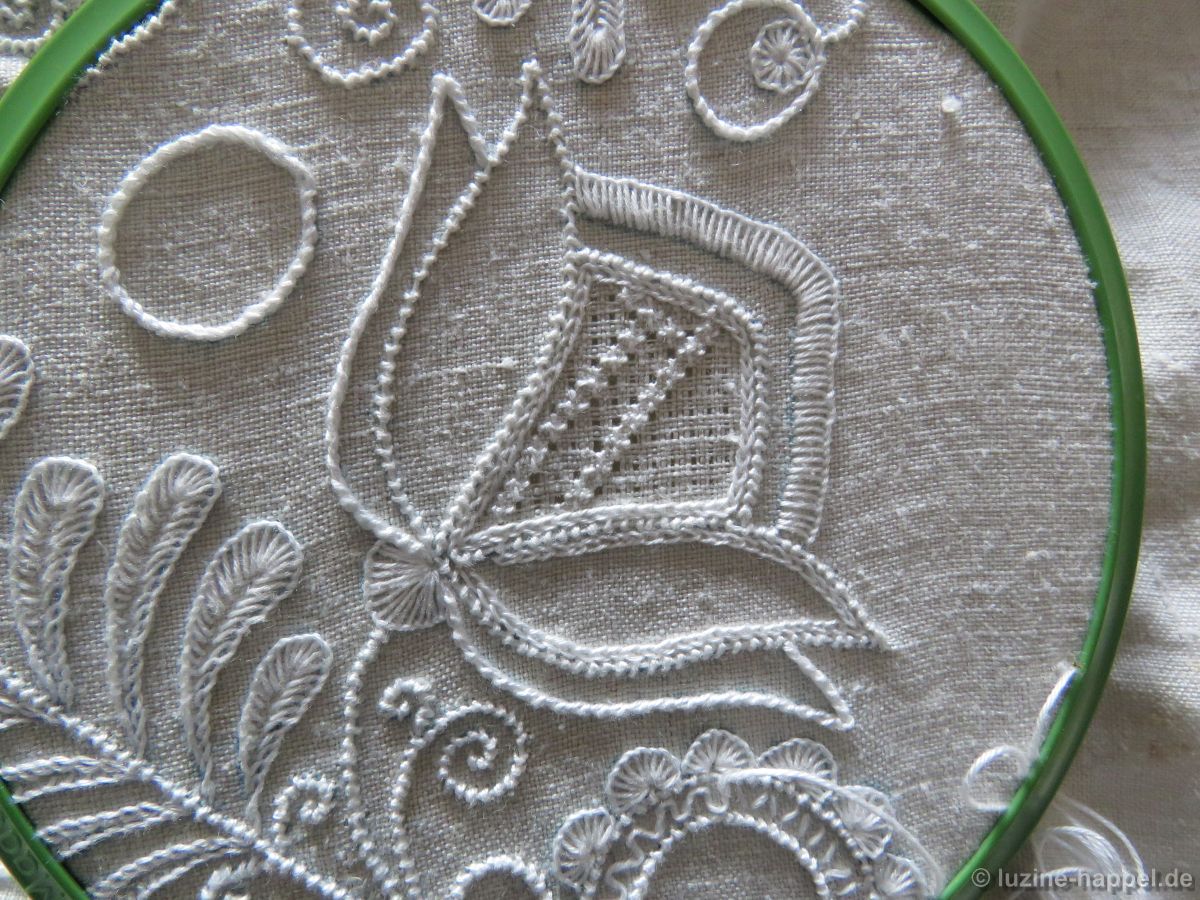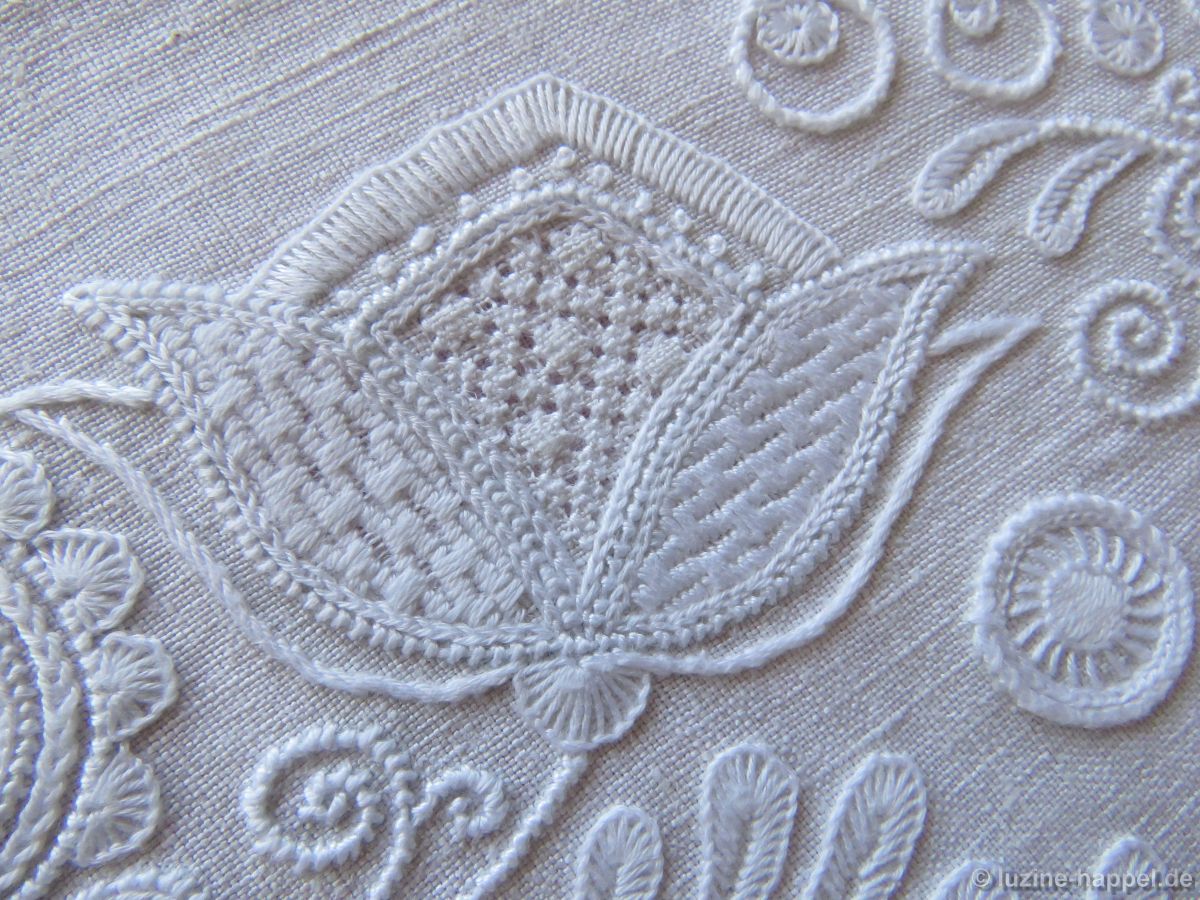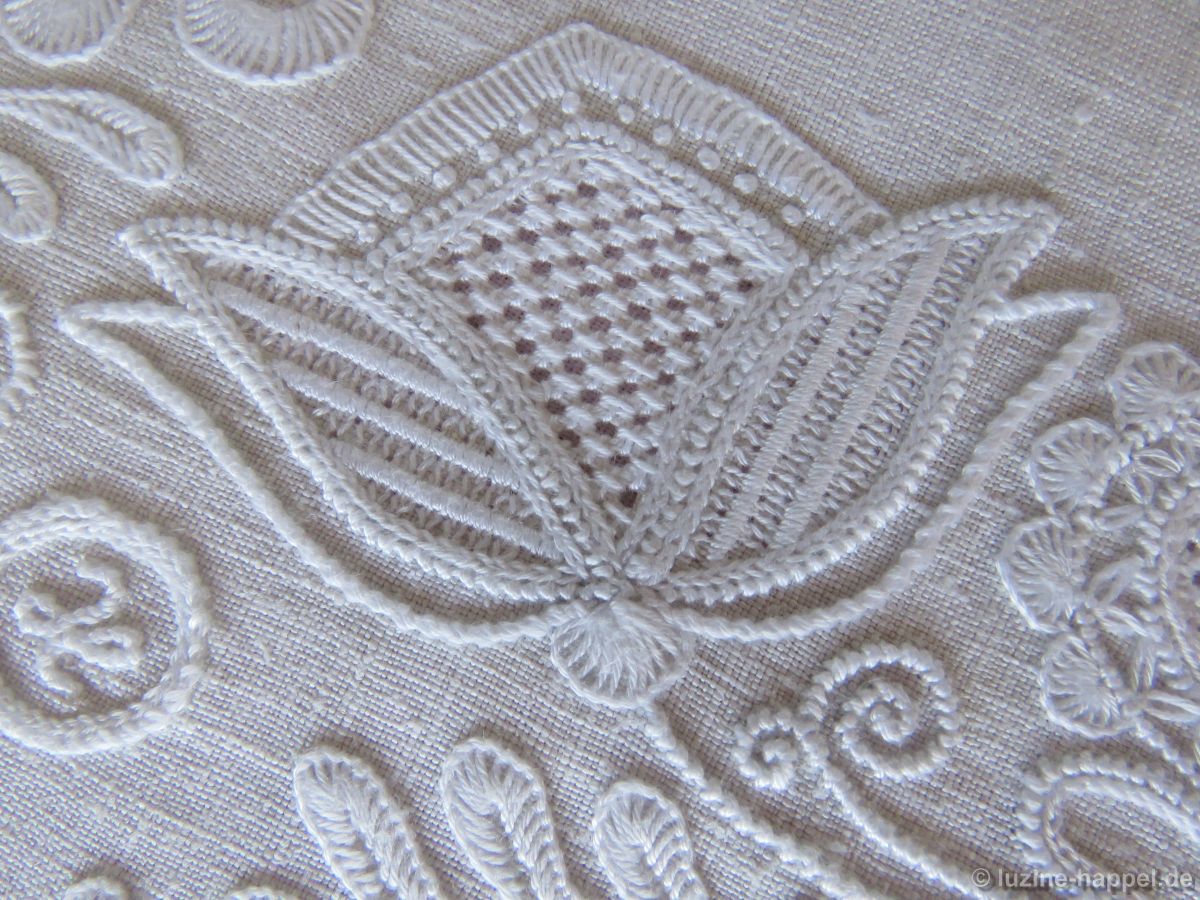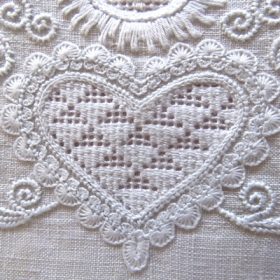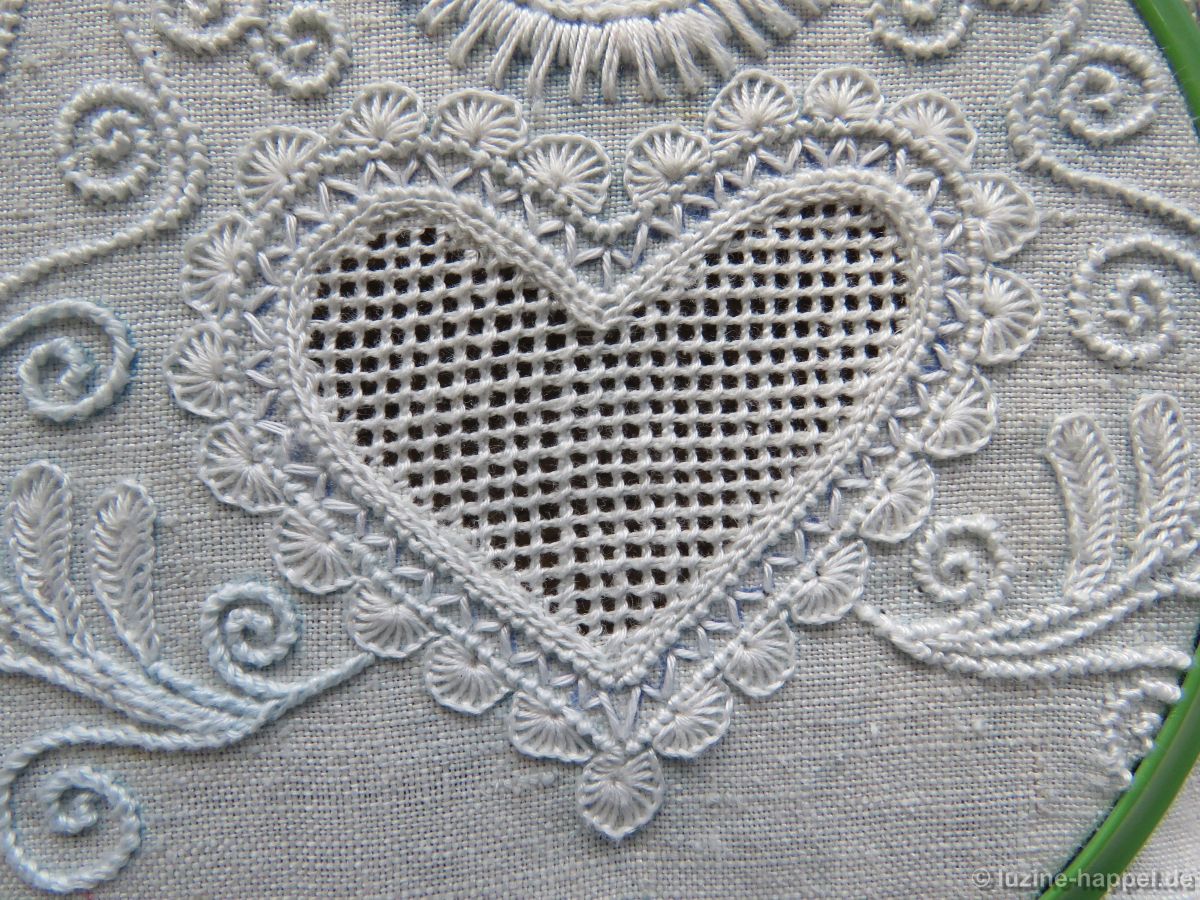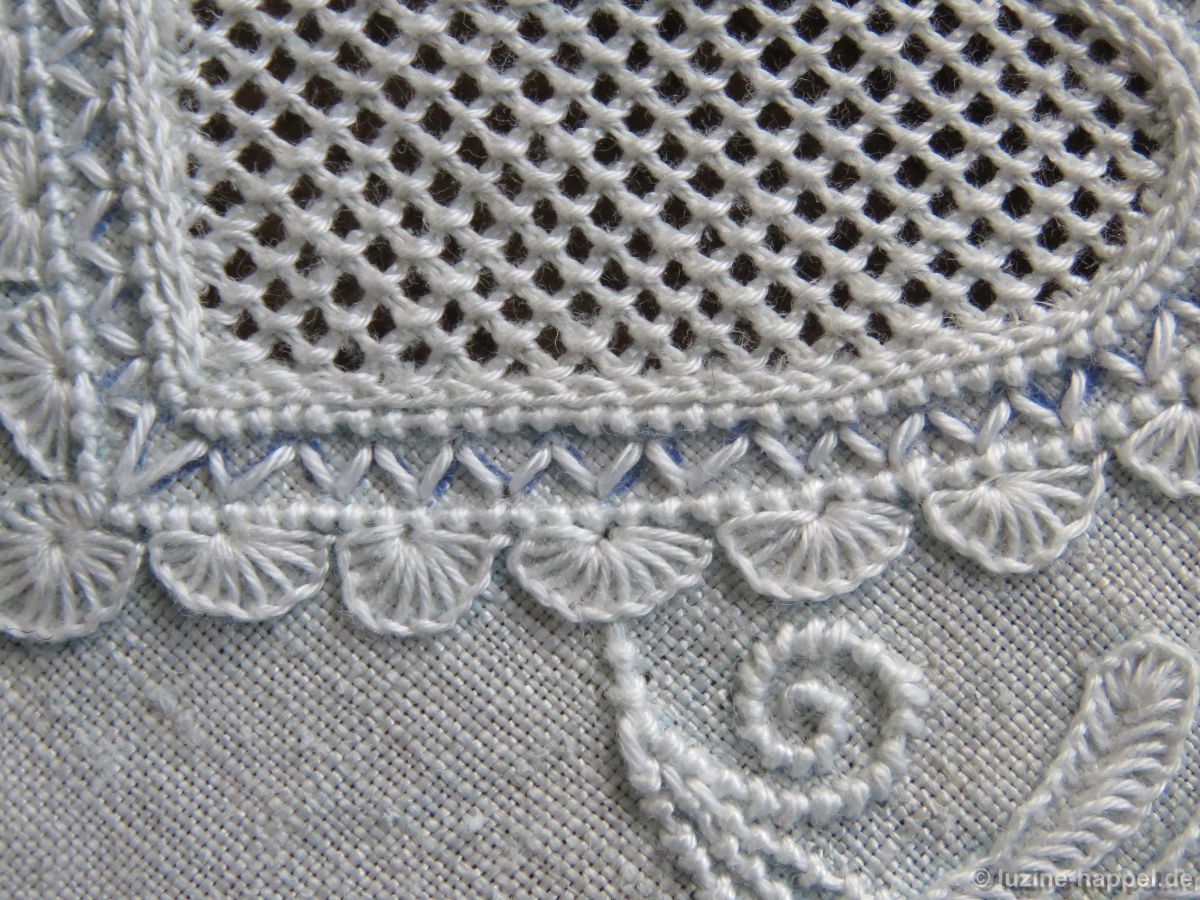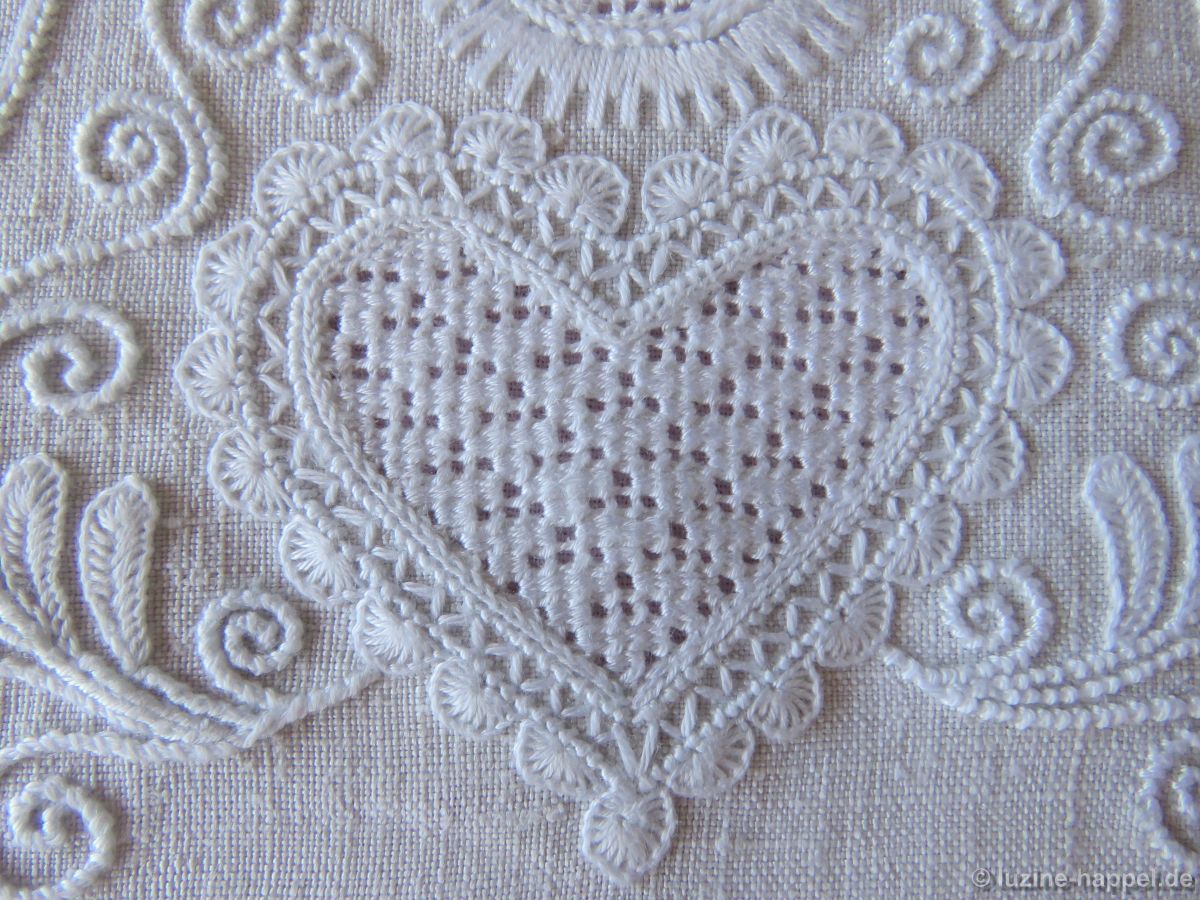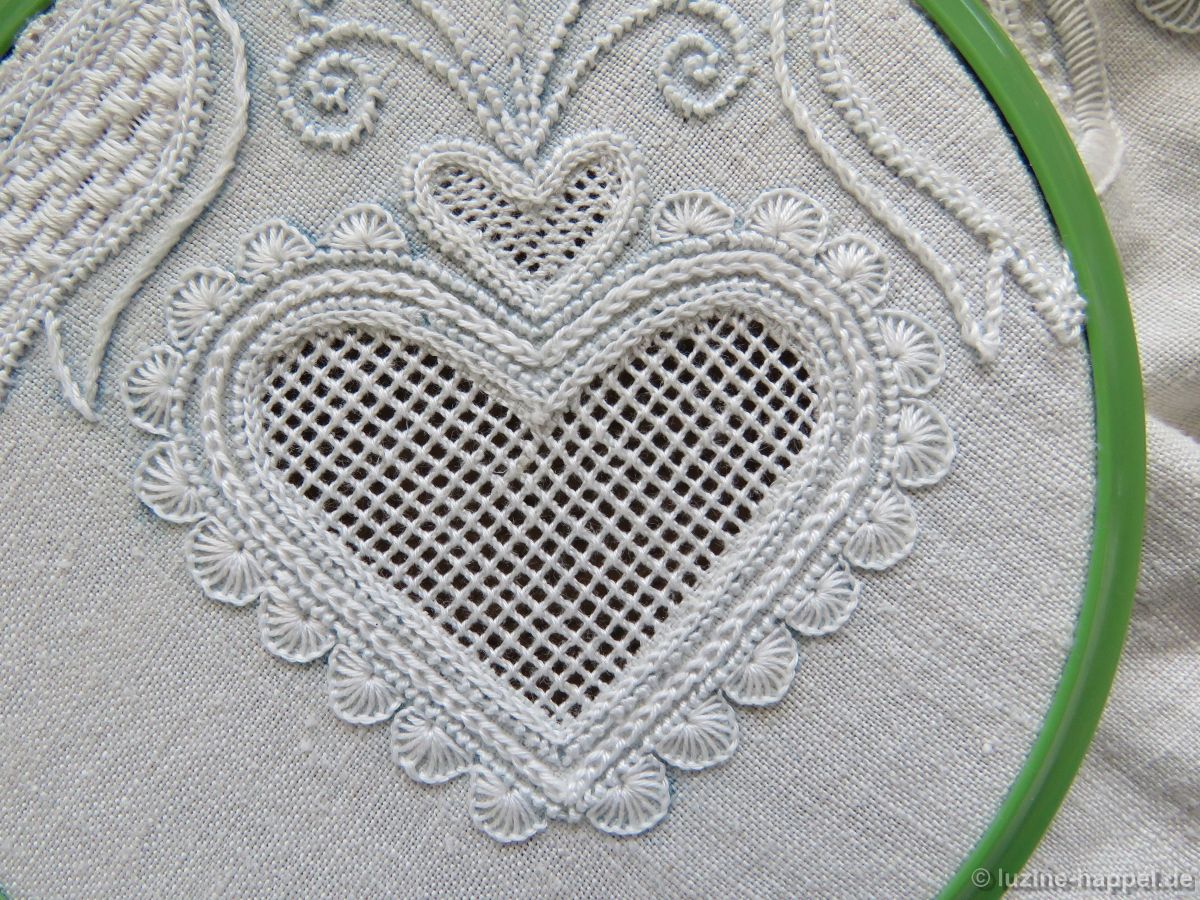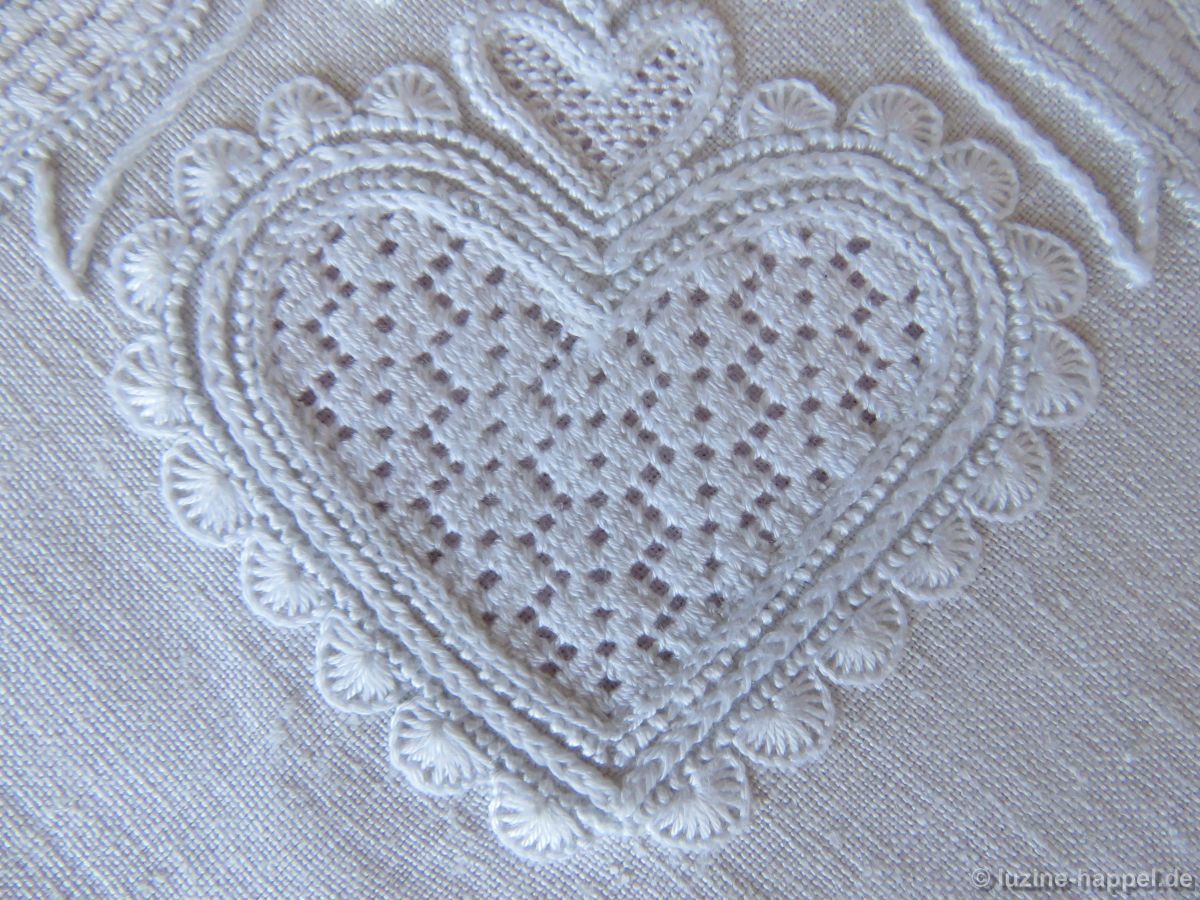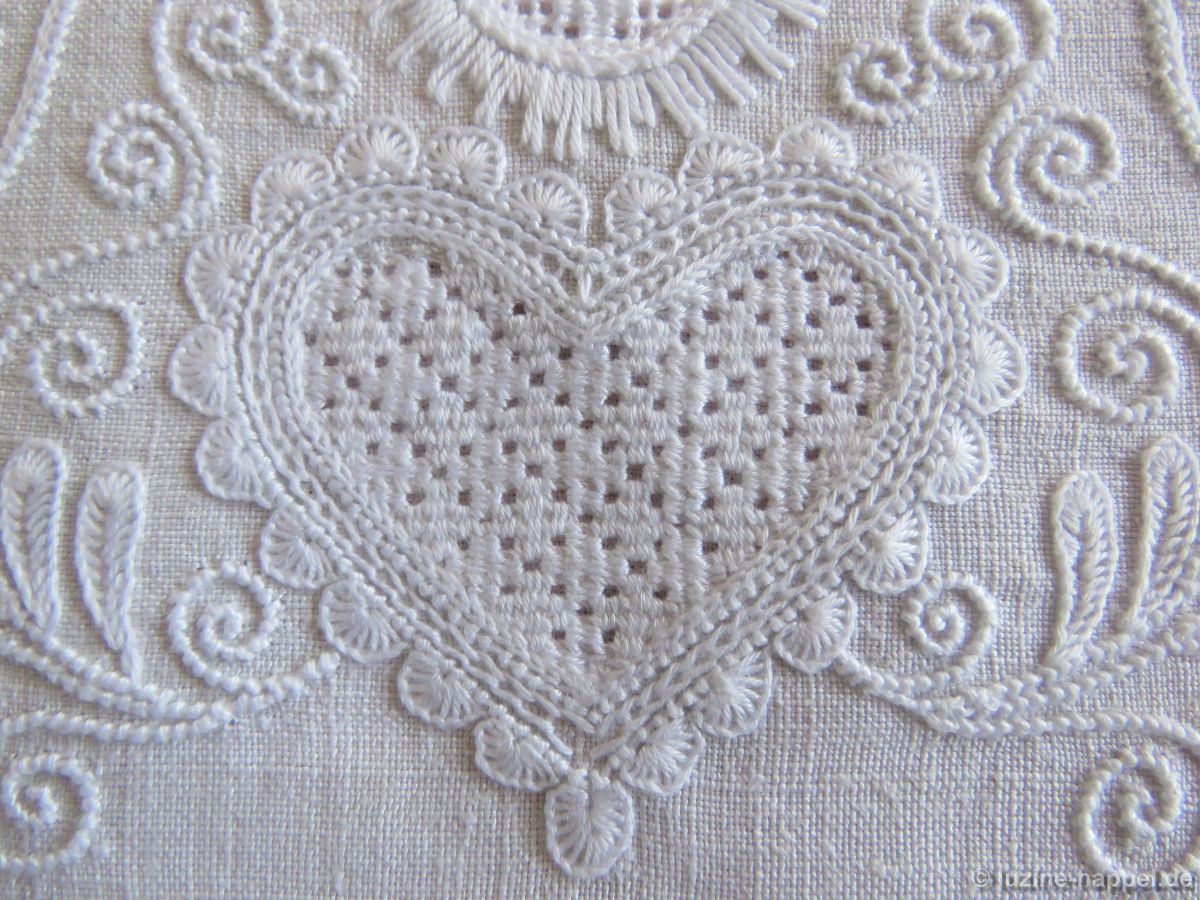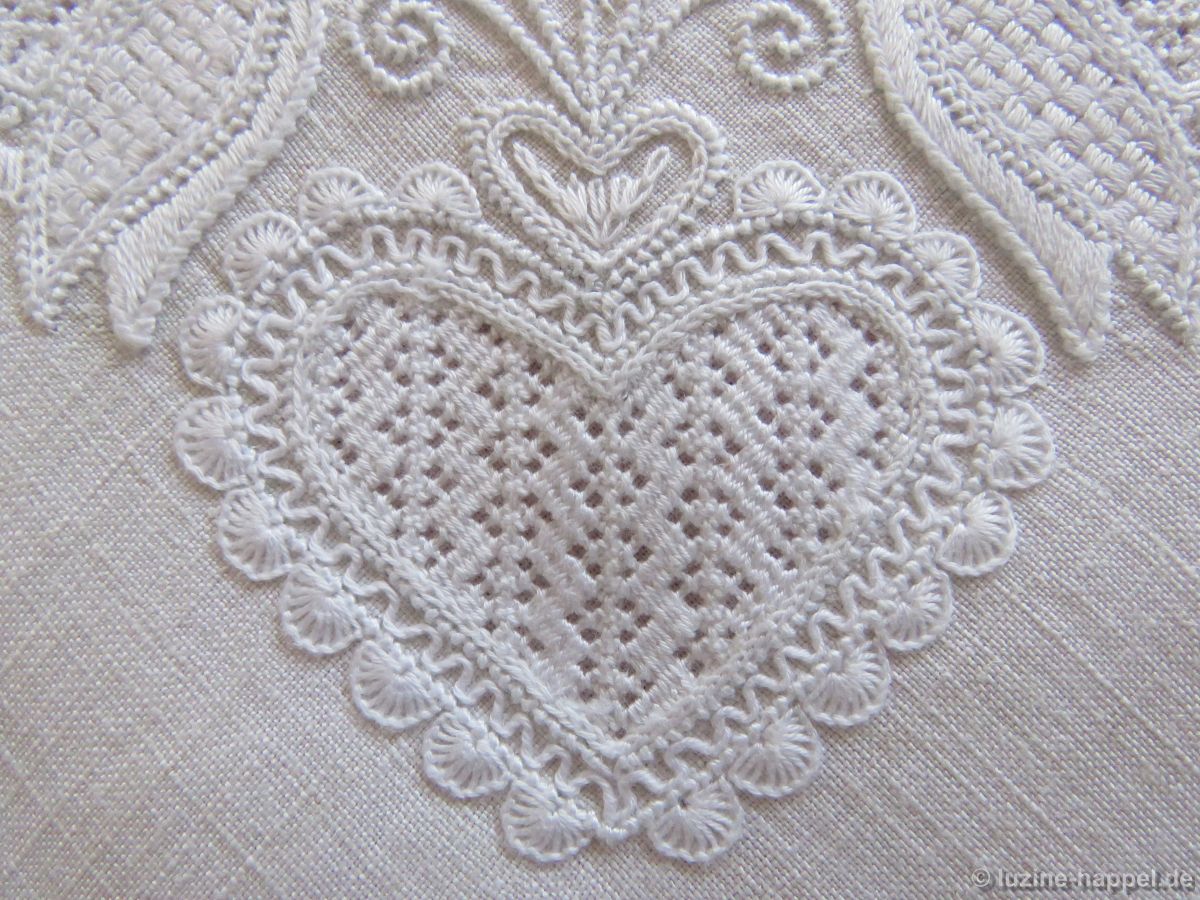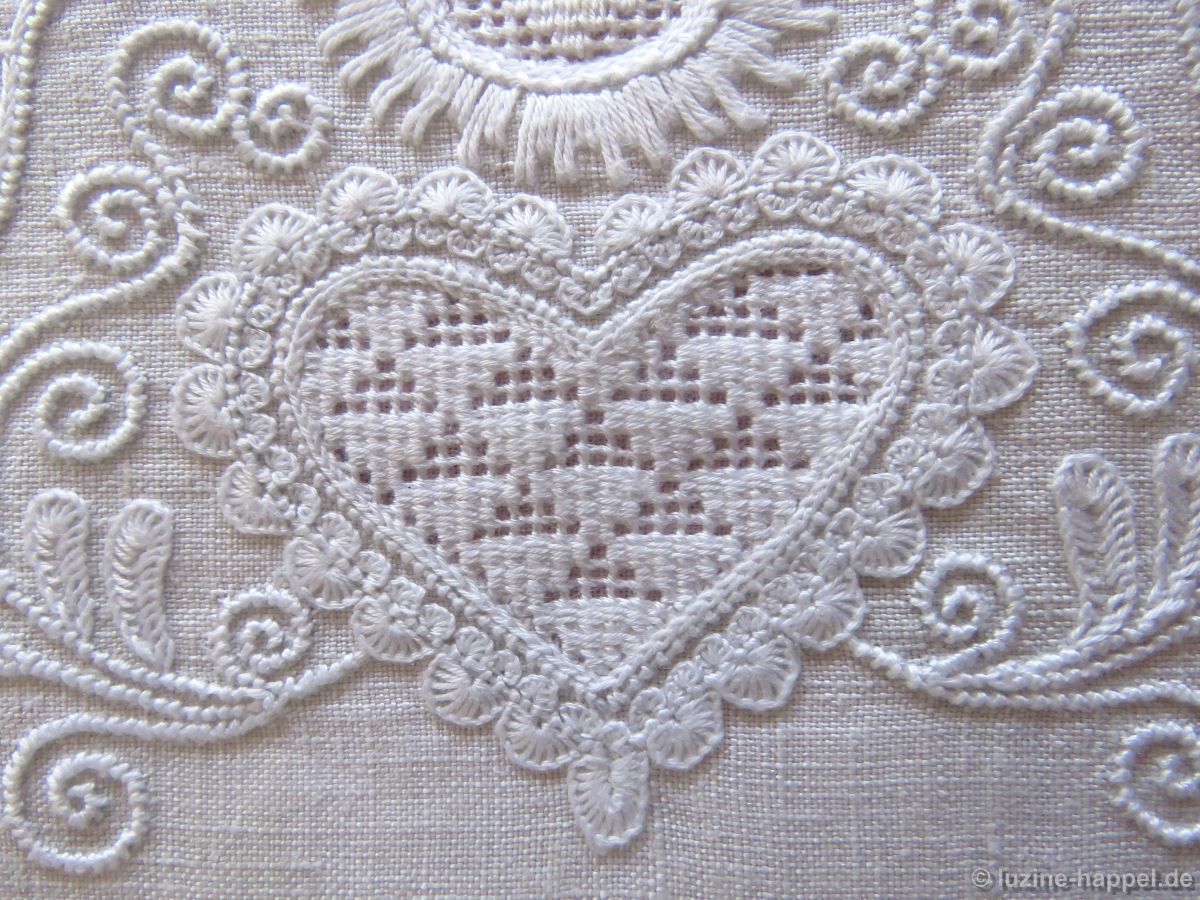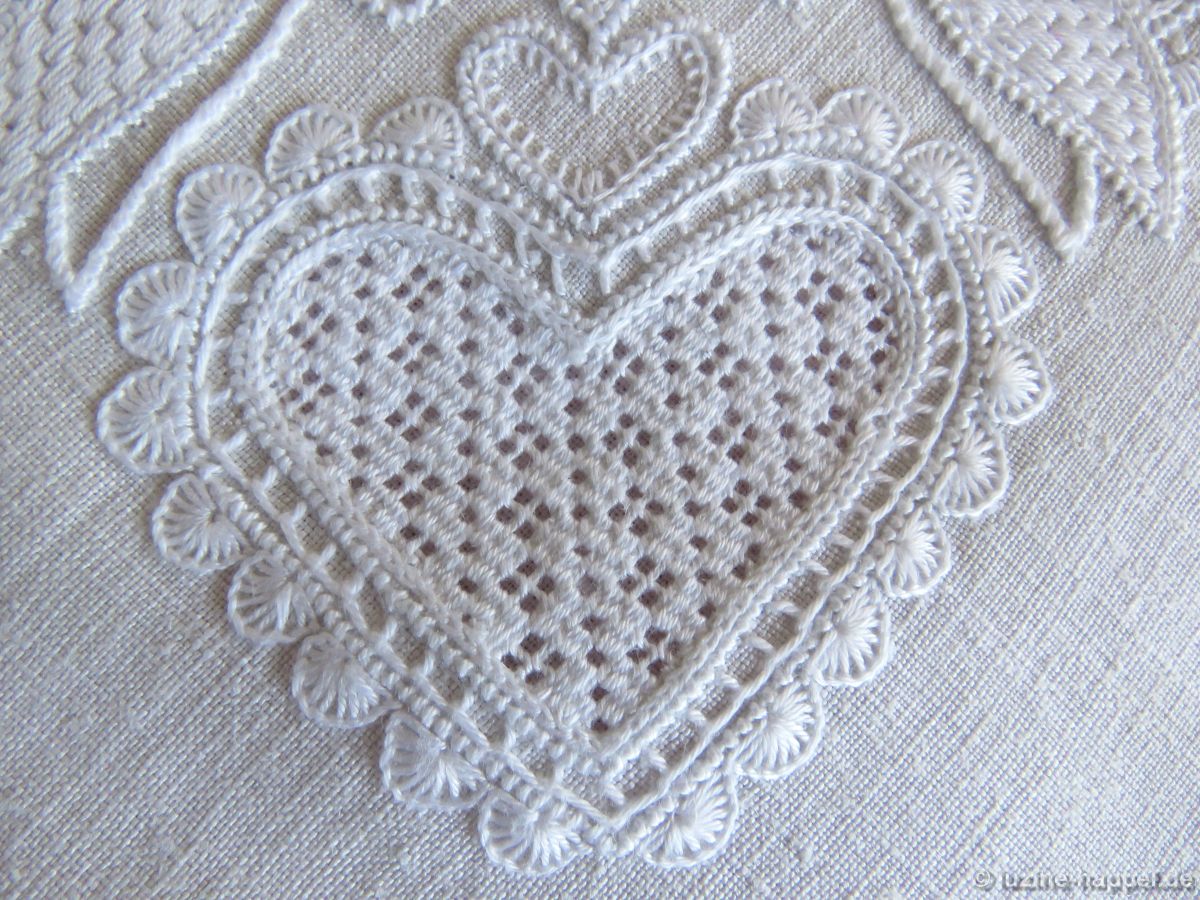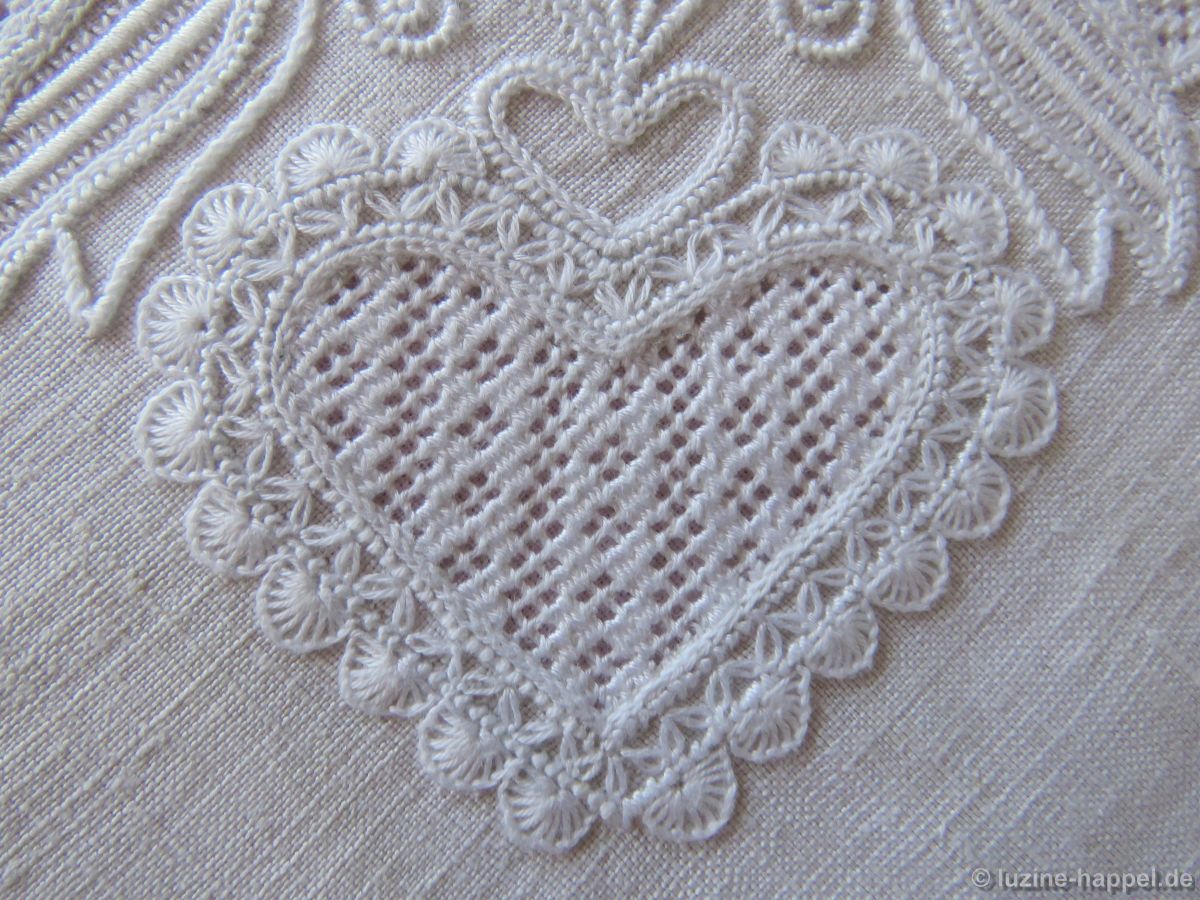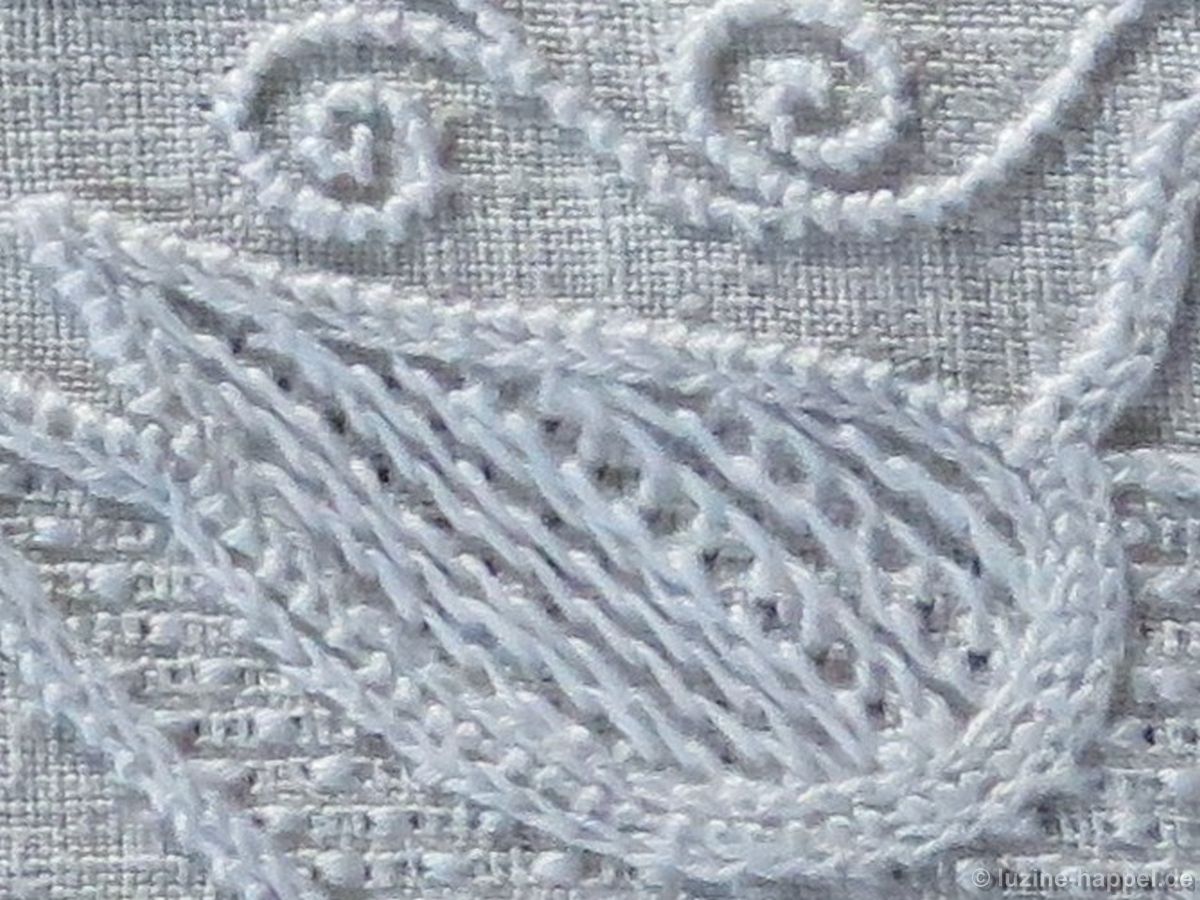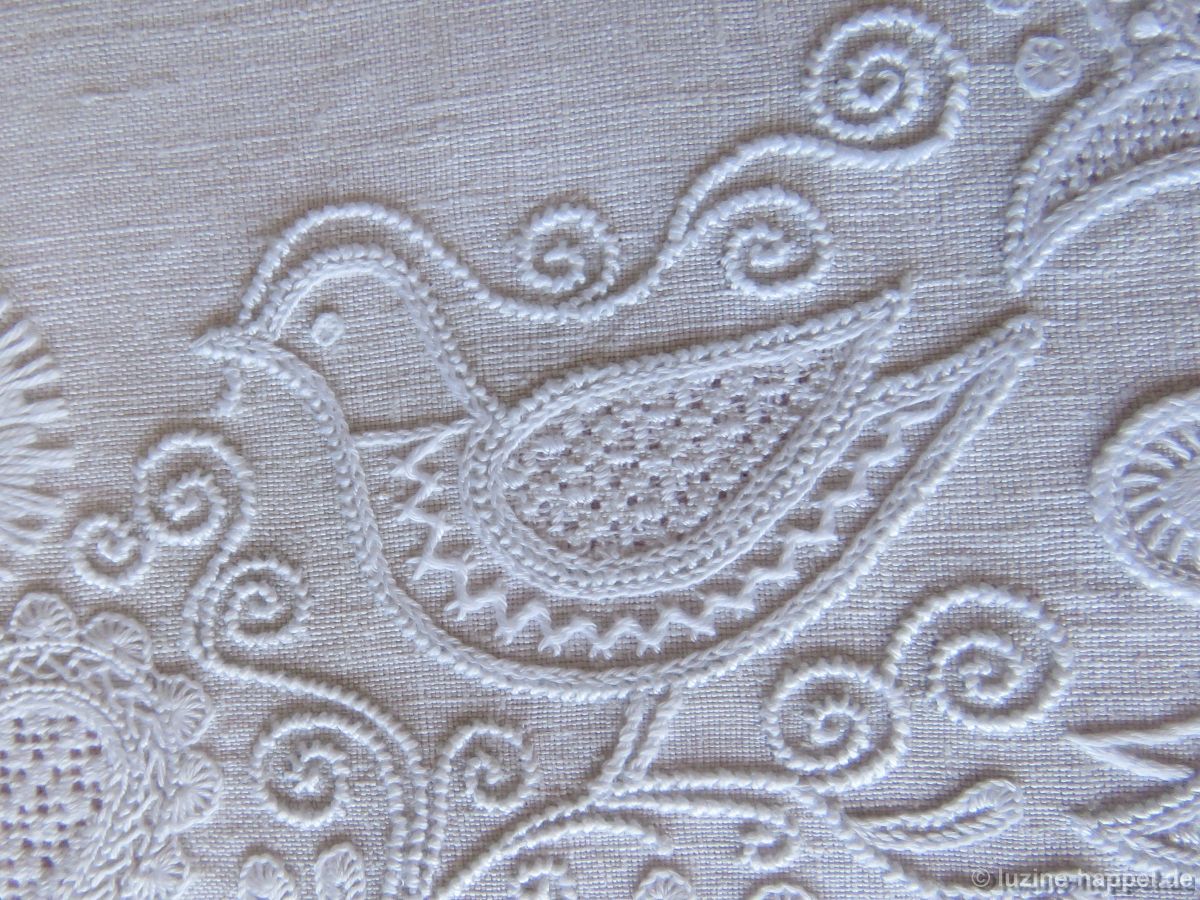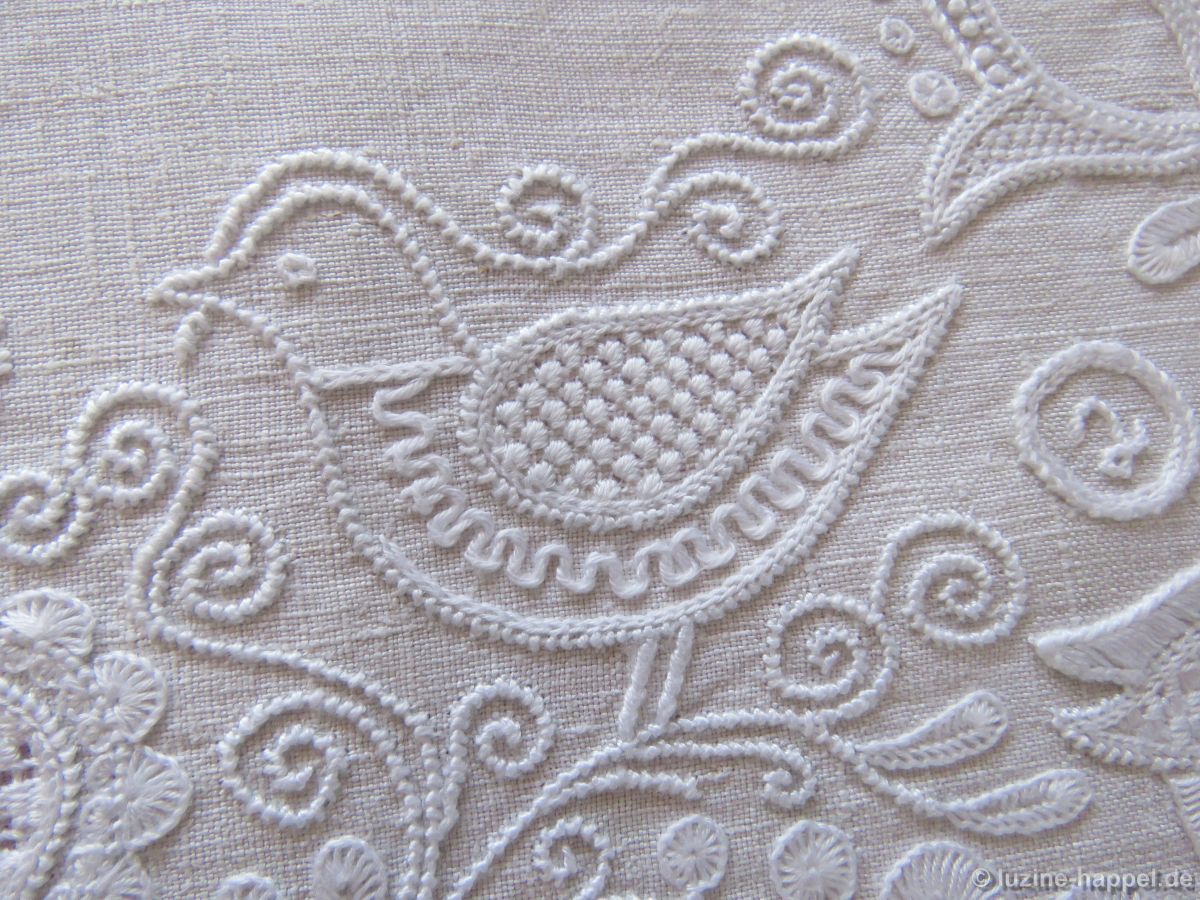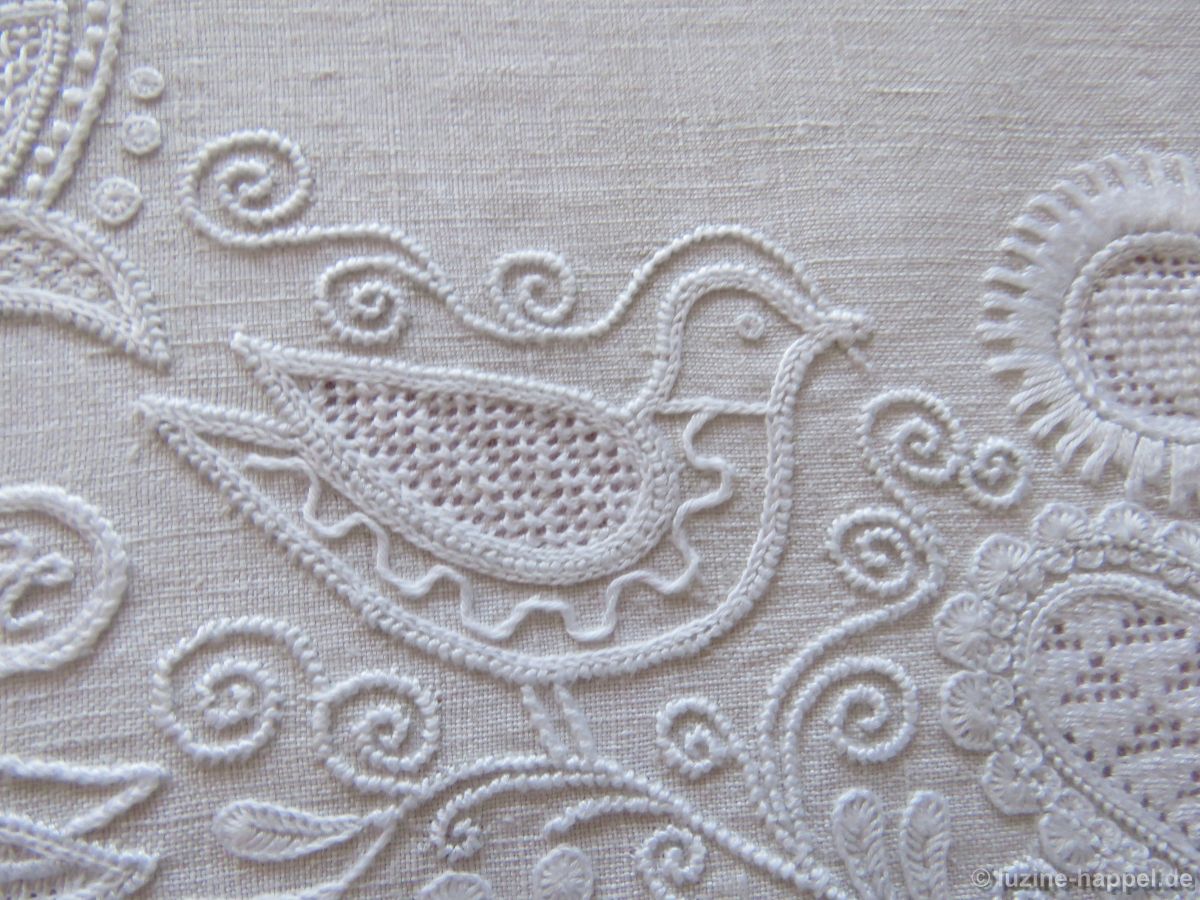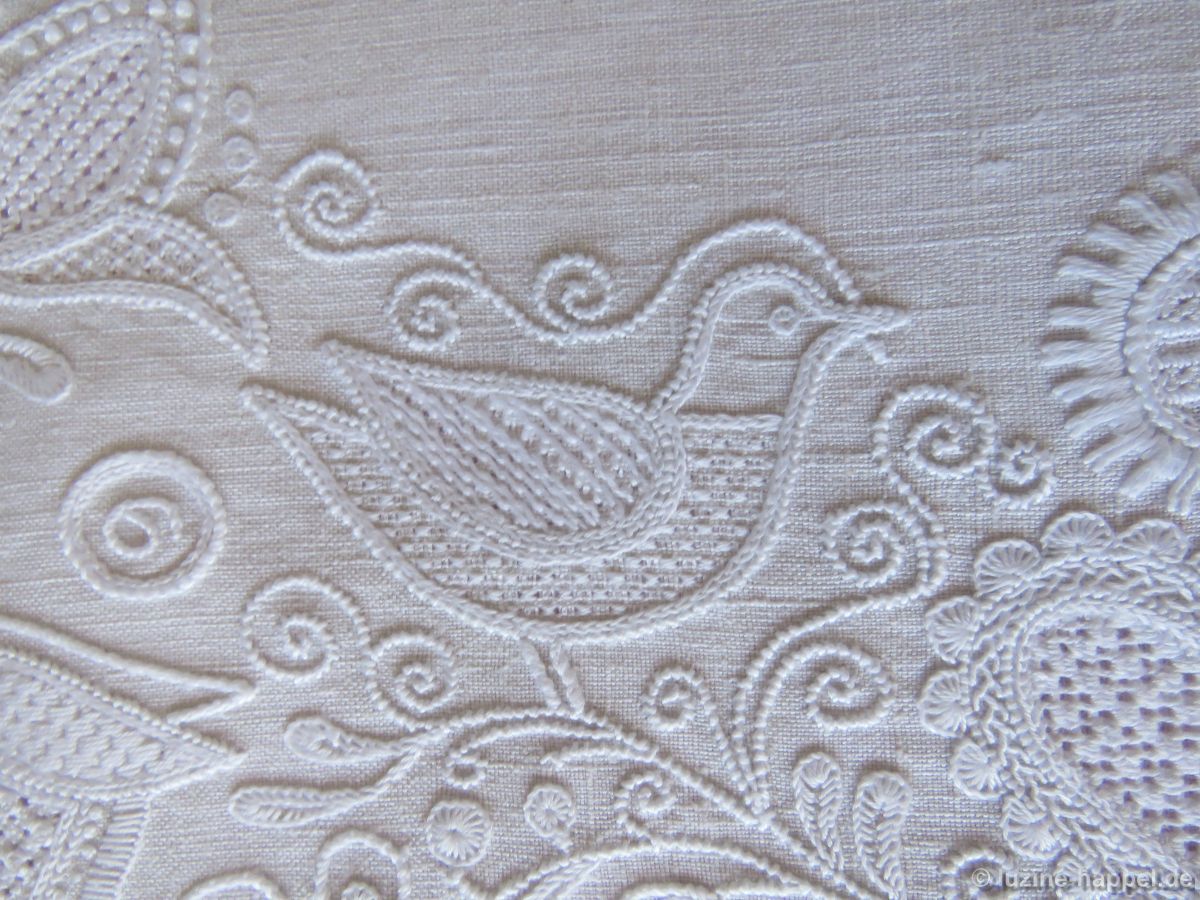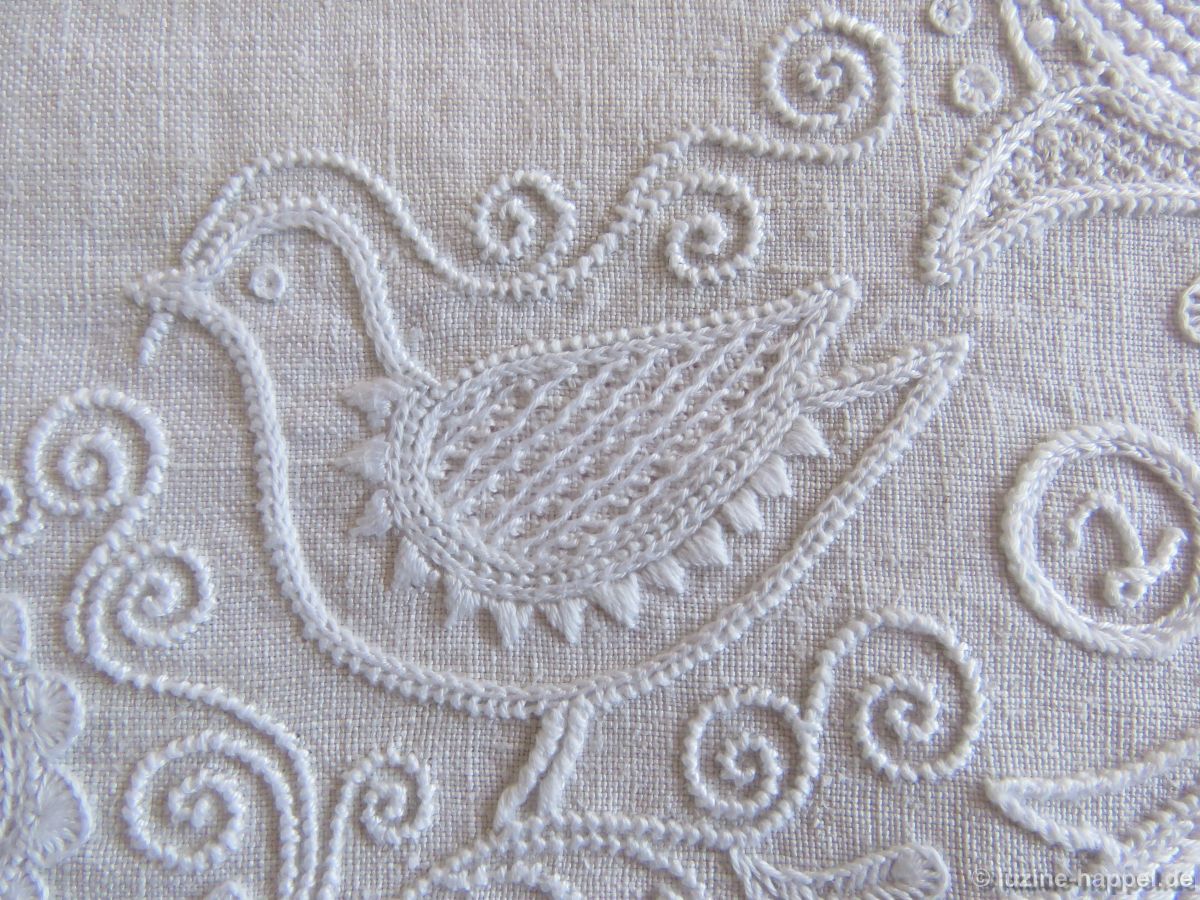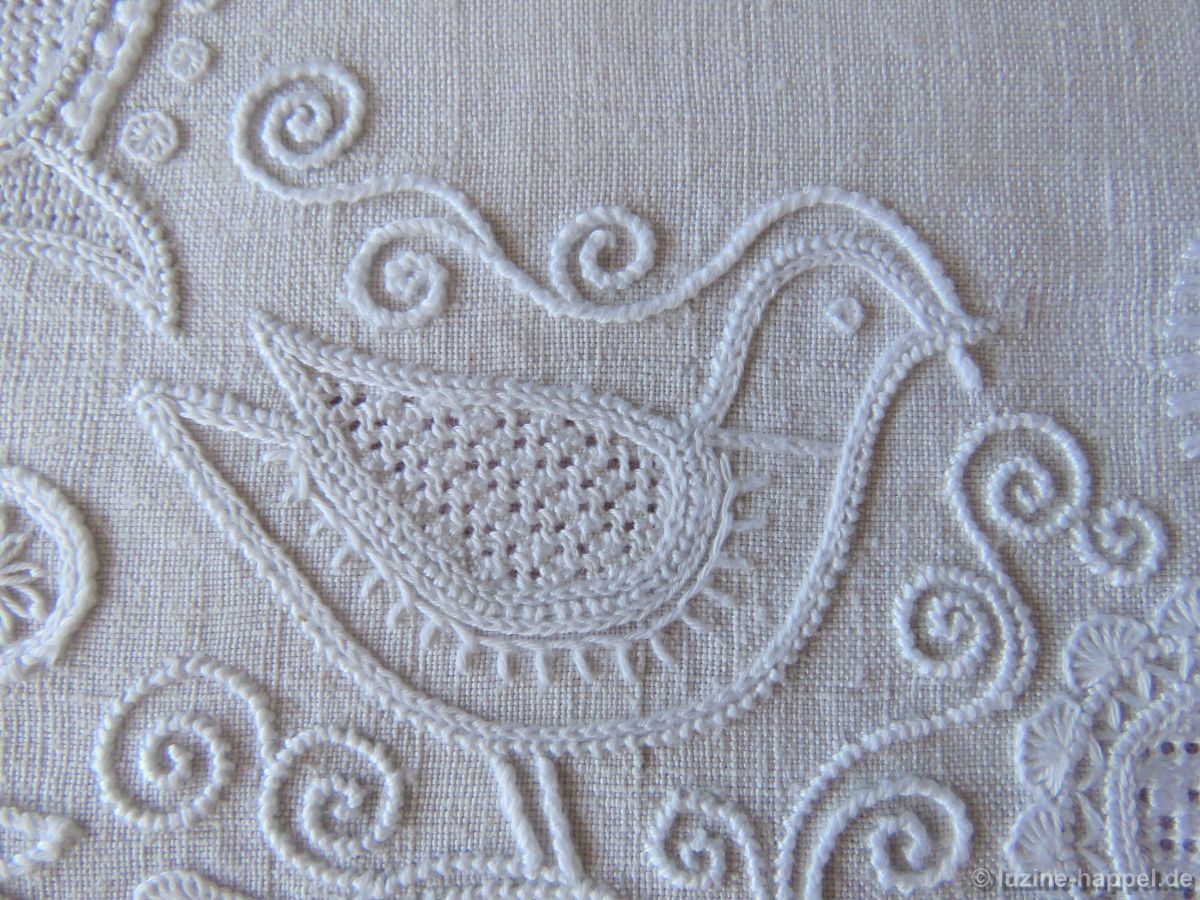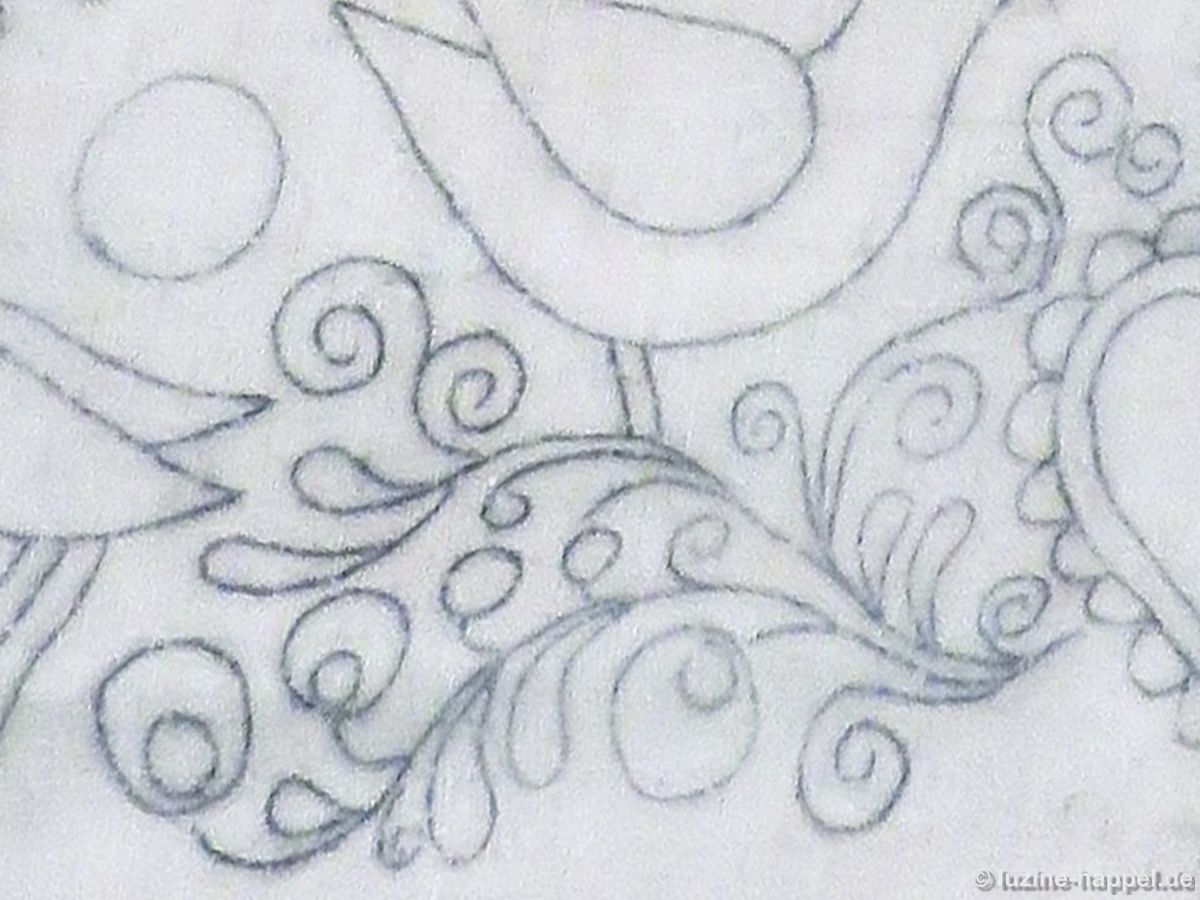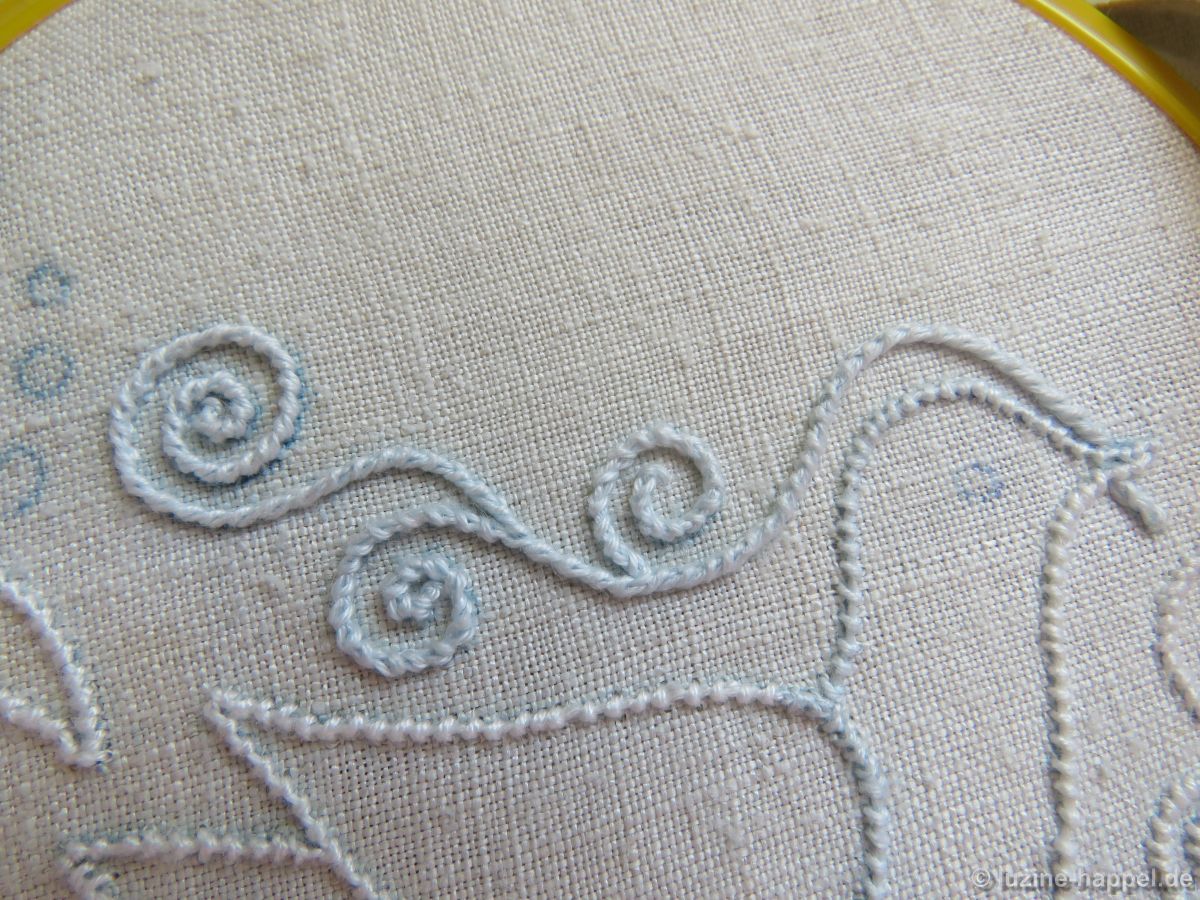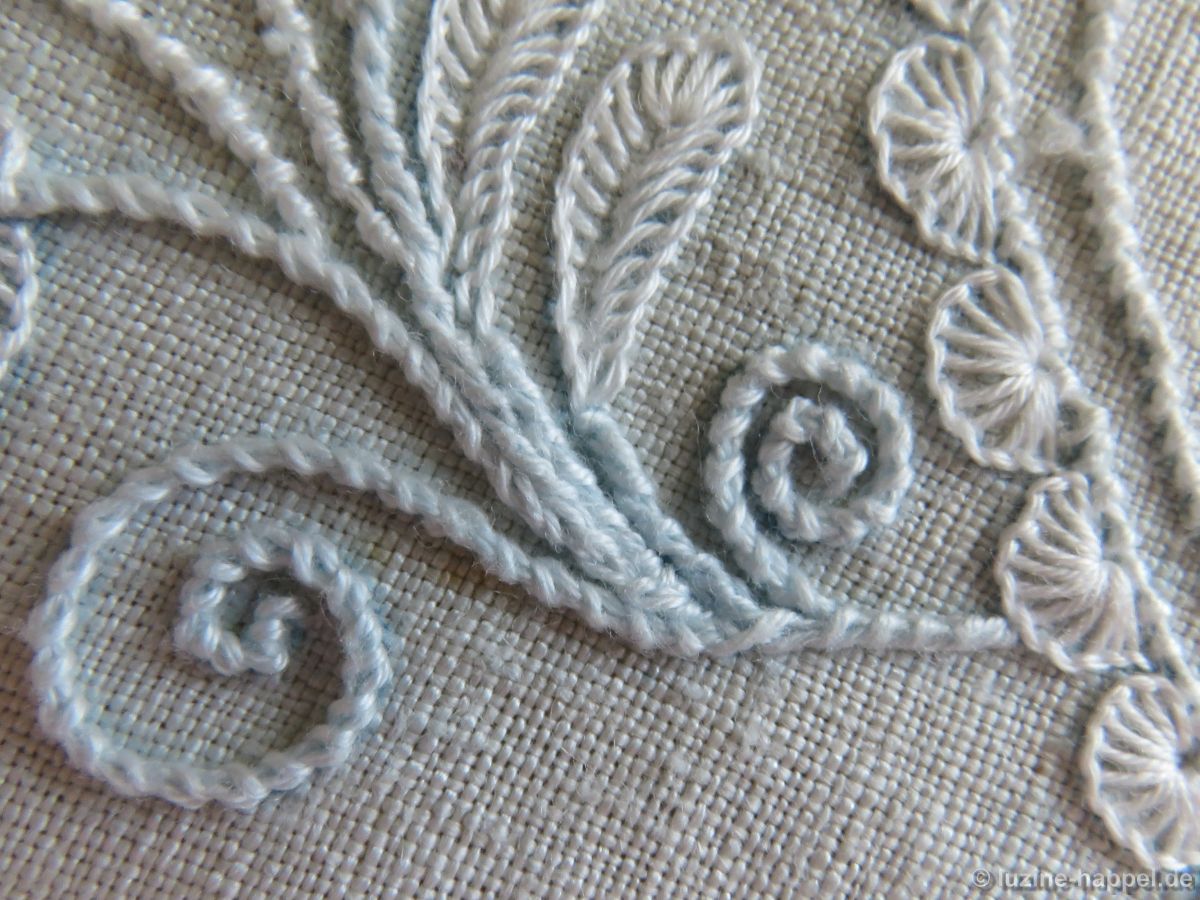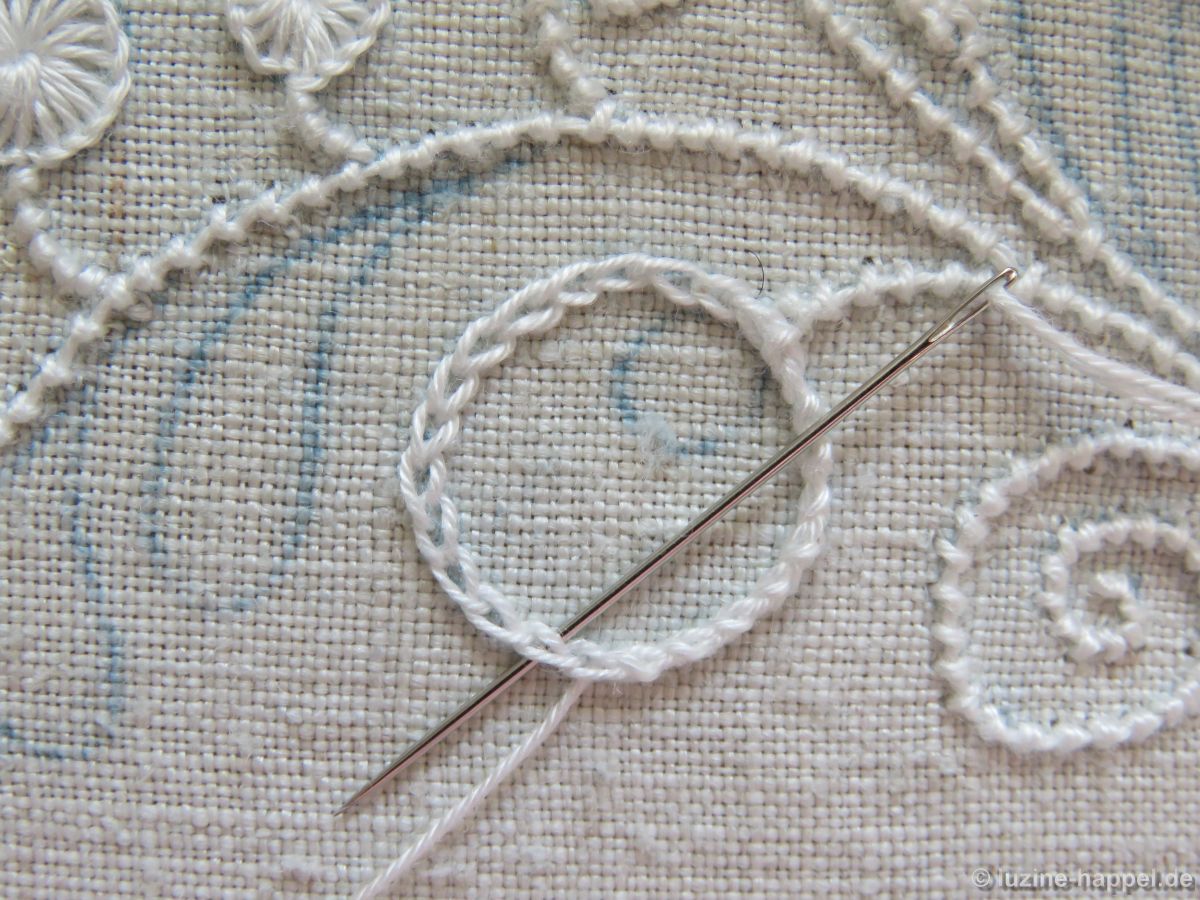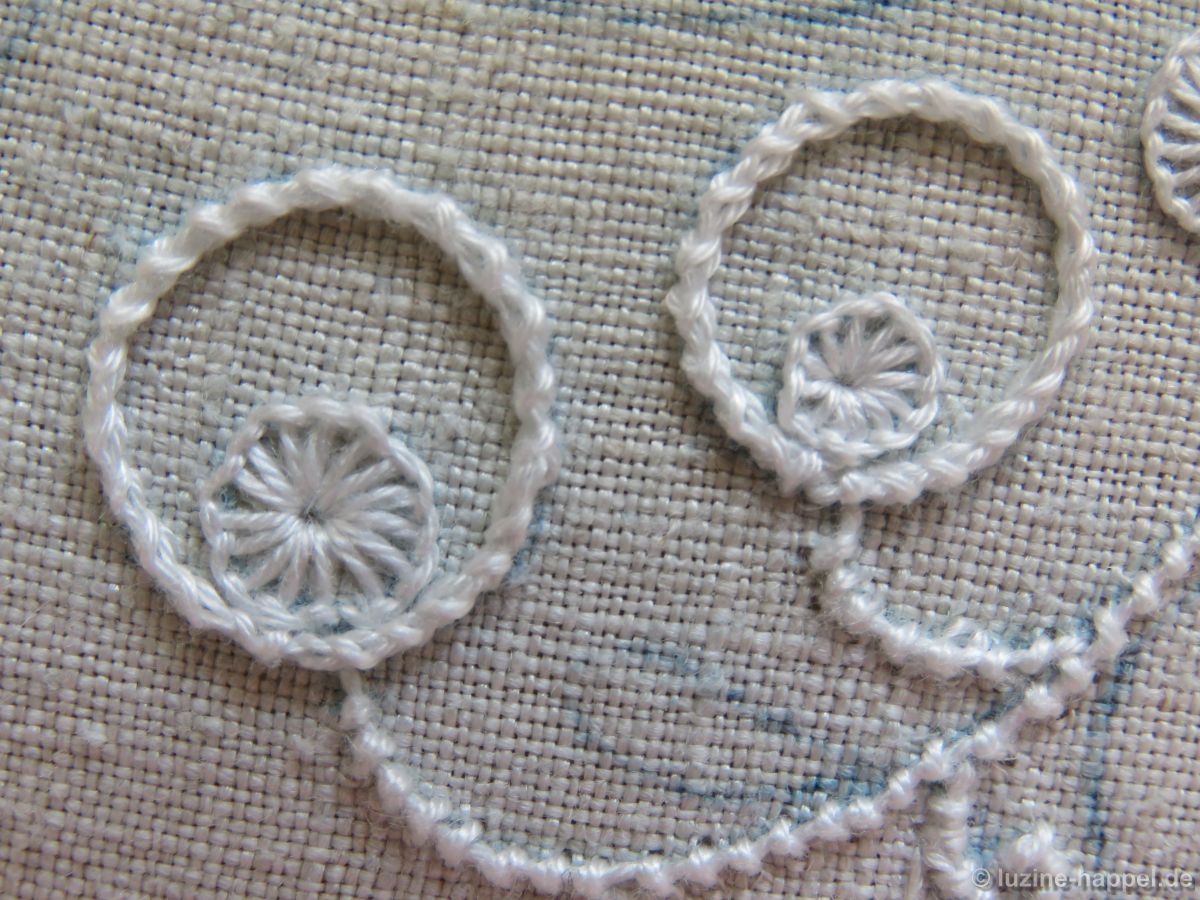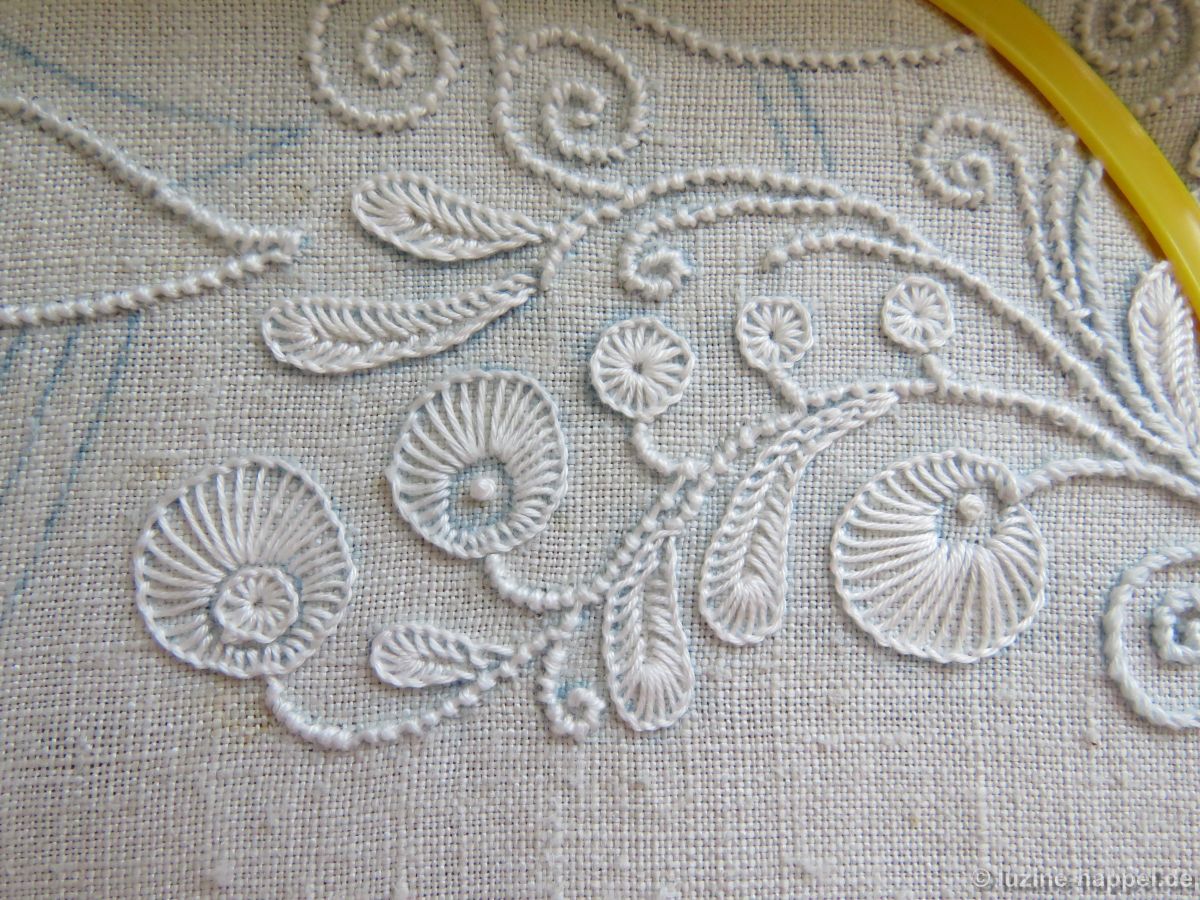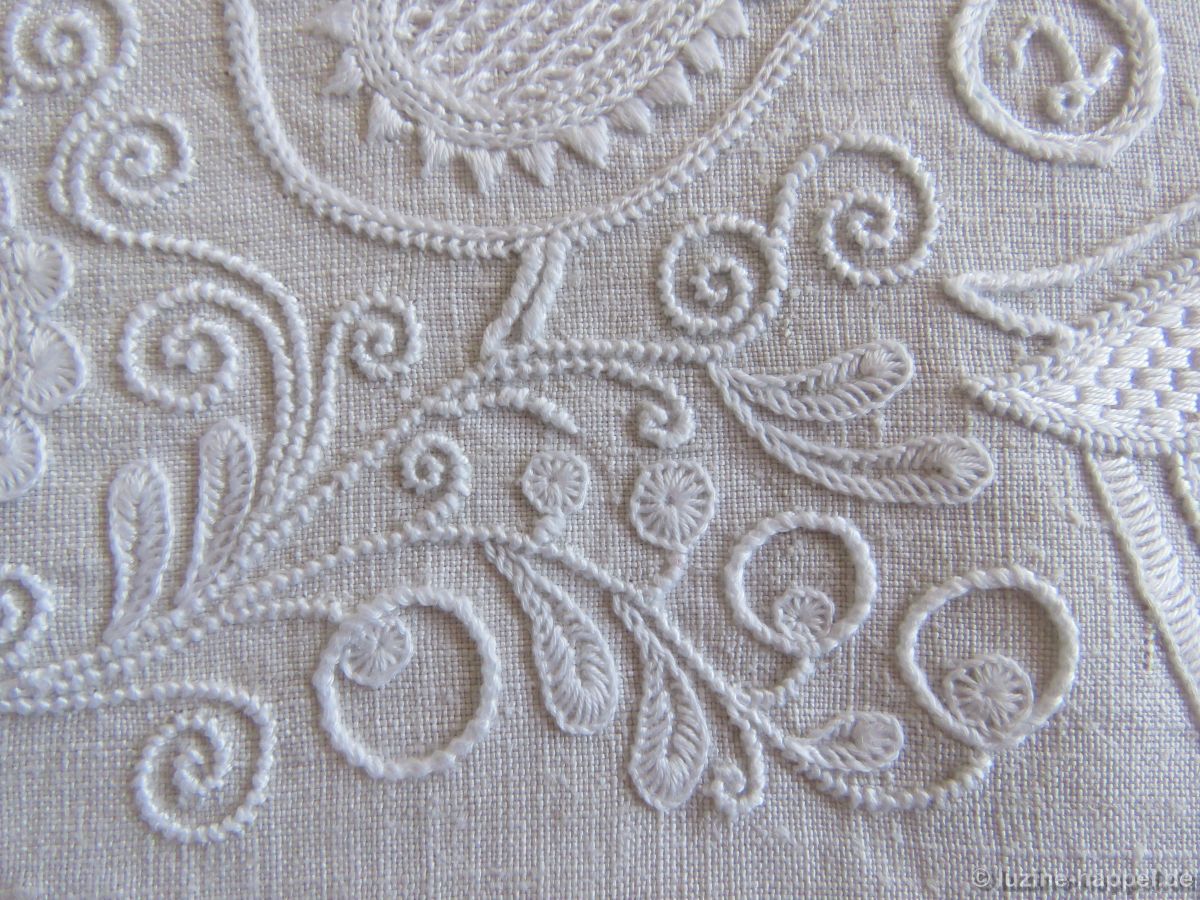
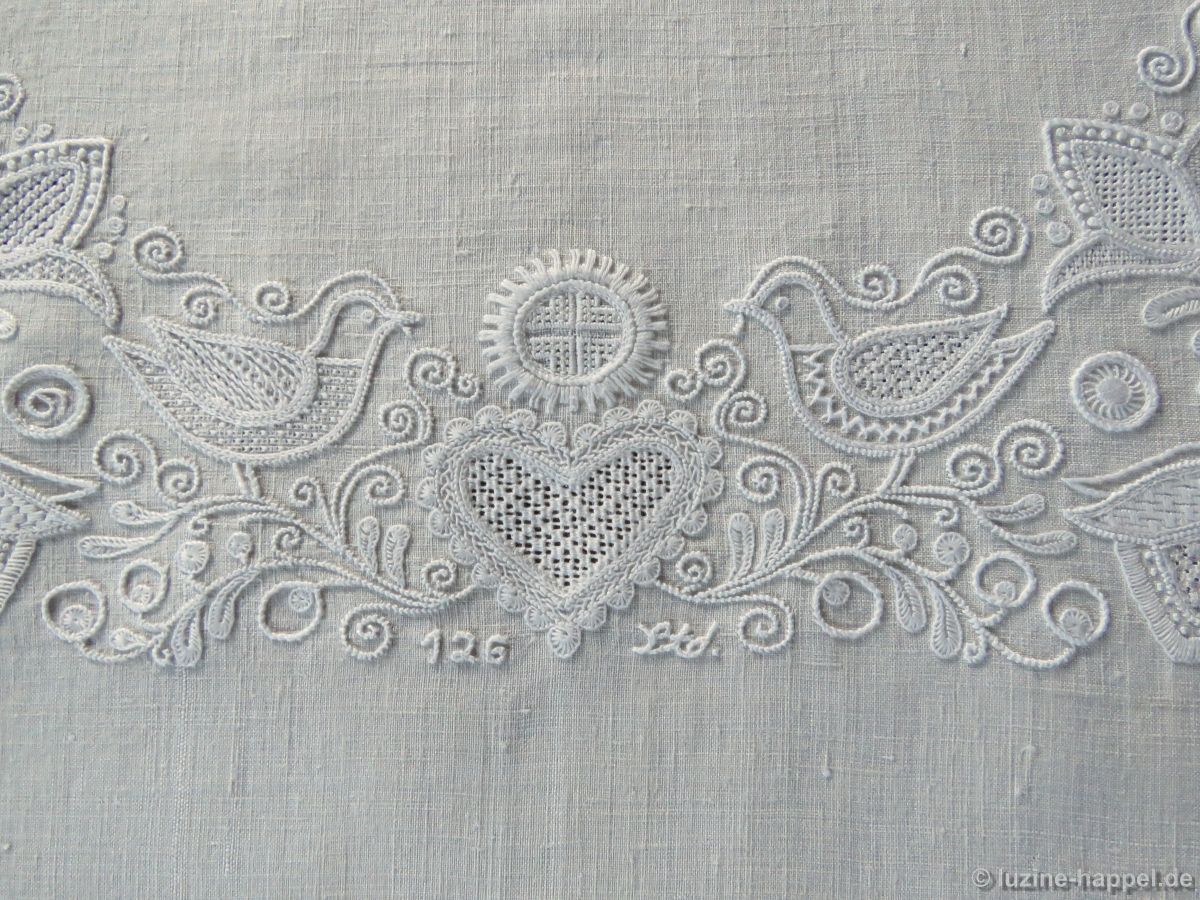
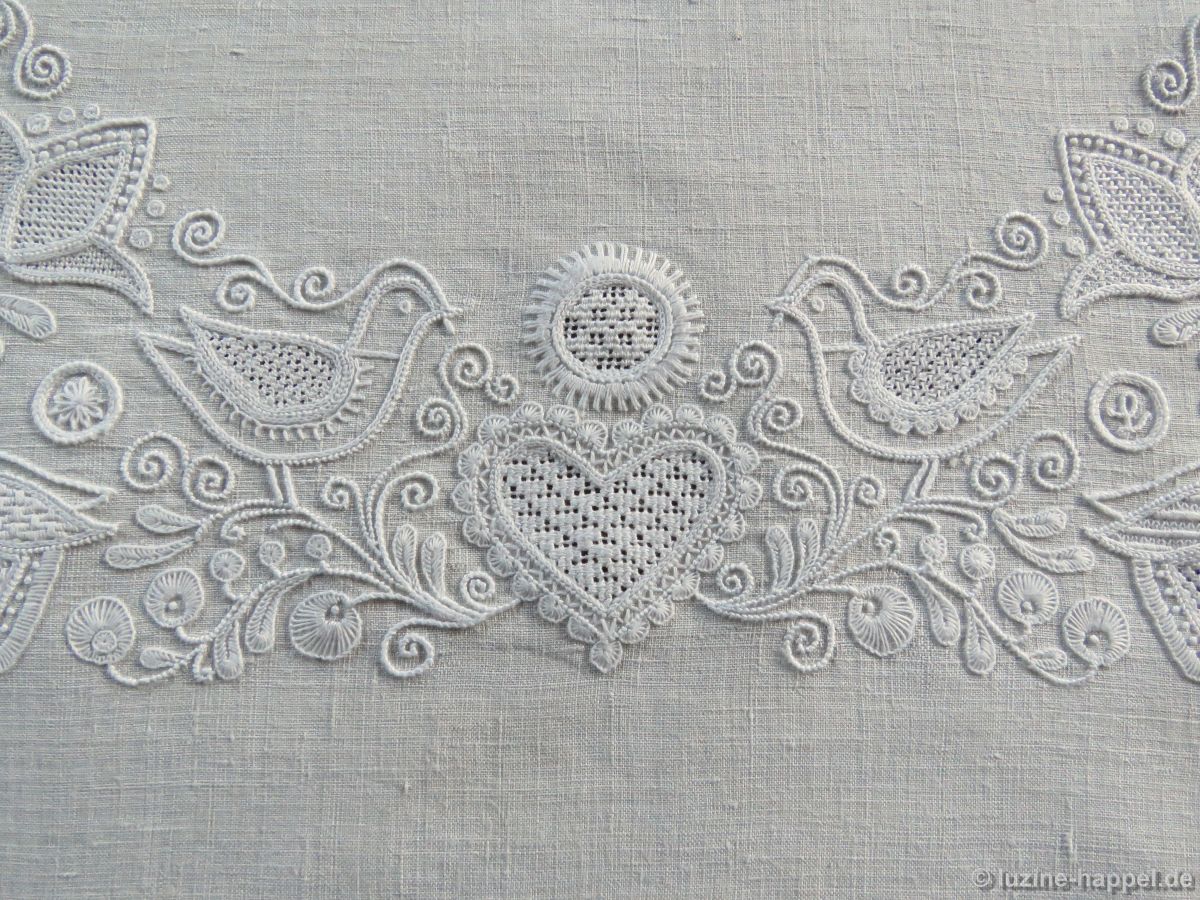
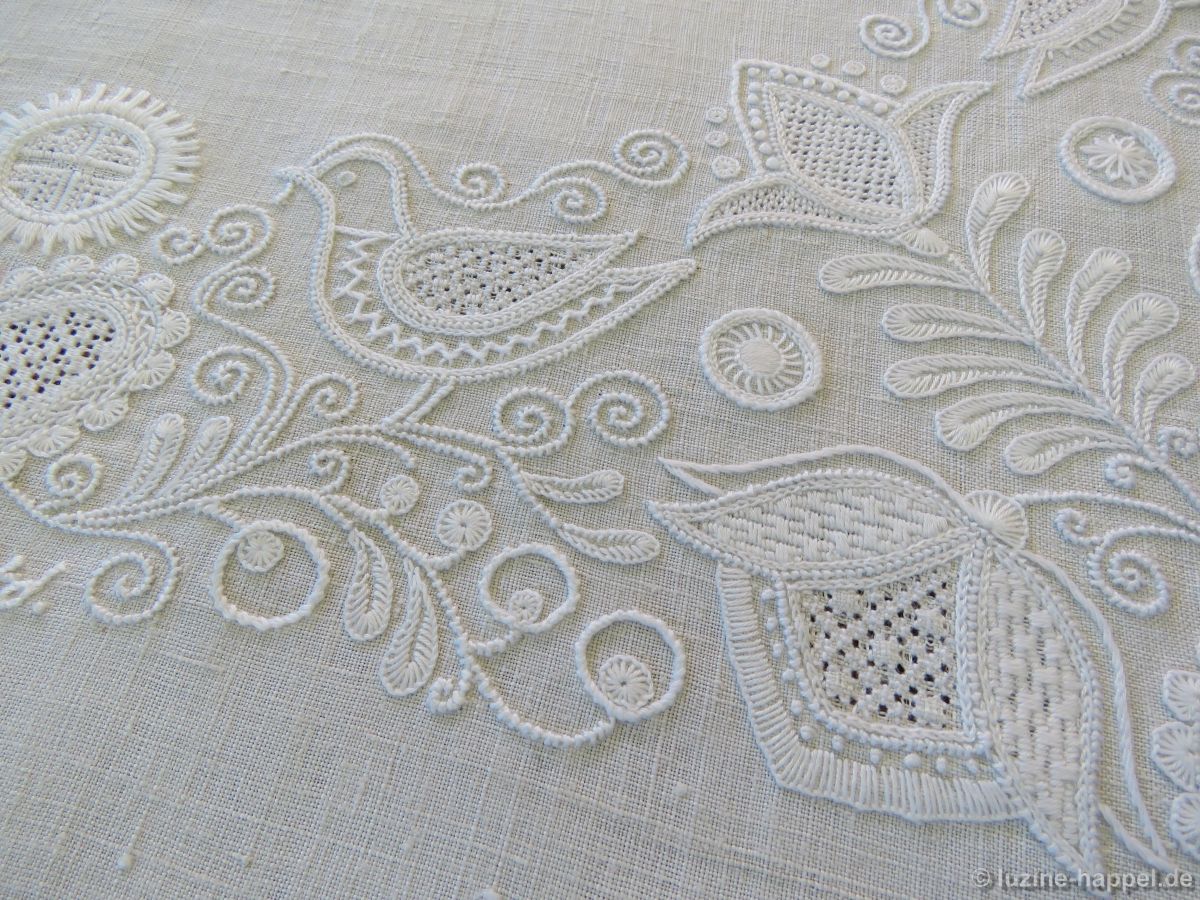
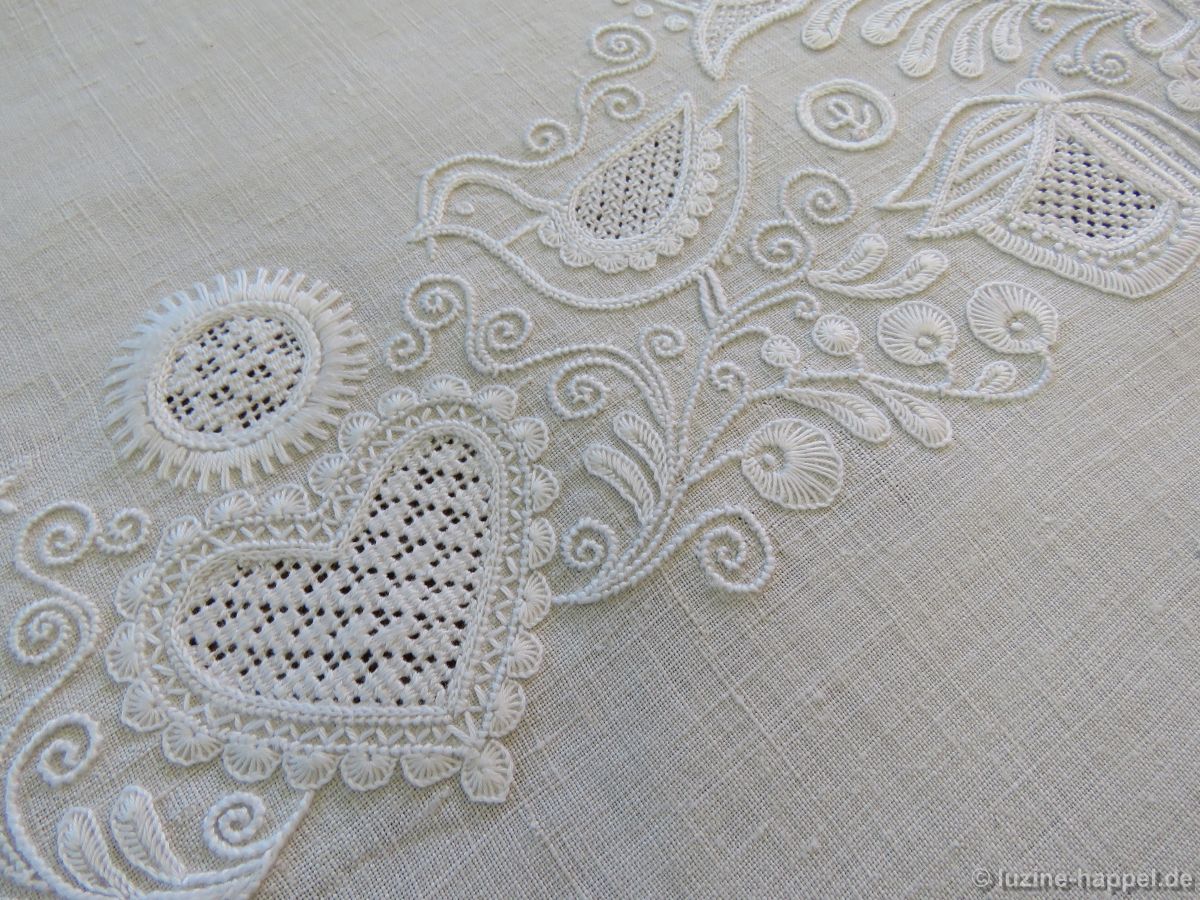
The embroidery on the tea cloth is nearly complete. The “sunflowers” were given a border of 2-short-2-long stitches and—just like the small circles—varied fillings. The details can be seen in the following images.
The hem was secured with a simple hemstitch, its simplicity contrasting with the elaborate embroidery. Then, the required number of working hours was determined and recorded on the cloth with a few stitches.
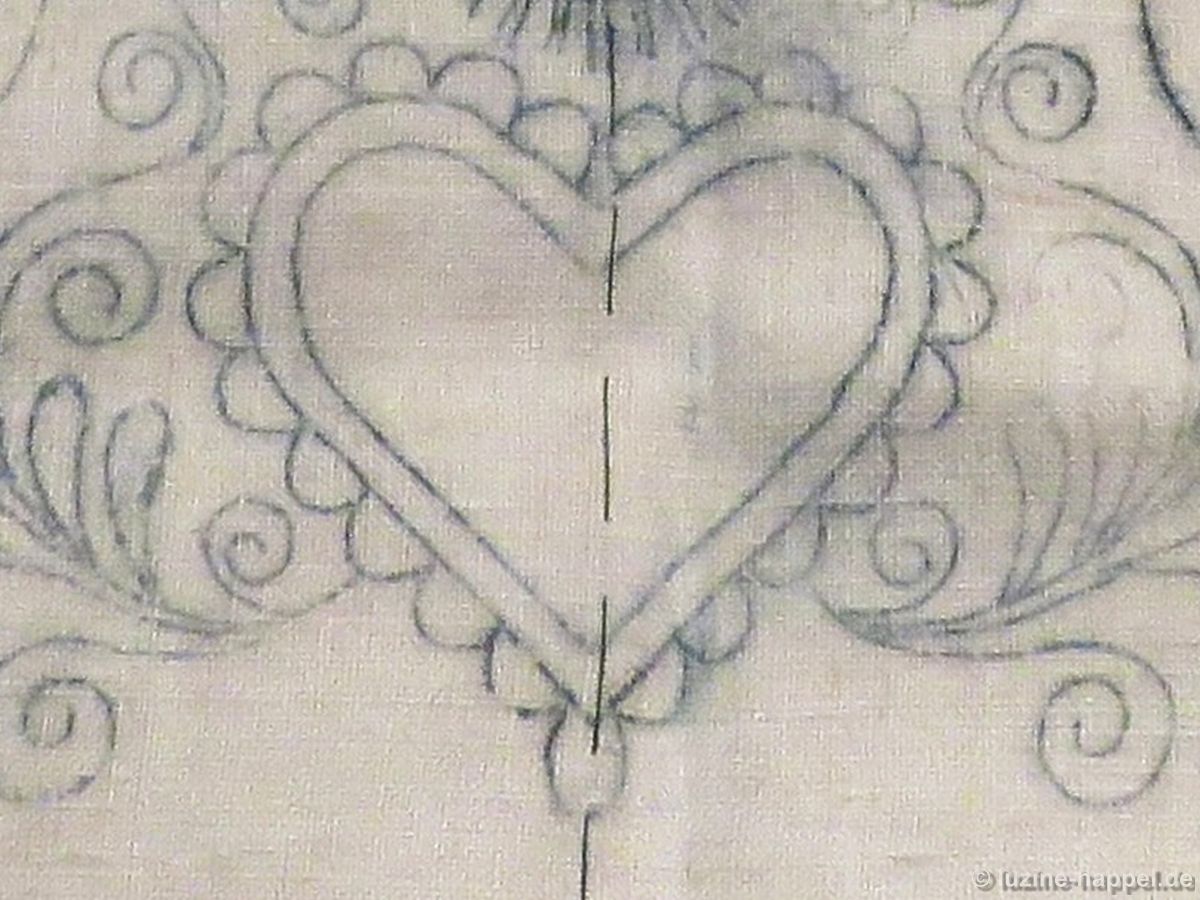
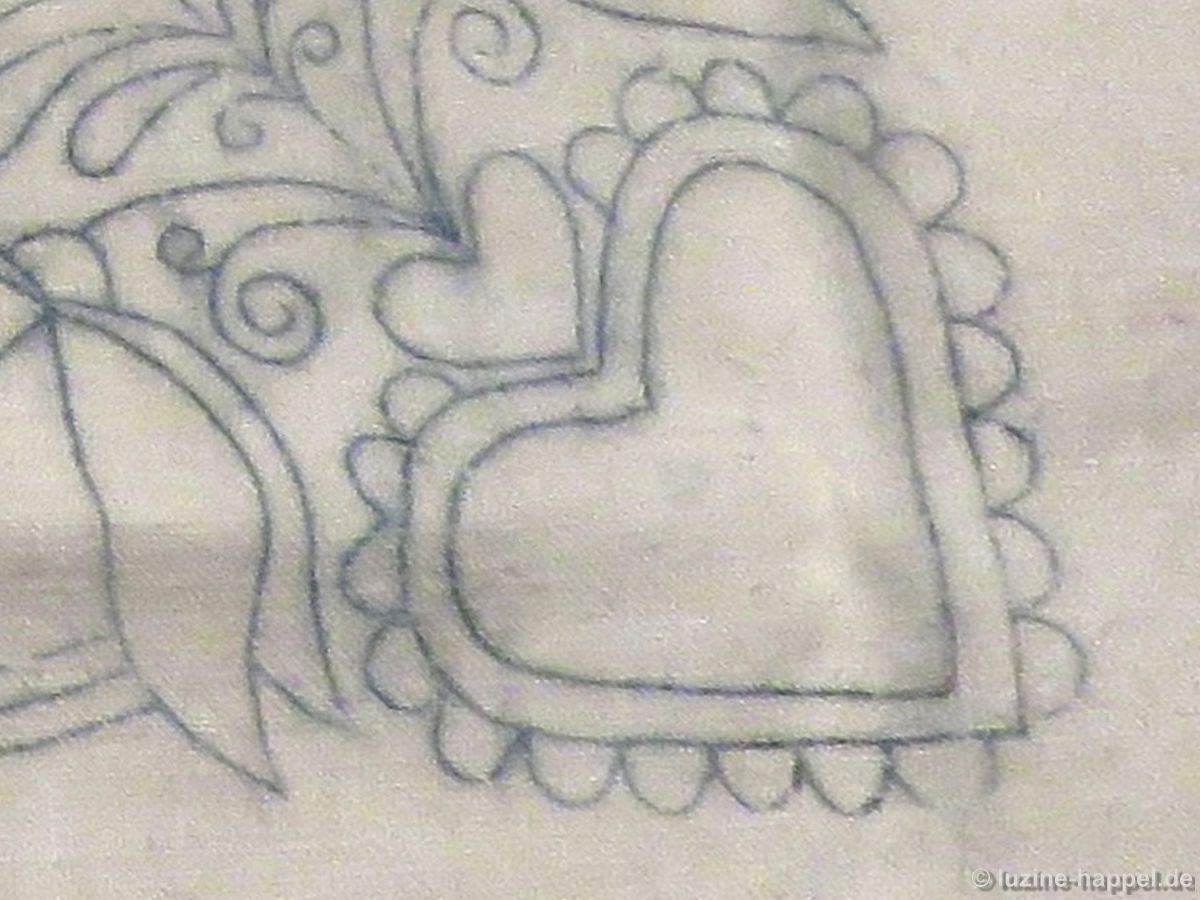
The cloth was soaked in clear water overnight to soften the blue printing ink. (Printed lines are often easier to wash out of hand-woven linen than out of industrially manufactured linen, but the blue traces are clearly visible on the wet fabric.)

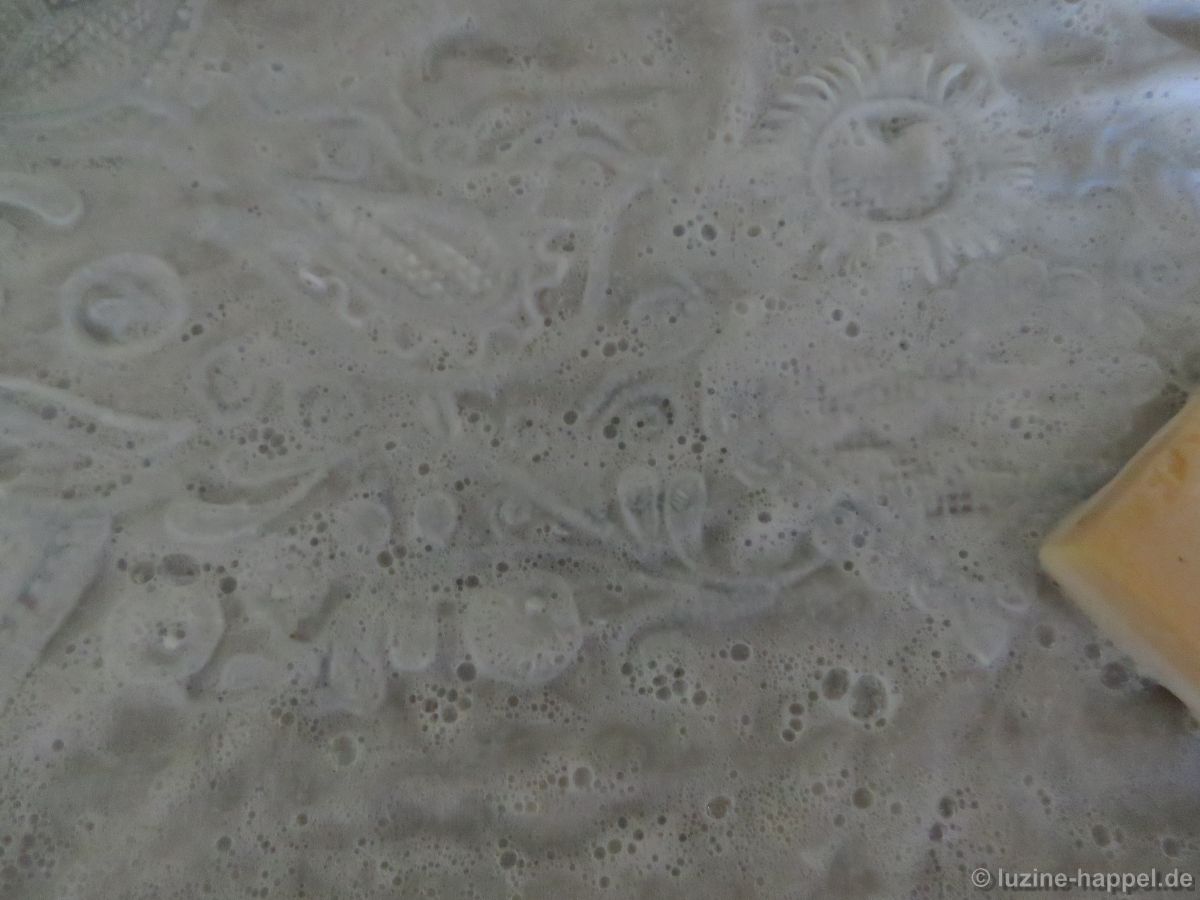
With solid curd soap—I used to use liquid soap often—
I thoroughly lathered the embroidery on both sides. The cloth was then left to sit for another two nights.
Then it was placed in a large pot containing water and heavy-duty laundry detergent. The liquid was brought to a boil, and the fabric was boiled in it for approximately 5 minutes while being constantly agitated.
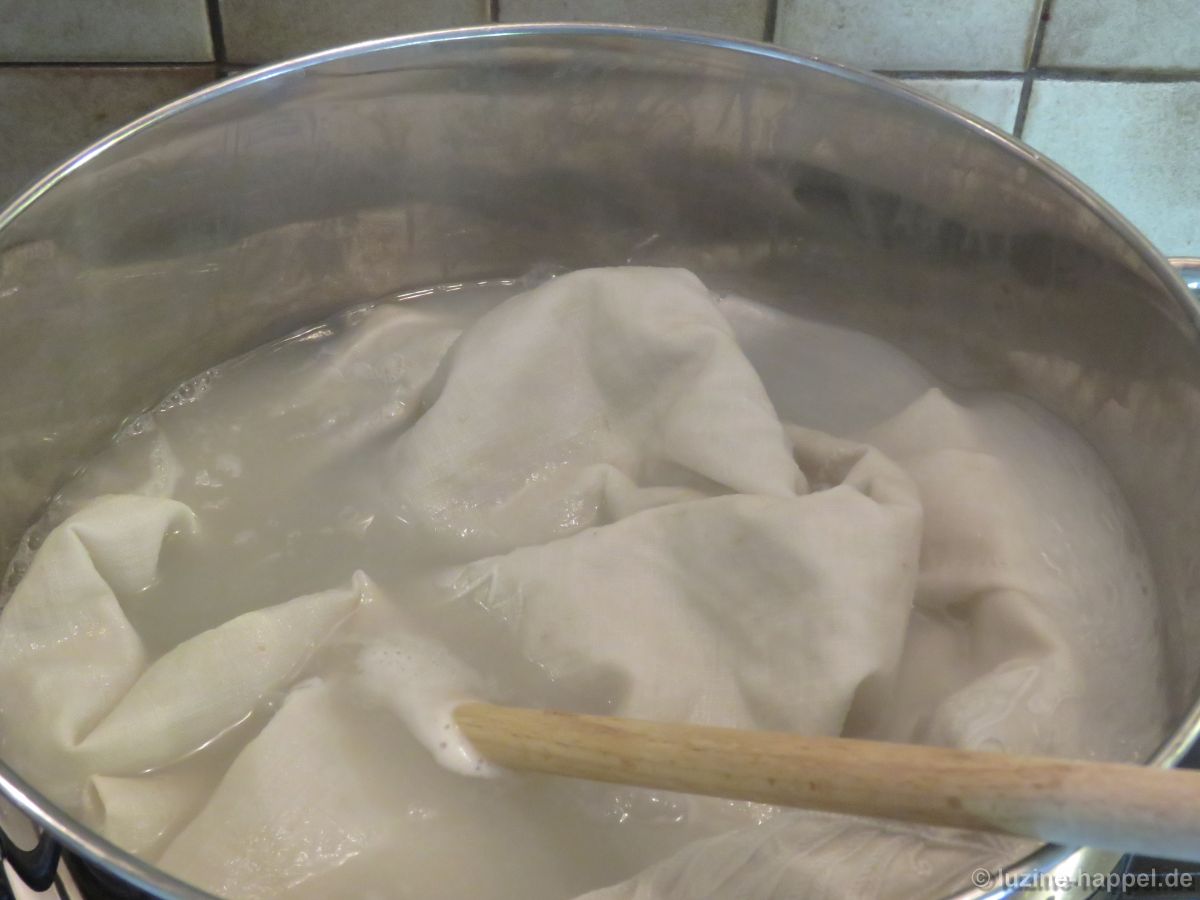
After that, the blue color had completely disappeared—without much effort and without scrubbing!
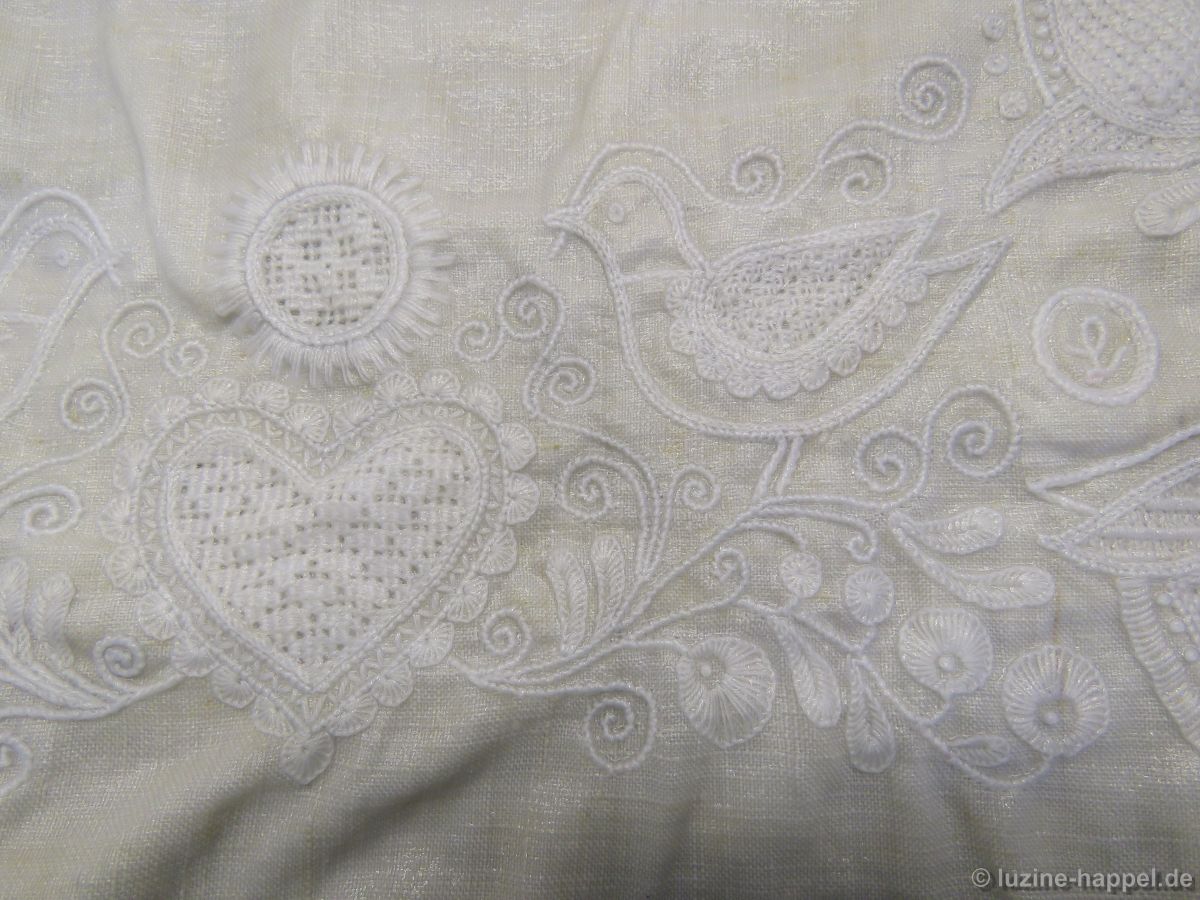
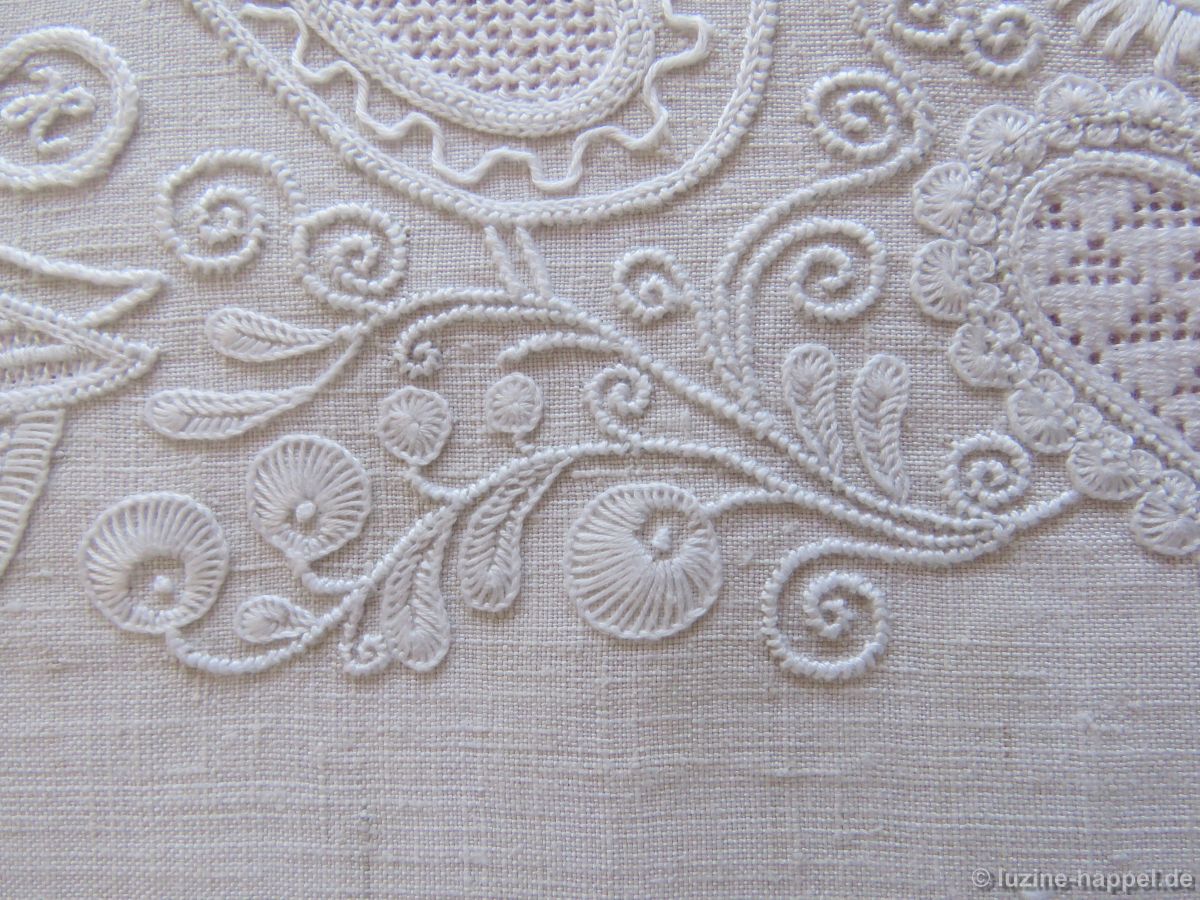
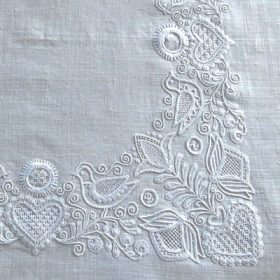
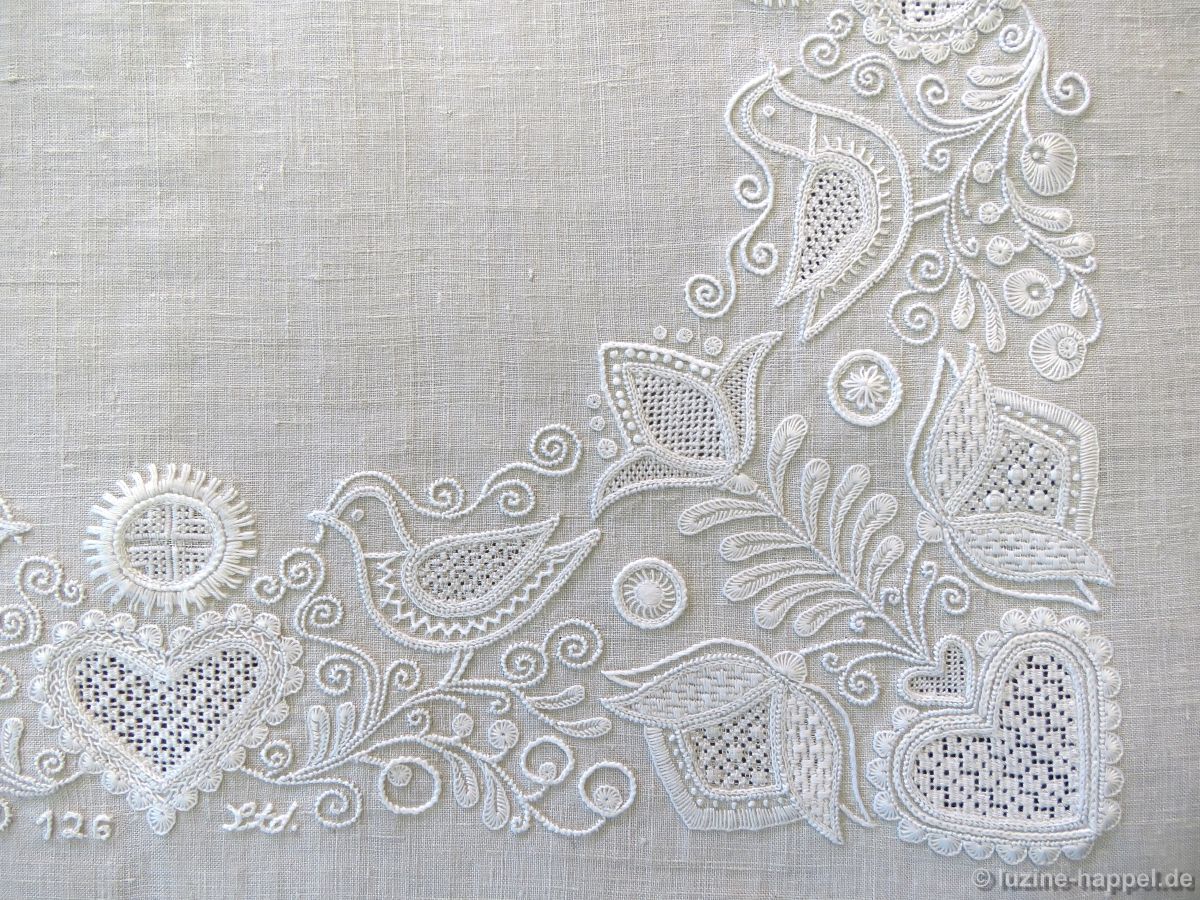
The tablecloth was rinsed, dried, and ironed. The embroidery appears in all its beauty.
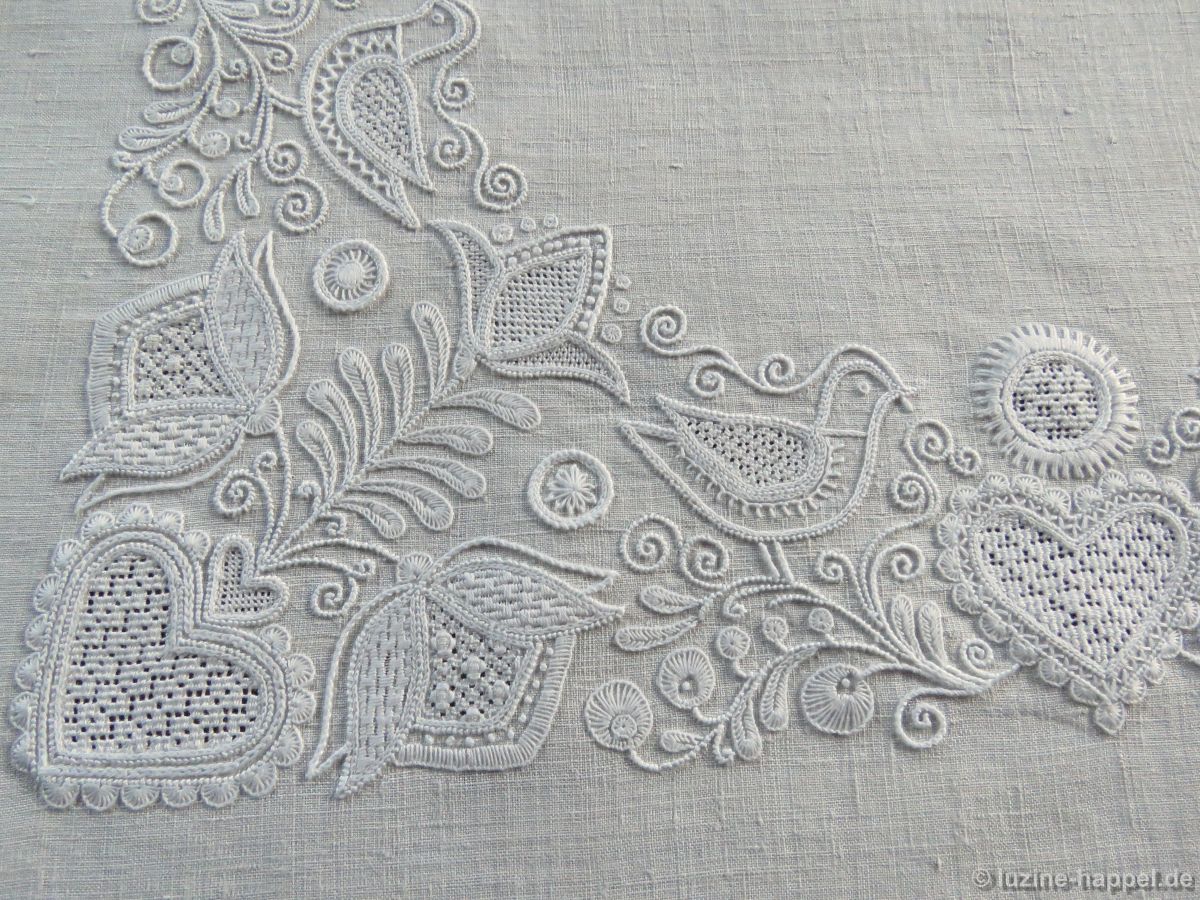
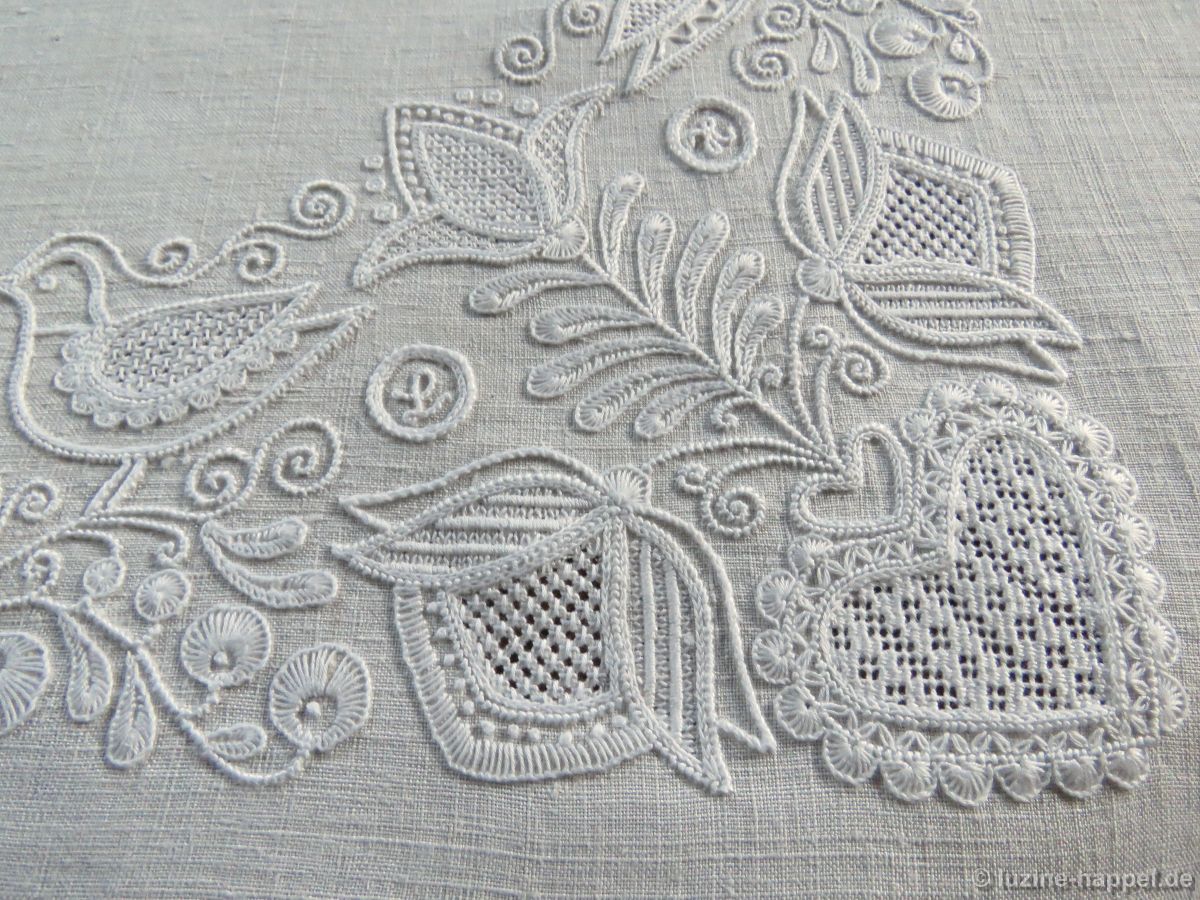
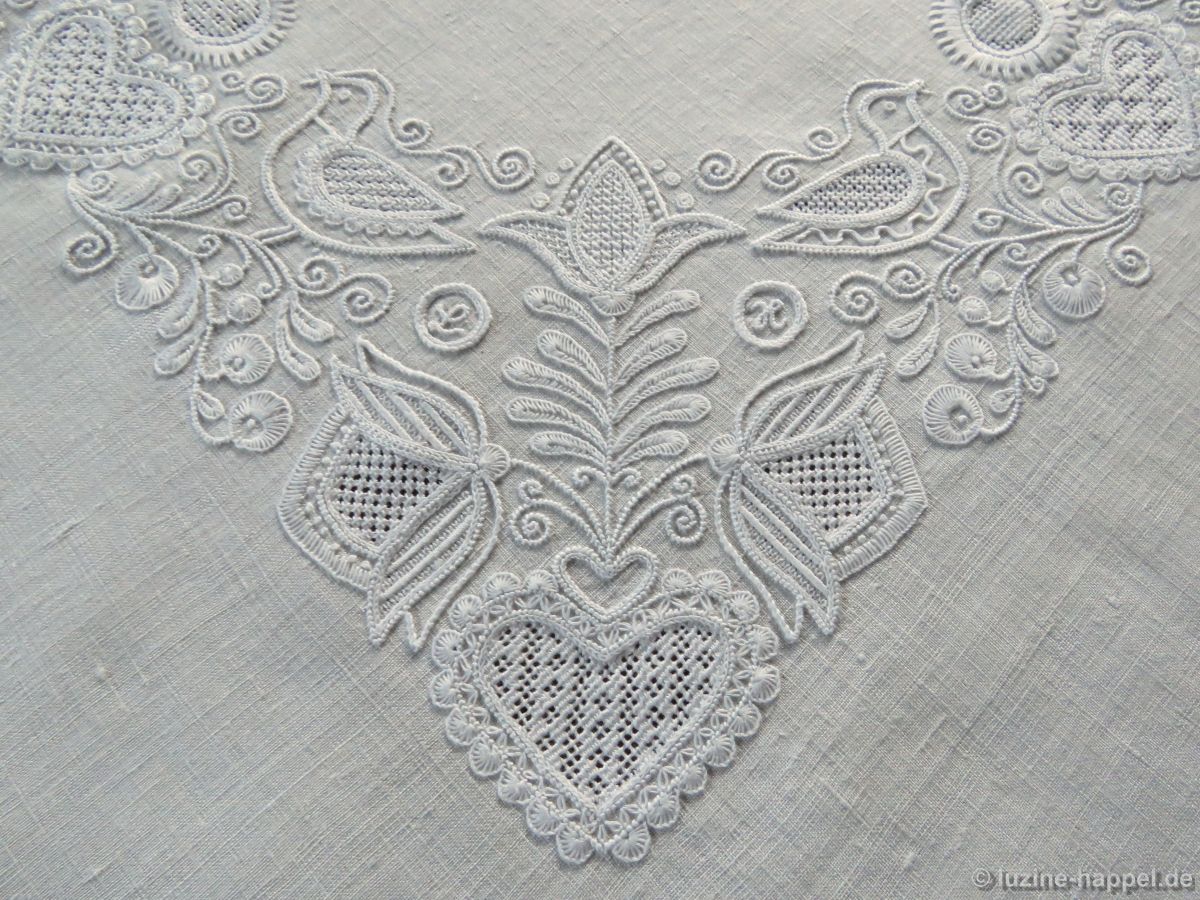
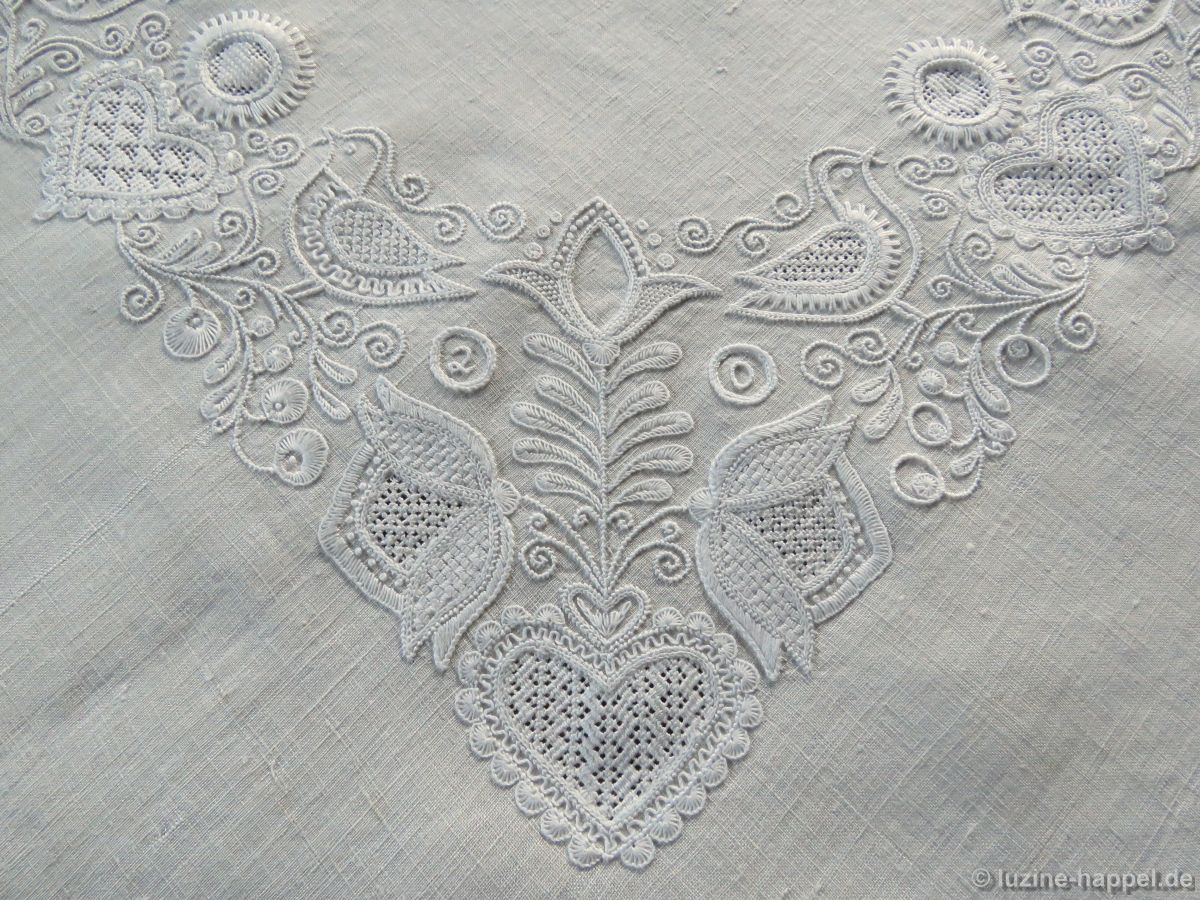
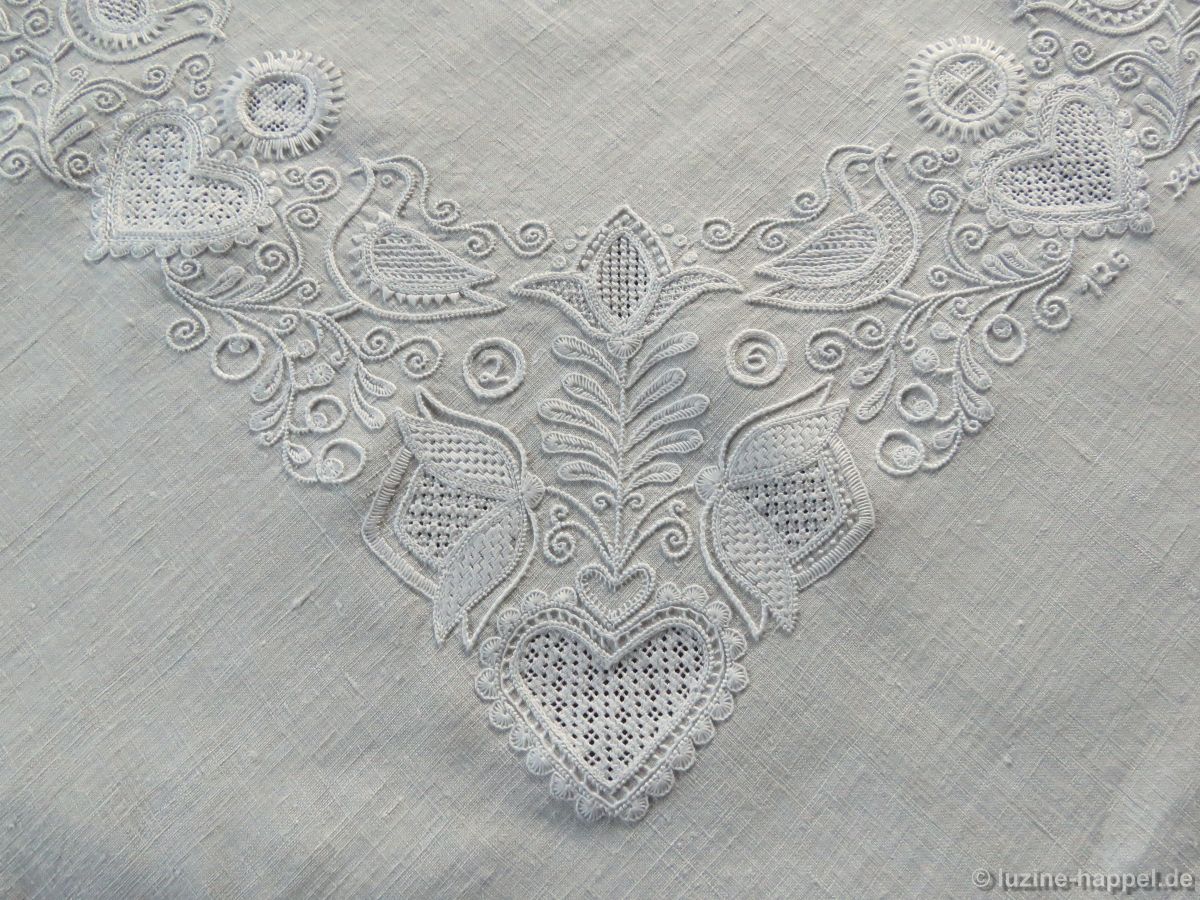
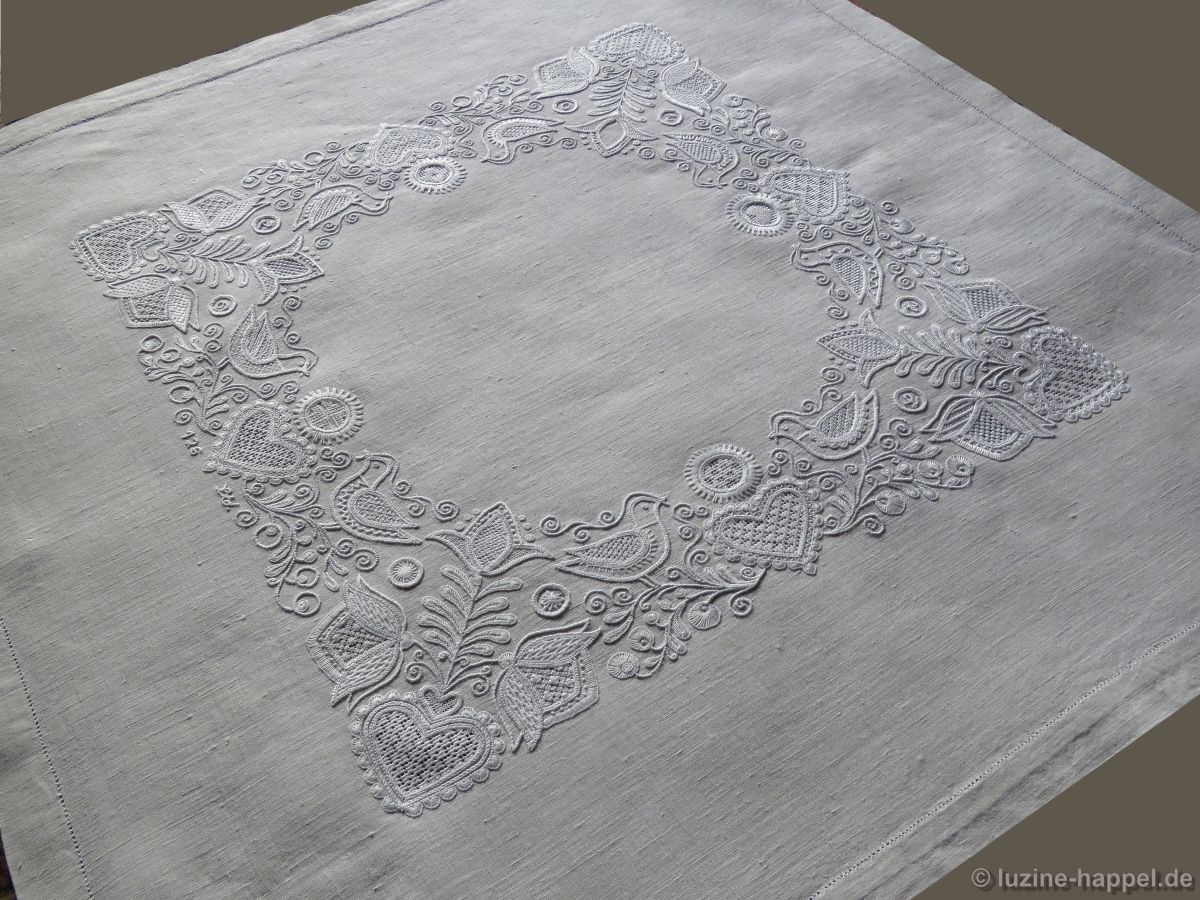
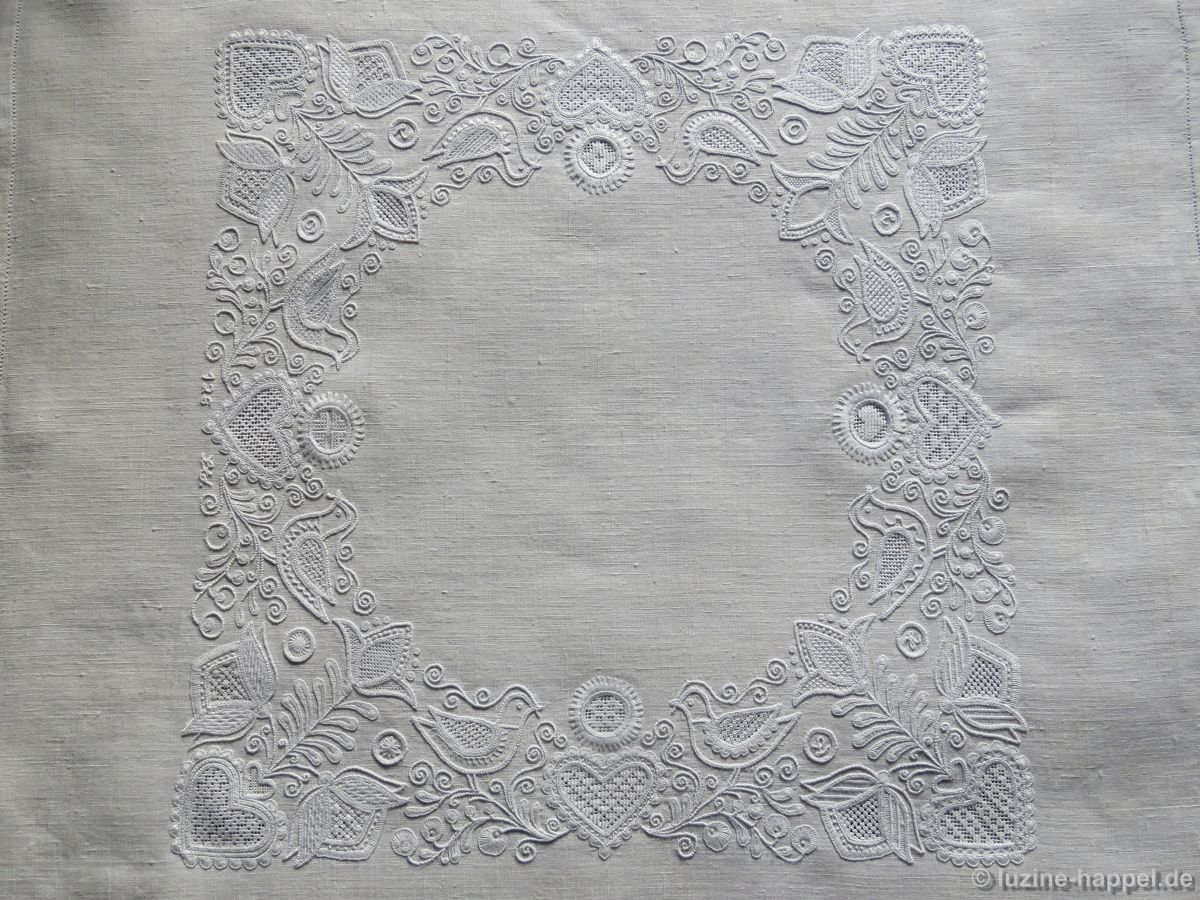
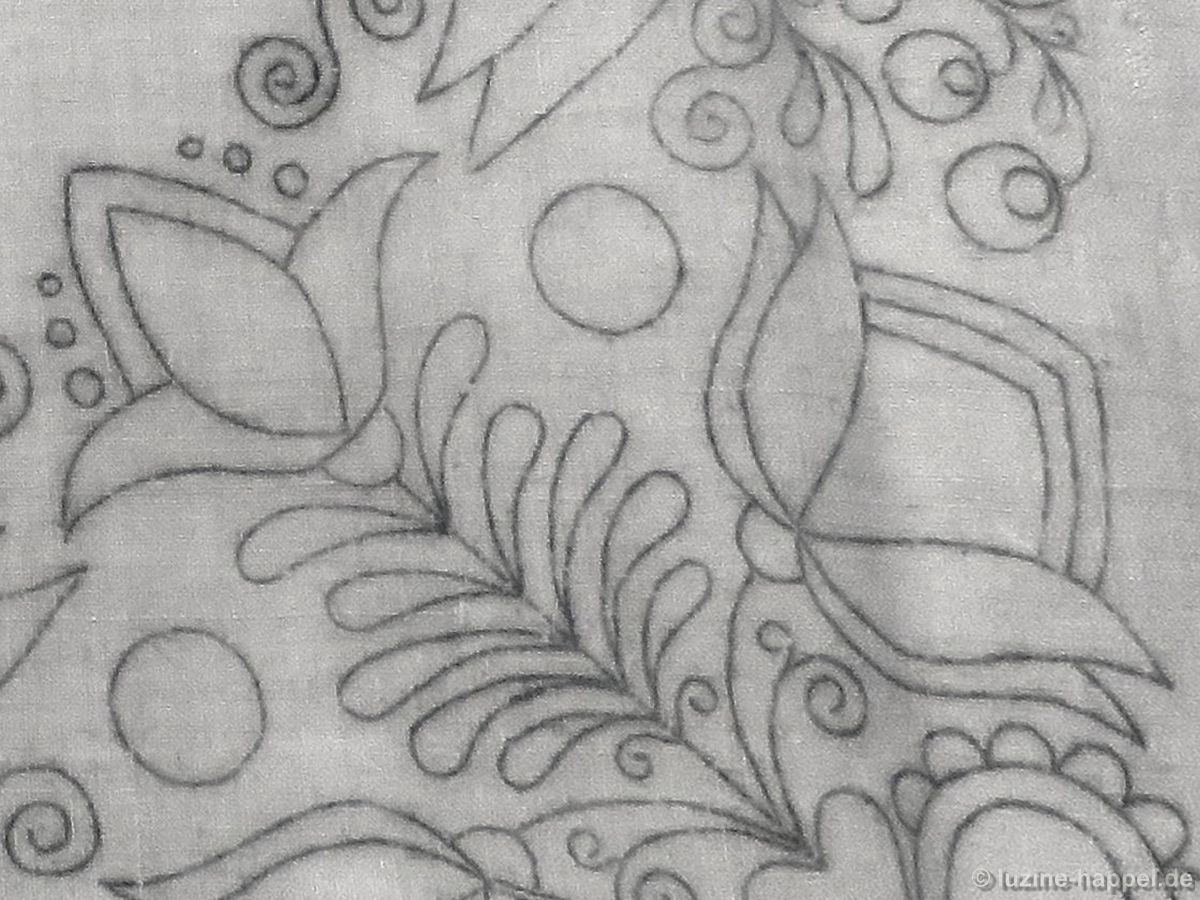
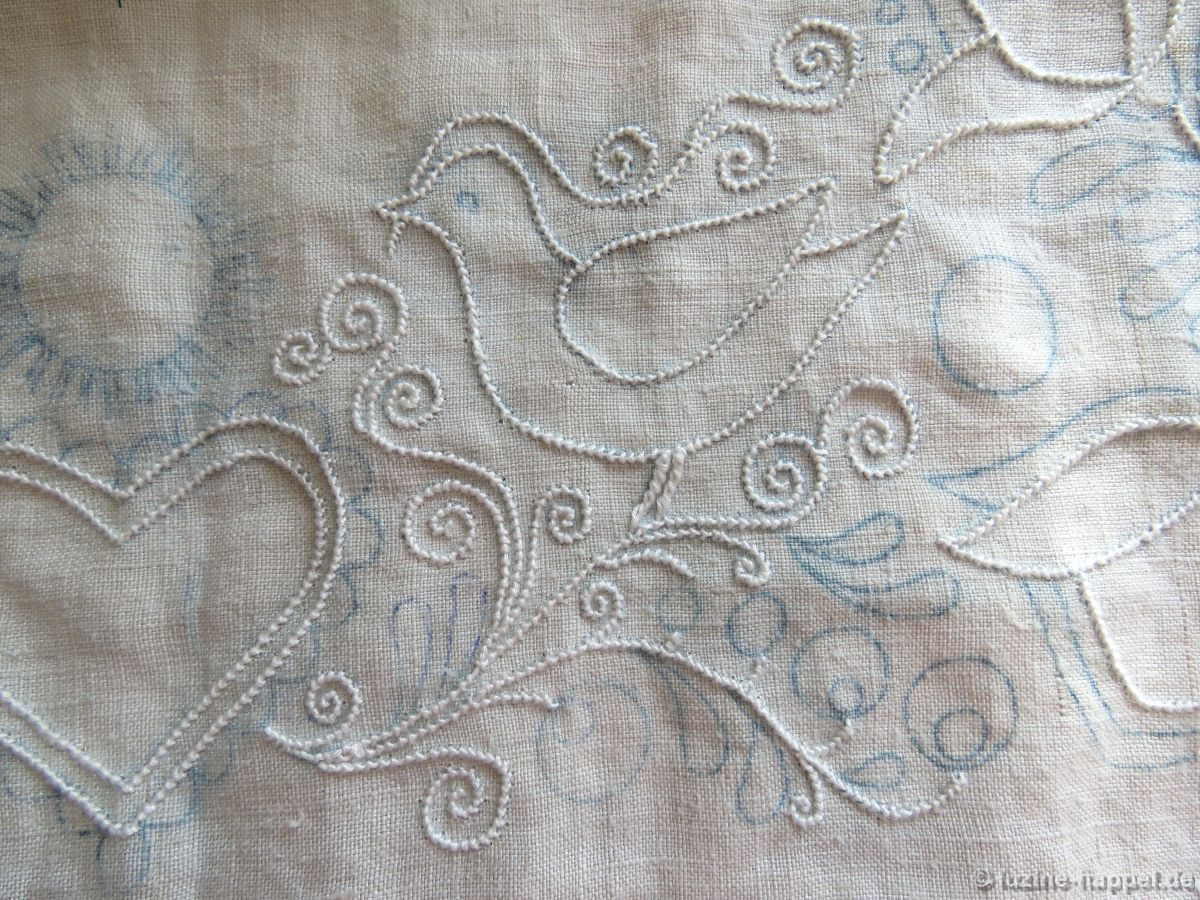
It was possible to embroider nearly 50 patterns on a relatively small cloth. However, the linen used was very fine, with 20 threads per centimeter.
The design, with its many small areas, is therefore particularly well-suited for working in the style of Early Schwalm Whitework, which does not require thread withdrawal.
Mitteldecke MJ2 (2)
Mitteldecke MJ2 (3)
Mitteldecke MJ2 (4)
Mitteldecke MJ2 (5)