A Bolster Cover Embroidered with Schwalm Borders

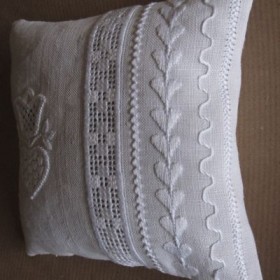
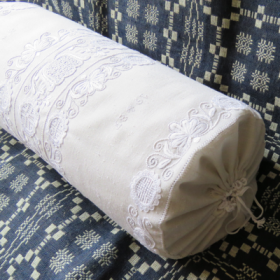
A beautiful, eye-catching bolster cover is embroidered with Schwalm borders. Narrow Schwalm borders are worked relatively quickly. And it is always possible, just as the fancy takes one, to add more borders to a design.
Nackenrolle_1First a bolster pillow form must be found. The bolster pictured has a pillow form that measures 40 cm long with a 15 cm diameter.
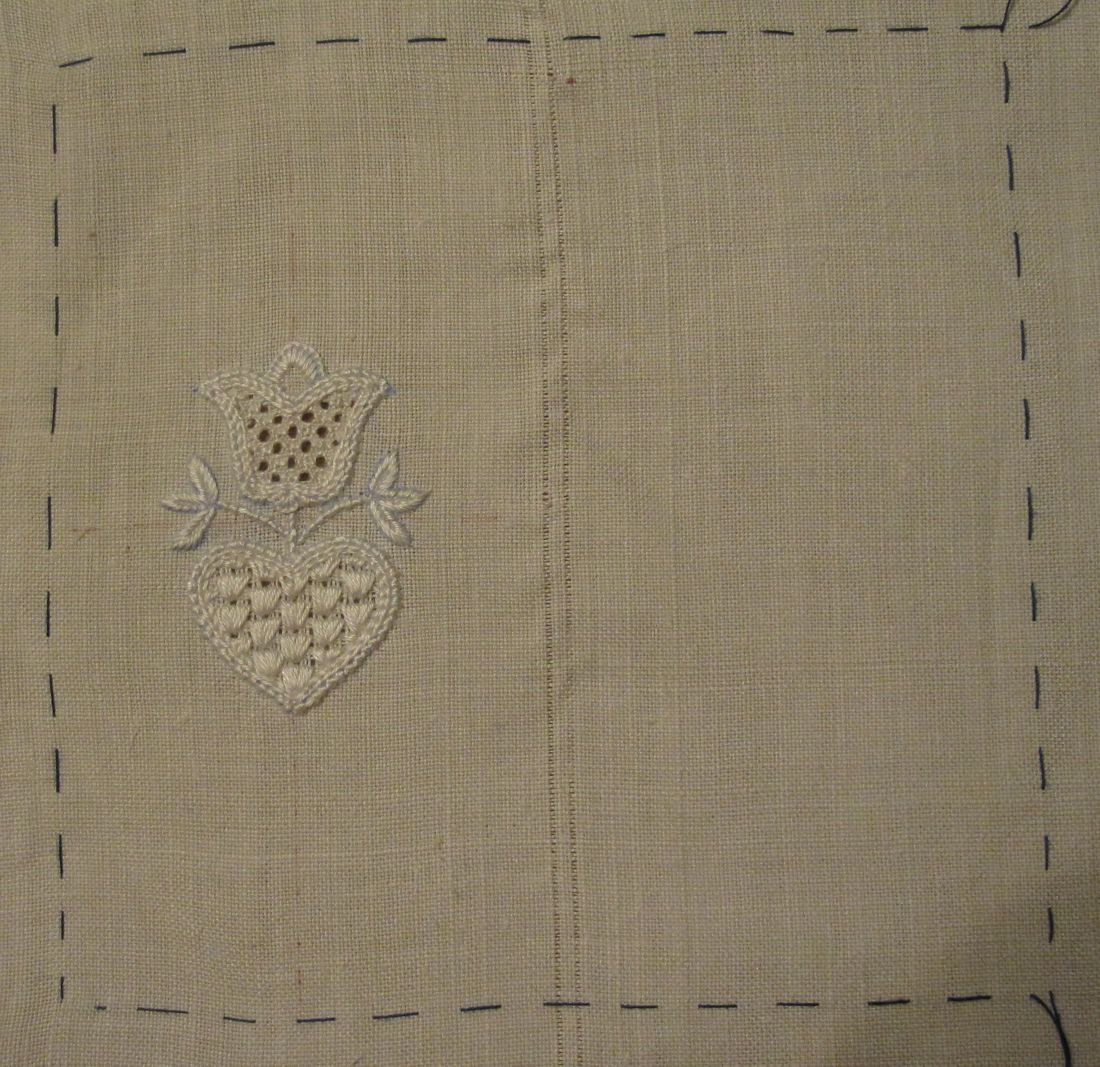
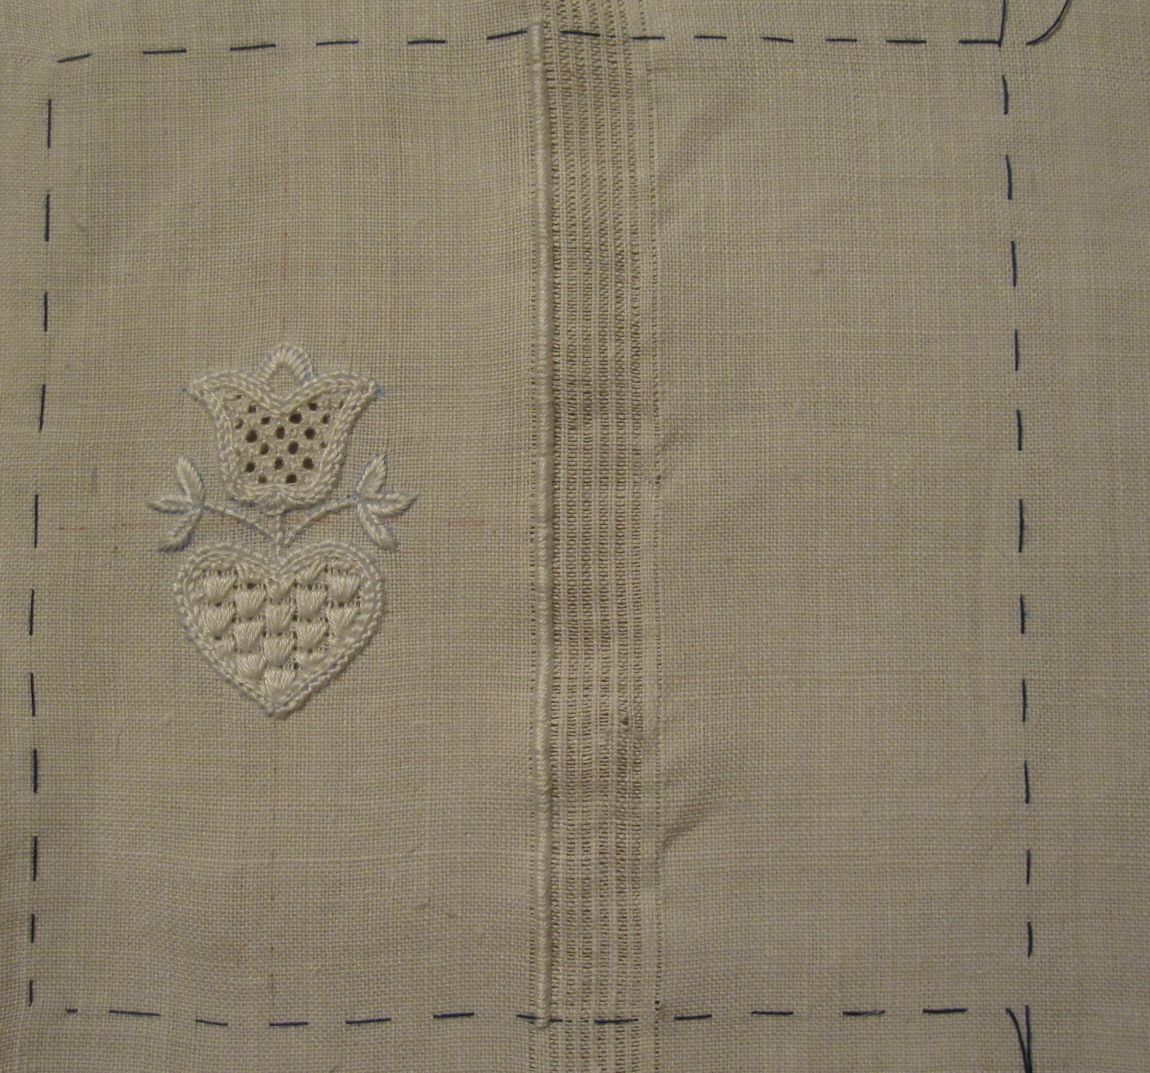
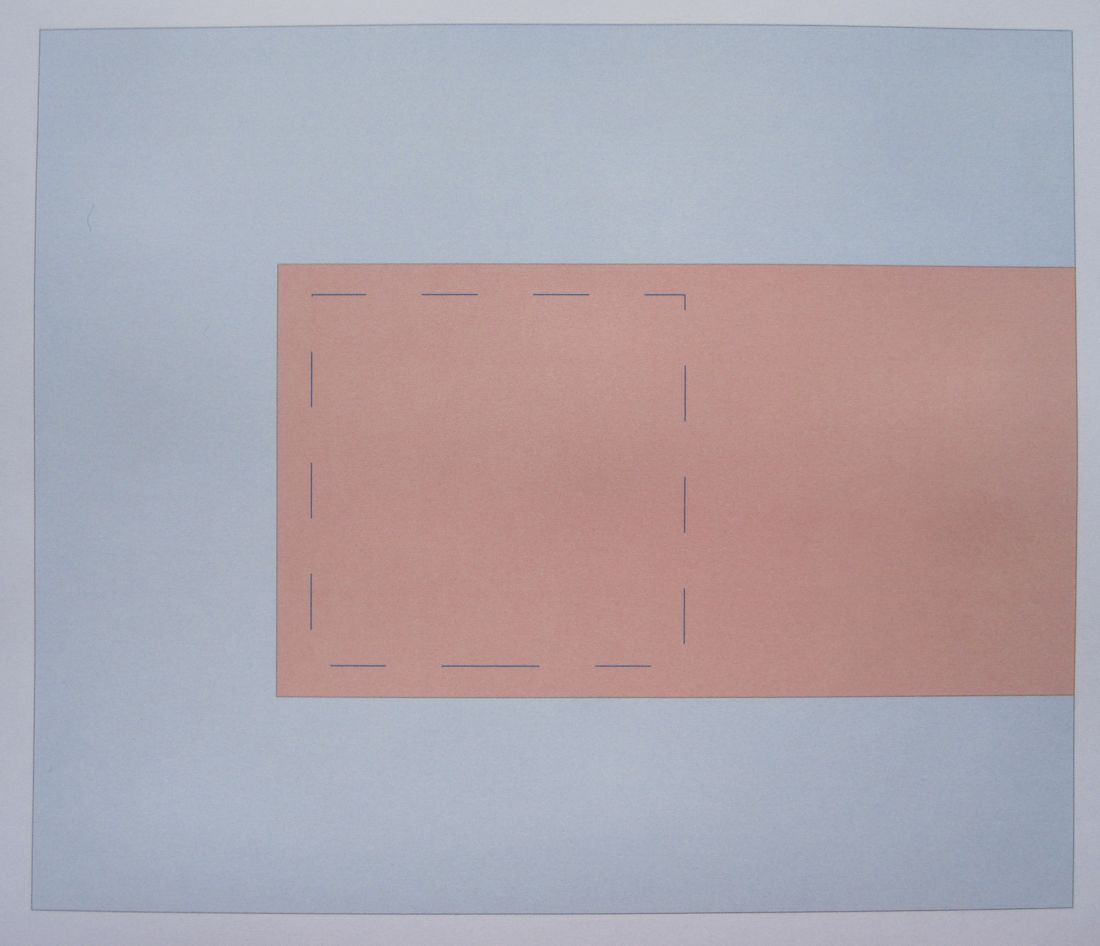
A linen piece was cut to a size of 58 cm X 52 cm.

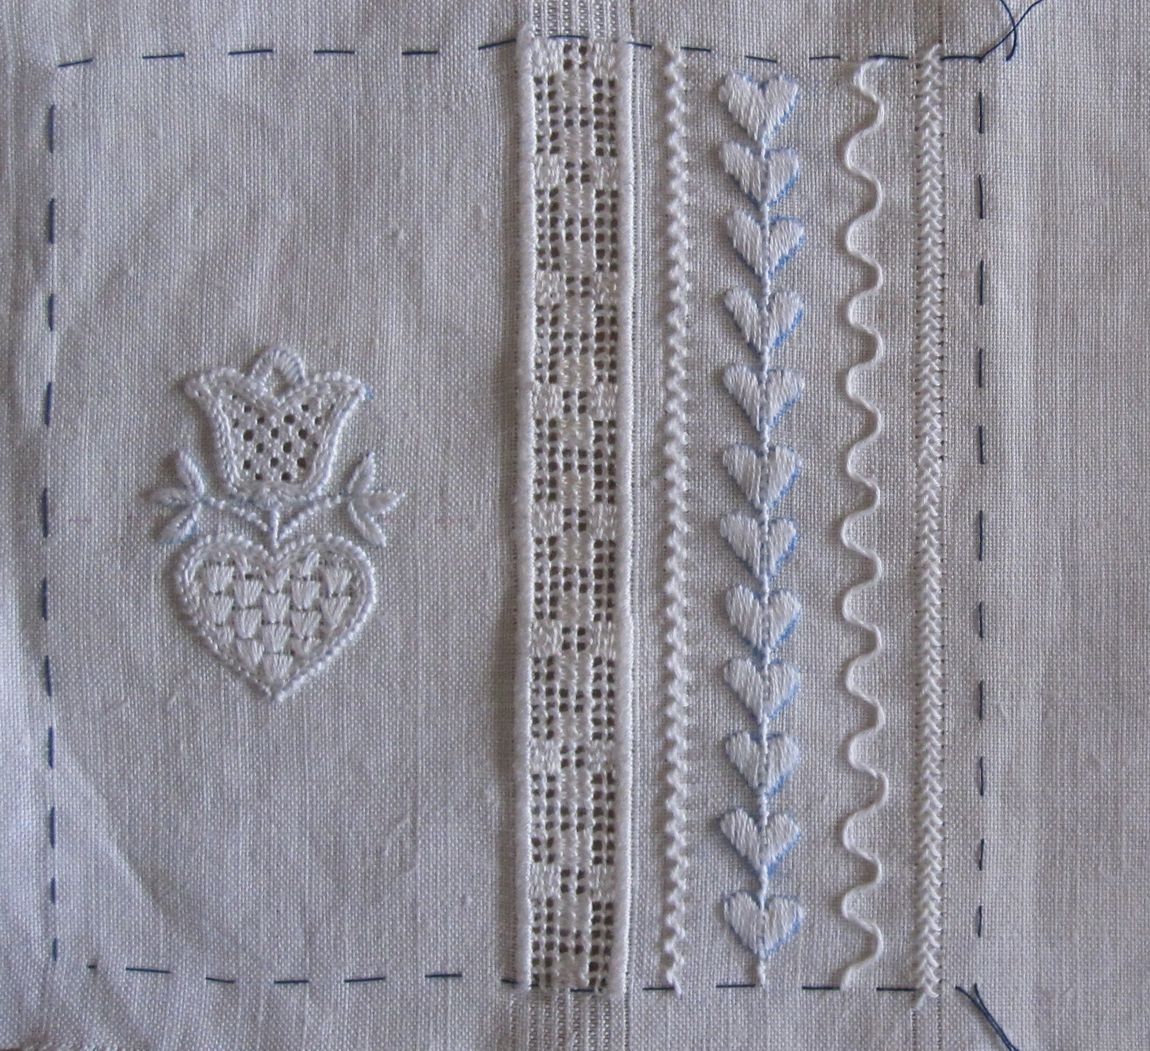
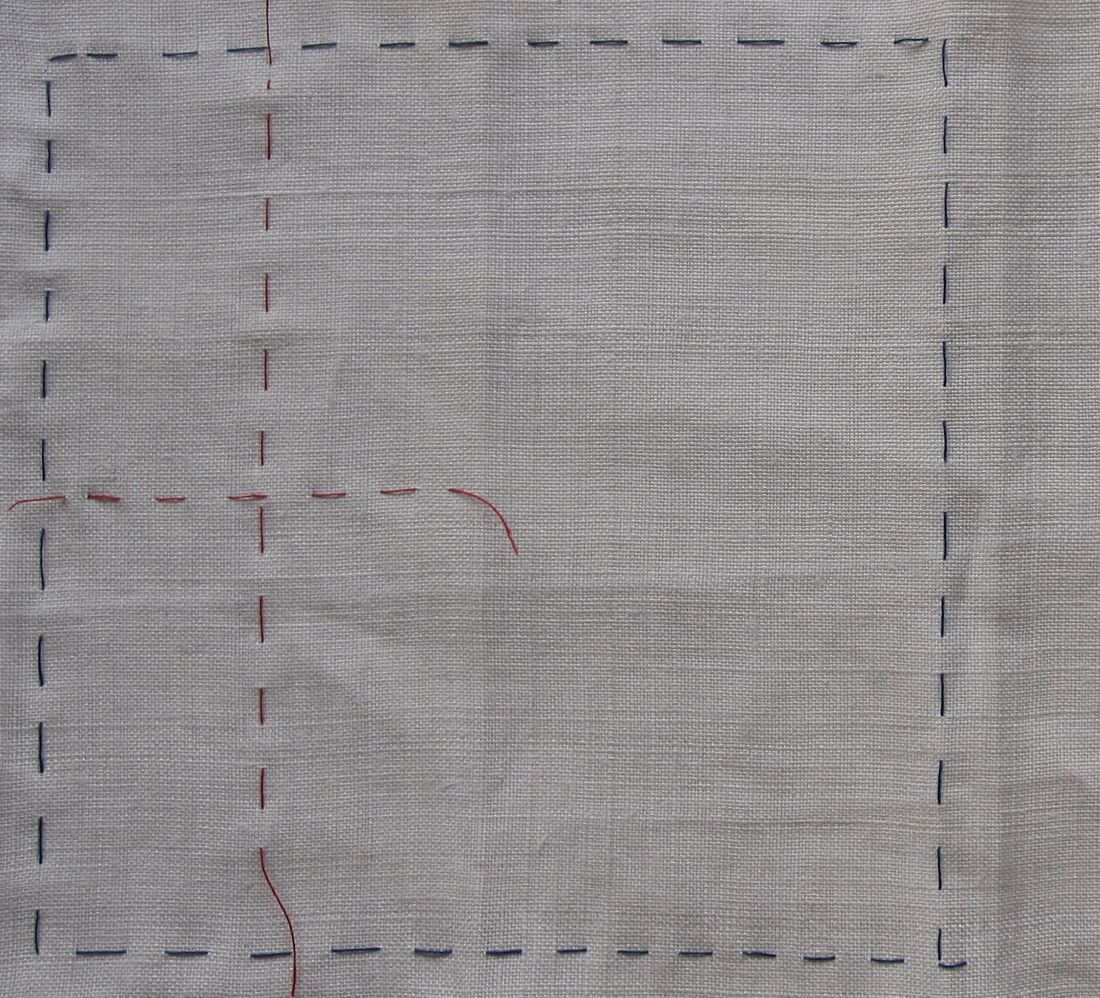
Along the 58 cm edge, measure out 20 cm from the center axis to both ends and work Four Sided stitches along these two lines. These lines will mark the ends of the roll later.
Nackenrolle_2
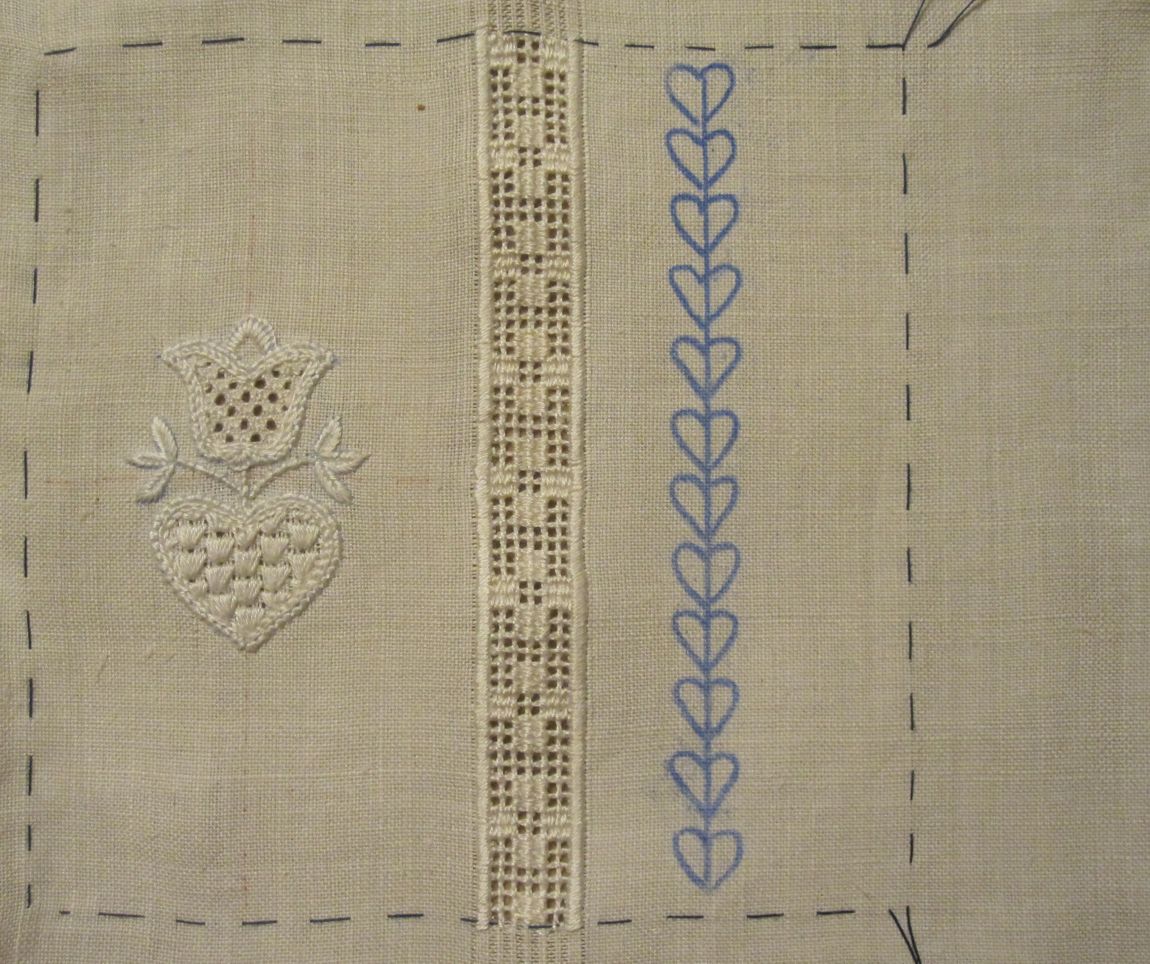
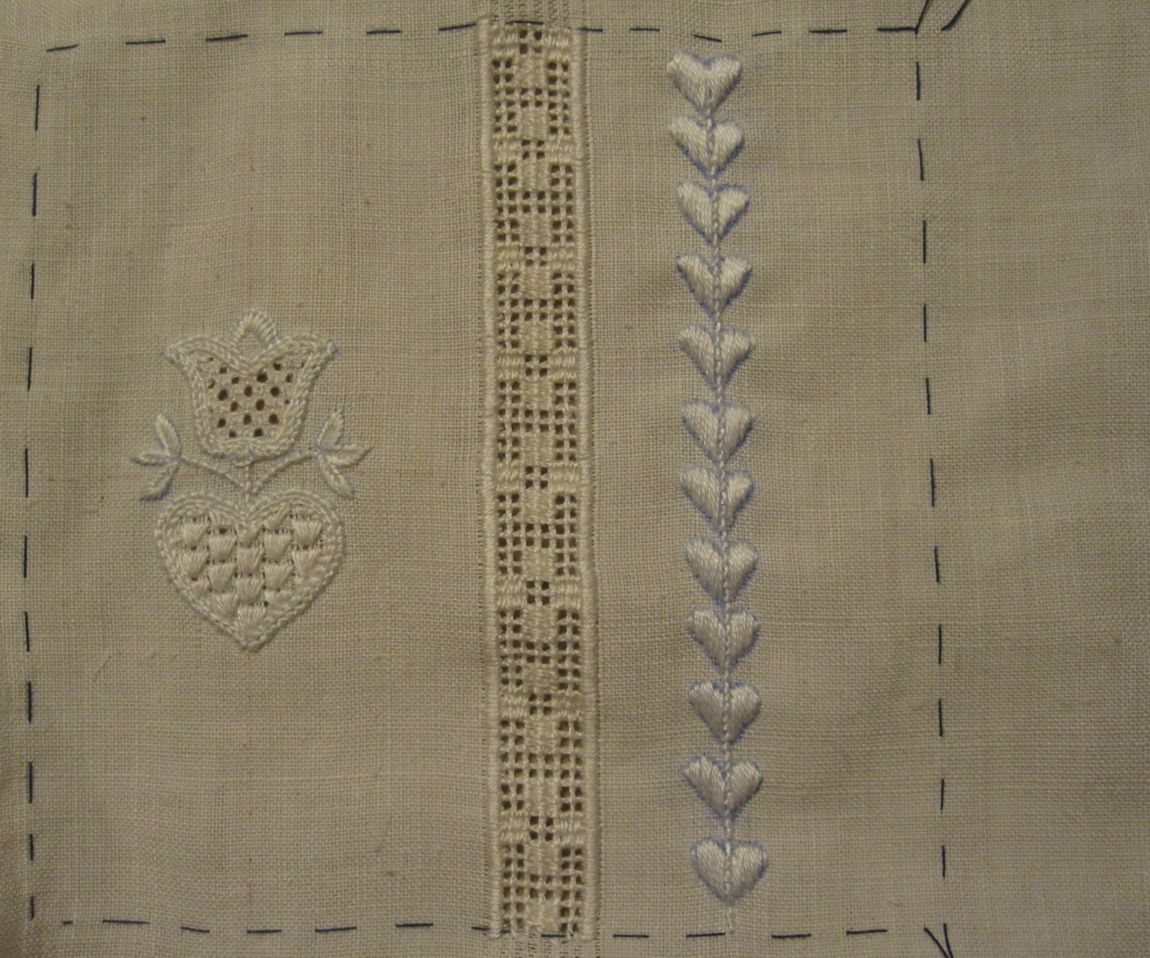
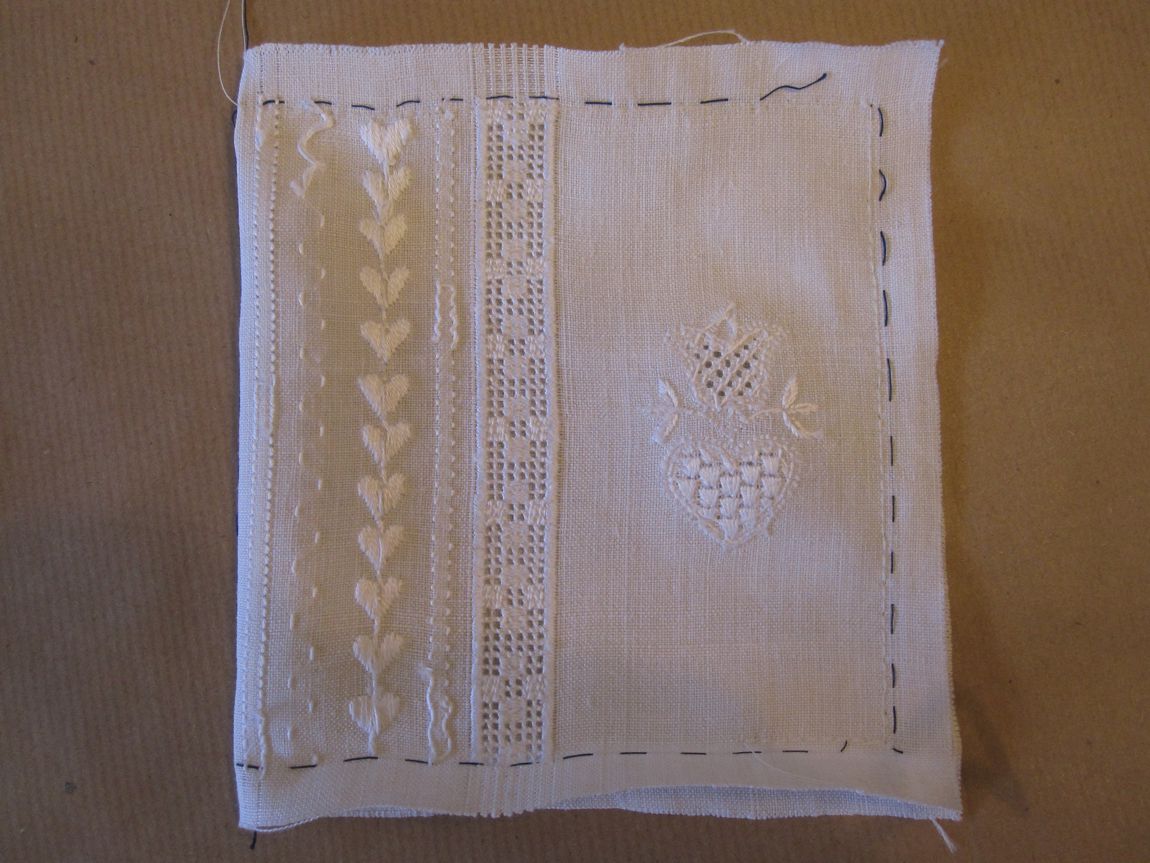
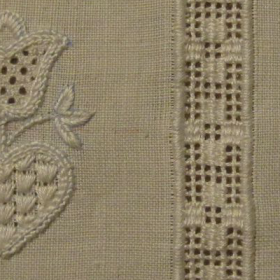
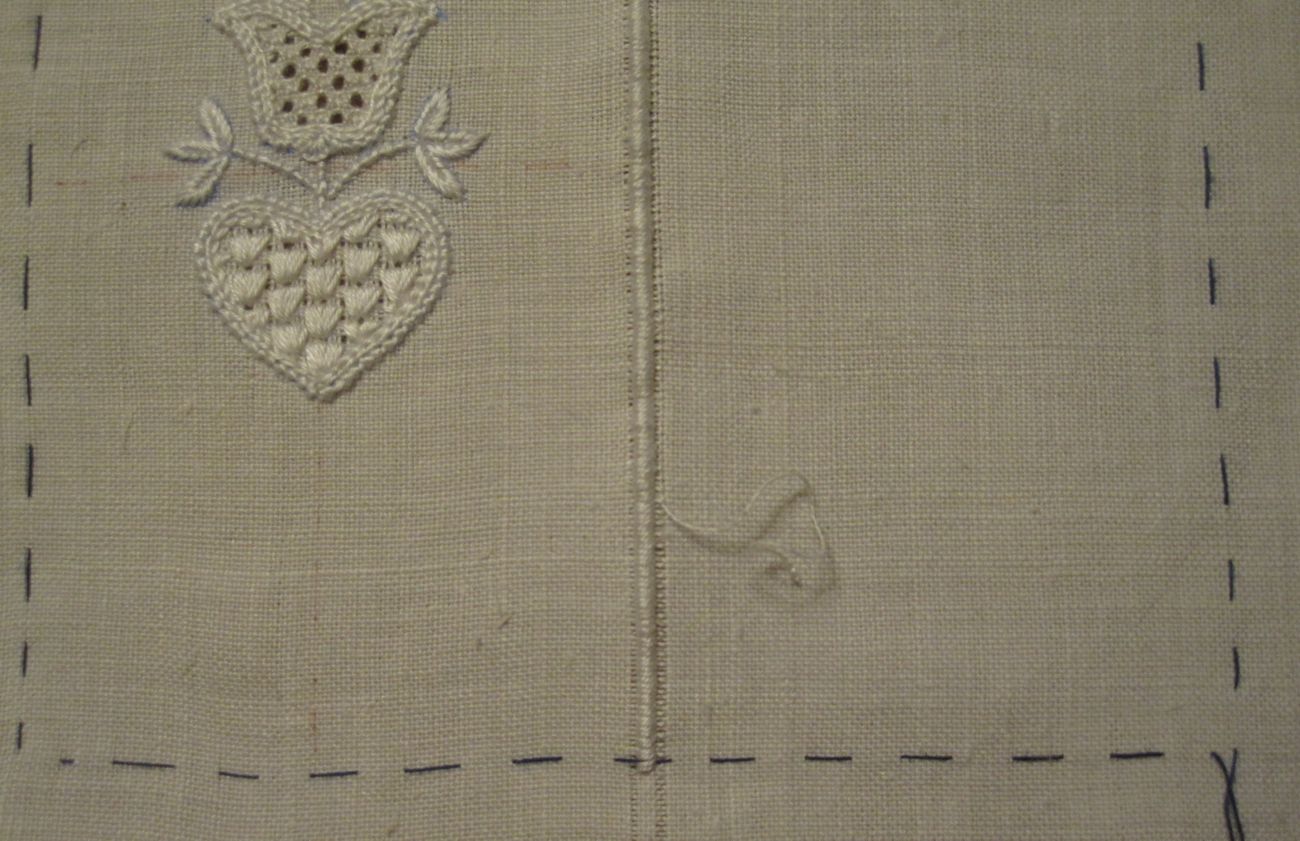
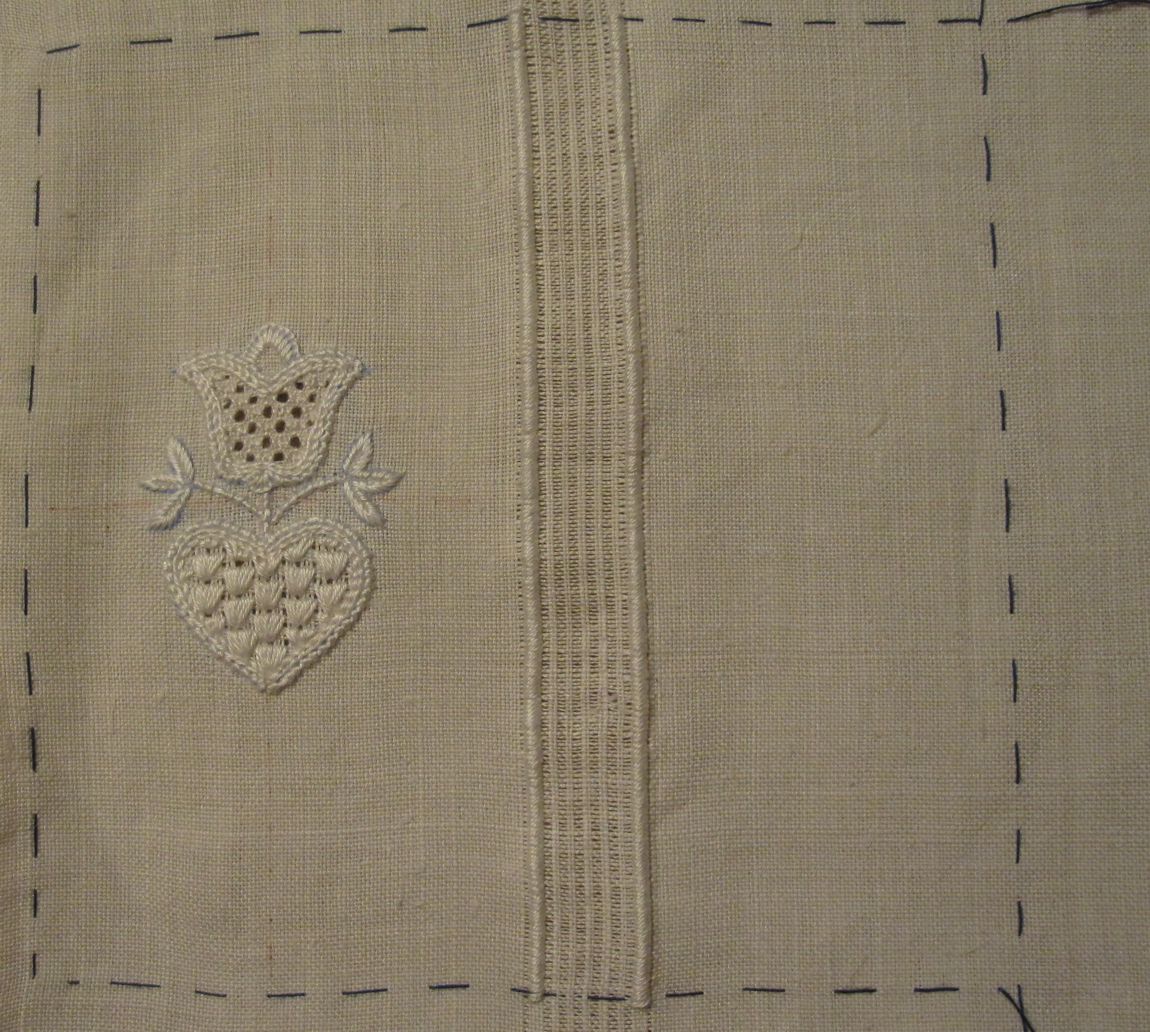
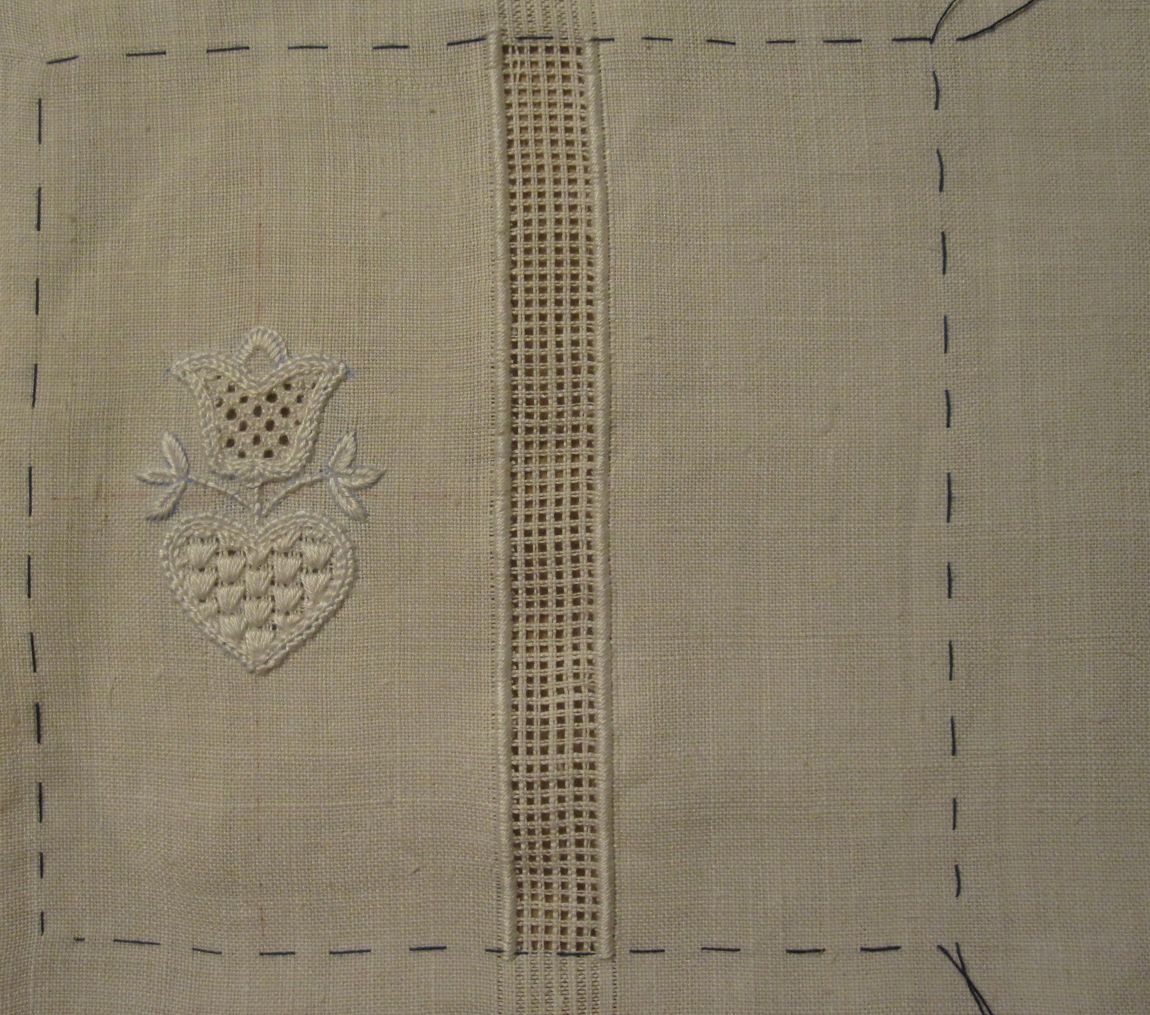
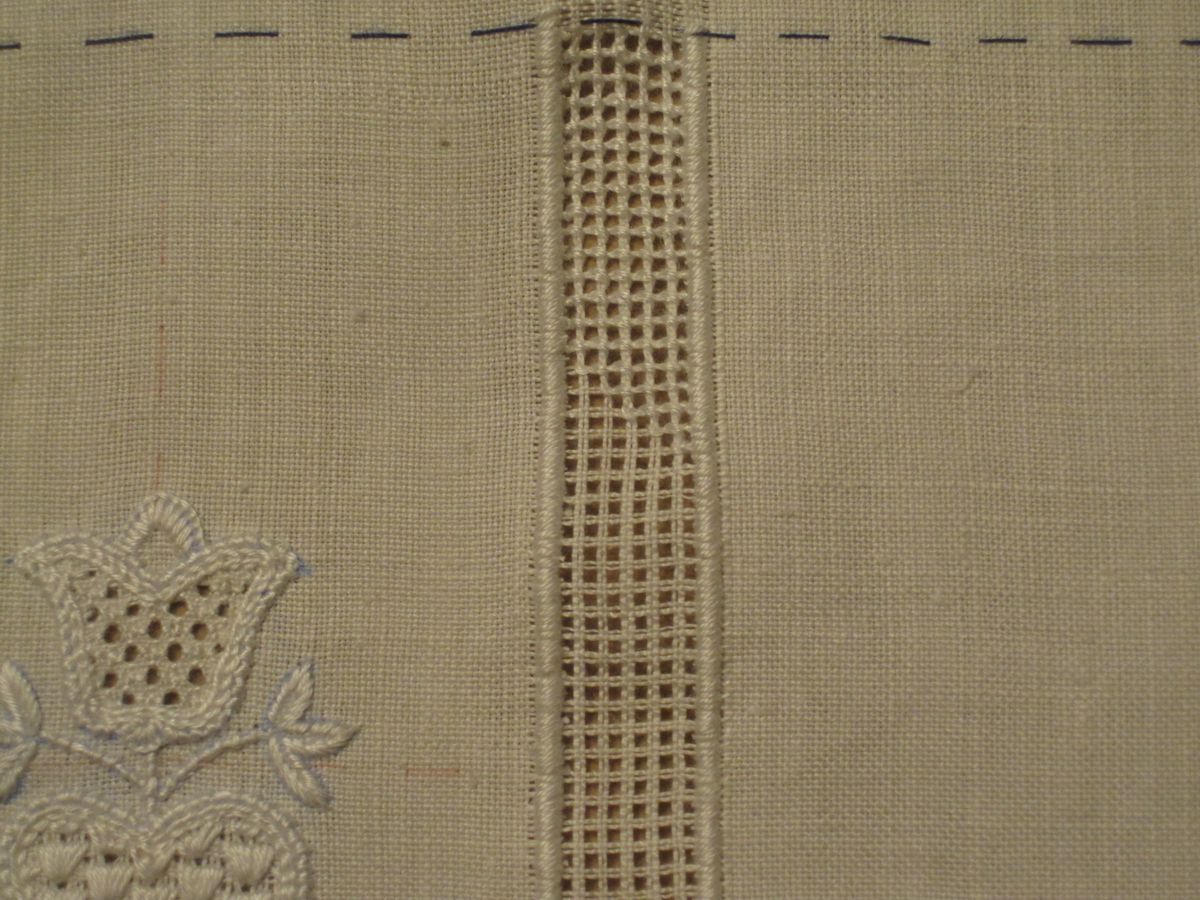
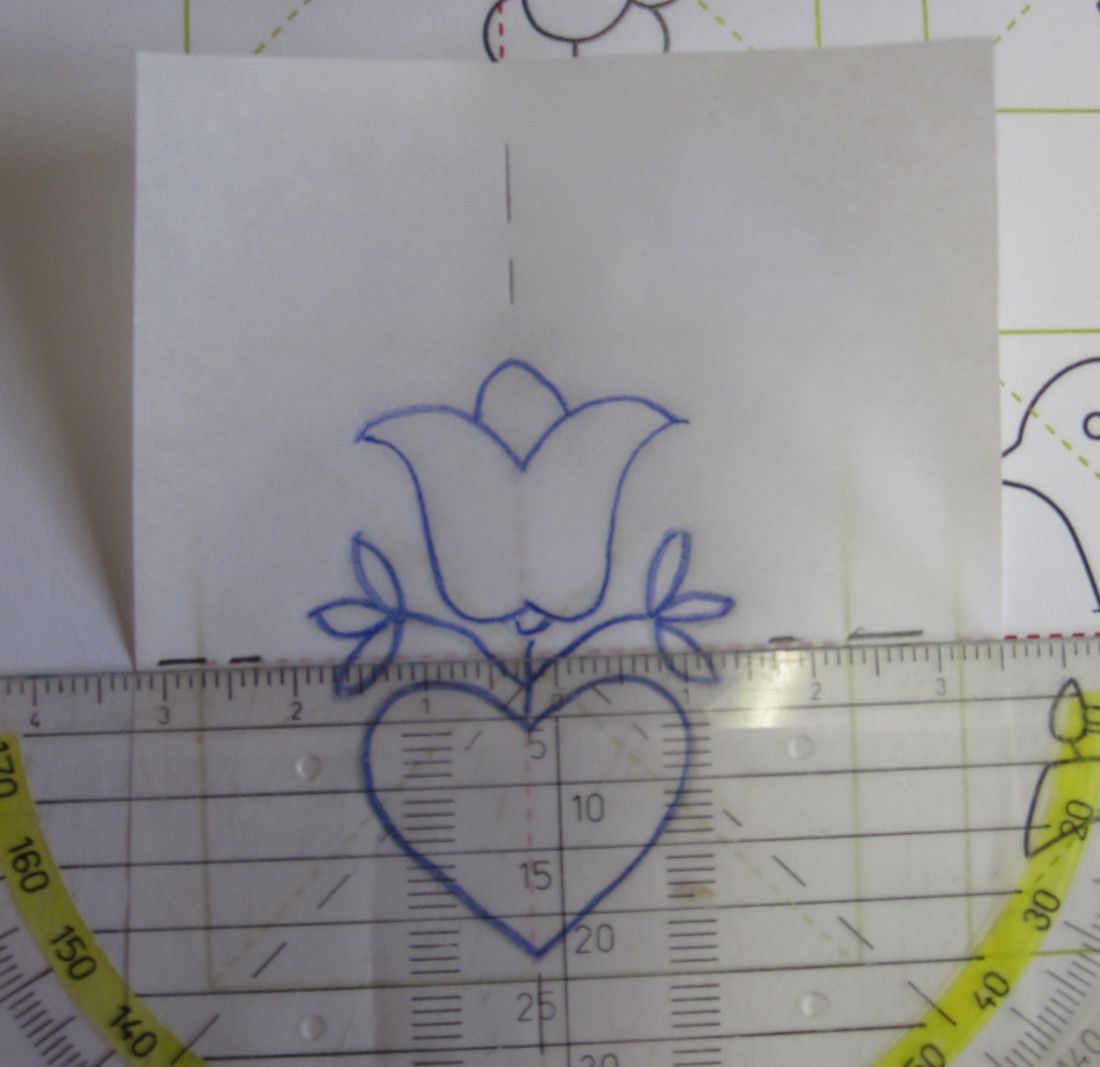
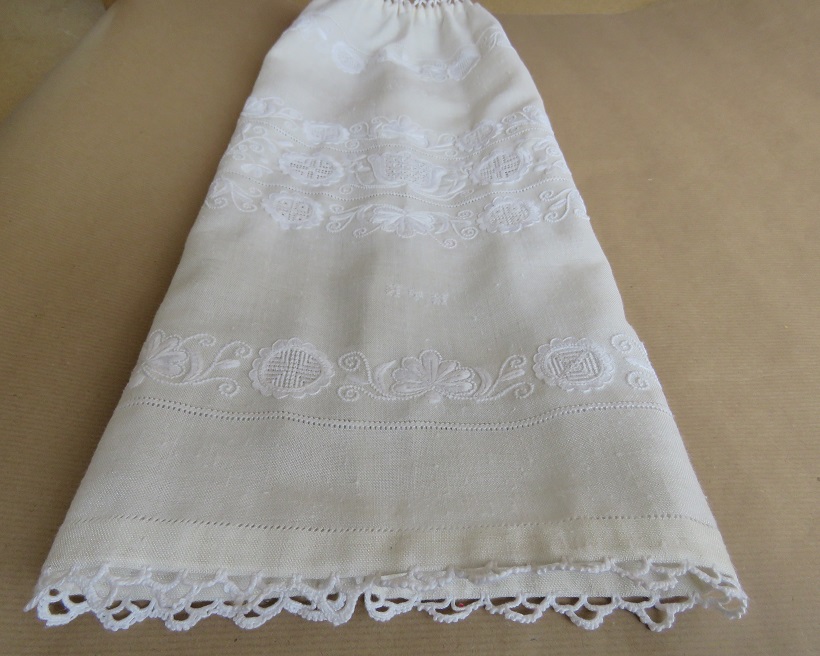
Inwards of the two Four Sided stitch rows, typical Schwalm borders are embroidered. A great quantity of similar Schwalm borders can be found in the booklet Schwalm Curved Lines, Narrow Borders, and Ornamental Stitches.

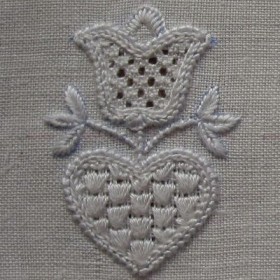
In the middle, a design of three Schwalm borders is stitched—each border separated from the next with one row of Four sided stitches. A wide range of different filling patterns is used.

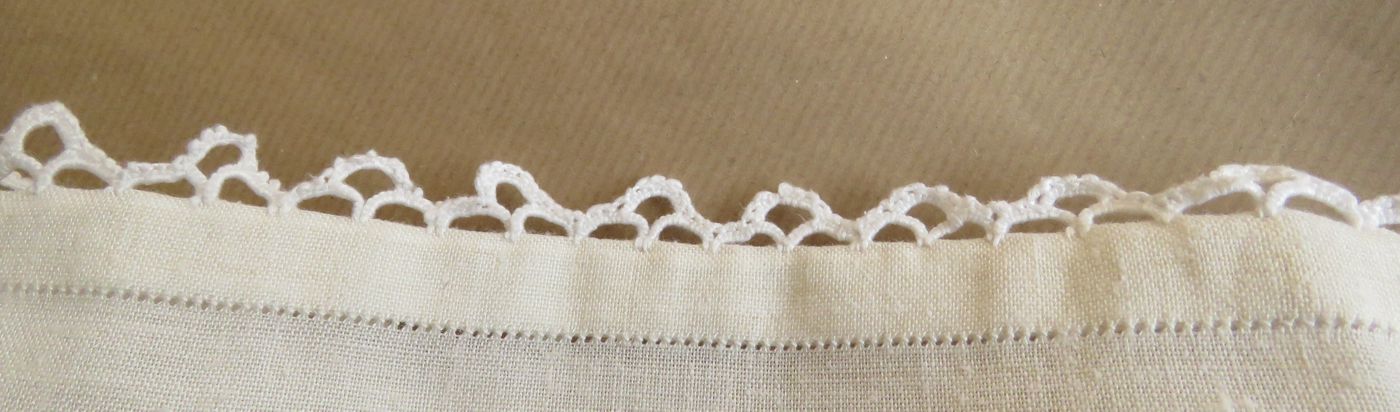
The edges at the two ends get hems measuring 2 cm + 1 cm fold. They are additionally decorated with needlelace.
Nackenrolle_3Before sewing the long edges together, the piece is washed for shrinkage.

Then it is ironed and sewn together. Begin and end the long seam before the hems. A cord—for gathering and closing the ends—is inserted into the hems of the bolster cover.
Nackenrolle_4
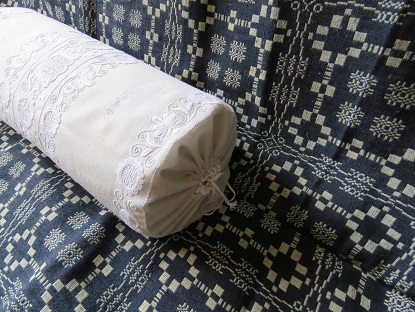
The pillow form is inserted into the embroidered bolster cover, and the ends are gathered and closed.
Nackenrolle_5
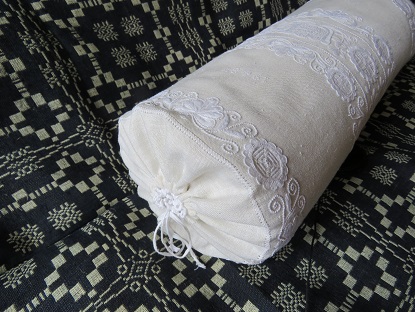
A very decorative bolster is finished.
Nackenrolle_6
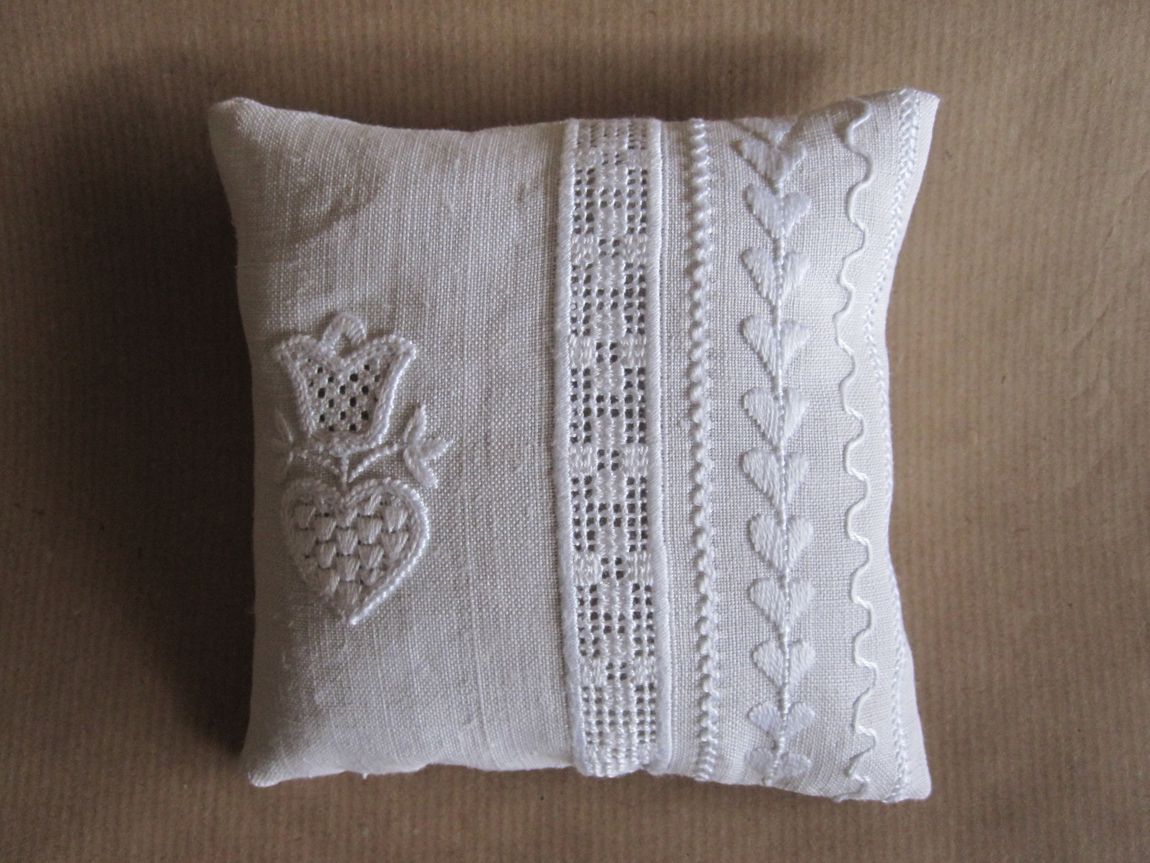
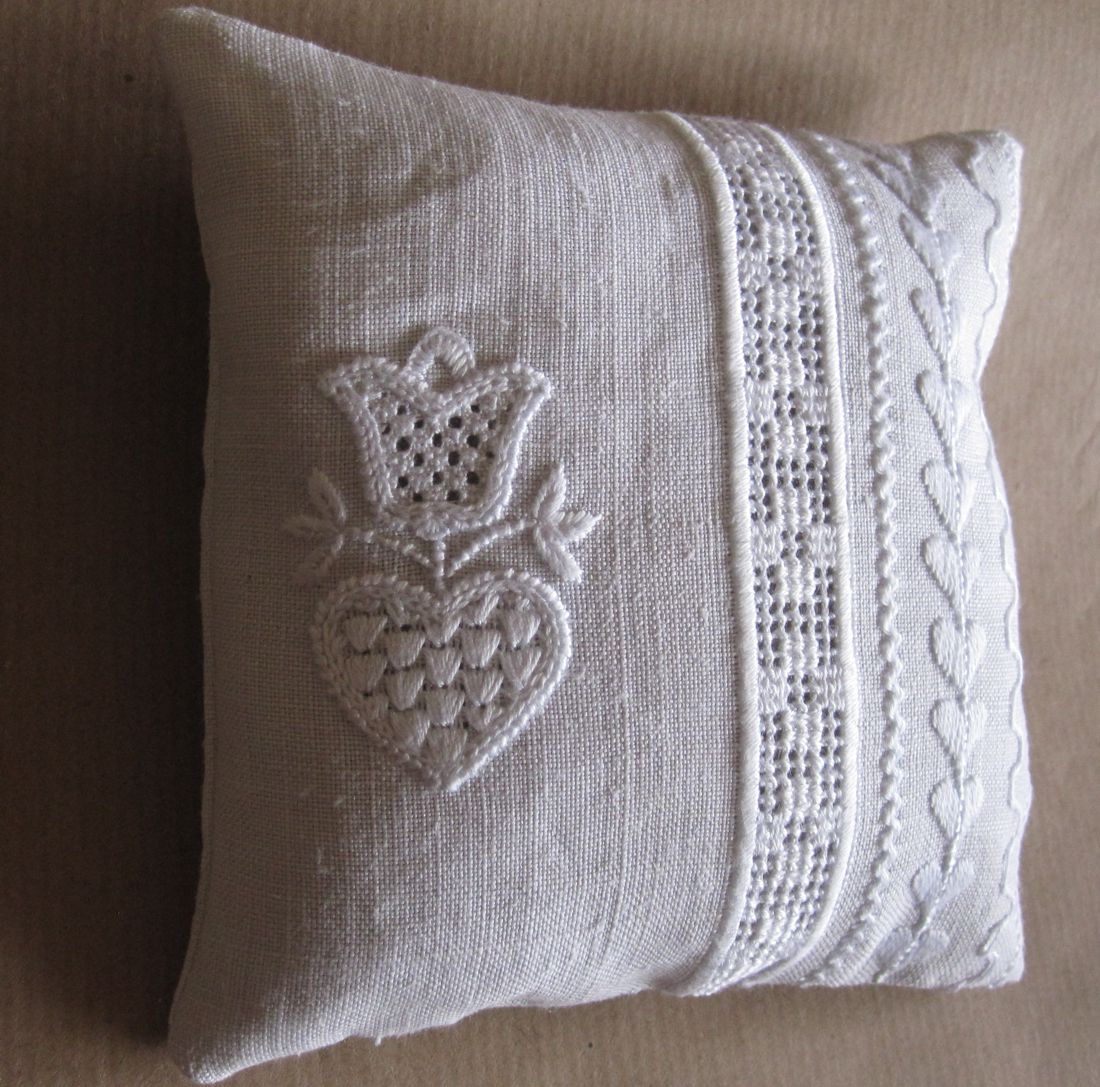
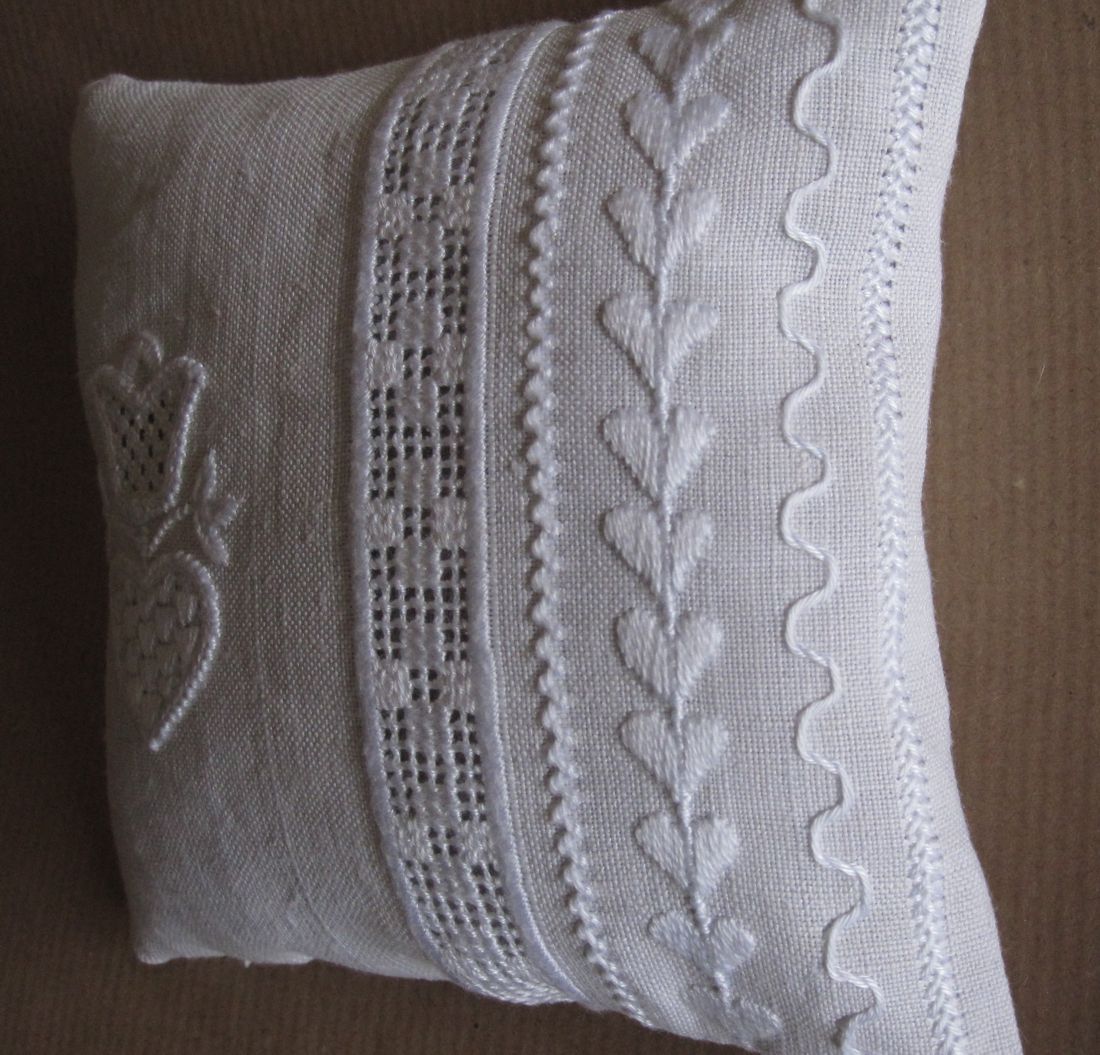
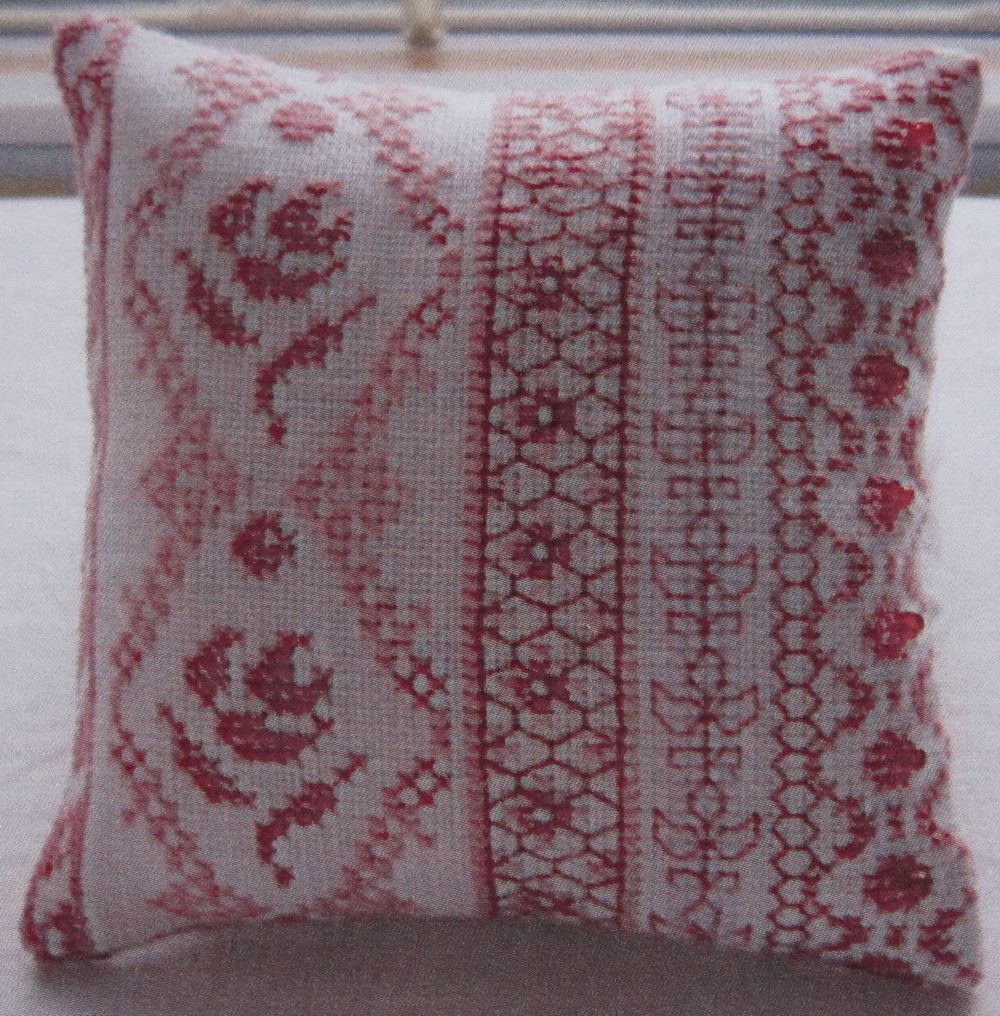
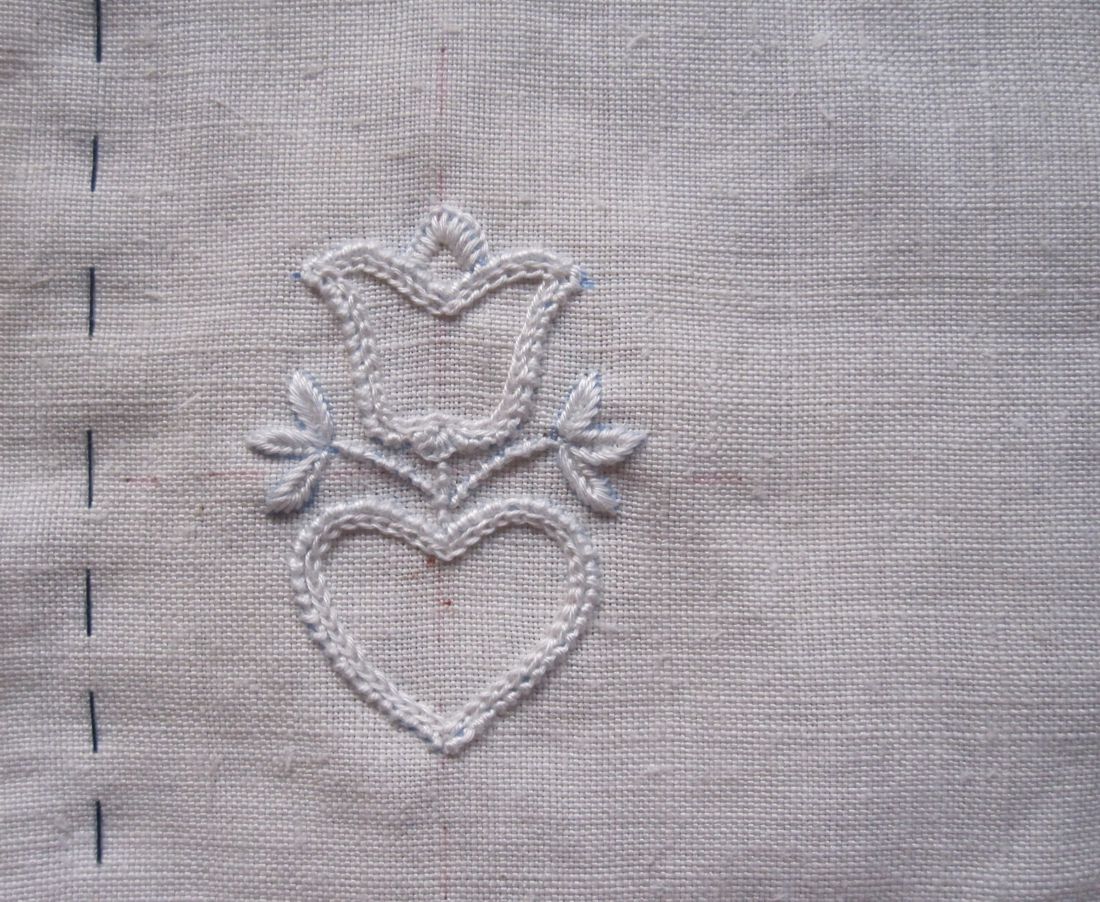
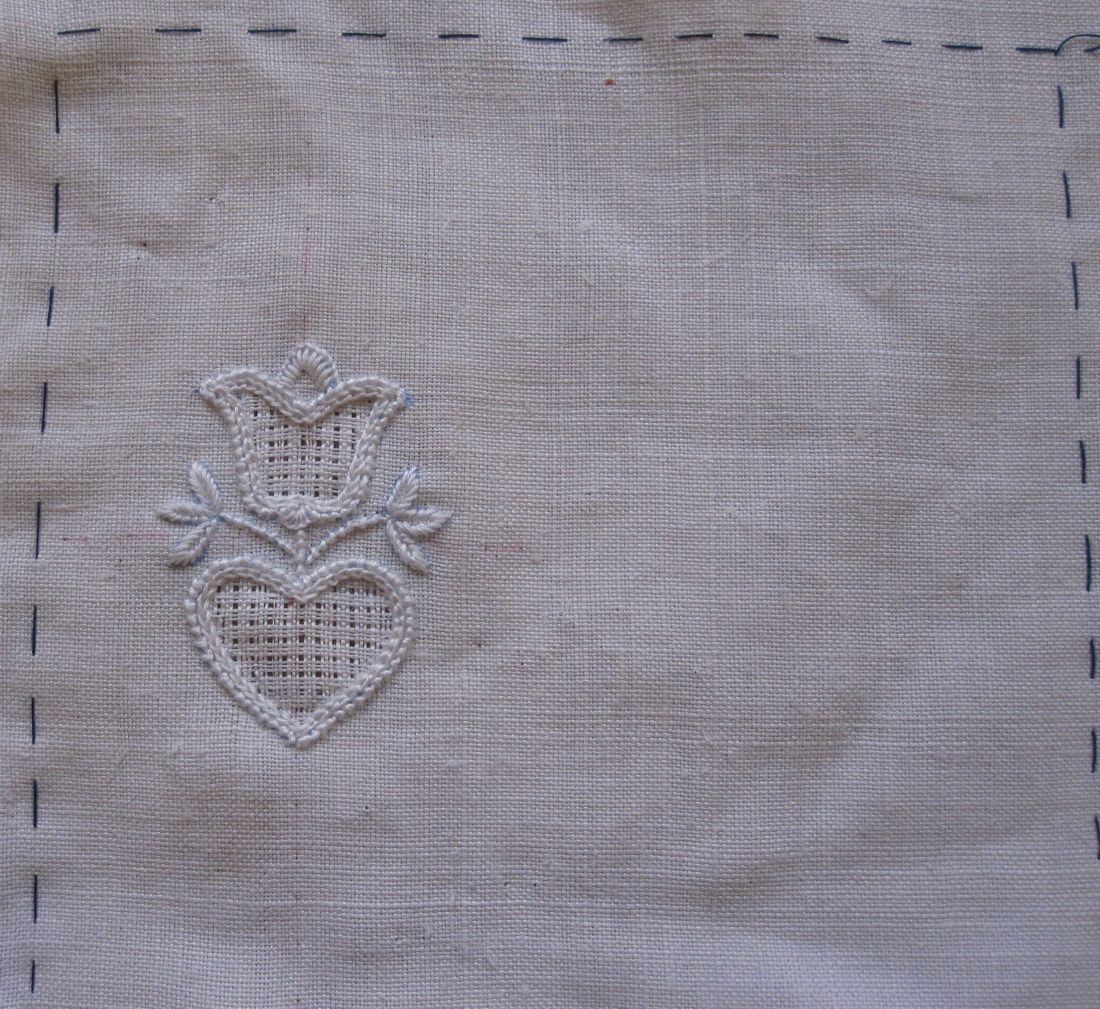
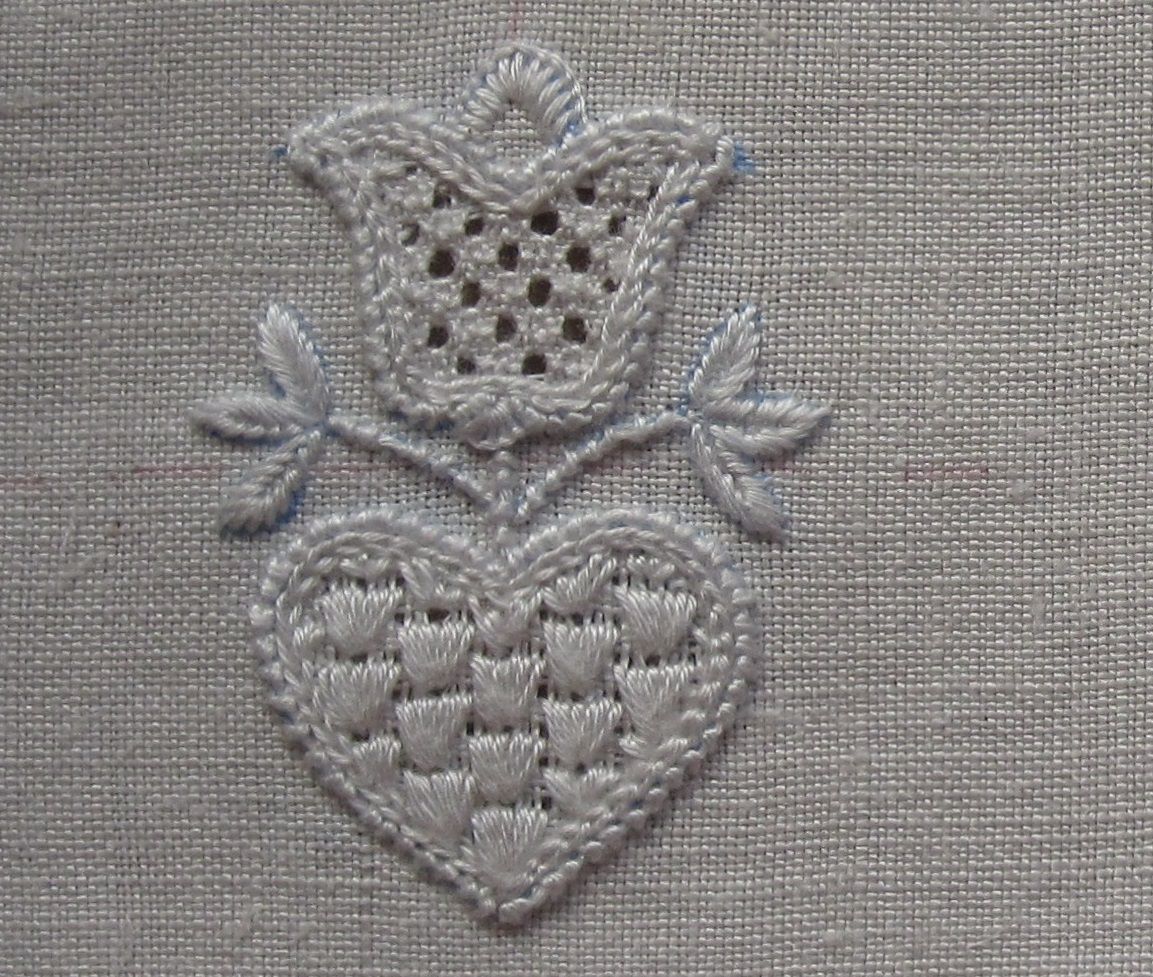
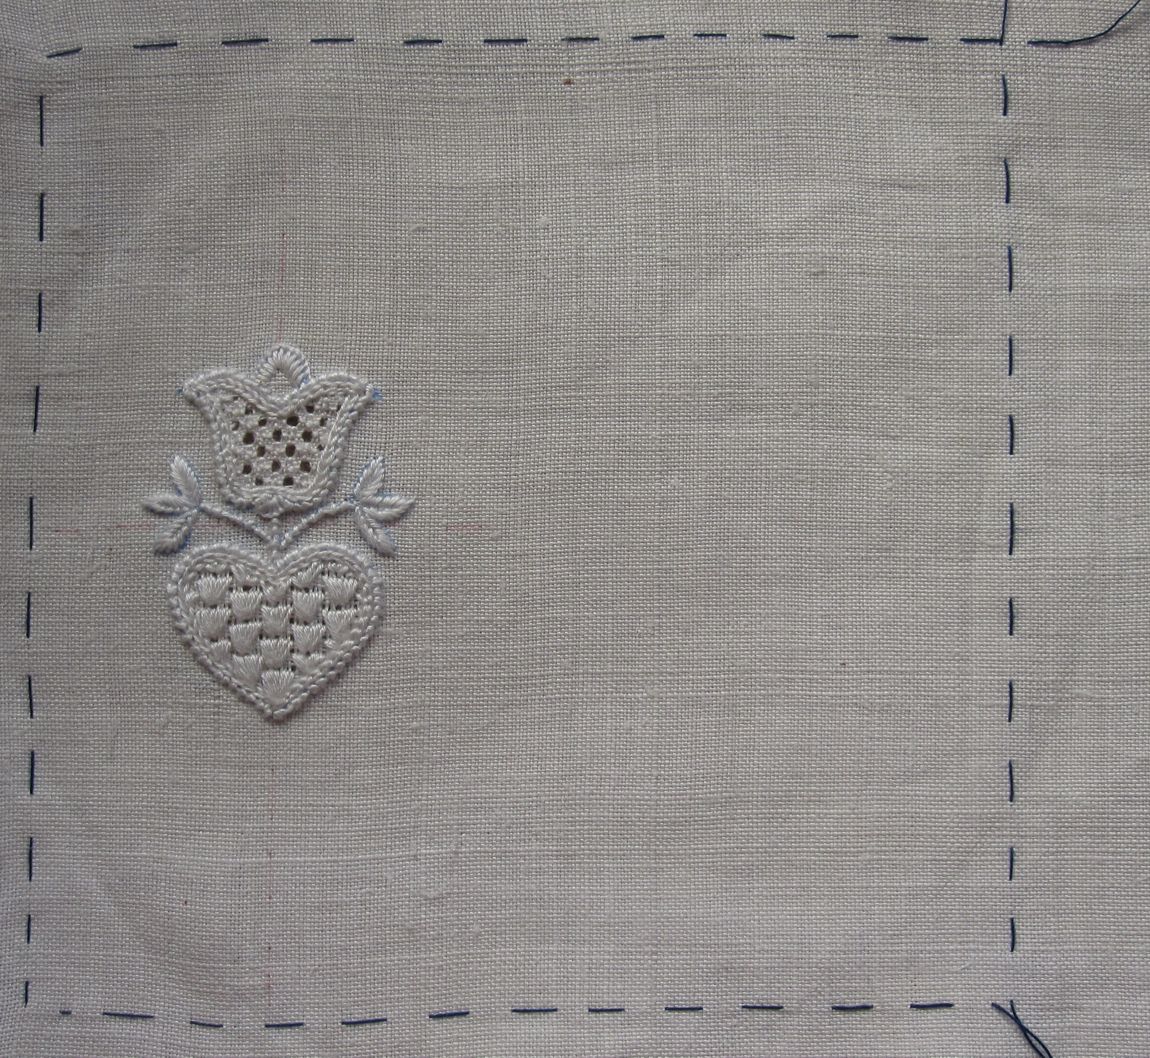
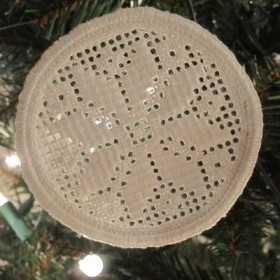
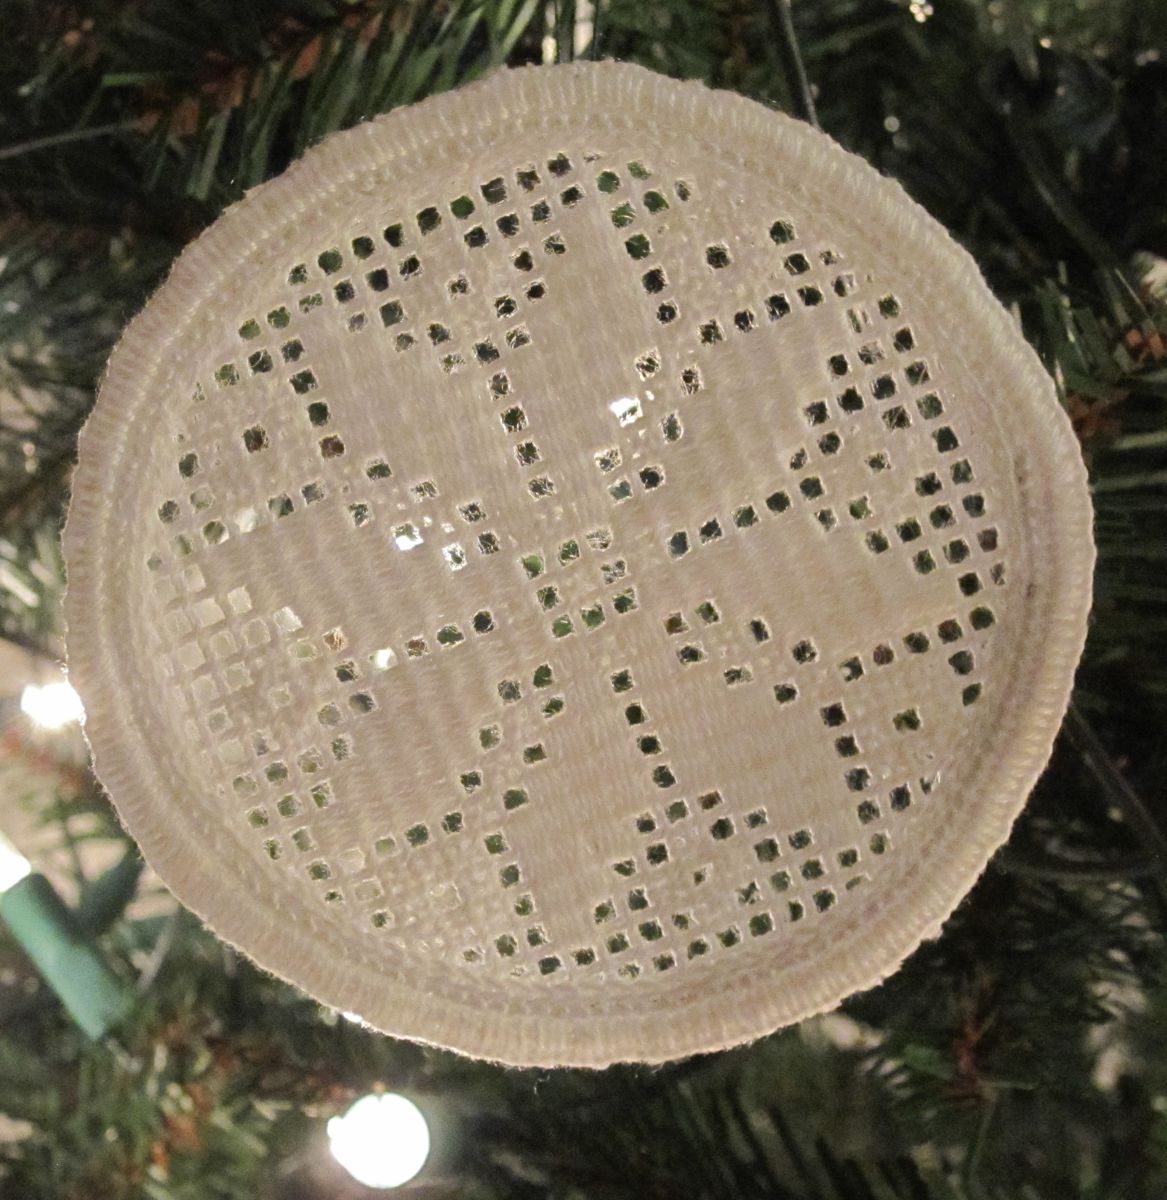
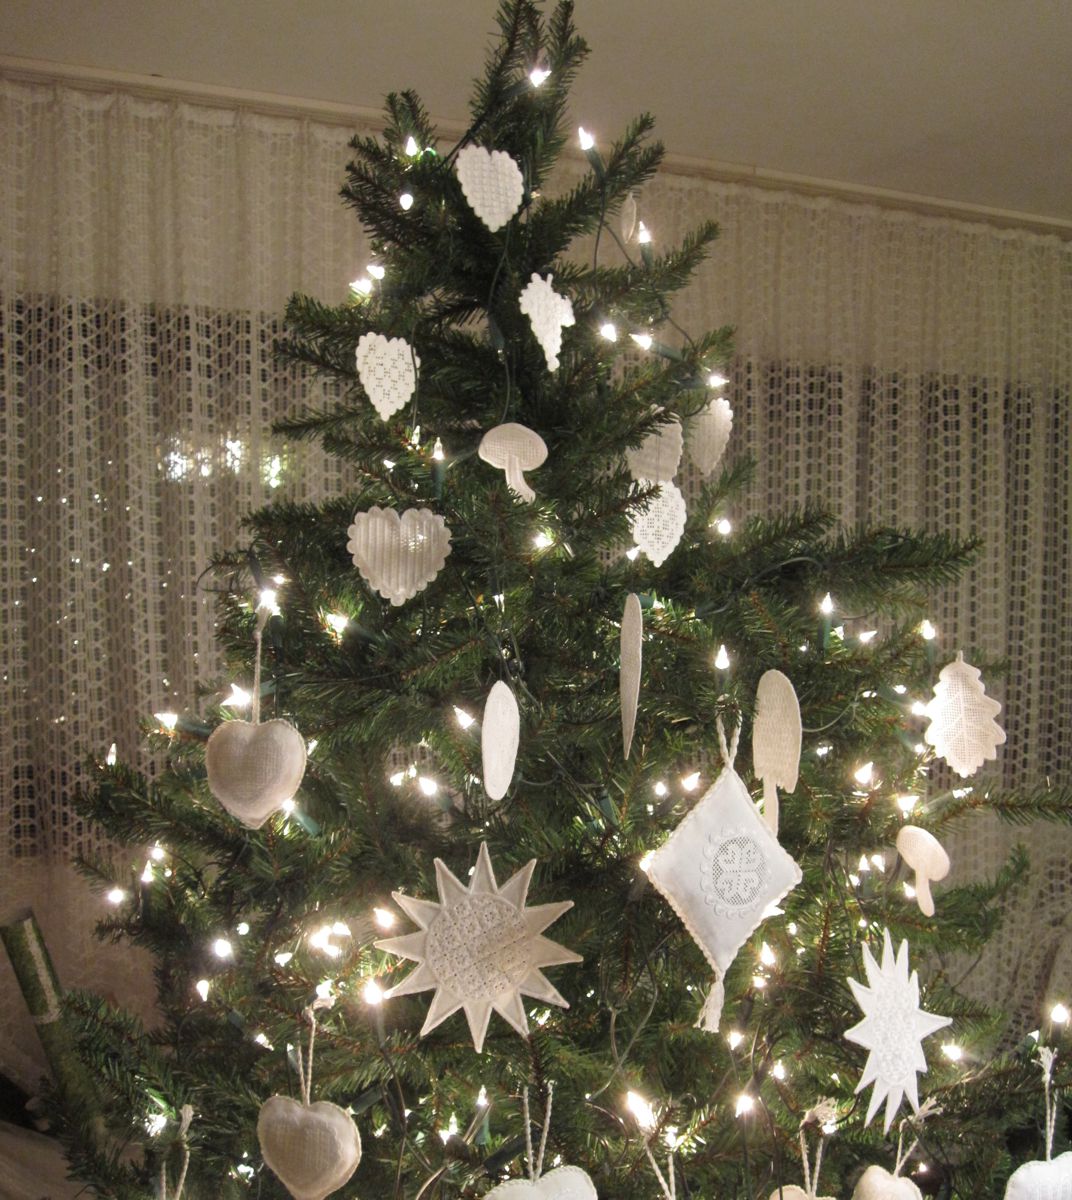
Of course such narrow border designs have a multitude of applications. The designs can be re-sized to become suitable for different kinds of miniatures, for example a pincushion roll or a pincushion square.

I hope I have given you some good ideas for Christmas gifts!

Ideas Workshop – Pincushion (3)

The small Schwalm borders and ornamental stitches should complement the other decorations on the pincushion.
NA3_1So, first a small heart border design is transferred on the straight of grain and stitched with Coral Knot stitches and Satin stitches.
NA3_2Additional decorations include “Schlängchen” (interlaced Herringbone stitches), “Kerrercher” (interlaced Running stitches) and a variation of Herringbone stitches.
Many examples of small borders and typical ornamental stitches can be found in my download document “Schwalm Curved Lines, Narrow Borders, and Ornamental Stitches”, or you can design your own to complement the embellishments of the first two sections.
NA3_3After finishing the embroidery, the fabric is cut to the measurement of 14 cm X 26 cm that was established at the beginning.
NA3_4The piece is washed – please wash gently so that the fabric edges will not fray – starched and ironed.

Then the piece is folded right sides together and sewn – just inside the blue marked lines – on two and a half sides (one must create an opening to turn inside out and for stuffing).
NA3_5The marking thread is removed. Inside is turned out and the piece is ironed once more. The pincushion is filled with Poly-Fil, wool fleece, or wadding. The remaining seam allowance is folded inside and secured.
NA3_6A nice little pincushion is worked.
NA3_7Were you able to envision this result in the beginning?
NA3_8
Personal critique: My first attempt did not turn out just as I had hoped. In particular, to accommodate the bowing of the pillow when it is stuffed, the motif at the left should not have been centered. The Openwork pattern band should have been started closer to the motif. Also, the motif could have been a little larger. And, I think, a little needlelace edging would make it a very special pincushion.
I hope you see that we all learn from trial and error and that we will accomplish very little if we expect perfection every time we pick up a needle and thread. Please, do not be afraid to make
mistakes!

Where you able to realize your ideas?

previous part

Ideas Workshop – Pincushion (2)

For the next section’s embellishment, I decided that an Openwork pattern band should be worked.
Therefore, one vertical thread is withdrawn. The motif just worked should be centered in its section, so the distance to the withdrawn thread line should equal the distance from the motif to the marked line on the left.

Please note: After finishing my pincushion, I realized that the motif should not be centered in its section. If it is centered, when the pincushion is stuffed the motif will look as though it is sliding off the left side of the pincushion. Either it is best to withdraw the first linen thread of the Openwork pattern band somewhat closer to the motif – it is a question of taste how close. Or, if the excess linen on the left allows, one can move the whole blue marked square 1 cm to the left to work a small border or an ornamental stitch on the left of the motif – similar to the original inspirational pincushion.
Nadelkissen_1
Over from this withdrawn thread line 4 threads are left and the next is withdrawn. One row of Satin stitches is worked over the 4 linen threads.
Nadelkissen_2
Next to the withdrawn thread on the right, another thread is withdrawn.
Nadelkissen_3
My Openwork pattern band is 6 squares wide. So, always alternating, 2 threads are left and 2 threads are withdrawn – 5 times in all. Then 4 threads remain and 1 more is withdrawn.
Nadelkissen_4
Over the 4 linen threads on the right, one row of Satin stitches is worked.
Nadelkissen_5
Then, to establish the Openwork grid (notice the section outlined in blue), the horizontal threads are withdrawn.
Nadelkissen_6
Next, the Openwork grid is secured with Cable stitch.
Nadelkissen_7
Into the established grid a Needleweaving pattern is worked. Suggestions for arranging such pattern bands can be found in Saumbaukasten or in Easter Eggs.
Nadelkissen_8
The second section is finished. The third section will be embroidered with small Schwalm borders and ornamental stitches. Can you envision how it will look?

previous part

Ideas Workshop – Pincushion (1)

Ideas do not fall out of the sky – one gets inspiration from many different places. Some time ago I saw a pincushion embroidered with Cross stitches and Back stitches along a French pattern.
NA1_1
I thought that such a pincushion could also be worked in the style of Schwalm whitework.
Perhaps a small Schwalm design at the left?
In the center area a nice Needleweaving hem, a Peahole hem or an Openwork patterned band? At the right small schwalm-typical borders or decorative stitches?

I can very well envision this; what do you think? Won’t you please stitch along with me on this small and creatively fun project?

Let’s get started!

The finished pincushion will measure 12 cm X 12 cm. So, after the embroidery is finished, the linen will be cut (for the front and back) in the size of 14 cm X 26 cm (beige-coloured section); the measurements include a 1 cm seam allowance along three sides (after the rectangle is folded). The reason why one does not cut the linen to size beforehand is that the linen must be stretched in a hoop while working. The blue area represents the area that will be cut away after the embroidery is finished, and the size of excess linen depends on the size of the hoop one is using.
NA1_2
For my project I chose a very fine handwoven linen. With Running stitches (blue) I outlined a 12 cm X 12 cm area, which will be decorated with embroidery later. Inside this space I marked the horizontal and vertical axes to aid in the precise placement of a small motif which I had chosen to work at the left. Additional small designs can be found in the downloadable document 24 small designs
NA1_3
I transferred the chosen motif to tracing paper using a DEKA iron transfer pencil. With a pen I marked the straight of grain.
NA1_4
The motif was then transferred to the linen.
NA1_5
Coral Knot stitches, Chain stitches, Satin stitches and Blanket stitches were worked.
NA1_6
I decided to fill both motif areas with Limet patterns. So I withdrew the threads cutting 1 – leaving 3
NA1_7
and embroidered the chosen patterns.
NA1_8
The heart was filled with the pattern “Netzpatent” (“magic net”) (Limetrosen I, page 64). The tulip was decorated with Rose stitches (Basic Principles of Schwalm Whitework, pages 50–52).
NA1_9
The first section is finished. Now it is time to consider how to embroider the next section:
Needleweaving hem? Peahole hem? Openwork pattern band? Or….?
What have you decided?
I would really enjoy receiving emails with pictures of your ideas realized!

Trimming the Christmas Tree in White

This year I will trim the tree in white. Working such small projects throughout the year resulted in a trove of ornaments which, in turn, allows me to decorate luxuriantly and diversely.

The items with Openwork patterns, such as this snowball from the January seasonal tablecloth, are specially well suited for trimming the tree because the light showing through creates such a fantastic effect.

Christmas Tree Decorations 1
However, all others also look very nice. Do you recognize them?
Christmas Tree Decorations 2
I want to say “Thank you” to Joey, my English editor. Only her work makes it possible for me to reach the English-speaking world.

I want to say “Thank you” to all who have purchased one or more of my books or other items. Your patronage lifts my spirits and allows me to keep my blog vibrant, interesting, and packed full of free lessons and projects.

I want to say “Thank you” to all who follow my blog and offer kind and encouraging words.

To all of you I wish a

Merry Christmas!