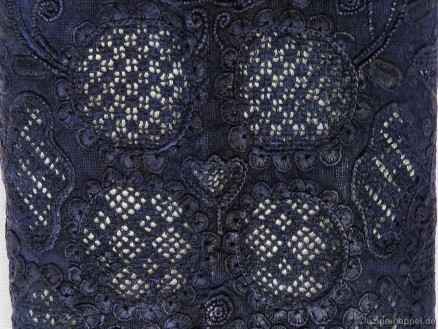
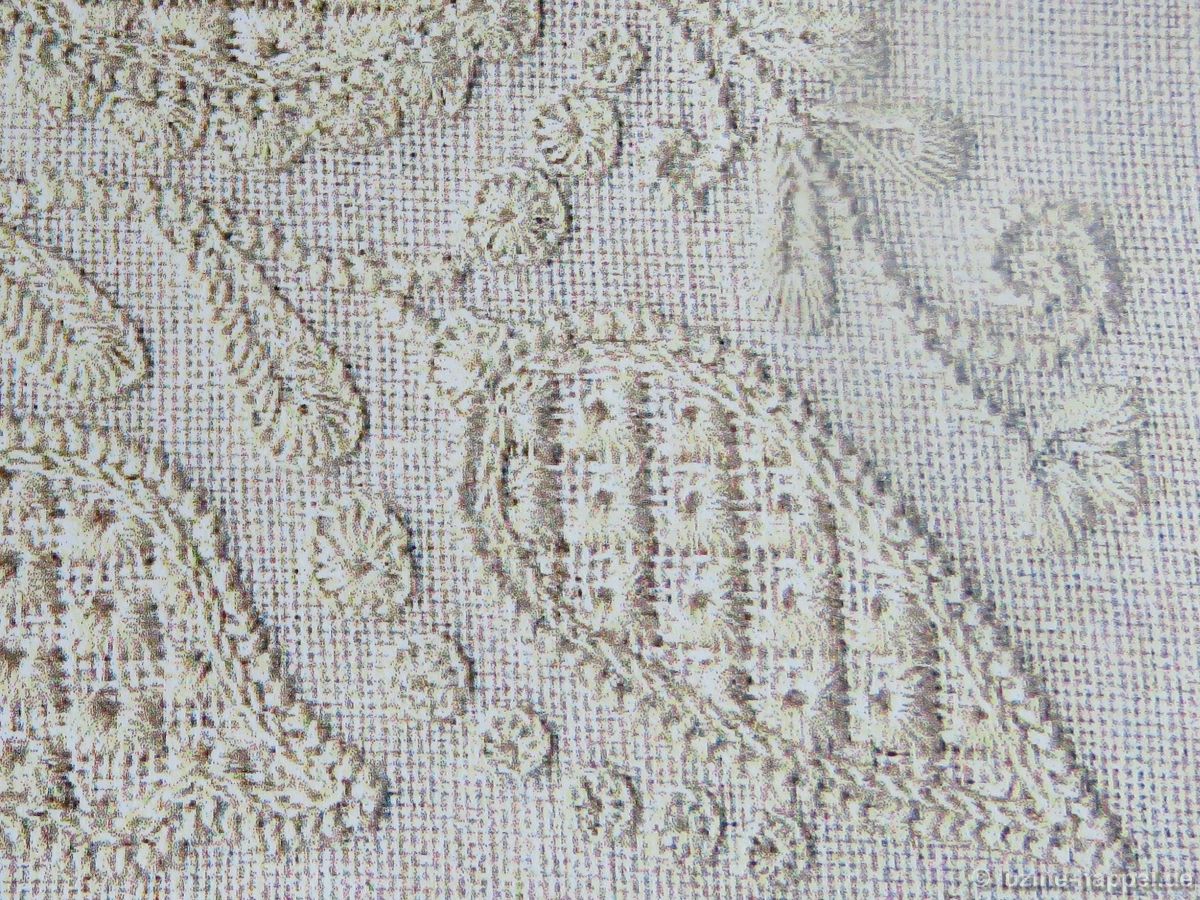
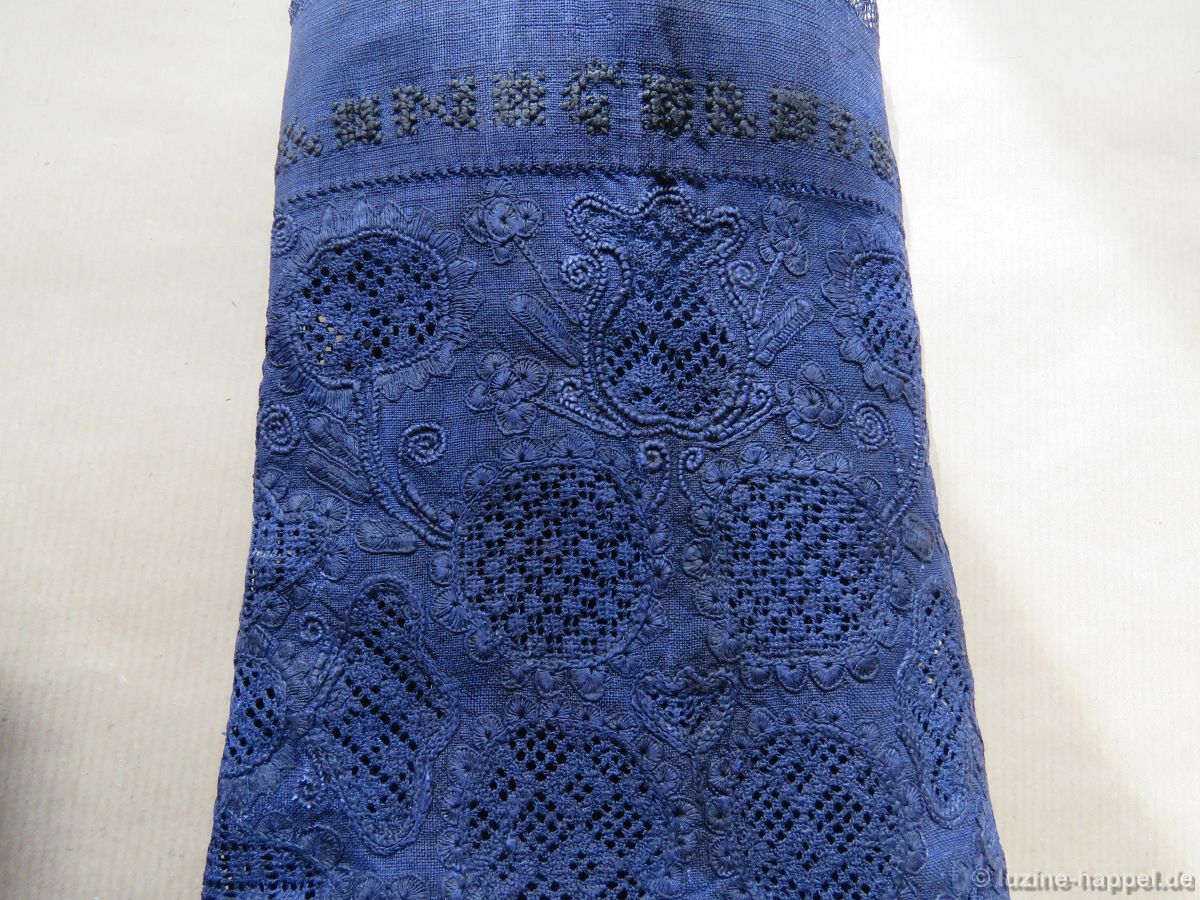
The embroidery of the dyed-to-blue Schwalm bodice (D) is extravagant. The picture shows the entire border in a photomontage.
 The linen used has a 23/cm thread count, thus it is very fine. The border design is 18 cm wide, making it especially large for a bodice embroidery.
 Initials and small ornaments were worked both at the bottom and at the top of the border. Only openwork filling patterns were worked in the motifs.
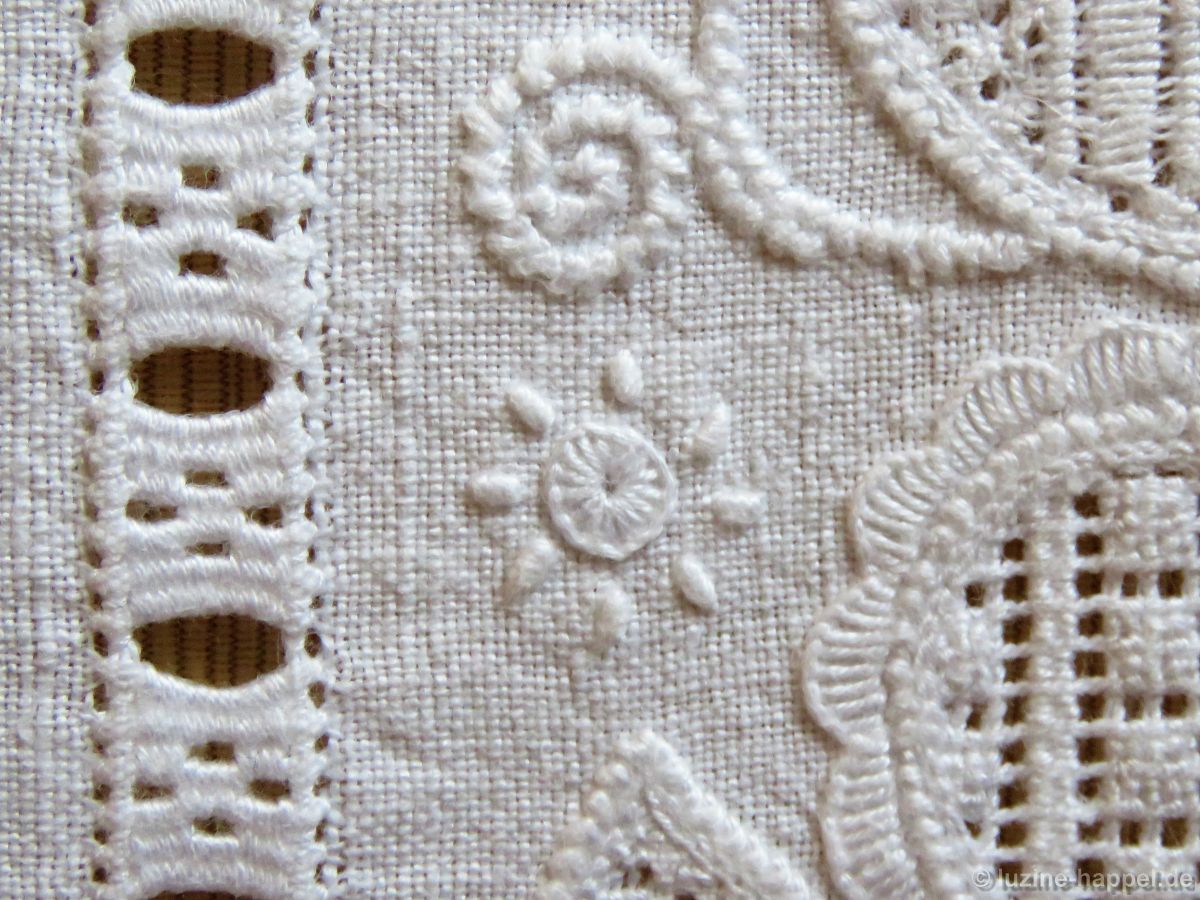
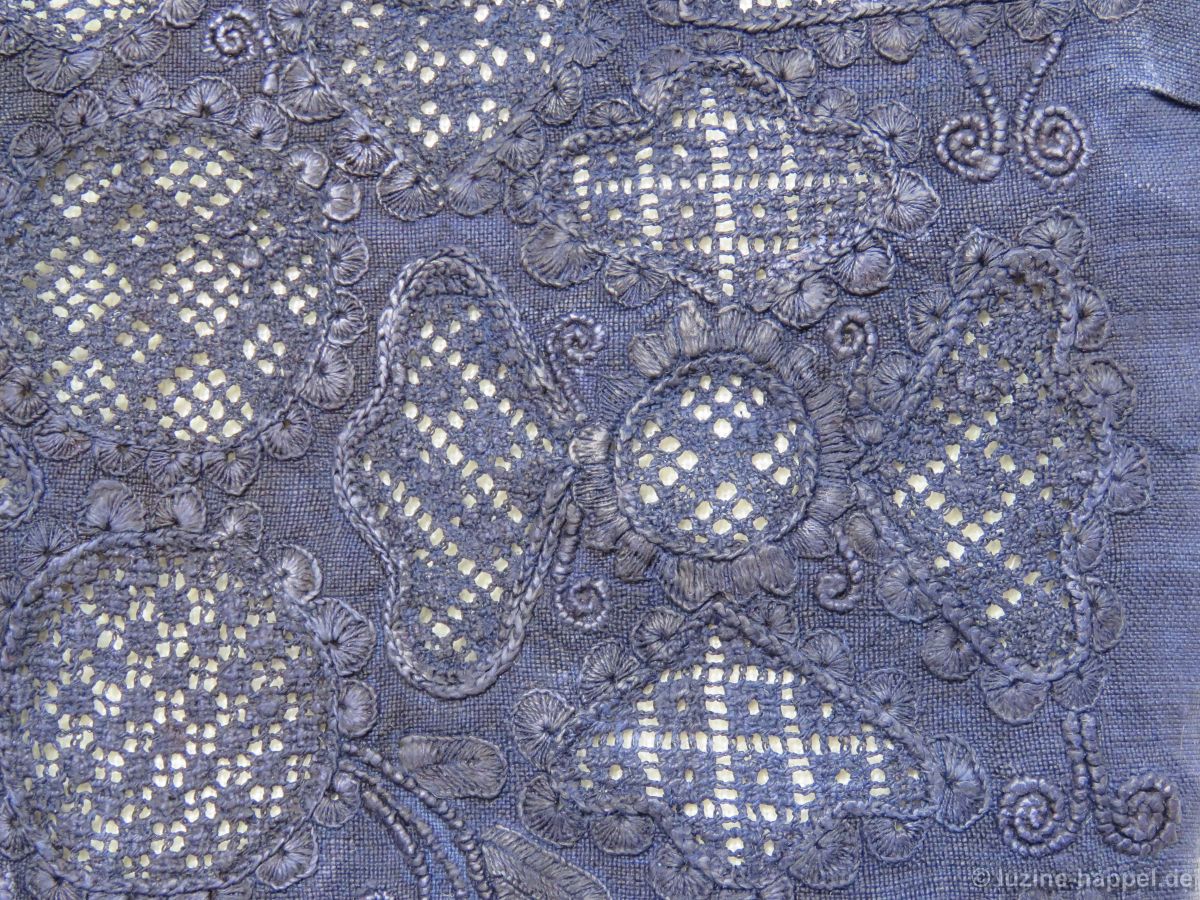
 One can note that Coral Knot stitches were used but only rarely. Only tendrils and some stems were worked with Coral Knot stitches. And only three shapes at the top middle have Coral Knot outlines; the center shape was outlined with two rows of Coral Knot stitches. The Chain stitch outline is missing in this motif. Stems worked with Chain stitches are clearly visible. The rounded leaves are worked with Blanket stitches.
Looking closer to the design, it looks a little bit awkward and heavy.
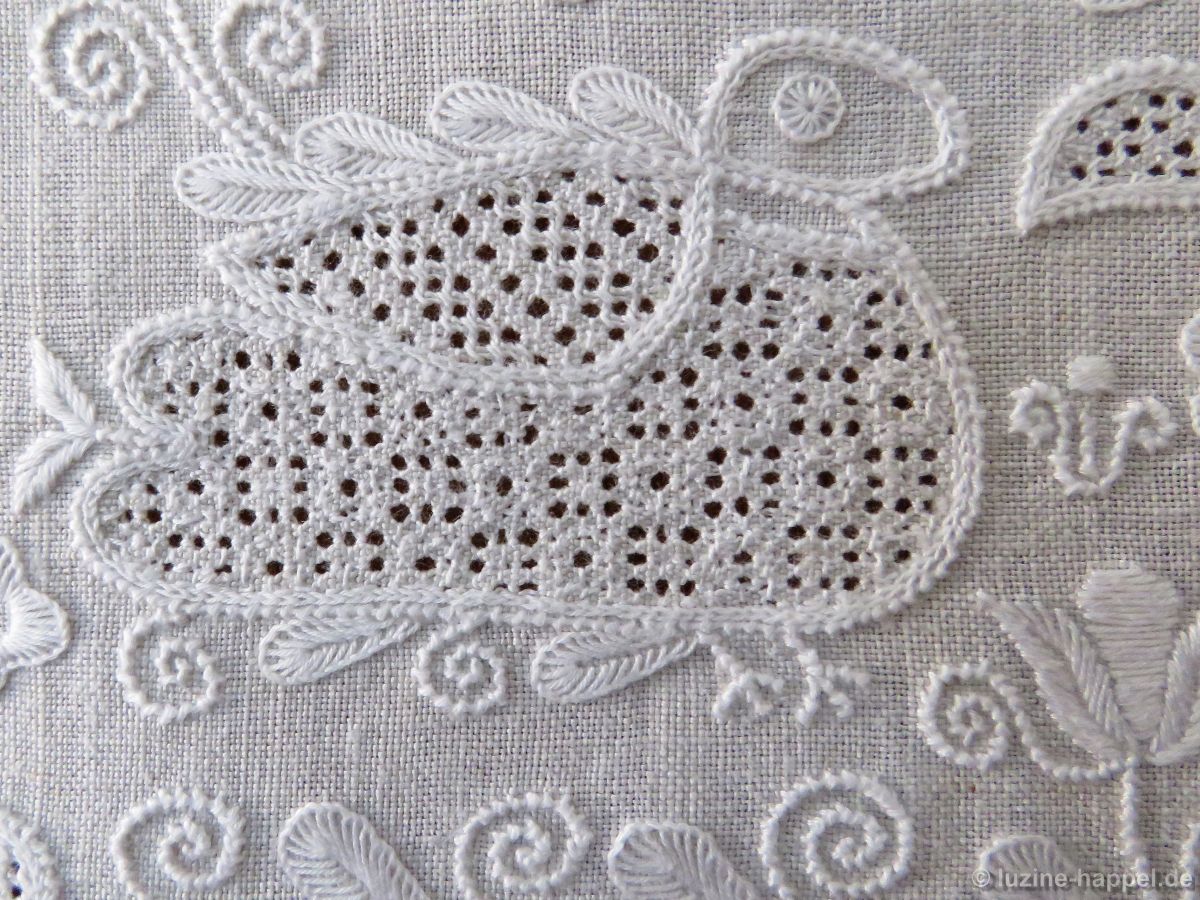
 The shape in the top middle was filled with an openwork pattern without a Cable stitch grid being worked first. A zigzag Rose stitch pattern was worked, but the pattern was not centered in the motif.
 The circle motifs to the left and right of the top center shape are not true circles. It is remarkable that the thick stem is outlined with two Coral Knot lines and that these lines merge into the outline of the shape. Usually motifs are outlined separately, and the stems are attached. An additional row of Chain stitches inward of the Coral Knot stitches is missing.
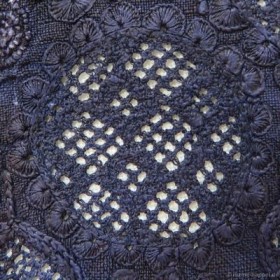
The circle motif was outlined with Blanket stitch knife points. The shape was filled with a Rose stitch openwork filling pattern without a Cable stitch grid.
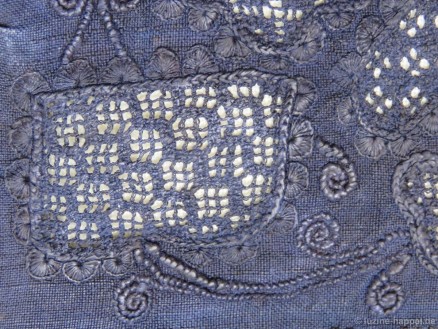
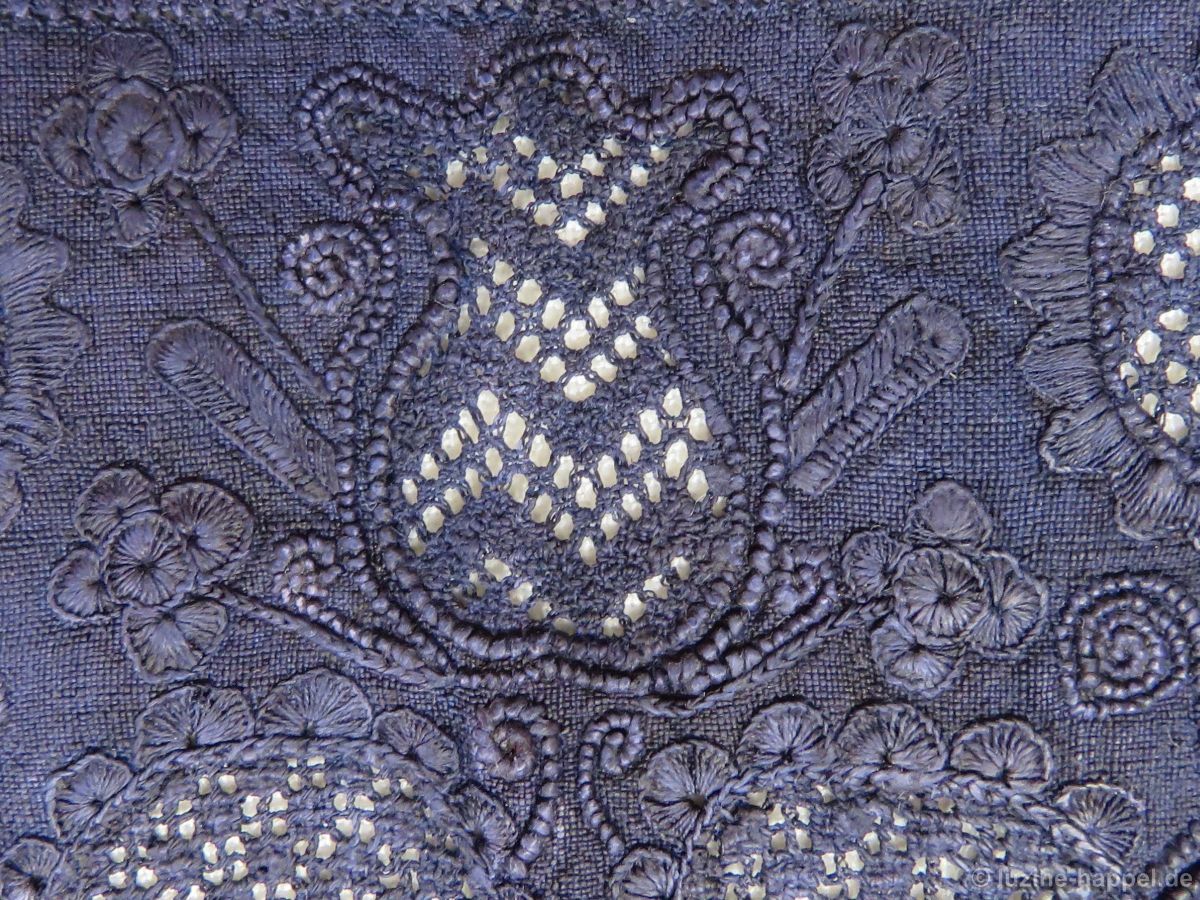
 There is an odd shape at the top right and top left of the design; I suspect these should be tulip motifs. These are naive representations. The shape is outlined with one row of Chain stitches and Blanket stitch knife points or Blanket stitch scallops. The motif is filled with an openwork pattern. It is remarkable that parts of a Cable stitch grid alternate with sections of Rose stitches that were worked without a Cable stitch grid. The zigzag line of Rose stitches was worked on the Cable stitch grid – all other Rose stitches were worked without a Cable stitch grid.
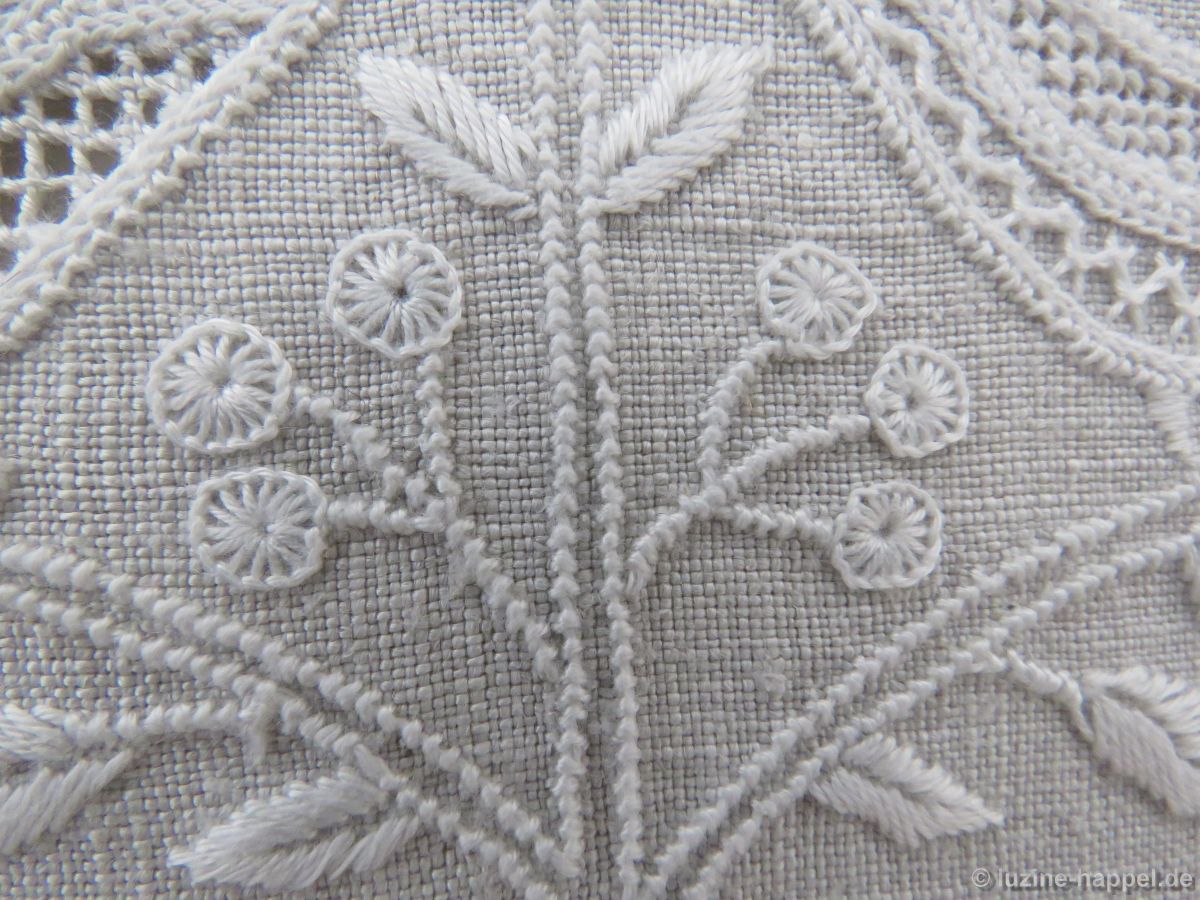
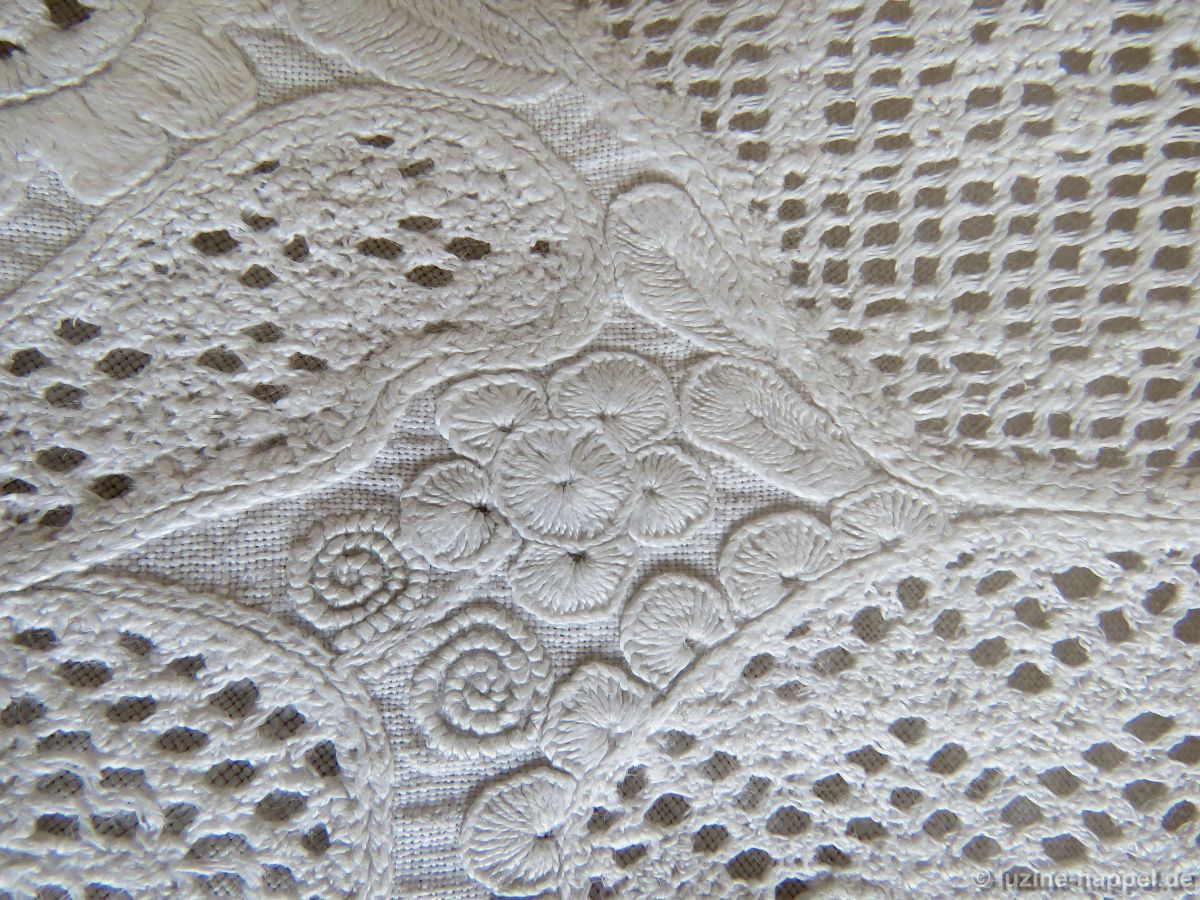
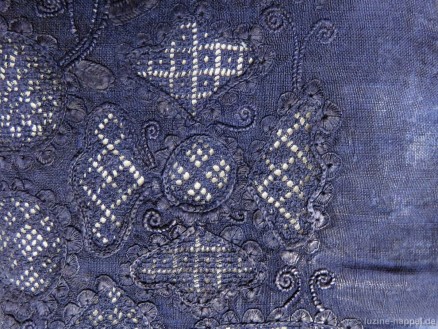 At the side of the middle section of the border, there is a motif combination that looks like it was meant to be a cloverleaf. The center circle connects four similar shapes. The center circle is outlined with one row of Chain stitches and Blanket stitch scallops. It is filled with a Rose stitch openwork pattern without a Cable stitch grid. Three of the surrounding “leaves” are outlined with one row of Chain stitches and Blanket stitch half-eyelet scallops, whereas the fourth “leaf” is outlined with two rows of Chain stitches. Opposite shapes are filled the same – the openwork pattern showing the squares is a Rose stitch pattern embroidered on a Cable stitch grid. Whereas the openwork pattern showing the rhombi is a Rose stitch pattern without a Cable stitch grid.
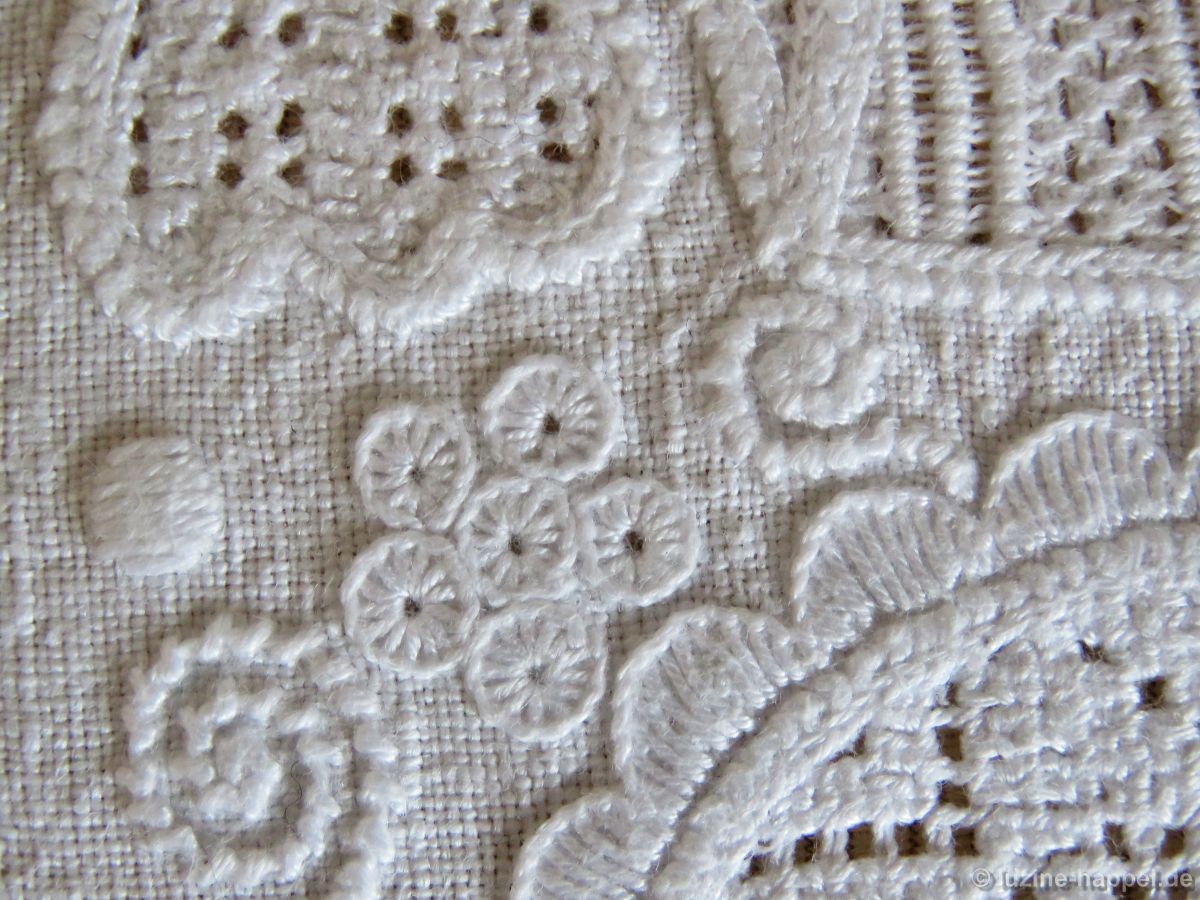
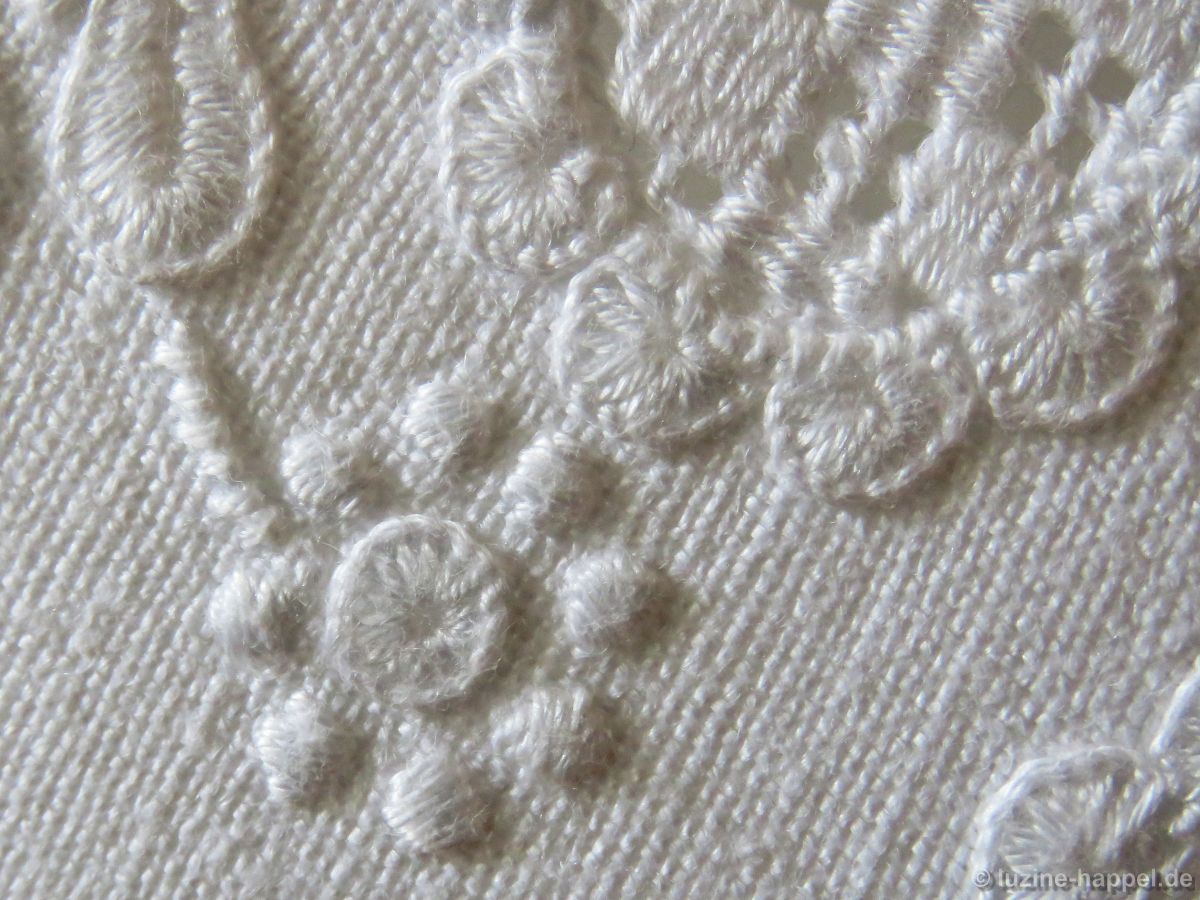
Conspicuous is the arrangement of the tendrils; here they have been haphazardly placed. The tendrils on the same arrangement on the opposite side of the border have been placed with more intention and care.
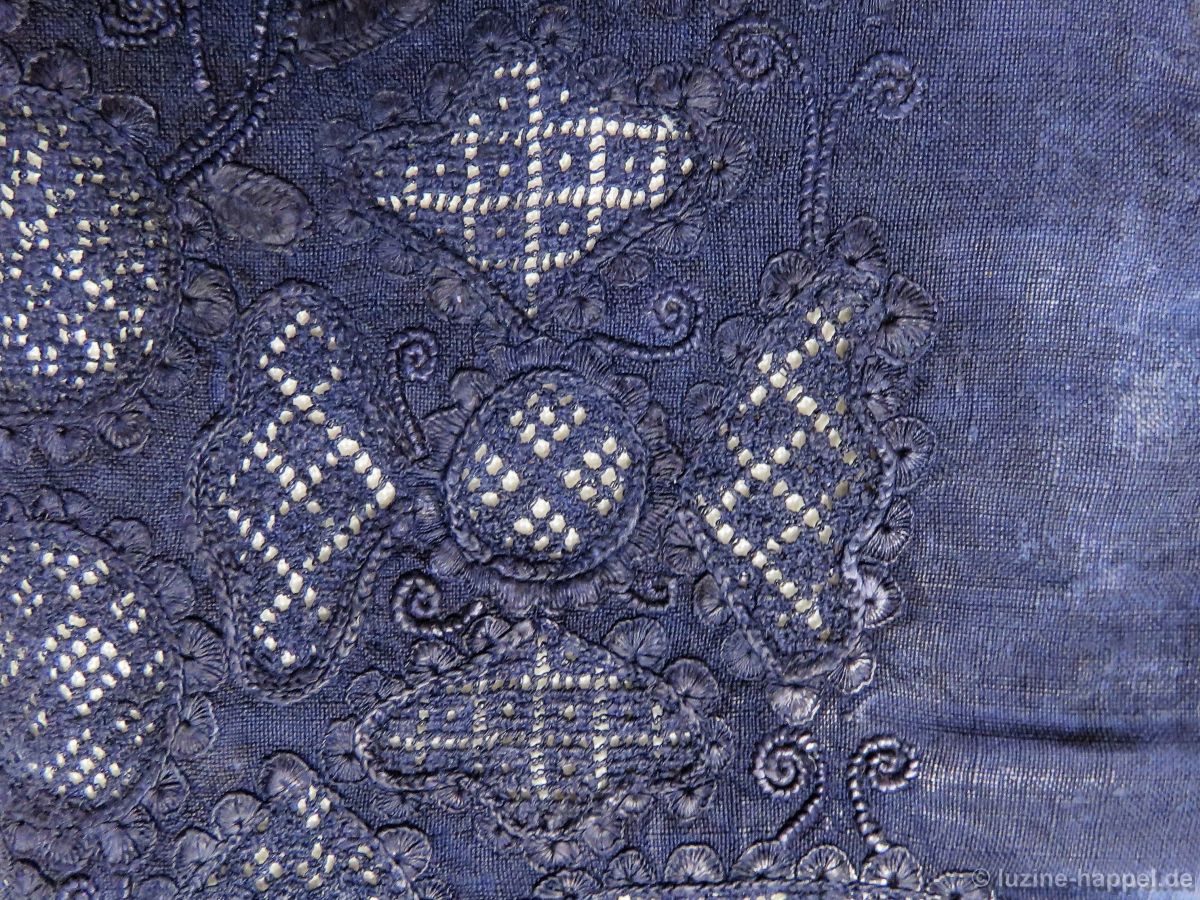
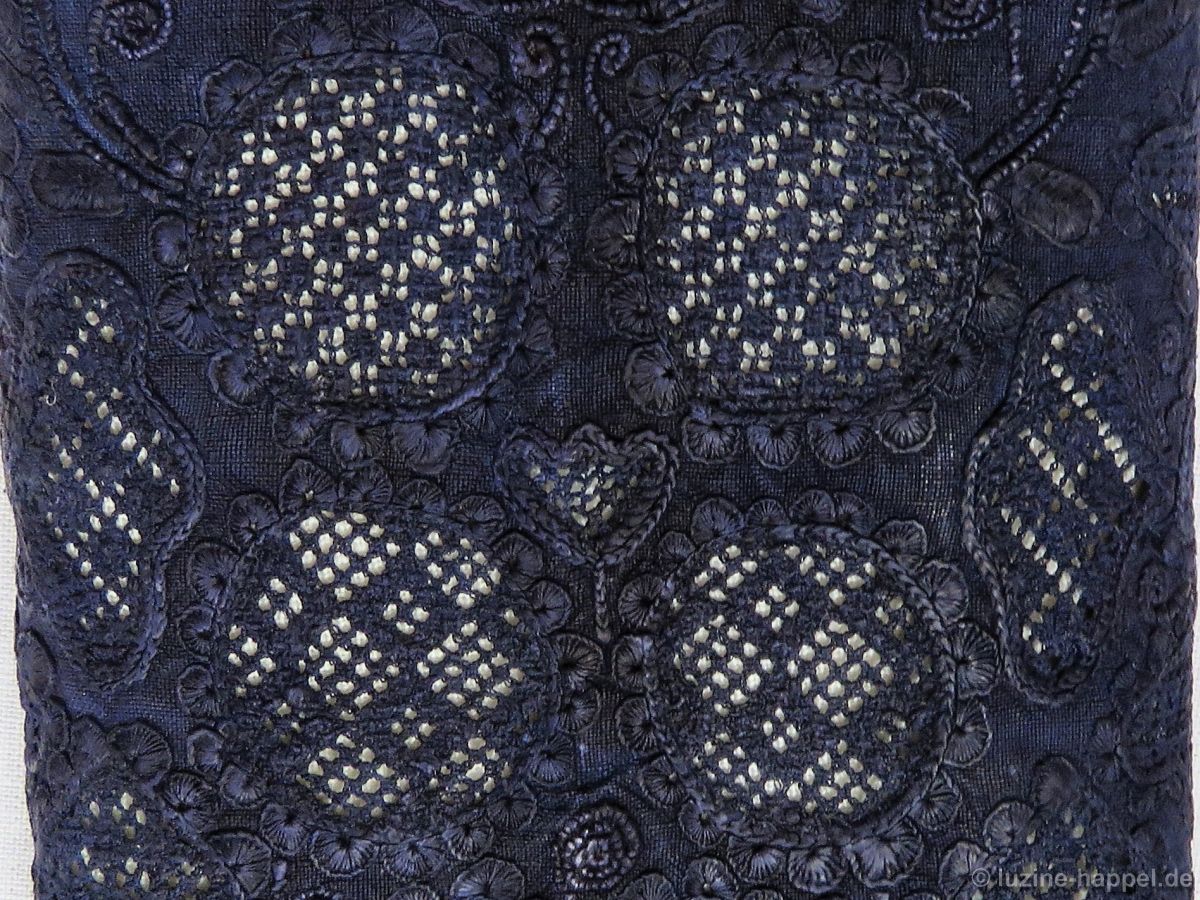
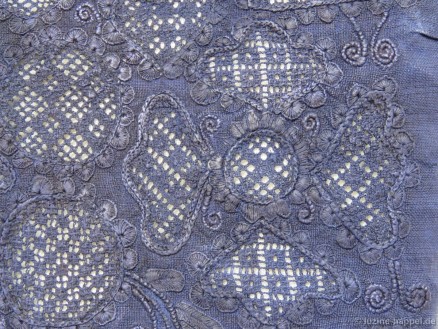 Between the two “cloverleaves” there is an arrangement of four circles with a small tulip between.
 The circles are outlined with one row of Chain stitches and Blanket stitch half-eyelet scallops. The tulip is outlined with two rows of Chain stitches. The bottom circles are embroidered with a Rose stitch openwork pattern without a Cable stitch grid, whereas the two upper circles are worked with Rose stitch openwork patterns with a Cable stitch grid. Although the tulip in the center is very small, it is embroidered with alternating rows of Cable stitches and Rose stitches.
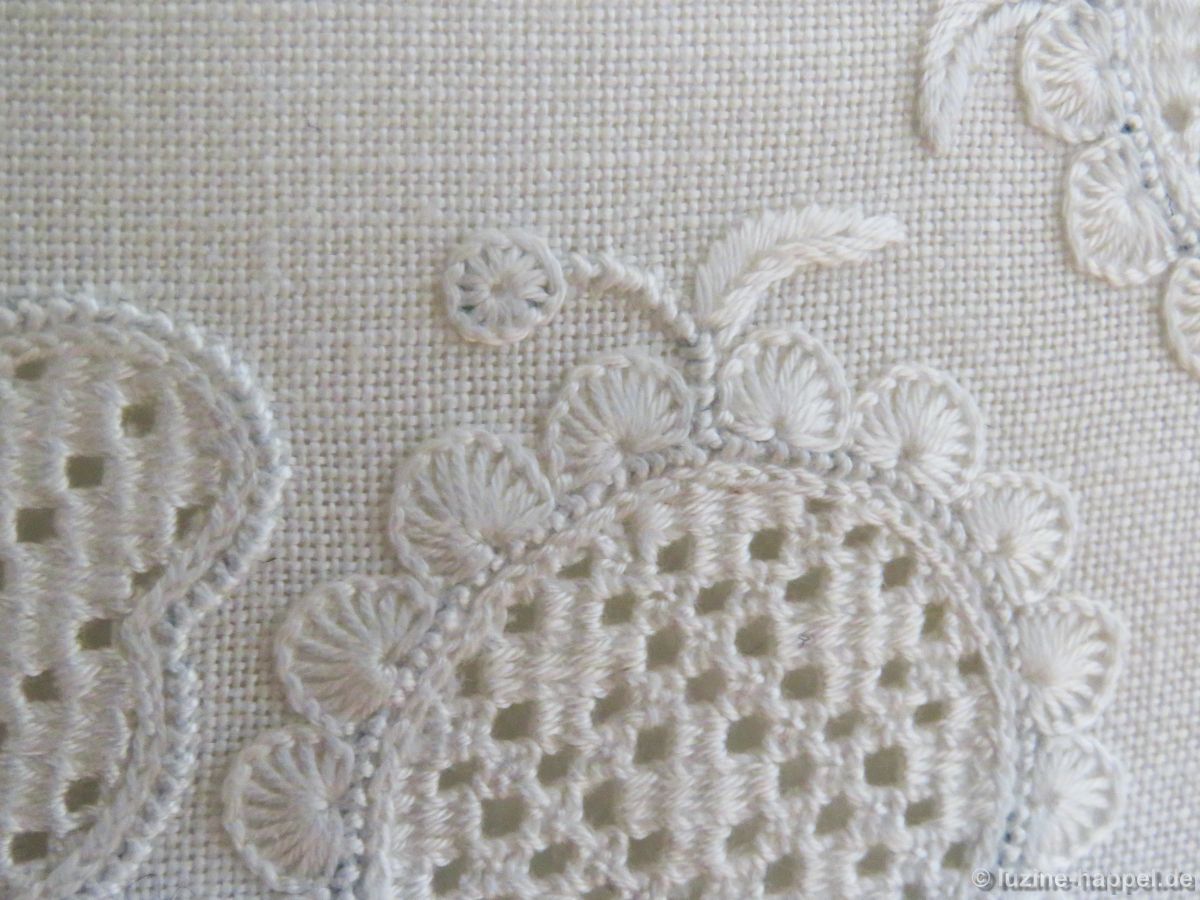
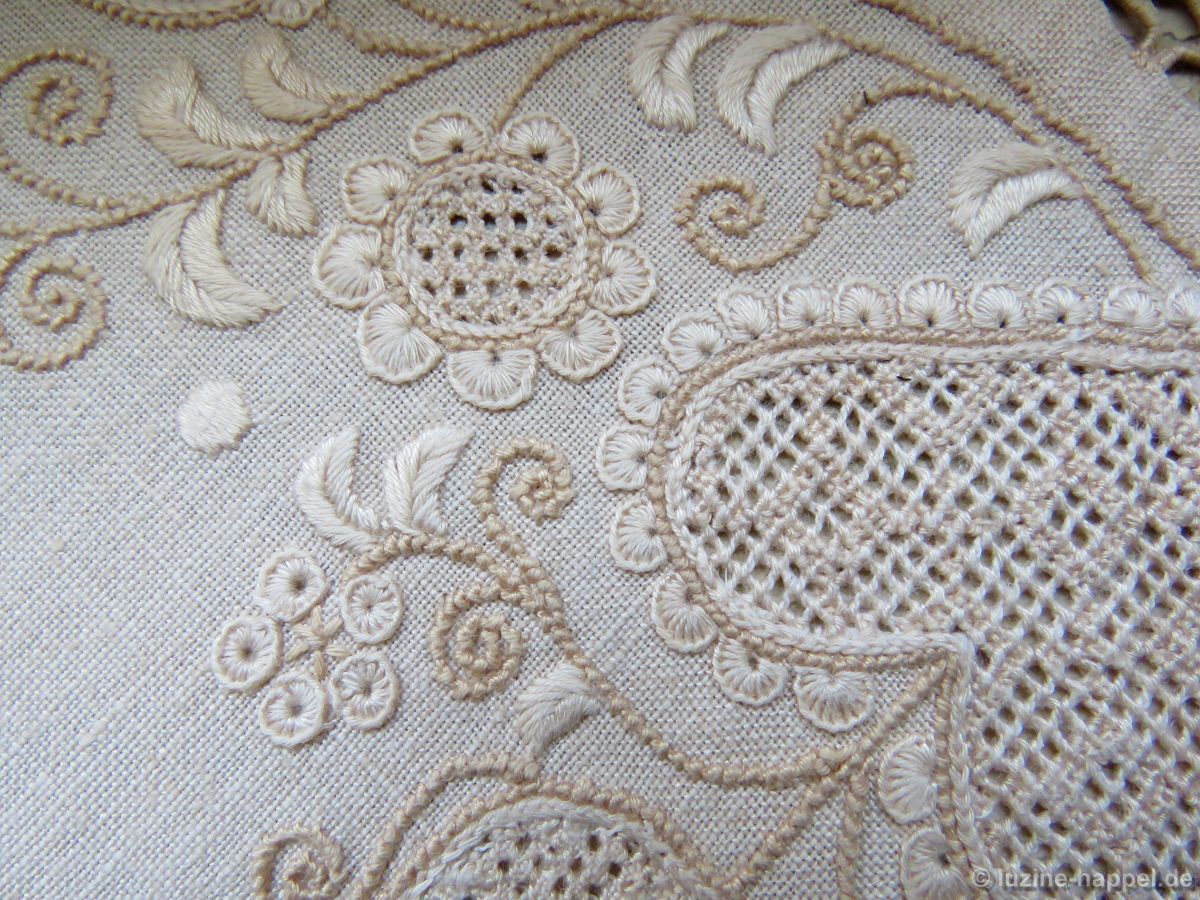
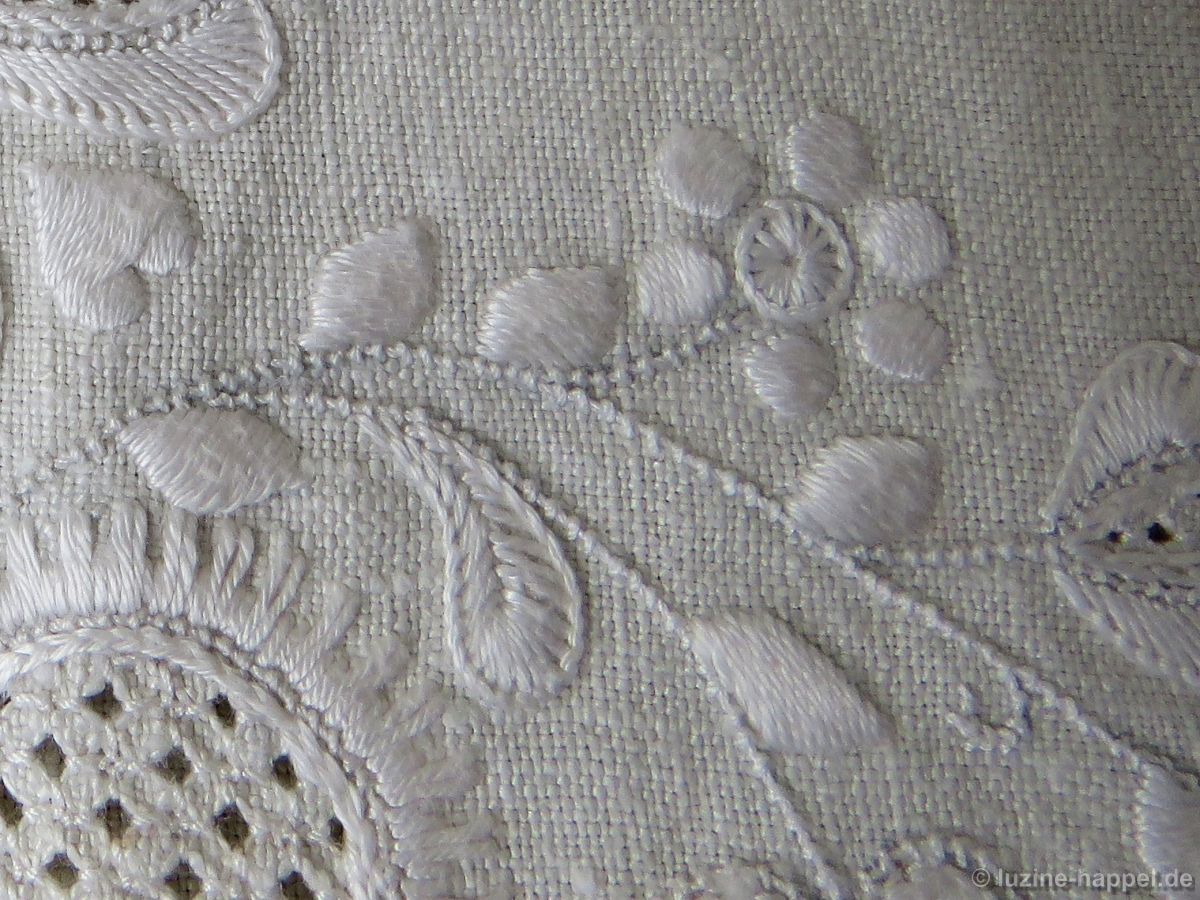
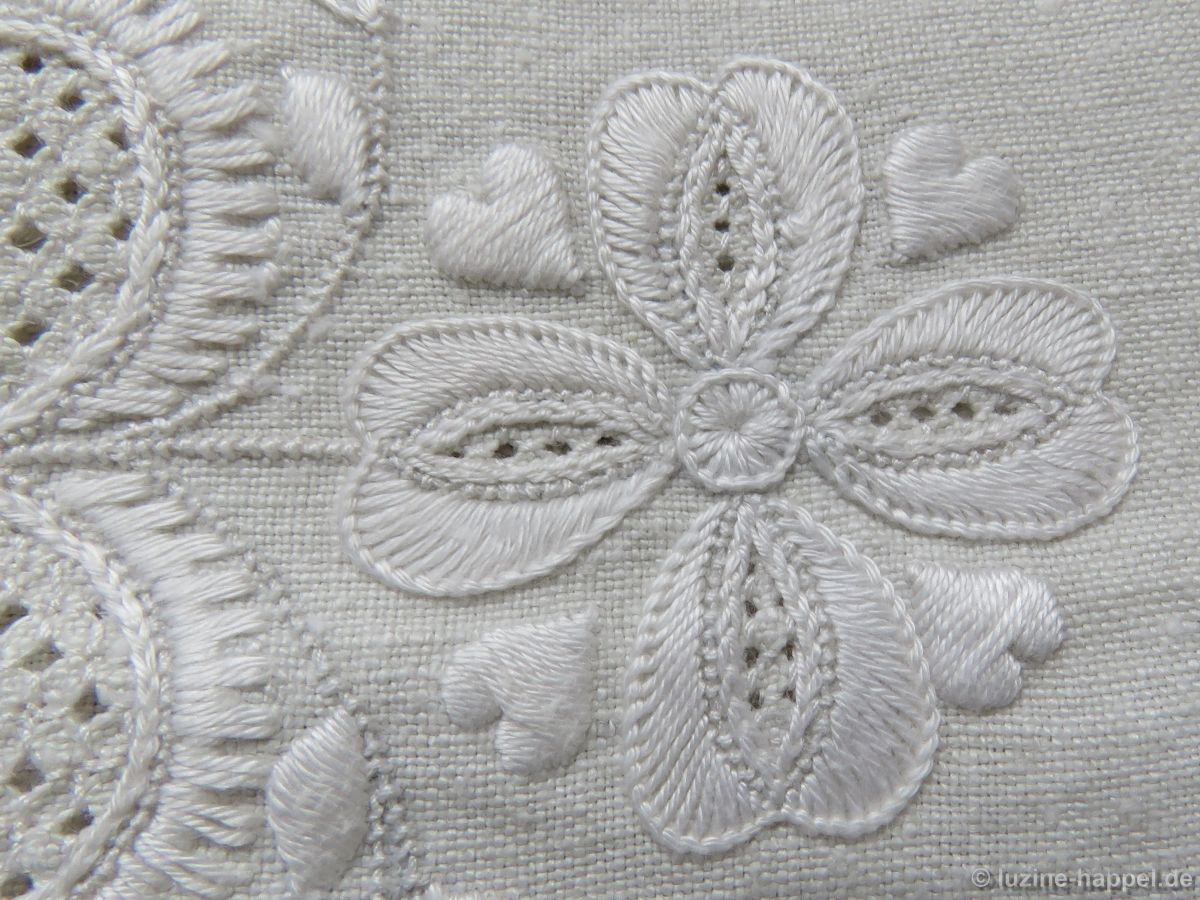
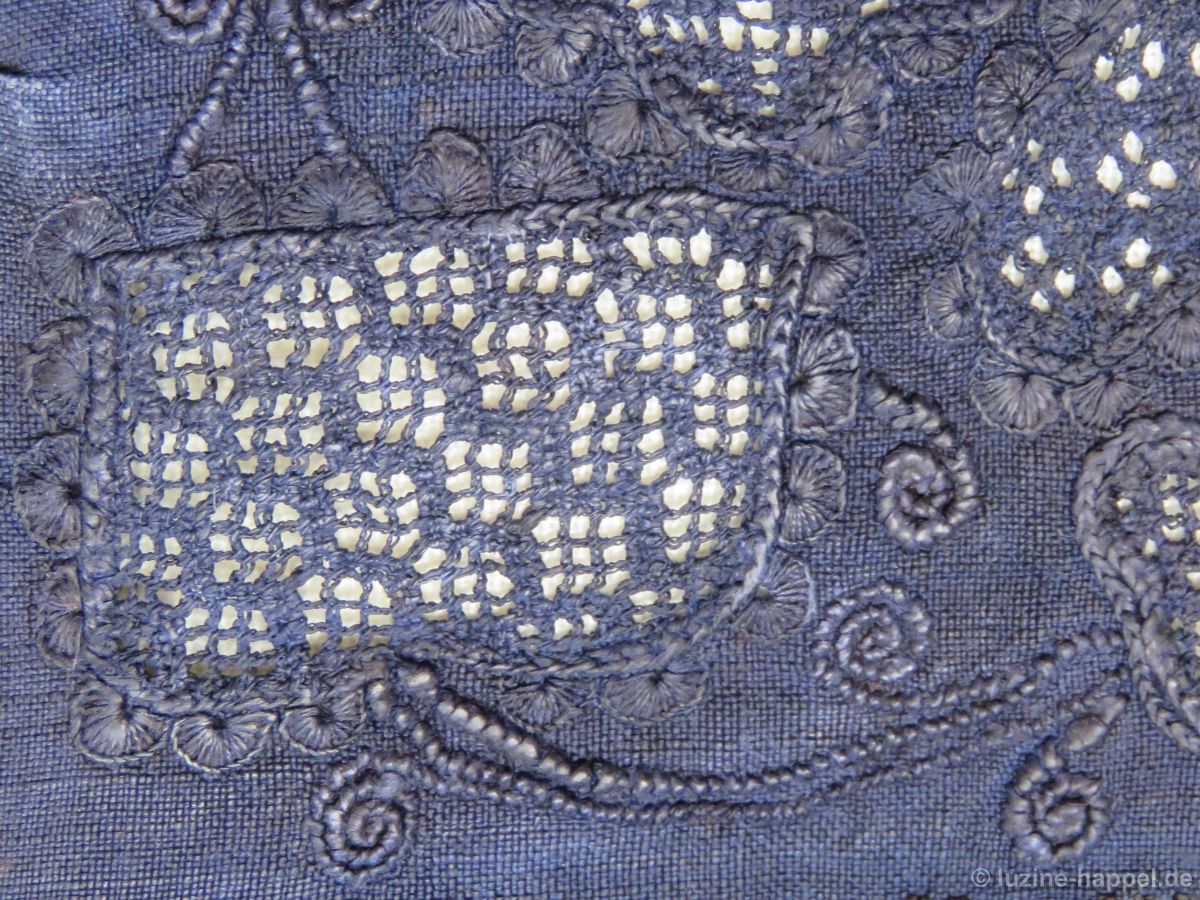
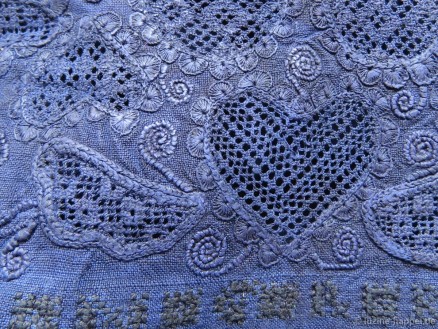 There is a heart motif in the center of the bottom section of the border design; it is flanked by big leaves. Hearts – turned upside down – are situated above each of the leaves. All hearts are outlined with one row of Chain stitches and Blanket stitch half-eyelet scallops, whereas the leaves are outlined with two rows of Chain stitches. The filling patterns in the upside down hearts have been worked without a Cable stitch grid. The center heart shows a combination of rows of Rose stitches and rows of Cable stitches. The smaller hearts were embroidered with Rose stitches only. The openwork pattern in the leaves is made with a Cable stitch grid filled with a Rose stitch pattern. Distinctive tendrils are worked in the remaining areas between the motifs.
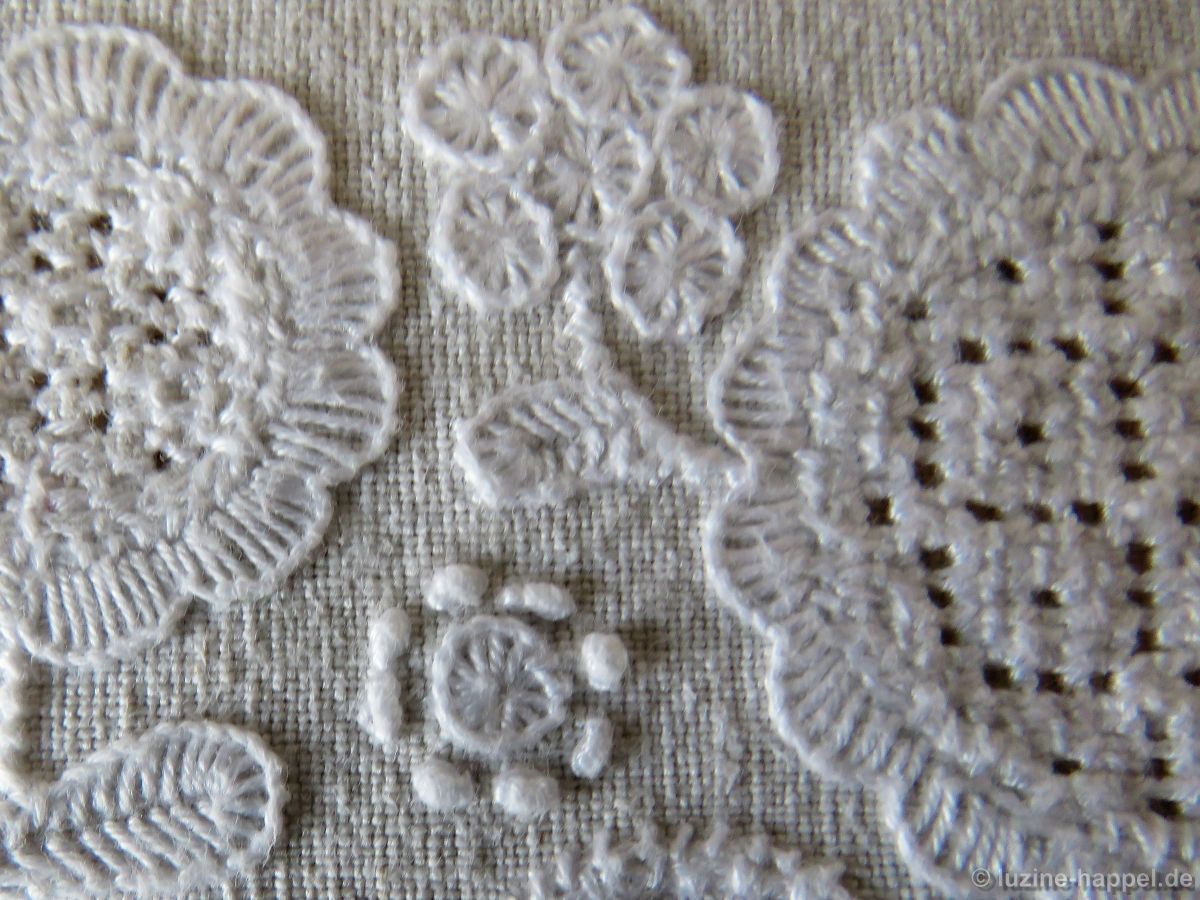
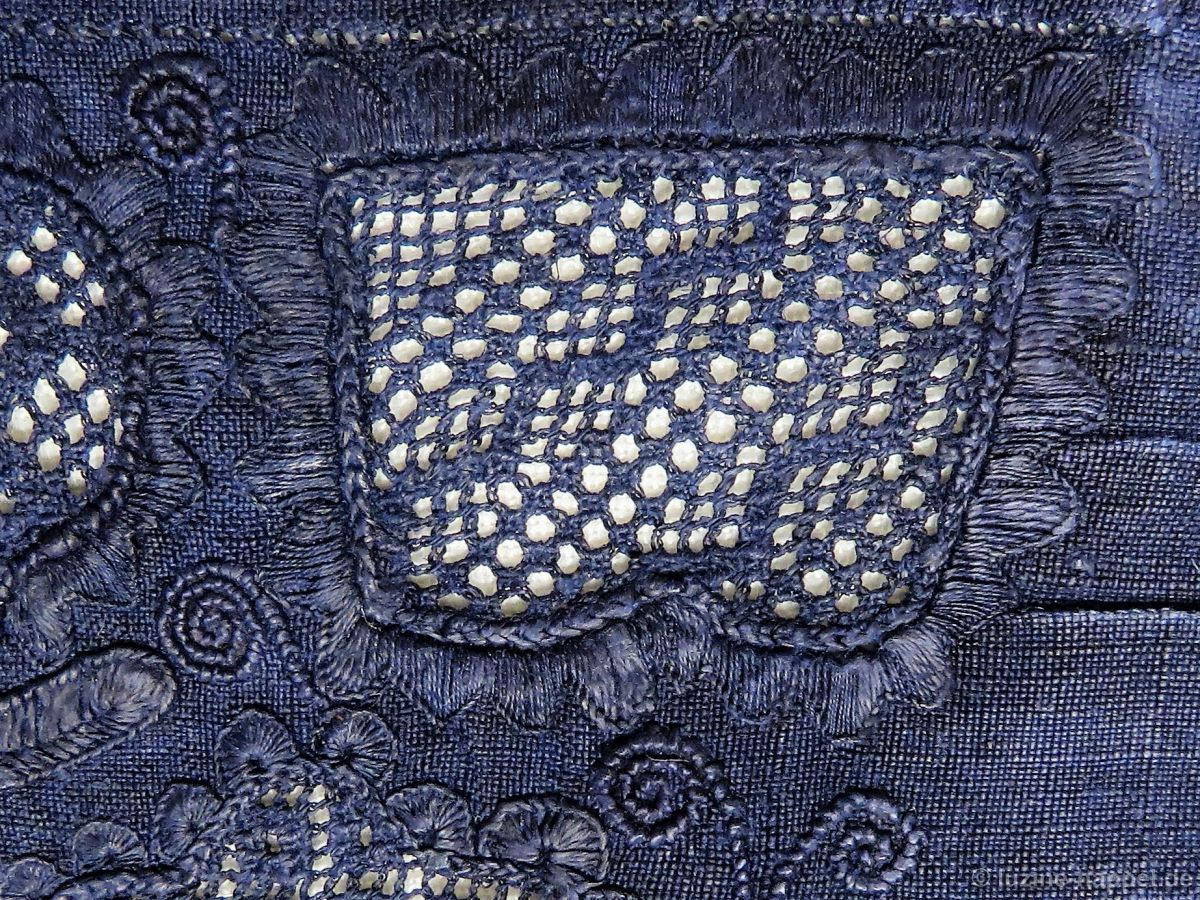
 The last motifs at the bottom sides of the border design are tulip shapes – outlined with one row of Chain stitches and, where the room was wide enough, Blanket stitch half-eyelet scallops. The shapes were filled with an openwork Rose stitch pattern with a Cable stitch grid.
Looking again at the photomontage, it is striking how inconsistently the border was embroidered. In some areas the left side looks more orderly and balanced, in other areas the embroidery is more consistent on the right side. Unfortunately I did not find a year, but I think it was made about 1850.
Embroidered on such a fine linen fabric (23/cm thread count!) without the possibility of electric lighting, eyeglasses, or magnifier, it is a work of art that radiates the charm of traditional hand embroidery.
Carefully studying the details, we can learn a lot.

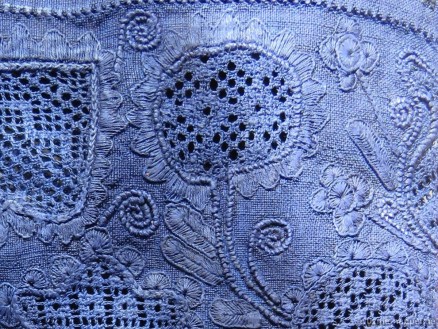
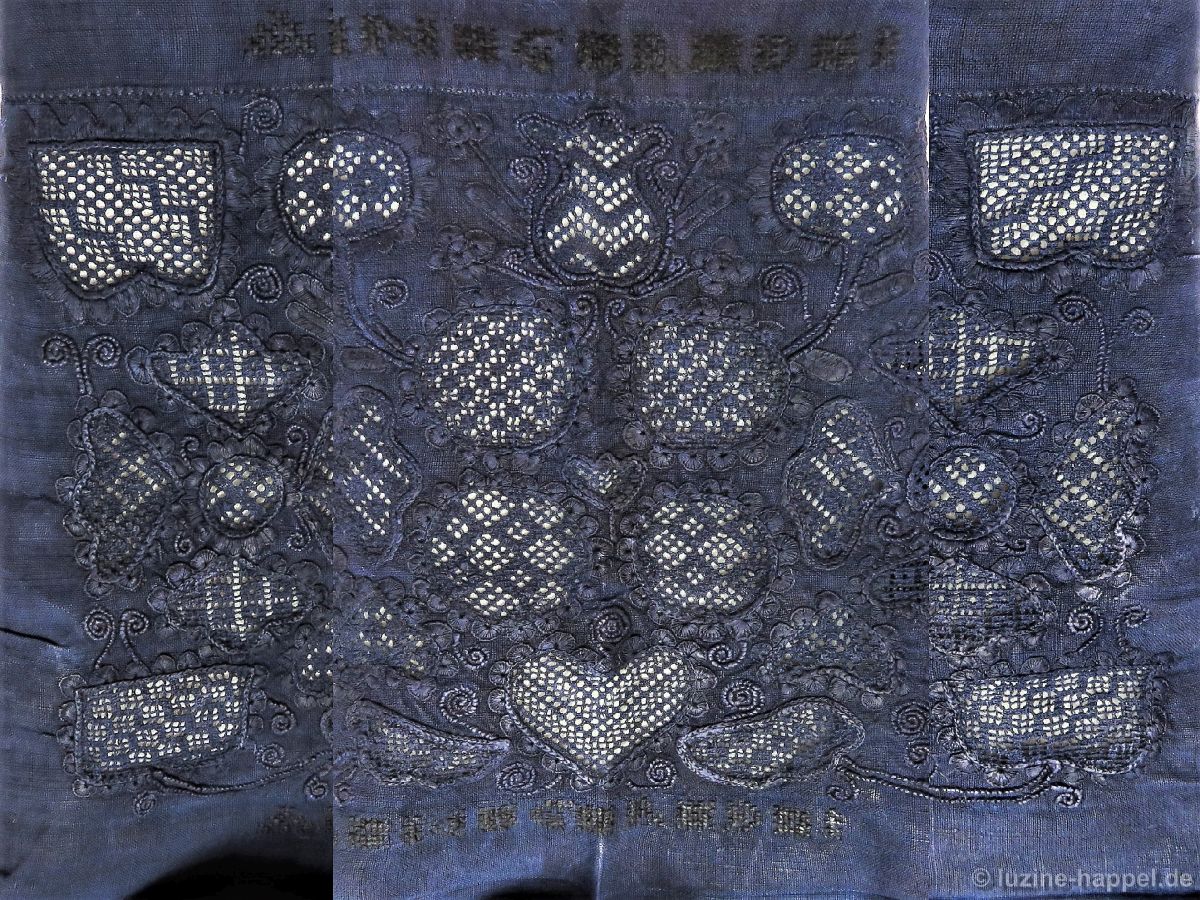
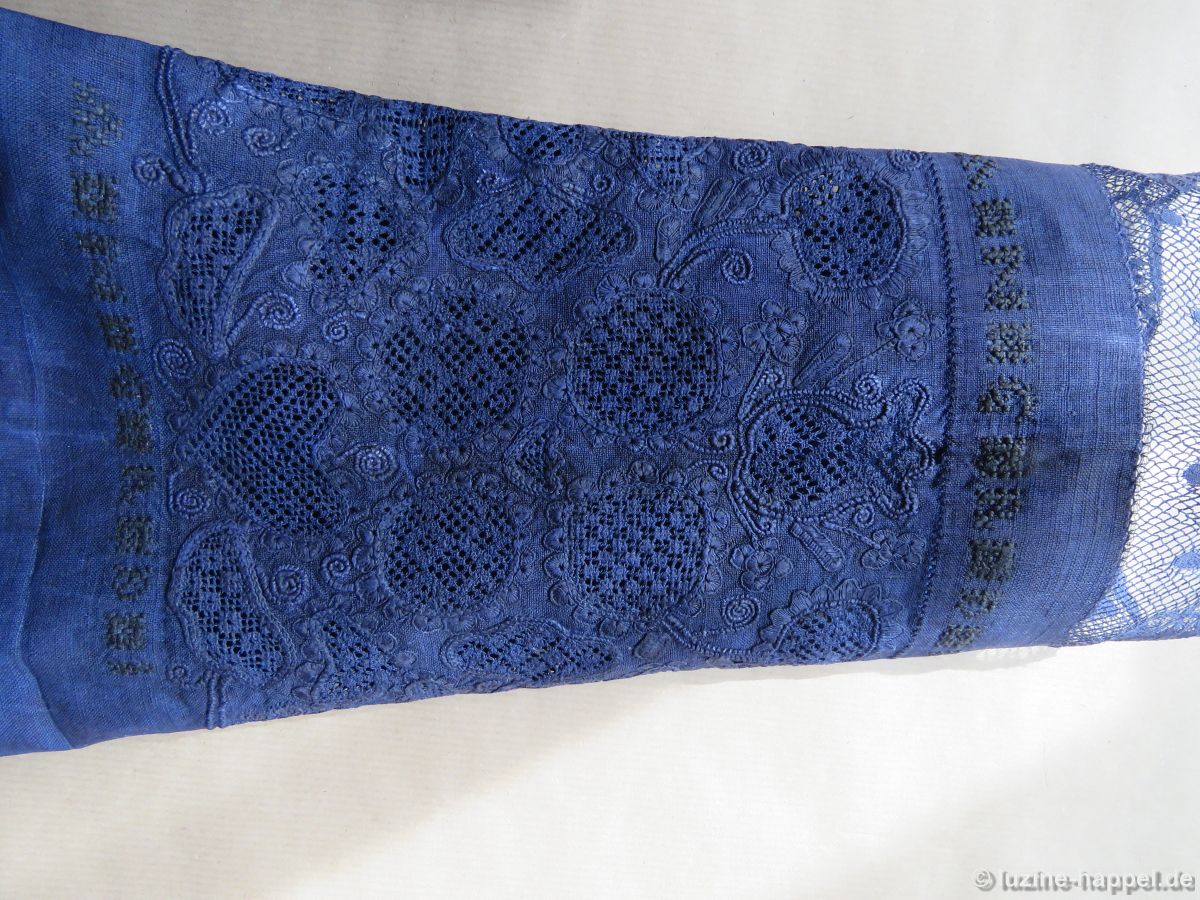
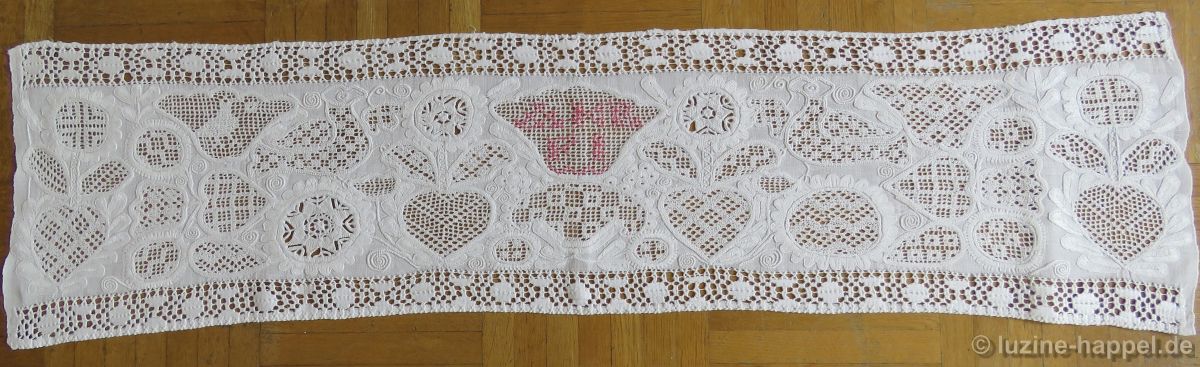 The linen has a 21/cm thread count – thus it is relatively fine. The border in all has a height of 21 cm, the embroidery only has a height of only 15 cm. The embroidery is bordered by a six-unit divided needle-weaving hem which is itself bordered with Peahole hems on both sides. The needleweaving pattern is rare.
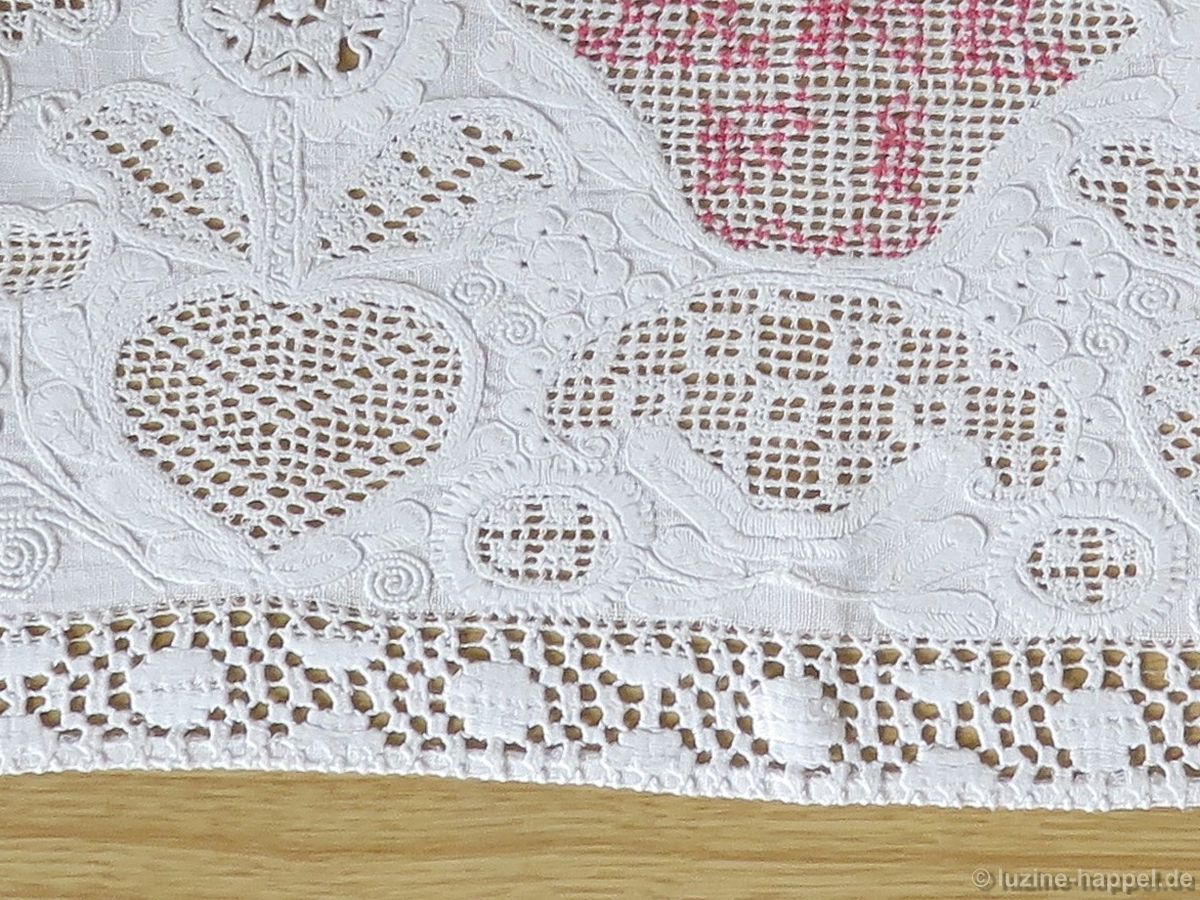 Needlelace and openwork patterns fill the shapes, with some of the openwork patterns partially worked with a Cable stitch grid. In the forty shapes, I count twenty-three different filling patterns.
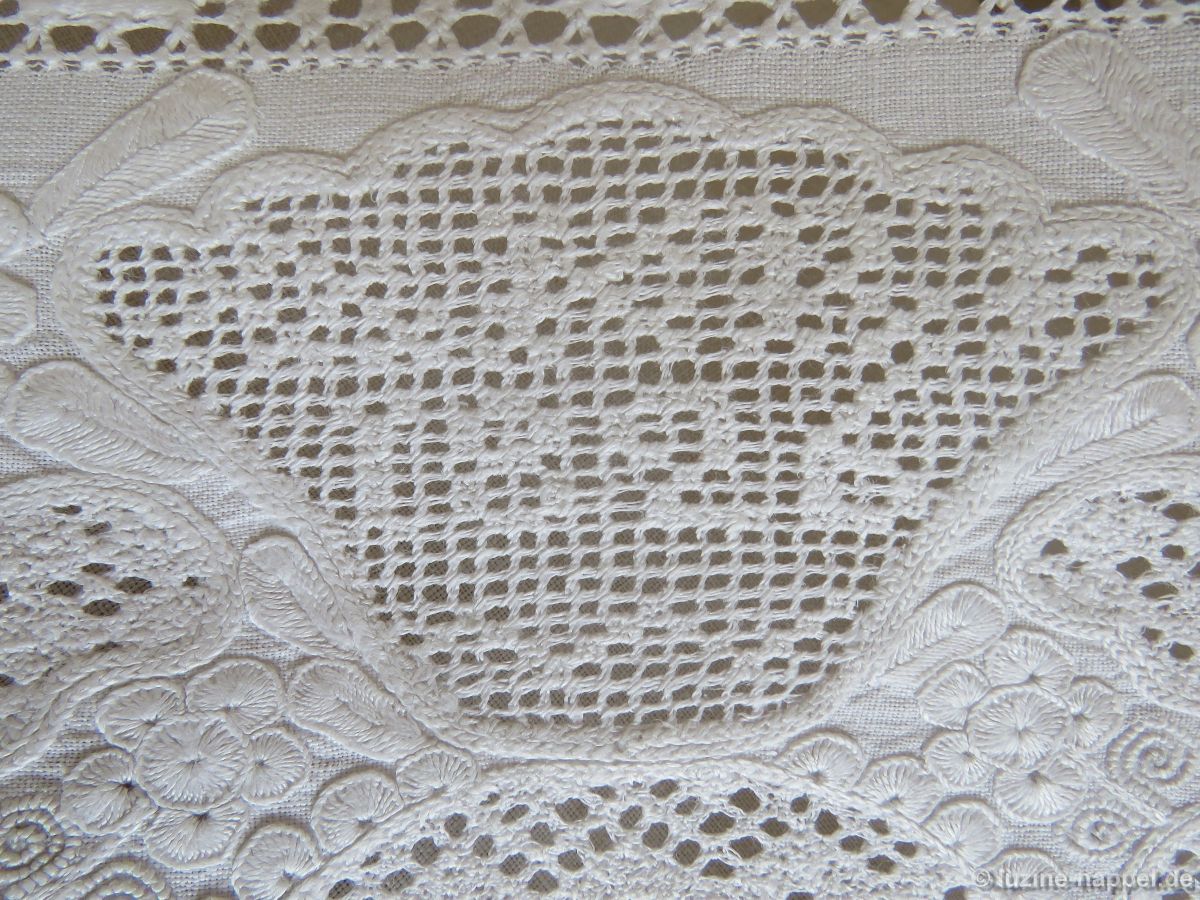 The other has a red Rose stitch pattern. Red is sometimes, but rarely, incorporated into whitework borders. In this tulip, the initials AKRFI are visible.
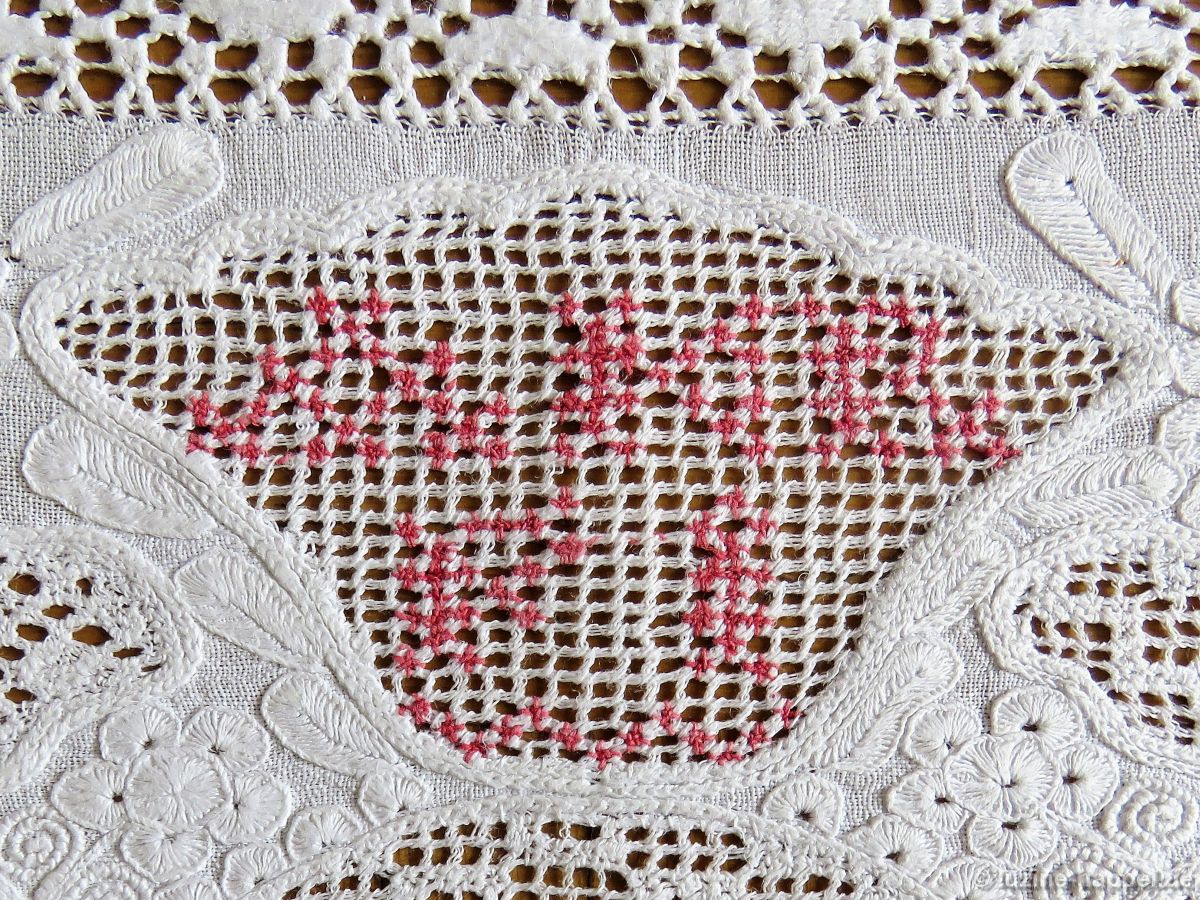 The design is created mirrored at the longitudinal axis. But the filling patterns were not worked symmetrically. In some instances, they differ very much, as the image on top of this article shows clearly.
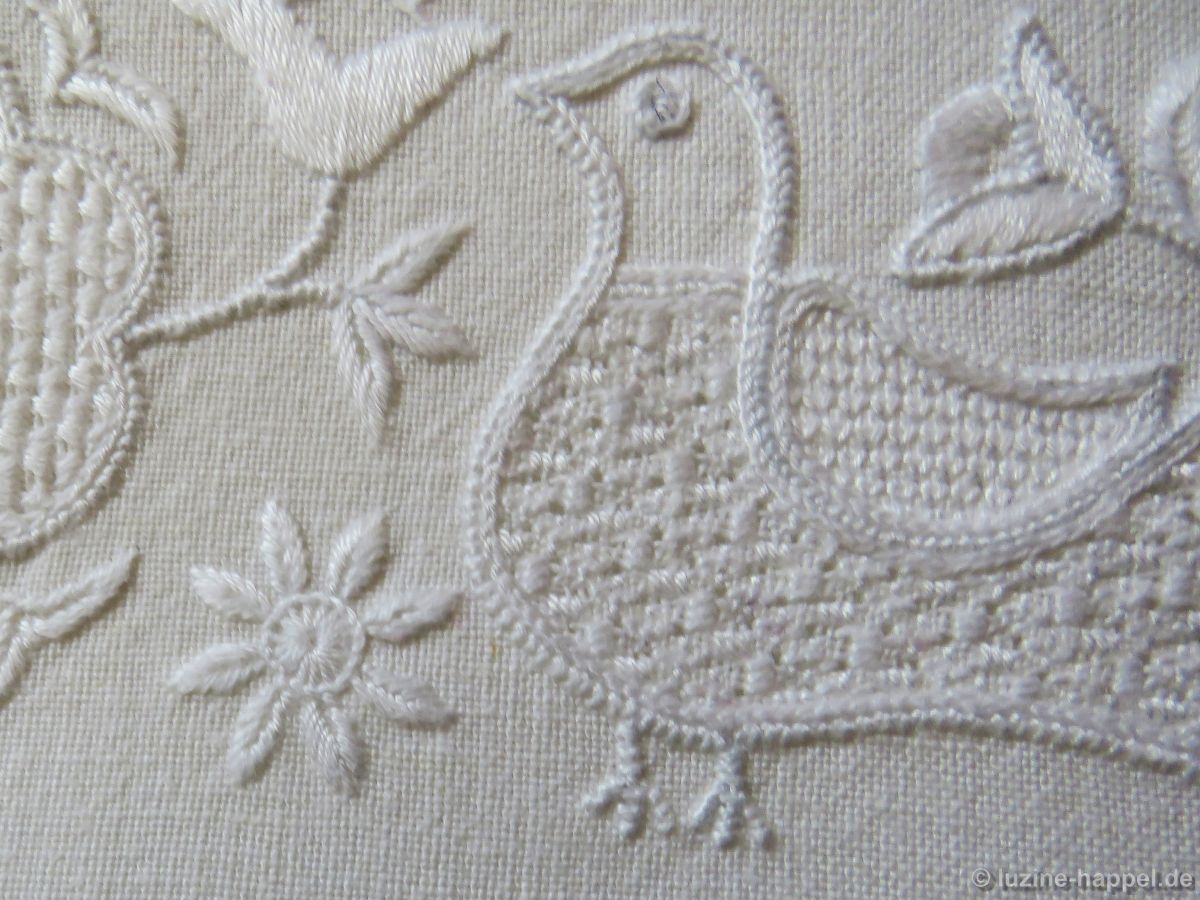
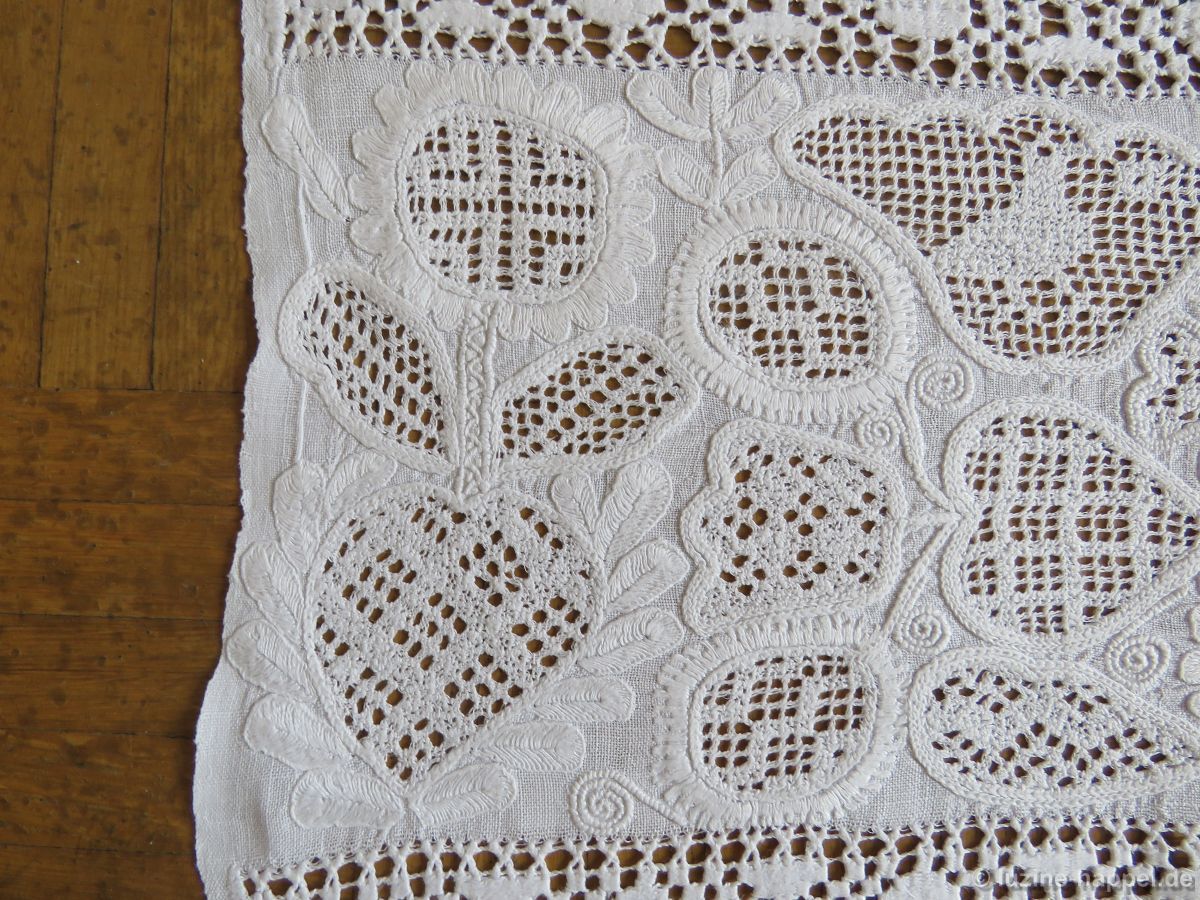 One distinct feature is the bird pattern that was embroidered using Rose stitches into a tulip shape next to a bird shape.
 Some circles are filled with needlelace; six-pointed and eight-pointed stars are visible.
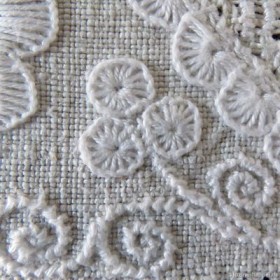
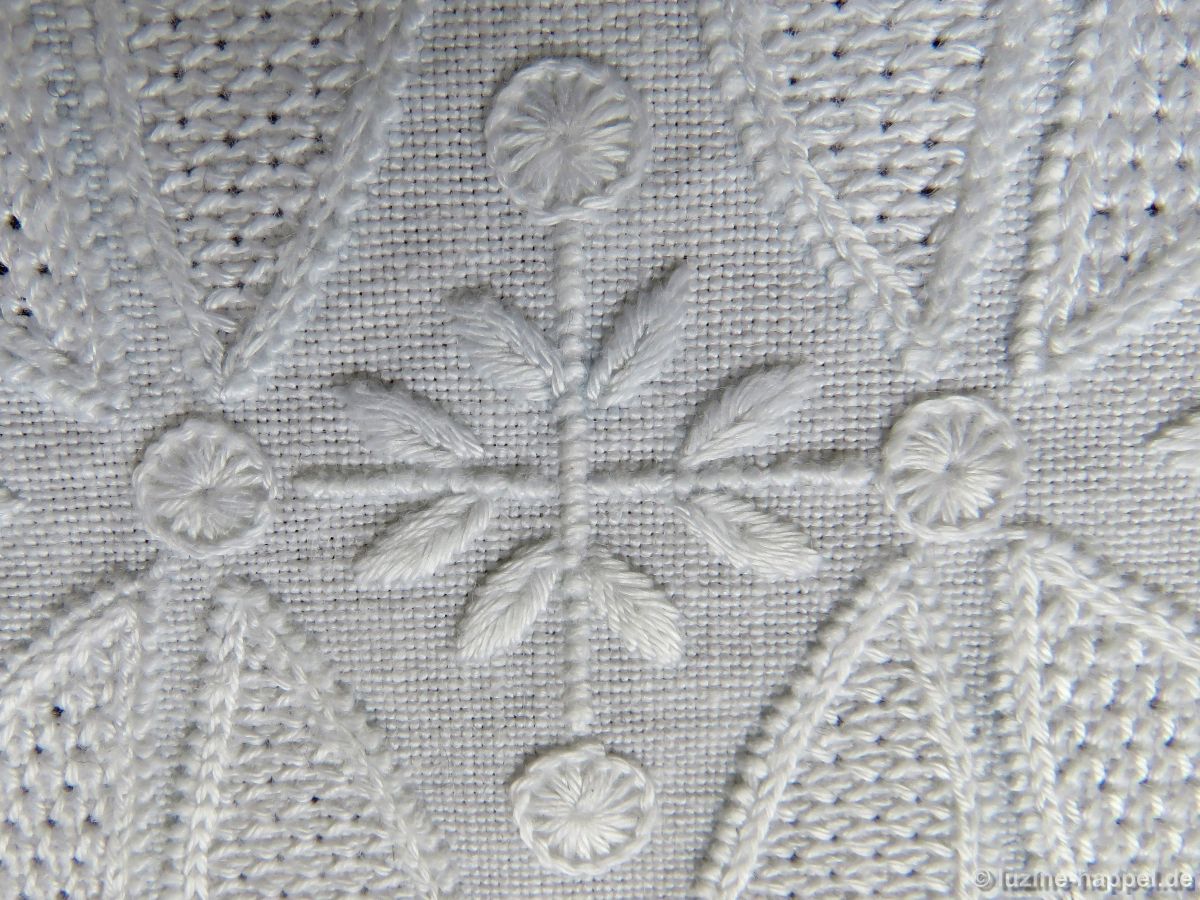
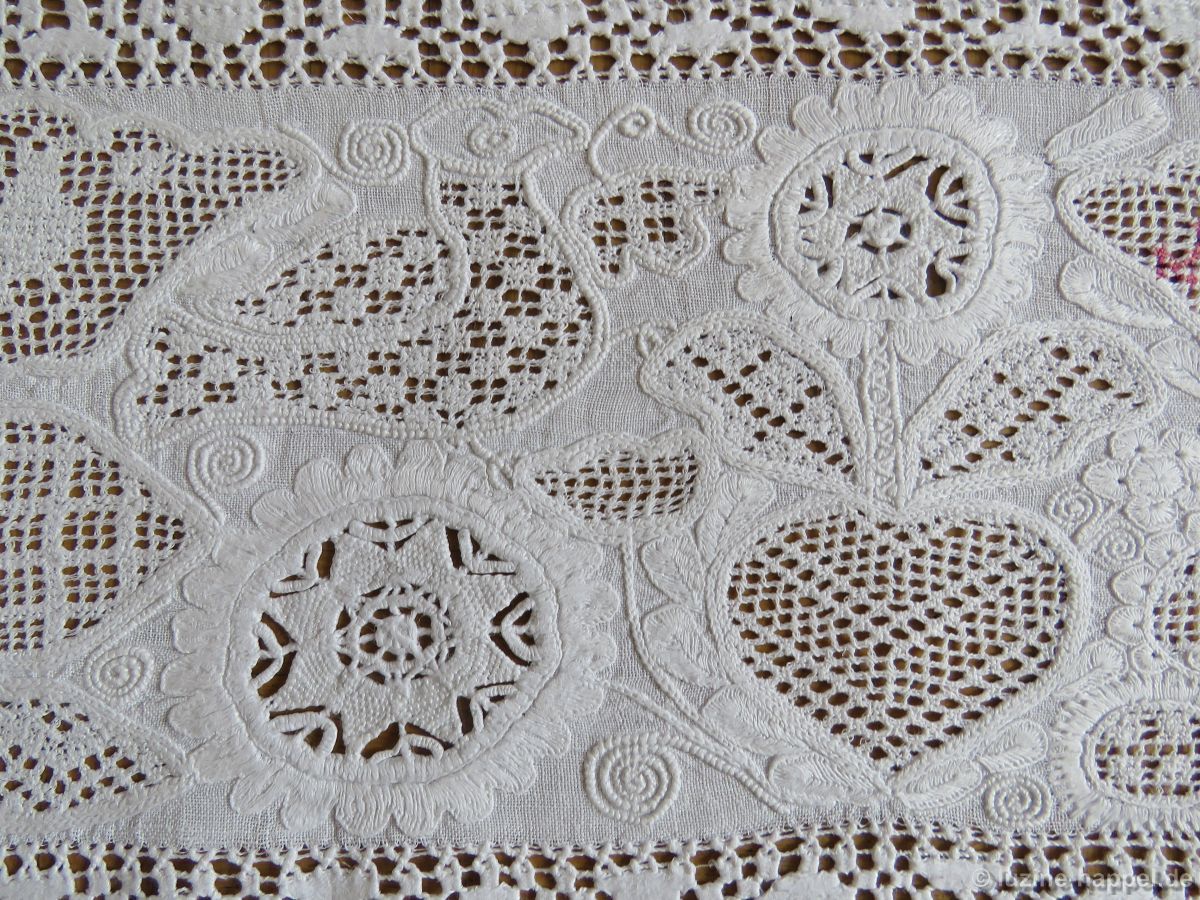 Also worth mentioning is the arrangement of the stems between the heart and the star circle. Worth viewing is the special treatment of the edges of the shape below the center tulip: Big leaves in the form of a bowl at the bottom, tendrils ending in Chain stitches, and a several half eyelet scallops on both sides make this shape eminently interesting.
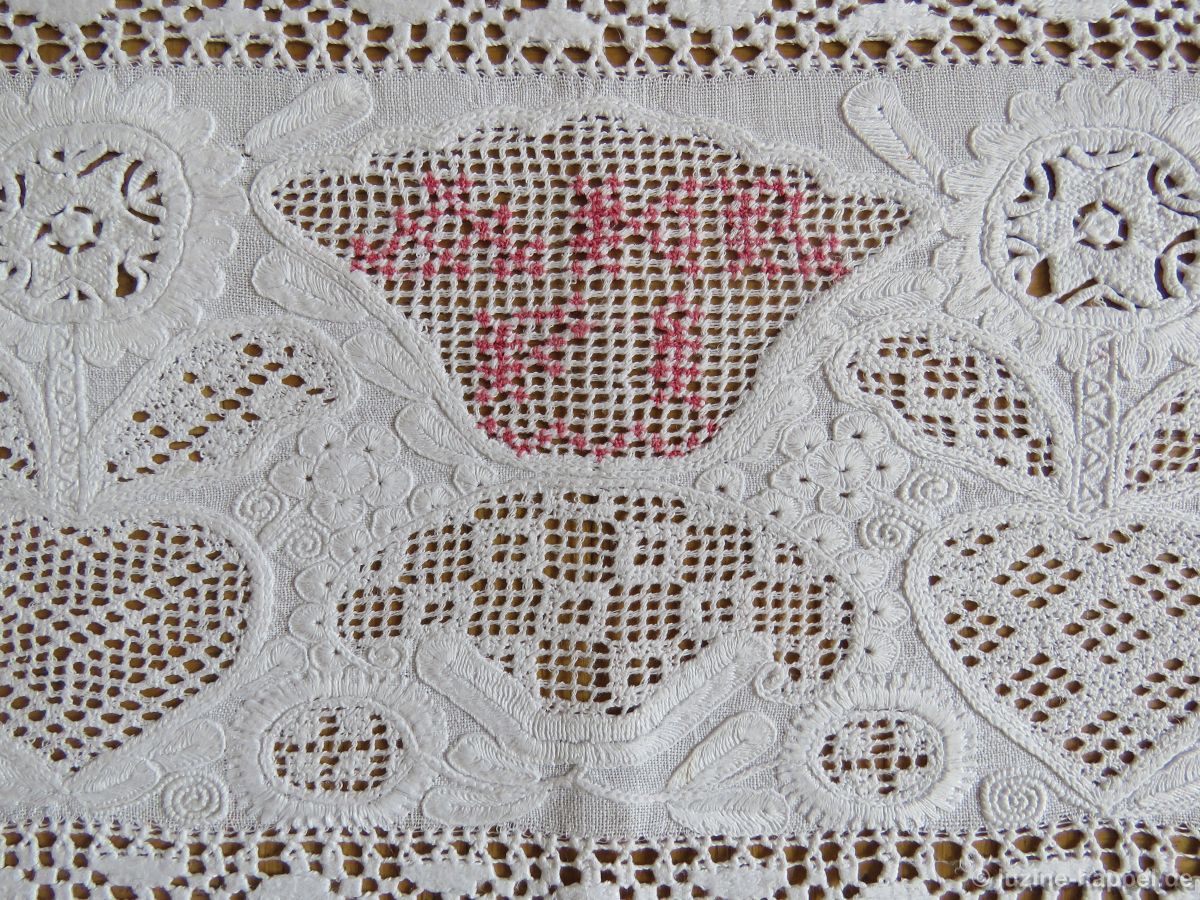 The placement of the bird´s legs is also interesting.
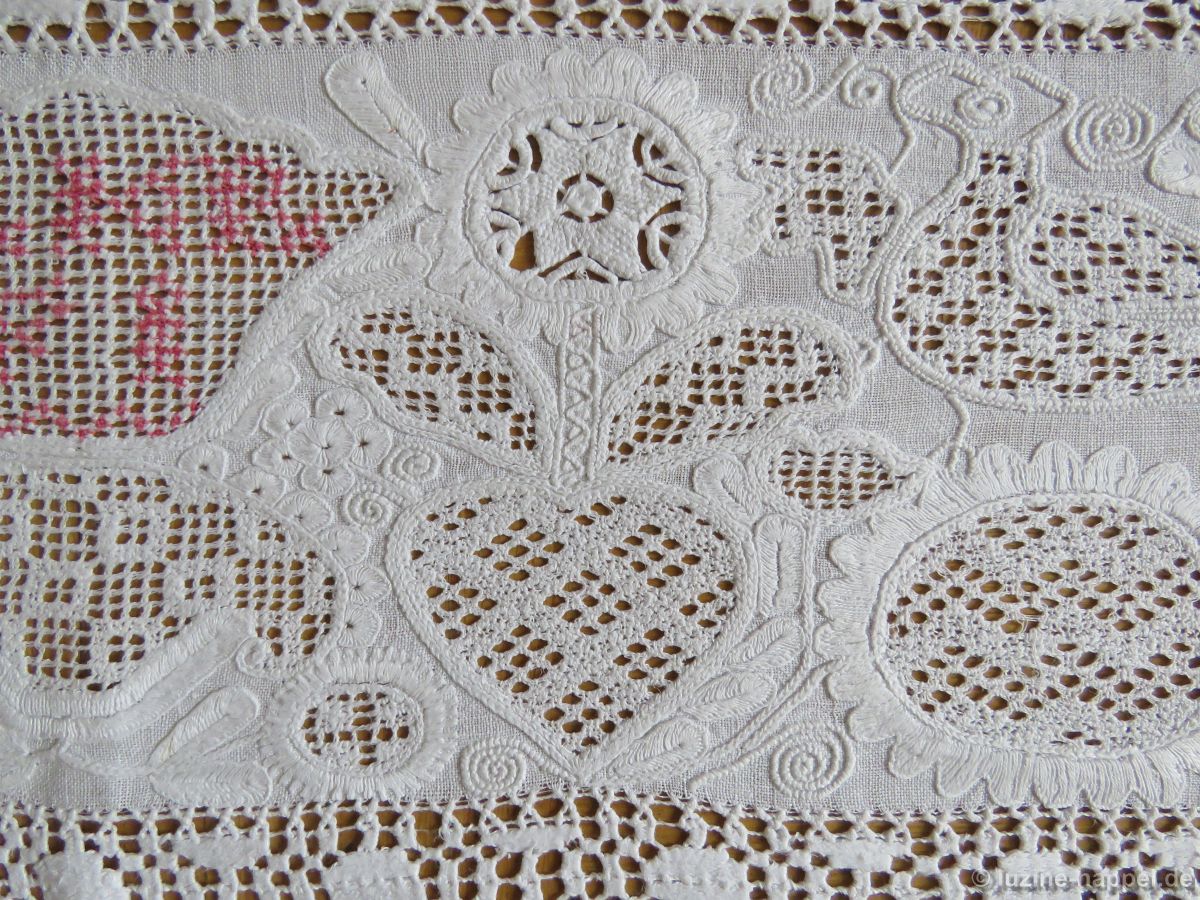 It is apparent that Coral Knot stitches as outlines were worked rarely on this piece. Coral knots can be seen on the bird motif as an outline and as the stem in the bird’s beak. They can also be seen in the tightly curled tendrils.
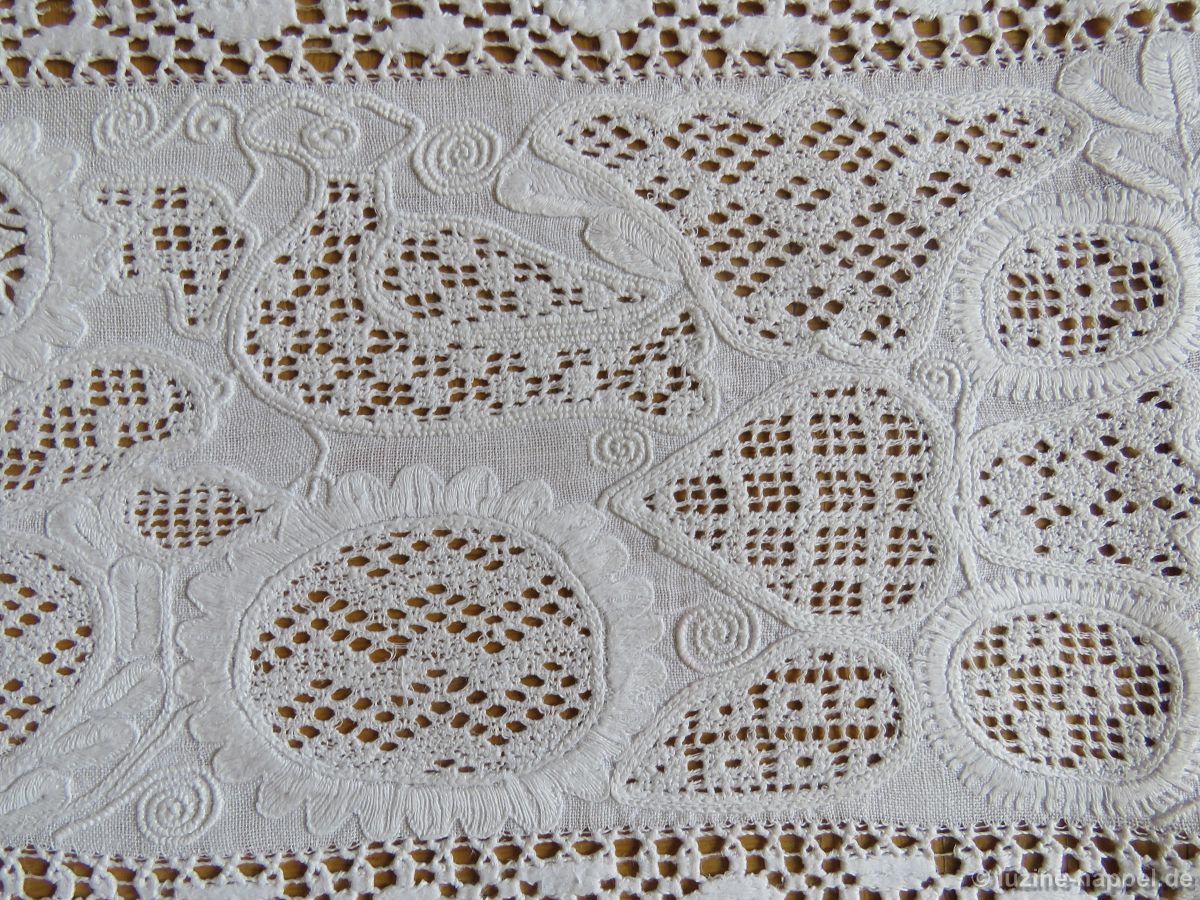 Thin stems were worked with Chain stitches. For outlining the big shapes densely worked, rounded leaves, Blanket stitch scallops, partially half eyelet scallops and 2 short-2 long were used.
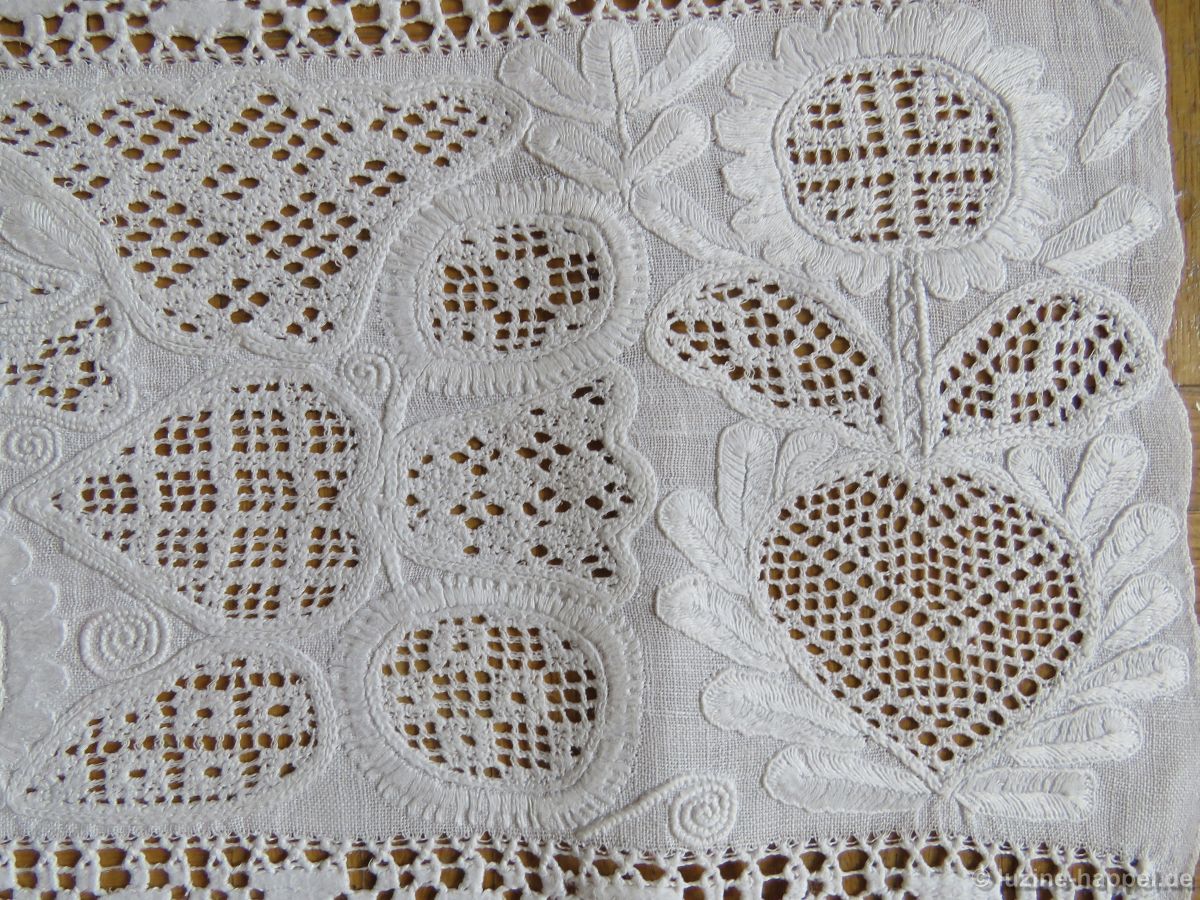


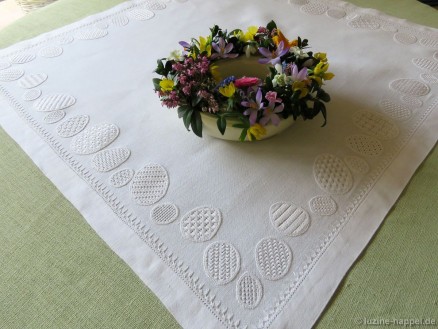
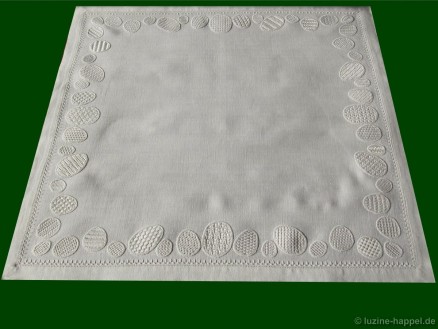 To simulate grass, I used “Trachtenstitch” (see
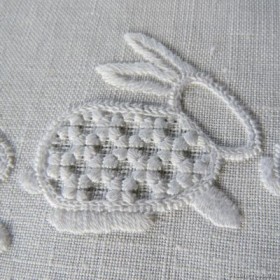
 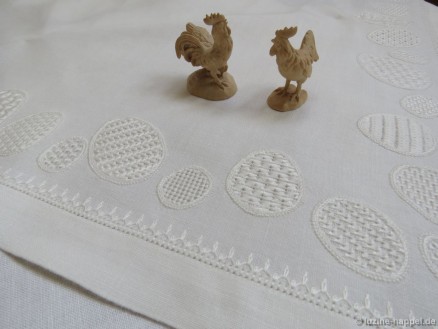 Each of the fifty-four eggs got its own special pattern. This was a real pleasure to stitch. I used exclusively square eyelet patterns, most can be found in my Limetrosen I book. The patterns in
 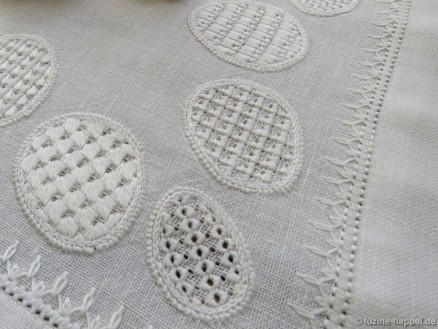 The Easter eggs can be decorated with striped patterns
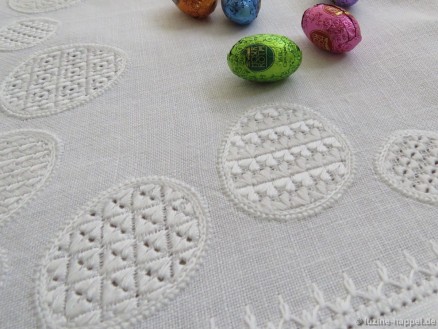 or with dots.
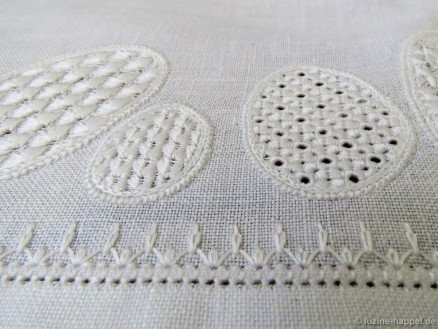 The Limetrosen patterns use more thread than many other stitches. But the effect of the threads, dense and lying in different directions on top of the fabric, is very pleasant indeed. Chiaroscuro – the interplay of light and shadow – makes the border beautiful, although is is unadorned. My tea cloth is eye catching. The whitework is timeless; it complements all kinds of crockery, flowers, and contemporary decorations.