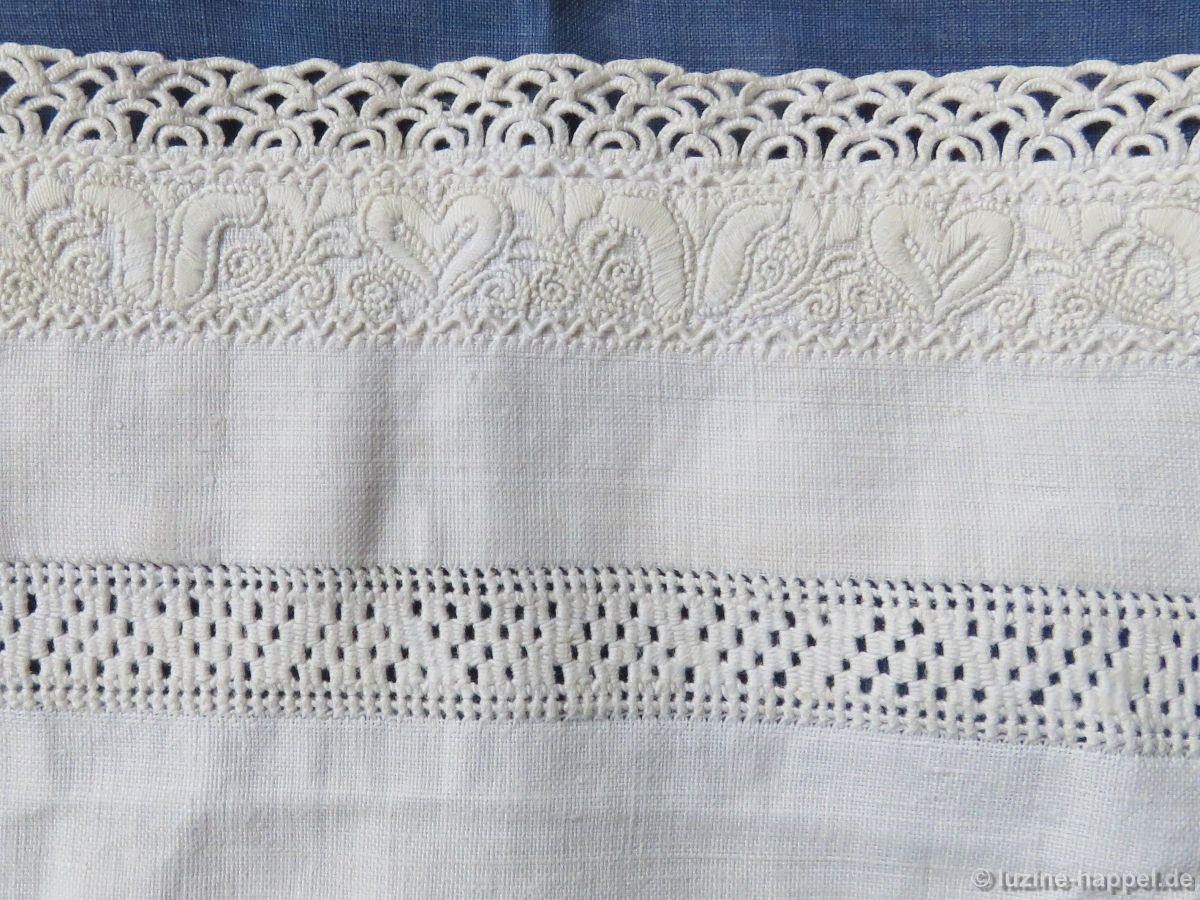
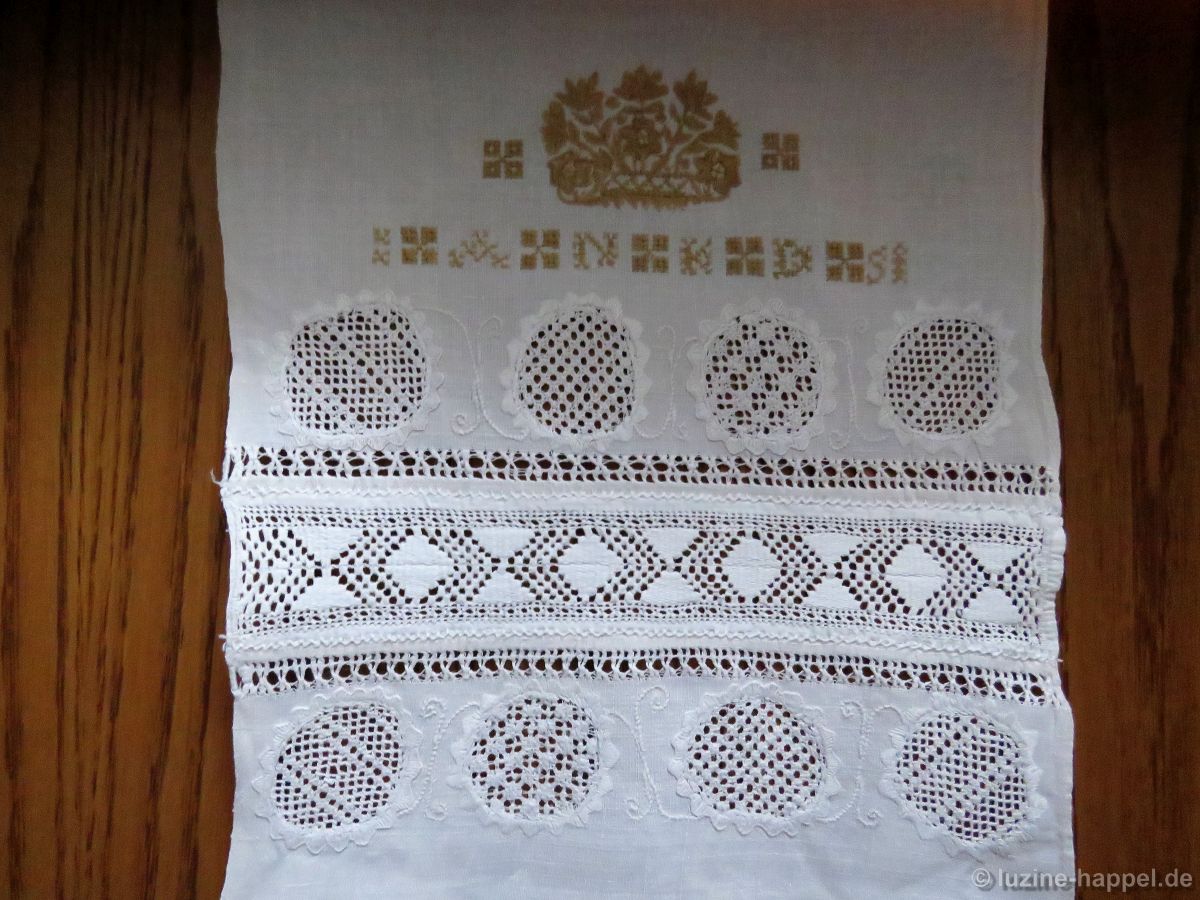
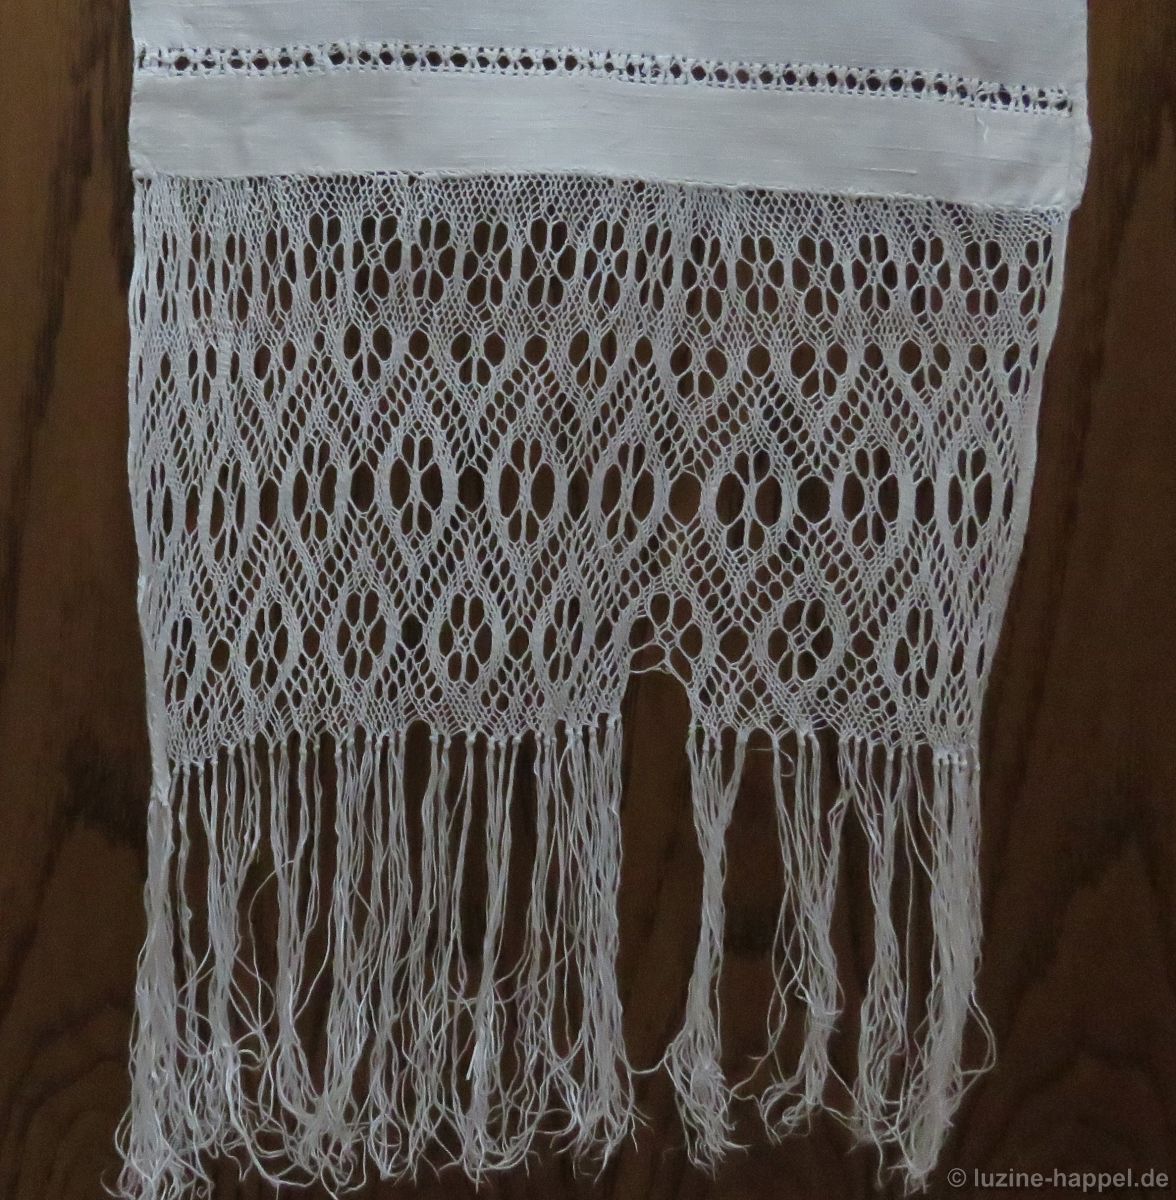
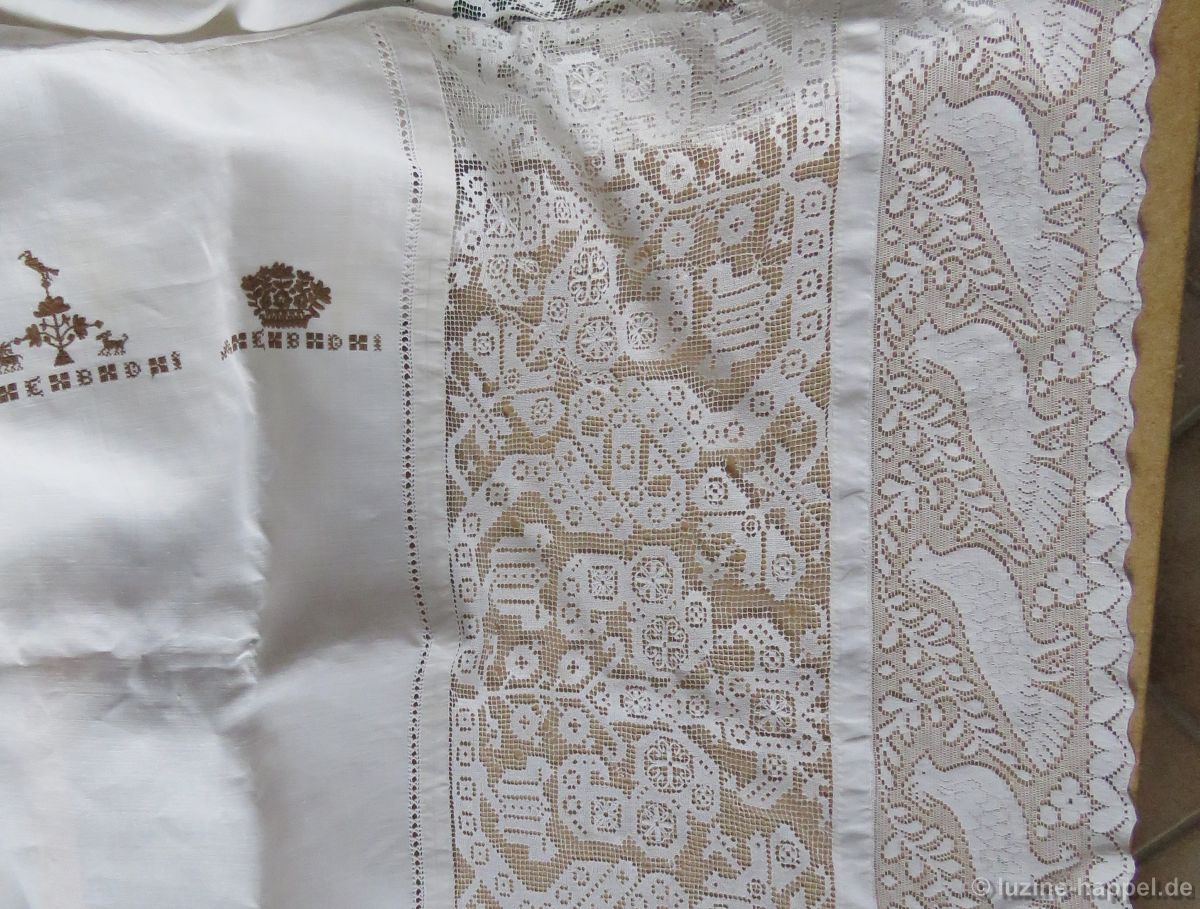
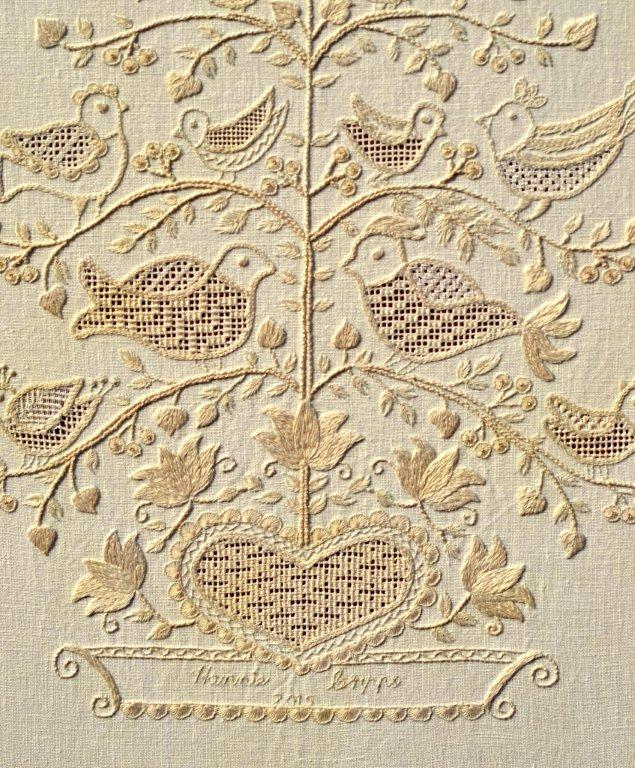
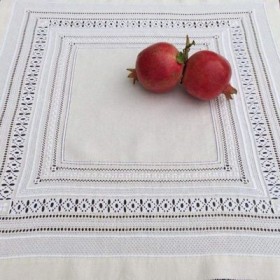
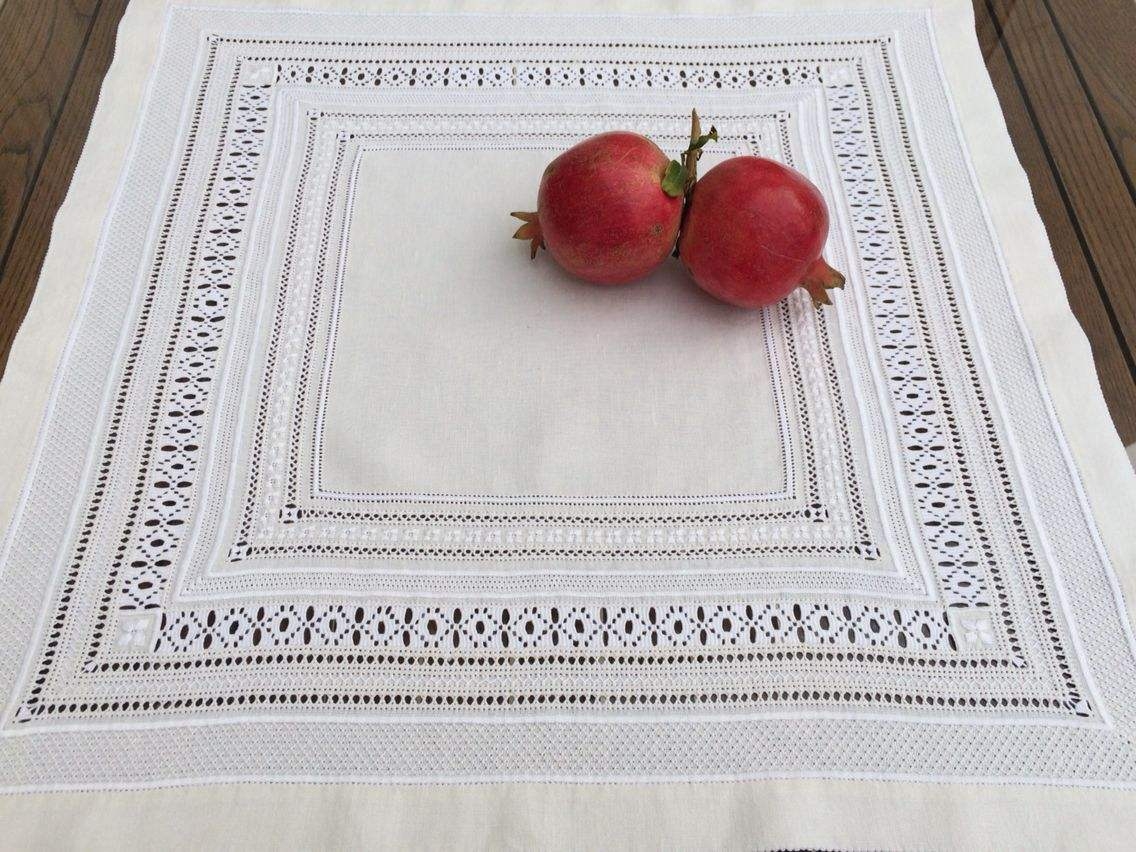
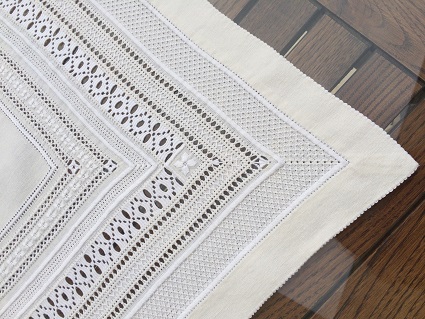
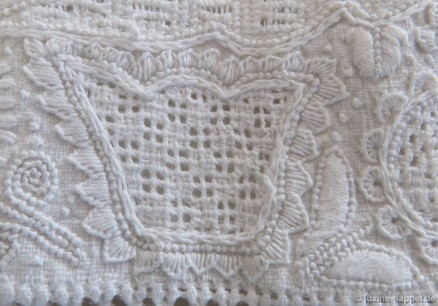
The embroidery of the Schwalm bodice design A has many variants. The linen used has an 18–20/cm thread count. The picture shows the entire border in a photomontage.
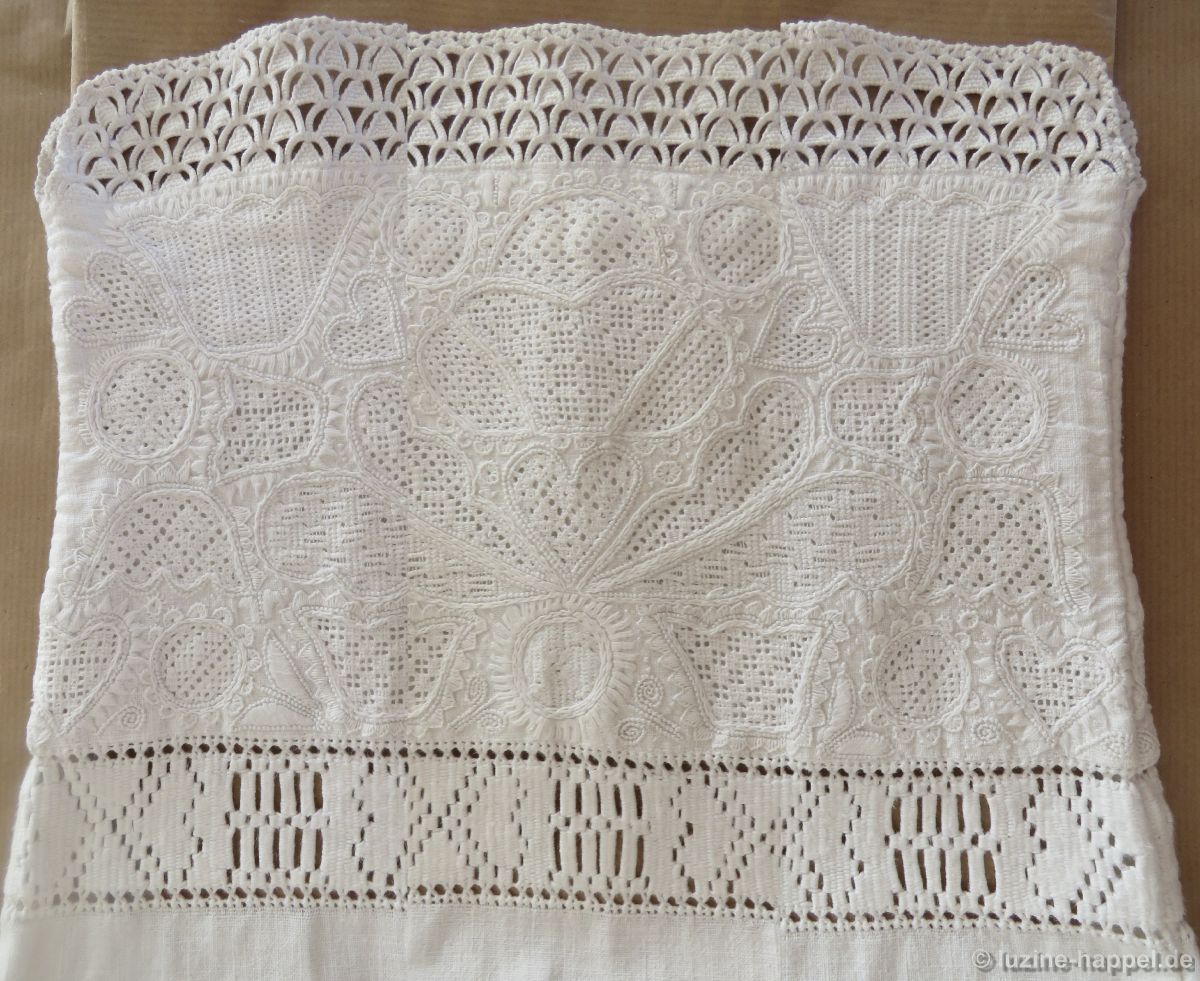
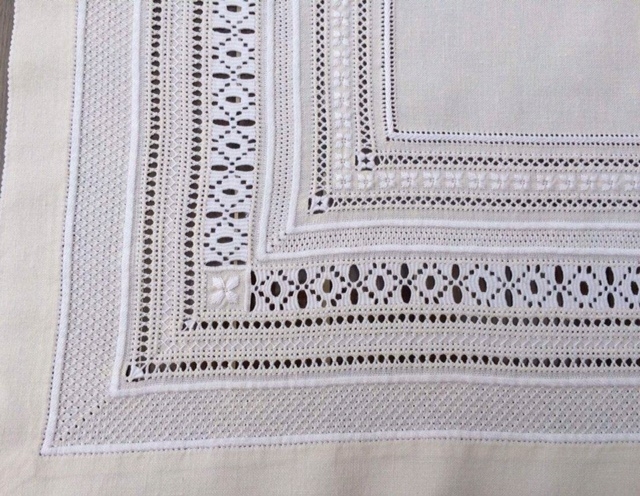
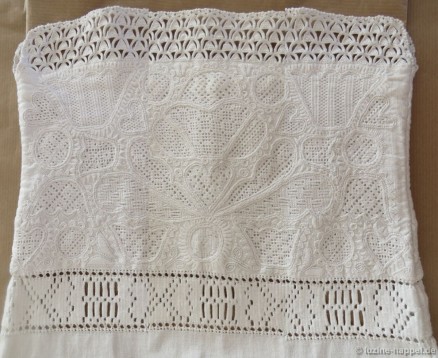 Please note that the border design has a width (from needlelace to needle weaving band) of about 14 cm. The following pictures show the embroidery enlarged; the embroidery is actually very fine.
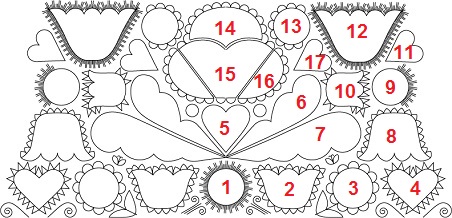
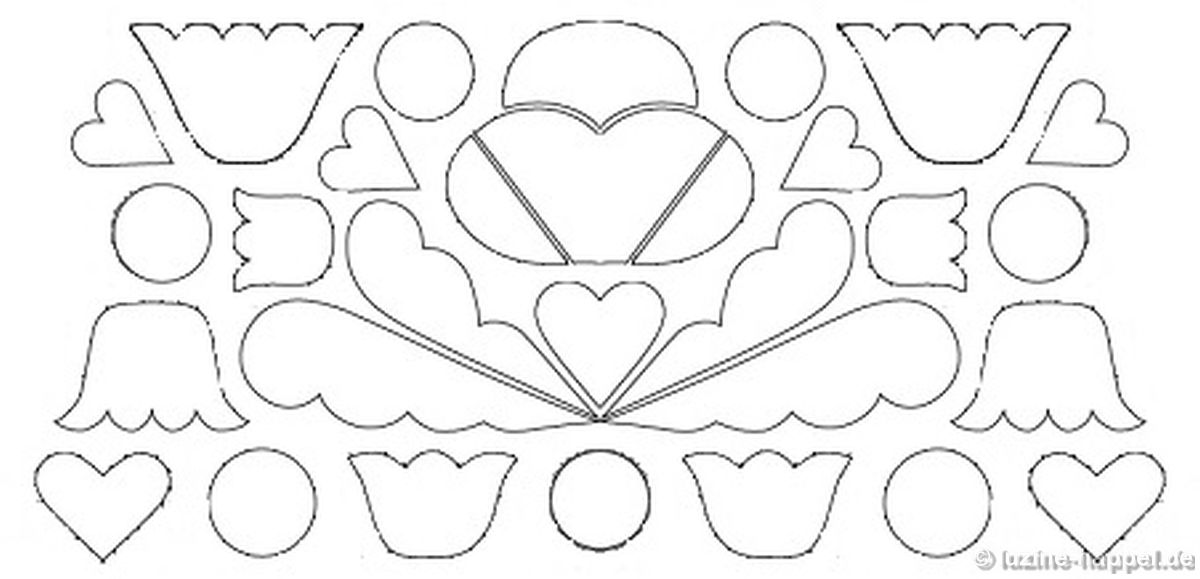
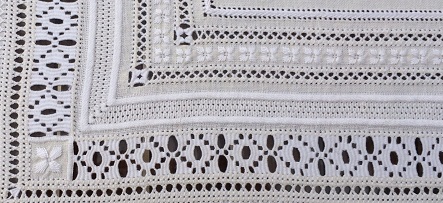
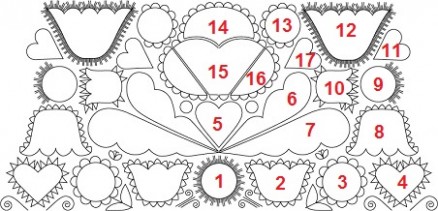
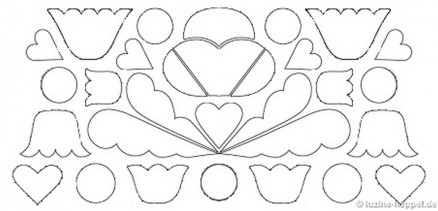
Below I show details of the arrangements of the single shapes. Here is a numbered overview to ease the assignation of the single motifs to the whole design.
 1.
1.
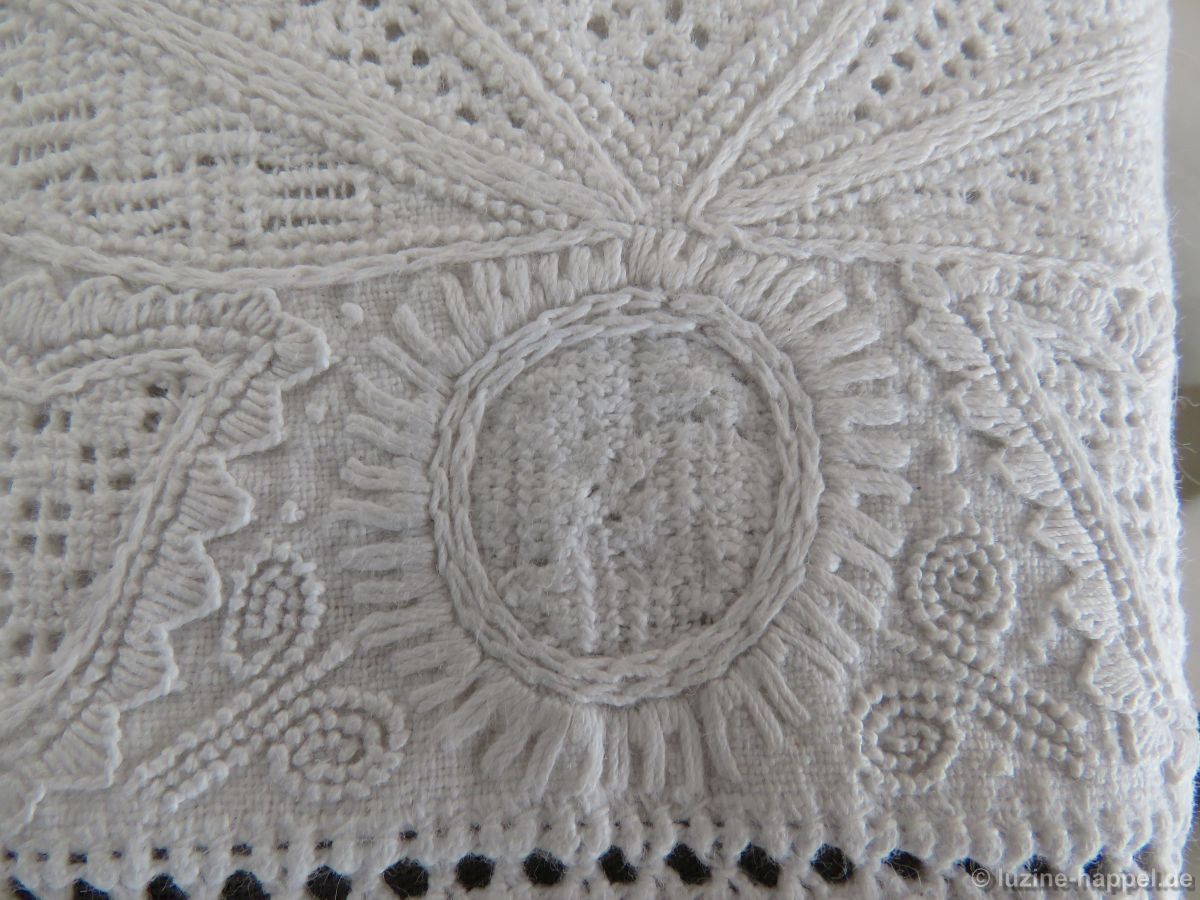
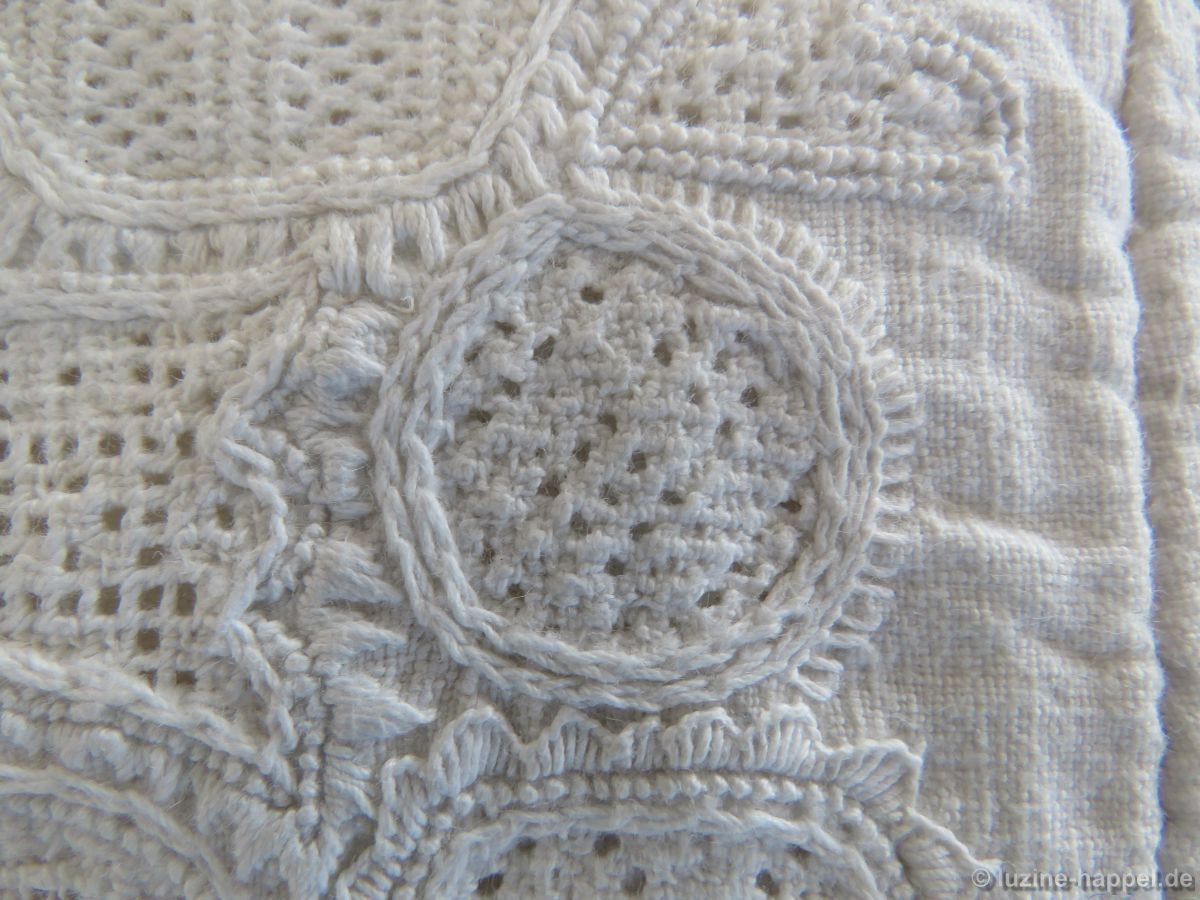
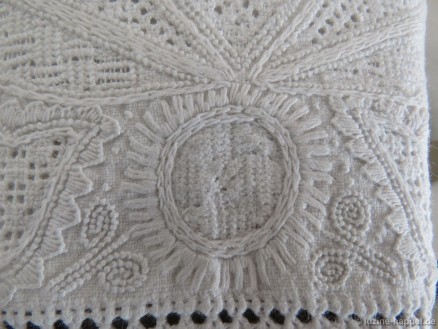
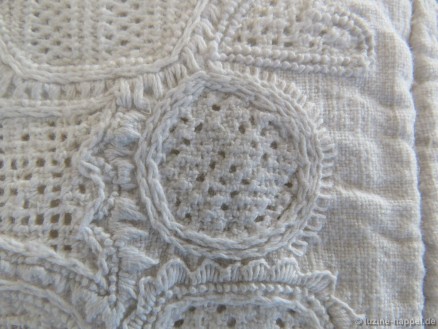
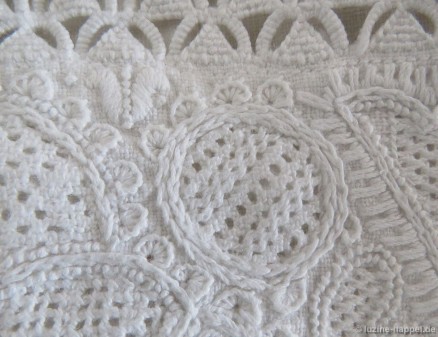
There are no Coral Knot stitches outlining the circle; instead of 2 rows of Chain stitches were worked. As an outline embellishment 2 short-2 long was used. The shape was filled with a pattern established by using Satin stitch blocks and Rose stitches. Unfortunately the pattern is difficult to recognize, even using a magnifier. It is a little bit similar to pattern 450.
I figured it out and will present the result in detail as filling pattern 478 in one of my next posts. It is common to work this pattern as a Limet pattern (cut 1, leave 3 in both directions). Here it was worked as a simple drawn thread filling pattern; that means threads were only withdrawn vertically. And the thread withdrawal was cut 1, leave 2. The result is a somewhat blurred appearance. And also thread withdrawal was made by leaving 2 and cutting 1. However, the Satin stitches were worked slanting and crossing 2 fabric threads in the height. So, a Satin stitch bar is made with 8 stitches in all. Also, the stitches were worked alternating rising up to the right and then to the left.
The remaining area between the circle motif and the next motif was filled with closely worked Coral Knot tendrils and single dots of French Knots.
 2.
2.
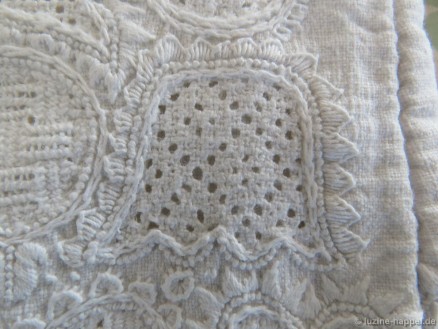
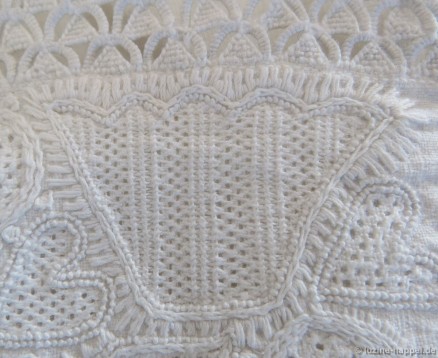
The tulip was outlined with knife points with Blanket stitches. The shape was filled with an openwork pattern (cut 2, leave 2) with a Cable stitch grid. Into the grid a Rose stitch pattern was worked by distributing squares of 2 X 2 Rose stitches like a checkerboard. The pattern is called “four windows of Rose stitches.”
 The area to the right of the tulip was filled with a stem of Coral Knot stitches leading to the next circle shape, leaves, and a narrow tulip worked with Coral Knot stitches and Satin stitches. Also, some single dots of French knots were embroidered.
3.
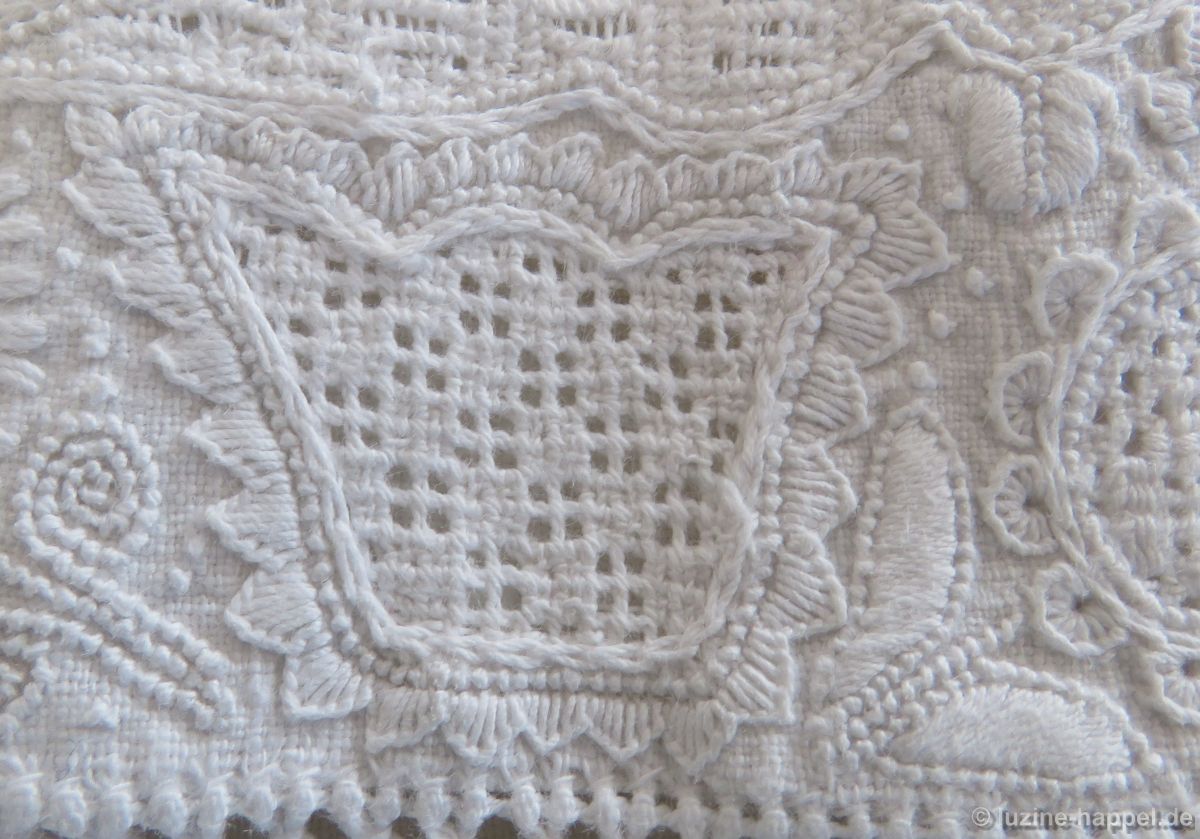
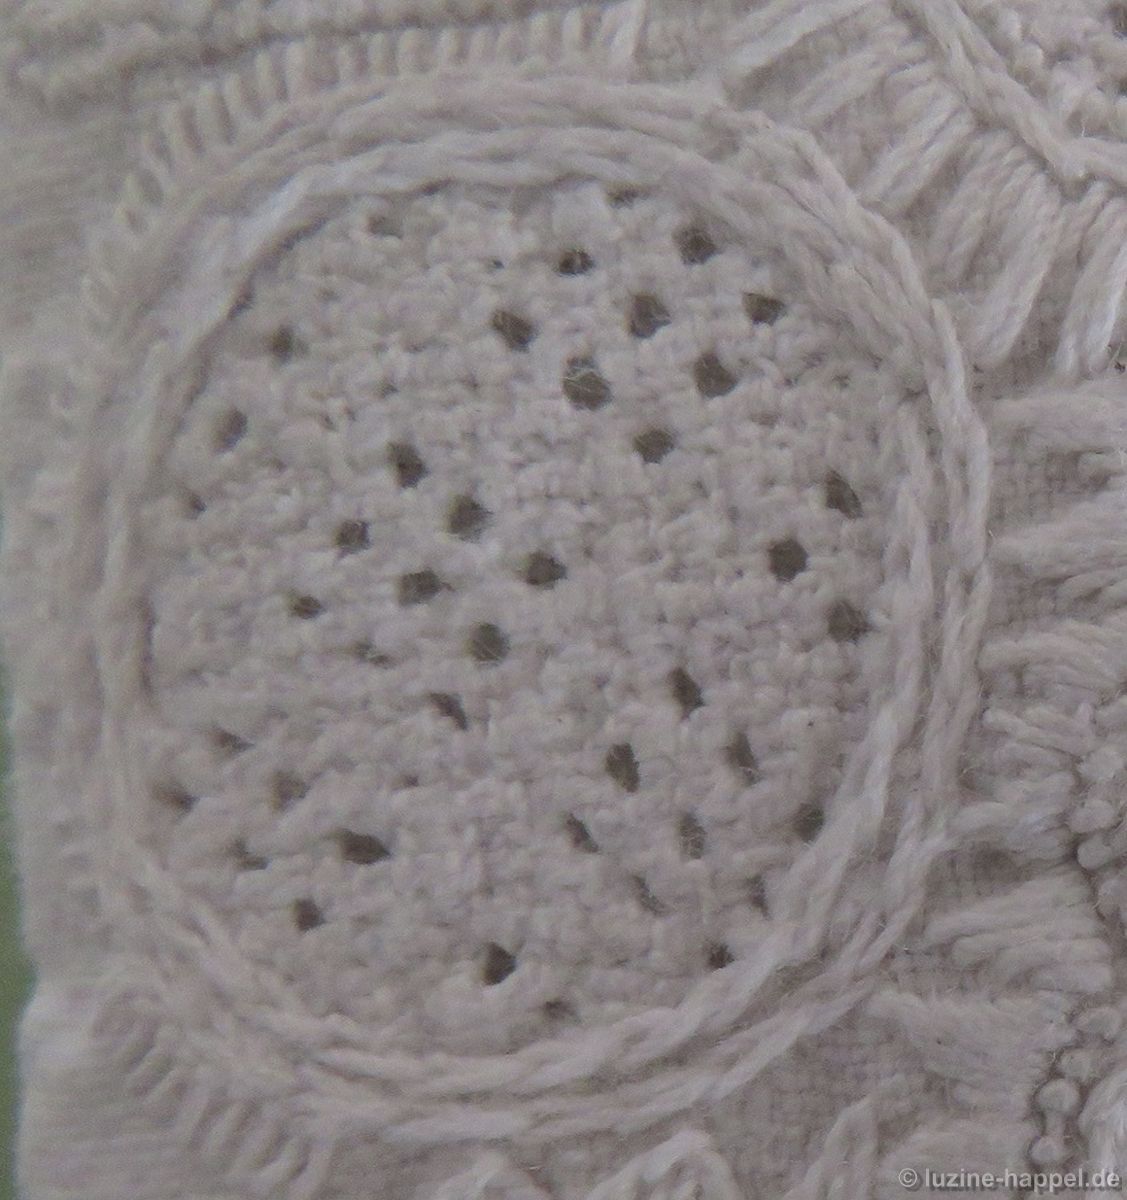
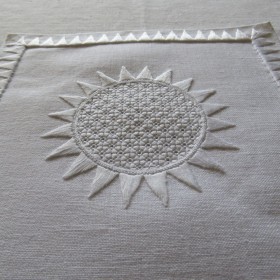
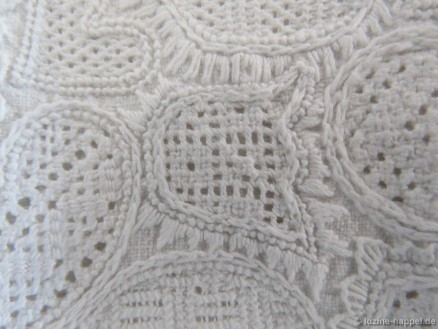
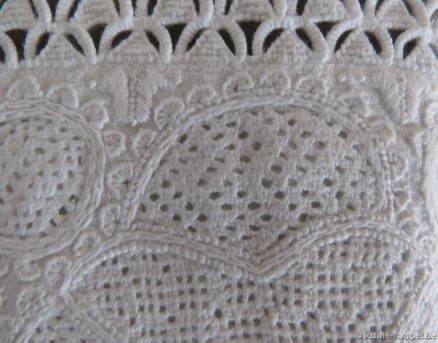
Because the individual motifs were placed so close together, the sunflower (circle shape) was only partially outlined with Blanket stitch half-eyelet scallops.
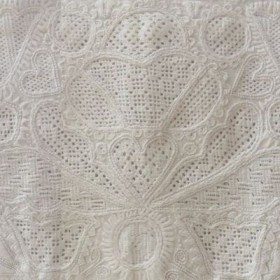
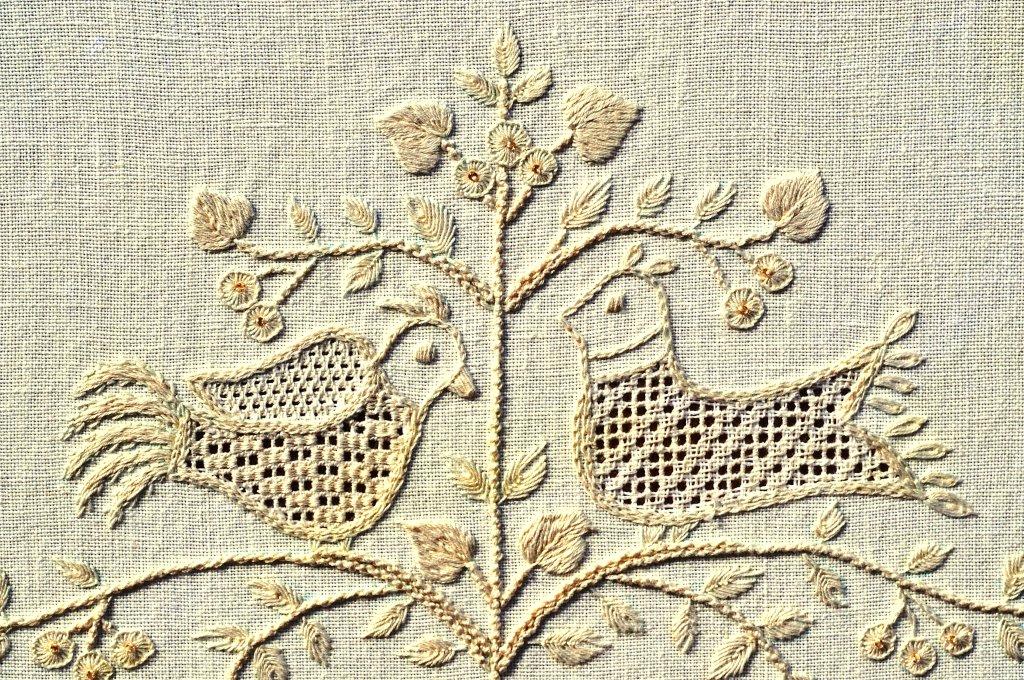
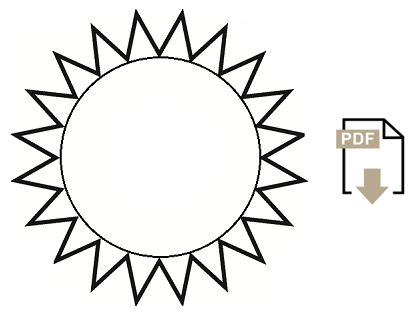
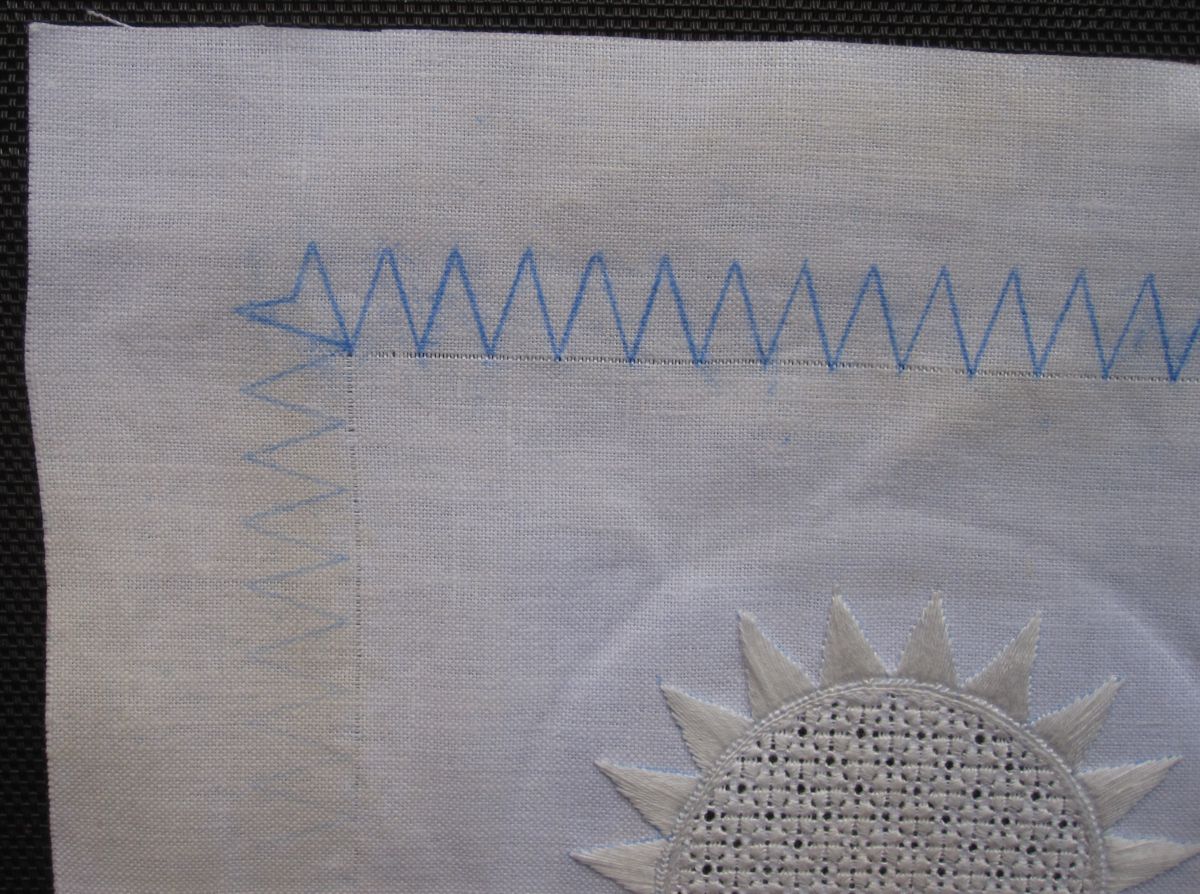
 One must keep in mind that not all embroiderers had detailed line-drawn designs. Often only the outlines of the simple figures were transferred to the fabric, as shown in the example below. Details of the embroidery emerged while it was being worked.
Working in such a way the outlining of some motifs inevitably had varying widths.
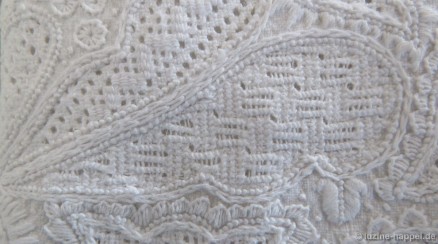
 The circle shape was filled with an openwork pattern without a complete Cable stitch grid. Up from
the bottom right, the pattern was established as follows: 3 rows of Cable stitches, 2 rows of Rose
stitches, 4 rows of Cable stitches, and 2 rows of Rose stitches. Into the grid made with the 4 rows of
Cable stitches, a pattern was woven in a stair-step manner with needle weaving over 3 squares.
The remaining area in the top right of the circle was filled with a Blanket stitch eyelet.
4.
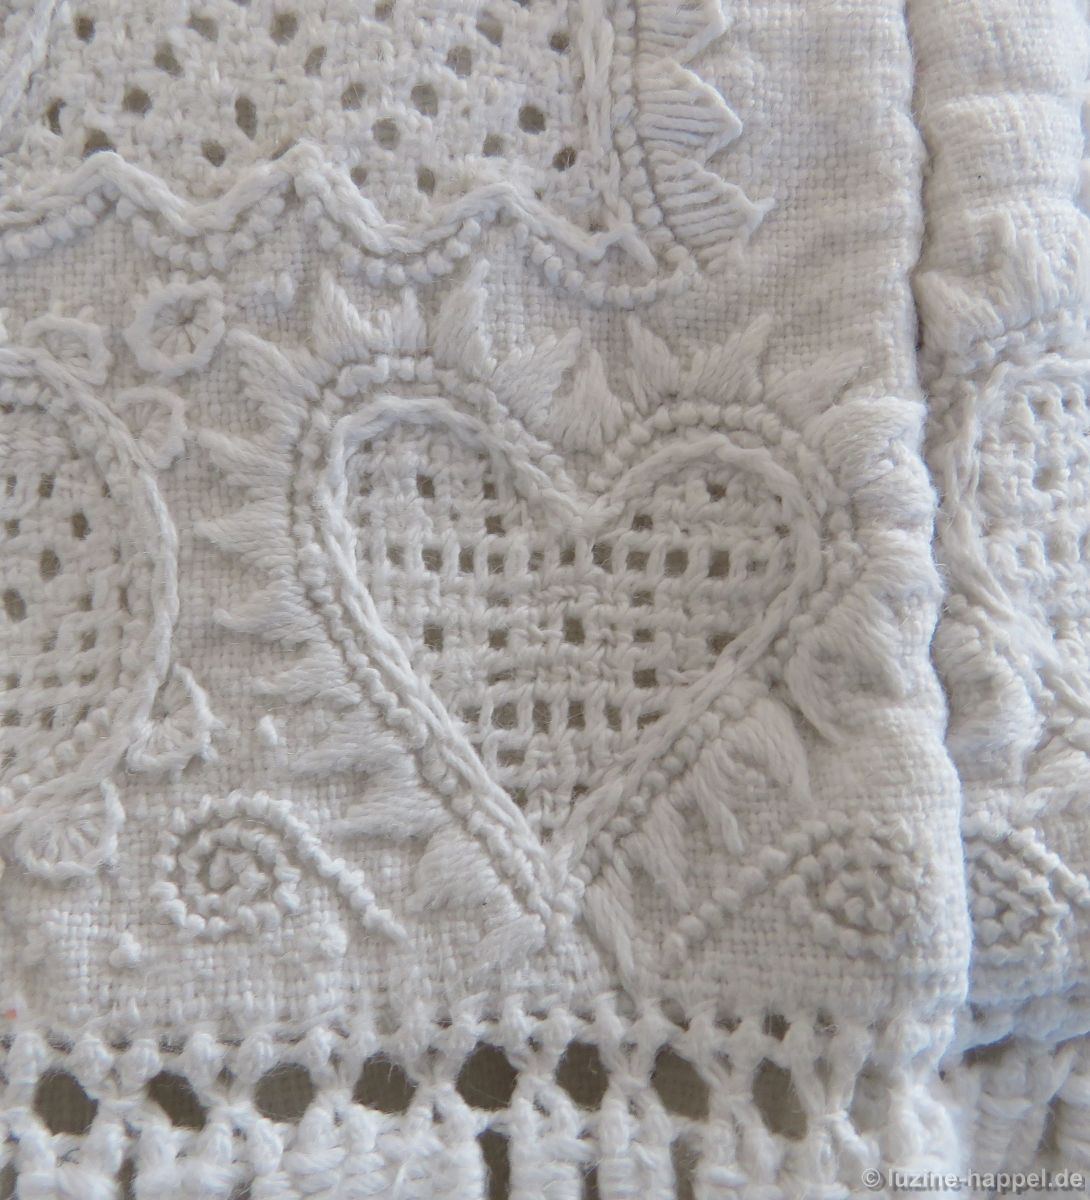
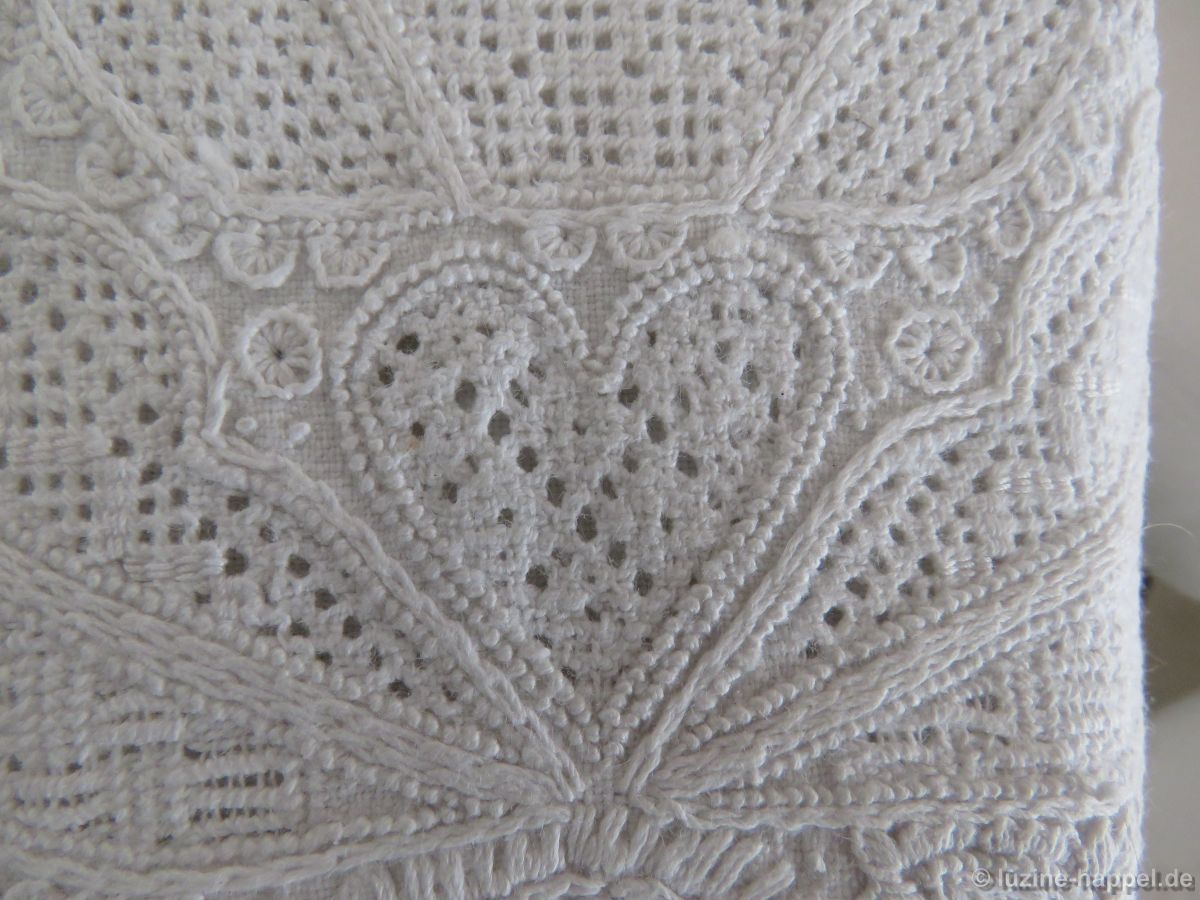
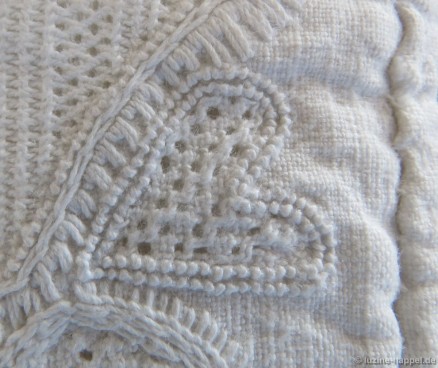
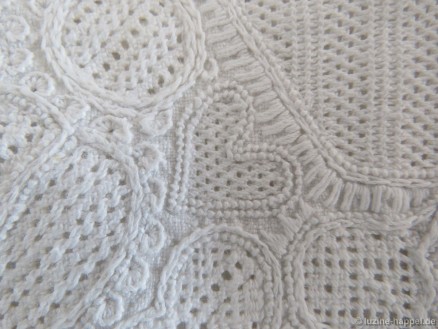
The heart was outlined with a knife point decoration. The shape was filled with an openwork pattern with a Cable stitch grid. Into the grid the Rose stitch pattern “8 Rose stitches in a square around a center with a distance of one square from one to another” was worked (please refer to my book Basic Principles of Schwalm Whitework, pages 62-65).
It looks like the Chain stitches outlining the shape were worked after finishing the filling pattern.
This method I used to practice myself. By working the Chain stitches last and on top of the filling pattern, the edges of the pattern appear clear and clean, but working the Chain stitches last is not as comfortable as working them first. It is more difficult to get the stitches evenly sized.
The heart motif was placed so close to the side edge of the sleeve that it partially disappeared into the seam during construction.
To fill the remaining areas at the bottom of the heart, tight Coral Knot tendrils and single dots of French Knots were worked.
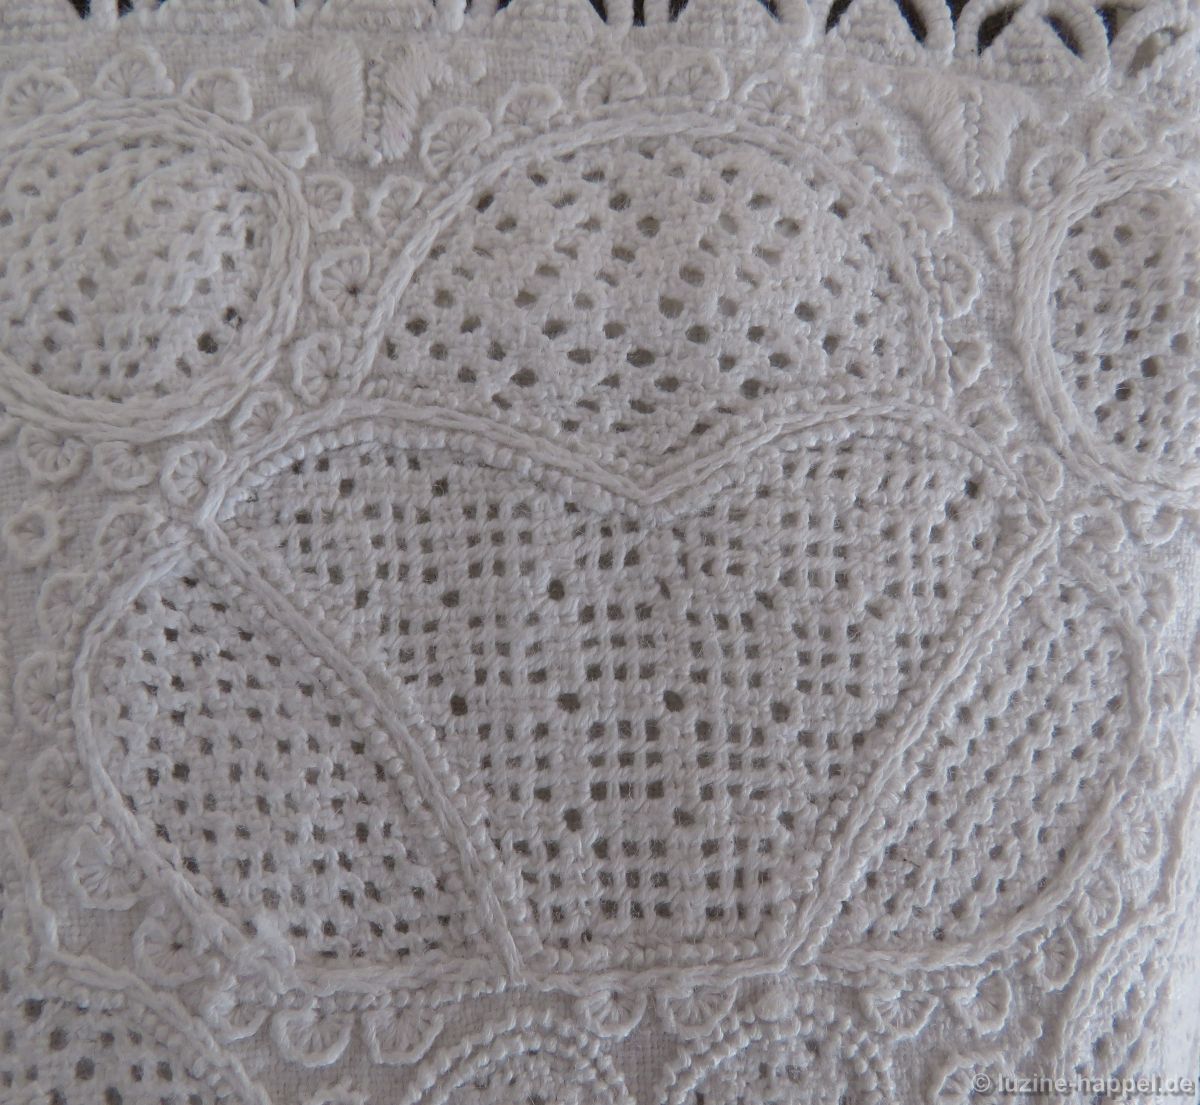
 5.
5.
The heart in the center of the design was outlined with 2 rows of Coral Knot stitches. Chain stitches were not worked. The shape was filled with an openwork pattern without a Cable stitch grid.
Double-row Rose stitch rhombi with one square remaining free in the center were embroidered. (1 outside edge of a rhombus is made with 3 Rose stitches.)
 6.
6.
The upper leaf had both a Coral Knot stitch and a Chain stitch outline. However, the Chain stitches were worked outside of the Coral Knot stitches.
The shape was filled with the same pattern used for filling the circle No. 3, an openwork pattern without a complete Cable stitch grid. Up from the bottom right, the pattern was established as follows: 2 rows of Rose stitches, 4 rows of Cable stitches, and 2 rows of Rose stitches. The remaining areas were filled with Cable stitches. Into the grid made with the 4 rows of Cable stitches, a pattern was woven in a stair-step manner with needle weaving over 3 squares.
While this pattern was worked in both circle shapes No. 3 (mirrored on the longitudinal axis)
pointing to the top right, it was worked in both leaf shapes mirrored, as the top picture of this post shows.
 In the same leaf shape of the second sleeve, the filling pattern had a better arrangement, as the comparison between upper and lower pictures shows.
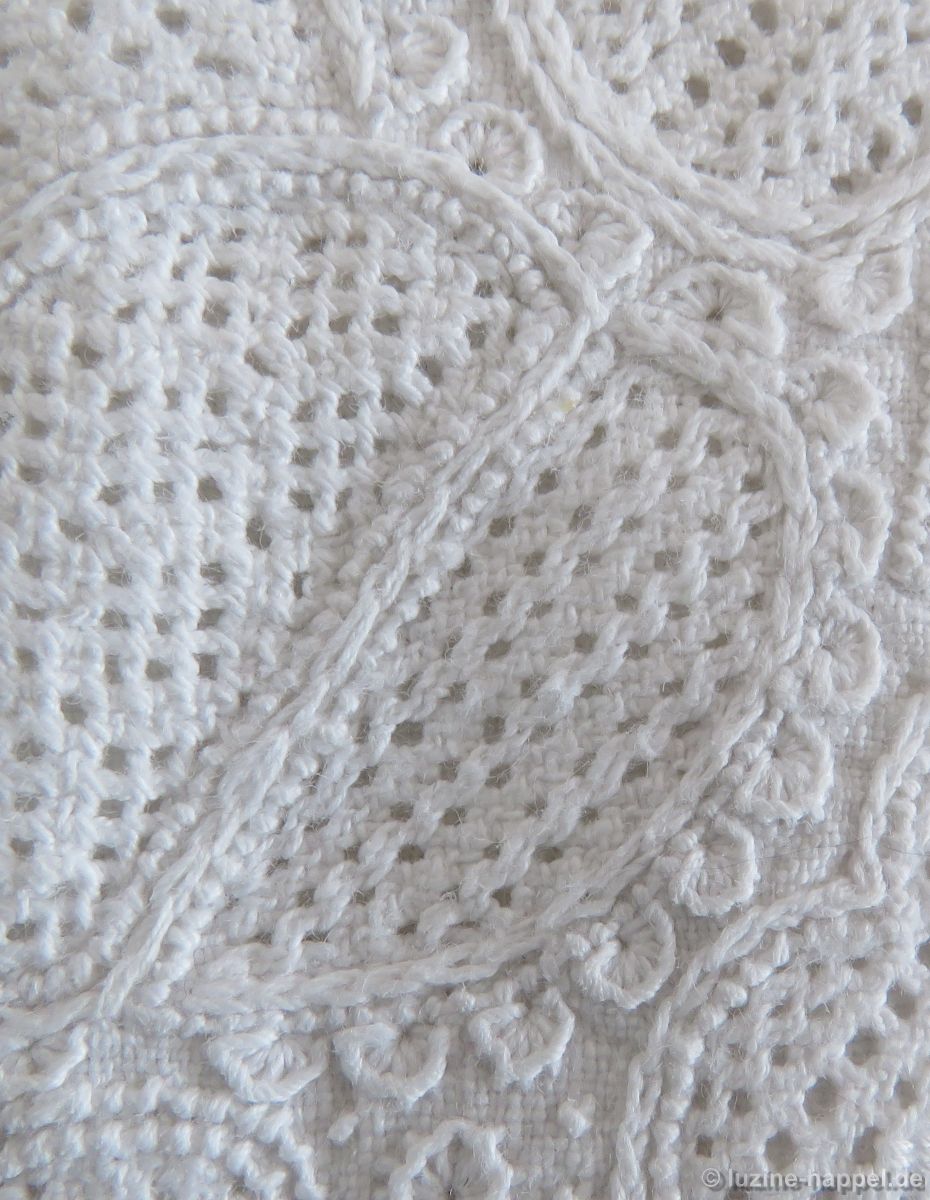
 7.
7.
Also, the lower leaf had both a Coral Knot stitch and a Chain stitch outline. However, the Chain stitches were worked outside of the Coral Knot stitches.
The shape is filled with a Limet pattern. It developed by working blocks of 3 Satin stitch bars alternating vertically and horizontally and stitched like a checkerboard all over the shape. This pattern is called “3-pattern.”
The Limet grid was created by leaving only 2 threads and cutting 1. Satin stitches were worked slanting on the front and straight on the back. The bars were worked from bottom to top and back without turning the piece. So, the stitches rise up alternating to the top right and to the top left.
 8.
8.
The upside down tulip was outlined with Coral Knot stitches and Chain stitches inwards. On the outside it was decorated on 3 sides with Blanket stitch knife points. The shape was filled with an openwork pattern without a Cable stitch grid. Double- row Rose stitch rhombi with a single Rose stitch in the center were embroidered. (1 outside edge of a rhombus is made with 4 Rose stitches.) The pattern developed clearly, but it is not positioned at the center of the shape.
 9.
9.
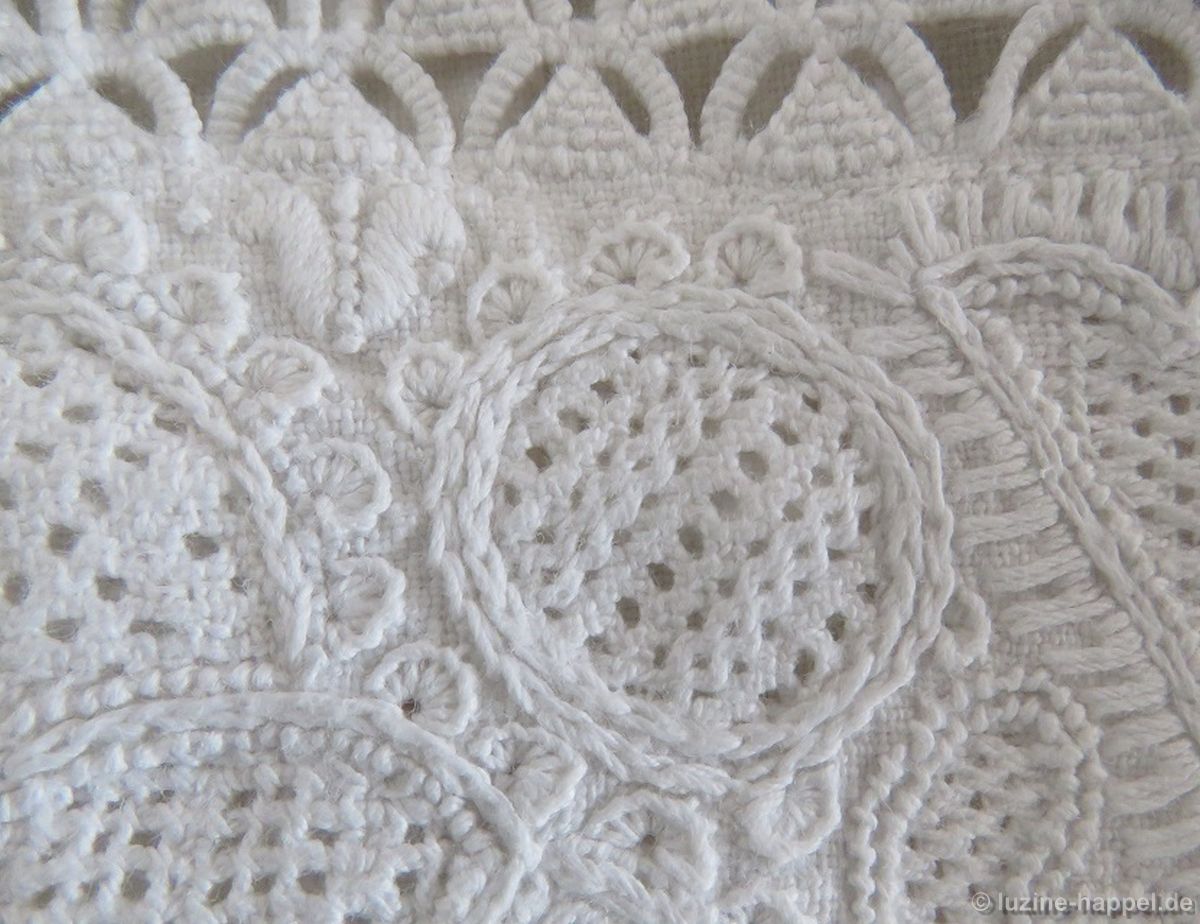
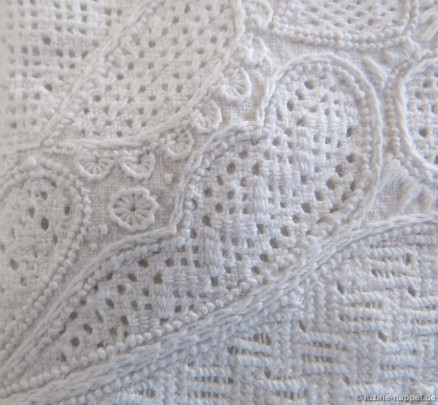
The circle is outlined with a double row of Chain stitches. Eyelash stitches were embroidered outside the perimeter in the areas open enough for an additional decoration. The shape was filled with an openwork pattern without a Cable stitch grid. Crisscrossing double rows of Rose stitches were worked at such a distance so that single row Rose stitch rhombi with one square remaining free in the center could be placed between.The pattern is not positioned at the center of the shape.And the pattern does not develop clearly because it is too large for such a small area (if it were embroidered in a larger area, it would become a very elegant pattern).
 The same pattern is more easily recognized in the mirrored circle shape.
 10.
10.
The small tulip lying on its side was outlined with Coral Knot stitches and Chain stitches inwards.
Satin stitch knife points were embroidered outwards in any place where there was sufficient room for additional decoration. The shape was filled with an openwork pattern with a Cable stitch grid.
Into the grid a Rose stitch pattern was worked. The pattern does not develop clearly – again, because it is too large for such a small area (if it were embroidered in a larger area, it would become a nice pattern).
 11.
11.
The narrow heart was outlined with 2 rows of Coral Knot stitches. The shape was filled with an openwork pattern without a Cable stitch grid. The pattern consists of 1 row of Rose stitches and 1 row of Cable stitches always alternating.
 12.
12.
The big tulip was outlined with Coral Knot stitches and Chain stitches on the outside of the Coral Knots. 2 short-2 long were embroidered around perimeter. This additional decoration was not made with even stitches; the stitch length has to match the available room. The shape was filled with a simple drawn thread filling pattern; that means threads were withdrawn only vertically. Thread withdrawal was made by leaving 2 and cutting 1. The pattern develops by always alternating 3 rows of Satin stitches and 3 rows of Wave stitches. However, the Satin stitches were worked slanting and crossing 2 fabric threads in the height. The Satin stitch bars were worked from bottom to top and back without turning the piece. So, the stitches rise up alternating to the top right and to the top left.
Patterns with alternating Satin stitch rows and Wave stitch rows were common and often used in Schwalm whitework.
 13.
13.
The circle at the top edge was outlined with 2 rows of Chain stitches. Blanket stitch half-eyelet scallops were embroidered outwards in any place where there was enough room for additional decoration. The shape was filled with an openwork pattern without a Cable stitch grid. The pattern consisted of always alternating 2 rows of Rose stitches and 2 rows of Cable stitches.
 14.
14.
The arch at the top of the center tulip was outlined with Coral Knot stitches. Inwards, along the upper edge, Chain stitches were worked. On the outside edge Blanket stitch half-eyelet scallops were worked. The shape was filled with an openwork pattern without a Cable stitch grid. A zig-zag pattern made with alternating single and double rows of Rose stitches was embroidered.
 15.
15.
The center tulip was outlined with Coral Knot stitches and Chain stitches worked outside the Coral Knot stitches. At the upper corners and at the bottom edge, the Blanket stitch half-eyelet decoration of the total motif was continued. The shape was filled with an openwork pattern with a Cable stitch grid. Rows of always alternating 3 Rose stitches and 1 remaining free square were worked horizontally and vertically at a distance of 3 remaining squares.
 16.
16.
The shapes on both sides of the center tulip were outlined with Coral Knot stitches and along the curved edge additional decorated with Chain stitches were worked inwards of the Coral Knot stitches. As mentioned above, Blanket stitch half-eyelet scallops outside the Coral Knot stitches continued around the total motif. The shape was filled with an openwork pattern without a Cable stitch grid. The pattern consists of always alternating 1 row of Rose stitches and 1 row of Cable stitches. As seen in the above picture, the pattern was worked mirrored.
 17.
17.
And finally, the narrow heart is shown. It is outlined with a double row of Coral Knot stitches. The shape was filled with a simple drawn thread filling pattern; that means threads were withdrawn only vertically. Thread withdrawal was made by leaving 2 and cutting 1. Wave stitches – a common and well suitable pattern for small shapes – were worked.
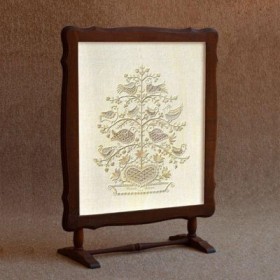
 I hope you enjoyed this analysis of a traditional, about 170 years old, piece of embroidery. Do you have questions or a request? Simply send me an email or leave a comment below.