Filling Pattern No. 541

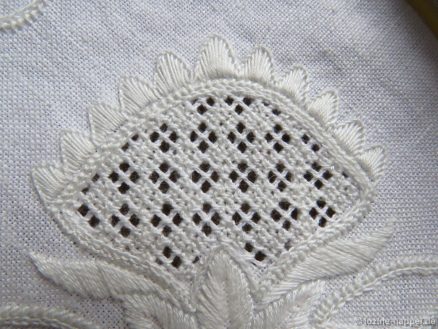
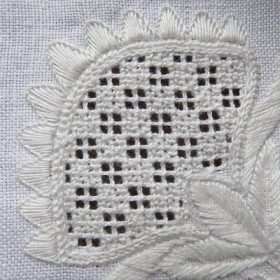
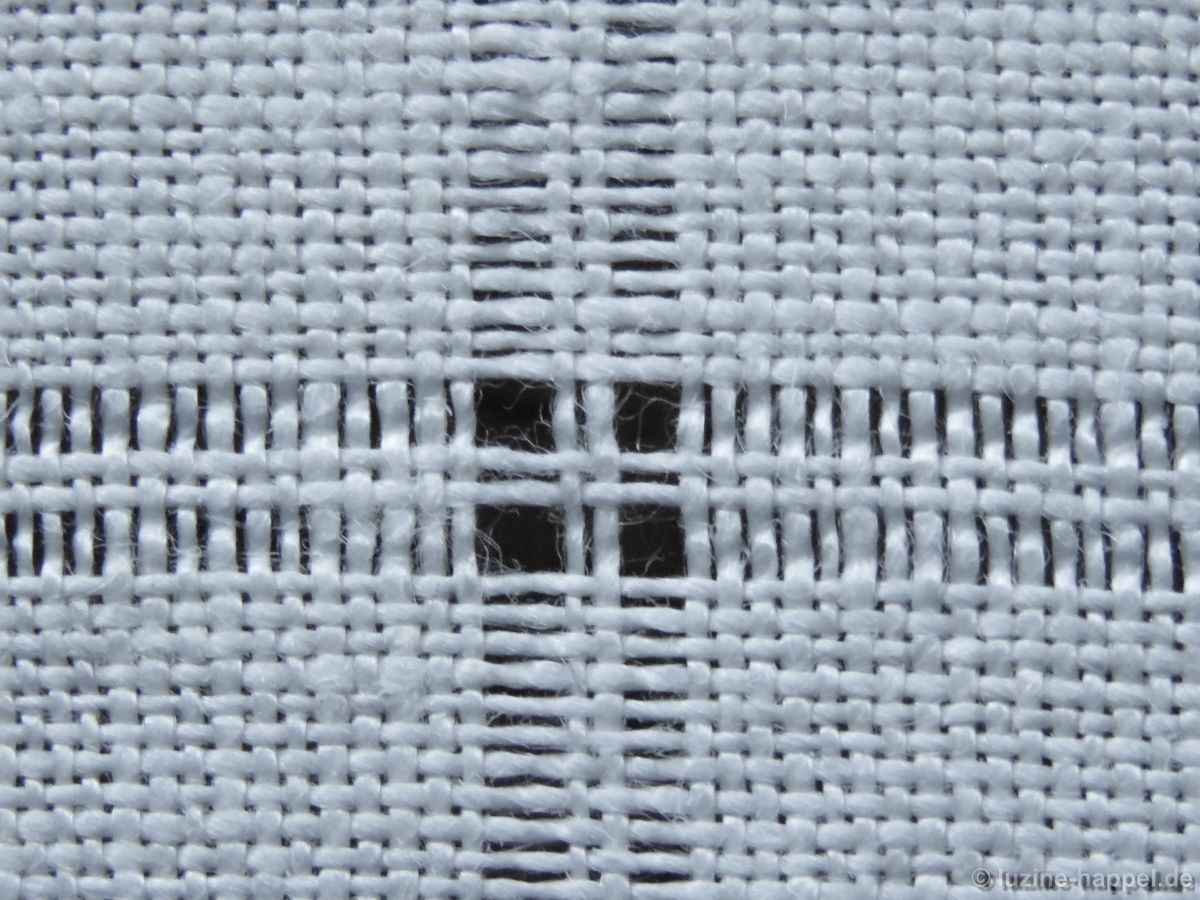
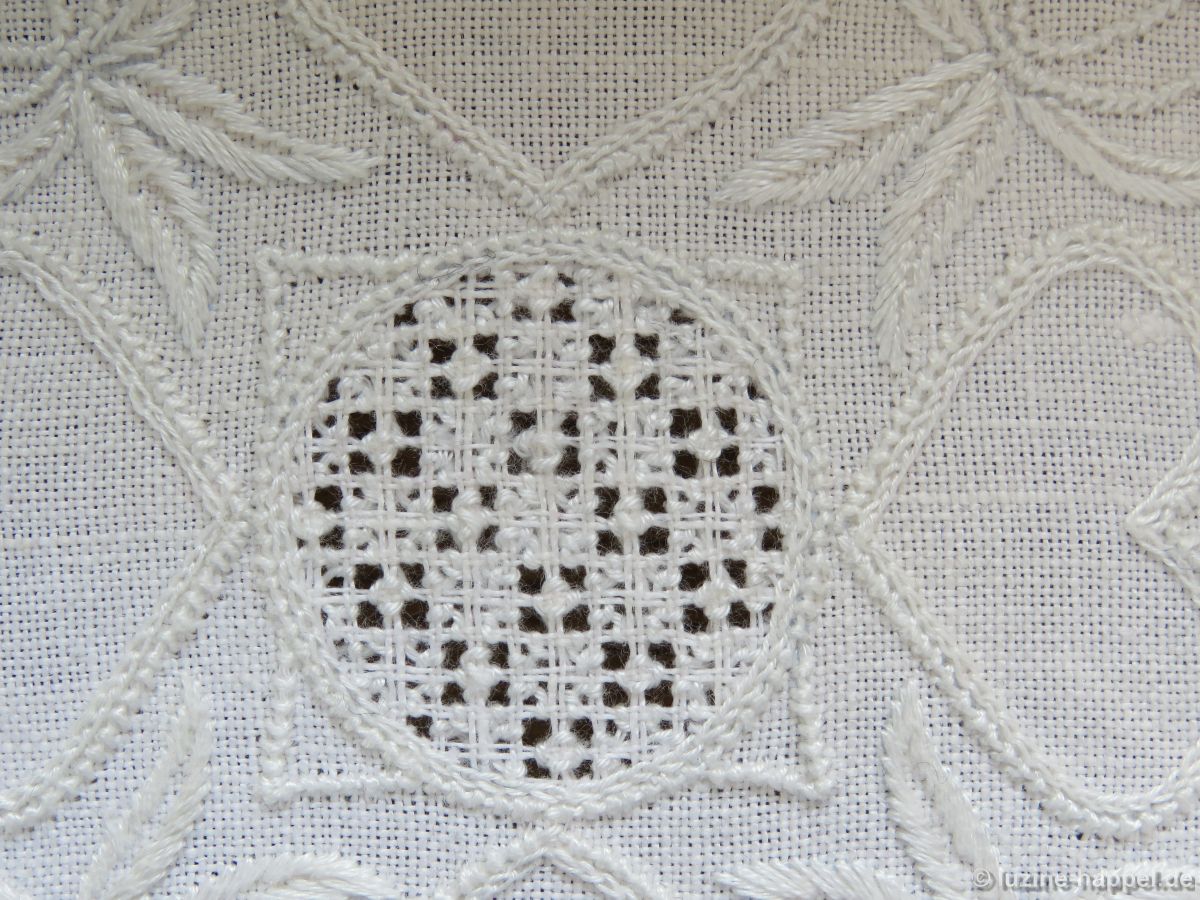
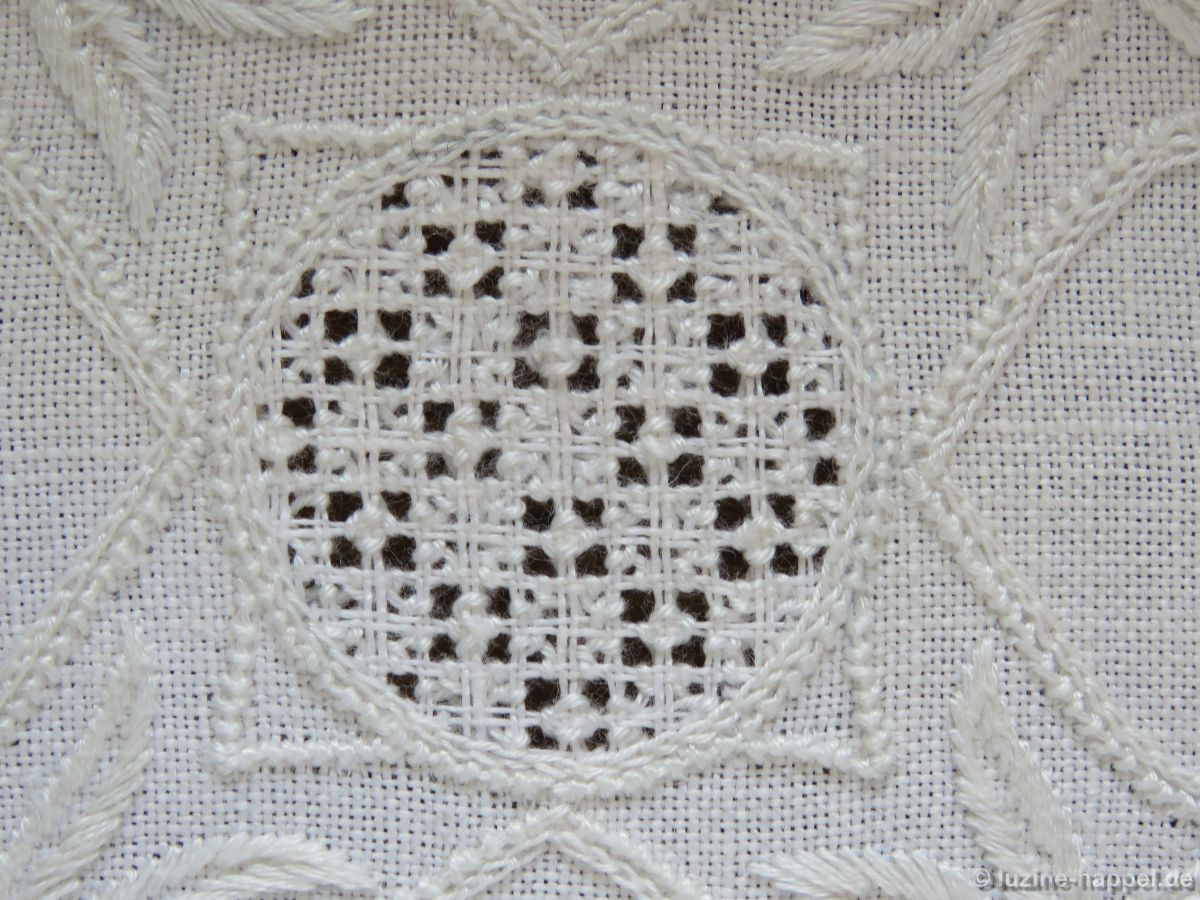
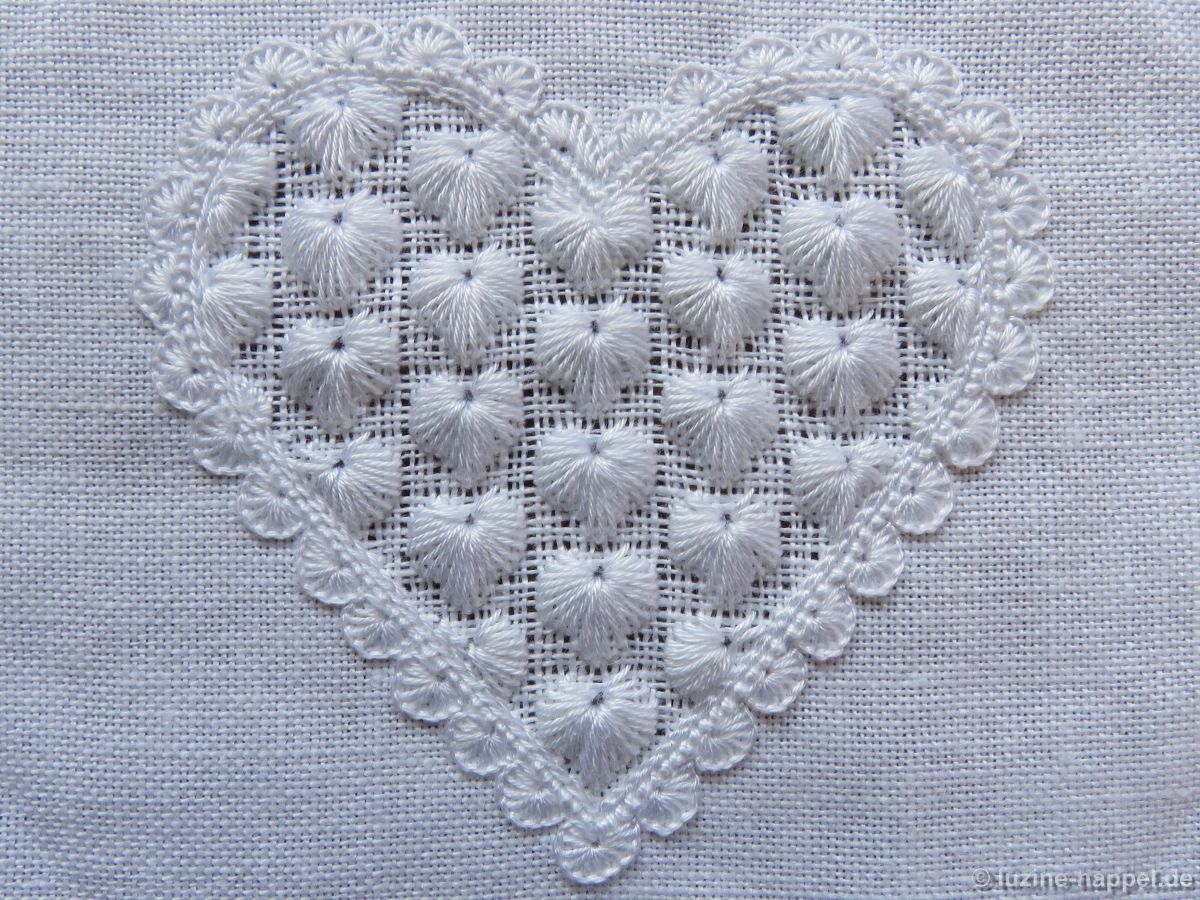
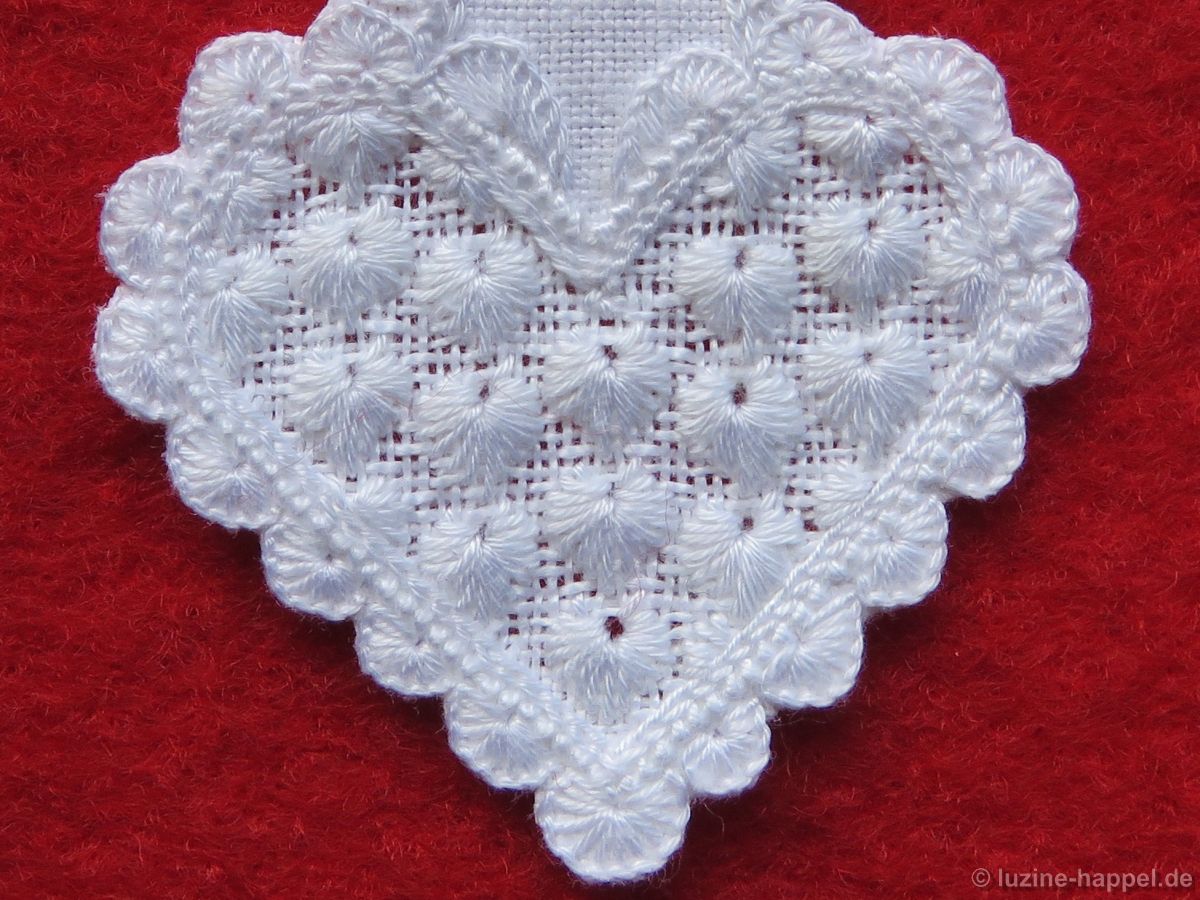
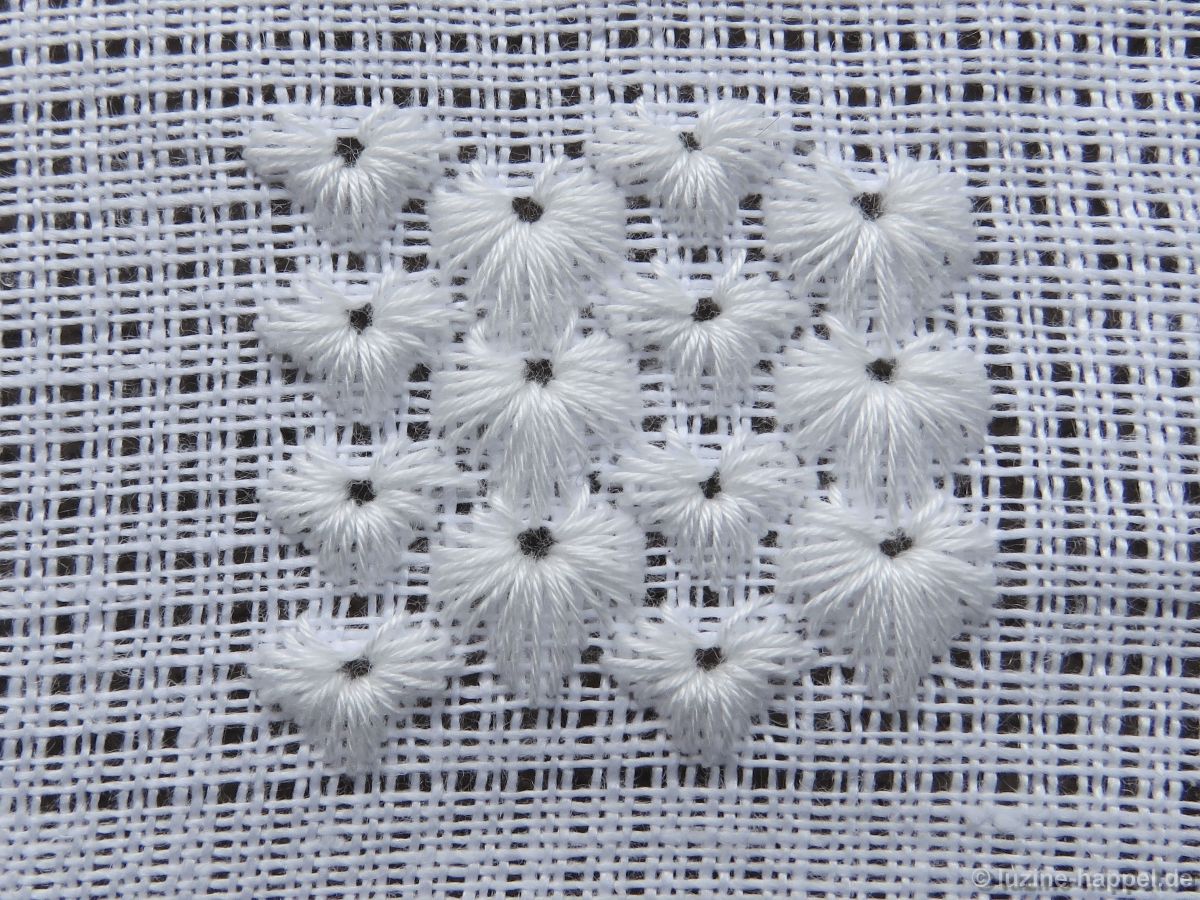
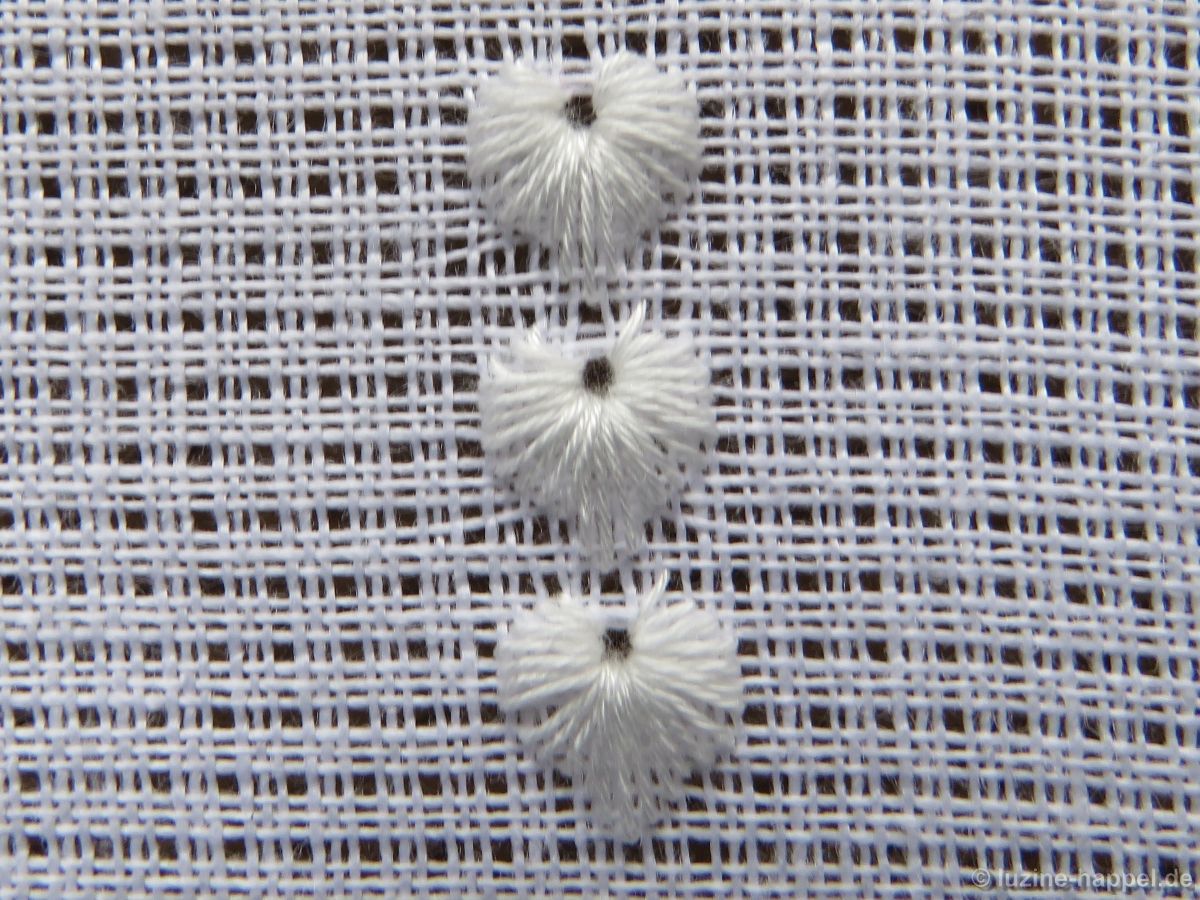
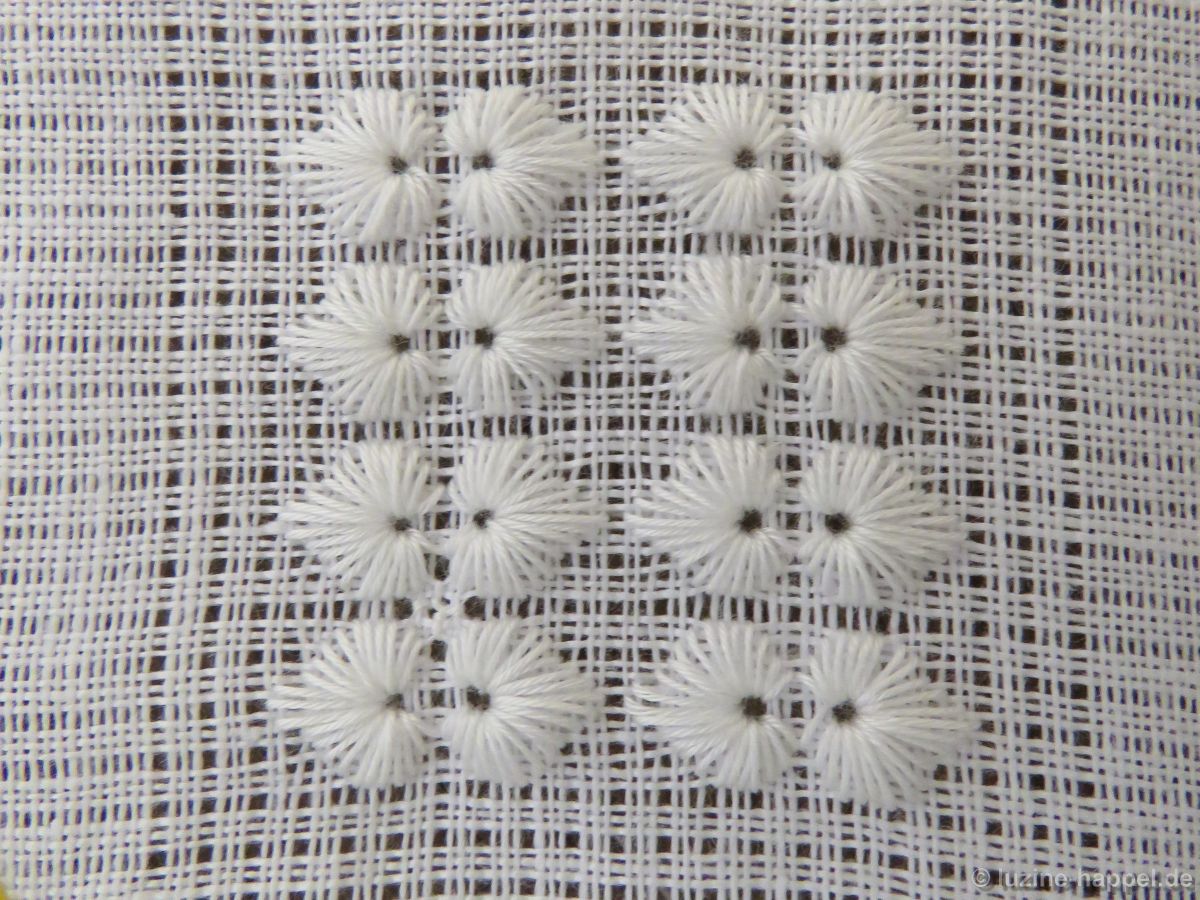
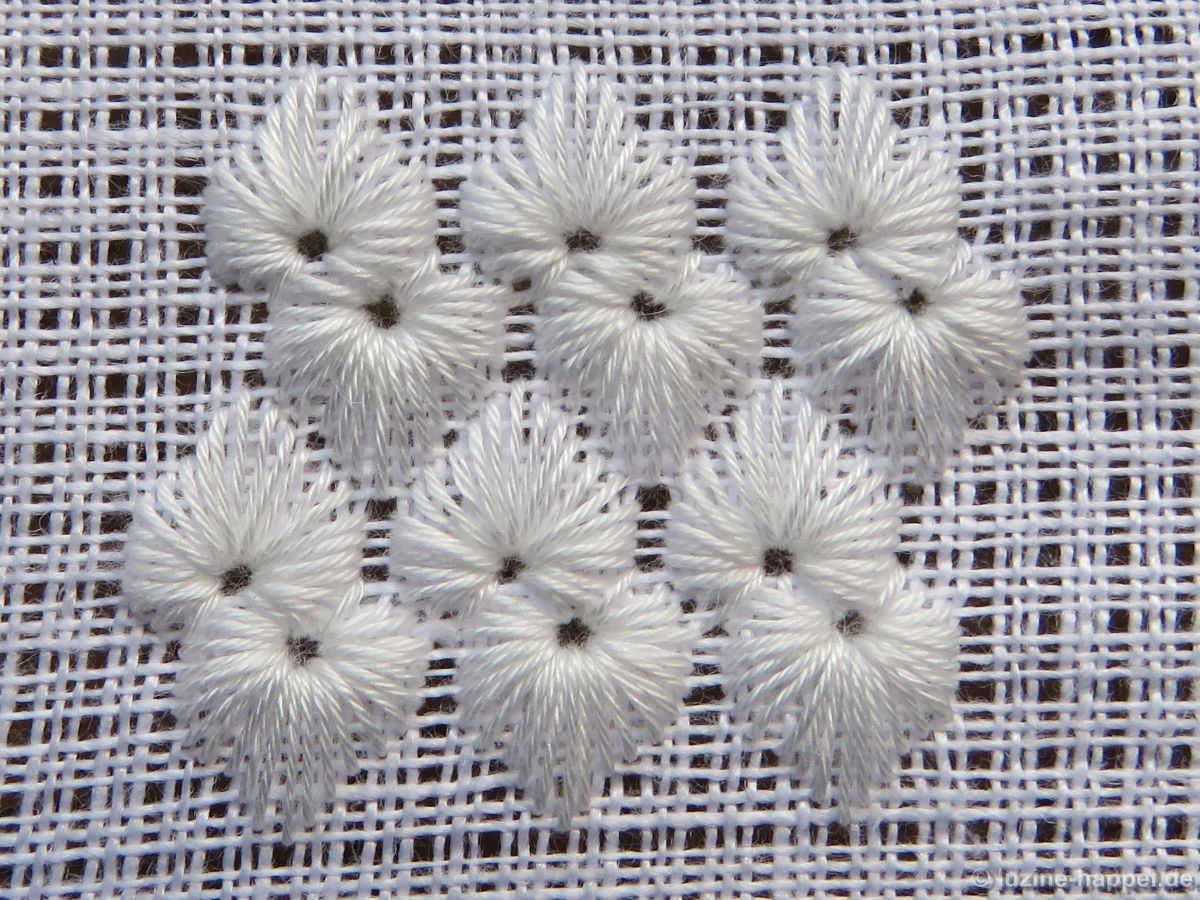
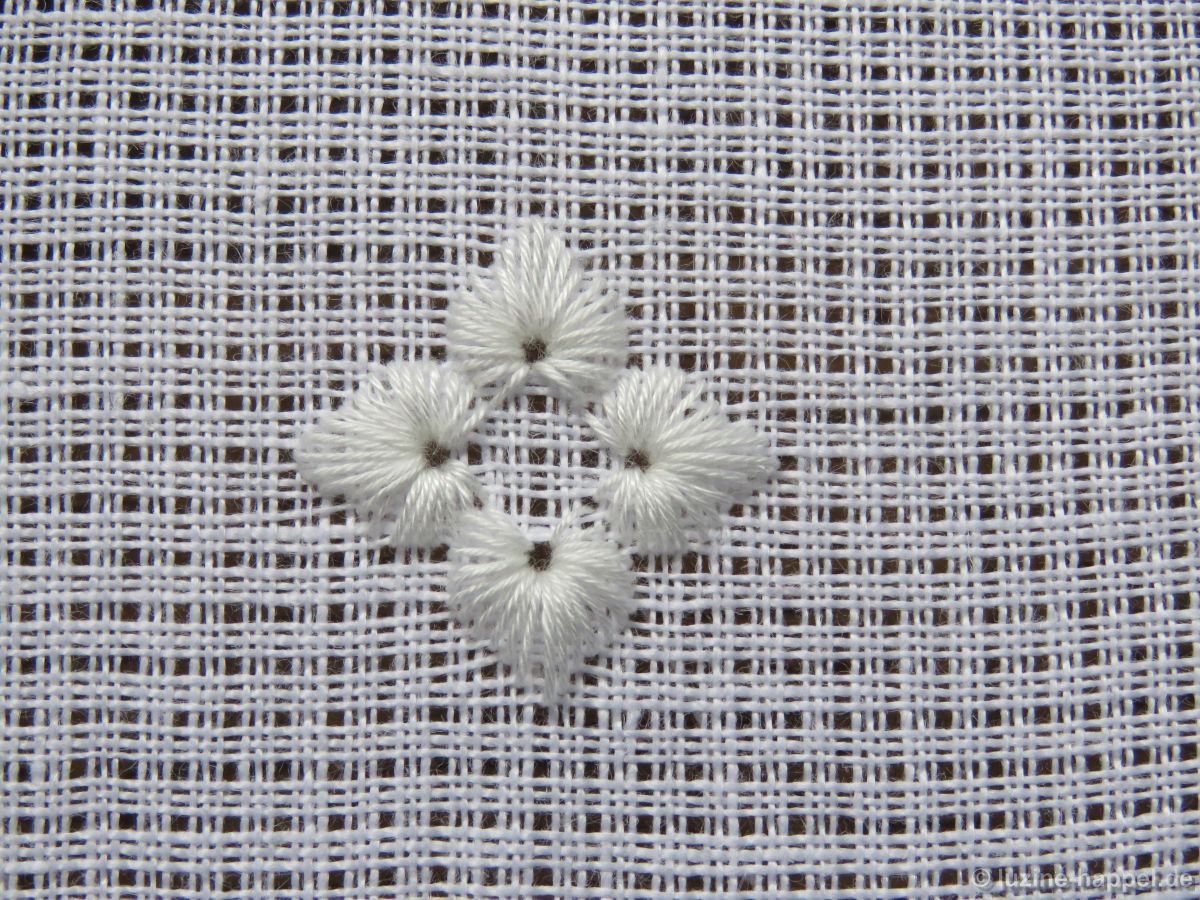
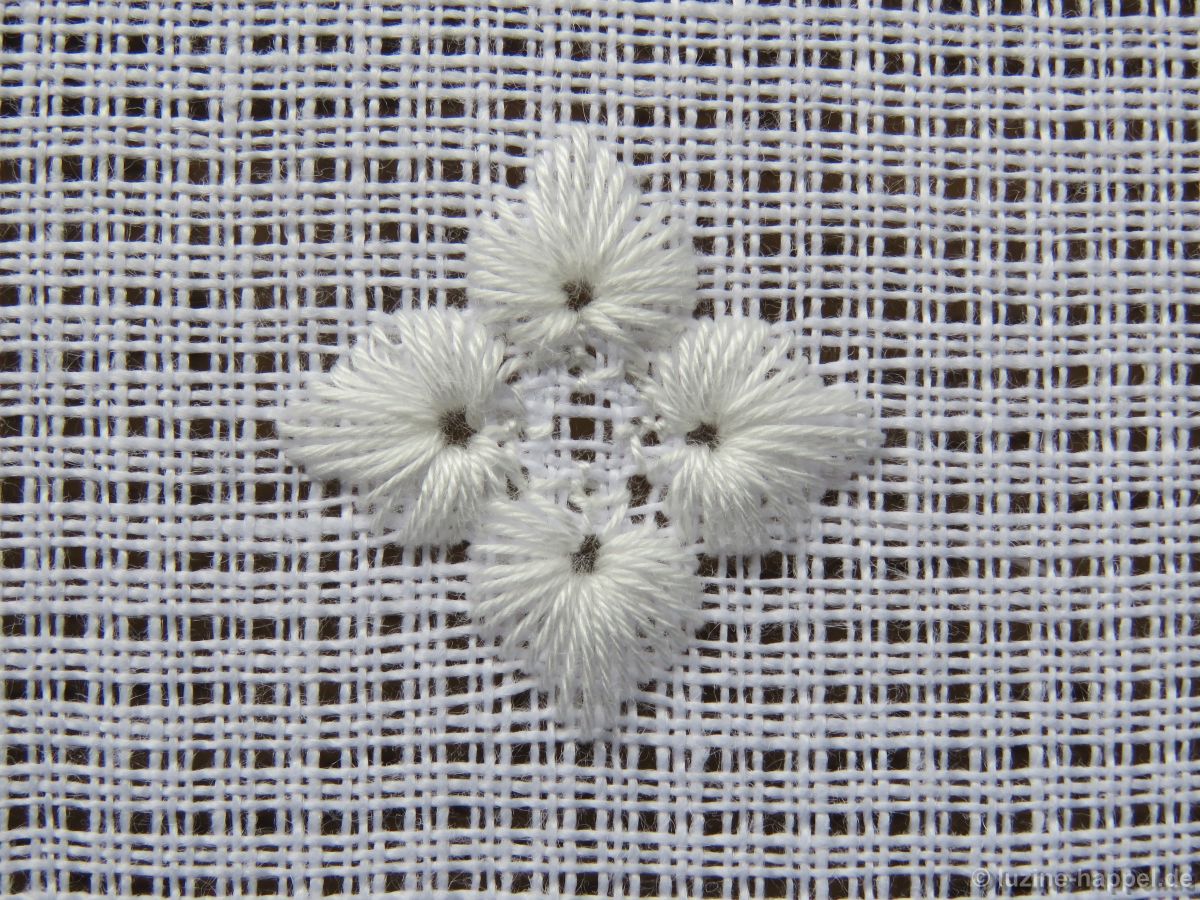
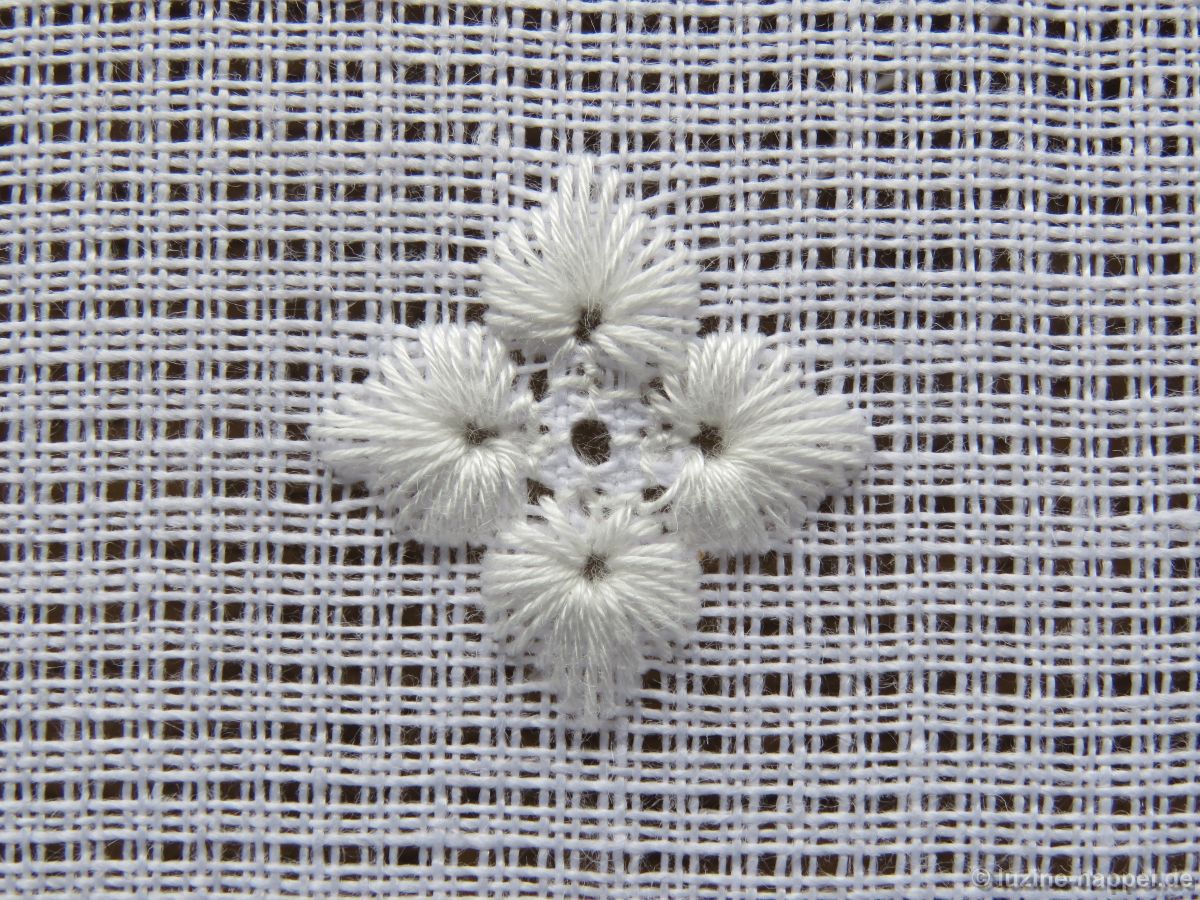
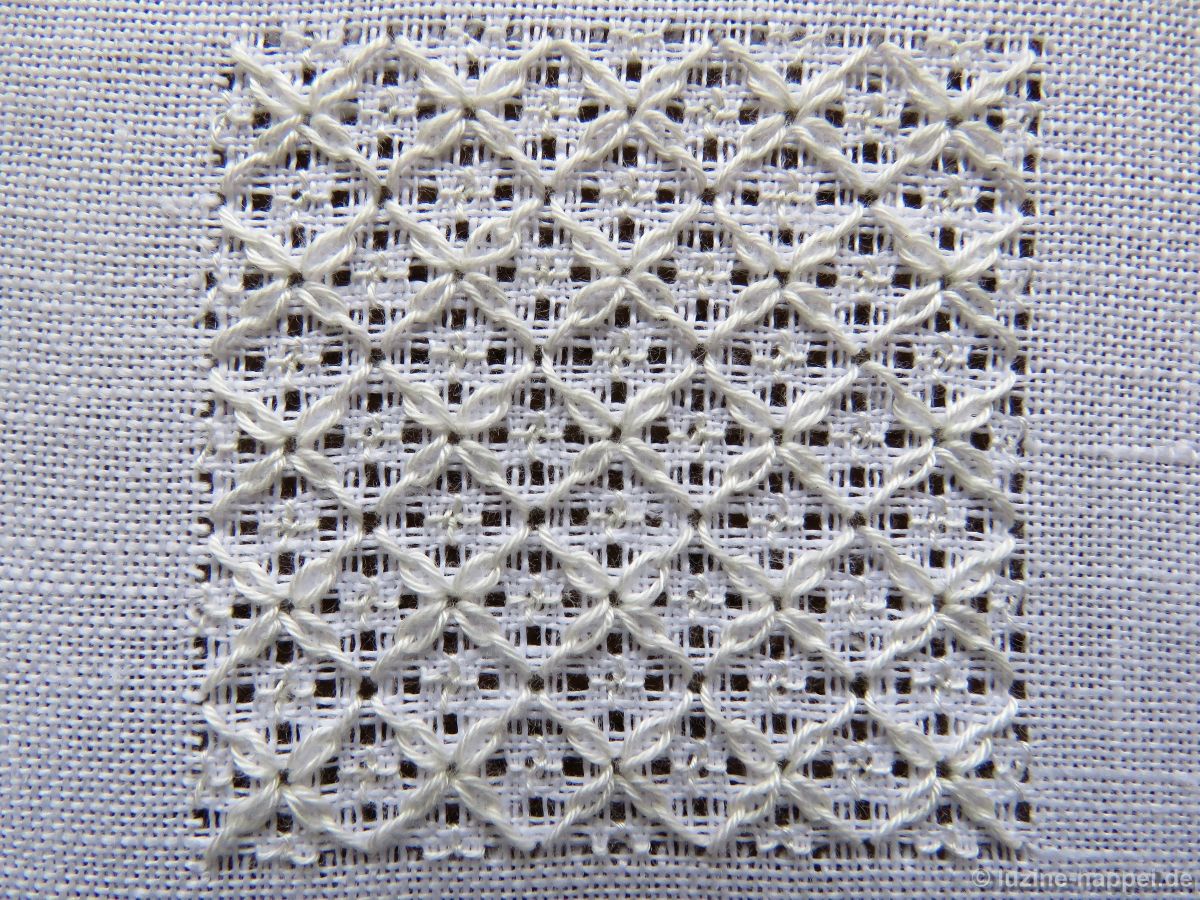
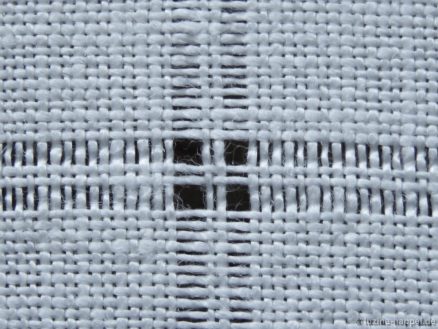
category: openwork filling pattern without Cable stitch grid
stitches used: sections of Rose stitches and Four-Sided stitches
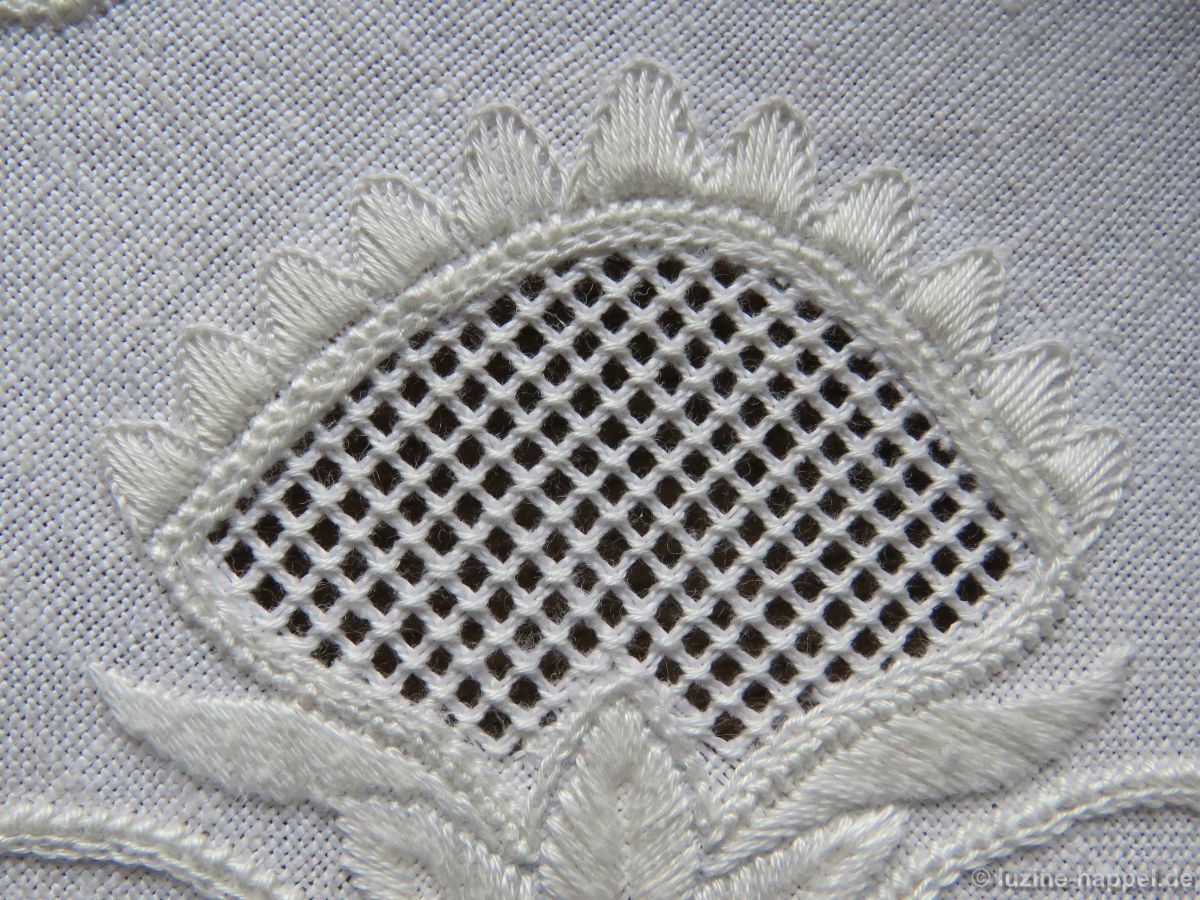
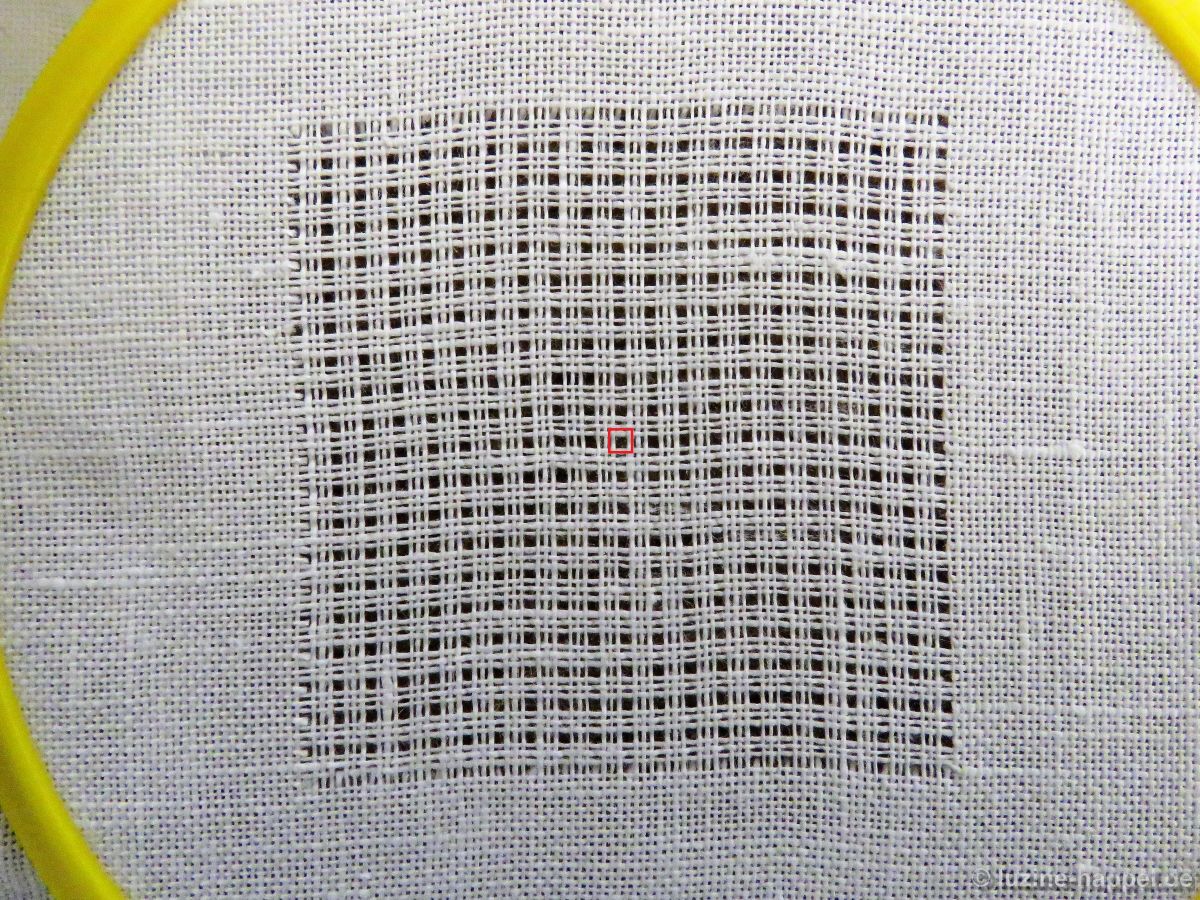
center: intersection of pairs of threads

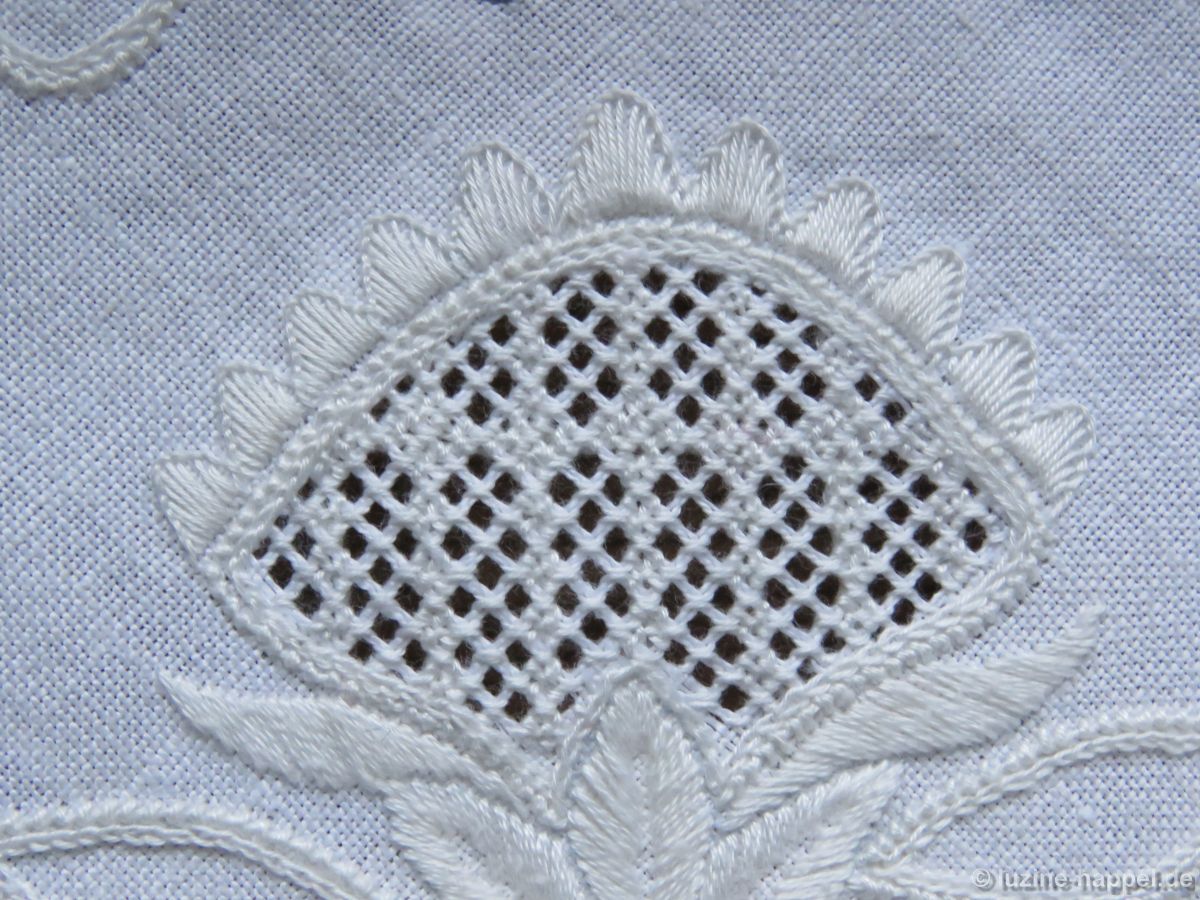
As mentioned in my blog post Traditional Schwalm Whitework, I will now explain how to work a special pattern consisting of sections of Rose stitches and Four-Sided stitches in an openwork grid without Cable stitches. I first noticed such a pattern on a piece from 1804.

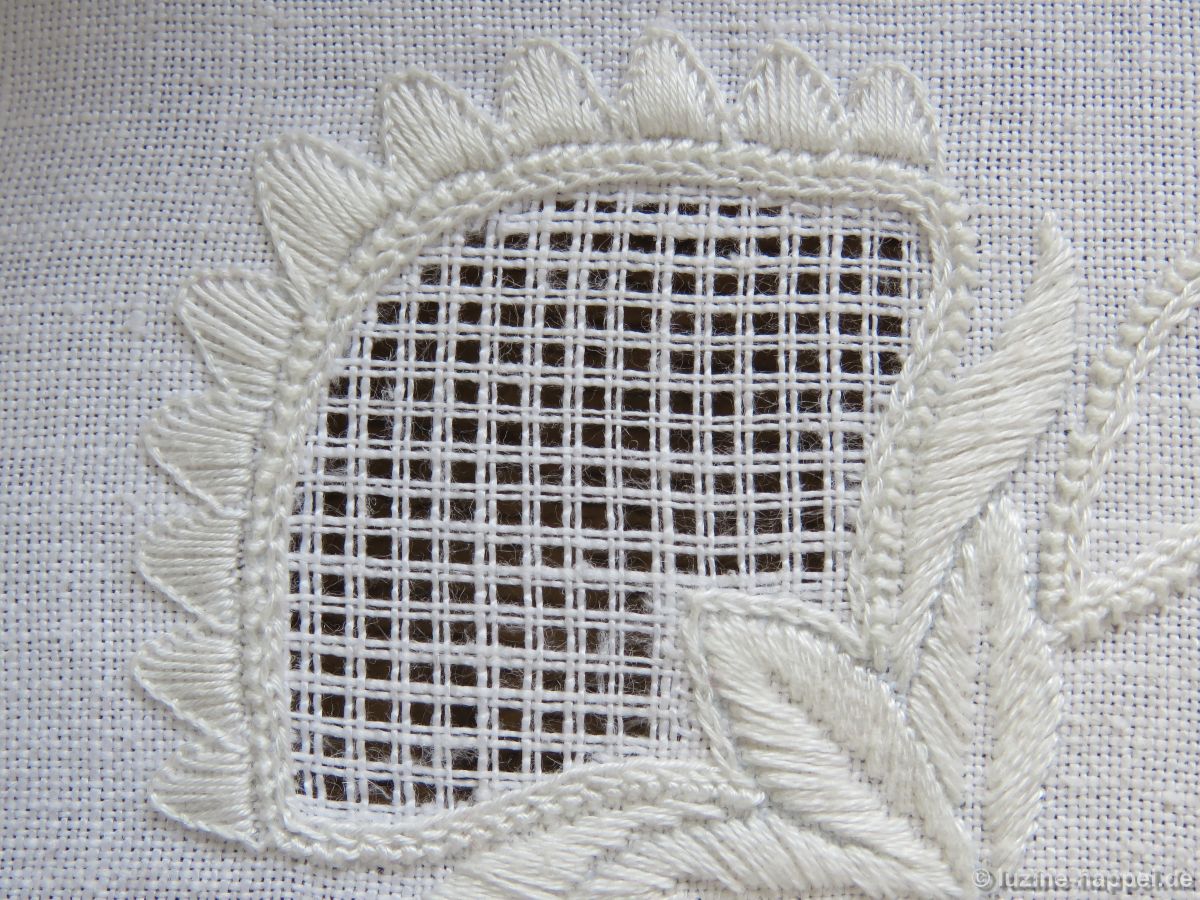
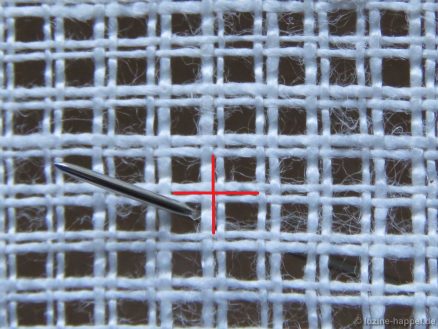
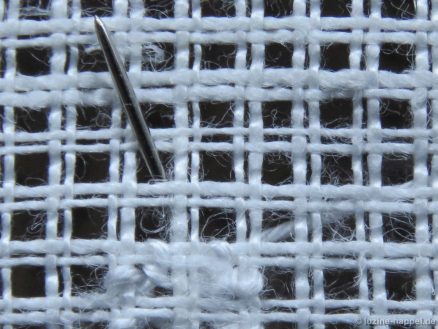
Starting at the center leave the two center threads, and then commence making the grid by always alternating between withdrawing and leaving two vertical threads. Do the same with the horizontal threads.

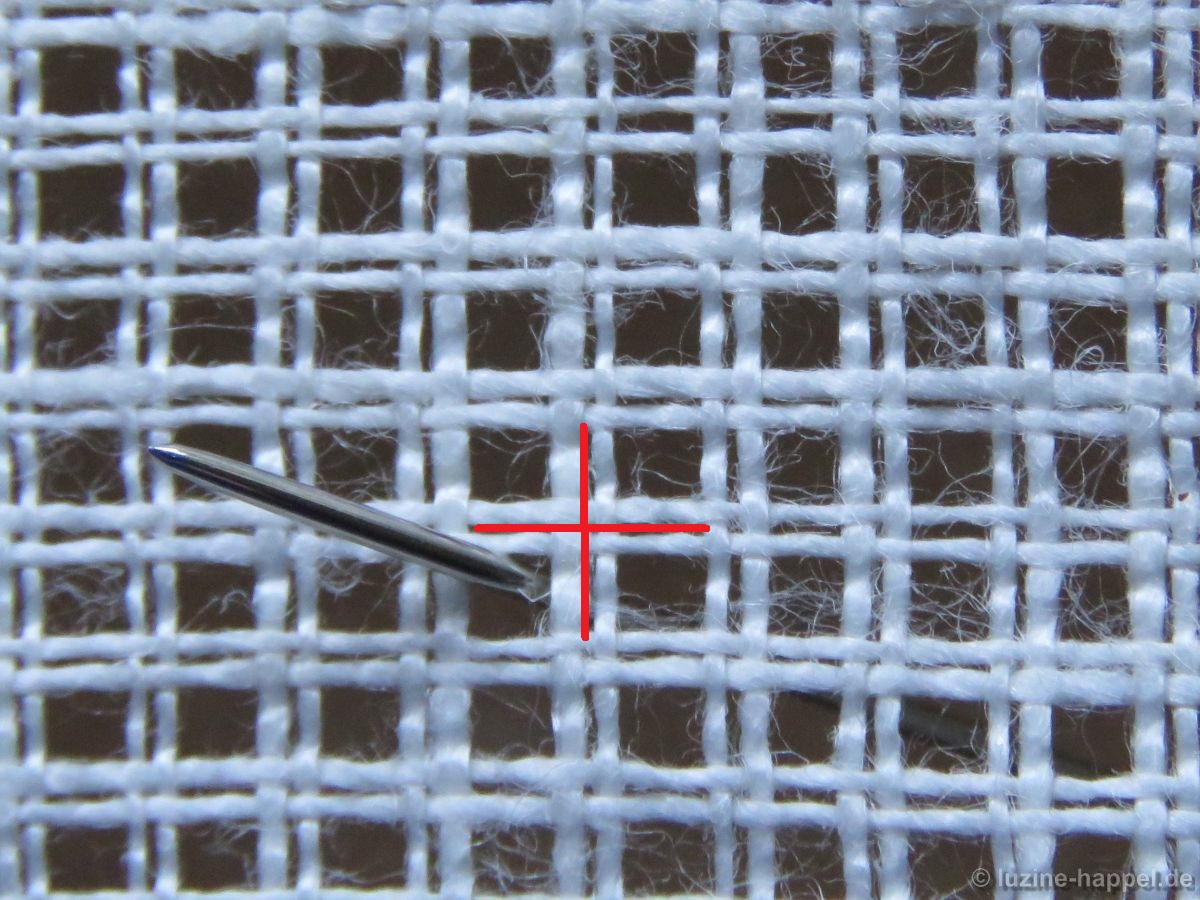
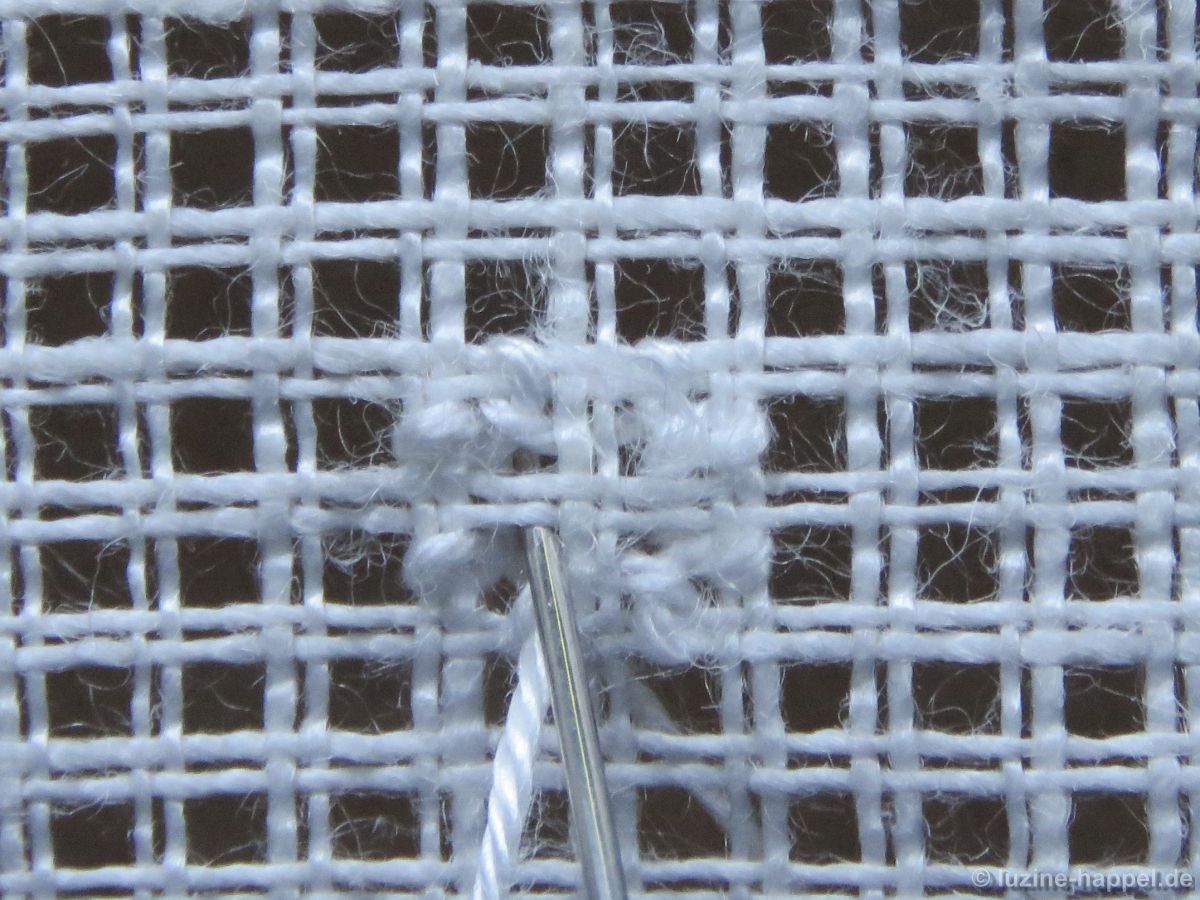
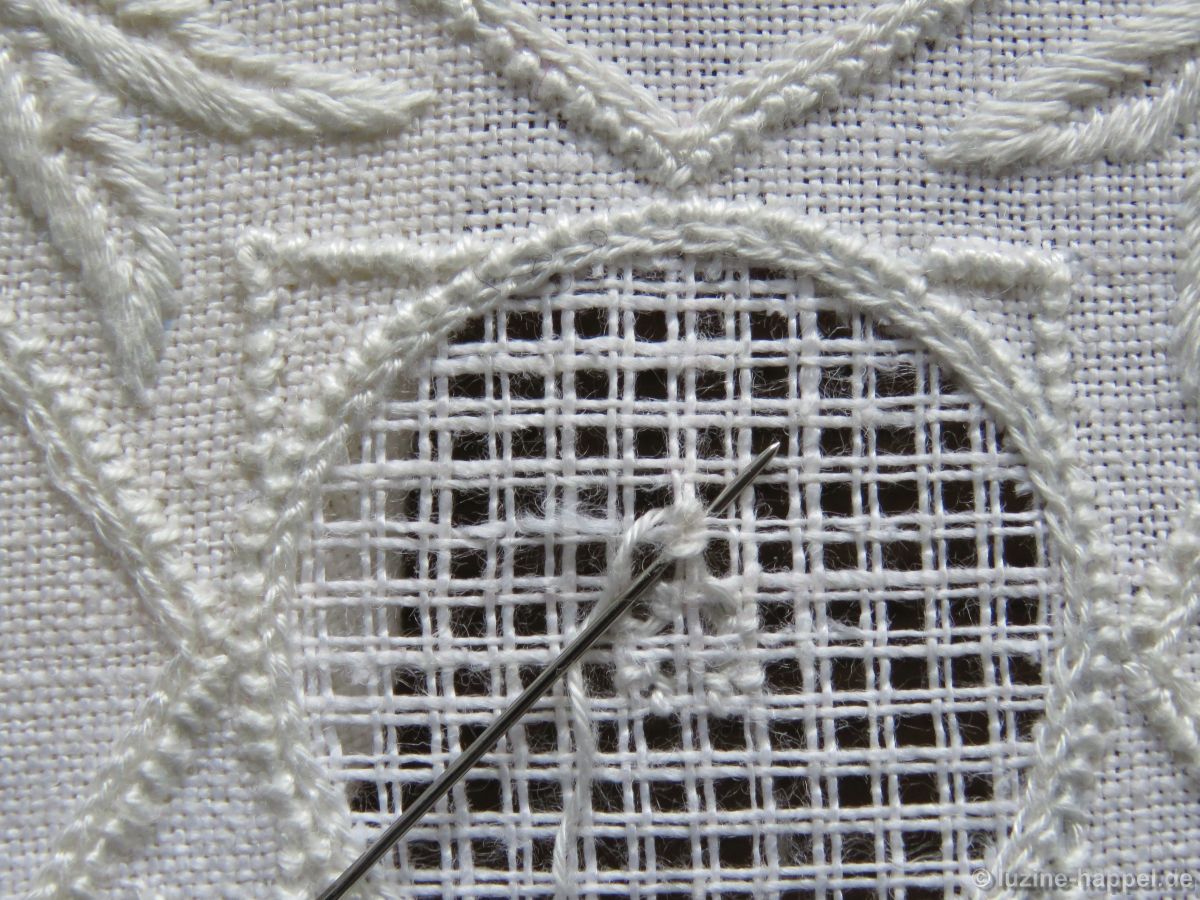
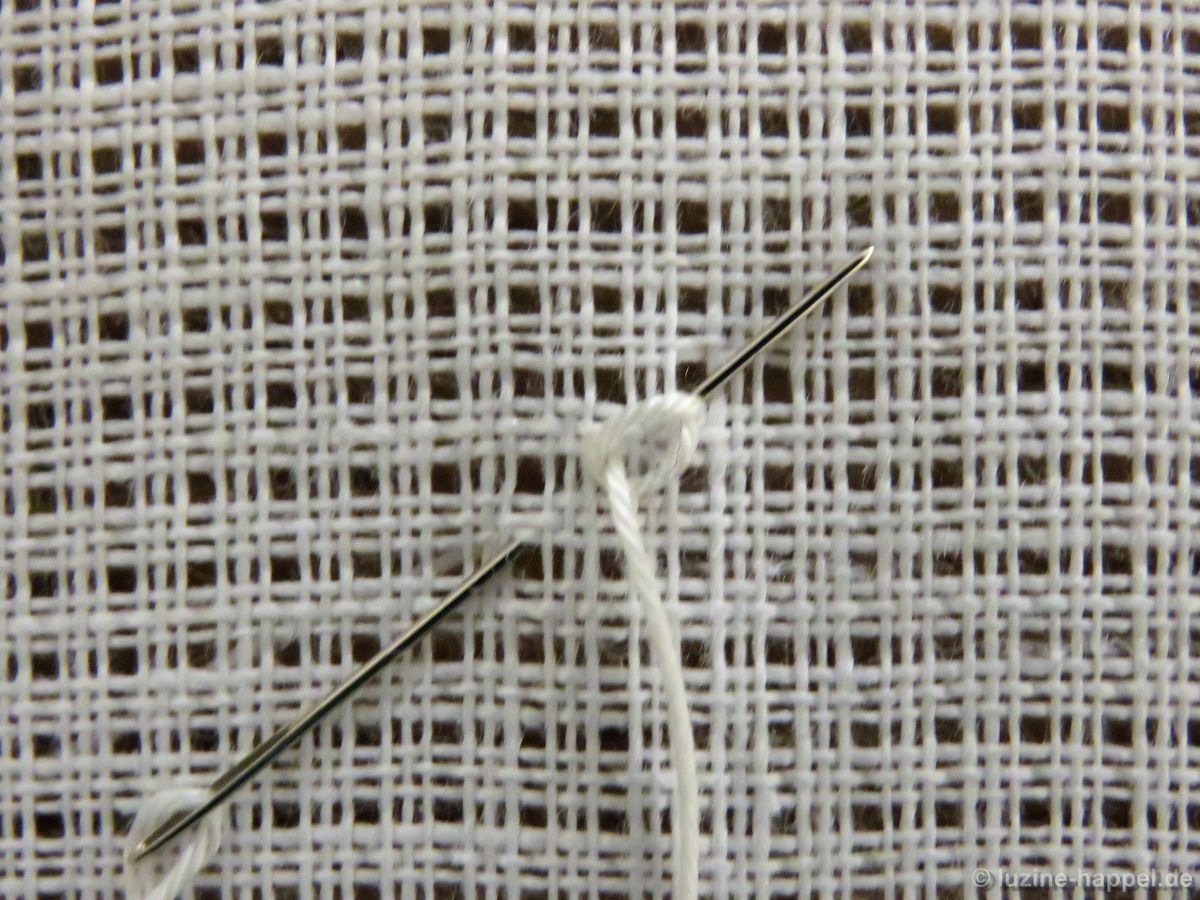
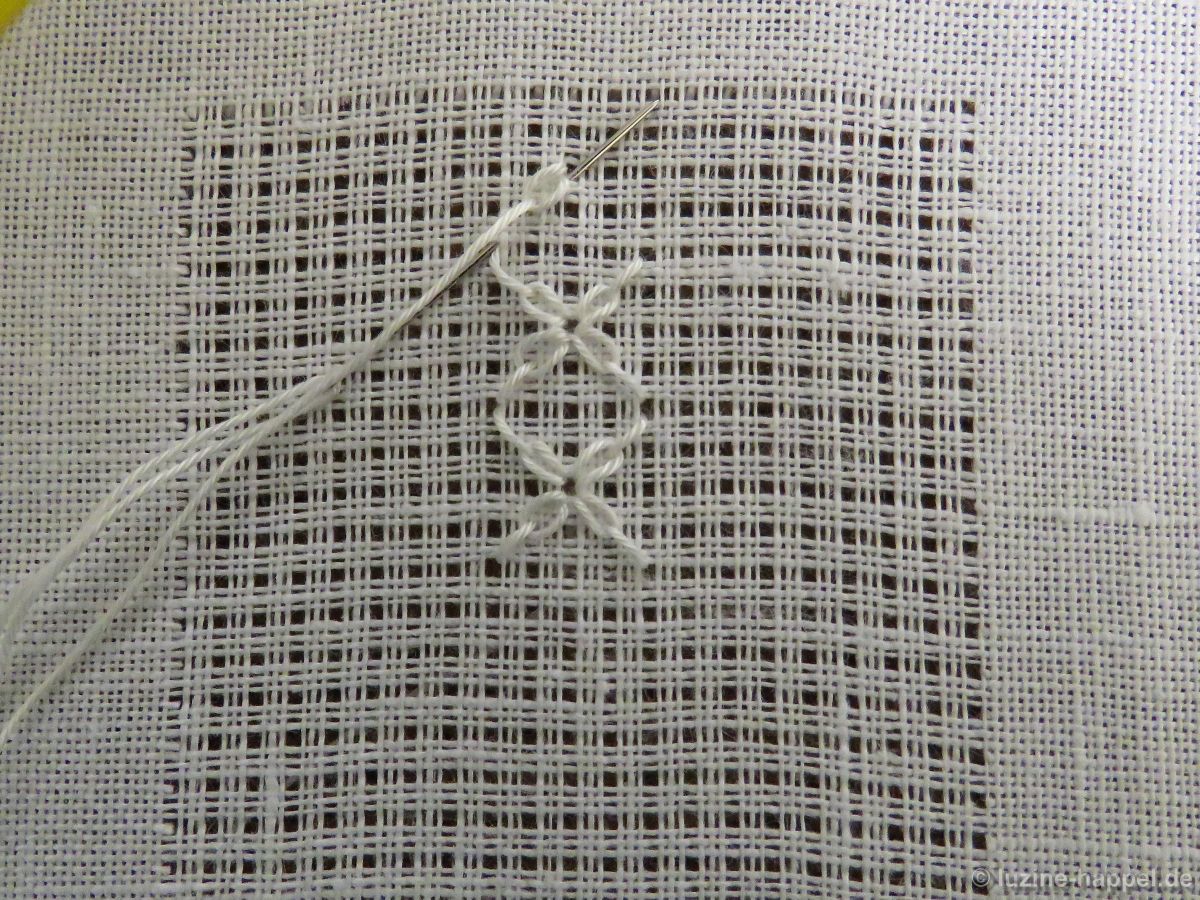
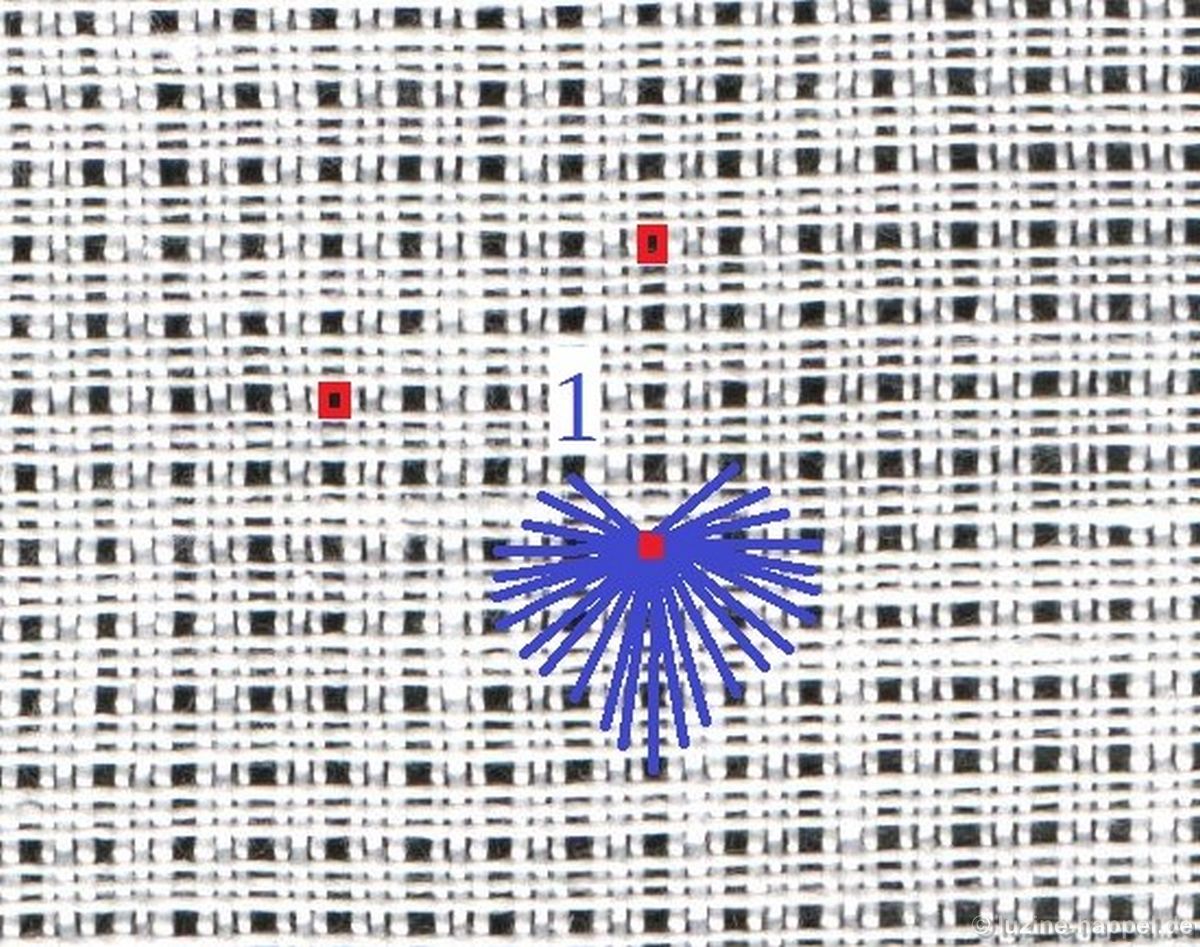
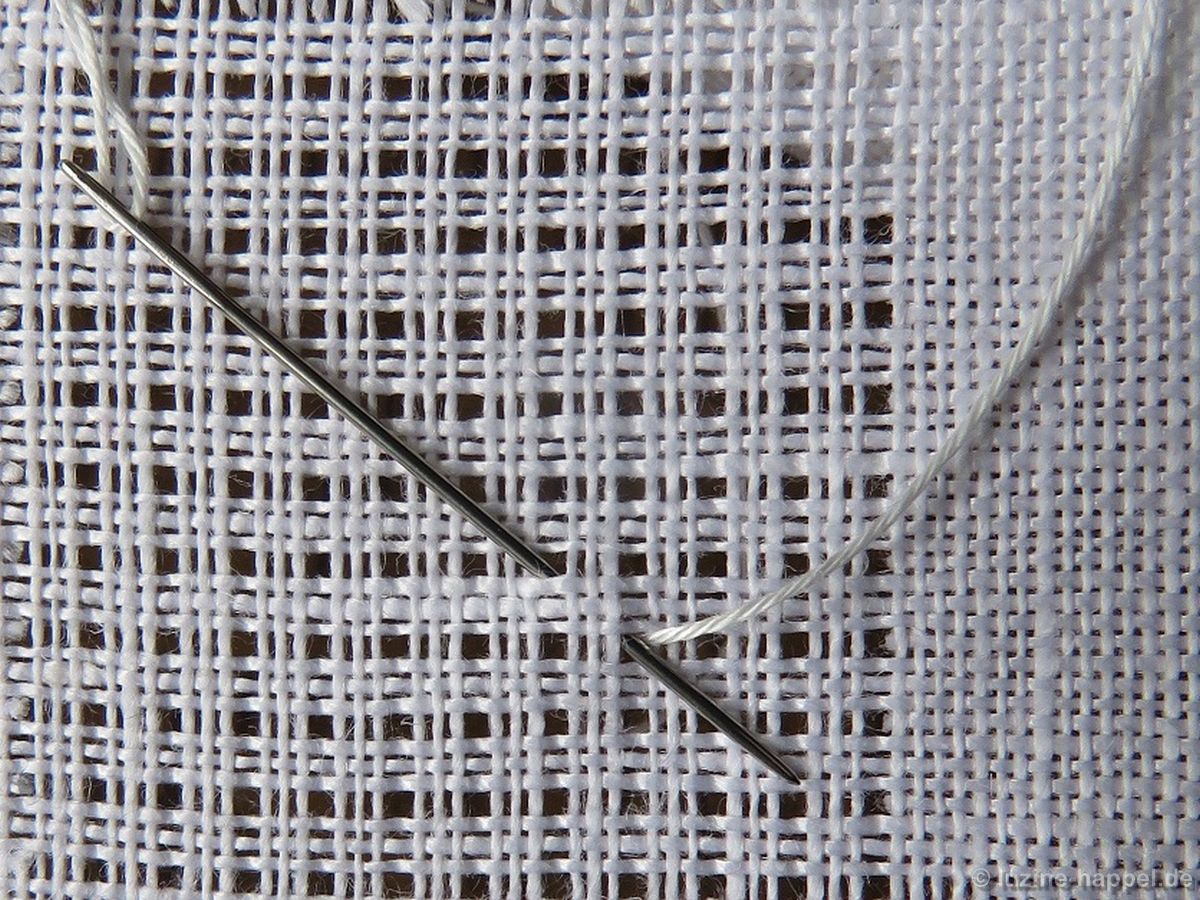
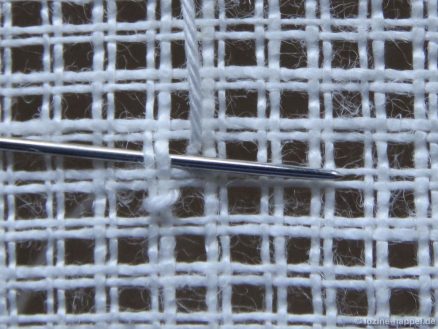
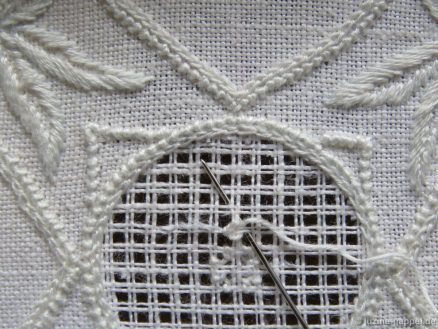
Bring the needle up in the hole at the bottom left of the center intersection (marked red).


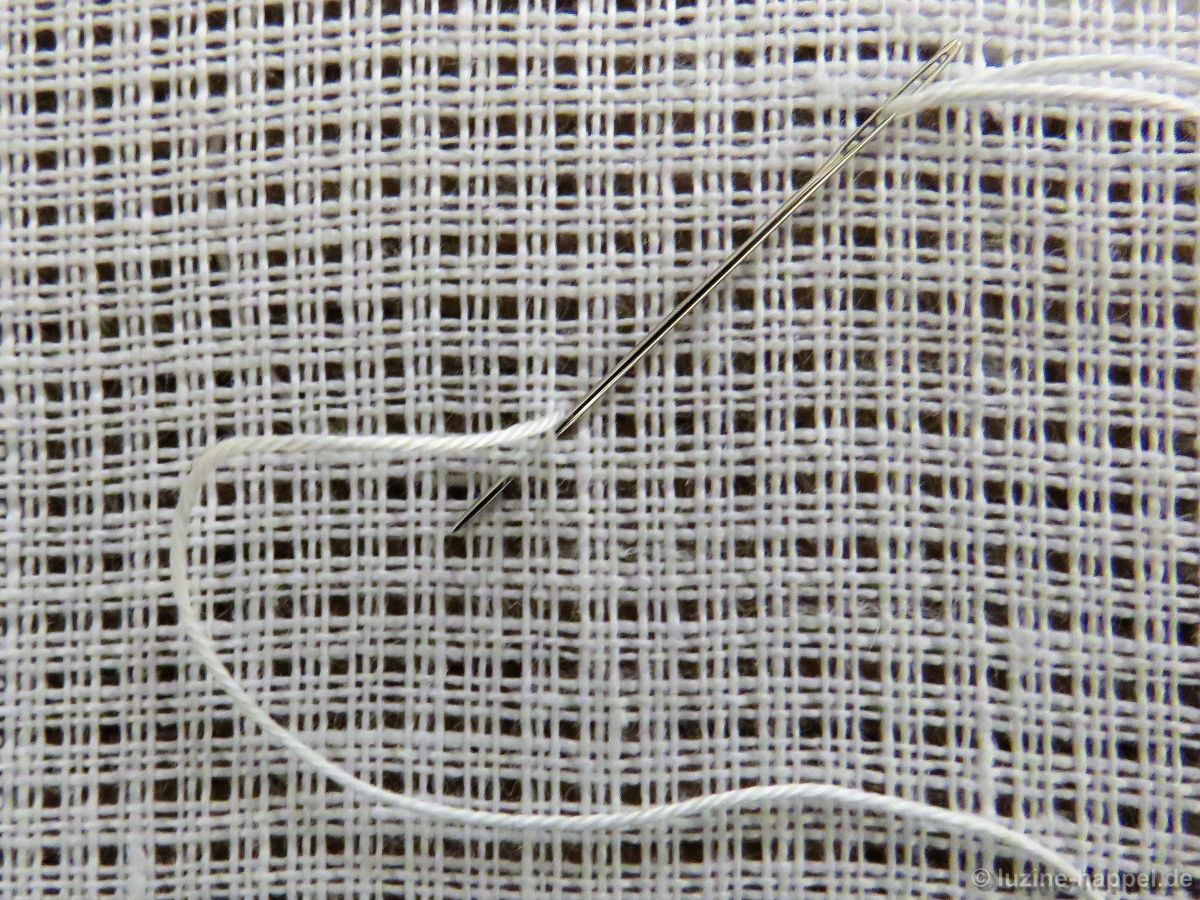
Lay the thread in a loop to the top and left, insert the needle in the next hole to the left and bring it up again in the first hole. Pull the thread through.


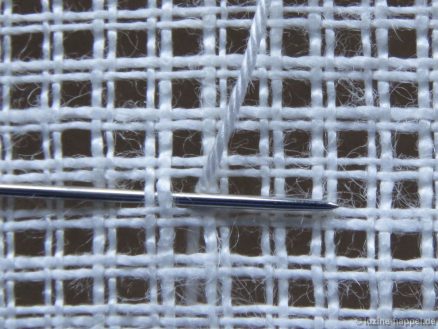
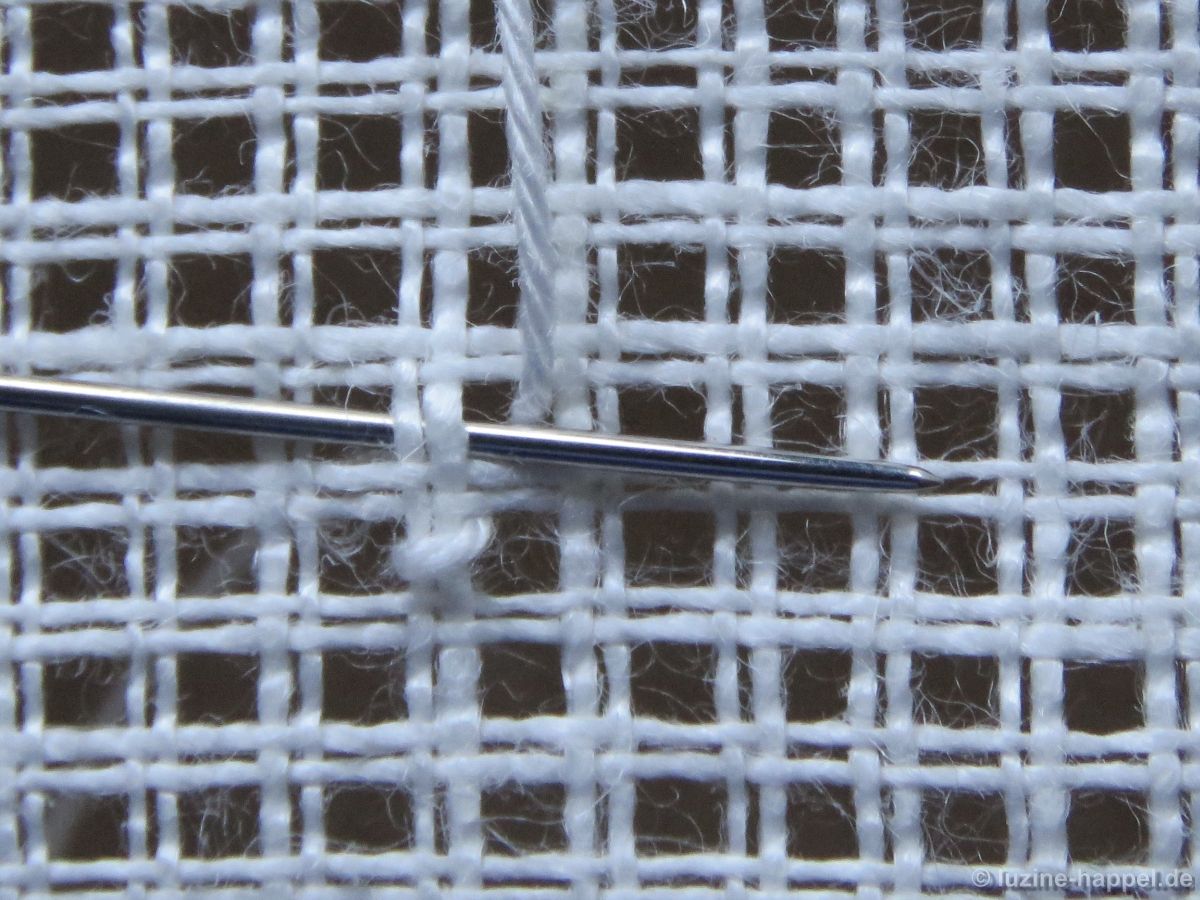
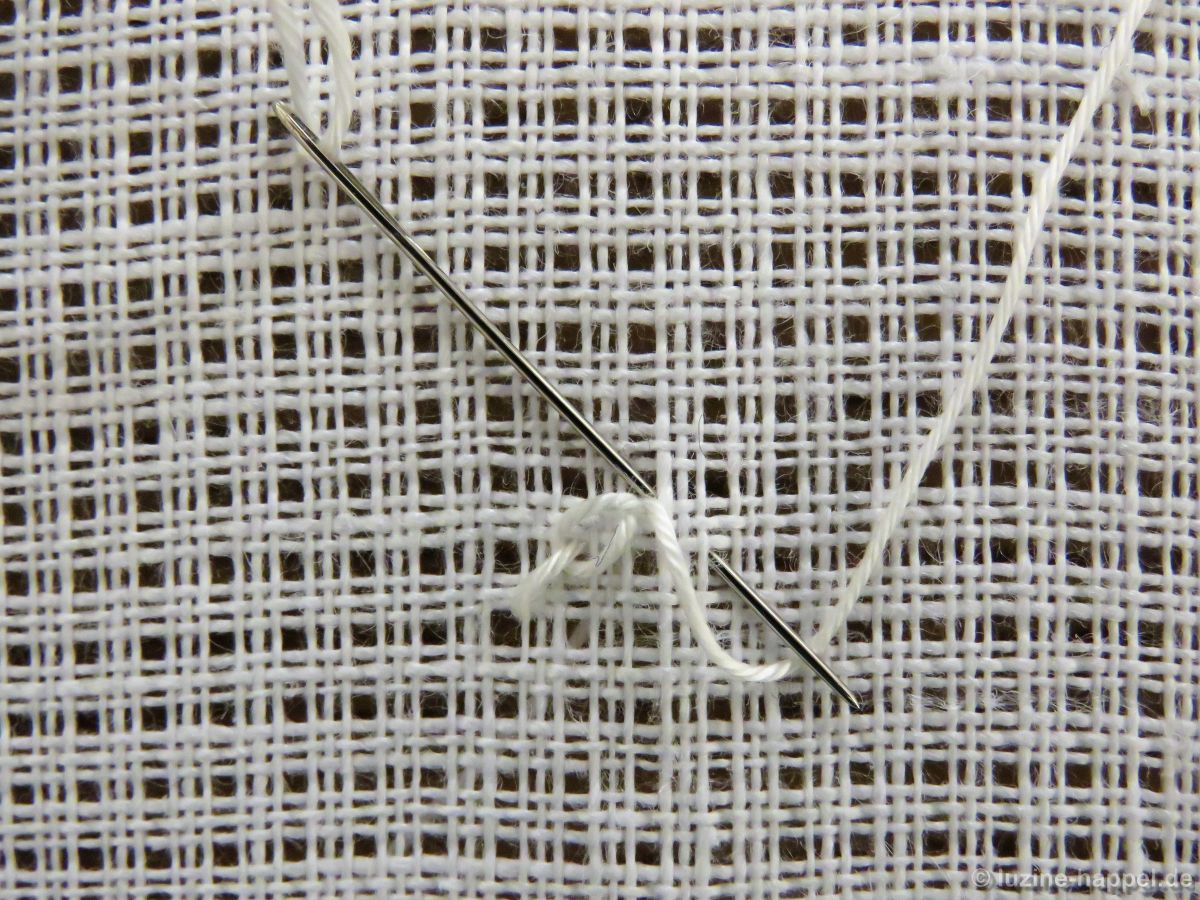
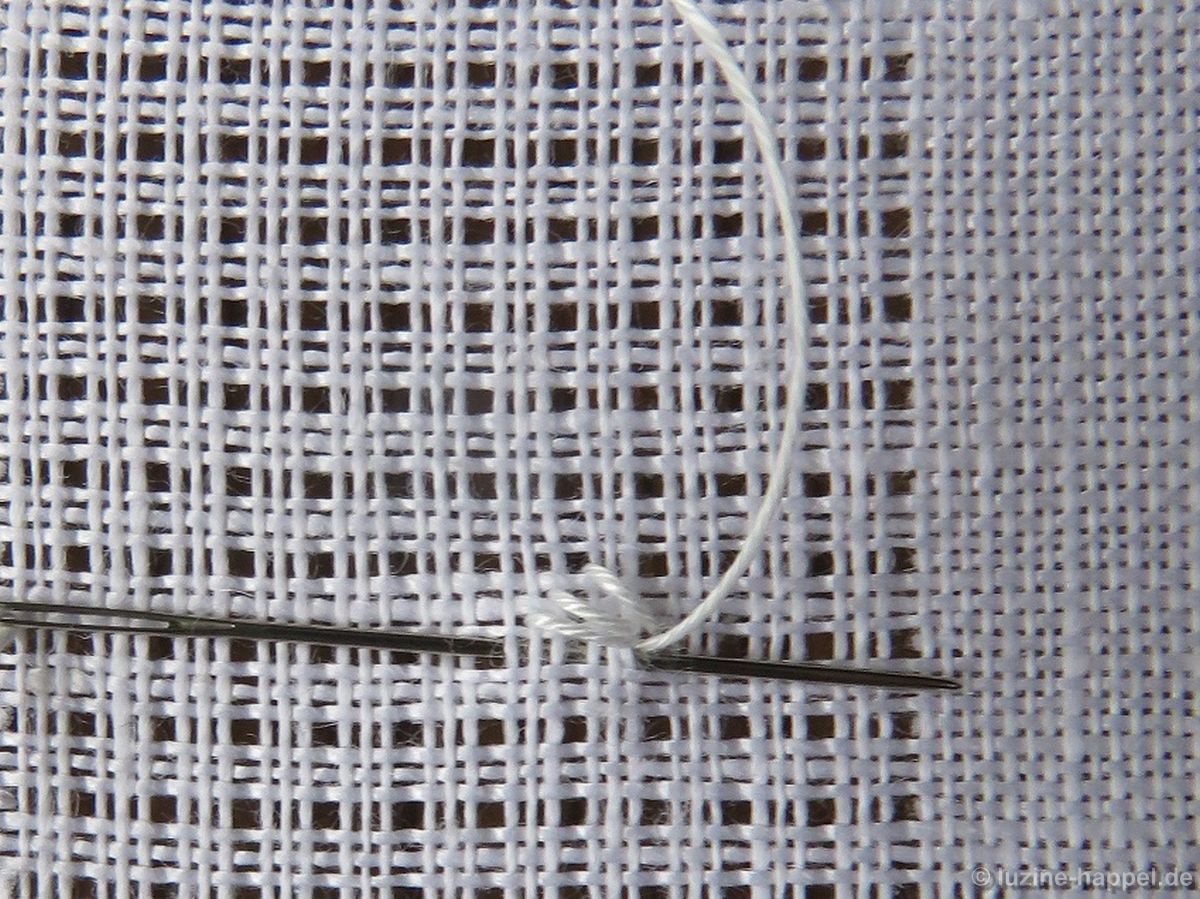
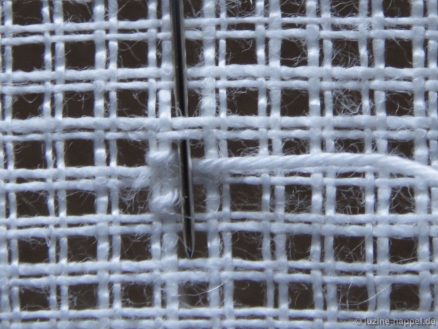
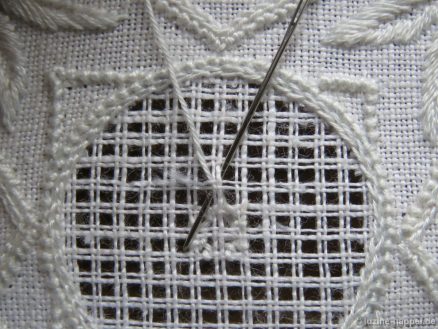
*Cross over the working thread and under the upper pair of fabric threads, and bring the needle up in the next hole upward.


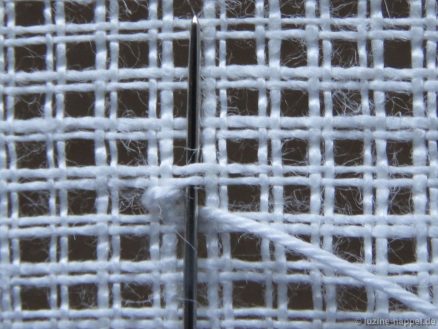
Again lay the thread in a loop to the top and left, insert the needle in the next hole to the left, and bring it up again in the previously used hole. Pull the thread through. The working thread is beneath the needle.


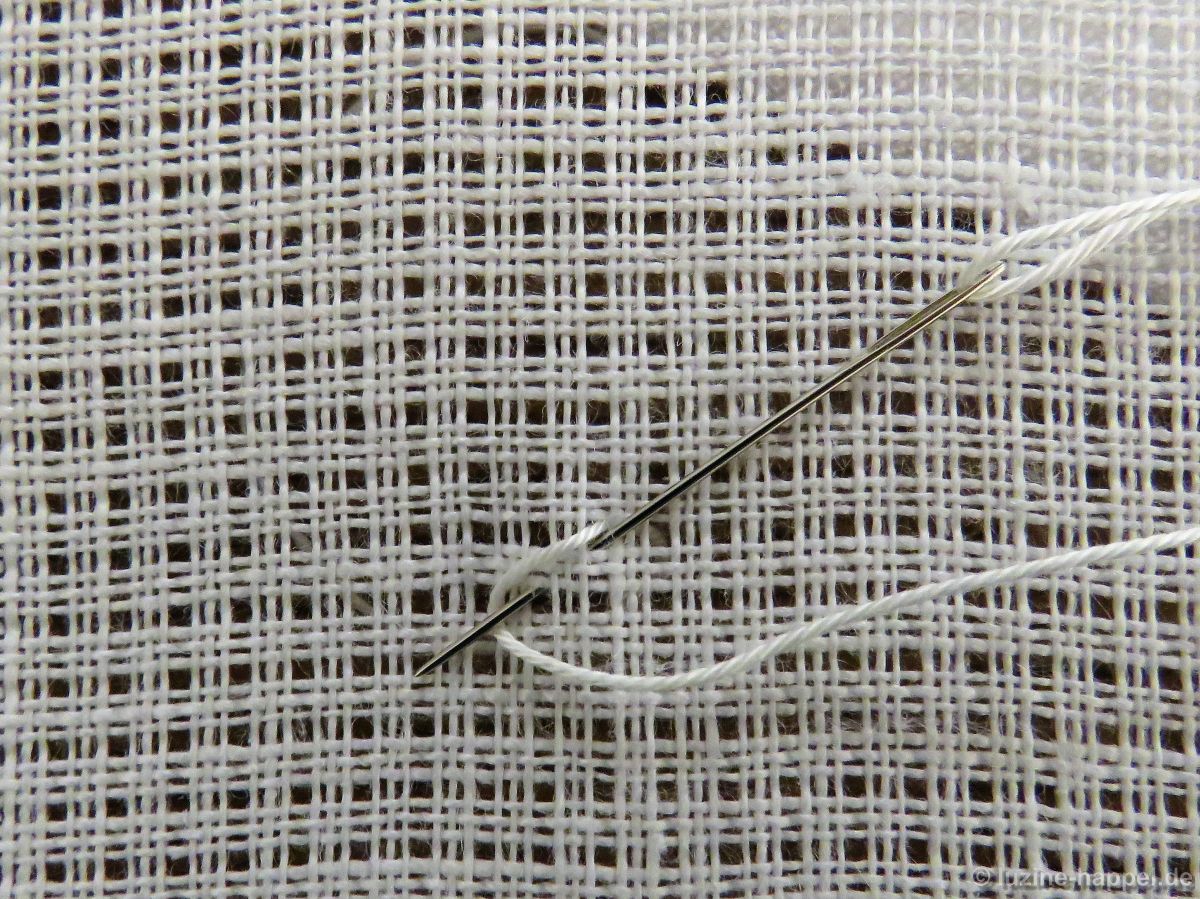
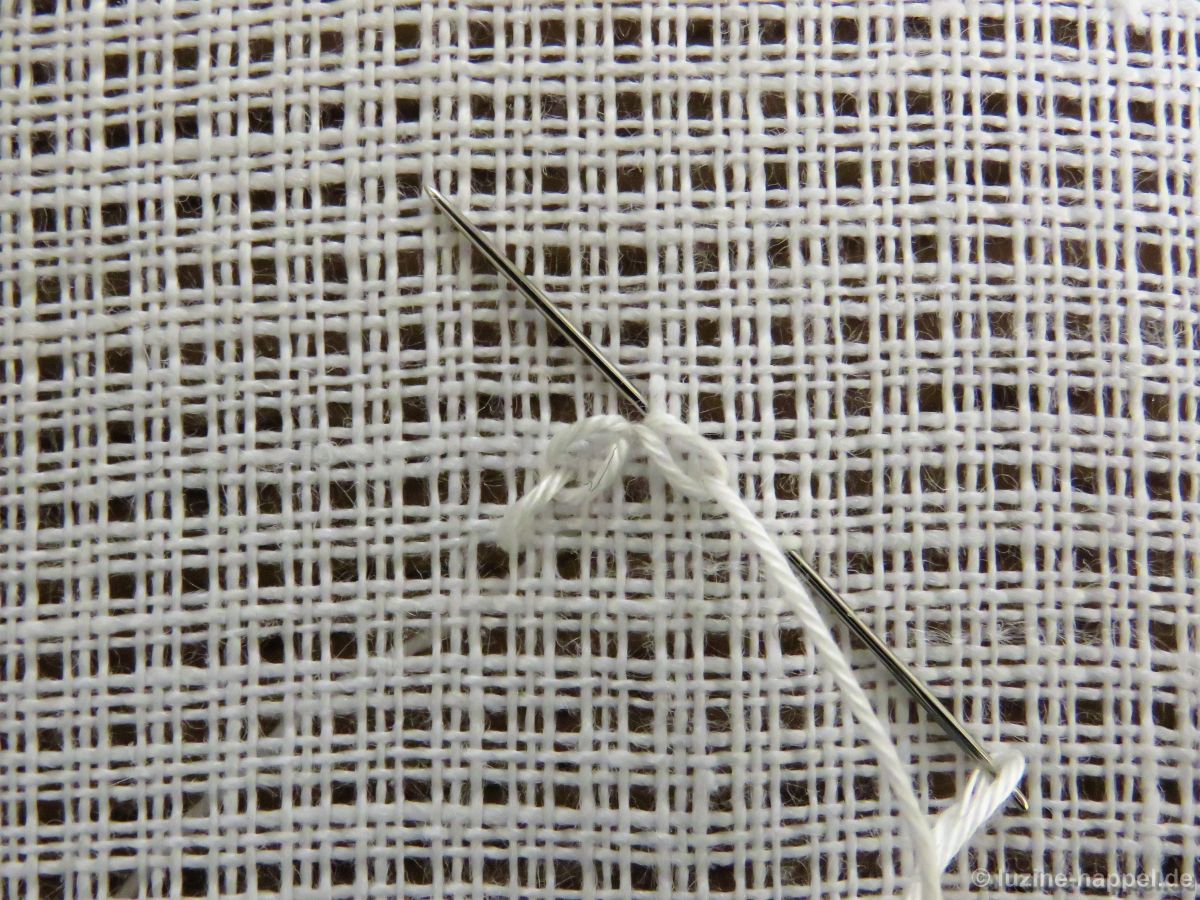
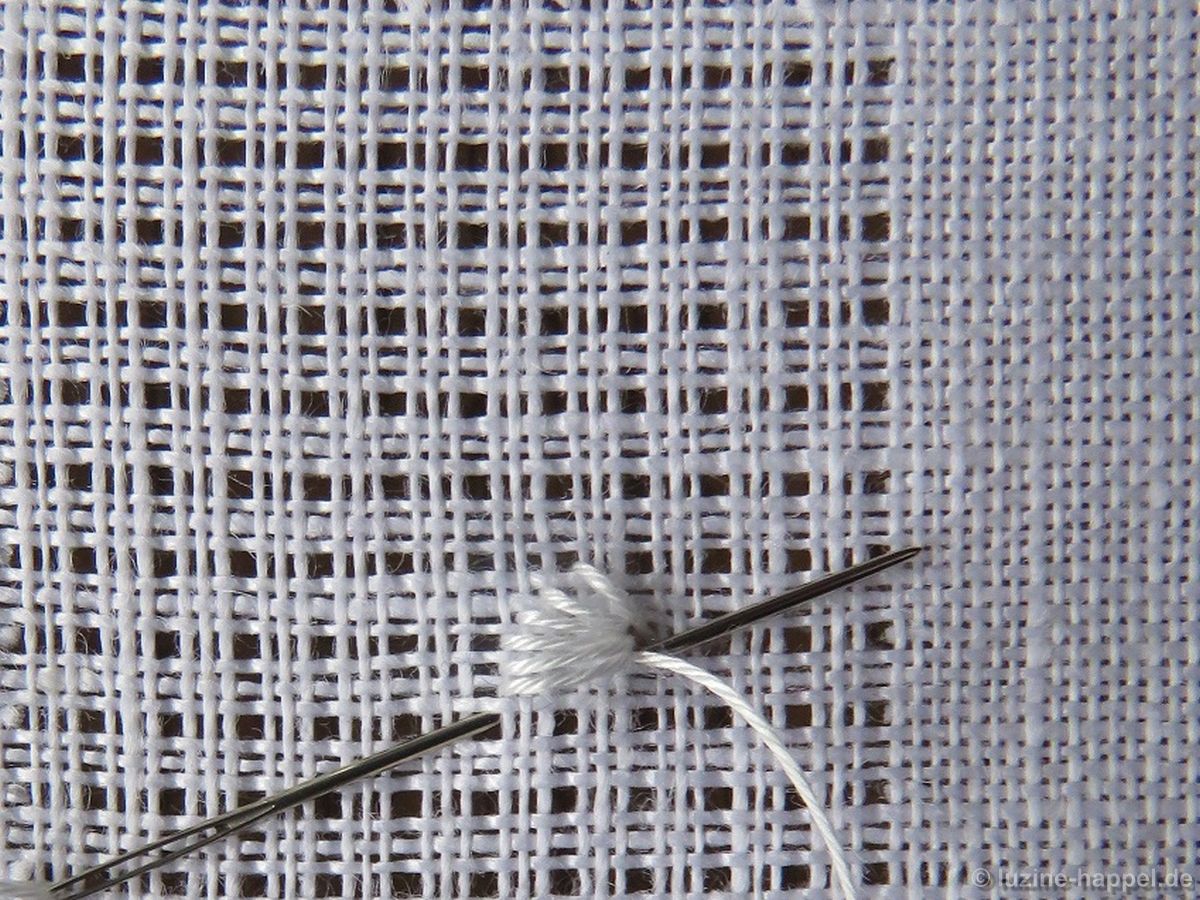
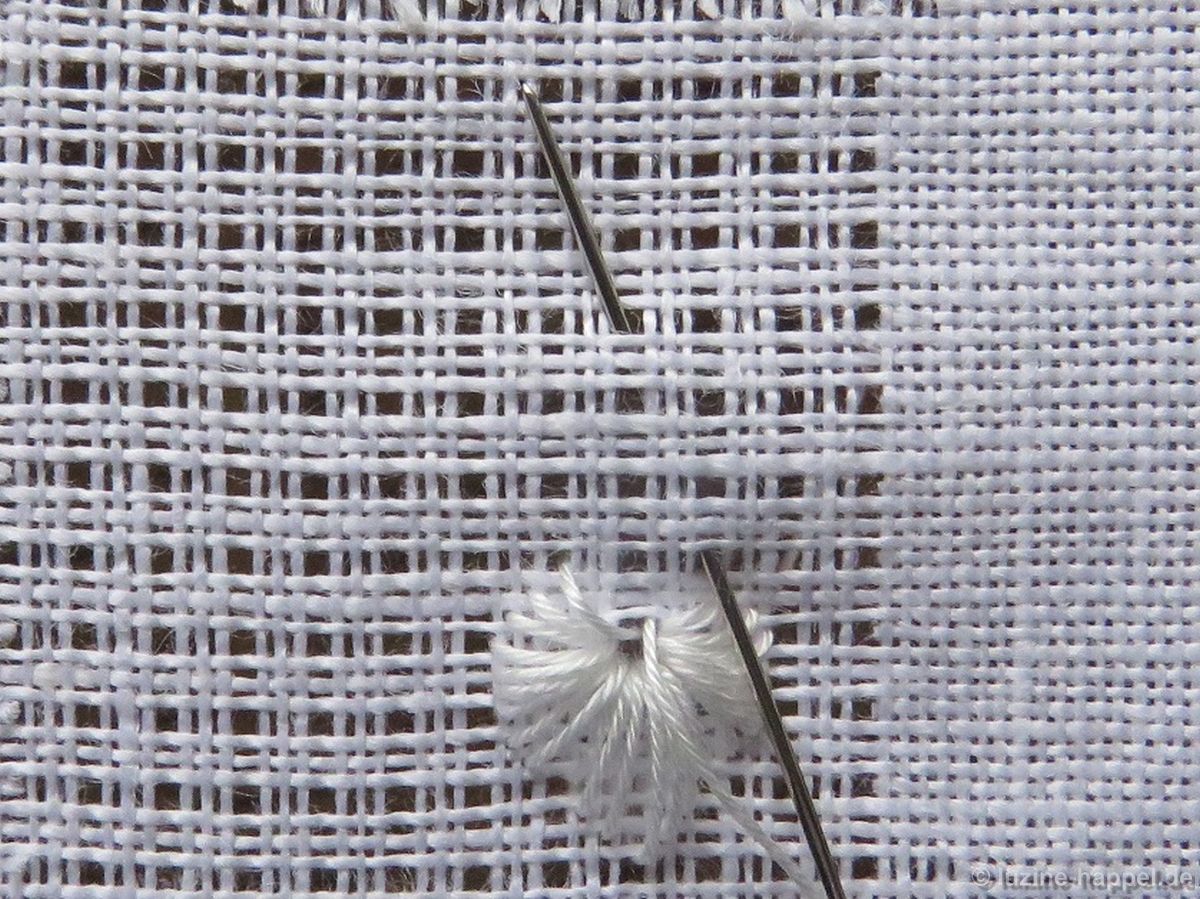
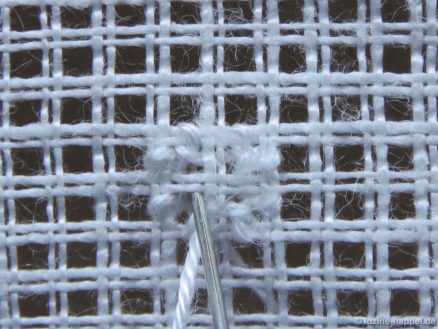
Lay a loop to the top right, insert the needle in the next hole upward, and bring it up again in the previously used hole.


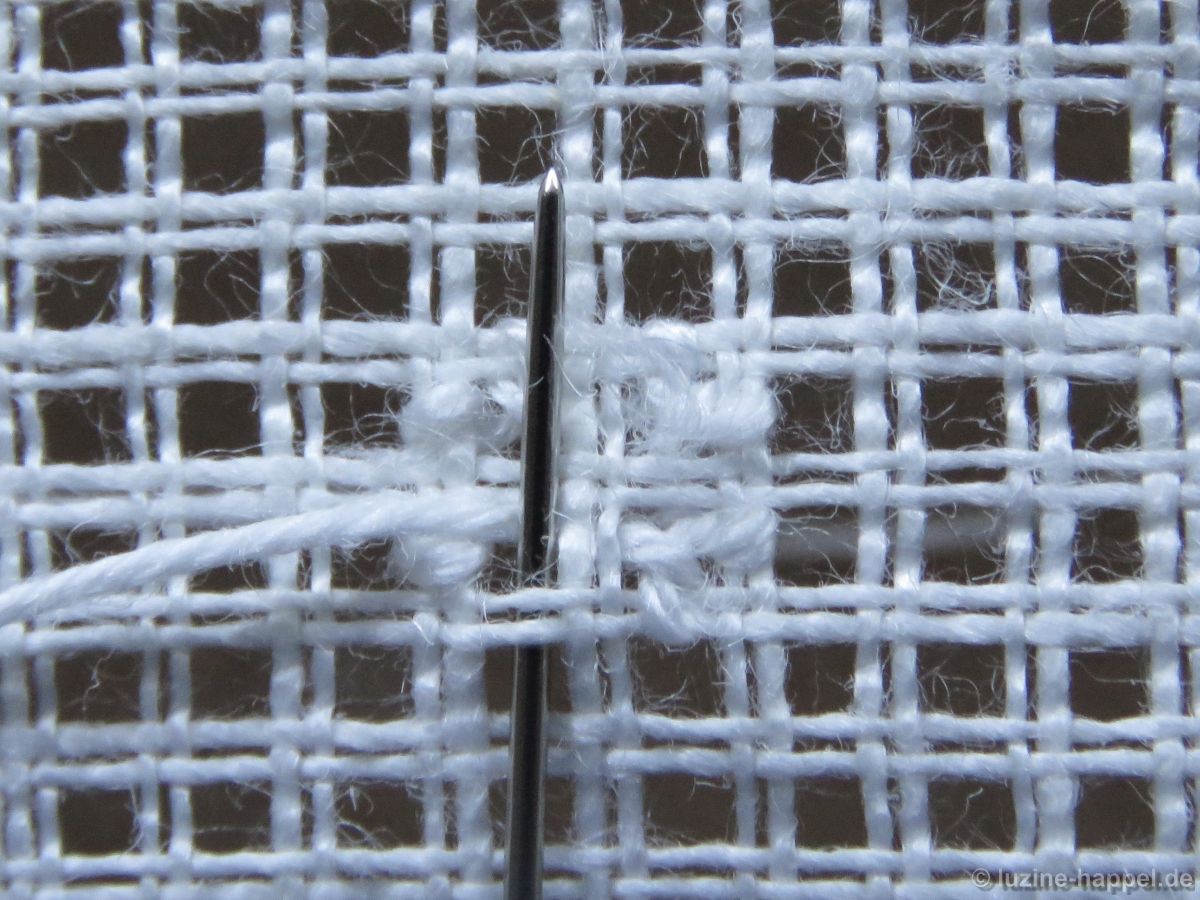
Pull the thread through and turn the piece 90° counterclockwise*. Repeat the steps (*) until a square of 2 X 2 holes is filled with two sections of a Rose stitch each. The last stitch is worked in the bottom left hole of the square. From the last stitch, cross over the working thread


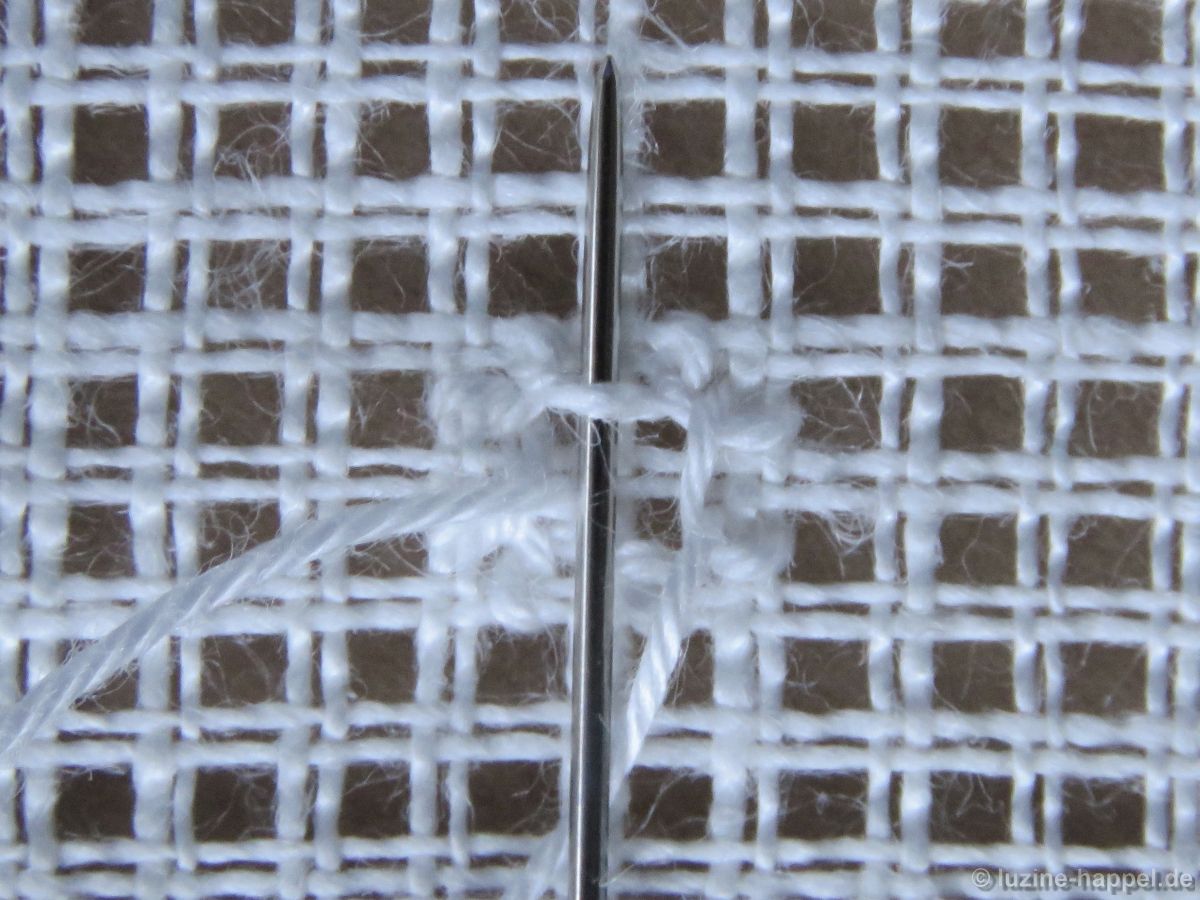
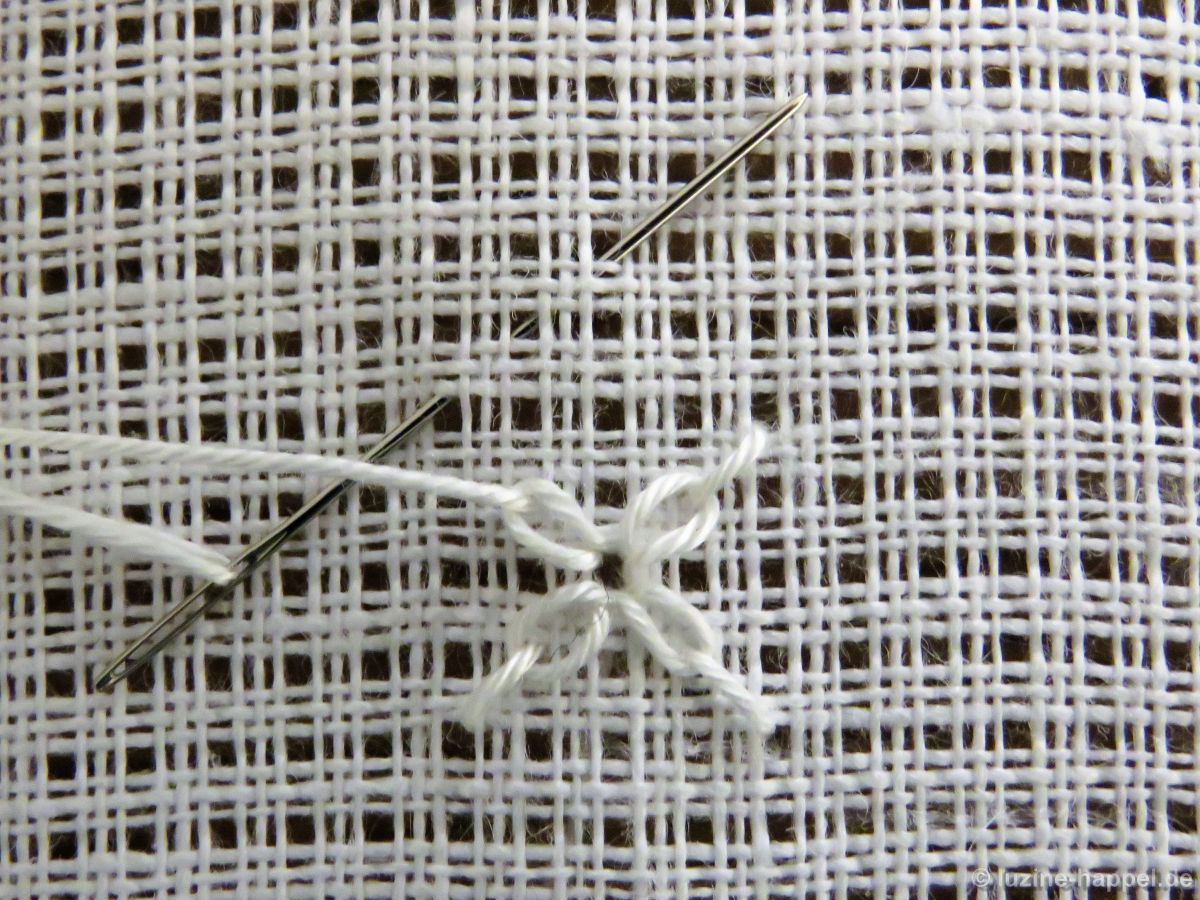
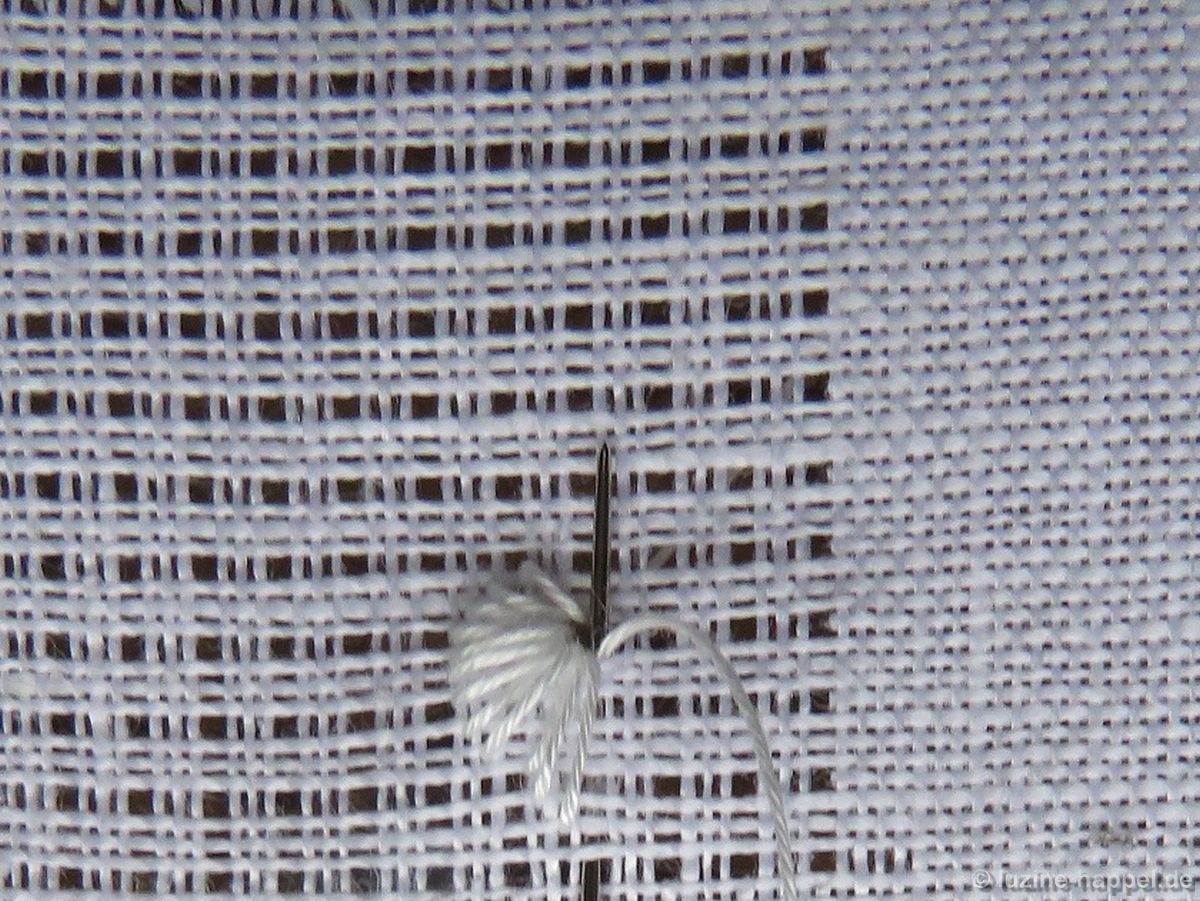
and insert the needle into the same hole.


On the back, slide the working thread under the former middle top stitch.


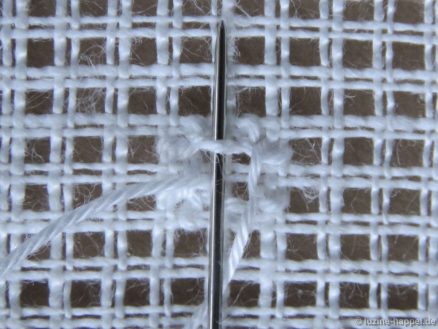
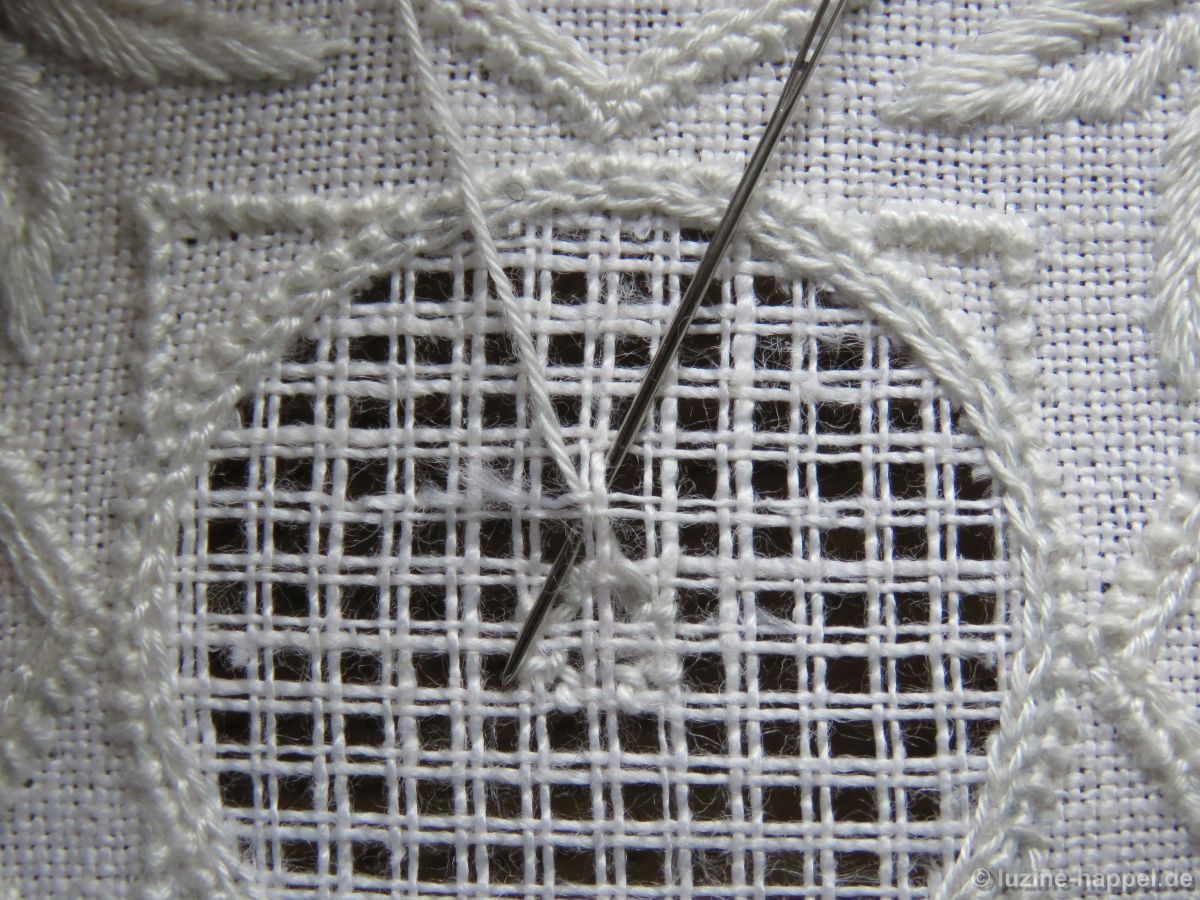
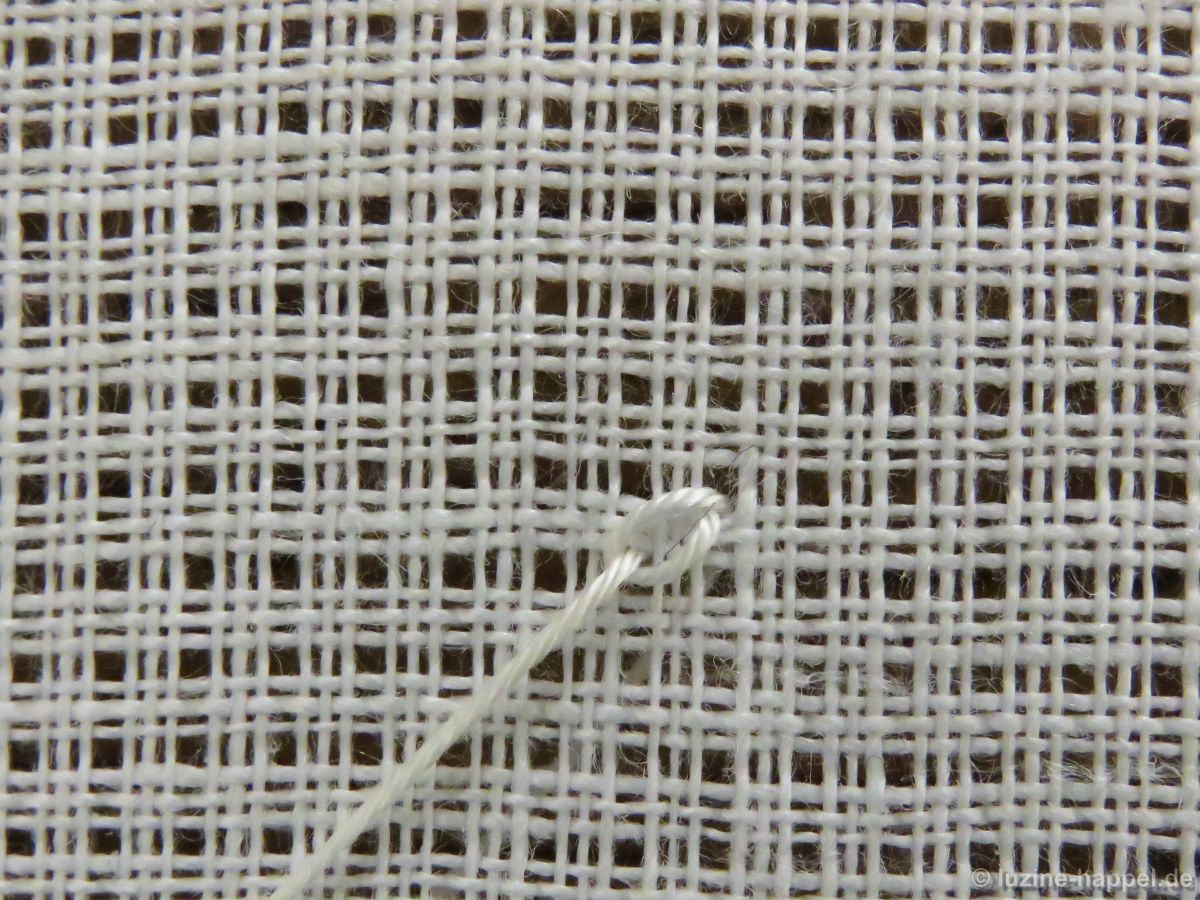
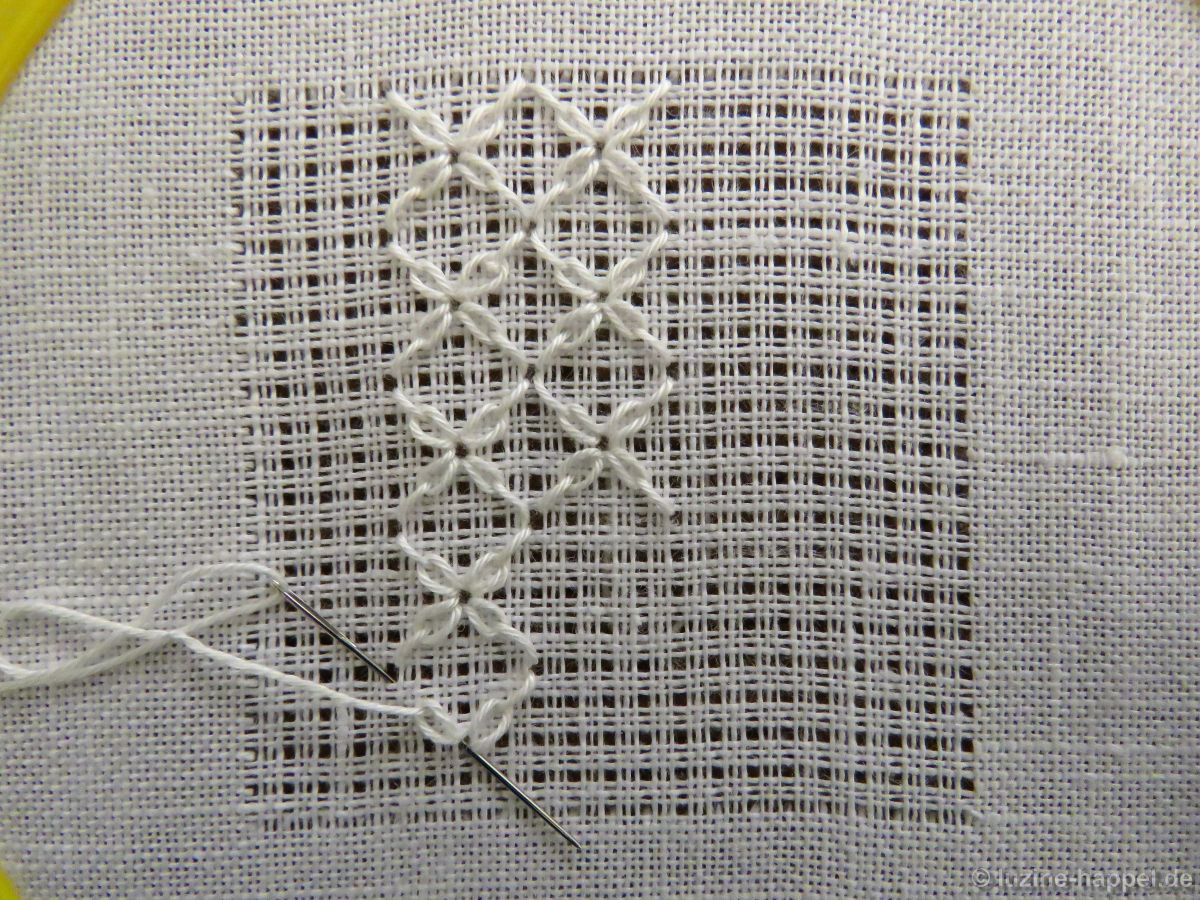
Looking at the next intersection above, bring the needle up in the top left hole to begin a Four-Sided stitch.


Cross over the pair of threads to the right, insert the needle, and bring it up diagonally in the bottom left hole.


Cross over the pair of threads to the right, insert the needle, and bring it up diagonally in the upper left hole.


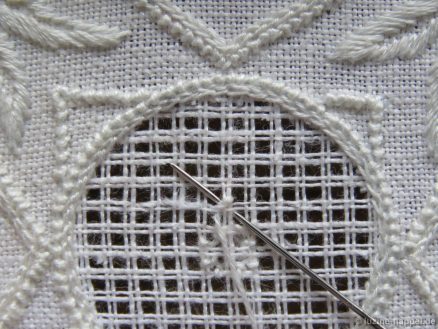
Cross over the pair of threads downward, insert the needle, and bring it up diagonally in the upper right hole.


Cross over the pair of threads downward, insert the needle, and bring it up two holes up and one hole to the left. Start here with the next square of 2 X 2 holes to be filled with two sections of a Rose stitch each.


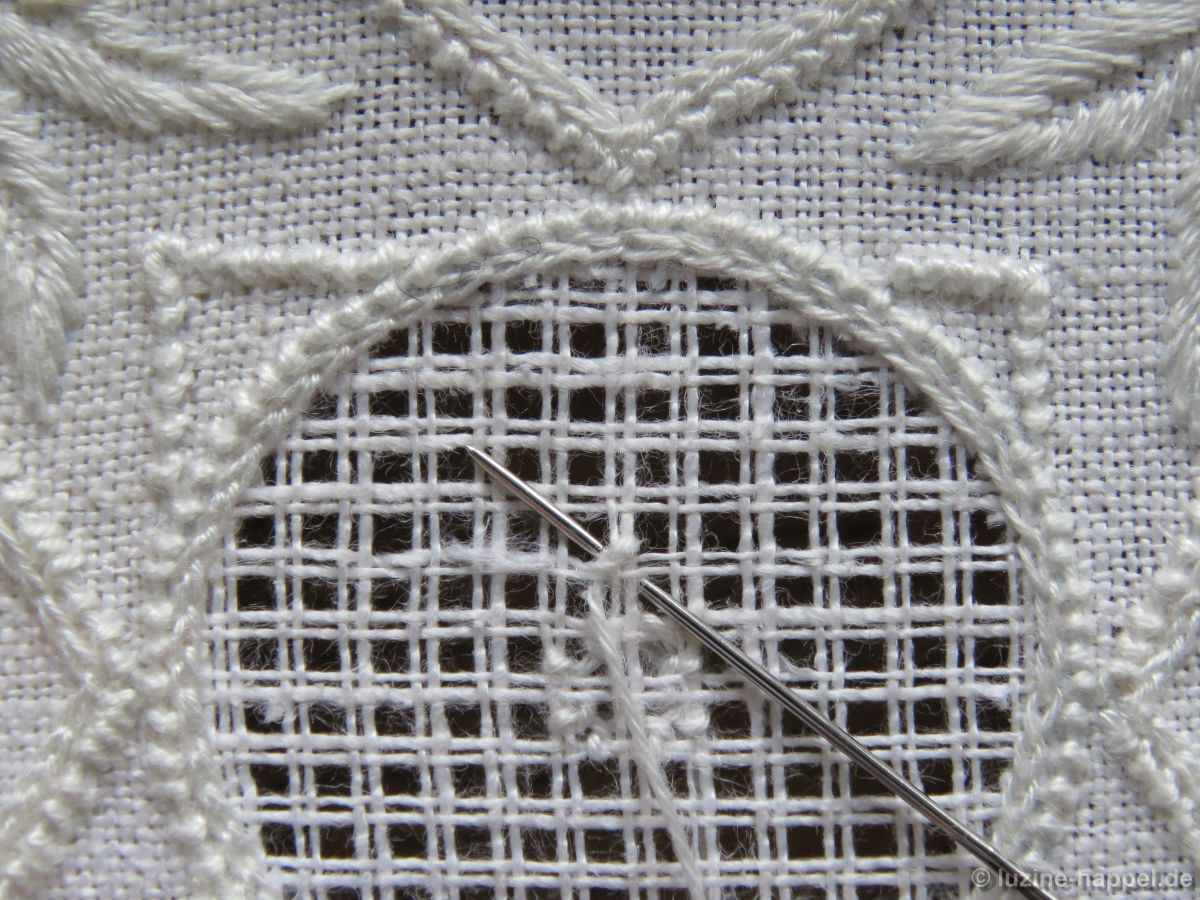
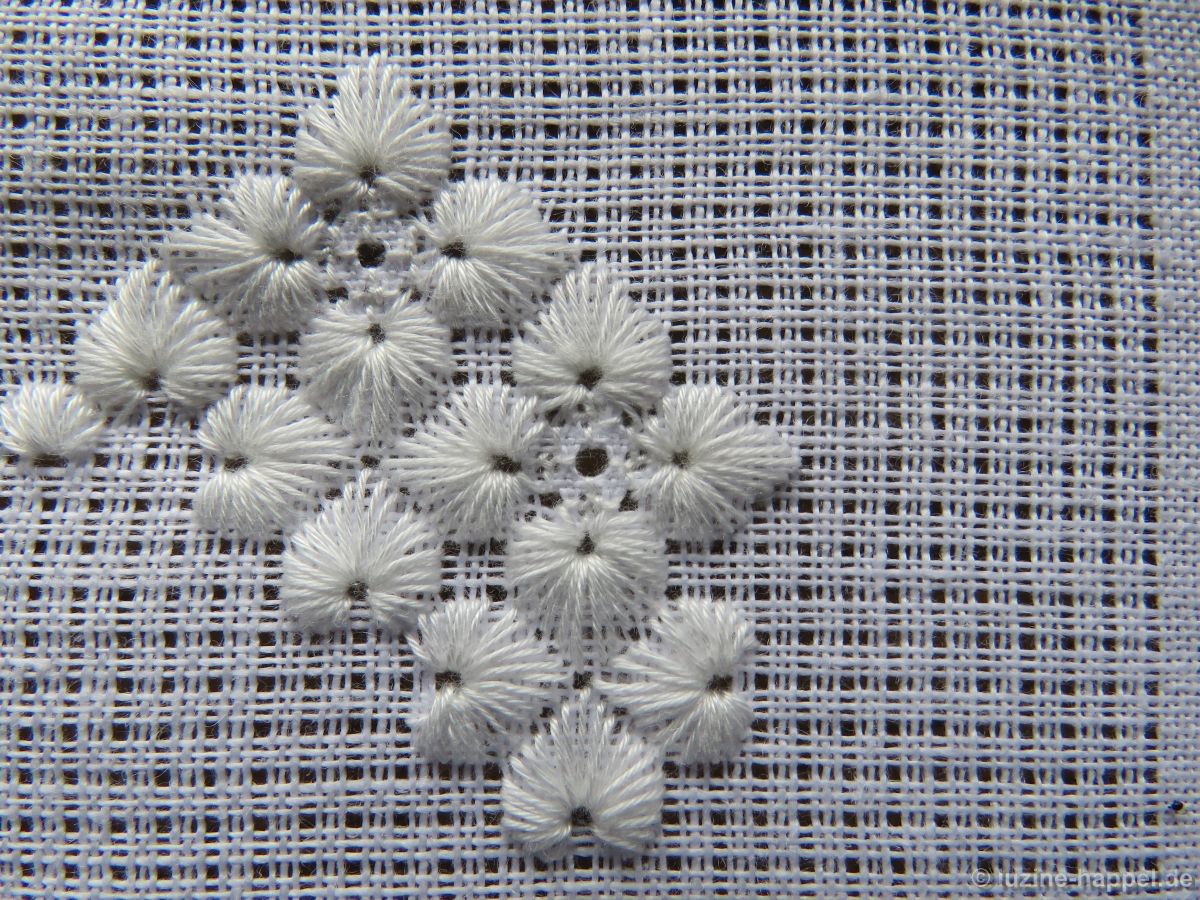
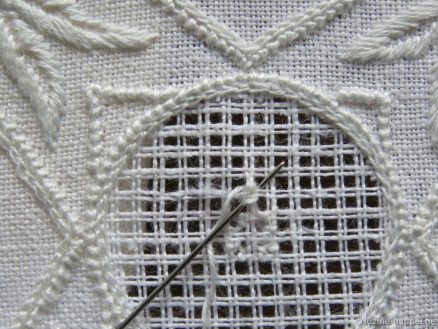
Work rows of alternating 2 X 2 squares and Four-Sided stitches.


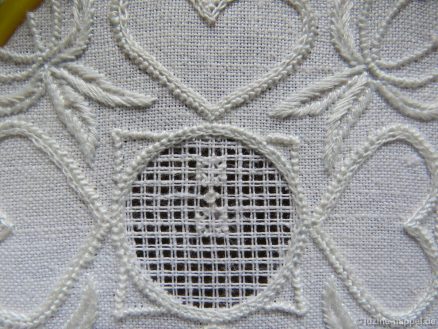
Work the next row staggered.


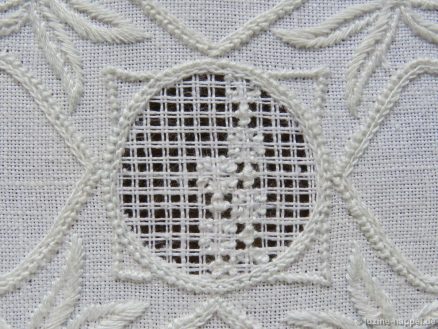
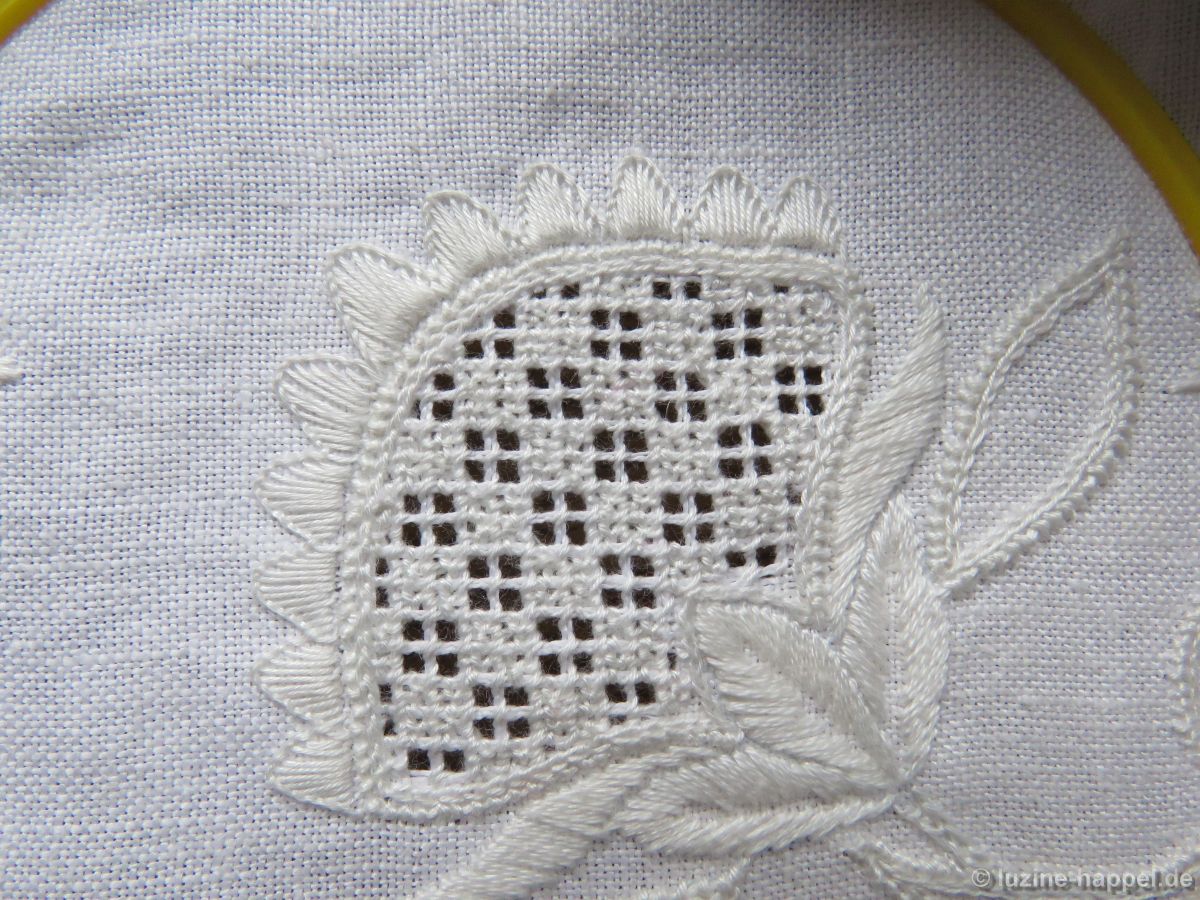
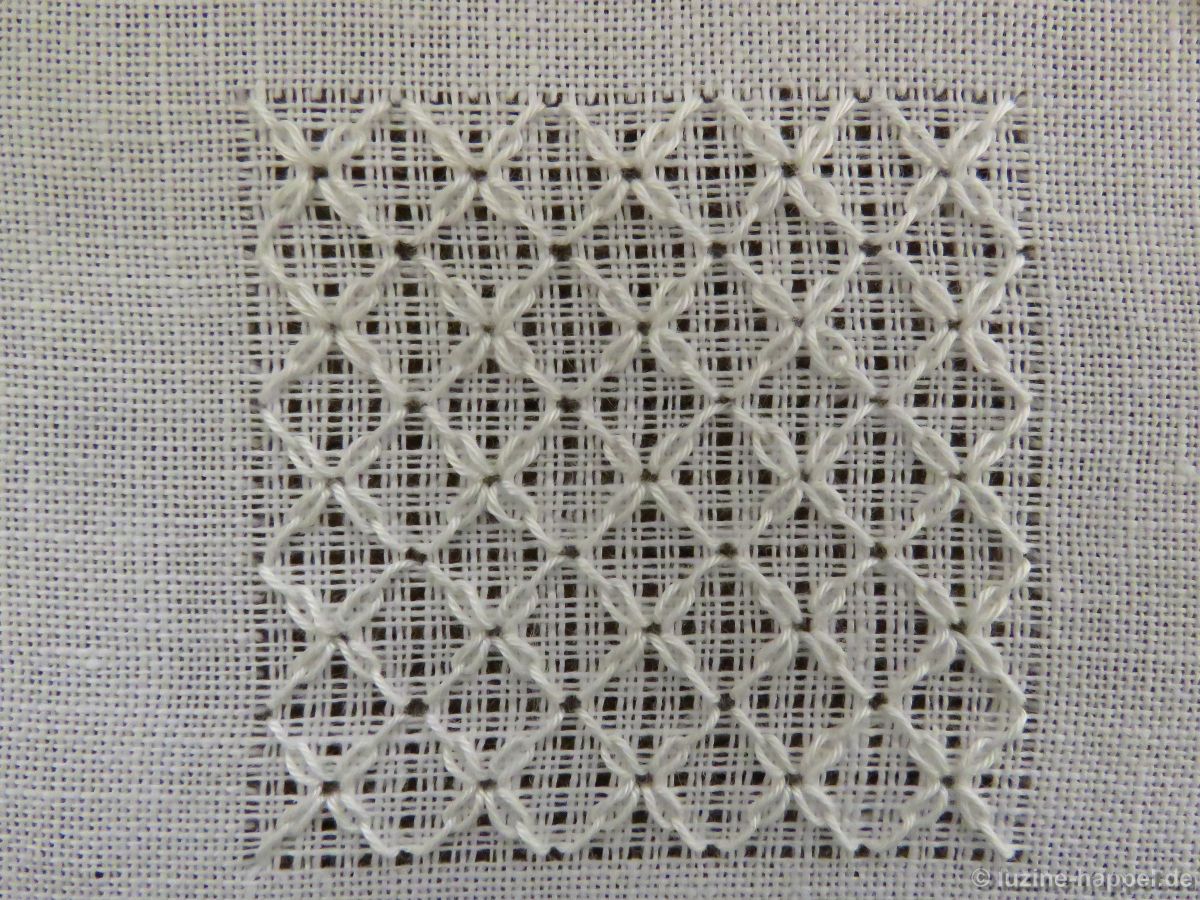
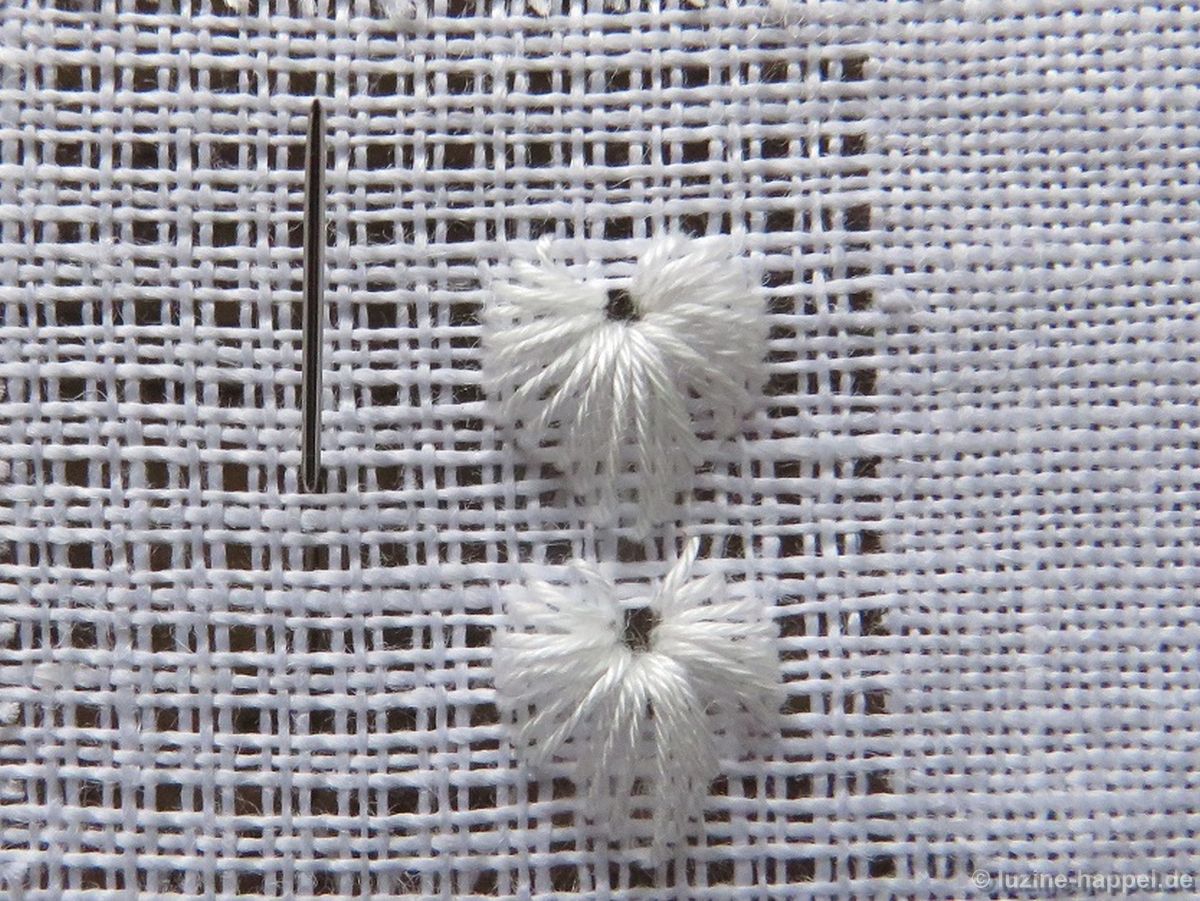
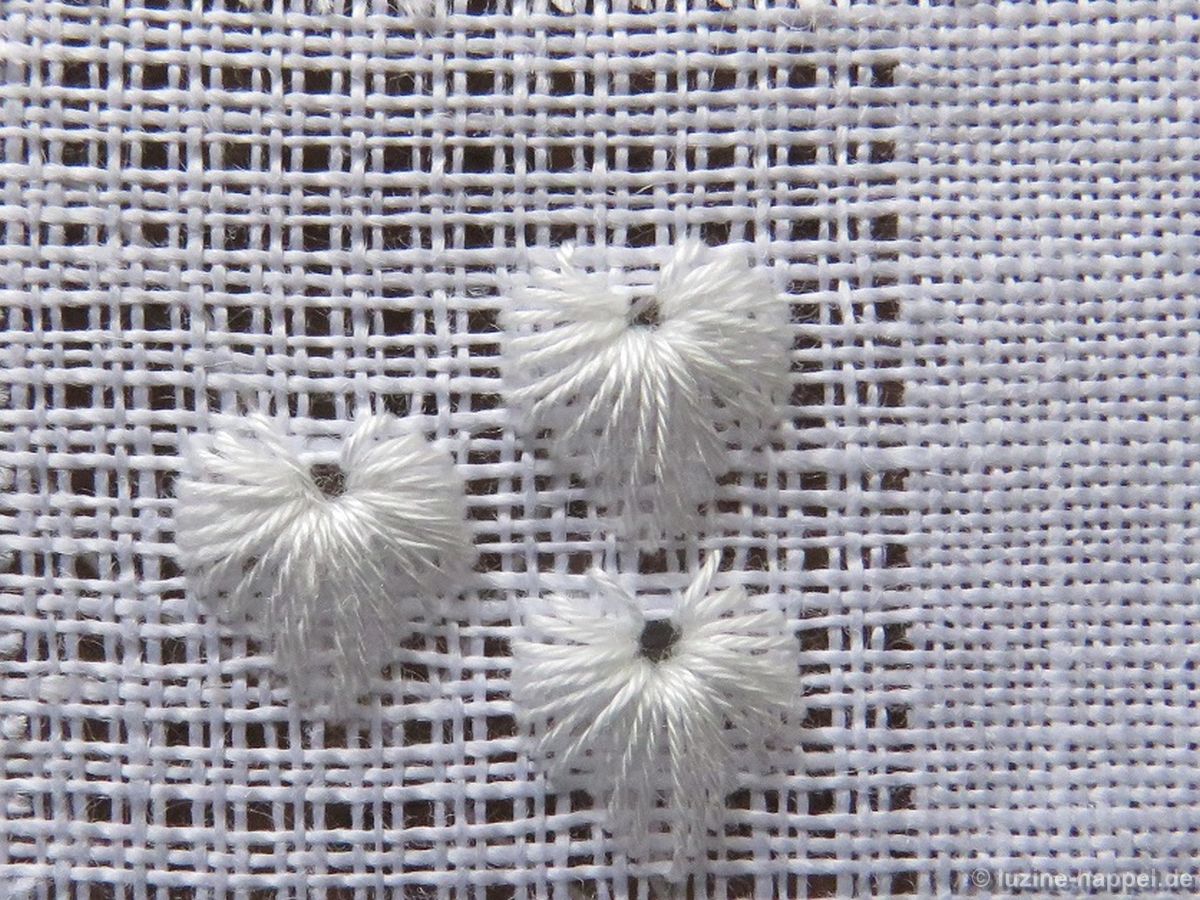
Repeat the steps until the entire shape is filled.


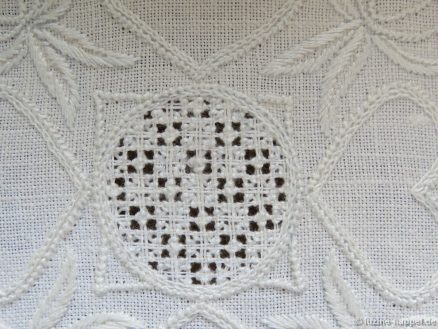
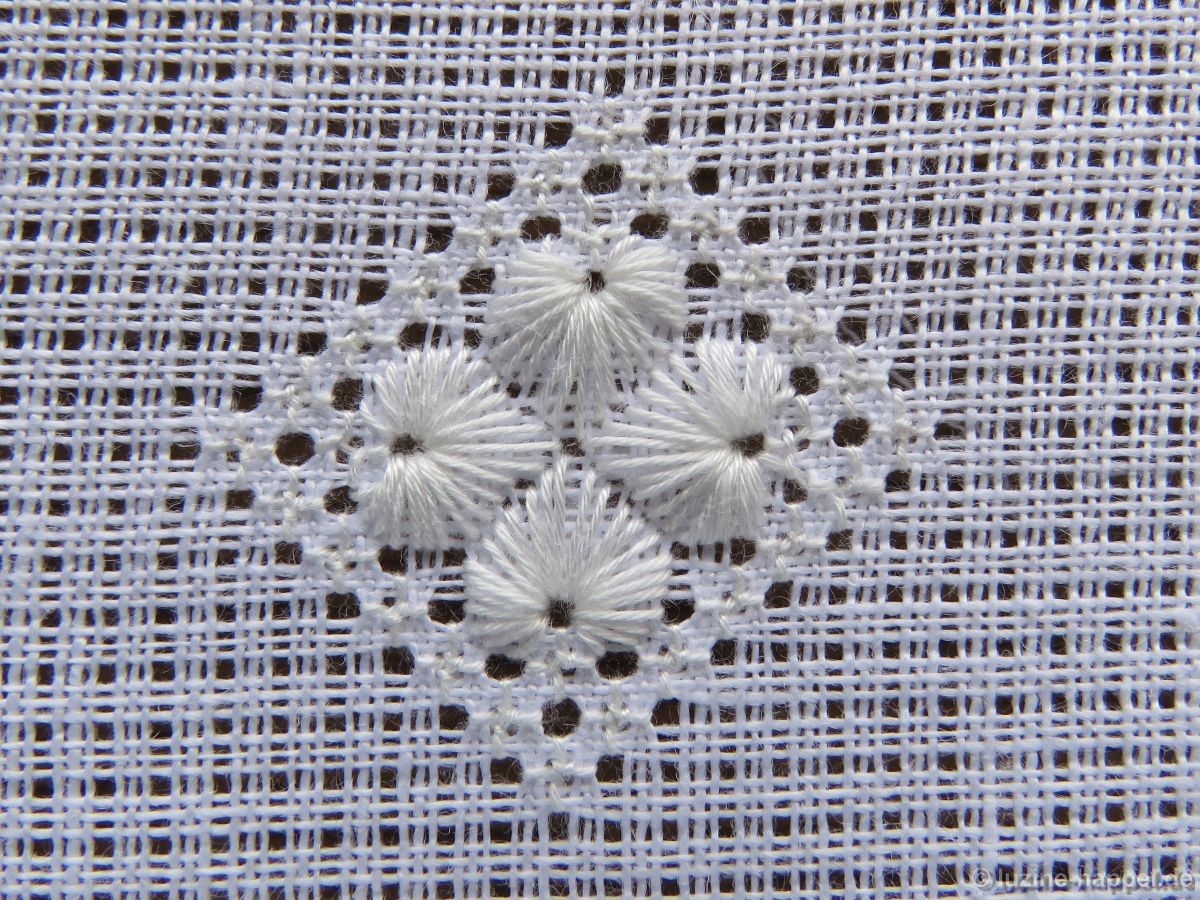
For my first attempt, I used coton à broder No. 25, but it was too fine to fill the holes thoroughly. So, in the end I used coton à broder No. 16.


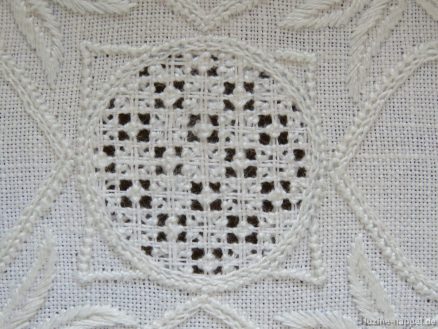
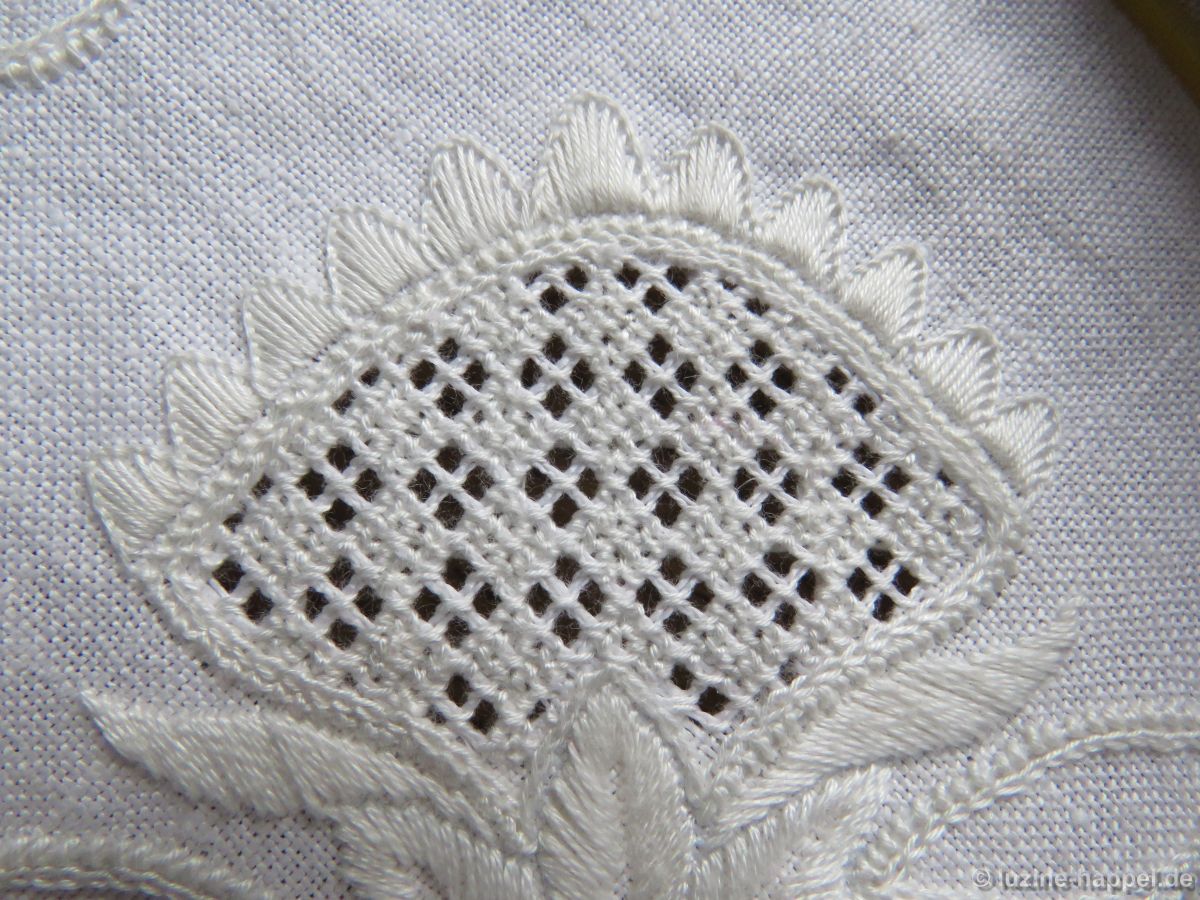
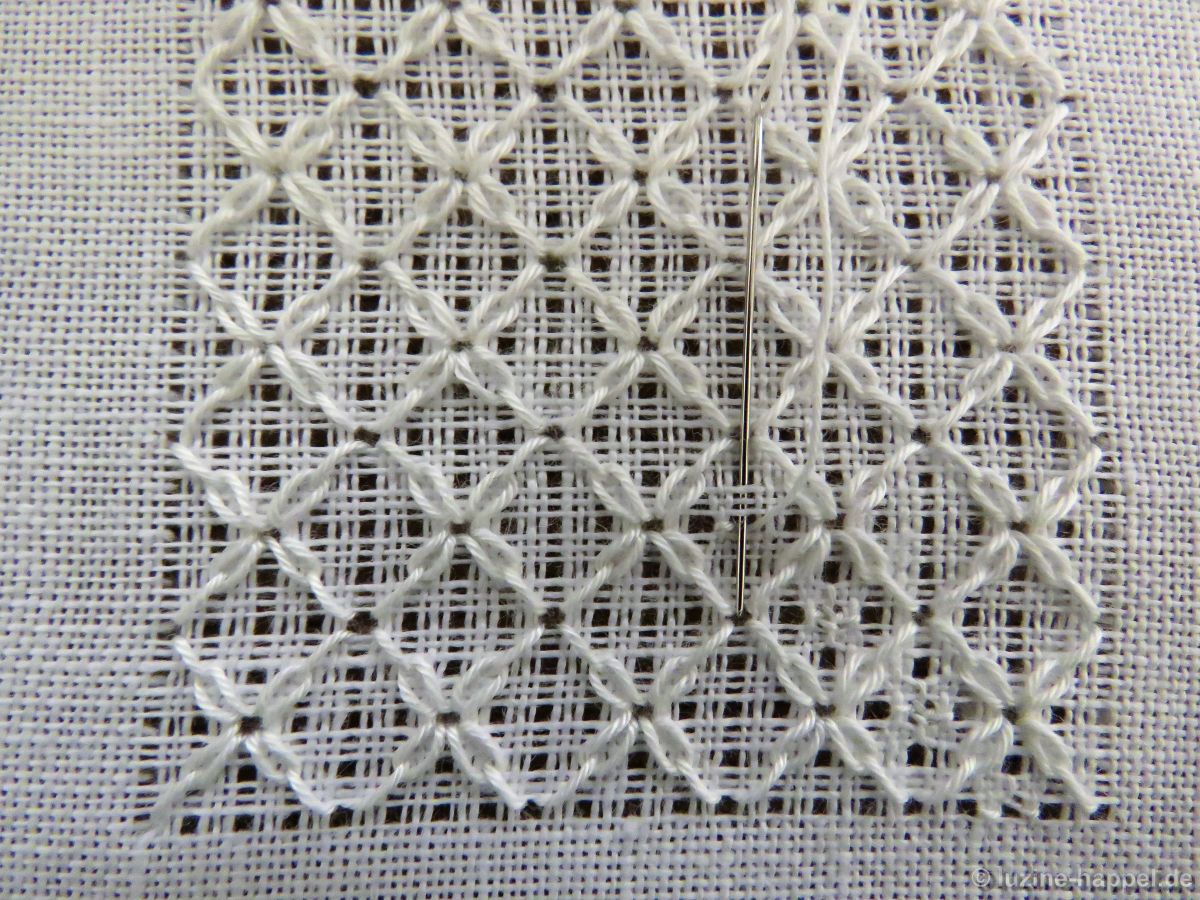
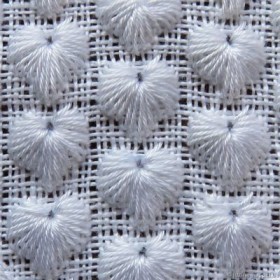
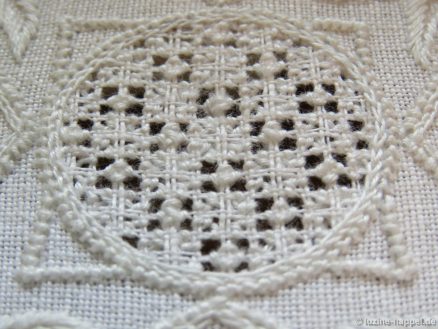
In the image above, the piece has not been boiled. After shrinking during the boiling process, the pattern will get a nice appearance with flat areas for the Rose-stitch-section squares and more prominent areas where the Four-Sided stitches are.


I will explain the counterpart – worked with the common pattern of Rose stitch squares in a Cable stitch grid – in a future article.

Playing with a Pattern

As already mentioned, I consider how to rearrange stitches so that a new pattern is created every time I stitch a pattern.
I take graph paper and lightly sketch my ideas to see the possibility of creating a new pattern.
This was my process while working on filling pattern No. 481.

First I made a variation of this pattern by establishing another Limet grid by cutting 1 and leaving only 2. This made the single pattern element narrower and the overall pattern smaller.


But also the distance between single pattern elements (or vertical rows of elements) can be adjusted


or hearts of different sizes can be combined.


Striped


or squared patterns can be created by combining the hearts with other stitches, such as Satin stitch bars shown here.


The single elements can be turned – to the left, to the right (here the stitches for the remaining sections are thus far missing, perhaps the diagonally worked Röserich [see Stars] would be fine)


or upside down.


Four hearts can be combined to form a blossom


The center can be filled in different ways:
a. with one Rose stitch


b. with a variation of four Rose stitches


c. or with four Rose stitches.


Such blossoms arranged closely together establish a nice pattern.


The same blossoms can be worked in a Rose stitch grid.


The single hearts can also be turned with the points meeting in the center.


Here they are surrounded with Rose stitches.


As seen, with a little bit of imagination and some trial and error one can easily create new patterns.

In summary, the following are ways one can play with patterns:
changing the direction of single pattern elements
combining pattern elements with other stitches
using different grids
using different thread weights
filling blank spaces differently

Filling Pattern No. 540

category: Limet-Filling pattern
stitches used: Lazy Daisy and Rose stitches
center: intersection of withdrawn thread lines (in other shapes or motifs: longitudinal axis = withdrawn thread line)

The last filling pattern on my blog was number 481.
Since then I published the Star book that contains 58 different star filling patterns.
So the next filling pattern on my blog is number 540.

First, establish a Limet grid by cutting 1, leaving 3, vertically and horizontally.

Bring the needle up in the center hole and pull the thread through.


Lay the thread in a loop to the left and down.
Insert the needle again in the center hole and bring it up 1 square diagonally left down (3 threads down and 3 threads to the left).


Lay the loop beneath the needle.


Pull the thread through and tighten it a little bit drawing it in the direction of the loop. Be careful to not tighten too much – the loop should keep its hoof shape.


Cross over 1 square diagonally left down, insert the needle and bring it back up through the center hole.


Work 3 more Lazy Daisy stitches counterclockwise


in the established way.


When one round (one element) is complete, continue to work the row of elements by crossing diagonally under 2 squares to bring the needle up in the next center.


In the established way work rows up


and down


until the entire shape is filled.


Now start to work Rose stitches in diagonal rows,


1 in each of the spaces that remain between the Lazy Daisy elements.


Another easy to work and attractive pattern is established.

Filling Pattern – No. 481

For special events like Valentine´s Day or Mother´s Day I looked for a special pattern. I wanted to have a filling pattern with hearts. I did not know of such a filling pattern for whitework. So I took needle, threads, and linen fabric and began experimenting. The results were very different, and not all patterns I established were what I had in mind. There was one that I actually did not want to publish, but a lady saw it and asked for a description. I have written up the instructions, and so I decided to share it with you, too.

No. 481
category: Limet-Filling pattern
stitches used: modified double Square Eyelet
longitudinal axis: withdrawn thread line (in other shapes or motifs: center = intersection of withdrawn thread lines
name: Little Hearts

First, establish a Limet grid by cutting 1, leaving 3, vertically and horizontally.

One heart spreads over 4 X 4 squares (4 X 3 threads horizontally and 4 X 3 threads vertically). And each heart is comprised of 25 stitches worked counter-clockwise around a center. Make sure that the center hole is open enough to maintain an orderly appearance of all the stitches radiating from it.

After each stitch give a slight tug on the thread. Please be careful to not distort the weave of the fabric.

Very special to this pattern is that the needle is not always taken down in the grid along the edges of a square – as is usual when working Square Eyelet patterns. Rather, stitches will also follow diagonal paths through squares. To give you a better overview, I made a graph. Red marks are the center points of the single hearts. Blue lines are the positions of the 25 stitches. The numeral “1” designates the first stitch.
1_481Bring the needle up in a center hole
2_481and take the needle 1 square (3 threads up and 3 threads to the left) diagonally left up, insert the needle and bring it up again in the center hole. Make sure that the center hole always remains well defined and open. (The “center hole” is not the center of the heart. While embroidering, always rotate the piece so that you can do a single stitch from right to left. For clarity, I show the steps without rotating.)
3_481For the second stitch, insert the needle 1 intersection of threads down and to the left of the first insertion point, and bring it up in the center hole again.
4-481The third stitch is made 1 intersection of threads down and to the left of the previous one.
5_481The fourth stitch is again 1 intersection of threads down and to the left of the previous one.
6_481Three more stitches are now made always moving 1 thread straight down.
7_481Then 6 stitches are made always moving one intersection of threads down and to the right. The sixth stitch is the bottom point of the heart.
8_481Work the second half mirrored – with 12 additional stitches (6 diagonally right up, 3 straight up, and 3 diagonally left up). After taking the last stitch, the needle travels diagonally under 3 squares (9 threads) up and 1 square (3 threads) to the left. This is the center hole of the next heart. Start here repeating the steps to establish another heart.
9_481Rows of hearts beside the first row are worked staggered. The distance between the center hole of one heart to the center hole of the next staggered heart is 2 squares (6 threads) up and 4 squares (12 threads) to the left (or to the right).
10_481Up from there a next heart is worked in the established way.
11_481A gentle boiling causes the remaining fabric threads to shift a little bit, so in the end the Limet grid is hardly noticeable.
12_481“Little Hearts” is a striking raised pattern. It is especially attractive in big heart shapes.
13_481

Filling Pattern – No. 480

Nr. 480
category: Limet-Filling pattern
stitches used: bars of 6 Satin stitches over 1 square in the width and Daisy stitches
center: intersection of withdrawn-thread lines (in other shapes or motifs: longitudinal axis = withdrawn-thread line)

The filling pattern shown here is a practice exercise only. You can see it used in a shape in the previous post. It will also be featured in a future post.
First, work a Limet grid by alternately withdrawing 1 and leaving 3 threads both horizontally and vertically.
480_1In the established Limet grid, work a grid of Satin stitches. Work Satin stitch bars over one square (3 threads) in the width and over 2 squares (6 stitches) in the length either in a stair-step manner (please see pattern 469; second and third pictures from the top) or in straight rows as here shown.
480_2Work the rows of Satin stitch bars up
480_3and back by turning the piece 180° and keeping a distance of 2 squares between the bars.
480_4Work rows of Satin stitch bars vertically
480_5and horizontally to establish the Satin stitch grid.
480_6Bring the needle up in a center of any established square,
480_7lay the working thread around a corner of this square, insert the needle in the center again, and bring it up in that corner with the loop beneath the needle.
480_8Tighten the thread in the direction of the loop. A Chain stitch is established. It is secured by inserting the needle just beyond the intersection of fabric threads adjacent to the corner space.
480_9Bring the needle up in the center again
480_10to work the next Chain stitch at the next corner. Work a Chain stitch at each corner of a square (4 Chain stitches per square). Make sure to work clockwise or counterclockwise; this method will keep the center hole well defined and open.
480_11Sometimes it is necessary to slide the working thread through the stitches on the back to arrive at the next starting point.
480_12Work 4 Chain stitches in the established way
480_13like a checkerboard over the entire shape.
480_14All other squares remain unembroidered.
There is a rule in the Schwalm: every Limet square must be embroidered in some way. For example, a Rose stitch could be worked into each of the remaining squares. However, the pattern shown here looks nicer, I think, and if it is used for projects such as Lavender bags, which will not be laundered too often, the pattern will keep for many decades.

Washed, starched and ironed the pattern gets its full charm.
This example was worked on 13.5/cm thread-count Weddigen linen with coton à broder No. 20.