For special events like Valentine´s Day or Mother´s Day I looked for a special pattern. I wanted to have a filling pattern with hearts. I did not know of such a filling pattern for whitework. So I took needle, threads, and linen fabric and began experimenting. The results were very different, and not all patterns I established were what I had in mind. There was one that I actually did not want to publish, but a lady saw it and asked for a description. I have written up the instructions, and so I decided to share it with you, too.
No. 481
category: Limet-Filling pattern
stitches used: modified double Square Eyelet
longitudinal axis: withdrawn thread line (in other shapes or motifs: center = intersection of withdrawn thread lines
name: Little Hearts
First, establish a Limet grid by cutting 1, leaving 3, vertically and horizontally.
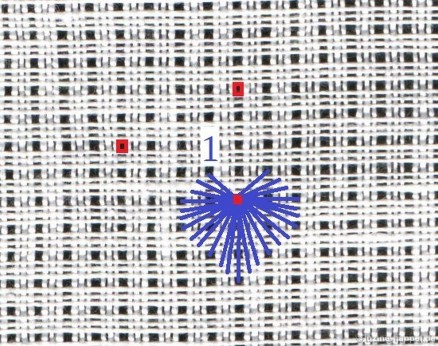
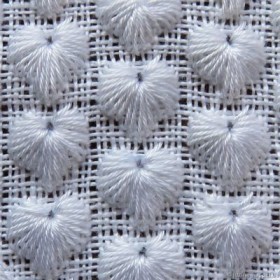
One heart spreads over 4 X 4 squares (4 X 3 threads horizontally and 4 X 3 threads vertically). And each heart is comprised of 25 stitches worked counter-clockwise around a center. Make sure that the center hole is open enough to maintain an orderly appearance of all the stitches radiating from it.
After each stitch give a slight tug on the thread. Please be careful to not distort the weave of the fabric.
Very special to this pattern is that the needle is not always taken down in the grid along the edges of a square – as is usual when working Square Eyelet patterns. Rather, stitches will also follow diagonal paths through squares. To give you a better overview, I made a graph. Red marks are the center points of the single hearts. Blue lines are the positions of the 25 stitches. The numeral “1” designates the first stitch.
 Bring the needle up in a center hole
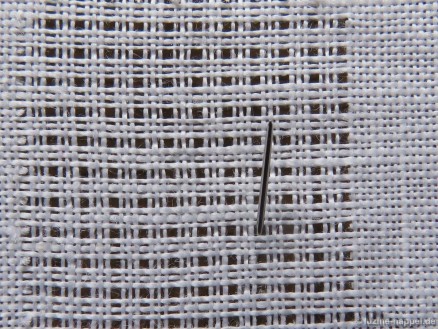 and take the needle 1 square (3 threads up and 3 threads to the left) diagonally left up, insert the needle and bring it up again in the center hole. Make sure that the center hole always remains well defined and open. (The “center hole” is not the center of the heart. While embroidering, always rotate the piece so that you can do a single stitch from right to left. For clarity, I show the steps without rotating.)
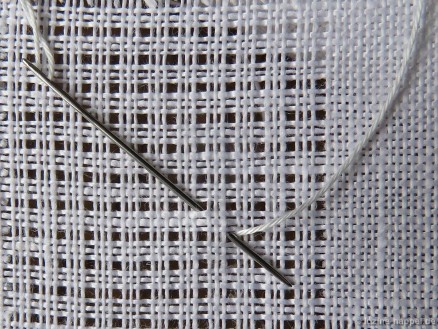 For the second stitch, insert the needle 1 intersection of threads down and to the left of the first insertion point, and bring it up in the center hole again.
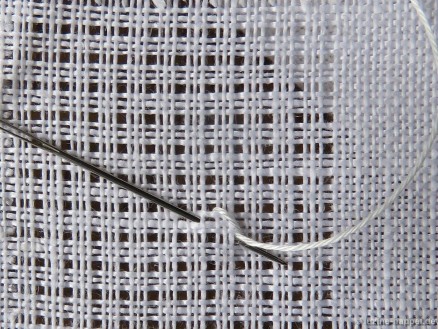 The third stitch is made 1 intersection of threads down and to the left of the previous one.
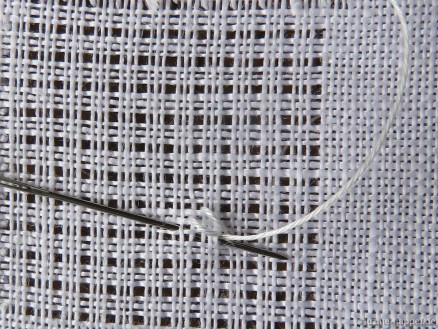 The fourth stitch is again 1 intersection of threads down and to the left of the previous one.
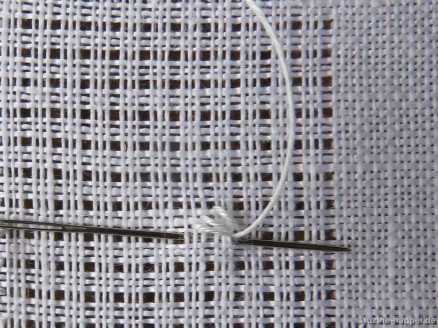 Three more stitches are now made always moving 1 thread straight down.
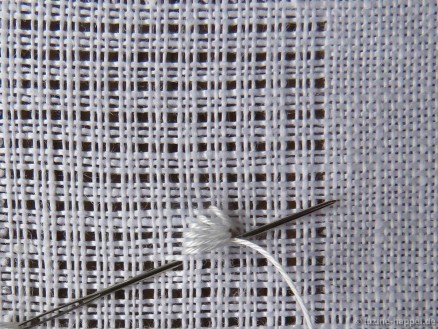 Then 6 stitches are made always moving one intersection of threads down and to the right. The sixth stitch is the bottom point of the heart.
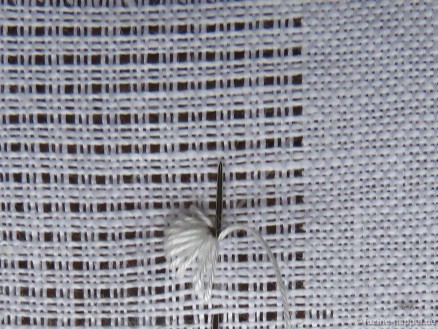 Work the second half mirrored – with 12 additional stitches (6 diagonally right up, 3 straight up, and 3 diagonally left up). After taking the last stitch, the needle travels diagonally under 3 squares (9 threads) up and 1 square (3 threads) to the left. This is the center hole of the next heart. Start here repeating the steps to establish another heart.
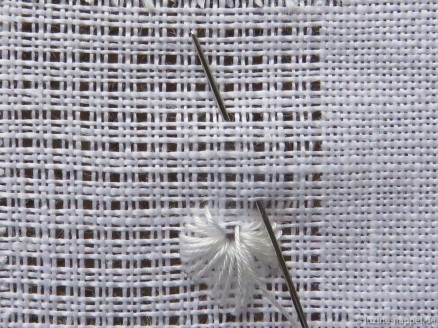 Rows of hearts beside the first row are worked staggered. The distance between the center hole of one heart to the center hole of the next staggered heart is 2 squares (6 threads) up and 4 squares (12 threads) to the left (or to the right).
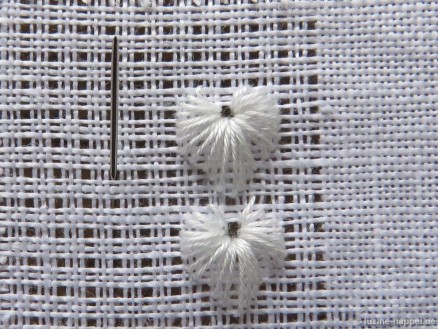 Up from there a next heart is worked in the established way.
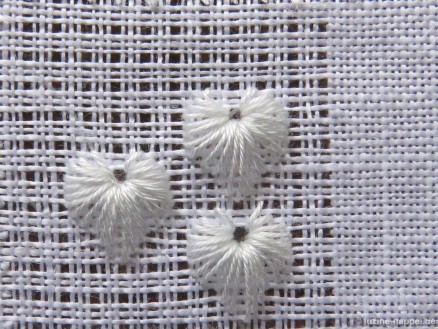 A gentle boiling causes the remaining fabric threads to shift a little bit, so in the end the Limet grid is hardly noticeable.
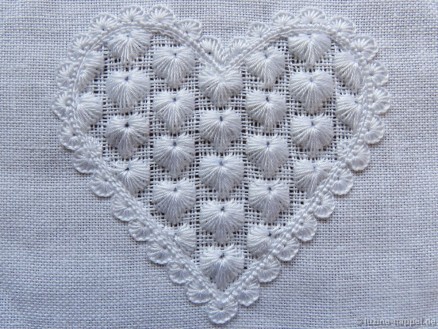 “Little Hearts” is a striking raised pattern. It is especially attractive in big heart shapes.


This is so beautiful for Valentine Cards. I had just finished the outline of a heart on piece for a Valentine Card and the heart filling is just the right design for the filling. Thank you so much.
Yes, I agree with you, Ana-Maria. There are many other pretty uses. I will show more beautiful pieces over the course of time. Do you want your Valentin´s card published in the end-of the-year article in the end of December?