
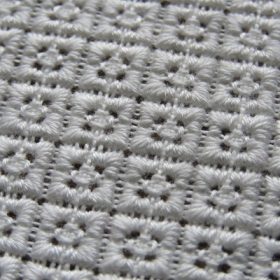
Filling Pattern – No. 544
category: Limet-Filling pattern
stitches used: nine-stitch sections of the simple Square Eyelet and Four-Sided stitches
center: square (in other shapes, longitudinal axis: group of three threads)
one pattern segment = 12 threads
name: small shirt button
used here: linen with 13.5/cm threads and coton à broder No. 25
New: Instructions for left-handers can be found at the end of this article.
First, establish a Limet grid with a square in the center by cutting 1, leaving 3 both vertically and horizontally.
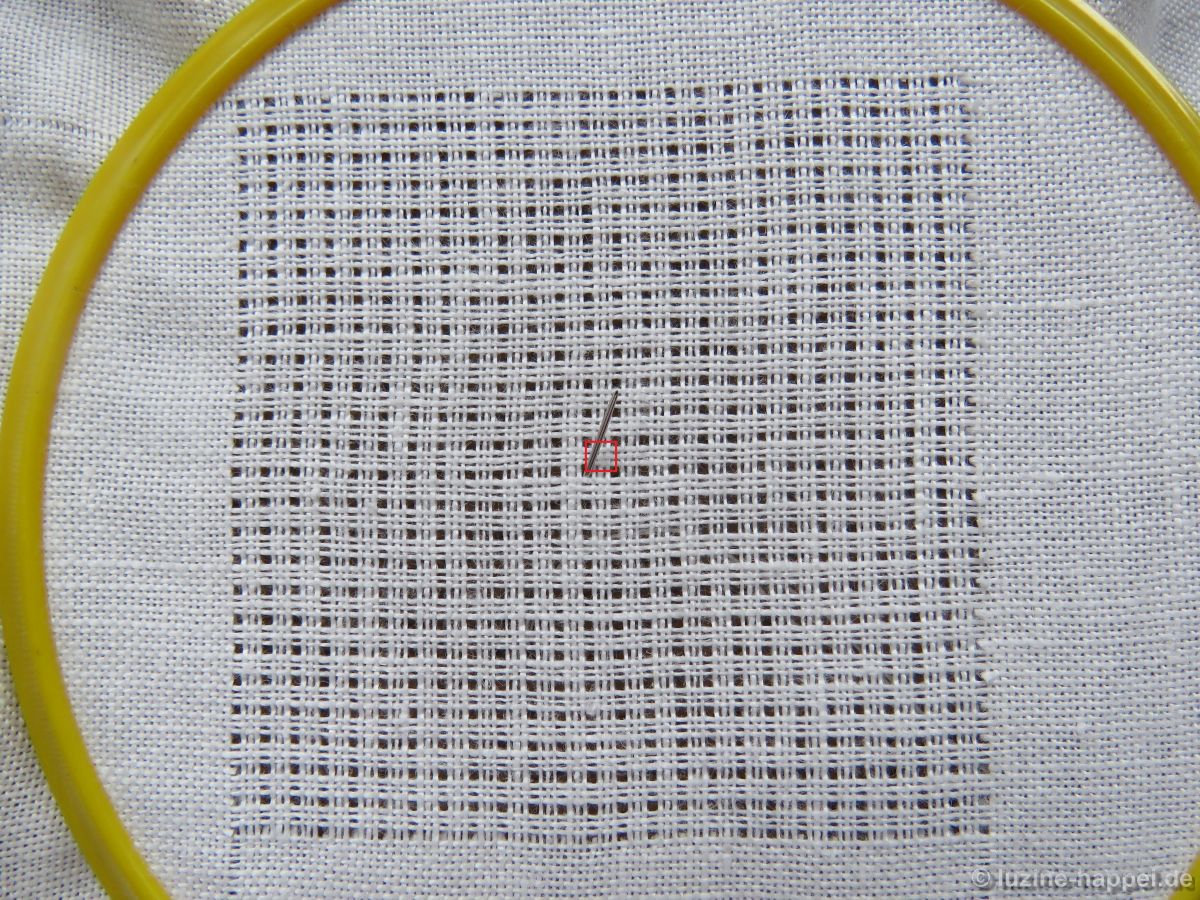
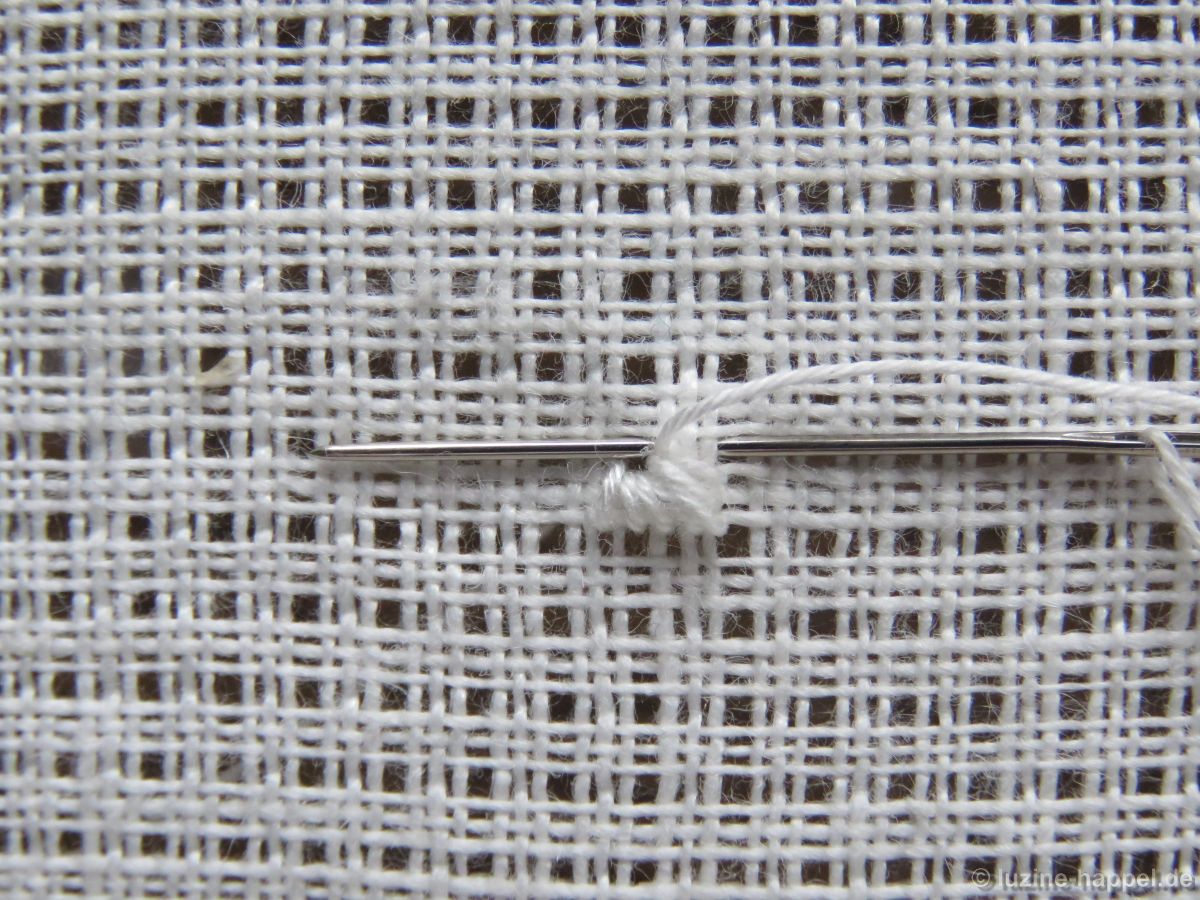
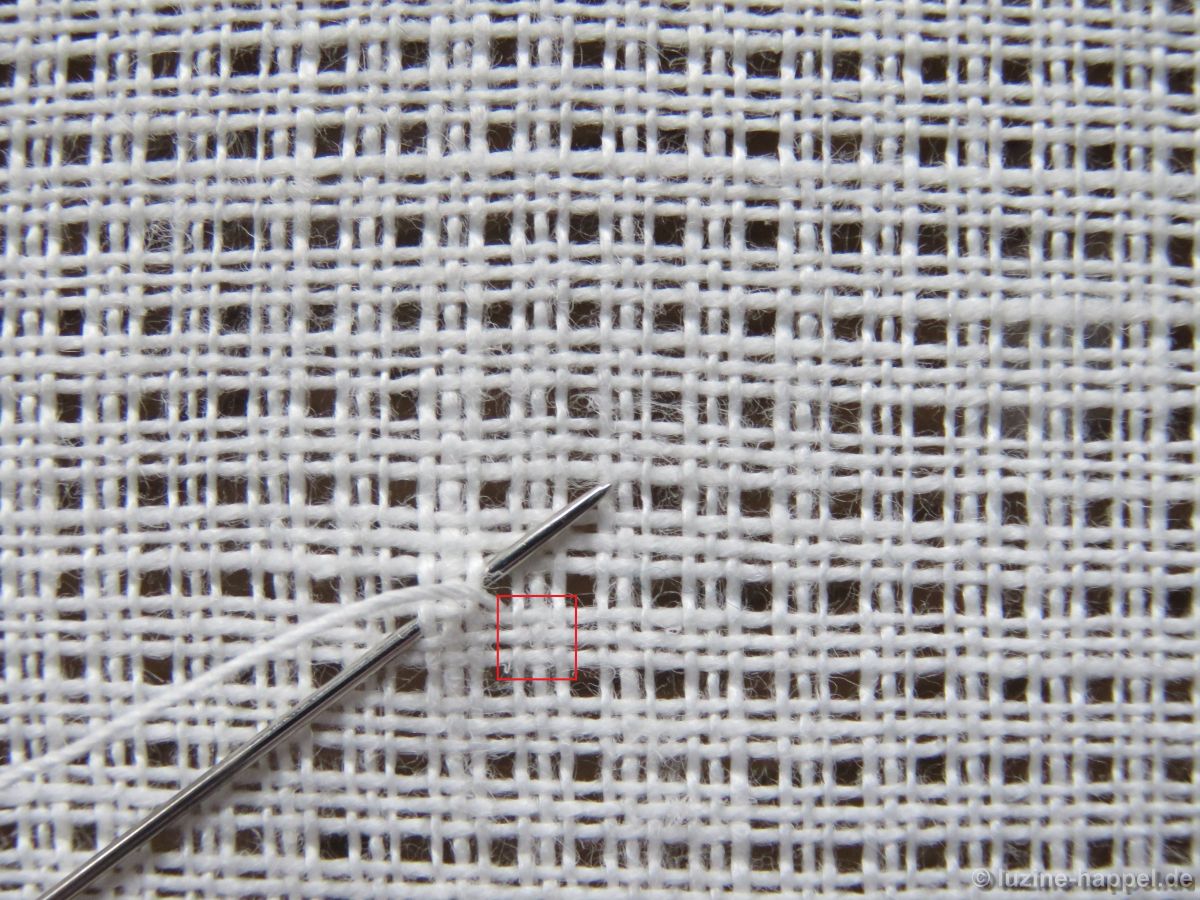
Bring the needle up in bottom left hole of the center square (point where the needle emerges = center of the nine-stitch section), and pull the thread through.
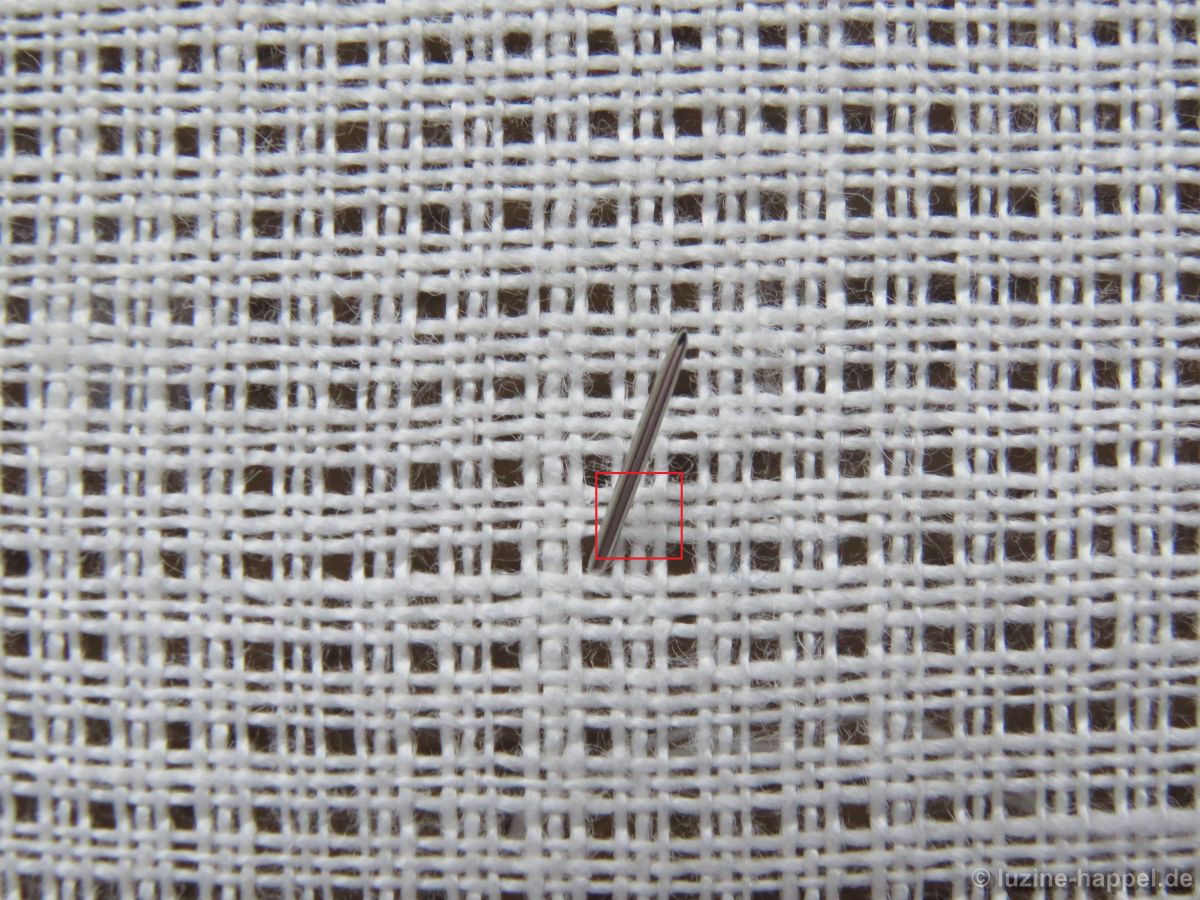
Turn the piece 180°, cross over three threads to the right and one thread down, insert the needle and bring it up in the center again. Tighten thread.
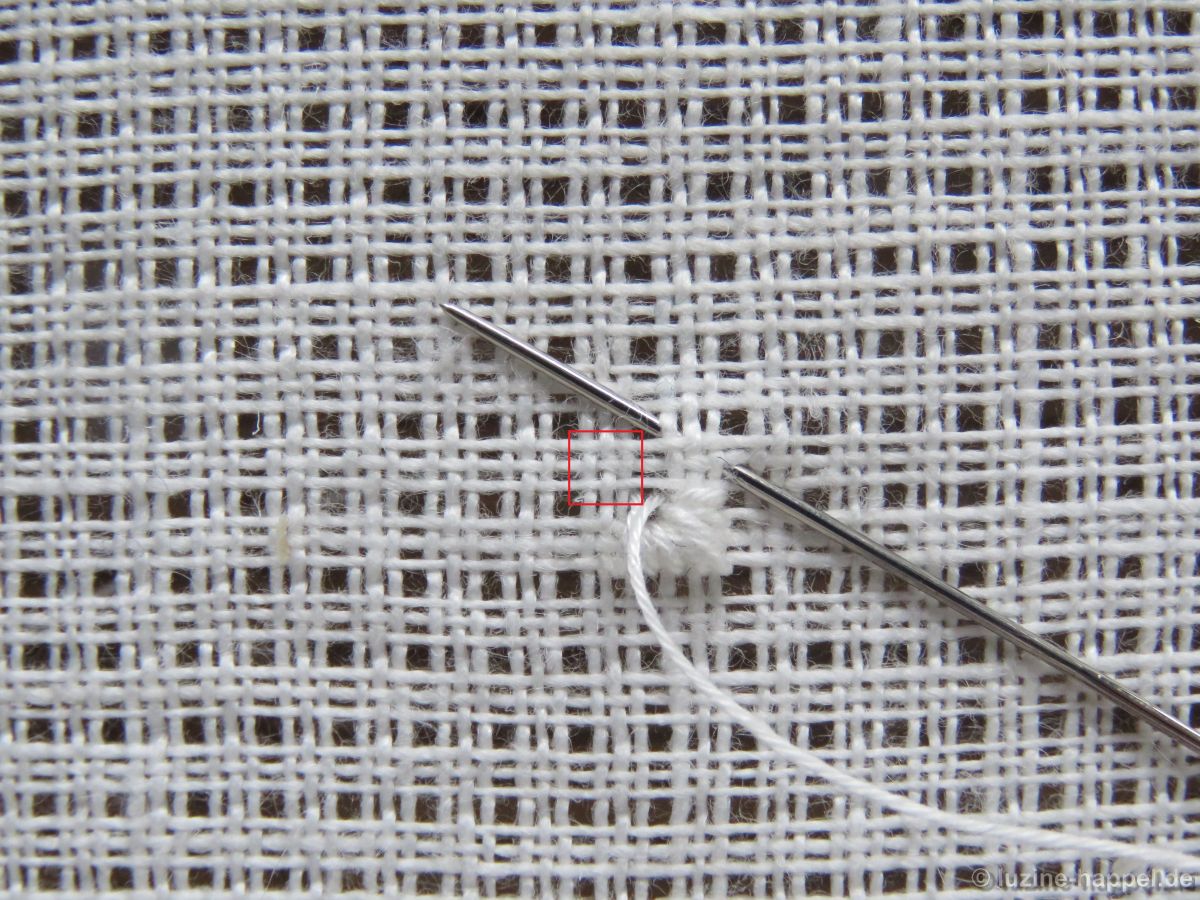
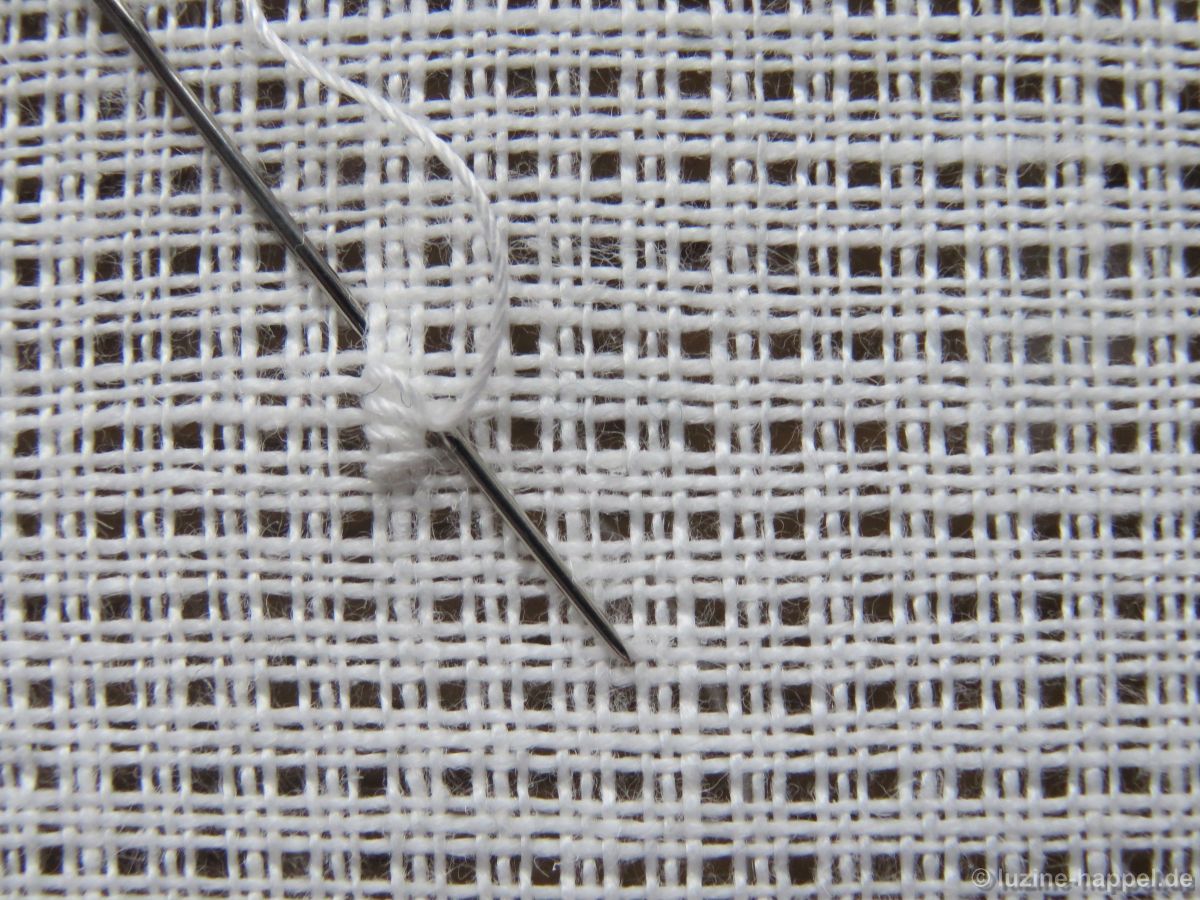
From the center (of the nine-stitch section) work four more stitches moving one fabric thread up with each stitch.

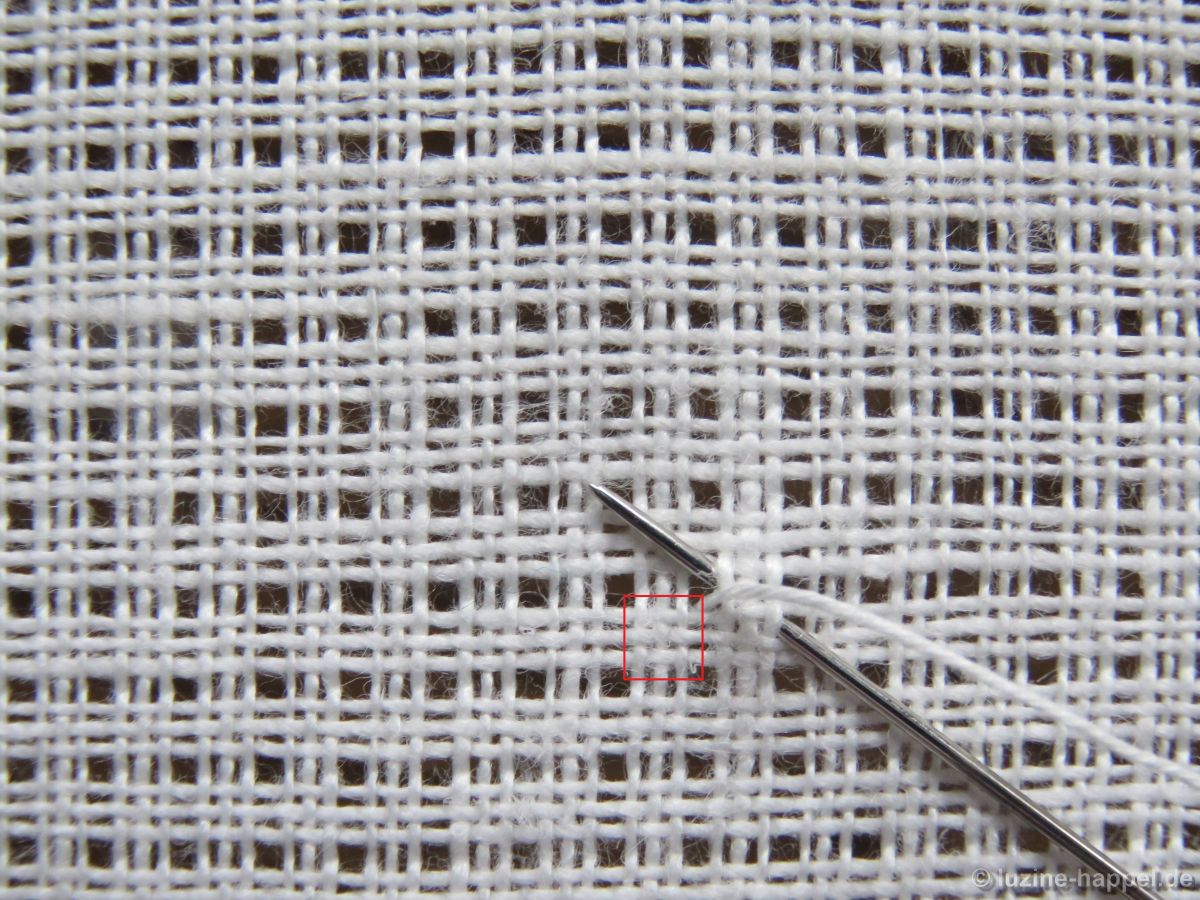
Rotate the piece 90° clockwise and continue stitching around the corner – working four stitches upward.
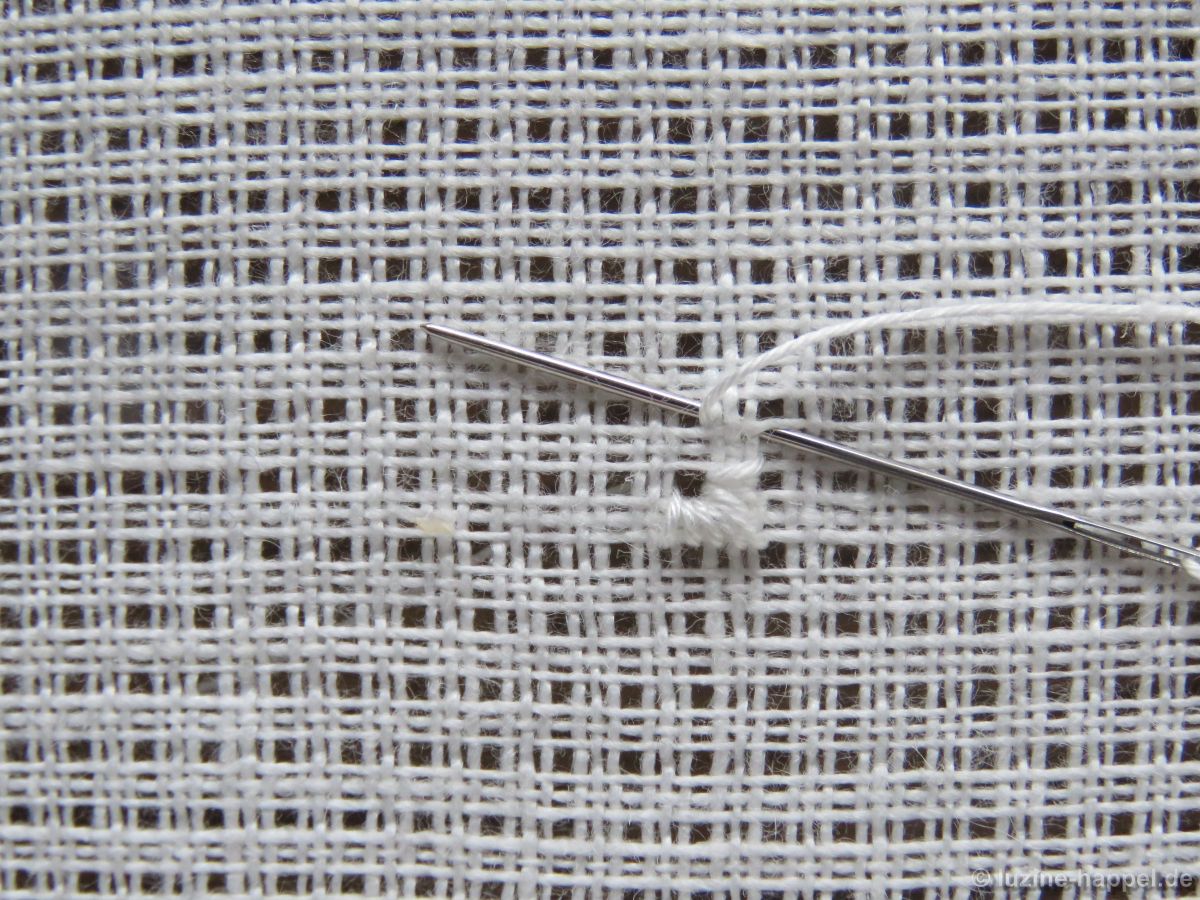
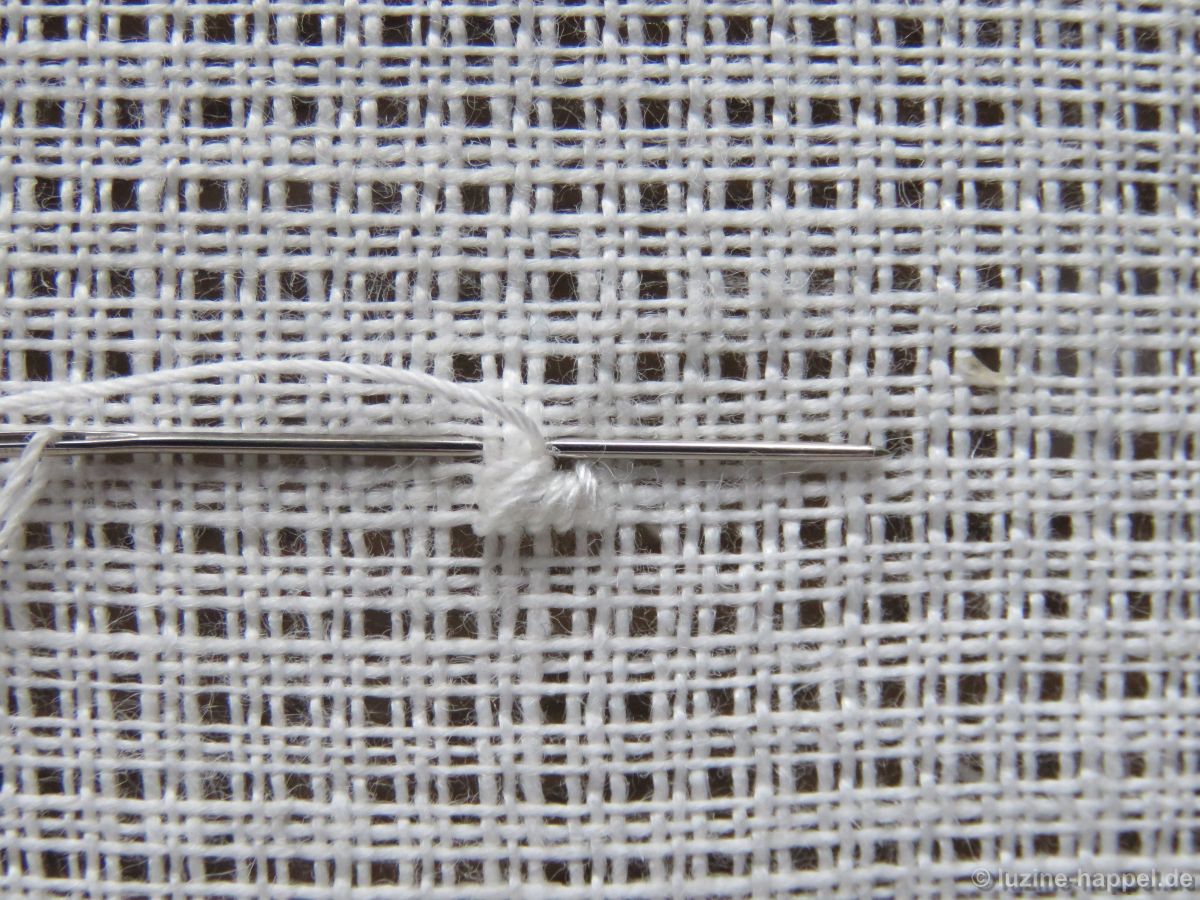
After the ninth stitch, take the needle to the back and bring it up in the center of the next nine-stitch section – the next counterclockwise corner hole of the center square.
Work the next nine-stitch section in the established way.
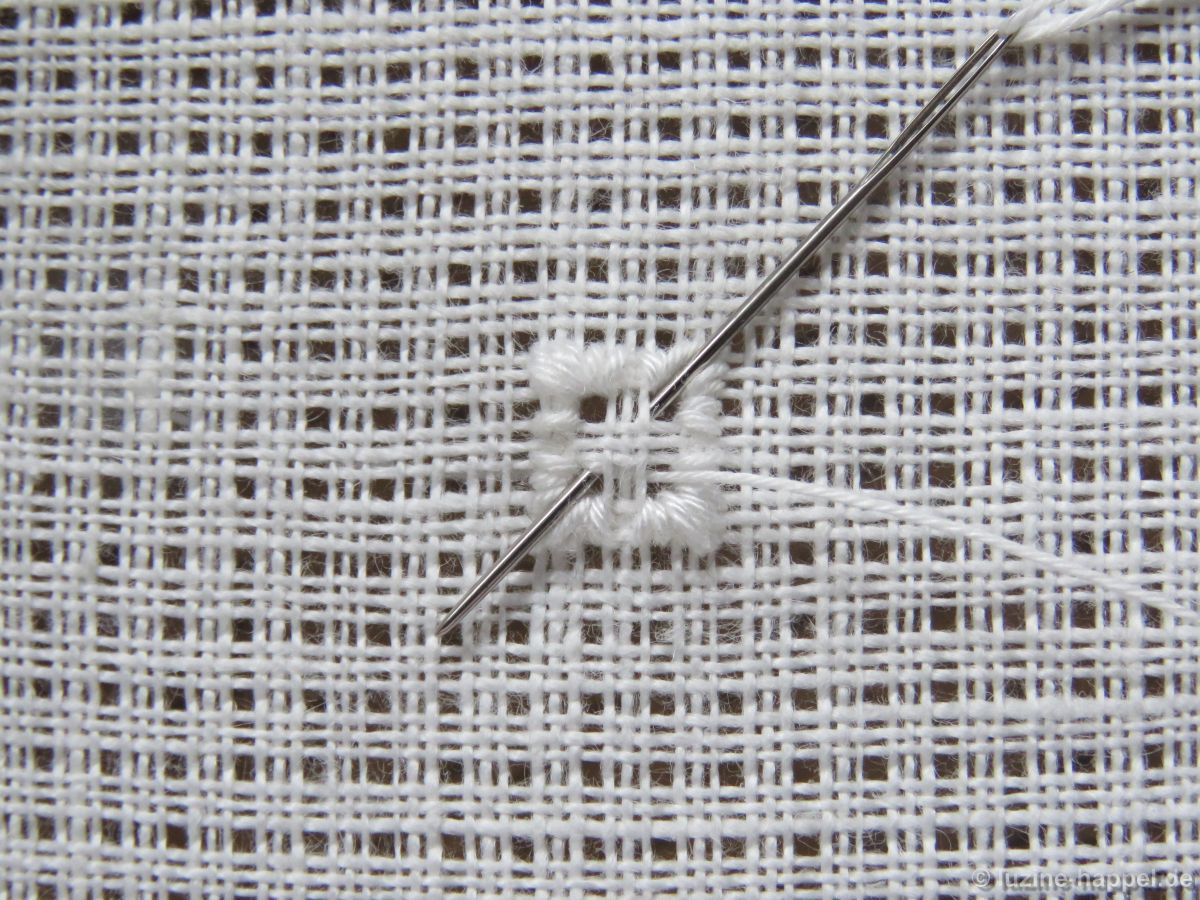
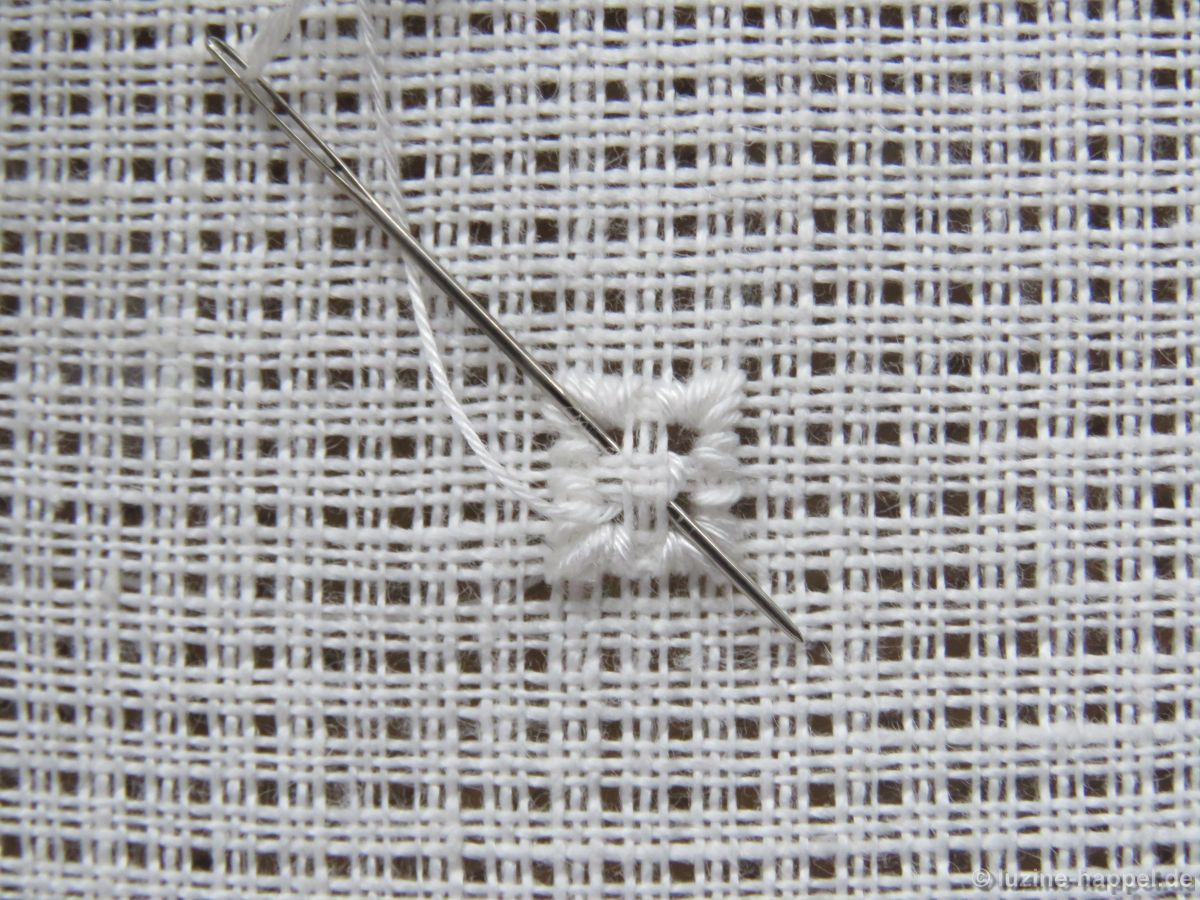
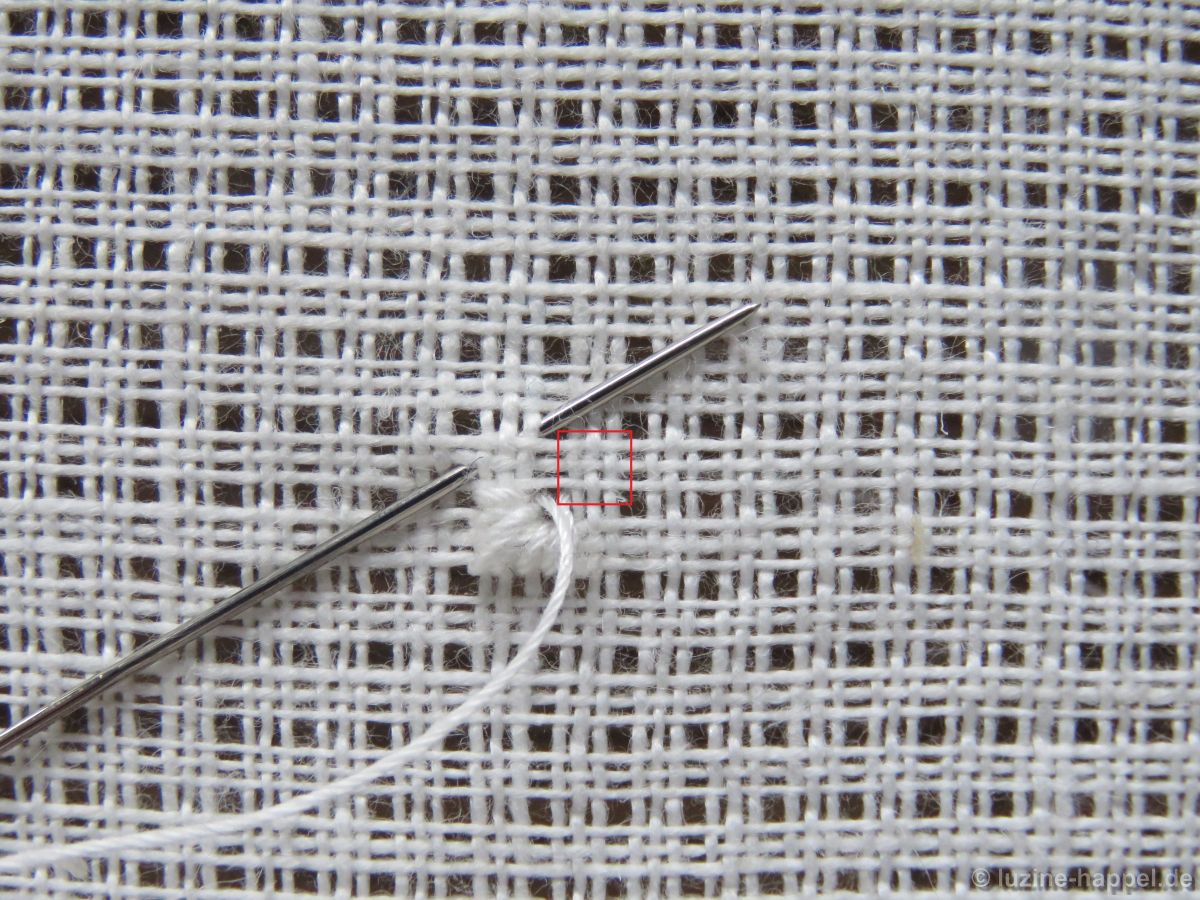
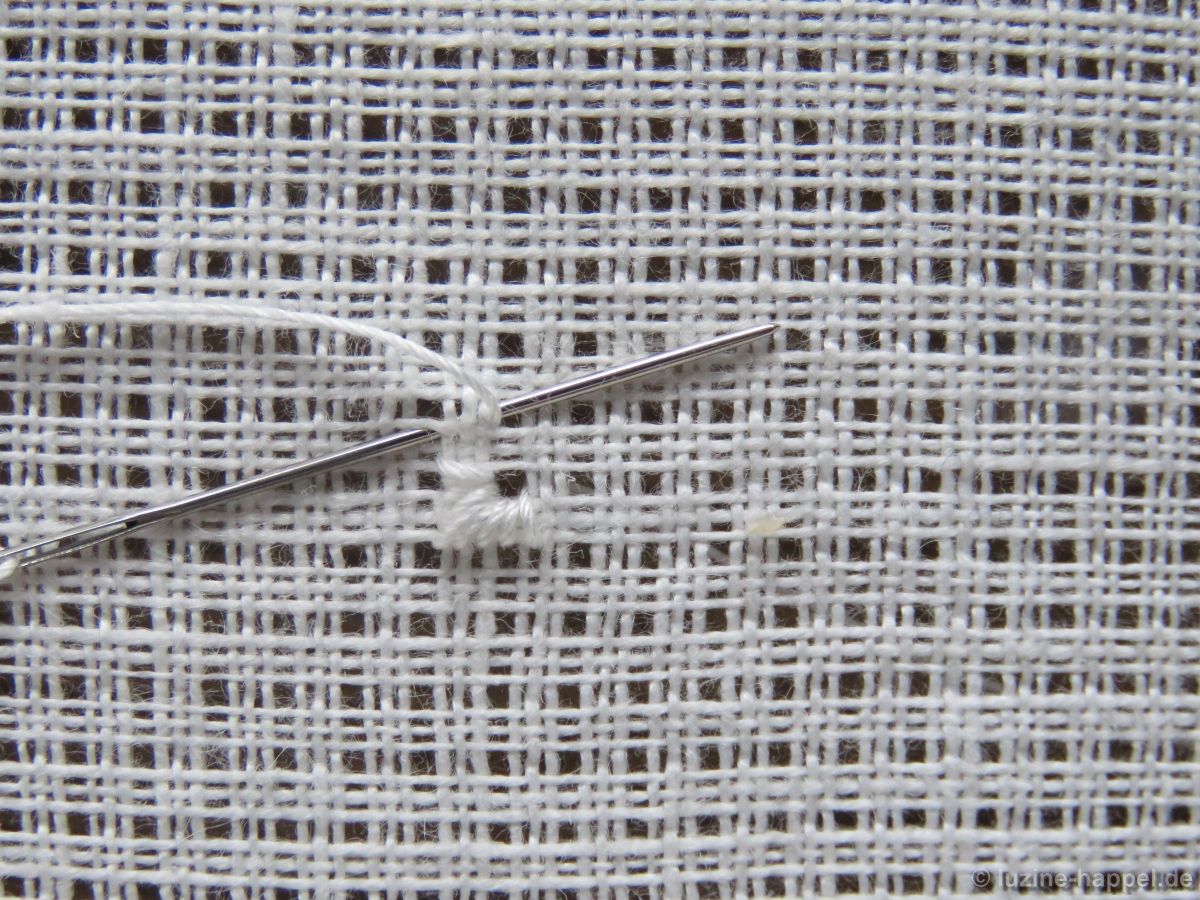
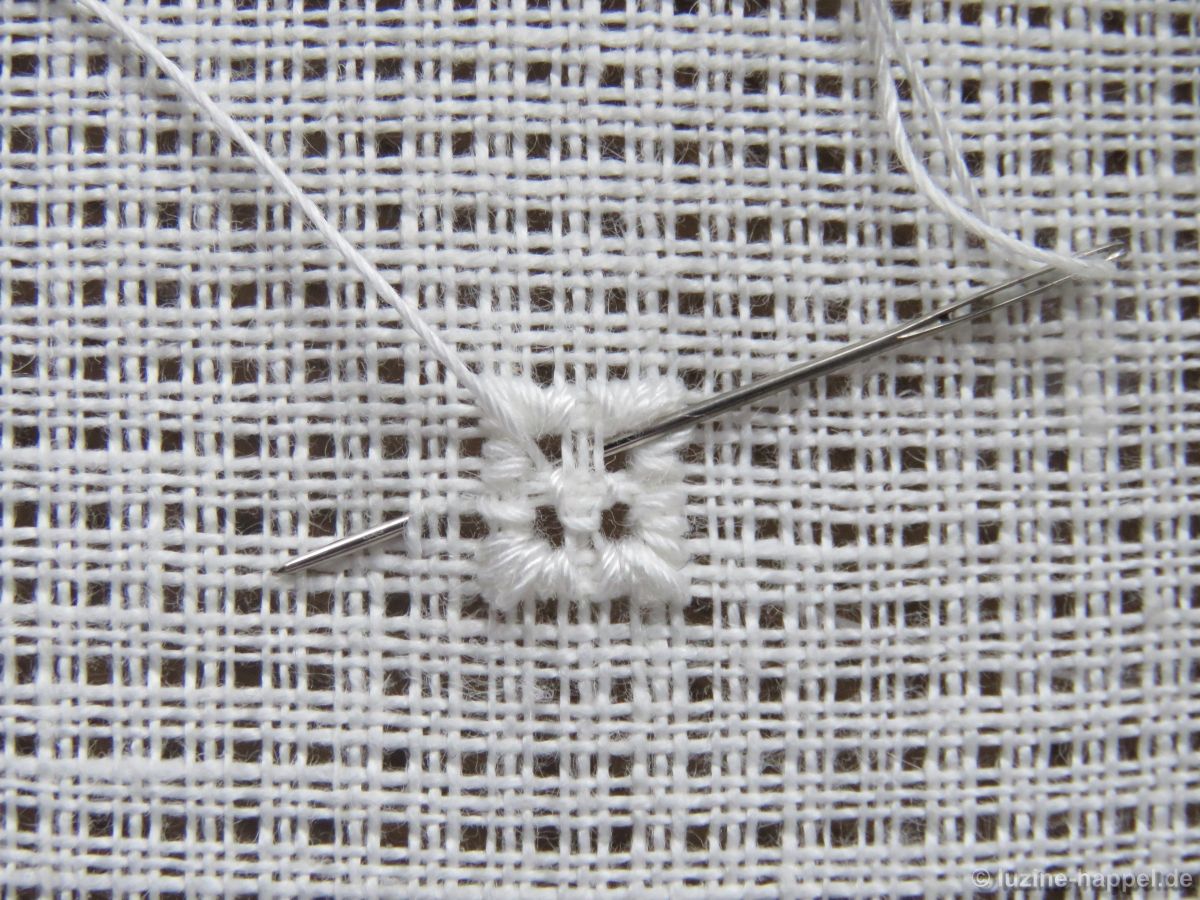
From the last stitch of the fourth nine-stitch section, bring the needle up in the bottom right hole of the center square. It is important to choose the opposite side for starting the Four-Sided stitch to get the corner holes clean and open and the stitch centered.

Work a Four-Sided stitch around the center square with the first stitch on the right and straight up;
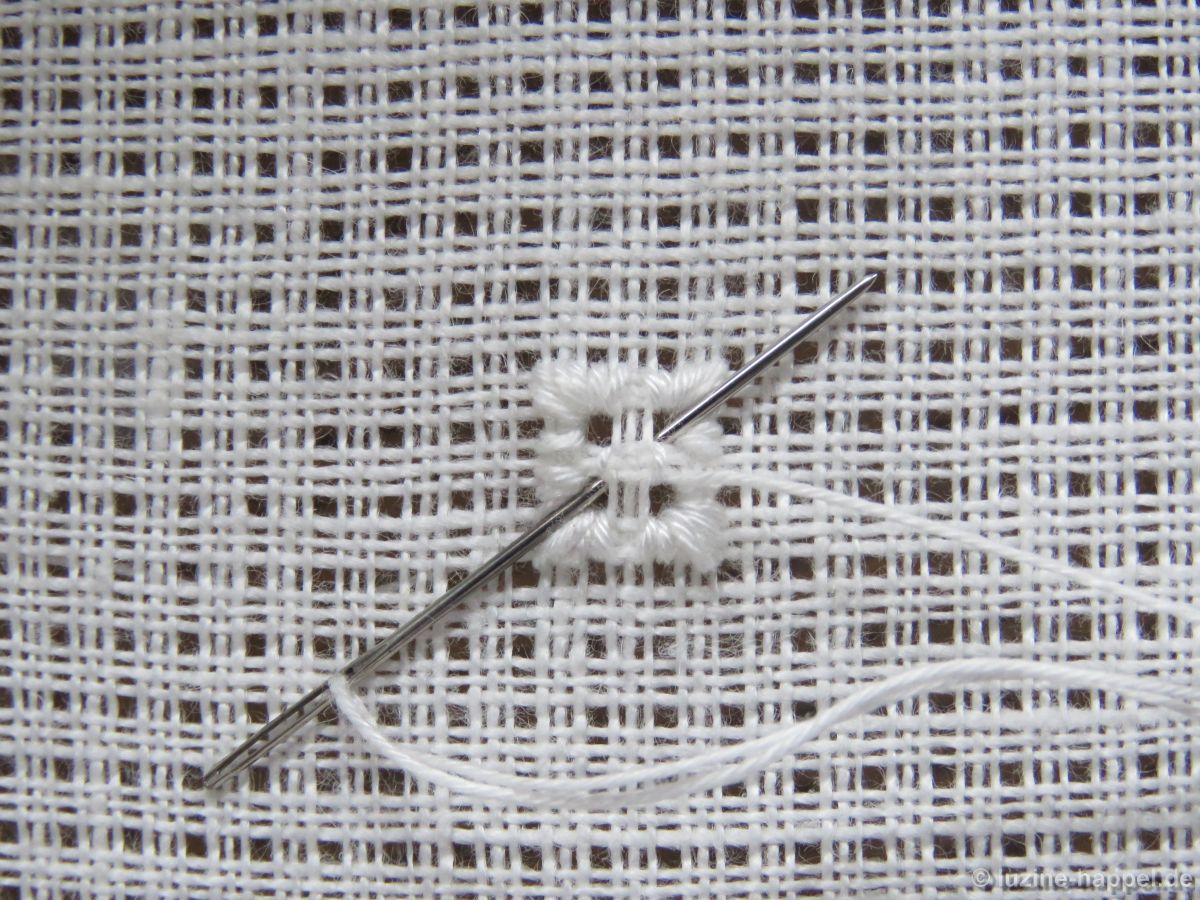
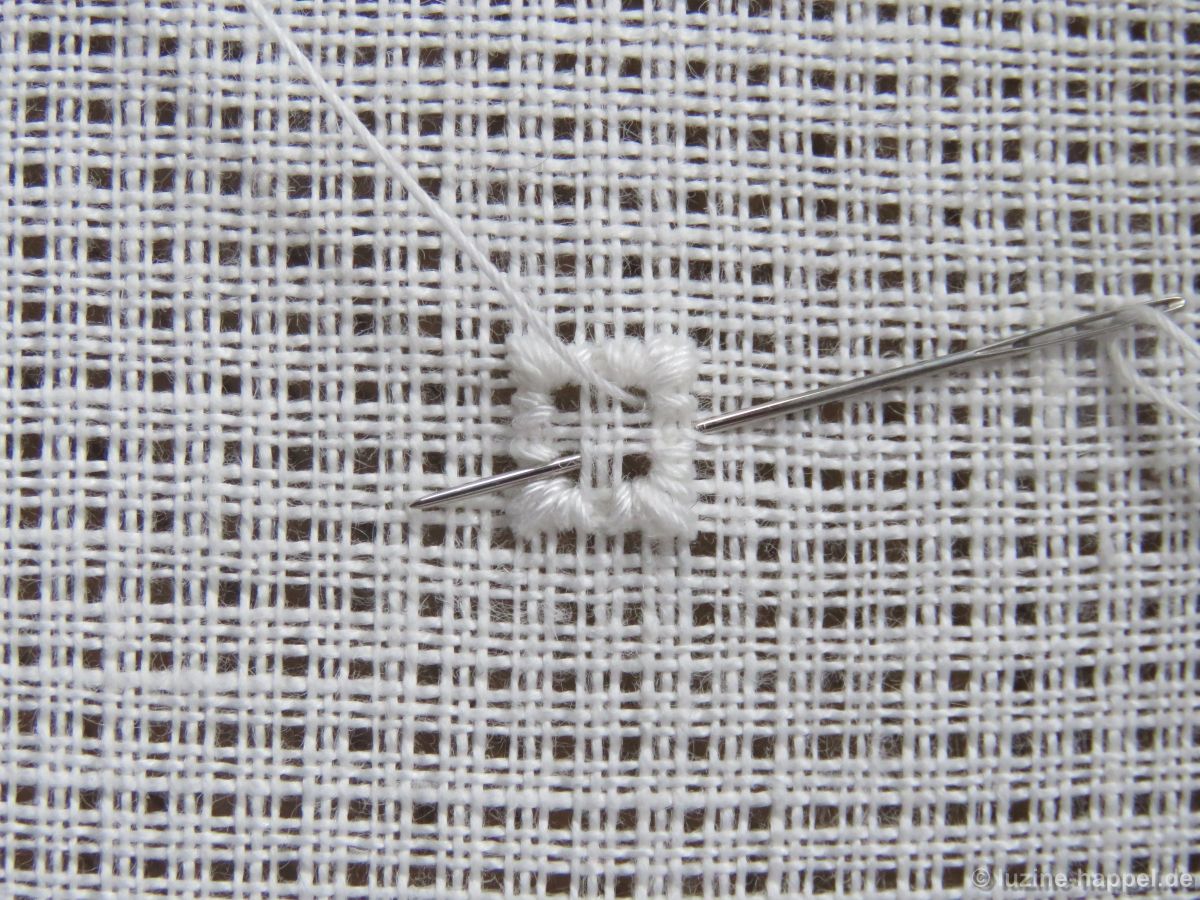
the second stitch is taken on the left and up. With this stitch the thread can be tightened a little bit more. In contrast to the Satin stitch sections, where the thread is only tightened so that the stitches lie flat, the thread of the Four-Sided stitch can be tightened a little bit more to pull together the threads of the center square.
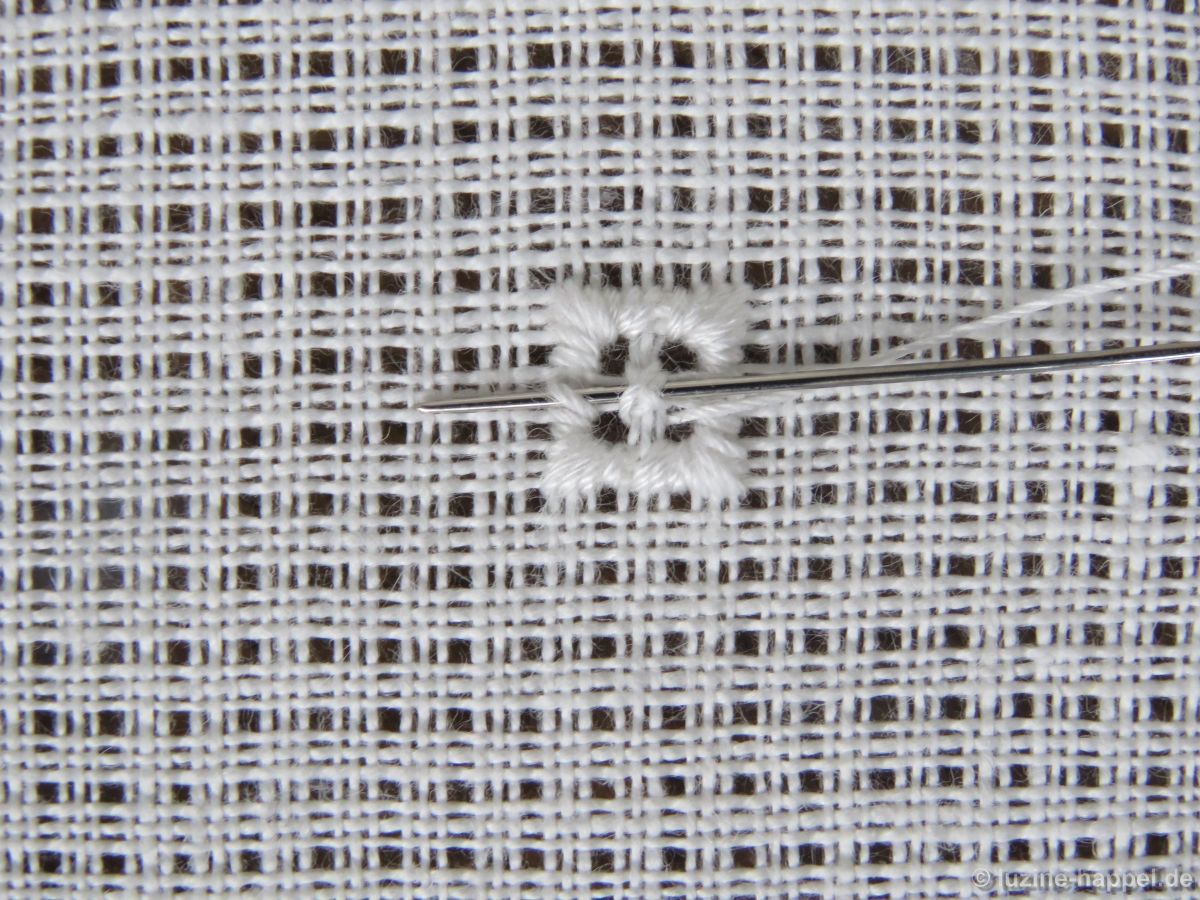
Work the third stitch on the bottom from right to left,
and the fourth on the top from right to left.
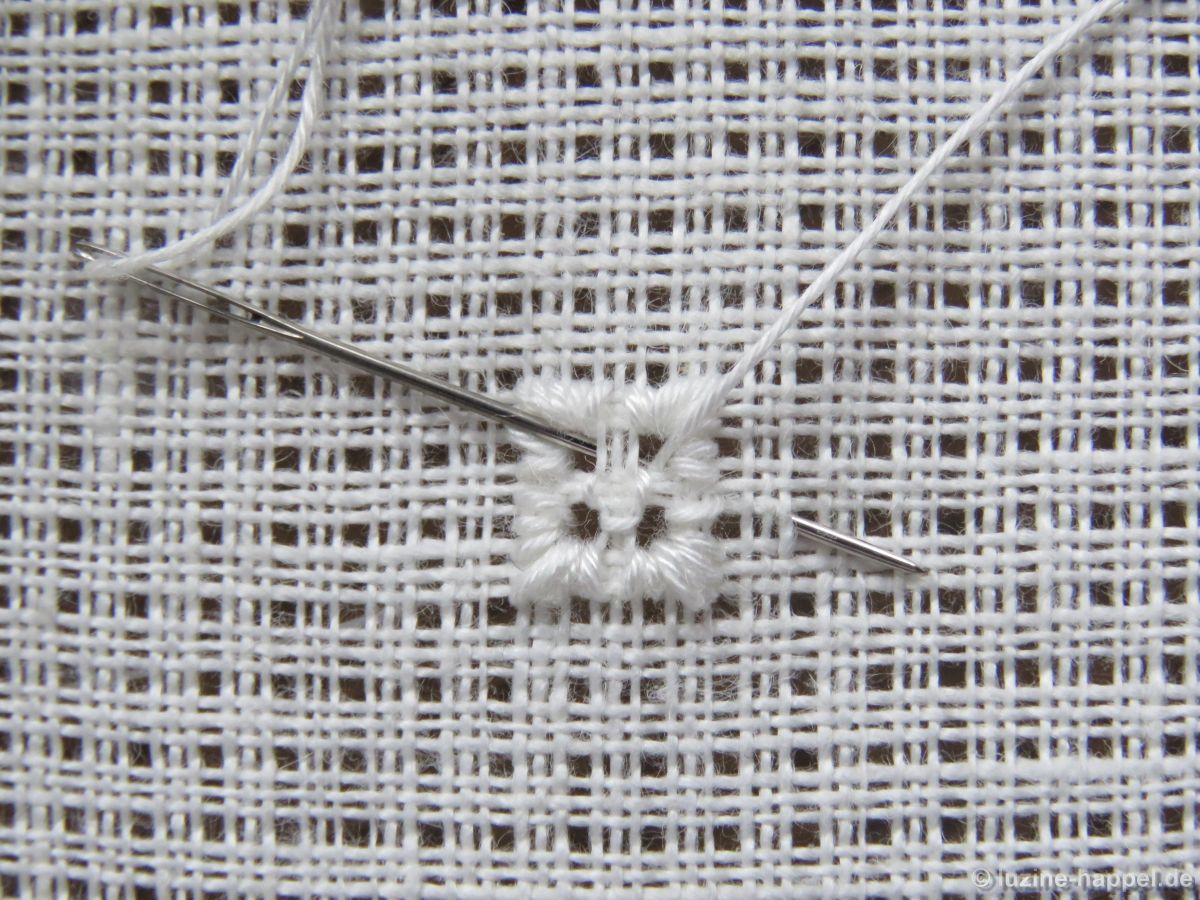
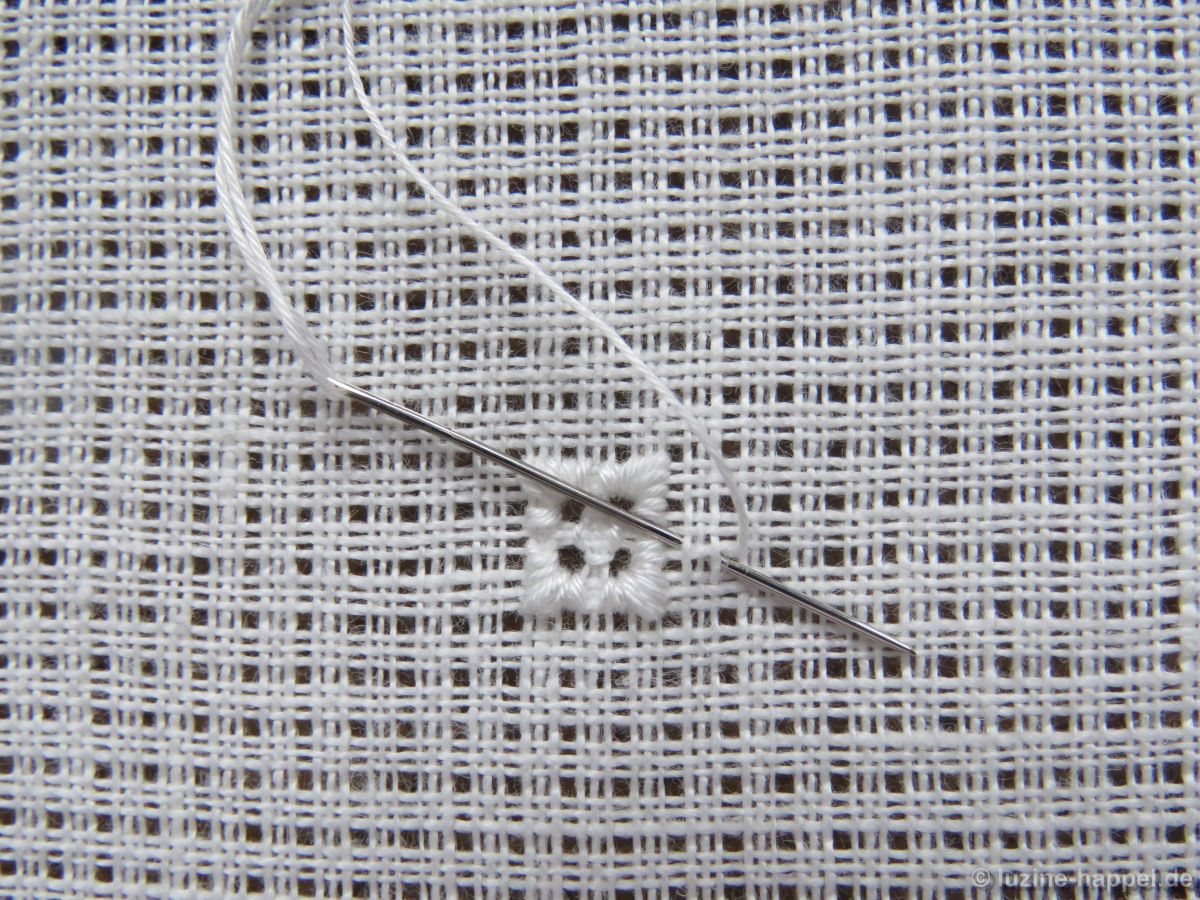
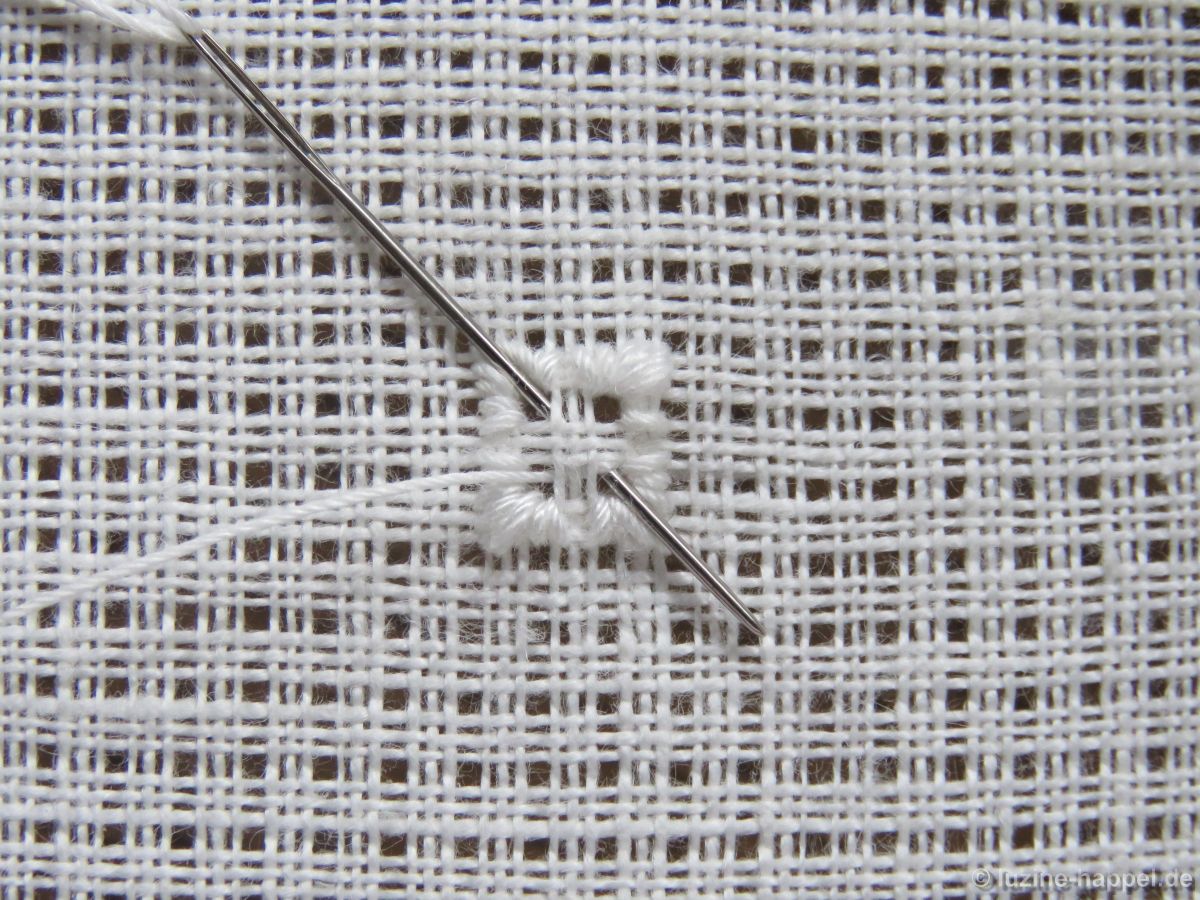
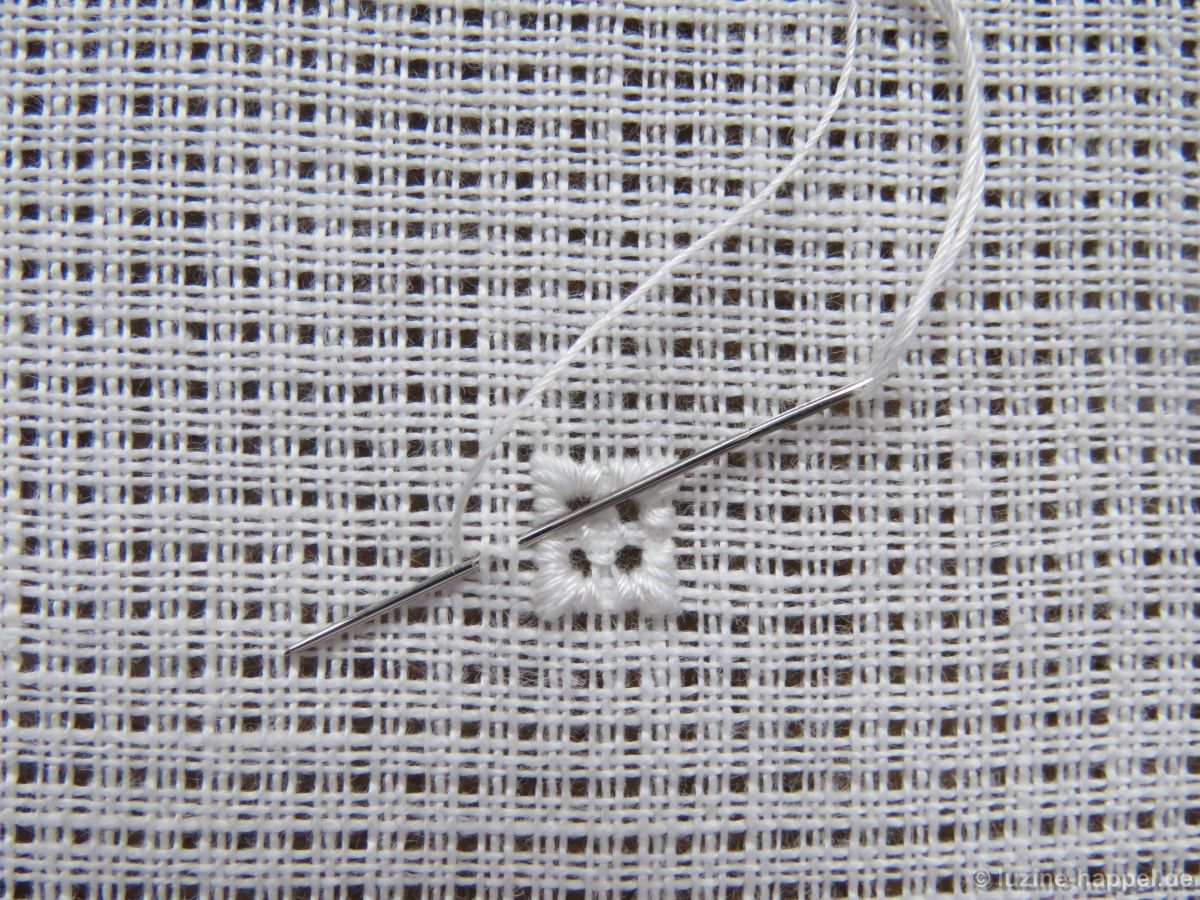
From there bring the needle up in the next center, one square (three fabric threads) down and three squares (nine fabric threads) to the right.
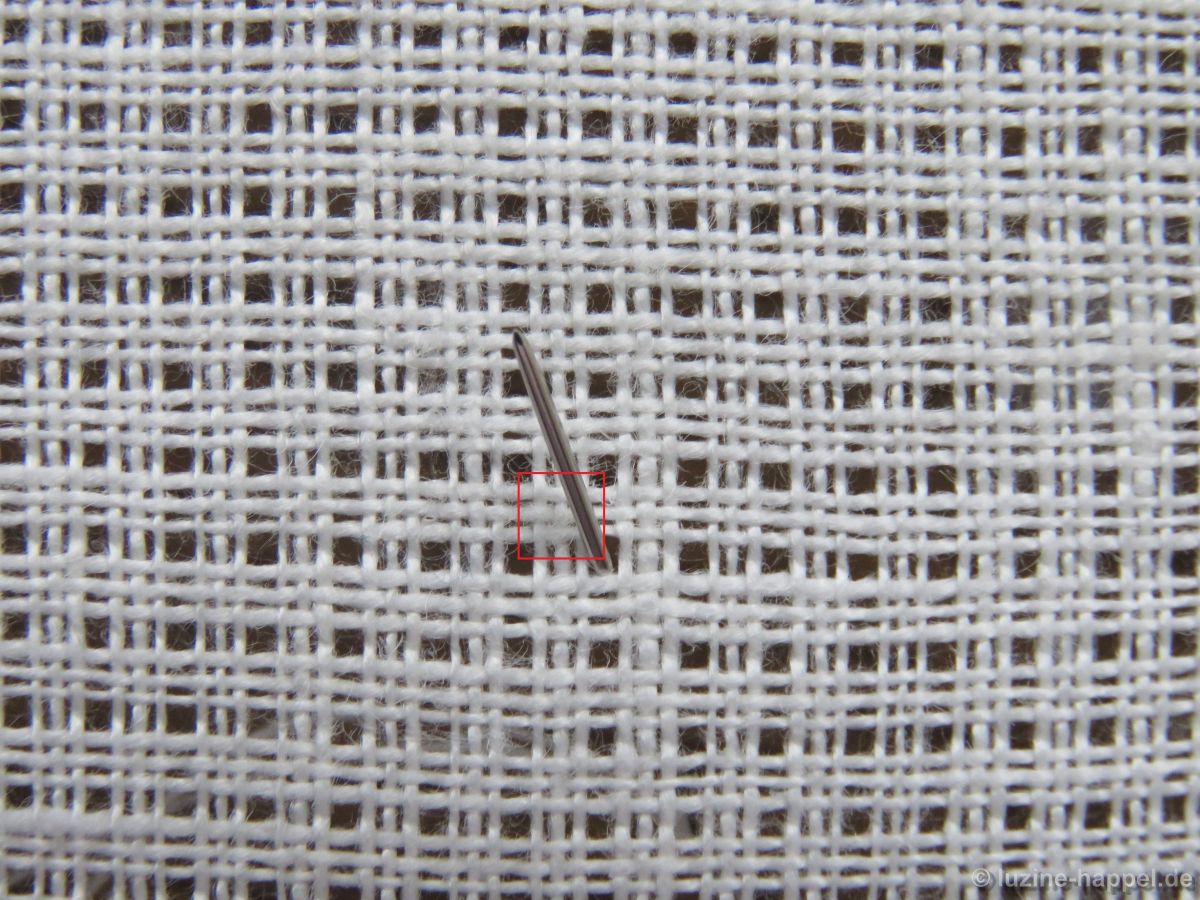
Please make sure to secure your working thread through the backs of stitches when travelling to the new starting point.
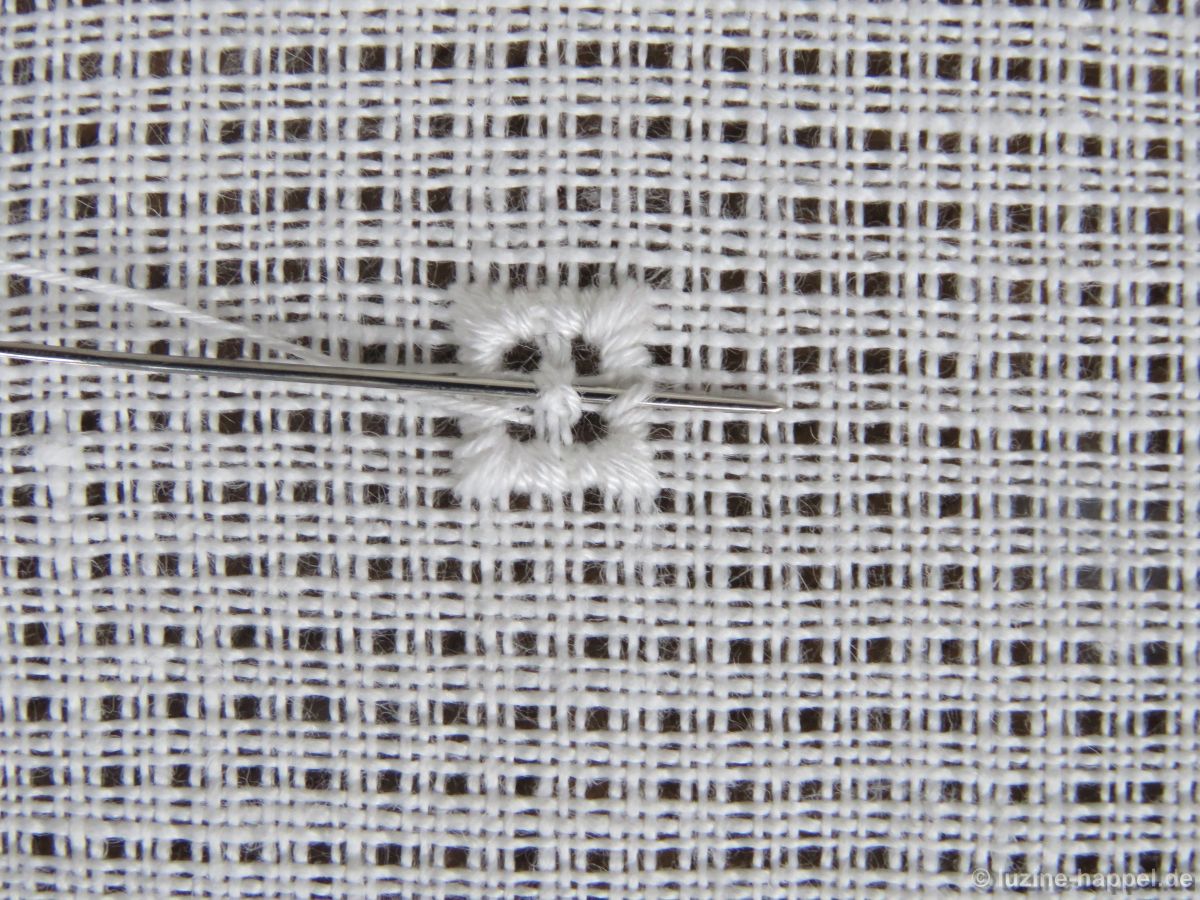
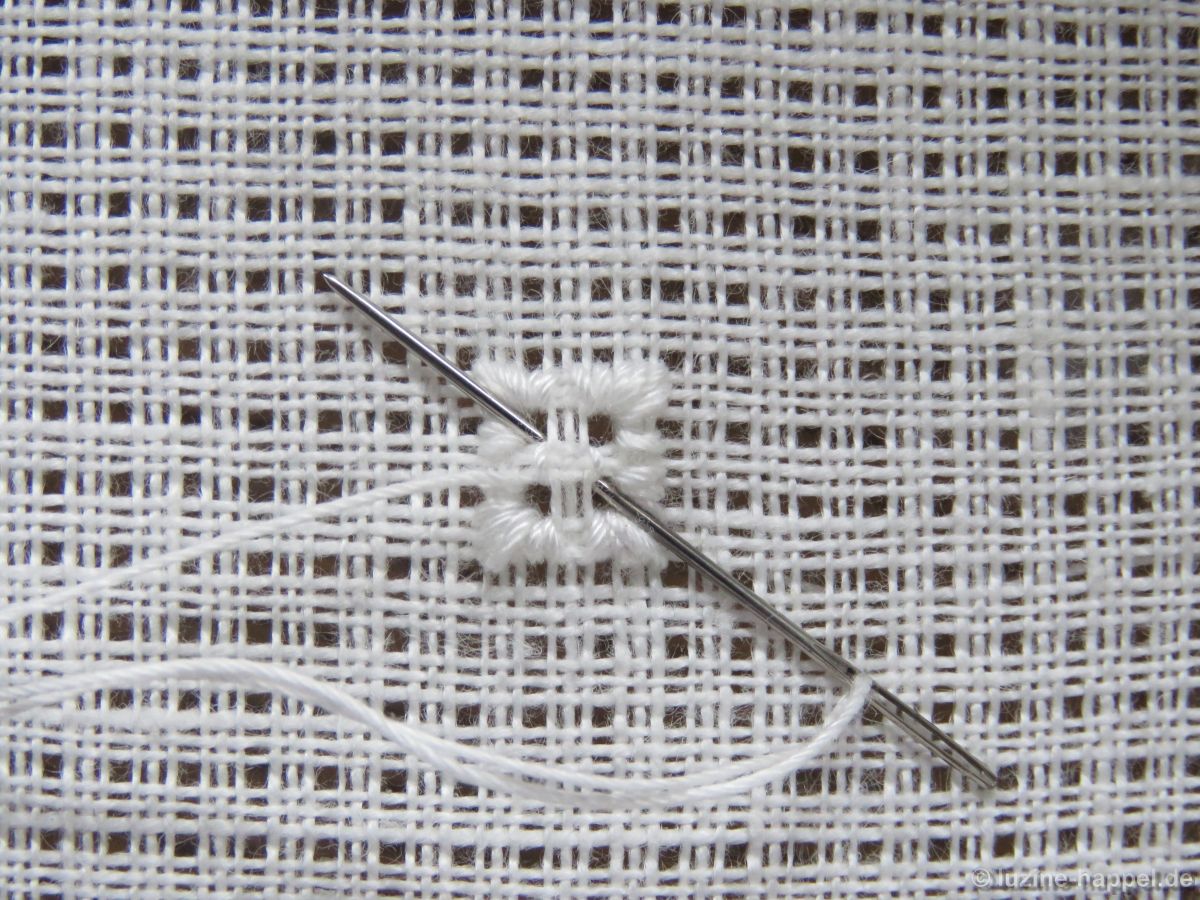
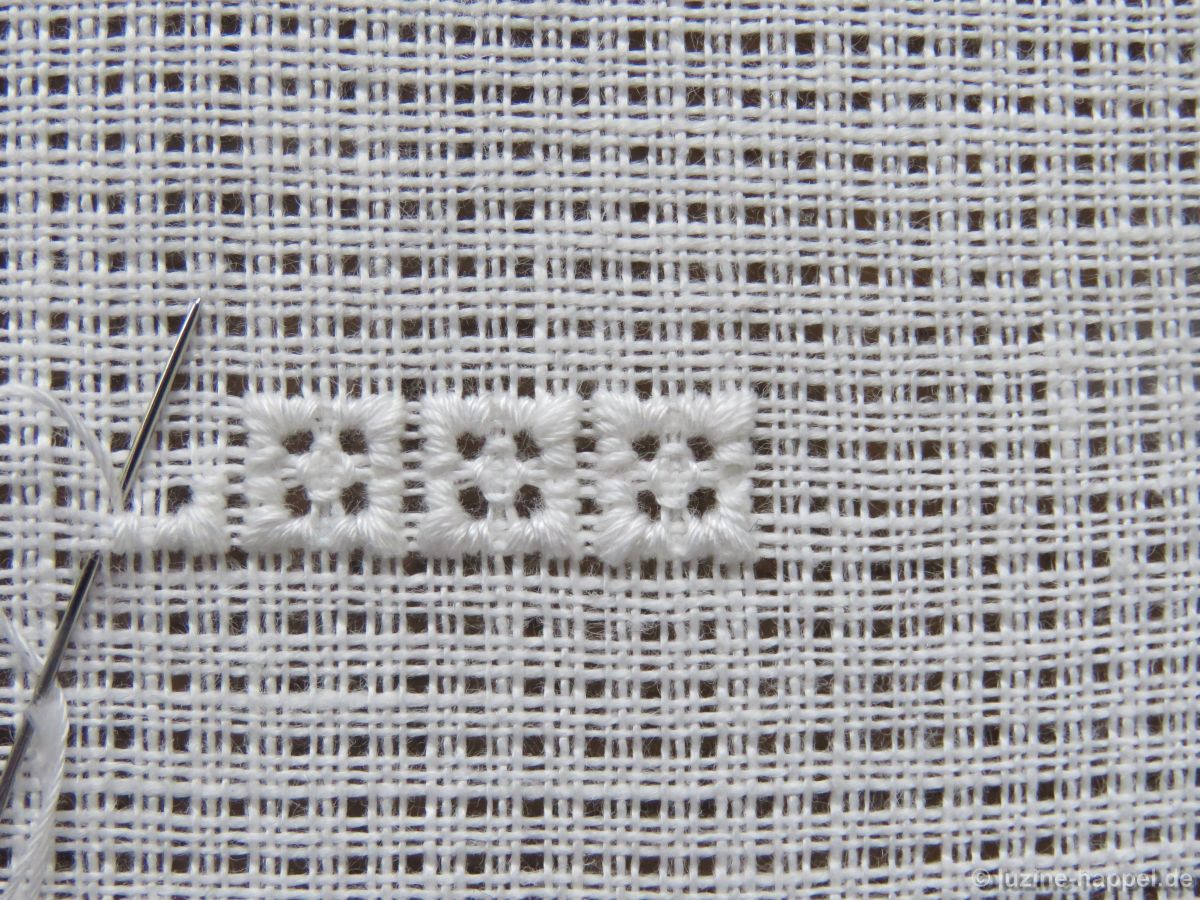
From the next center work a small shirt button in the established way beside the first.
Continue working small shirt buttons
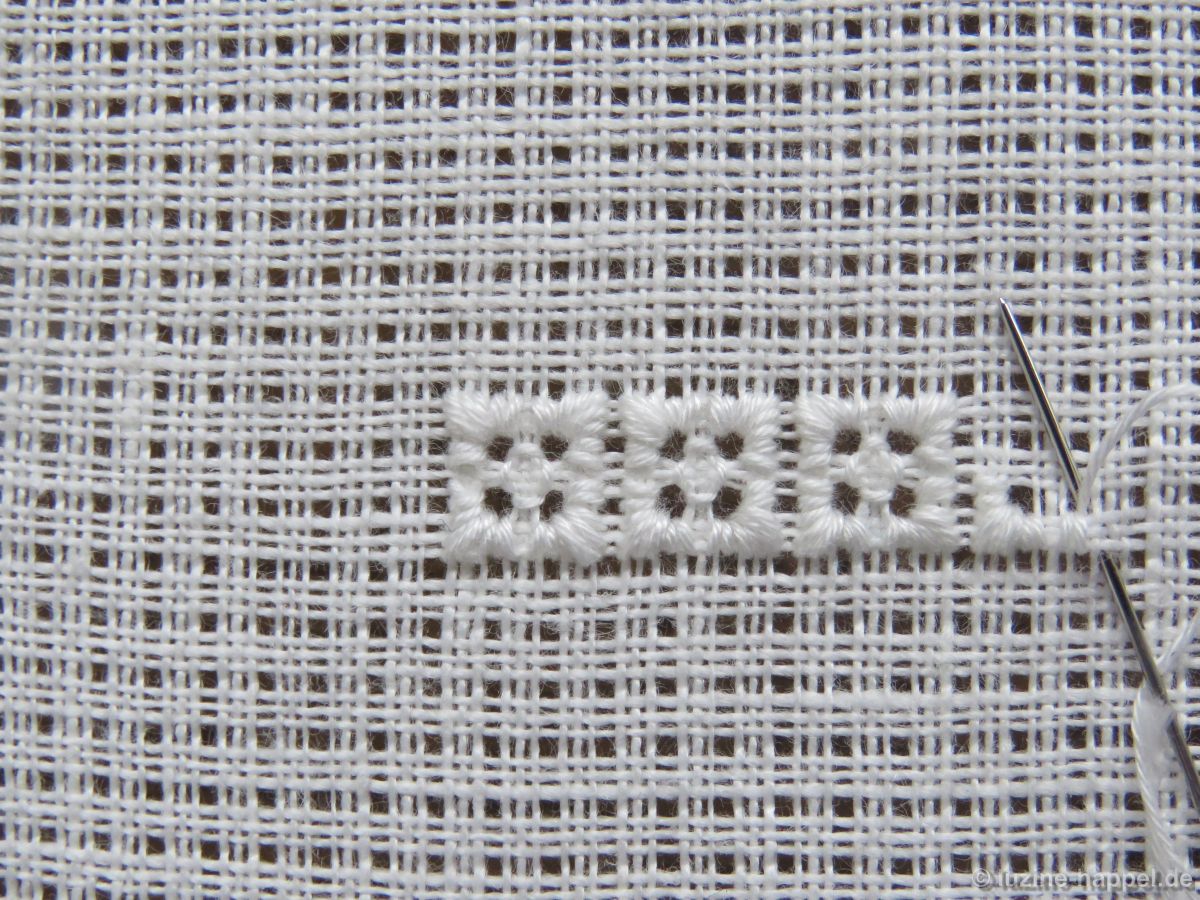
to fill the entire shape.
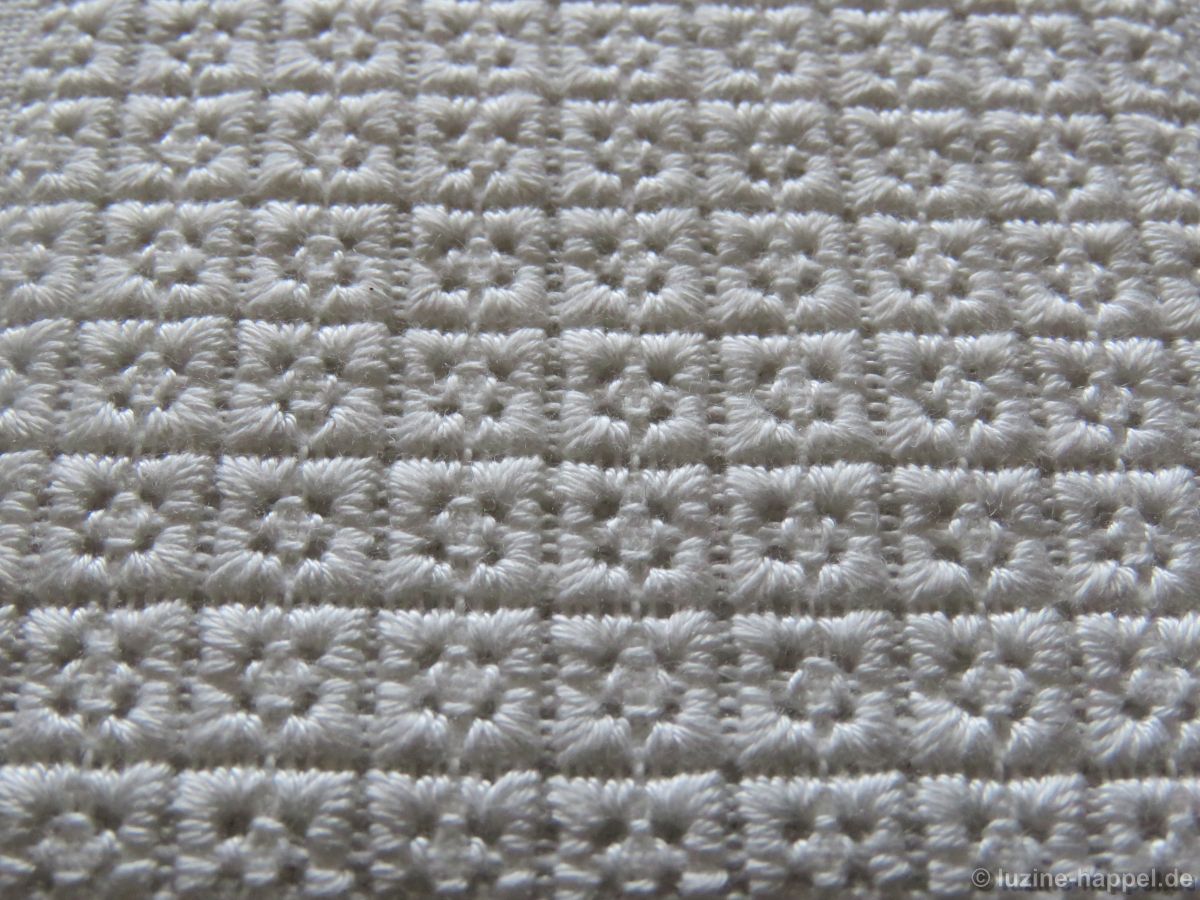
Pattern No. 451 is a combined pattern using small shirt button as one element.
Instructions for the left-hander:
Bring the needle up in bottom right hole of the center square (point where the needle emerges = center of the nine-stitch section), and pull the thread through.
Turn the piece 180°, cross over three threads to the left and one thread down, insert the needle and bring it up in the center again. Tighten thread.
From the center (of the nine-stitch section) work four more stitches moving one fabric thread up with each stitch.
Rotate the piece 90° counterclockwise and continue stitching around the corner – work four stitches upward.
After the ninth stitch, take the needle to the back and bring it up in the center of the next nine-stitch section – the next clockwise corner hole of the center square.
Work the next nine-stitch section in the established way.
From the last stitch of the fourth nine-stitch section, bring the needle up in the bottom left hole of the center square. It is important to choose the opposite side for starting with the Four-Sided stitch to get the corner holes clean and open and the stitch centered.
Work a Four-Sided stitch around the center square with the first stitch on the left and straight up;
the second stitch is taken on the right and up. With this stitch the thread can be tightened a little bit more. In contrast to the Satin stitch sections, where the thread is only tightened so that the stitches lie flat, the thread of the Four-Sided stitch can be tightened a little bit more to pull together the threads of the center square.

Work the third stitch on the bottom from left to right,
and the fourth on the top from left to right.
From there bring the needle up in the next center, one square (three fabric threads) down and three squares (nine fabric threads) to the left.
Please make sure to secure your working thread through the backs of stitches when travelling to the new starting point.
From the next center work a small shirt button in the established way beside the first.
Work one small shirt button beside the next, and continue working small shirt buttons
to fill the entire shape.

Leave a Reply