
Sometimes people find it difficult to get the mitered corner to exactly match up to the hem layout.
Here are some tips:
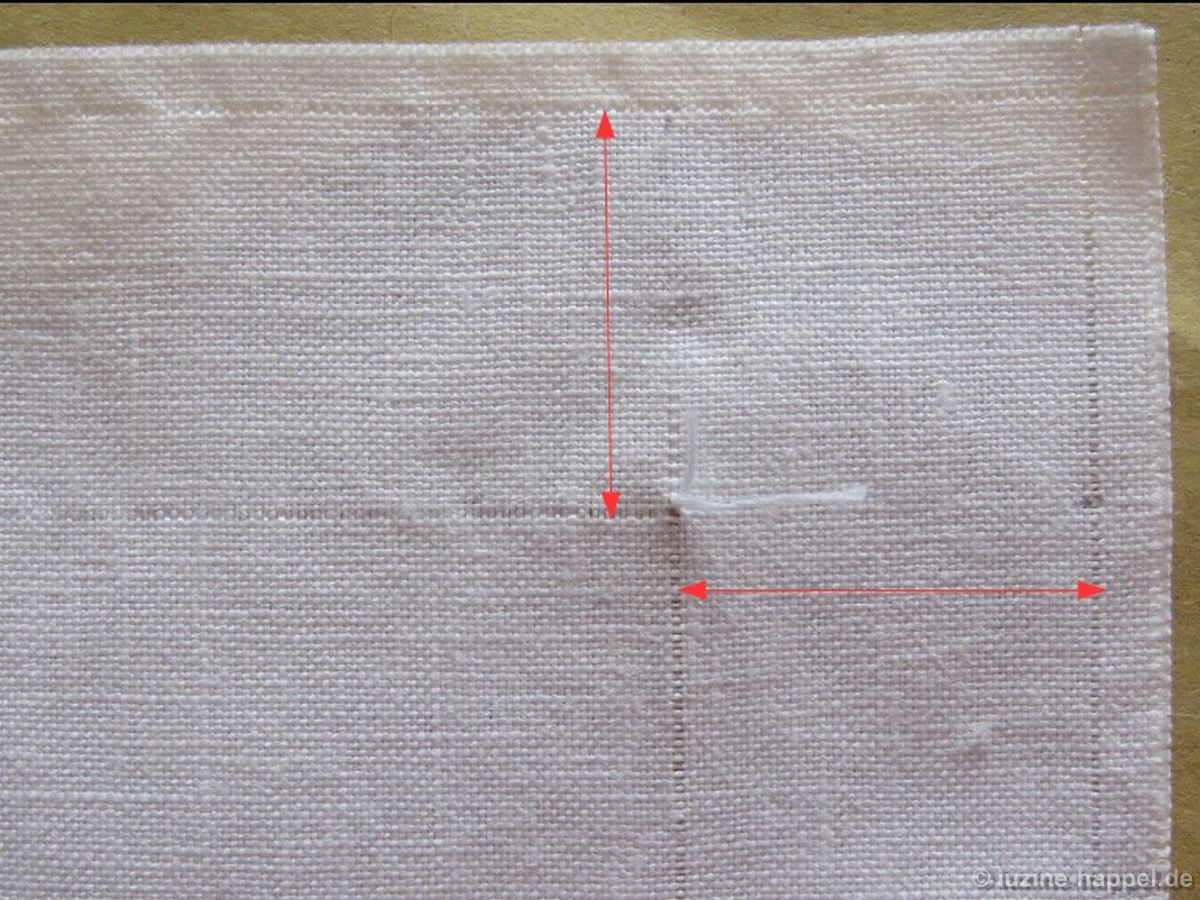
It is important that the distance between the withdrawn thread line for the fold and the withdrawn thread line for securing the hem is the same on both sides of the corner.
Iron your piece and lay it flat – right side face down.
Follow the thread of the withdrawn thread line for securing the hem up to where it meets the withdrawn thread line for the fold, mark the point exactly. Do the same on the adjacent side of the corner.

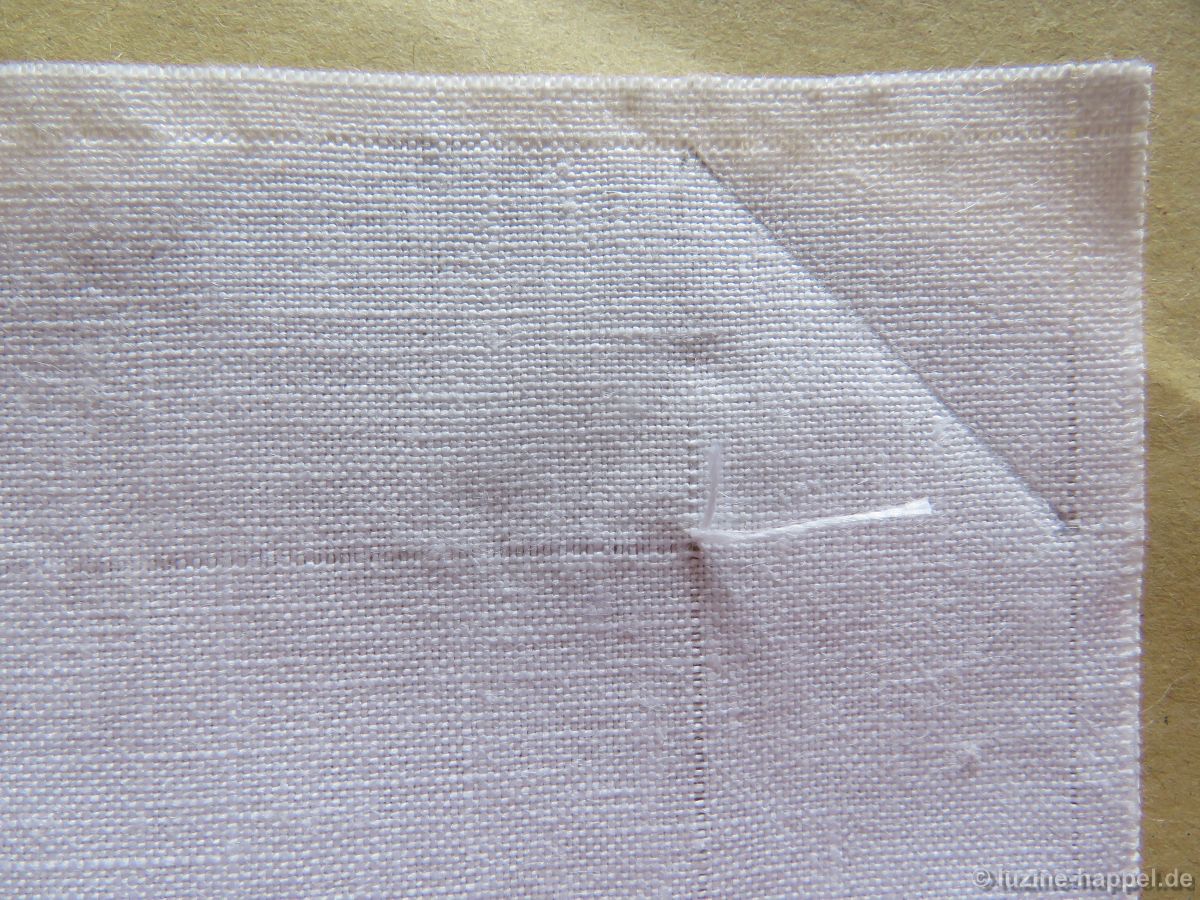
Using a #2 pencil draw a diagonal line to connect both marks.
Now there are two different ways to proceed.
#1:
Fold the piece as shown in the picture below.
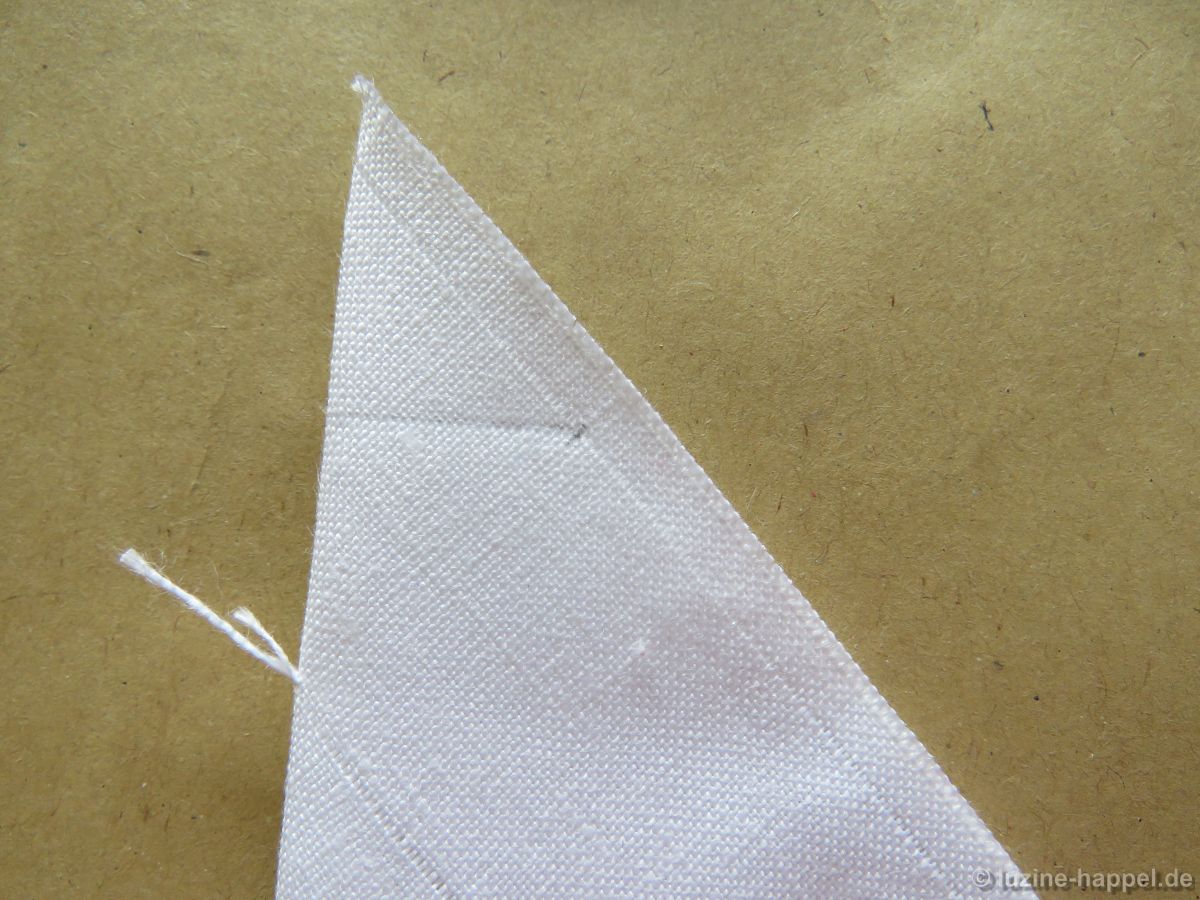
Insert a pin along the pencil line.
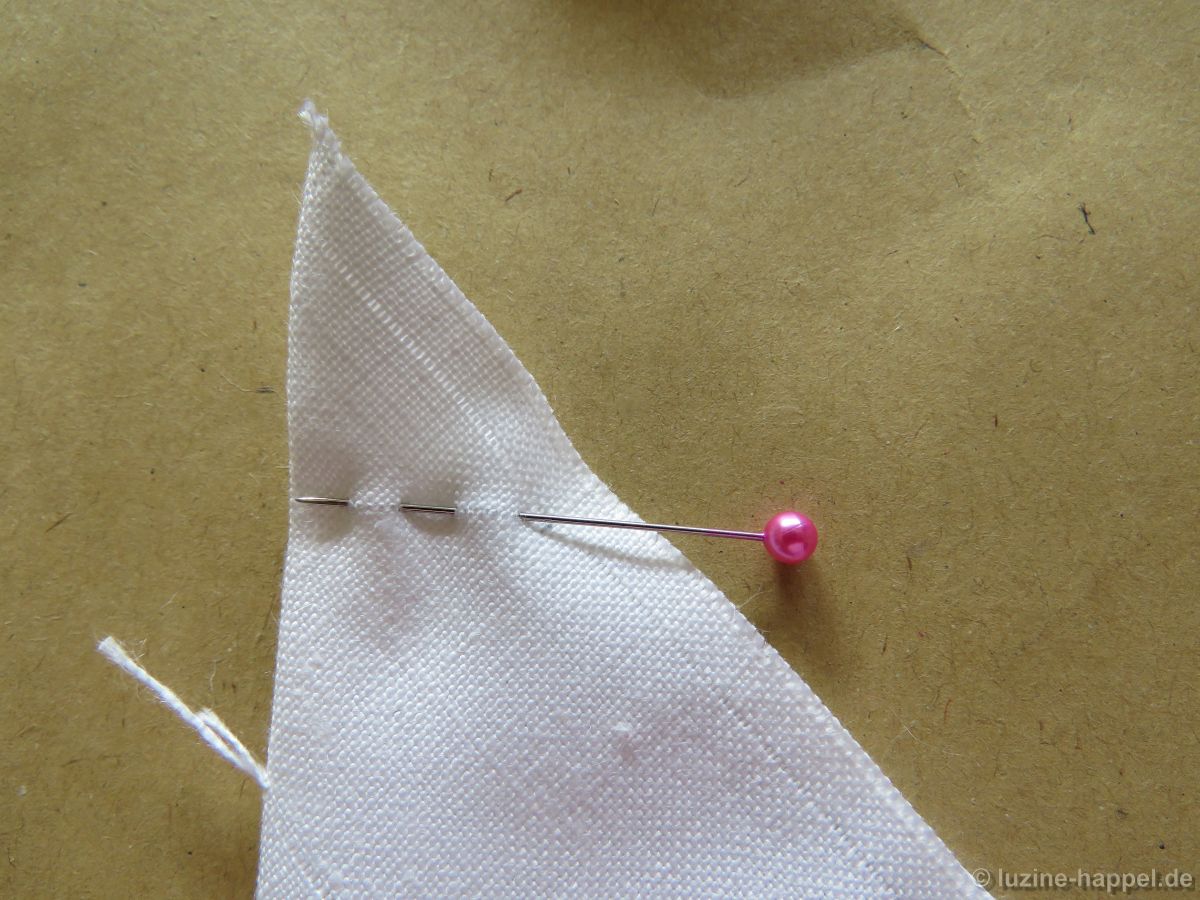
To make sure that you have folded the fabric exactly, turn the piece over to check that the pin is also lying directly on the pencil line on that side of the fabric.
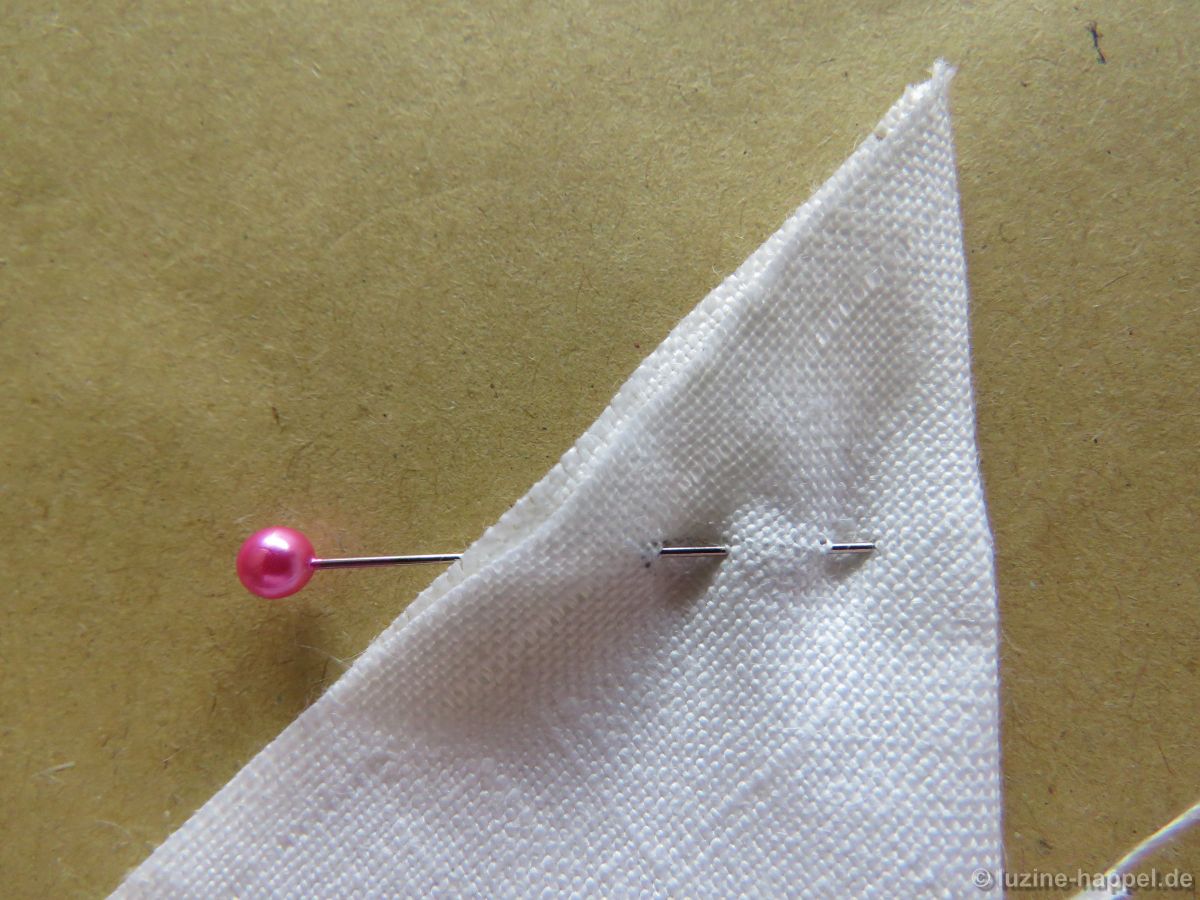
Sew along the pencil line then trim the seam allowance.

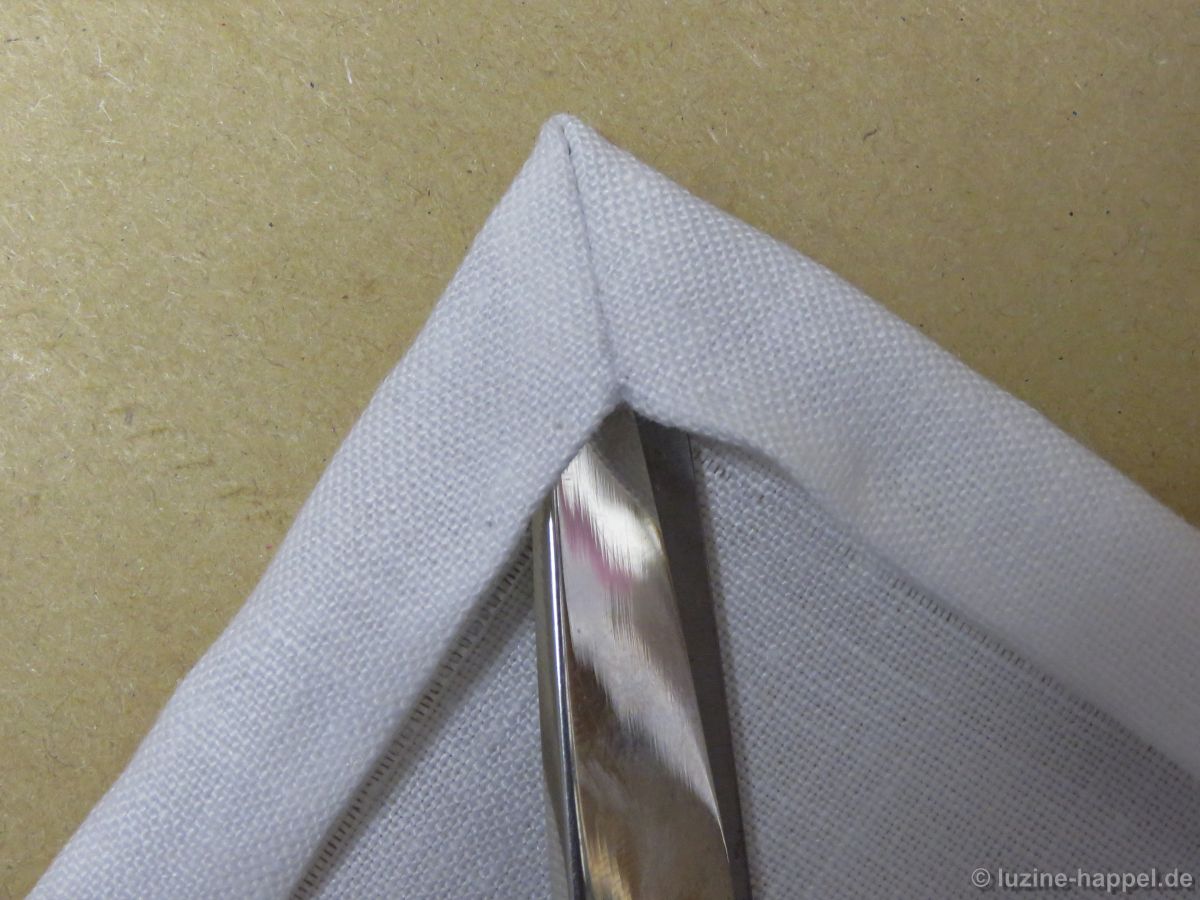
Open up the seam allowance, and smooth it with your thumbnail as far as possible into the corner point.

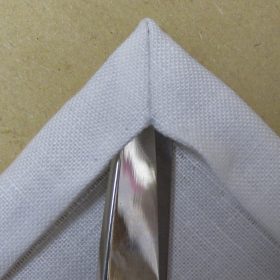
Turn the hem corner right side out. A pair of scissors with points that are not too sharp can help to define the corner point.
Fold the raw edge along the fold line. First pin and then baste the hem in place.
Secure it using Antique Hem stitches.


This is a beautiful and very precise explanation, thank you.
Mir ist das mit der Schere immer ein wenig zu gefährlich, ich benutze gerne ein Essstäbchen aus dem Asia-Imbiss. Ich finde das ist auch sehr gut geeignet, nicht zu dünn nicht zu dick mit einer schön abgerundeten Spitze.
Liebe Grüße
Sylvia Sellmaier
Danke für den Tipp – nützliche Hinweise sind immer willkommen. In einem Nagelpflegeset habe ich ein Werkzeug gefunden, das auch gut einsetzbar ist – mit fast rechtwinkliger Spitze und abgerundeten Kanten.