
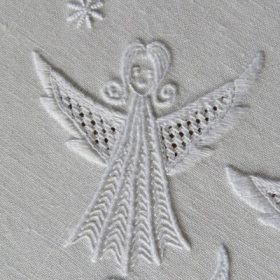
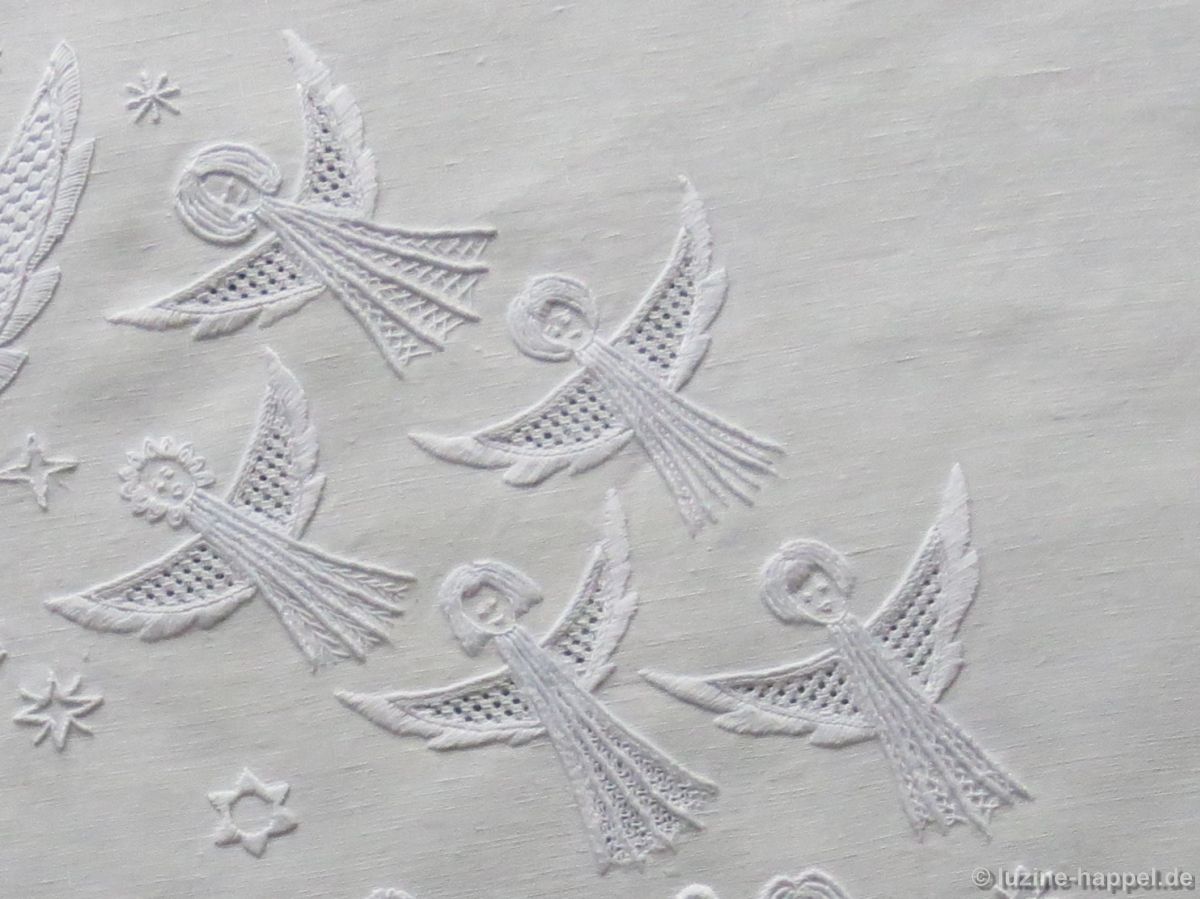
Little Angels (2) – Dresses and Wings
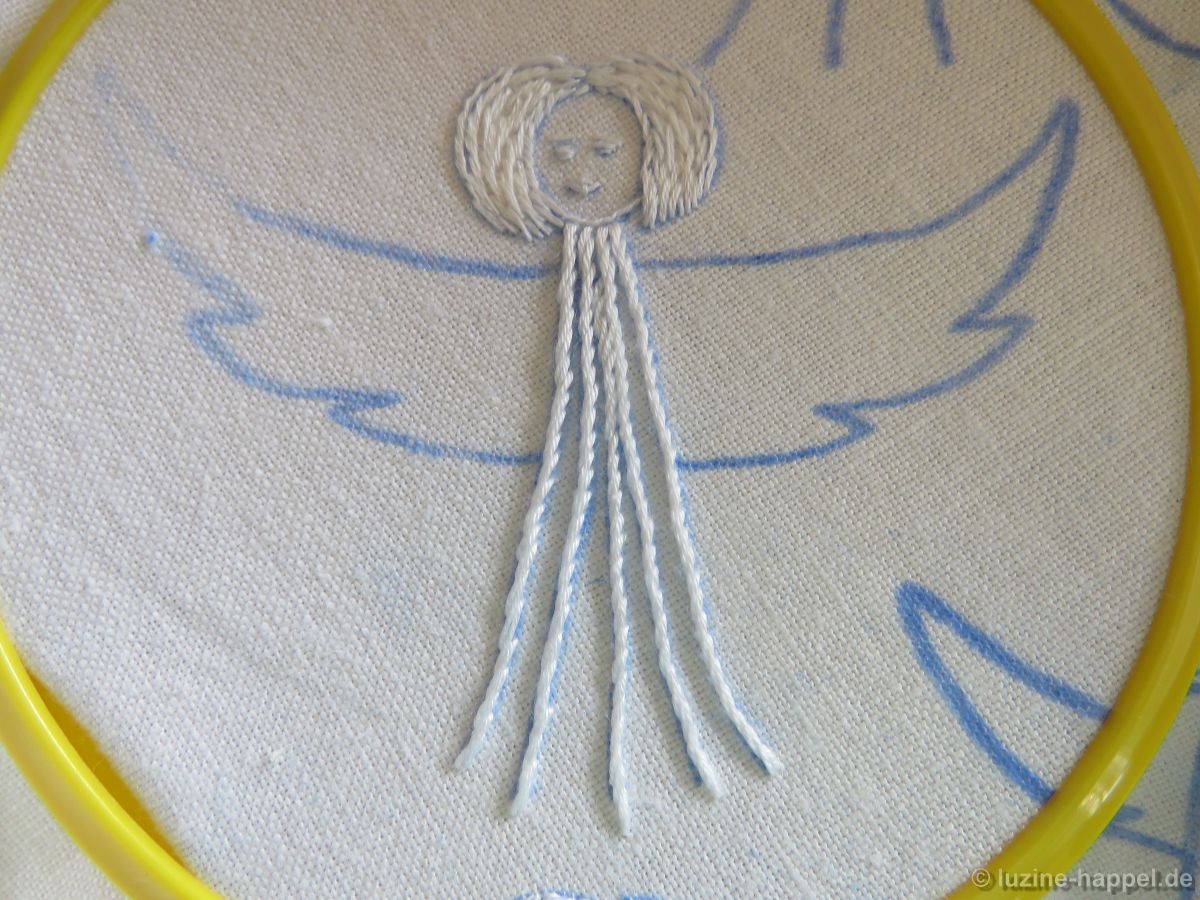
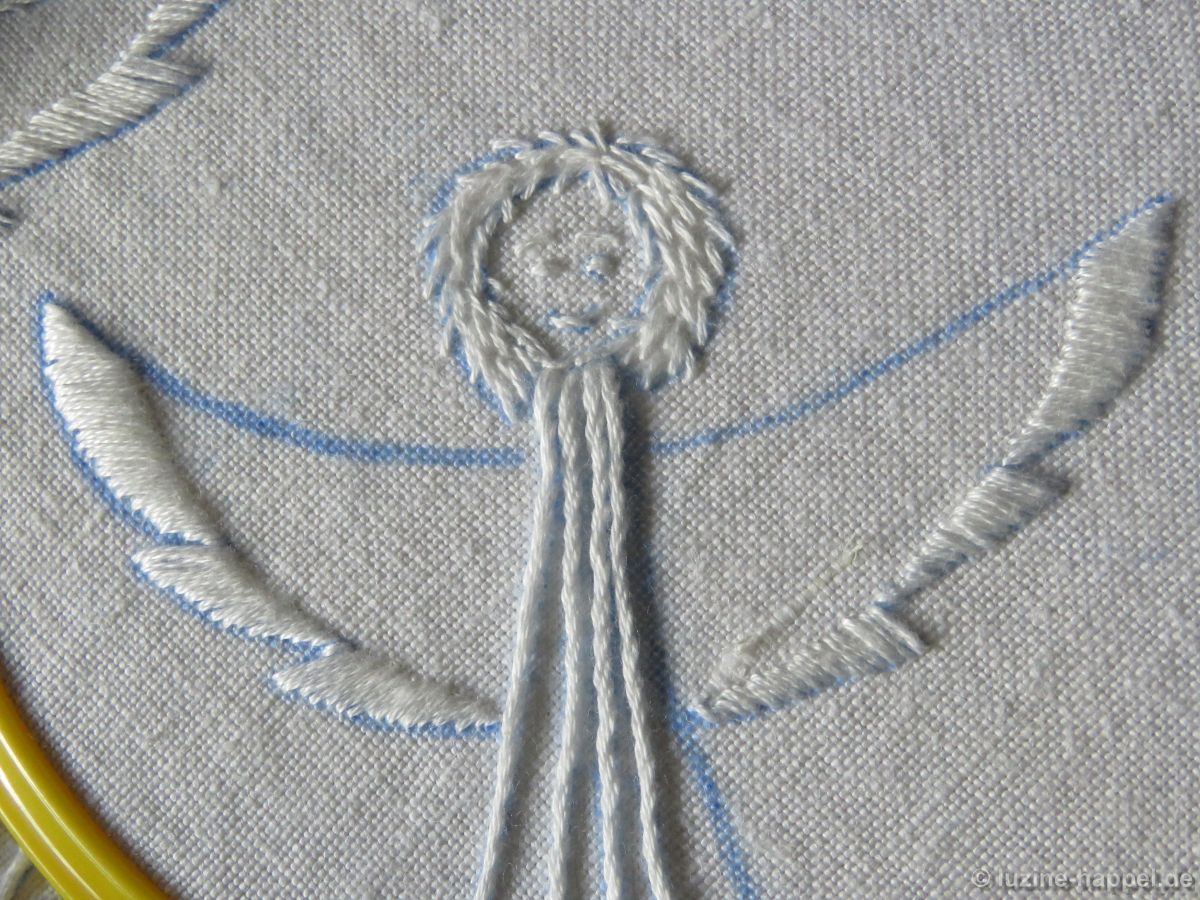
Since in this design the dress also covers the neck, the next step (after embroidering the head) is to embroider the dress. The dresses are designed like rays. To make them stand out, use coton à broder No. 16 to stitch a slanting wide Stem stitch (Early Schwalm Whitework). At the top the stitches are connected to the facial outline; at the bottom of the dress, the rows can end at different lengths to look a bit fringed. This, in my opinion, emphasizes the apparitional character of these angels.
In this project, I wanted to forego filling patterns in the dresses. But the appearance of the group of angels seemed to me to be incomplete. A discreet underlay under the rays would be good.

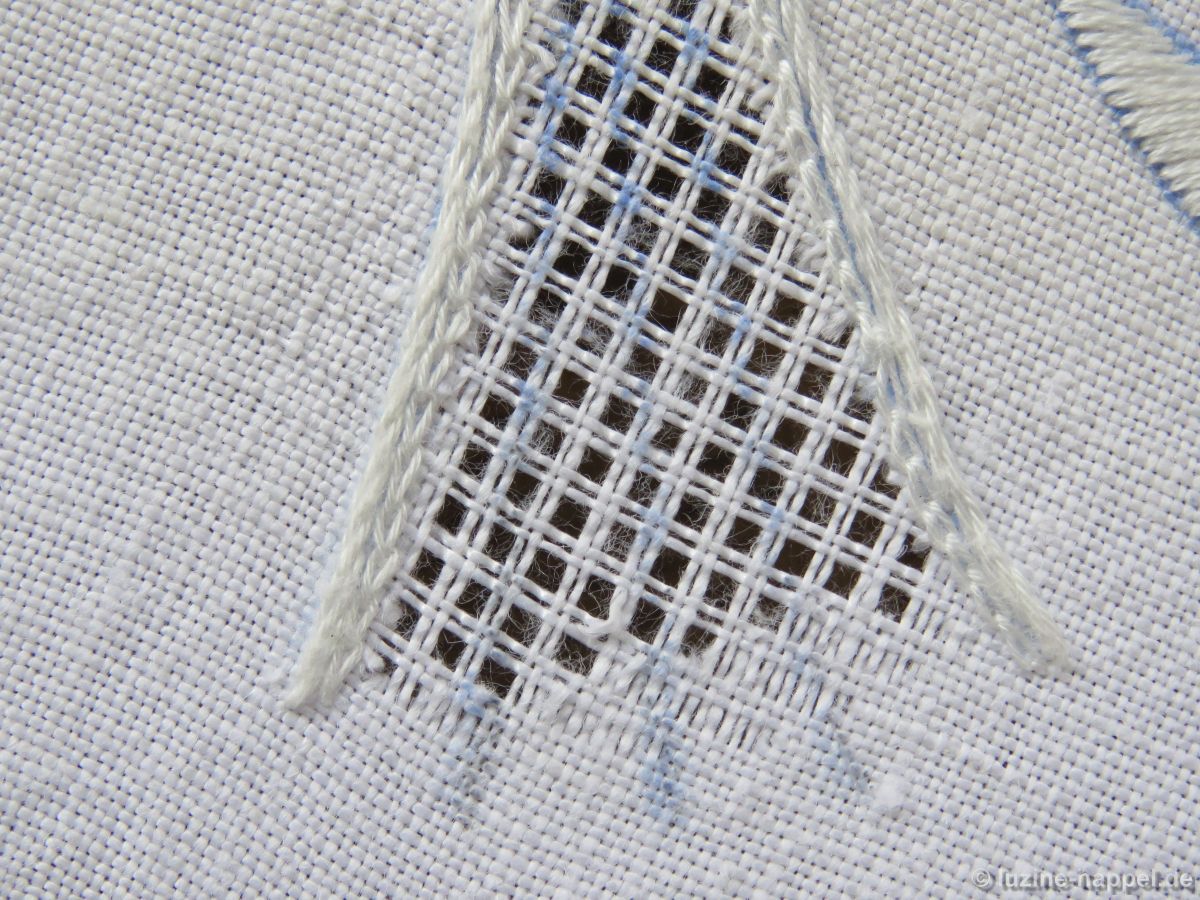
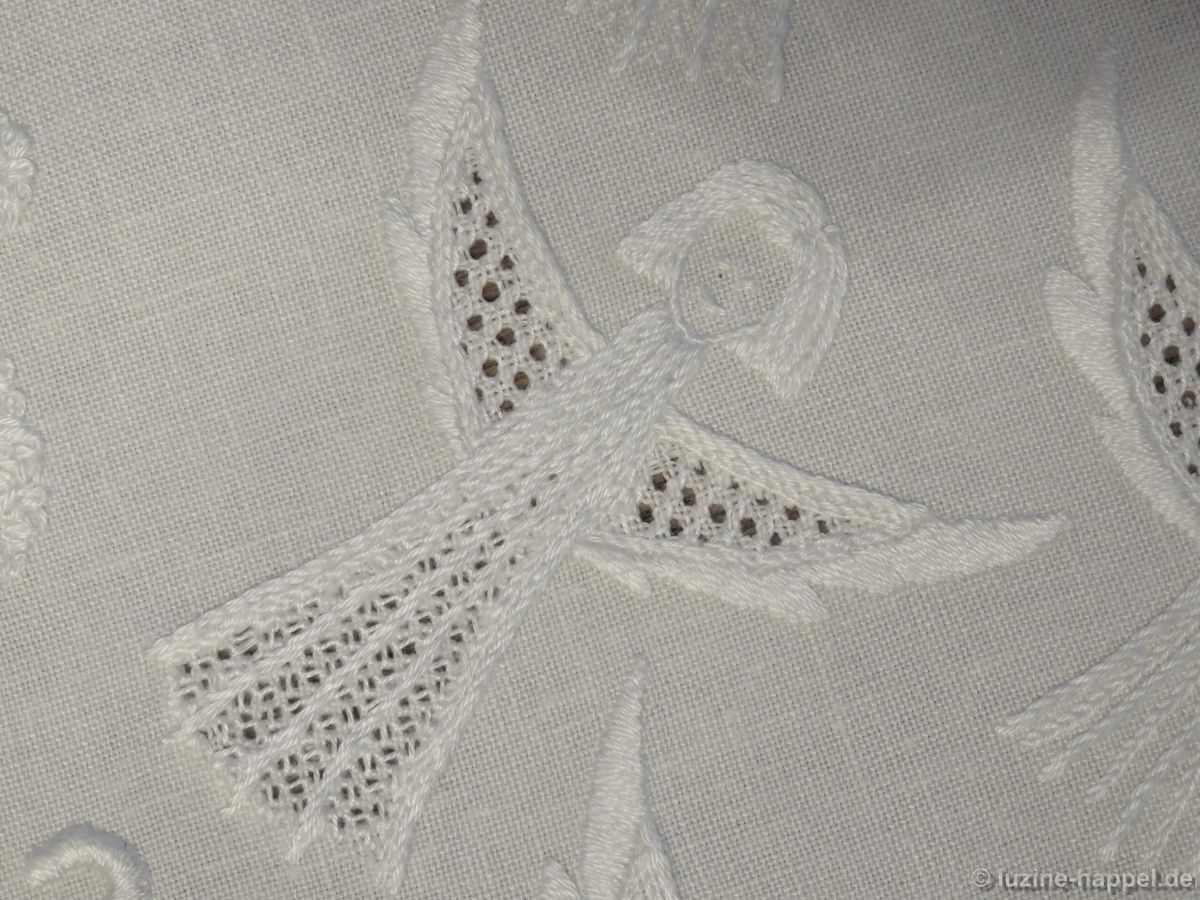
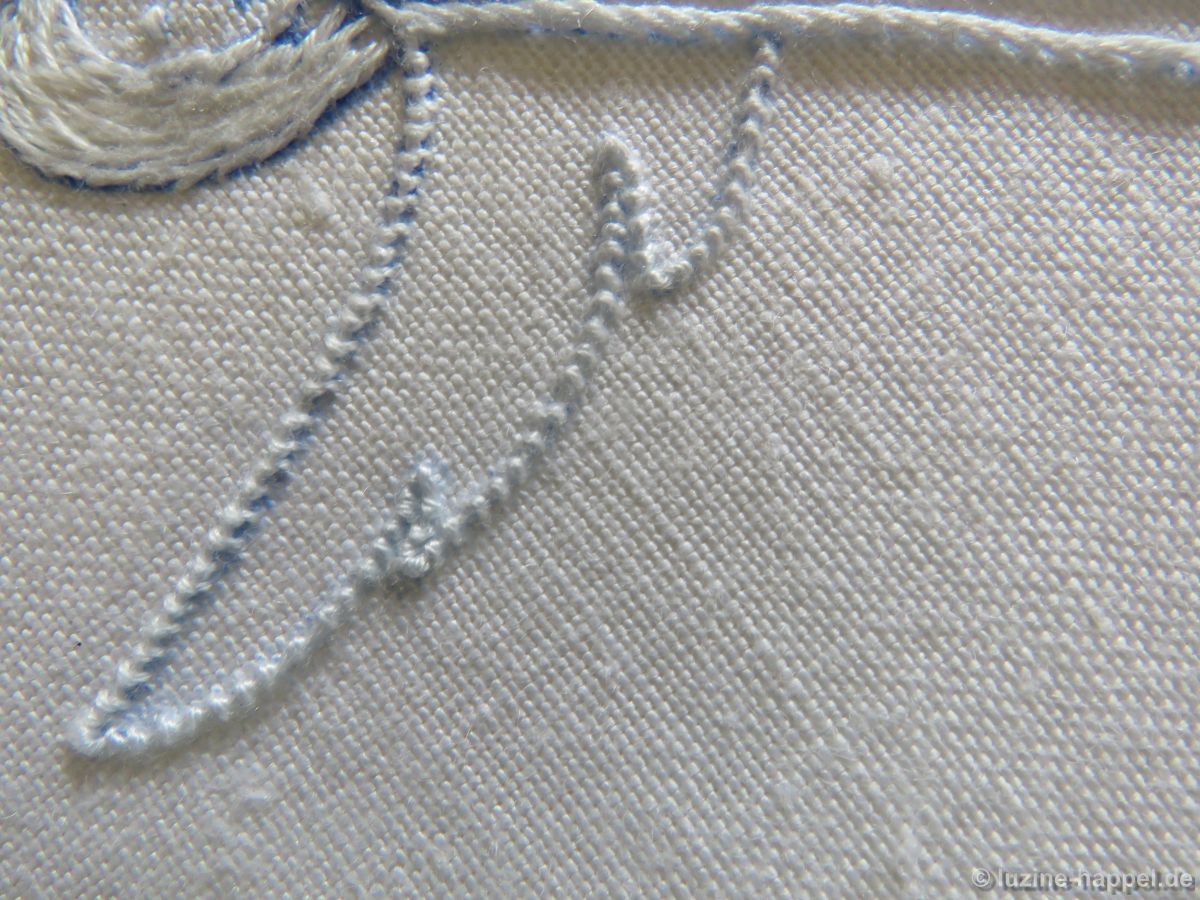
It is difficult to embroider filling patterns in such narrow shapes It works better if you first embroider only the two outer boundaries, insert the filling pattern and then embroider the other lines over the finished filling pattern. So I removed the middle rays of an angel´s dress, worked Chain stitches along the side edges, and withdrew threads (not quite to the bottom end of the dress) for an openwork pattern.
On the back the bottom thread ends were laid away from the grid,
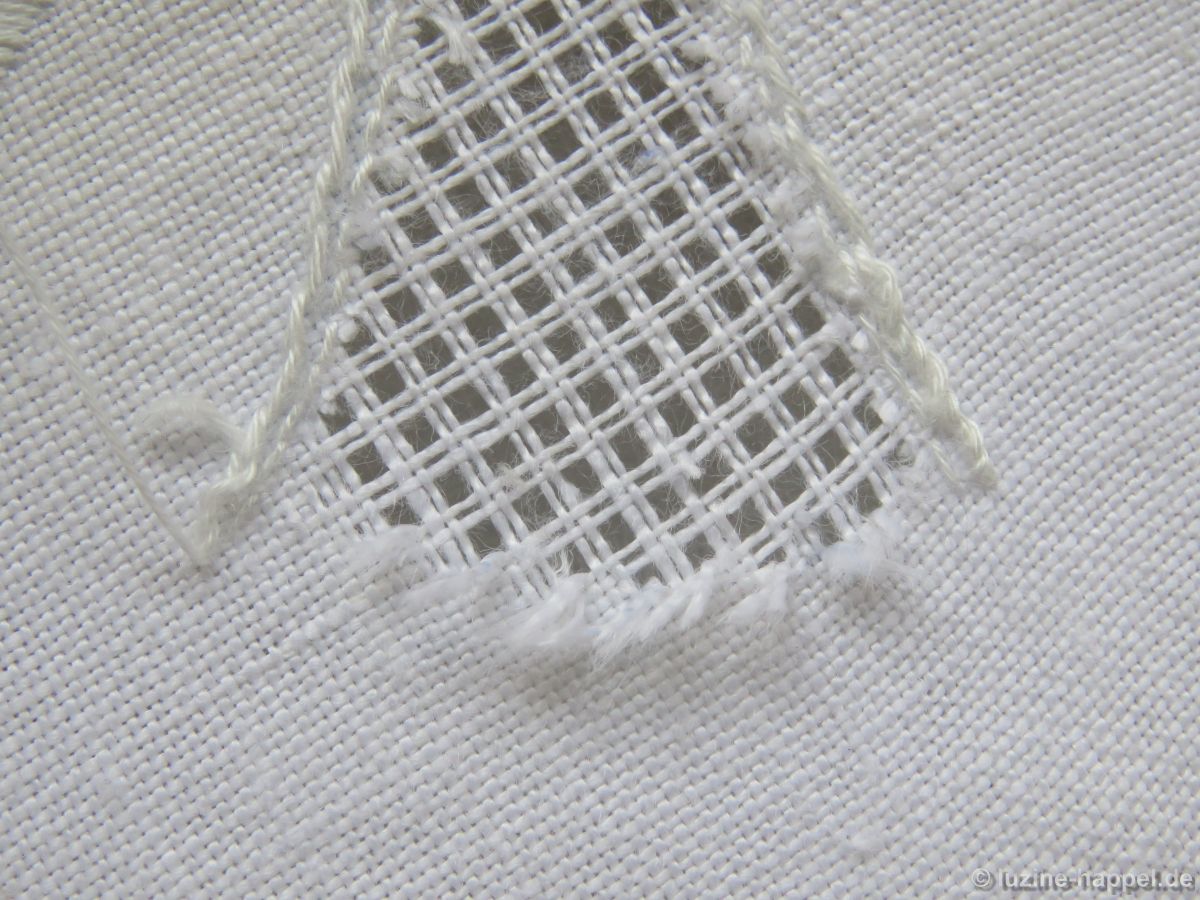
fastened with short Running stitches,
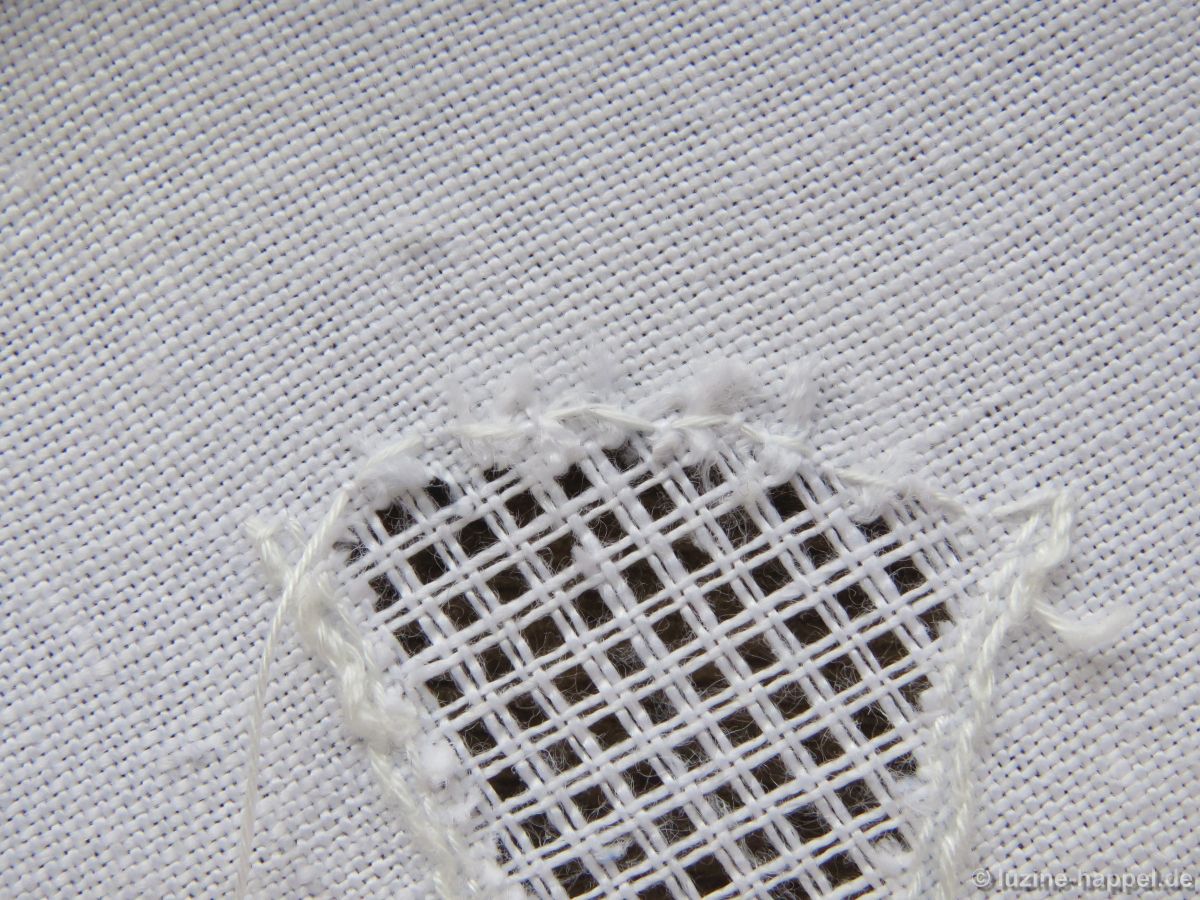
and secured from the front with Whip stitches.
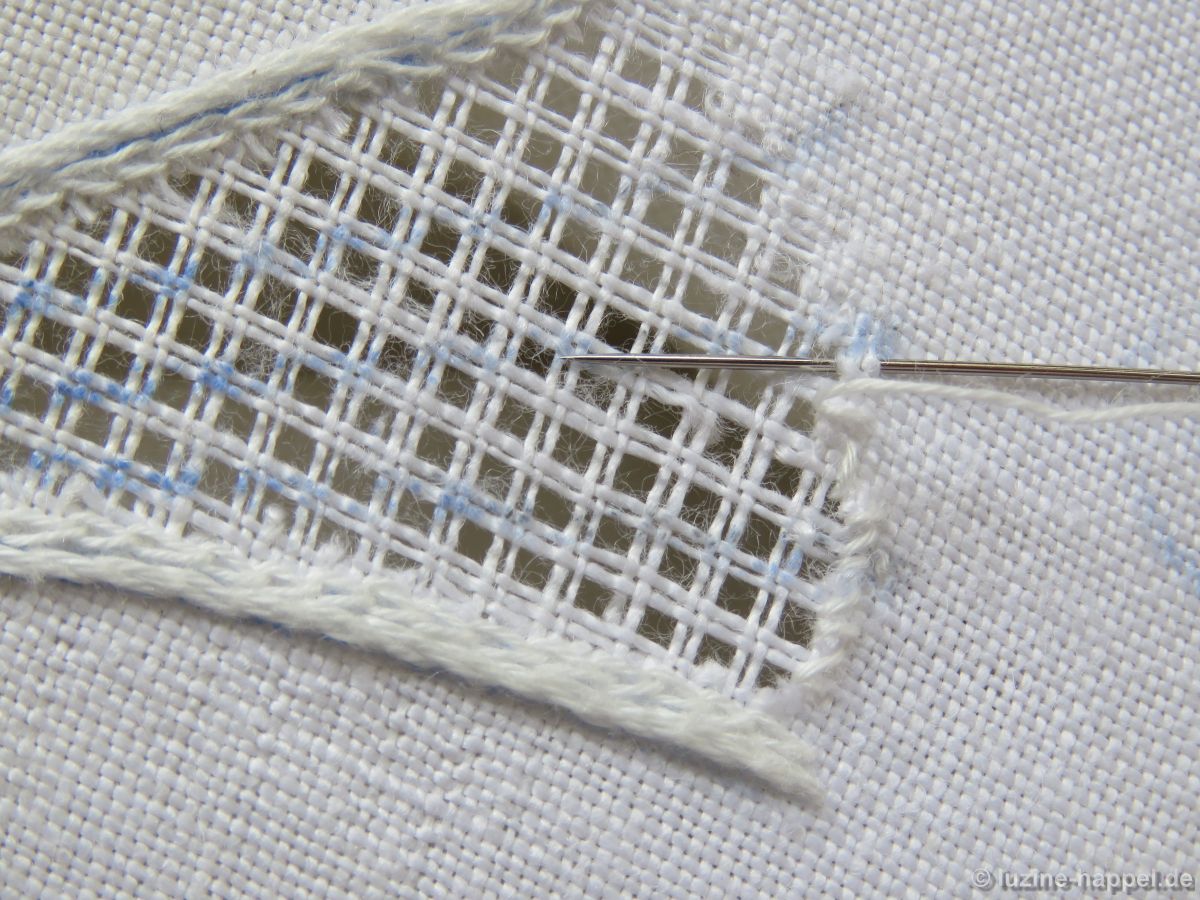
The filling pattern Diagonal Cross Filling-French Variation/”half” (Openwork Pattern Samplers) was worked.
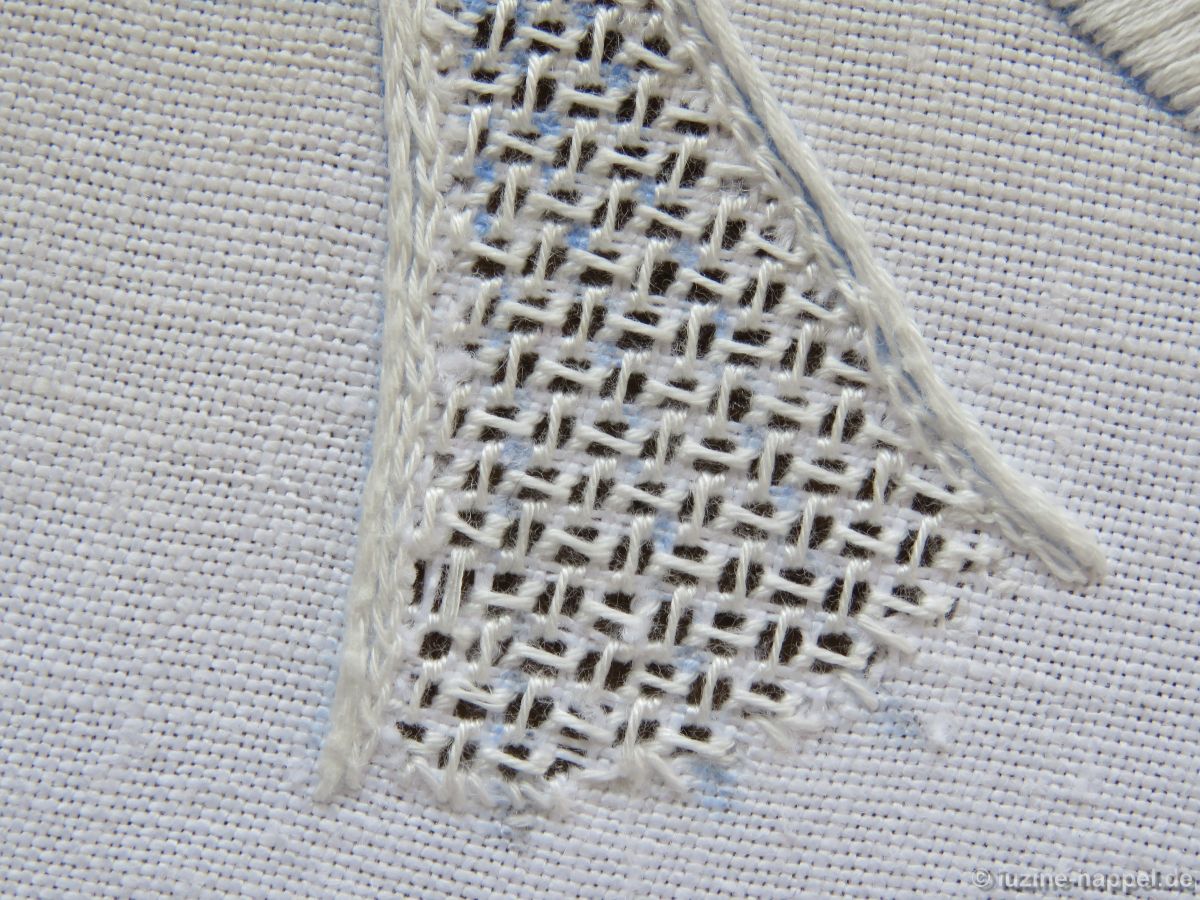
Afterwards the middle rays were embroidered again. The marking lines can be slightly seen through the pattern.
It is a little bit difficult to stitch the rays in the openwork filling pattern.
So I looked for other solutions.
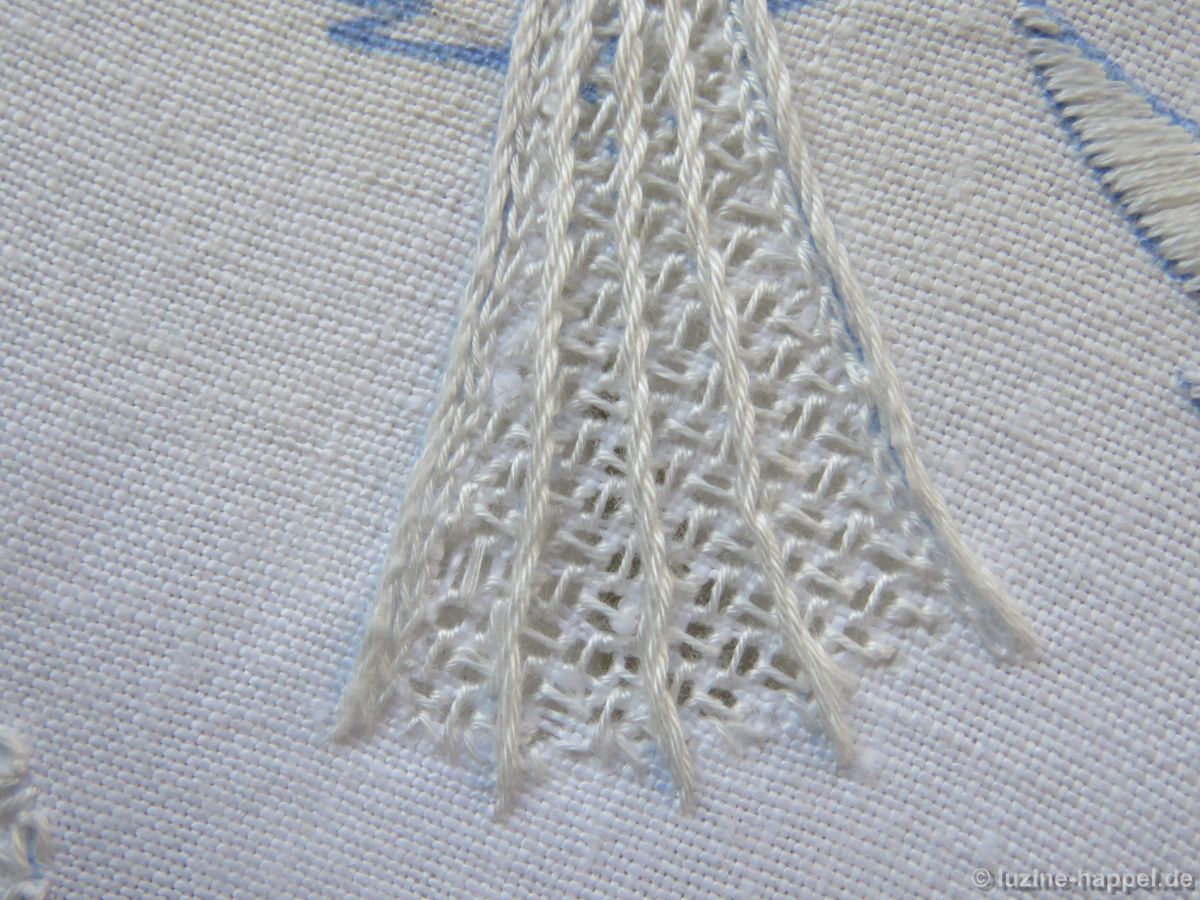
Herringbone stitches – started at the bottom of the dress – are a good option.
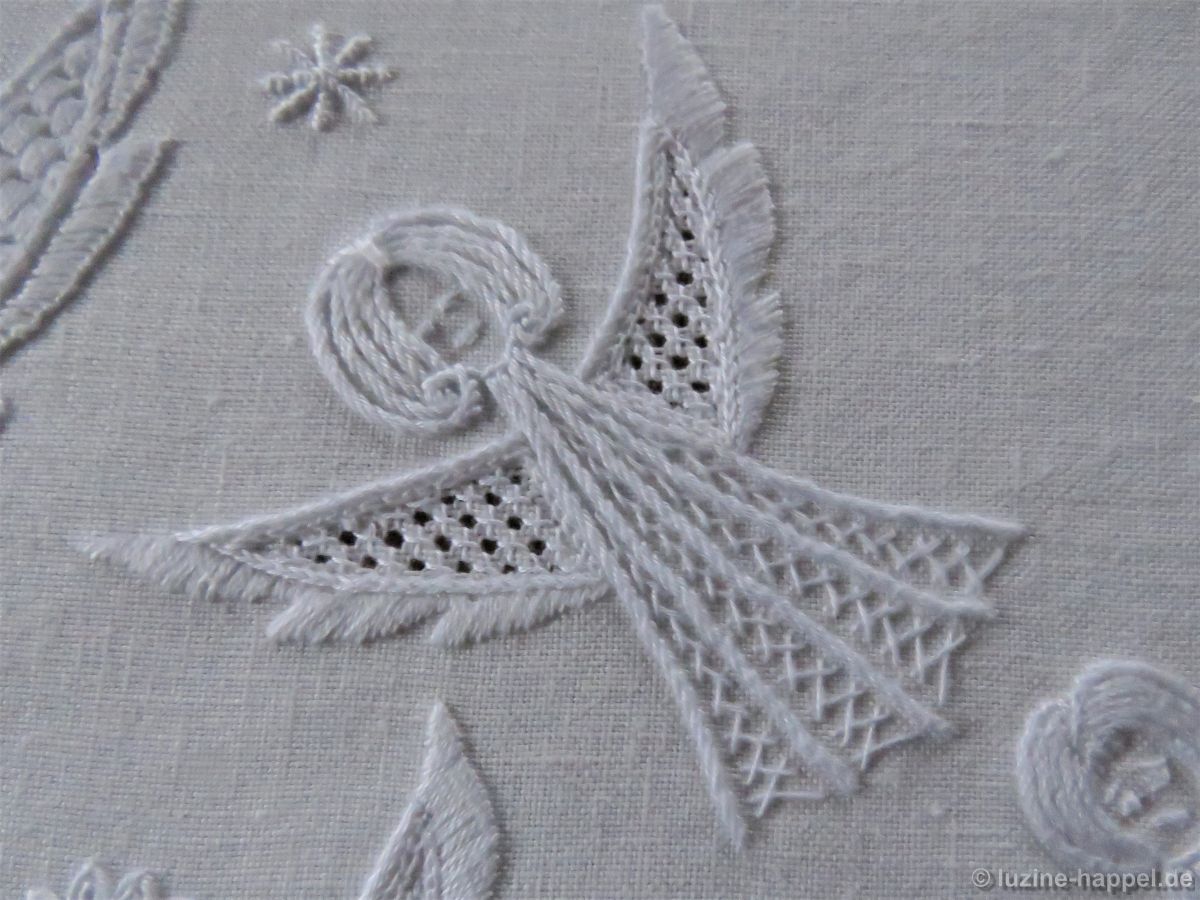
Many other decorative stitches (Early Schwalm Whitework) are conceivable – here are some examples:
These patterns – modest in appearance – between the more prominent rays

improve the overall impression.
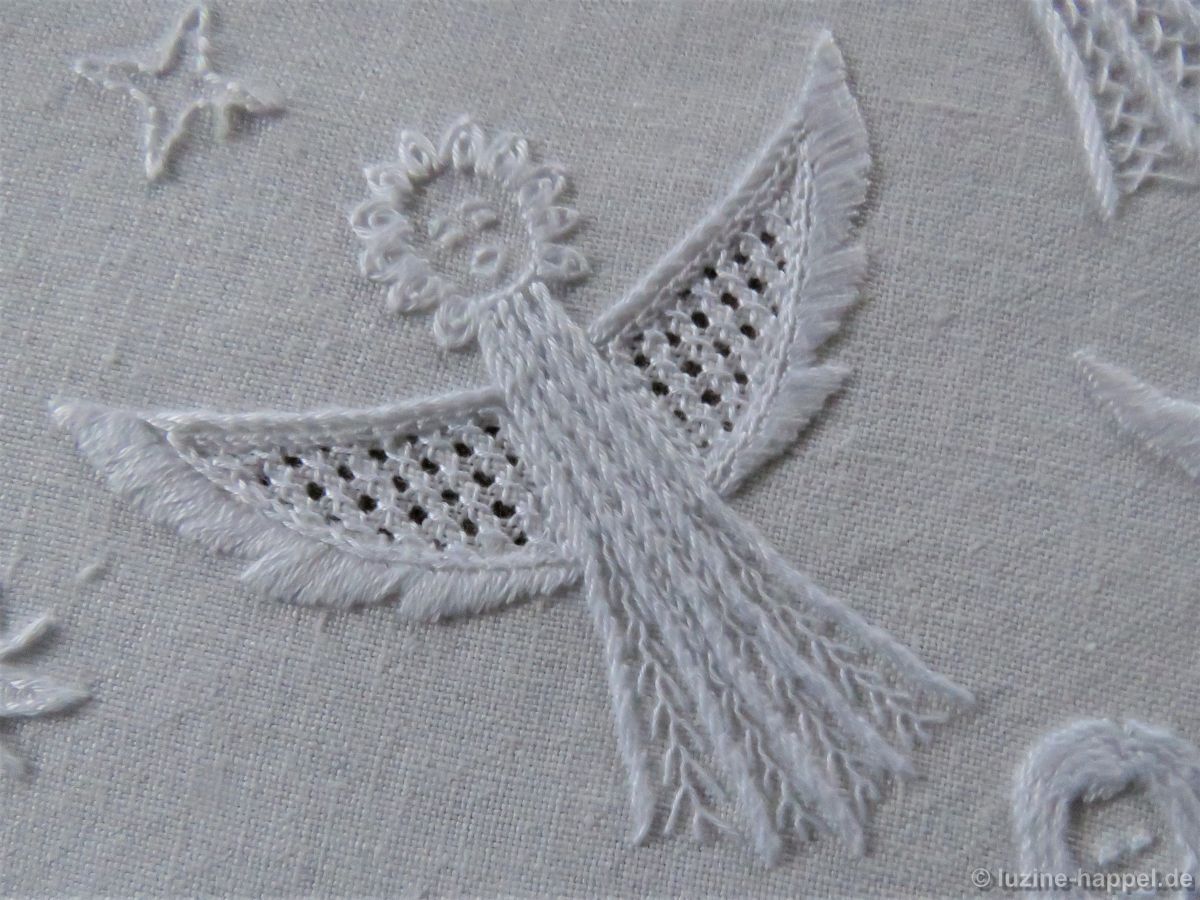
The outlines of the wings could be worked with Coral Knot stitches.
But because it is difficult to fill the small points with filling patterns, I marked a line separating the points from the remaining part of the wing. The points were filled with Satin stitches.
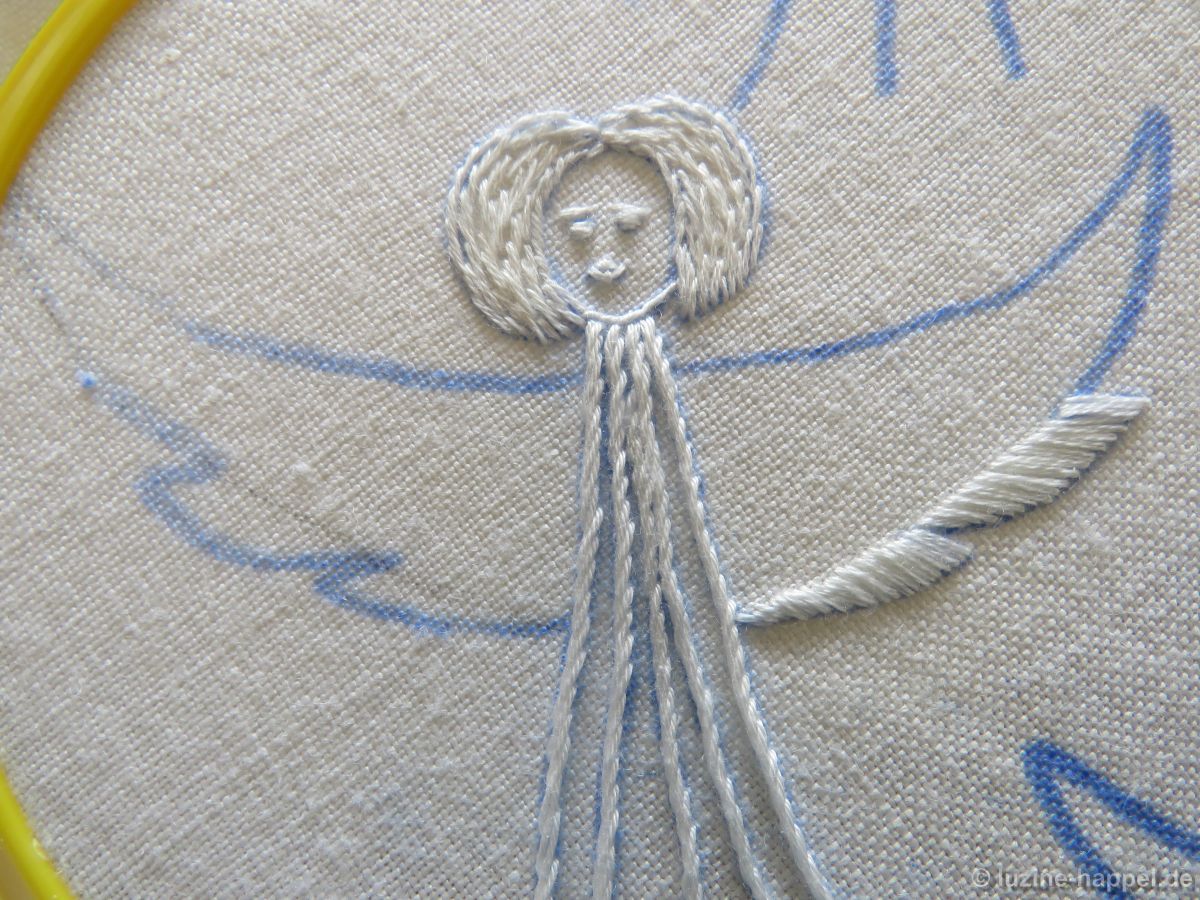
Continuing the outline of the wing, wide Stem stitches were worked (coton à broder No. 16).
But it would be better yet to draw the separating line in a curve to the top of the wing so that the bottom edge of the wing gets three points and a complete row of Satin stitches.
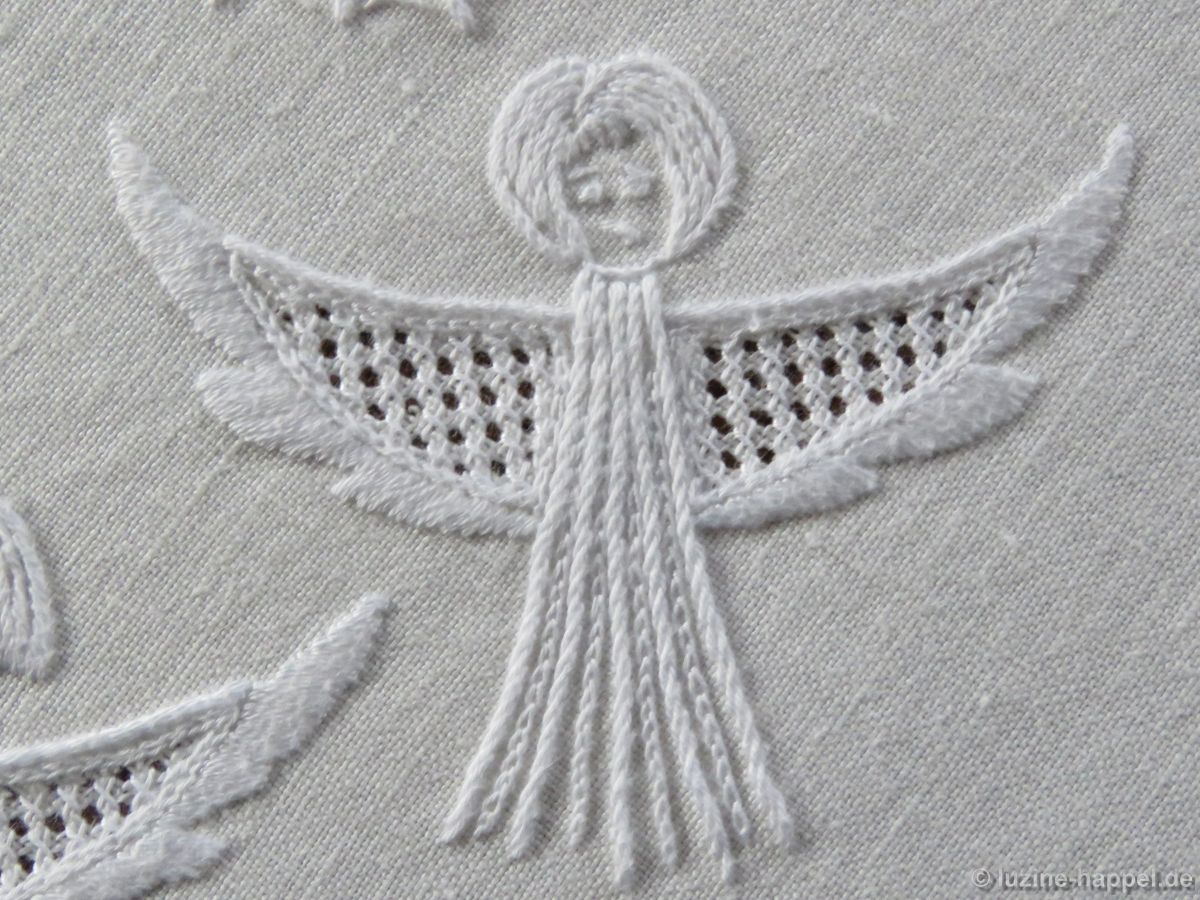
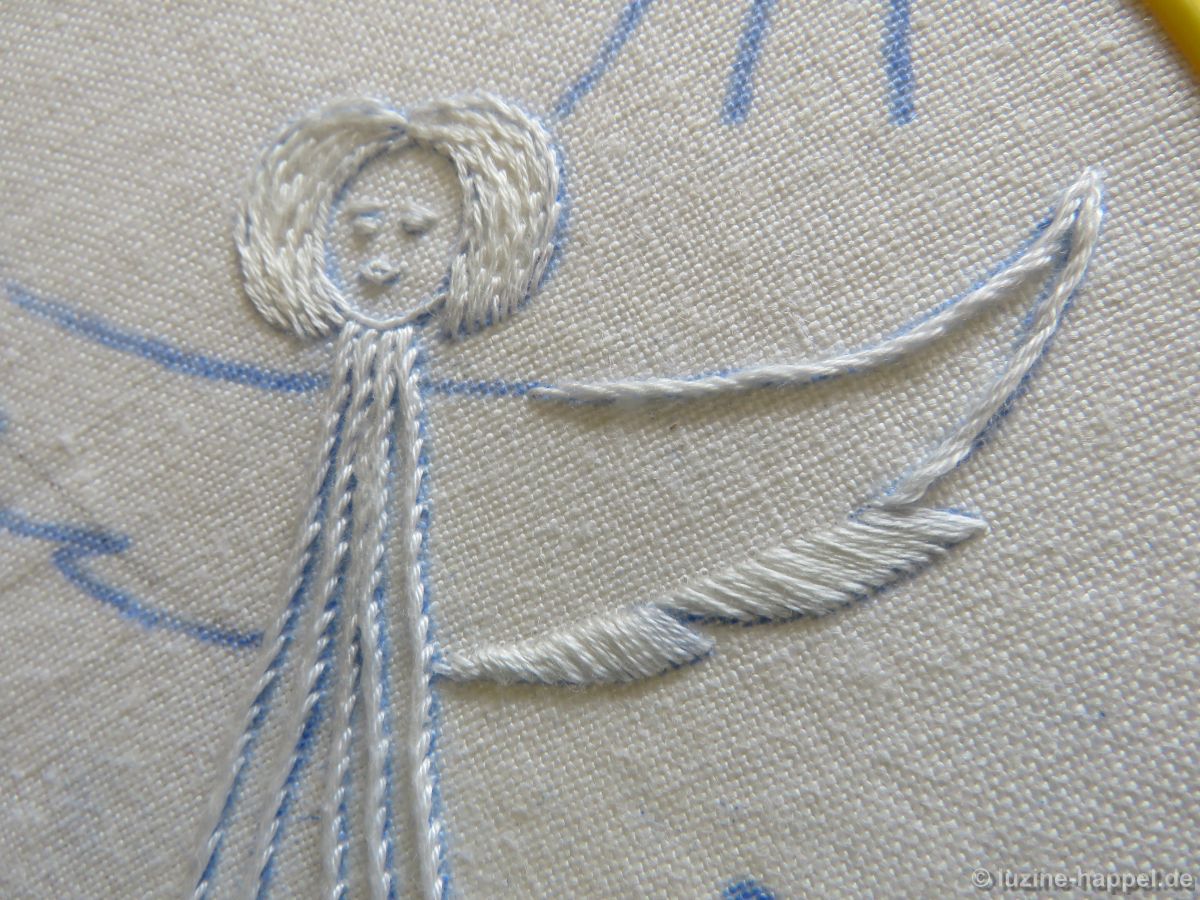
Using coton à broder No. 30, Chain stitches were worked and then threads were withdrawn for an openwork pattern.
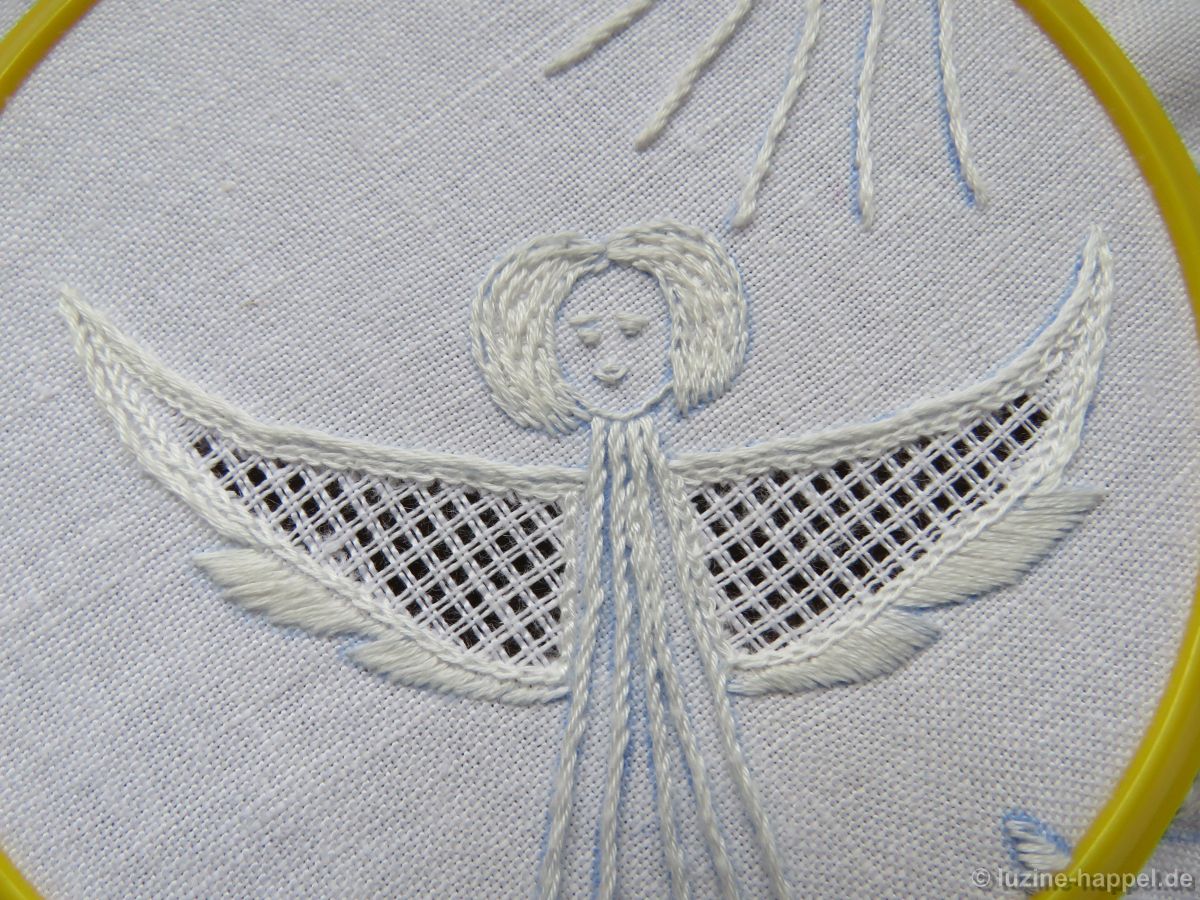
As quick and easy neutral filling pattern, Diagonal Cross Filling stitch (Openwork Pattern Samplers) , was chosen.

Although the wings in the image below are somewhat shorter then the wings in the picture above, one can see that the wings with three points look less sprawling then the wings with two points.
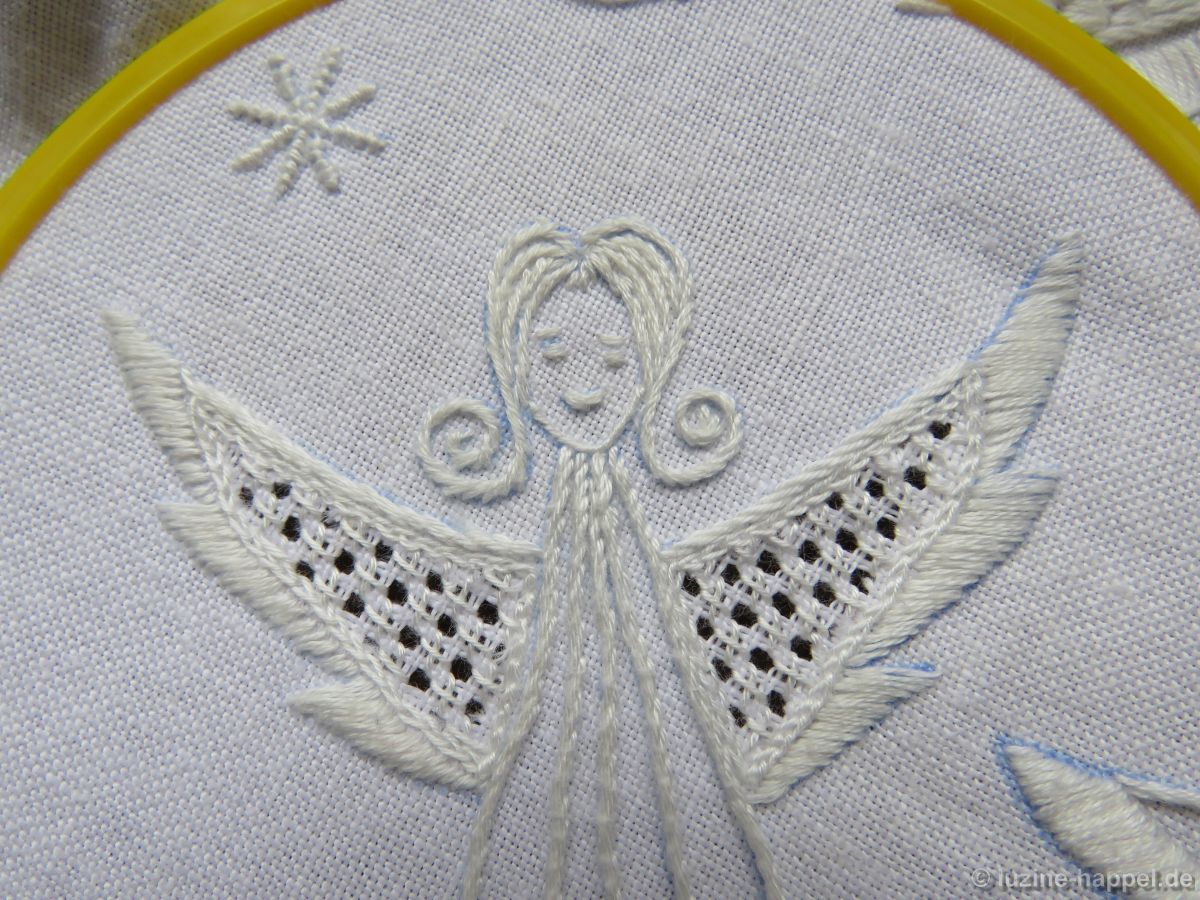
All wings of the little angels were filled with the same pattern.

The angels look amazing! You are so talented.
Thank you, Erica. Along my descriptions everybody can start to work such angles and while stitching ideas will appear for variations and own developing. That´s fun!
Thank you so much for sharing your wonderful skills. Have a Merry Christmas and a Mew Year full of success.
xx Meri