
category: Limet-Filling pattern
linen used: 13.5/cm thread count
threads used: coton à broder No. 16
stitches used: Honeycomb Darning stitches
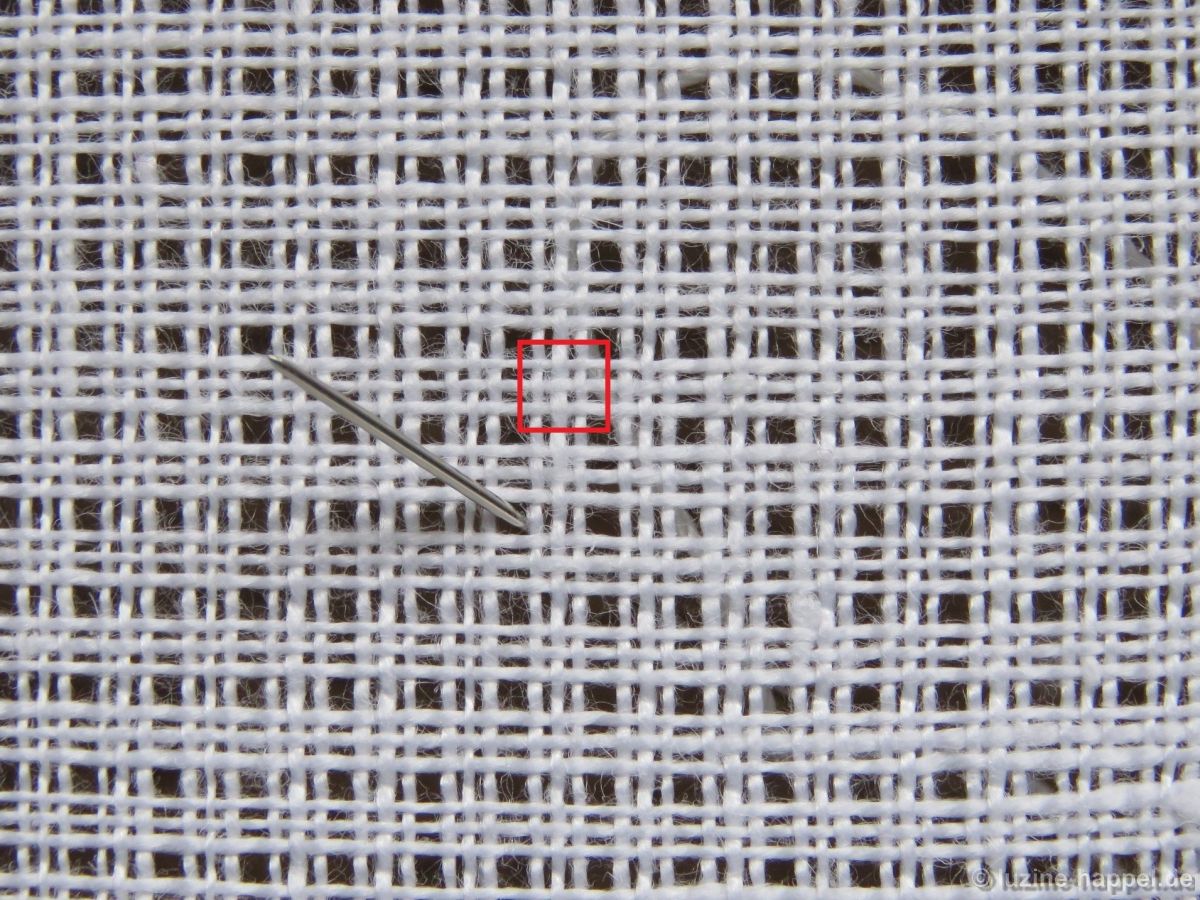
center: square (in other shapes, longitudinal axis: group of three threads)
one pattern segment: 12 threads
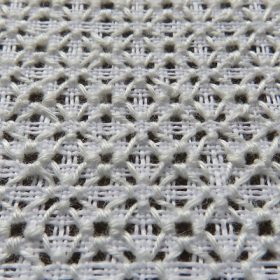
This pattern is a variation of Honeycomb Darning stitches – not worked in rows but around a center square.
Instructions for left-handers can be found at the end of this article.
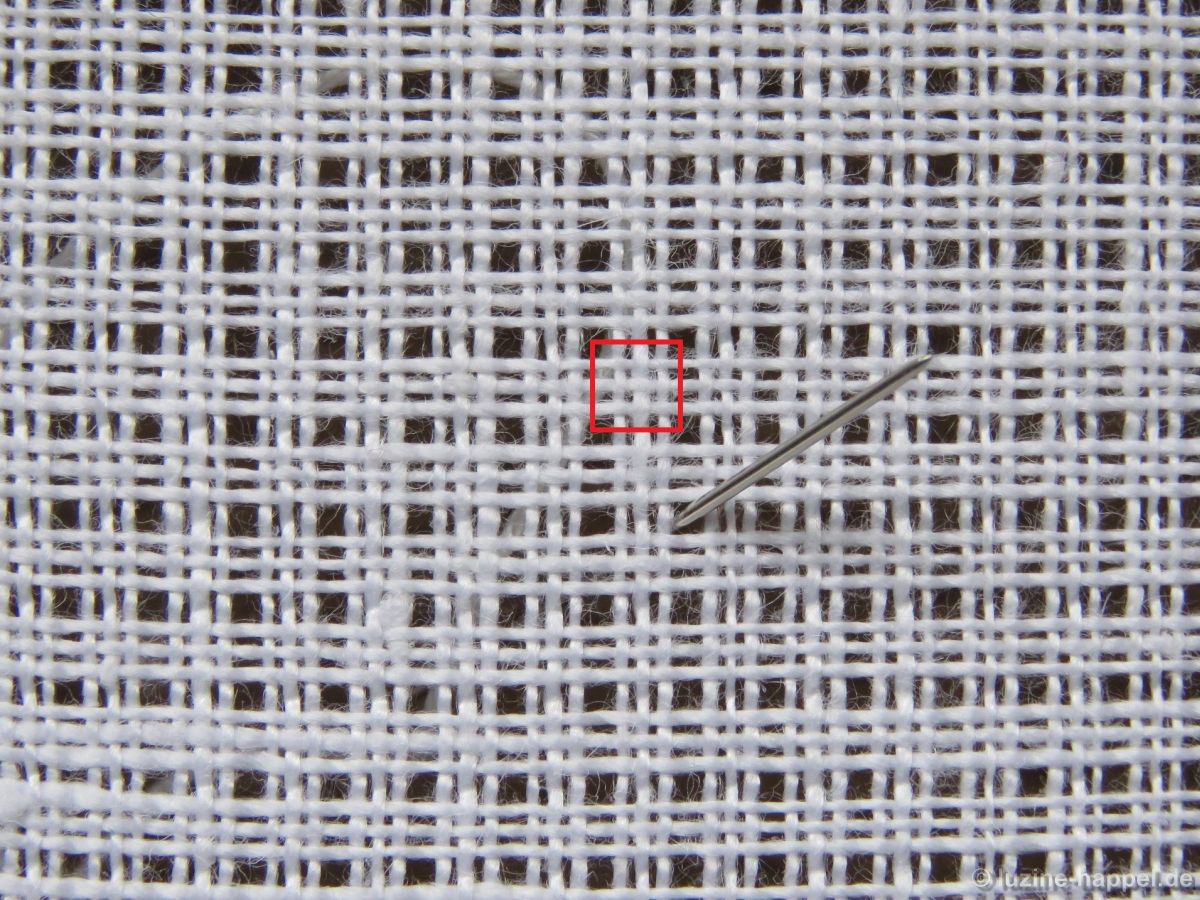
First, establish a Limet grid with a square in the center by cutting 1, leaving 3 both vertically and horizontally.
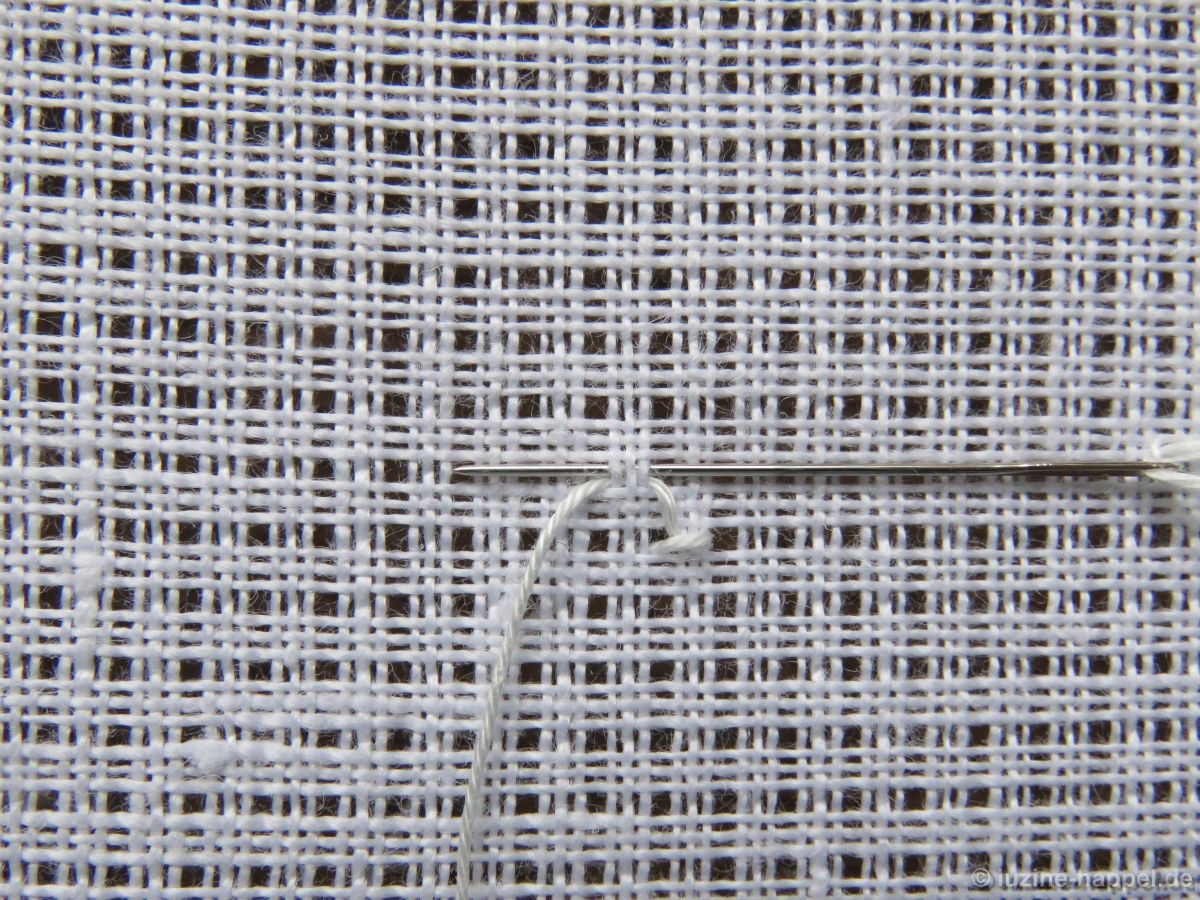
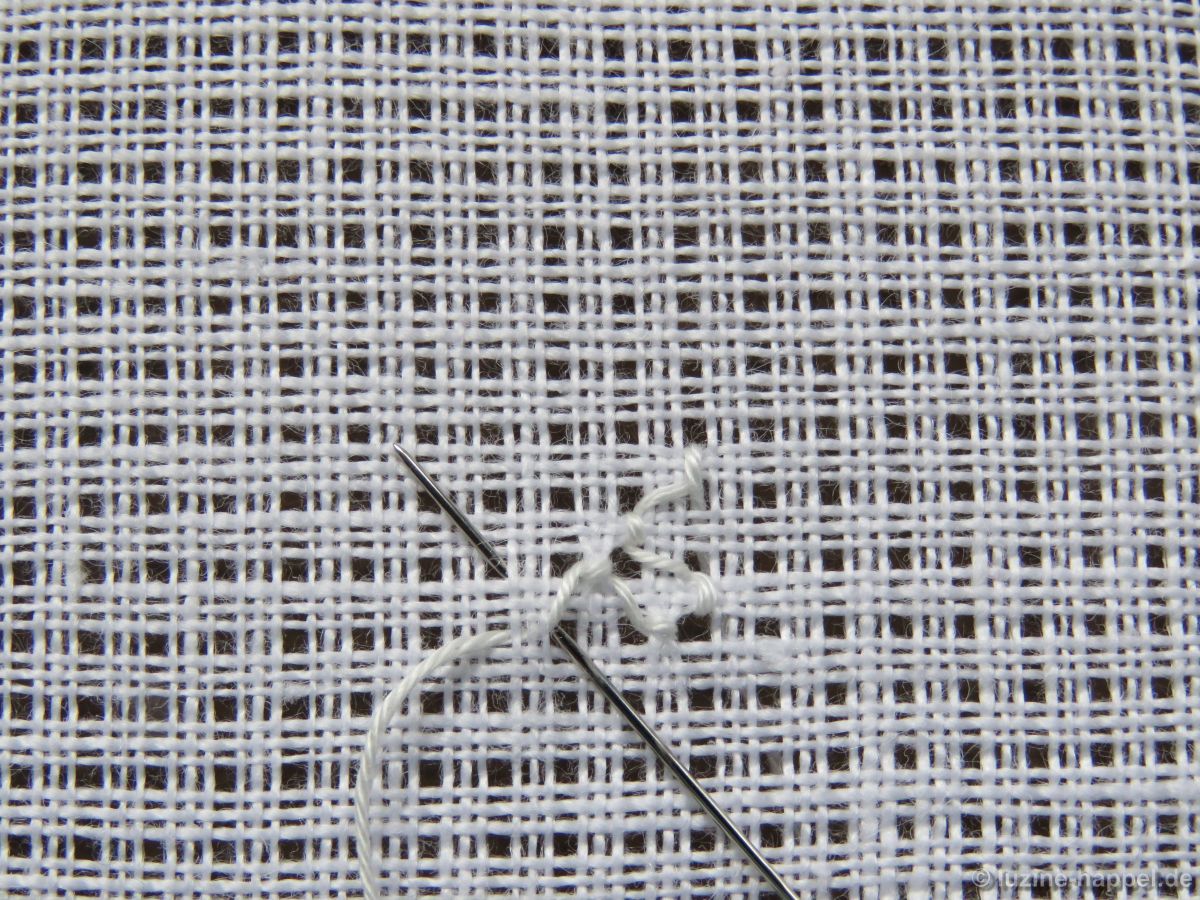
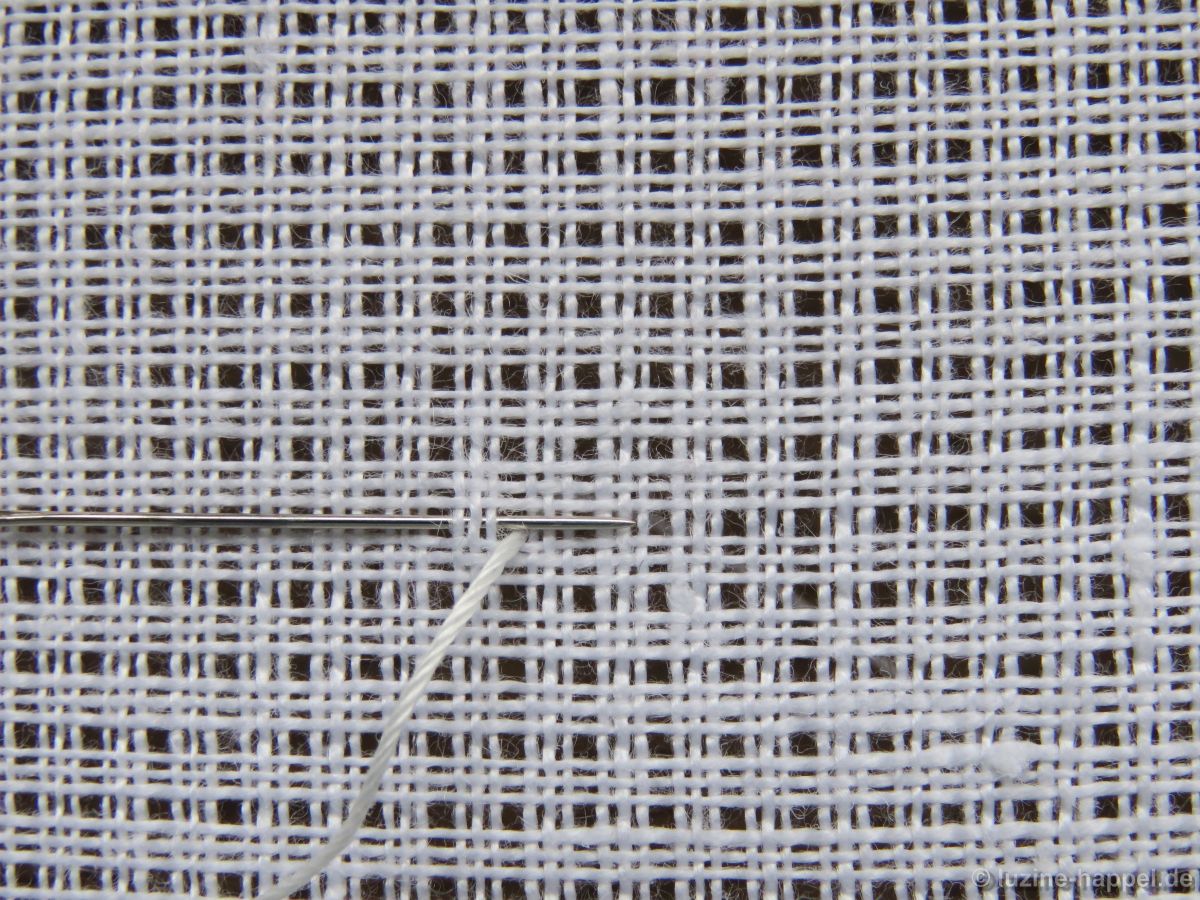
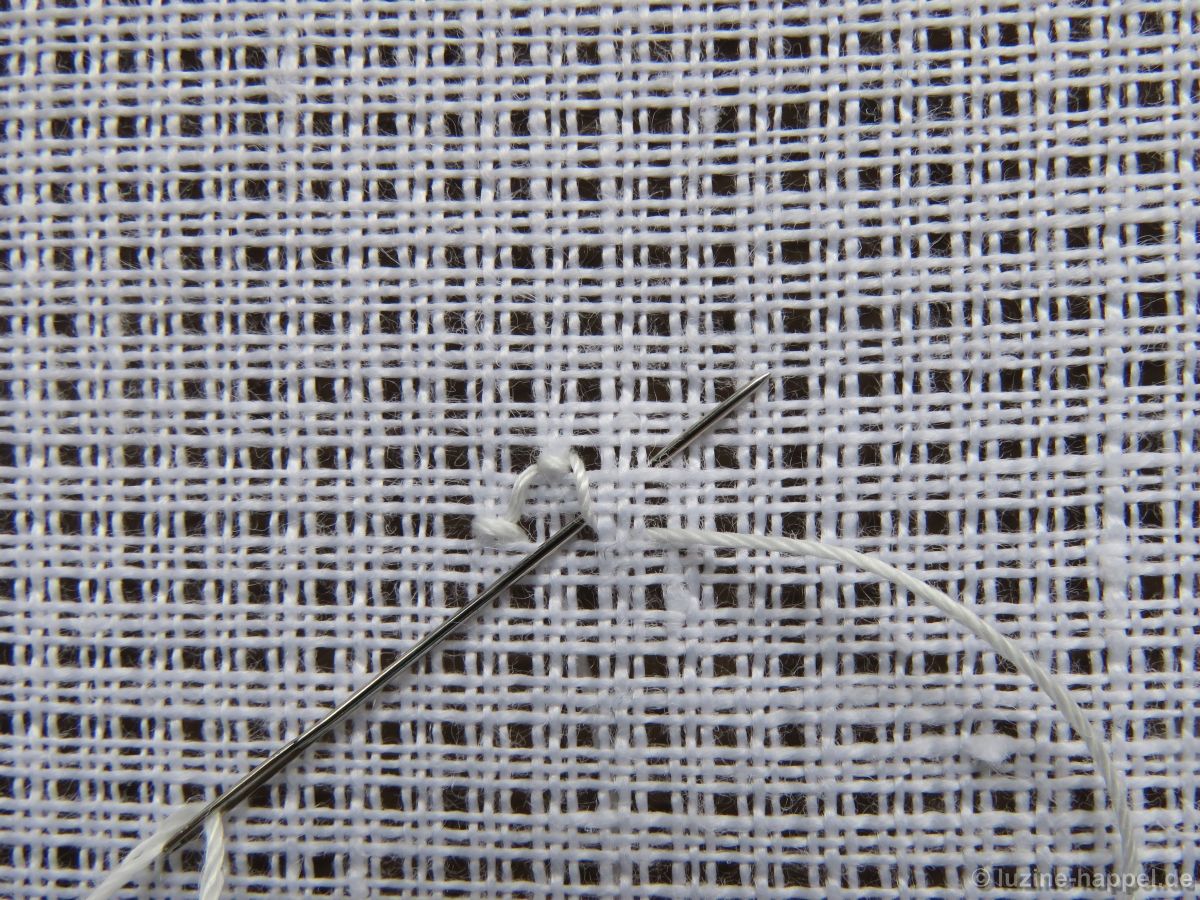
Bring the needle up one square below the lower right hole of the center square, and pull the thread through.
*Cross over one square (3 fabric threads) to the right, insert the needle and bring it up in the previous hole again. Tighten the thread.
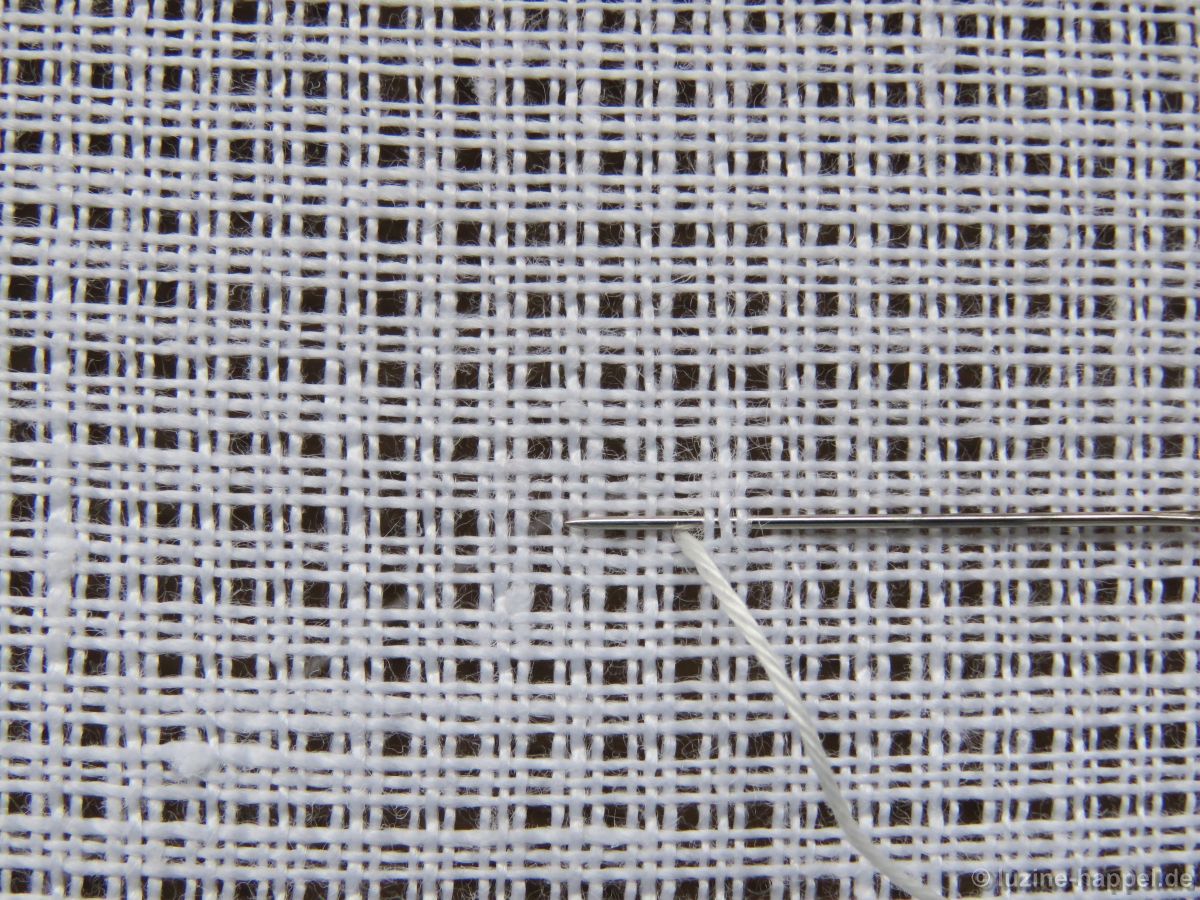
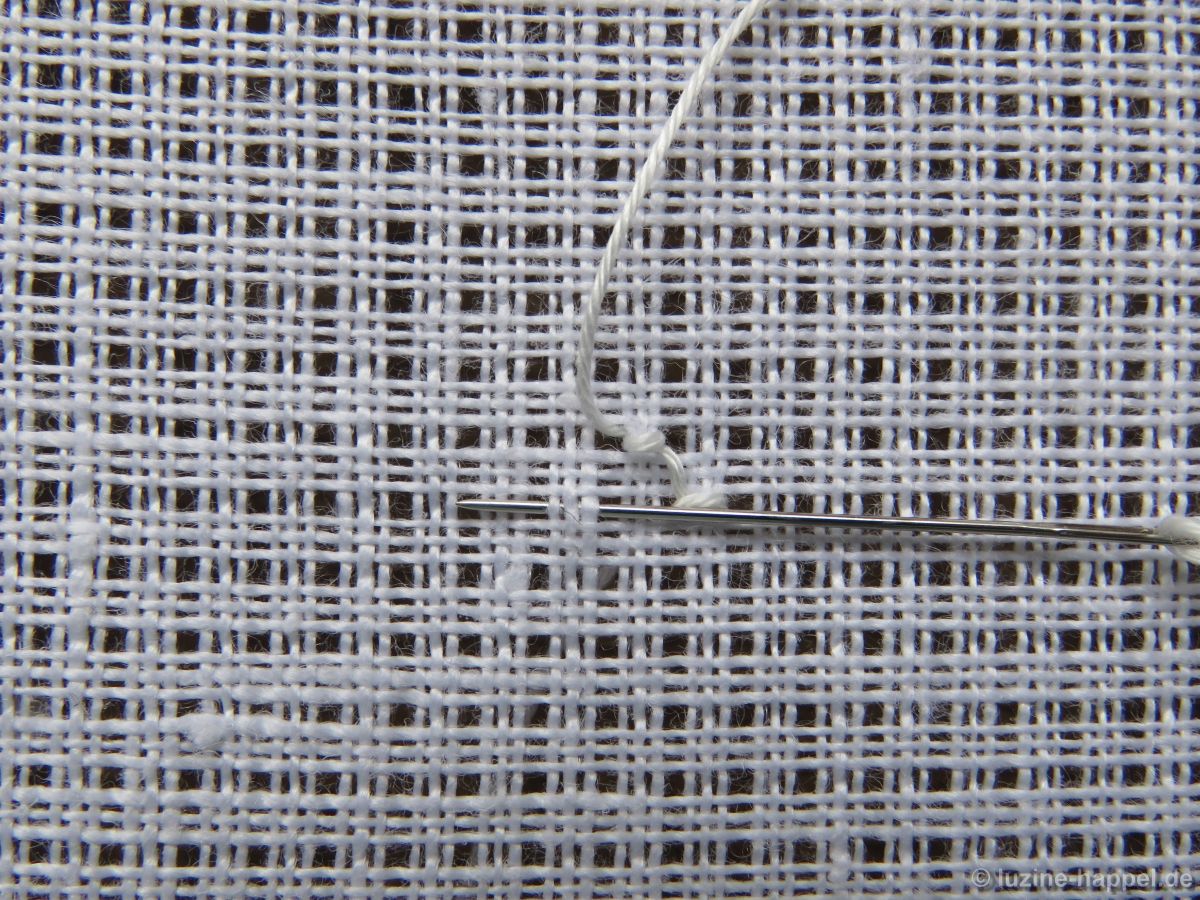
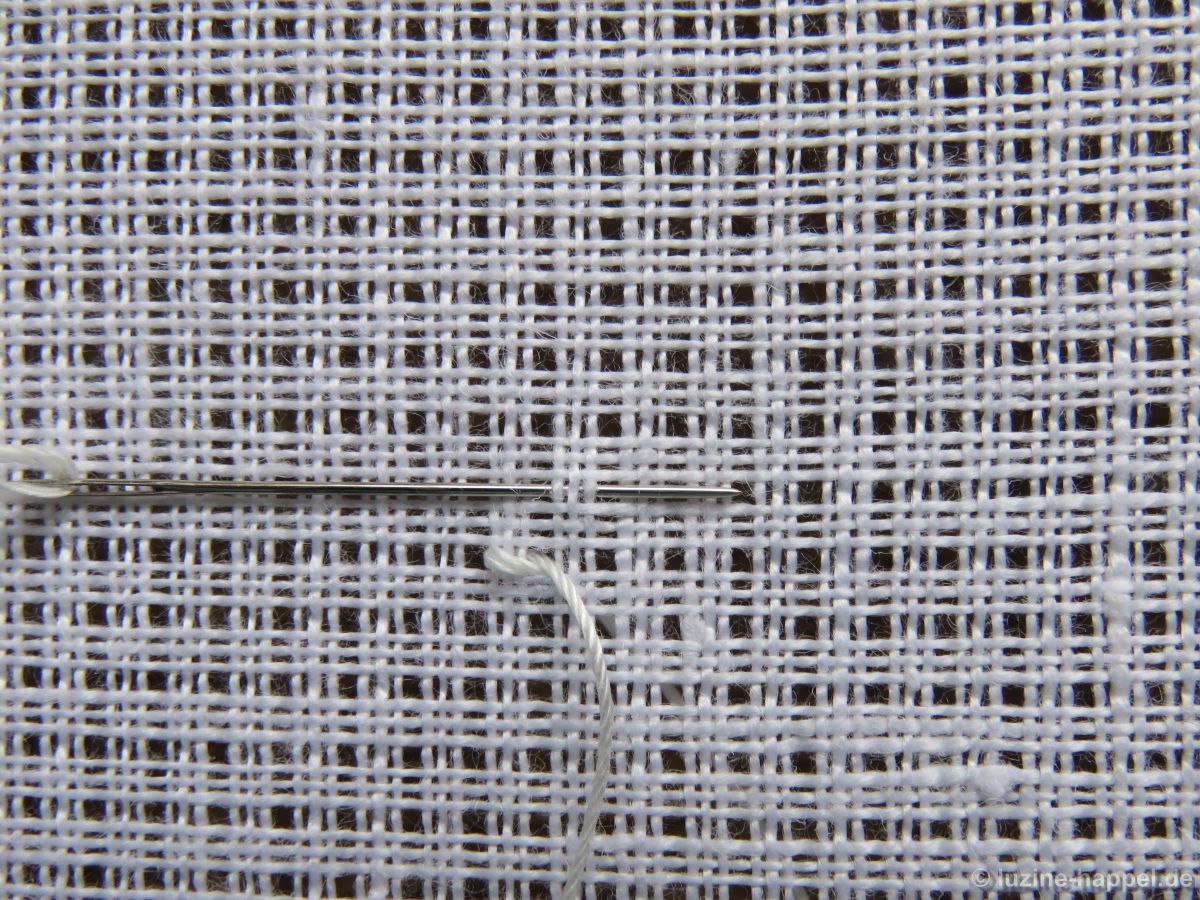
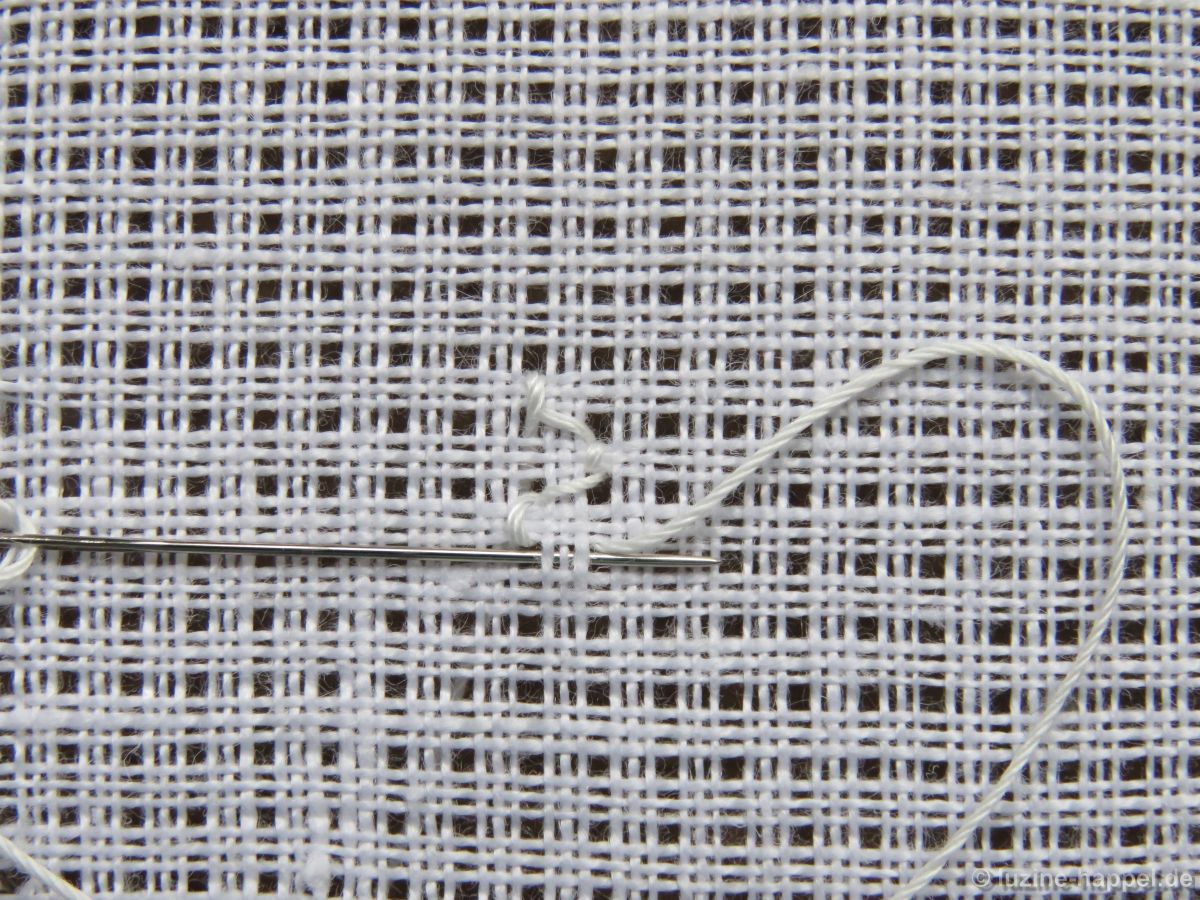
Cross over one square (3 fabric threads) up, insert the needle and bring it back up 1 square to the left.
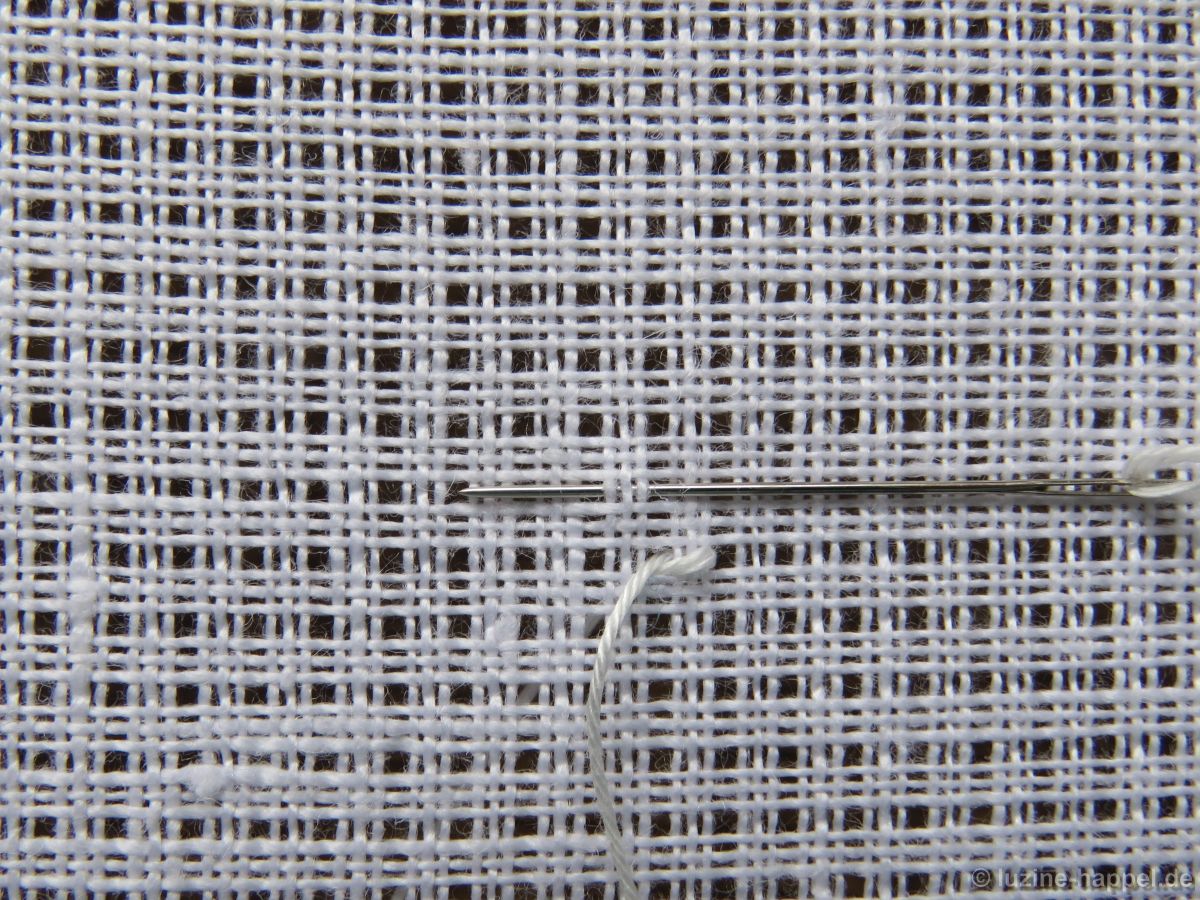
Cross over those 3 threads to the right, insert the needle and bring it up in the previous hole again.
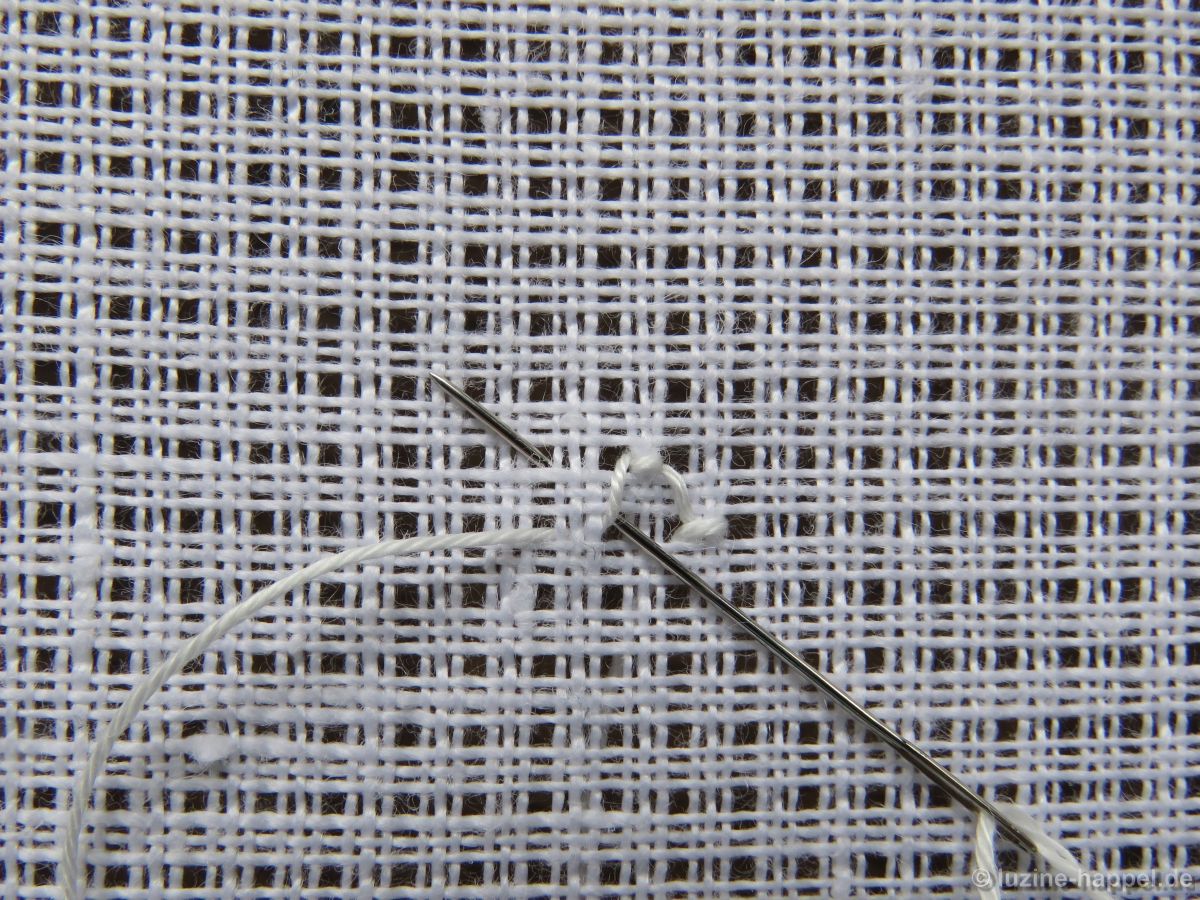
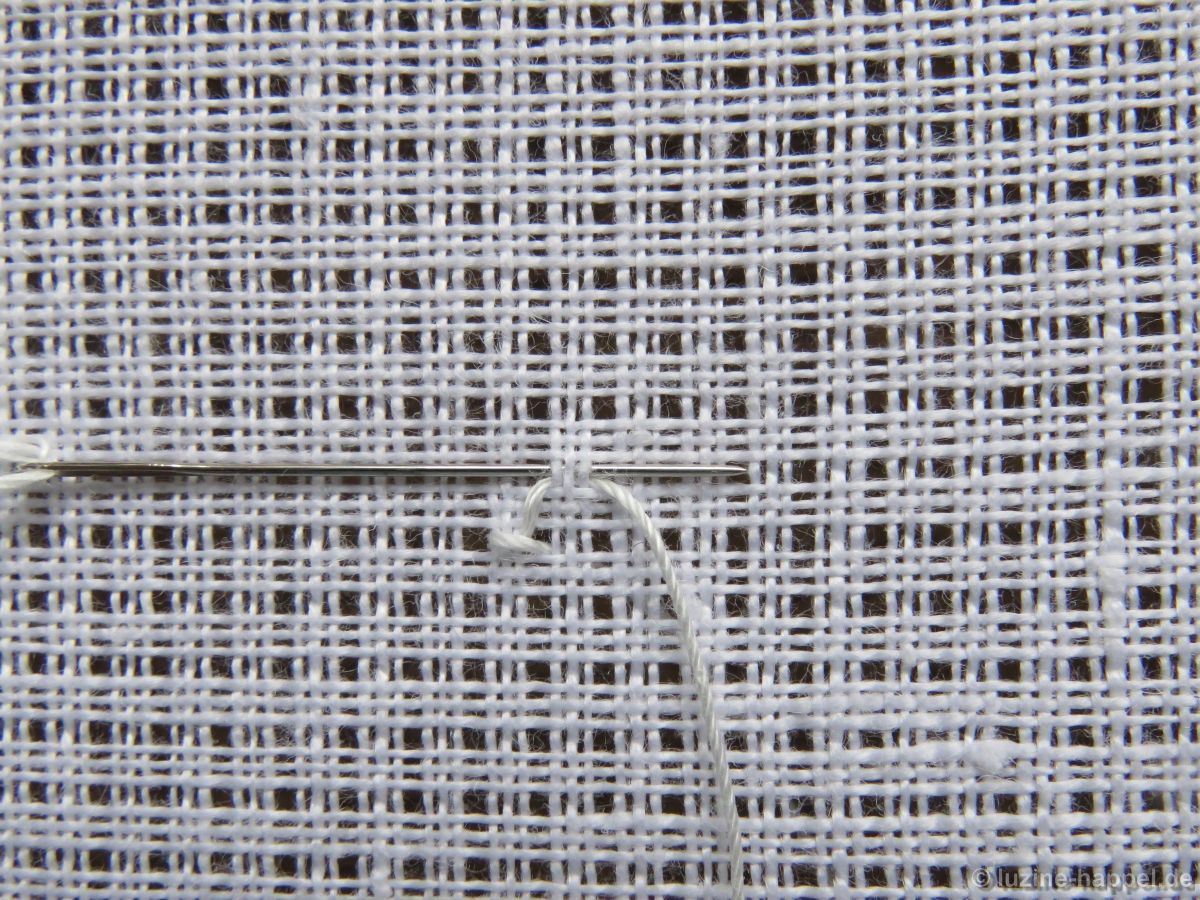
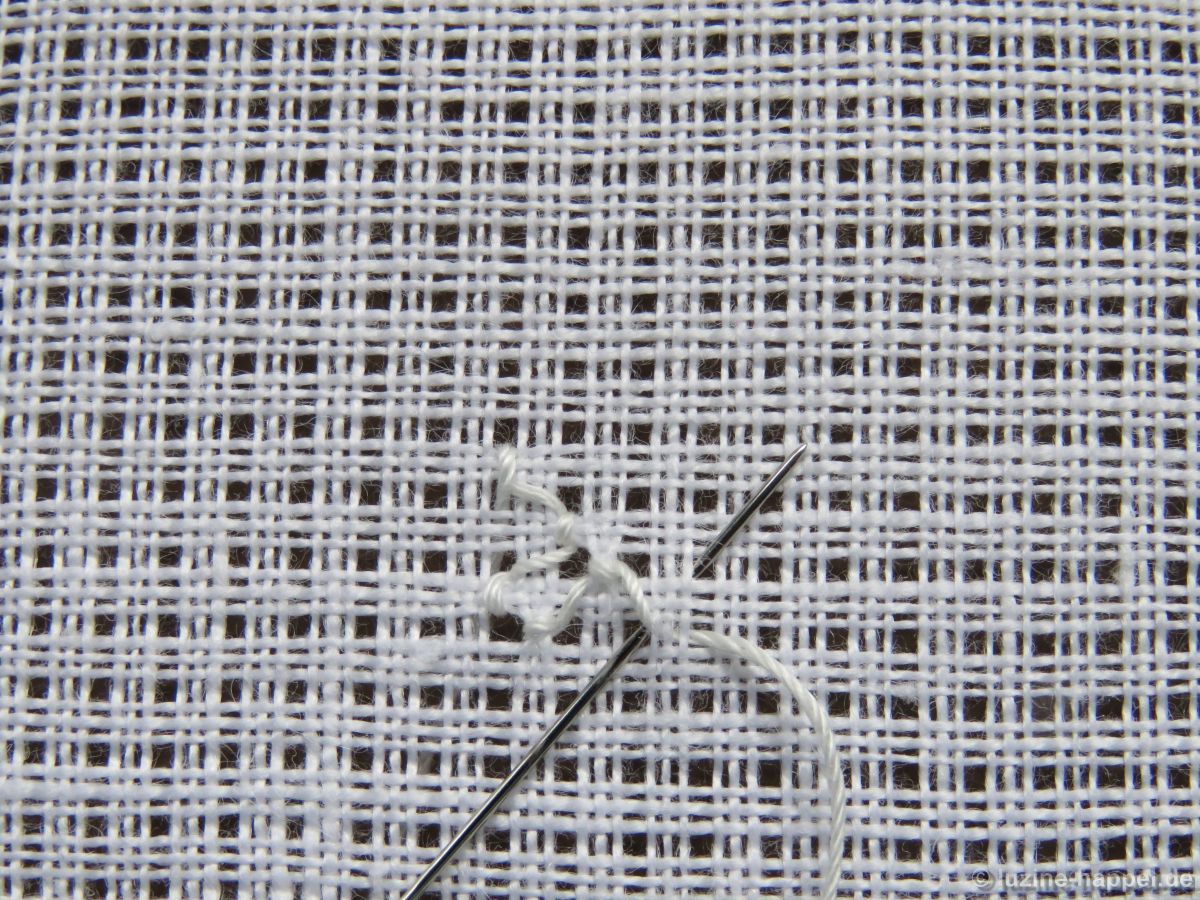
From now on always tighten the thread so that the bundled threads are pulled together a little bit.
Cross over one square below, insert the needle and bring it up 1 square (3 fabric threads) to the left.
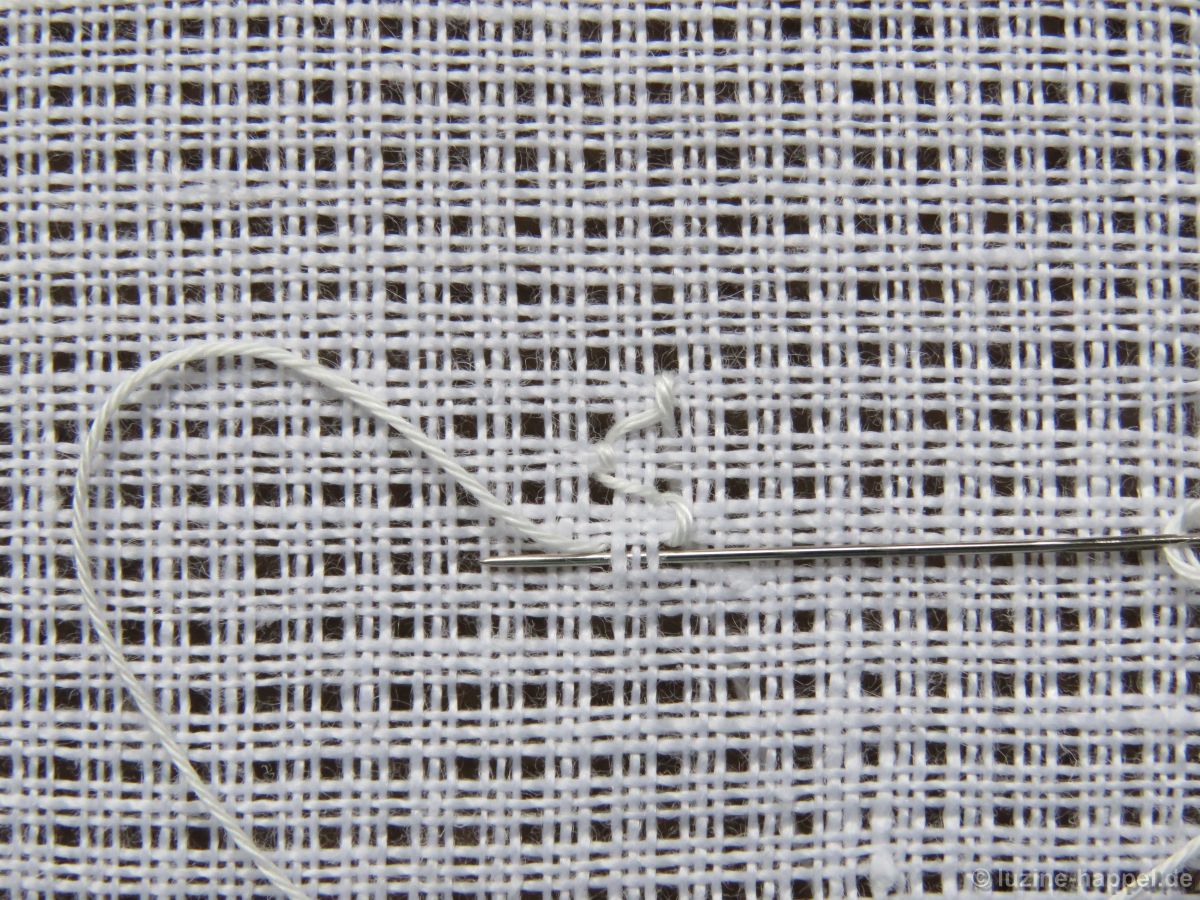
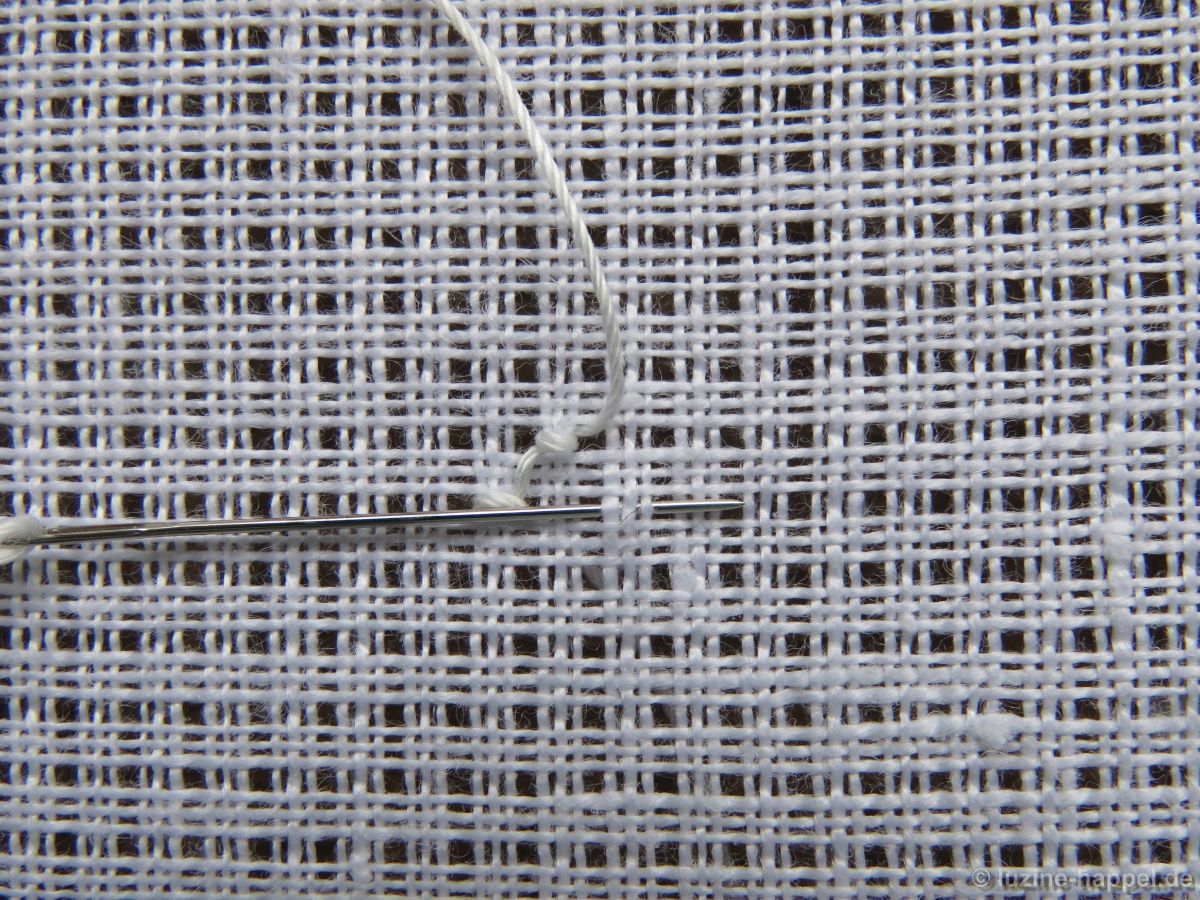
Cross over those 3 threads to the right, insert the needle and bring it up one square diagonally left and up.*
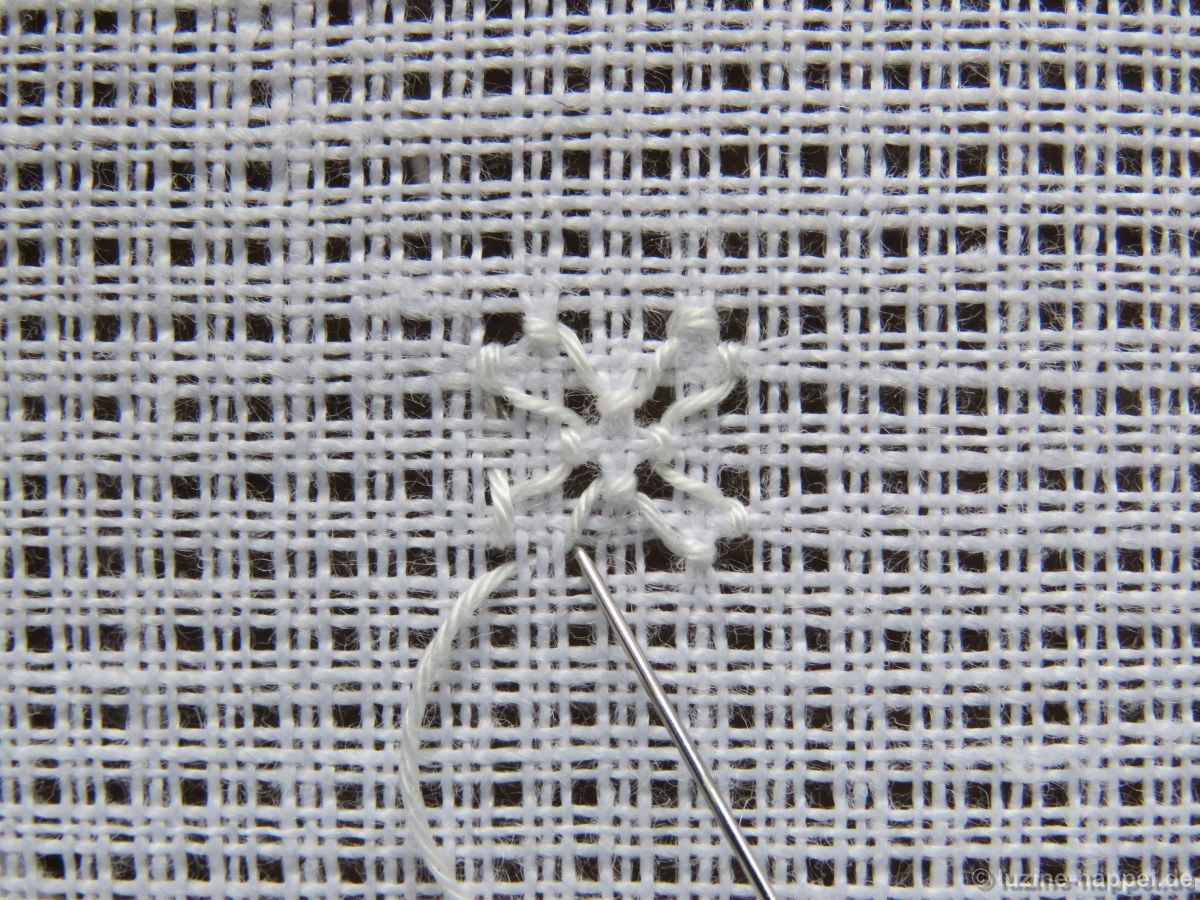
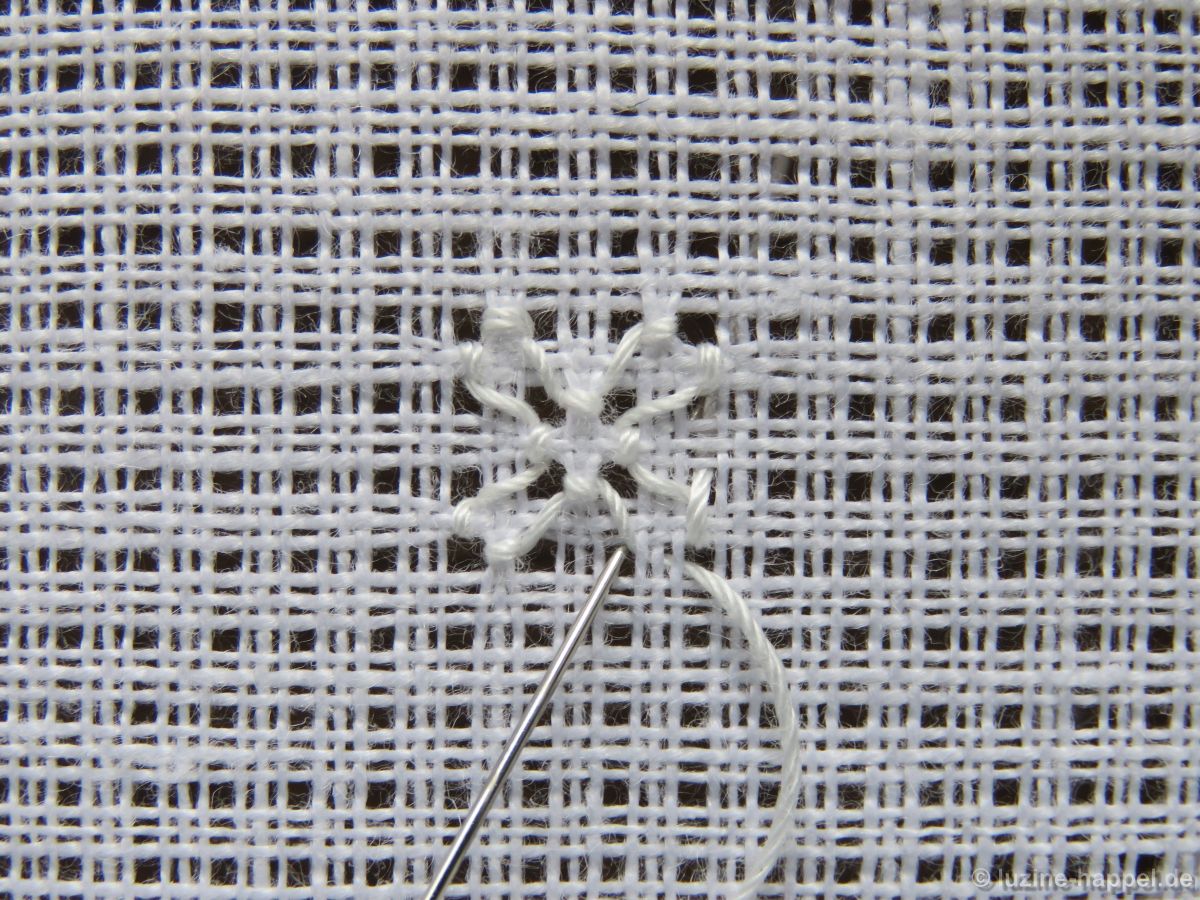
Turn the piece 90° counterclockwise and repeat working the five steps (*),
three times in all. At this point, one pattern segment covering a section of 3 X 3 squares is finished.
More of these pattern segments are added to establish the entire pattern. To start the next segment, the needle has to emerge from the same point that it was inserted. So, on the back side, slide the working thread under the stitch
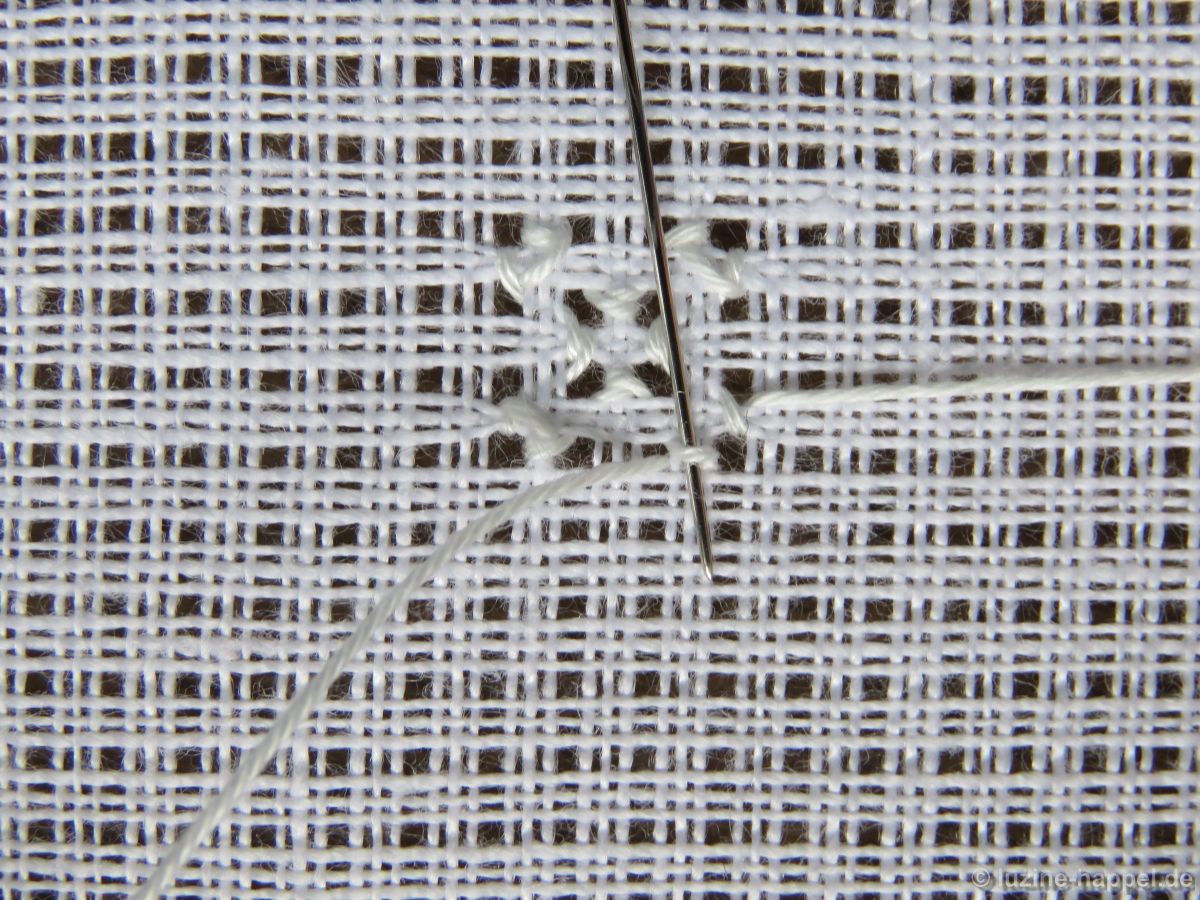
and then bring it up again to the front. Turn the piece to start working the next segment in the established way.
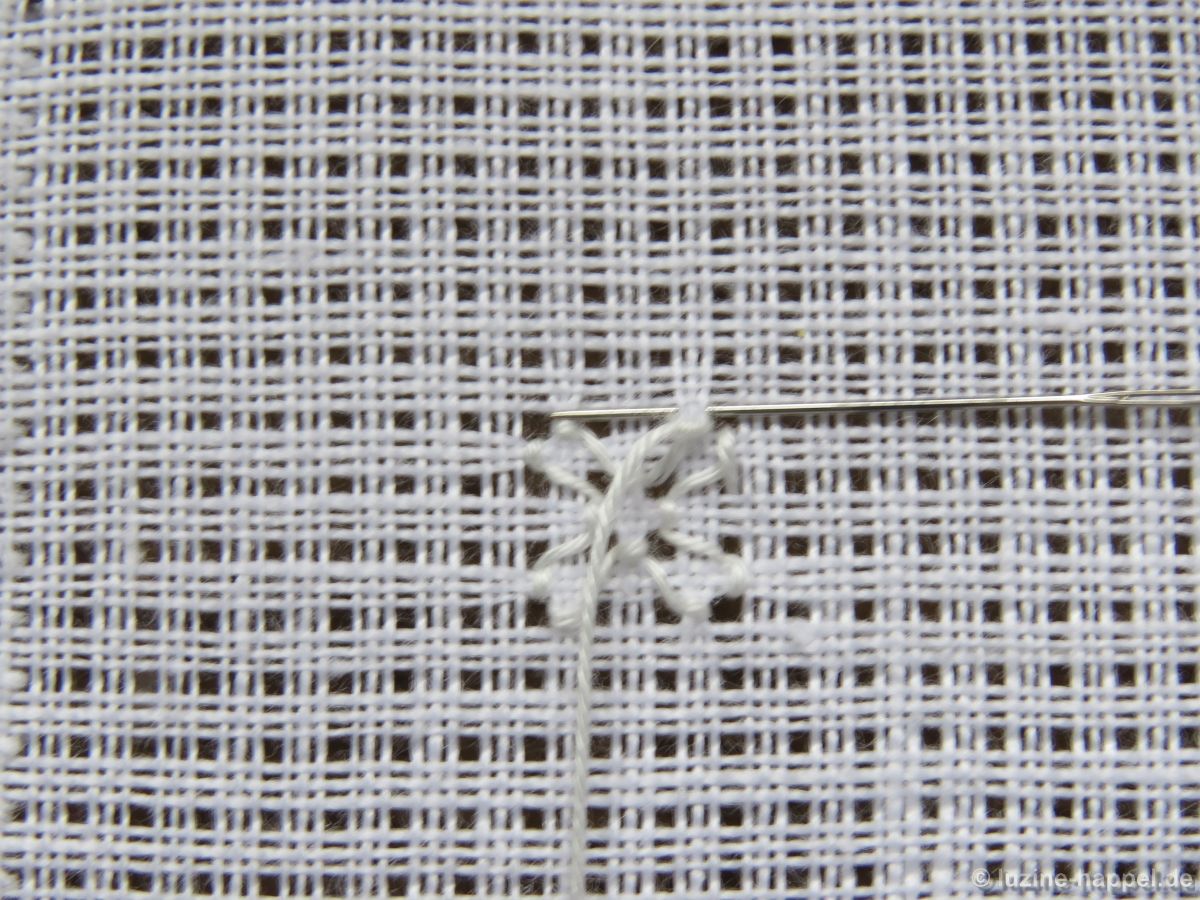
Work segment beside segment
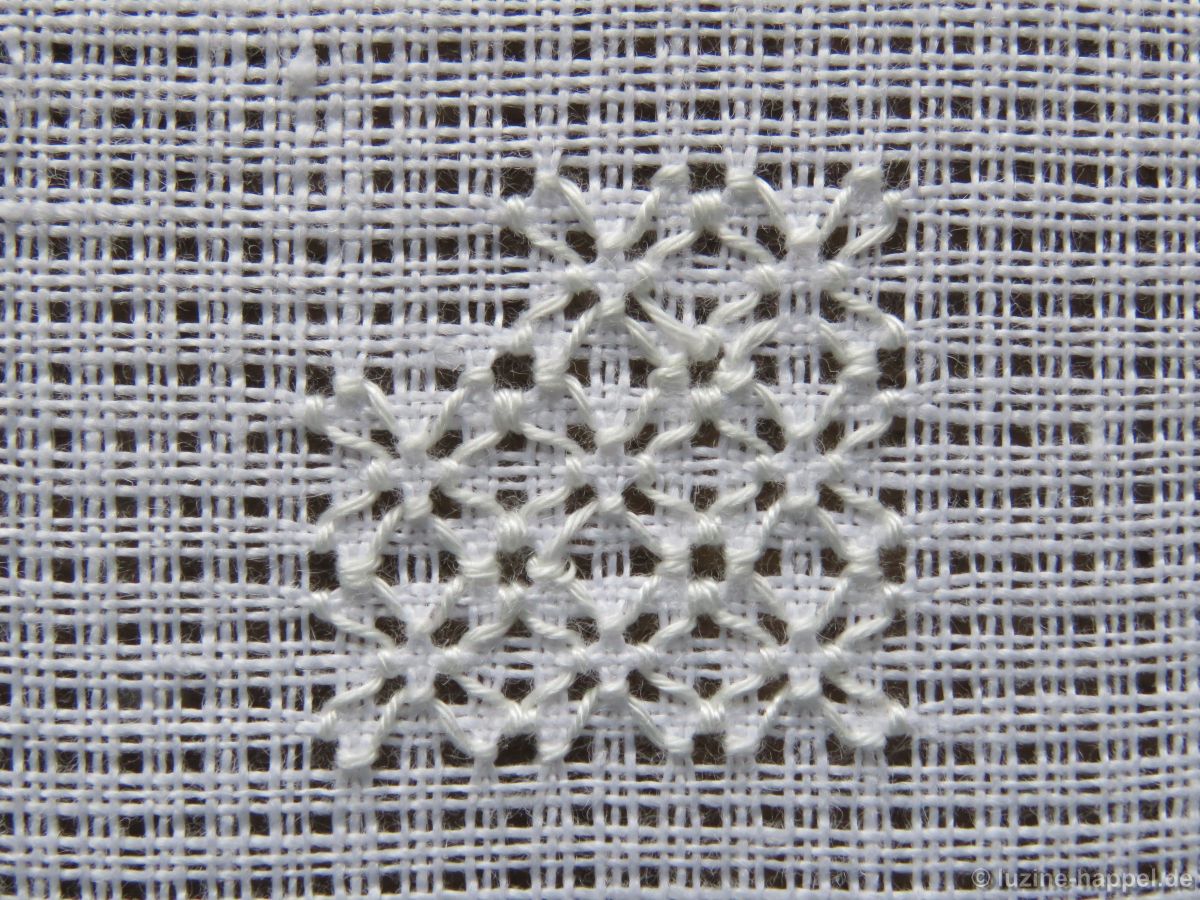
until the entire shape is filled. If you get lost while working, simply recall which is the segment´s center square that needs to be surrounded.
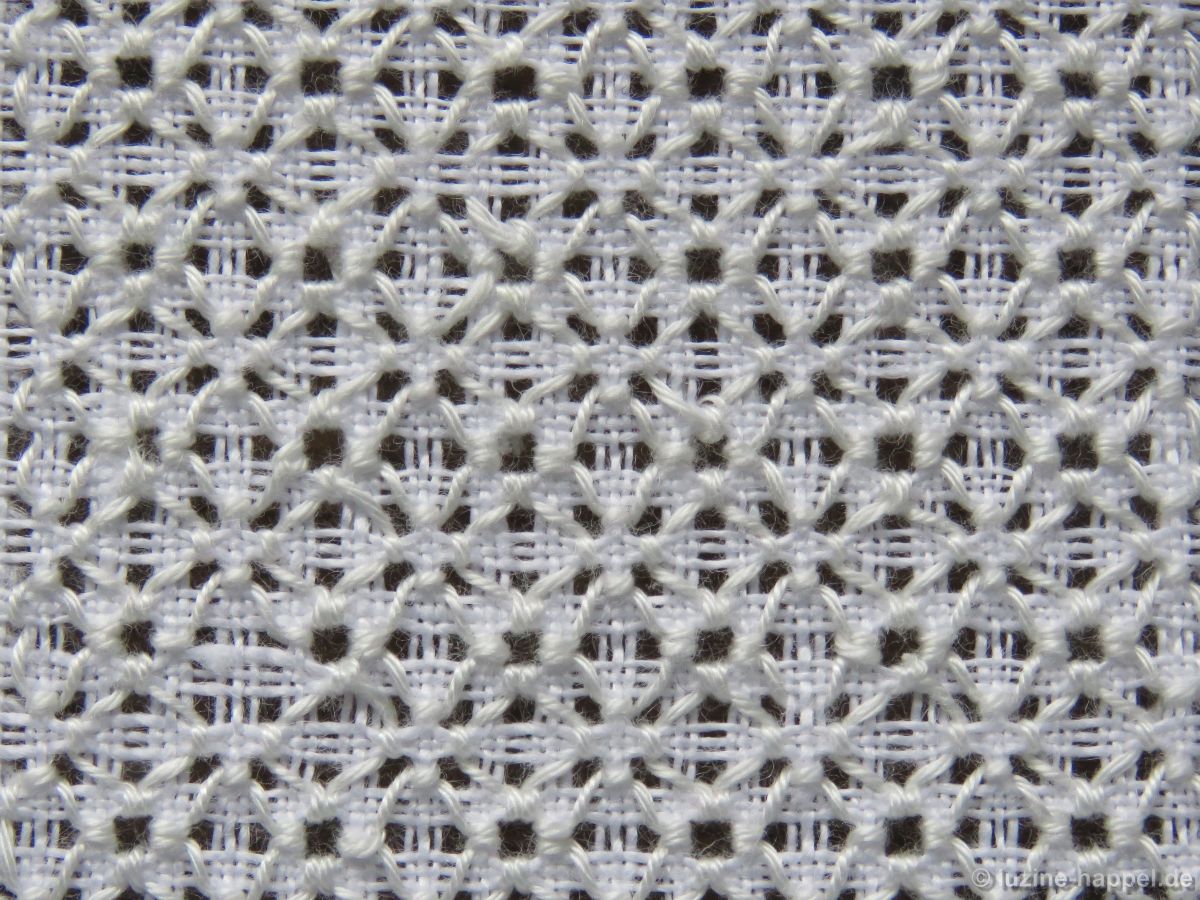
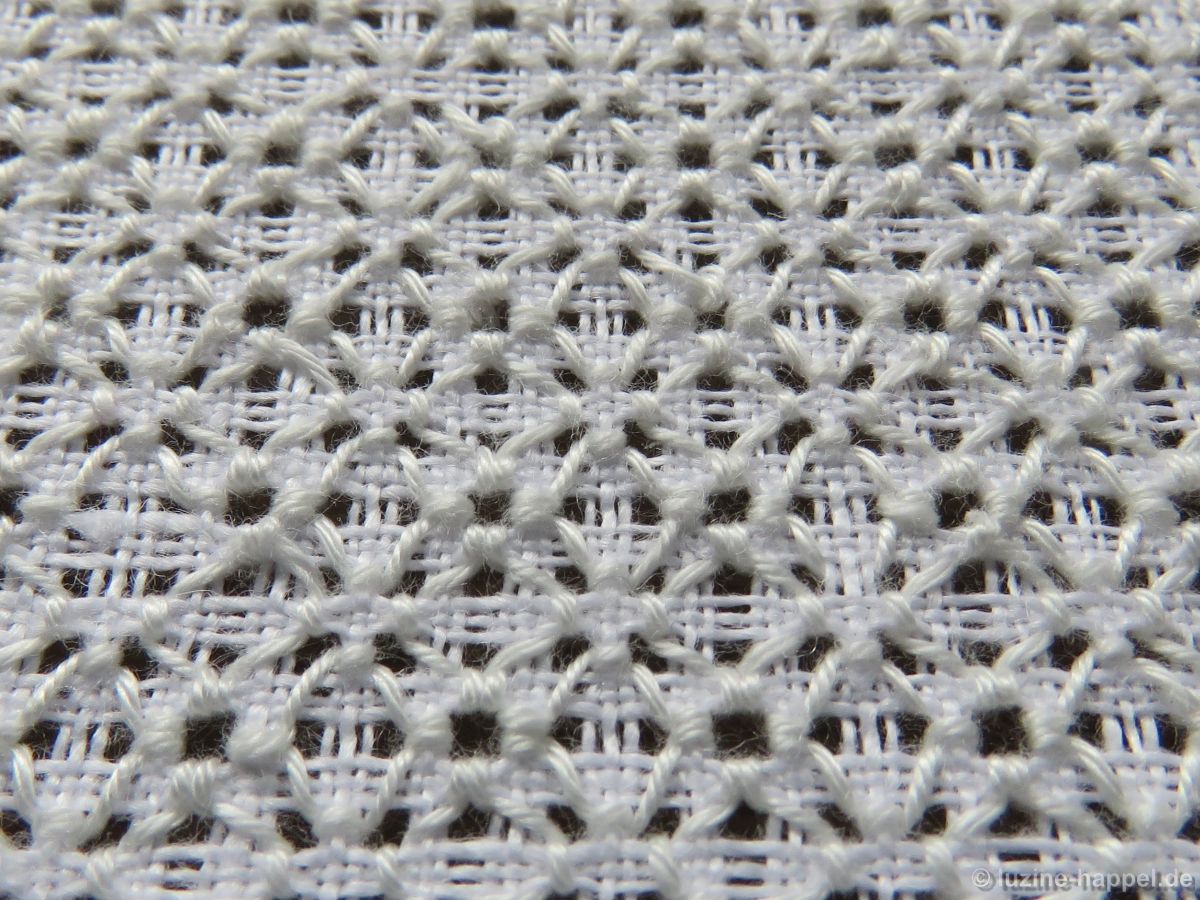
This pattern develops its full appearance only after boiling, starching, and ironing.

Instructions for the left-hander:
Bring the needle up one square below the lower left hole of the center square, and pull the thread through.
*Cross over one square (3 fabric threads) to the left, insert the needle and bring it up in the previous hole again. Tighten the thread.
Cross over one square (3 fabric threads) up, insert the needle and bring it back up 1 square to the right.
Cross over those 3 threads to the left, insert the needle and bring it up in the previous hole again.
From now on always tighten the thread so that the bundled threads are pulled together a little bit.
Cross over one square below, insert the needle and bring it up 1 square (3 fabric threads) to the right.
Cross over those 3 threads to the left, insert the needle and bring it up one square diagonally right and up.*
Turn the piece 90° clockwise and repeat working the five steps (*),
three times in all. At this point, one pattern segment covering a section of 3 X 3 squares is finished.

I love this pattern.
There are so many beautiful patterns. Soon I will share one more.
Excellent!!
A little bit difficult to work, but in the end there is the reward with an excellent result.