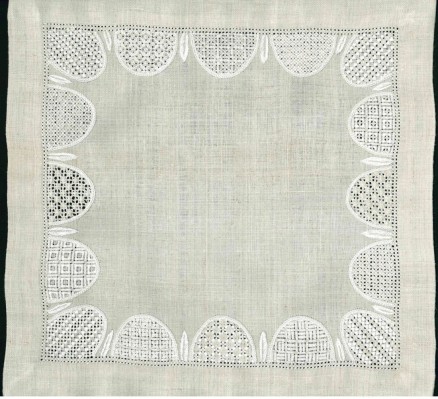
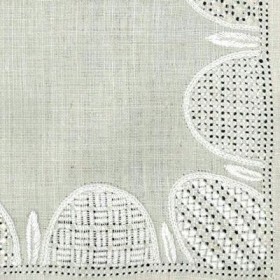
To use the arch border as an all-around decoration, I came up with a corner arch solution. (One can find another design of a corner solution in the downloadable file “Arch Borders – instructions with close-up photographs and line-drawn designs”.)
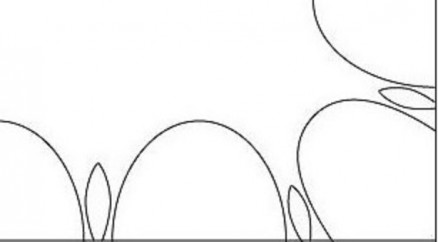
The arch is 3 cm high and 4.3 cm at its widest point. I want to decorate a doily with 3 arches per side plus the corner arches. To this end, I make a corresponding drawing. The square has a side length of 24.6 cm. My doily will have a 3 cm hem plus 1 cm fold. So, I cut the linen to the size of 2 x 7cm + 24.6 cm = 38.6 cm. On all sides, 7 cm from the edges, I withdraw a thread to the respective intersection points.
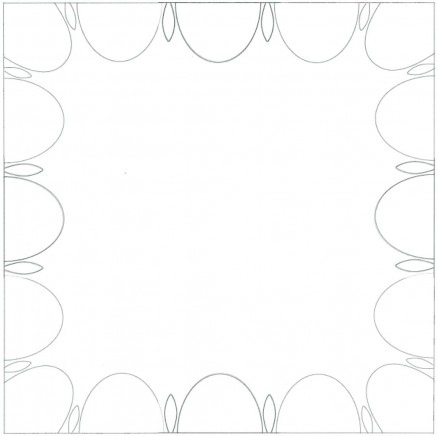
Using an iron transfer pencil, I transferred the pattern to the smoothly ironed and aligned linen. Please proceed extremely carefully.
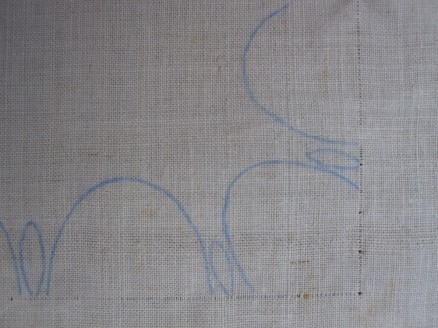
I want to work a single row of Four-Sided stitches around the border, so I let remain 4 threads outside the withdrawn thread lines and withdraw the fifth one up to the respective intersection points.
In the shapes, I withdraw the threads for the grids depending on the chosen patterns. The vertical threads are cut at the curve and withdrawn back to the perpendicular withdrawn-thread line that the arch sits upon.
So that the withdrawn threads do not interfere with the embroidery to be done on the grid, lay them away from the grid and baste them in place with short Running stitches using a coloured sewing thread. Trim the ends of the withdrawn threads. Now work the filling patterns.
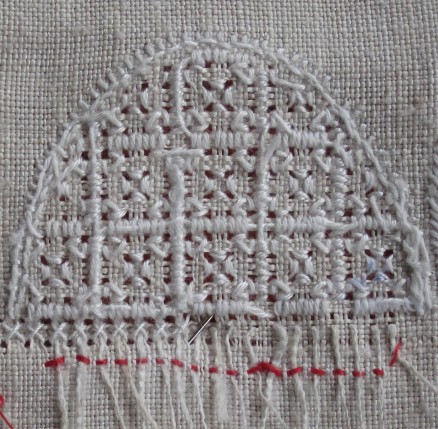
When all shapes are filled, from the front of the fabric Four-Sided stitch is worked (from the front one can see the number of the threads better). While working the Four-Sided stitch, the short thread ends on the back are covered. Every few stitches one should check to make sure that every thread is secured in the stitching.
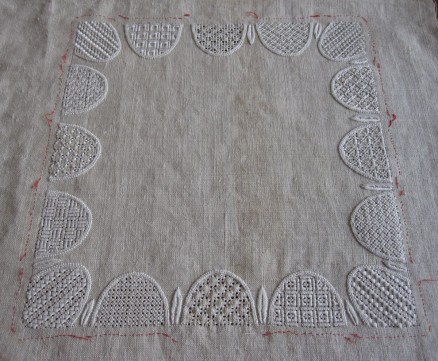
The hem is fastened by Antique Hem stitch. The coloured sewing threads are removed. The doily is washed, starched and ironed. A nice small sampler is finished.
To ease working along with the posted instructions on my blog, I made a downloadable file: “Arch Borders – instructions with close-up photographs and line-drawn designs”.
As already mentioned in an earlier post, in Schwalm whitework hems are not only decorated with Four-Sided Hem stitch, Peahole Hem stitch or Needleweaving; they are also adorned with small decorative borders worked along the seam. The arch border is a very special adornment. There are different versions of arch borders seen on both traditional and contemporary embroidered pieces.
Pictures of these embroideries, as well as their line-drawn designs, are presented in the downloadable booklet. In addition to the version presented here on my blog, the document includes six different, very nice arch border designs with corners (some with additional variations). Also included are instructions with close-up photographs to work an all-around arch border along a Four-Sided stitch row, and an arch border without corner embellishment along a Peahole hem. Note: these instructions have been posted on my blog, but in the downloadable document they are all in one place, and edited for absolute clarity.
Not included are the filling patterns or instructions for basic stitches. For detailed instructions of basic stitches used, please refer to my book, Basic Principles of Schwalm Whitework. And for detailed instructions for filling patterns, please refer to this blog or my other books.
The first sixteen pages of the document show the examples of the different arch borders, and outline, in detail, the order of working. The last four pages contain line-drawn sections of seven different arch borders in their original size as well as reduced sizes with corners.
If you like arch borders, I think you will enjoy having this detailed document at your fingertips.


Leave a Reply