
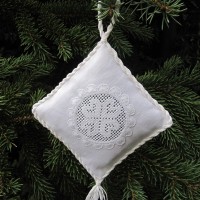
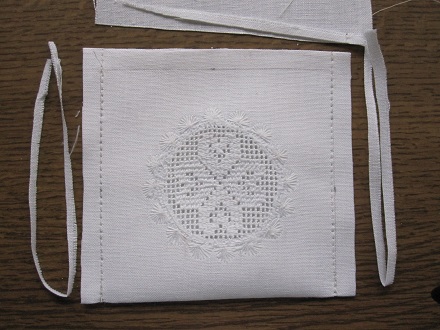
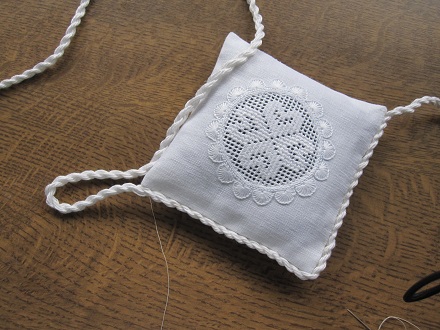
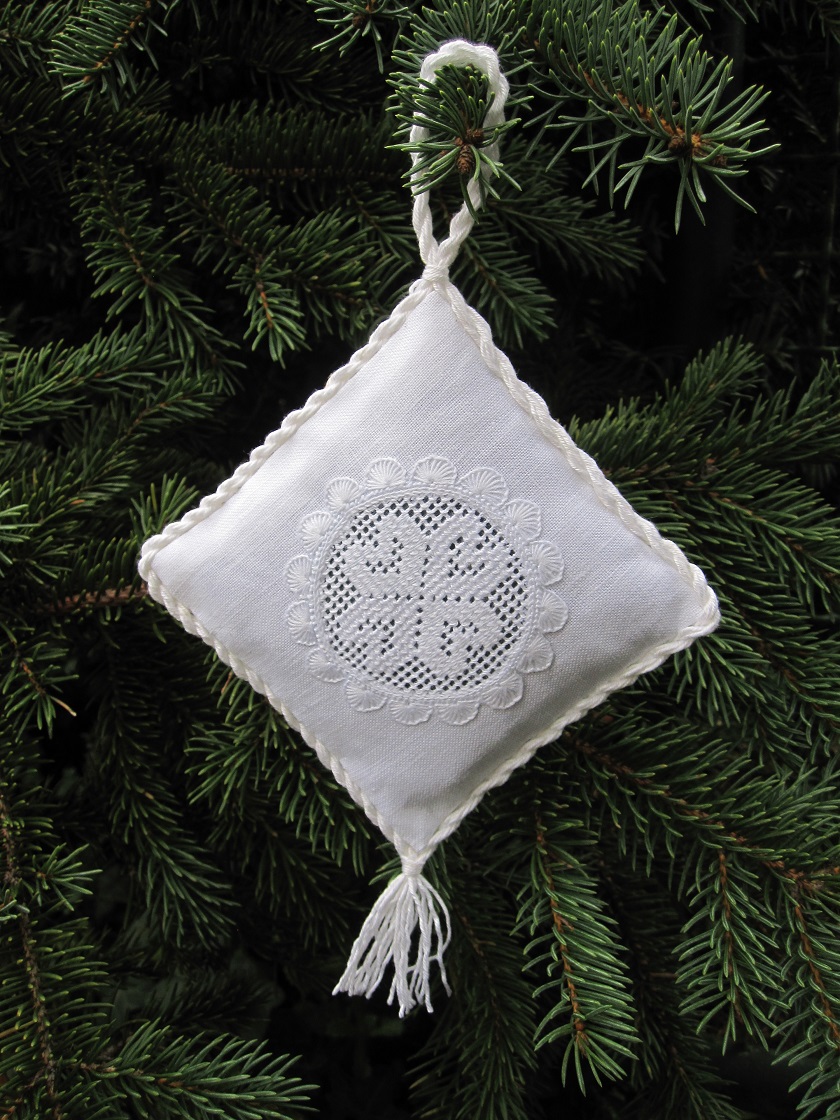
The finished ornament measures 10 cm x 10 cm. The working area of the linen is 22 cm x 12 cm, but because it is absolutely necessary to use an embroidery hoop for this project, you will need a piece of linen large enough to easily mount in an embroidery hoop. So, if necessary, cut the linen a little larger and trim it after the embroidery is finished.
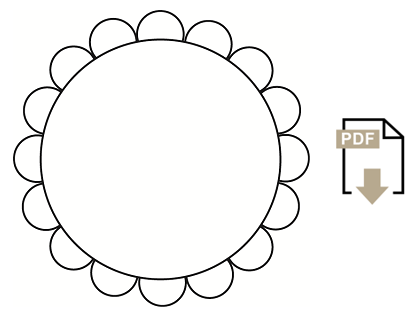
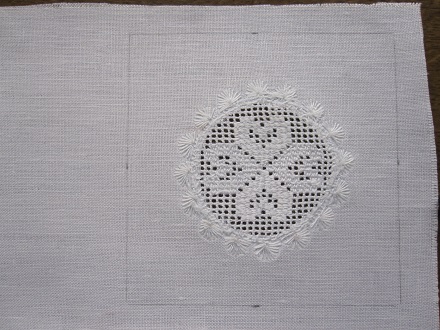
A circle motif with a diameter of 6.5 cm is transferred to the right side of one end of the linen.
Position the circle so that the center of the circle will be at least 6 cm from three edges of the linen.
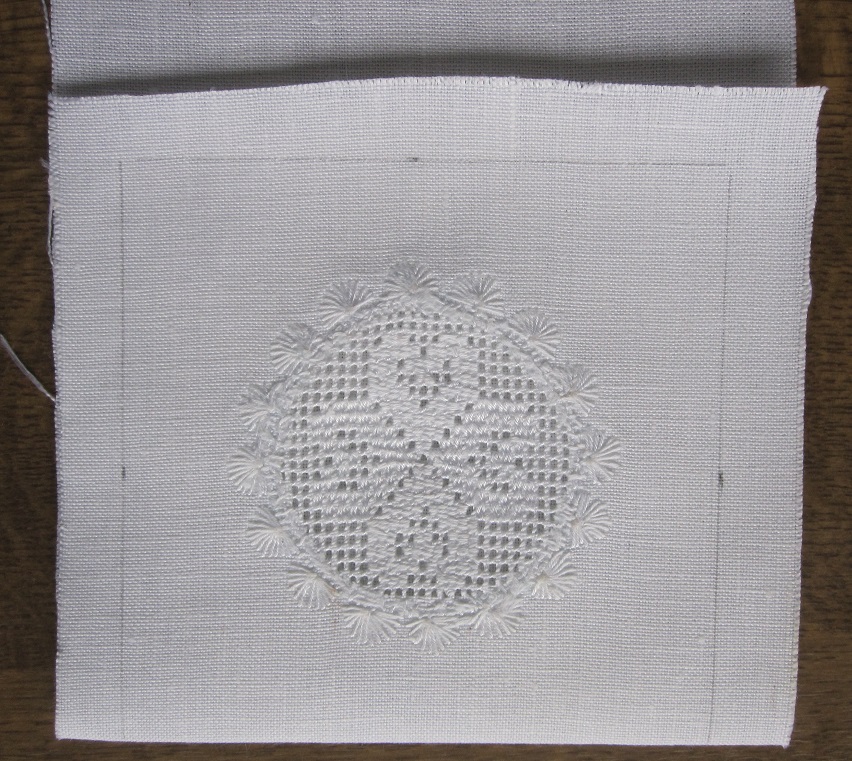
Using coton à broder No. 20 work Coral Knot stitches along the circle line. Using coton à broder No. 25 work half-eyelet scallops, and using coton à broder No. 30 work one row of Chain stitches inside the Coral Knot stitches. Then withdraw threads and embroider a filling pattern. In this example, filling pattern 470 was chosen.
After finishing the embroidery, the piece is washed, starched and ironed.
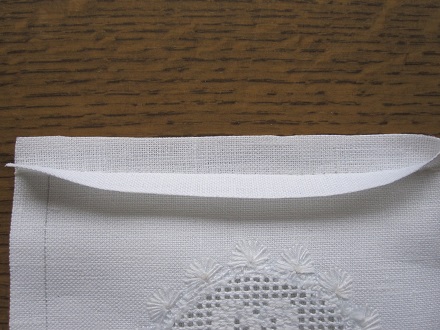
On the backside, out from the center of the circle, a distance of 5 cm is measured on all four sides on the straight of grain. A square, measuring 10 cm x 10 cm, and placed on the straight of grain, is marked with a pencil.
 Fold the linen, right sides together, on the marked line.
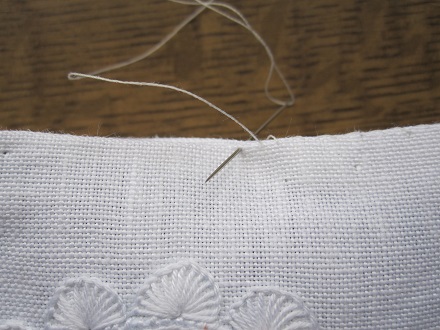
 Sew the left and right sides along the marked lines, and trim to 1 cm.
 Seam allowances are opened and pressed.
 Inside is turned out and the piece is ironed once more.
The ornament is filled with Poly-Fil or wadding. So that the Openwork pattern becomes more effective, it was underlaid with a coloured fabric.
 The remaining seam allowance is folded inside. The opening is sewn shut.
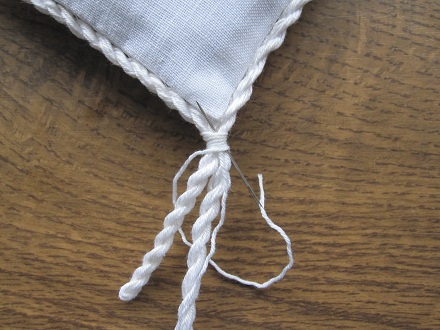
 Using cotton crochet thread a cord is twisted very tightly. Starting at one corner and on the backside, the cord is first sewn to two edges of the ornament. Notice, some centimeters of the cord end should remain in the beginning (this will form the tassel).
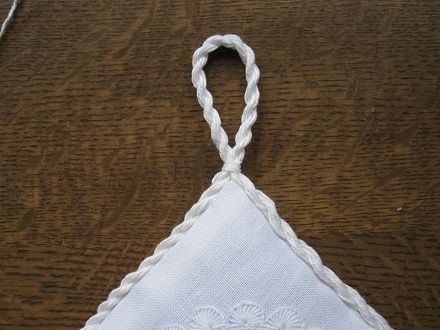
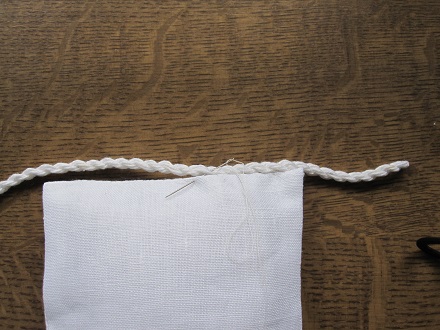 At the corner opposite to the beginning corner, a hanging loop is created. The cord is attached to the two remaining edges.
 When the starting point is reached, finish by wrapping – using crochet thread – the cord ends a number of times. The thread end is secured.
 Wrap the loop in the same way.
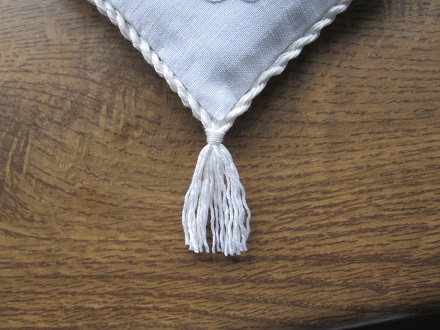
 The ends of the cord are trimmed.
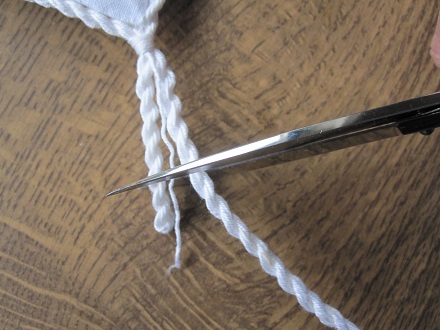 The cord is un-twisted, so that a tassel is created.
 The finished ornament is ready to decorate the tree. It is also a lovely gift.

This will be a sweet gift for Christmas. Thank you so much for all the tutorials! Hugs! Judy
Thank you, Judy,
Yes, the will be a sweet gift. Also working such small projects throughout the year results in a trove of ornaments.
Thank you for this lovely design and especially for the instructions for applying the cording around the ornament — so much neater than the way I have been doing it.
Have a happy Christmas and all the best in the New Year.
Always I try to make the steps of working as easy as possible – mostly it turns out well.
Thank you!
Hello! Thank your for an art sewers dream, a type of thread work that my grandmother Willi could do as a five year old child brought up by her Swedish mother and grandfather Peter Nils (who had been one of the King of Sweden’s tailors before 1870). This work is beyond anything I have seen for a while. I still have a small napkin my grandmother created from 1896. Thanks again. Mrs. ATK