
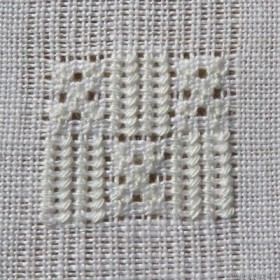
No. 478
category: simple drawn thread filling pattern
stitches used: Four blocks of 8 Satin stitches over 2 threads in the width and 2 threads in the height and Rose stitches
vertical axis: withdrawn thread line
materials used: 13.5/cm thread-count Weddigen linen Coton à broder No. 20 for the filling pattern
As already mentioned in the previous article “The Filling Patterns of the Traditional Schwalm Bodice A” I here present the filling pattern of shape 1.
Because it is easier to understand how to work this pattern without a shape, I first show it as a practice exercise.
 Alternate withdrawing 1 vertical thread and leaving 2 vertical threads.
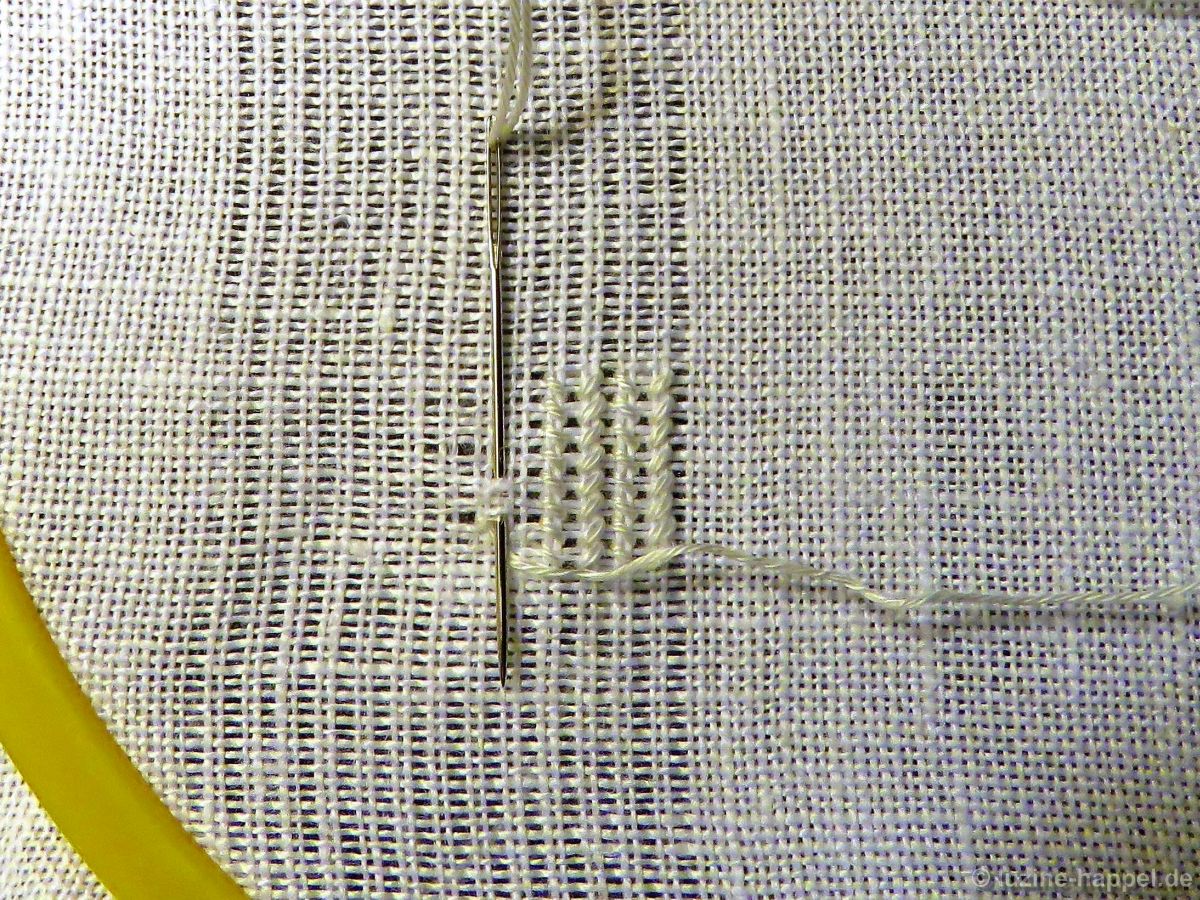
 In vertical columns, from bottom to top and back, embroider Satin stitches as “bars.” The Satin stitches are worked slanting and crossing 2 fabric threads in the height and width. A Satin stitch bar is made with 8 stitches in all.
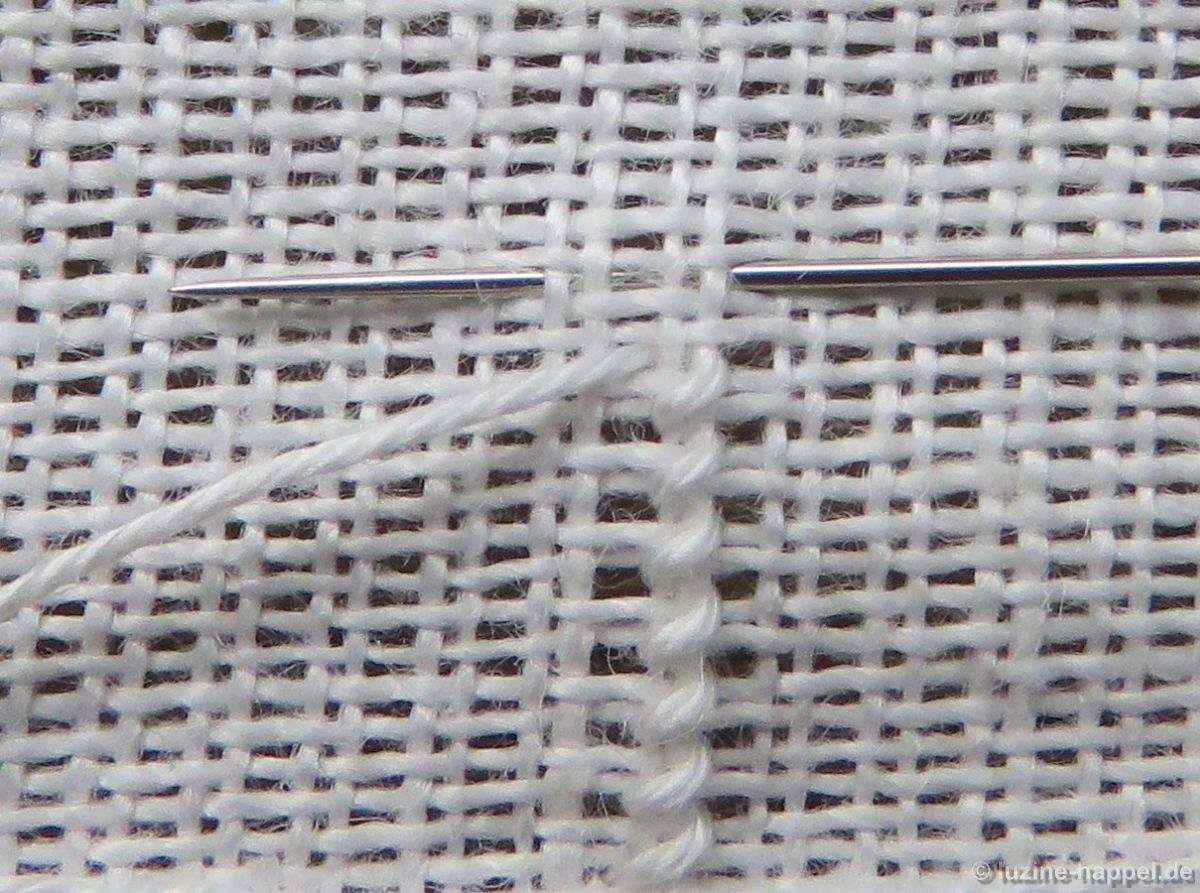 Also, the stitches are worked alternating slanting up to the right and then to the left. So, after working the last stitch of the first bar, do not turn the work but bring the needle up at the left of the next two-thread column (to the left of the column just worked)
 and work 8 slanting Satin stitches from top to bottom.
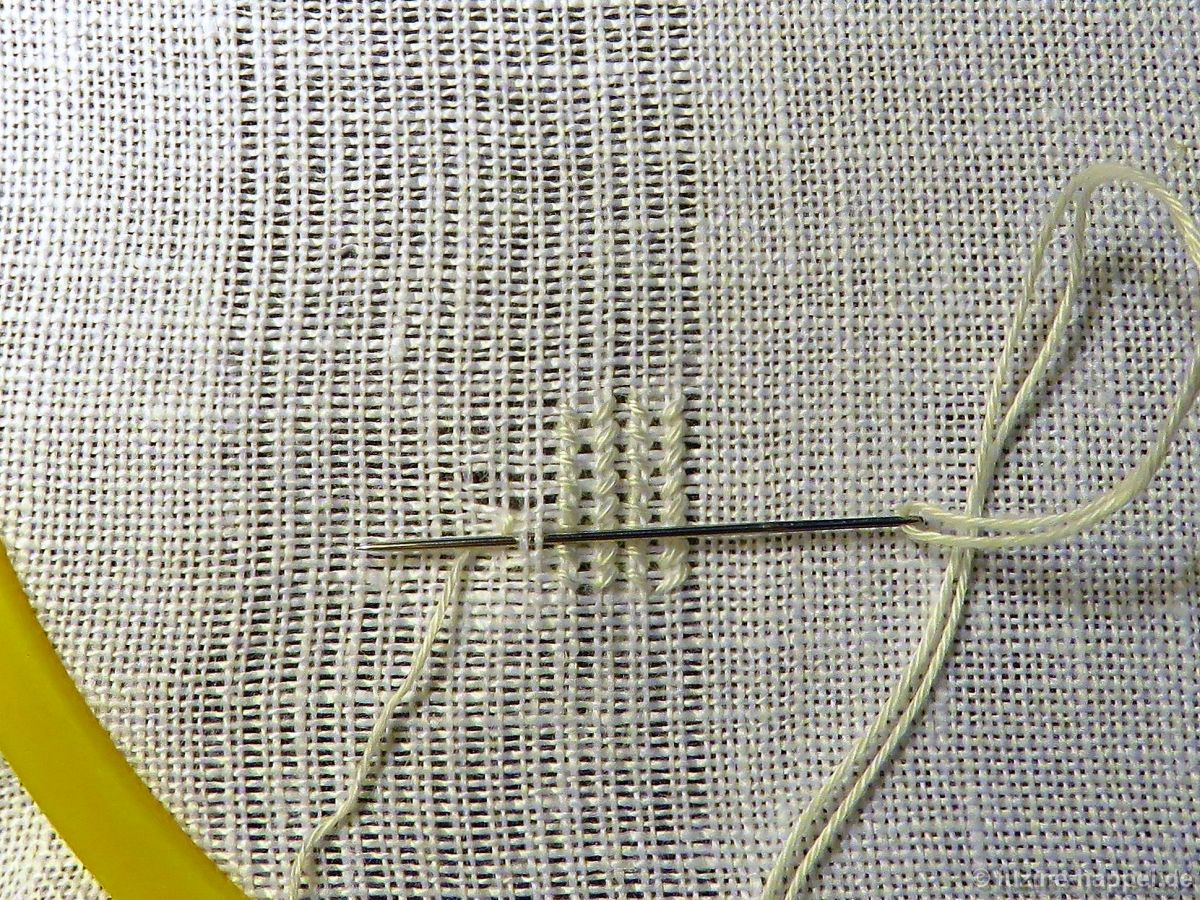
 Work 4 Satin stitch bars in all, alternating from bottom to top and back without turning the piece.
After the last Satin stitch, bring the needle up at the left of the next two-thread column (to the left of the column just worked) – 4 fabric threads up from the bottom.
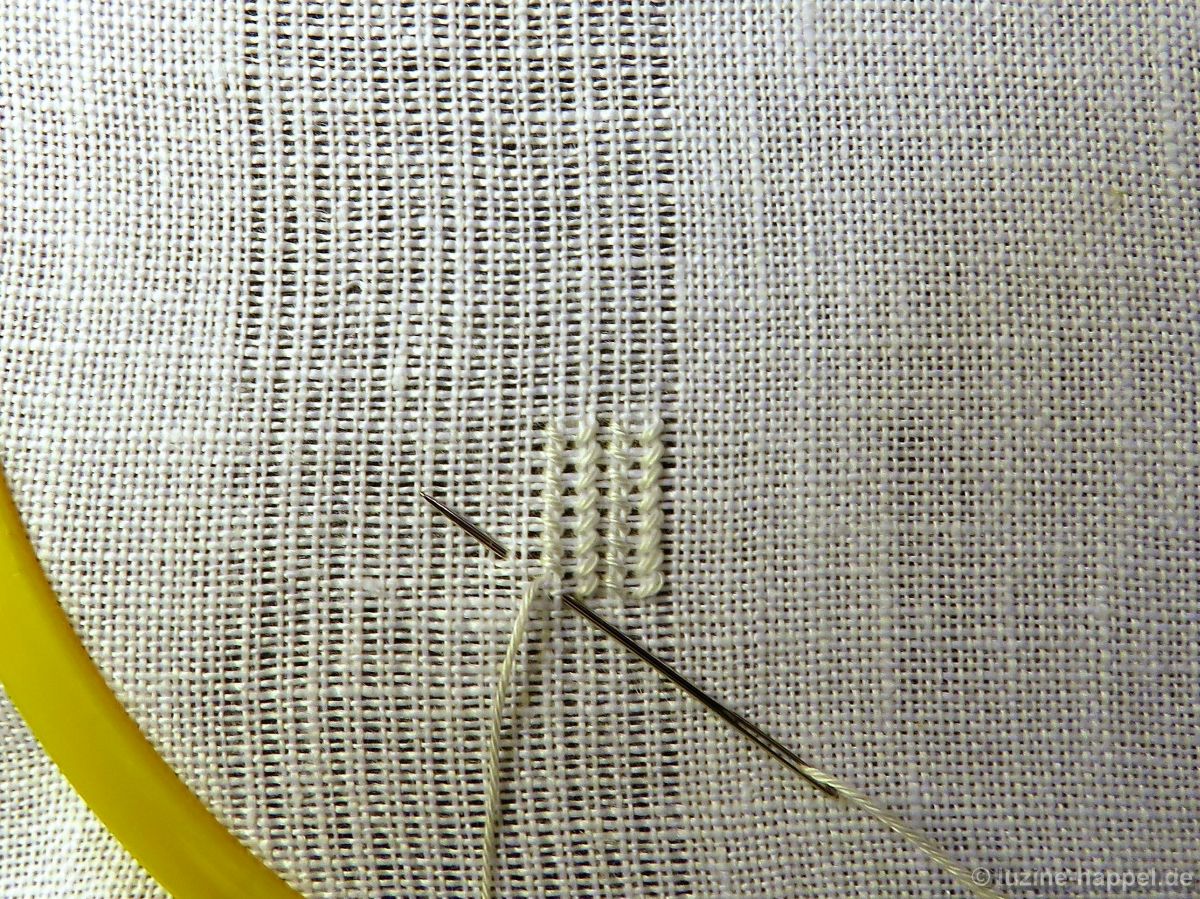
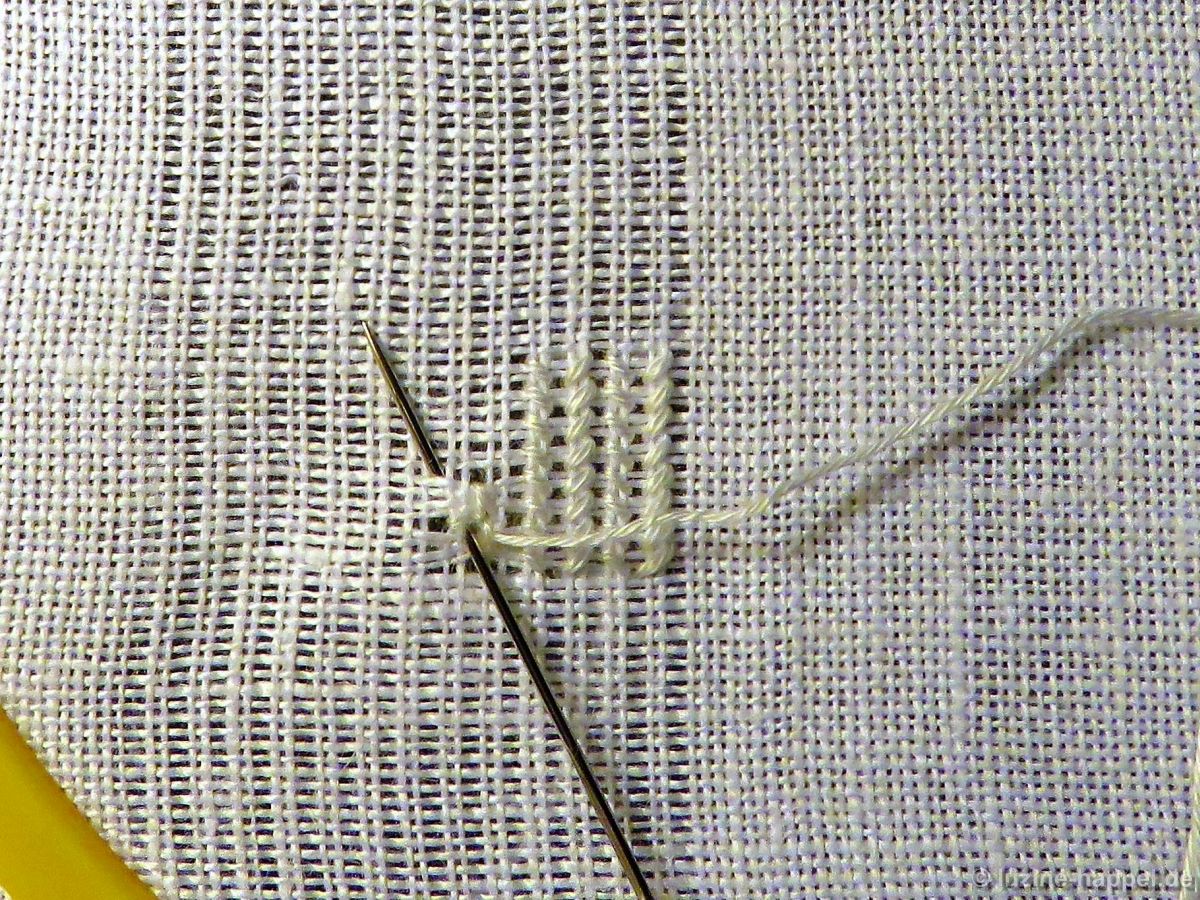
 Work a Rose stitch with the first step worked over 2 fabric threads to the left,
 the second step is worked over 4 fabric threads at the top,
 the third step is worked over 2 fabric threads to the right, and
 the fourth step is worked over 4 fabric threads at the bottom.
 Take the needle over the last step’s stitch, insert it in the center hole and bring it up 2 fabric threads to the left and 4 fabric threads up from the center.
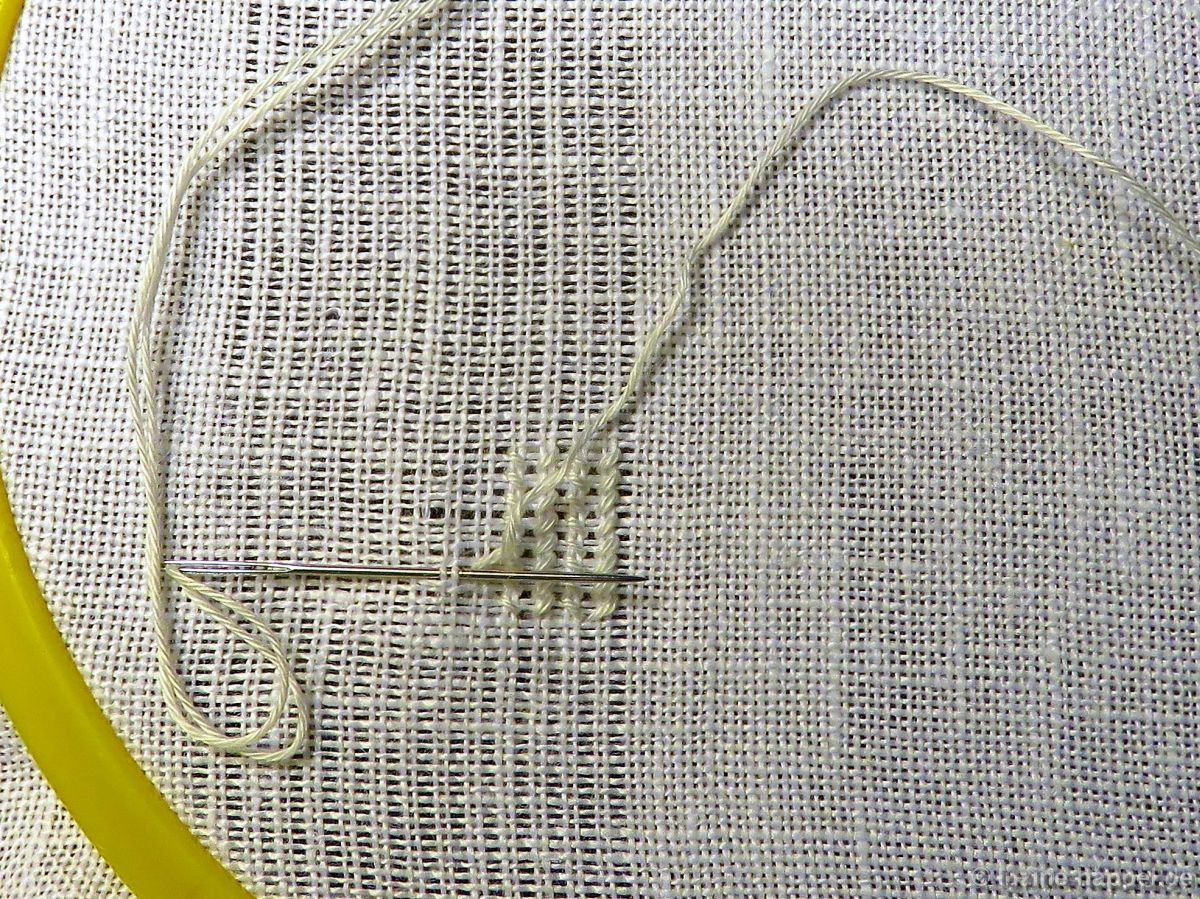
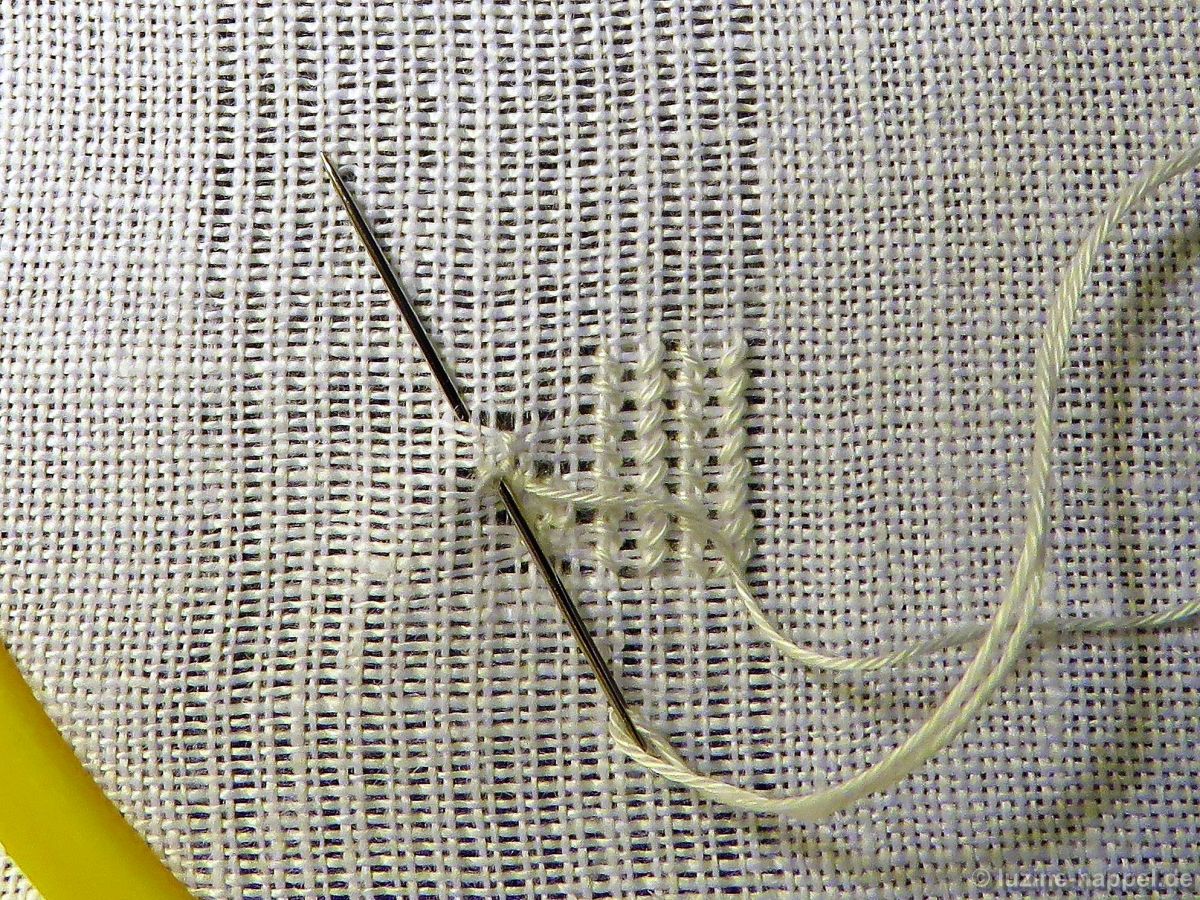 Again work a second and
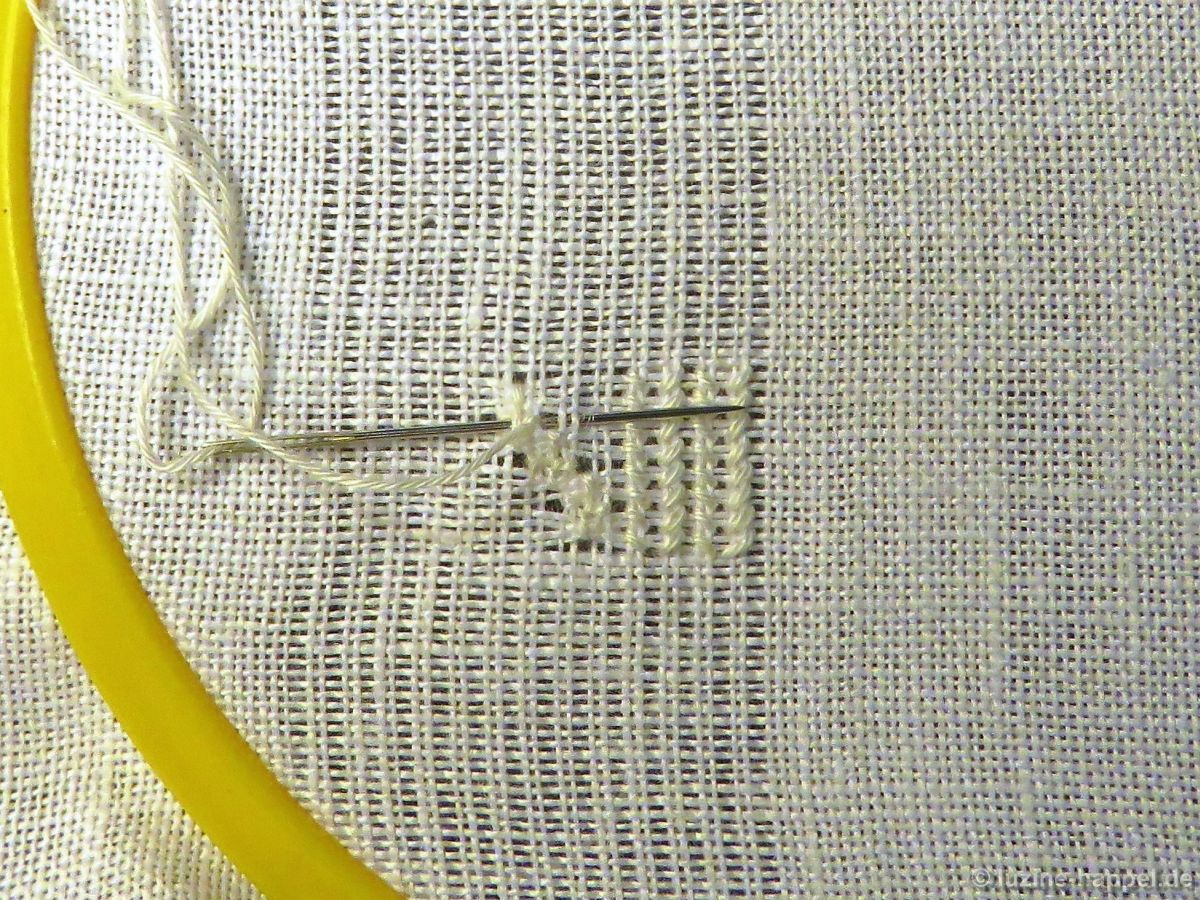 a third Rose stitch in the established way. You should create “a die with 5 pips.” So bring the needle up 4 fabric threads to the right of the last Rose stitch center. Moving straight to the right will make the working thread in the back visible (please see red arrow).
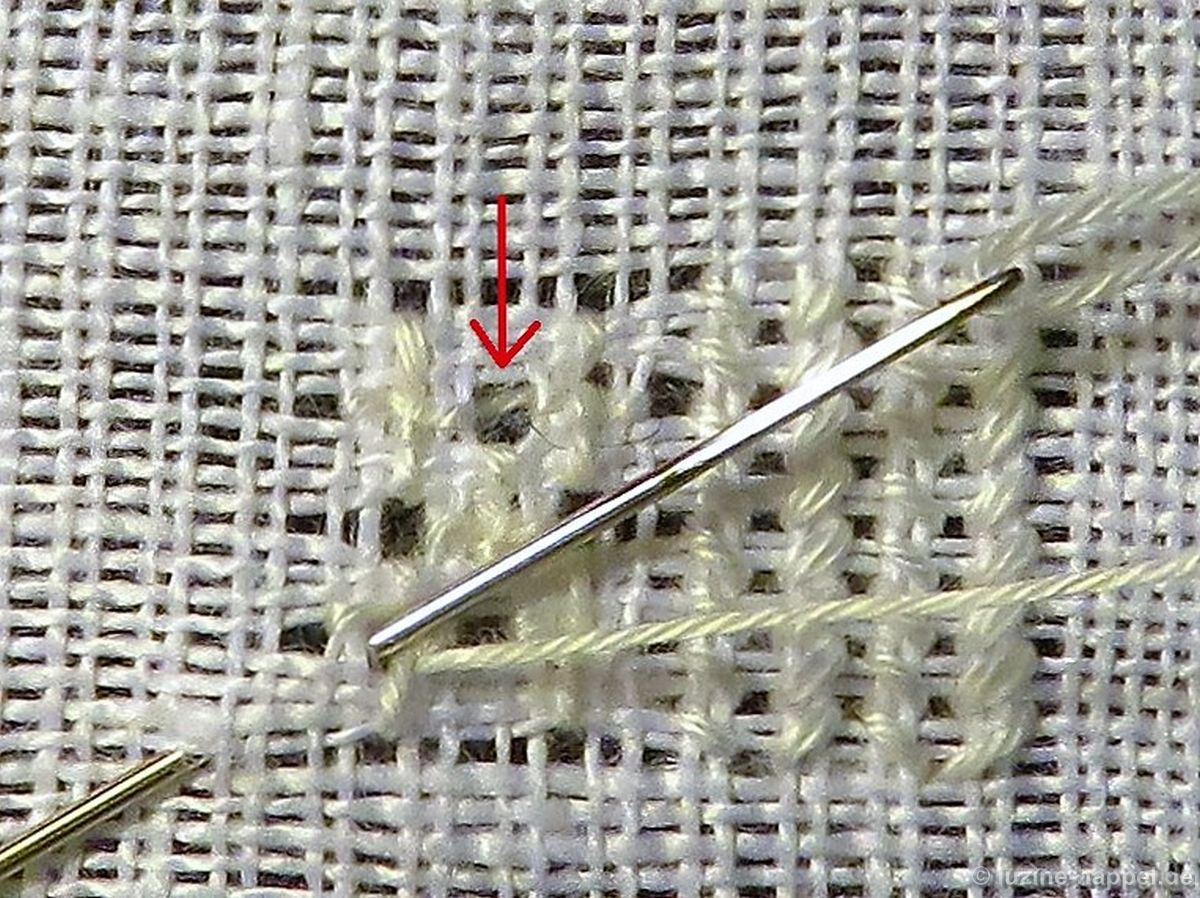 To avoid this and to keep the holes open and clean, slide the working thread along a curved path through the stitches on the back.
Work 1 Rose stitch at the top right and 1 Rose stitch at the bottom left (please carefully look to the picture).
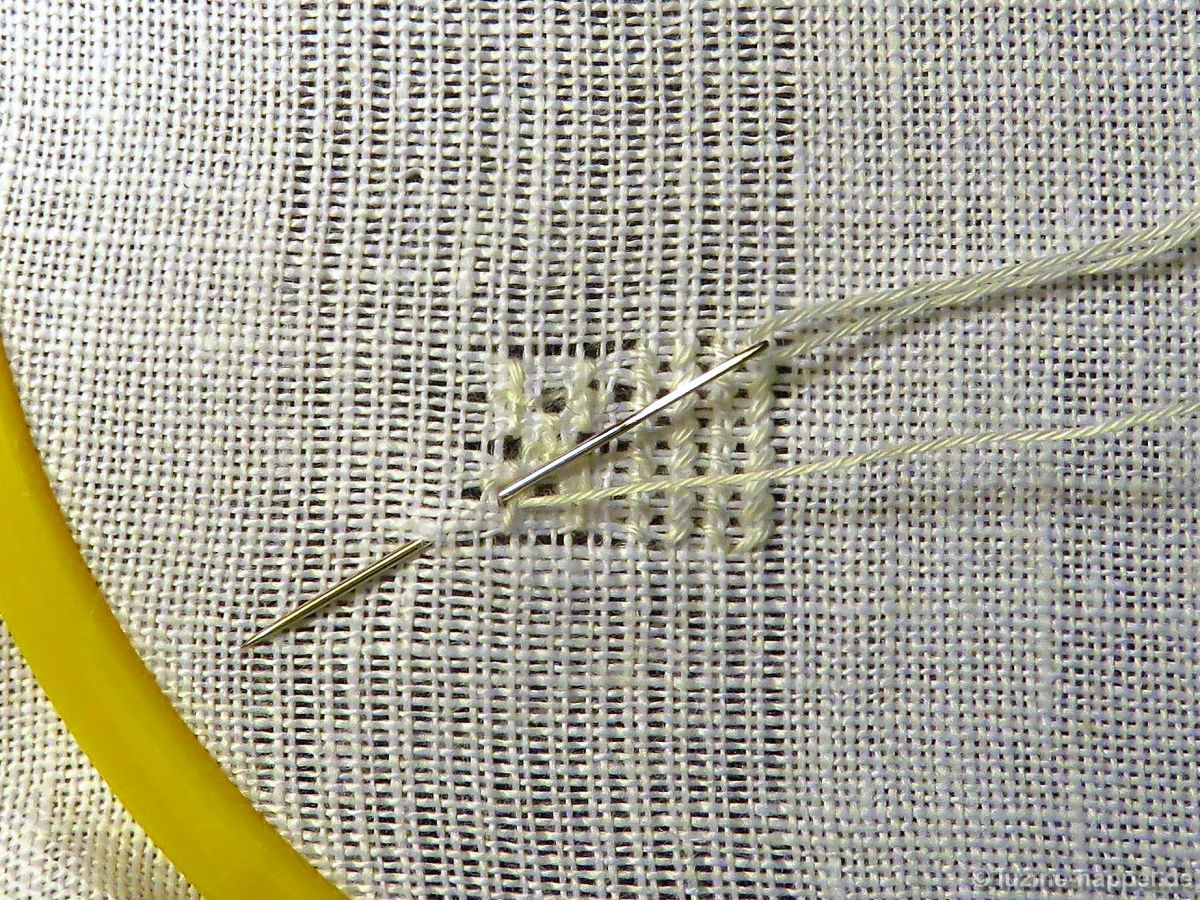 To start the next Satin stitch block, bring the needle up 4 fabric threads down and 4 fabric threads to the left of the last Rose stitch center.
In this established way work always alternating four blocks of Satin stitches and “dies with 5 pips” of Rose stitches.
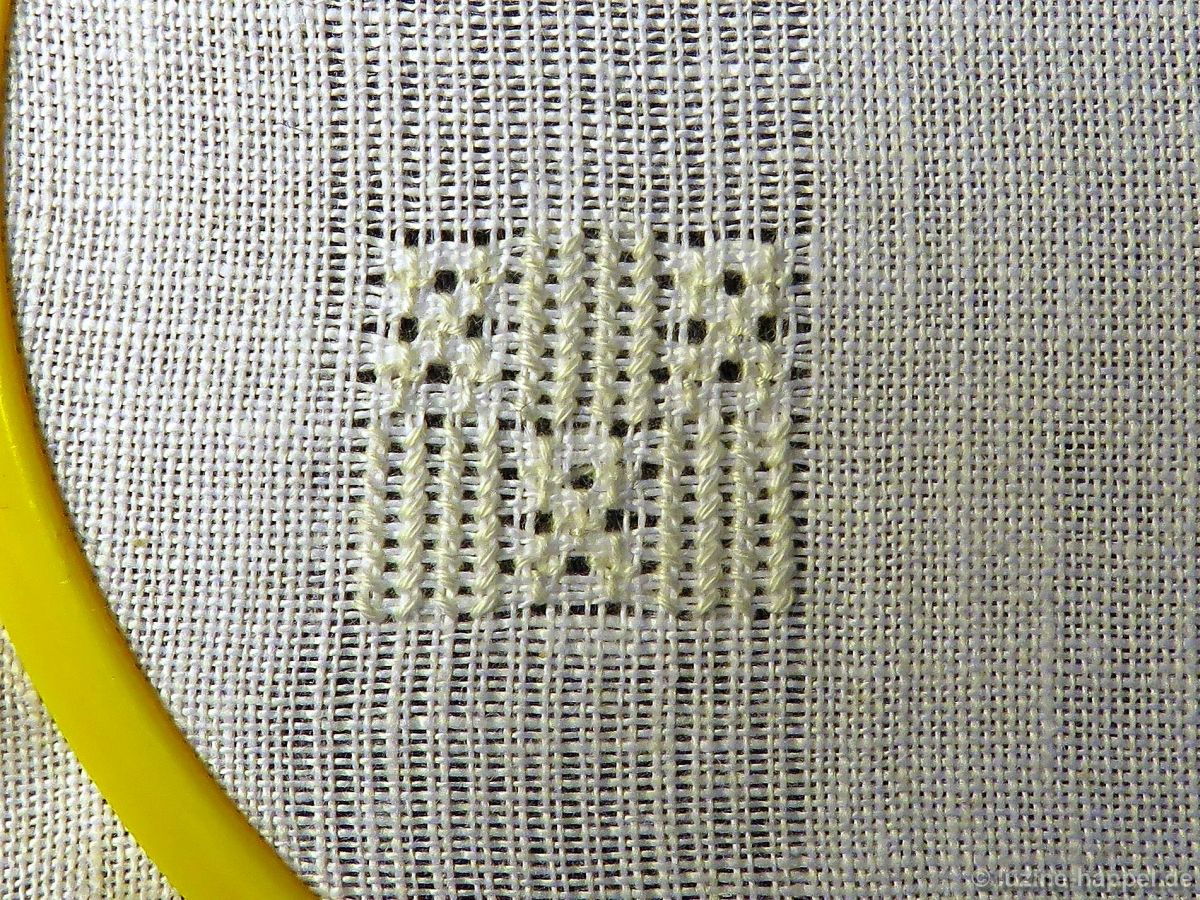 Work the “dies” staggered in the next row.
Because the pattern has a tall narrow effect, I looked for a matching shape and decided on a bell.
 Starting in the middle, alternate withdrawing 1 vertical thread and leaving 2 vertical threads.
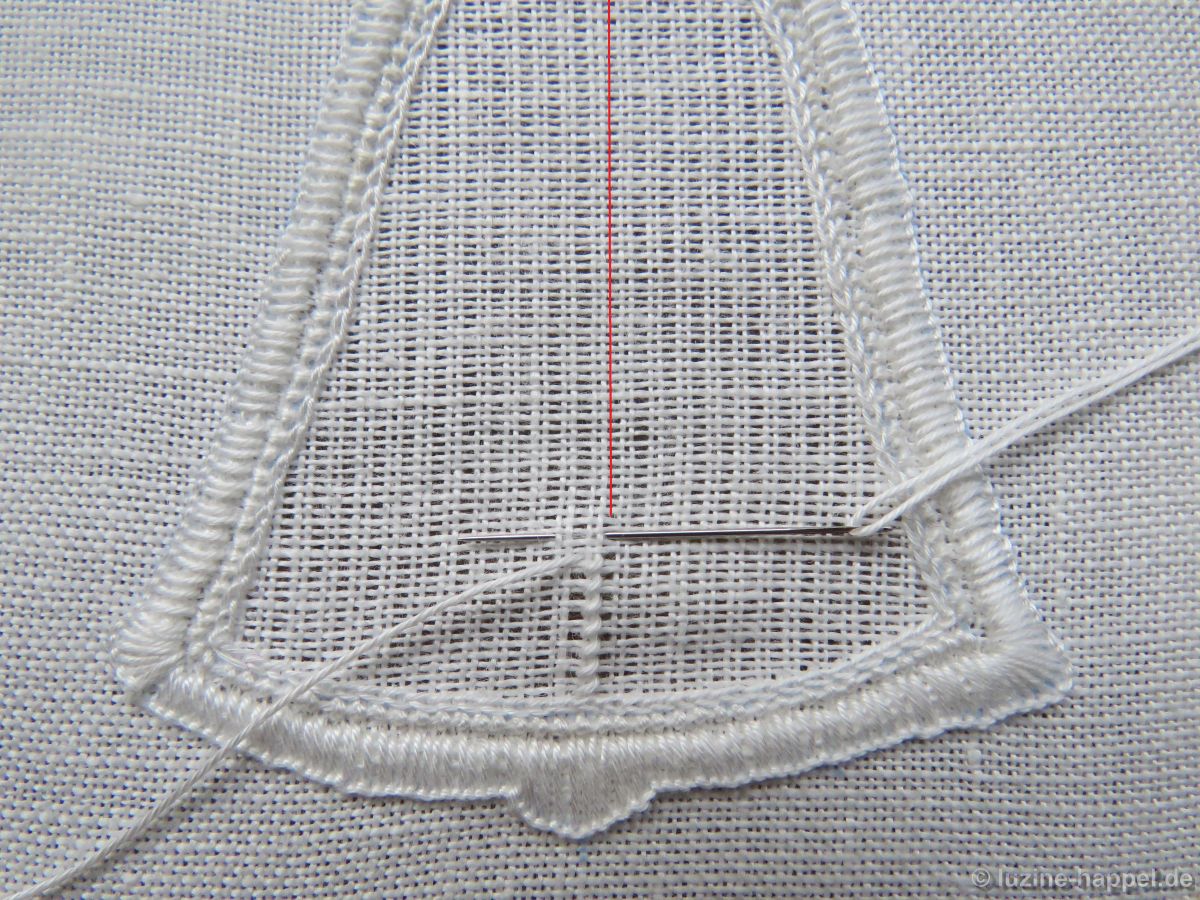 In vertical columns, from bottom to top and back, embroider Satin stitches as “bars.” Start at the bottom left of the longitudinal axis (red marked line) and work – in the established way – always alternating four blocks of Satin stitches and
 5 Rose stitches.
 Work the next row staggered.
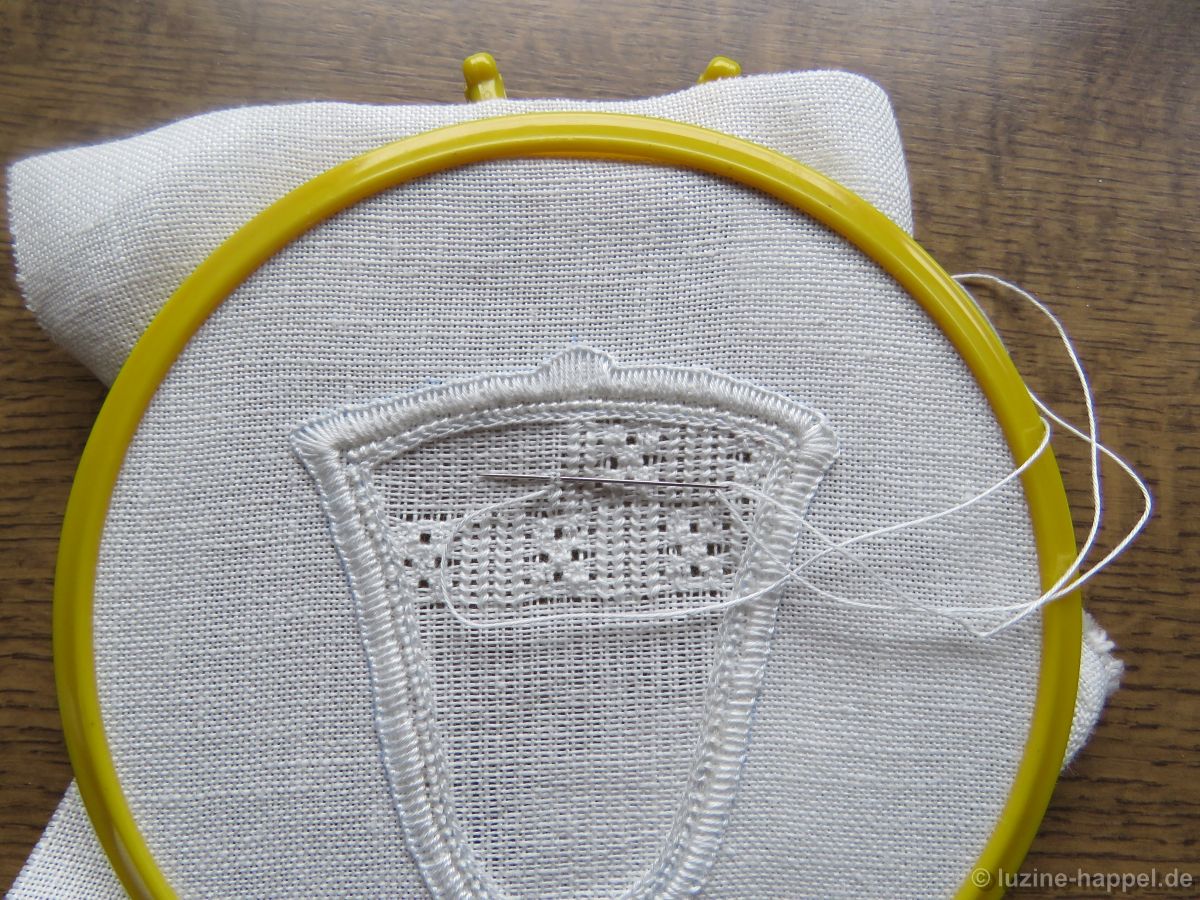 Finish the first row up from the already worked section.
 Work the rows like a checkerboard all over the shape.
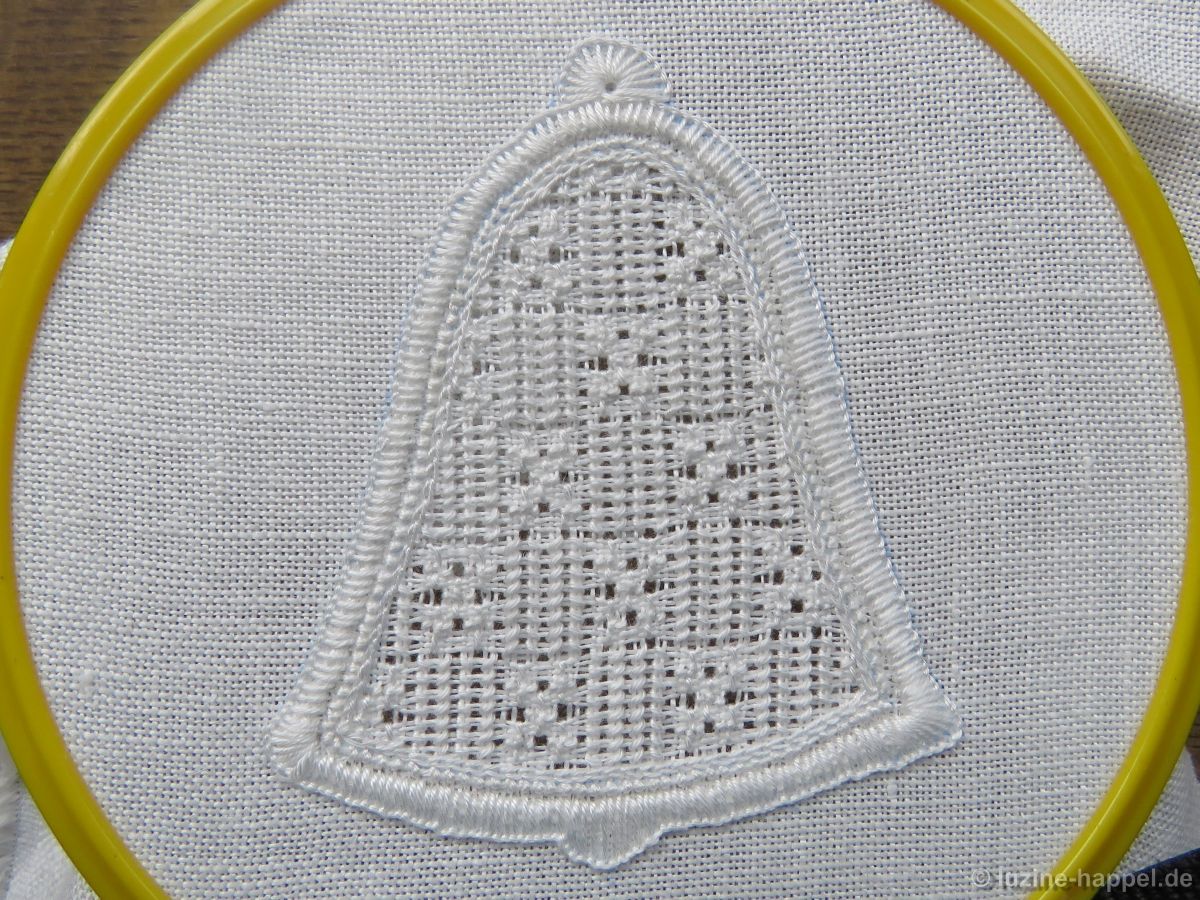
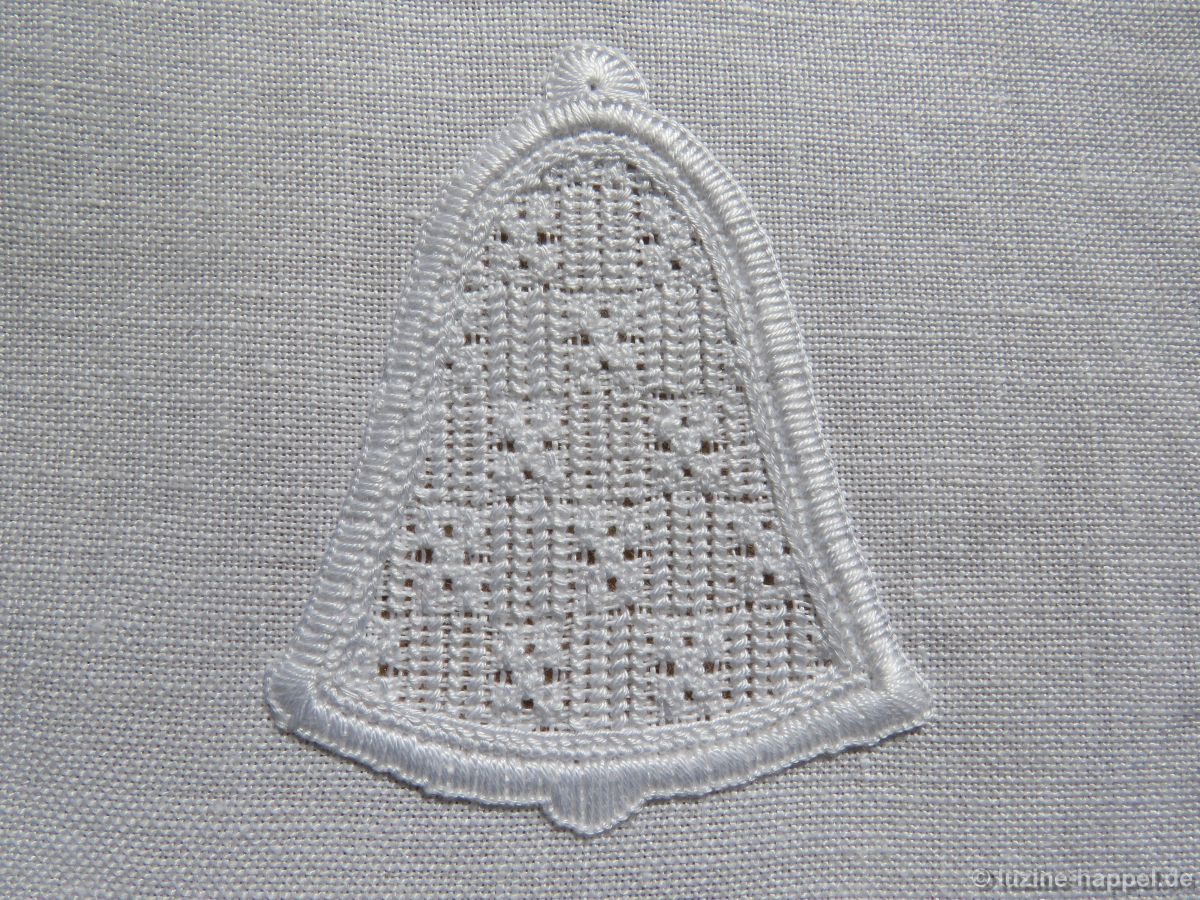 Washed, starched, and ironed the finished pattern shows its final charm.

A truly beautiful filling, Luzine. You never run out of ideas.
I really should visit your blog more often – so beautiful – so inspiring.
Thank you so much
Ylande