
As already mentioned, needlelace, in the past, was used most often as decoration for clothes; today it is found on other items as well. In my previous post I showed a circular doily with a needlelace edging.
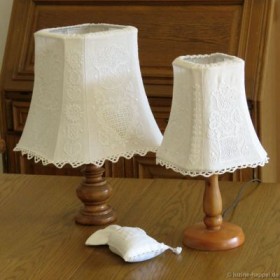
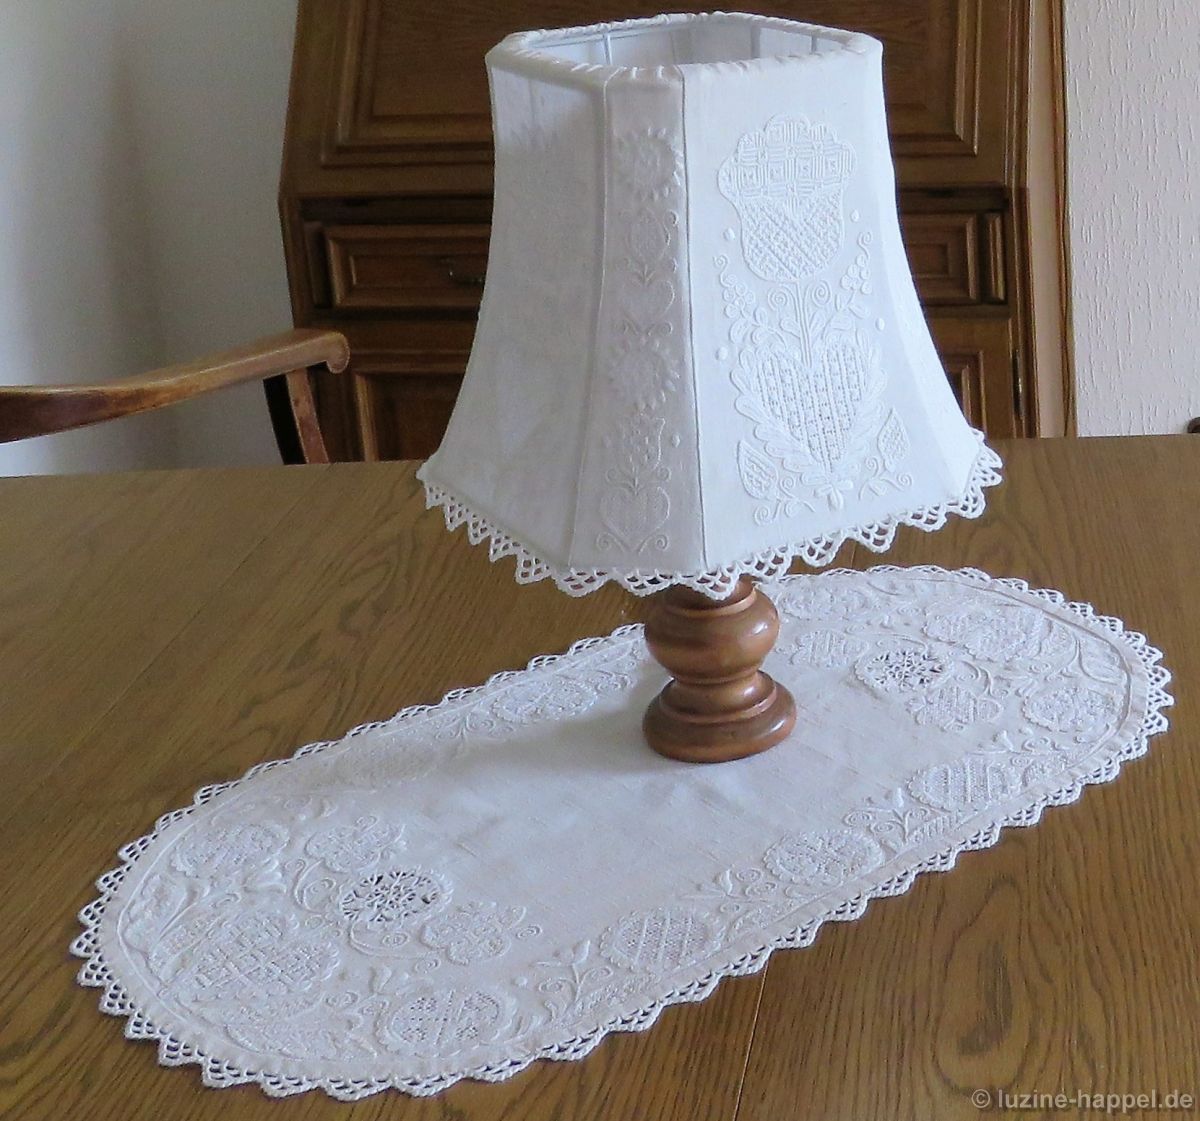
Now I want to show a small lampshade whose bottom edge is decorated with needlelace.
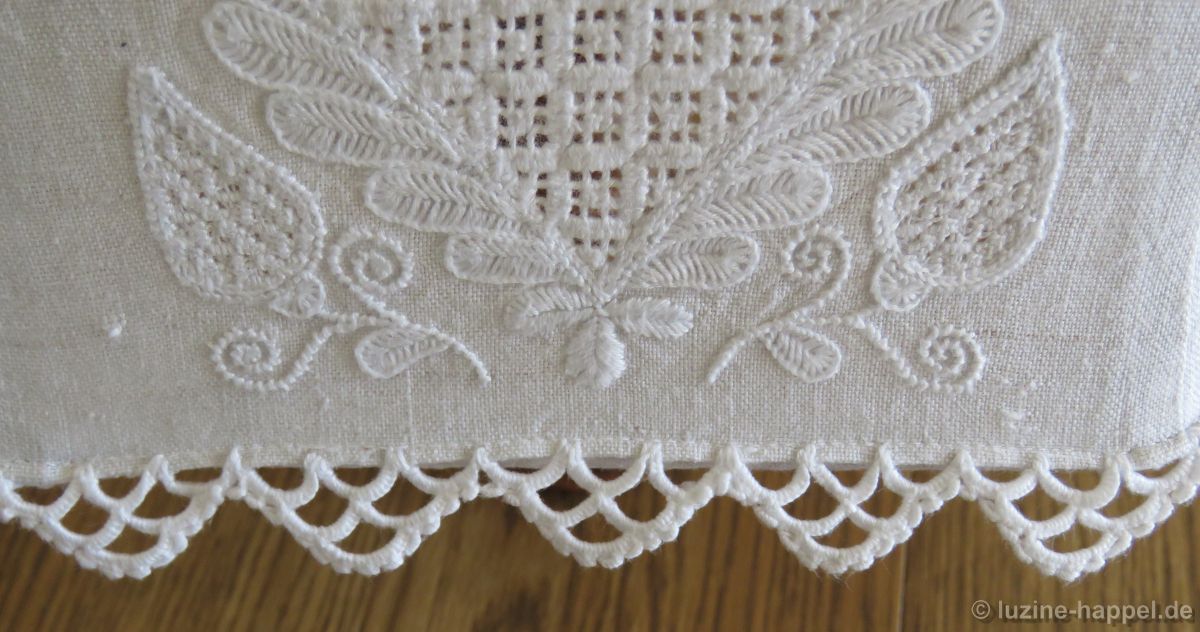
 The needlelace was made in an inverted pyramid shape (3-2-1). A row of picots borders the outside edges of the pyramids and binds them together.
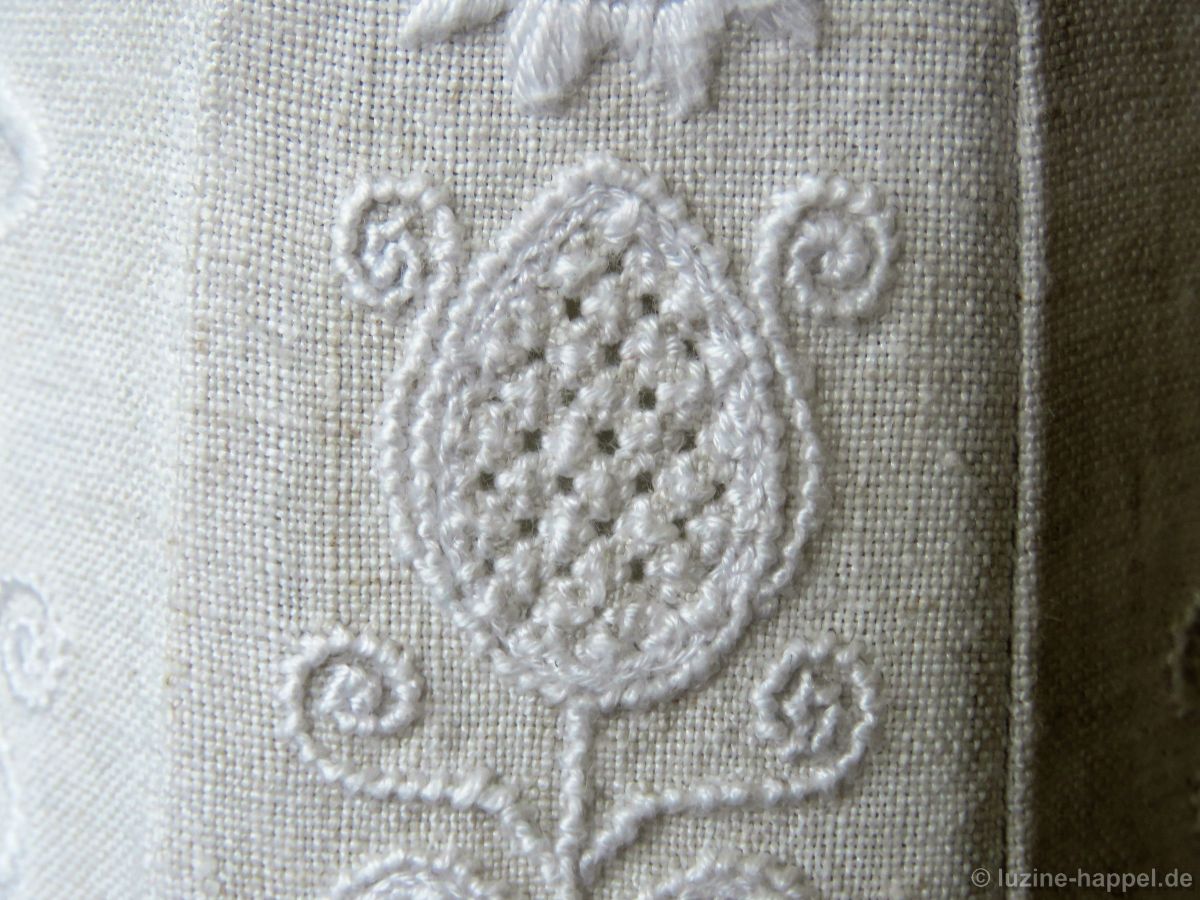
 The lampshade has four wide areas and four narrow areas. Two of the wide areas – oppositely arranged – contain heart and tulip motifs, and the other two wide areas contain heart and sunflower motifs.
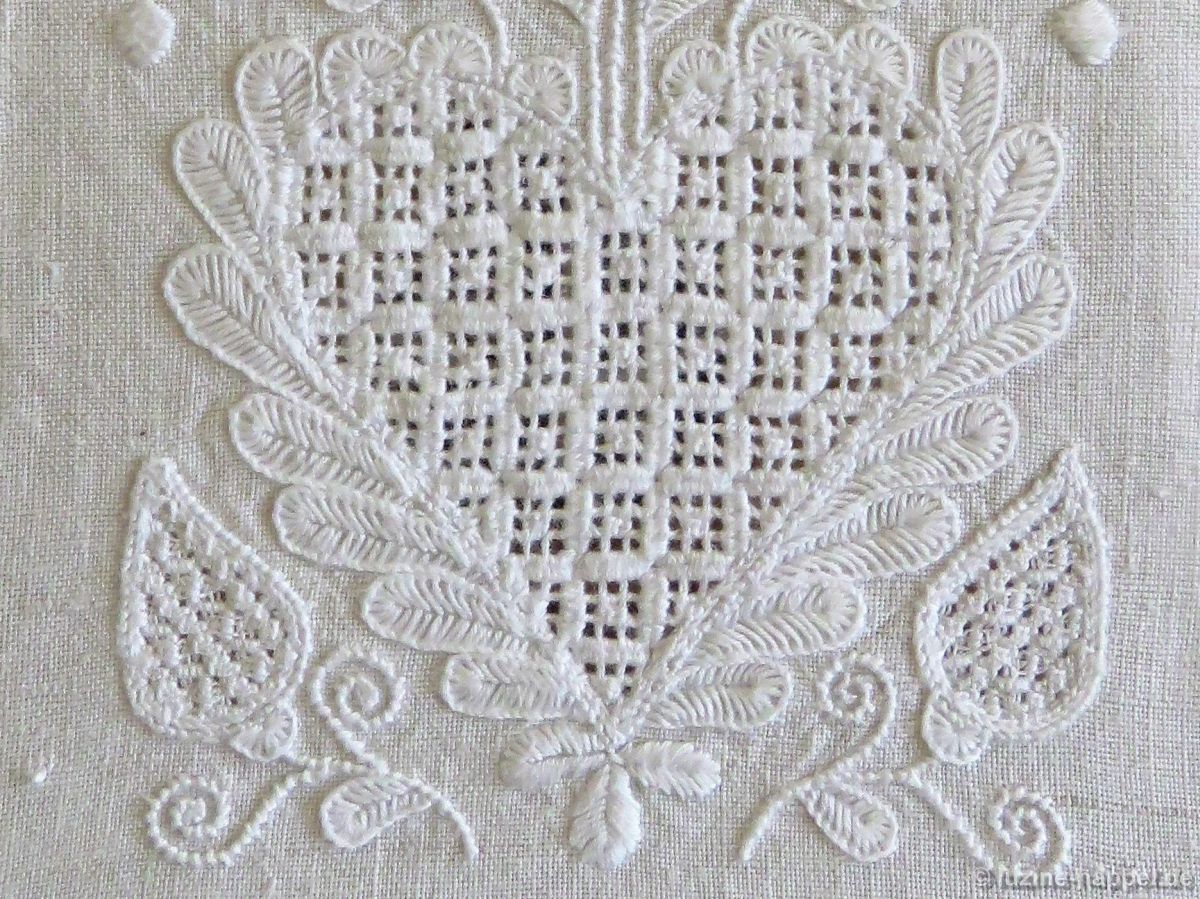
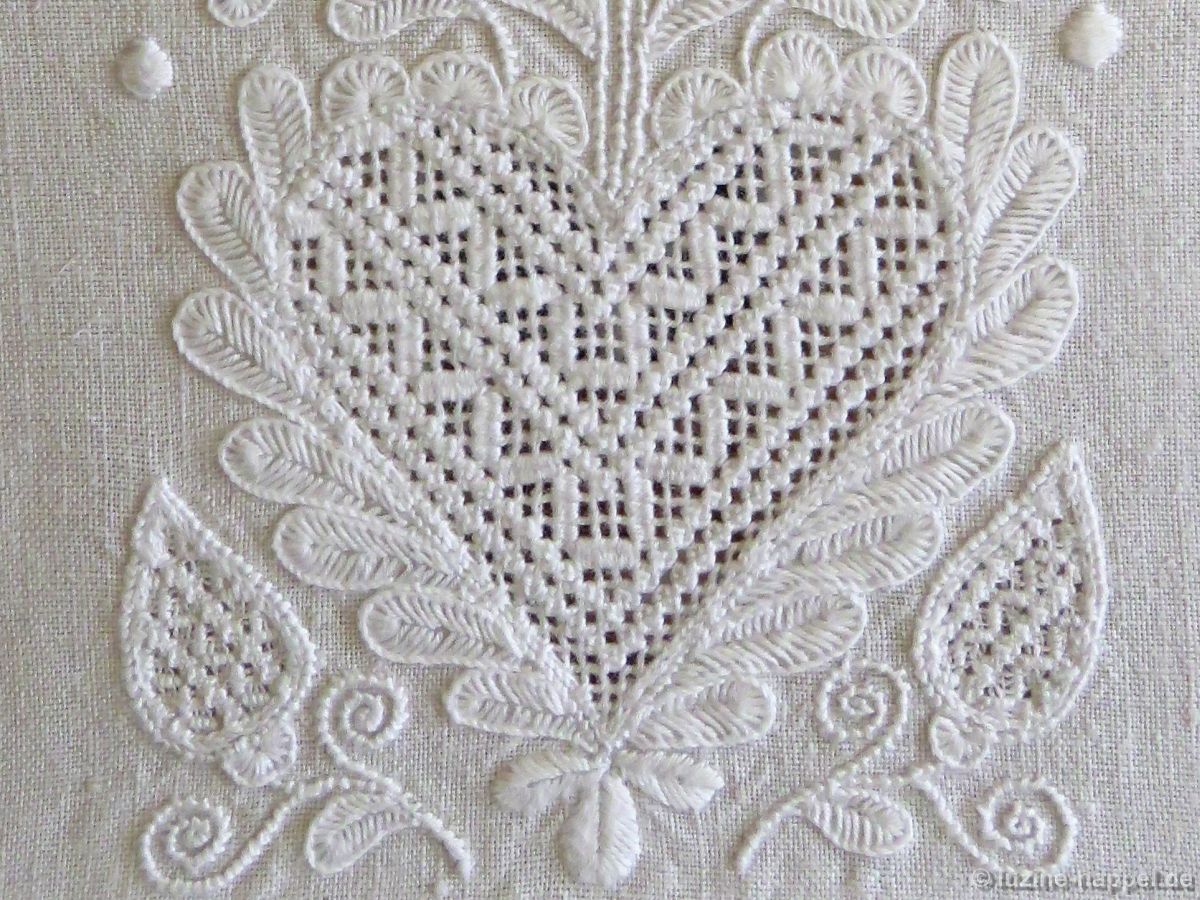
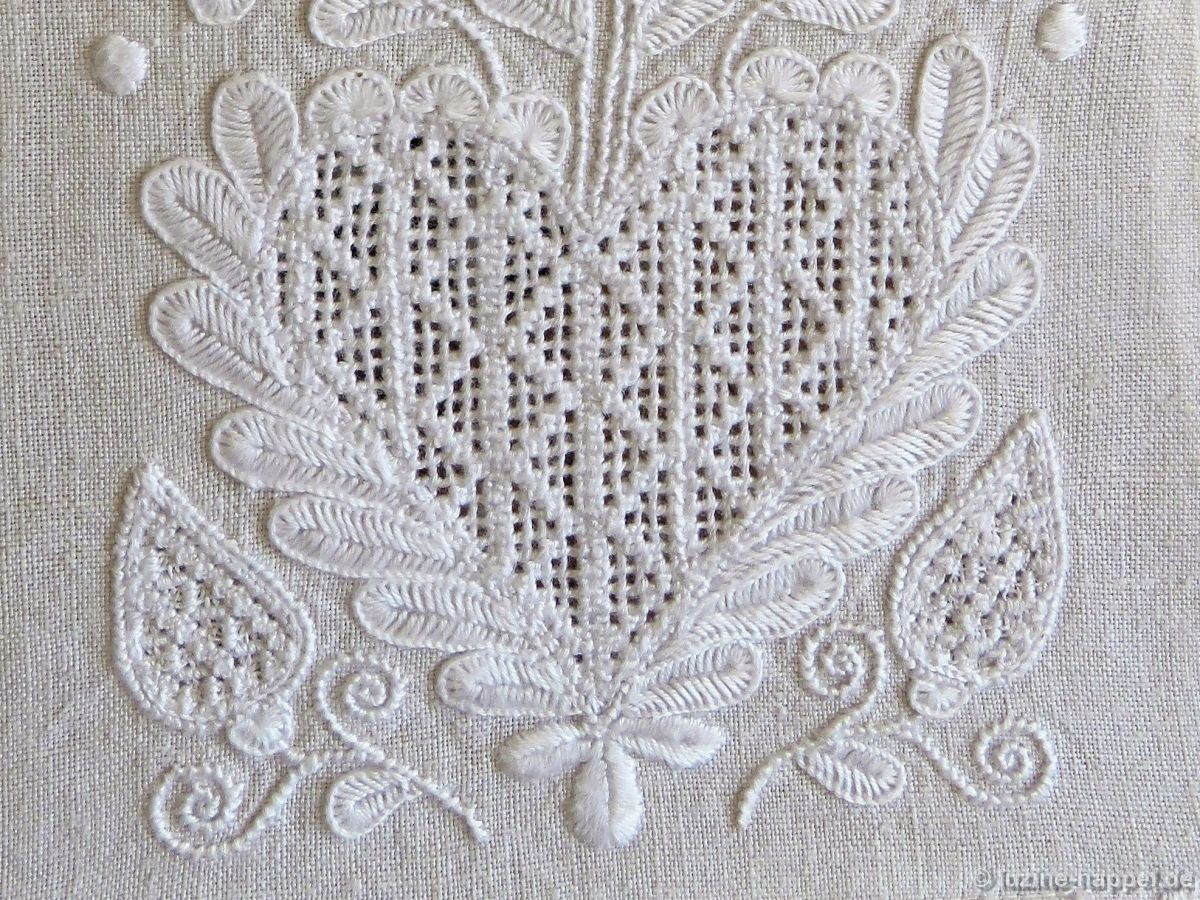
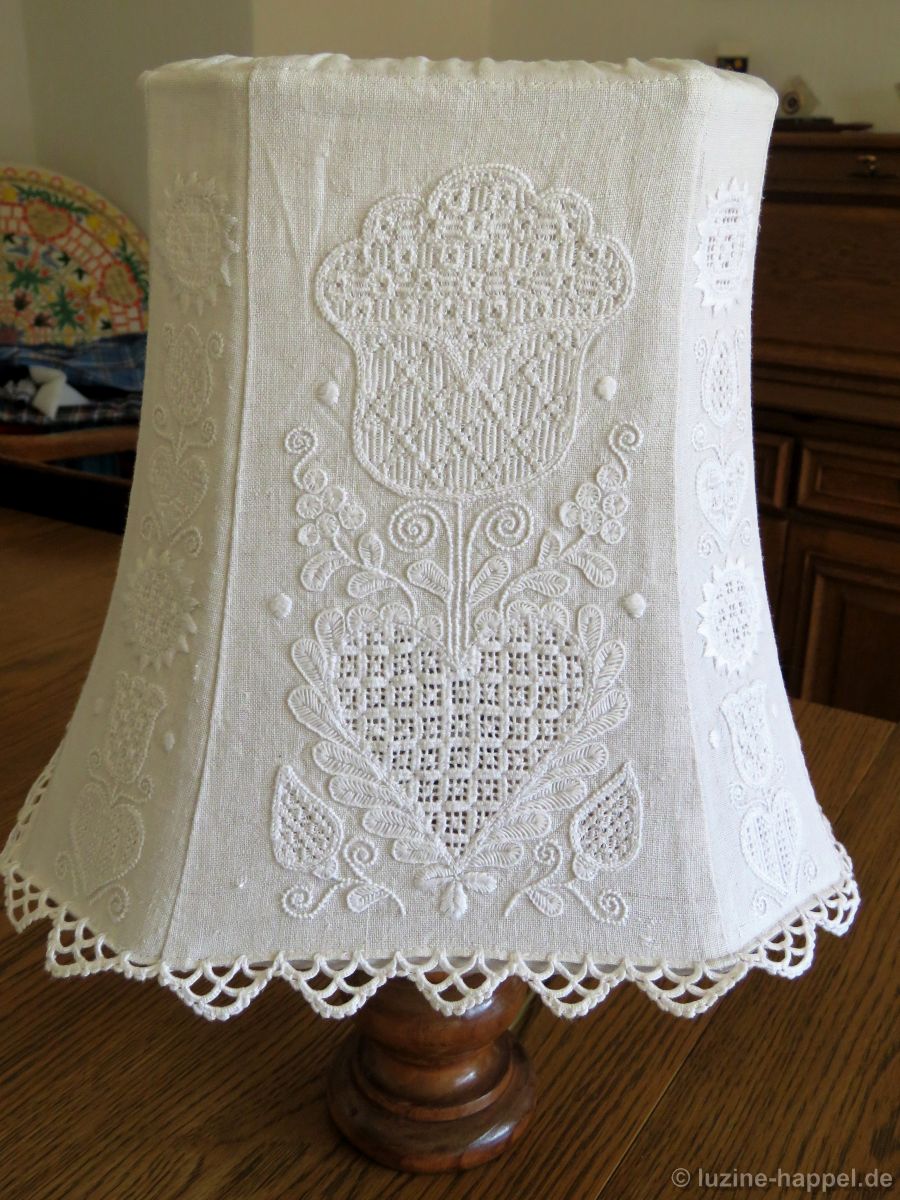 The shapes were filled with different patterns. Same motifs got similar patterns. All heart shapes were filled with openwork filling patterns with a Cable stitch grid. Needle weaving and Rose stitches in different arrangements were worked into the grid.
Needle weaving squares with a Rose stitch in the center.
Needle weaving in a stair-step manner and rows of Rose stitches.

Rows of needle weaving and Rose stitch squares.
Rose stitches in straight and zigzag lines.
Rows of Rose stitches and stair-step Satin stitches.
Rose stitch grid with Satin stitch bars (Filling pattern 472)
Röserich filling pattern
on top: Rose stitch squares and Satin stitch bars
on bottom: Rose stitch grid with Satin stitch bars
on top: Rose stitch squares and fourth blocks of Satin stitches
on bottom: Rosen stitch rhombi
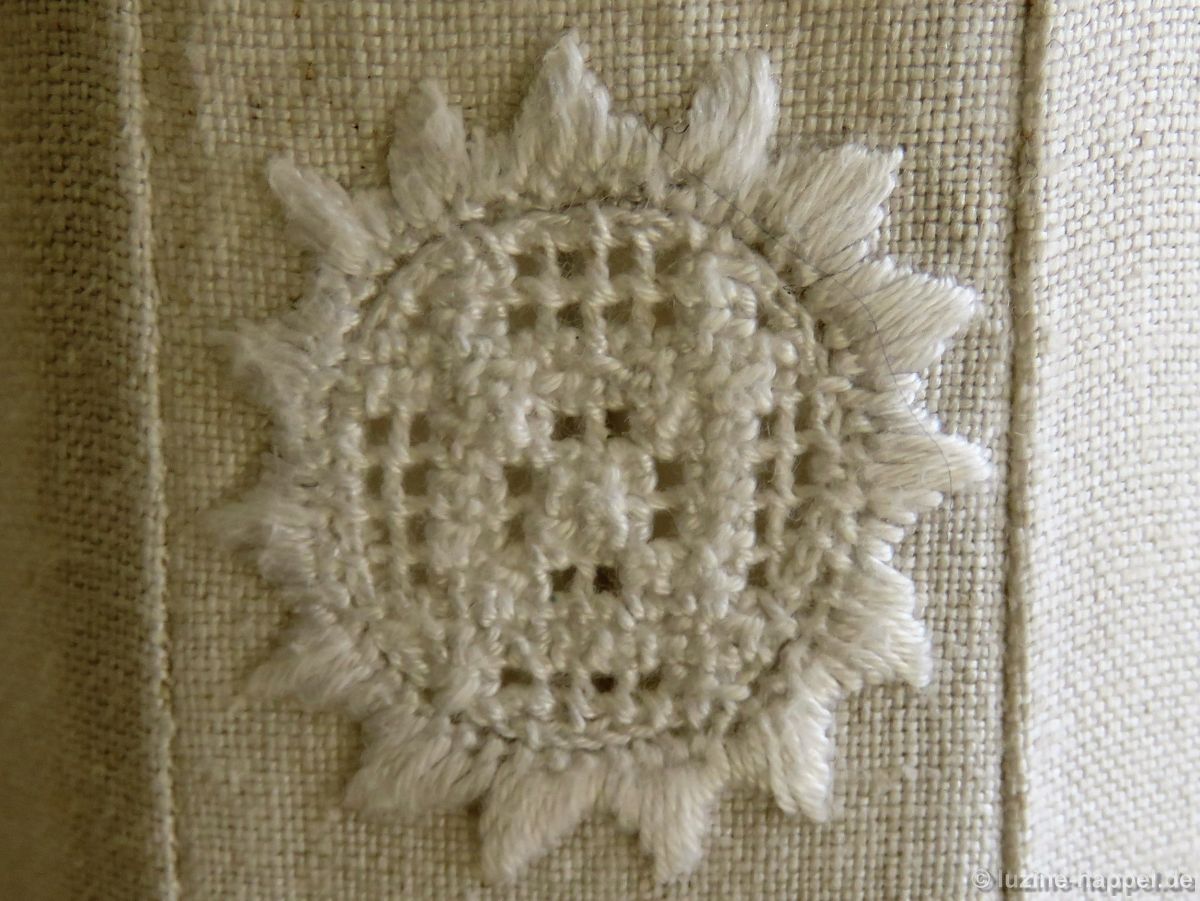
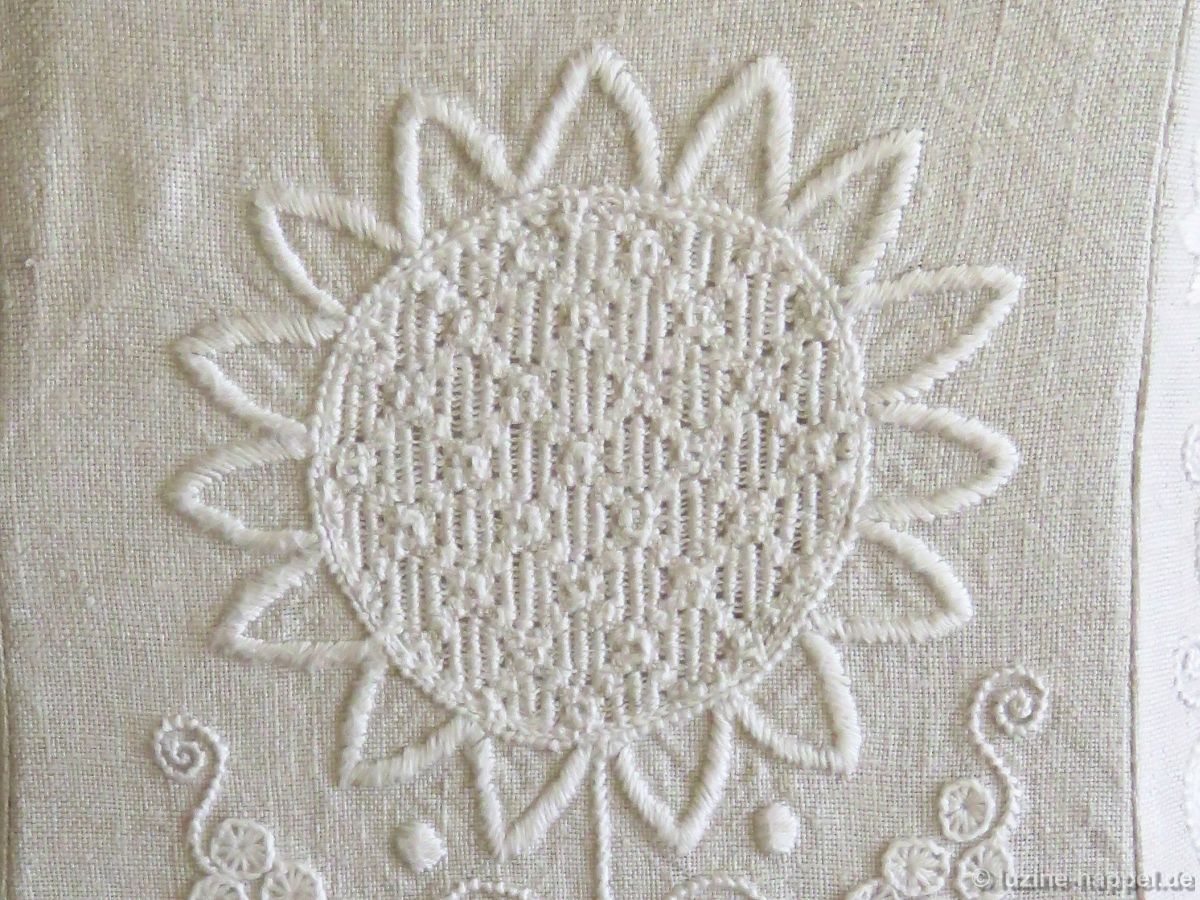
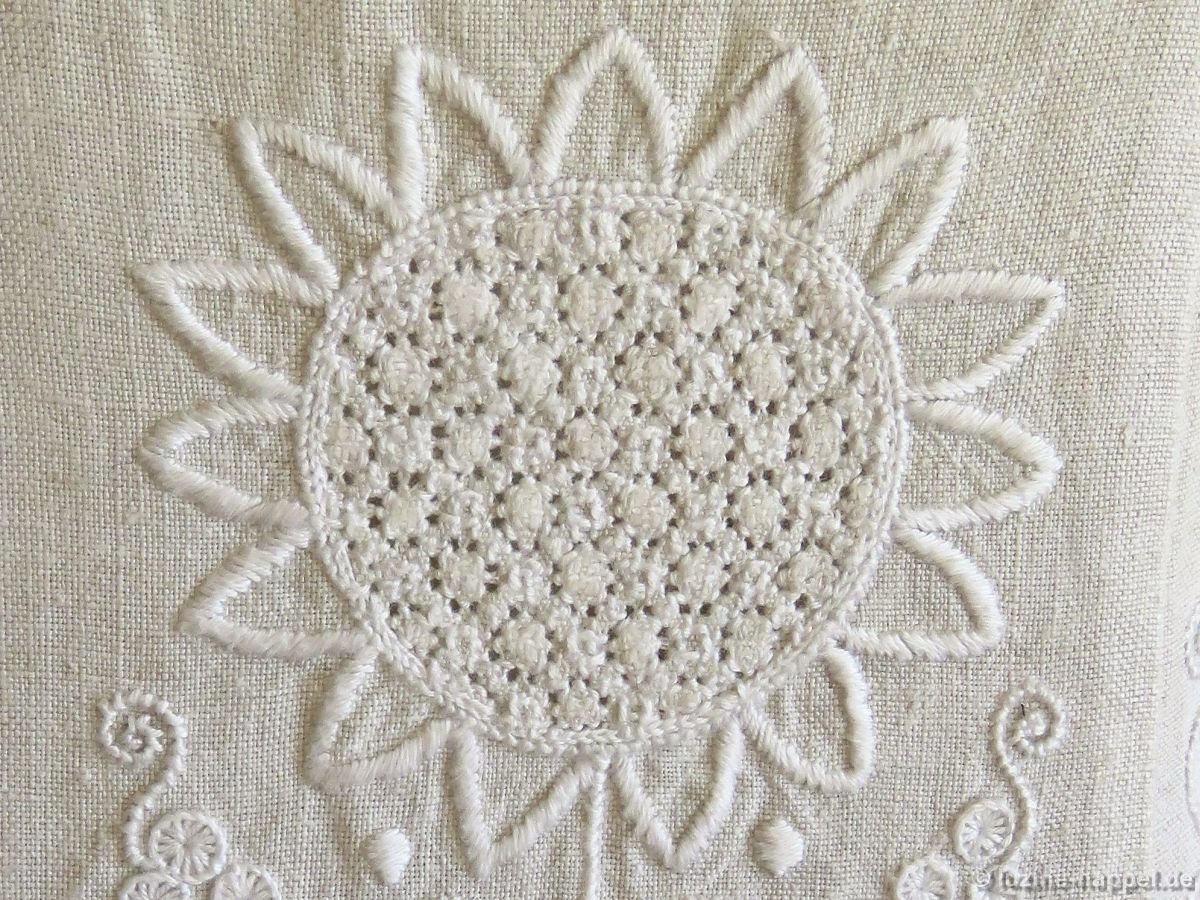
Circle with a knife point outline, and filled with an openwork pattern with a Cable stitch grid. Into the grid a Rose stitch pattern was worked.
Bud with the Limet-Filling pattern Rose stitches.
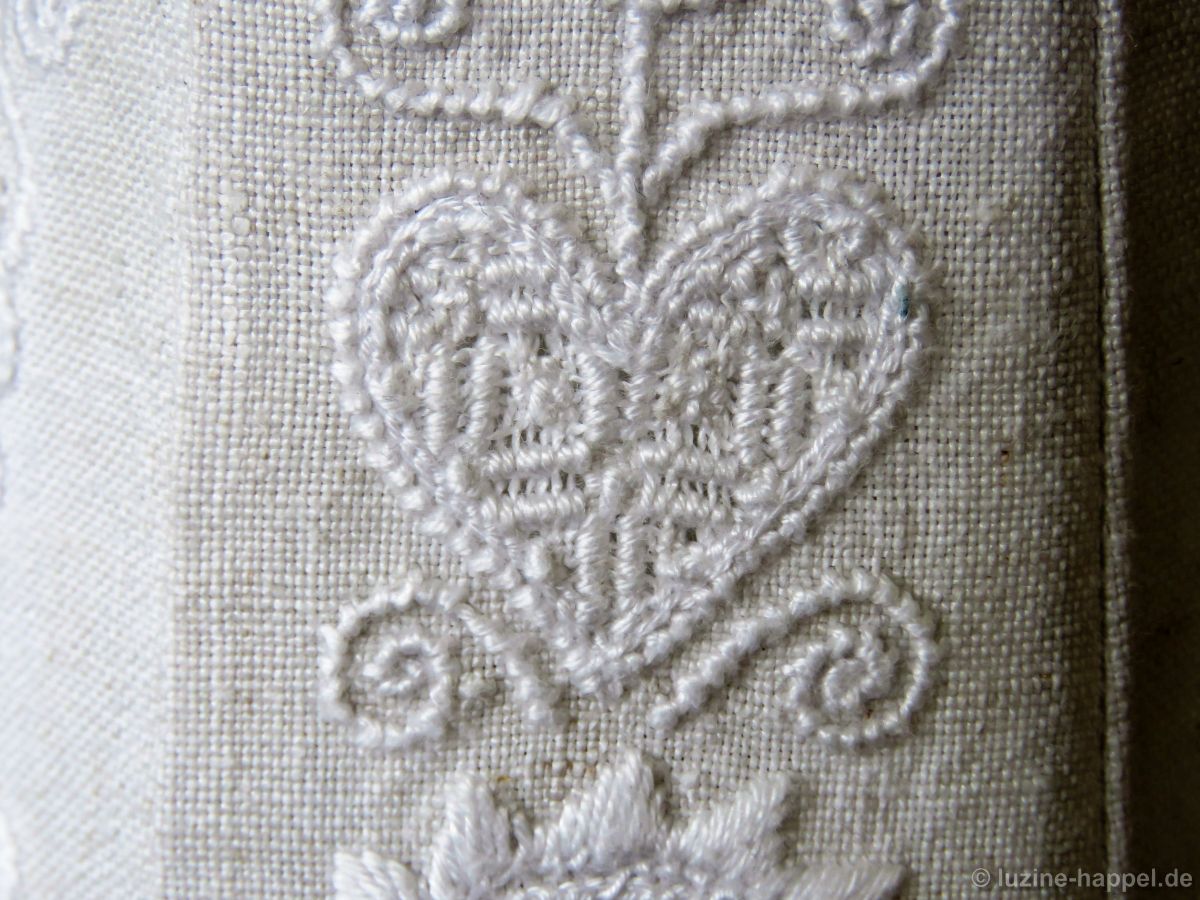
Heart with a Limet-Filling pattern using Satin stitches and Rose stitches.
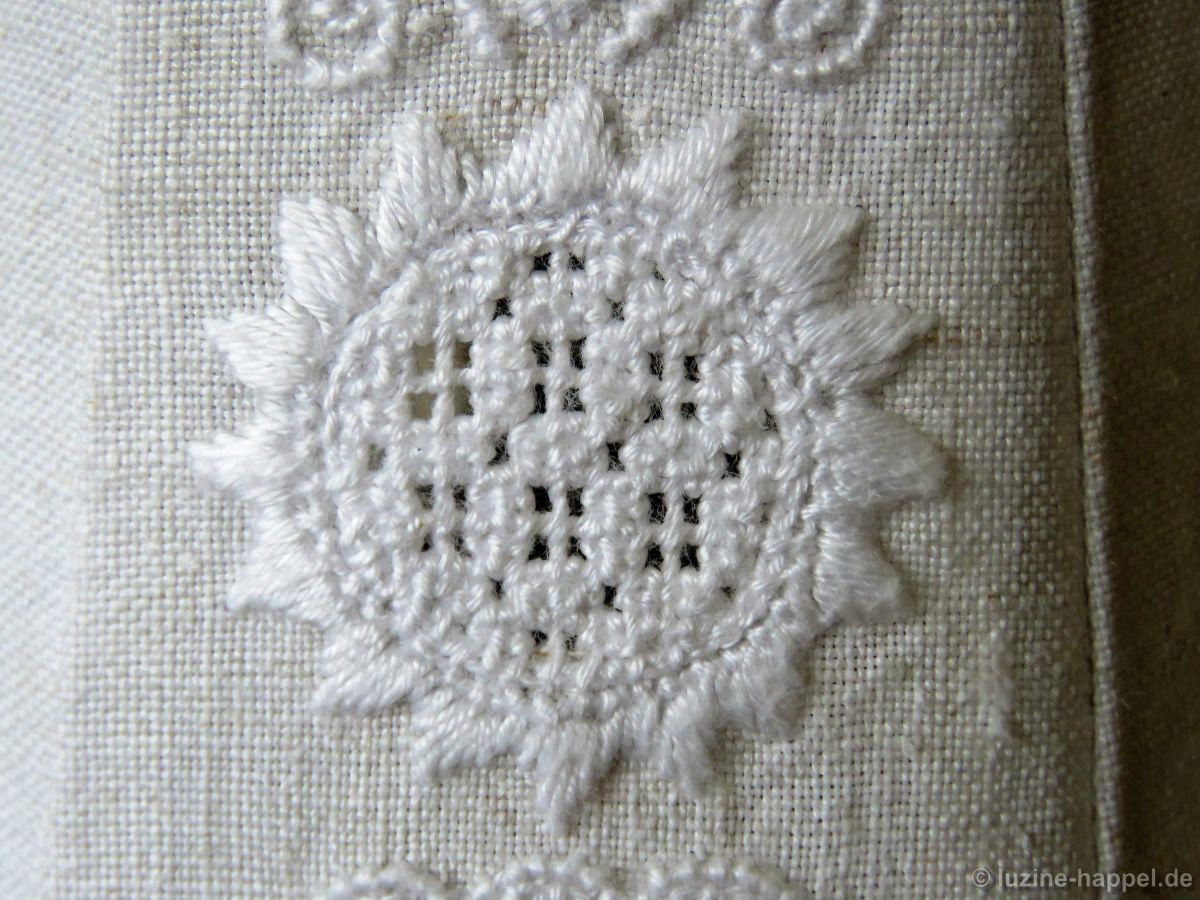
Circle with a knife point outline and filled with an openwork pattern with a Cable stitch grid. Into the grid a Rose stitch pattern was worked.
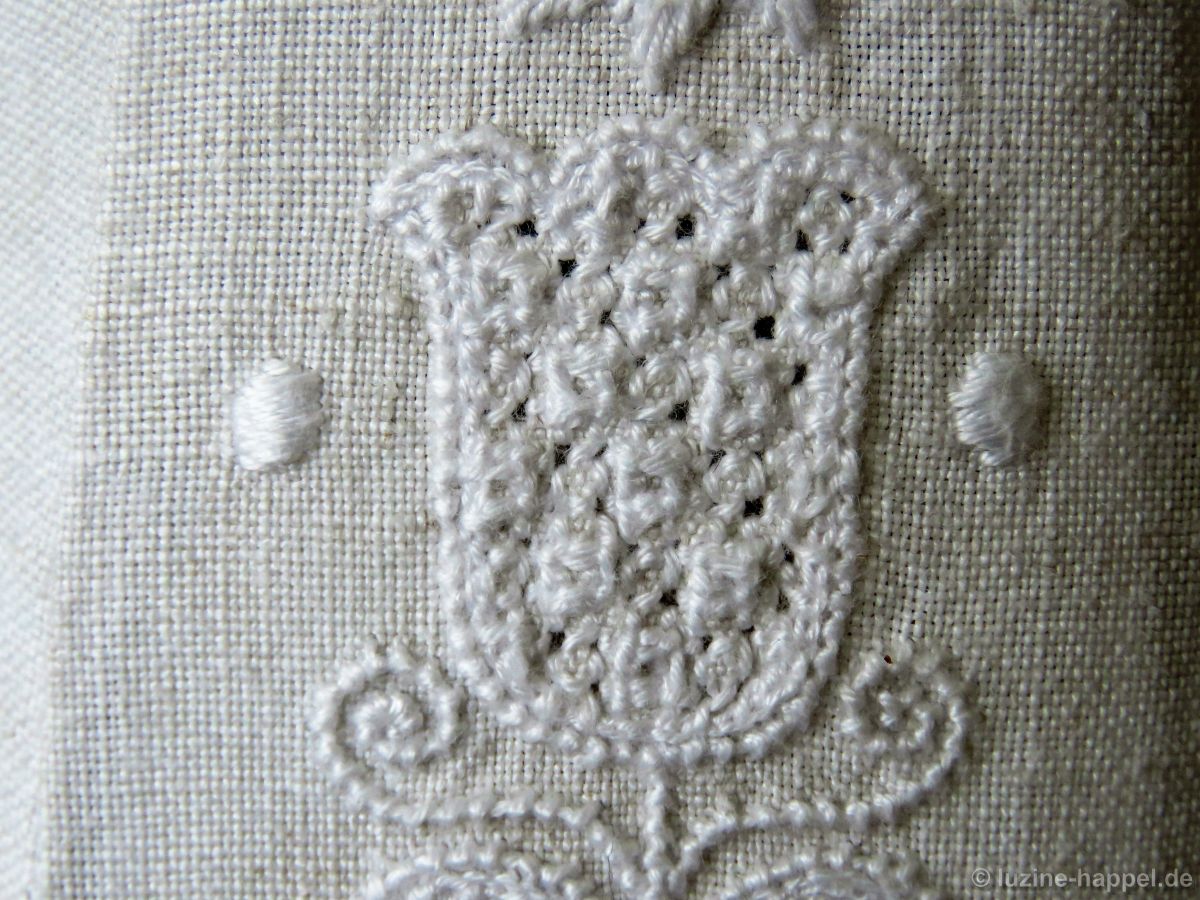
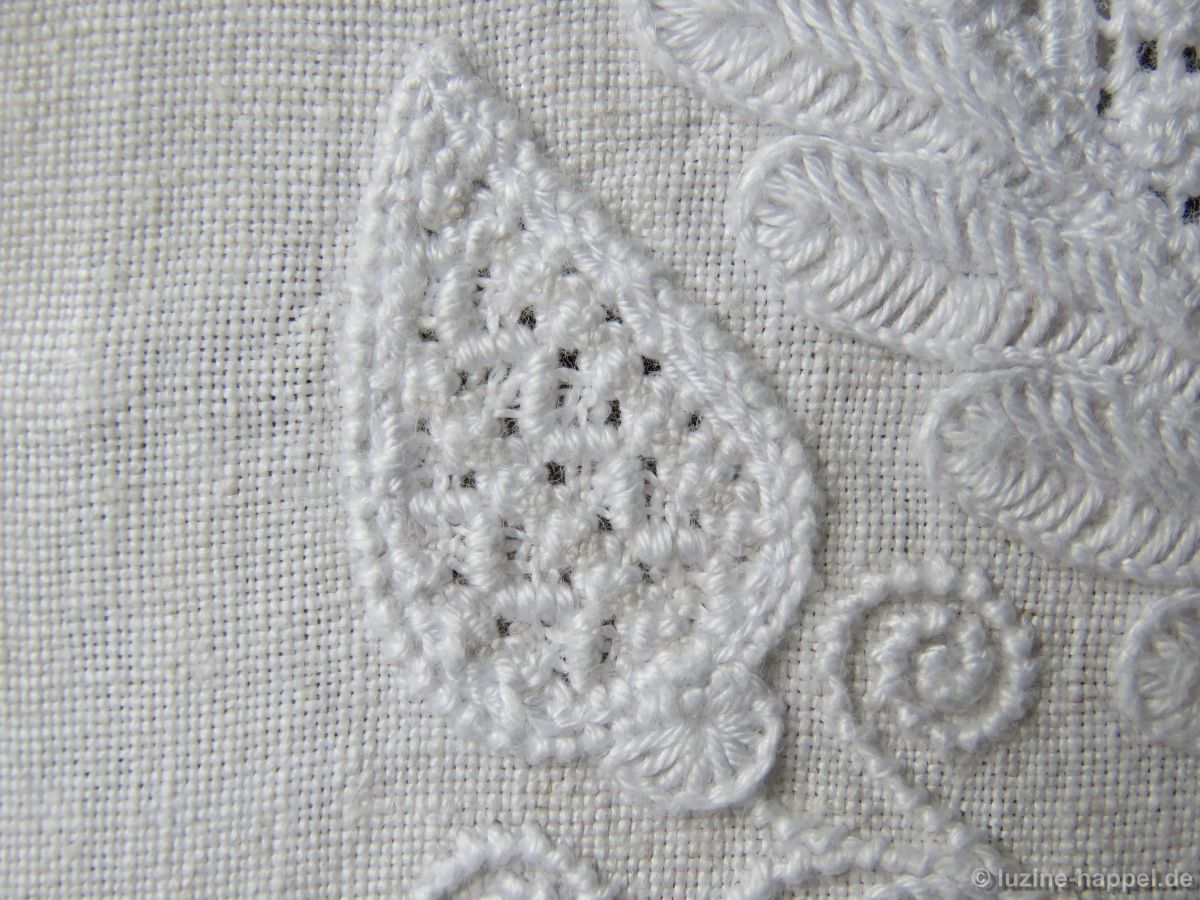
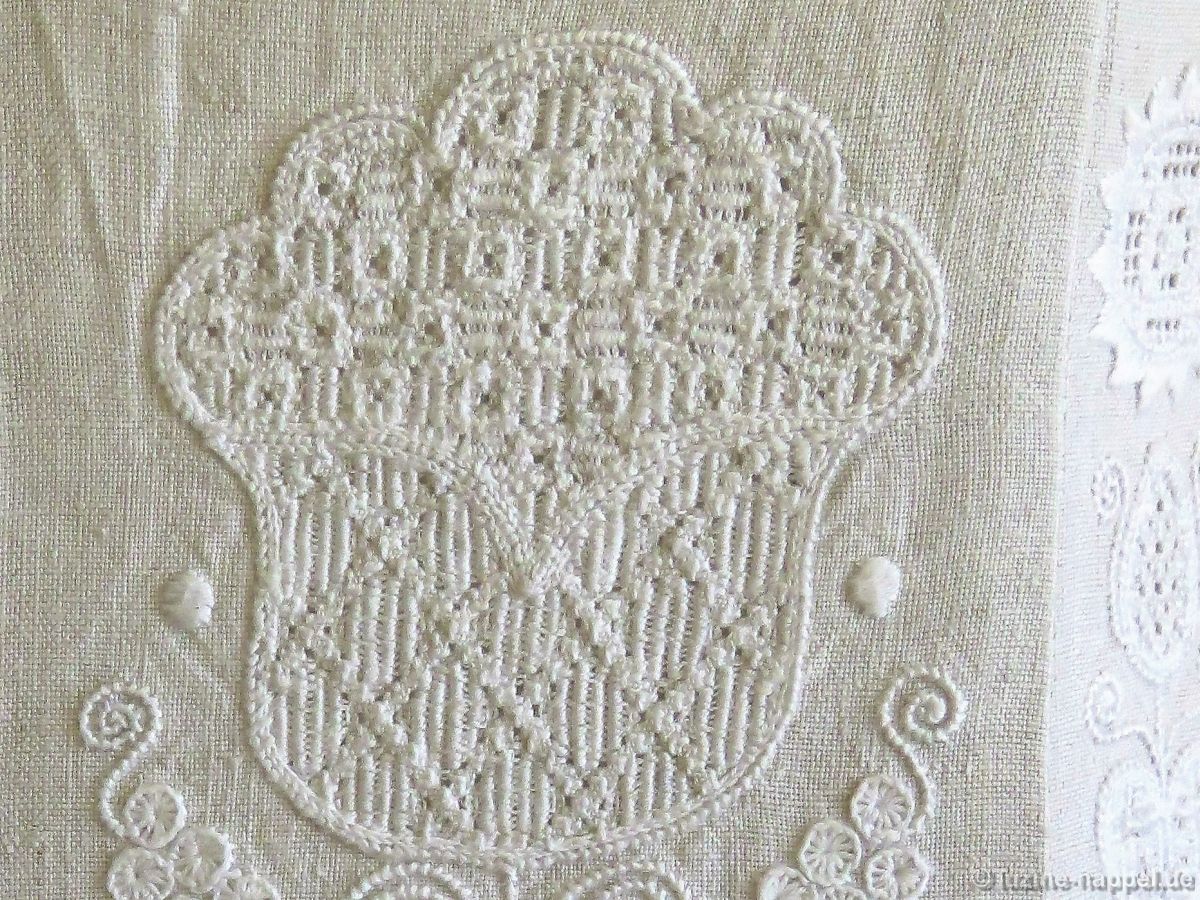
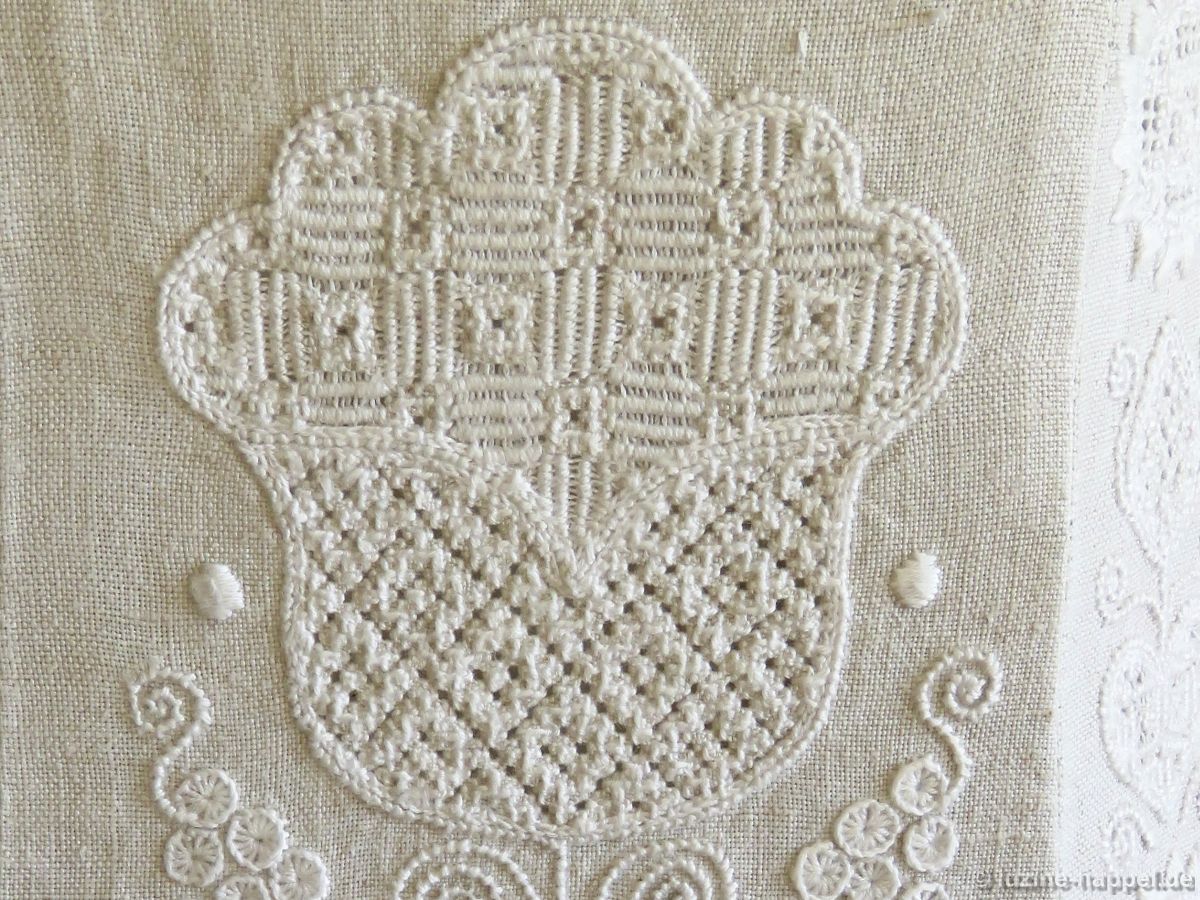
Tulip with a Limet-Filling pattern using Rose stitches and Four-Sided stitches.
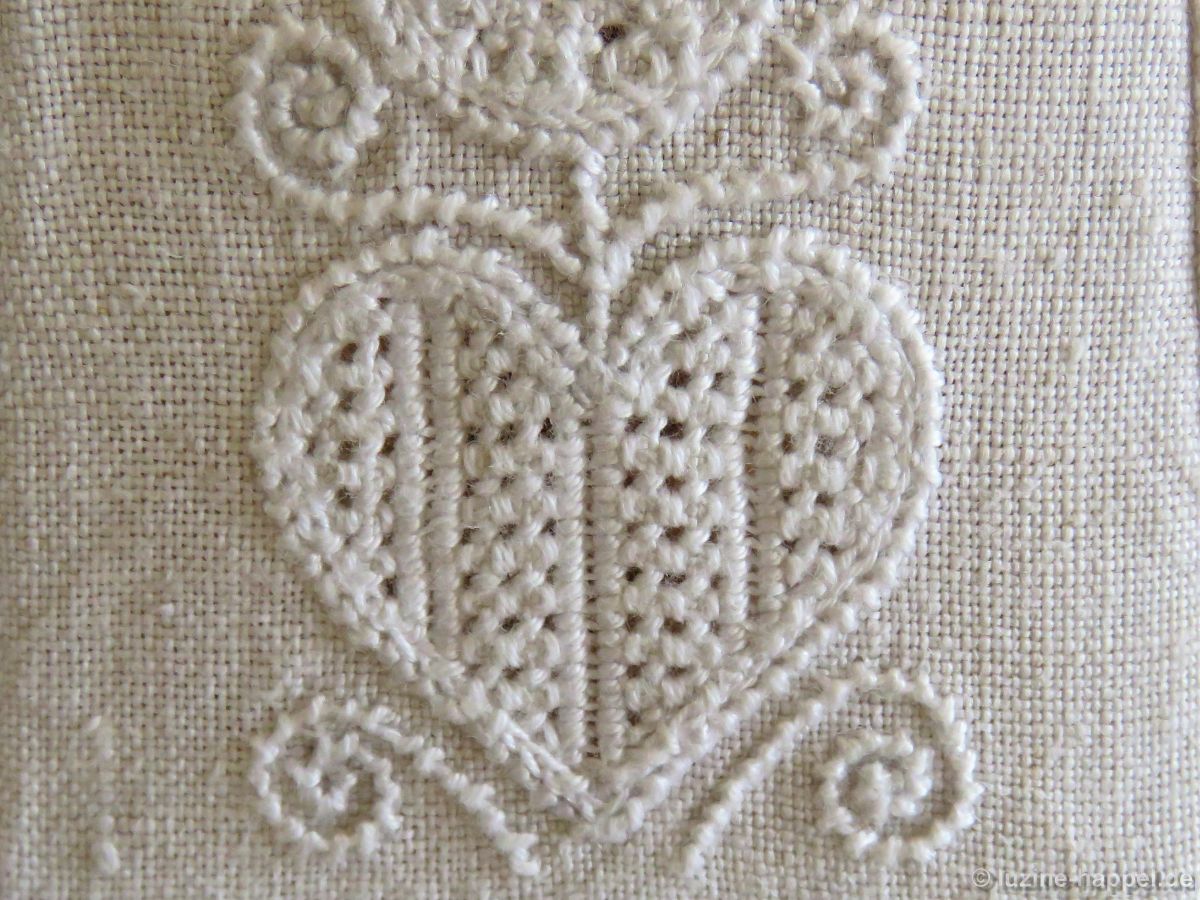
Heart with a Limet-Filling pattern using Satin stitch bars and Four-Sided stitches.
 Using linen for the lampshade creates a delightfully warm light. And the needlelace also produces a lovely effect in this illumination; the edging gives the lampshade that certain something.
Here you can find a description on how to work such a lampshade.

This is truly exquisite, wish it was mine.
In my next post I will explain how to work such a lampshade. May be, it is an idea for your next project and a nice completition to your fire screen.
Is there a pattern for this? I would love to make one for my mother. She’s been looking for a nice lampshade for a while with no luck.
The pattern is depending to the size of the frame, you will get for your lampshade. In my tomorrow post I show, how to work such a lampshade.