
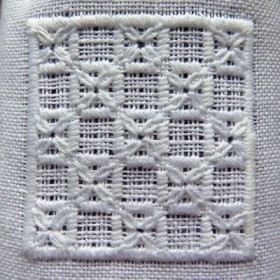
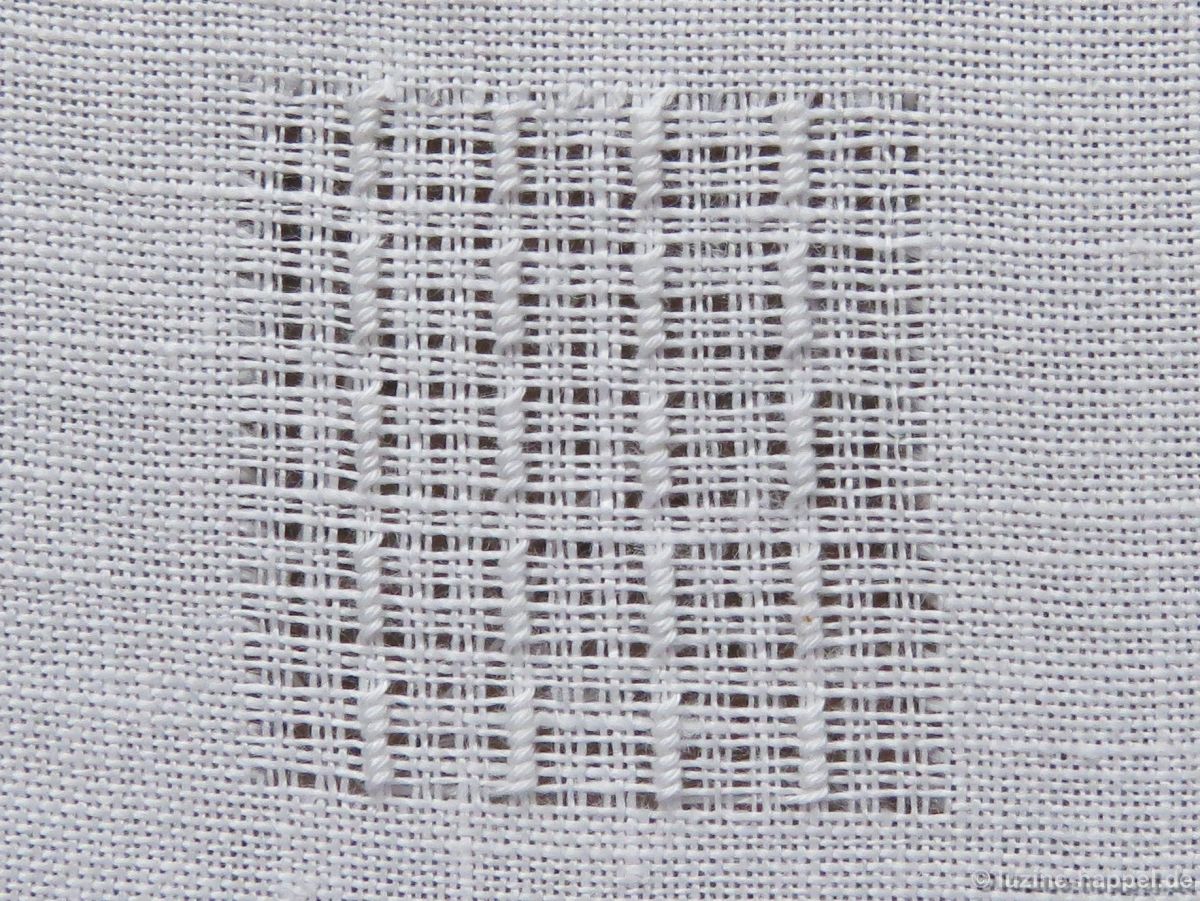
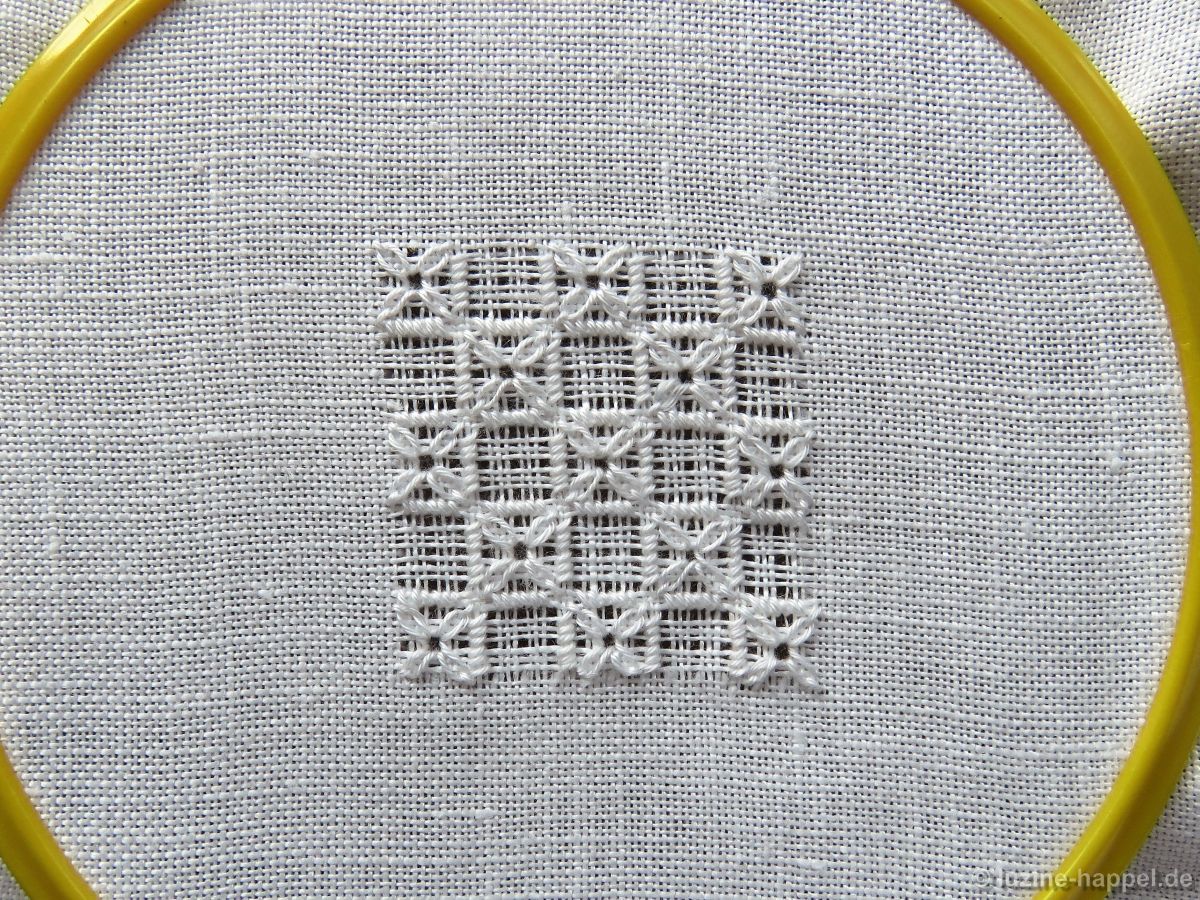
Nr. 480
category: Limet-Filling pattern
stitches used: bars of 6 Satin stitches over 1 square in the width and Daisy stitches
center: intersection of withdrawn-thread lines (in other shapes or motifs: longitudinal axis = withdrawn-thread line)
The filling pattern shown here is a practice exercise only. You can see it used in a shape in the previous post. It will also be featured in a future post.
First, work a Limet grid by alternately withdrawing 1 and leaving 3 threads both horizontally and vertically.
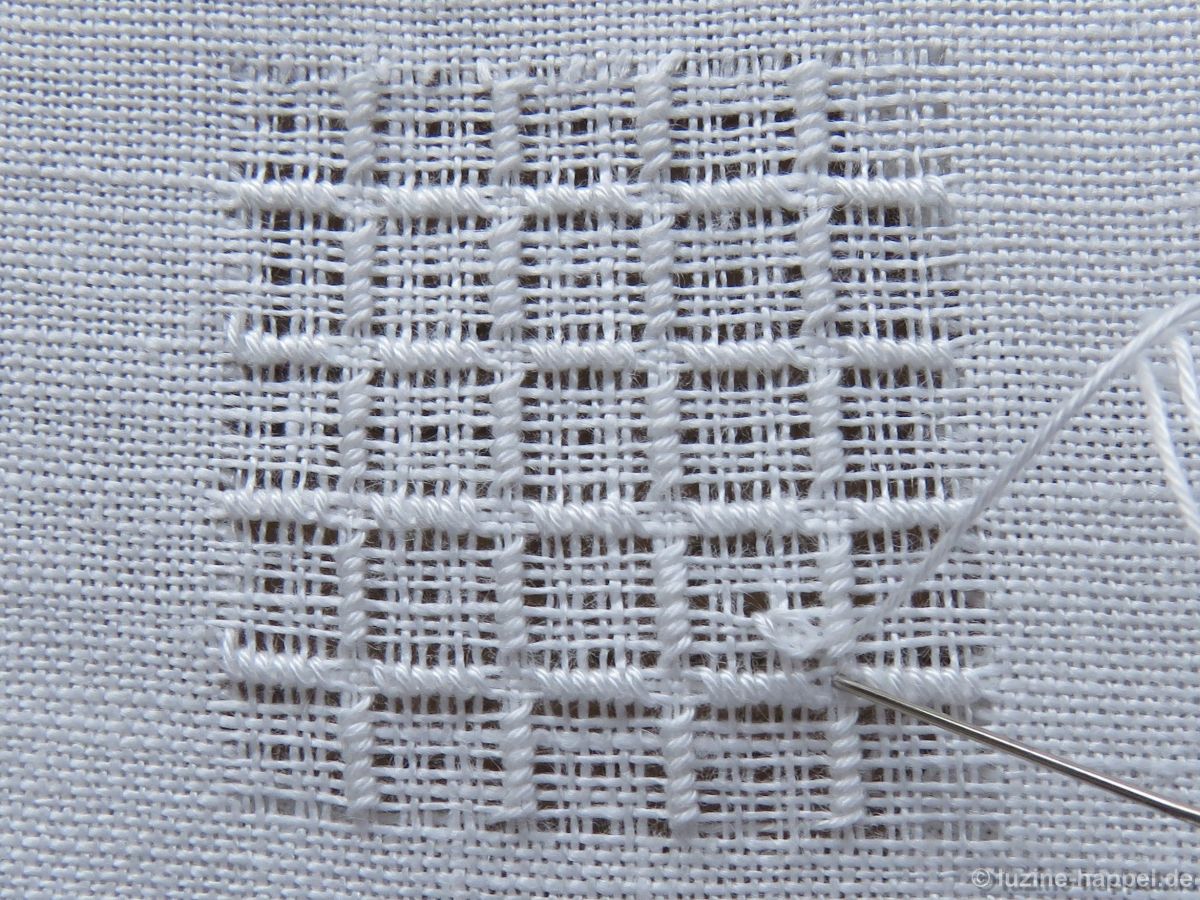
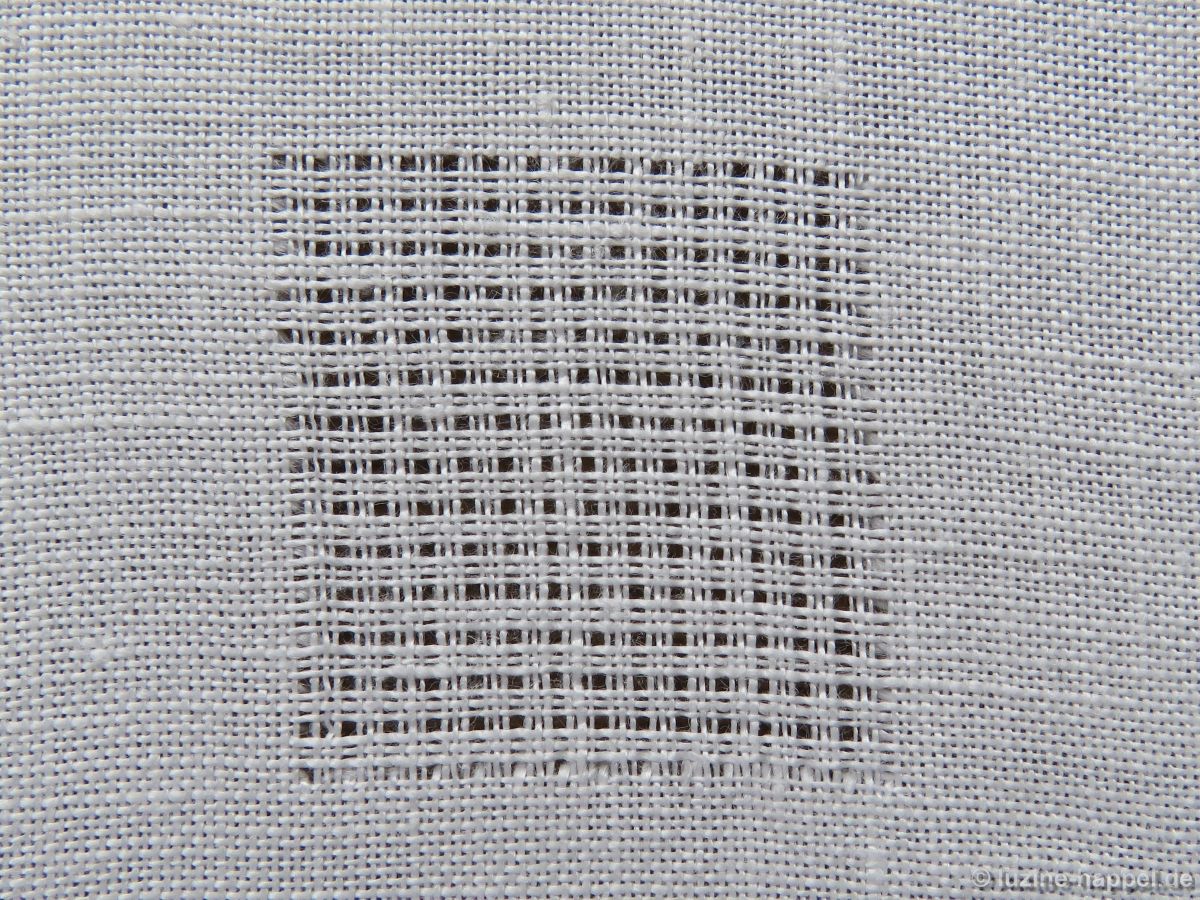 In the established Limet grid, work a grid of Satin stitches. Work Satin stitch bars over one square (3 threads) in the width and over 2 squares (6 stitches) in the length either in a stair-step manner (please see pattern 469; second and third pictures from the top) or in straight rows as here shown.
 Work the rows of Satin stitch bars up
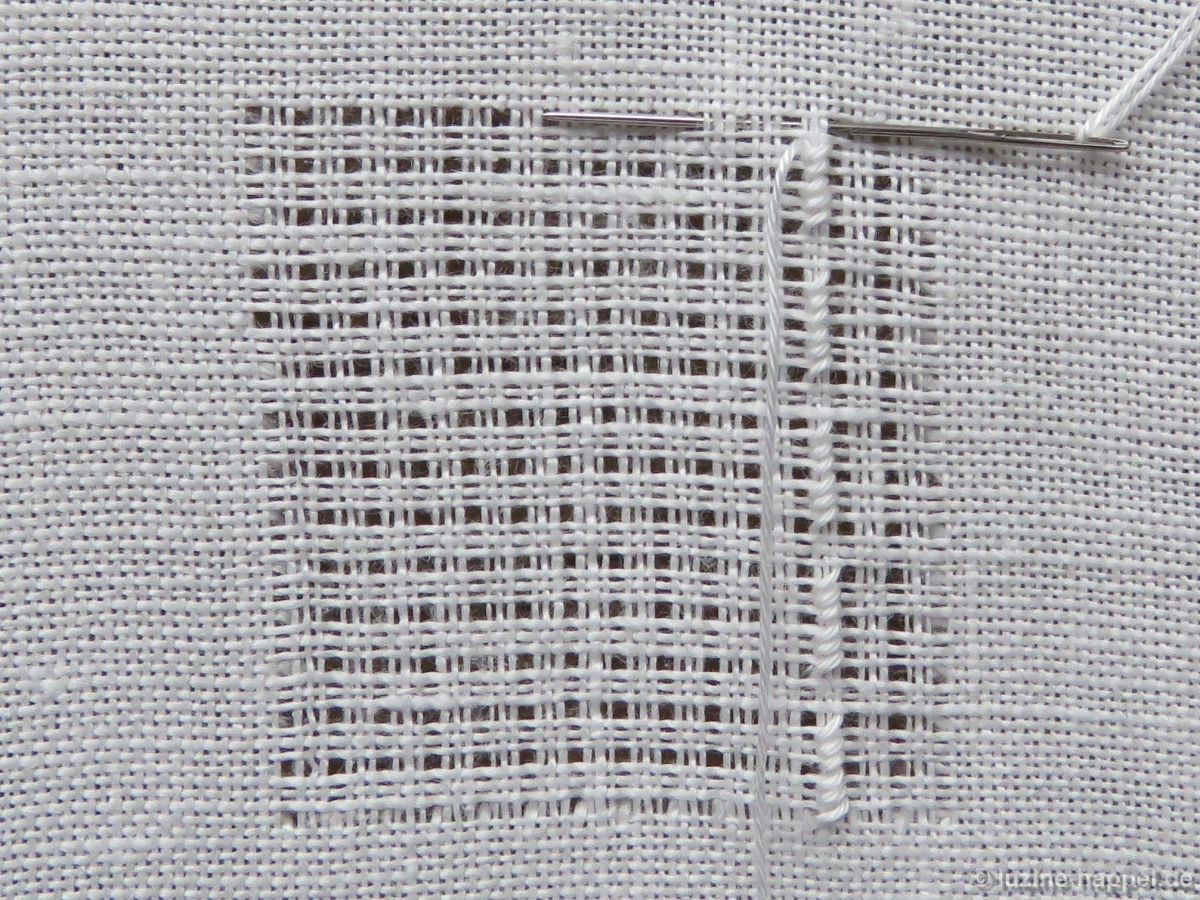 and back by turning the piece 180° and keeping a distance of 2 squares between the bars.
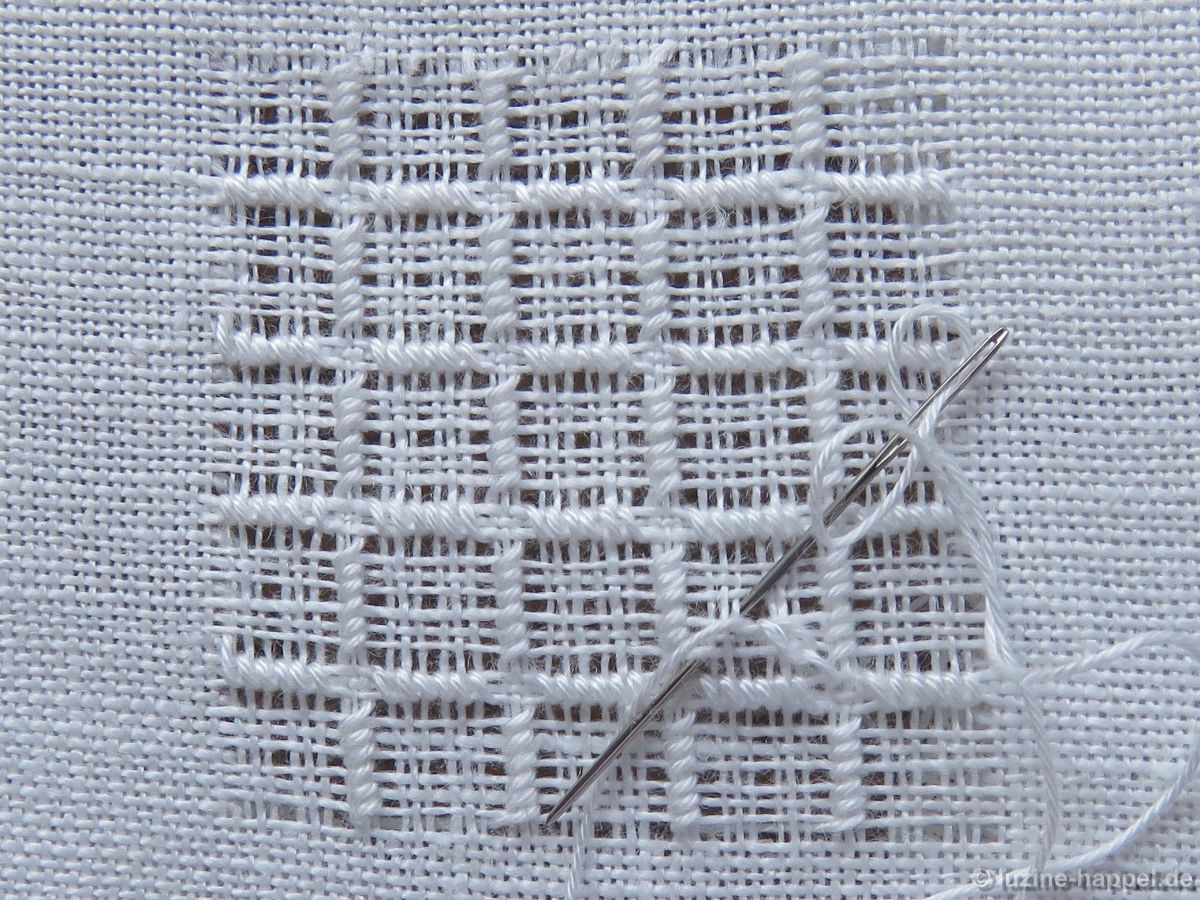
 Work rows of Satin stitch bars vertically
 and horizontally to establish the Satin stitch grid.
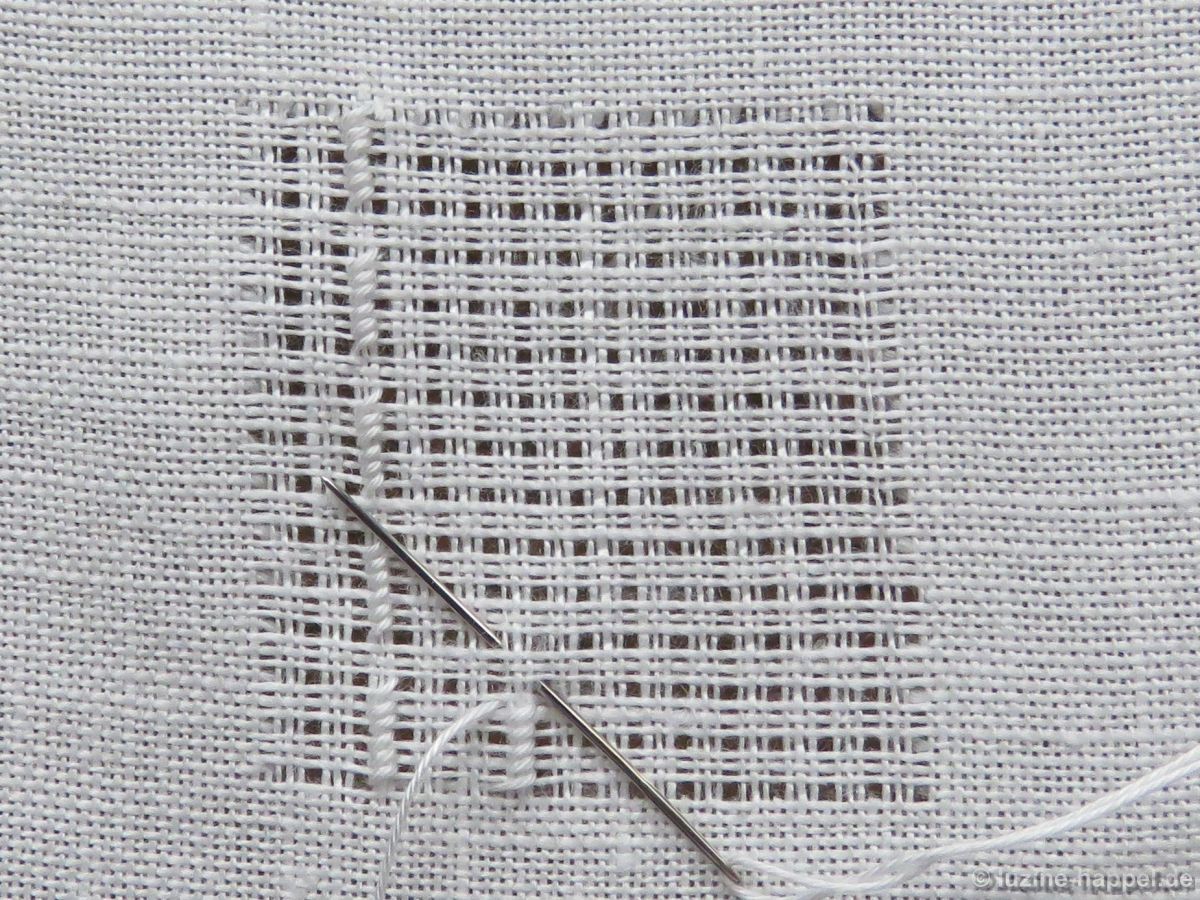
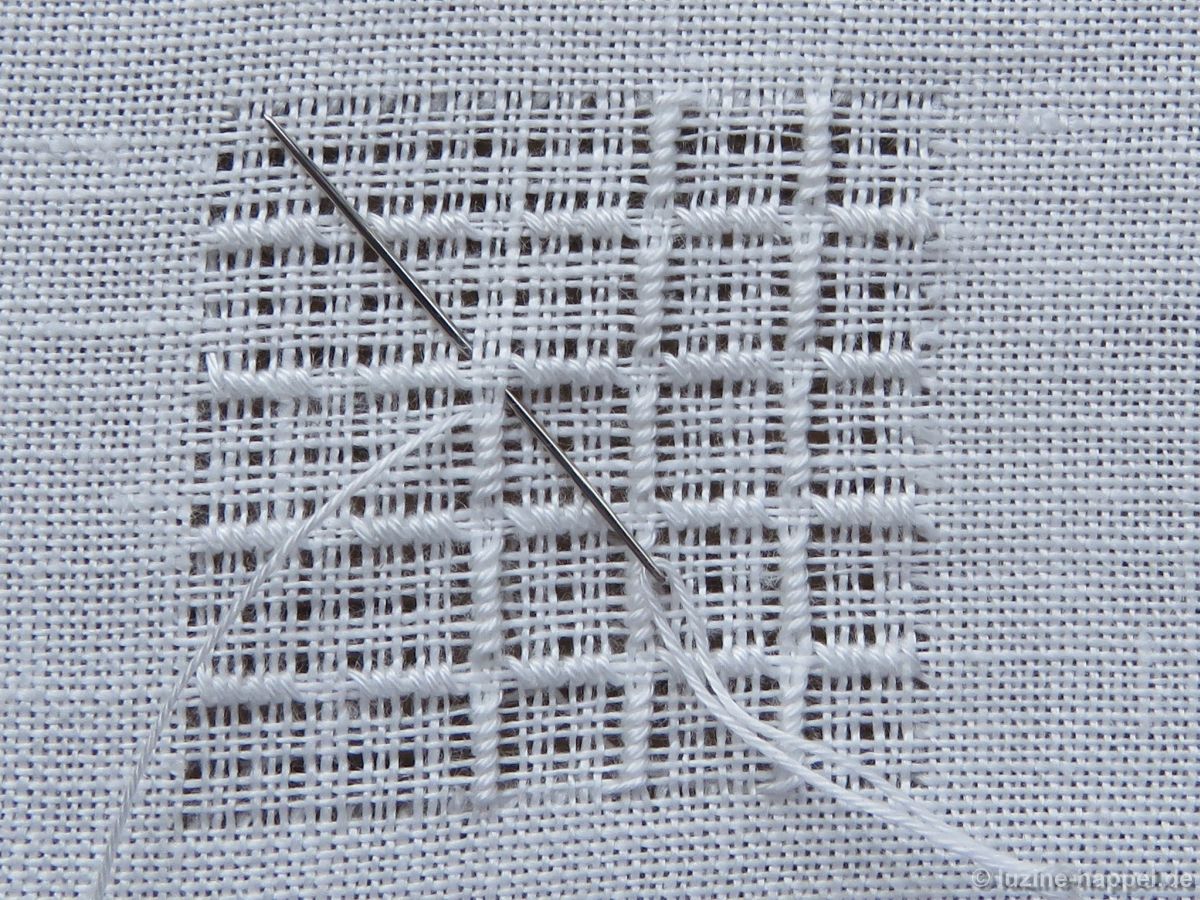 Bring the needle up in a center of any established square,
 lay the working thread around a corner of this square, insert the needle in the center again, and bring it up in that corner with the loop beneath the needle.
 Tighten the thread in the direction of the loop. A Chain stitch is established. It is secured by inserting the needle just beyond the intersection of fabric threads adjacent to the corner space.
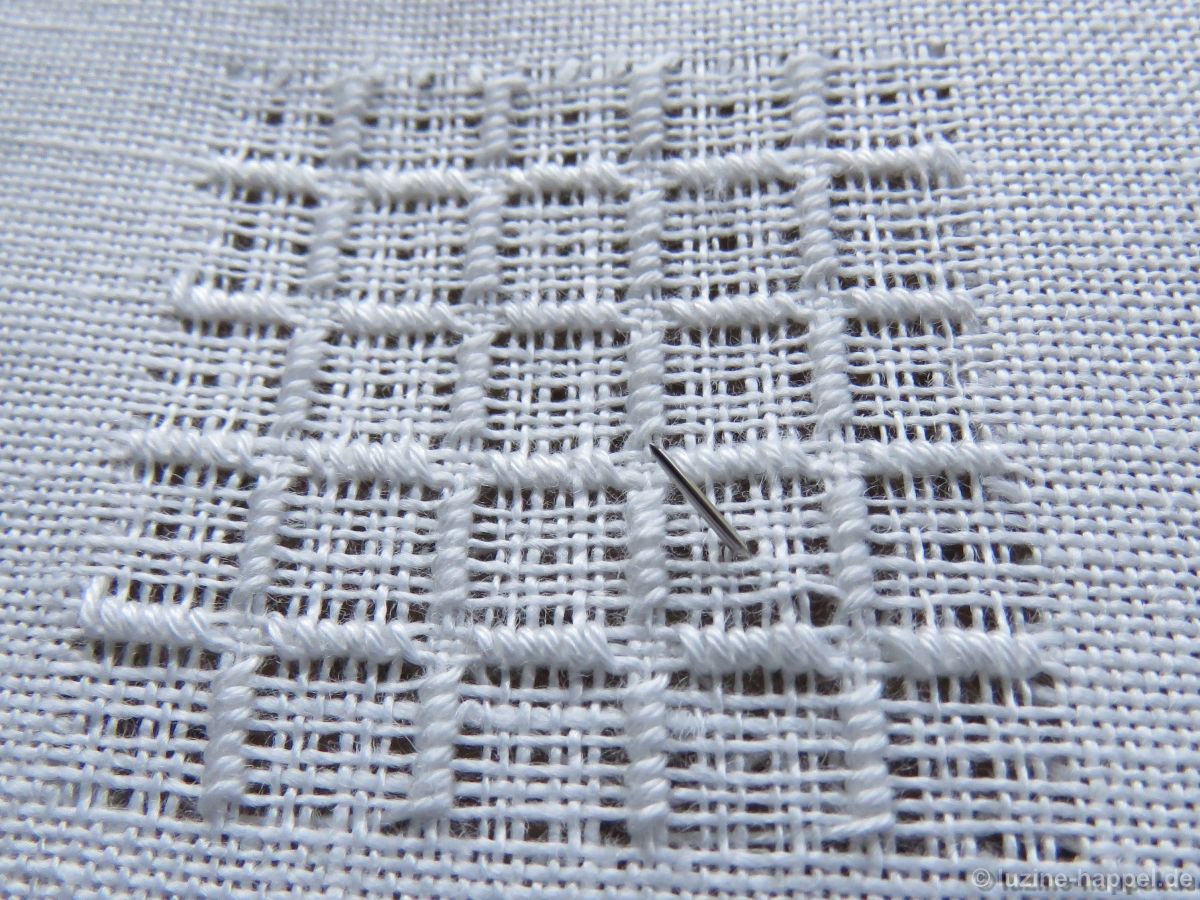
 Bring the needle up in the center again
 to work the next Chain stitch at the next corner. Work a Chain stitch at each corner of a square (4 Chain stitches per square). Make sure to work clockwise or counterclockwise; this method will keep the center hole well defined and open.
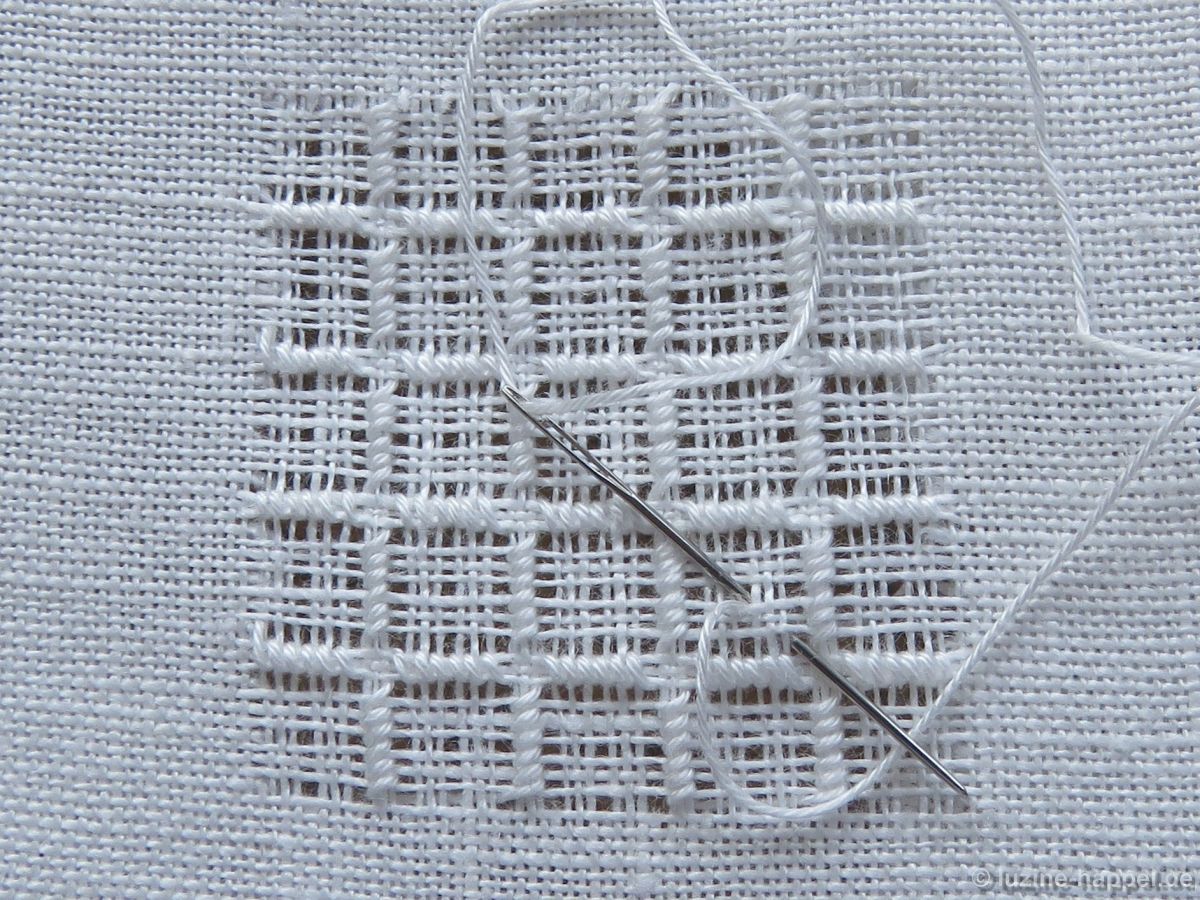
 Sometimes it is necessary to slide the working thread through the stitches on the back to arrive at the next starting point.
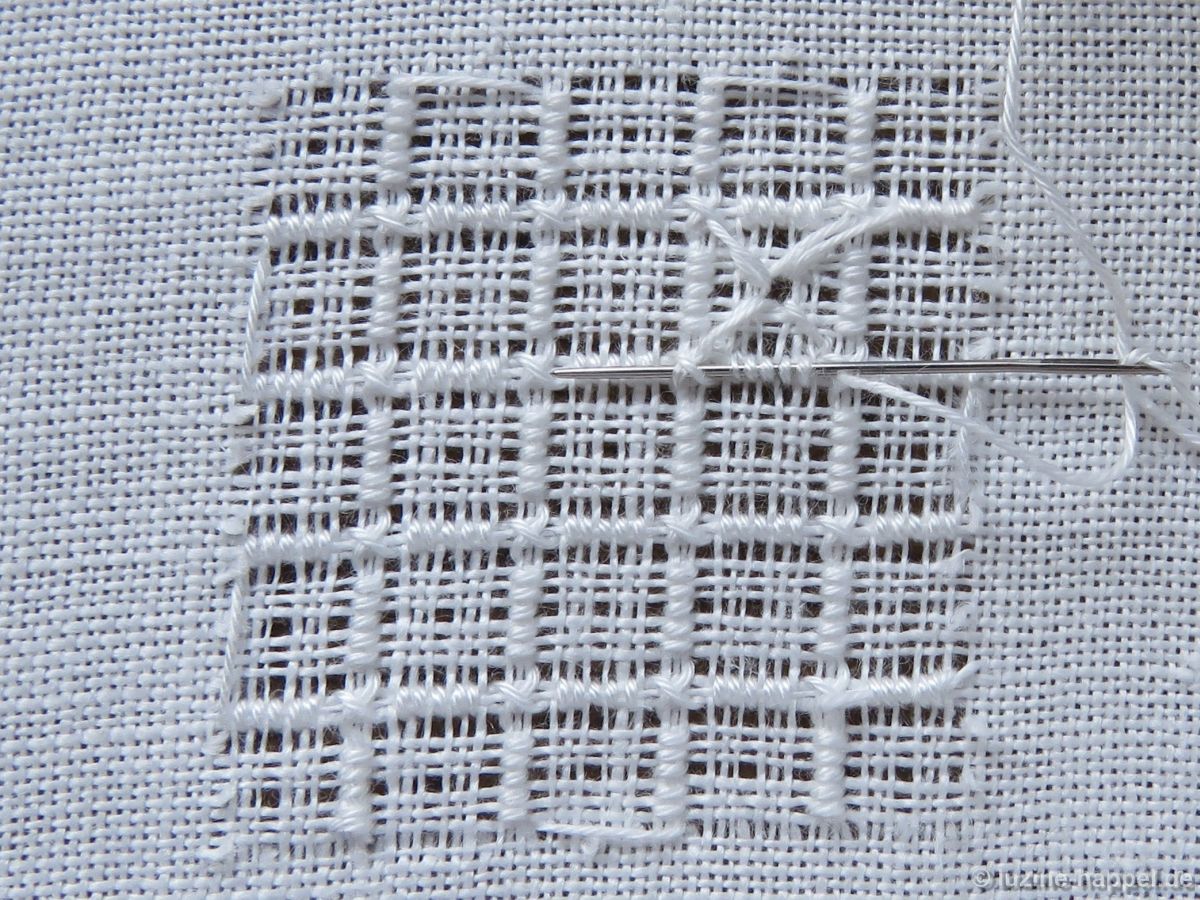 Work 4 Chain stitches in the established way
 like a checkerboard over the entire shape.
 All other squares remain unembroidered.
There is a rule in the Schwalm: every Limet square must be embroidered in some way. For example, a Rose stitch could be worked into each of the remaining squares. However, the pattern shown here looks nicer, I think, and if it is used for projects such as Lavender bags, which will not be laundered too often, the pattern will keep for many decades.
Washed, starched and ironed the pattern gets its full charm.
This example was worked on 13.5/cm thread-count Weddigen linen with coton à broder No. 20.

Sehr verständliches Beschreibung. Aber ich muss doch sicher erst den Rand befestigen bevor ich anfange Fäden zu ziehen, oder irre ich mich da?
Gruß
Anja
Hallo Anja,
Ja, normalerweise wird immer erst der Rand befestigt, bevor Fäden ausgezogen werden. Daher habe ich auch darauf hingewiesen, dass es sich in meinem Beispiel nur um eine Arbeitsprobe handelt.
Da ich dieses Muster später in ein genau auf die Größe des Musters abgestimmtes Quadrat sticken will, muss ich die Reihenfolge der Arbeitsschritte etwas abändern. Dies wird in einem der nächsten Blog-Beiträge detailliert gezeigt und genau beschrieben.
Dies wird Ihnen dann sicherlich weiterhelfen.