I have seen the folded Peahole edging (also called mouse tooth edging) on many different pieces, but I have never worked it myself before now. I took a practice piece of linen and tried to replicate it. I was absolutely displeased with the result.
After several attempts I was able to produce a better result, and this is what I figured out:
The holes have to be taller – beans (instead of peas) should fit between the rows of Four-Sided stitches.
And the bundling together of two bundles should not be made with a knot or a loop because those would disturb the final appearance. Furthermore, a knot is unnecessary because the bundles are wrapped together again later on.
Thread withdrawal is:
cut 1leave 8
cut 1leave 4
cut 1
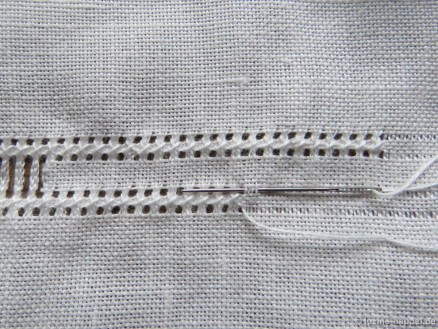 From the back of the fabric, Four-Sided stitch rows are worked in the established way.
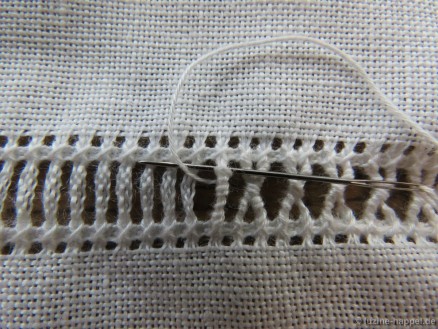 Then wrapped Peaholes are made. The first bundle of a Peahole is wrapped 8 times from bottom to top. Please take care that the wrapping threads lay parallel and do not cross one another.
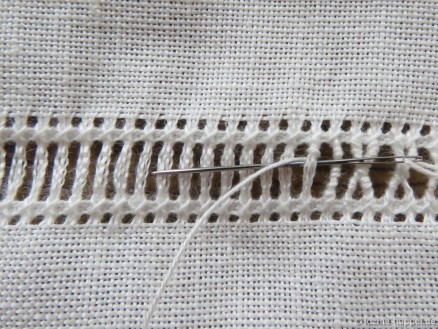 The second bundle is wrapped 3 times from top toward the middle.
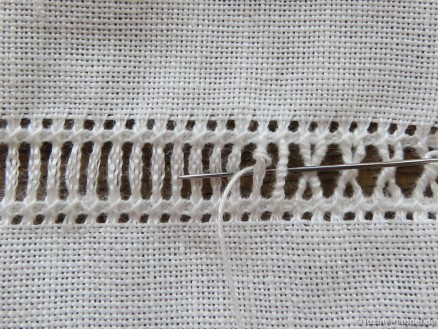 The two bundles are joined together in the middle with 2
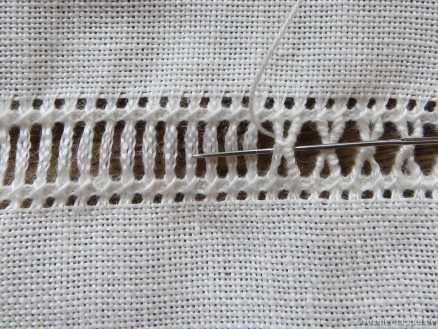 wraps. After the second wrap, the thread is tightened very well. The tighter both bundles are bound together, the sharper the point of the folded Peahole later.
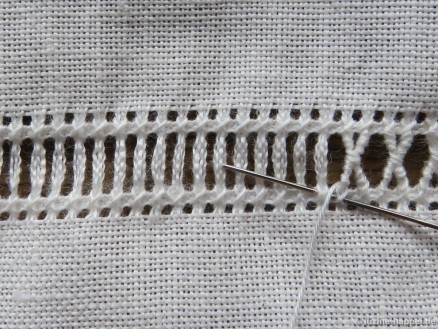 The second bundle is wrapped 3 times down to the bottom.
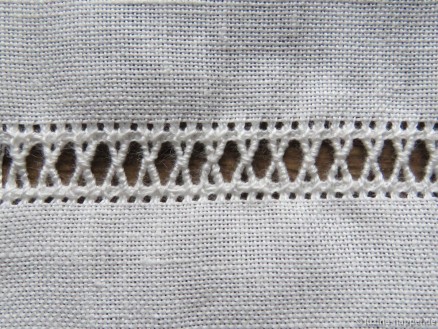 After finishing the row
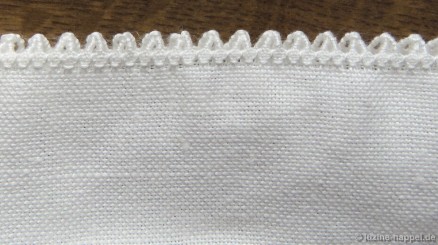 the backs of both Four-Sided stitch rows are laid on top of each other. Small triangles are now on the edge.
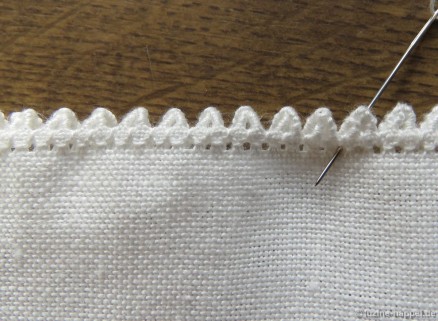 Working from the right side of the fabric and from right to left, the needle is brought up in a bottom hole of a Four-Sided stitch between two of the triangles.
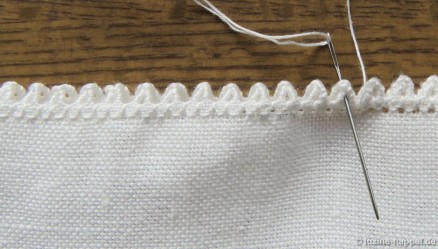 Take the needle straight up and wrap once around the right side of the triangle, bringing the needle from the back to the front.
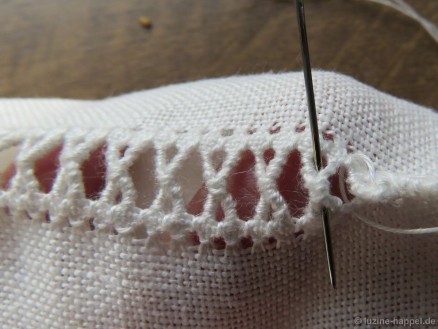 To ease inserting the needle, the Peahole can be unfolded a little bit.
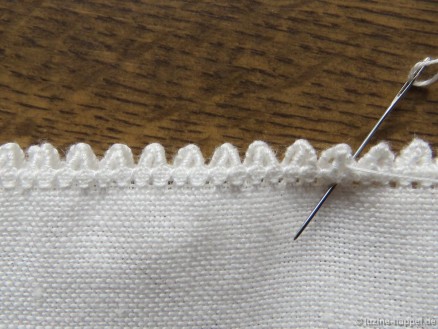 Repeat wrapping as often as needed to bind both layers together (2–3 times).
Bring the needle up in the next Four-Sided stitch bottom hole.
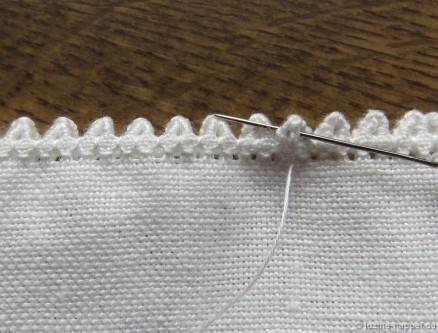 Take the needle straight up, and insert it into the center of the triangle from front to back
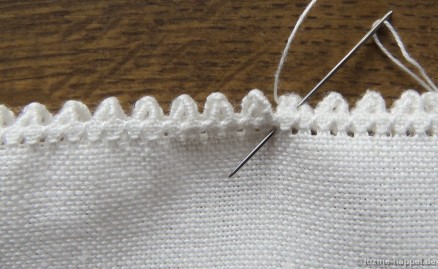 and wrap as often as needed to bind the left side of the triangle together. Insert the needle in the center again and bring it up in the next Four-Sided stitch bottom hole.
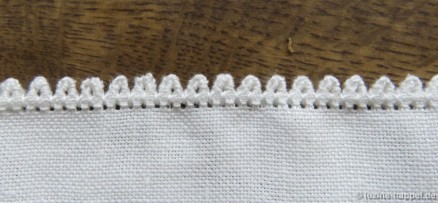 Continue working in the established way. If needed, draw the triangles up a little bit with the help of your needle.
The back side looks like this:
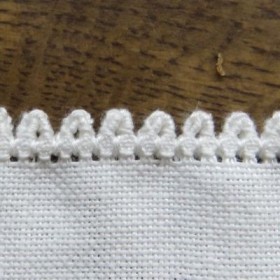
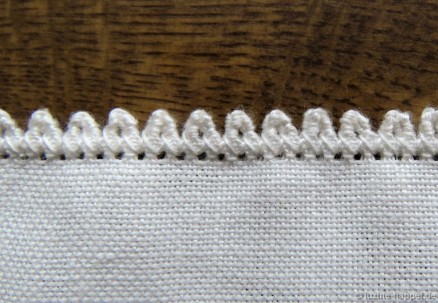 A nice narrow edging is established. Here it is worked on 13.5/cm thread-count linen using coton à broder No. 30.


Frau Happel, ich muss Ihnen ein sehr grossen Lob aussprechen und freue mich immer wieder
an Ihren Anregeungen (man kann ja alles “umwandeln”):
Sie geben Ihr Wissen weiter und man kann sehr viel von Ihnen
lernen. Denn sonst stirb die Stickerei ja aus!!!!
Danke, liebe Frau Götz, für die Anerkennung meiner Arbeit. Es ist mir ein großes Anliegen, mein Wissen so weiterzugeben, dass auch Stickerinnen ohne große Vorkenntnisse und ohne persönliche Lehrmeister damit arbeiten können. Die Zahl der Stickkursleiterinnen und der Handarbeitslehrerinnen nimmt ja drastisch ab – irgendwann wird kaum noch jemand für die fachkundige Anleitung zur Verfügung stehen. Dann hoffe ich, dass meine Beschreibungen weiterhelfen können.
Vielen Dank für die wunderbare Anleitung. Zum wiederholten Male konnte ich feststellen wie toll Sie erklären können. Da bekomme ich gleich Lust das Sackerl nach zu sticken.
Ich freu mich schon auf den nächsten Teil.
Liebe Grüße
Sylvia Sellmaier
Danke, Frau Sellmaier, für das Lob. Eine präzise Anleitung ist gerade für nicht ganz so versierte Stickerinnen überaus wichtig, damit sie nicht frustriert aufgeben.
Im Moment bereite ich ein anderes Thema vor und gehe dazu meine umfangreiche Bibliothek durch. Ich bin erstaunt und entsetzt, wie schlecht und unzureichend Dinge in mancher neueren Fachliteratur dargestellt werden.
Perfect and beatifull.Thanks a lot for sharing your knowledge
Thanks
Indeed it is beautiful, Sandra. Thank you for the compliment! I enjoyed it very much.