Stitch by Stitch Lace

Stitch by Stitch Lace
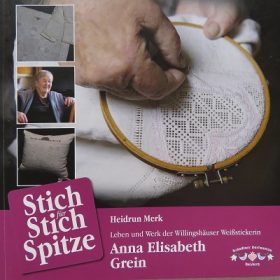
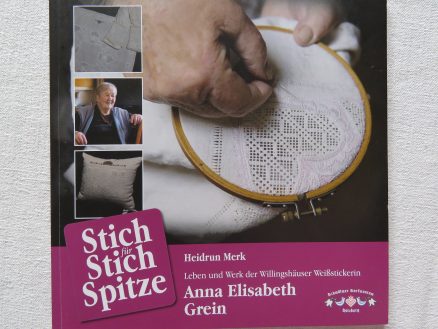
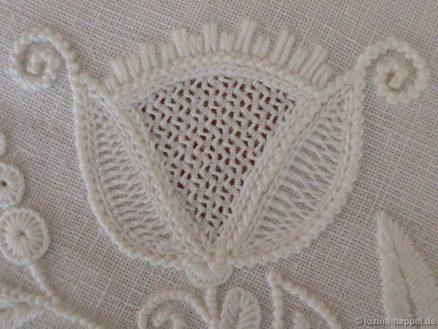
Life and Work of the Willingshausen Schwalm Whiteworker Anna Elisabeth Grein

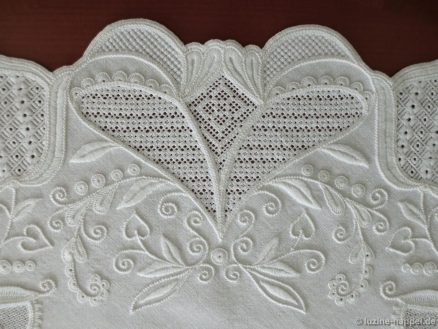
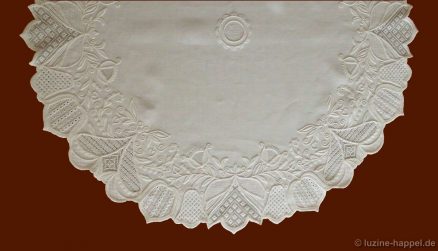
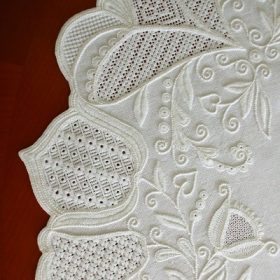
In more than 50 years of teaching, given in countless courses, Ms. Grein has ensured that the knowledge and skills of the unique Schwalm whitework are passed on. Both the lessons and her striking designs based on traditional motifs and exhibitions of her perfect embroidery have made her known far beyond Schwalm.

Now Heidrun Merk, 1st chairwoman of the Holzburg Museum Association, honors the work of Anna Elisabeth Grein in her latest publication (text: German).

After introductory chapters about whitework, she gives a brief outline of her life and then presents 30 selected, very different masterful embroideries in pictures and short word descriptions on 30 pages

The volume “Stich für Stich Spitze” is available from Ms. Merk for a price of €12 plus postage (contact: heidrun-merk@t-online.de).

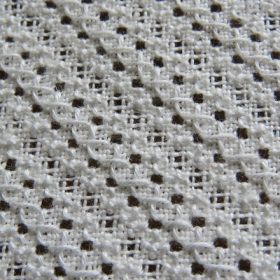
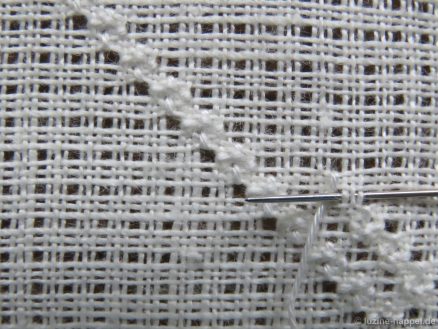
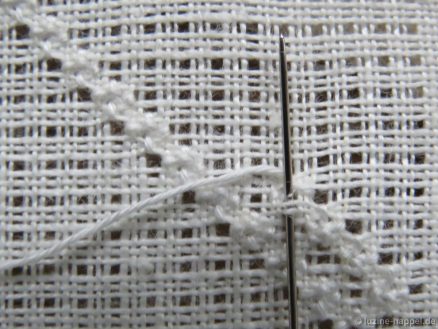
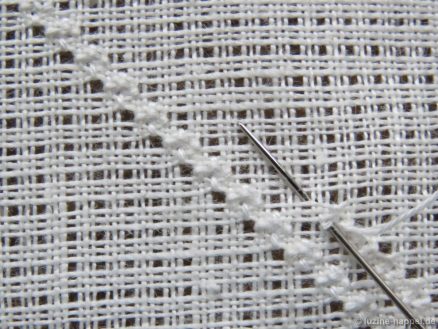
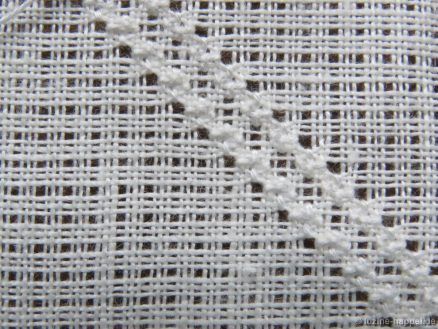
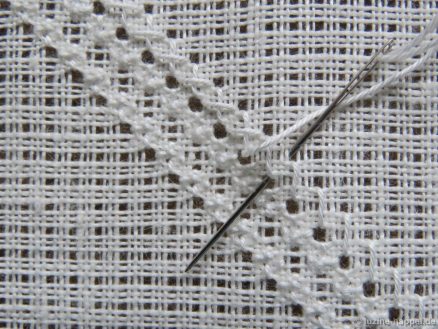
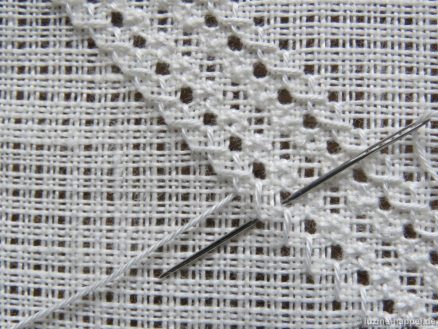
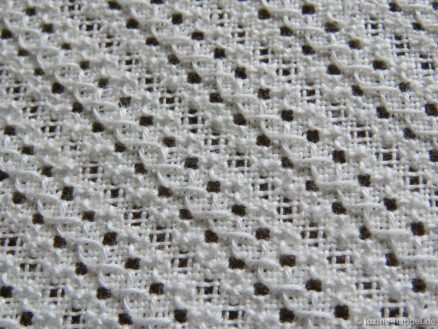
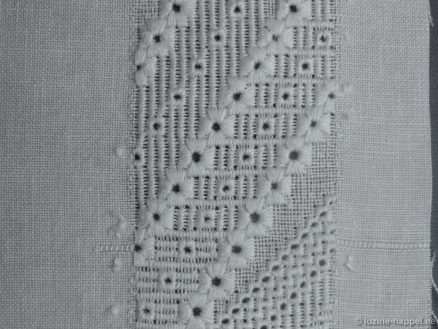
Filling Pattern – No. 572

category: Limet-Filling pattern
linen used: 13.5/cm thread count
threads used: coton à broder No. 20
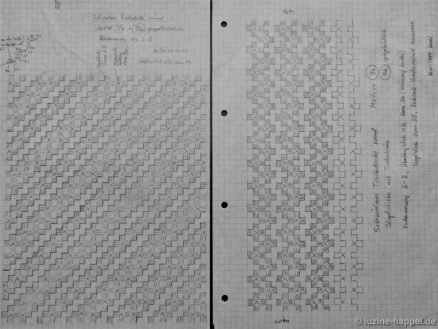
stitches used: half Rose stitches/half Rose stitch variation and Diagonal Cross stitches
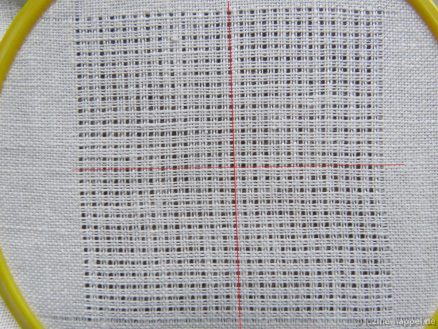
center: intersecton of withdrawn thread lines
one pattern segment = 25 threads

The filling pattern shown here is a practice exercise only. You can see it used in a shape at the end of this article.

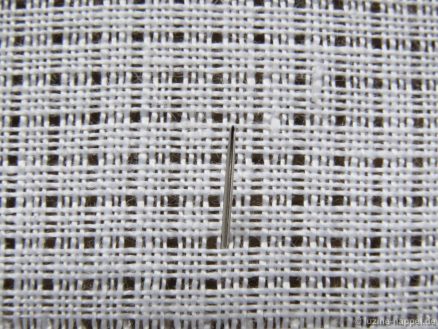
First, establish a Limet grid by alternately cutting 1, leaving 3, vertically and horizontally.

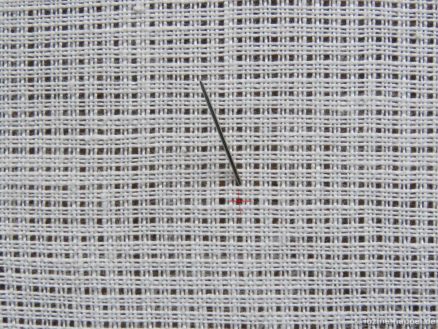
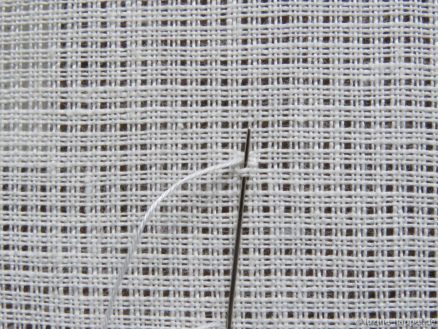
Bring needle up one square above the center,

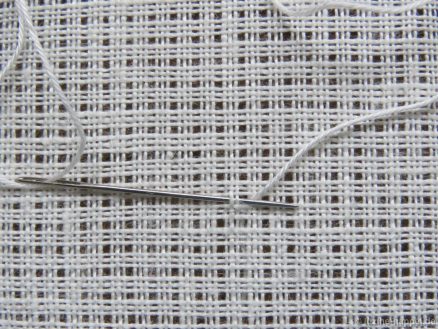
*cross over 2 (!) fabric threads to the left, insert needle there and bring it up again in the first hole.

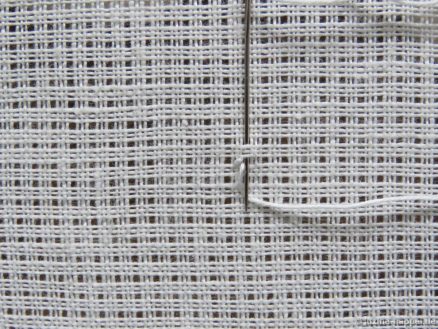
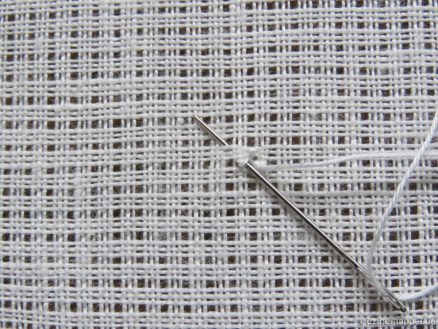
Cross over 3 fabric threads to top, insert needle there and bring it up again in the first hole.

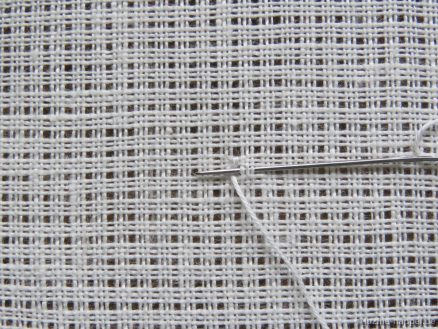
Cross over 3 fabric threads to the right, insert needle there and bring it up again in the first hole.

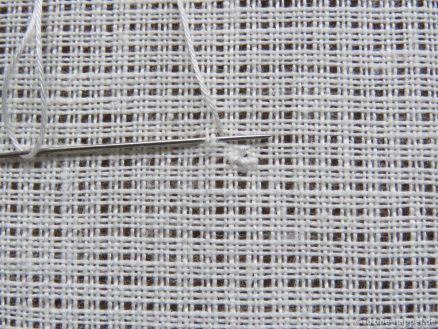
Cross over 2 (!) fabric threads to bottom, insert needle there and bring it up again in the first hole.
The first half Rose stitch with a half Rose stitch variation has formed.

Cross over the last stitch, insert needle and bring it up one square diagonally up to the left.*

This is the center of the next half Rose stitch with a half Rose stitch variation. From here always repeat the steps (*)

until the end of the row.

Turn the work 180° and embroider a row next to it in the established way,

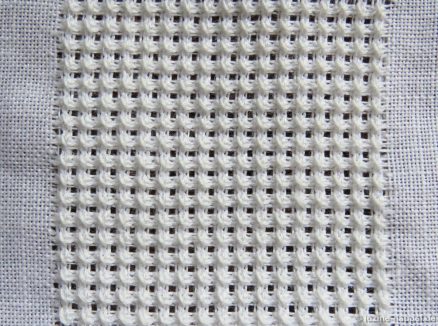
so that the four remaining threads form a square.

Without turning the work, embroider Diagonal Cross stitches from bottom to top and

back from top to bottom next to the Rose stitches. First on one side, then also

on the opposite side.

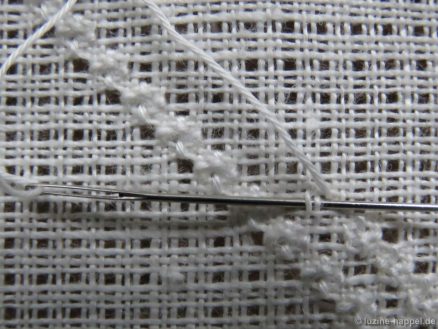
By constantly alternating double rows of half Rose stitches with half Rose stitch variations and Diagonal Cross stitches, a diagonal striped pattern is formed.

I discovered this pattern in Fumie Suzuki’s contribution to the Global Schwalm Sampler.

Here it was worked on 16 tpc linen.

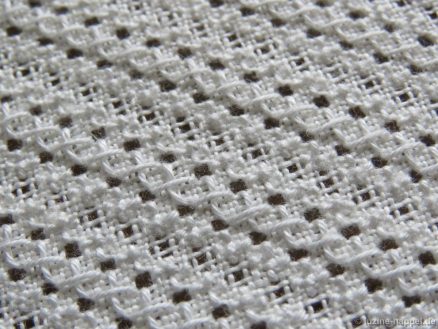
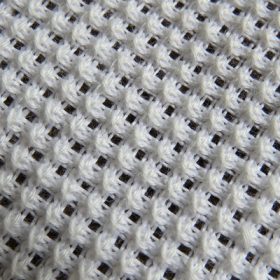
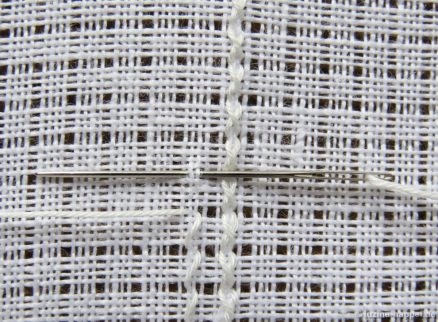
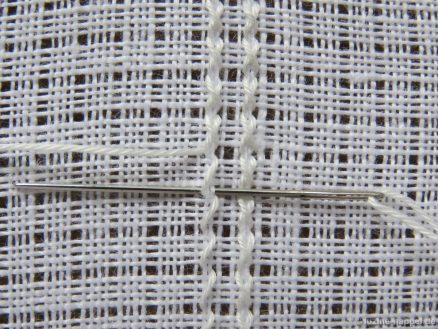
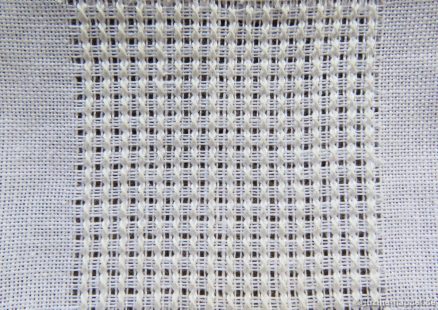
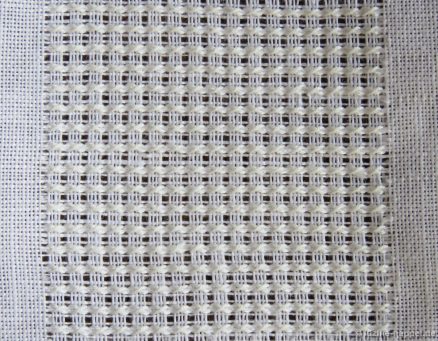
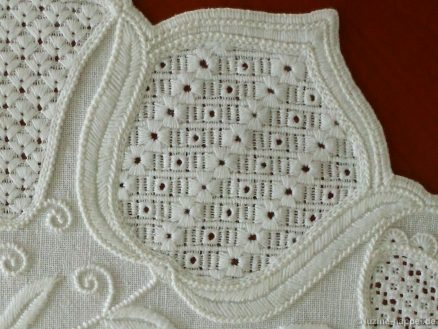
Filling Pattern – No. 571

category: Limet-Filling pattern
linen used: 13.5/cm thread count
threads used: coton à broder No. 20
stitches used: Cross stitches
center axises: four thread columns
one pattern segment = 5 threads

The filling pattern shown here is a practice exercise only. You can see it used in a shape at the end of this article.

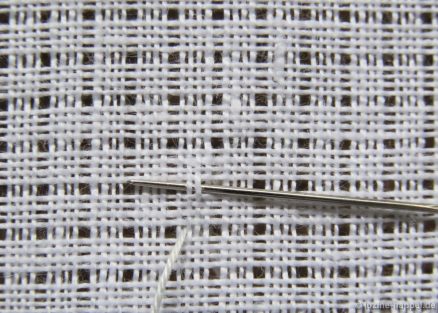
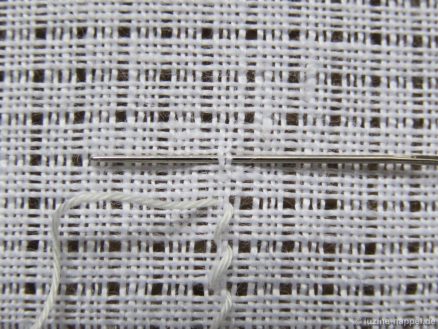
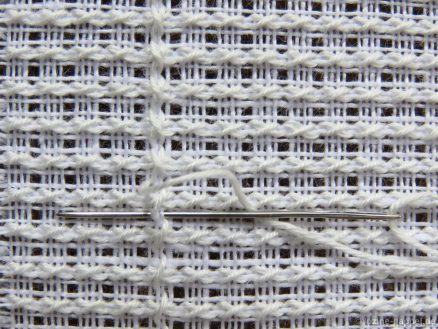
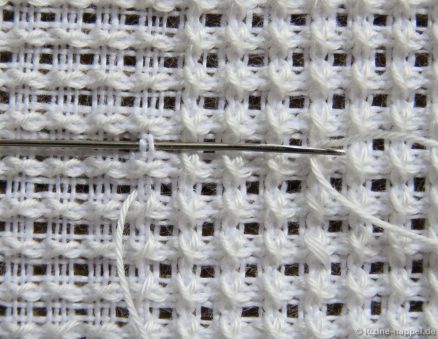
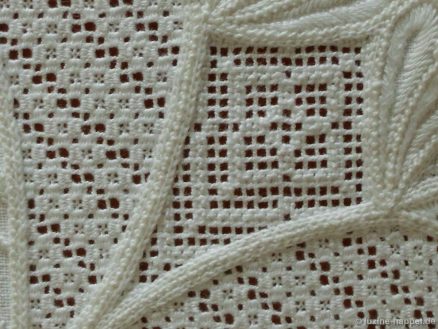
First, establish a Limet grid by alternately cutting 1, leaving 4, vertically and horizontally.

Bring needle up at the bottom of a square between the third and fourth threads from the right,

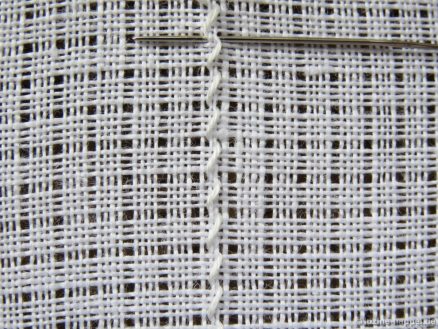
crosses the square upwards and pick up the two middle fabric threads there.

Always repeat this step up to the top of the row.

Once there, don’t turn the work, but

embroider downwards in the same way. Rectangular crosses are formed.

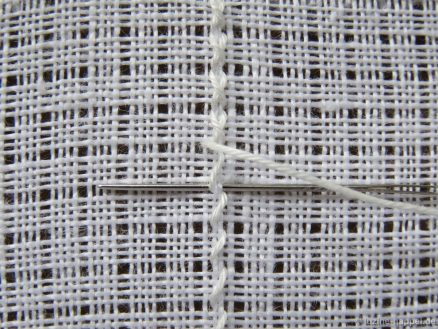
Further rows are embroidered in the established way next to it, always starting with the stitches leading upwards and

with the downward leading finishing the rows.

This way embroider row by row

until the entire area is filled.

Now turn the work by 90° and embroider crossing stitches in the established way

first again from bottom to top,

then from top to bottom.

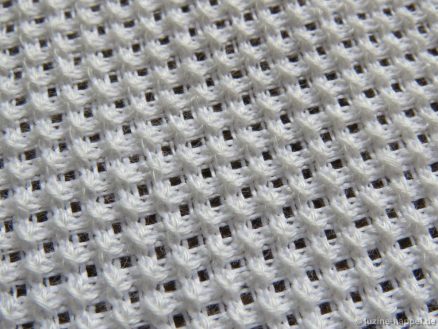
This creates double crosses

that seem very prominent.

I discovered this filling pattern on the Schwalm tablecloth from “brubi”.

Here it was embroidered on 16/cm thread count linen.

Schwalm Tablecloth – round (3)

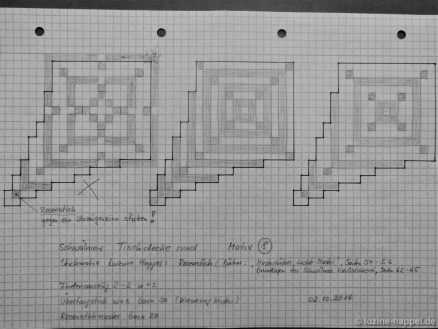
Fascinated by the care and precision with which brubi creates her beautiful Schwalm tablecloth and the attention to detail with which she prepared the embroidery, I wanted to share it with my blog readers. To do this, brubi opened her folders again so that she could create the corresponding images – thank you very much for that.

First tests at embroidery: Coral Knot stitch in different thread thicknesses and types, Chain stitch, Satin stitch, Macrame stitch

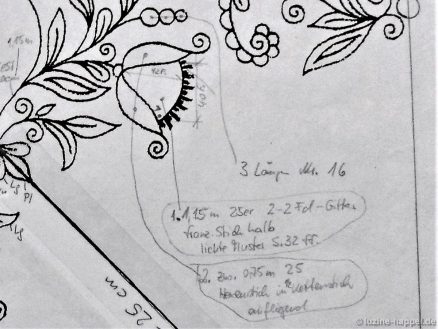
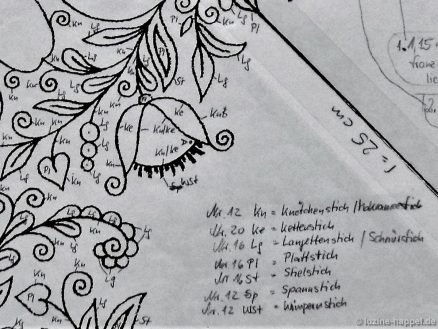
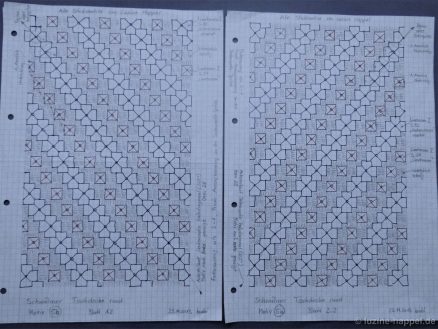
Overview 1: thread allocation, thread weight and thread length to the individual objects, definition of stitch types.

Section 1 from Overview 1: thread length for the individual objects, definition of stitch types

Section 2 from Overview 1: thread allocation and thread weight

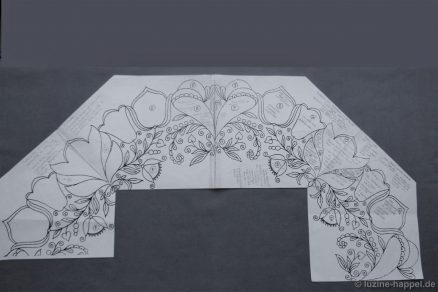
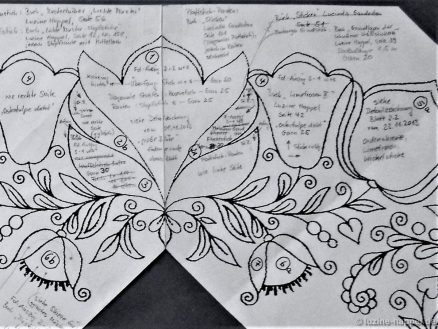
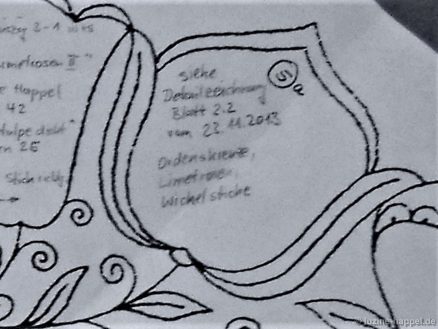
Overview 2: initially only numbering of the motifs,
later, after drawings and test embroidery, gradually determining the course of the pattern, the thread withdrawing, the embroidery direction and the embroidery patterns.

Embroidery samples: tried out various types of stitches, embroidered combinations of embroidery stitches.

Section 1 from Overview 2

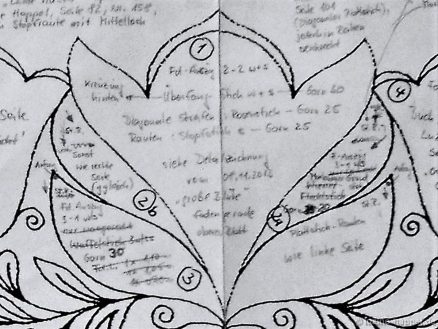
Section 2 from overview 2 with details 1, 2 and 3

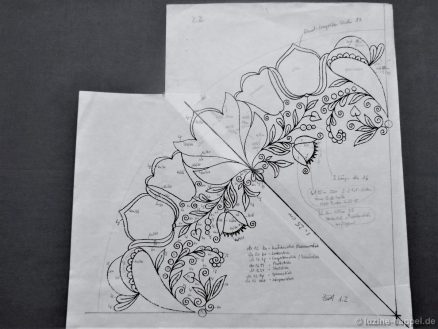
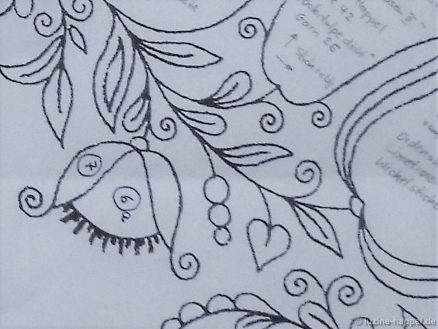
Detail 1 large flower (in the straight of grain) flower center – sketched

Detail 1, 2 and 3 – finished embroidered

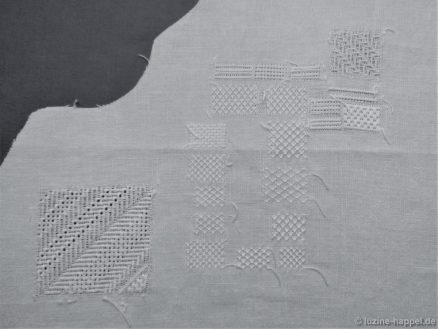
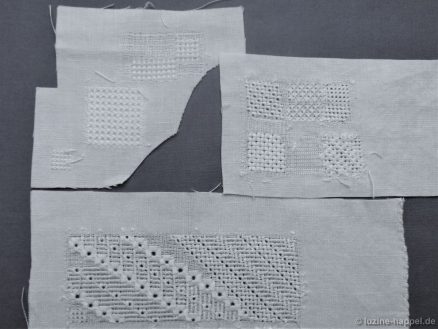
Embroidery samples:
small patch at the top left –
2nd pattern from above = embroidered in detail 10 (top petals).
small patch at the top right –
sample bottom left = embroidered in detail 3 (outer petals),
sample bottom right = embroidered in detail 2 (inner petals).
large patch below –
sample between middle and right cross, upper area = embroidered in detail 5 (large tulip inclined 22.5 degrees).

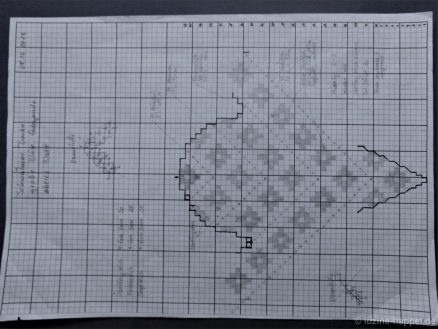
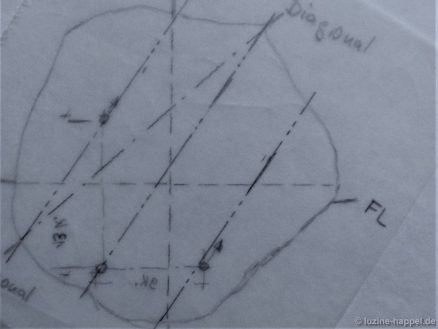
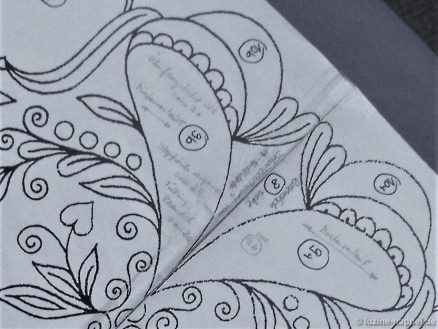
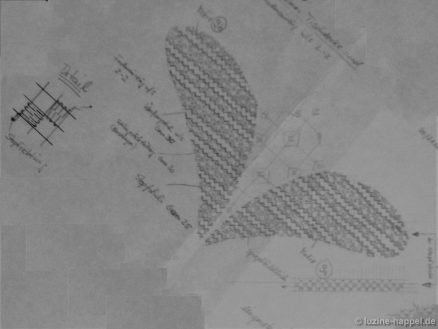
Detail 5 (a + b) – large tulip (inclined 22.5 degrees): determination of thread lines (sketched on tracing paper – so you can get the mirror image motif by turning it over.

Embroidery samples of the patterns in question

Detail 5 (a + b) – large tulip (inclined 22.5 degrees): design sketches and arrangement of the individual stitch elements

Detail 5 finished embroidered

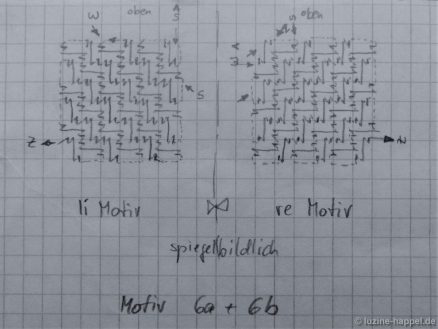
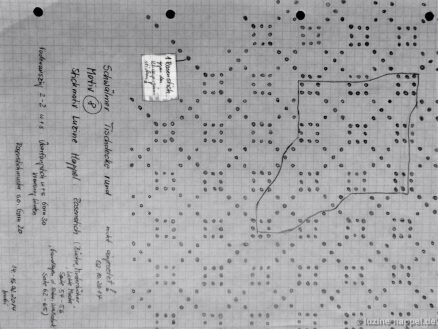
For detail 6 (a + b) bud (slightly inclined), center of flower

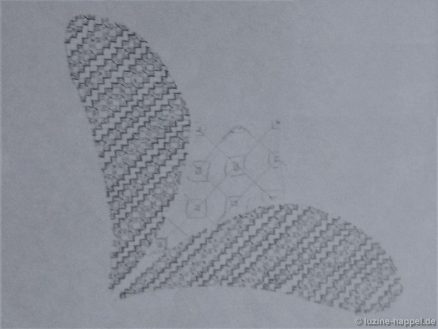
“Diagoanl Cross filling – French variaton/”half” was sketched in mirror image

and embroidered.

For detail 8 – large flower (diagonal) flower center –

various filling patterns were sketched.

The left checked pattern was embroidered, the others were discarded.

Detail 8 embroidered

Sketches for patterns for detail 9 (large flower (diagonal) outer petals) – left side embroidered, right side discarded

Sketch for detail 9 – pattern run vertical – discarded

Sketch for detail 9 – pattern run horizontal – embroidered

Detail 9 embroidered

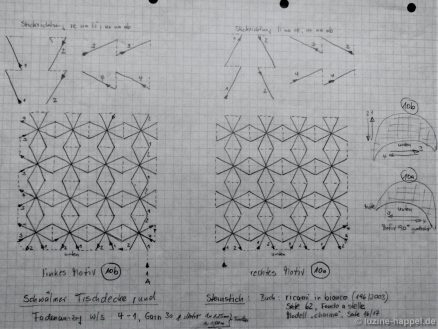
Detail 10 (a + b): large flower (diagonal) upper petals: sketches for star stitch

Detail 10 embroidered

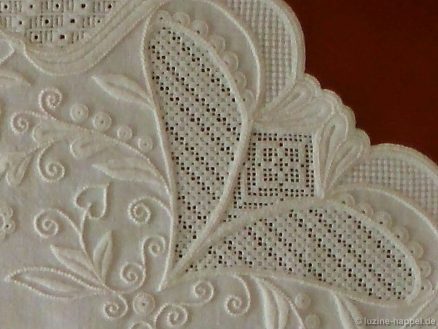
large flower diagonally with details 8, 9 and 10 embroidered

Many people might think that so much effort for embroidery is excessive. But if you consider that these preparations only took about 40 days, but the final embroidery took almost four years (not including the interruption), the ratio is quite acceptable. And only with such an accurate preparation was such a unique result possible. The effort was truly worth it.

Thanks again to brubi for providing all the information. Hardly anyone will probably undertake the entire accuracy, but you can definitely incorporate some suggestions into your own work.

Schwalm Tablecloth – round (2)

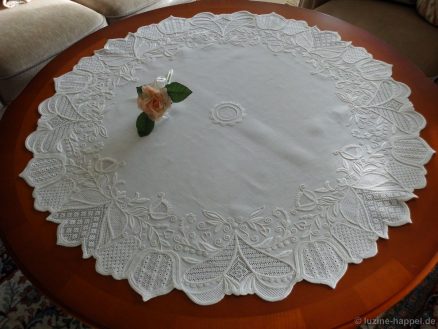
brubi – an embroiderer who wants to remain anonymous – has described her dreamy Schwalm tablecloth in detail and has kindly allowed me to share these descriptions with you:
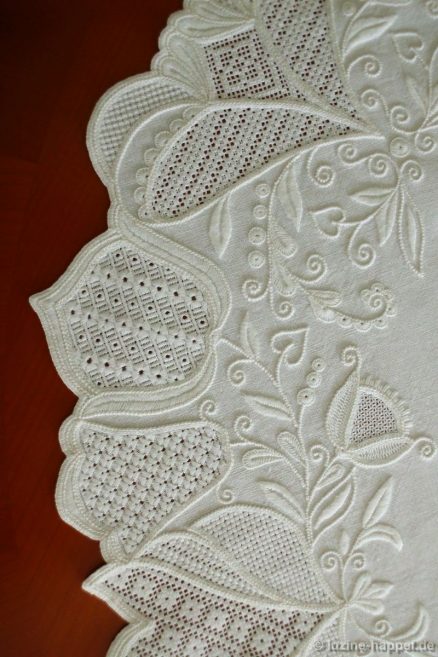

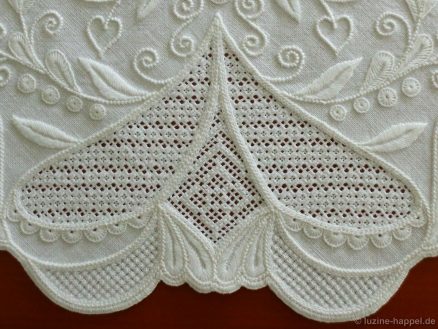
1/8 of the border embroidery
Border width approx. 20 cm
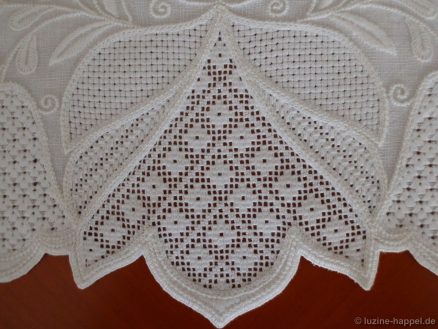

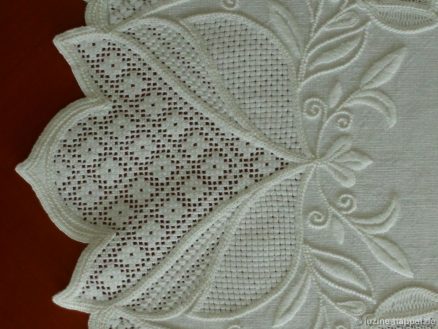
Details 1, 2 and 3: large flower (on the straight of grain)

flower center: thread withdrawing: cut 2, leave 2, Cable stitch grid, Rose stitch diagonally (book: Openwork Pattern Samplers, page 64), needle-weaving pattern „Raute“ Nr. 126 (book: Openwork Needleweaving Patterns, page 66).

inner petals: thread withdrawing: cut 2, leave 2, Cable stitch grid, two Satin stitches over one empty squares with change of direction around the corner, thread continuation on the back, embroidered in opposite directions,

outer petals: thread withdrawing: cut 1, leave 3, Satin stitch diamonds made of 5 stitches with change of direction (book: Sticken von Lucinda Ganderton, page 101).
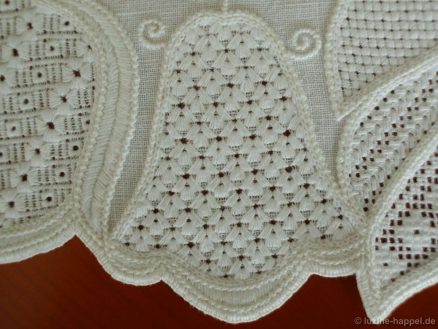
Detail 4: small tulip (on the straight of grain)
thread withdrawing: cut 1, leave 3,
double square eyelet pattern „Ostertulpe – dicht“ (book: Limetrosen II, page 42)
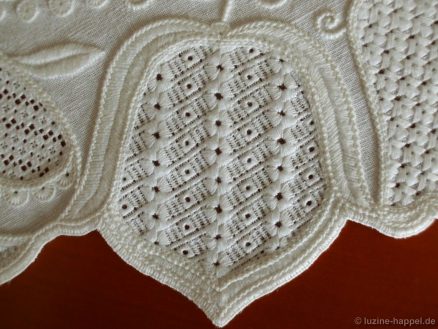
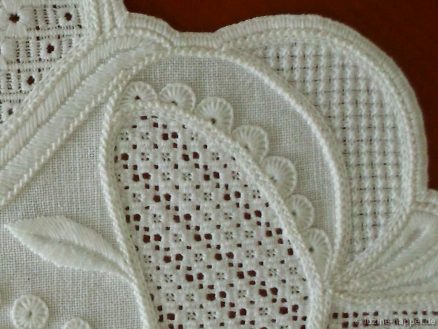
Detail 5: large tulip (inclined 22.5 degrees)
thread withdrawing: cut 1, leave 3,
Stitch combination, embroidered in mirror image in every second tulip, consisting of double square eyelet „Cross Medal – staggerd“, here single row (book: Limetrosen I, page 78), „Simple Square Eyelets“, here offset in one row (book: Limetrosen I, page 33), Satin stitch bars slanting, here with a change of direction (book: Wickelstiche I, page 9).
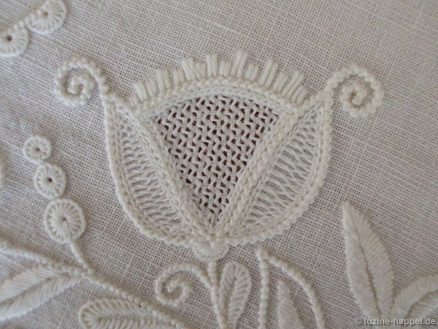
Details 6 and 7: bud (slightly inclined)

flower center: thread withdrawing: cut 2, leave 2,
Diagonal Cross Filling – French Variation/”half”, here embroidered in mirror image in every second bud, (book: Openwork Pattern Samplers, page 32),

outer petals:
surface Herringbone stitch, hooked into the chain stitch (inspired by book: Early Schwalm Whitework).
Details 8, 9 and 10: large flower (diagonal)

flower center: thread withdrawing: cut 2, leave 2,
Cable stitch grid, Rose stitch vertically (book: Openwork Pattern Samplers, page 63),

Outer petals: thread withdrawing: cut 2, leave 2,
Cable stitch grid, needle-weaving pattern over 1 square, here with a change of direction, 2- and 3 rows, (book: Openwork Needleweaving Patterns, page 83) with Rose stitch filling.

upper petals: thread withdrawing: cut 1, leave 4
Star stitch in rows (book: Ricami in bianco, Casa Editrice Mani di Fata, page 62, pattern „Fondo astelle“).
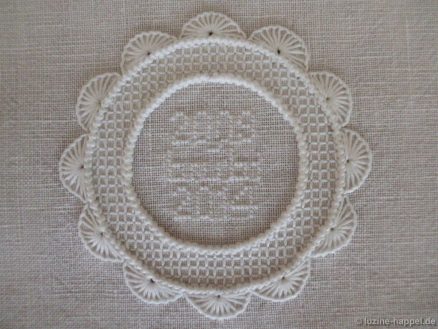
Detail 11: Crown (on the straight of grain – own design)

Circles: Macrame stitch,
Ring filling: Four-Sided stitch,
Semicircles: Blanket stitch half eyelets,
Characters: Cross stitch, text horizontally “brubi”, vertically “2009 – 2014”.
General information about embroidery realising

fabric: pure linen, 16 tpcm, Weddigen linen mill,

embroidery threads:
coton à broder:
No. 12: Makramee stitch, Coral Knot stitch, Satin stitch, Blanket stitch (border),
No. 16: Blanket stitch, Satin stitch, Stem stitch,
No. 20: Chain stitch, Blanket stitch (Detail 1),
No. 25: Rose stitch (Details 1,8, and 9), needle-weaving stitch (Detail 1 and Detail 9),
Karomuster (Detail 11), Limetrosen und Satin stitch (Detail 4 and Detail 5),
Diagonal Cross stitch – French Variation (Detail 6) and Herringbone stitch (Detail 7),
No. 30: Cable stitch grid, Rose stitch filling (Details 8, 9), Star stitch (Detail 10), Satin stitch diamonds (Detail 3),
Stranded Cotton:
1-ply: characters,
2-plies: underlay of the border.
Preparation for embroidering this tablecloth began on September 20, 2009.
Embroidery work began on October 27, 2009.
Completion of the embroidery work on November 16, 2014, 10:55 p.m.

Order of embroidery work:
1. Flower outlines in Macrame stitch (stitch embroidered from top to bottom)
2. Stems, tendrils, hearts, leaf outlines partly in Coral Knot stitch (stitch embroidered from top to bottom),
3. Leaves, leaf fillings, flower border fillings in Satin stitch,
4. Bud awns in Satin stitch
5. Some leaves, eyelets and half eyelets in Blanket stitch,
6. Inner flower outlines for the filling patterns in Chain stitch
7. Underlay border (stitch type forgotten), border in Blanket stitch.
– at least 1 year break –
8. Select, determine, sketch, test embroider outside the wreath area, withdrawingt the threads, embroider, and partially remove them again and changing the filling patterns.
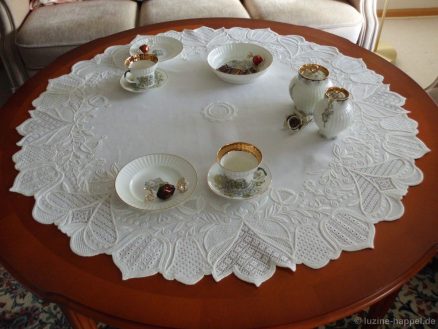
You will find out exactly how the preparatory work was done to achieve such sophisticated and first-class embroidery in the next blog post.

Stay tuned!