Needle-Weaving Cushion B

A slightly differently woven striped linen as used for the needle-weaving band of cushion A served as the basic material for a pillow with a wide needle-weaving band in the middle.

It is a 17-unit (!) band with a mirrored pattern

and a pattern segment of 18 bundles.

The centers stand out due to their very special spider constructions with two spider bodies.

In contrast to the needle-weaving band of cushion A, the needle-weaving on this cushion only runs across the front of the pillow.

The end was secured with Blanket stitches and decorated with half-eyelet scallops. At the level of every second unit, the needle-weaving was tied to the remaining fabric.

Information on the individual categories and detailed descriptions of the working methods can be found in Lesson #4 – Needle-Weaving Band Sampler.

In my documentation Schwalm Needle-Weaving Bands are shown 193 (!) different patterns .

Heather’s wonderful Boutis

Actually, I show – with very few exceptions – only projects of Schwalm whitework on my blog. However, many embroiderers are interested in trying out different techniques. One of them is Heather Harteneck from Florida/US. She loves to embroider Schwalm whitework, but has used the last few years to create a magnificent Boutis. When she sent me the pictures, I was completely thrilled. Since I think other viewers would also be delighted by the result, I show – with Heather’s permission – the photos here.

The pattern for the boutis is an original pattern obtained from France.

Heather’s Boutis is an impressive size, measuring 130cm x 150cm. How many stitches do you think it took to create this variety of patterns?

Batiste was chosen for the surface, the back is made of altar linen.

An incredible 1100g cotton yarn was needed for the filling. How much sensitivity do you need to underlay the individual sample parts so precisely and evenly?

Heather writes: I worked on this for about 8 years with maybe a 2-3 year ‘break’ as I got frustrated a lot!

I learned a lot.

Against the light, the patterns with their differently thick fillings come into their own in an attractive way.

Many more pictures and information can be found on Heather’s website.

Easter Greetings from Colette Bonnet

Colette Bonnet from France visited my exhibition in Eschwege about 1 1/2 years ago and got a lot of inspiration. At that time still a beginner in Schwalm whitework, she quickly approached the many facets of the combination of techniques with the help of her friend and teacher Jacqueline Blanot and made unmistakable progress.

A spring-like teacloth was created on linen with pre-transferred design purchased here in record time.

Especially trying out different filling patterns gives her pleasure.

And a small rabbit with a big egg greets (subsequently) for Easter.

Further impressive testimonies of her embroidery activity will be presented in the course of the year.

Needle-Weaving Cushion A

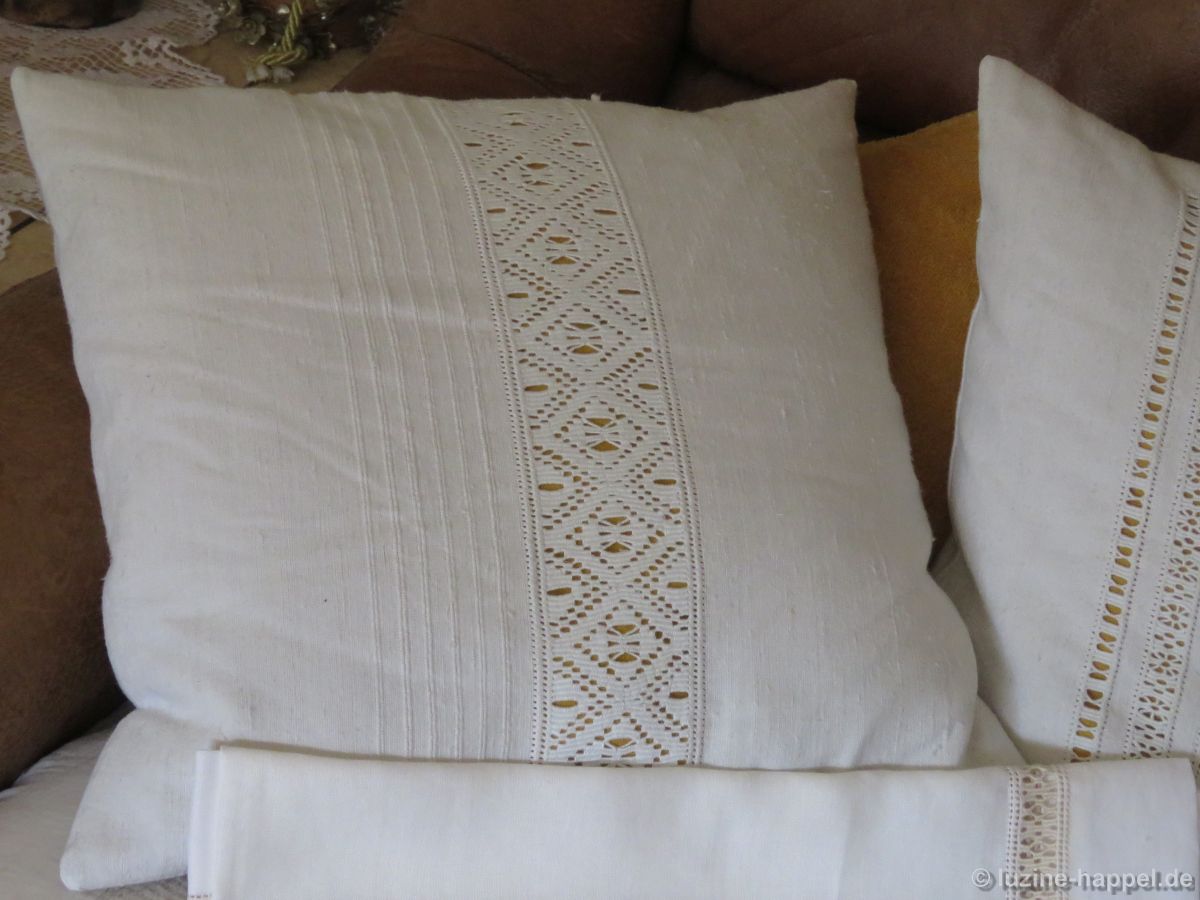
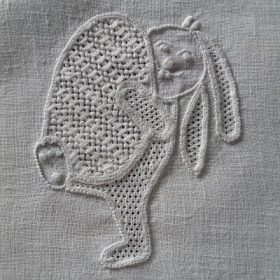
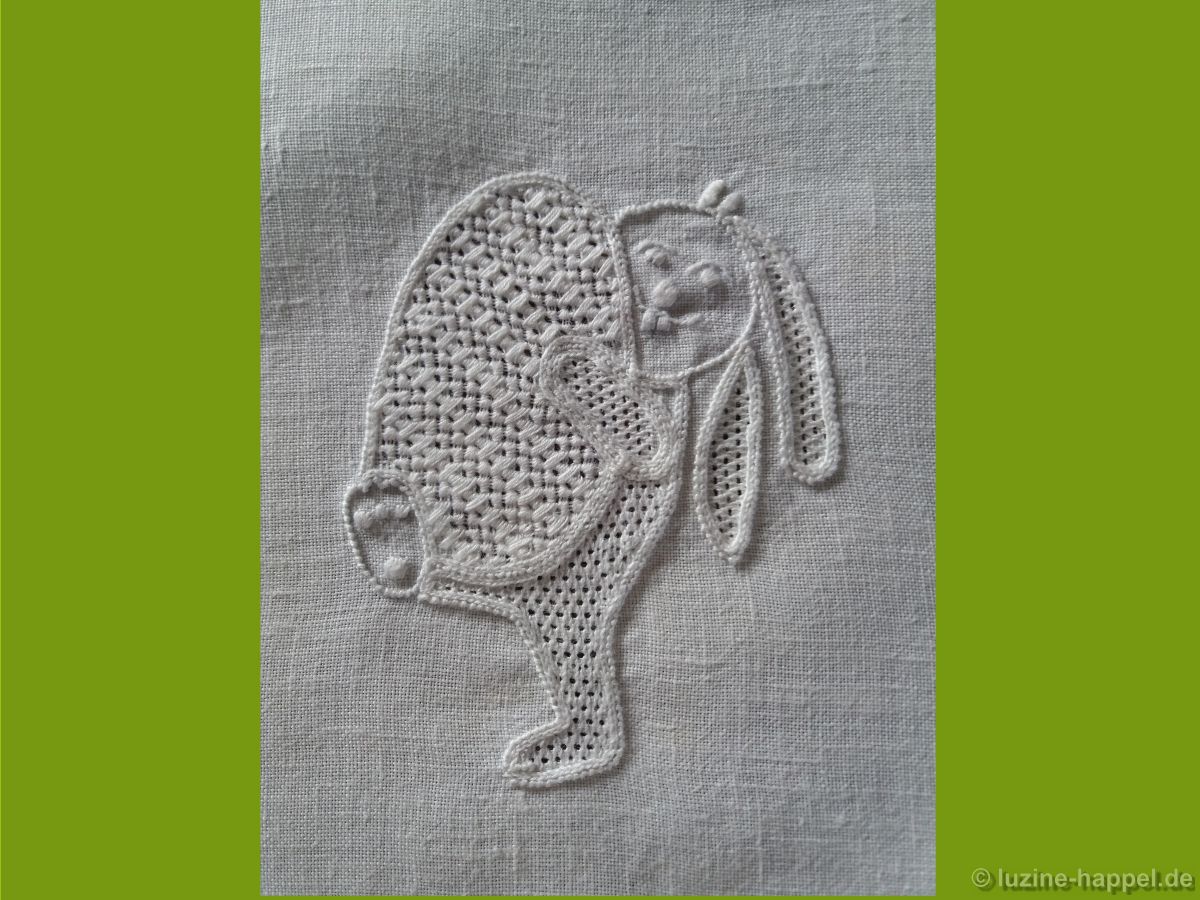
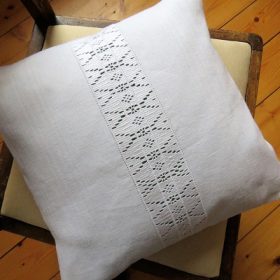
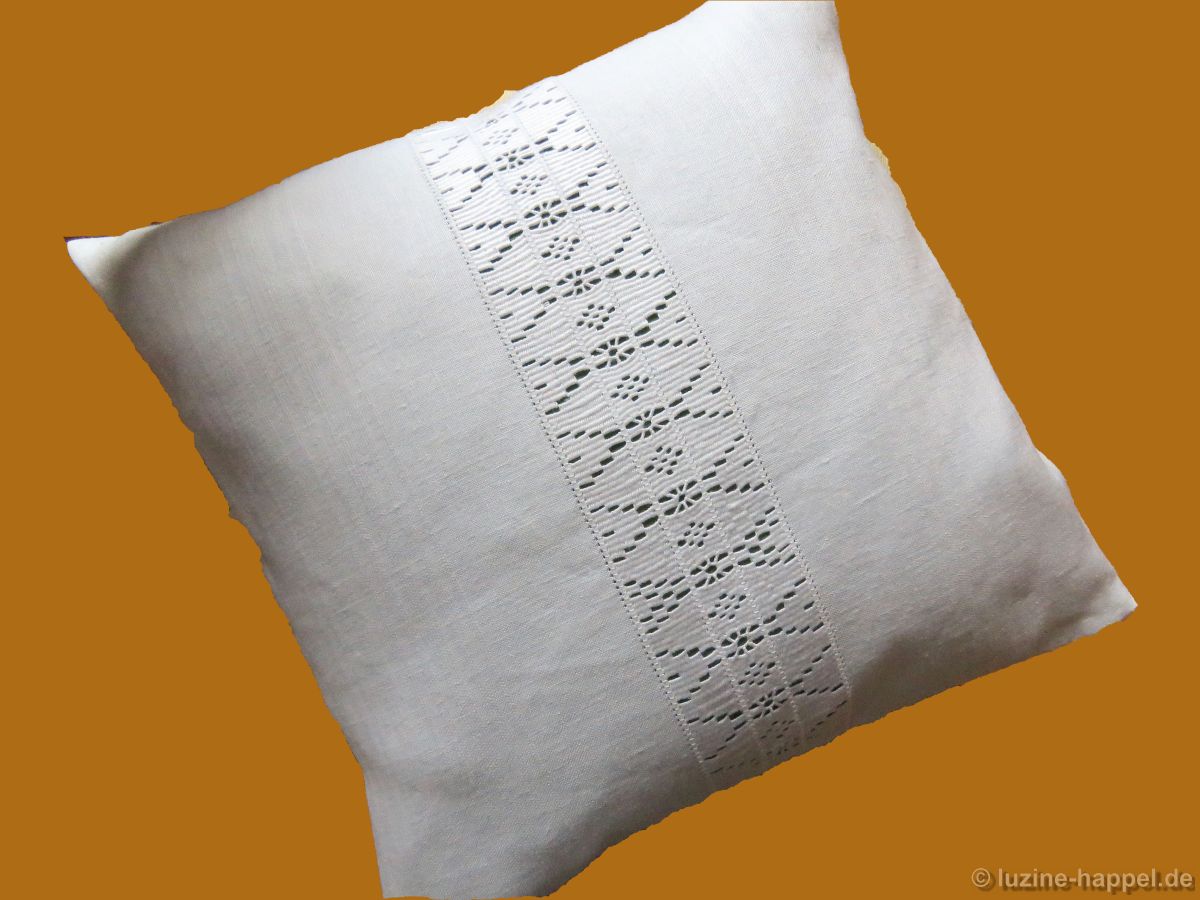
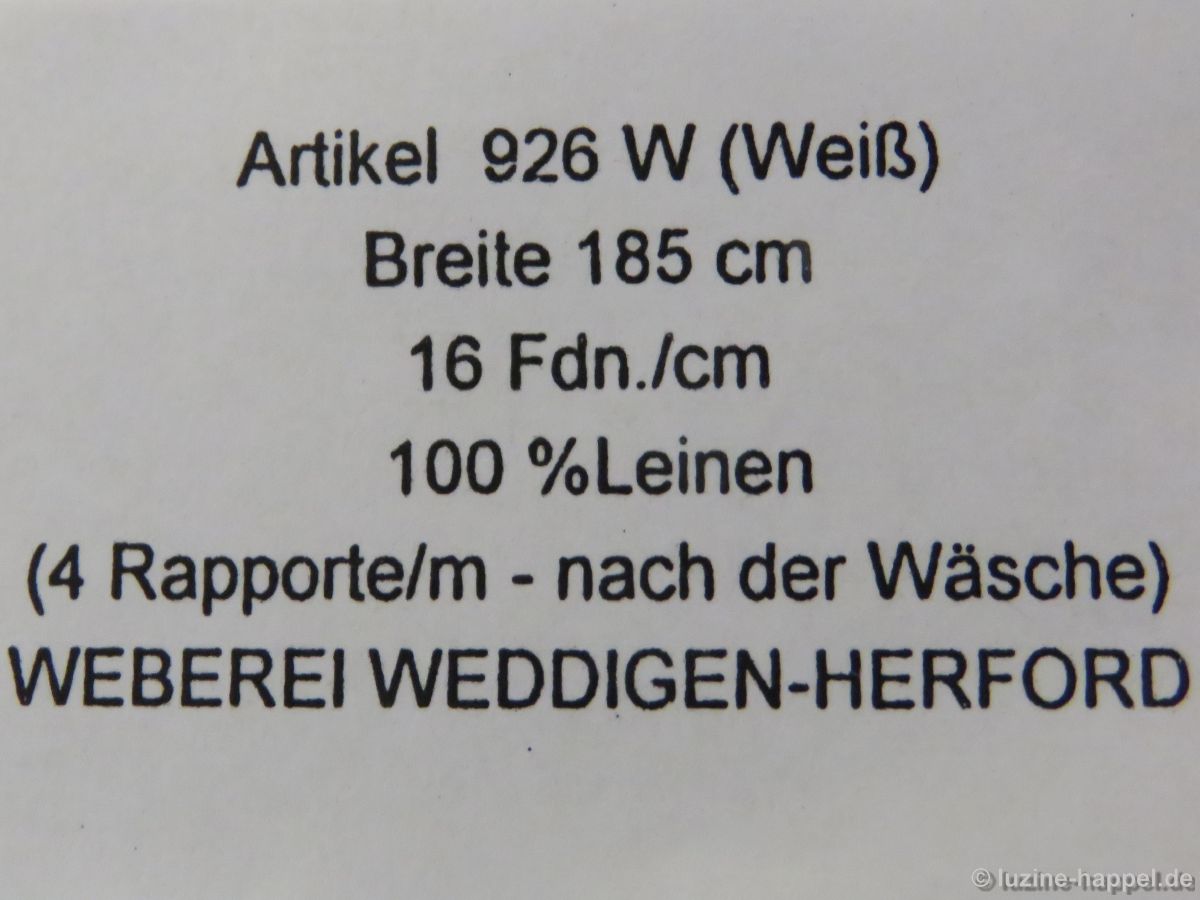
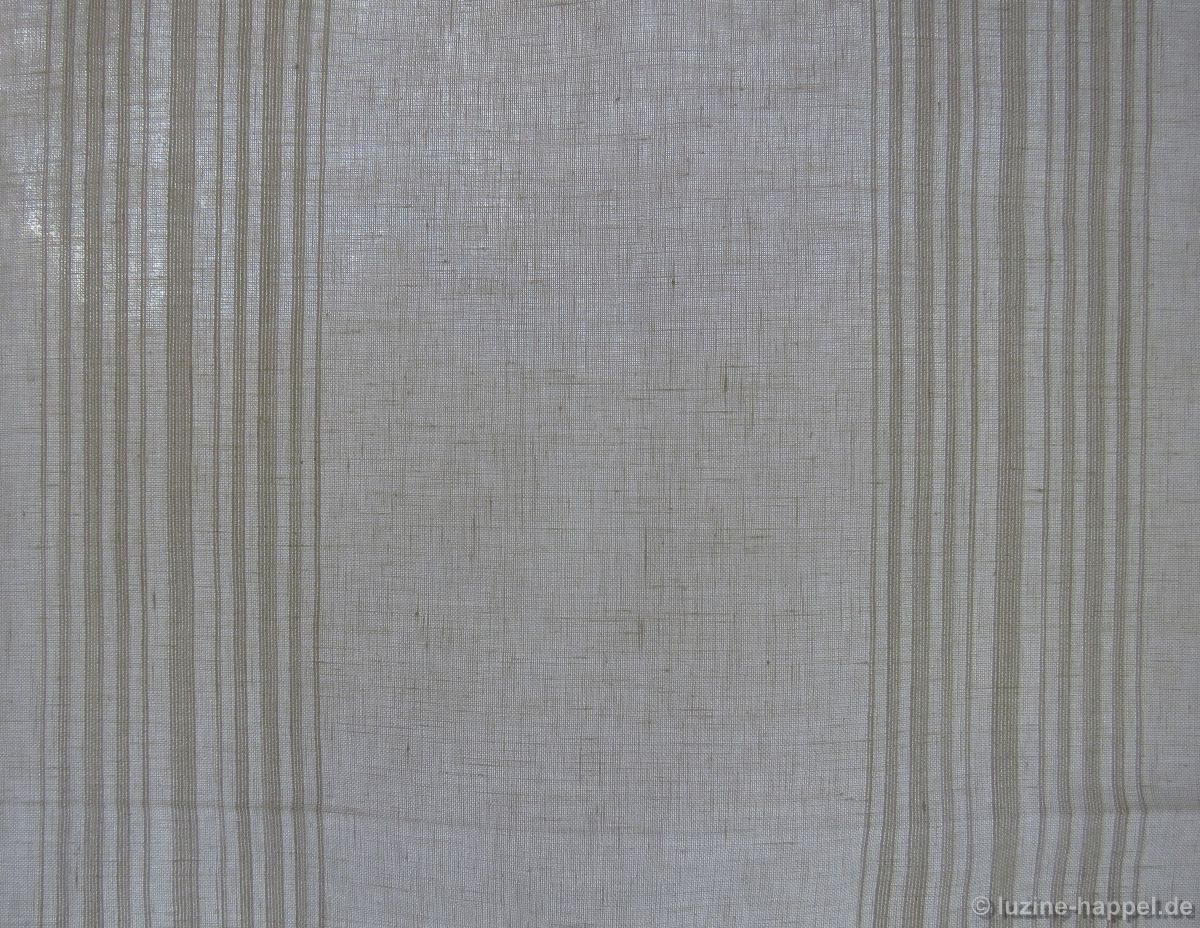
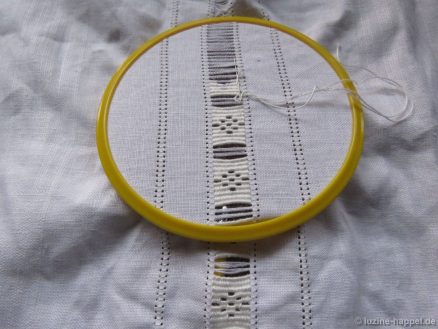
Combined needle-weaving bands are to be worked on striped linen #926 in the middle between two stripes of fabric. The needle-weaving bands should run continuously across the front and back of the pillowcase.

The pillowcase should have a finished size of 38 cm x 38 cm (seam allowance 1 cm, hem allowance 2 cm).
Measurement calculation:
Width: 1cm + 38cm + 1cm + 4cm (shrinkage about 8-10%) = 44cm
Length: 2cm + 38cm + 38cm + 2cm + 2.5cm (shrinkage about 3%) = 82.5cm
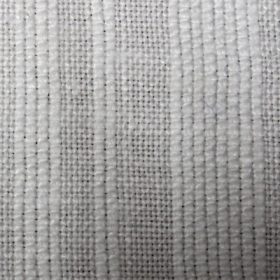
The fabric is cut to a size of 44 cm x 82.5 cm. The stripes should be the same distance from the center.
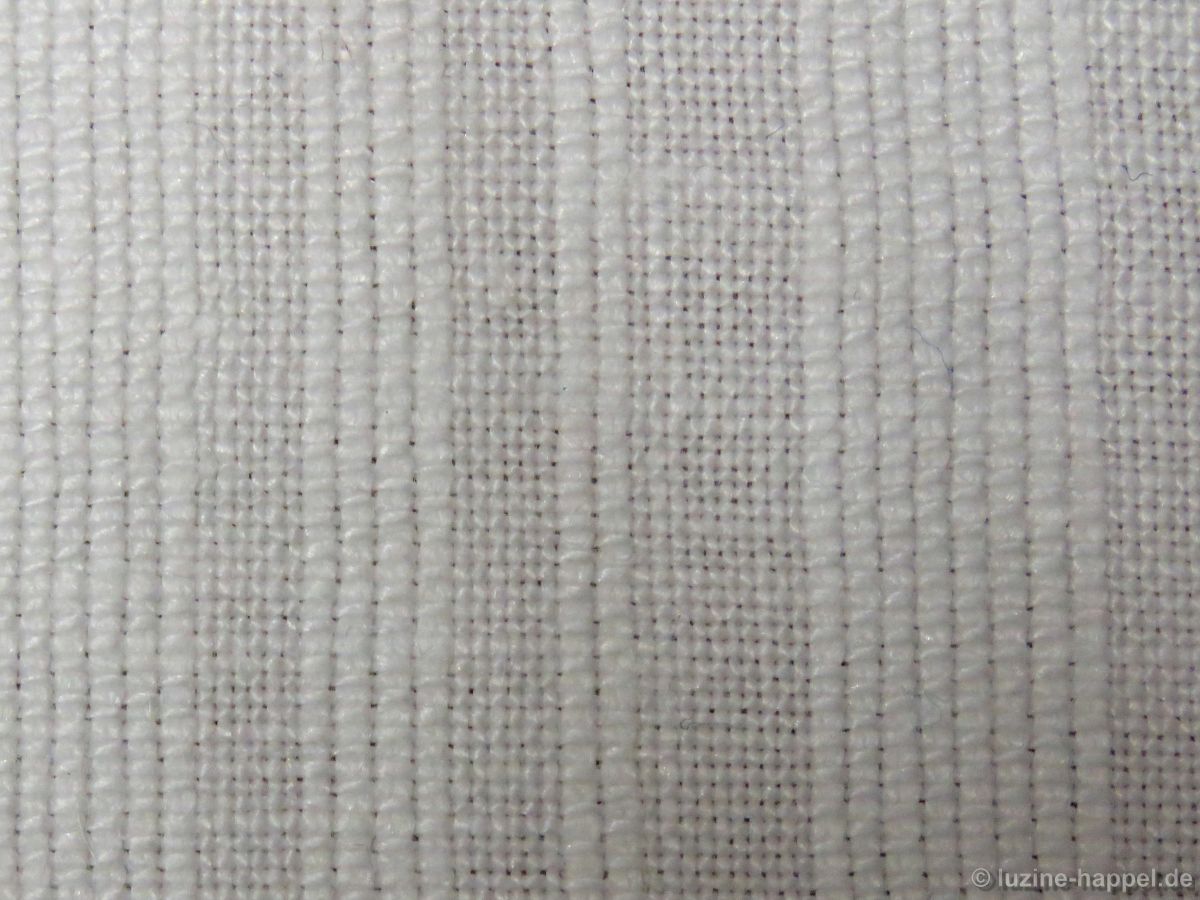
The edges of the fabric are secured against fraying.

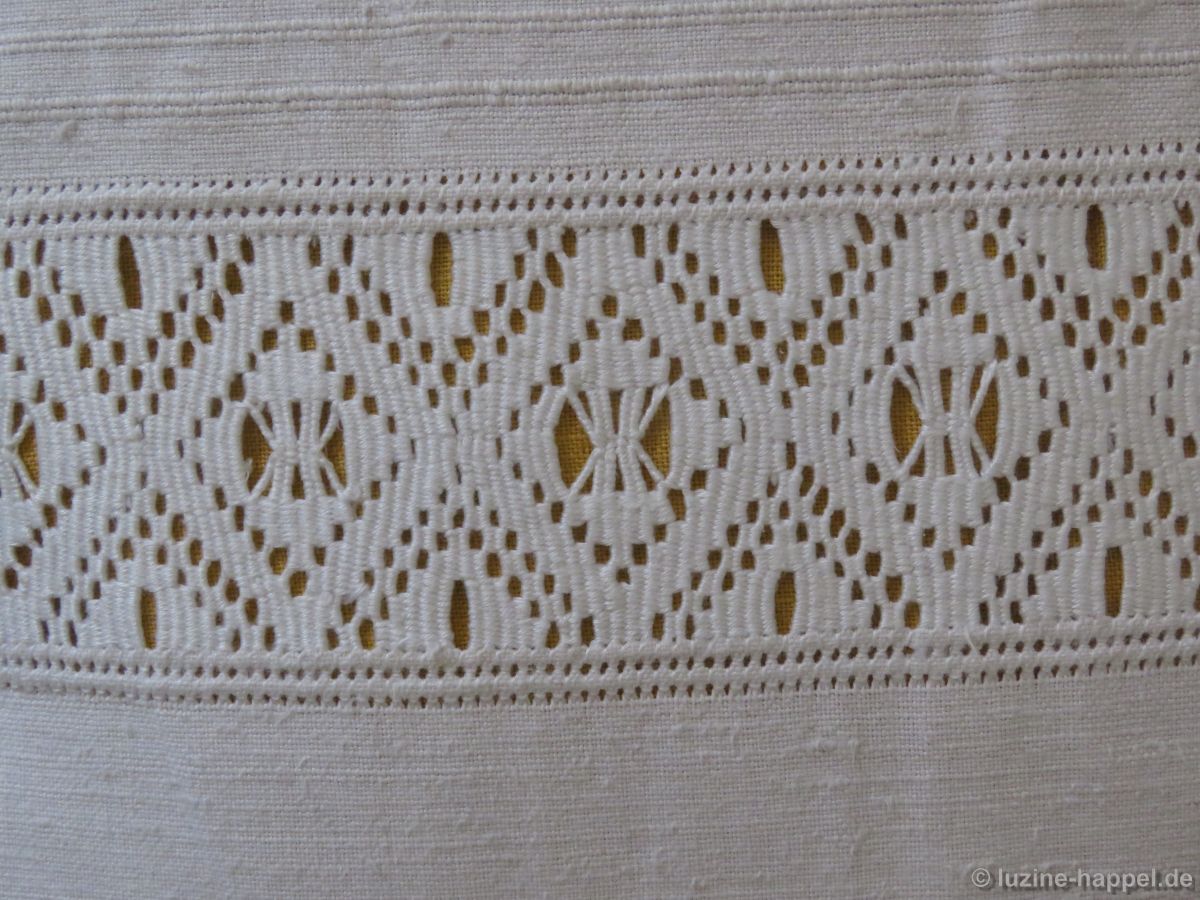
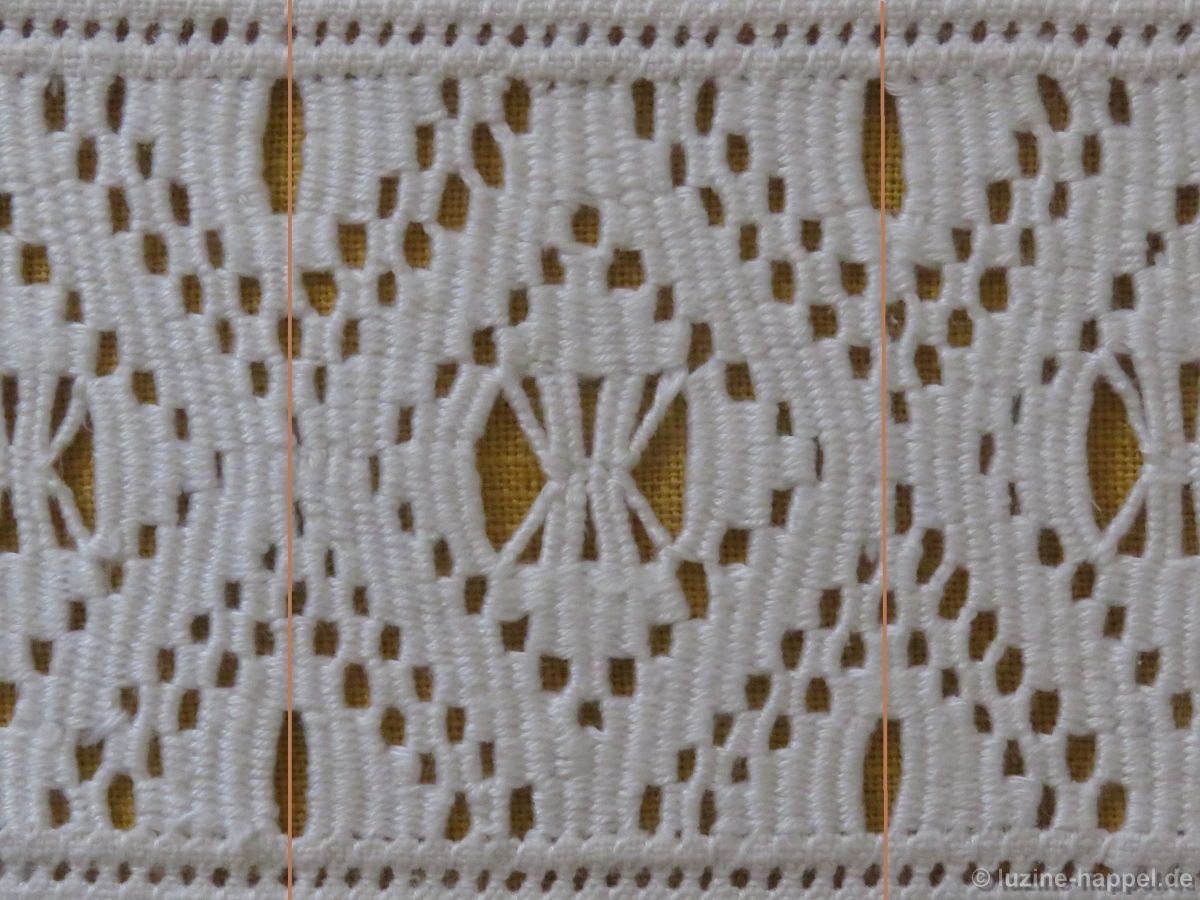
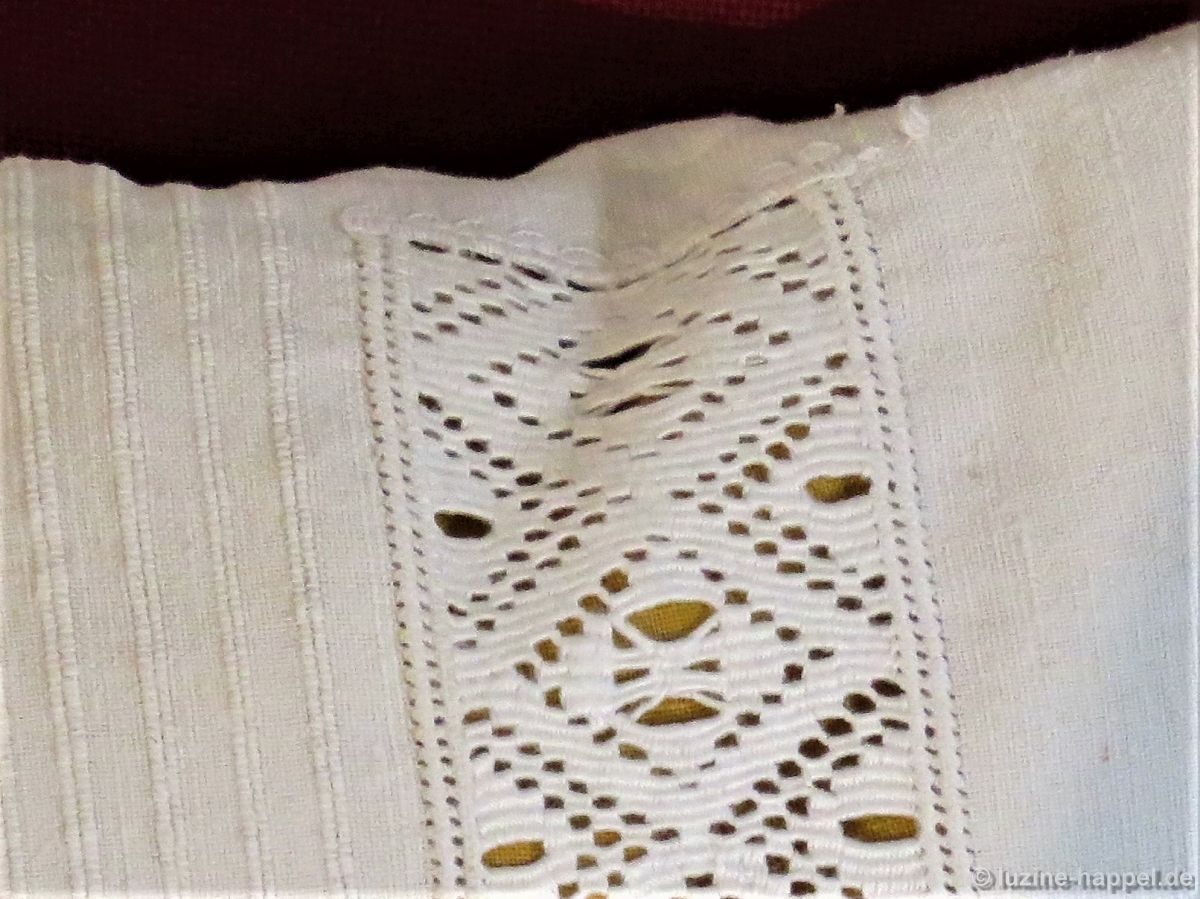
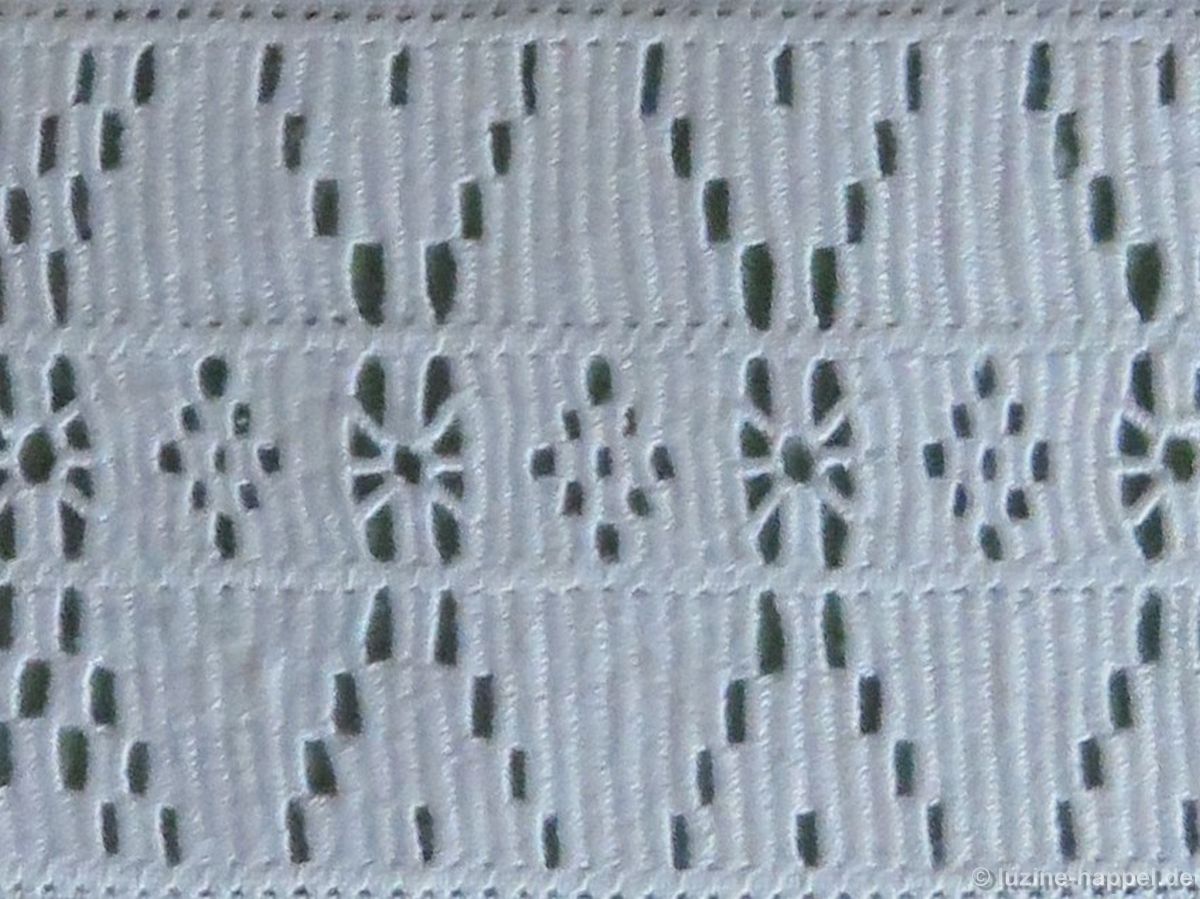
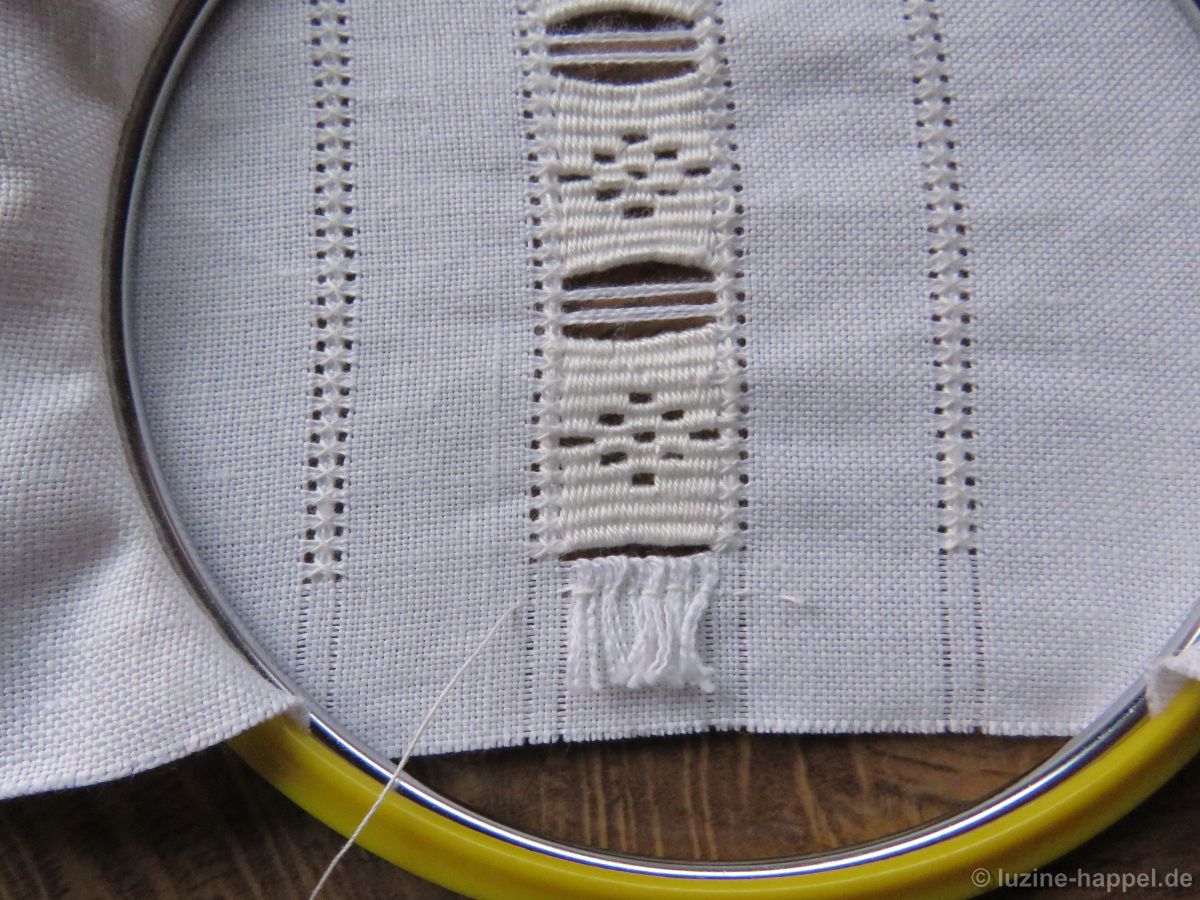
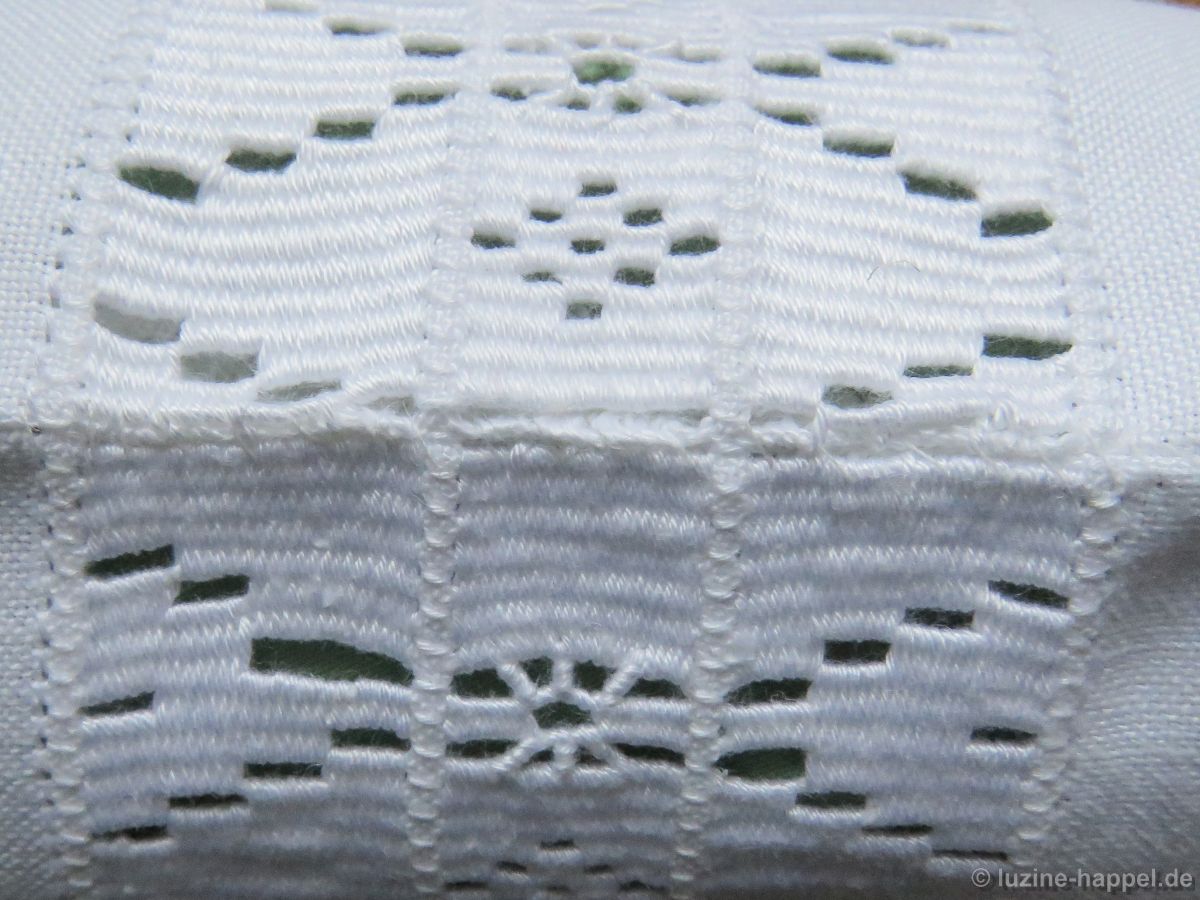
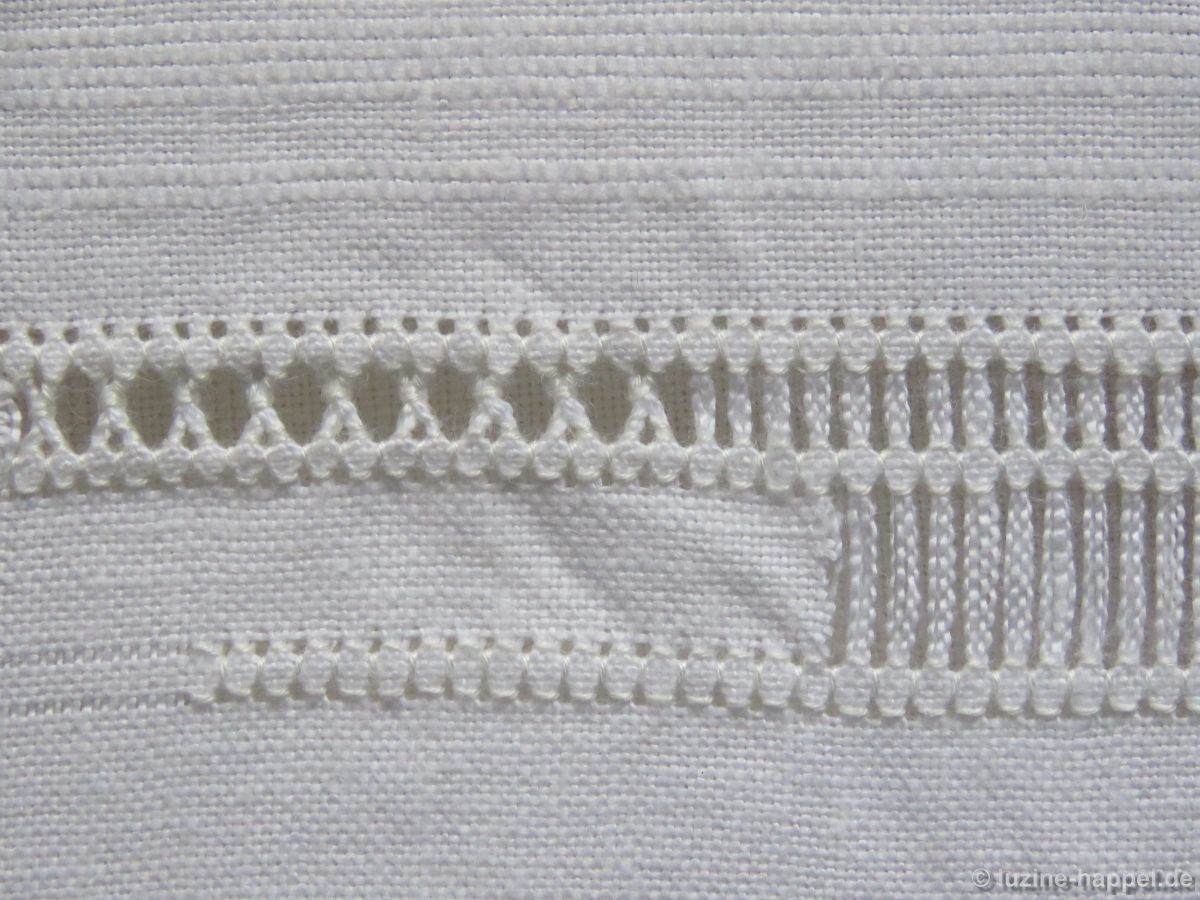
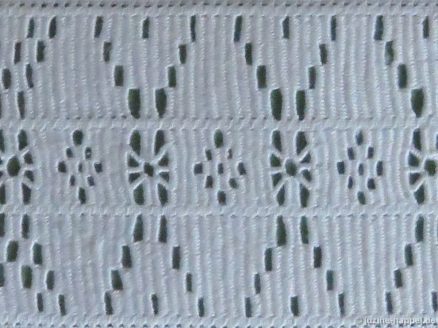
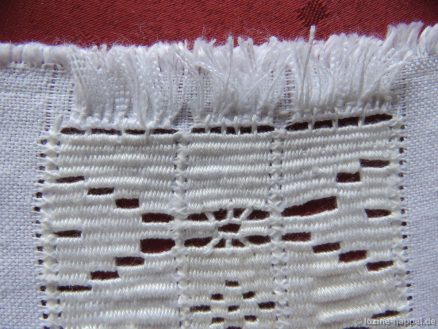
The needle-weaving hem should be composed of 3 bands. The center should be formed from a two-piece block pattern over 5 units reduced to 0.3 cm. The sides are to receive an A-pattern over 4 units increased to 0.5 cm.

Thread-withdrawing is accordingly. From the center of the length, measure 0.75 cm on each side, withdraw 1 thread, leave 4 threads, withdraw 1 thread, measure 2 cm, withdraw 1 thread, leave 4 threads and withdraw a last thread.

Starting 2 cm from the bottom edge, Four-Sided stitches are worked from the back over the 4 groups of four threads. It is important to ensure that the same four horizontal (vertical in the picture) fabric threads are always bundled.

The fabric threads remaining in the center are cut 3.5 cm from the edge. The short thread ends are withdrawn 1.5 cm, laid straight back and held in place with short Back stitches.

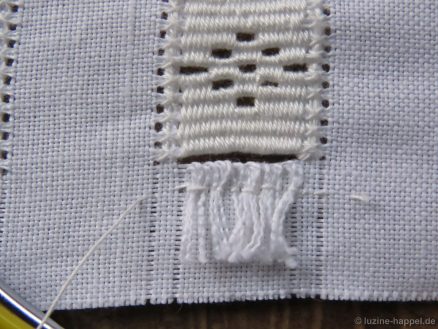
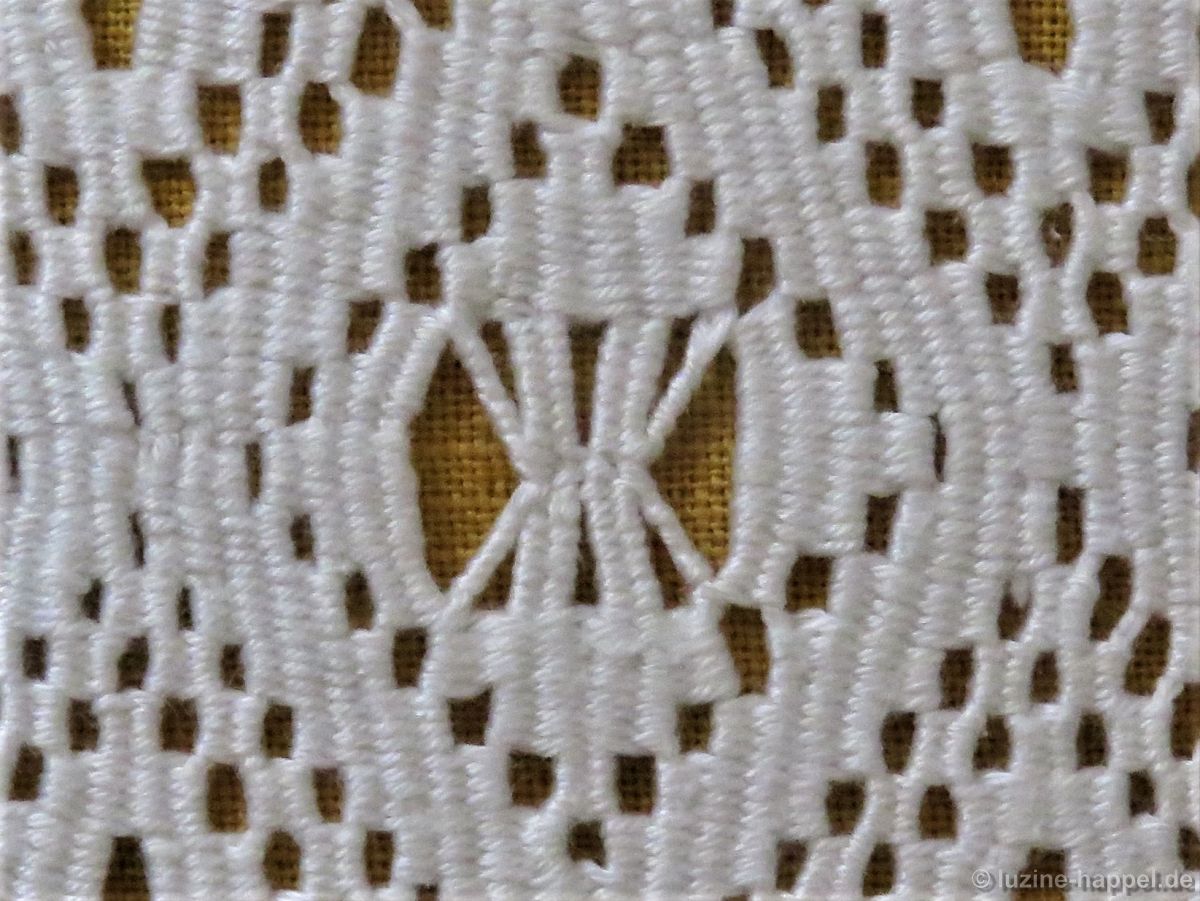
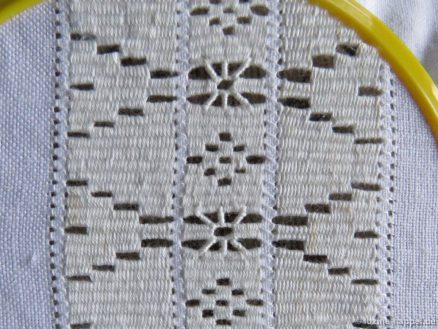
The long thread ends are cut about 4 cm from the opposite edge and withdrawn. Using coton à broder No. 16, blocks are first woven into the middle withdrawn-thread line over 10 bundles at a distance of 2 free bundles.

Then the spider blocks are worked over the two remaining thread bundles.

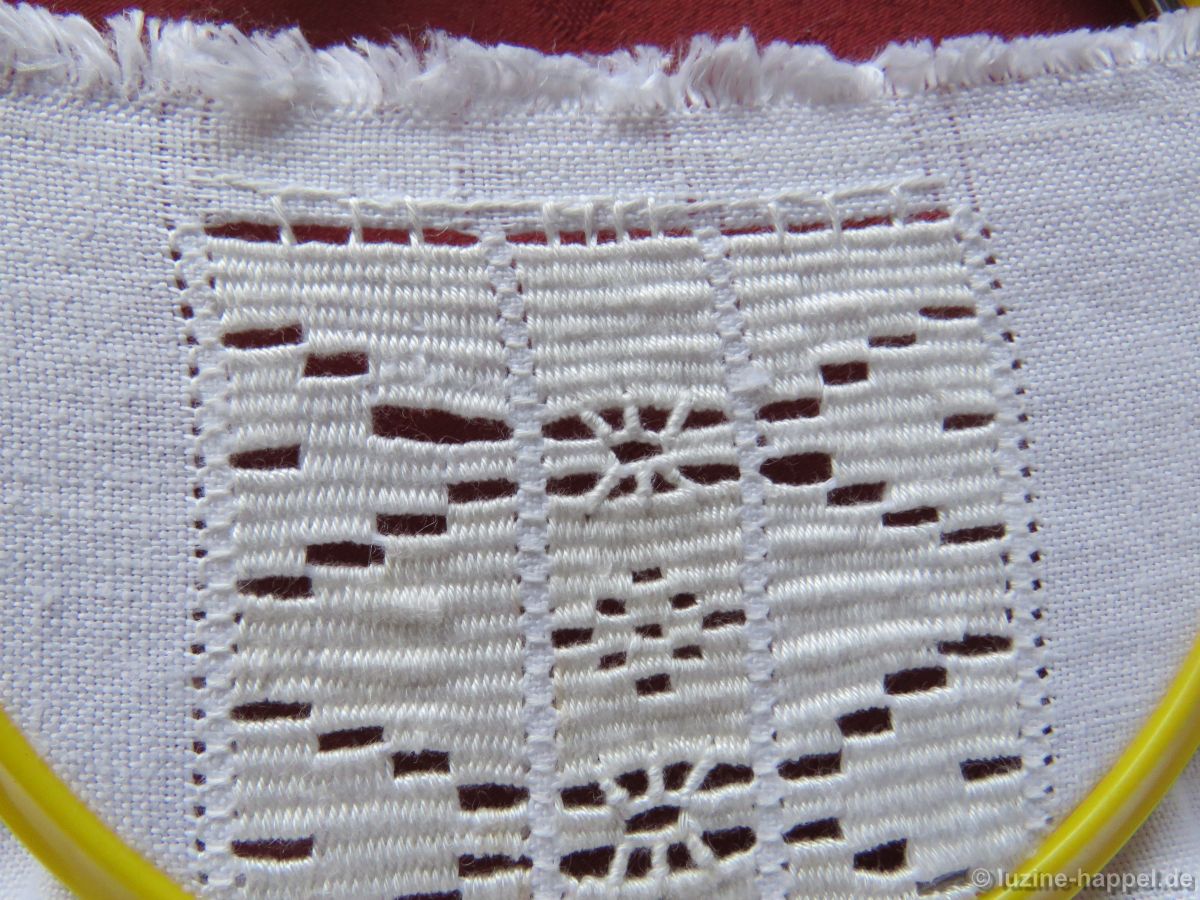
The threads for the side parts are withdrawn in the same way. The desired A-pattern is woven.

Shortly before reaching the opposite side, stop weaving, pull back the fabric thread ends to 2 cm from the edge and hold them in place on the back with short Back stitches.

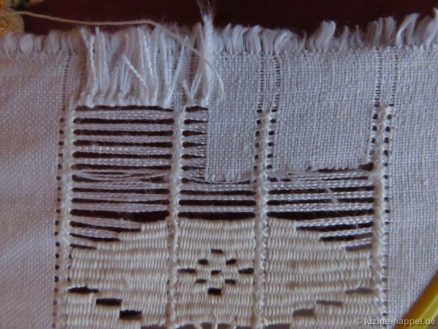
The needle-waeving pattern is continued over the remaining bundles of threads, tied at the edge at each unit.

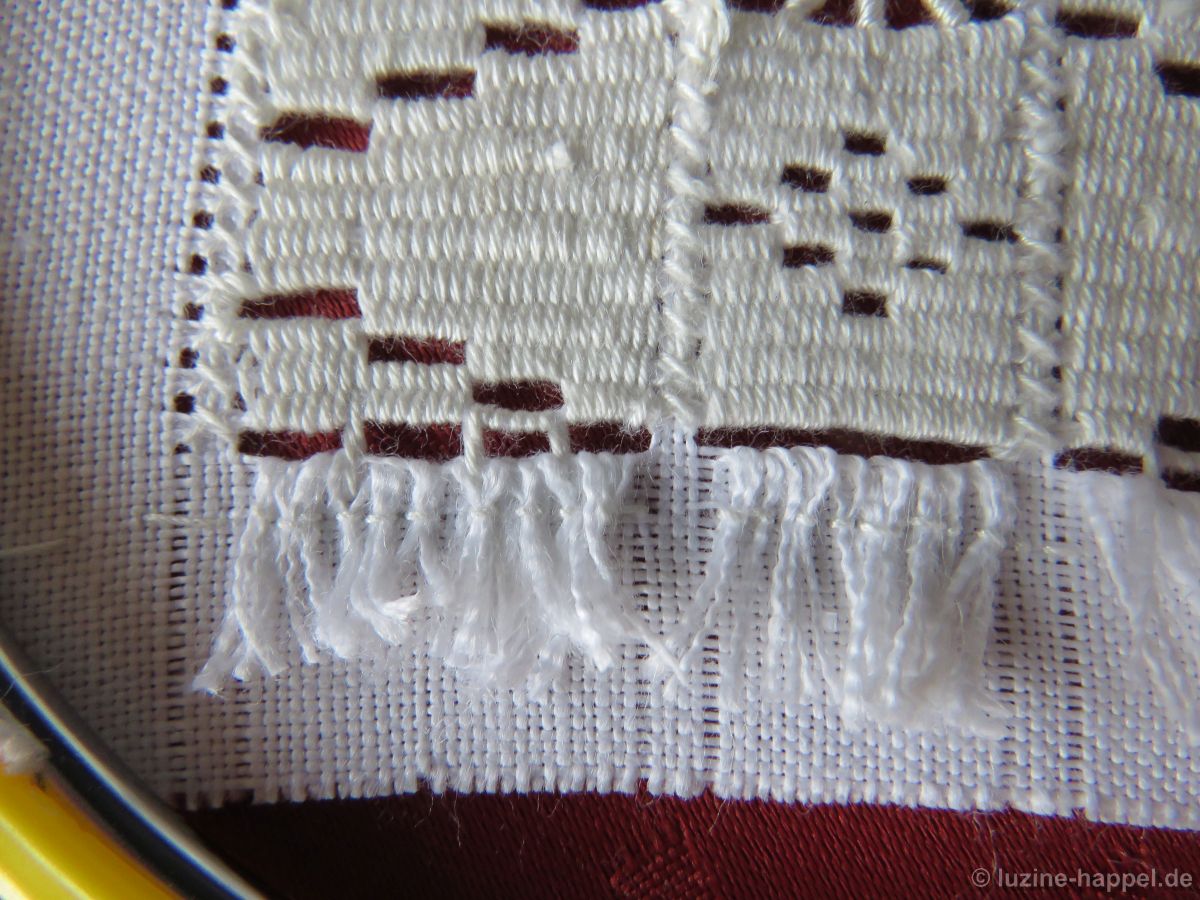
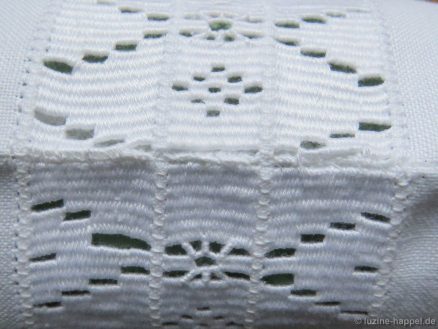
From the front it looks like this:

Then the needle-weaving hem is tied to the remaining fabric on the opposite side as well.

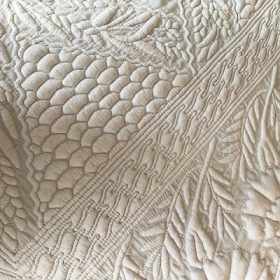
A pretty, expressive, wide needle-weaving hem is the result.

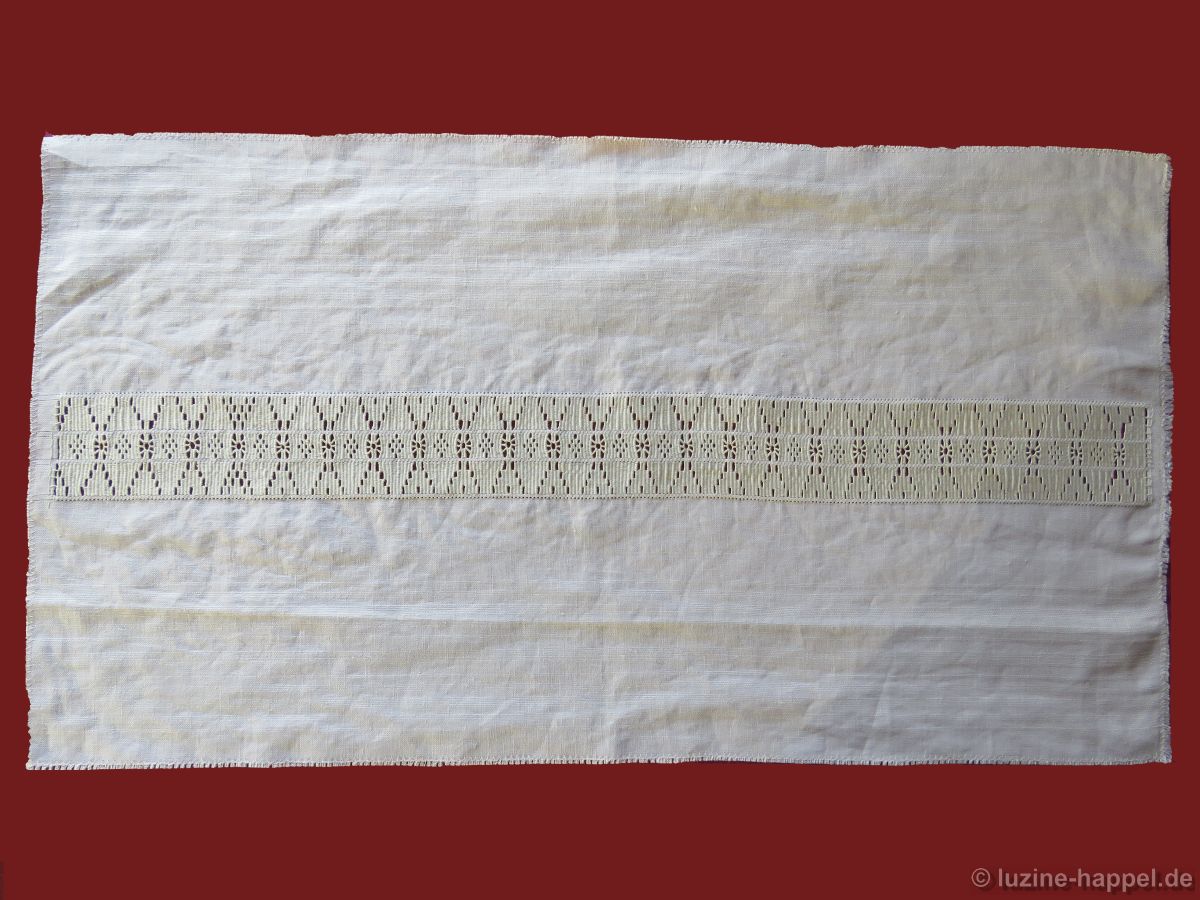
The embroidered linen is washed, starched and ironed and sewn together at the sides.

After turning, the fabric can be ironed on again if necessary. The pillow is pushed in. The bottom edges of the fabric are folded in at the 2cm line. The opening is closed with overcast hand stitches.

With not too much effort, a simple, clearly structured pattern was created that harmonises very well with the fabric stripes.

The combination of striped linen with needle-weaving has produced a classy-looking cushion cover.

White Striped Linen

When looking through my linen stock, I came across a small supply of white striped linen from the Weddigen company. It concerns the following article:


#926 W, width 185 cm, 16 tpcm, 100% linen, 4 pattern repeats/m – after laundry

According to the manufacturer, the linen has a shrinkage of approx. 8% to 10% in length and 3% in width. The stripes were created by weaving in thicker threads, as the high magnification shows.

The stripe looks like this:

Unwashed, a stripe is 10 cm wide. The stripes are spaced 18 cm apart on the fabric.

I pulled a thread out of the fabric.

The thread could be easily withdrawn over a long distance. Only a few pieces of fluff remained in the thread line.

A few rows of Four-Sided stitches were quickly embroidered

to try Peahole-

and needle-weaving hem.

Both harmonize very well with the stripes.

I am selling this linen for €10.08 + 19% VAT = €12.00 per stripe (=28 cm x 185 cm)
or in cuts of 56 cm (2 stripes) x 90 cm at a price of €10.92 + 19% VAT = €13.00.

Please email me with your request.

In my next blog post I will show an example of how I processed this linen.