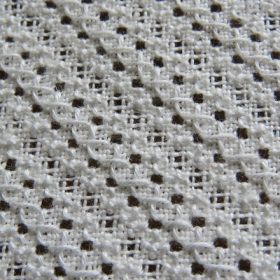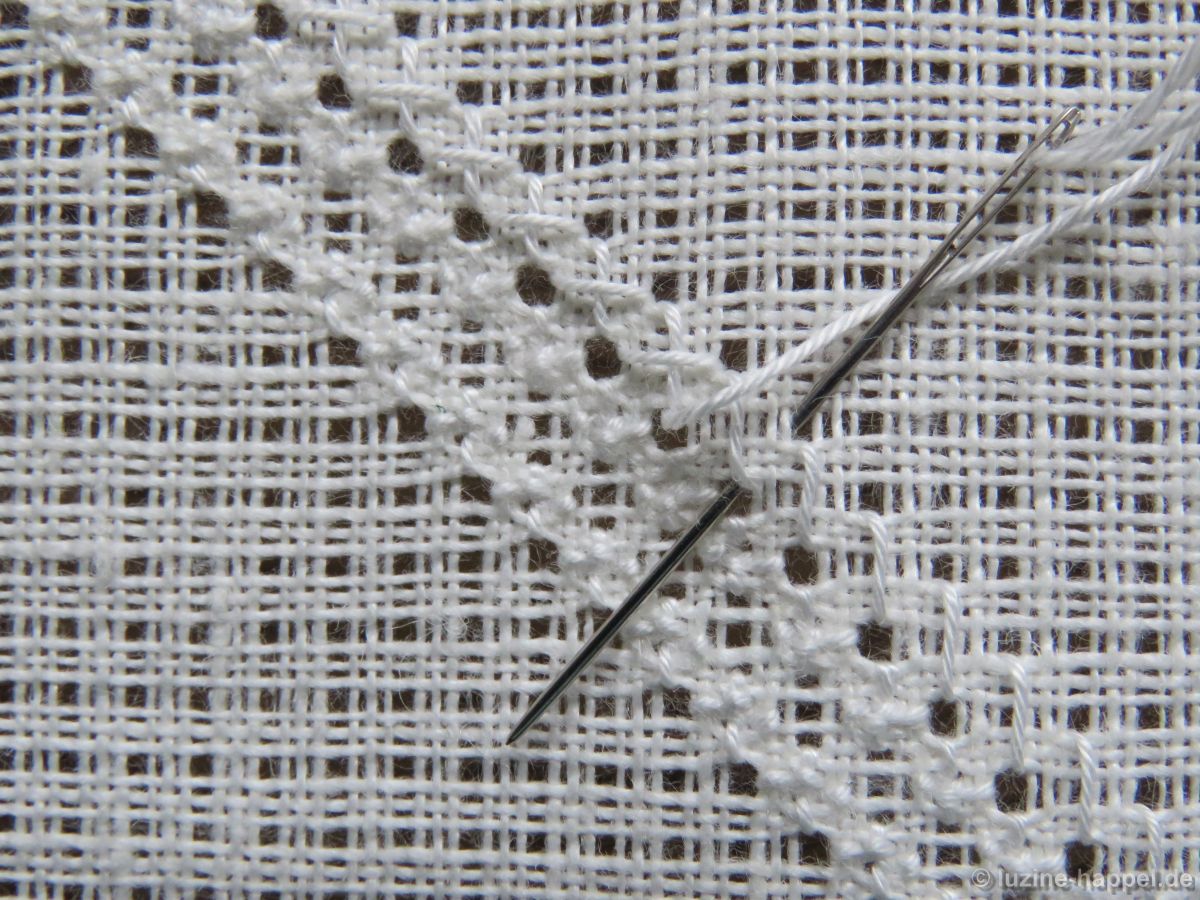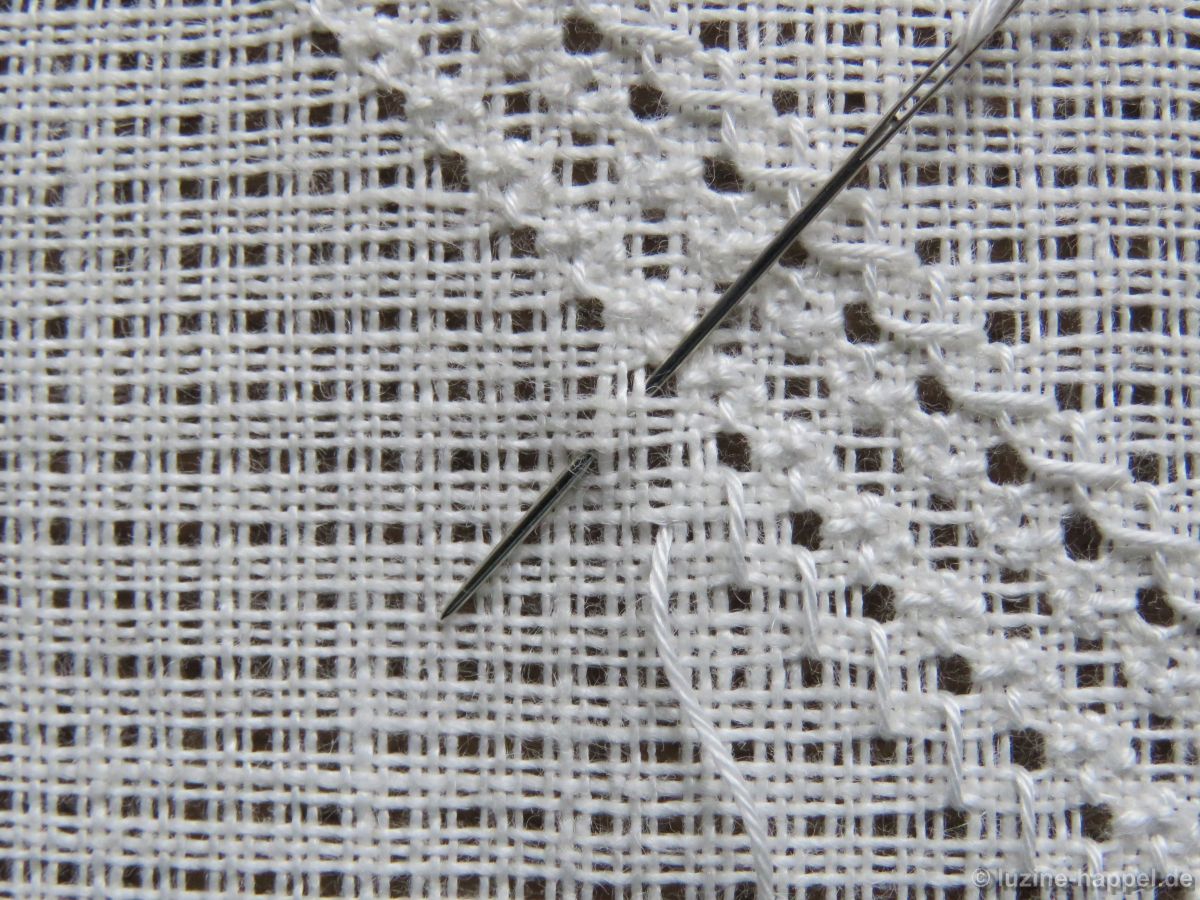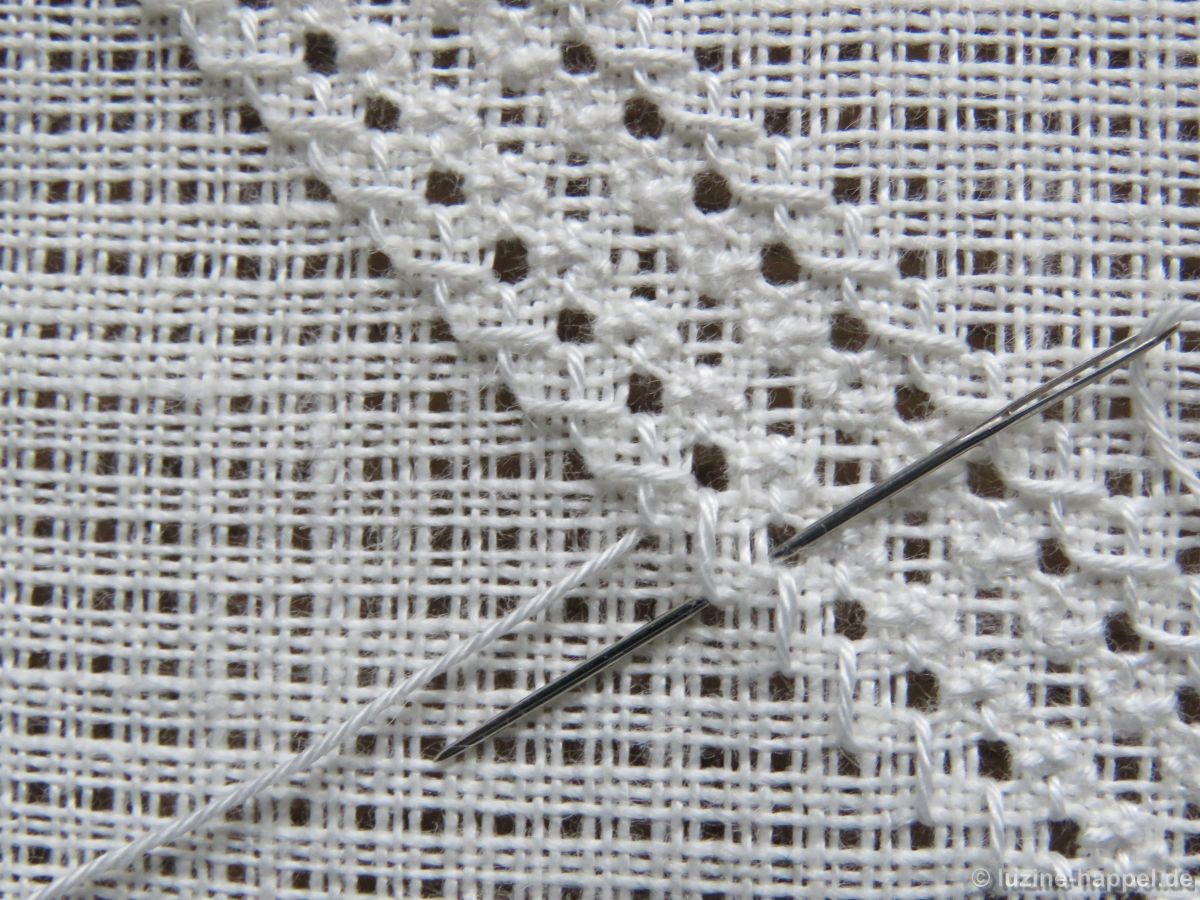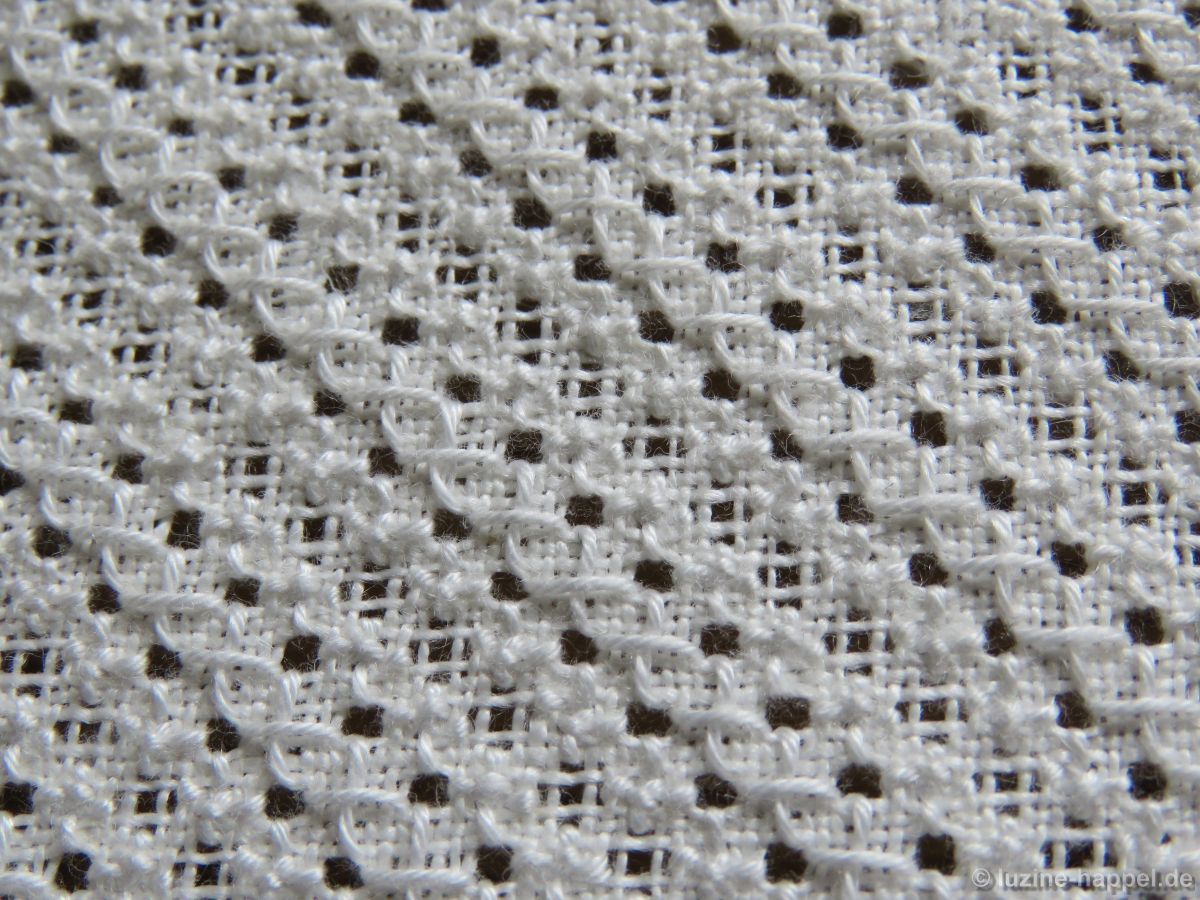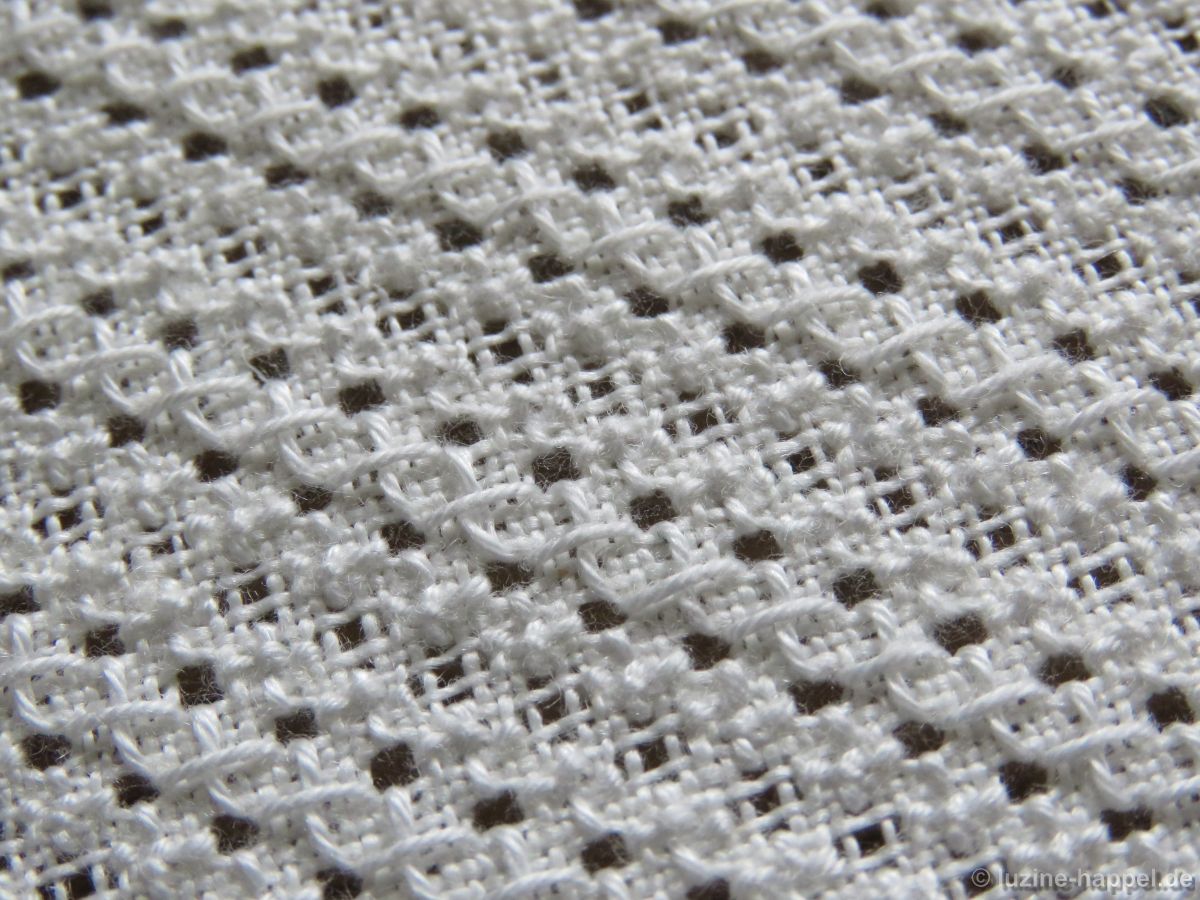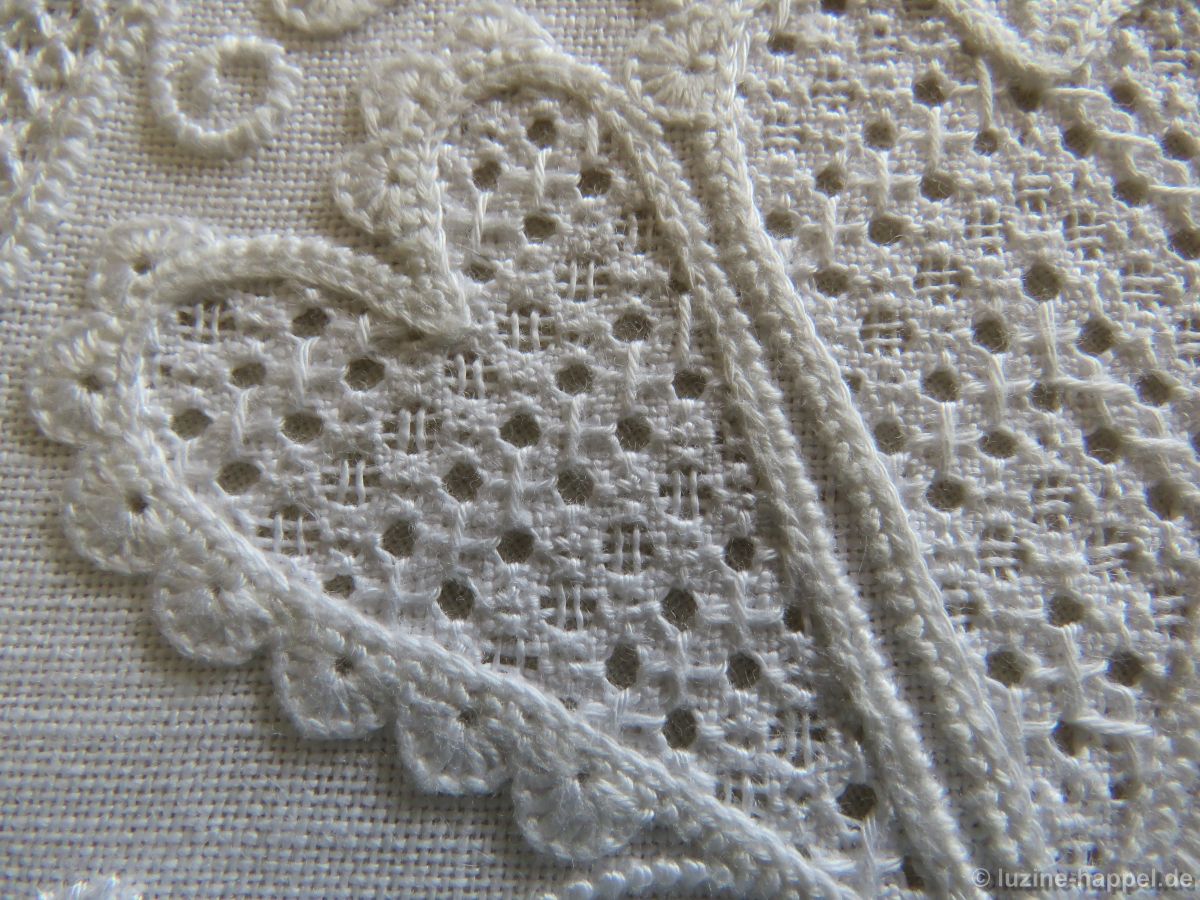
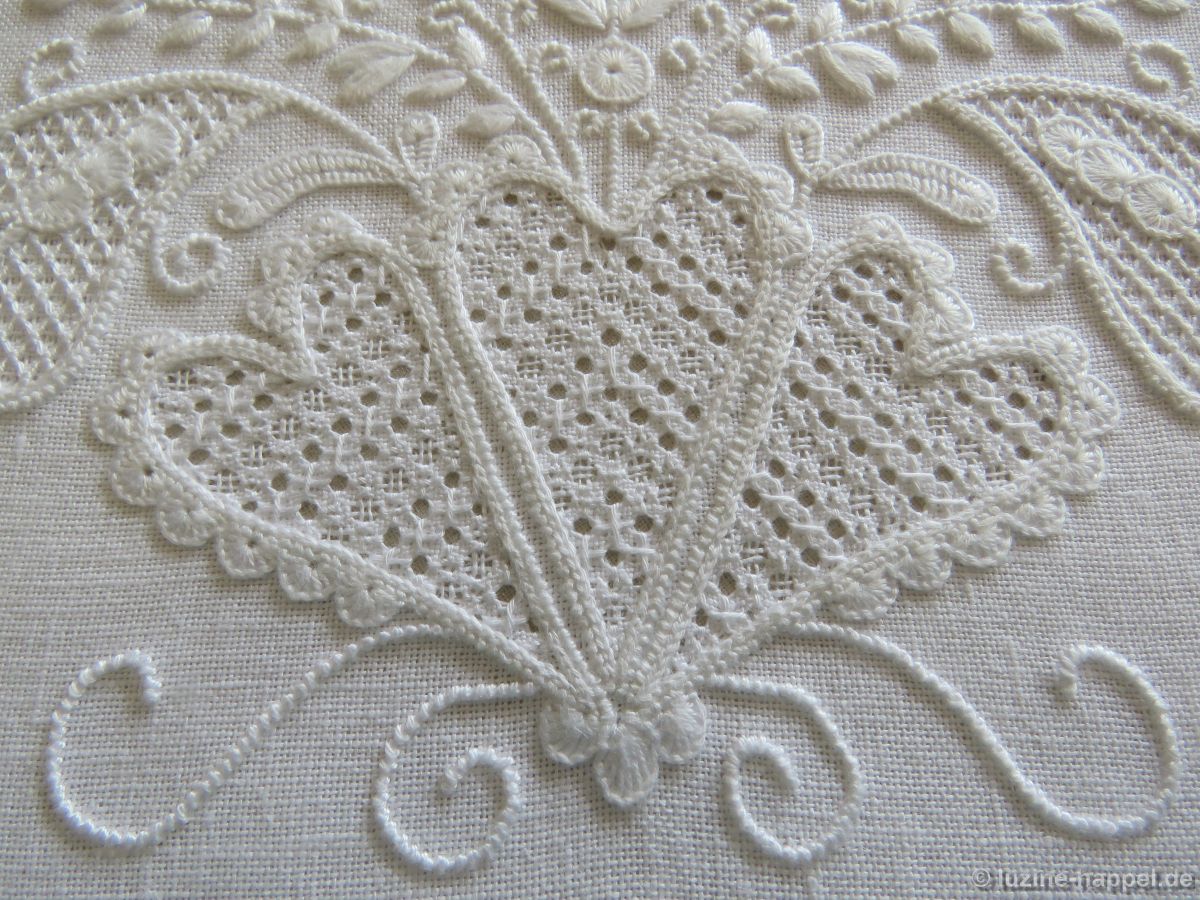
Filling Pattern No. 573

category: Limet-Filling pattern
linen used: 13.5/cm thread-count
threads used: coton à broder No. 20
stitches used: bars of 6 Satin stitches over 1 square in the width and Four-Sided stitches
center = intersection of withdrawn-thread lines (in other shapes or motifs: longitudinal axis = withdrawn-thread line)
one pattern segment = 12 fabric threads

The filling pattern shown here is a practice exercise only.
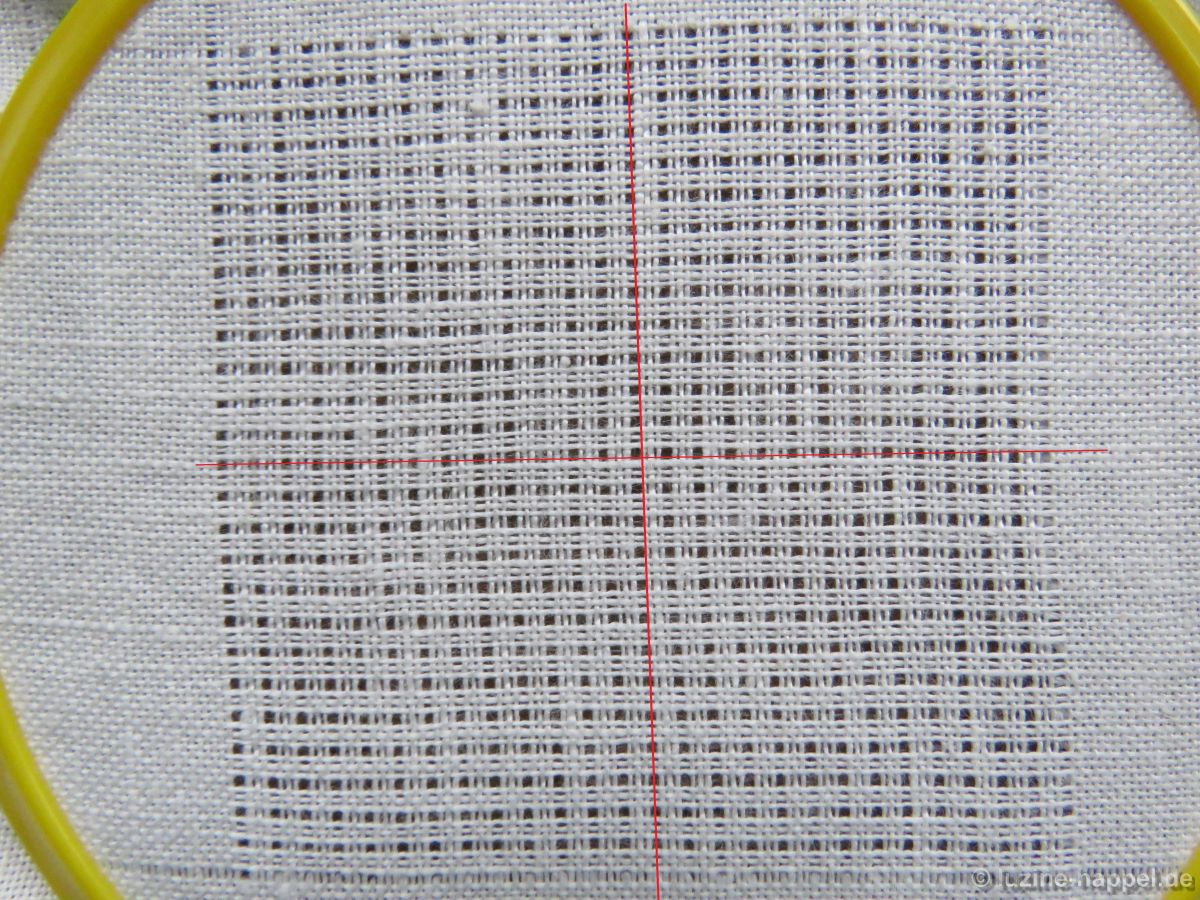
First, work a Limet grid by alternately withdrawing 1 and leaving 3 threads both horizontally and vertically.
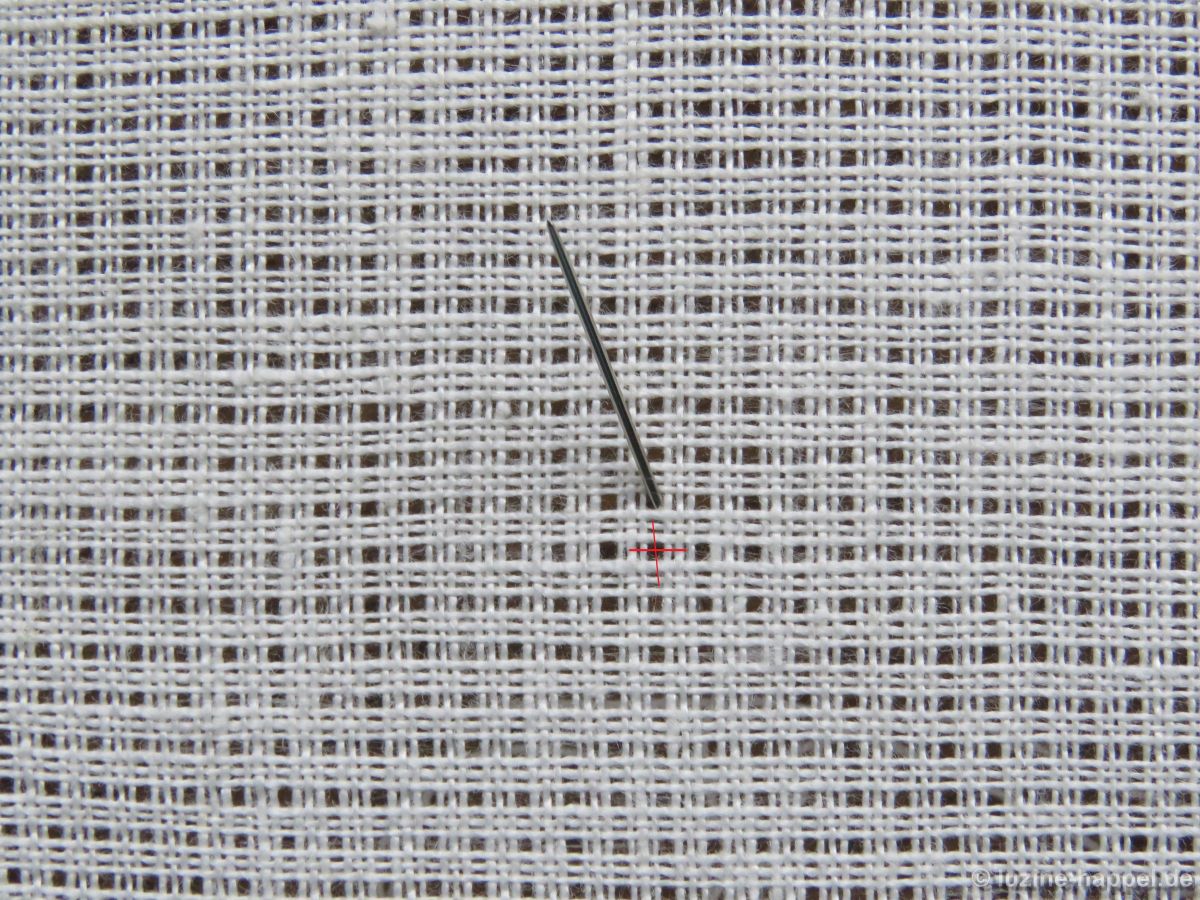
In the established Limet grid, work a grid of Satin stitches. Work, in a stair-step manner, Satin stitch bars over one square (3 threads) in the width and over 2 squares (6 stitches) in the length. In the center remains a square of 2 X 2 squares.
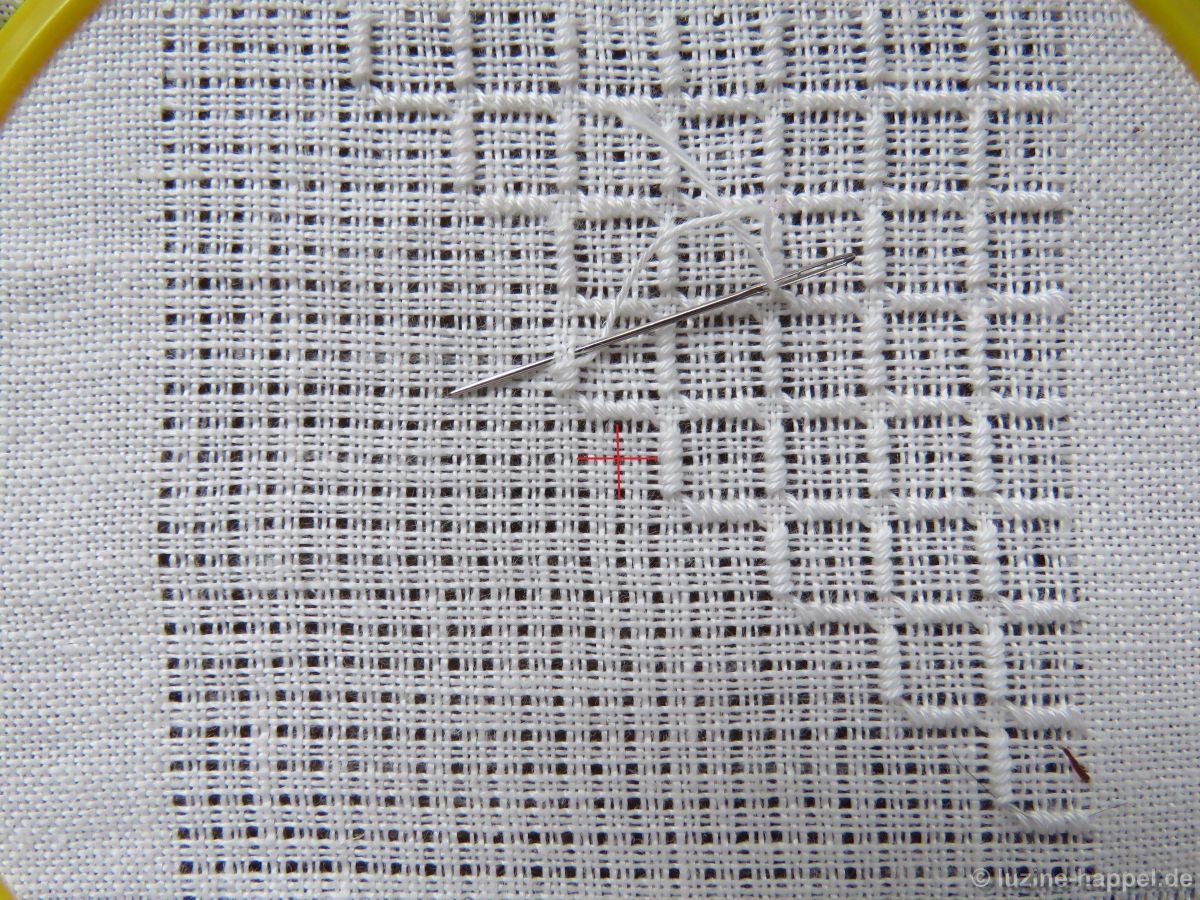
Work the Satin stitch grid over the entire shape.
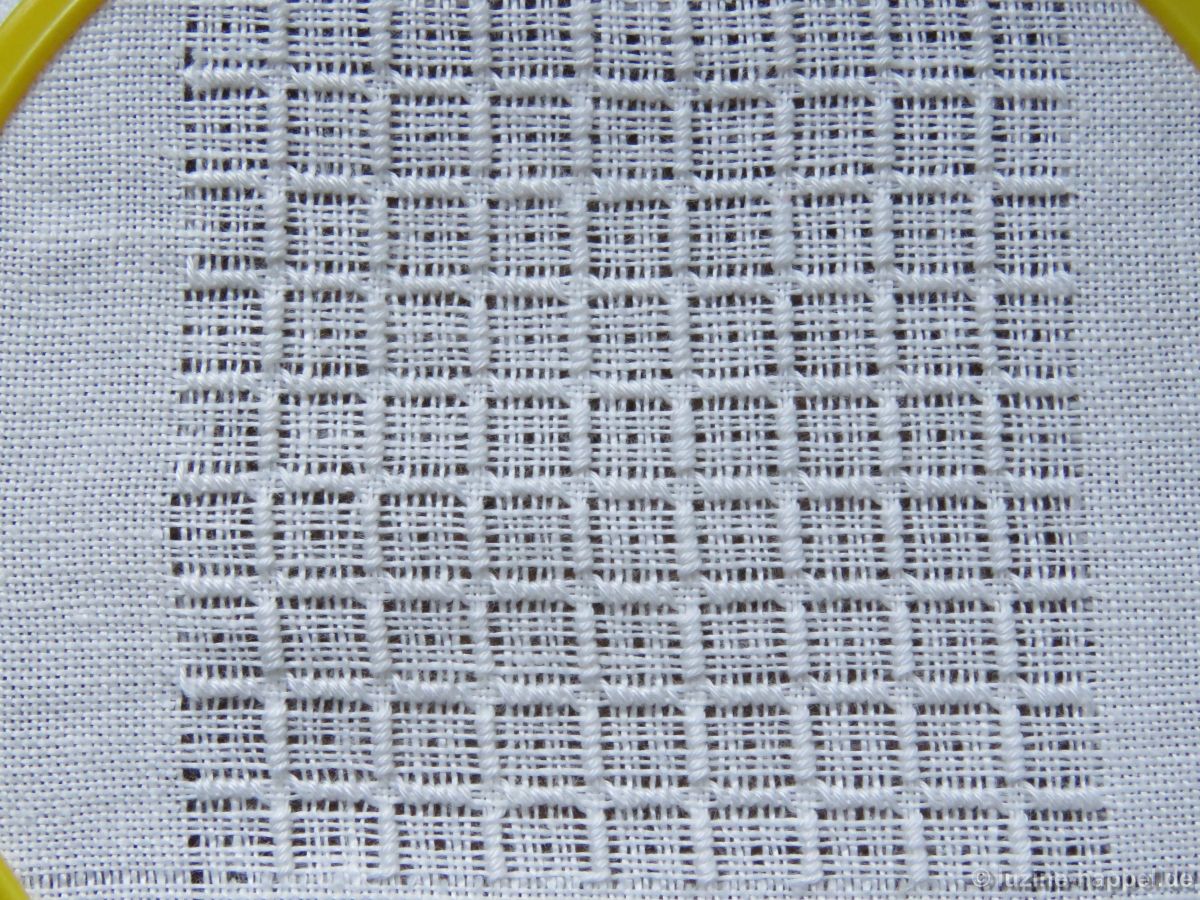
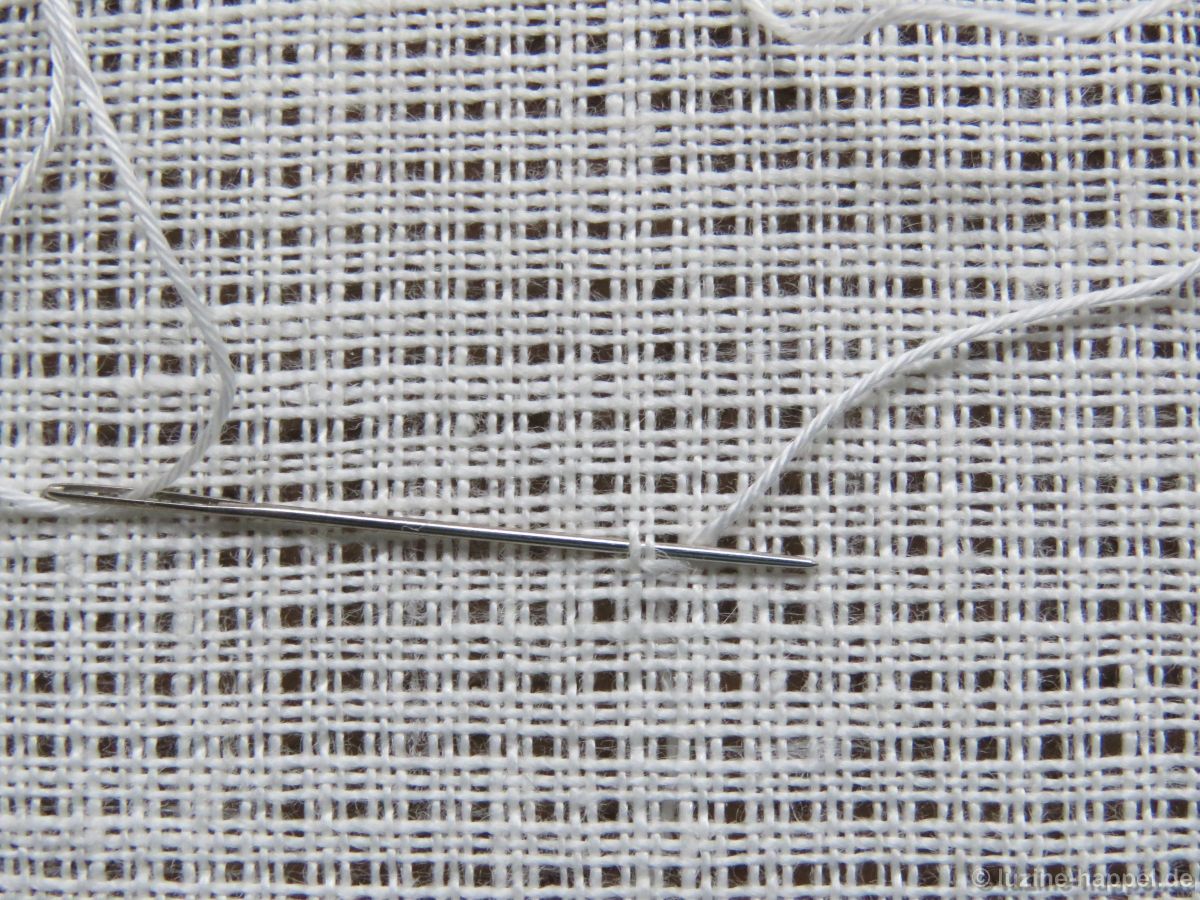
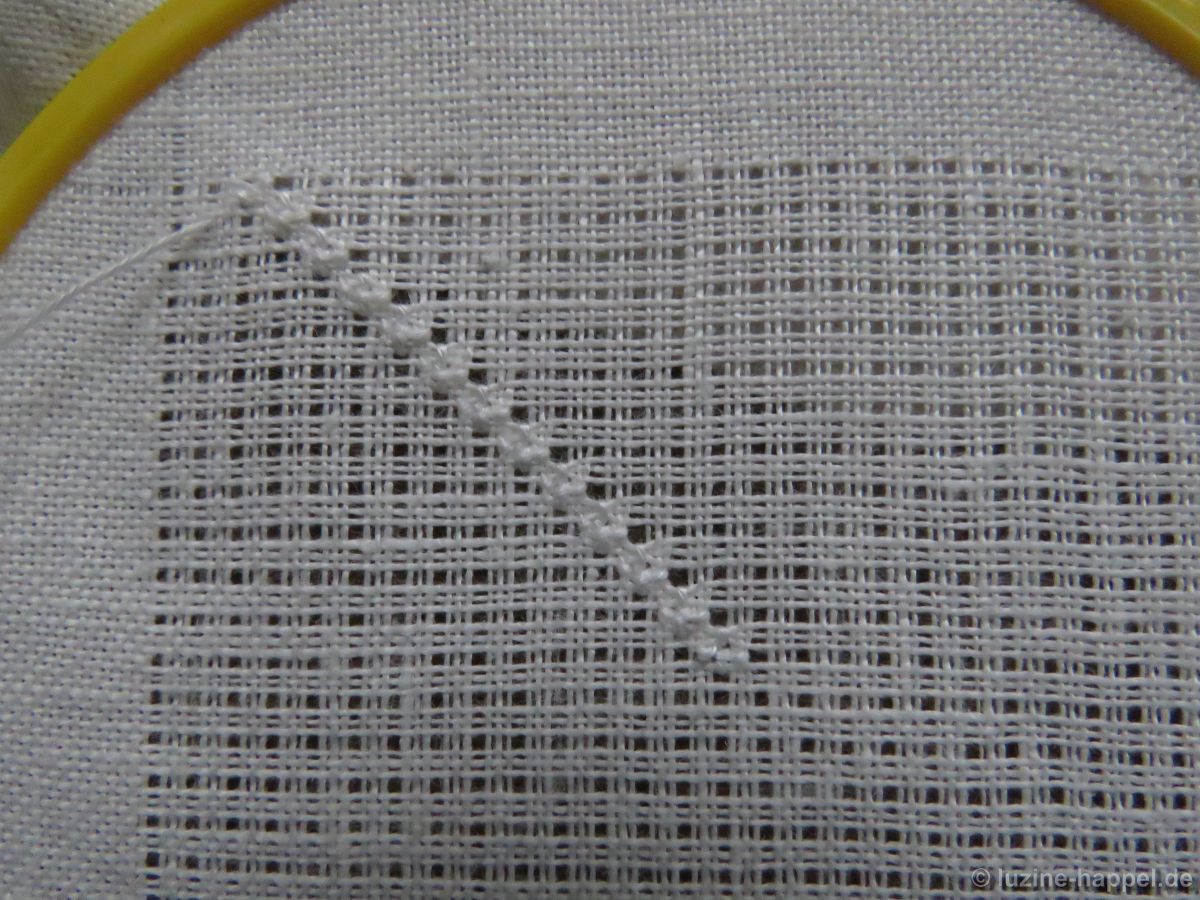
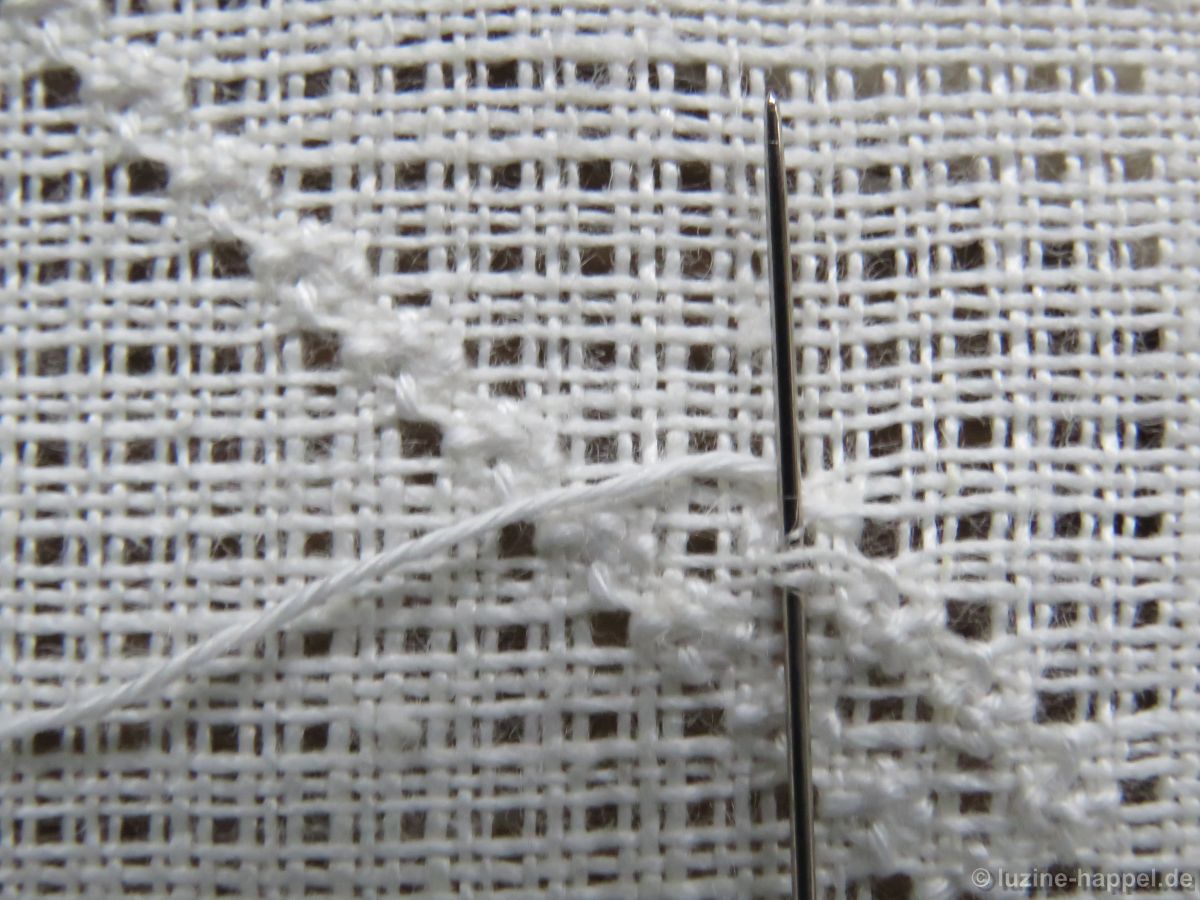
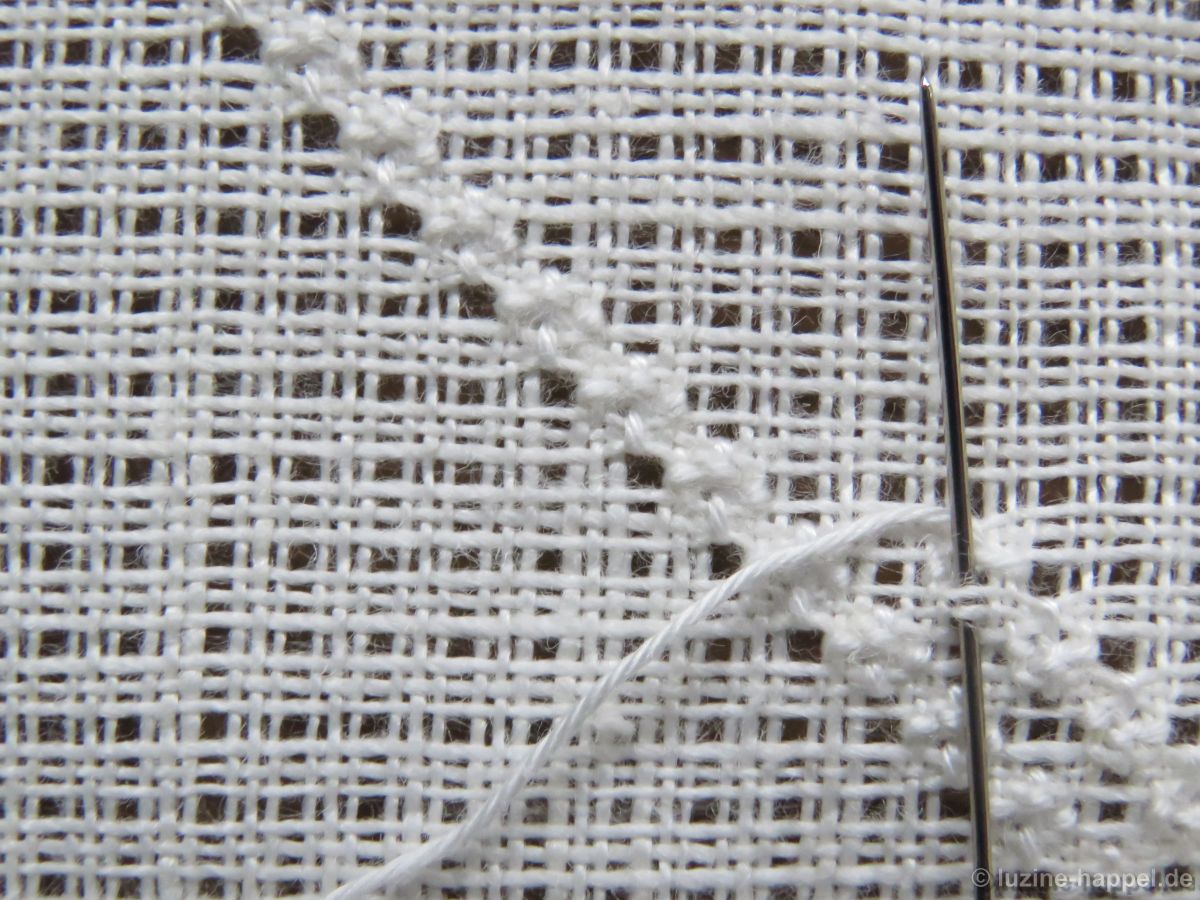
Then, from the back of the fabric, work Four-Sided stitches in the remaining squares. Each side stitch bundles 6 fabric threads.

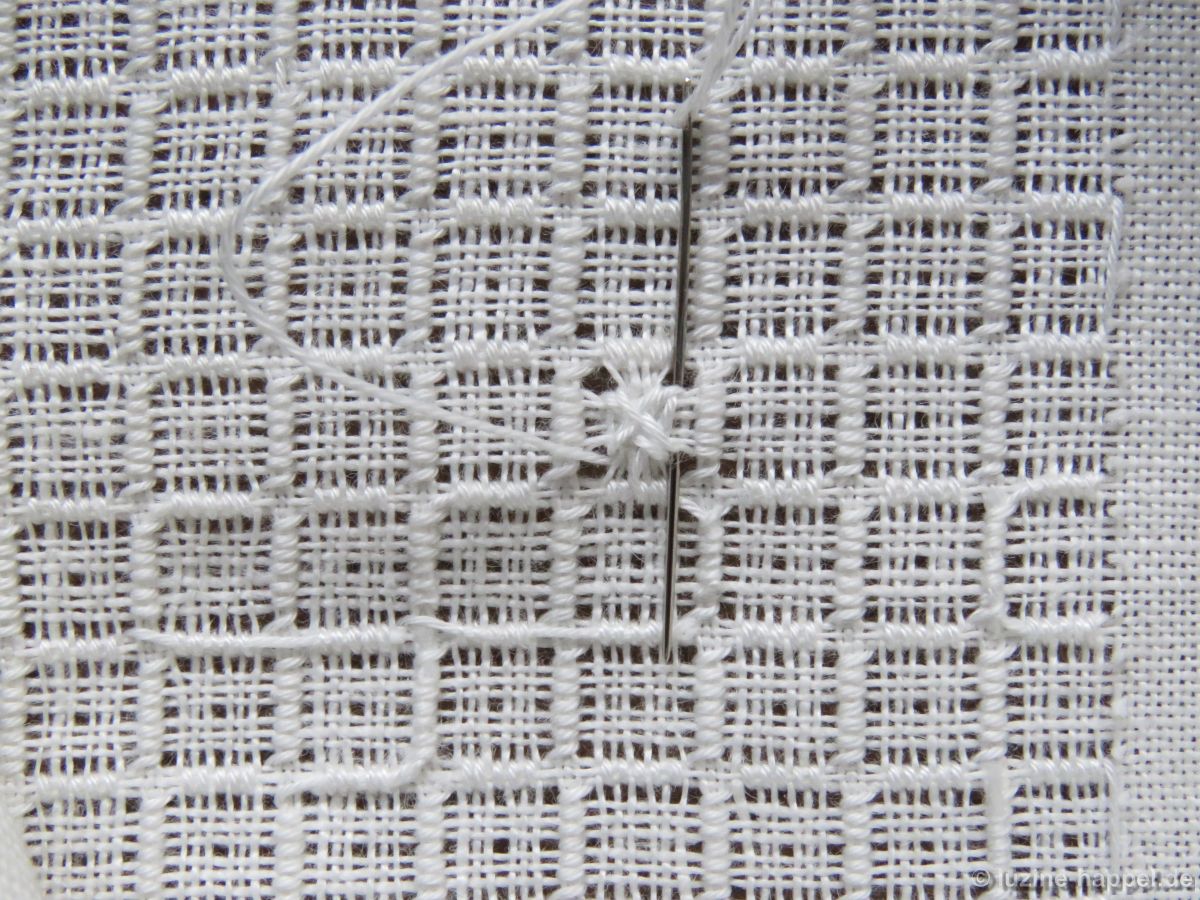
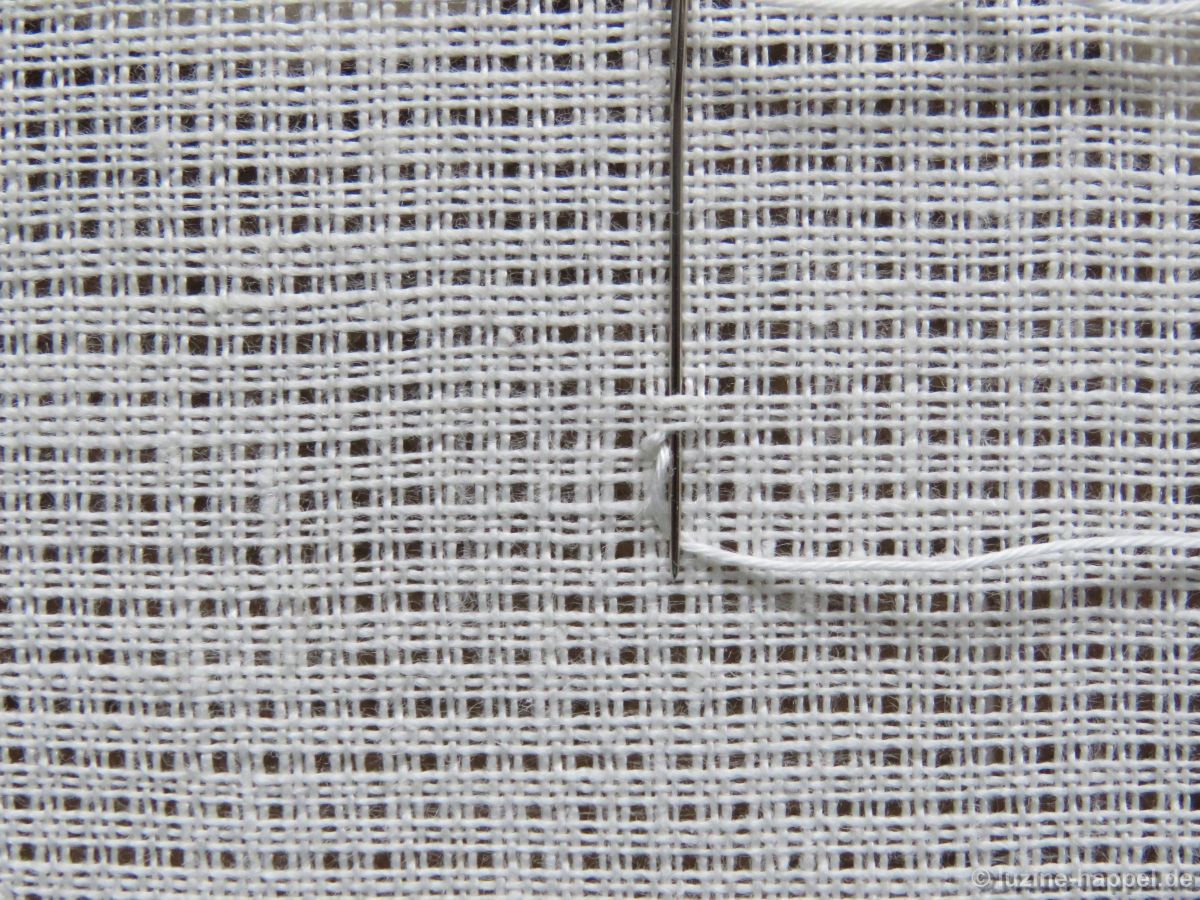
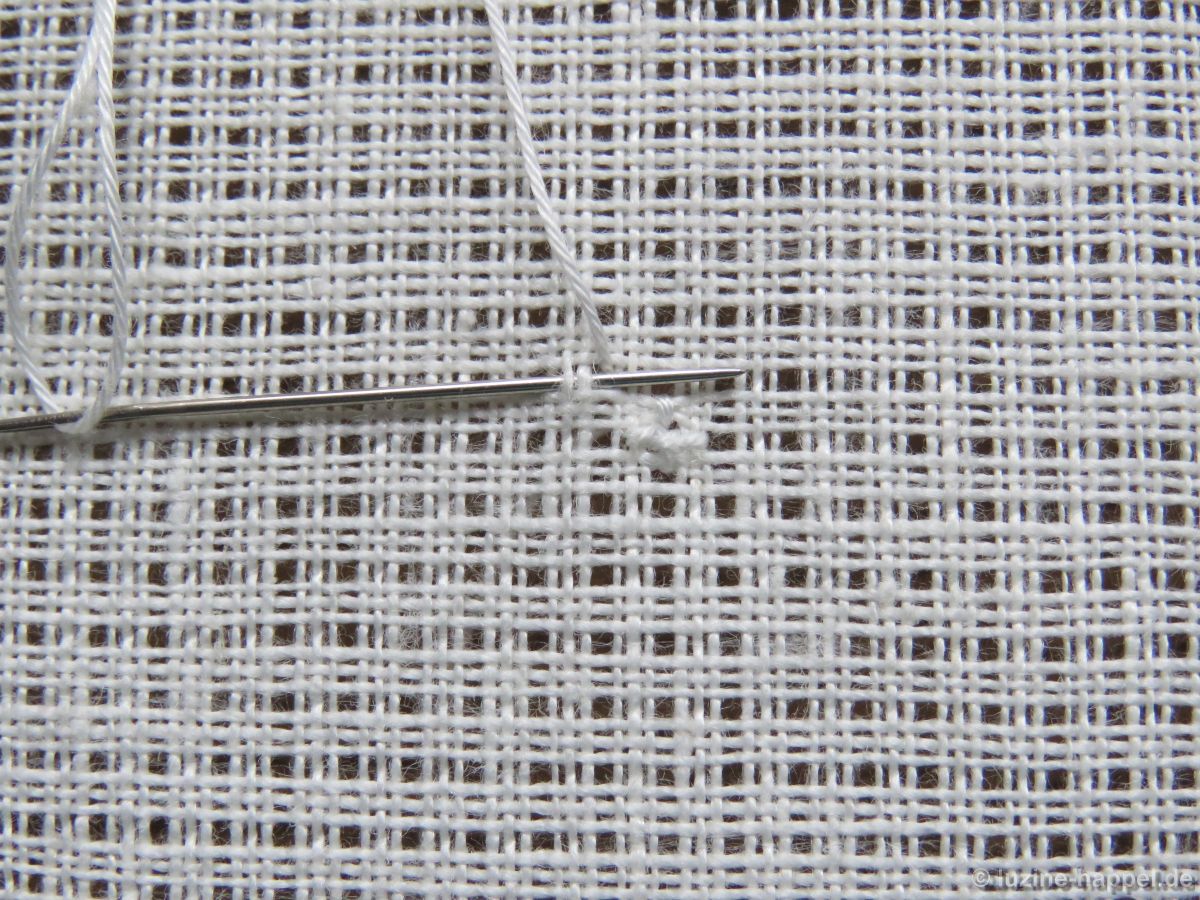
Secure the working thread very well and bring it up in the middle of a bottom edge of a 2 X 2 square.
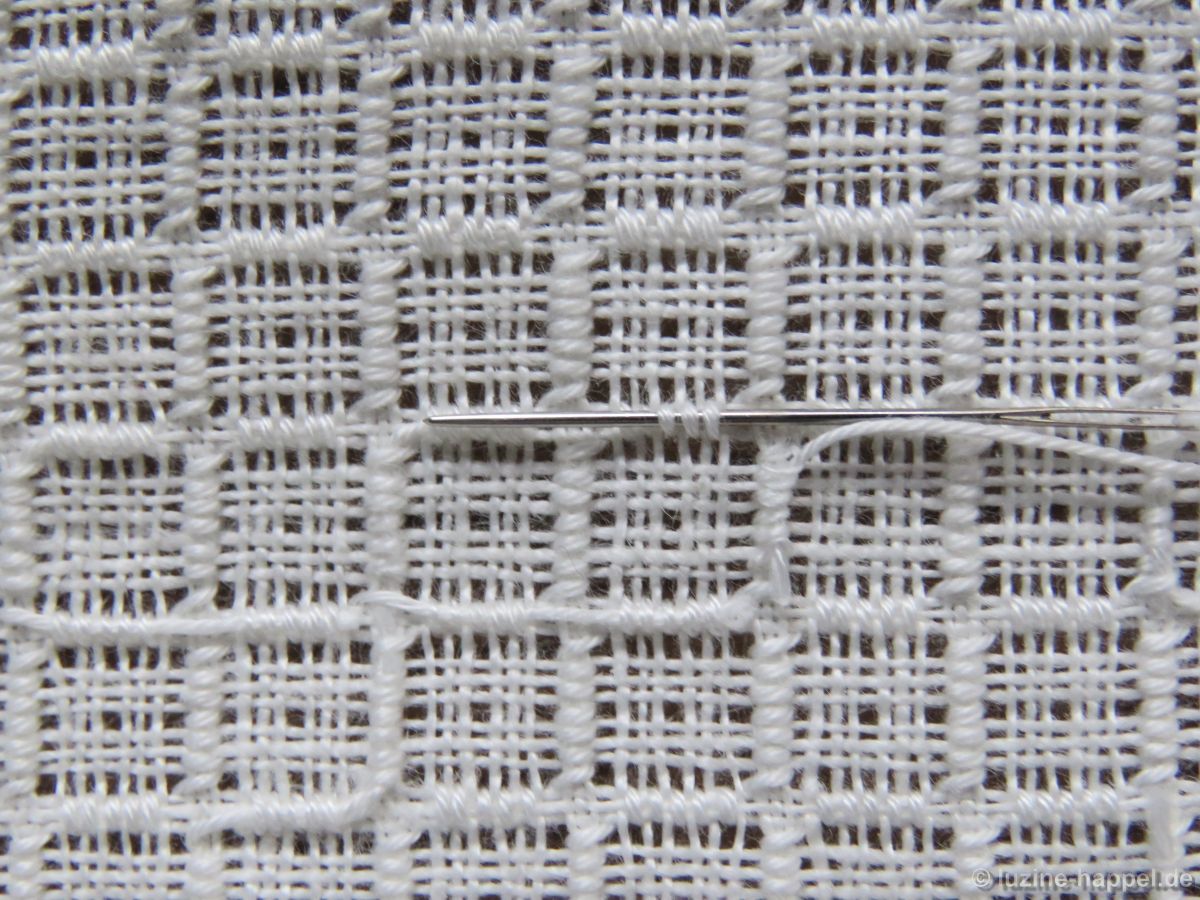
It is important to choose the opposite side for starting the Four-Sided stitch to get the corner holes clean and open and the stitch centered.

*Start on the top of the square, inserting the needle in the top right hole and bringing it up in the top left hole.
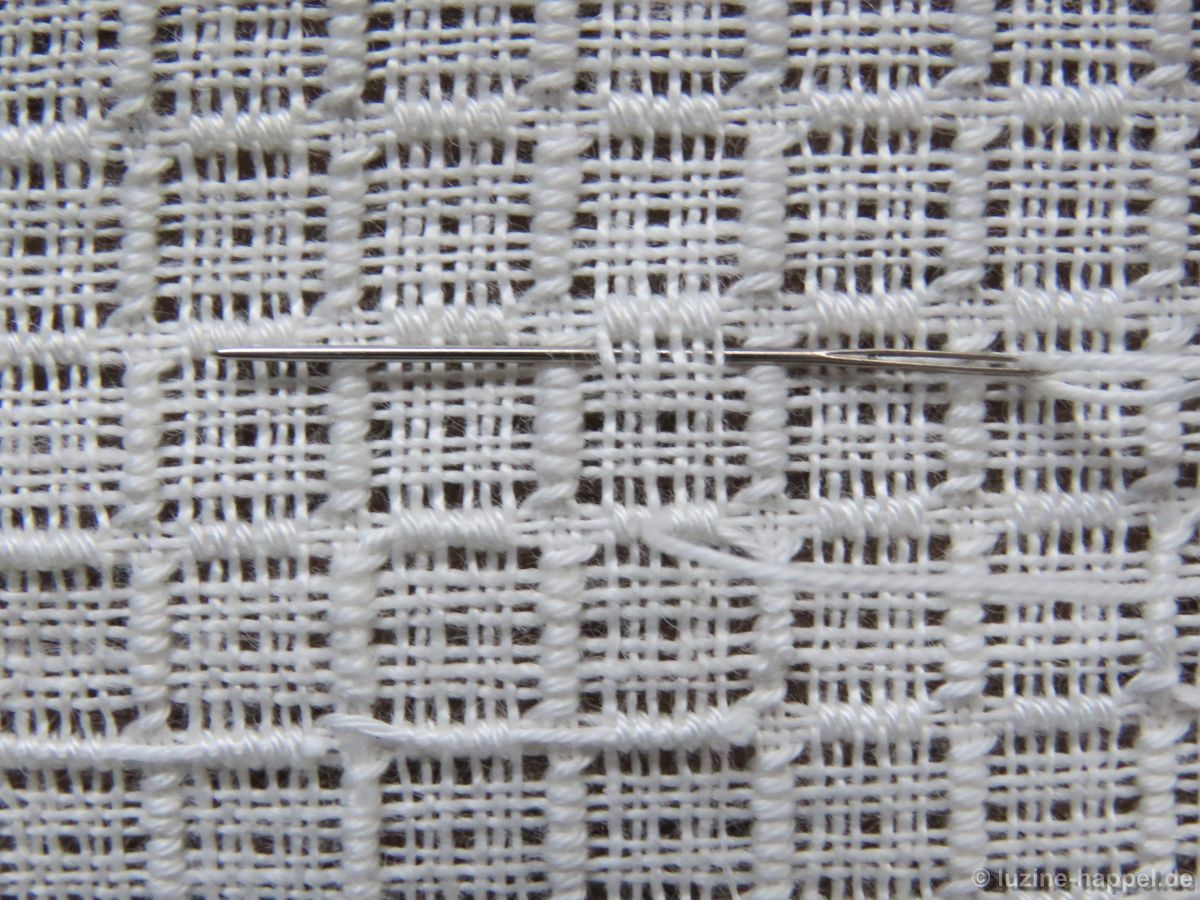
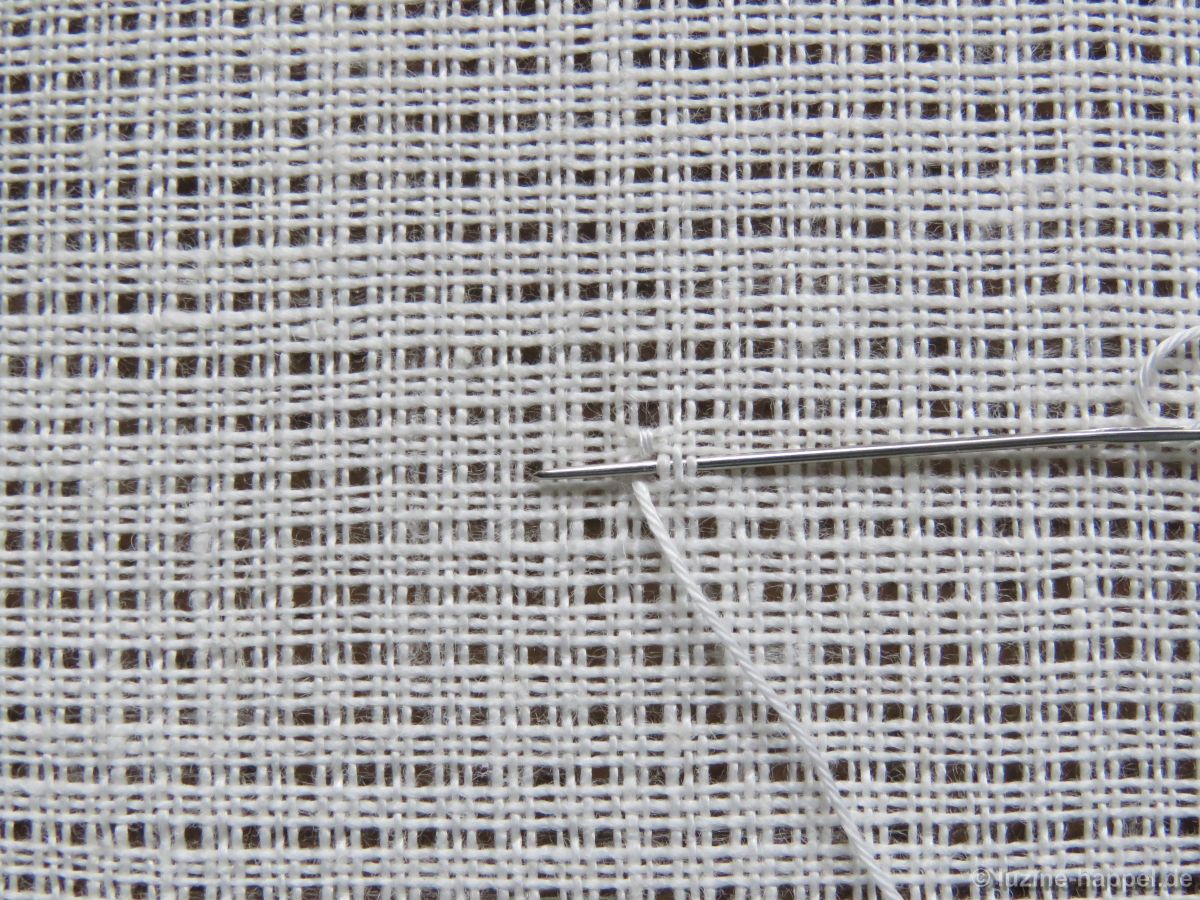
Travel to the bottom, insert the needle in the bottom right hole and bring it up in the bottom left hole. With this stitch the thread can be tightened a little bit more to pull together the threads of the center square.
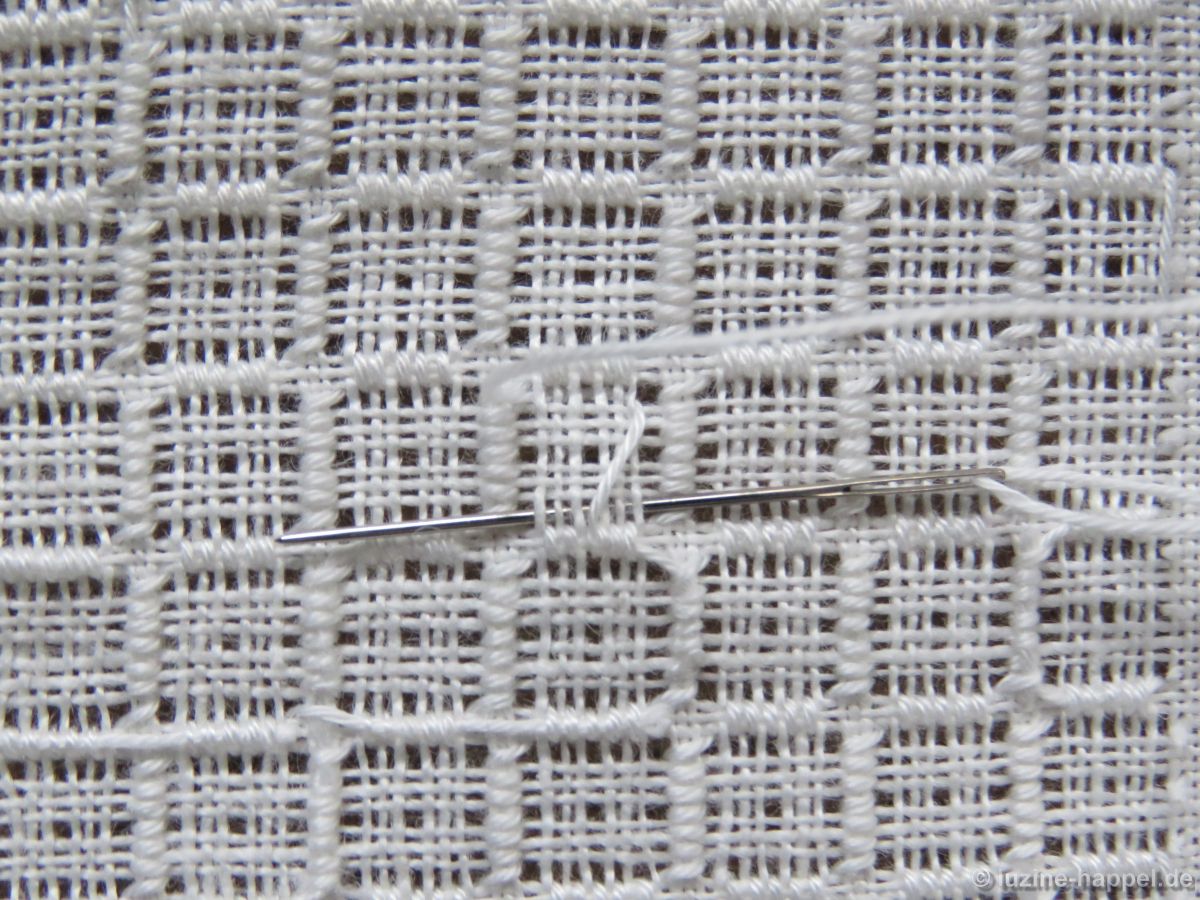
Insert the needle in the top right hole again, but bring it up in the bottom right hole.
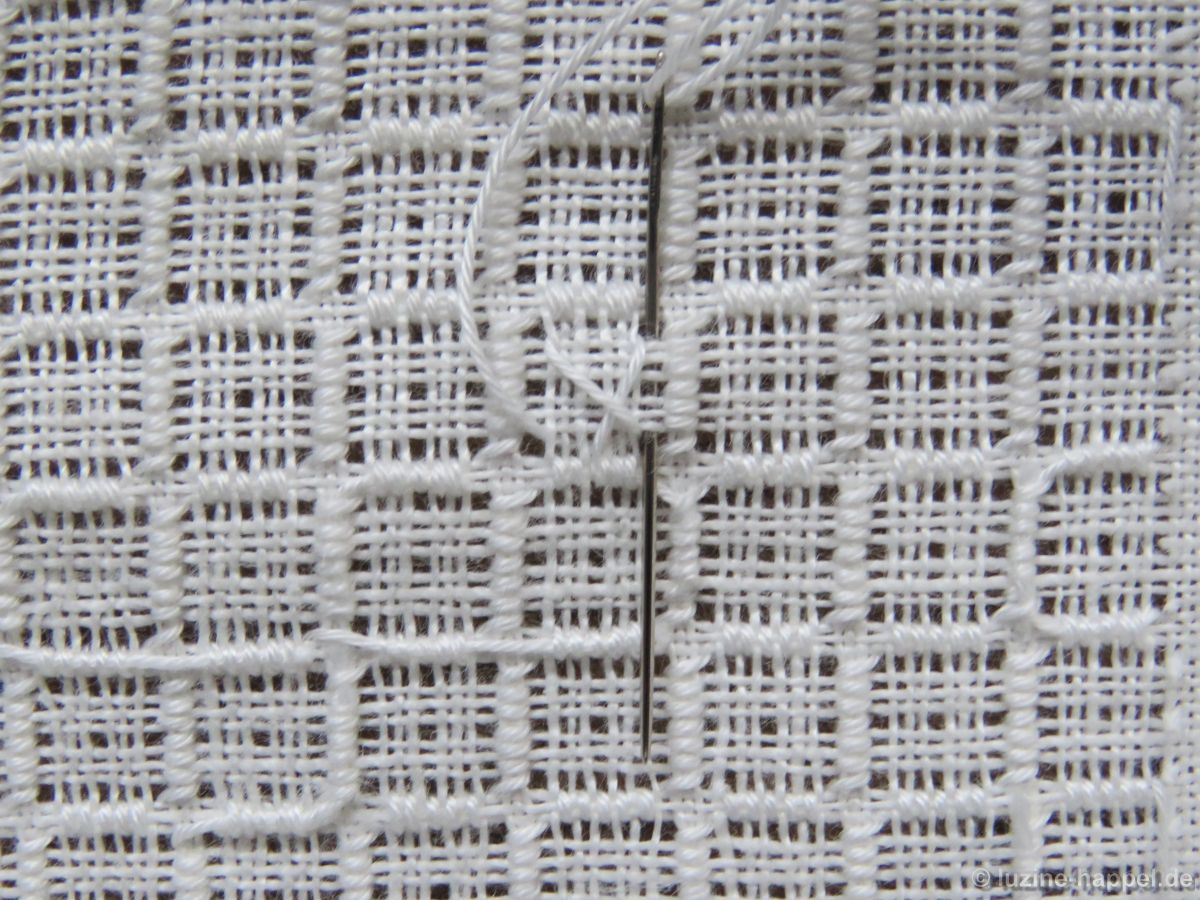
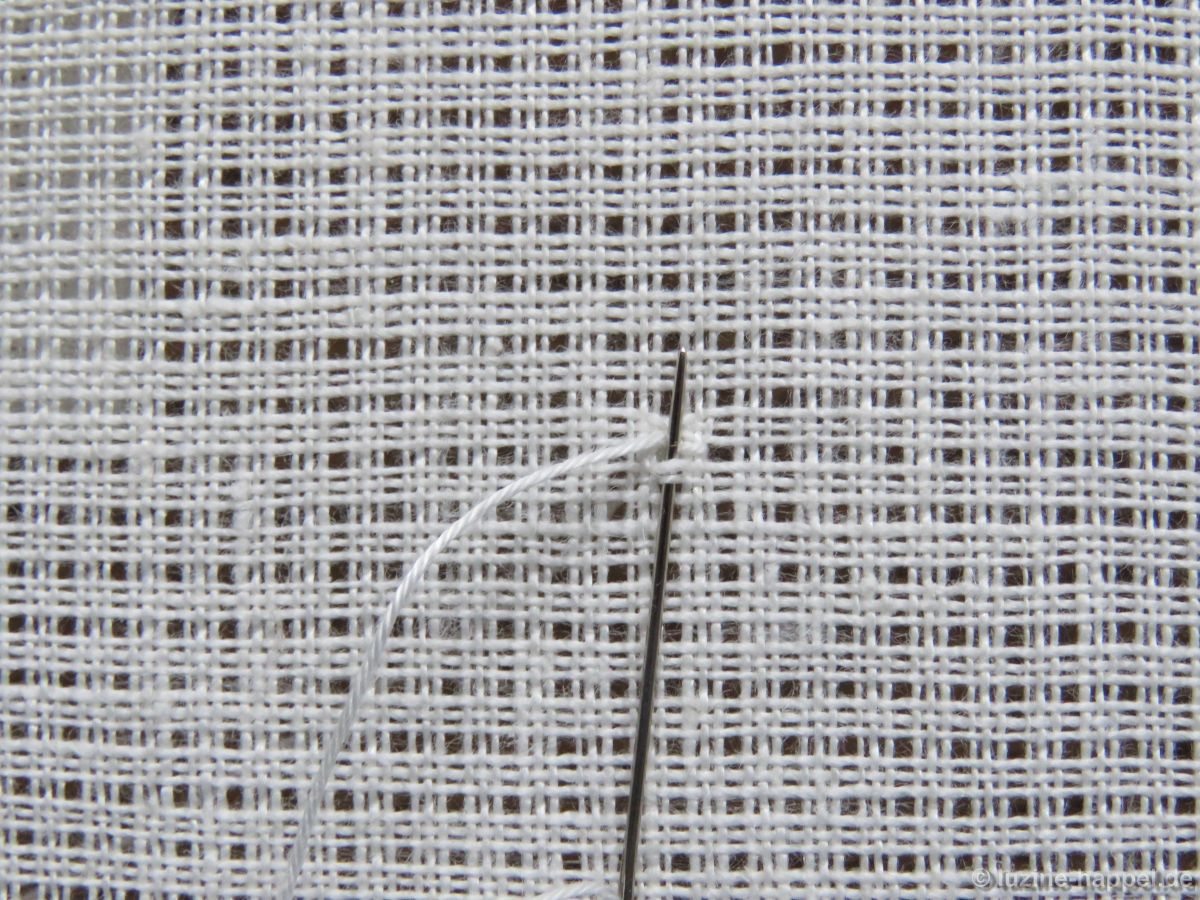
Insert the needle in the top left hole and bring it up in the bottom left hole.* In this way and always tightening the working thread, a prominent center is established on the front.

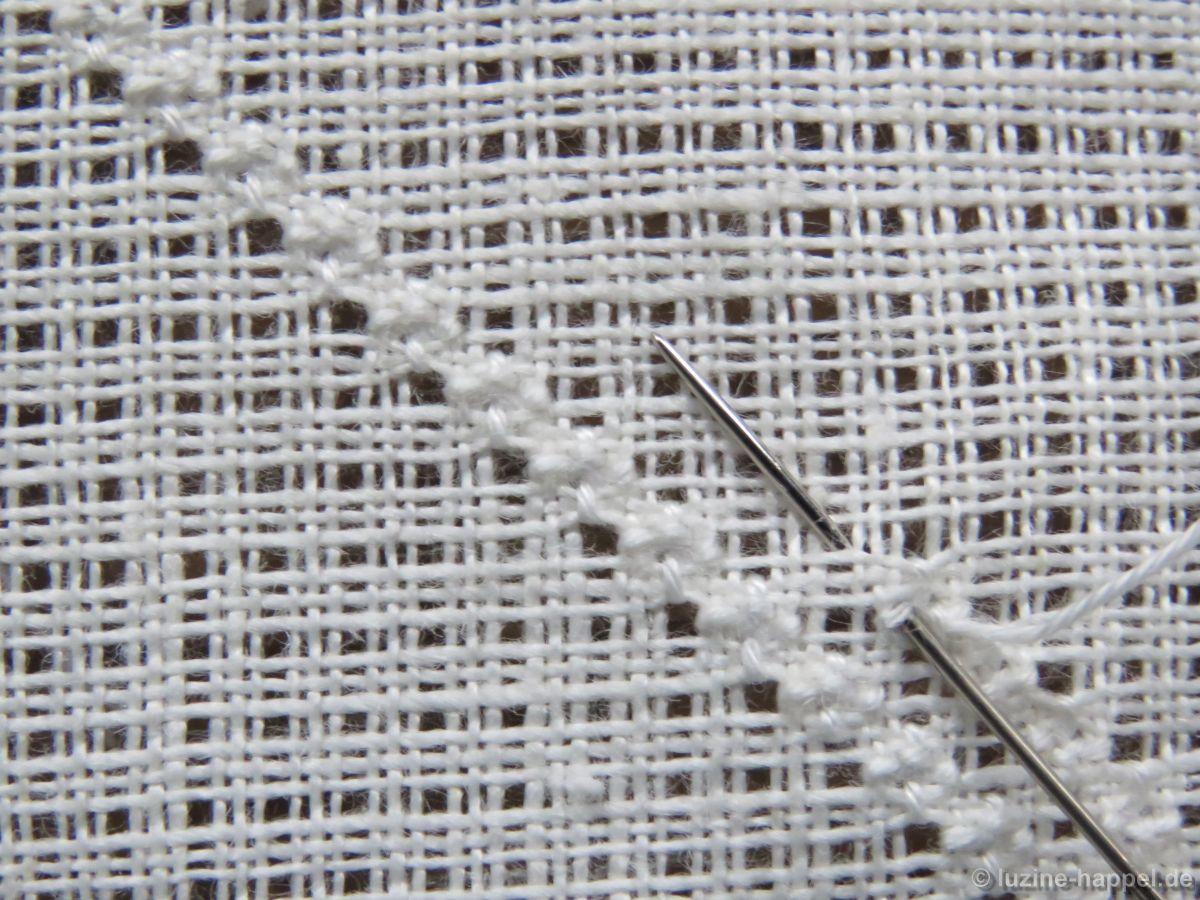
But this stitch will turn out much more prominent, working the Four-Sided stitch twice. This also enables one to better tighten the working thread and so to establish a more even structure of the complete pattern. So repeat the four steps (*) once.
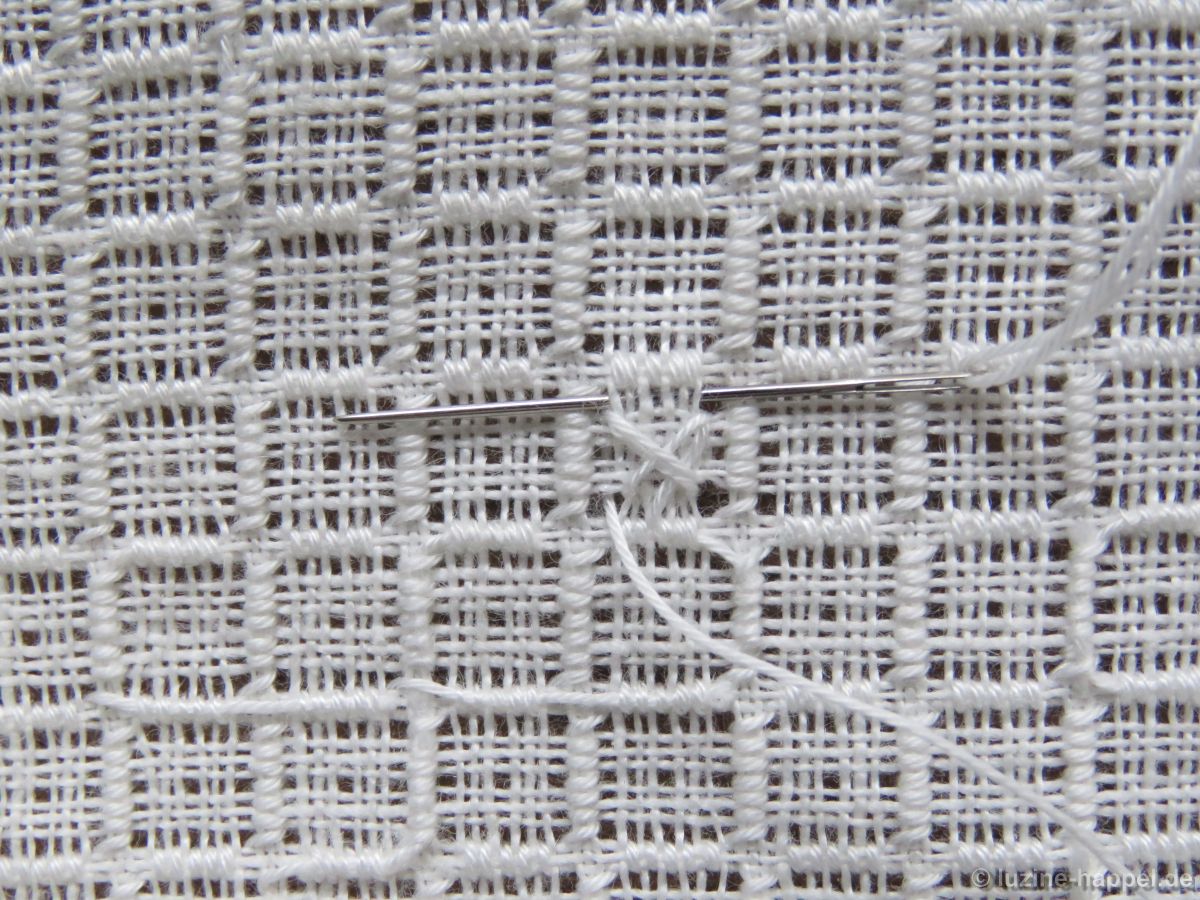
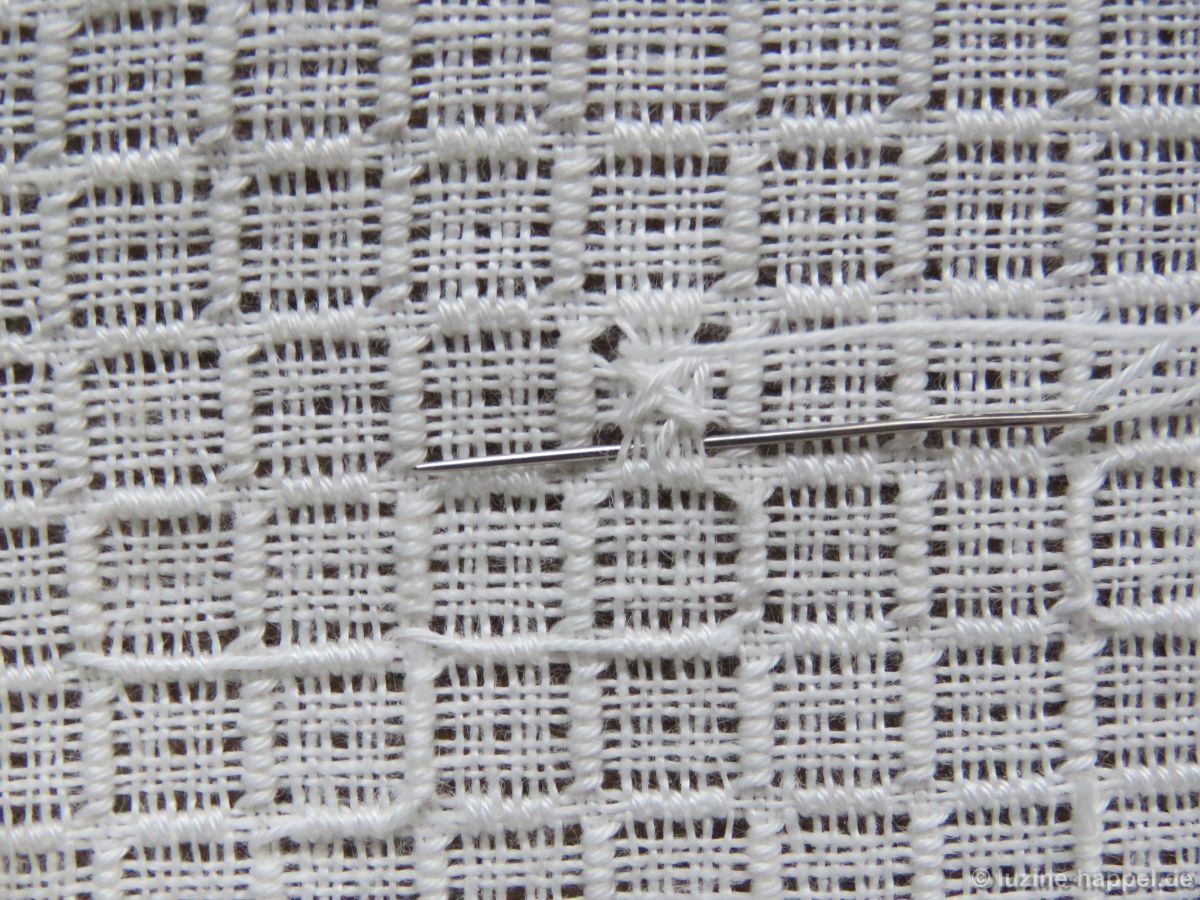
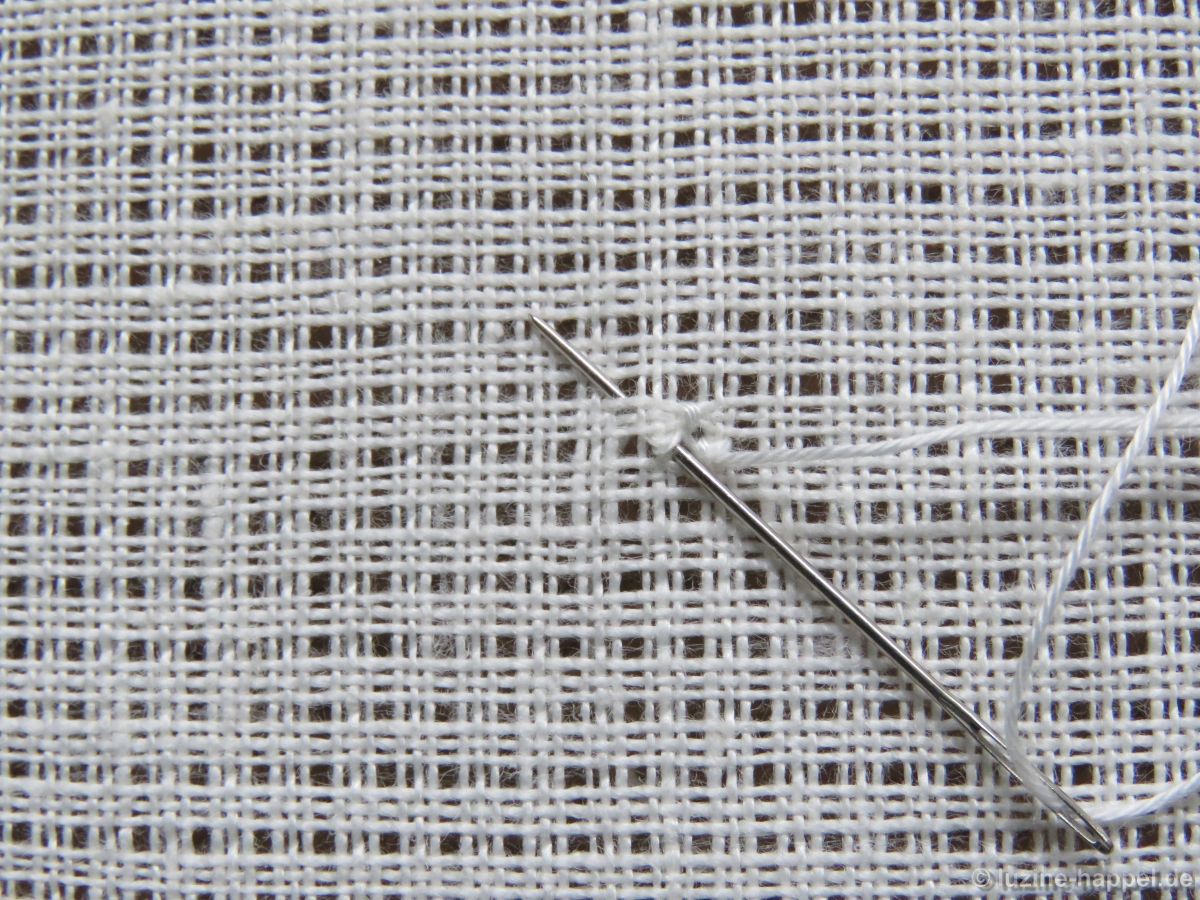
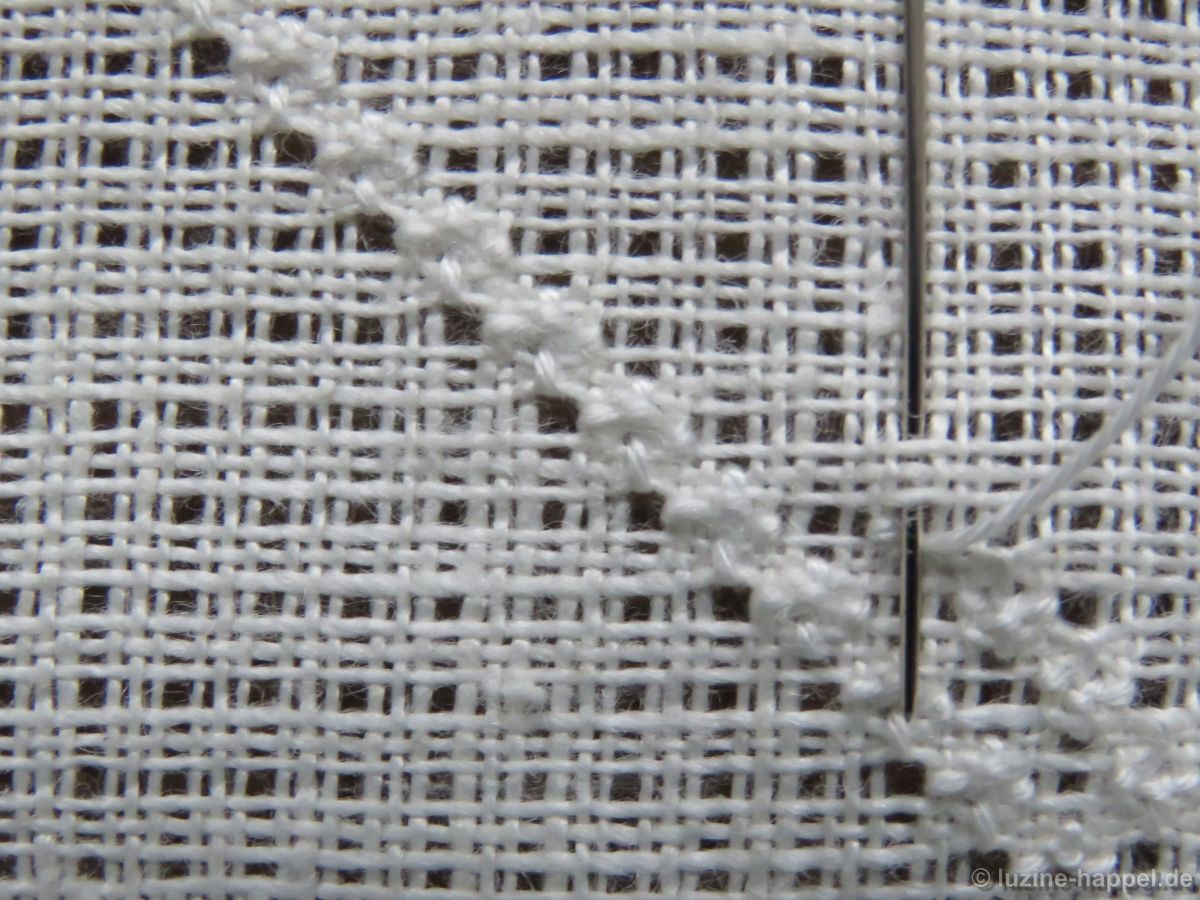
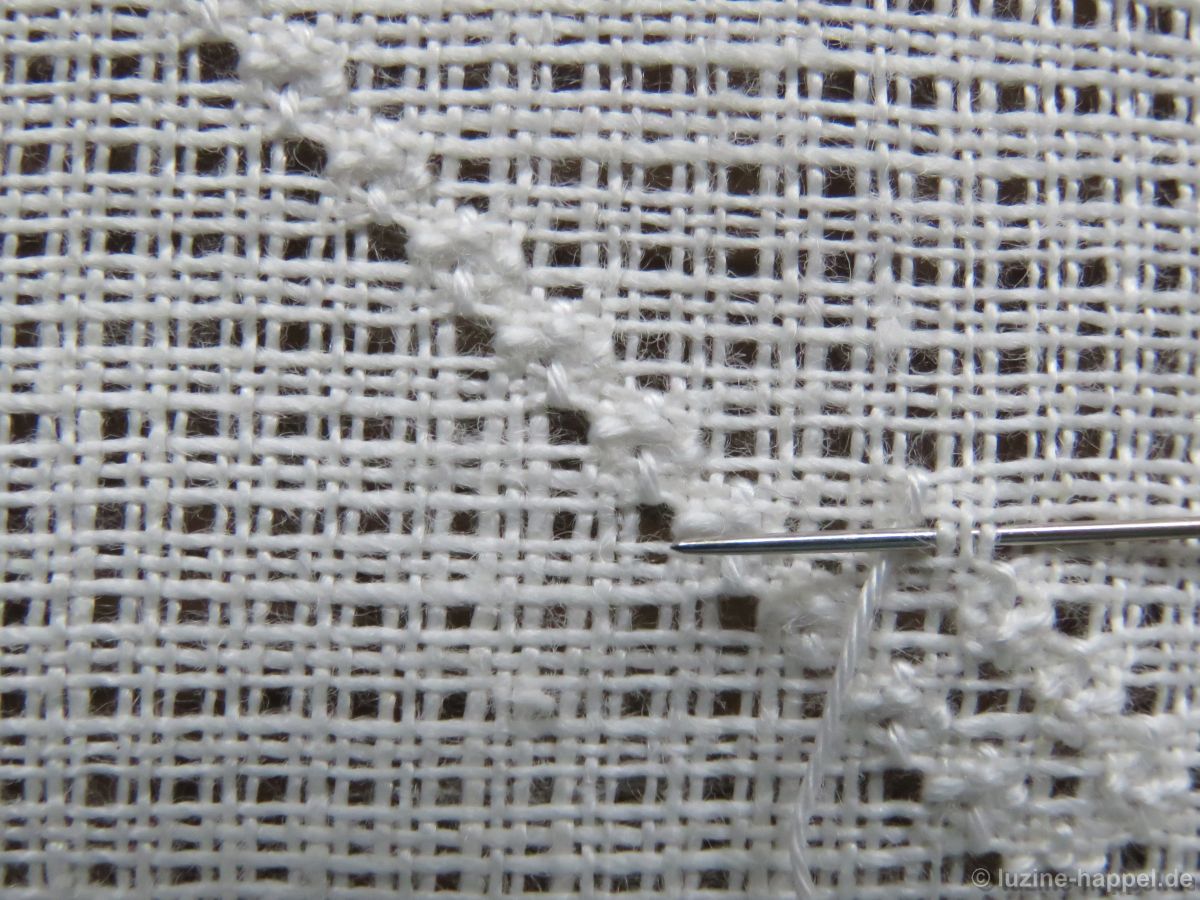
Then bring the working thread straight up to the next square.

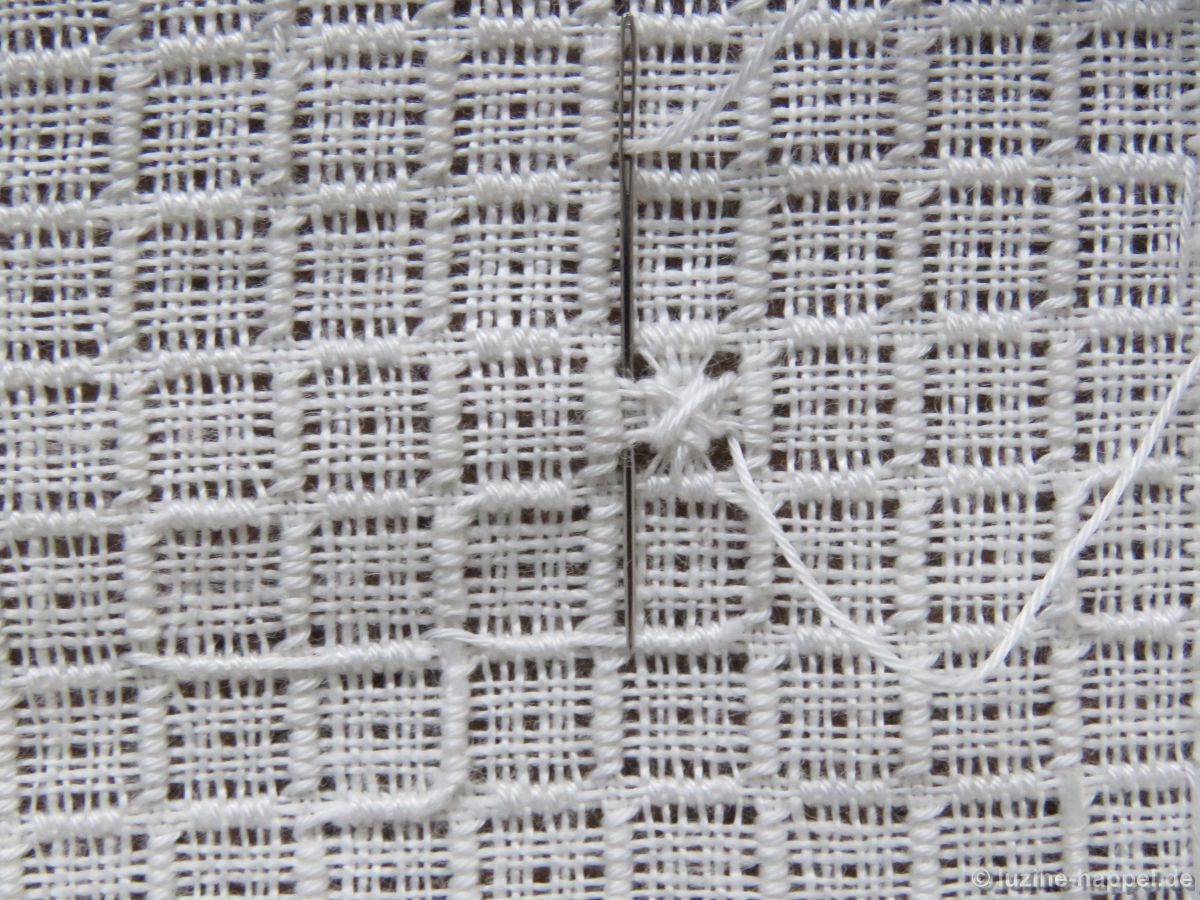
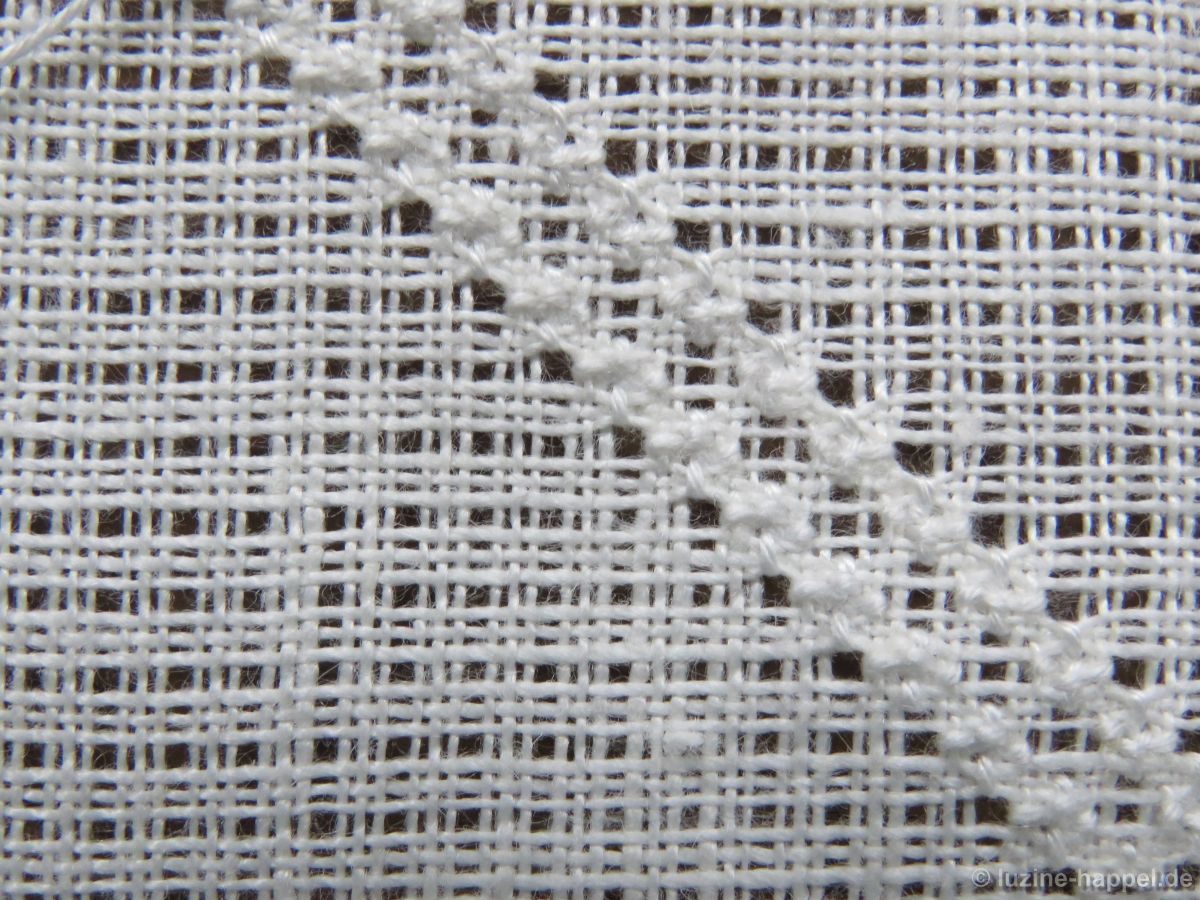
From the front it looks like this:
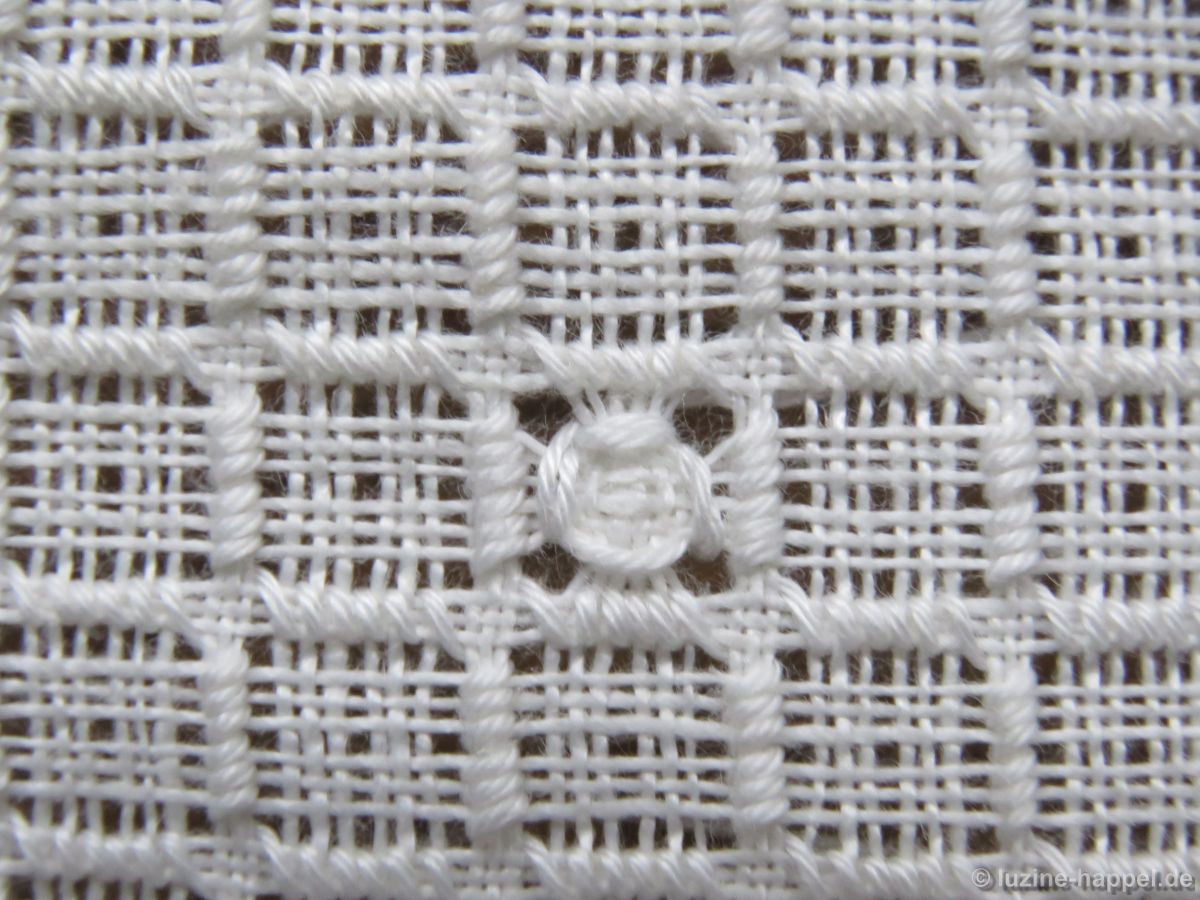
Work one Four-Sided stitch two times in the established way in each section center of the Satin stitch grid.

After shrinking in the laundry the bundled fabric will look even more prominent.

Schwalm Whitework in the Netherlands?

An embroiderer from the Netherlands who started learning Schwalm whitework a few years ago needs advice from time to time. She would like to embroider with like-minded people in her home country or attend courses. She lives in Rotterdam, but also accepts journeys if they are not too far.
Does anyone know of Schwalm whitework courses or embroidery circles that still accommodate interested embroiderers?

I would be grateful for feedback to my email address leuchtbergverlag@aol.com.

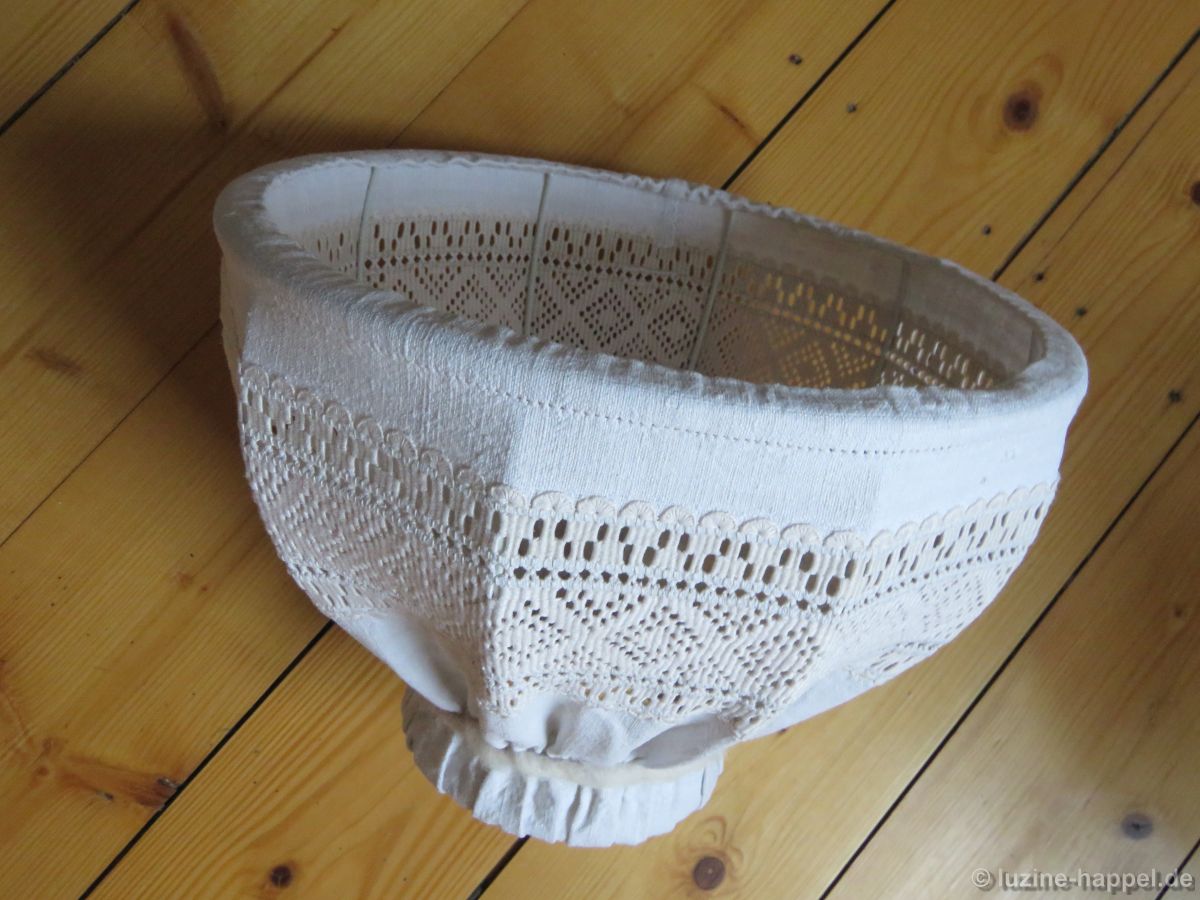
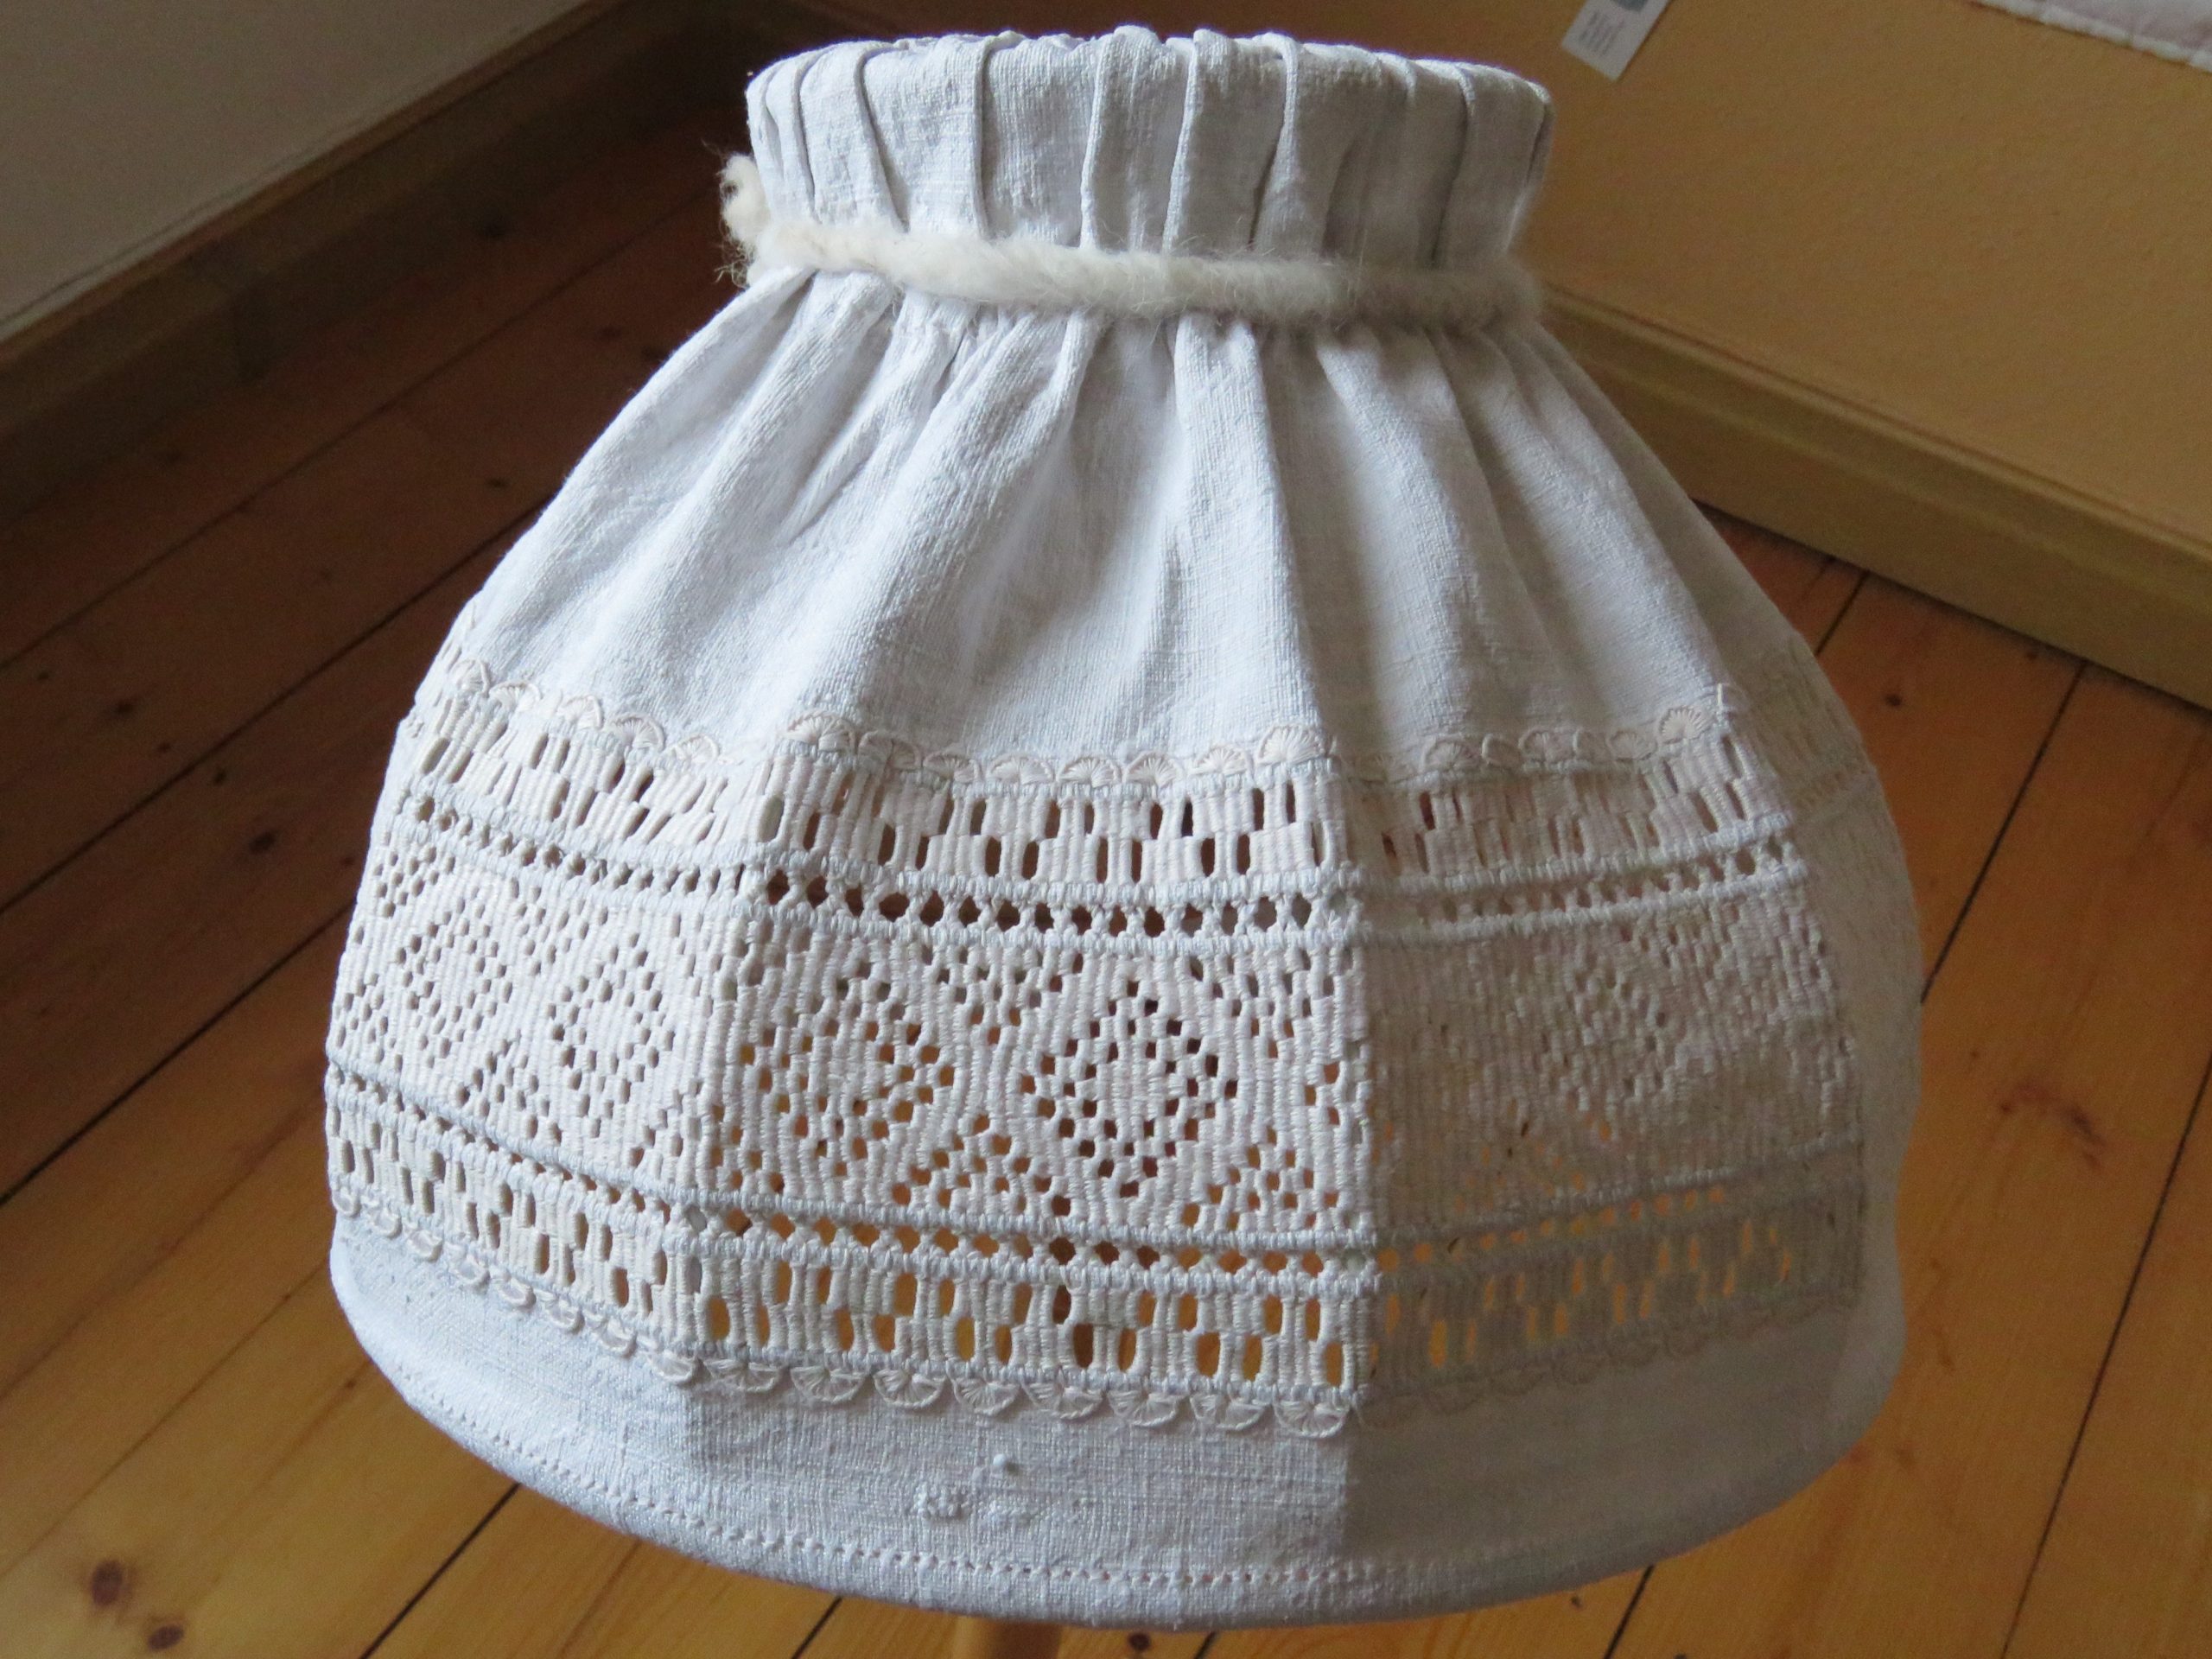
Lampshade with a Needle-Weaving Hem

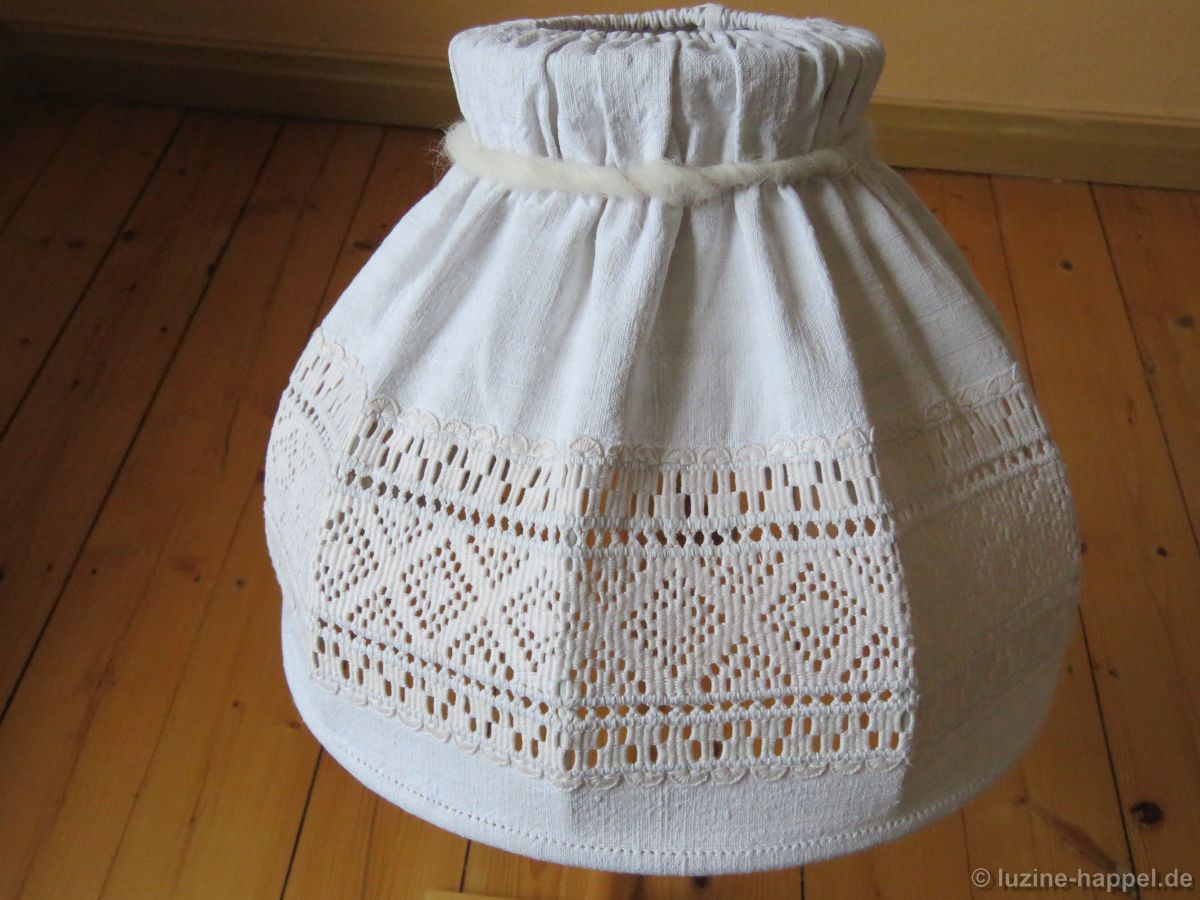
A combination of hem and decorative stitches decorates a rustic lampshade.

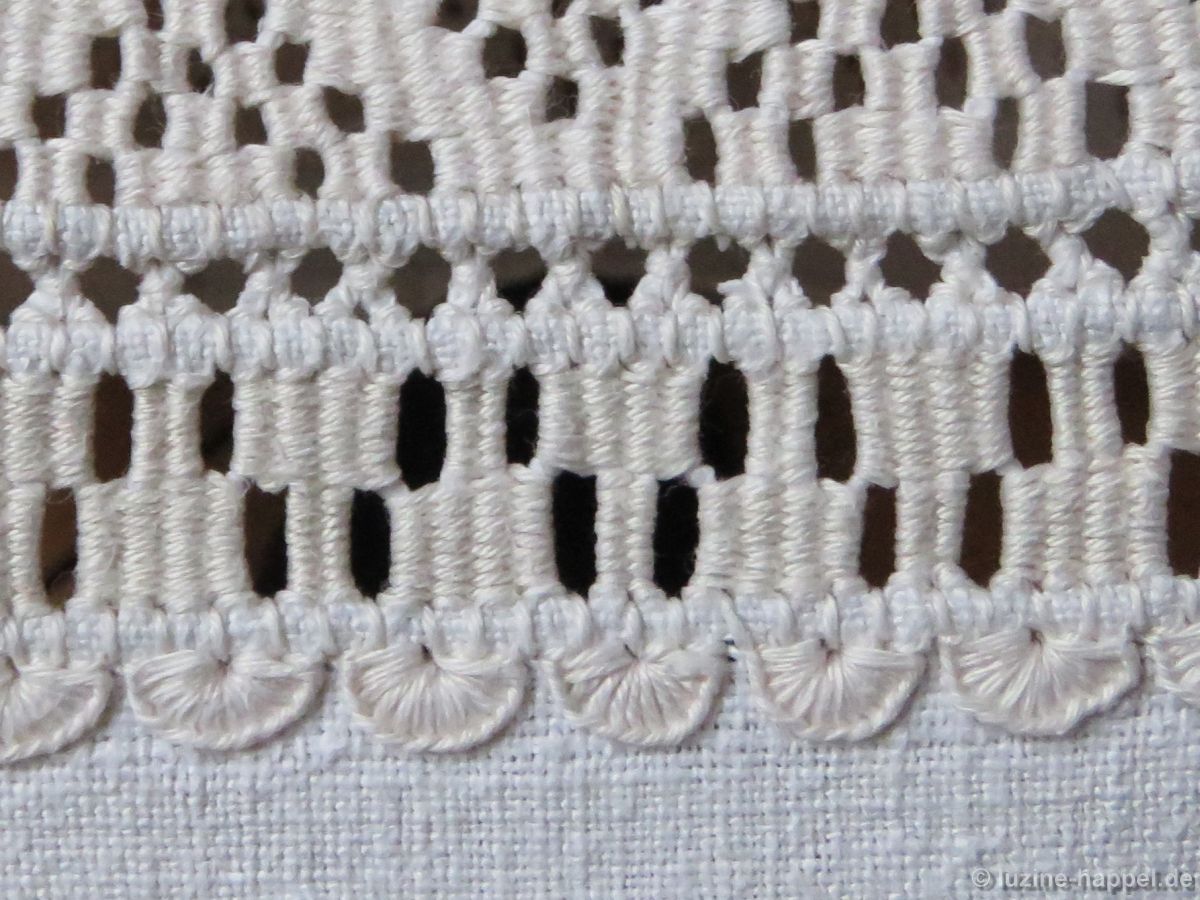
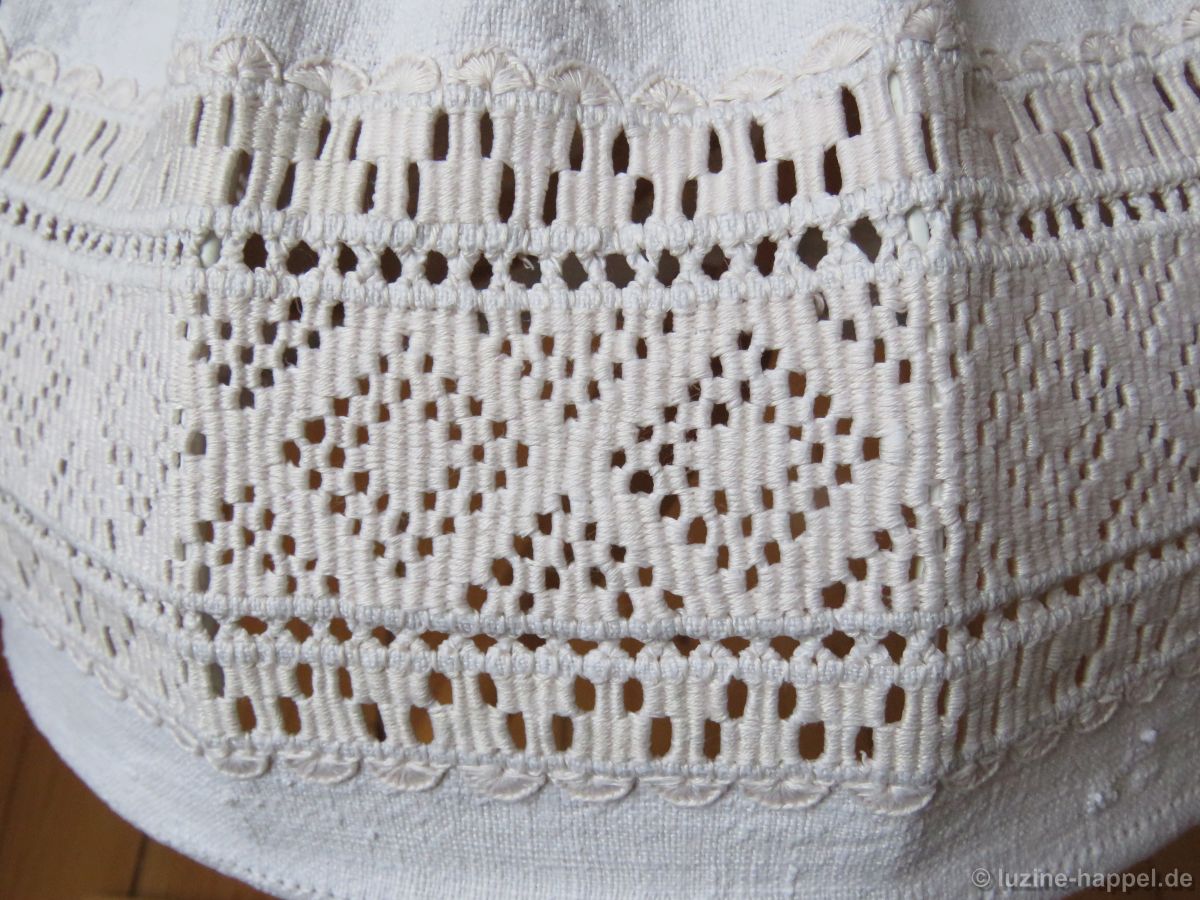
In the middle runs a band of a 13-unit mirrored needle-weaving hem, which is bordered at the top and bottom by a row of Peahole hemstitch.

The Peahole hem is followed by a needle-weaving hem with an A-pattern over 4 units. Blanket stitch half-eyelet scallops complete the border.

The entire combination reaches a height of 12 cm.

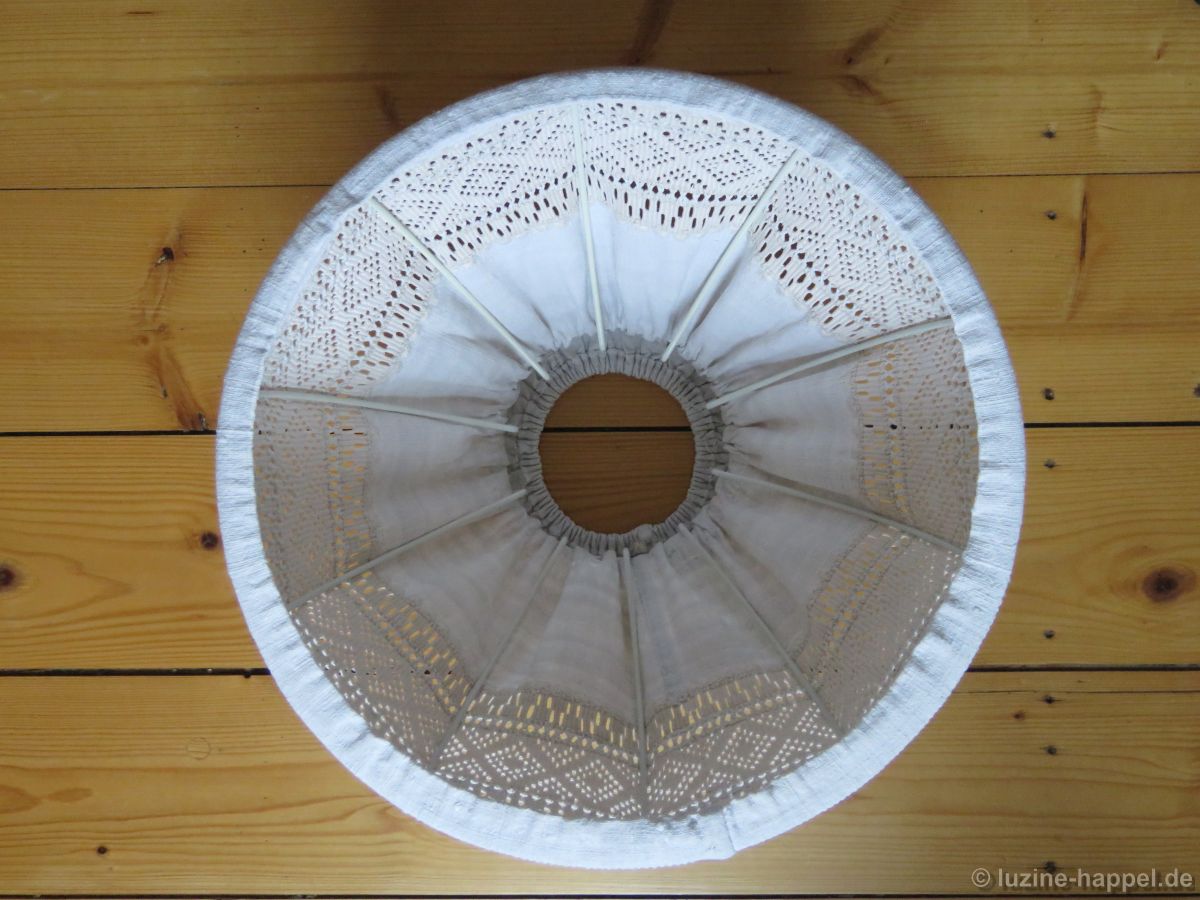
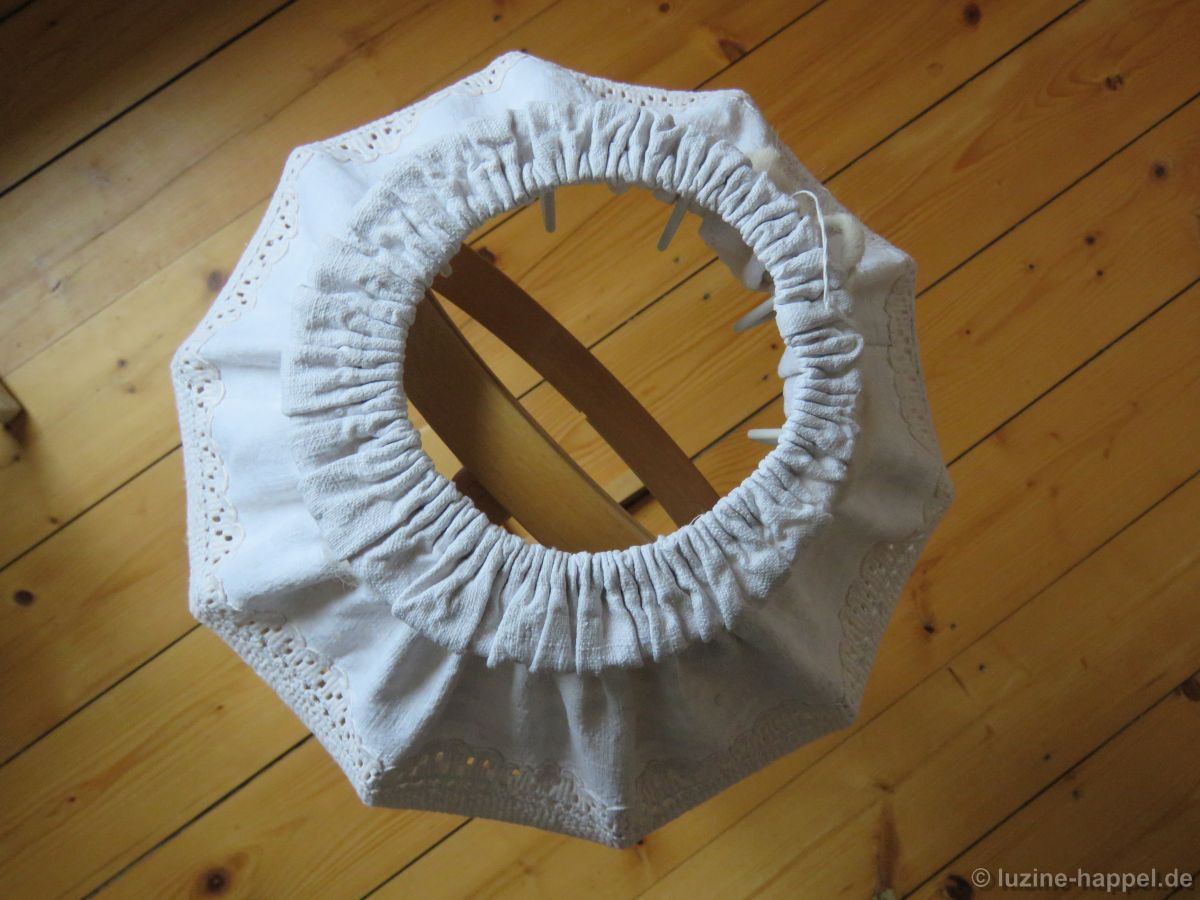
The embroidered and washed fabric was sewn together in a tubular shape and – with a hem at the top and bottom – pulled over a wire frame.

Rubber bands were pulled into the hems. This allowed the fabric to turn around the edges

and hold the lampshade in place.

At the upper end, the fabric was folded and shaped with a ribbon.

Stitch by Stitch Lace

Stitch by Stitch Lace
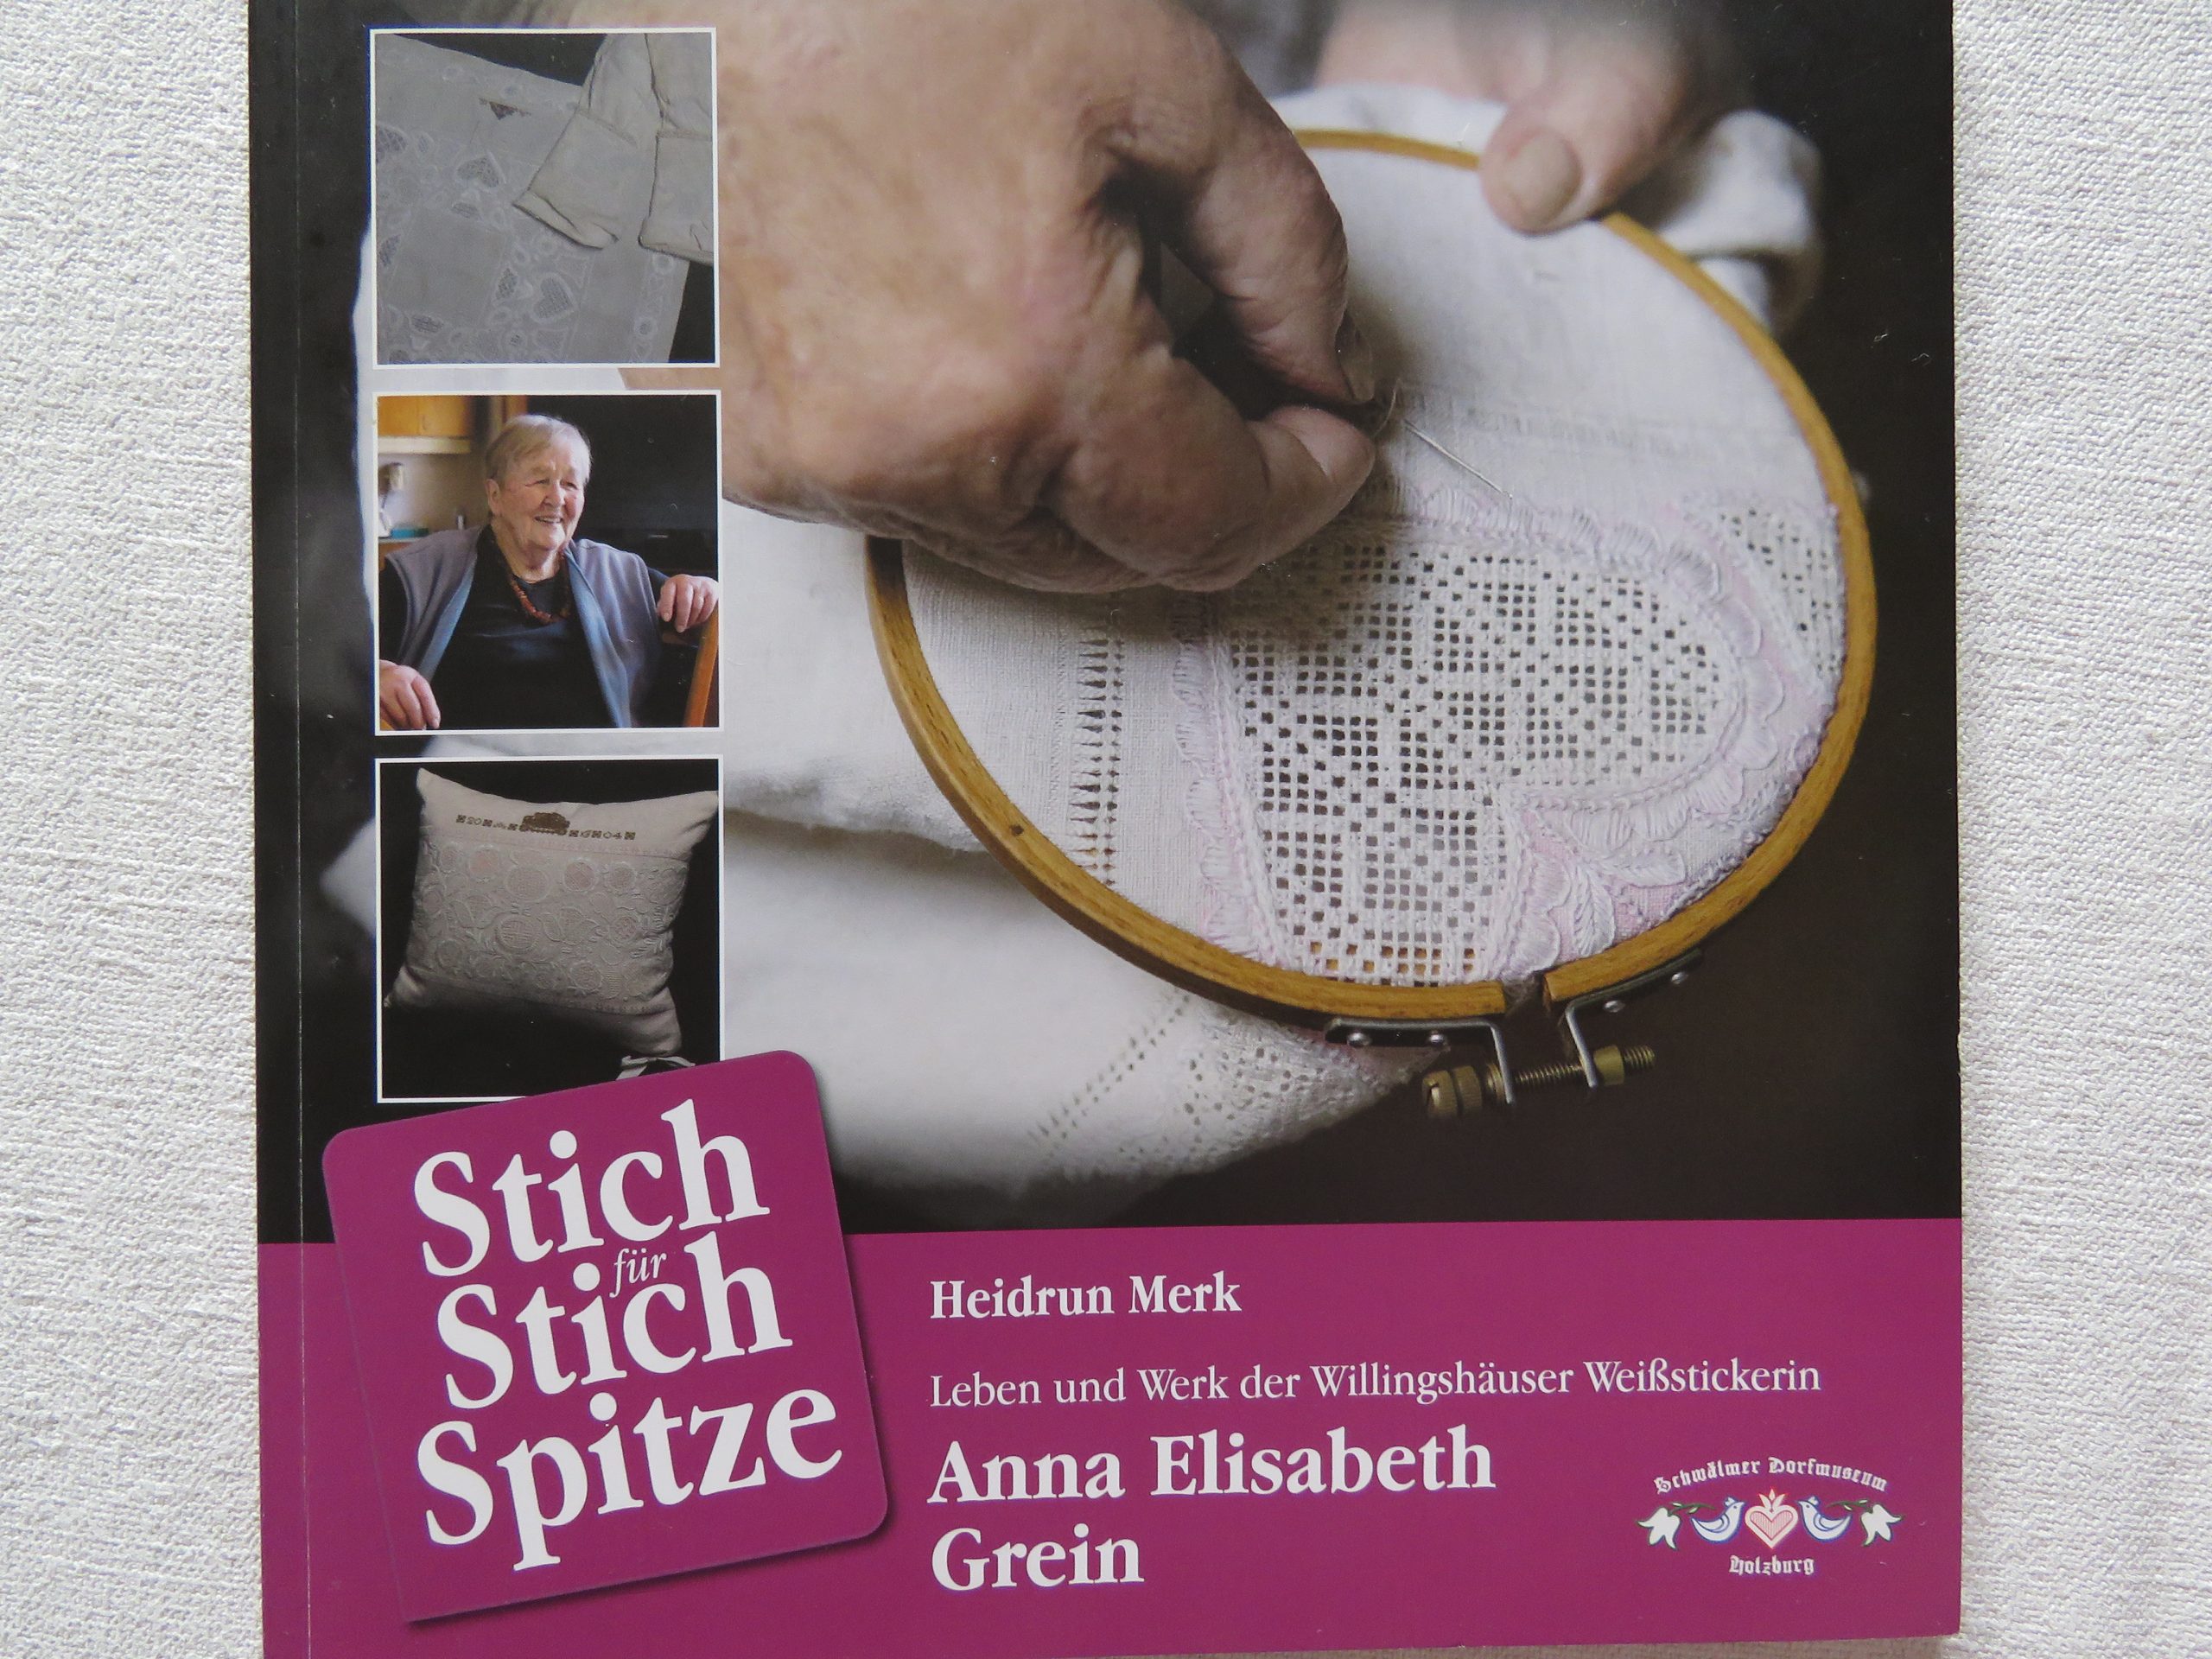
Life and Work of the Willingshausen Schwalm Whiteworker Anna Elisabeth Grein

In more than 50 years of teaching, given in countless courses, Ms. Grein has ensured that the knowledge and skills of the unique Schwalm whitework are passed on. Both the lessons and her striking designs based on traditional motifs and exhibitions of her perfect embroidery have made her known far beyond Schwalm.

Now Heidrun Merk, 1st chairwoman of the Holzburg Museum Association, honors the work of Anna Elisabeth Grein in her latest publication (text: German).

After introductory chapters about whitework, she gives a brief outline of her life and then presents 30 selected, very different masterful embroideries in pictures and short word descriptions on 30 pages

The volume “Stich für Stich Spitze” is available from Ms. Merk for a price of €12 plus postage (contact: heidrun-merk@t-online.de).

Filling Pattern – No. 572

category: Limet-Filling pattern
linen used: 13.5/cm thread count
threads used: coton à broder No. 20
stitches used: half Rose stitches/half Rose stitch variation and Diagonal Cross stitches
center: intersecton of withdrawn thread lines
one pattern segment = 25 threads

The filling pattern shown here is a practice exercise only. You can see it used in a shape at the end of this article.

First, establish a Limet grid by alternately cutting 1, leaving 3, vertically and horizontally.

Bring needle up one square above the center,

*cross over 2 (!) fabric threads to the left, insert needle there and bring it up again in the first hole.

Cross over 3 fabric threads to top, insert needle there and bring it up again in the first hole.

Cross over 3 fabric threads to the right, insert needle there and bring it up again in the first hole.

Cross over 2 (!) fabric threads to bottom, insert needle there and bring it up again in the first hole.
The first half Rose stitch with a half Rose stitch variation has formed.

Cross over the last stitch, insert needle and bring it up one square diagonally up to the left.*

This is the center of the next half Rose stitch with a half Rose stitch variation. From here always repeat the steps (*)

until the end of the row.

Turn the work 180° and embroider a row next to it in the established way,

so that the four remaining threads form a square.

Without turning the work, embroider Diagonal Cross stitches from bottom to top and

back from top to bottom next to the Rose stitches. First on one side, then also

on the opposite side.

By constantly alternating double rows of half Rose stitches with half Rose stitch variations and Diagonal Cross stitches, a diagonal striped pattern is formed.

I discovered this pattern in Fumie Suzuki’s contribution to the Global Schwalm Sampler.

Here it was worked on 16 tpc linen.