Filling Pattern – No. 474

No. 474
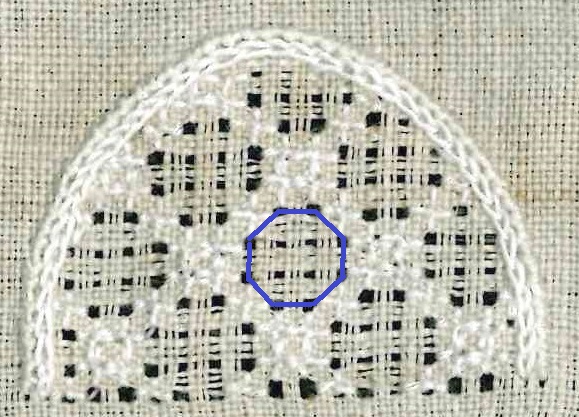
category: Limet-Filling pattern; please note that this is worked on a leave 4, cut 1grid
stitches used: diagonal Satin stitches over 1, 2, 3 and 4 intersection points of the fabric threads and Rose stitches
center = intersection of withdrawn thread lines (in other shapes or motifs: longitudinal axis =
withdrawn thread line

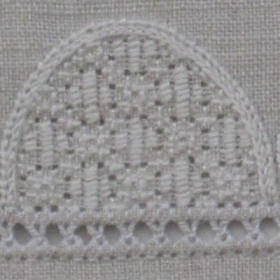
474 is a beautiful, but difficult pattern to work.
474_1
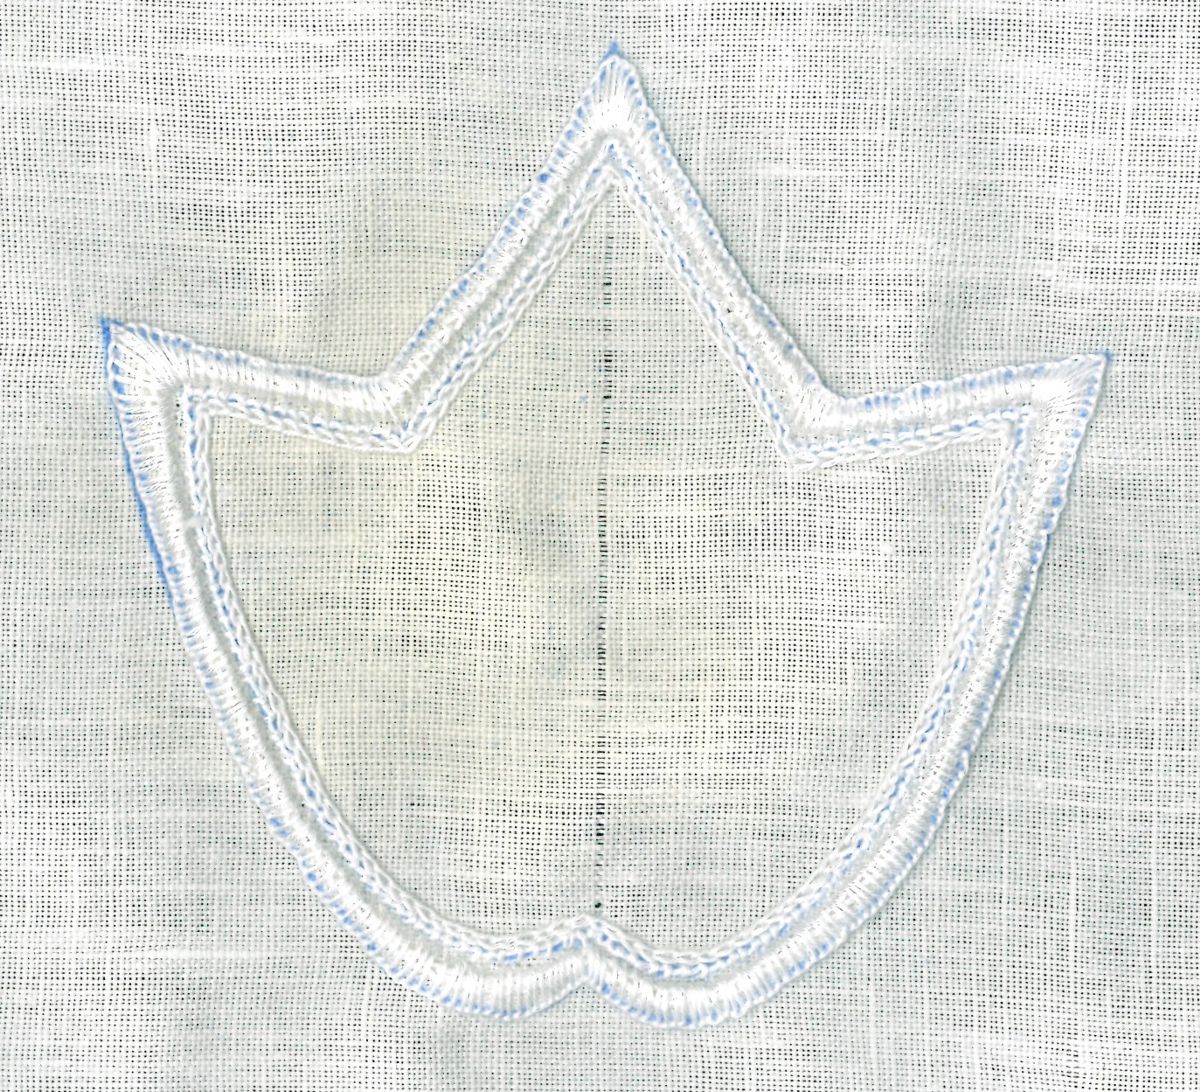
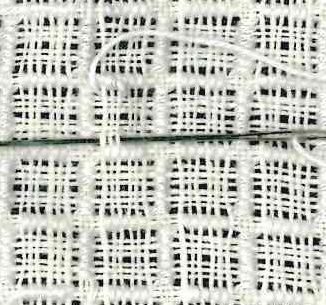
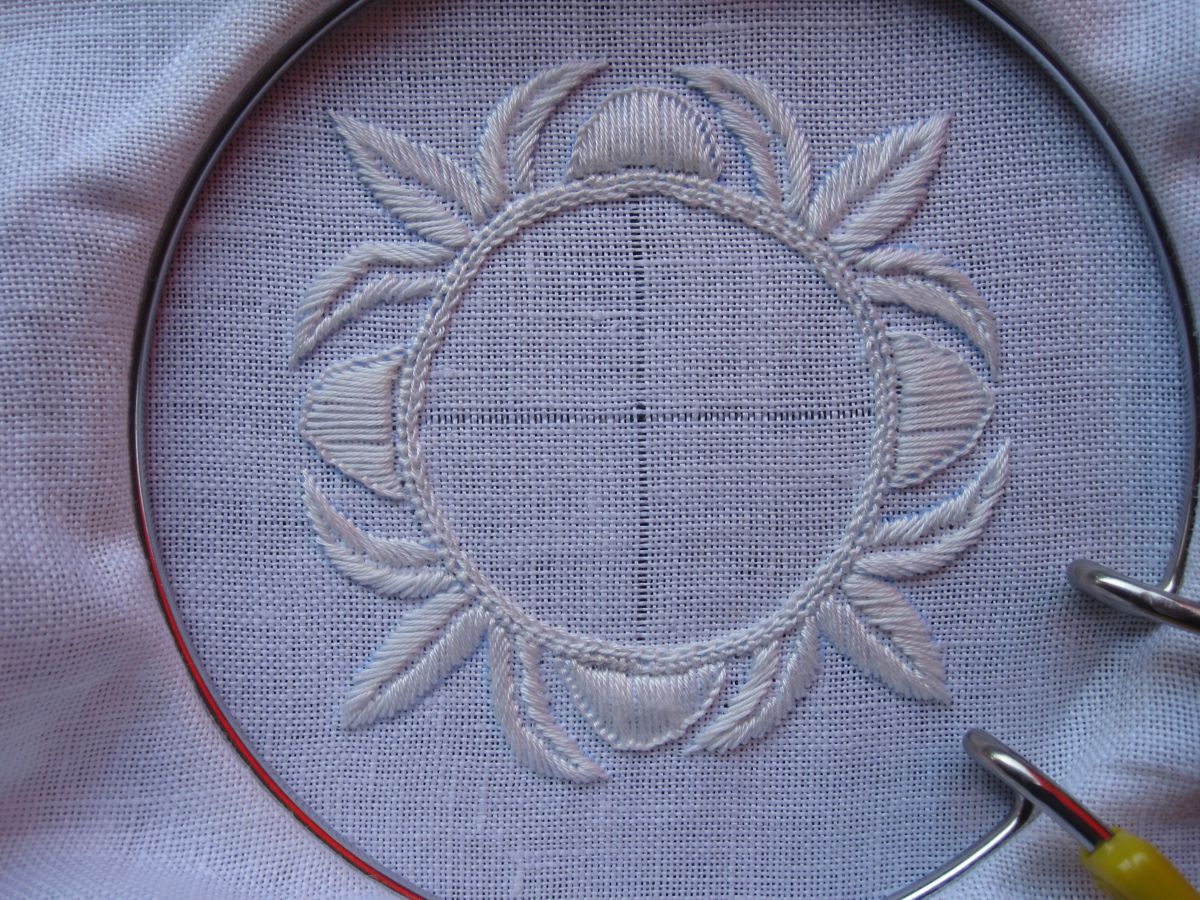
First, both the horizontal and the vertical center threads are withdrawn.
474_2
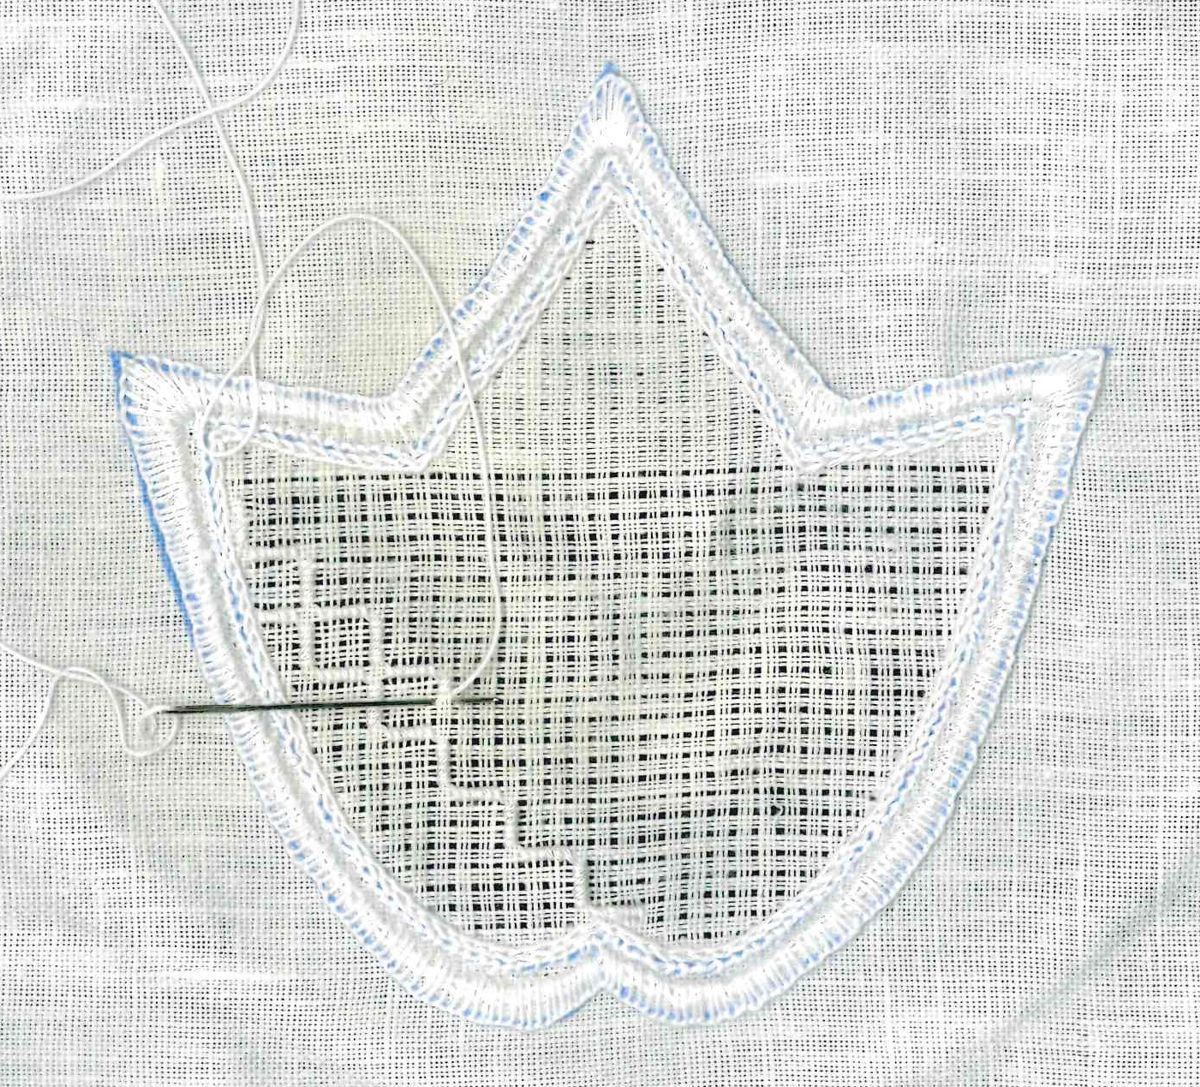
Working from the center outwards, a Limet grid is established by leaving 4 threads, and cutting 1.
474_3
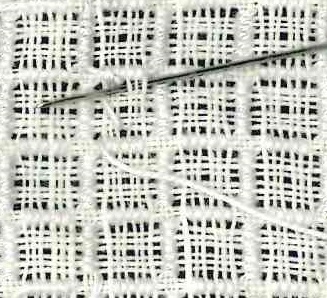
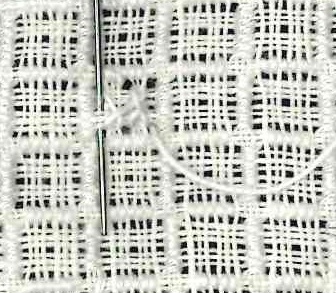
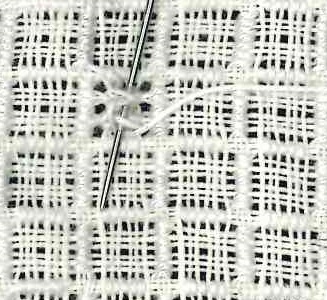
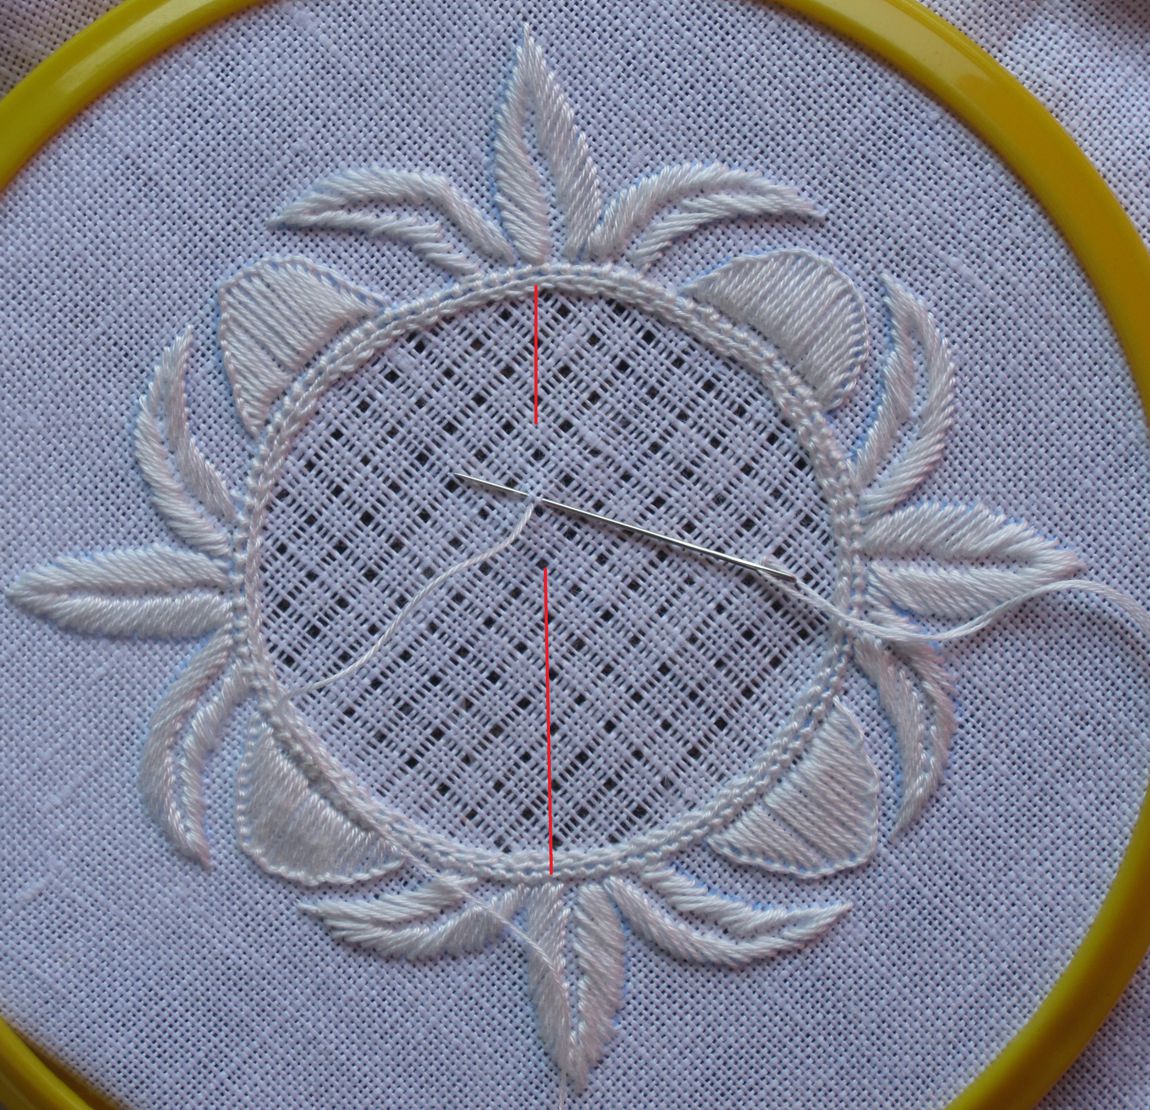
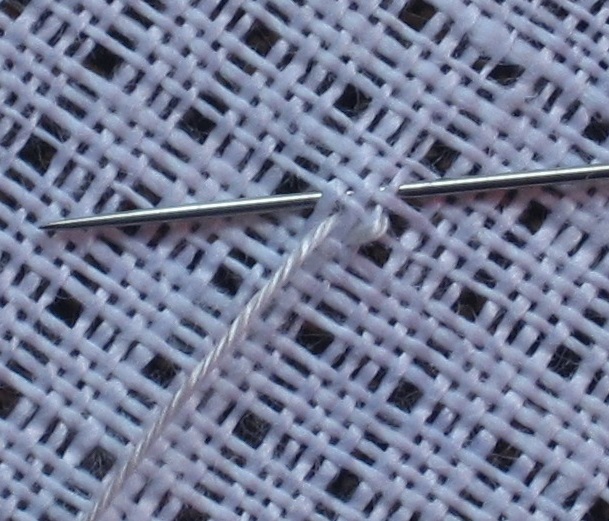
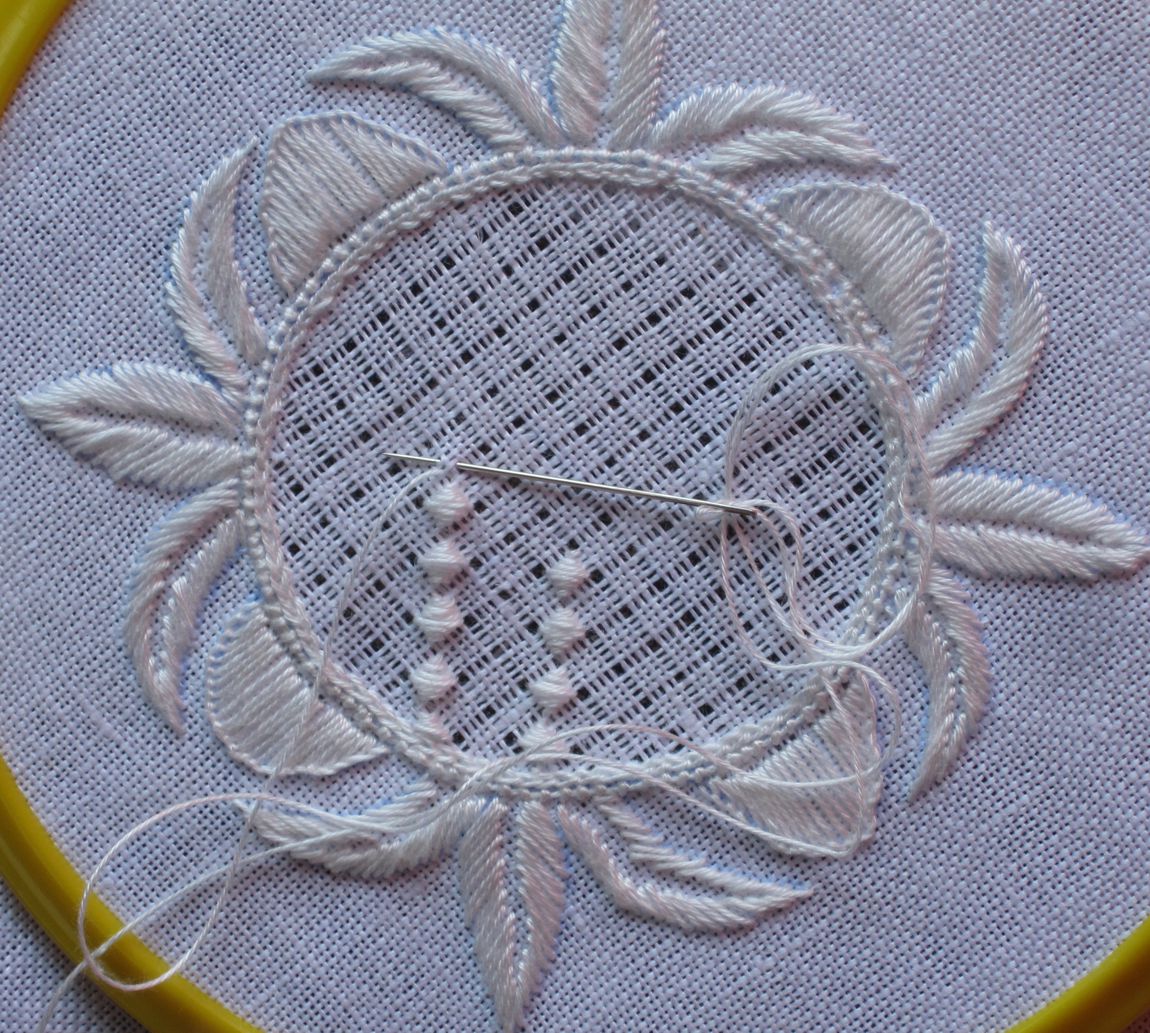
Orient the withdrawn thread lines so that they run diagonally and bring the needle up one thread up and to the left of the bottom of any rhombus on the diagonal center axis. The needle travels to the right and crosses the intersection point of two fabric threads; insert the needle and bring it up at the left one fabric thread up from first stitch.
474_4
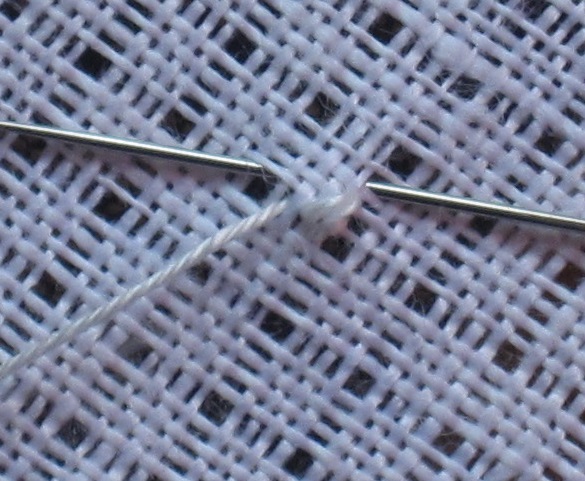
Work more Satin stitches – 7 in all – from right to left, always moving one thread up on both sides.
474_5third stitch
474_6fourth stitch
474_7fifth stitch
474_8sixth stitch
474_9
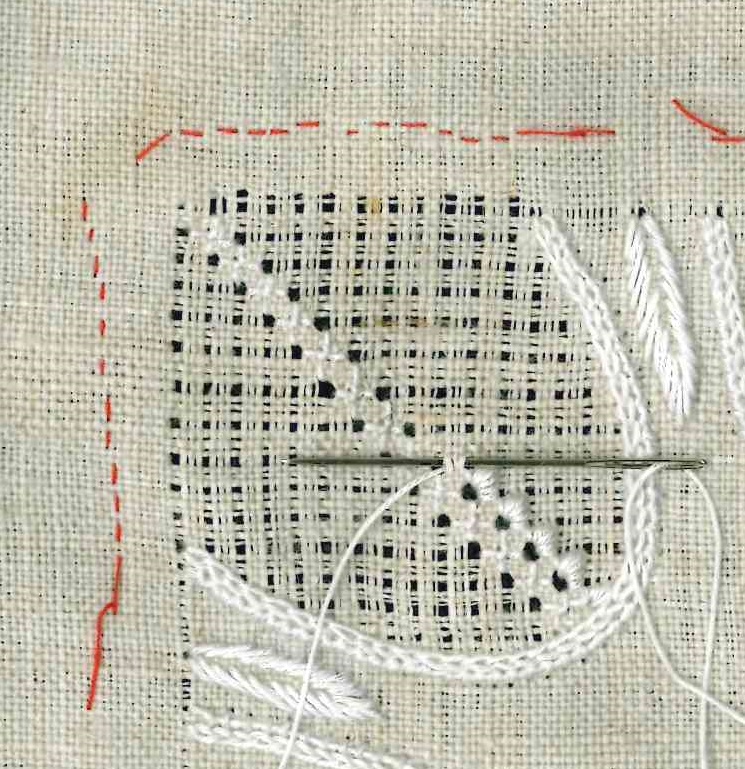
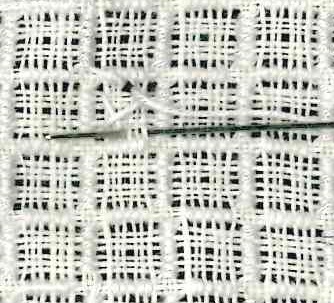
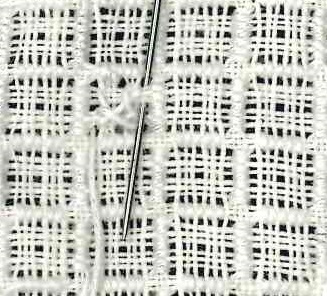
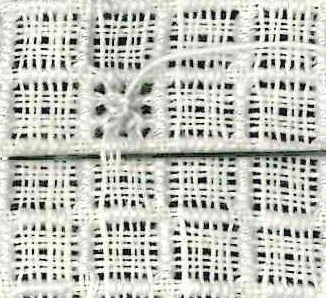
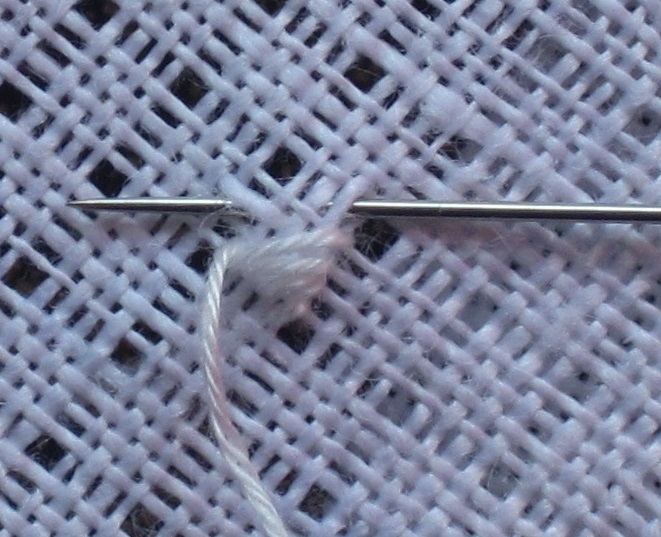
With the seventh stitch the needle travels to the next starting point at the bottom left of the next rhombus.
474_10
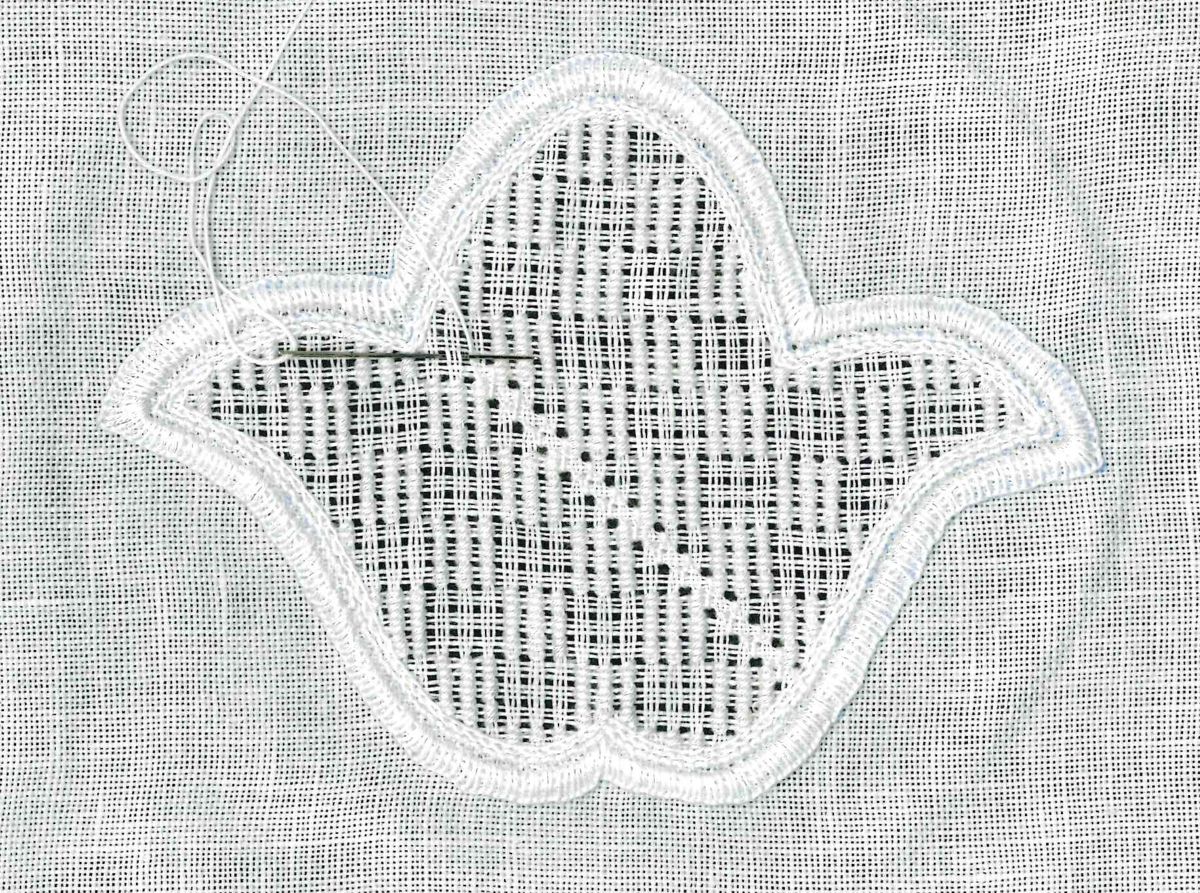
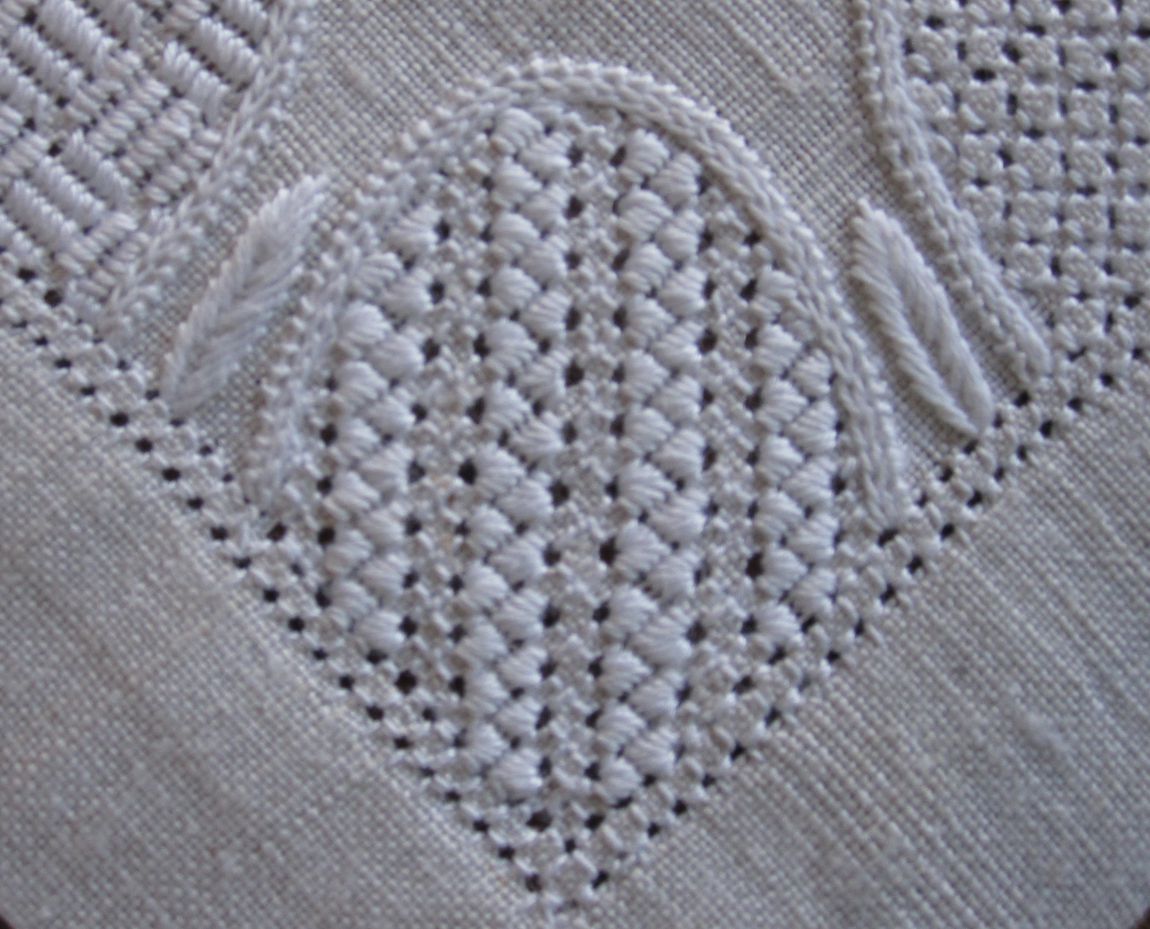
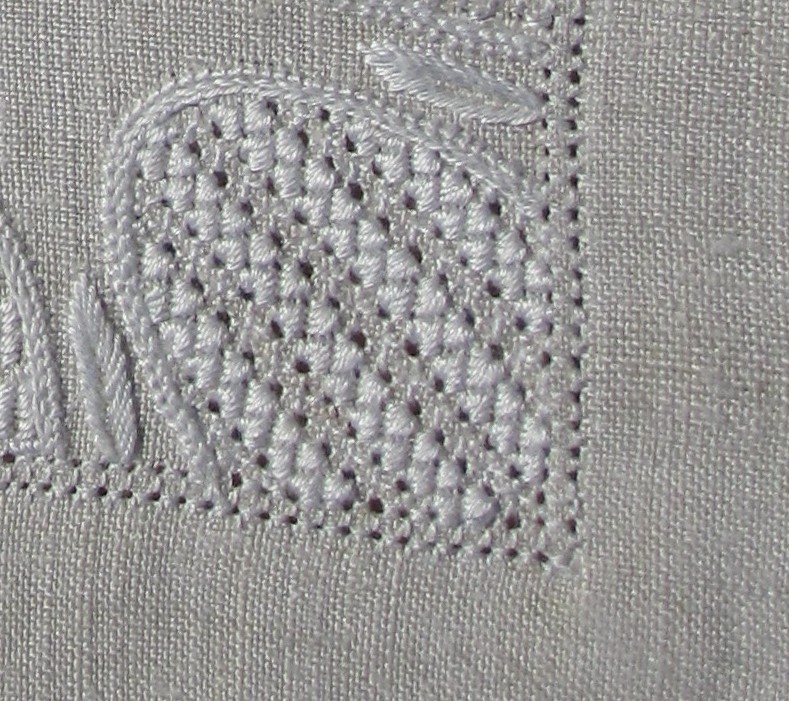
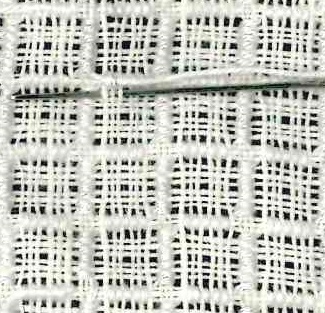
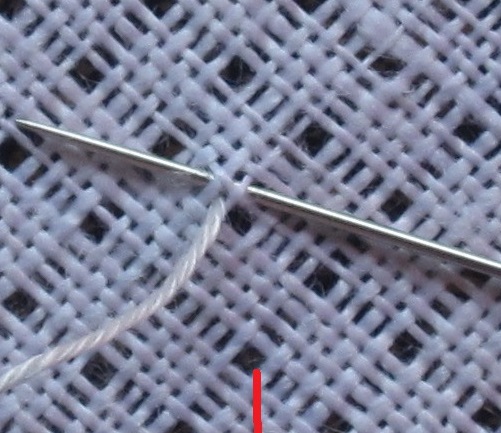
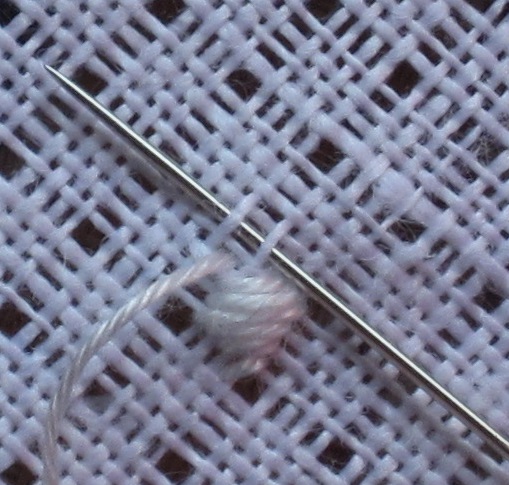
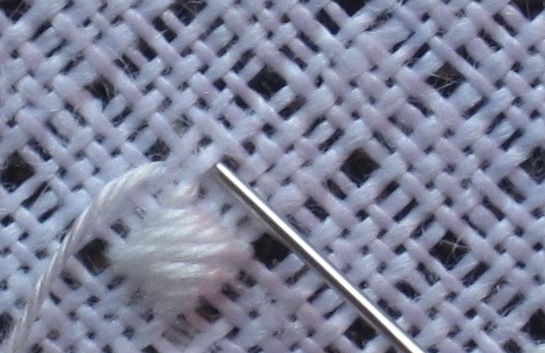
Work the 7 Satin stitches again. When taking the first stitch, be careful to insert the needle into the withdrawn thread line and not between the fabric threads of an adjacent rhombus, as the picture below shows. The fabric threads easily shift out of place when traveling from one rhombus to the beginning of the next.
474_11
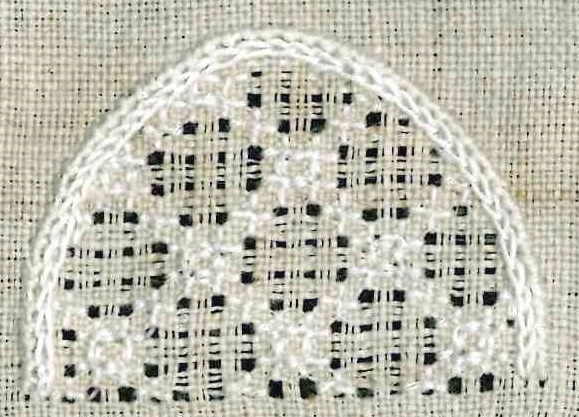
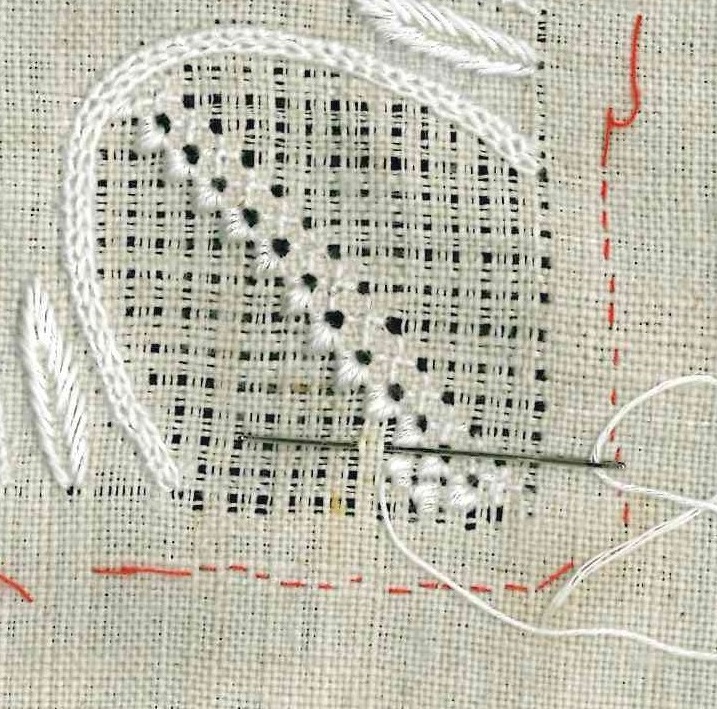
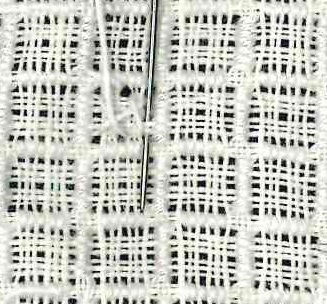
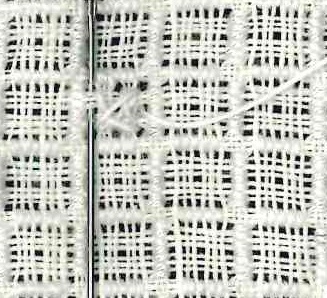
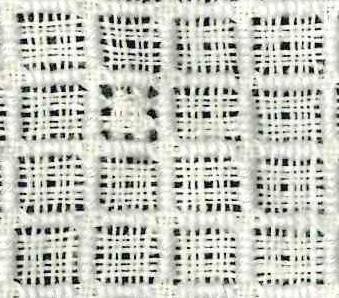
Work, leaving a distance of one rhombus between, rows of Satin stitch rhombi all over the shape.
474_12
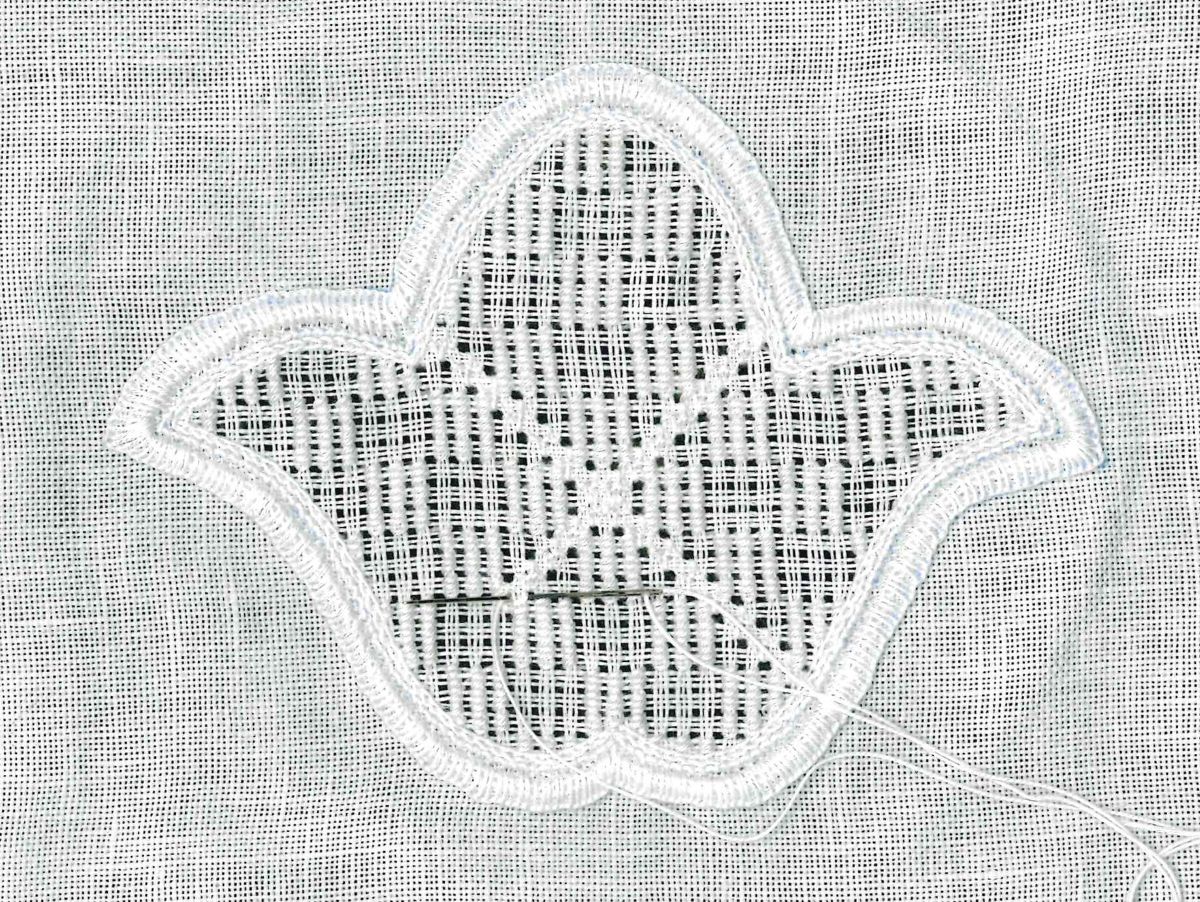
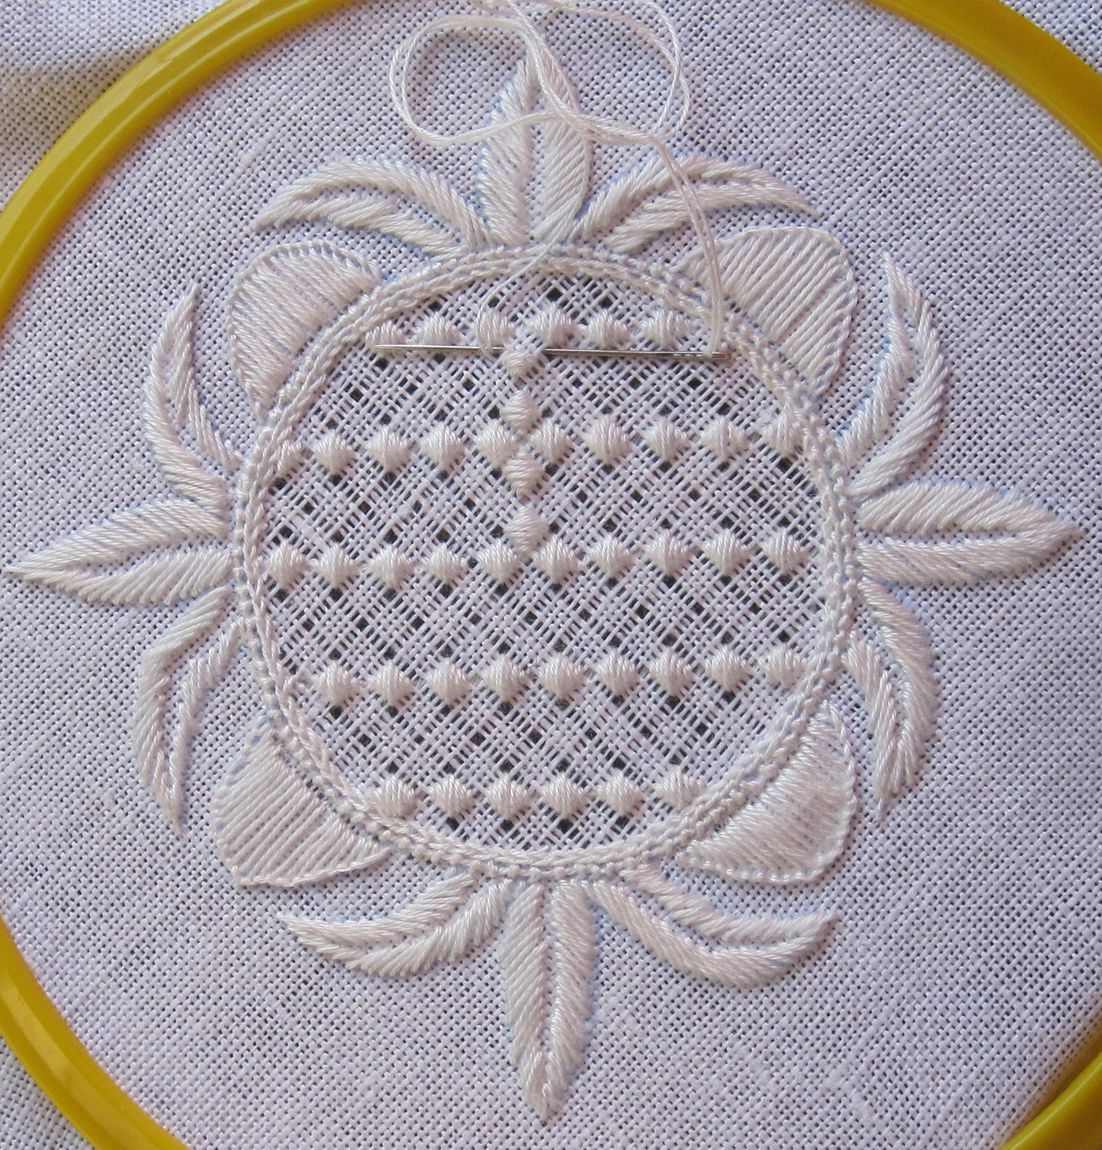
Turn work 90° and work, up from the diagonal center axis, rows of rhombi perpendicular to the rows already worked.
474_13
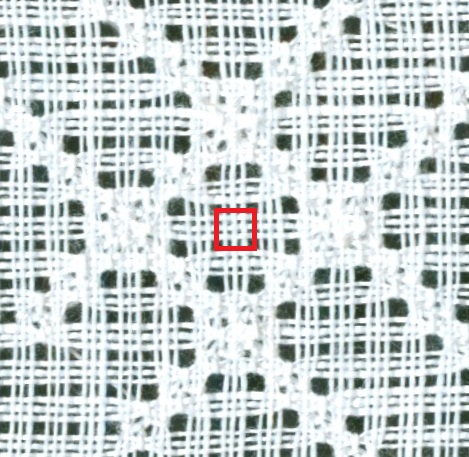
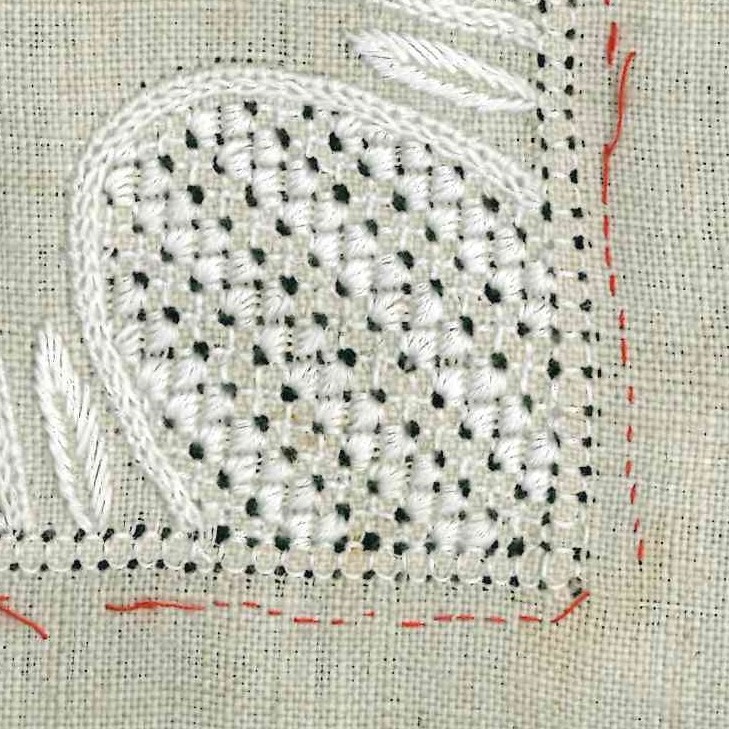
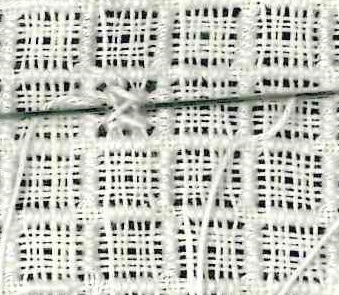
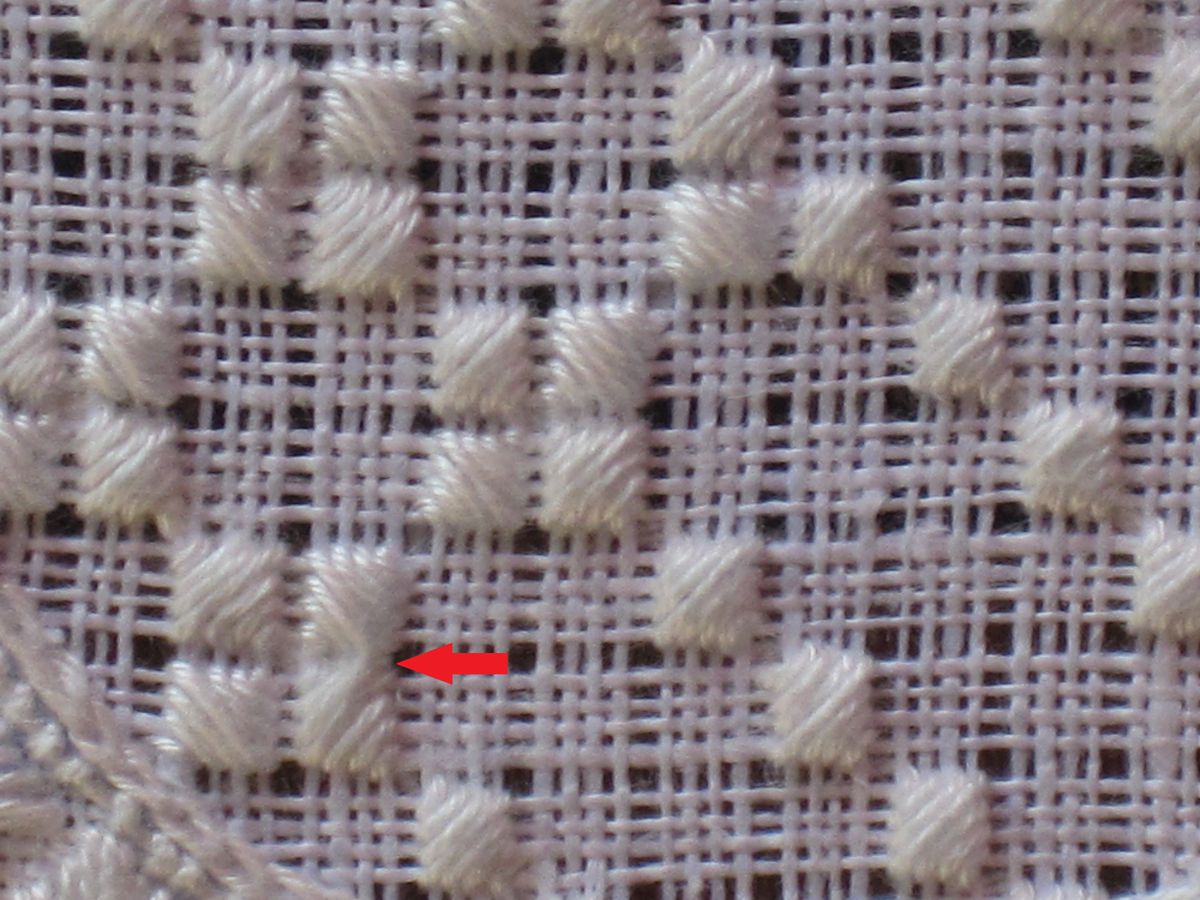
Please be careful to keep the holes between the stitches clean and open, and avoid inserting your needle into a previously worked thread as seen in the picture above – bottom left (red arrow).

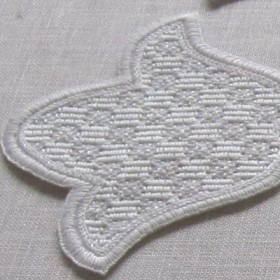
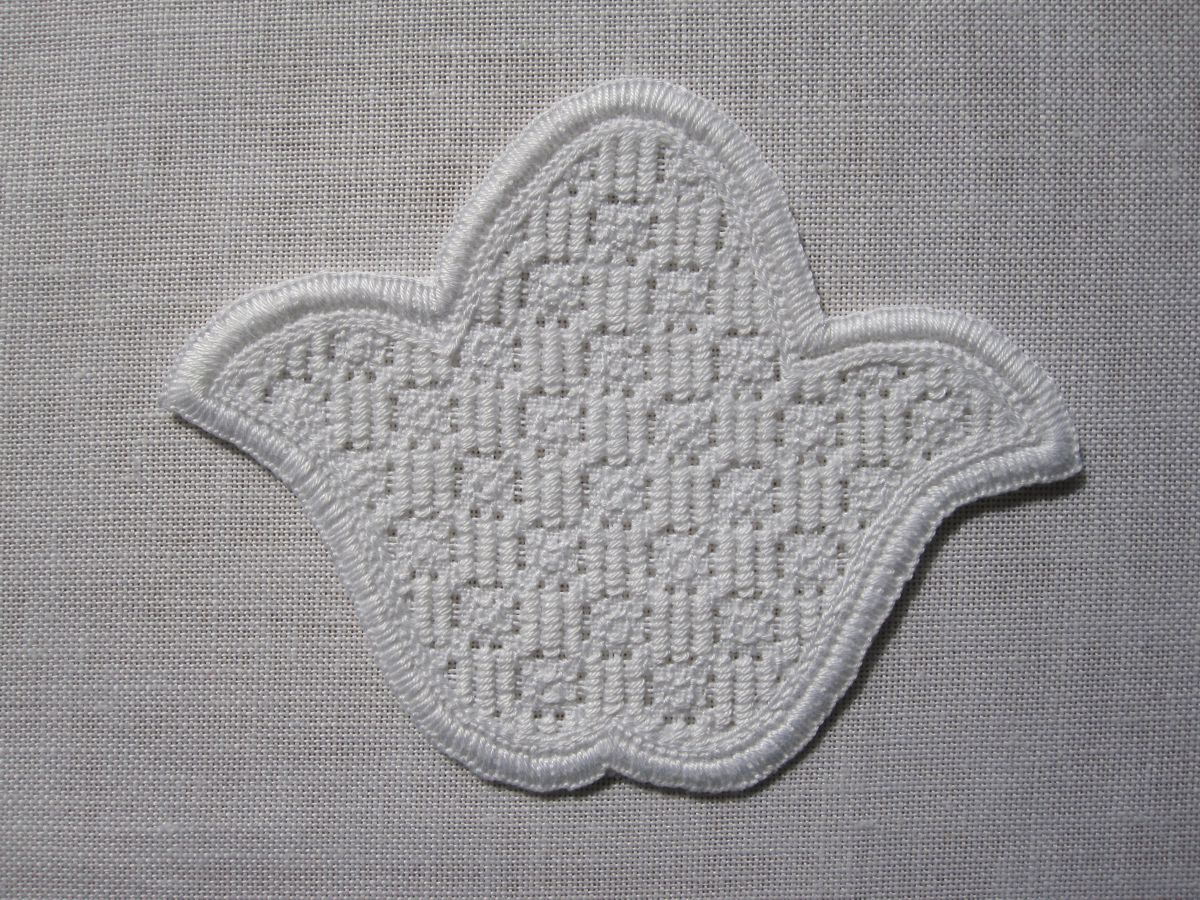
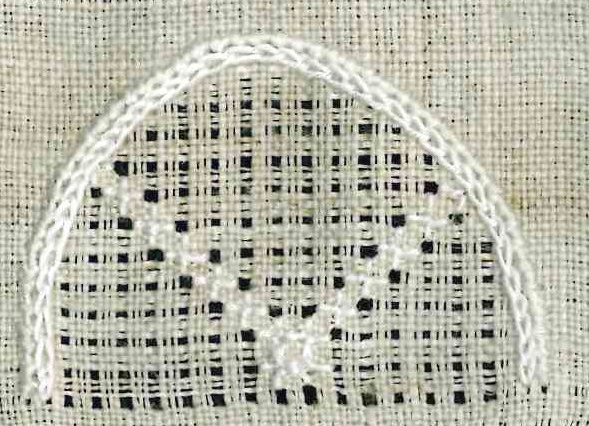
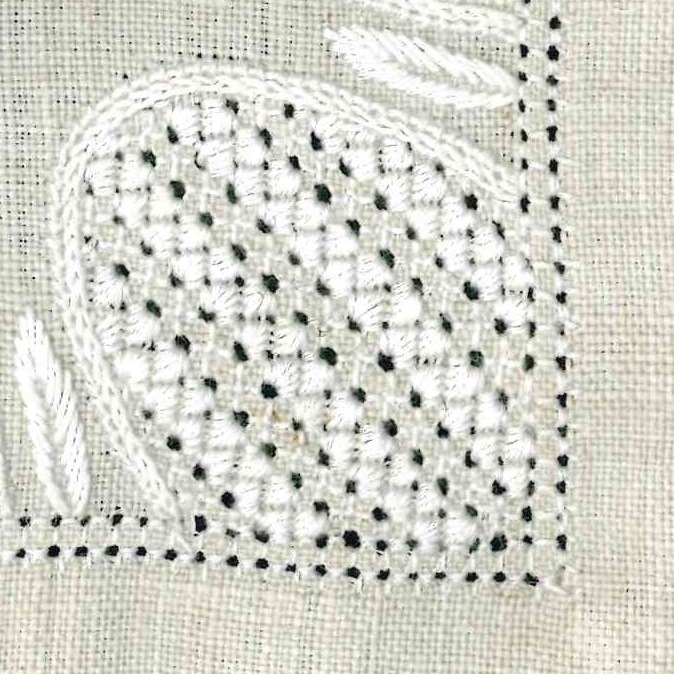
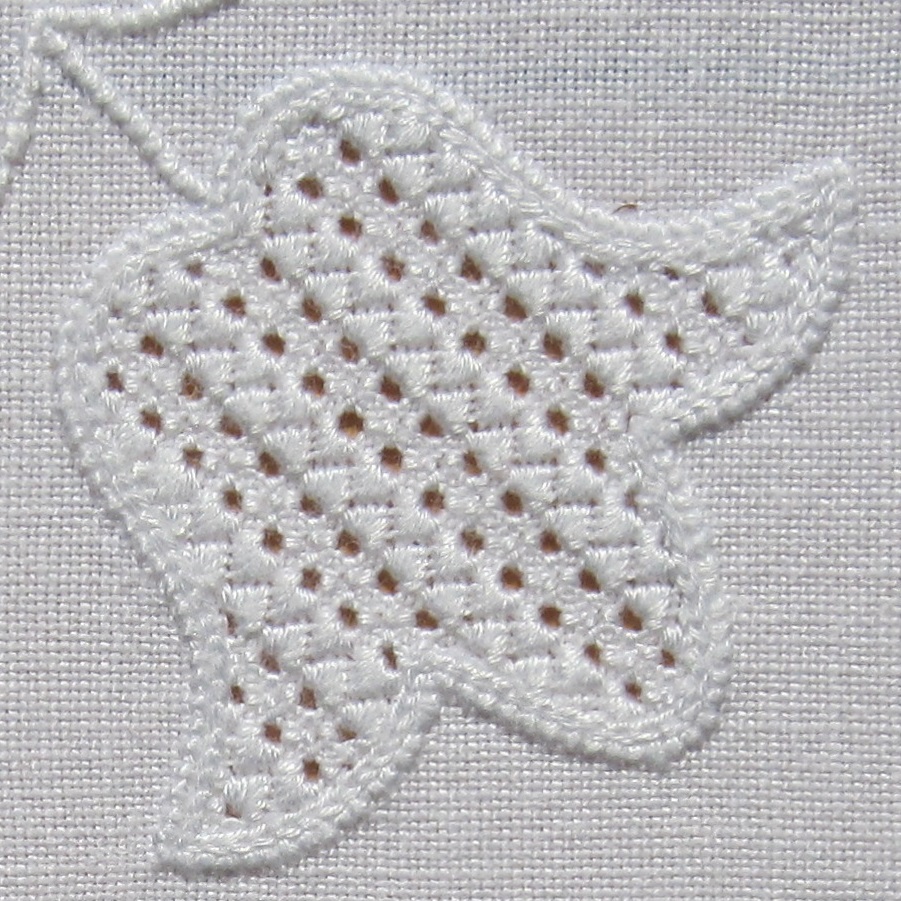
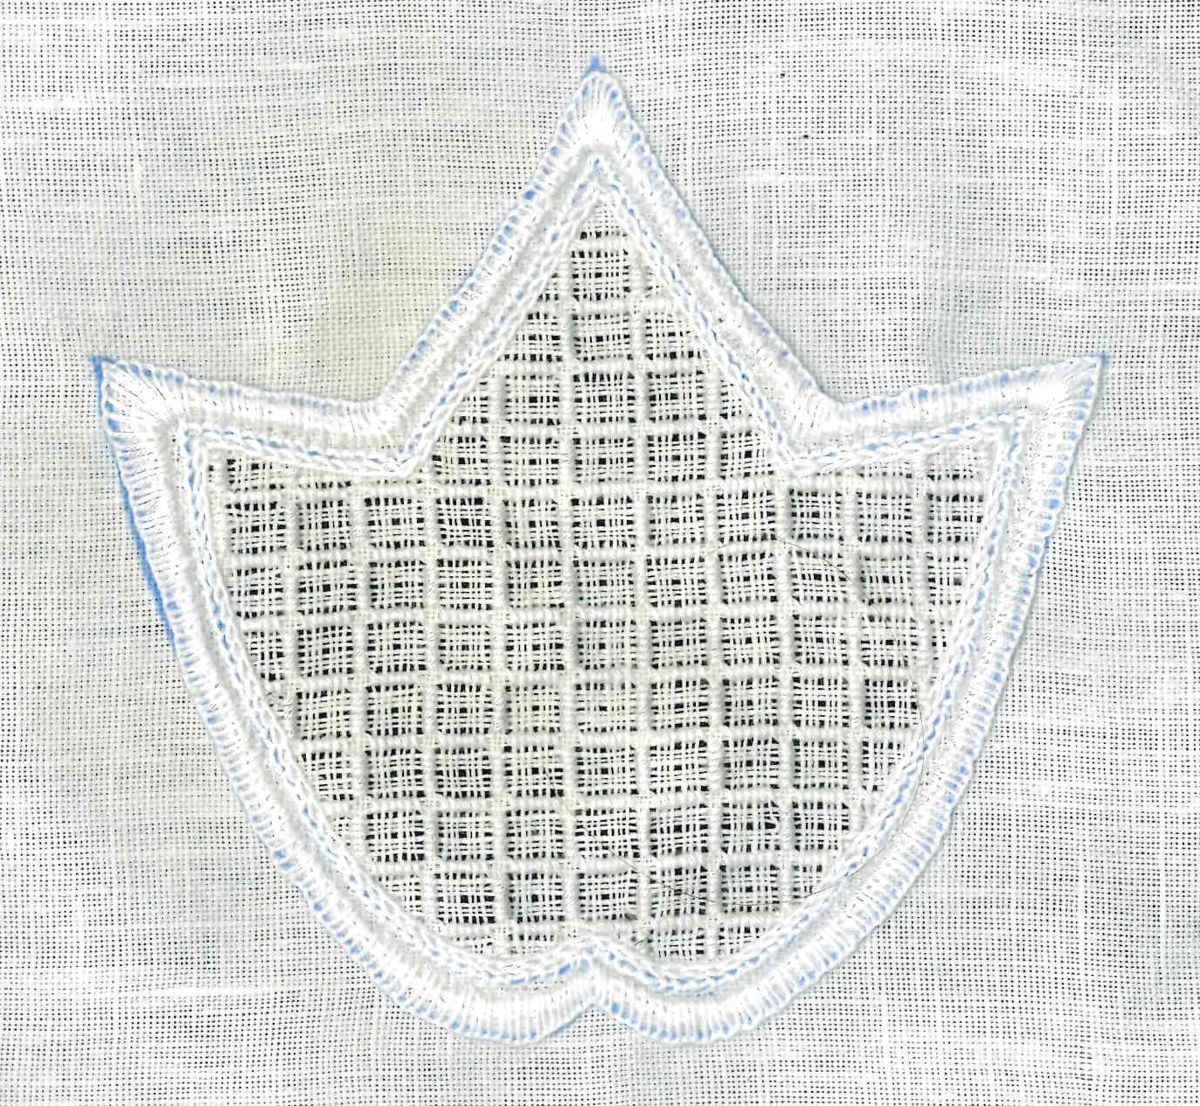
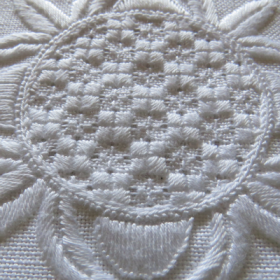
Work Rose stitches in the remaining squares.
474_14
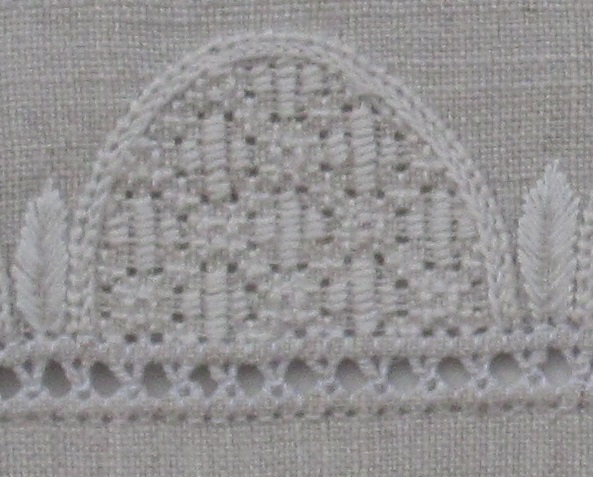
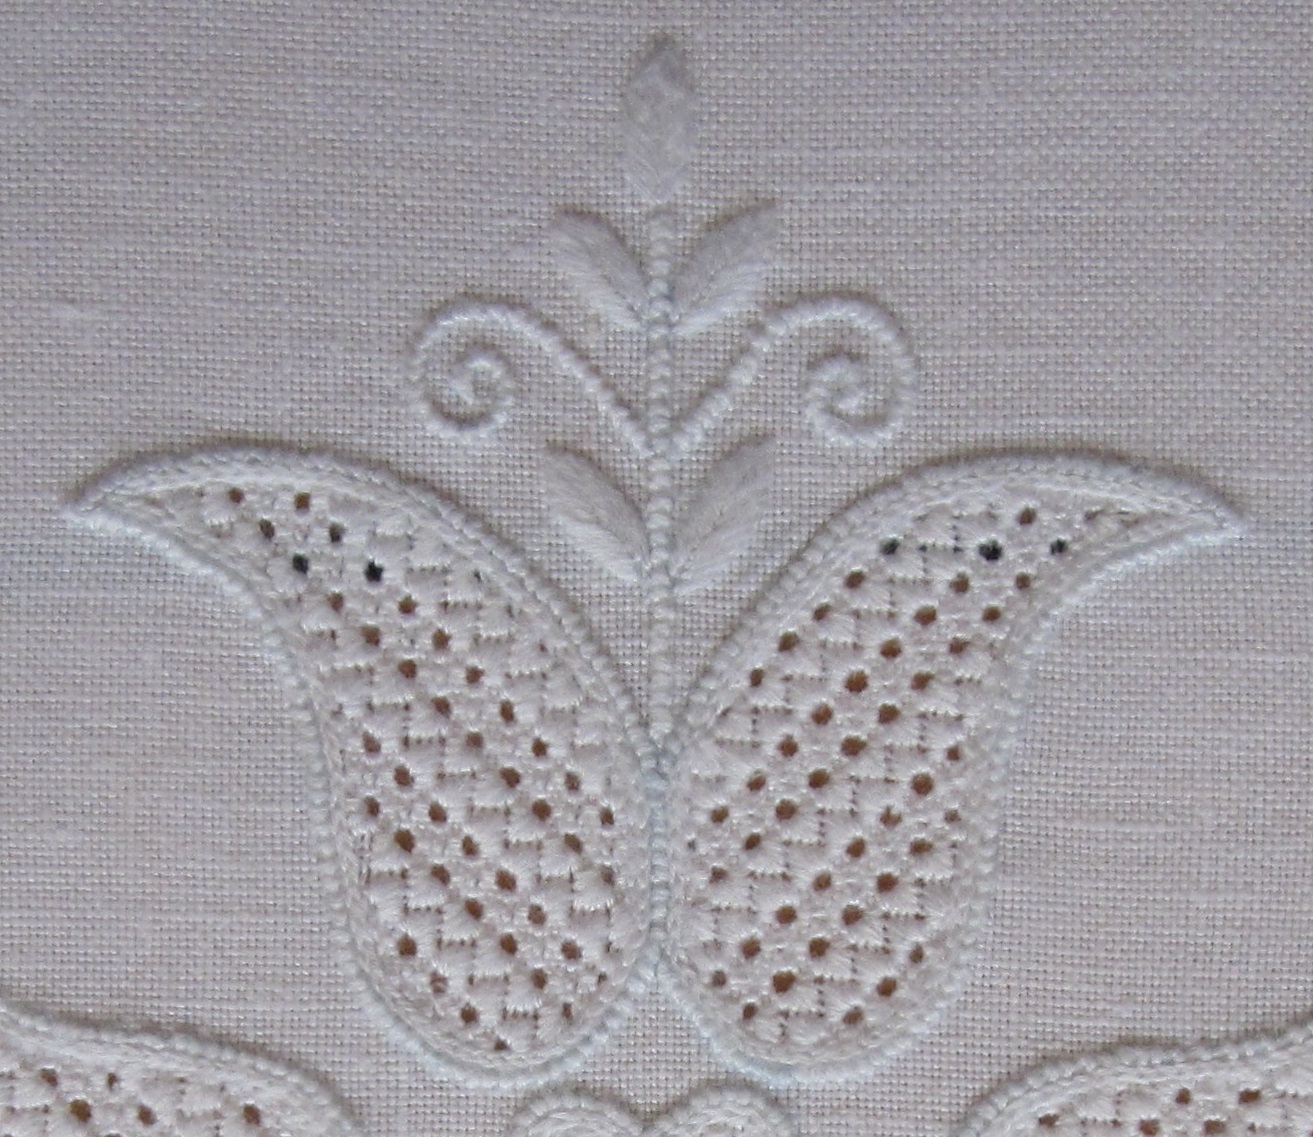
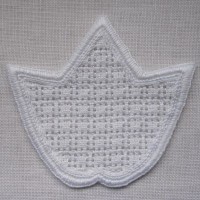
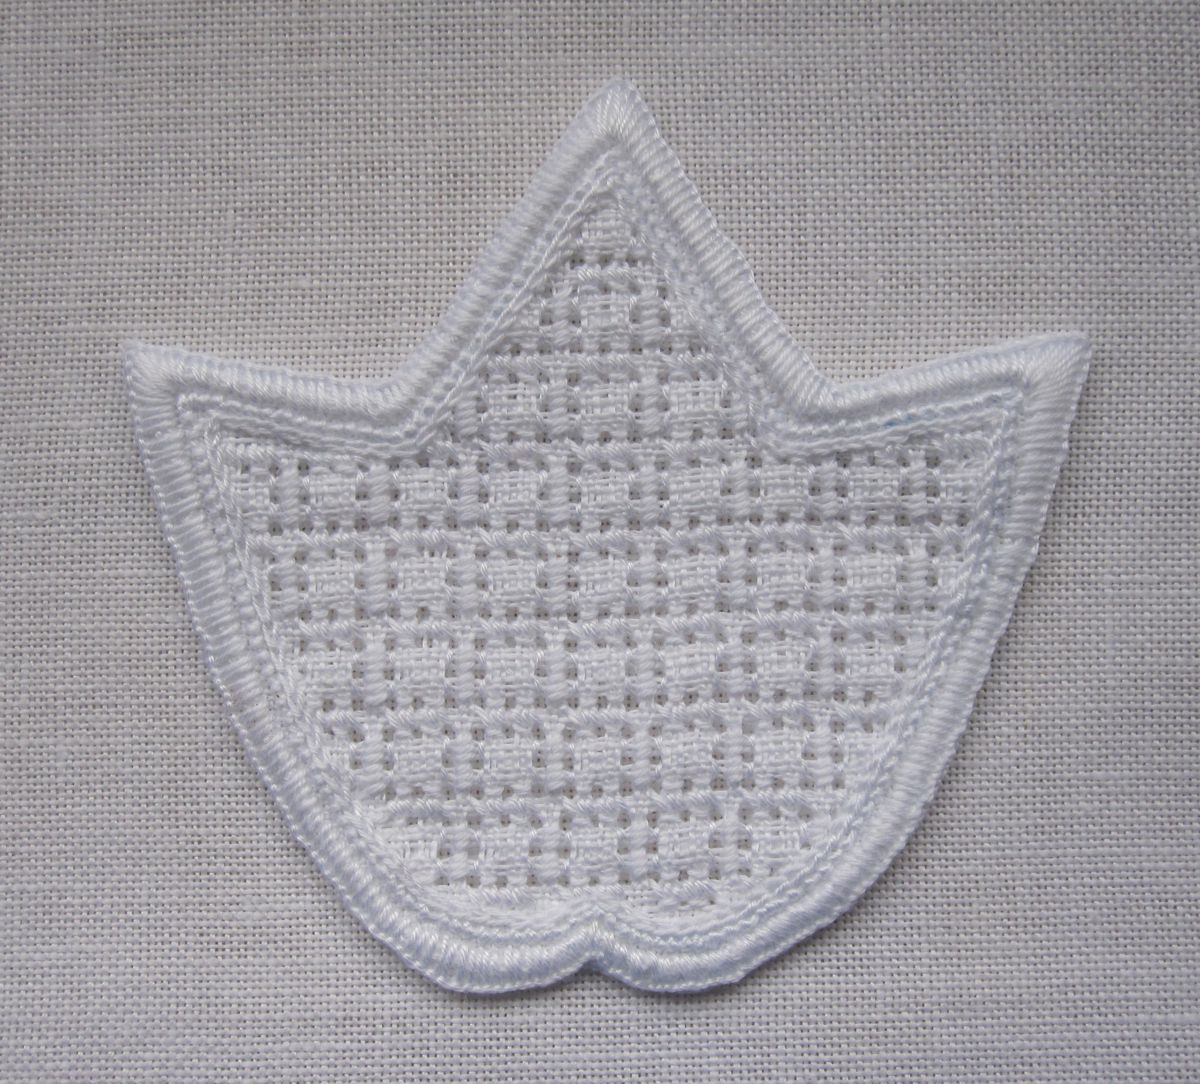
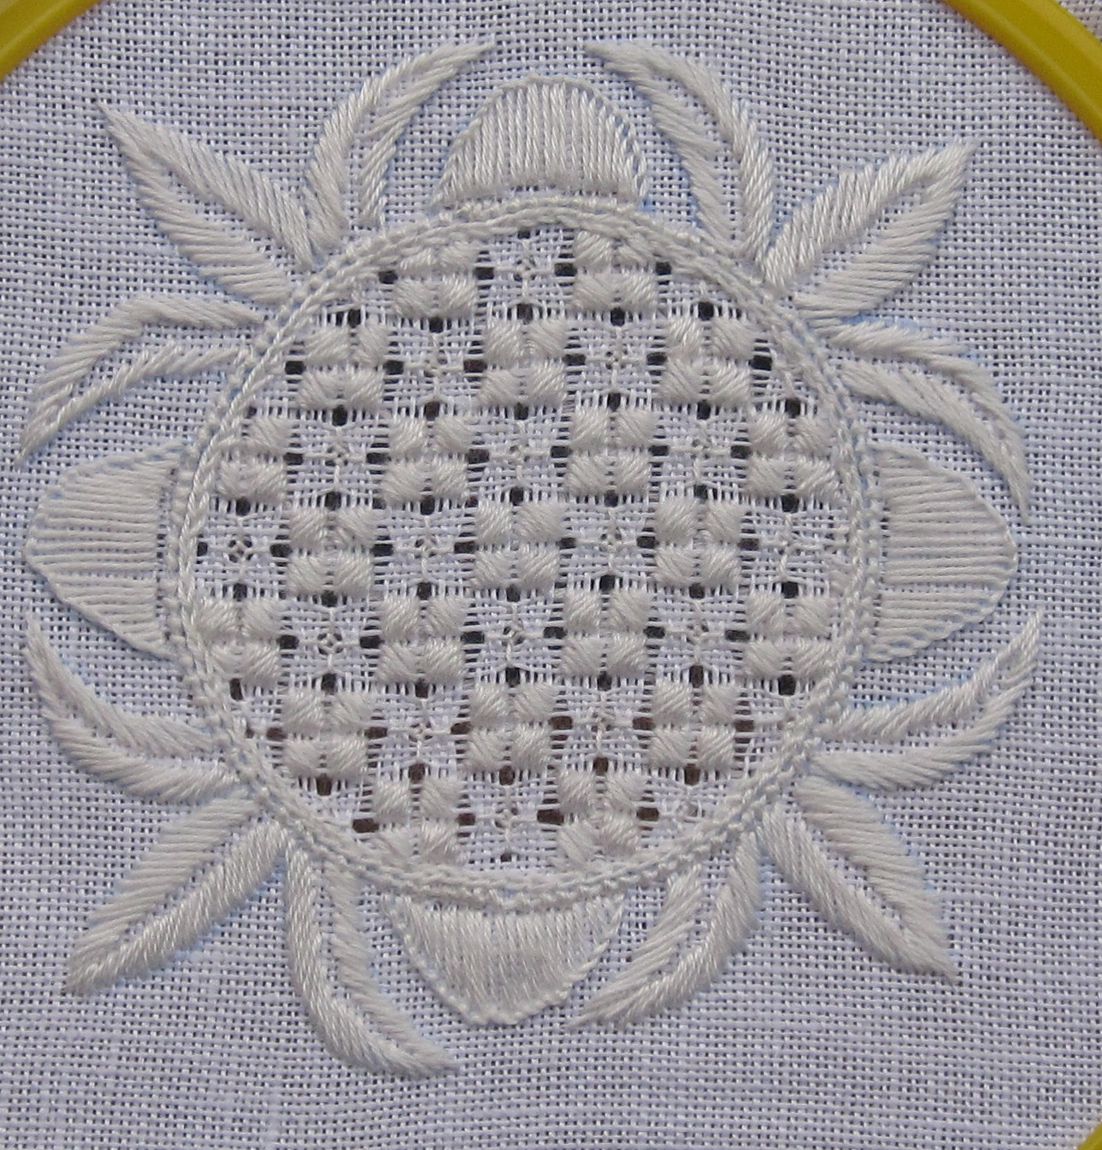
Washed, starched and irond the pattern shows its full charme.
474_15This example was worked on 13.5/cm thread count linen using Coton à broder No. 30 for both the Satin stitches and the Rose stitches.

Filling Pattern – No. 473

No. 473
category: Limet-Filling pattern
stitches used: Rose stitches and Satin stitches
longitudinal axis: group of three threads (in other shapes/motifs: center = square)

This pattern is very similar to the pattern “472“, but after laundering it gets its own, very special appearance.
Because the Rose stitches will bundle fabric threads together and because it is difficult to stitch between bundled threads, start with the Satin stitch bars.
473_1
First, in the established Limet grid, work Satin stitches as blocks of three bars consisting of 9 stitches (3 squares) over one square (3 threads). Start at the top middle – so that the pattern can fully develop in the upper part of the motif – working the blocks in a stair-step manner without changing the direction of the stitches with each block.

Work the blocks like a checkerboard all over the shape.
473_2
Work Rose stitches in diagonal rows across the remaining squares,
473_3
to established a grid of Rose stitches. Some Rose stitches will intersect other rows of Rose stitches creating blocks of 2 X 2 Rose stitches.
473_4
Washed, starched and ironed the pattern gets its full charm.
473_5
This example was worked on 13.5/cm thread-count linen with Coton à broder No. 20 for both the Satin stitches and the Rose stitches.
473_6
Especially from the side view the the special appearance of this pattern is seen.

Filling Pattern – No. 472

No. 472
category: Limet-Filling pattern
stitches used: Rose stitches and Satin stitches
longitudinal axis: group of three threads (in other shapes/motifs: center = square)

In the established Limet grid (cut 1, leave 3), work a grid of Rose stitches. Some Rose stitches will intersect other rows of Rose stitches creating blocks of 2 X 2 Rose stitches.
472_1
Position a block of Rose stitches at the bottom-middle of the shape. Please note that when working Rose stitches in straight rows parts of adjacent stitches will overlap.
472_2
If one has another design to be filled, an octagon should be centered. For example, in a circle one can start the grid as follows:
Establish the Limet grid (cut 1, leave 3) so that in the center there is a square.
472_3
In this established grid (created by the diagonally worked Rose stitches), Satin stitches are worked in vertical rows.
472_4
Always blocks of 3 – 9 – 3 Satin stitches are places in each octagon.
472_5
Washed, starched and ironed the pattern gets its full charm.
This example was worked on 17/cm thread-count old handwoven linen with Coton à broder No. 20.
472_6

Filling Pattern – No. 471

No. 471
category: Limet-Filling pattern
stitches used: Rose stitches and 7 stitches of the simple square eyelet
diagonal striped pattern
471_Bild_01
First, in the established Limet grid, one row of Rose stitches is worked along the diagonal axis using Coton à broder No. 25.
Then, using Coton à broder No. 30 and always starting at the meeting points of two Rose stitches, 7 stitches of a simple square eyelet are worked counterclockwise. For more detailed description please refer to my book “Limetrosen I”.

471_Bild_02
471_Bild_03

On the return pass, one more row of 7 stitches of the simple square eyelet is worked – each step is worked mirrored and staggered so that the stitched sections interlock.
And then another Rose stitch row is worked.

471_Bild_04
471_Bild_05

One Rose stitch row and two rows of interlocking square eyelet sections always alternate.

471_Bild_06
471_Bild_07

After laundering, starching and ironing the pattern gets its full charm.
471_Bild_08
This pattern looks nice in many different shapes.
471_Bild_09
471_Bild_10

Filling Pattern – No. 469

No. 469
category: Limet-Filling pattern
stitches used: Satin stitches over 1 square in the width and 2 squares in the length and Double Back stitches
longitudinal axis: withdrawn thread line (in other shapes or motifs: center = intersection of withdrawn thread lines
name: Double Back stitch in a Satin stitch grid

It is expedient to begin thread withdrawal for the Limet grid in the prepared leaf design here:
01-469
First, in the established Limet grid, work a grid of Satin stitches. Start at the bottom-middle of the shape. Work, in a stair-step manner, Satin stitch bars over one square (3 threads) in the width and over 2 squares (6 stitches) in the length.
02-469
On the way back work the bars mirrored, so that squares of 6 X 6 thread-squares are established.
Work the grid all over the shape.
03-469
Then, from the back of the fabric, work Double Back stitches (a more detailled description is found in Openwork Pattern Samplers, pages 48 – 52) in the remaining squares. Therefore, starting at the top left, work 8 stitches following carefully the step-by-step pictures.

04-469

1

05-469

2

06-469

3

07-469

4

08-469

5

09-469

6

10-469

7

11-469

8

Now, bring the needle – from right to left – between the layers of the fabric and the stitches and pull the working threads of the stitches together with a Blanket stitch – thread under the needle. Do the same from top to bottom.

12-469

9

13-469

10

Travel to the starting point – top left – of the next Double Back stitch and repeat the steps. Picture 12 shows the result from the front of the fabric.

14-469

11

15-469

12

All remaining squares are filled in the same way. To get a uniform appearance, work the rows of Double Back stitches always from top to bottom.
16-469
Washed, starched and ironed the pattern gets its full charm.
This example was worked on 13.5/cm thread-count Weddigen linen with Coton à broder No. 20.
17-469