A Wide Hem with a Folded Peahole Edging

(If you came to this blog post via pinterest, please take a look here too.)

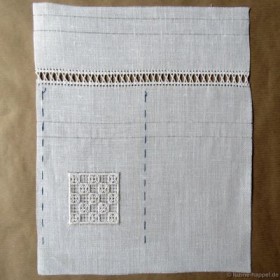
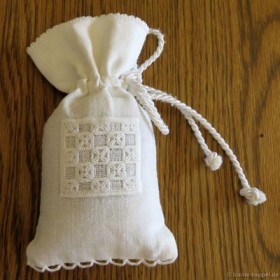
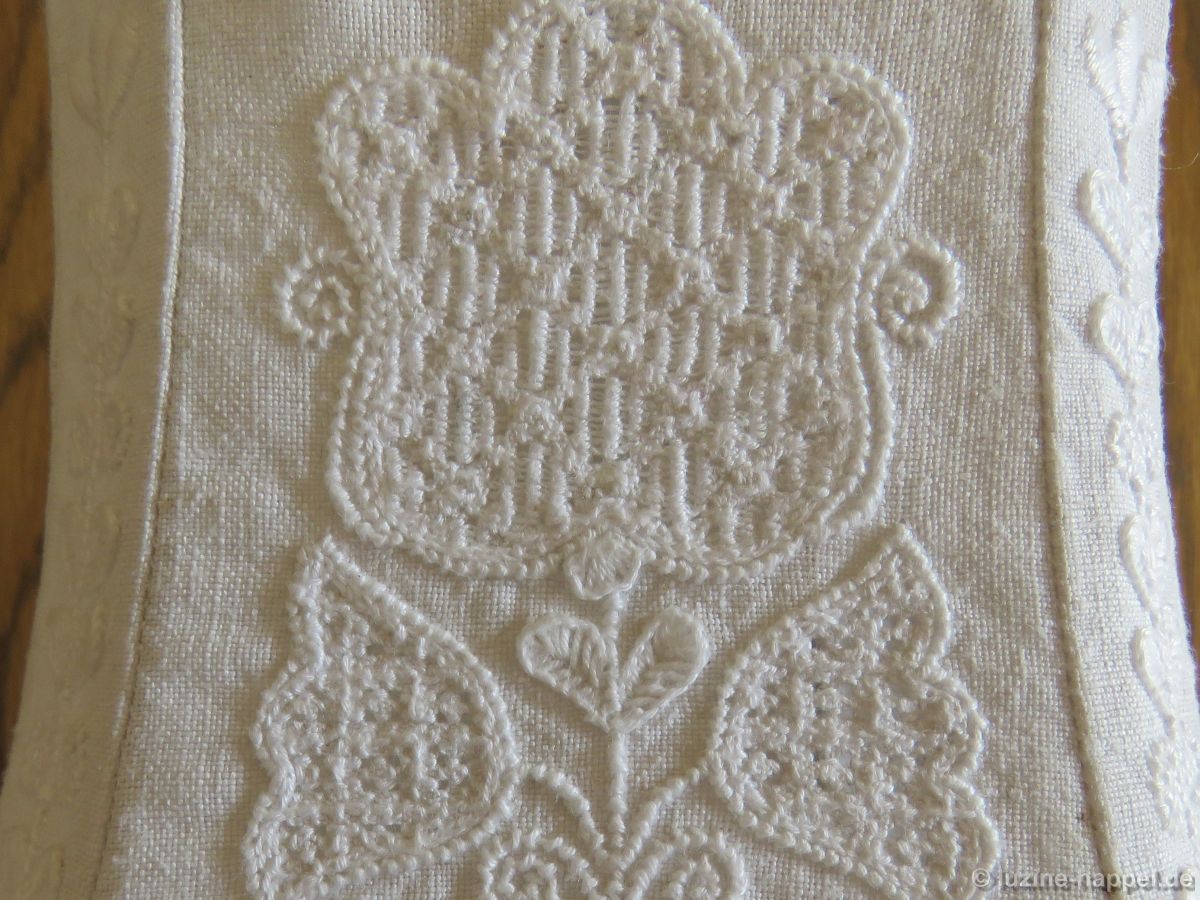
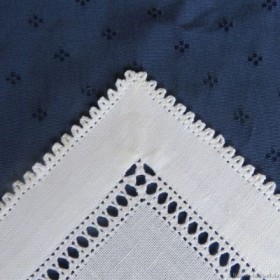
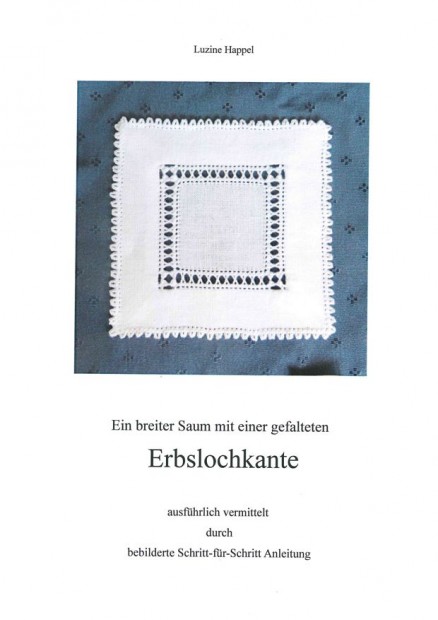
In previous articles I showed how to work a folded Peahole edging and how to work the corner of the folded Peahole edging. Now I present a wide hem with a mitered corner and a folded Peahole edging.
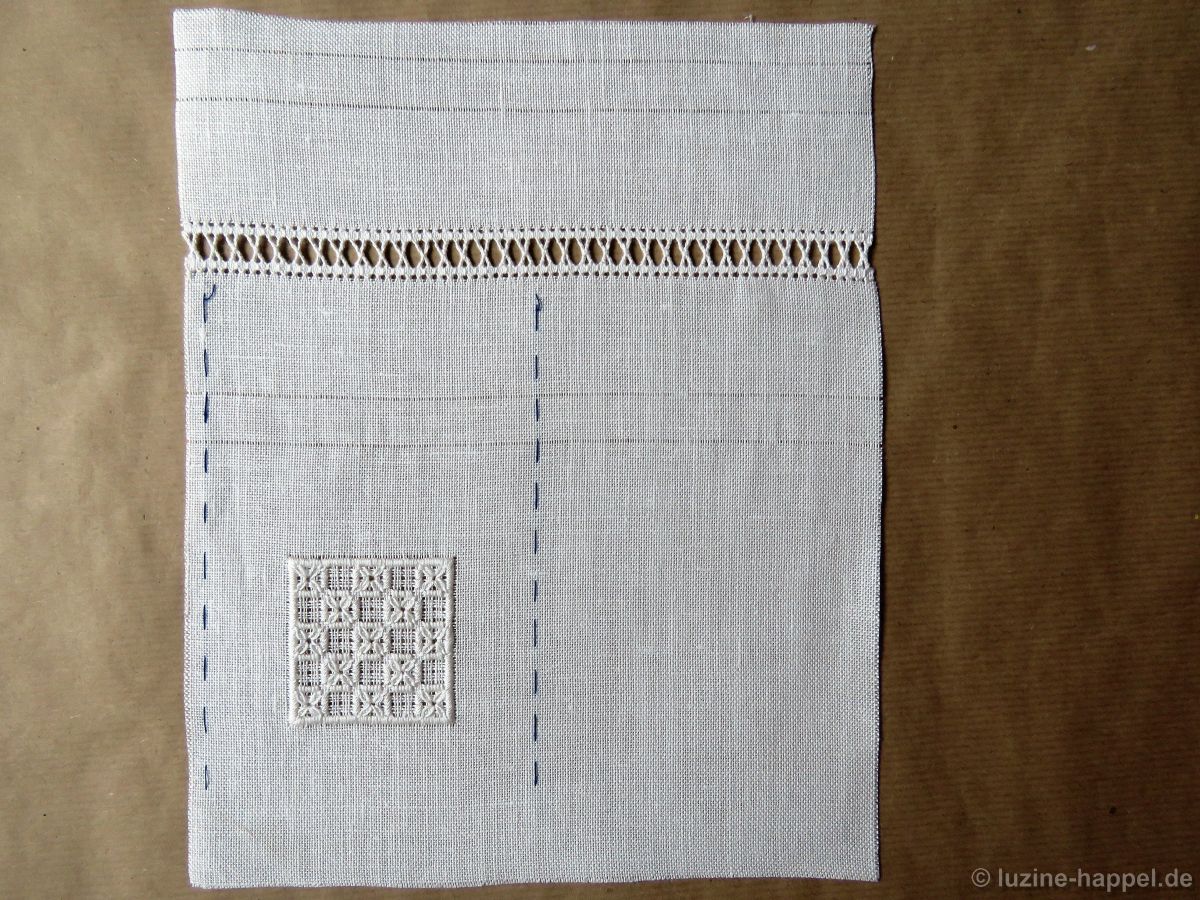
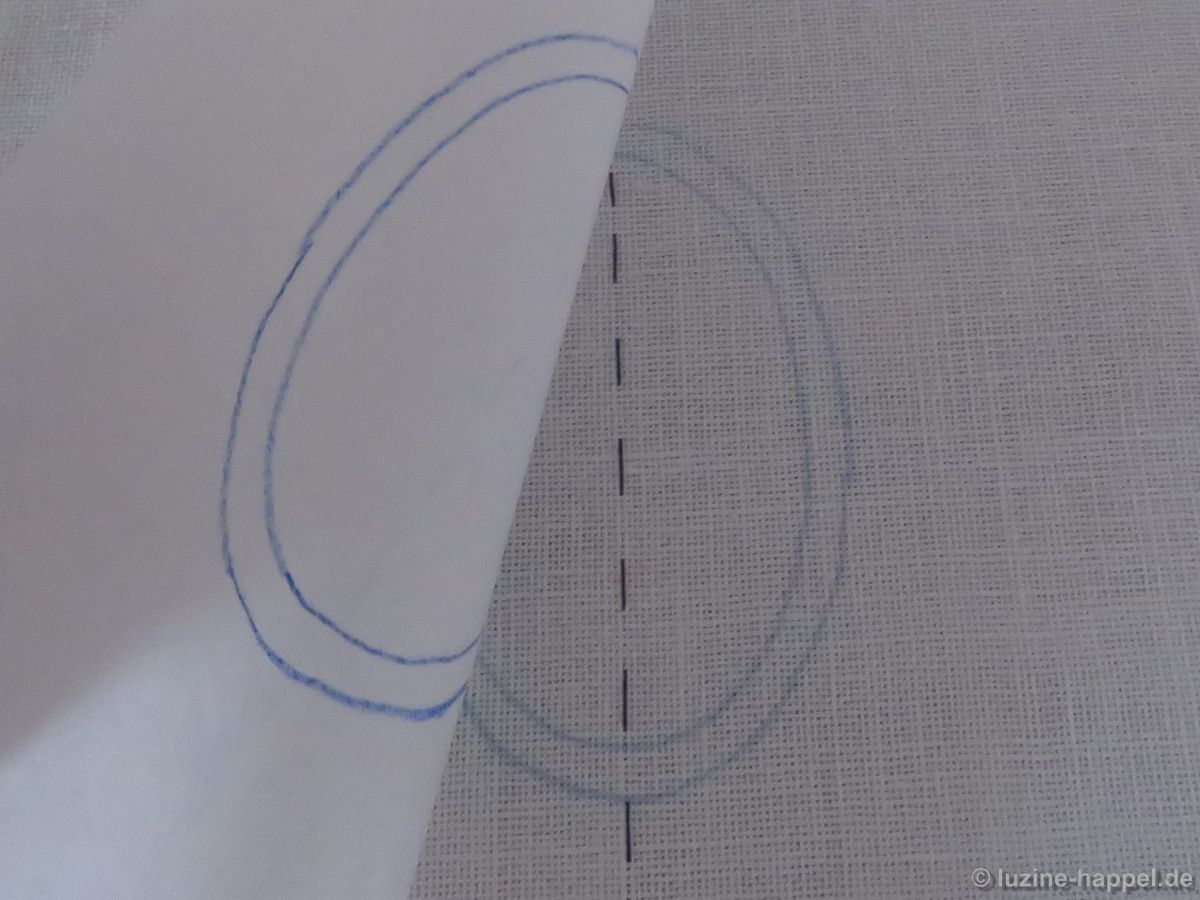
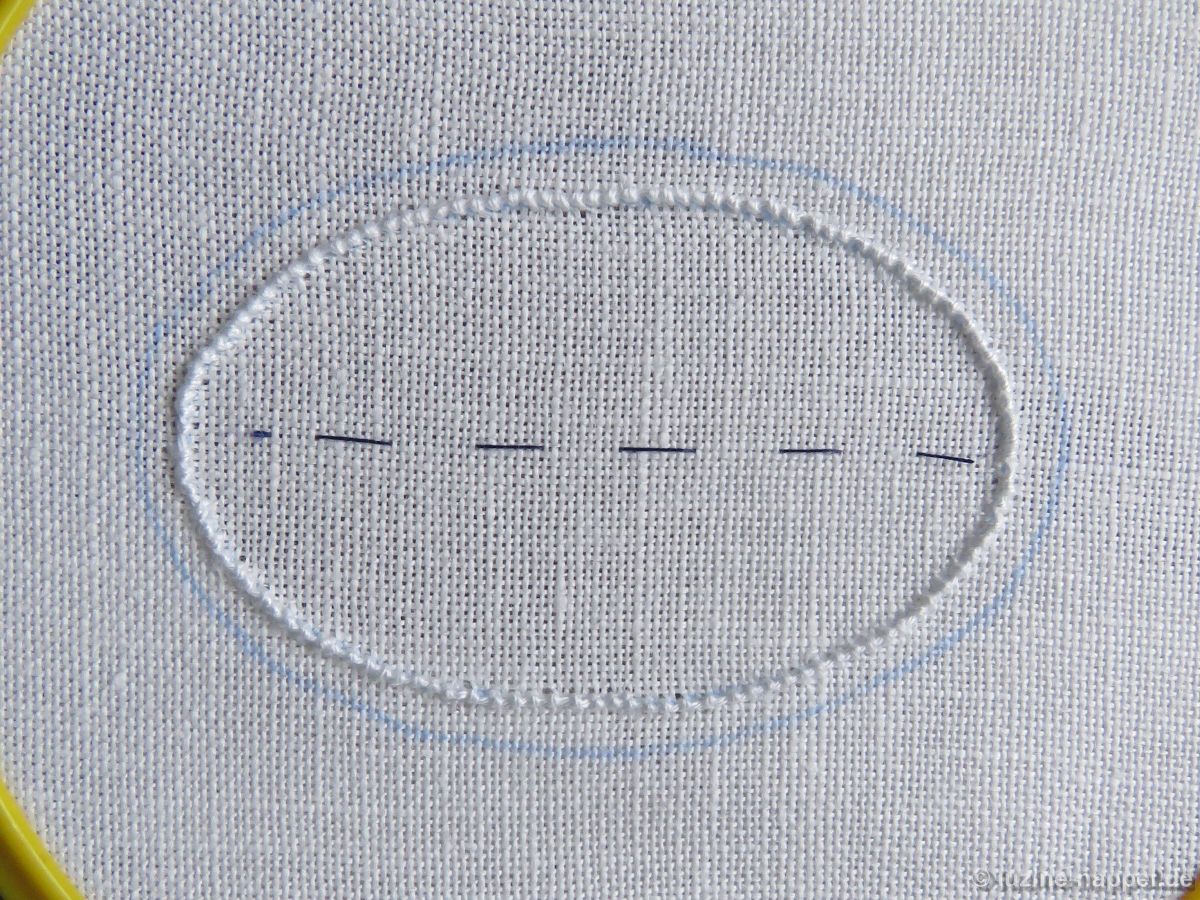
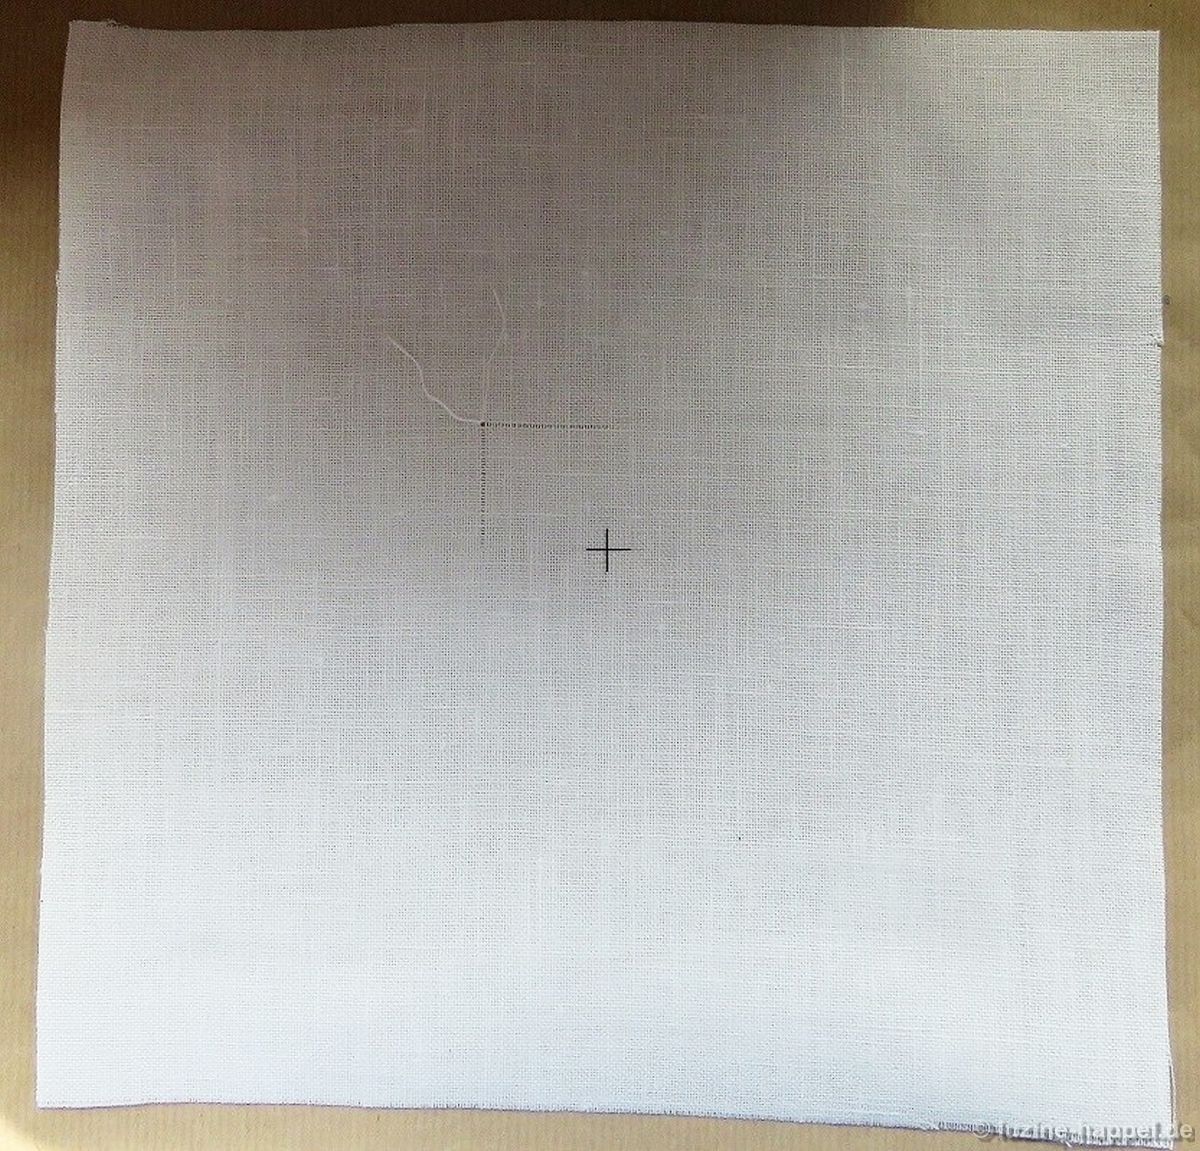
Linen with a 13.5/cm thread count is cut to measure 26 cm X 26 cm. The center is marked.
E-Saum_1
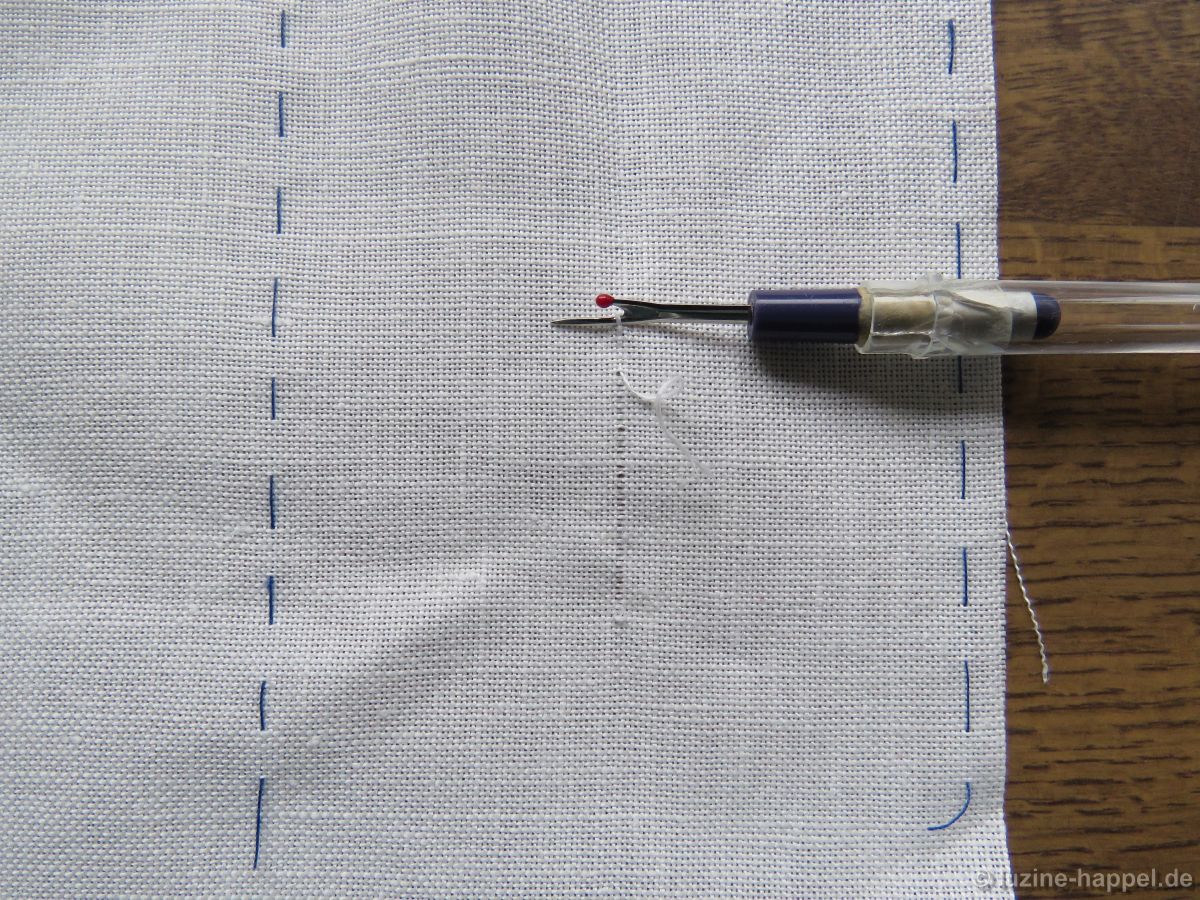
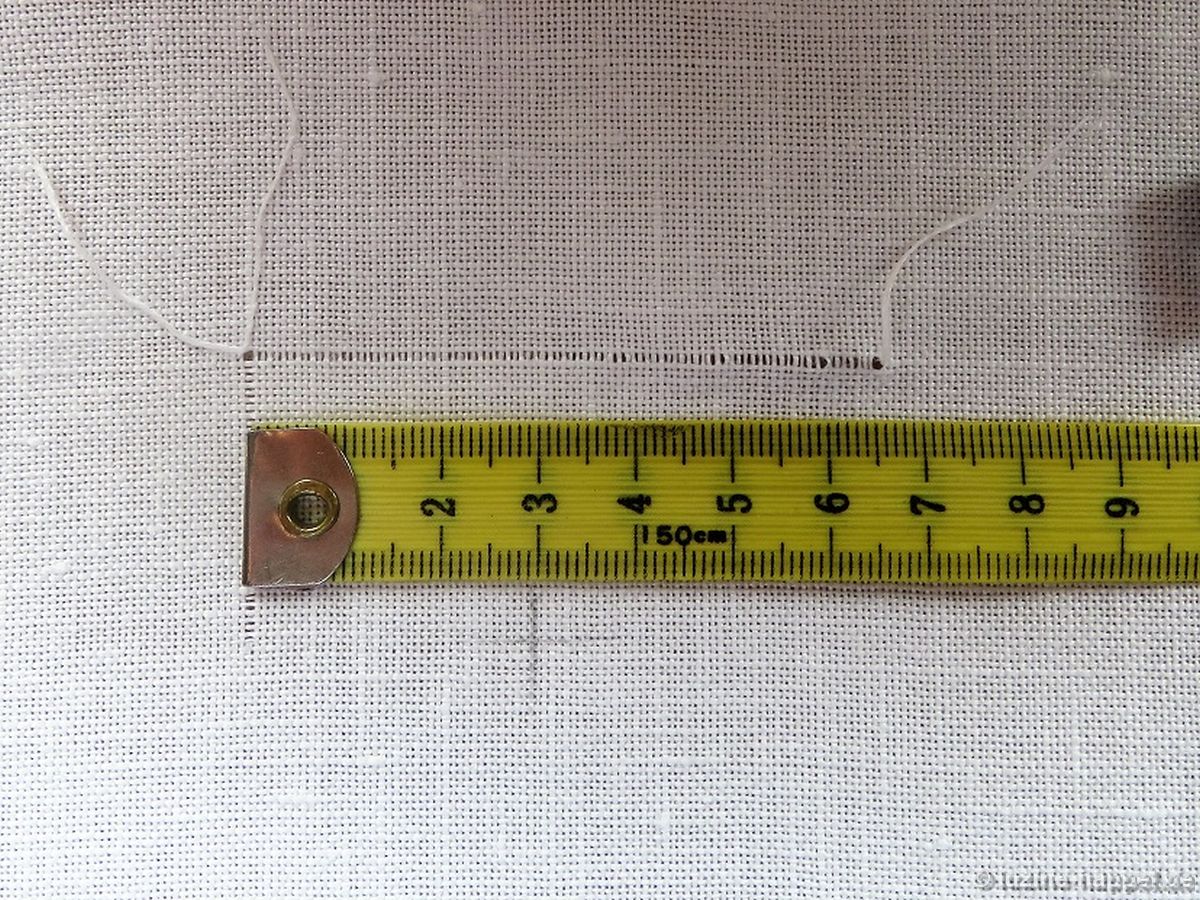
From the center point, count 40 horizontal and 40 vertical threads, and cut the forty-first thread; withdraw the threads to their intersection point.
E-Saum_2
The section of the withdrawn thread measures 3 cm. The opposite thread end is now withdrawn about 3.5 cm.
E-Saum_3
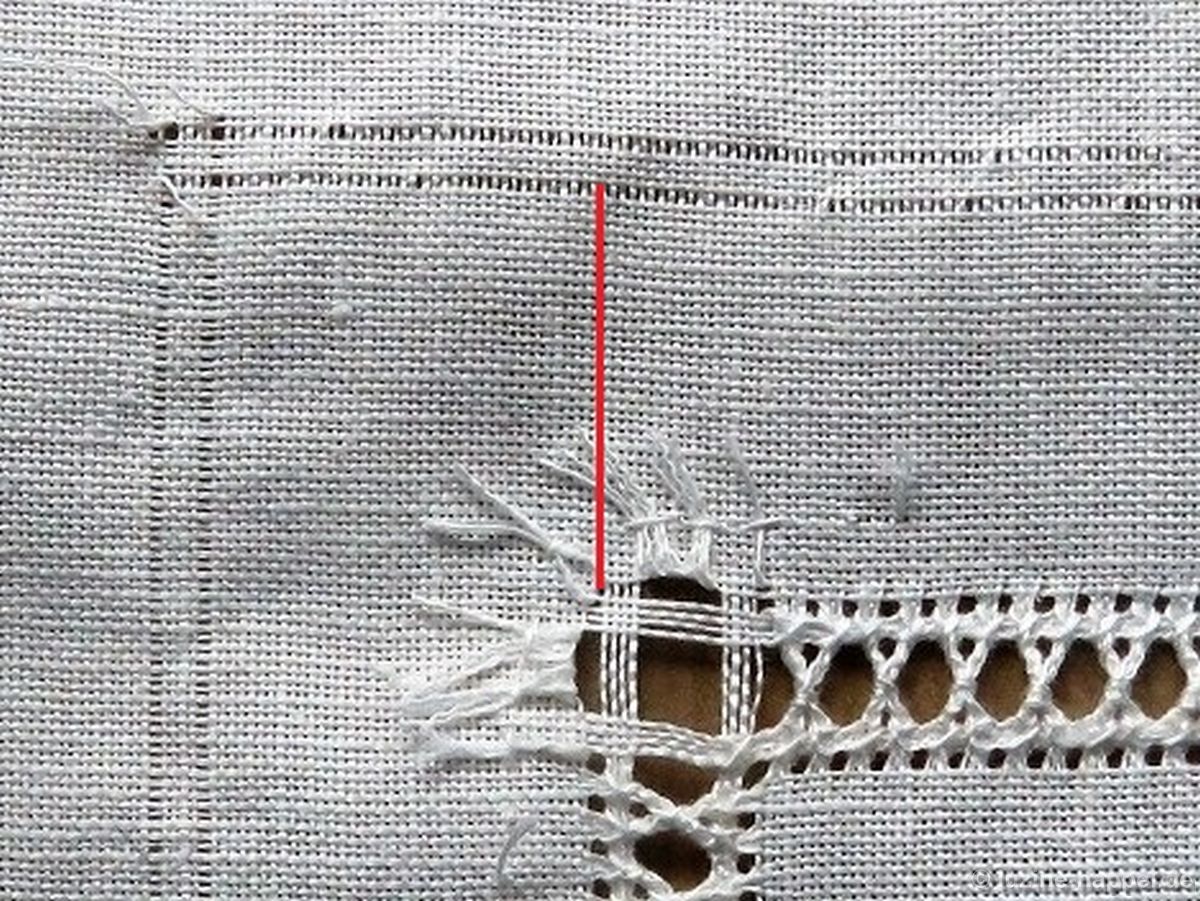
Outward from the withdrawn-thread line, leave 4 threads, and cut the fifth thread where it aligns with the center; withdraw it about 3.5 cm to both sides.
E-Saum_4
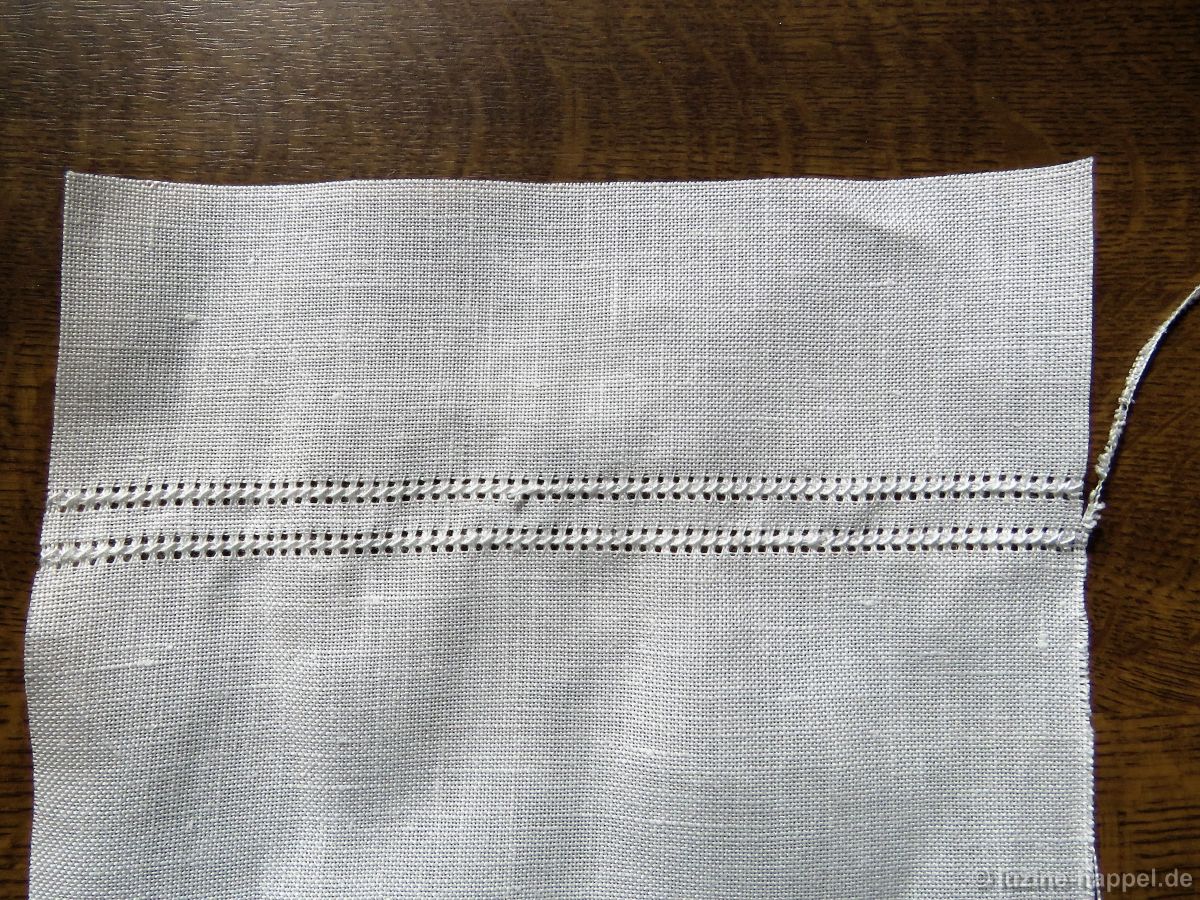
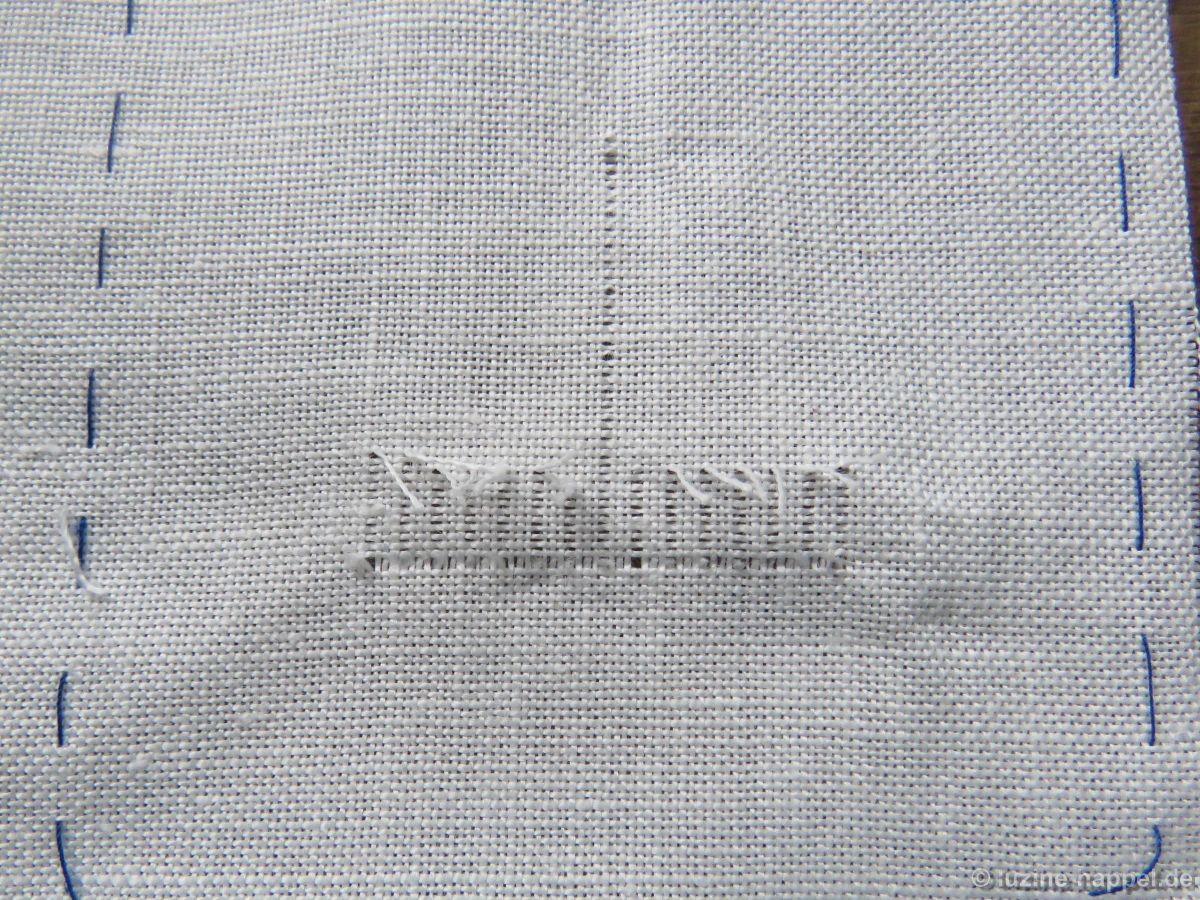
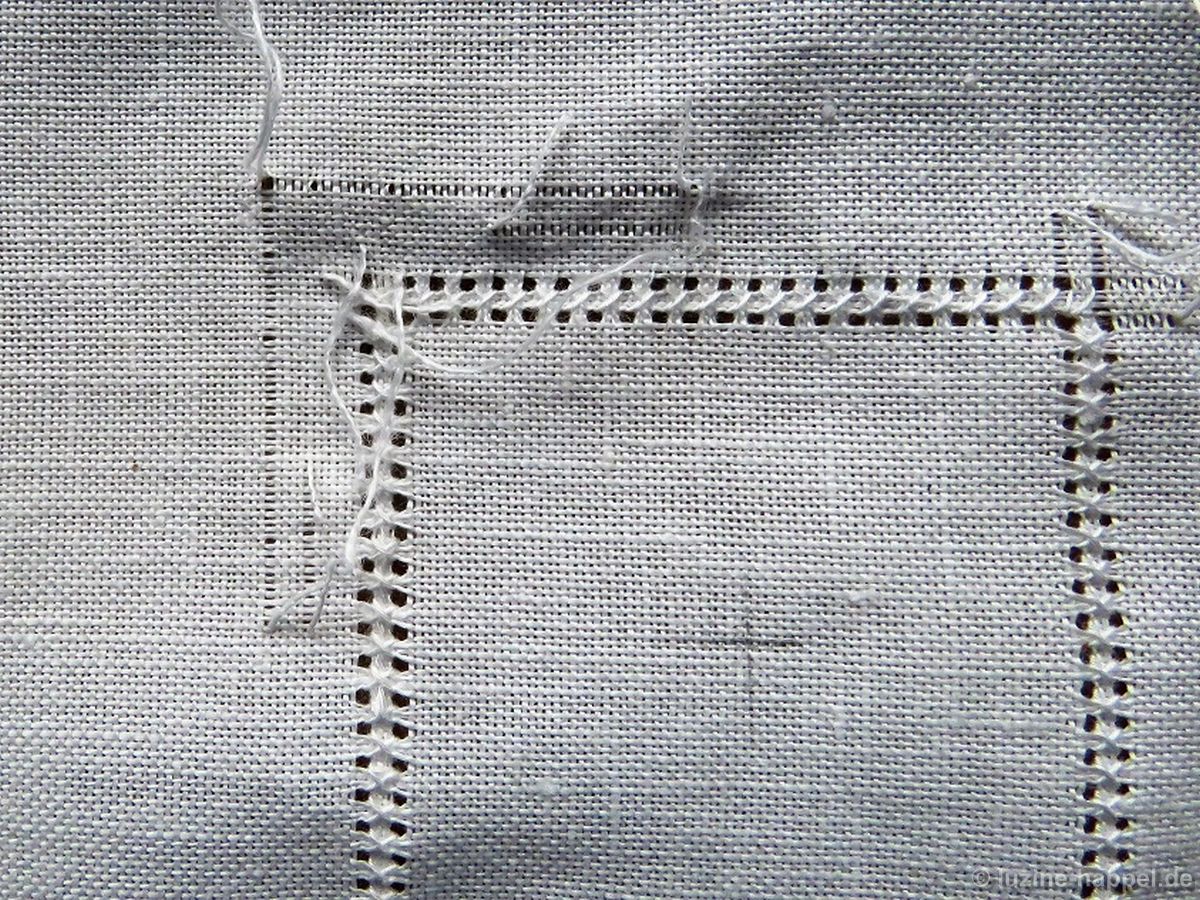
Starting at the left at the vertical withdrawn-thread line, work Four-Sided stitches over 4 threads between the two horizontal withdrawn-thread lines. Work 20 stitches in all and stop.
E-Saum_5
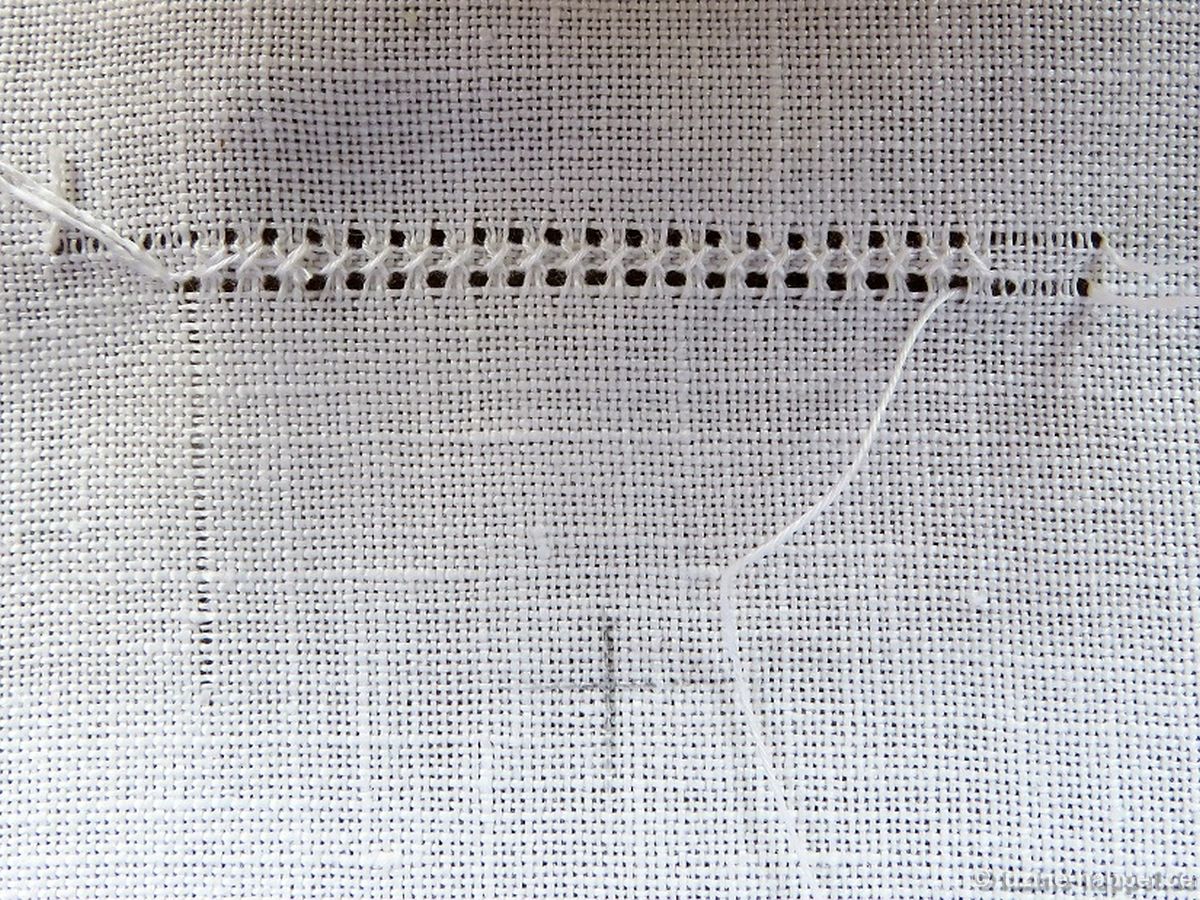
Cut the vertical thread to the right of the center mark (again, the forty-first thread) and withdraw it about 3.5 cm in both directions.
E-Saum_6
Leave 4 threads to the right, and withdraw the fifth. Turn the work 90° counterclockwise,
E-Saum_7
and continue working Four-Sided stitches around the corner.
E-Saum_8
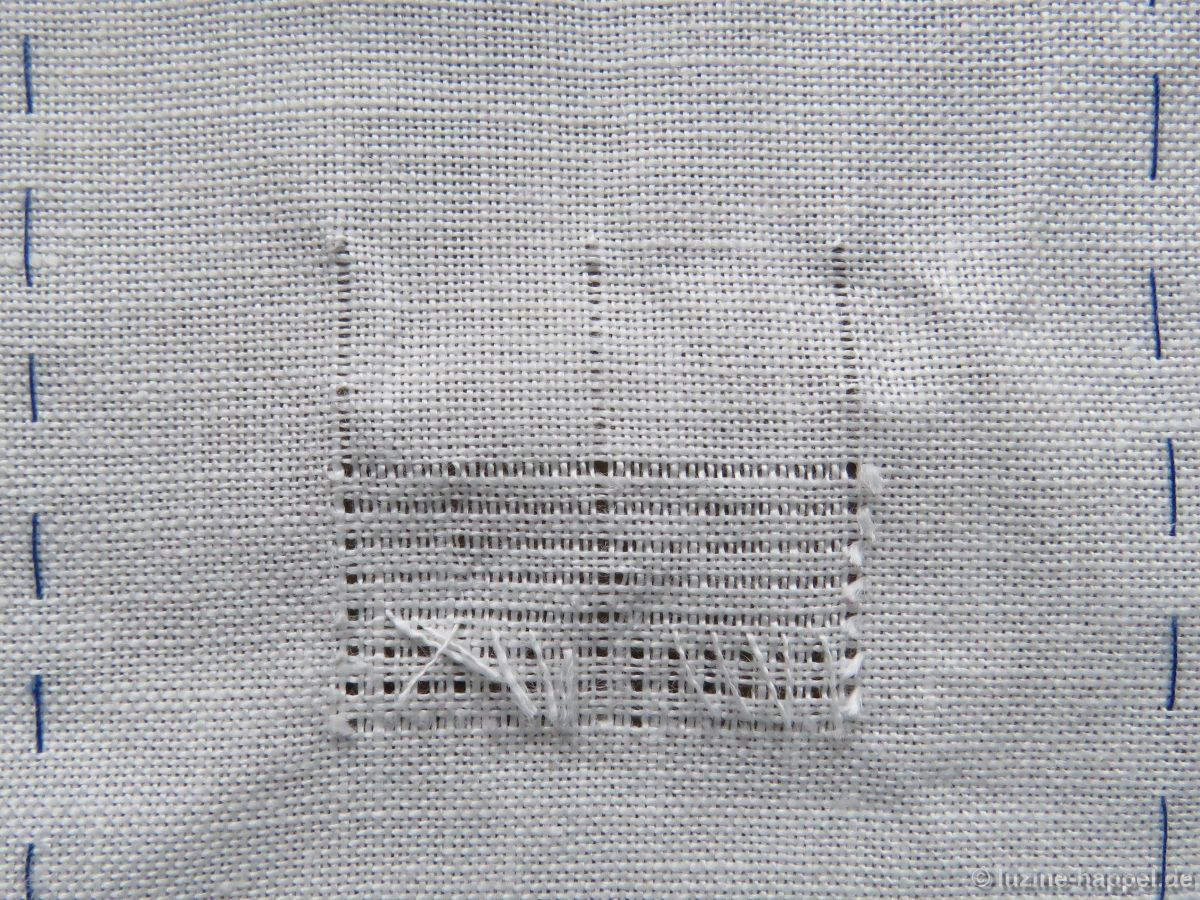
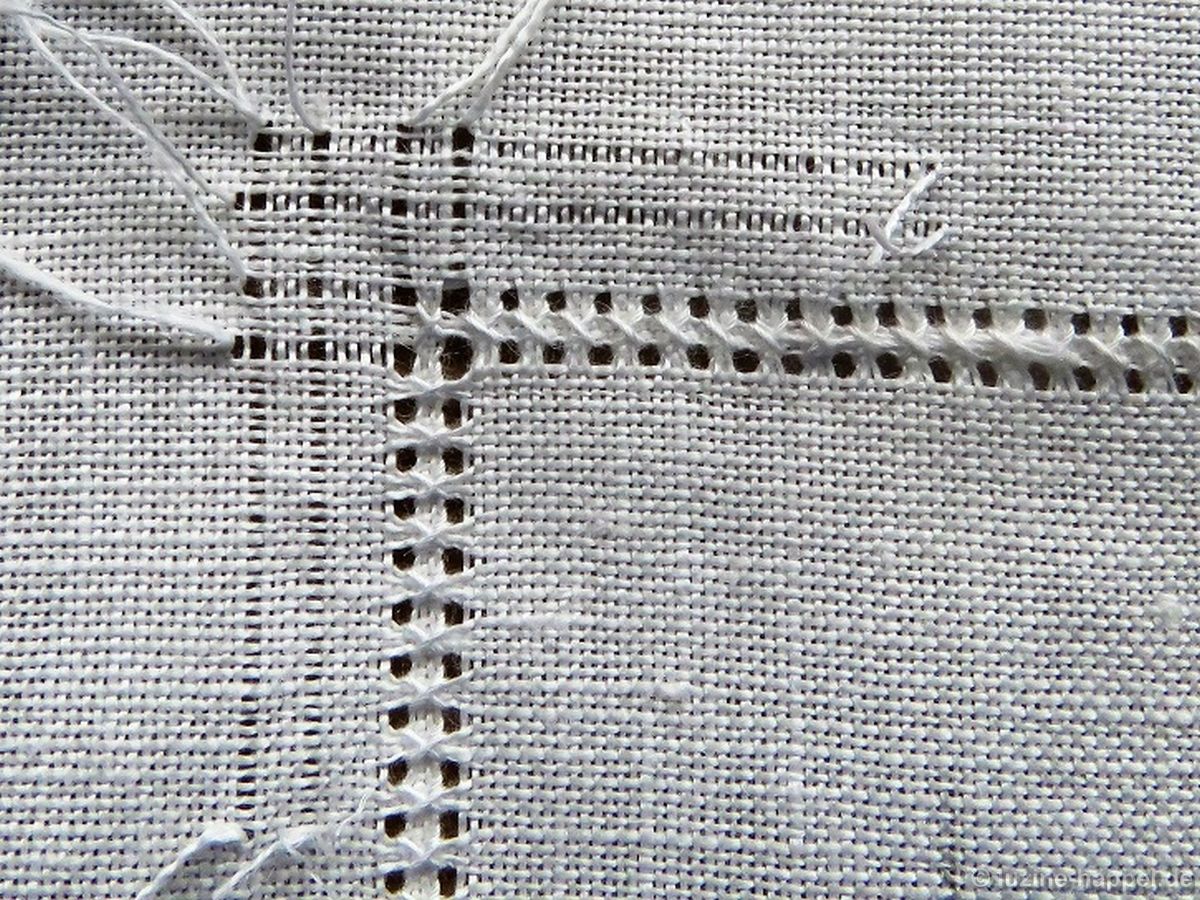
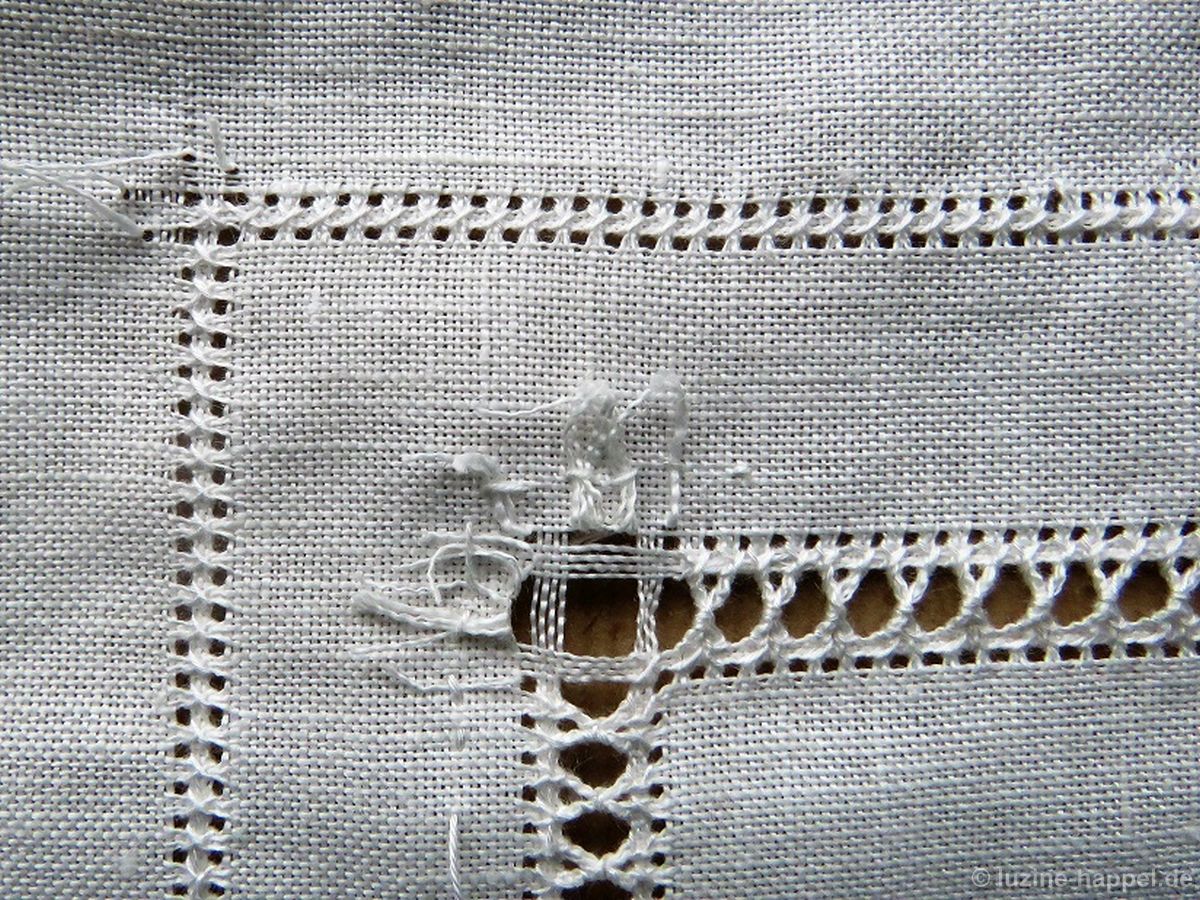
After working 21 (counting the Four-Sided stitch at the corner) Four-Sided stitches, withdraw perpendicular threads in the established way. Also withdraw the cut thread of the first withdrawnthread line about 3.5 cm and the fifth thread outward from this line. Work Four-Sided stitches around the entire square.
E-Saum_9
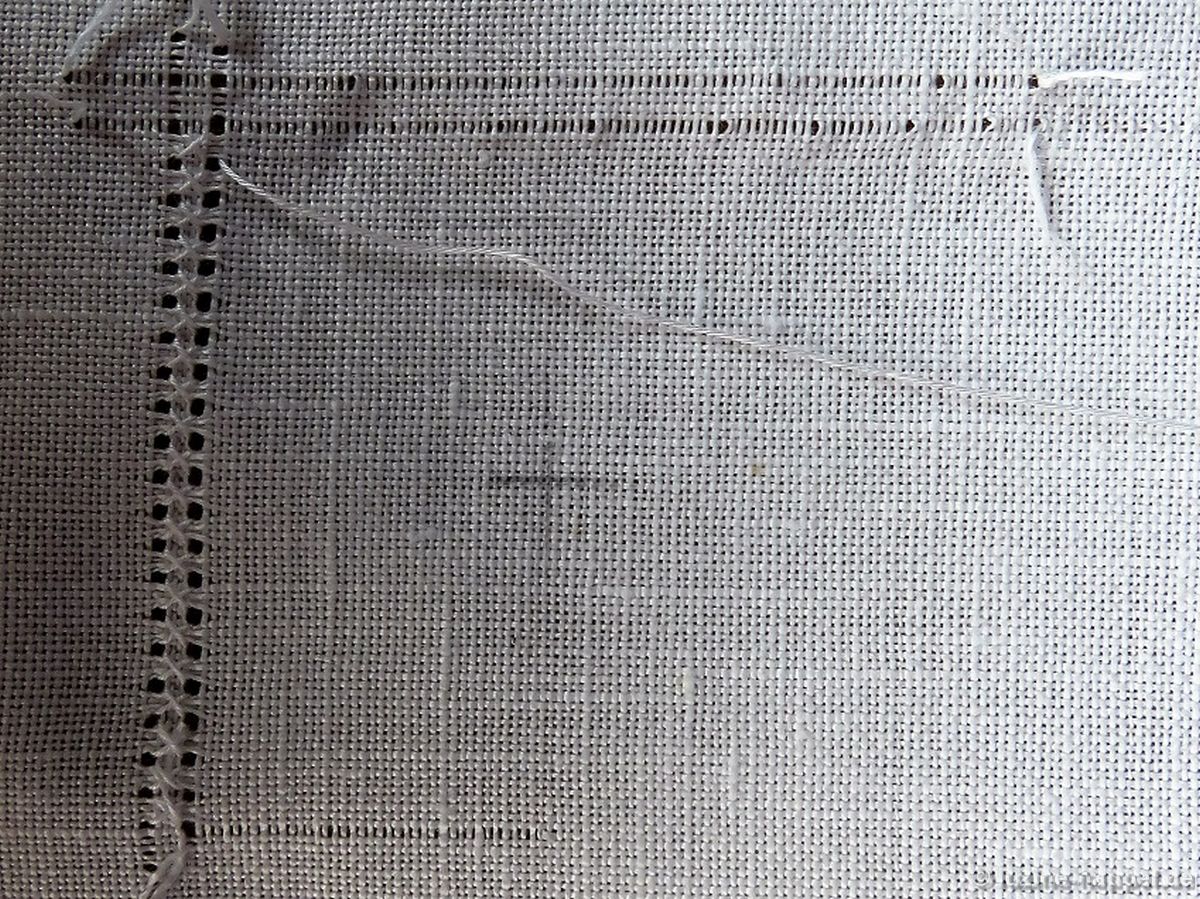
Leave 6 threads outward each side, and cut the seventh in the middle of the side. Leave 4 threads outward, and cut the fifth in the middle. Withdraw the thread ends of the outermost cut threads to their respective intersection points.
E-Saum_10
Now withdraw all the cut threads on the inside up to these lines. The thread ends remain there. They will disappear in the hem later.
E-Saum_11
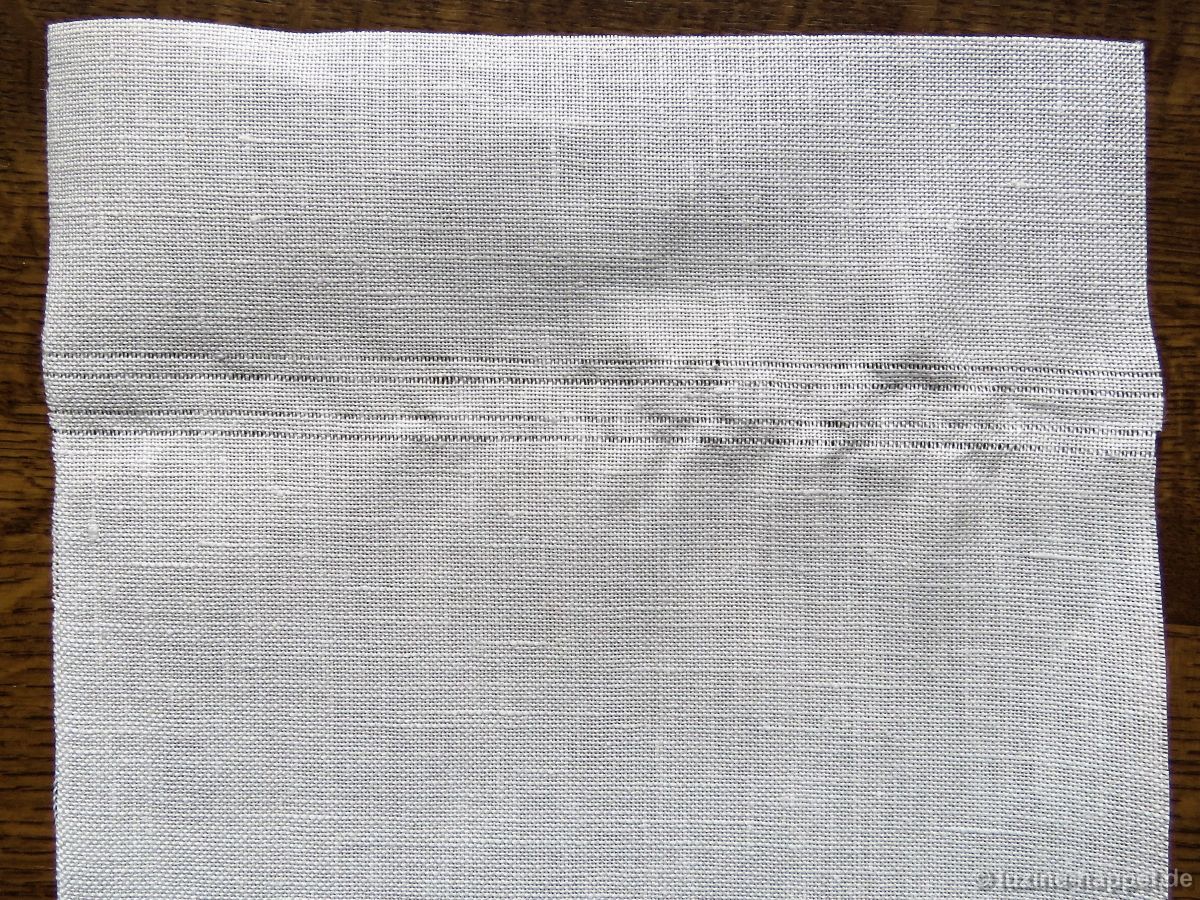
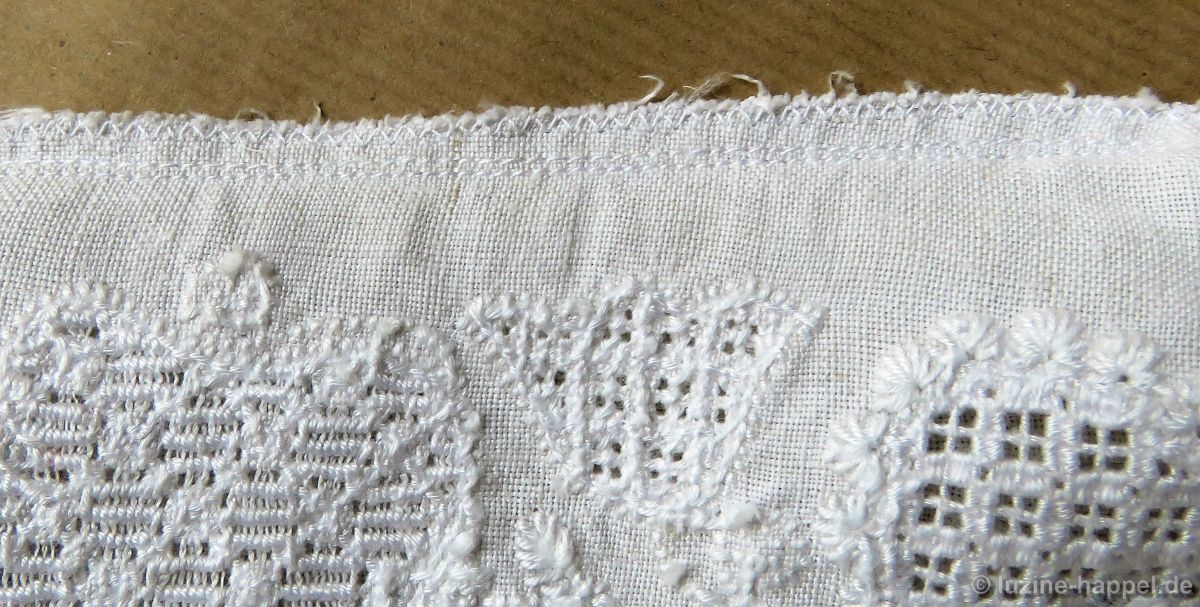
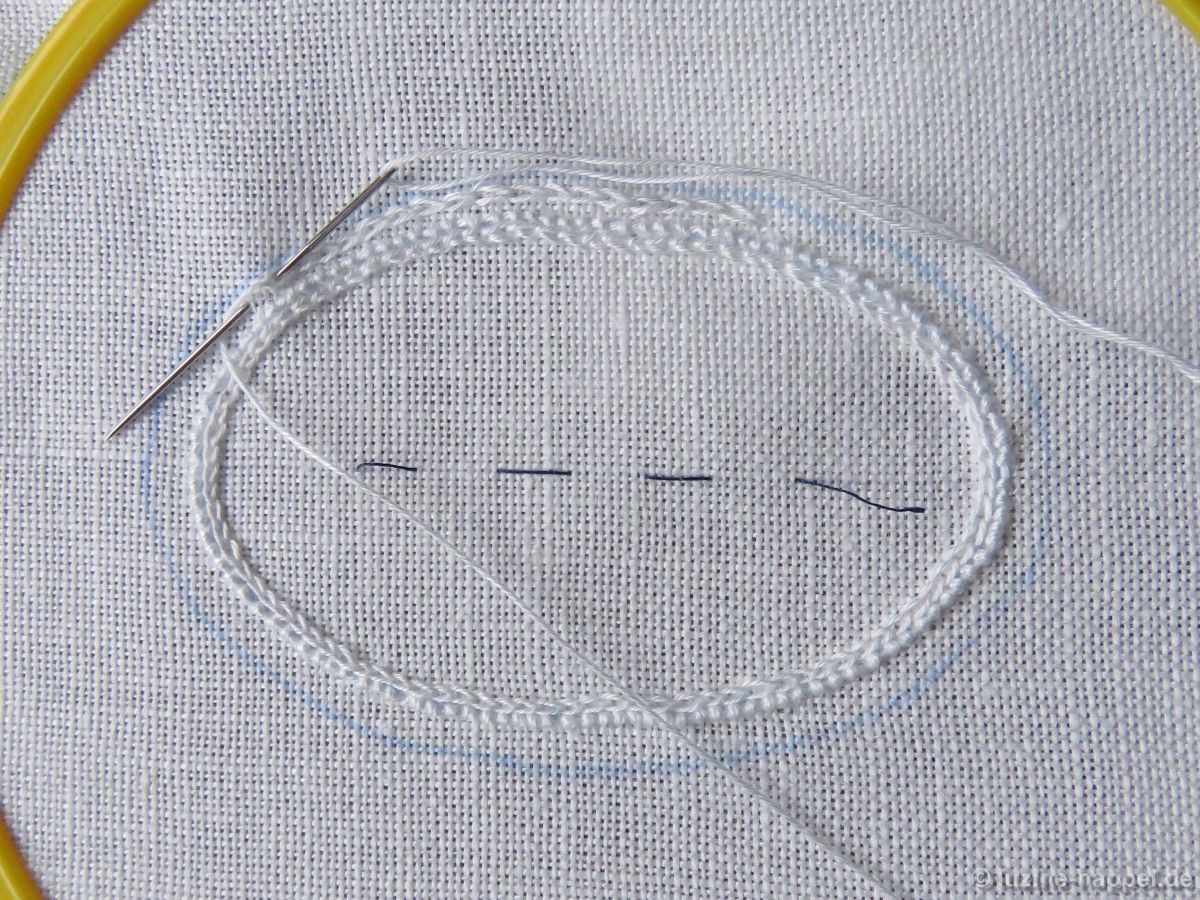
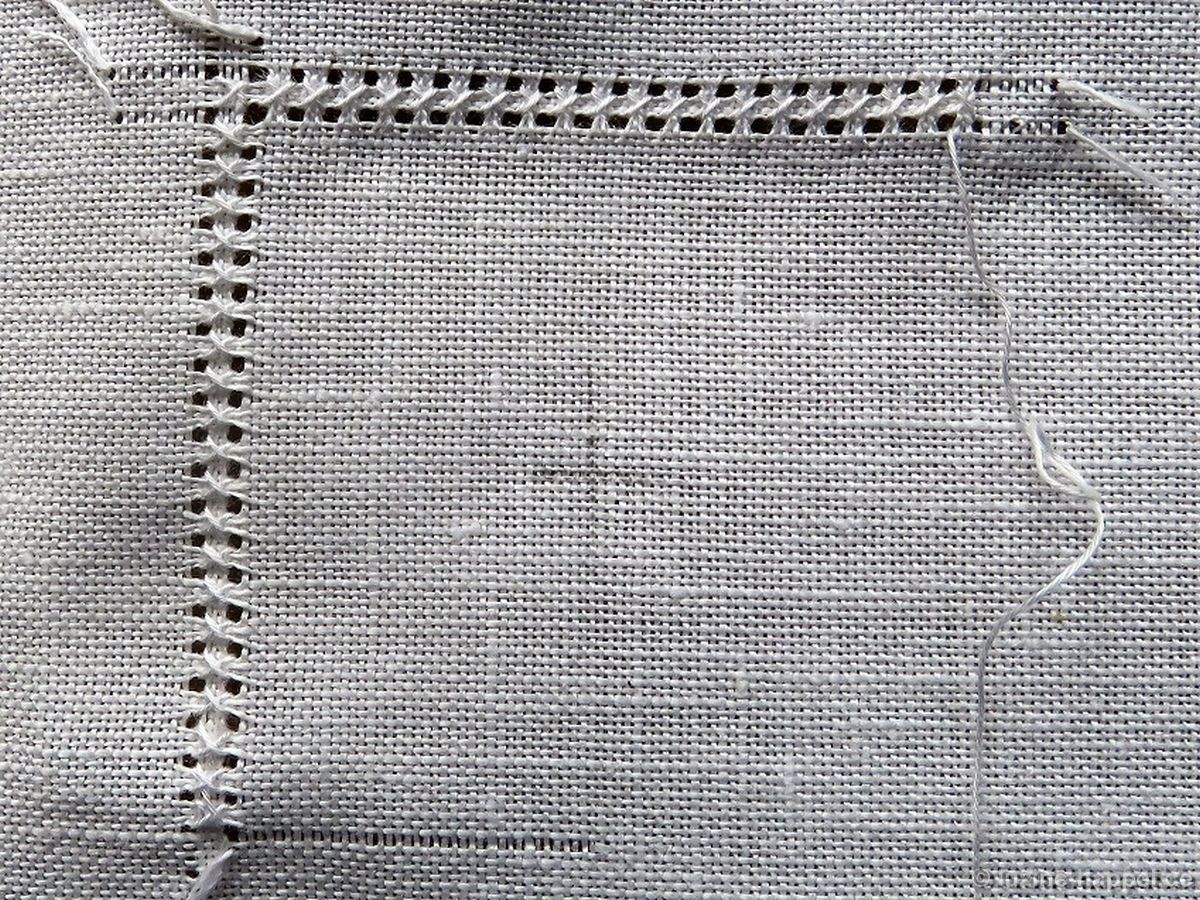
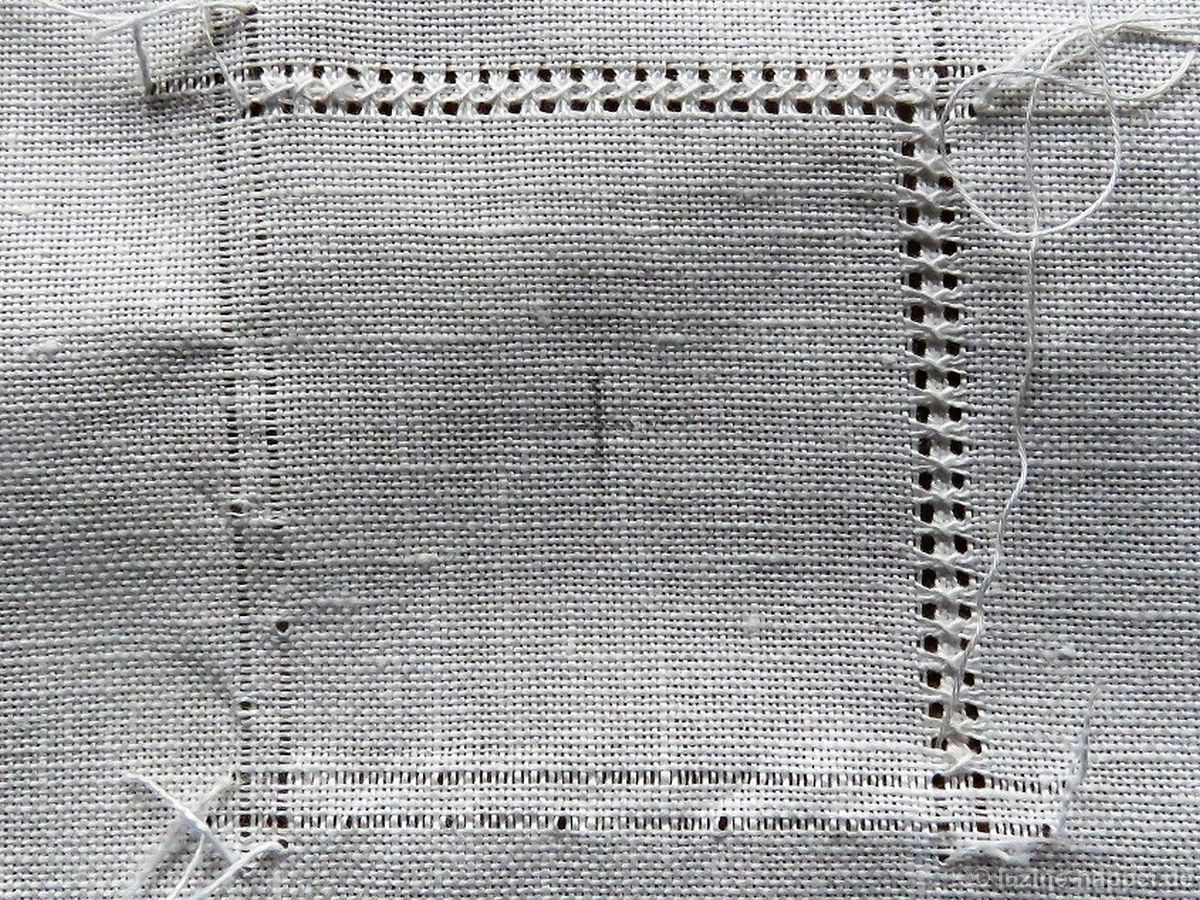
Around the square work 20 Four-Sided stitches between the outside withdrawn-thread lines on each side; these stitches must match the inner Four-Sided stitches. The corner sections remain free.
E-Saum_12
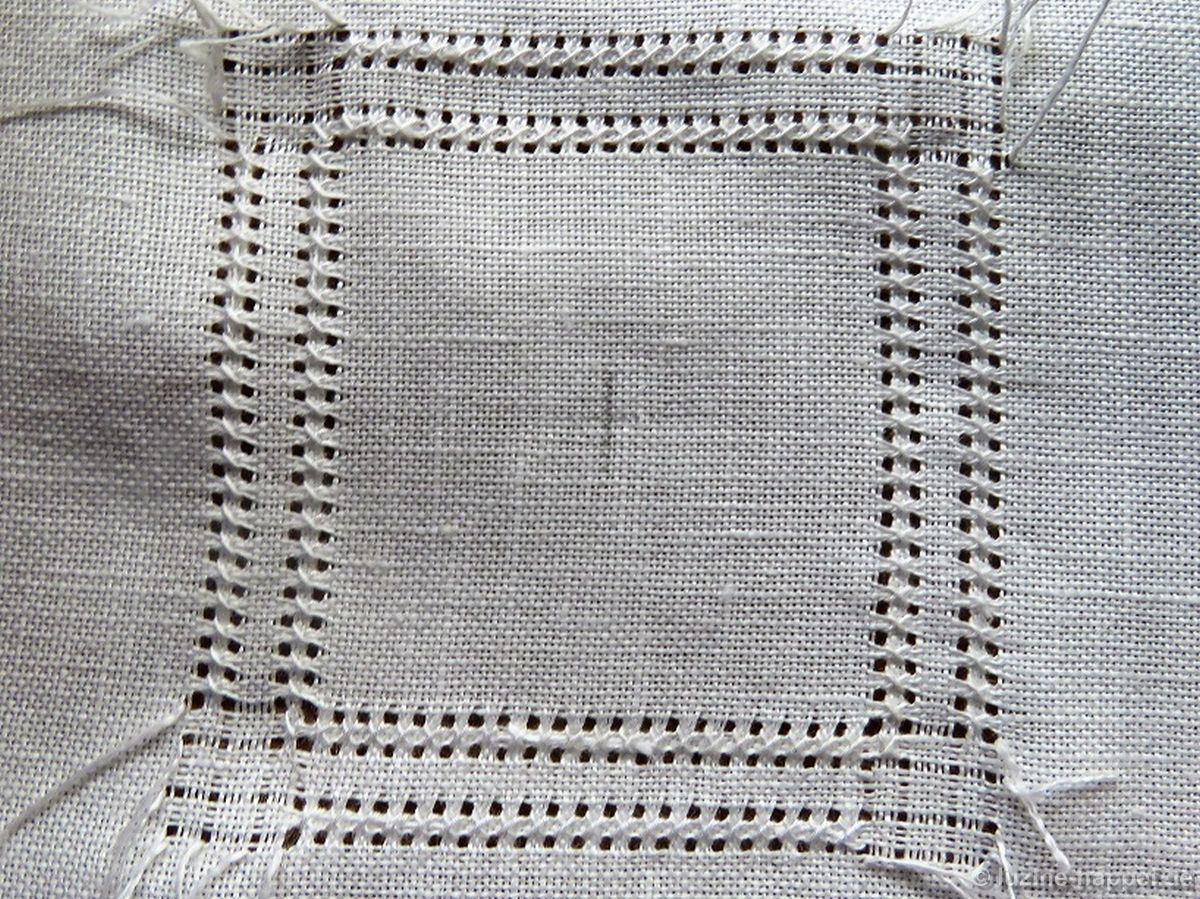
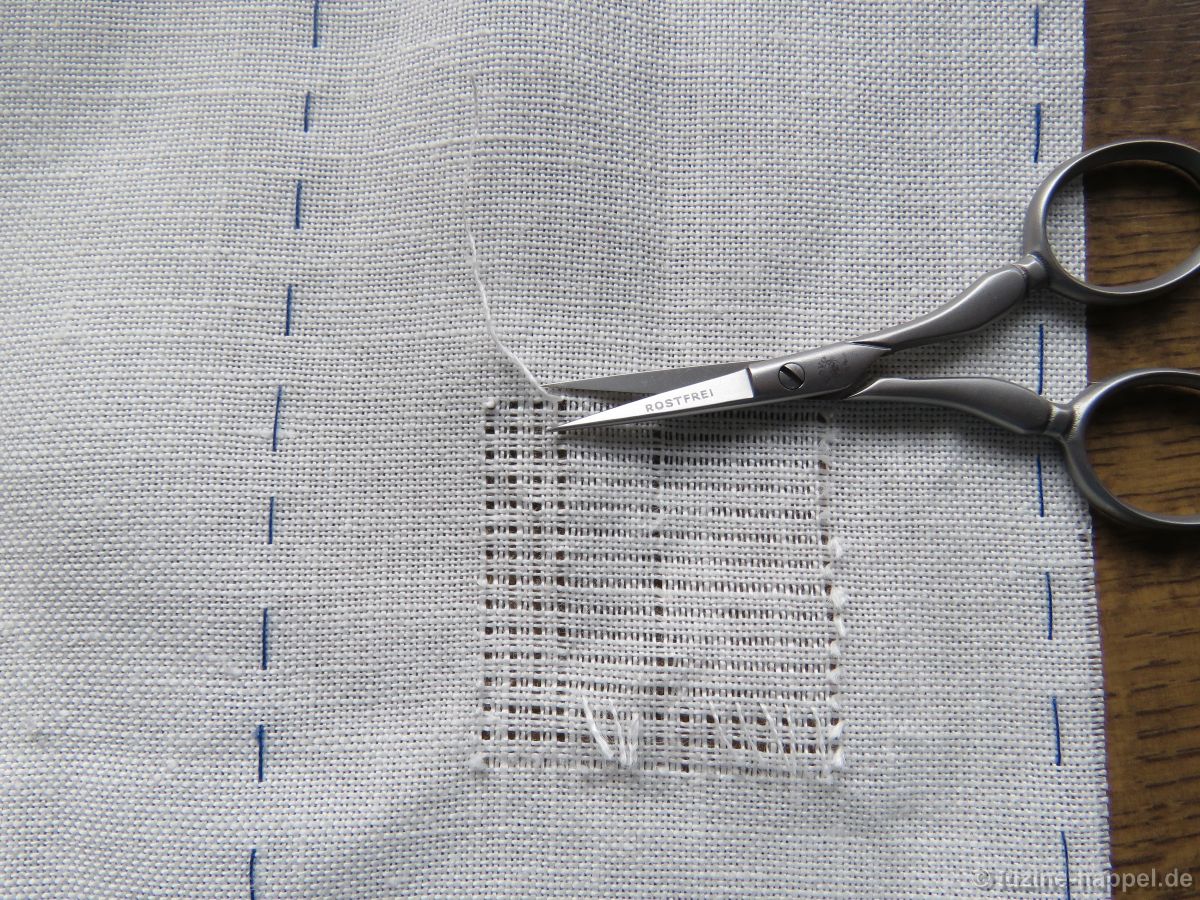
Cut and withdraw the remaining 6 threads. Baste the thread ends in place and work Peaholes.
E-Saum_14
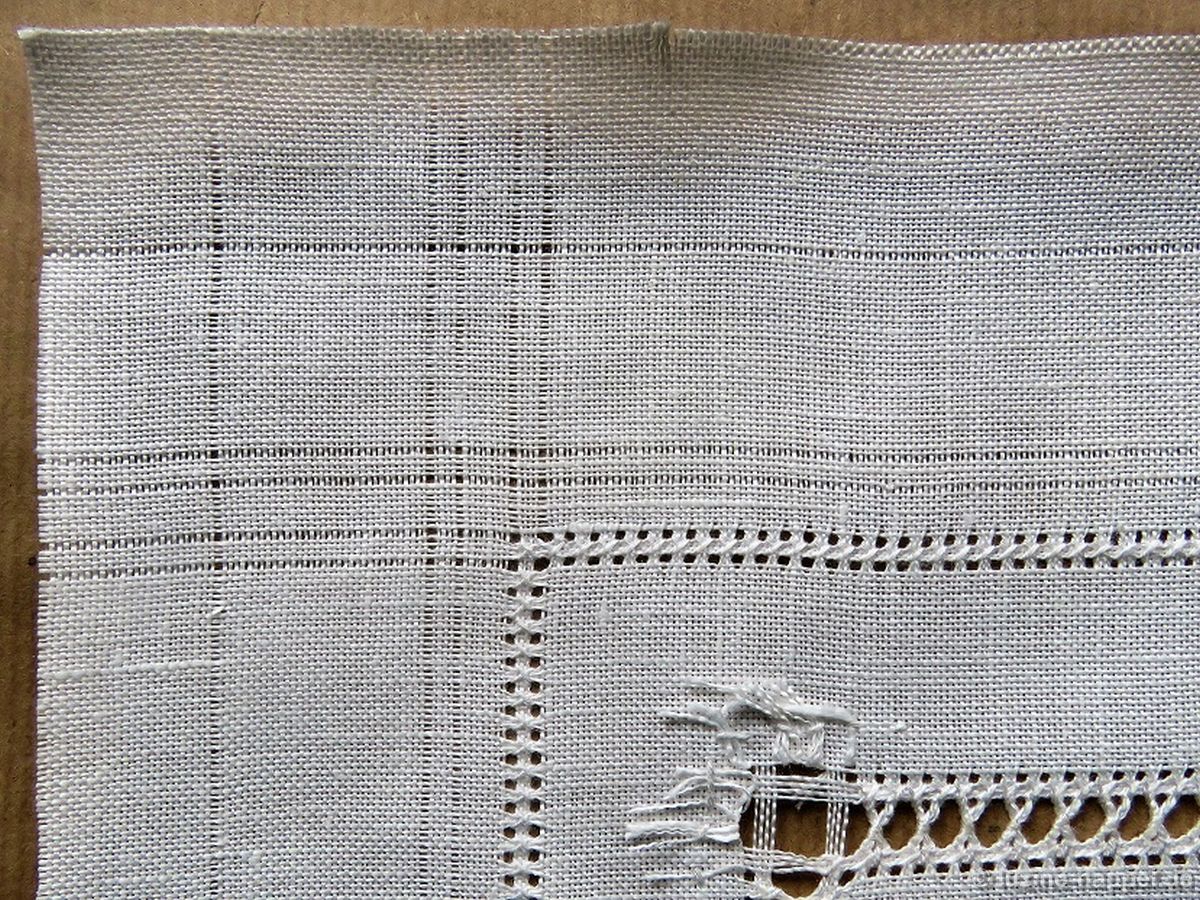
Now prepare the section for the wide hem. Therefore, a number of threads divisible by 8 plus 2 are needed. In this example I chose 34.
E-Saum_15
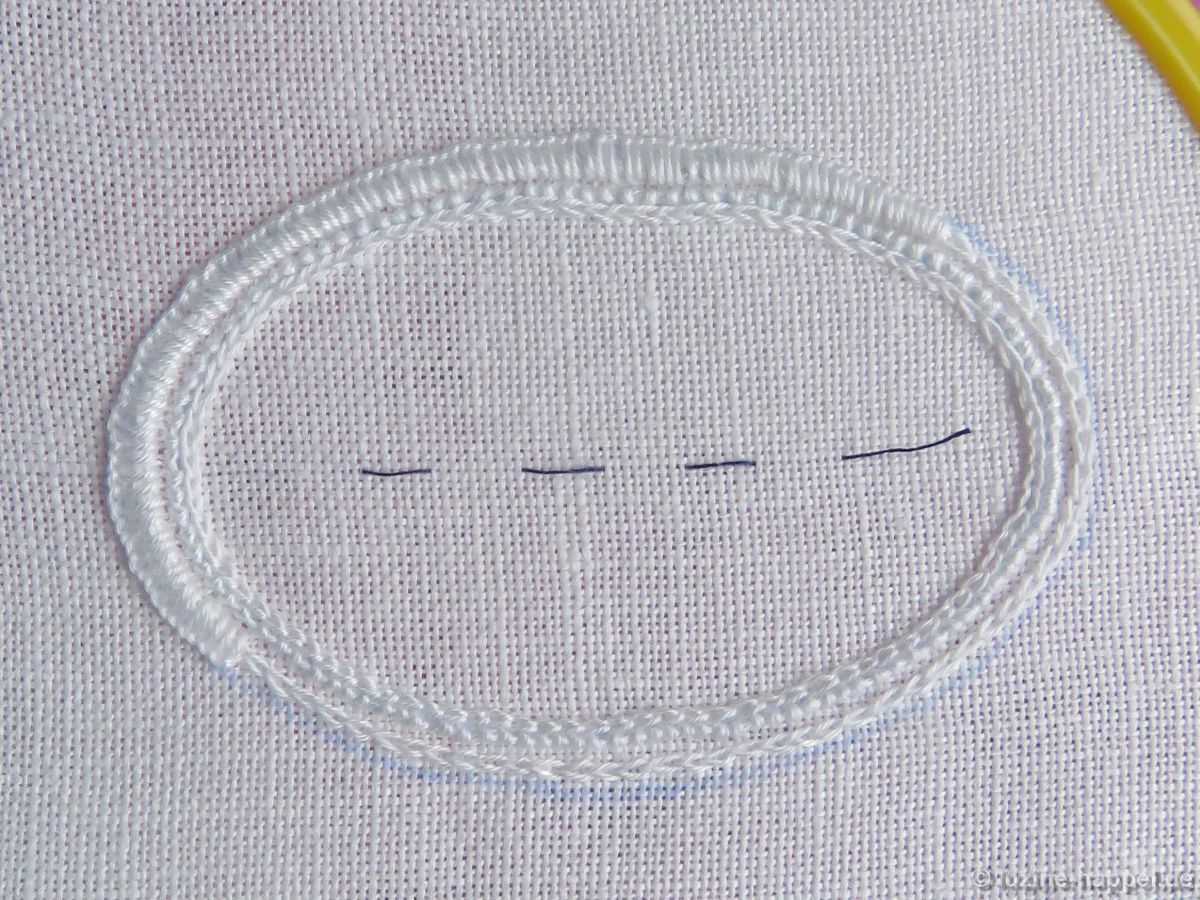
So, out from the outer withdrawn-thread line count 34 threads, and cut the thirty-fifth thread. From now on all threads can be withdrawn up to the edge of the linen.
Please note, if you will work a wide hem as I show here, this counted section is the front of the hem.
You must have enough remaining fabric for working the Peaholes, the back side of the hem, and a fold. Please keep this in mind so that you do not have too little fabric in the end.
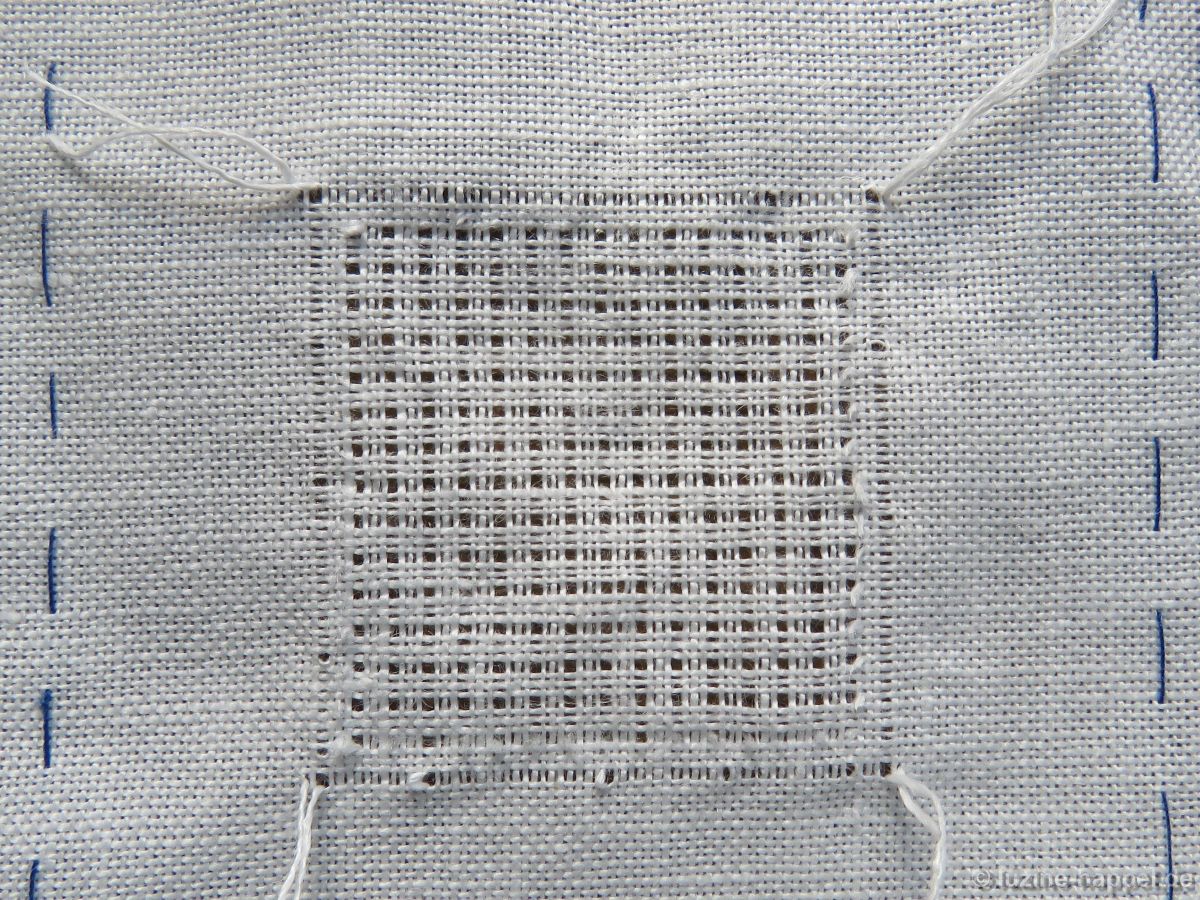
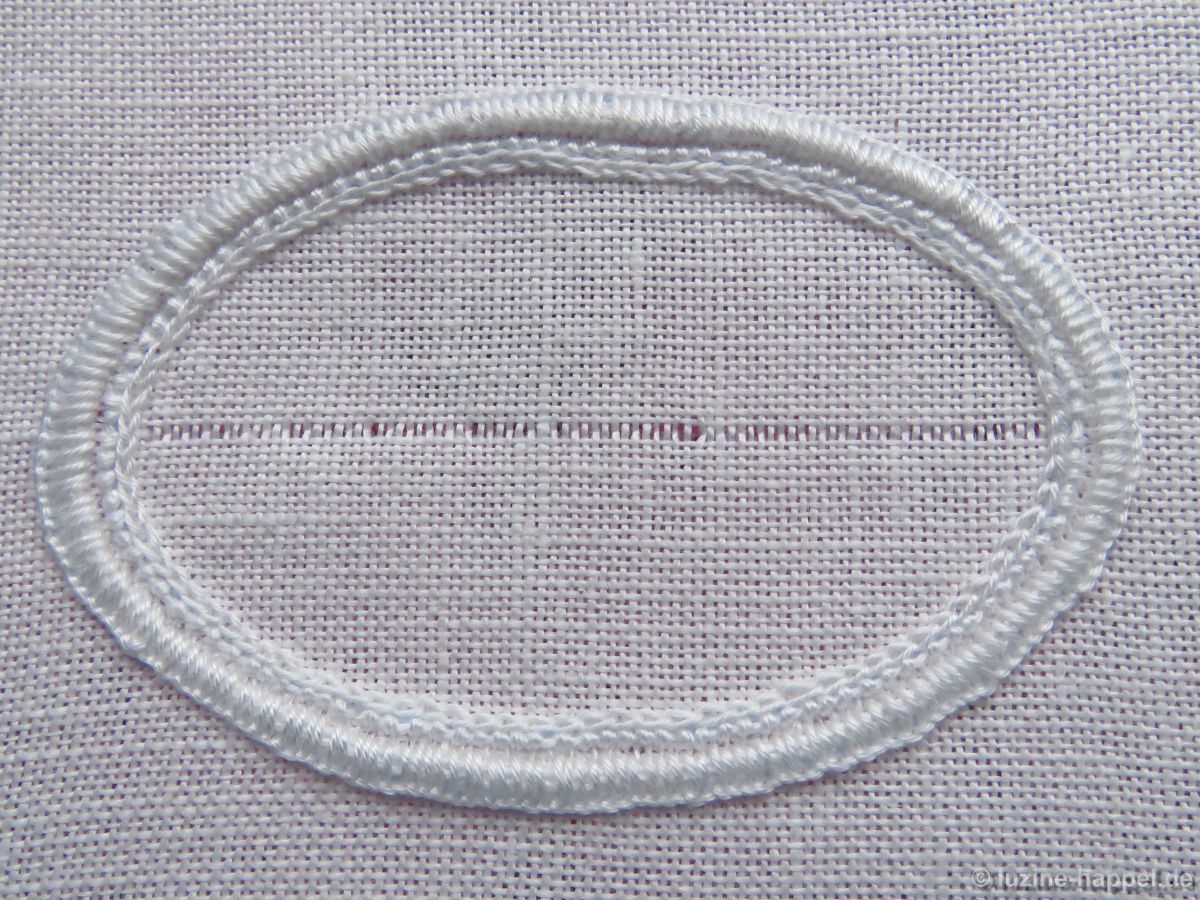
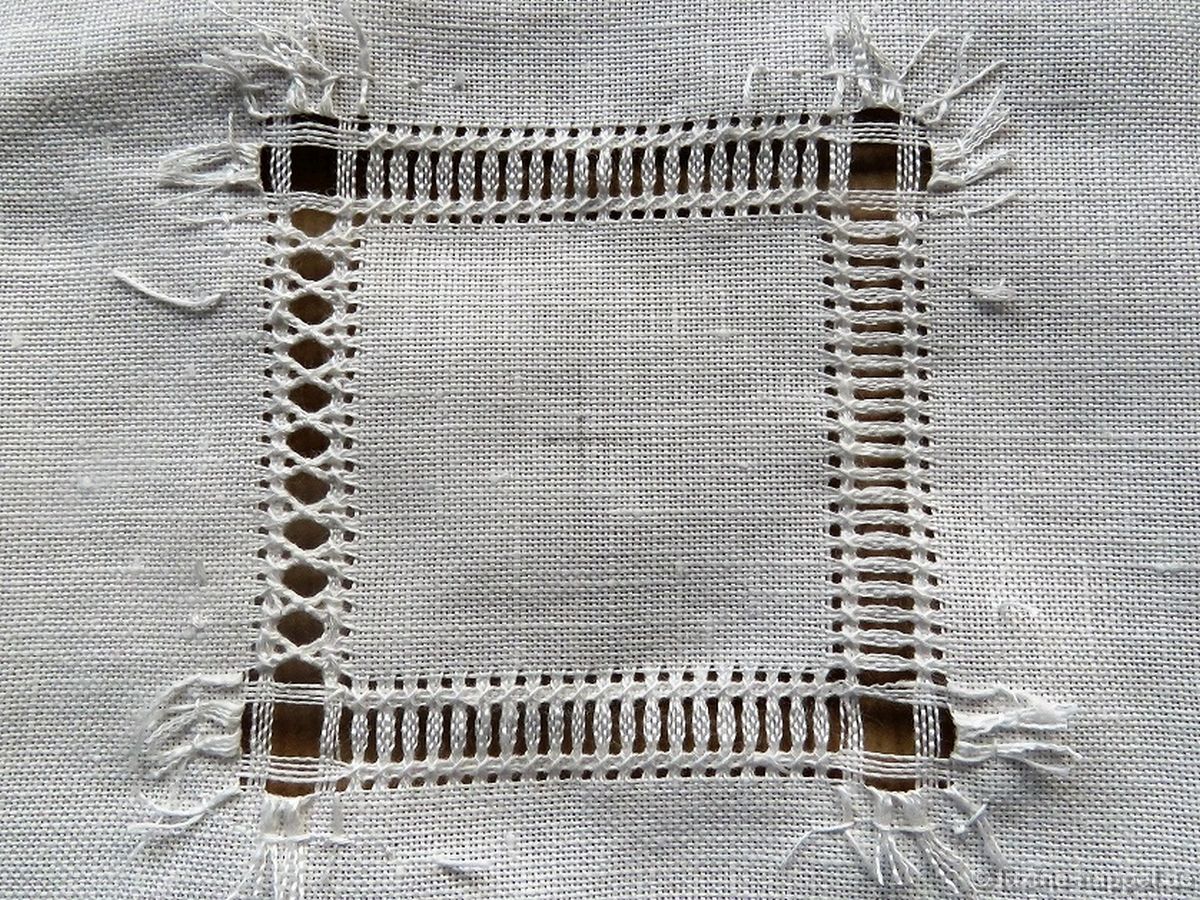
Leave 4 threads outward and withdraw the fifth.
E-Saum_16
Work Four-Sided stitches around the entire square.
E-Saum_17
Withdrawn more threads:

leave 8 cut 1
leave 4 cut 1
leave 34 cut 1

E-Saum_18
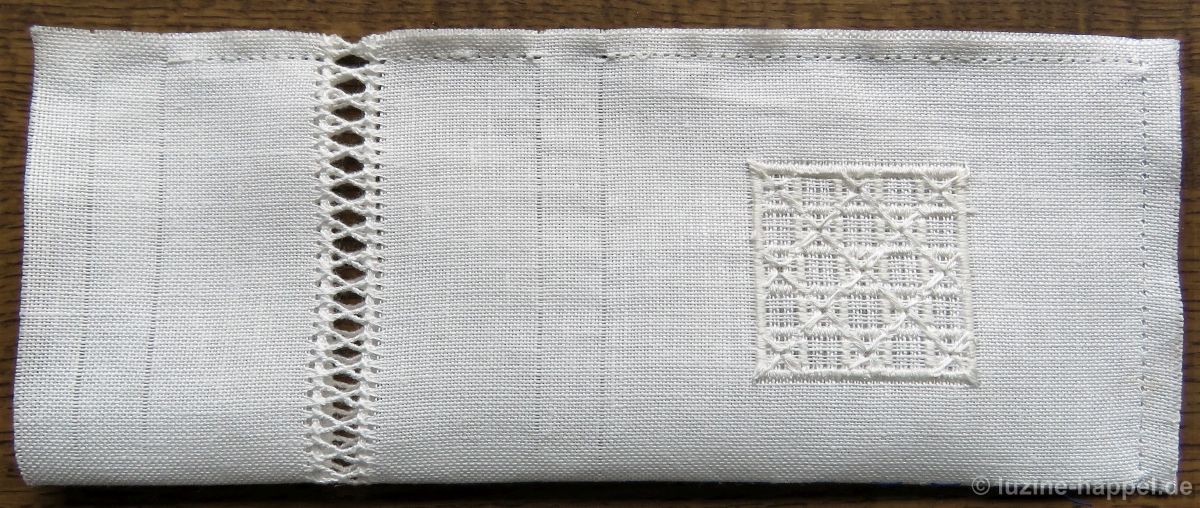
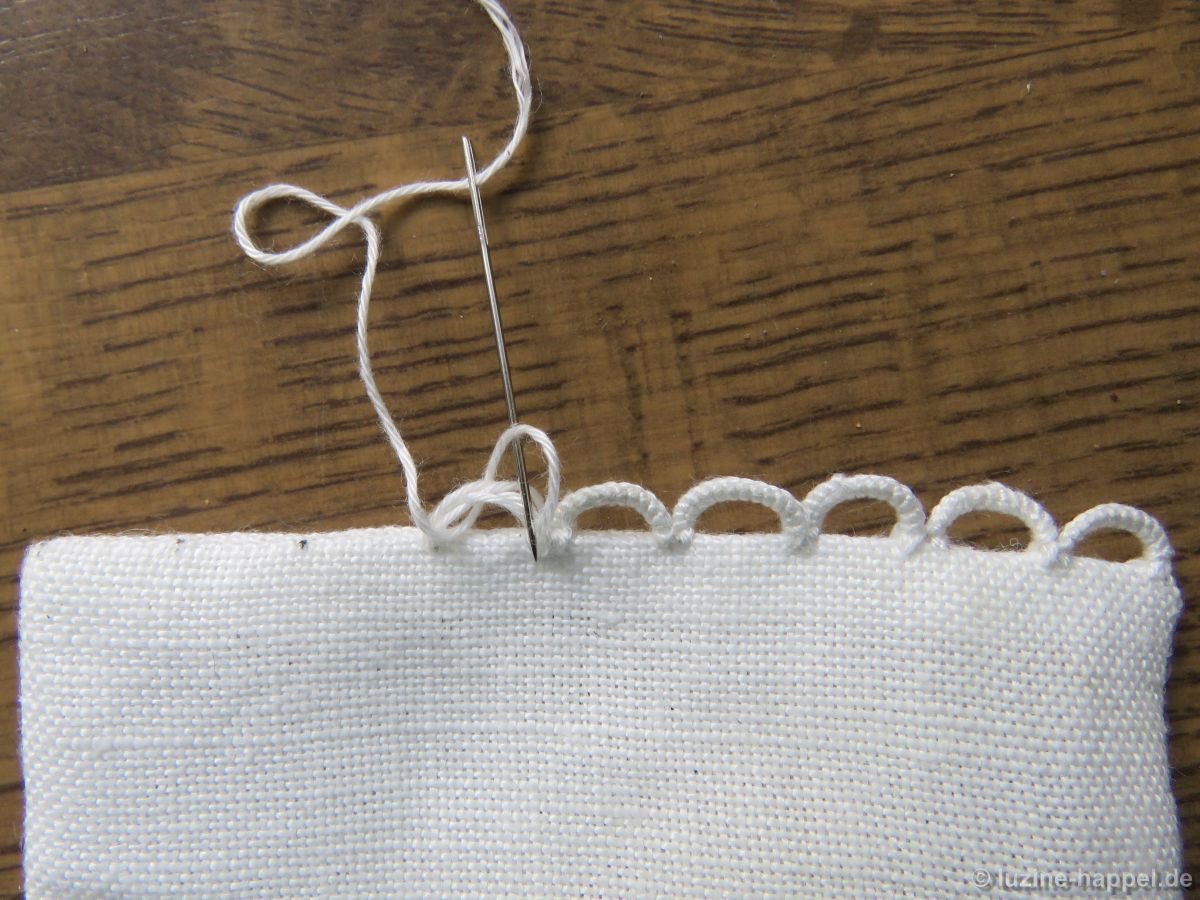
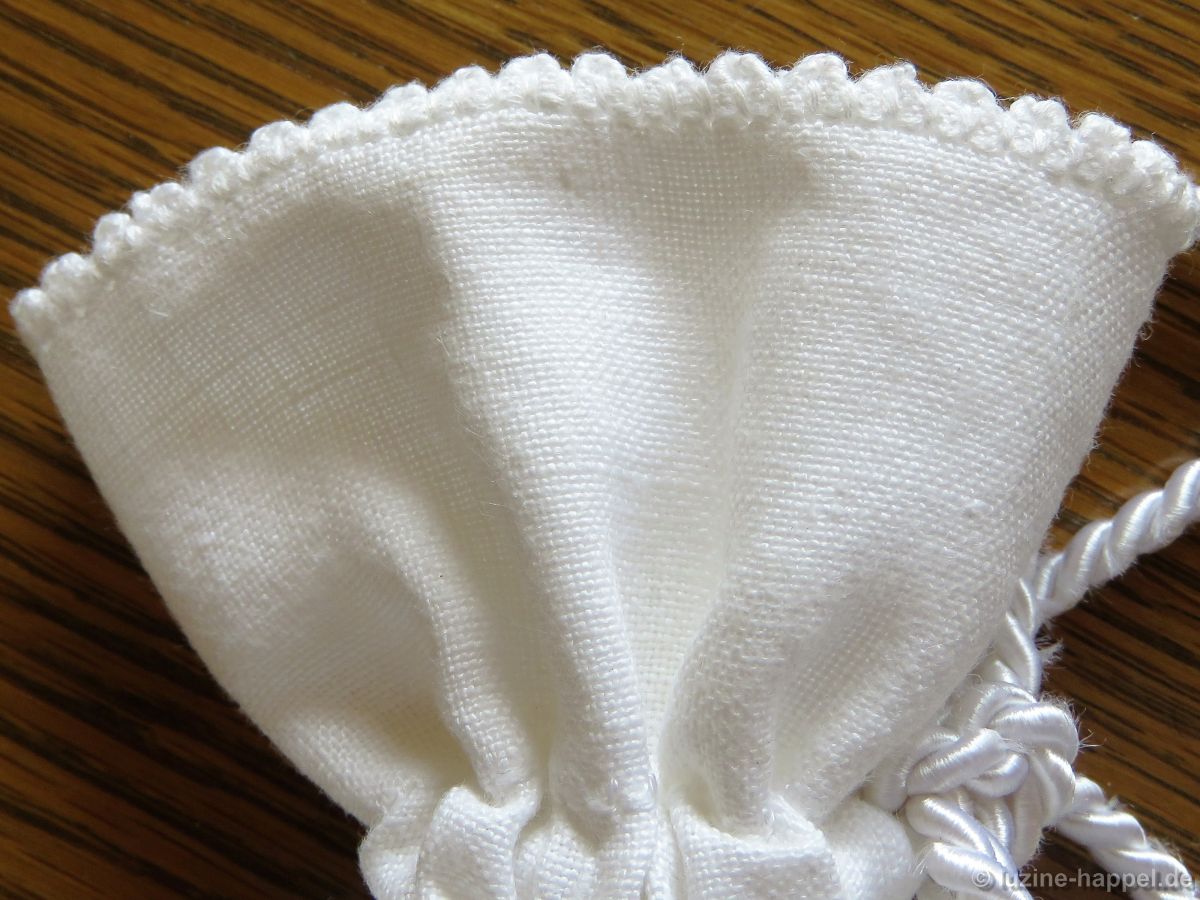
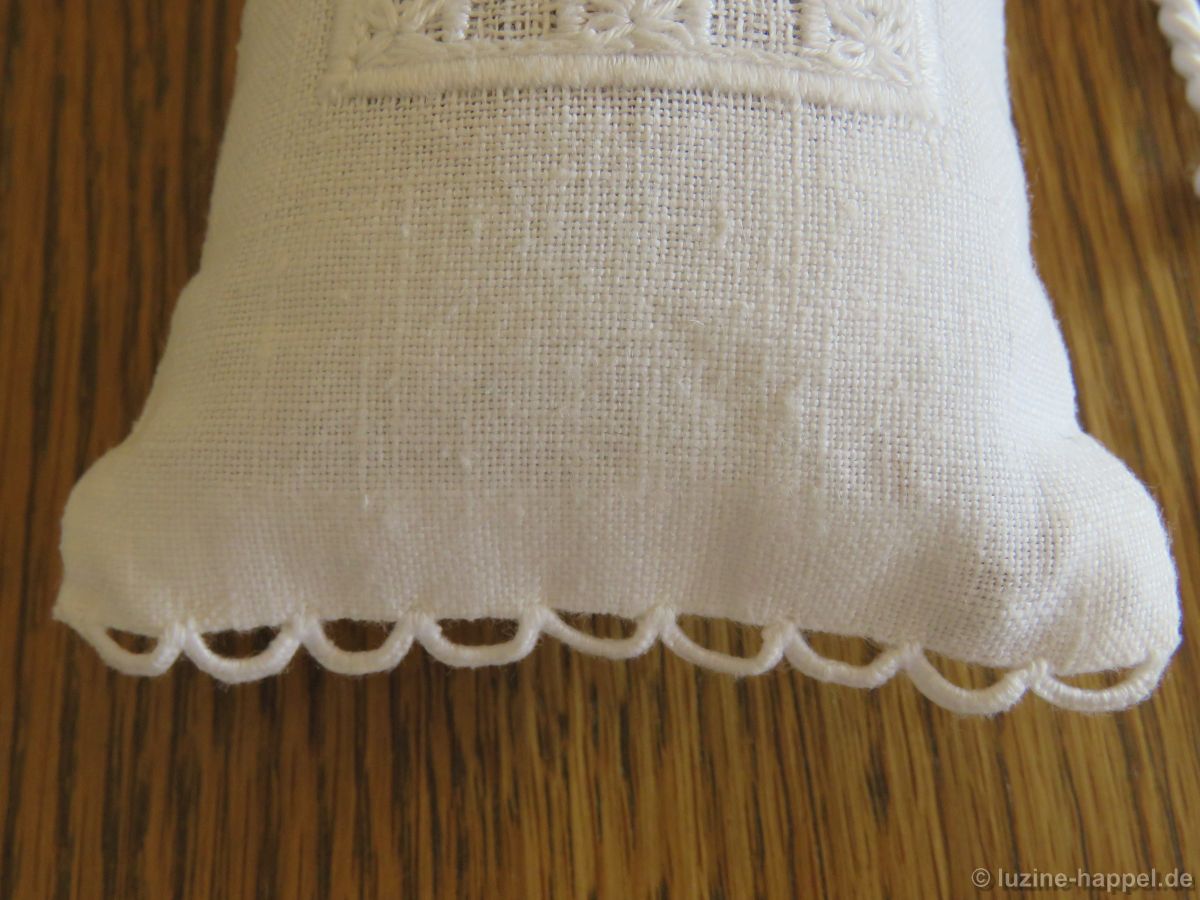
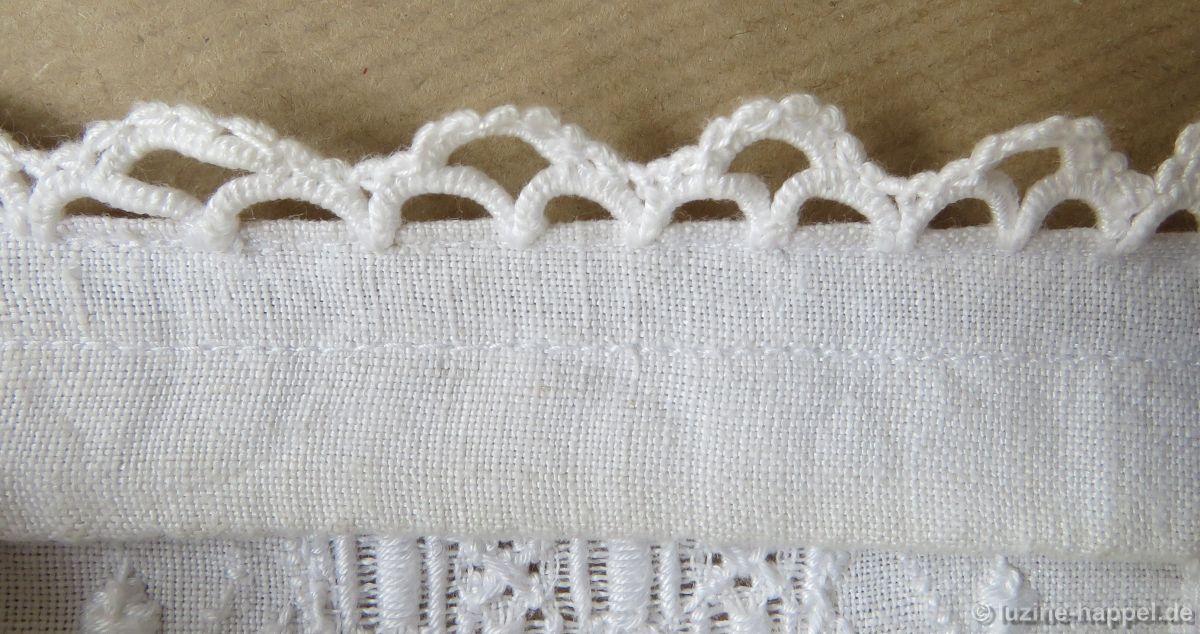
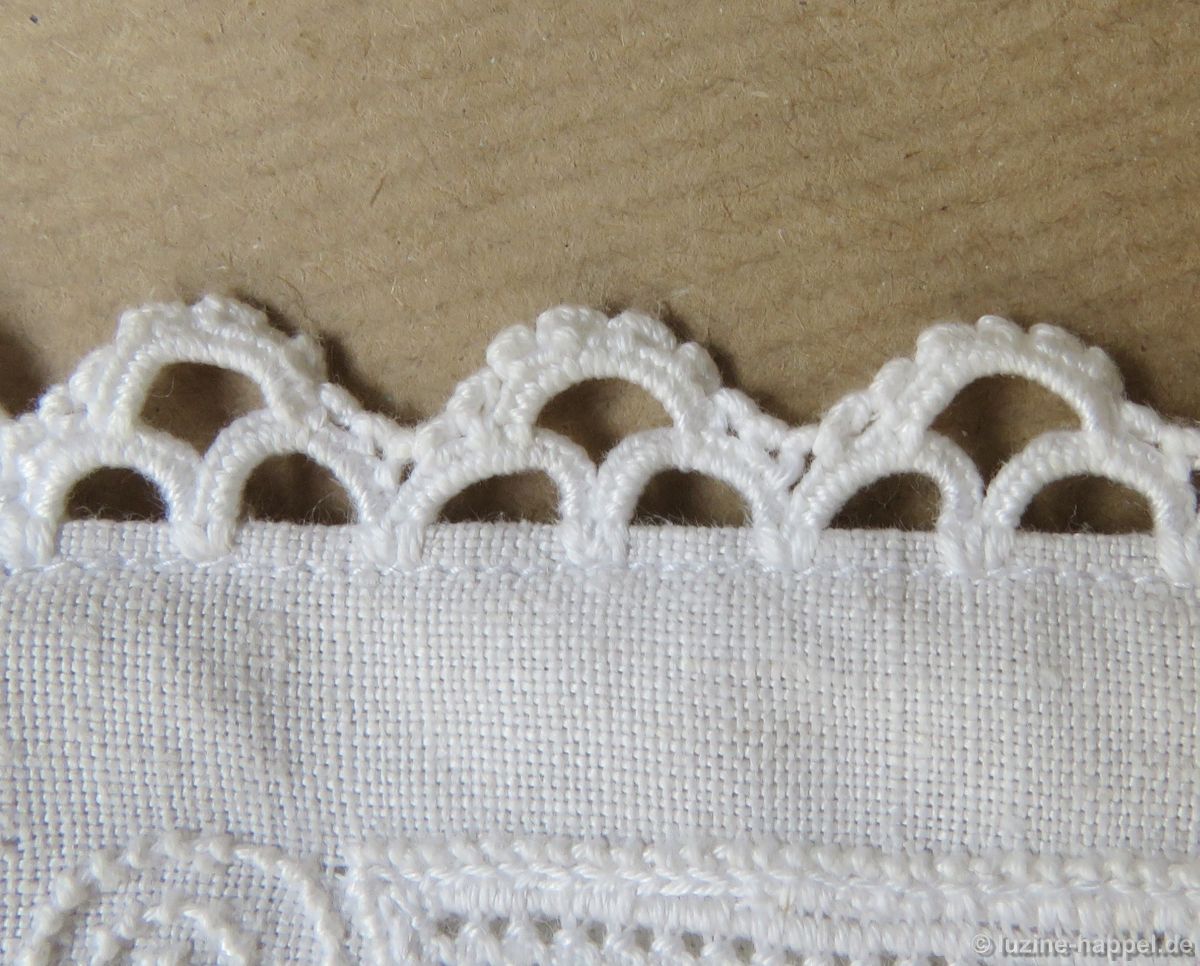
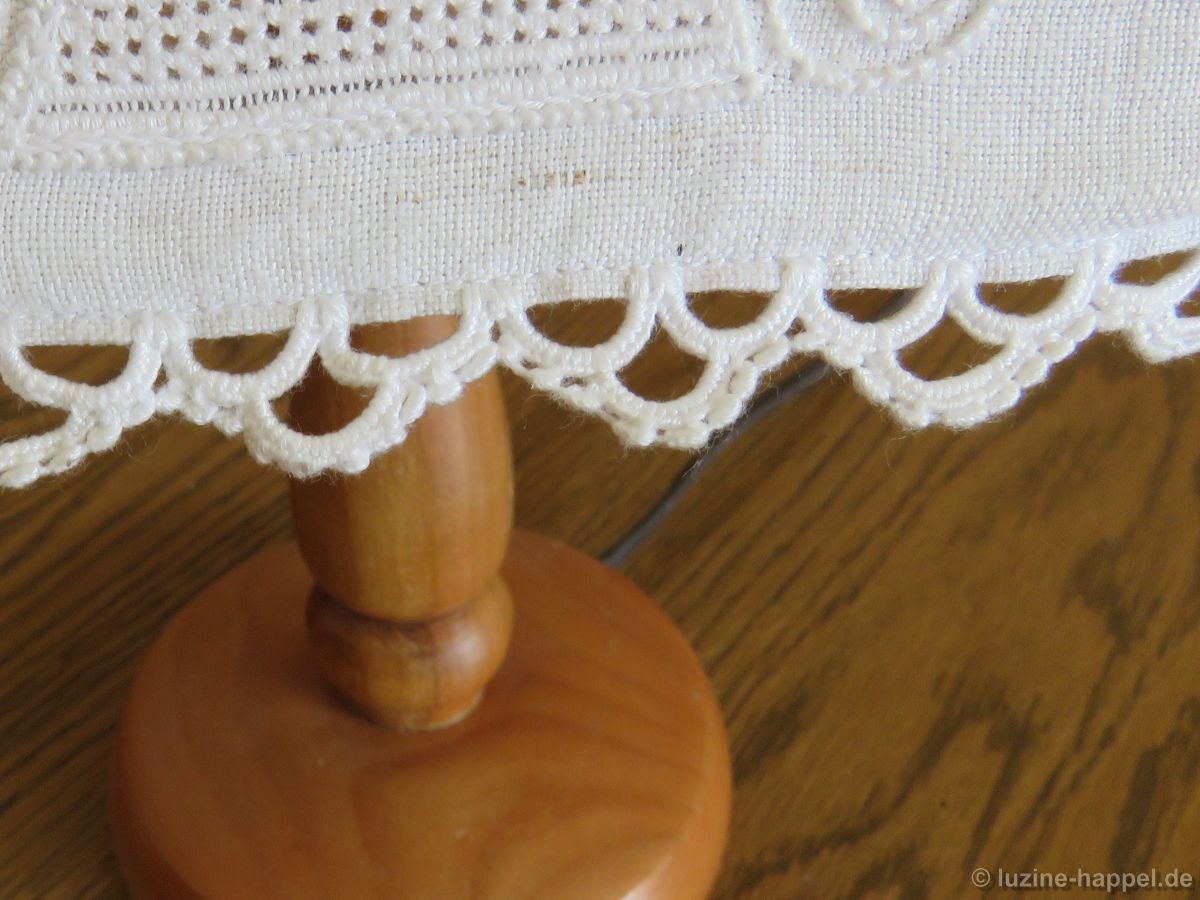
Work the Peaholes for the folded Peahole edging and trim the fabric for the hem fold to about 1 cm.
E-Saum_19
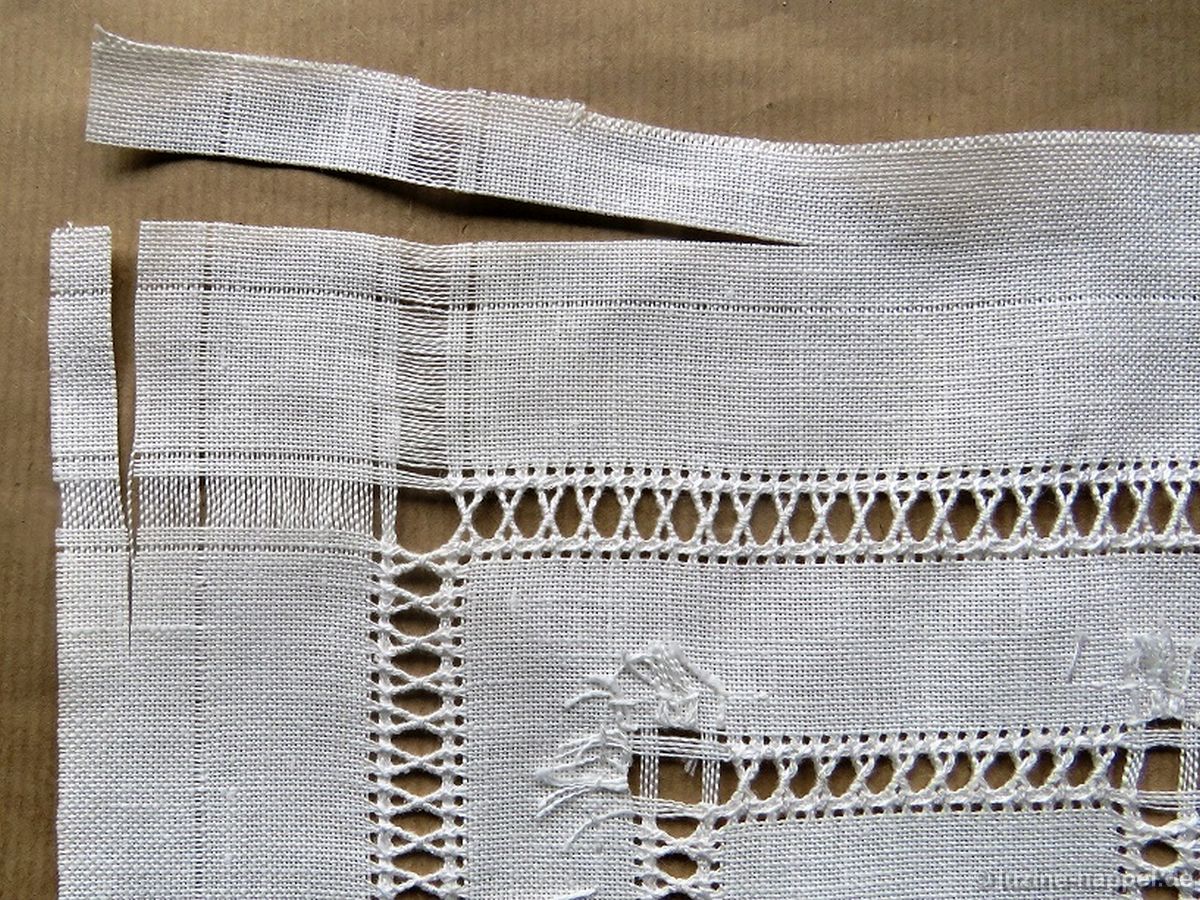
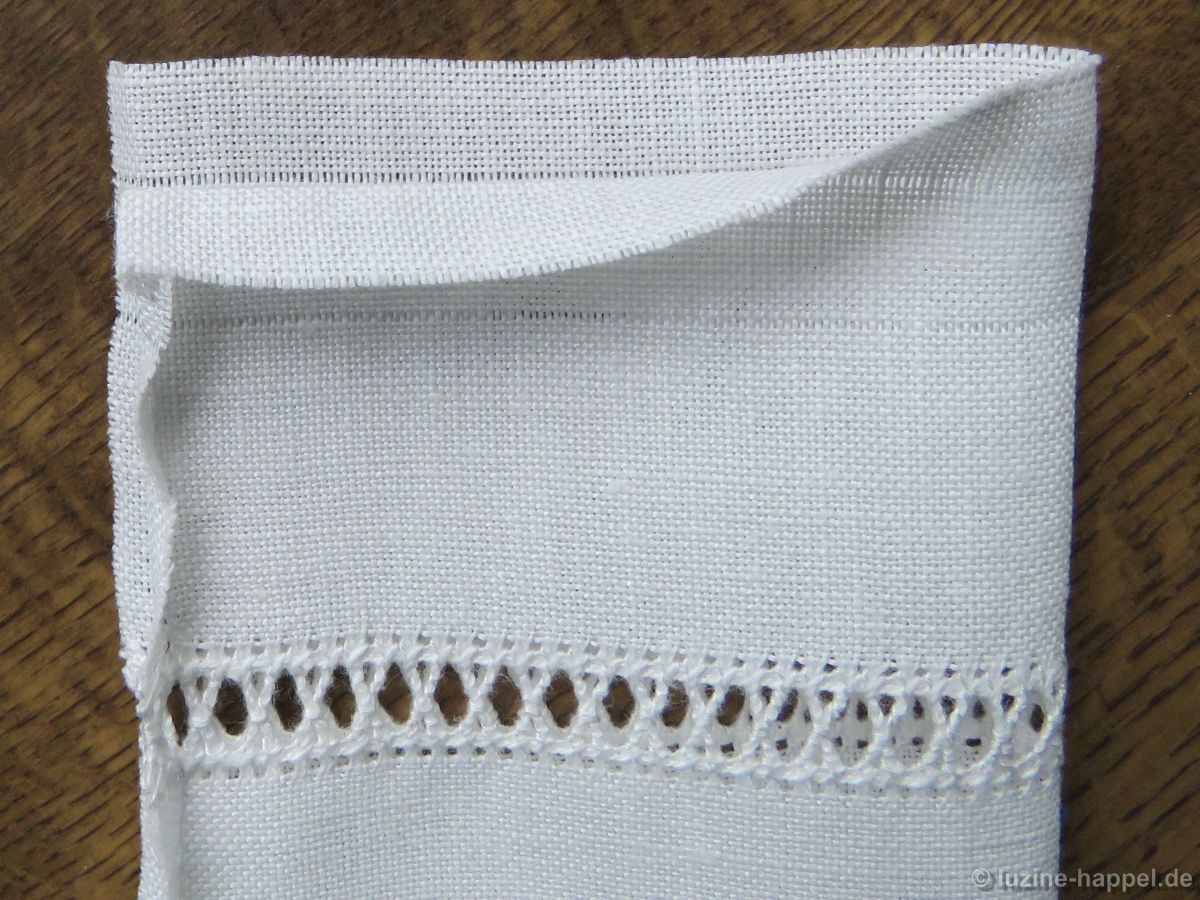
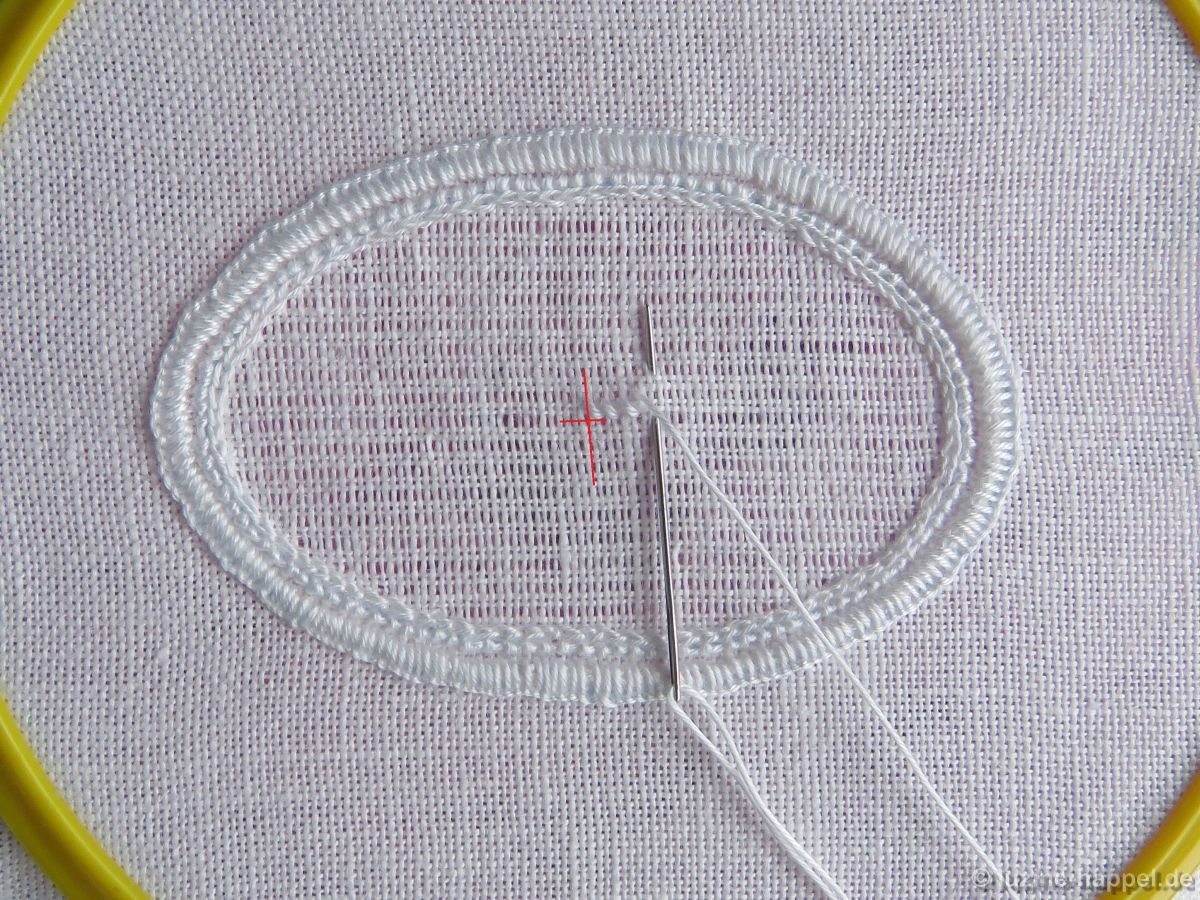
Mark the sewing line for the mitered corner. The line should run diagonally through the outside Four-Sided stitches.
E-Saum_20
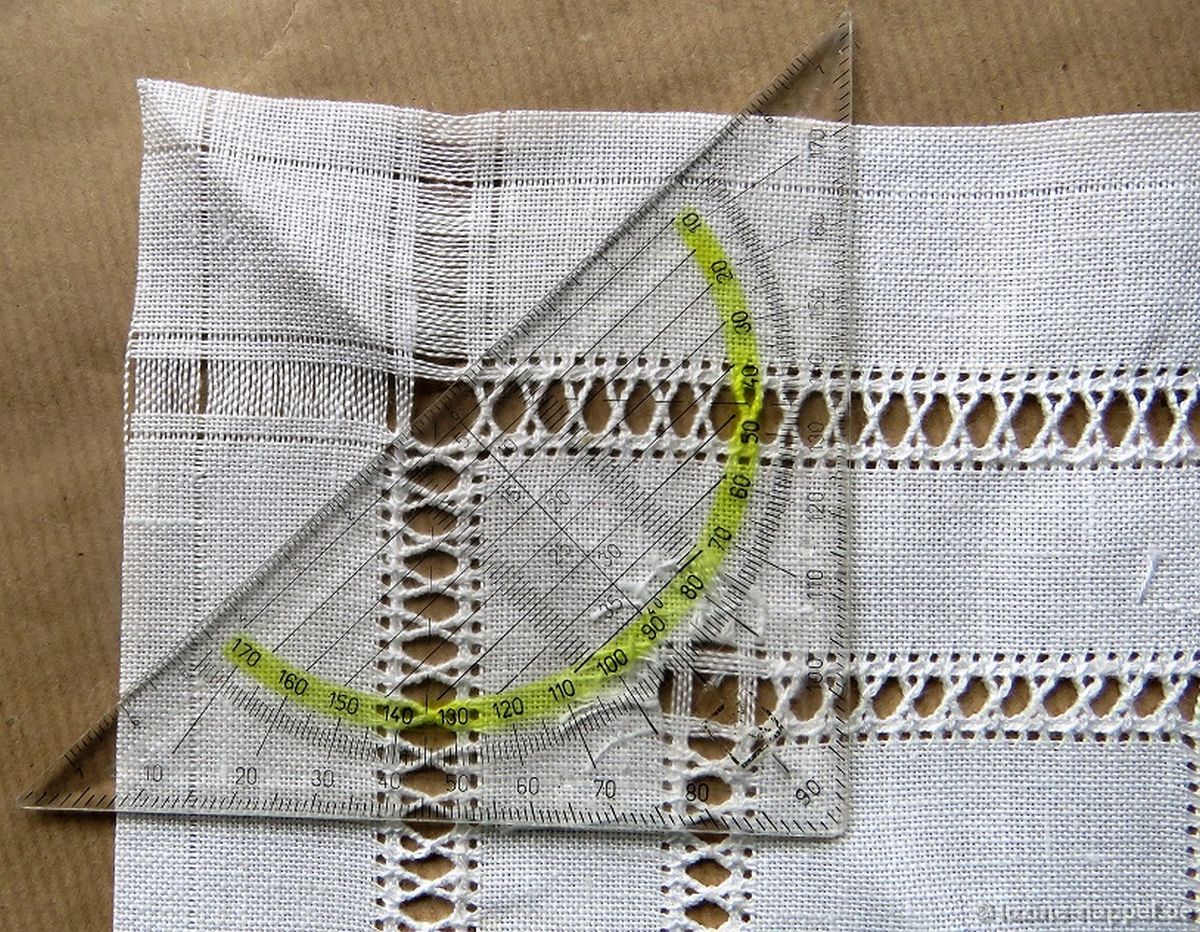
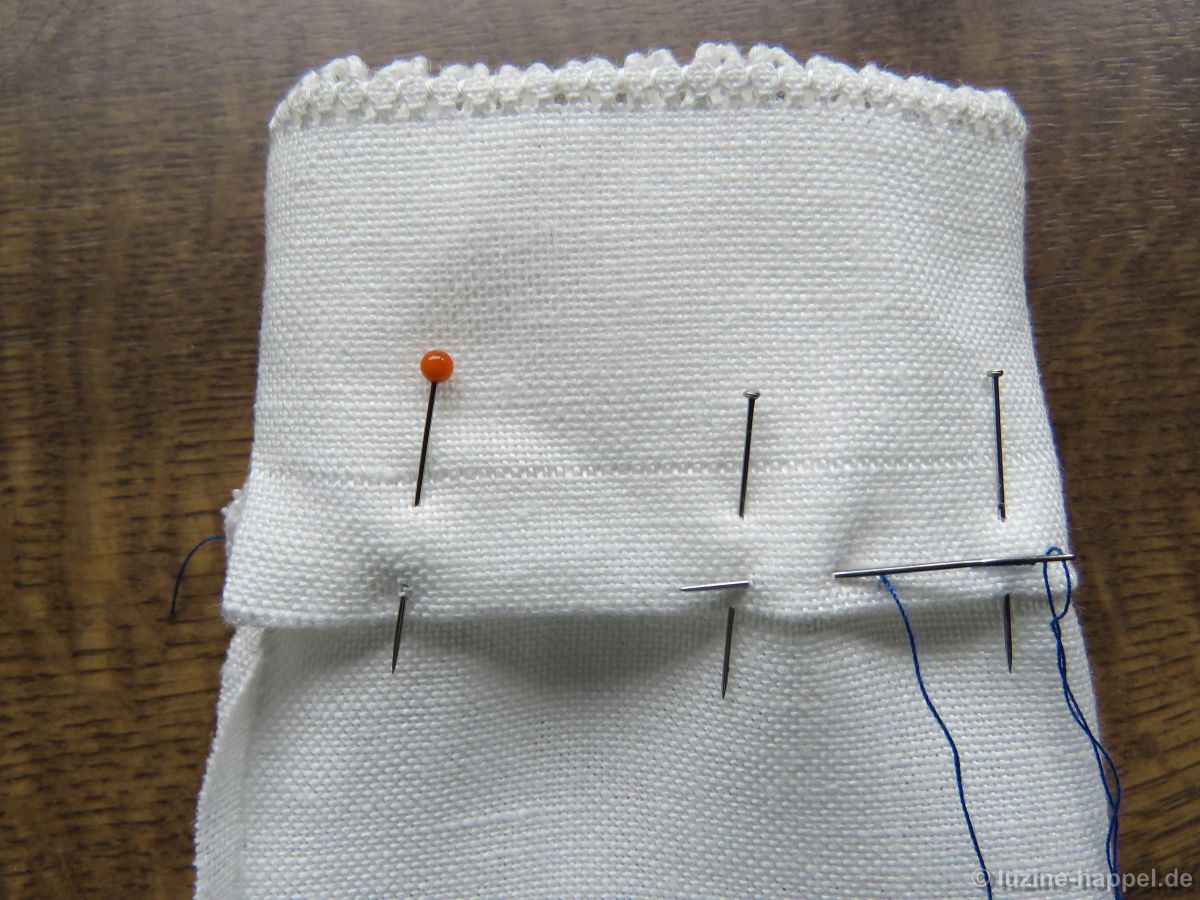
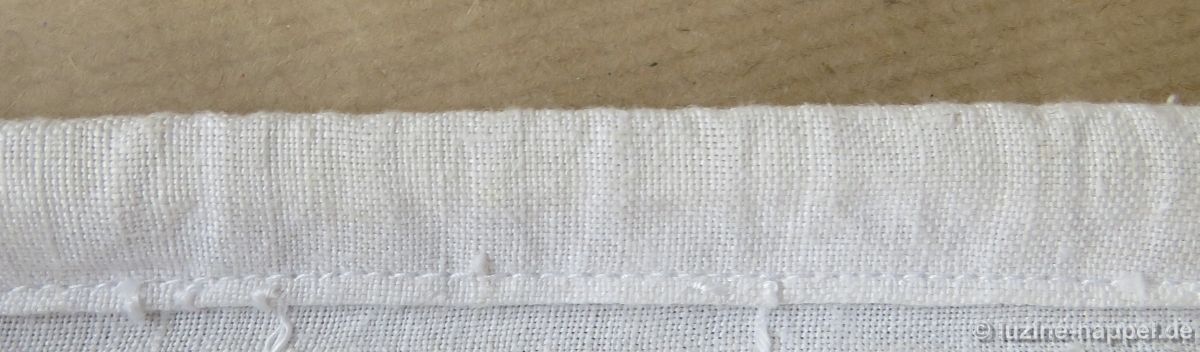
Fold the piece exactly – right sides together. Sew by hand or by machine.
E-Saum_21
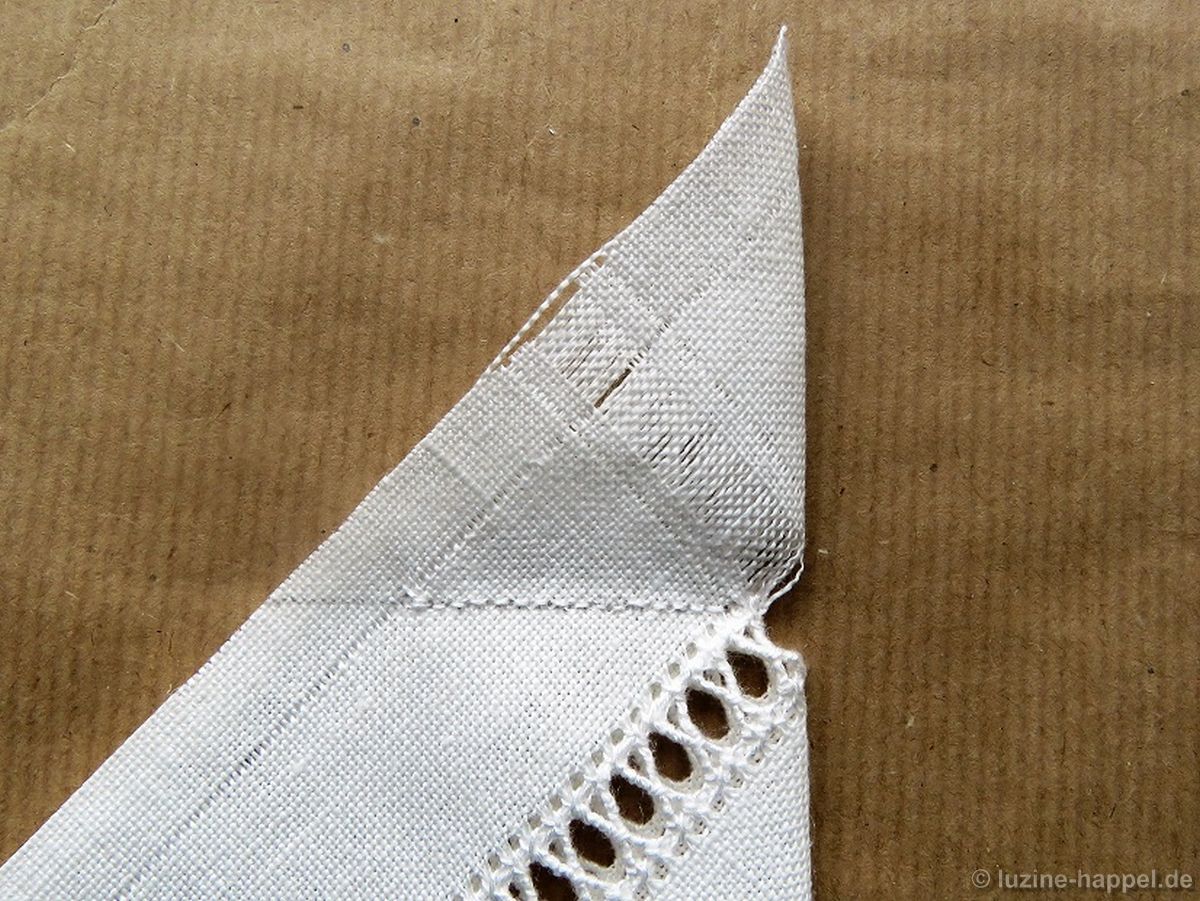
Trim the seam allowance to about 1 cm.
E-Saum_22
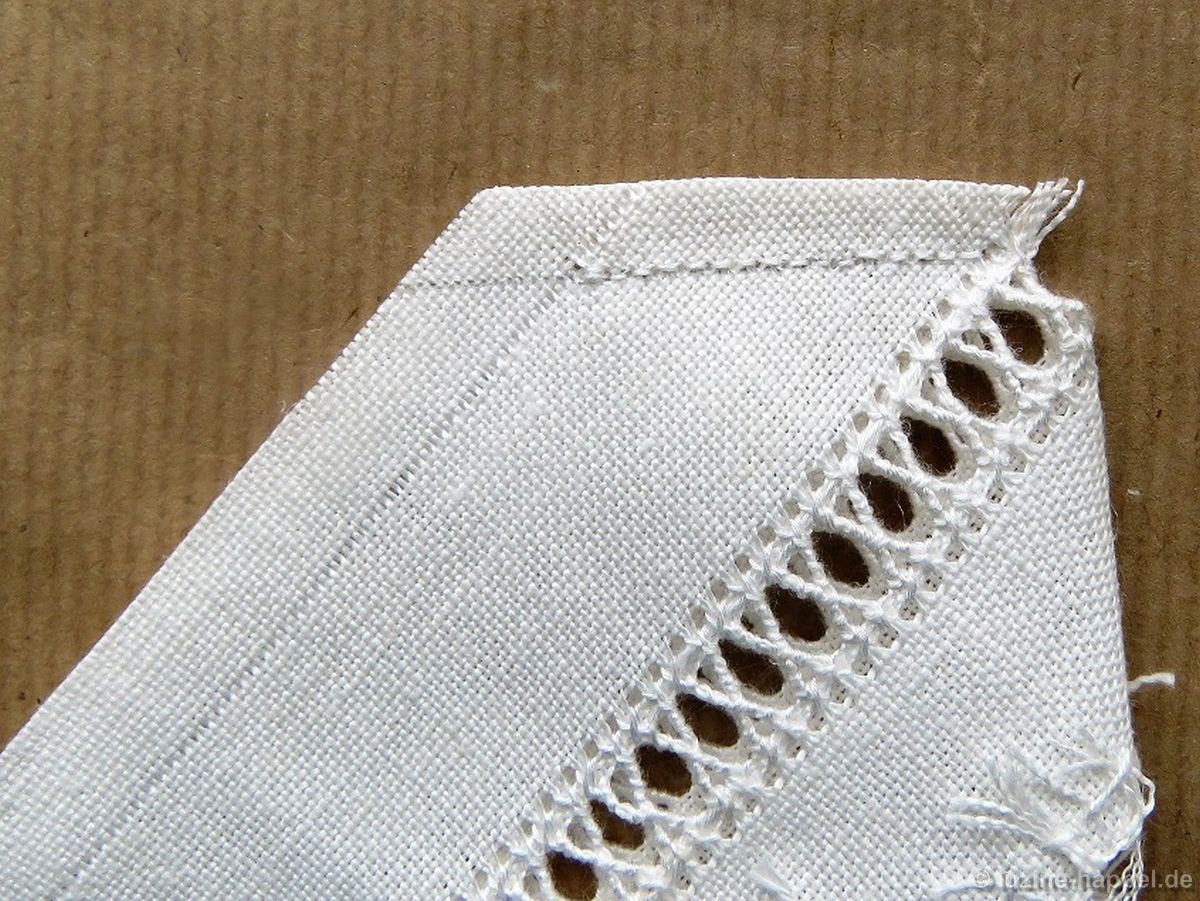
Turn the hem corner. For more information about hemming please look to my book Basic Principles of Schwalm Whitework.
E-Saum_23
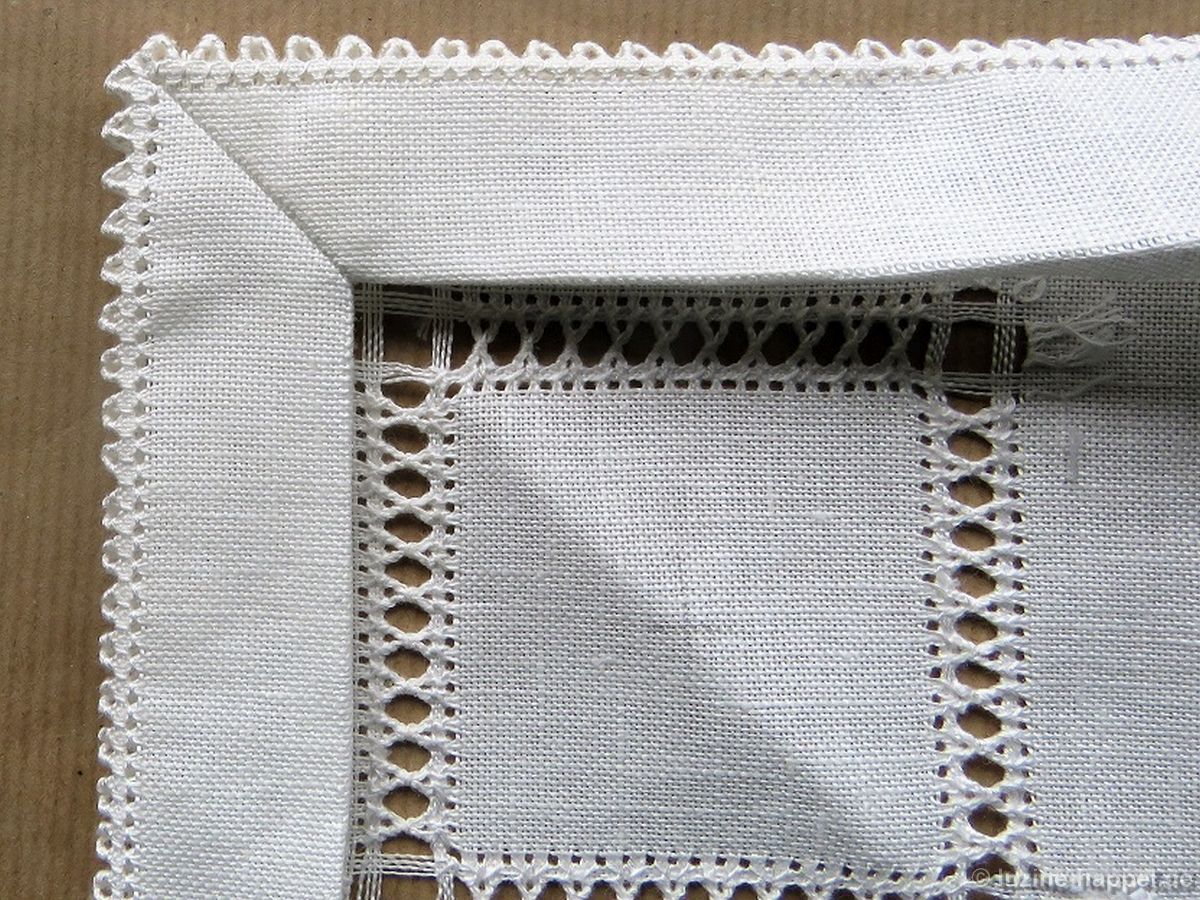
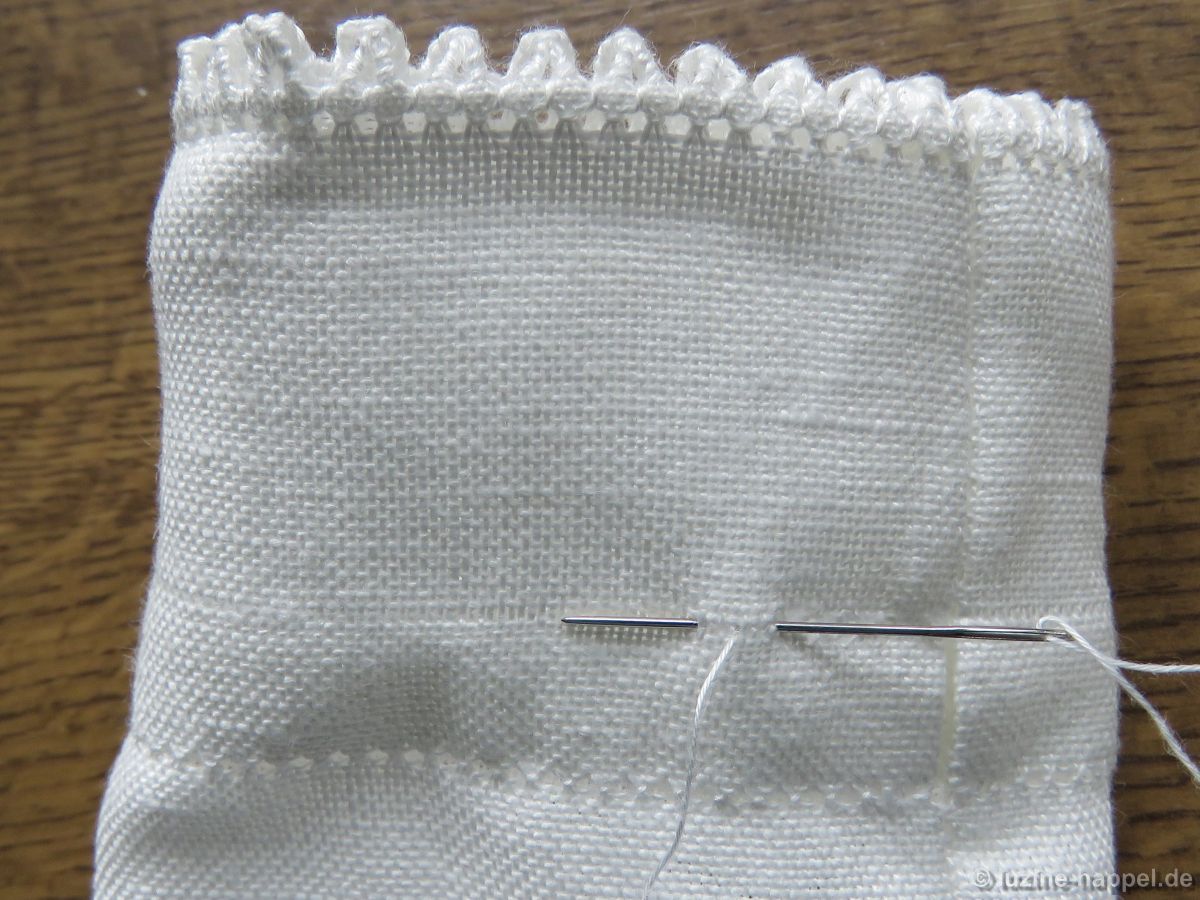
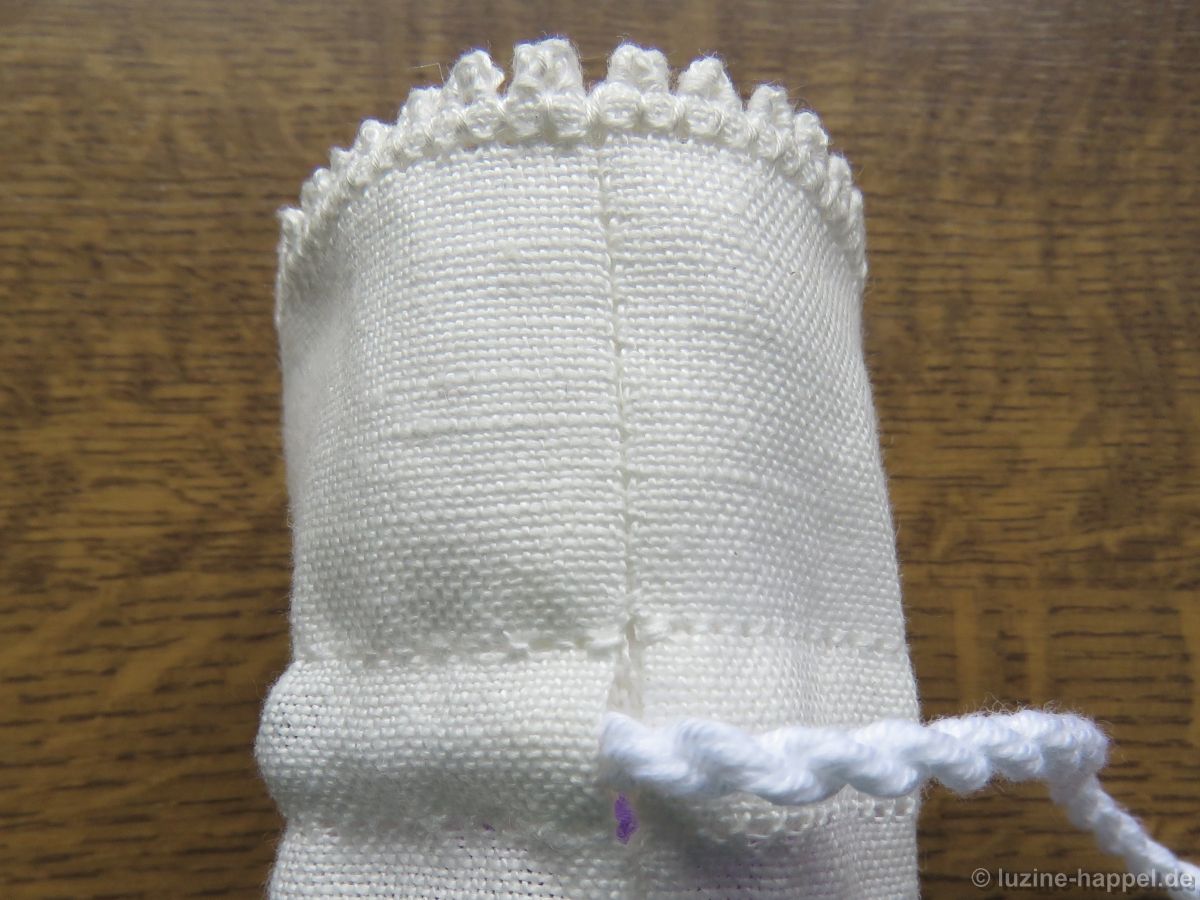
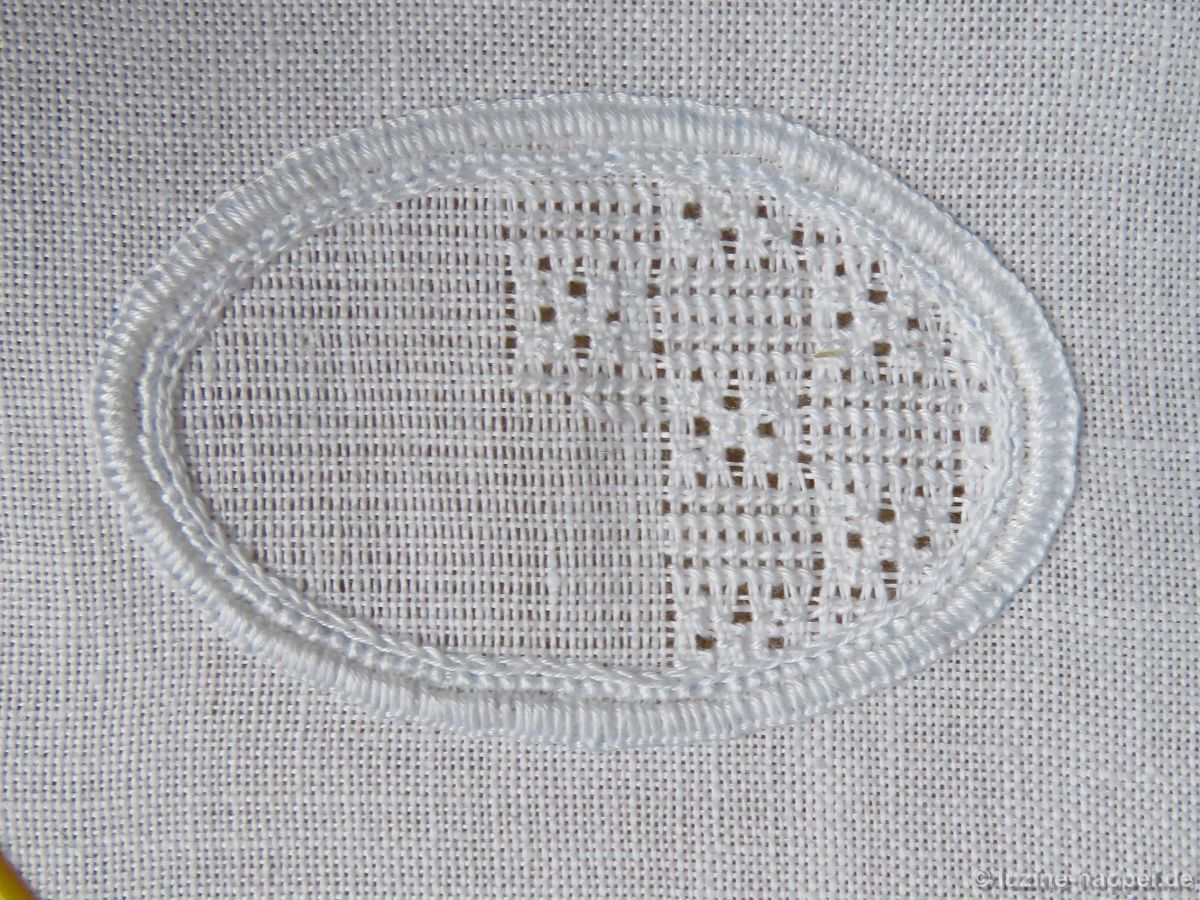
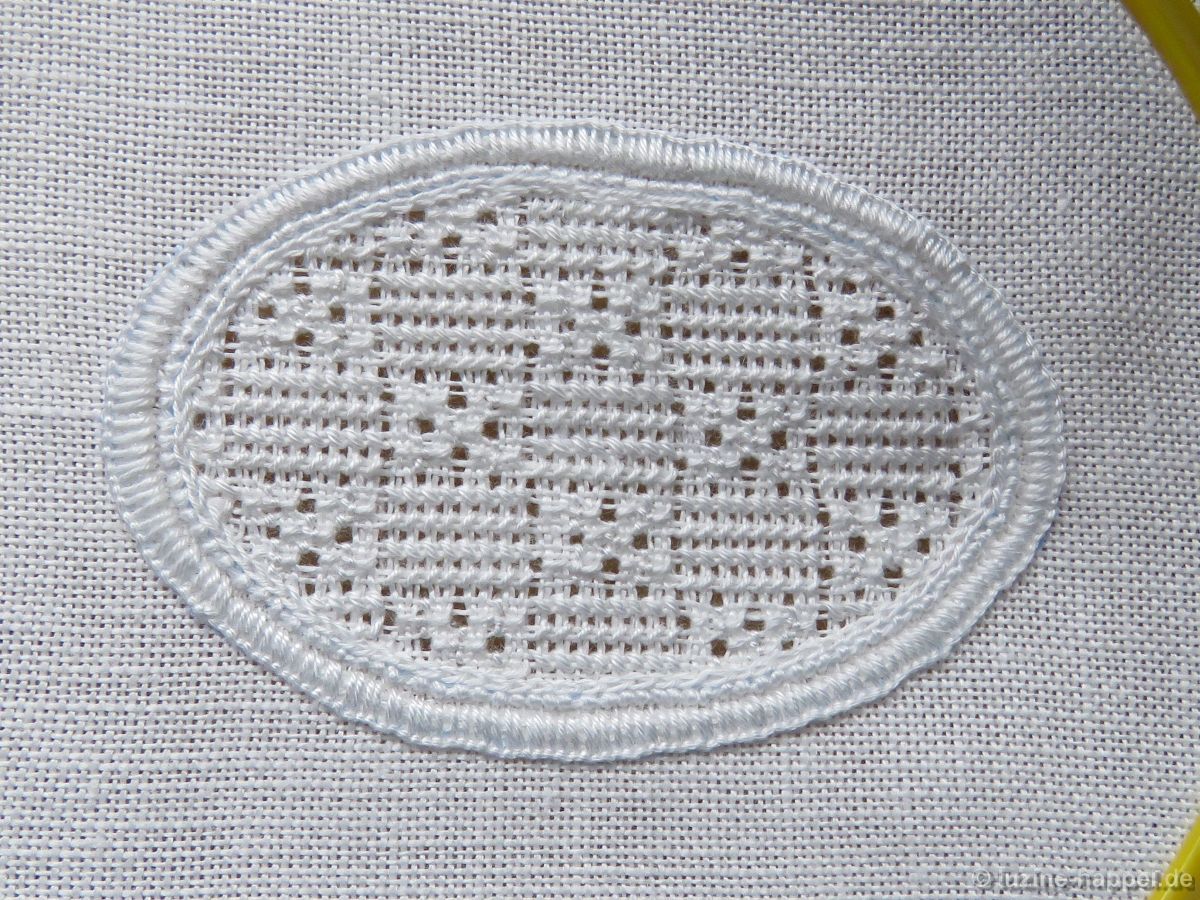
Fasten the hem, work the corners of the inside Peahole hem. Continue working the folded Peahole edging.
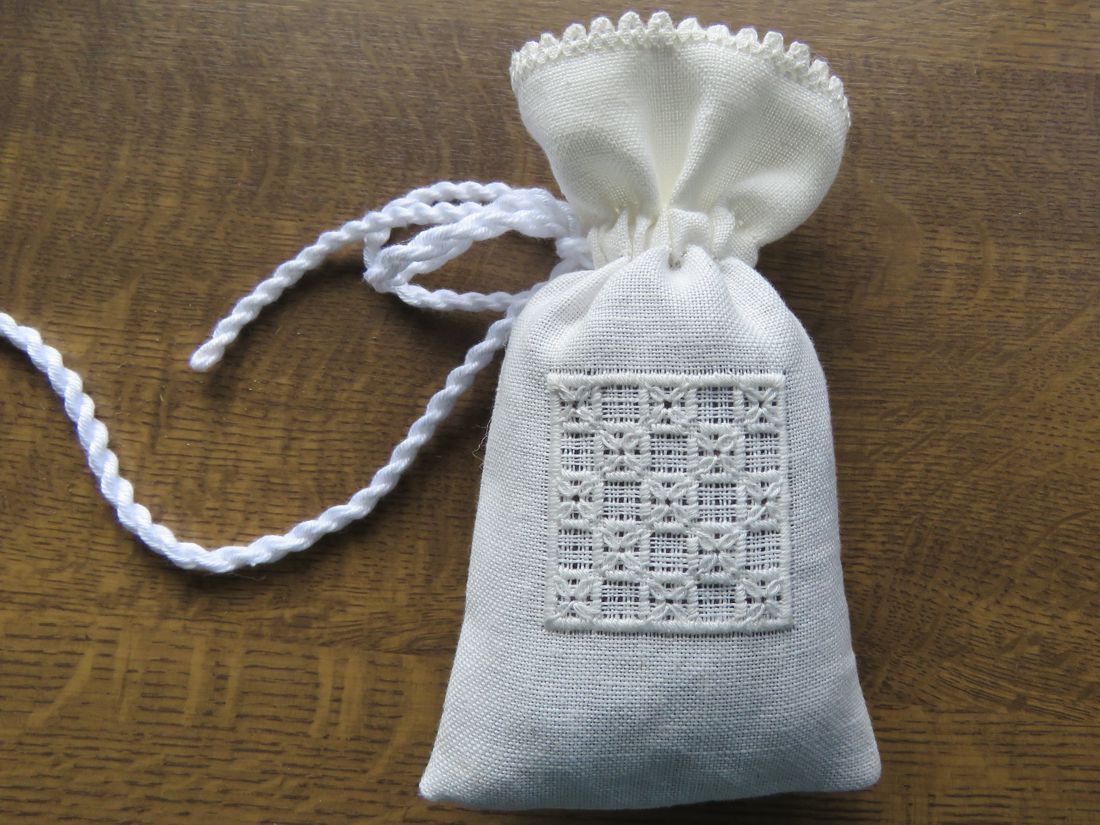
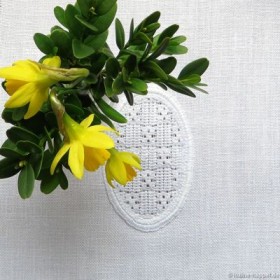
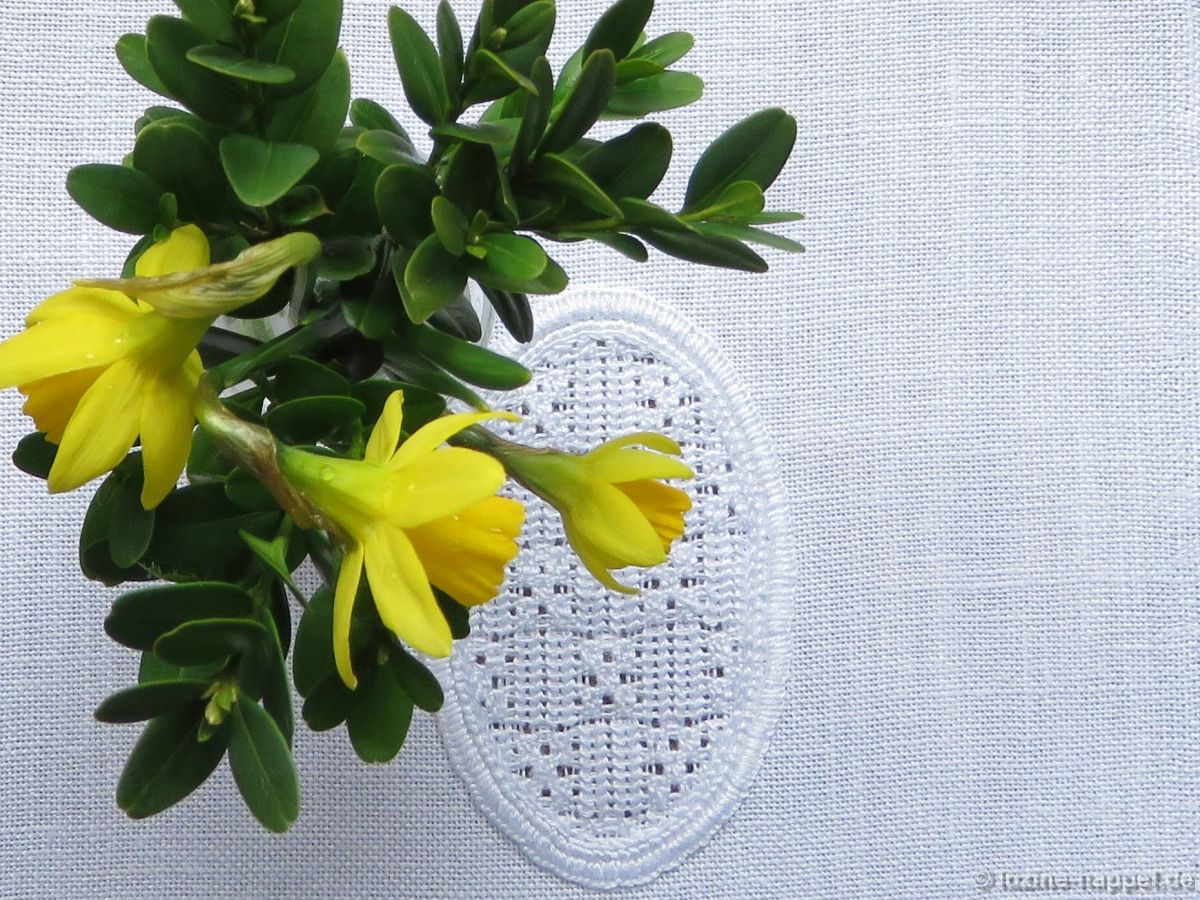
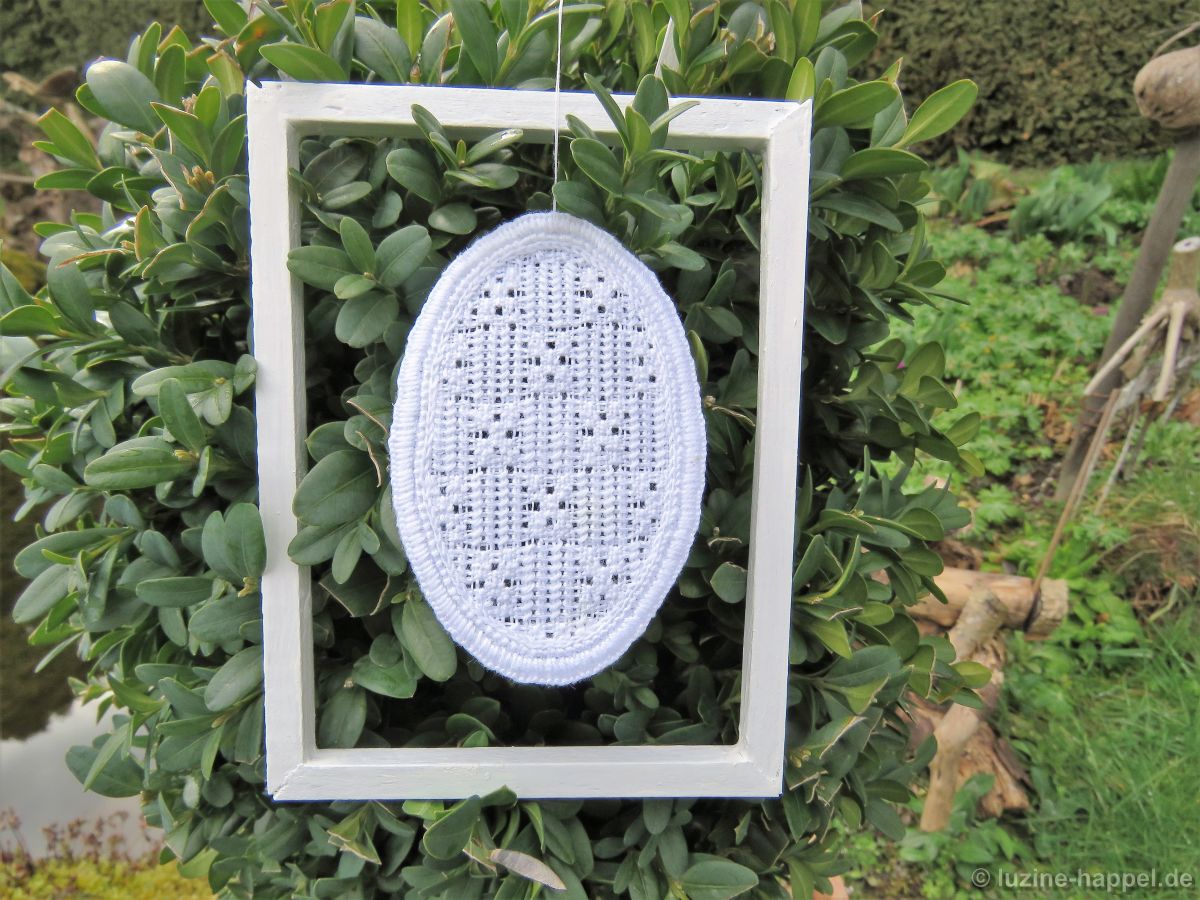
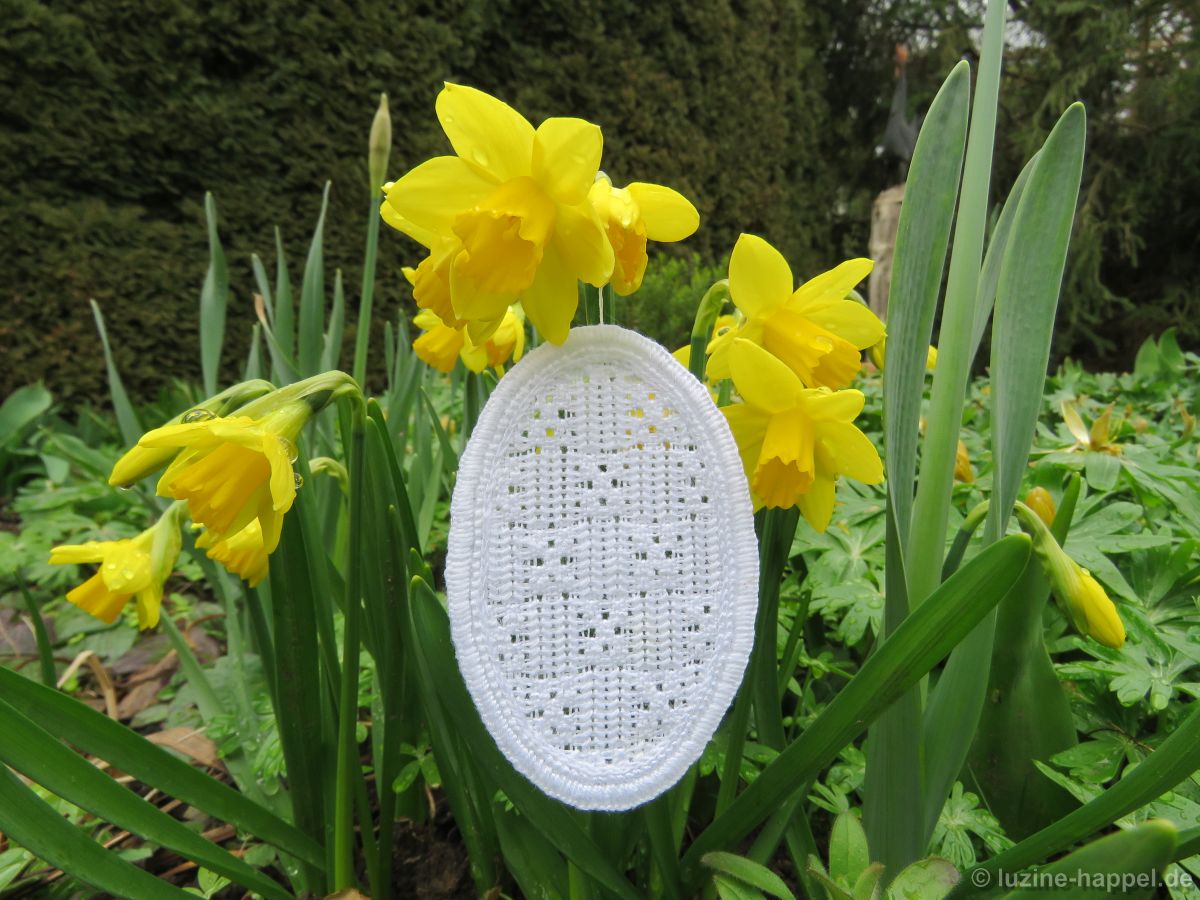
Wash, starch and iron the piece. Leave it as it is – a nice little doily. Or use it for making a beautiful lavender sachet. If you were to add a loop for hanging and a tassel, it is also well-suited for a lovely ornament for trimming the tree.
E-Saum_24
If you would like to work a larger project, square or rectangle in any size, counting fabric threads from the center of the piece is nearly impossible. And the order of working is somewhat different from the order presented in this blog post.
So, I made a leaflet for downloading; it explains in great detail how to withdraw fabric threads, how to work wrapped Peaholes for both the hem and the folded edging, how to make a mitered corner in the hem, and finishing.
On 17 pages, illustrated with 70 pictures, you will find all the needed step-by-step instructions for working a wide hem with a folded Peahole edging.
Titel Erbslochkante deutsch

A Wide Hem with a Folded Peahole Edging
described in great detail
and
illustrated with step-by-step instructions
17 pages
7,8 MB file size
Text: English
15,00 € (12,61 € + 19 % value added tax)
download here

How to Work a Lavender Bag

Begin with a piece of 13.5/cm thread-count linen cut to measure 20 cm X 25 cm.
6 cm down from the top edge (an edge that measures 20 cm wide), withdraw threads for the folded Peahole edging.
Beutel_1A Peahole hem is worked starting directly over from one side – it makes no difference if it is the right or left. Therefore, two rows of Four-Sided stitches are worked. Please note that these rows must contain an even number of Four-Sided stitches. Any excess fabric is cut along the entire side after finishing both rows of Four-Sided stitches.
Beutel_2The Peaholes can be worked later.

Using a contrasting thread color and Running stitches, mark the seam allowance (8 fabric threads from the side edge) along one side, the longitudinal axis, and also the middle between the two just marked lines.
Beutel_3A Limet-Filling pattern in a square shape should be worked. And the pattern should fit fully into the square. So it is necessary to withdraw fabric threads step by step, exactly counting out the correct size.

Withdrawal of threads is done from the back.
About 5 cm up from the bottom edge, in the middle between the two marked lines, a vertical fabric thread is cut and withdrawn toward the top – step by step – about 3.5 cm.
Beutel_4(Please keep in mind, the above picture shows the back side of the bag. By placing the Limit-Filling pattern to the right of the center mark on the back side, the cording – when all is finished – will emerge on the left side of the bag. If you want the cording to be on the right side of the bag, you need to place the pattern on the left side of the longitudinal axis.)

At the bottom end of the vertical withdrawn-thread line, a horizontal thread is cut and withdrawn to both sides about 1.5 cm each.

Now, away from the vertical withdrawn-thread line, more threads – 7 on the left and 7 on the right – are withdrawn leaving 3, cutting 1. They are cut at the horizontal withdrawn-thread line and withdrawn about 1–2 cm. Fifteen vertical withdrawn-thread lines are needed. If needed, carefully lengthen the horizontal withdrawn-thread line to accommodate all the needed vertical withdrawnthread lines.
Beutel_5Both outermost cut threads are withdrawn 3.5 cm.

Between these, more horizontal threads are withdrawn by leaving 3 and cutting 1 – fifteen in all. If needed, carefully lengthen the vertical withdrawn-thread lines to accommodate all the needed horizontal withdrawn-thread line.
Beutel_6Now the remaining vertical threads are withdrawn step by step up to the upper line and cut.
Beutel_7So a Limet grid, correctly sized for a special pattern, is created in the middle of the bag.

To secure the cut threads, Satin stitches should be worked outlining the Limet grid. To facilitate this, one more thread is cut in the middle of each side of the square, leaving 3 threads between. Both ends are withdrawn to their respective intersection points. The thread ends remain; they will be covered by the Satin stitches later.
Beutel_8Now, from the right side of the fabric, using coton à broder No. 20, and working counterclockwise, one row of Satin stitches is embroidered between both outside thread lines.
Beutel_9Then filling pattern 480 is worked into the Limet grid and the Peahole is worked.

One horizontal thread is withdrawn 1 cm from the top edge to mark the seam allowance. A second thread is withdrawn 1.5 cm down from there to mark the casing seam for the cord. This withdrawnthread line has a distance of 3.5 cm to the Peahole hem.

Down from the bottom edge of the Peahole hem one more horizontal thread is withdrawn at a distance of 3.5 cm, a fourth thread is withdrawn 1.5 cm below.
Beutel_10Now fold the piece along the longitudinal axis, right sides together. Sew together both layers along the marked line with Back stitches. This can be done hand or machine. For accuracy, it is more easy to do this step by hand. Start directly at the second withdrawn thread line and work up to the Four-Sided stitch of the Peahole hem. Secure working thread there.

Start again at the opposite Four-Sided stitch of the Peahole hem and work up to the third withdrawn-thread line. Secure working thread there.

Start again at the fourth withdrawn-thread line and work along the remaining section the side and then along the bottom.

The keep the seam secure, work the first and the last stitch of each section several times.
Beutel_11Trim seam allowance at the corner.

Open up side and bottom seam allowances and smooth them with the thumbnail.
Beutel_12Fold down the seam allowance of the top edge and smooth it along the first withdrawn-thread line.
Beutel_13Fold it down again and lay the hem so that the first folded edge lies directly above the last withdrawn-thread line.

Baste in place with short Running stitches. You will notice, that the under layer lies slightly curved and needs to be pressed a little bit to match the upper layer.
Beutel_14Secure the hem along the withdrawn-thread line with Antique hem stitches. So that the Antique hem stitches create a line of Back stitches on the right side of the bag, make sure that the vertical parts of the hem stitch catch only the two upper layers.
Beutel_15Turn inside out and work one row of Back stitches along the remaining withdrawn-thread line, catching both layers. Make sure to also meet the inside withdrawn-thread line by looking inside when the needle is on the inside of the bag.
Beutel_16Secure the triangles of the folded Peaholes. In the area of the side seam, make sure to catch both layers of triangles so that they end up looking like one.

Insert a cord into the casing.
Beutel_17Decorate the bottom edge with needlelace scallops.
Beutel_18Wash and iron the finished piece, put an appropriately sized lavender pillow into the bag and close it.
Beutel_19A cute whitework embroidery is finished and ready to be admired.

A Lavender Bag with a Needlelace Edging

Needlelace in its different patterns can be easily practiced on small projects. On this project, you can practice simple needlelace arches.

The linen for a small sachet was embroidered with a filling pattern square,
Beutel_1_1sewn closed, decorated at the upper edge with the folded Peahole edging,
Beutel_1_2and decorated at the bottom edge with needlelace arches.
Beutel_1_3The little sack was filled with lavender and closed with a cord.
Beutel_1_4Such small bags look nice, they are relatively quick and easy to work, and they are very suitable for small gifts.

I will show the detailed steps of working in the next posts.

How to Work a Lampshade

To make a small lampshade, as shown in the previous post, you will need a frame. The wire frame should have a simple shape. Octagonal frames are especially suited; they look beautiful, are solid, and the wires can be covered later by the seams of the lampshade.

The wire frame must be encased in some kind of coating. The coating has to be pristine without any damage; any blemish that exposes metal can get rusty, and any tiny sharp bits will damage the linen.
These kinds of damages are irreparable.

Also, you will want a matching lamp base.
Lampe2_1The first step is to make a pattern for the lampshade. Because the shape is slightly concaved, it is best to lay a sheet of paper along the frame, to tape it, and then to mark the outside lines along the wires of the respective sections.
Lampe2_2The marked sections are cut and held against the respective sections of the frame to ascertain they really fit.
Lampe2_3Linen for lampshades should be densely woven. Weddigen linen,16/cm thread count, is suitable, but old handwoven linen is better.
It is absolutely necessary to shrink the linen by boiling before cutting to size. If you were to do this step after finishing the lampshade, it would hardly fit around the frame.

Because the single parts are small, it would not be possible to stretch each section in a hoop without wasting a lot of fabric—so, all eight sections are marked on the linen. A 0.5 cm seam allowance should be added to the side edges of each section. At the top edges, a 4 cm allowance is added: this includes a 2 cm fold with a 1.5 cm hem + 0.5 cm fold. At the bottom edges, a 4.5 cm allowance is added: this includes 2.5 cm fold with a 1.5 cm hem + 0.5 cm fold). Place the single sections close to one another. Leave a large enough fabric margin around the group of sections to be able to easily stretch the embroidery in a hoop.
Lampe2_4Also the longitudinal axes are marked. Suitable designs are transferred onto the sections and embroidered as required.

After finishing the embroidery, the pieces are cut out. Either zigzag with a sewing machine or serge the side edges to prevent fraying. The sections are sewn together. Because the lampshade cover should be tightly stretched later, I recommend stitching a double seam for reinforcement.
Lampe2_5The seam allowance should be opened and smoothed. Later, the seam allowances will be arranged around the wires.

Then the top edge and the bottom edge are hemmed (here: 0.5 cm fold and 1.5 cm hem). An opening of about 2 cm is needed to insert a piece of elastic in the hems.
Lampe2_6The bottom edge is folded inwards along the marked line and stitched close to the edge of the fold.
Lampe2_7Along the closely stitched edge, needlelace is worked.
Lampe2_8A piece of elastic or lightweight curtain cord is inserted into the hems. The finished cover is – if needed – washed and ironed and then, from top down, placed over the frame.

The elastic causes the top
Lampe2_9and bottom allowances to fold to the inside of the lampshade frame.
Lampe2_10The seams are adjusted at the wires
Lampe2_11the needlelace is groomed.
Lampe2_12The lampshade is mounted onto a matching base.
Lampe2_13Whether very small or a little bit bigger, lamps with shapes embroidered with Schwalm whitework are always special – individual and attractive!

An Easter Egg

A simple oval design with a double line (Here: external measurements 8 cm X 5.28 cm)
2016-03-23_pdf
was ironed on Weddigen linen, 13.5/cm thread count.
OE_2Coton à broder No. 16 is used for the Coral Knot stitches, No. 20 for both the Blanket stitches and the filling pattern, and No. 25 for the Chain stitches.
Coral Knot stitches are worked along the inner line.
OE_3Chain stitches are worked directly inside the Coral Knot stitches.
OE_4Chain stitches are worked a small distance outside the Coral Knot stitches. The outside Chain stitches are covered with densely worked Blanket stitches between the outline and the Coral Knot line.
OE_5The shape was filled with pattern “478”.
Starting in the middle, alternate withdrawing 1 vertical thread and leaving 2 vertical threads.
OE_7Start at the center (red marked)
OE_8always alternate working four blocks of Satin stitches and 5 Rose stitches.
OE_9The first row is finished up from the already worked section.
OE_10After finishing, the embroidered piece is washed (boiled), starched and ironed. Then, the egg is cut.
OE_11If needed, such closely trimmed embroidery can be washed and ironed – quick and easy – at any time, but never spun in a washing machine!
OE_12Whether you choose to place the egg on a surface, to hang it, or to mount it in a frame, cutting out the embroidery opens up manifold ways for decorations.
OE_13

Happy Easter!