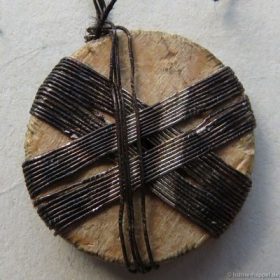
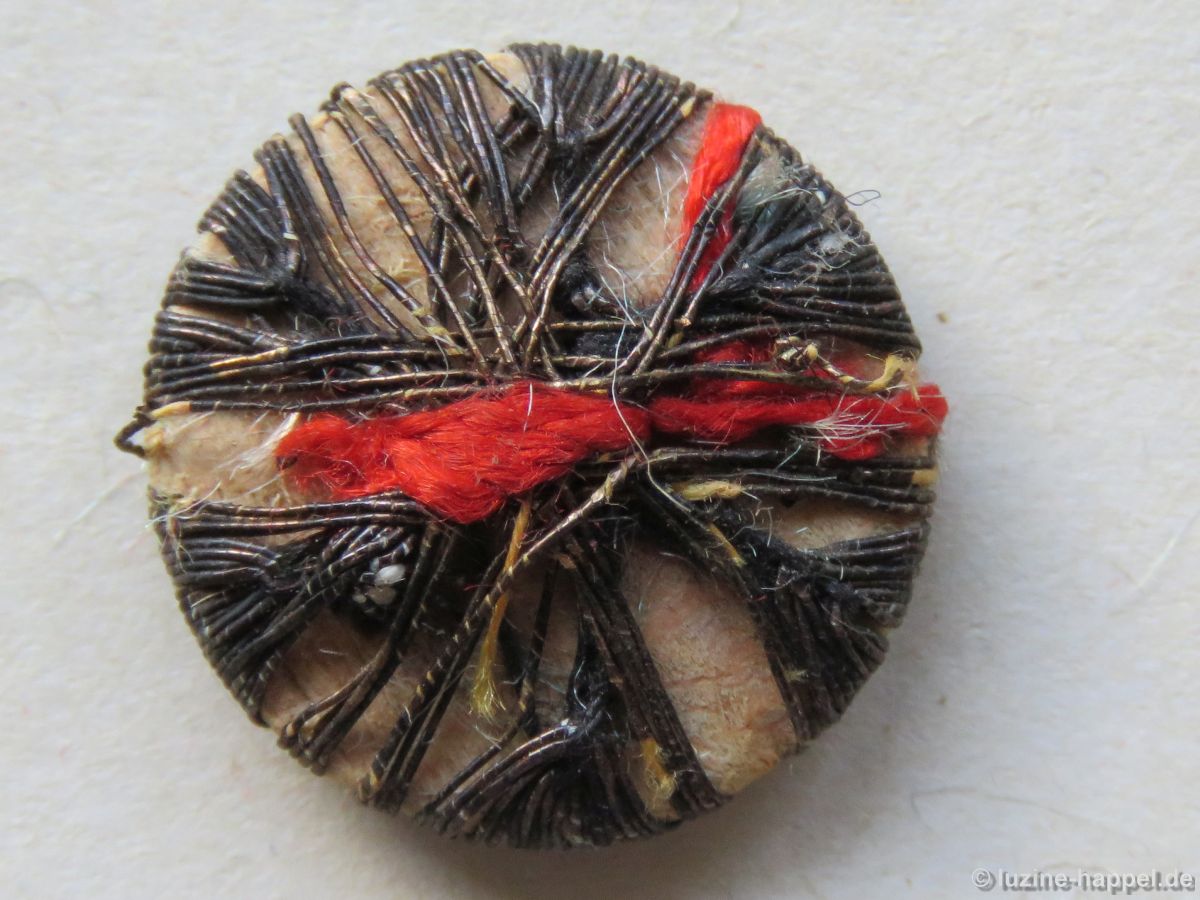
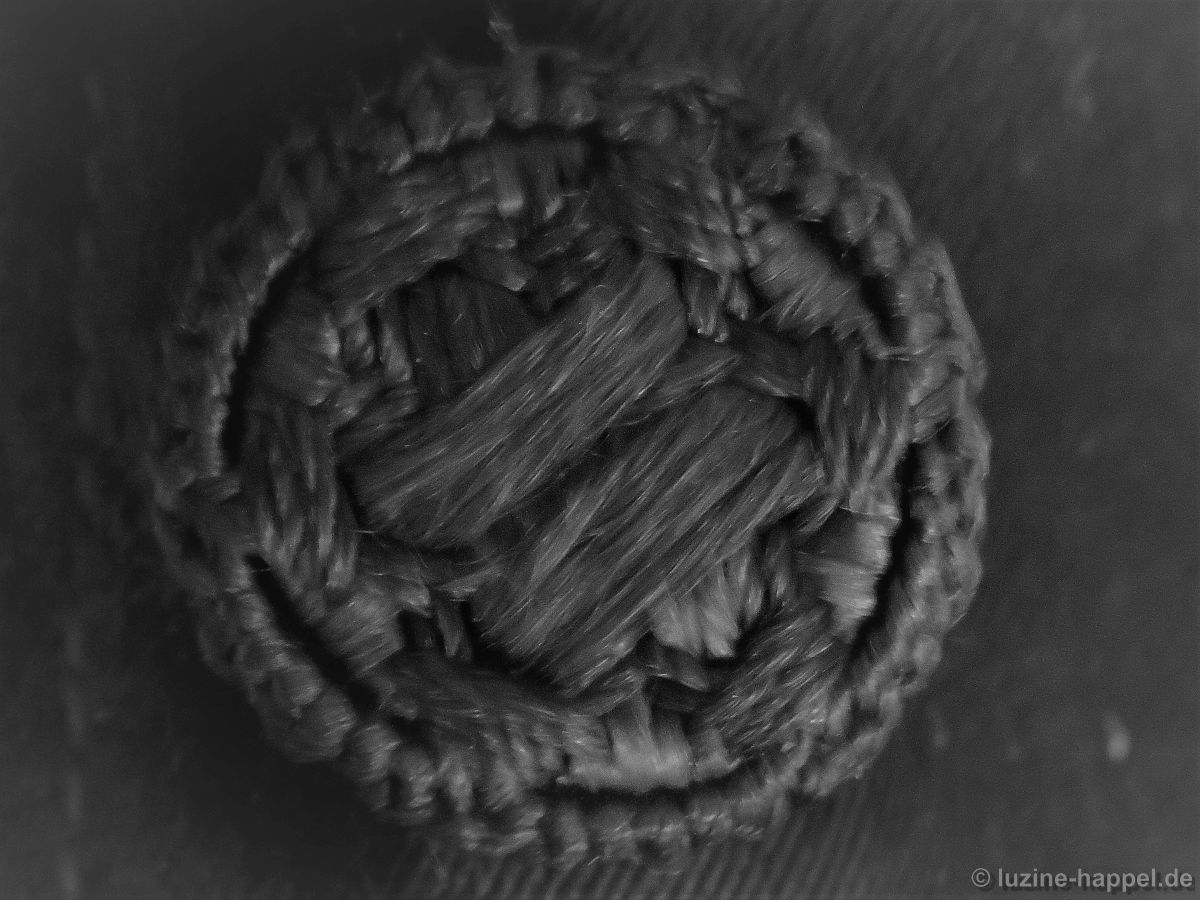
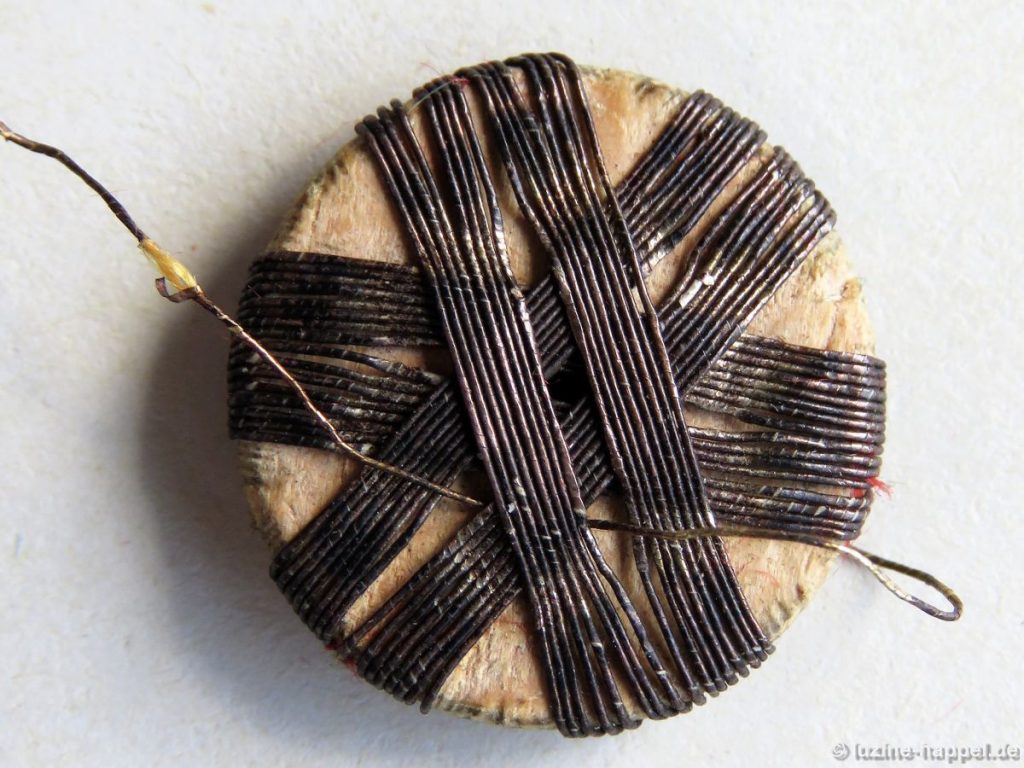
I have in my collection a typical Schwalm passementerie button that is slightly damaged. Because it is not in pristine condition, I decided to unstitch it to see exactly how it was made and the materials that were used.
 Photos were taken while re-working. They are now shown in the reverse order.
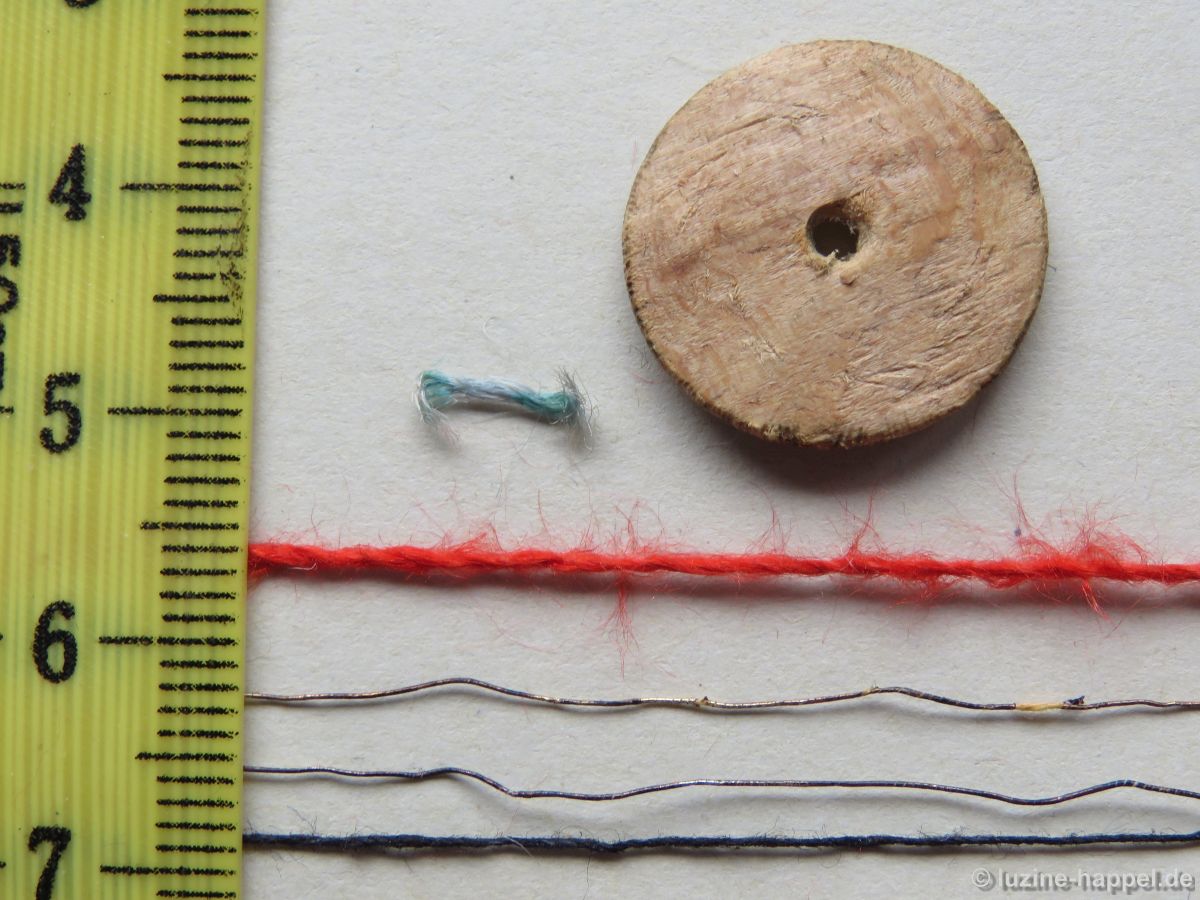
Needed for establishing such a button were:
- A wooden disc that had a hole in the center
- Silk threads in red and (formerly) green
- 4 metallic threads in a length of 35 cm each
- 1 metallic thread in a length of 90 cm
- Black linen thread
The tape measure allows one to imagine the fineness of the threads.
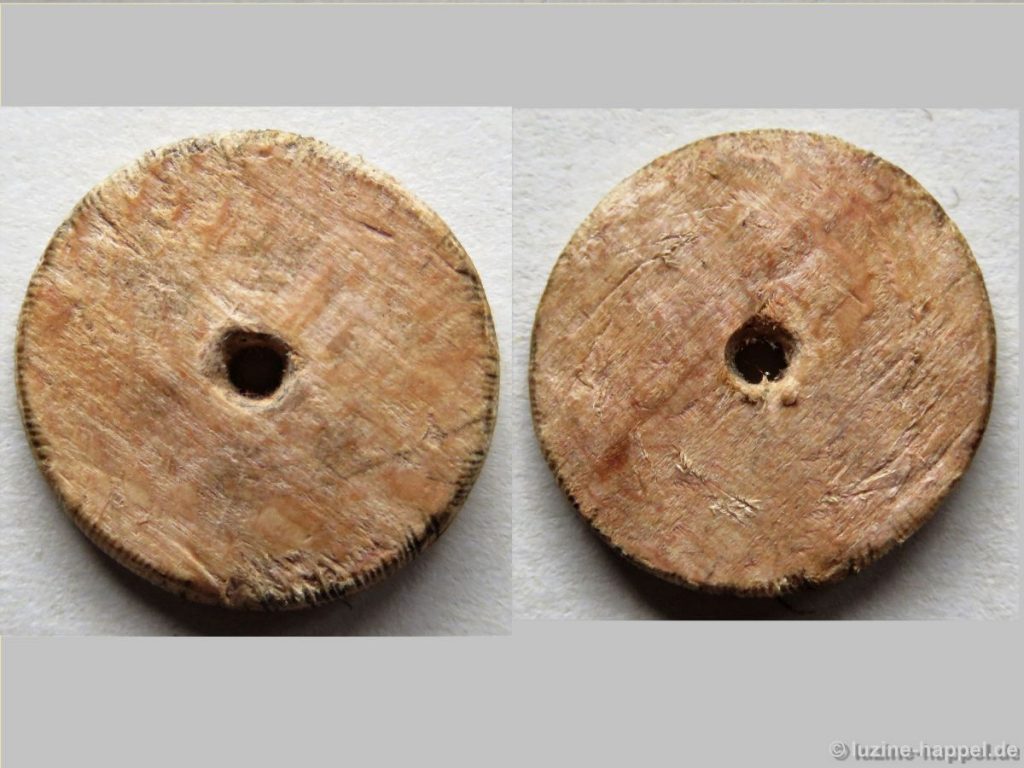
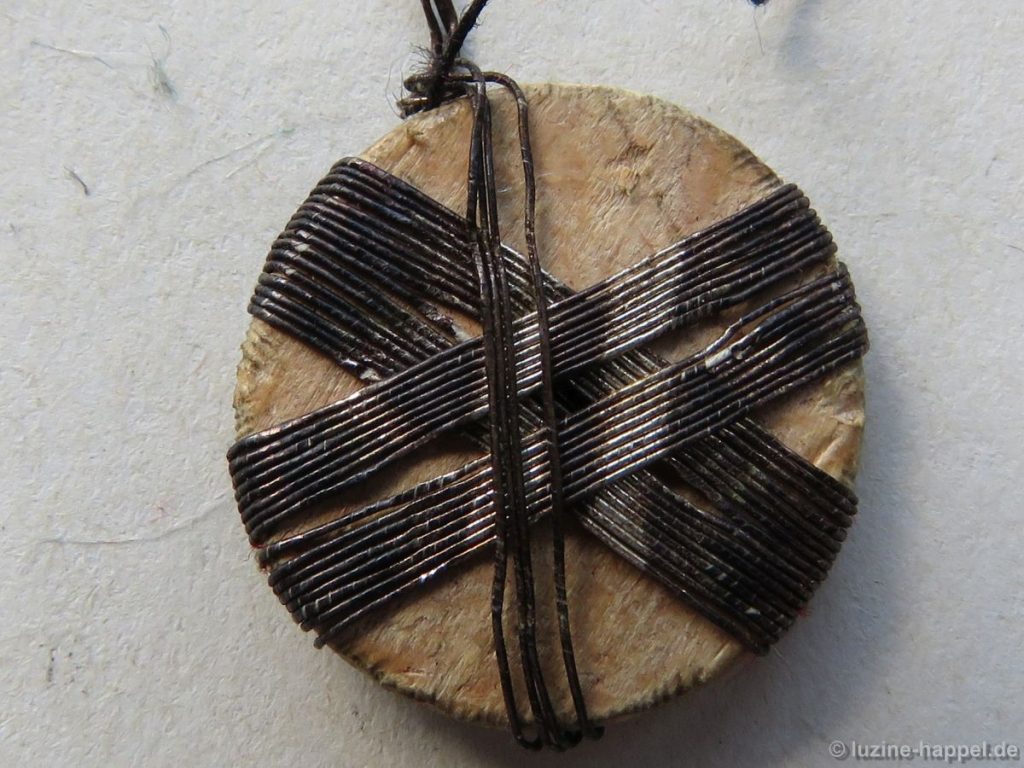
 The disc has a diameter of 1.8 cm. The wood is from the beech tree. The left image – the front of the disc – shows indentations on the edges caused by the tightening of the wrapped metal threads. I cannot see division marks on the front or the back sides.
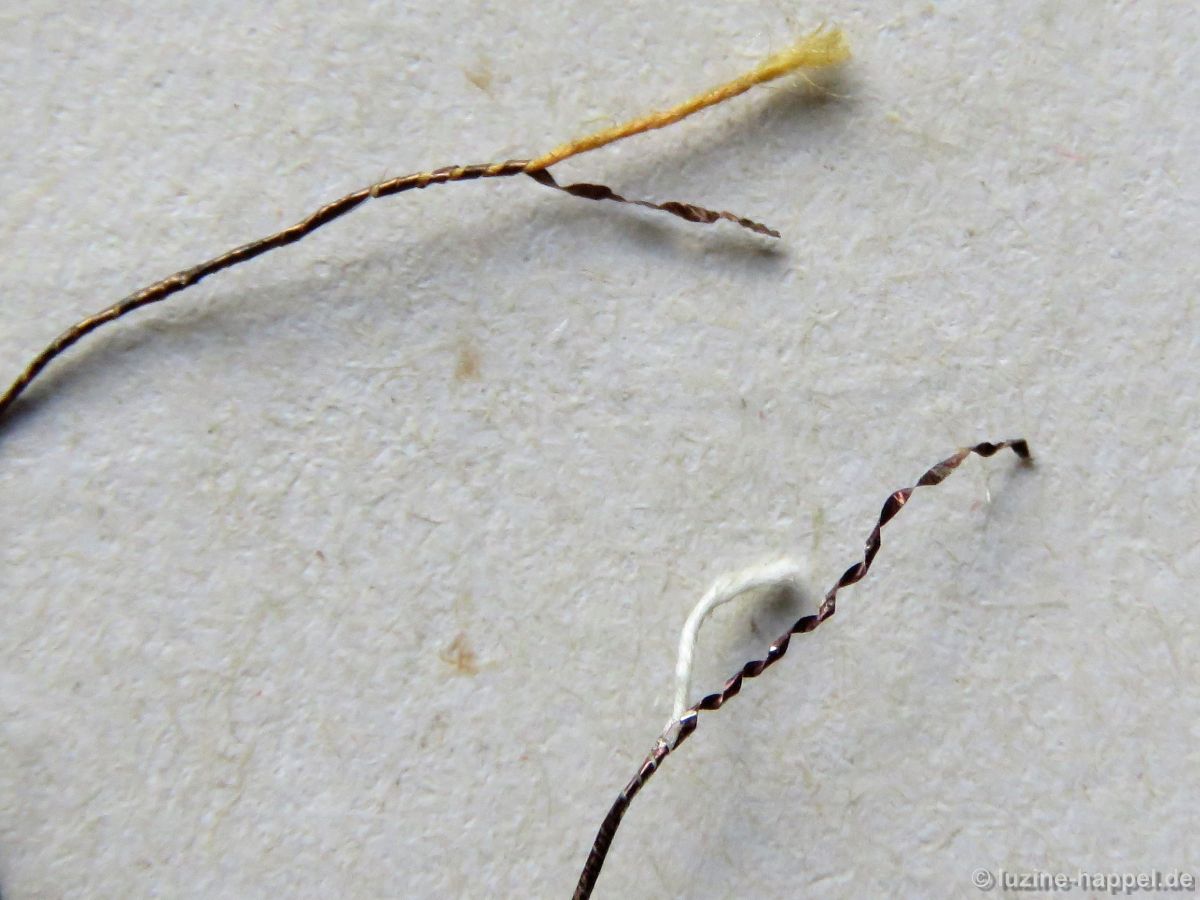
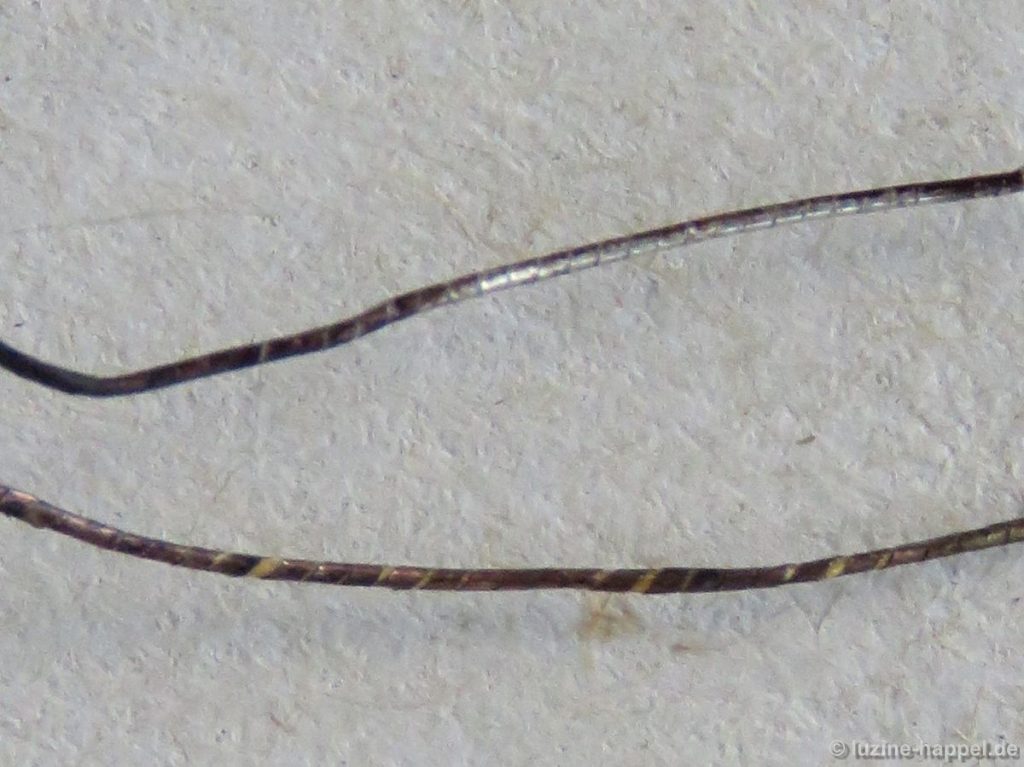
 To the naked eye a difference in the thicknesses of the metal threads is imperceptible, but a difference can be felt when the threads are held between two fingers. The thread for wrapping feels stiffer.
 I found the difference when I untwisted the threads. Both metal threads had different twisted cores that were wrapped with a metal band. The metal band on the thread used for wrapping the disc (white core) was more closely wrapped around the core than on the thread used for the weaving stitches (yellow core).
So the threads used for wrapping were more stable (the top thread in the picture below).
 Button making was a stand-alone trade at the time. It is chronicled that a Konrad Plannet, button maker master in Schwalmstadt-Treysa, in the middle of the 19th century needed 12–14 hours to work about twenty buttons. It is hardly surprising because he had to twist carefully and exactly all the necessary threads first.
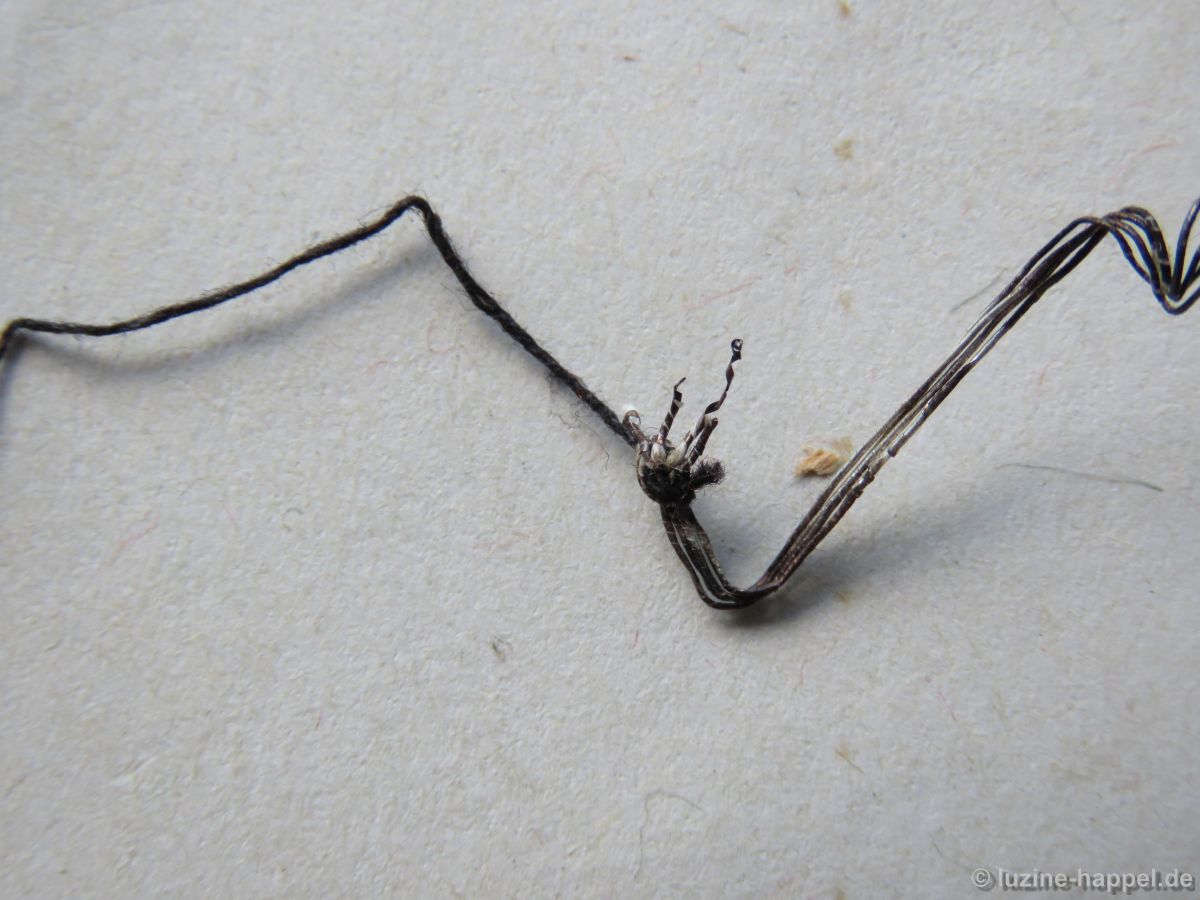
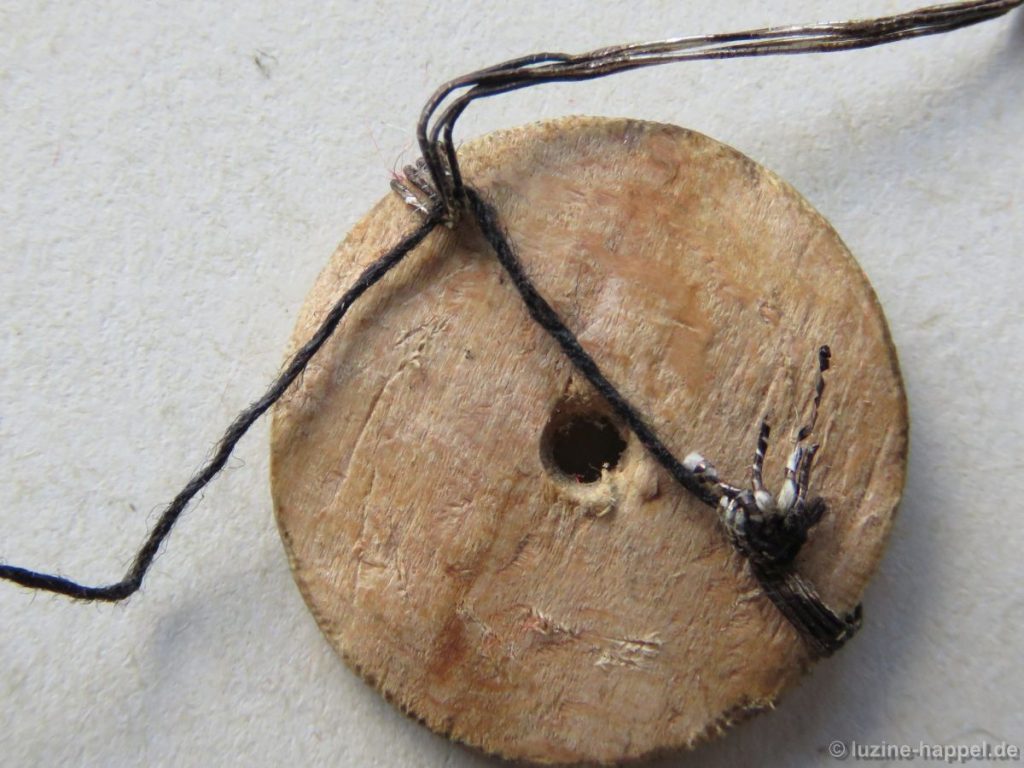
The ends of four silver threads were knotted together with a black linen thread.
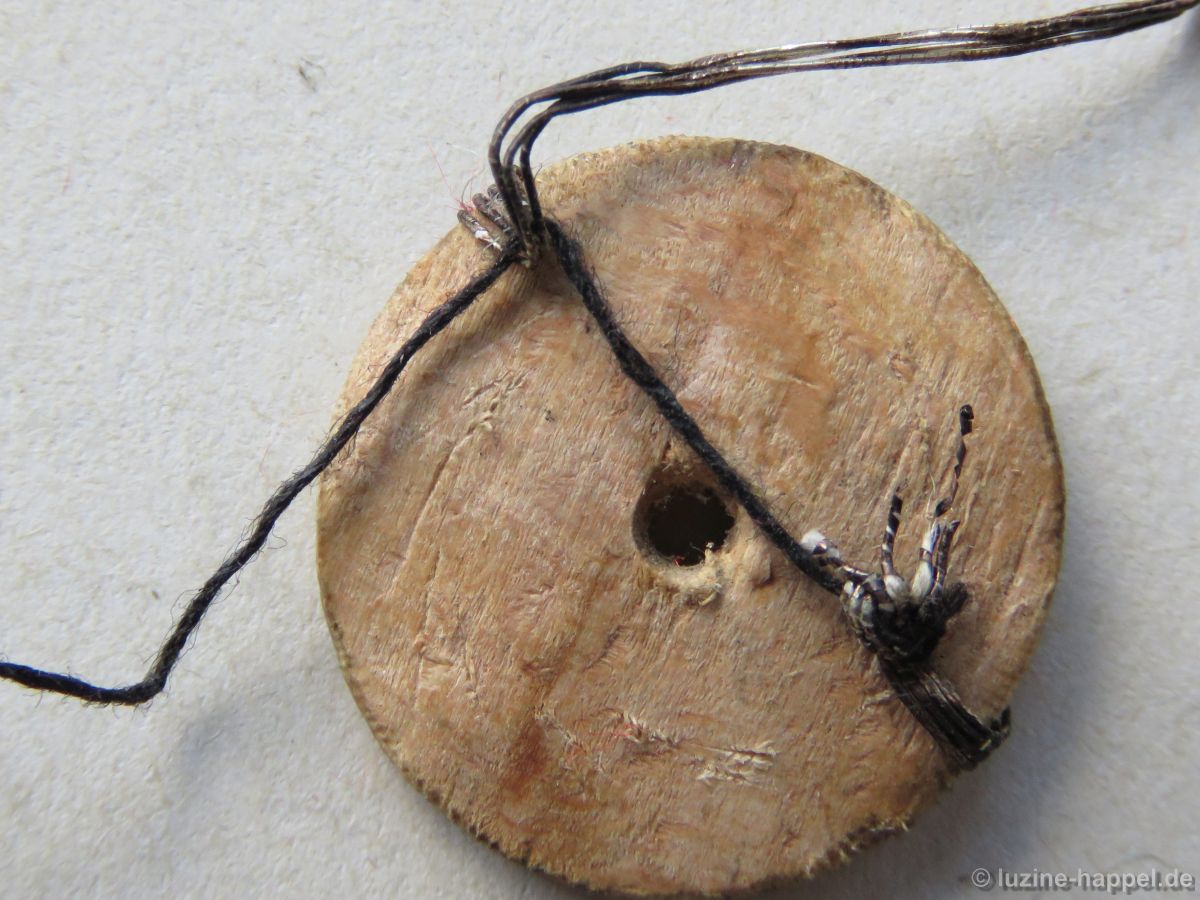
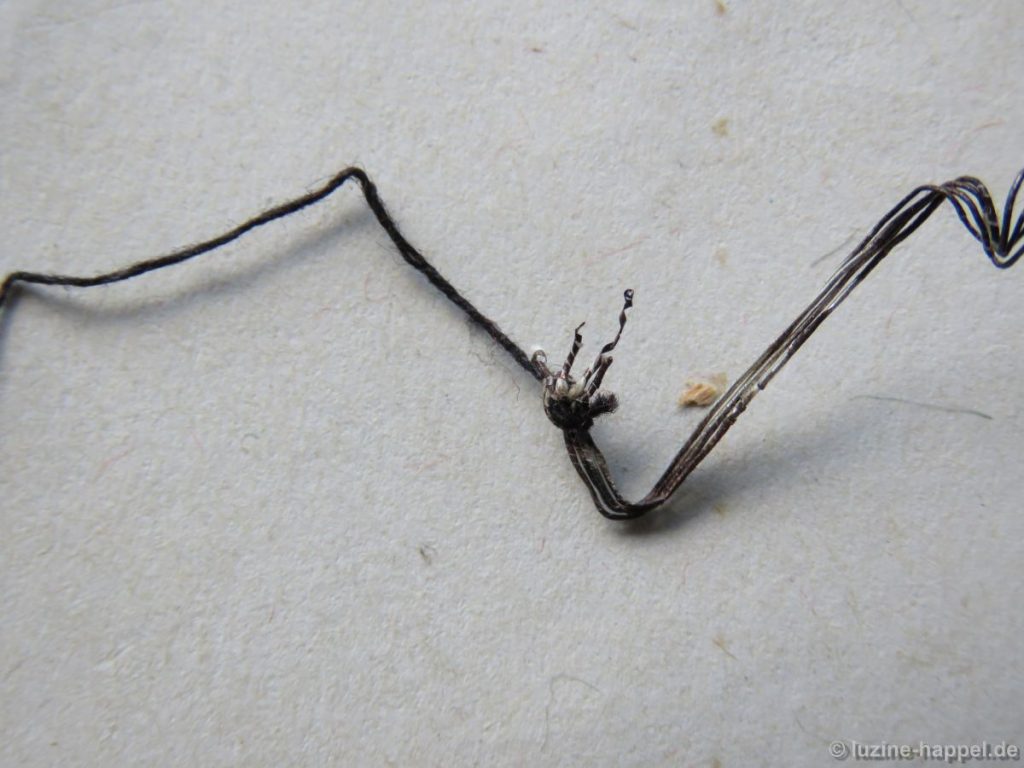 The knot was positioned at the back of the wooden disc, approximately in the middle between the center and the edge. The metal threads were laid around the disc so that all four threads lay densely parallel and beside the center hole.
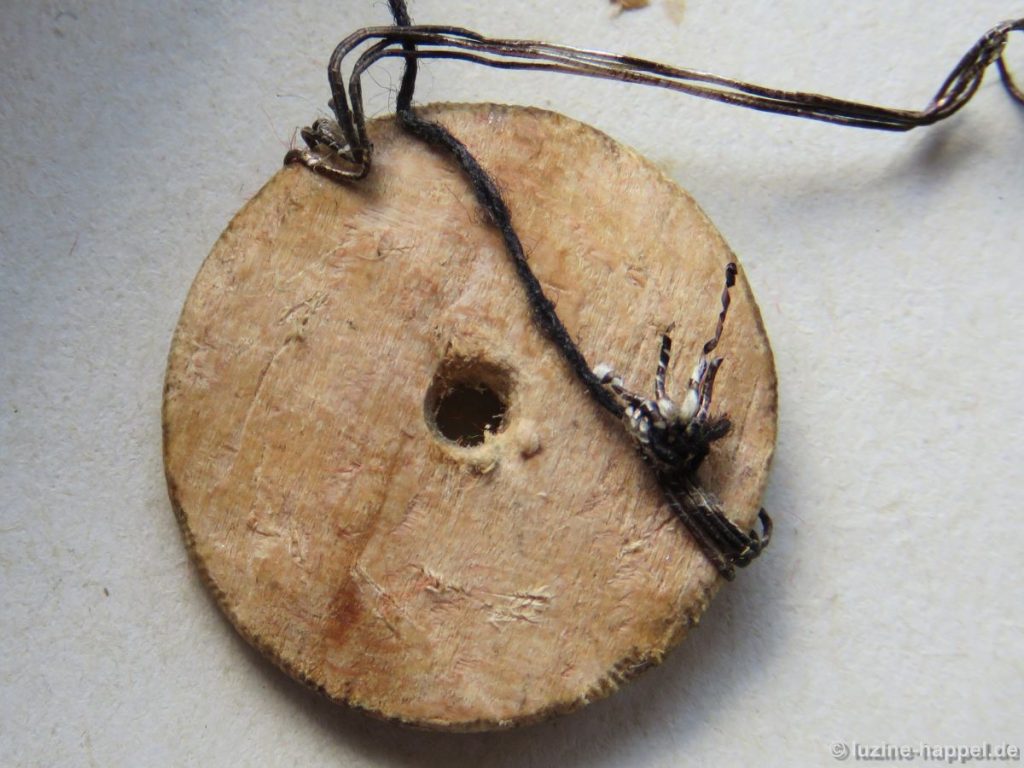 The black thread is laid to the opposite edge of the disc and there, a small distance from the edge, laid across the metal threads. These were bent back
 and laid again across the front of the disc, parallel to the first but this time on the opposite side of the center hole.
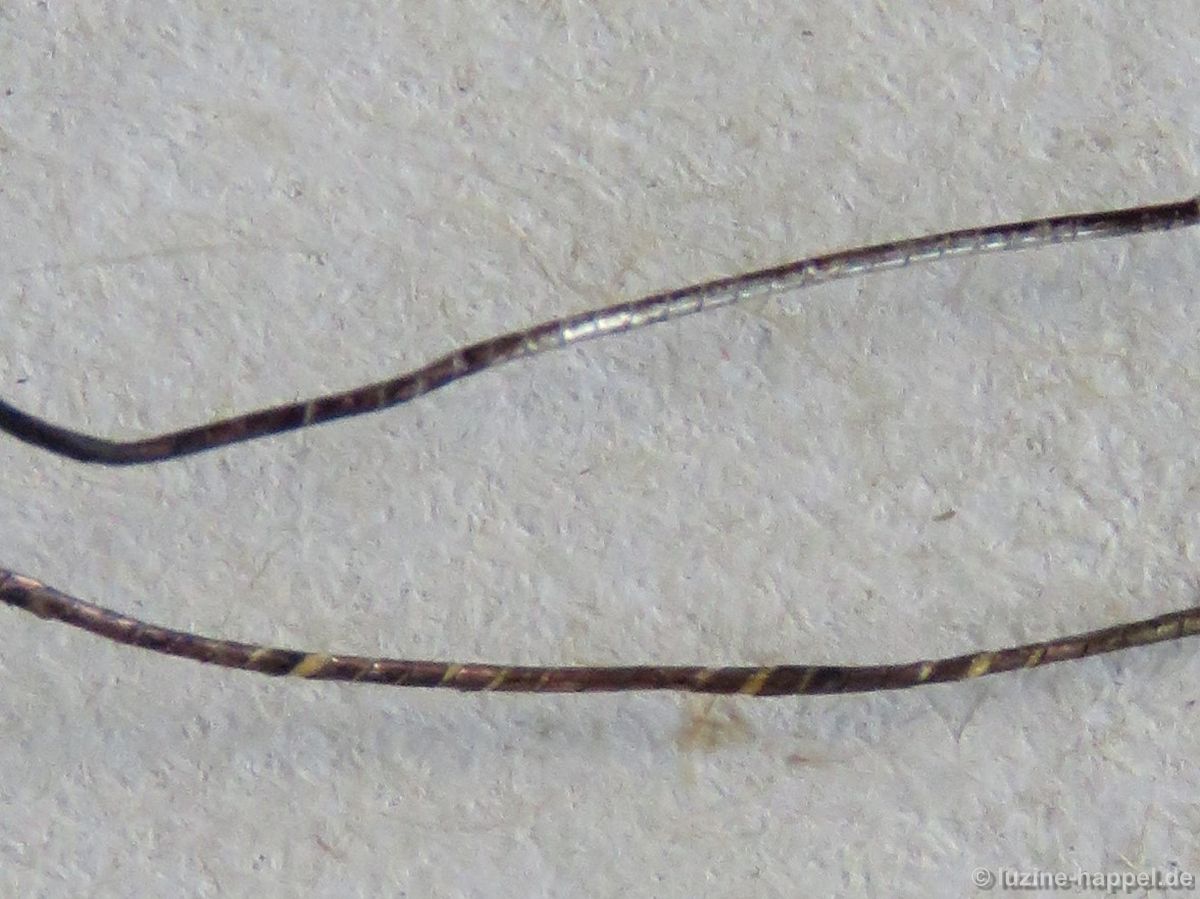
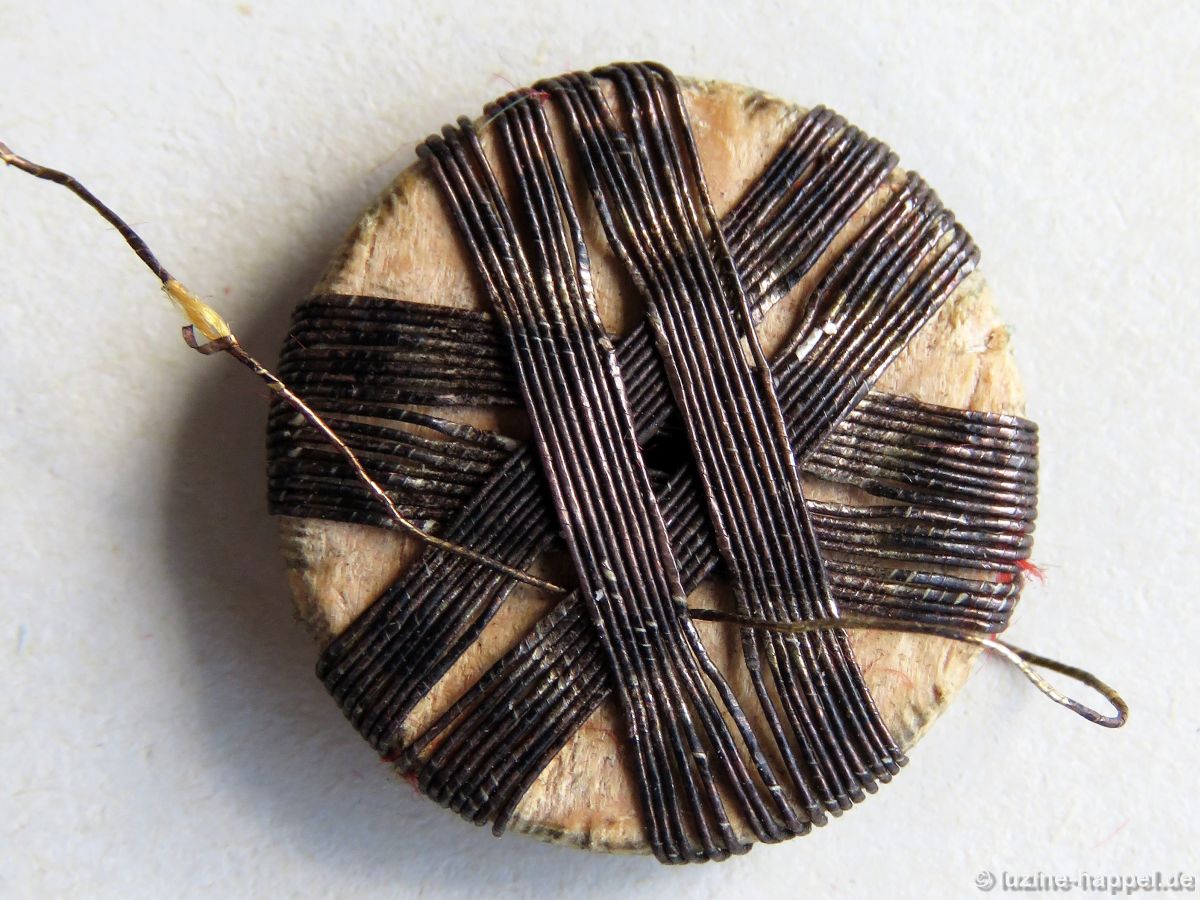
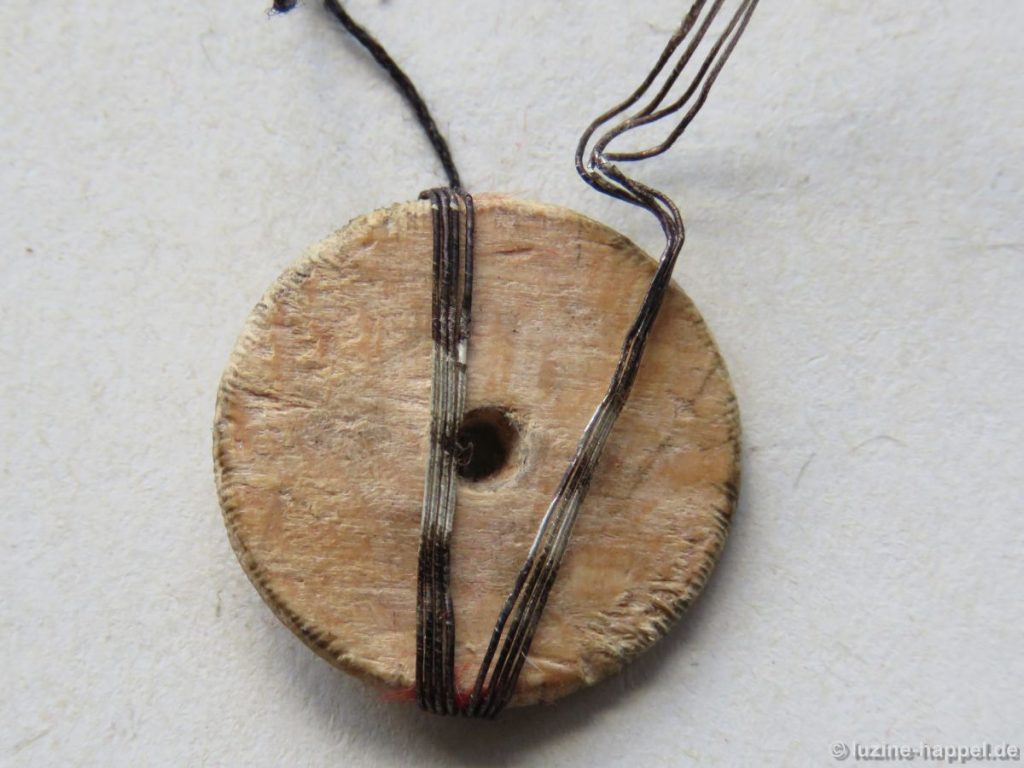 On the back the black thread held and tightened the metal threads (using the black thread in such a way also enabled the button maker to conserve precious metal threads). The steps were repeated two times, laying four parallel metal threads outward of the first wrapping and again laying four parallel metal threads outward of the second wrapping. (This image shows that the metal threads were originally silver wires.)
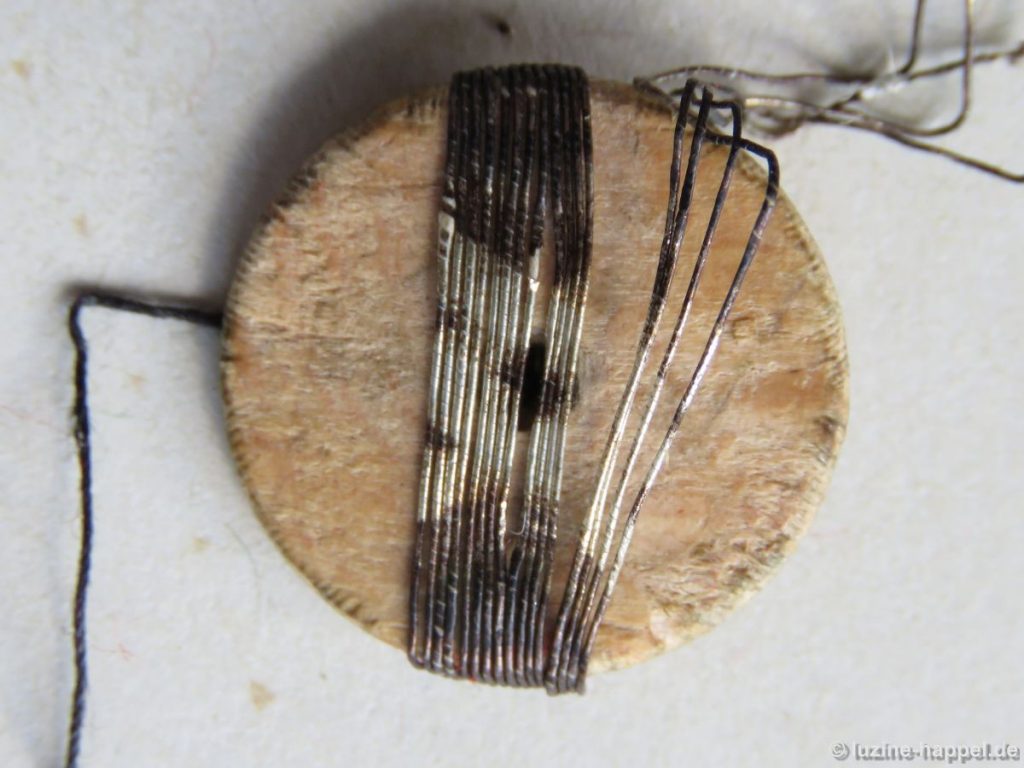 The disc was rotated 30° clockwise, and the steps were repeated once
 and again after rotating 30° clockwise twice.
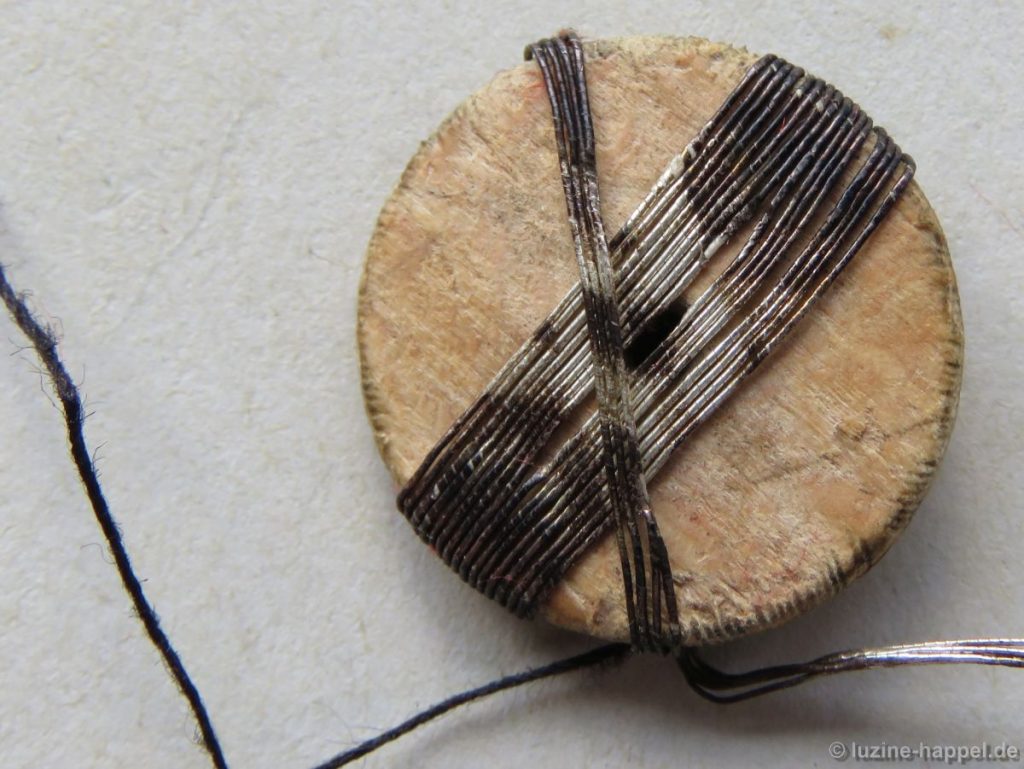
 On the back all metal thread bundles were held in place and stretched with the black thread. It is clearly visible that the curve of the first two bundles is closer to the edge than the curve of the second two bundles. And the thread bundles leading from one section to the next were laid in a curve that nearly reaches the center. In this way bulky areas on the back of the button were avoided.
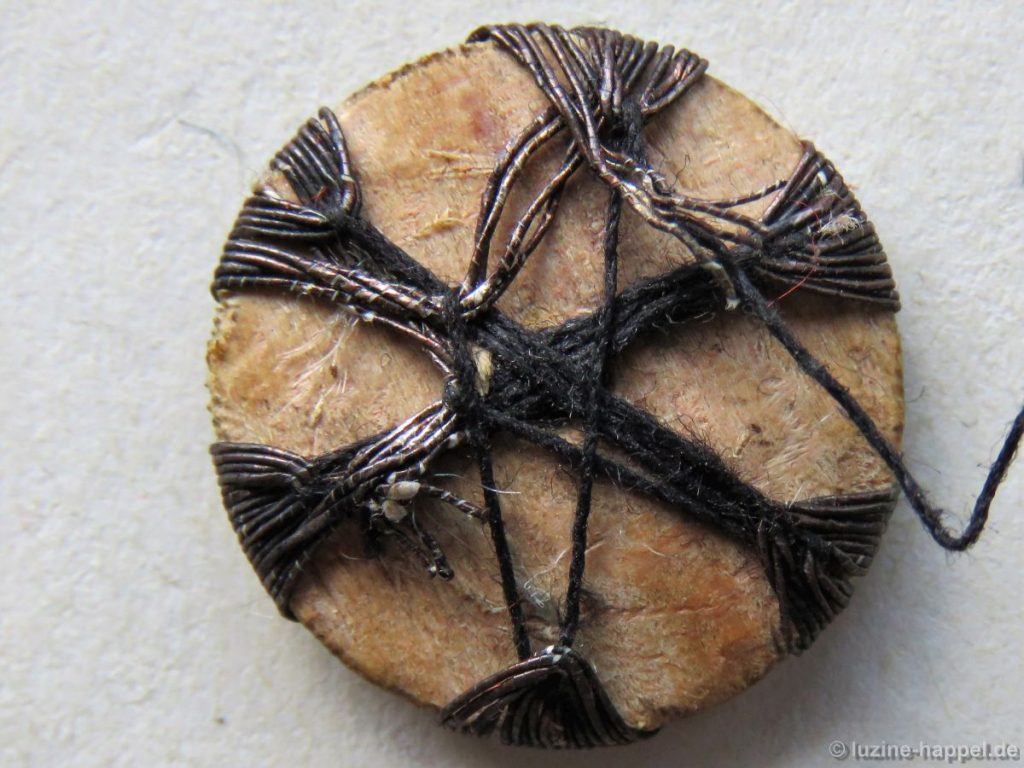 The thread ends were wrapped many times and then cut. The more flexible metal thread – in the picture it looks like gold wire (it makes sense that the yellow core thread was covered with gold wire, the white core thread was covered with silver wire) – got a knot at one end and was slid under one thread bundle on the back.
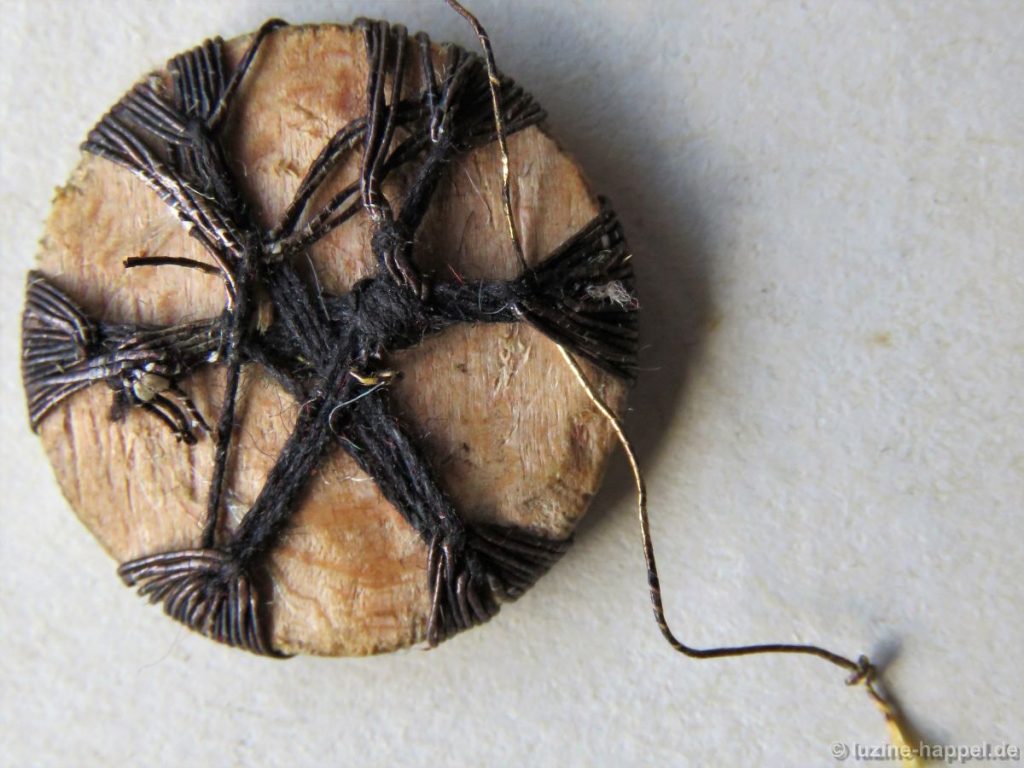 Emerging directly from the thread bundle, it was brought to the front side. (The red arrow marks the knot.)
 On the front side, it was woven over the first bundle of metal threads, under the two crossing bundles, and over the fourth bundle.
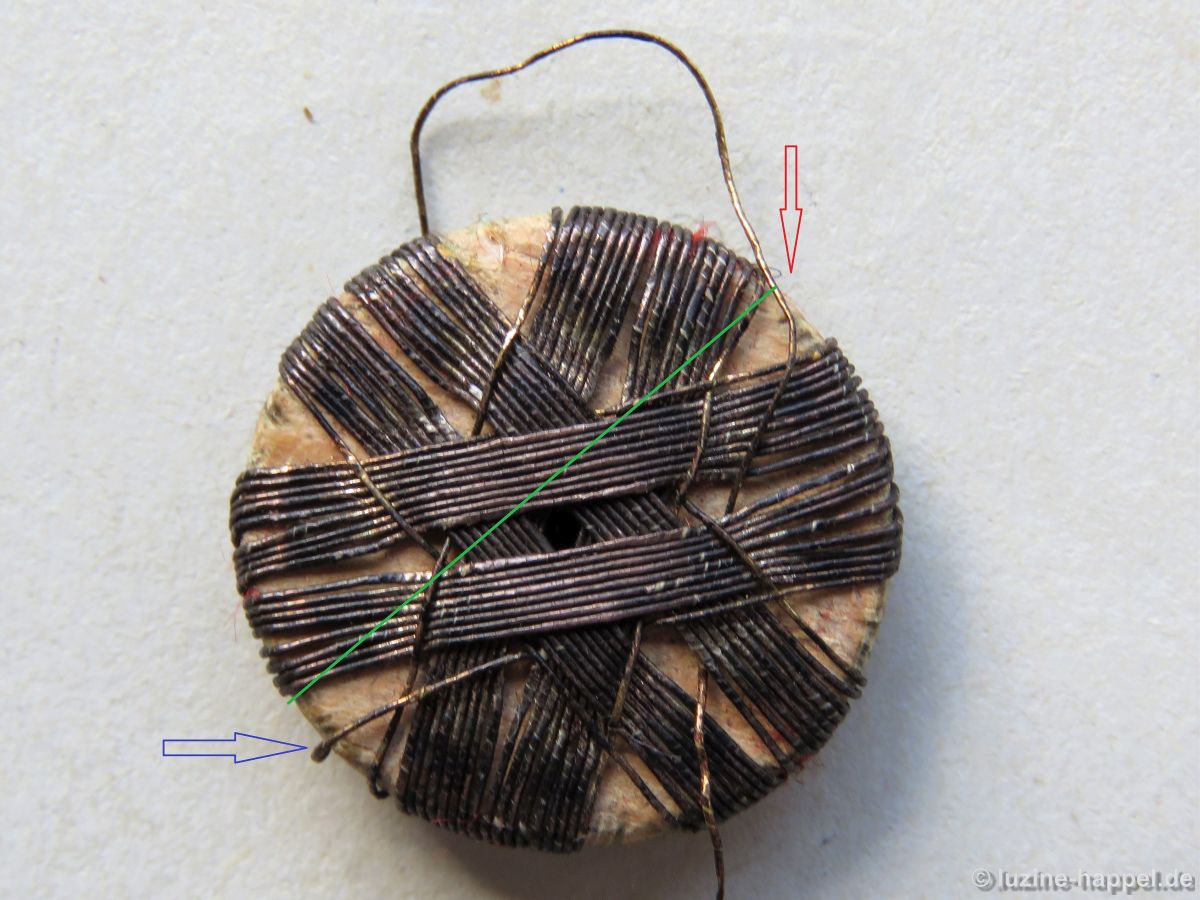
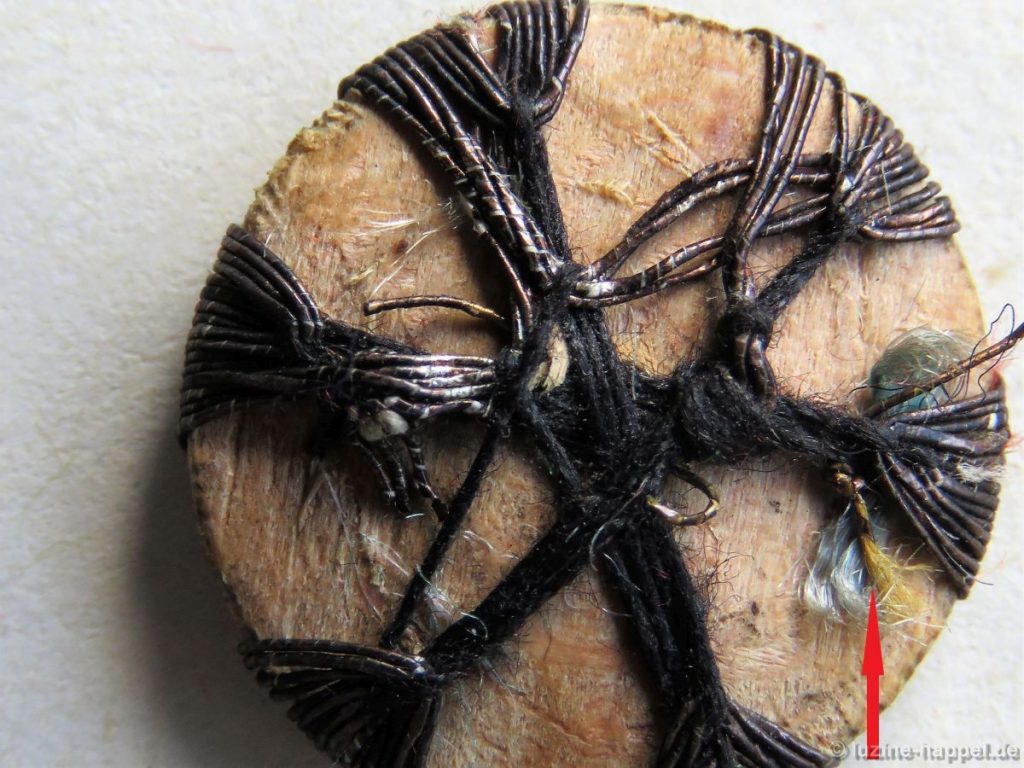
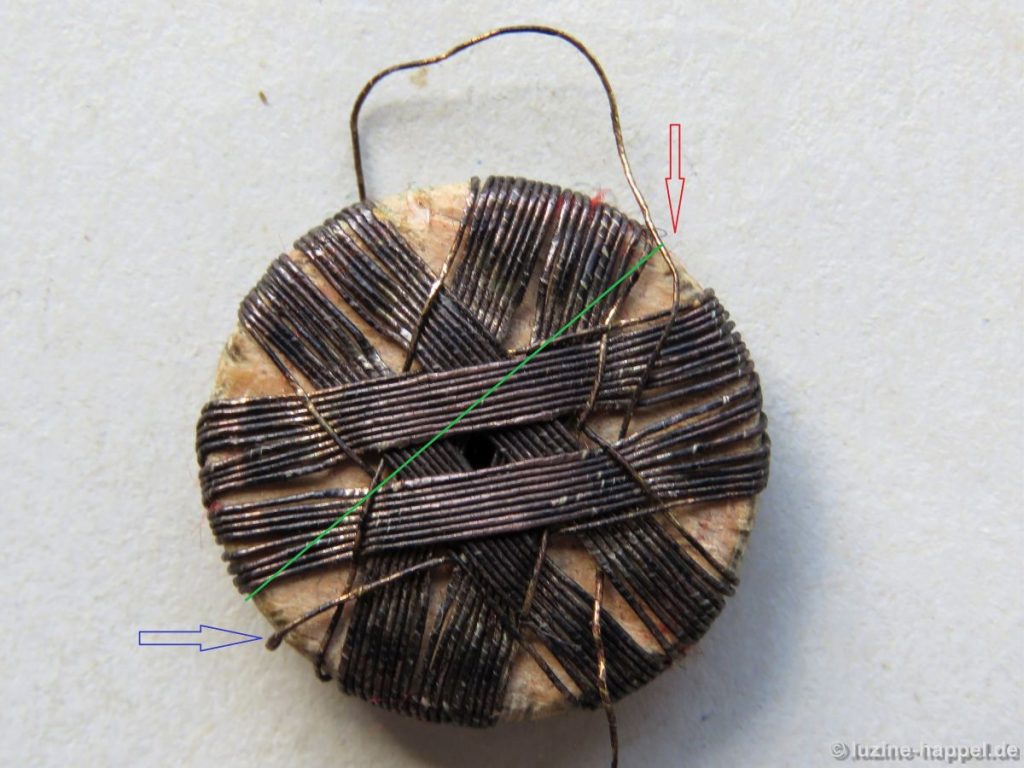
 Now the working thread is – seen clockwise – lying before a sixteen-thread bundle. On the back it is brought clockwise three sixteen-thread bundles away and now lies – seen clockwise – behind the third sixteen-thread bundle. Unfortunately the brittle thread spread out of place, so I marked the position with arrows. The blue arrow marks the ending of a weaving sequence, the green line marks the thread’s path along the back of the disc, and the red arrow marks the beginning of the next weaving sequence, which is parallel outward the previously laid threads.
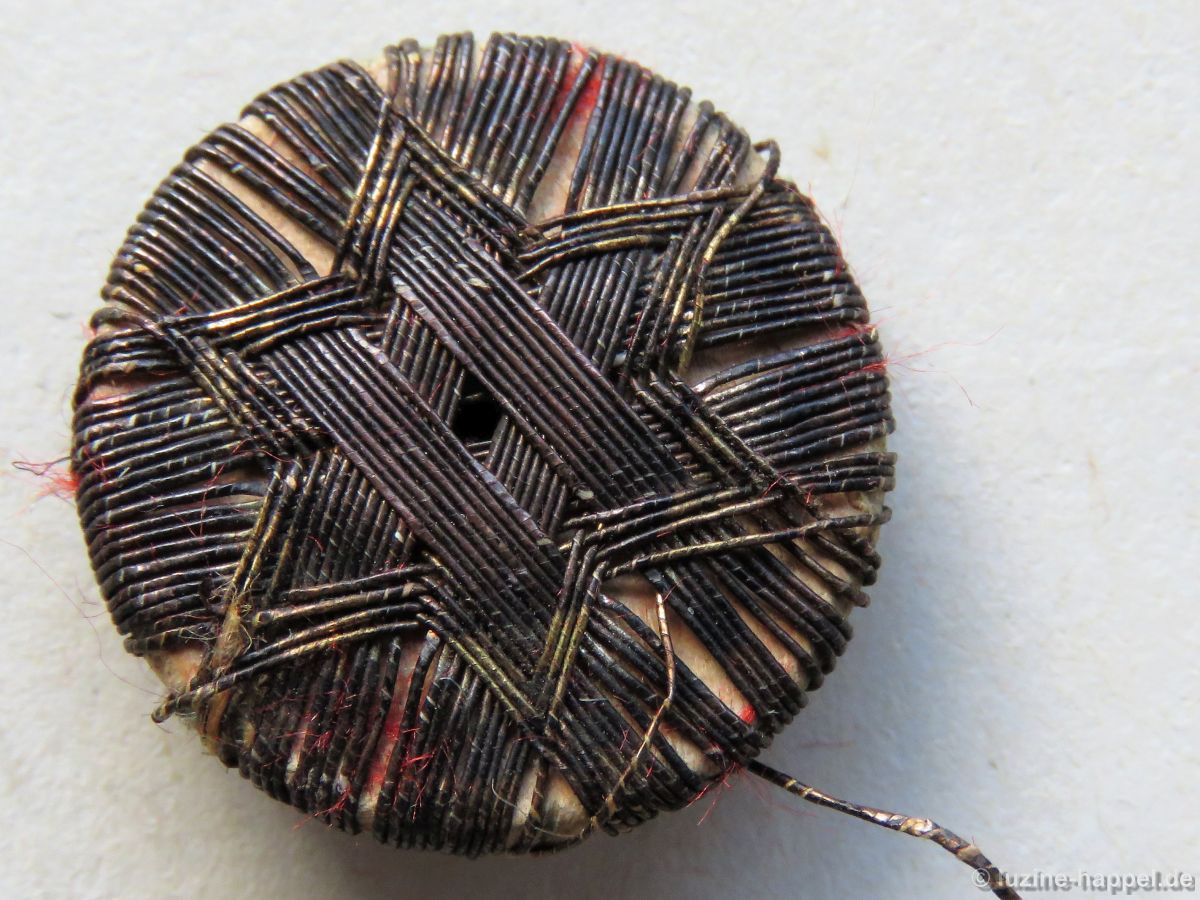
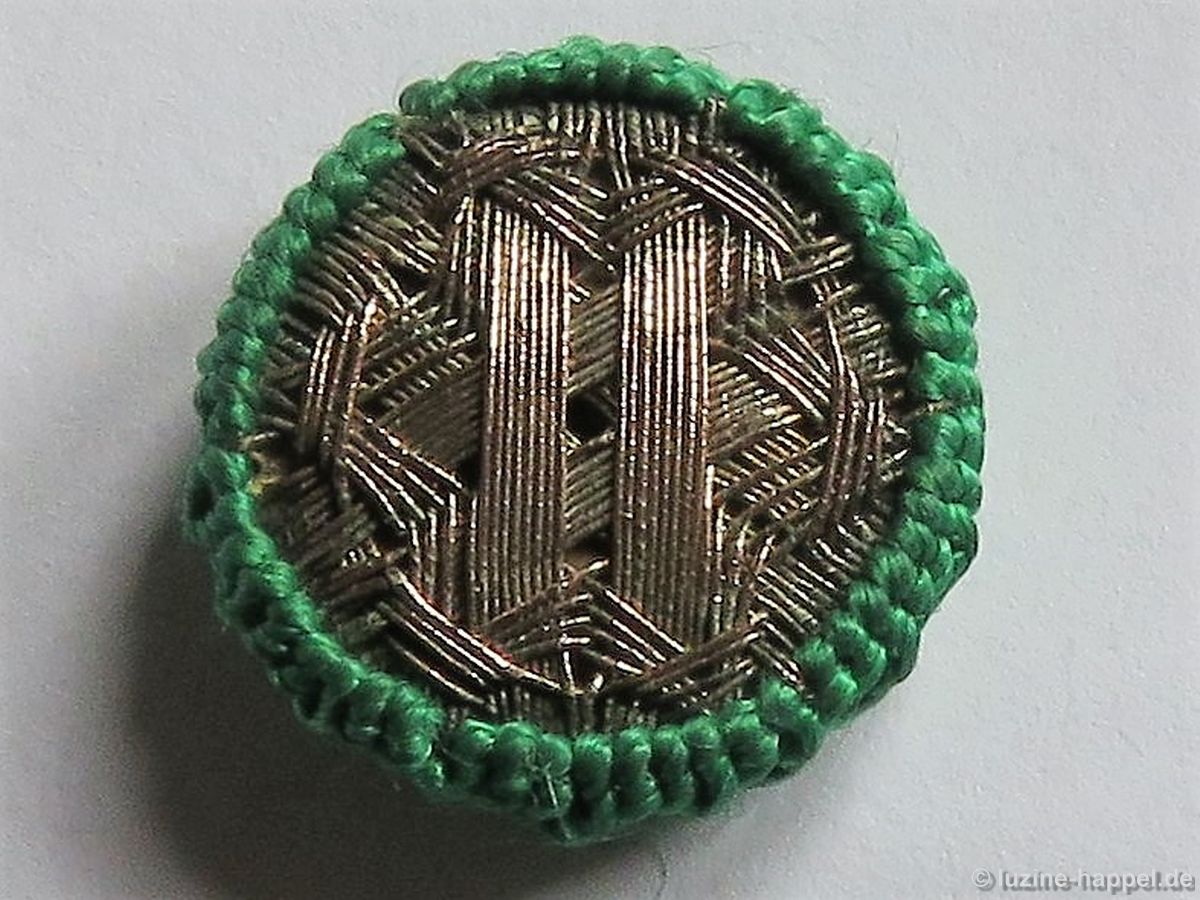
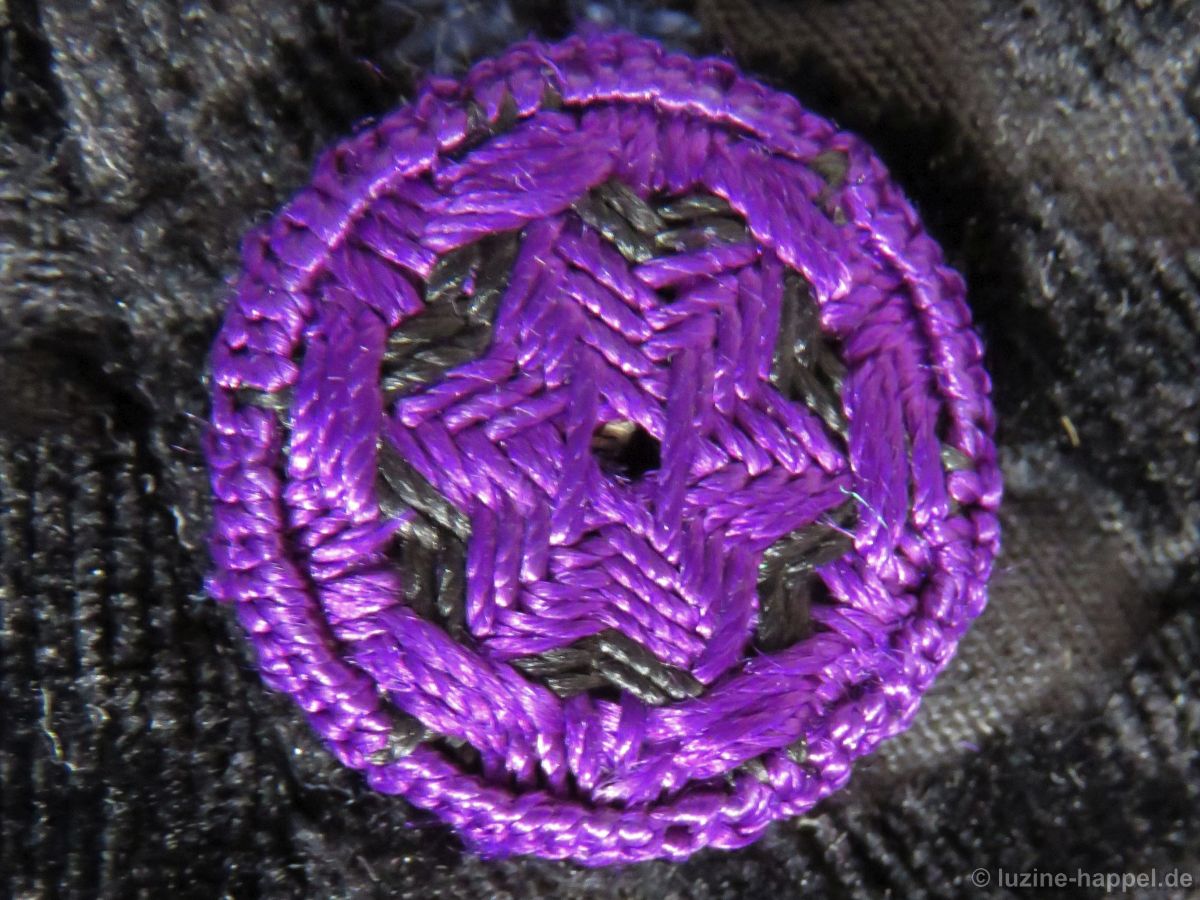
 Always in the same way the thread was woven and wrapped until a star with a four-thread edge was established.
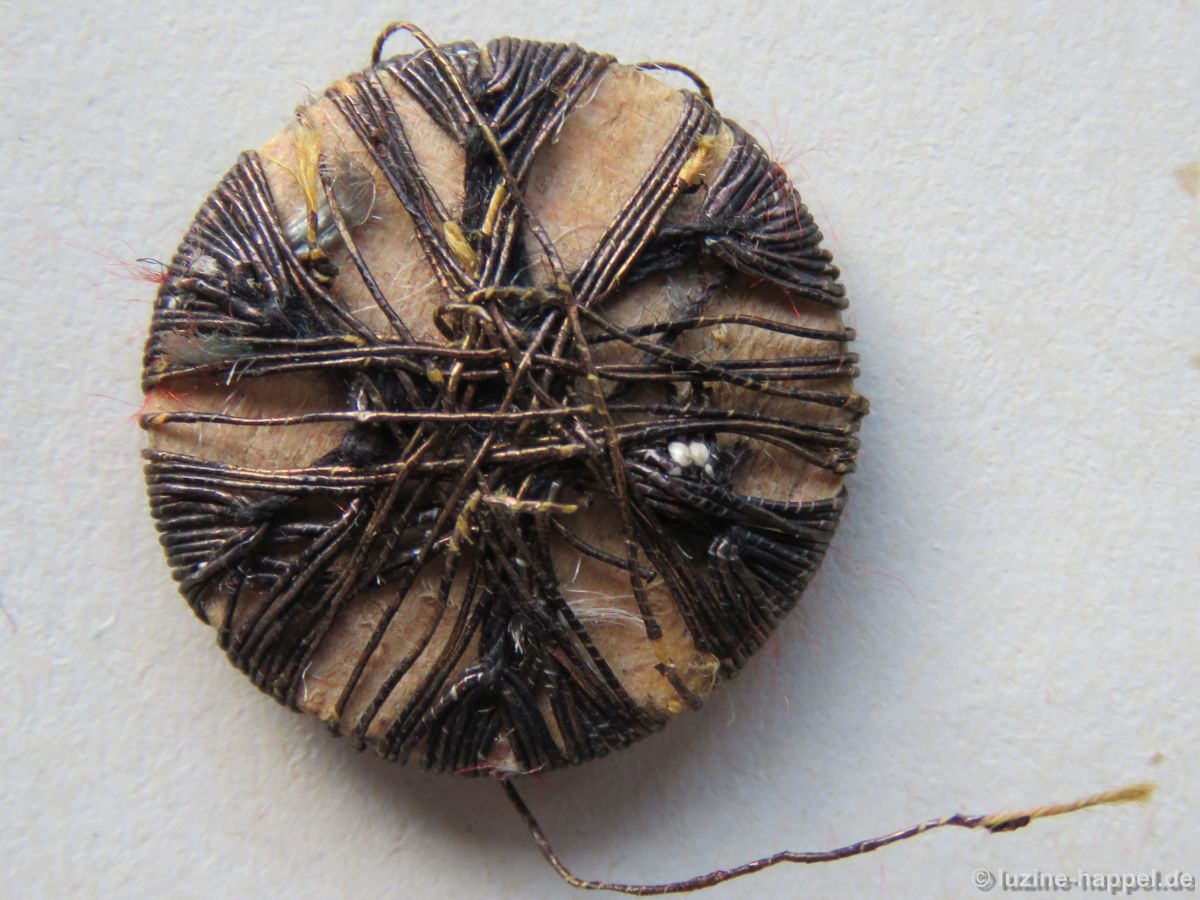
 On the back it looked like this:
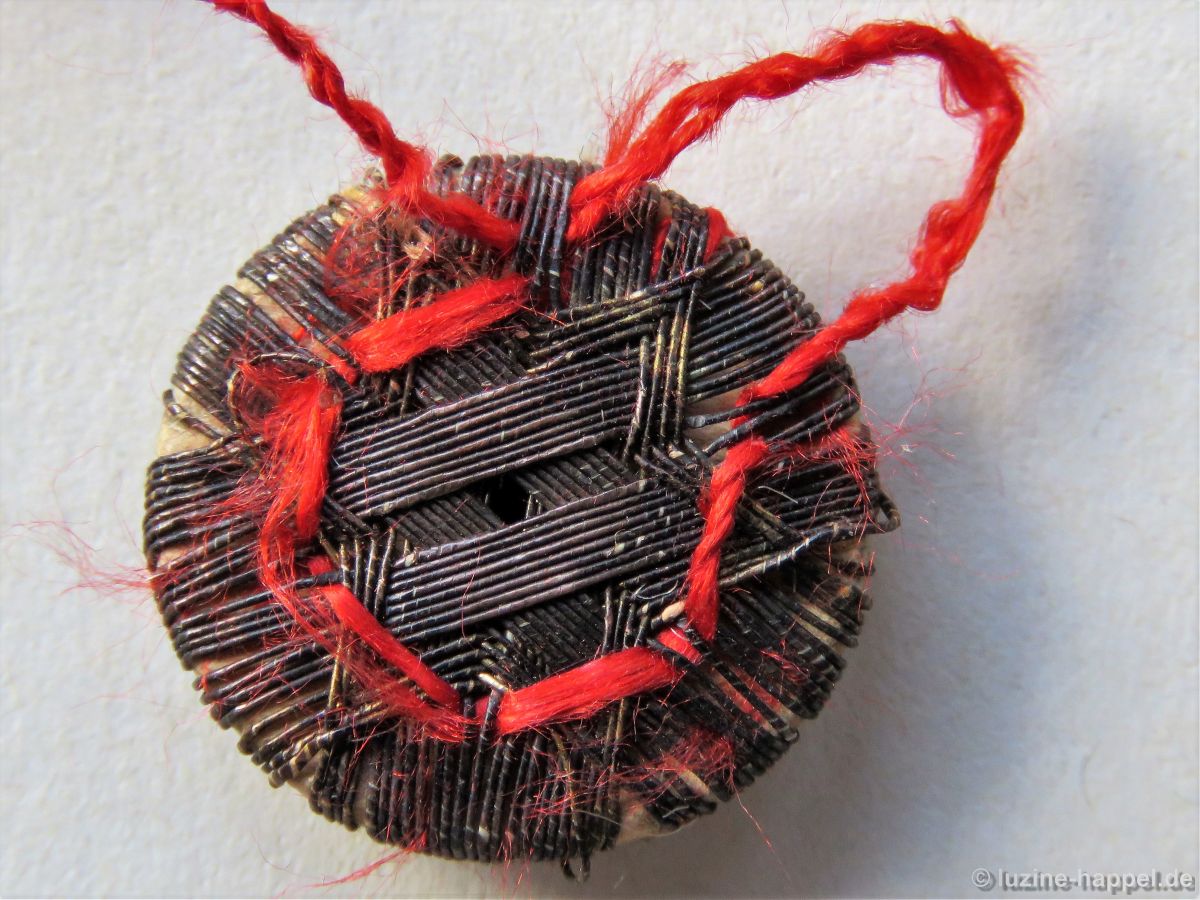
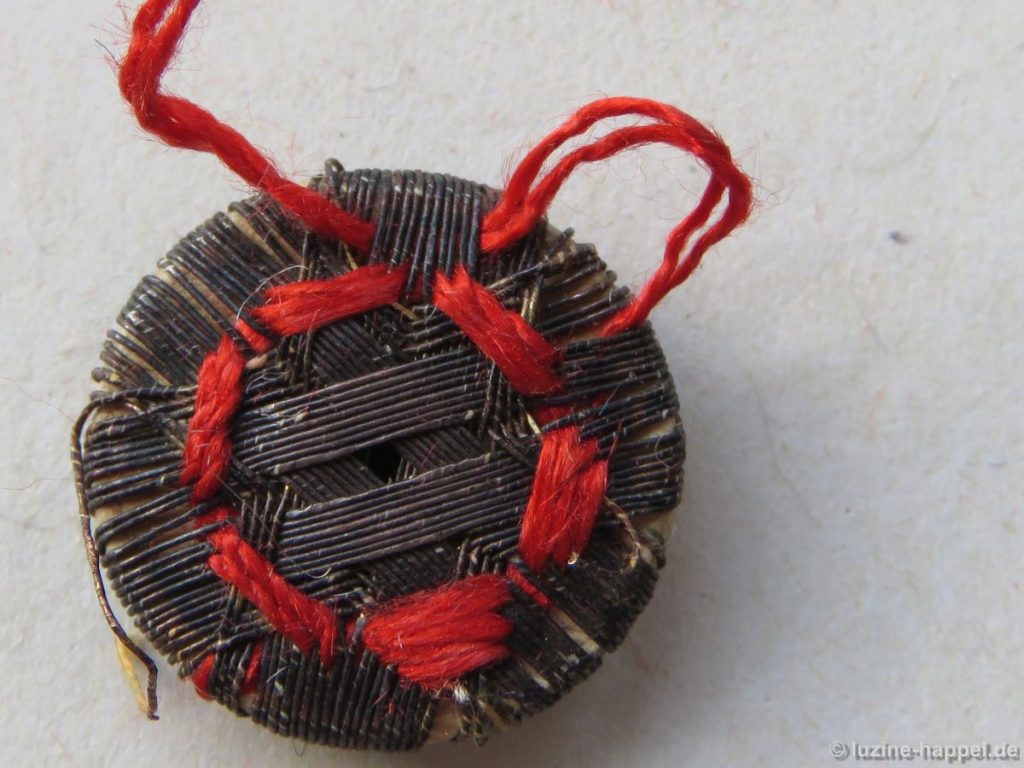
 Now a red silk thread was fastened with a knot and slid under a thread bundle in the back
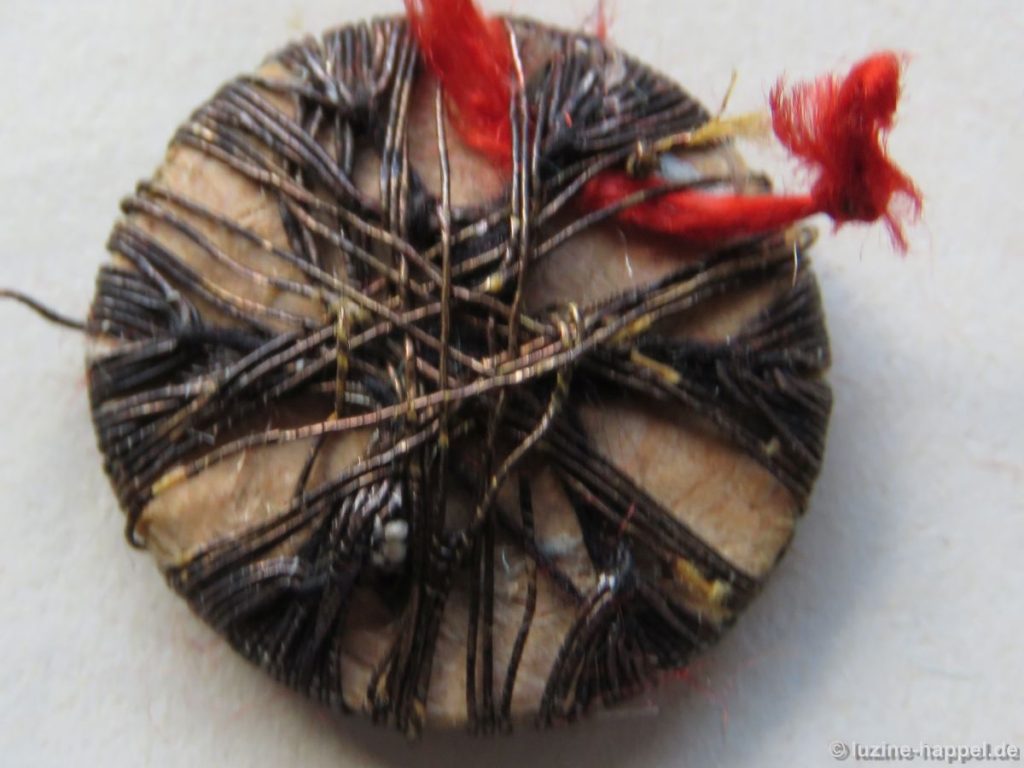 to be brought up at the side of the bundle (see blue arrow) and slid under the laid threads (coming up one thread past the middle).
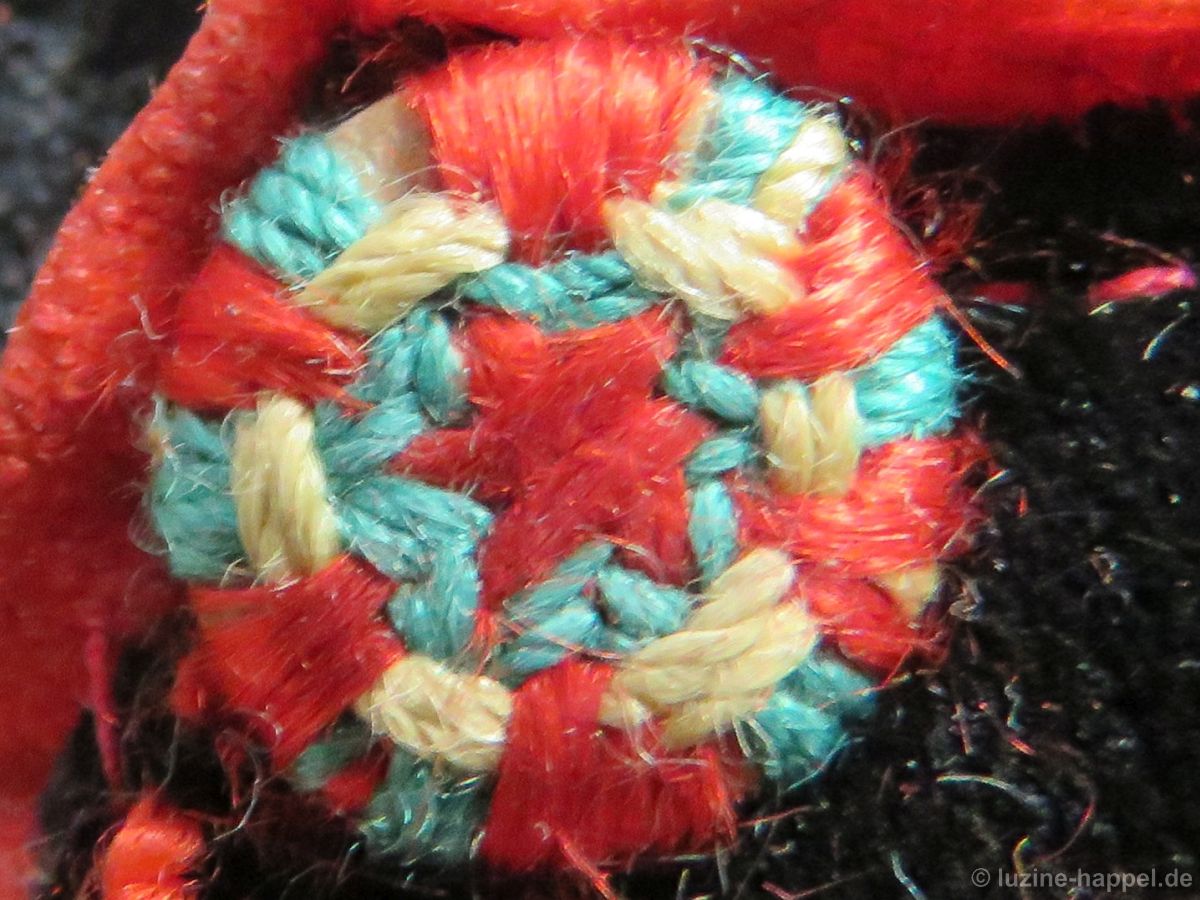
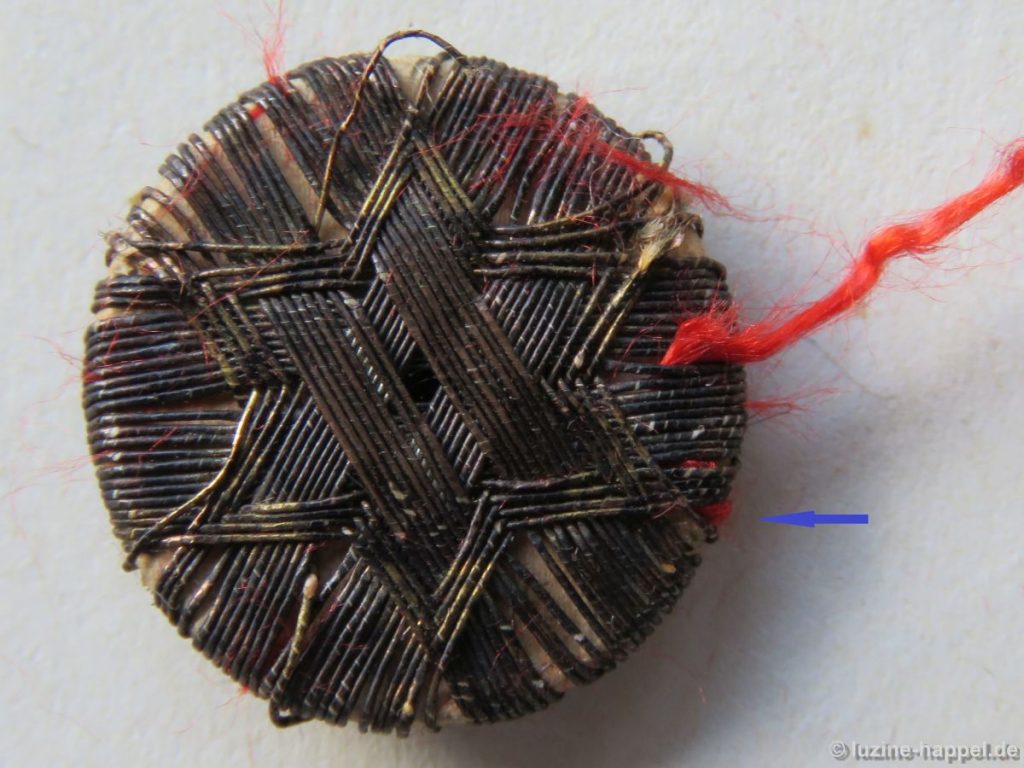 With Running stitches over the points of the established star and under the two middlemost threads of the first laid bundles, a circle pattern is created close to the bases of the star points.
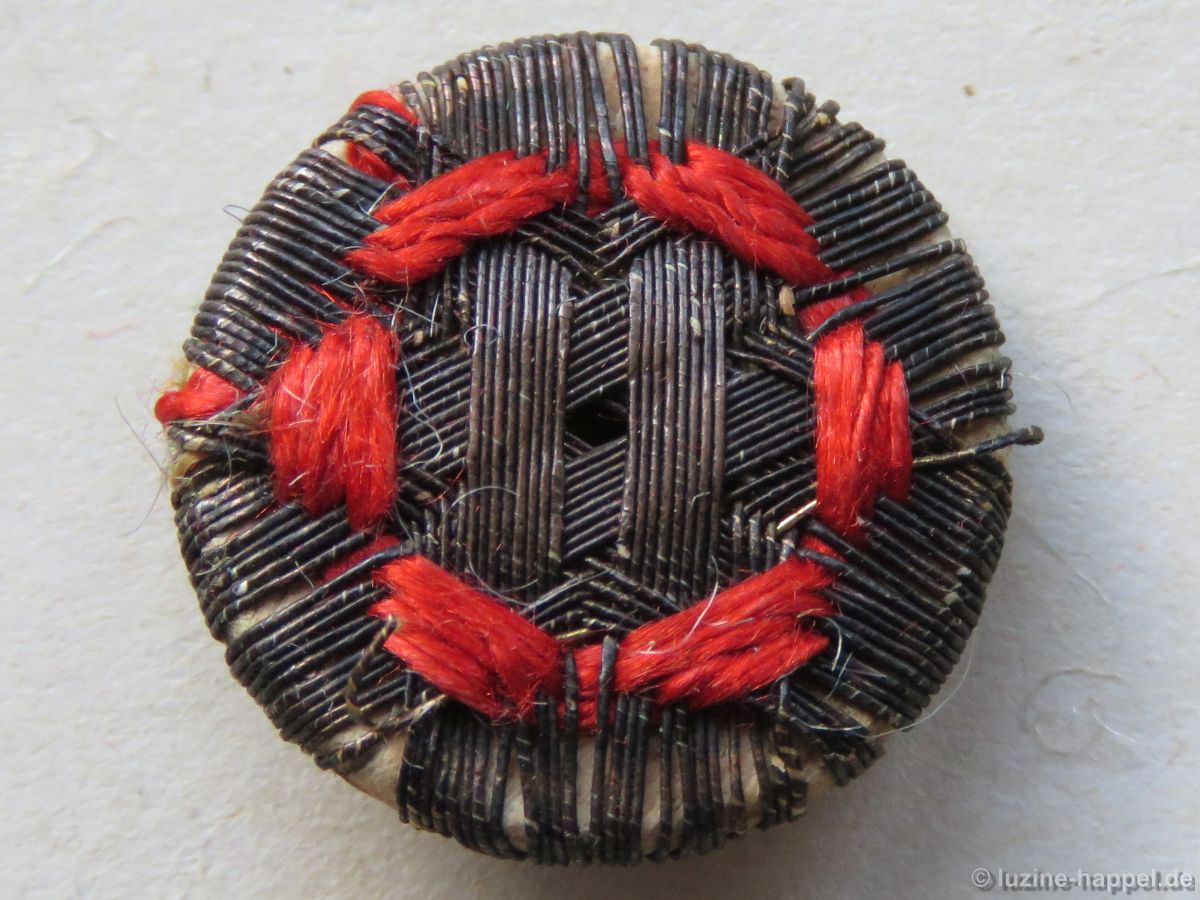
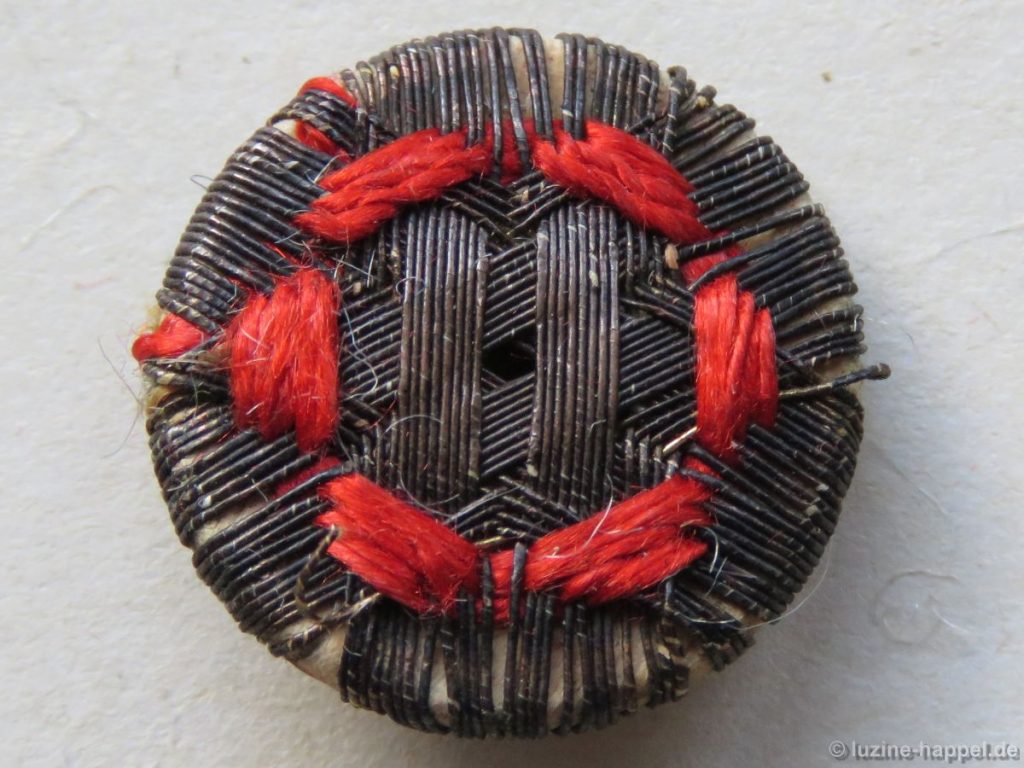
 Two more rounds are worked outward with the Running stitches (when they cross the star points) becoming shorter one thread each side and each round.
 Here it is clearly visible that the Silk thread was twisted with two thick plies. (It is chronicled that the above mentioned button maker master took 6–8 ultra-fine silk plies for twisting the threads for the Running stitches and 10–15 ultra-fine silk plies for twisting the threads for the buttonhole stitches at the edges.)
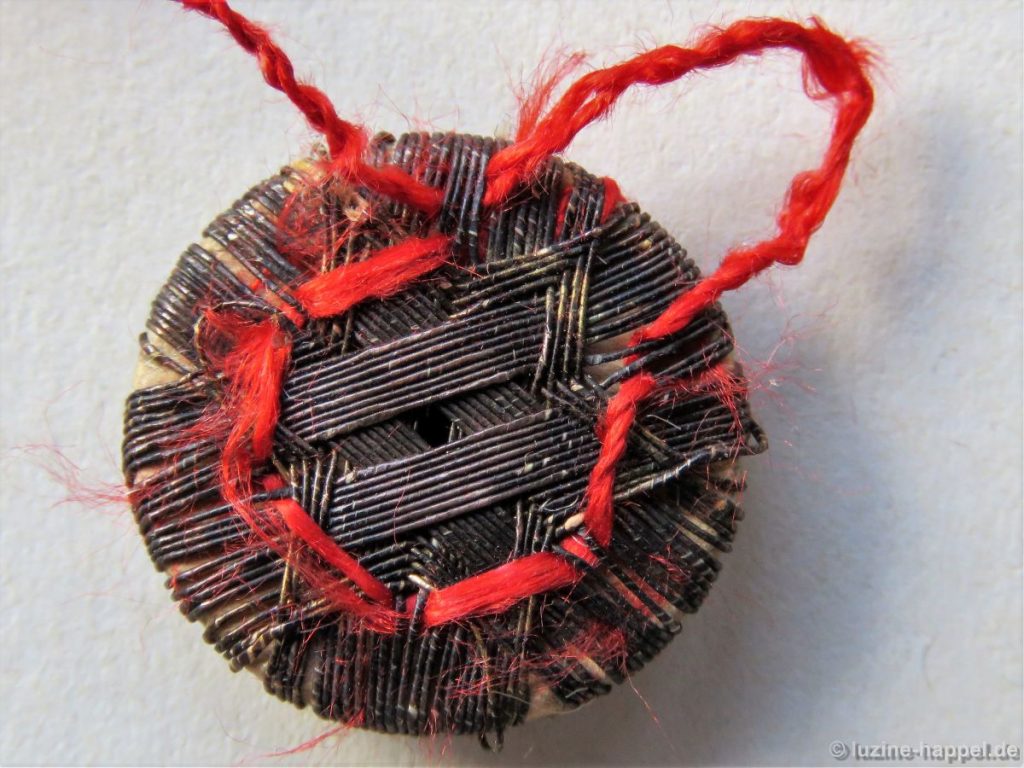
 After three rounds of Running stitches, the thread is brought to the back and secured.
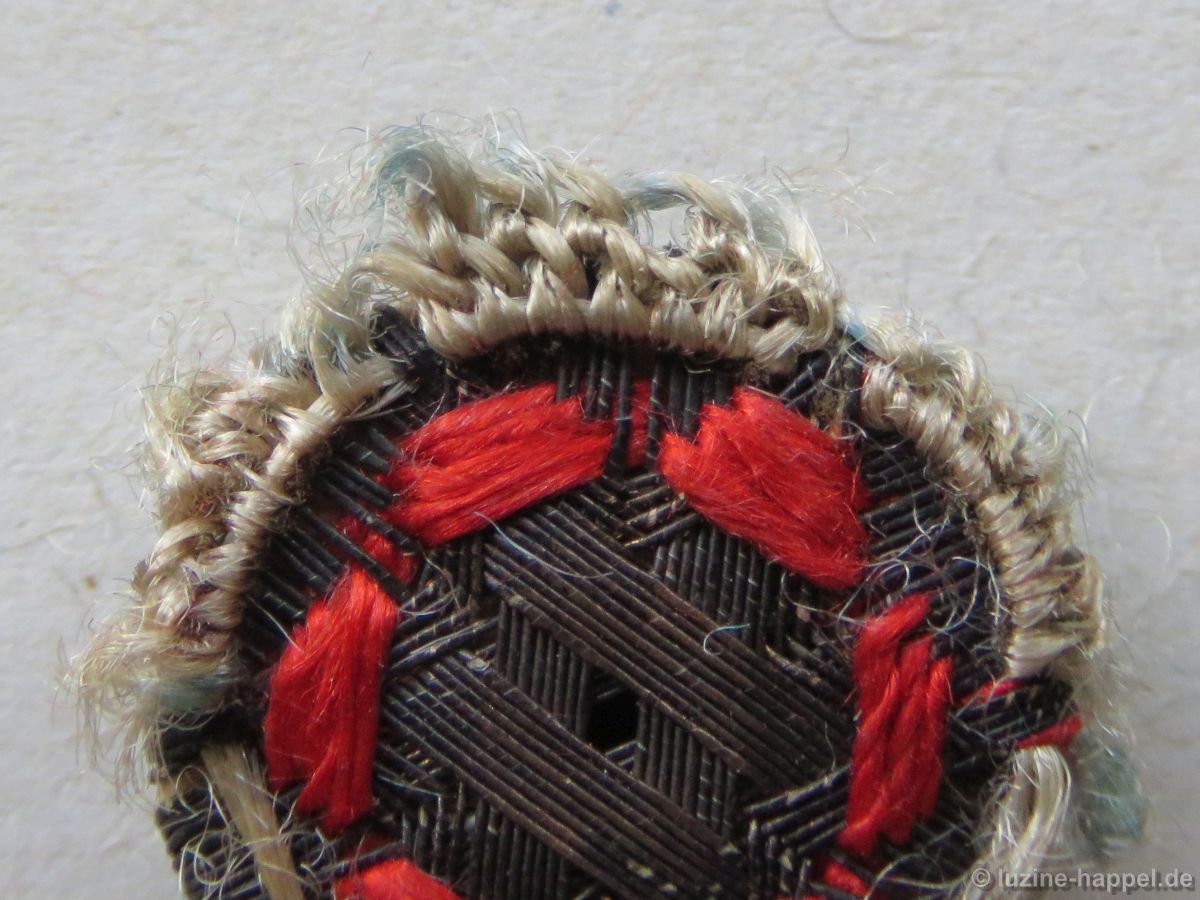
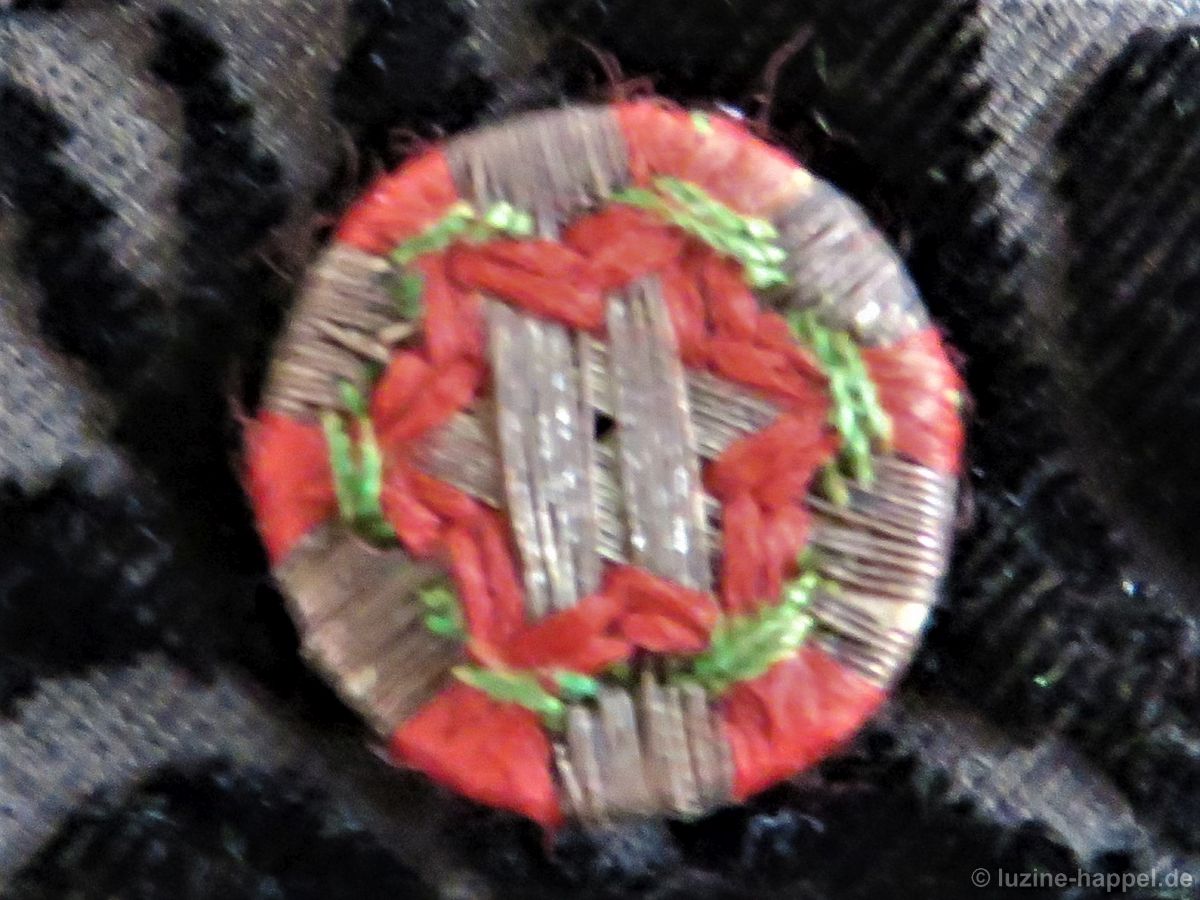
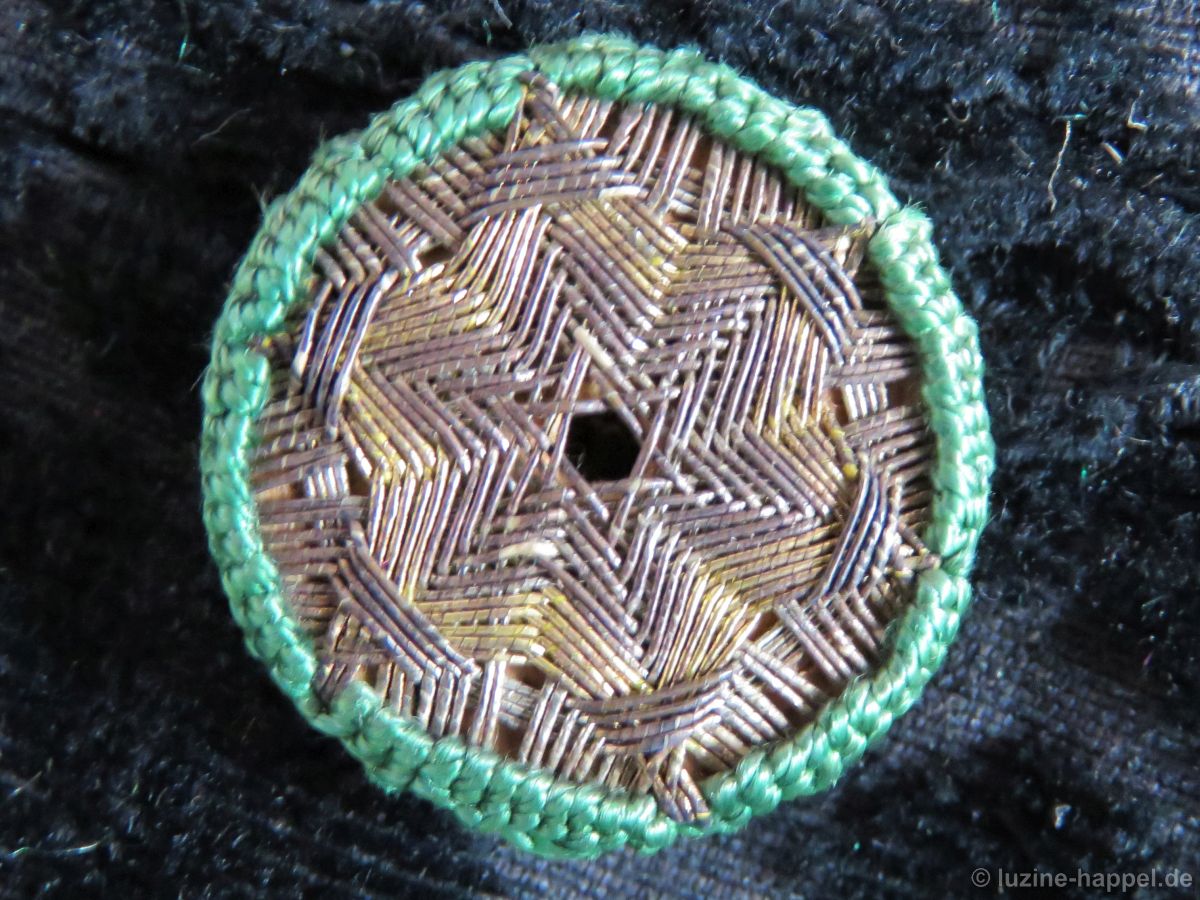
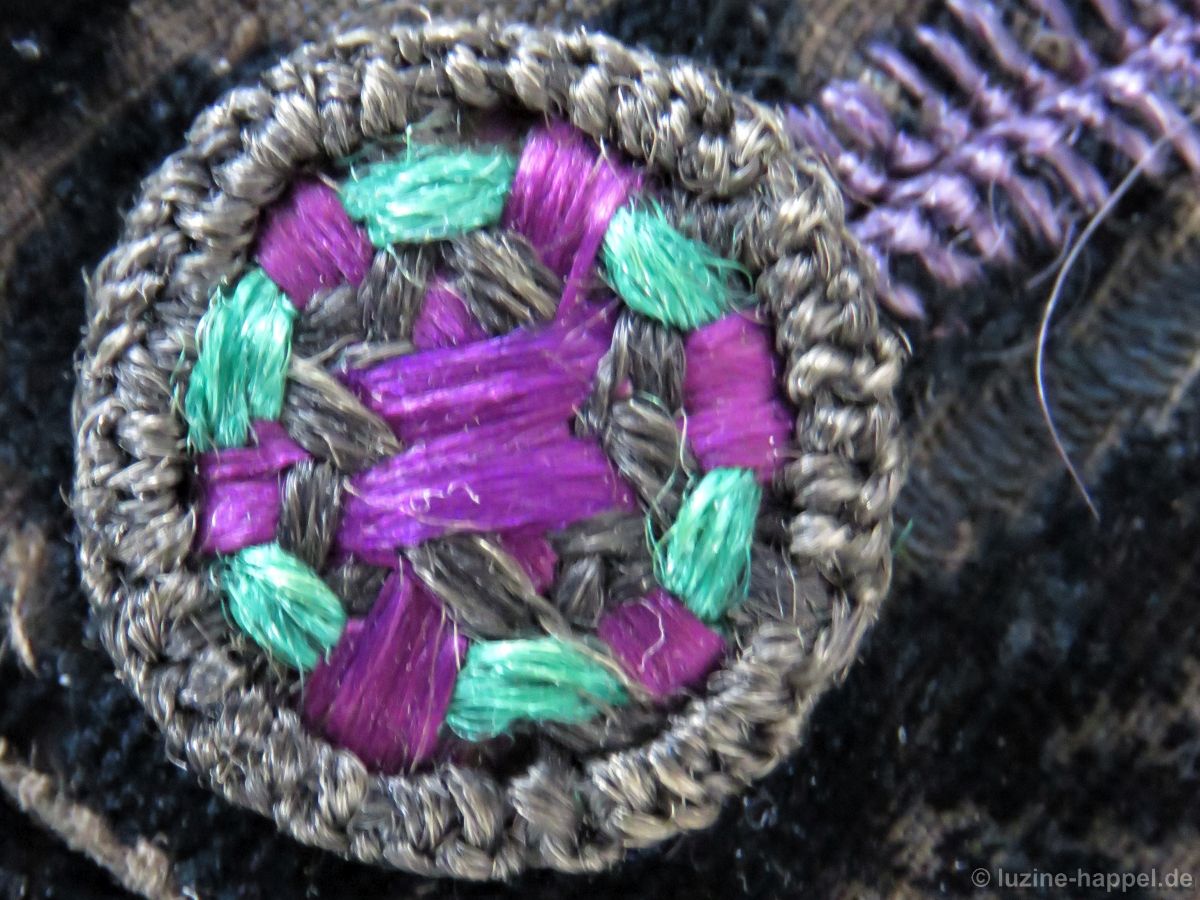
 Now a (formerly green) silk thread was taken up. Six Running stitches were worked in a round near the edge crossing always over fourteen of the sixteen-thread bundles.
 Buttonhole stitches were worked on these threads. I count seven Buttonhole stitches in each section.
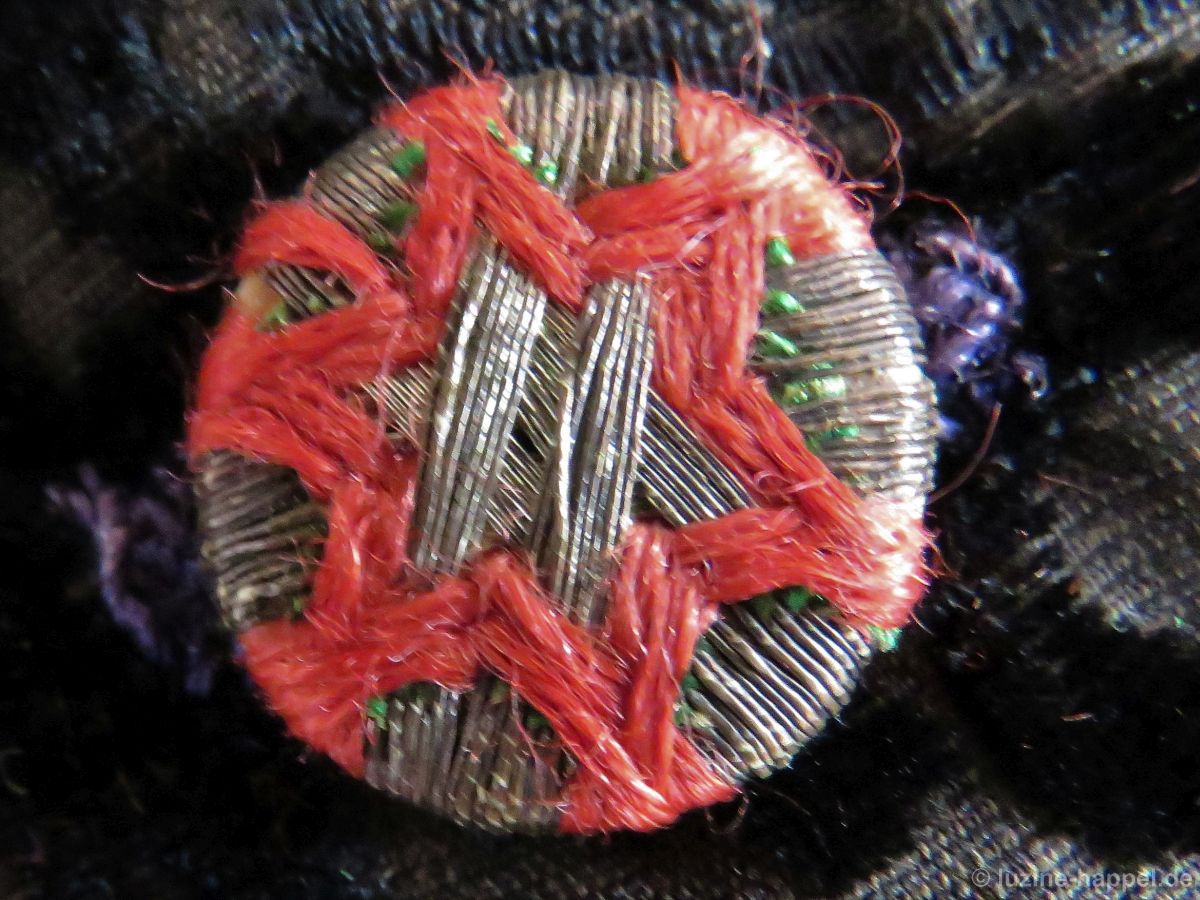
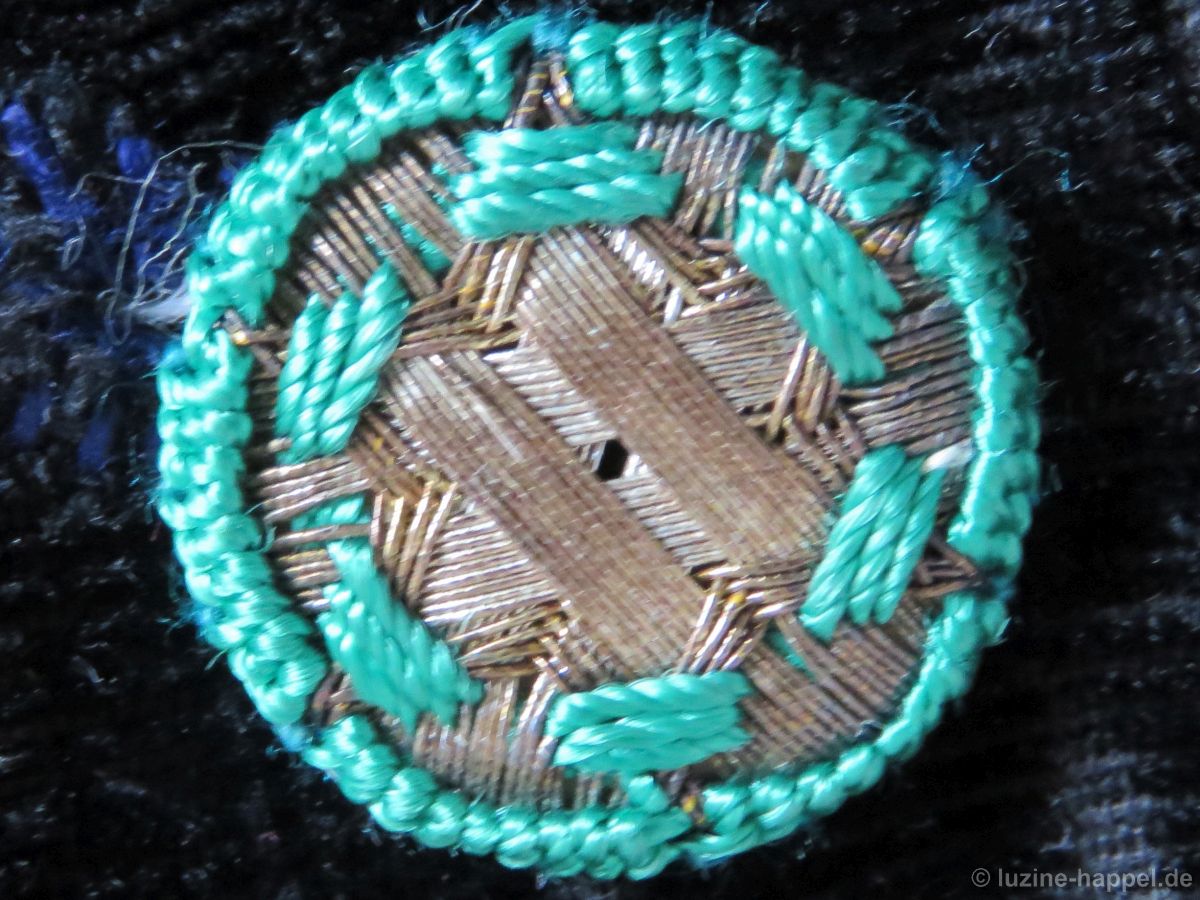
 A second row of Buttonhole stitches was worked (unfortunately this is no longer completely intact)
 to bring the stitches around the edge.
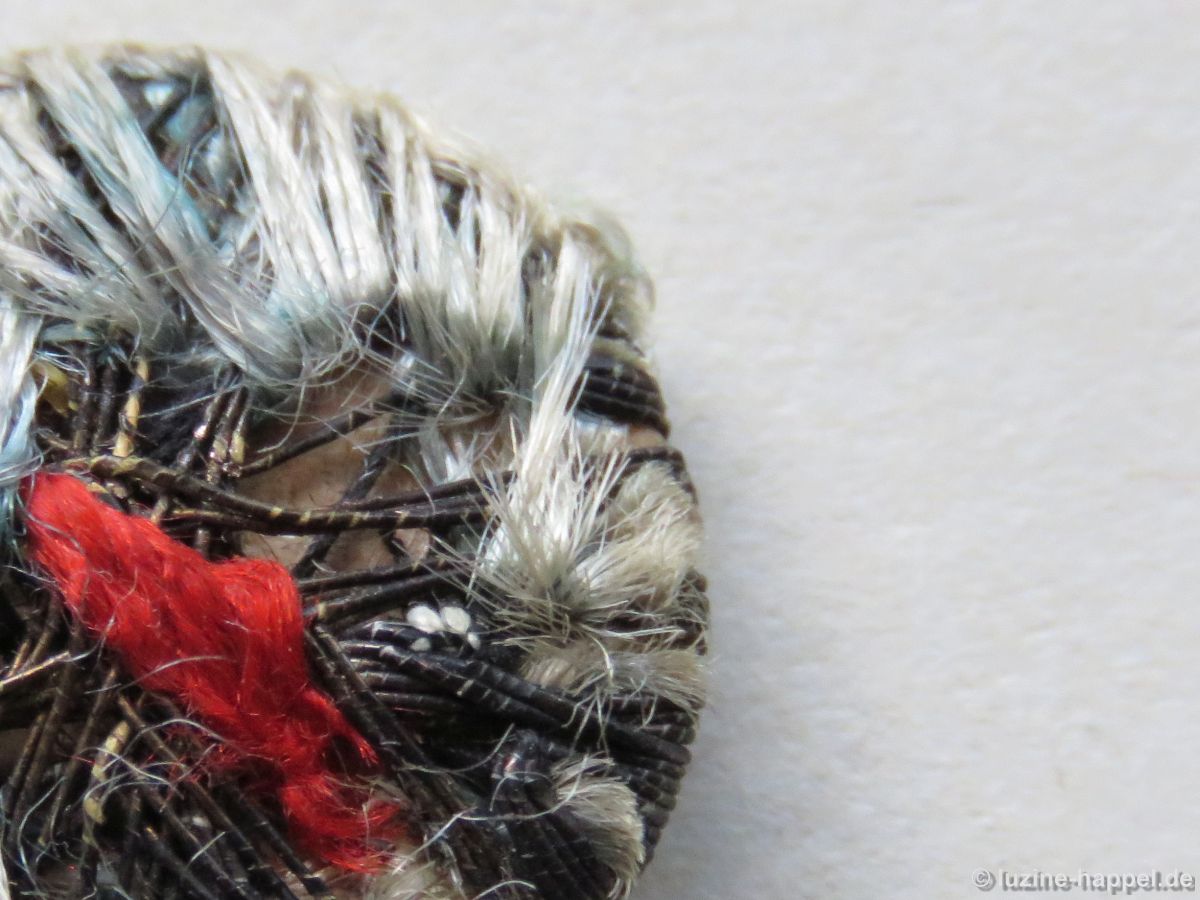
 On the back the stitches were fastened by wrapping around previously worked threads.
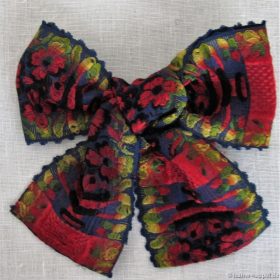
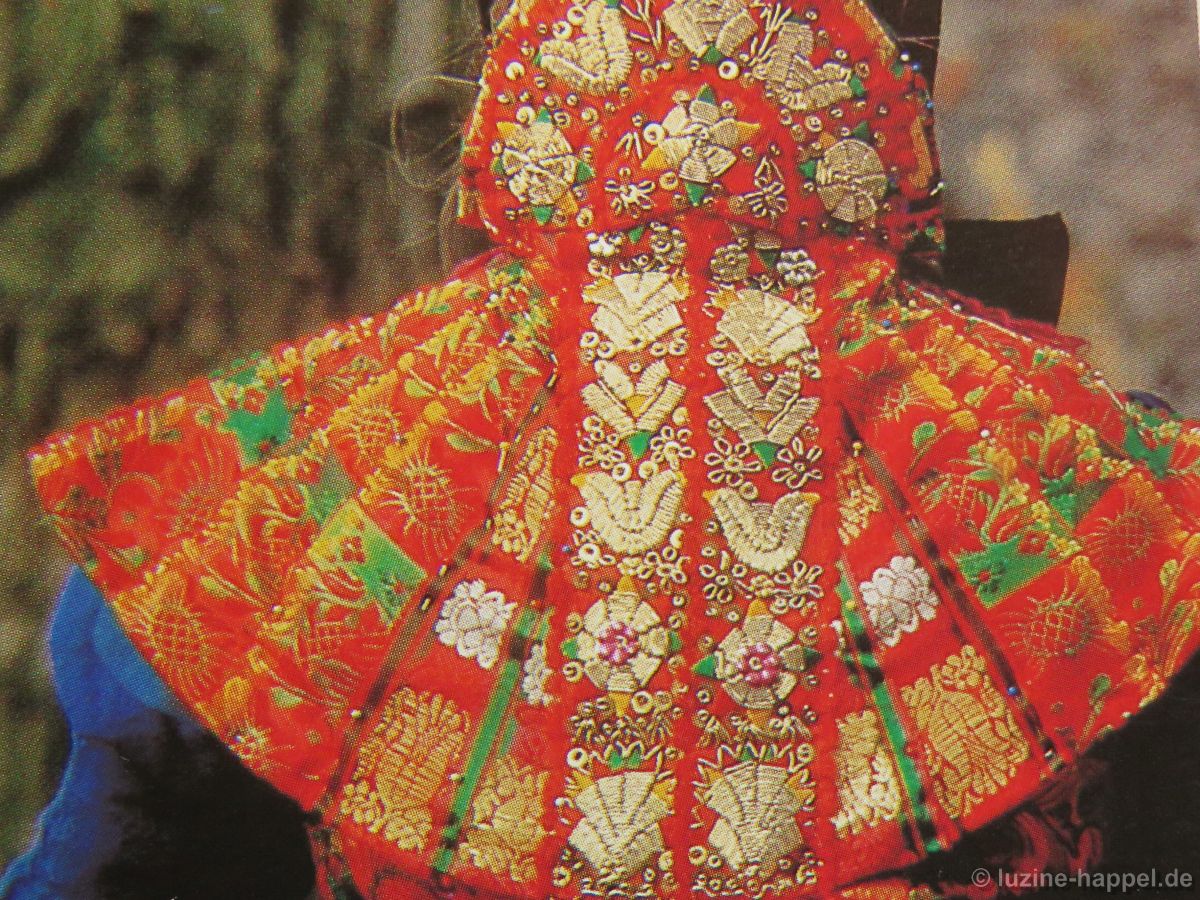
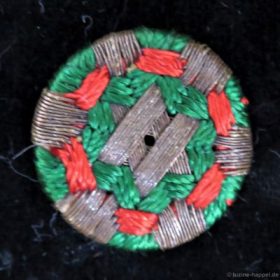
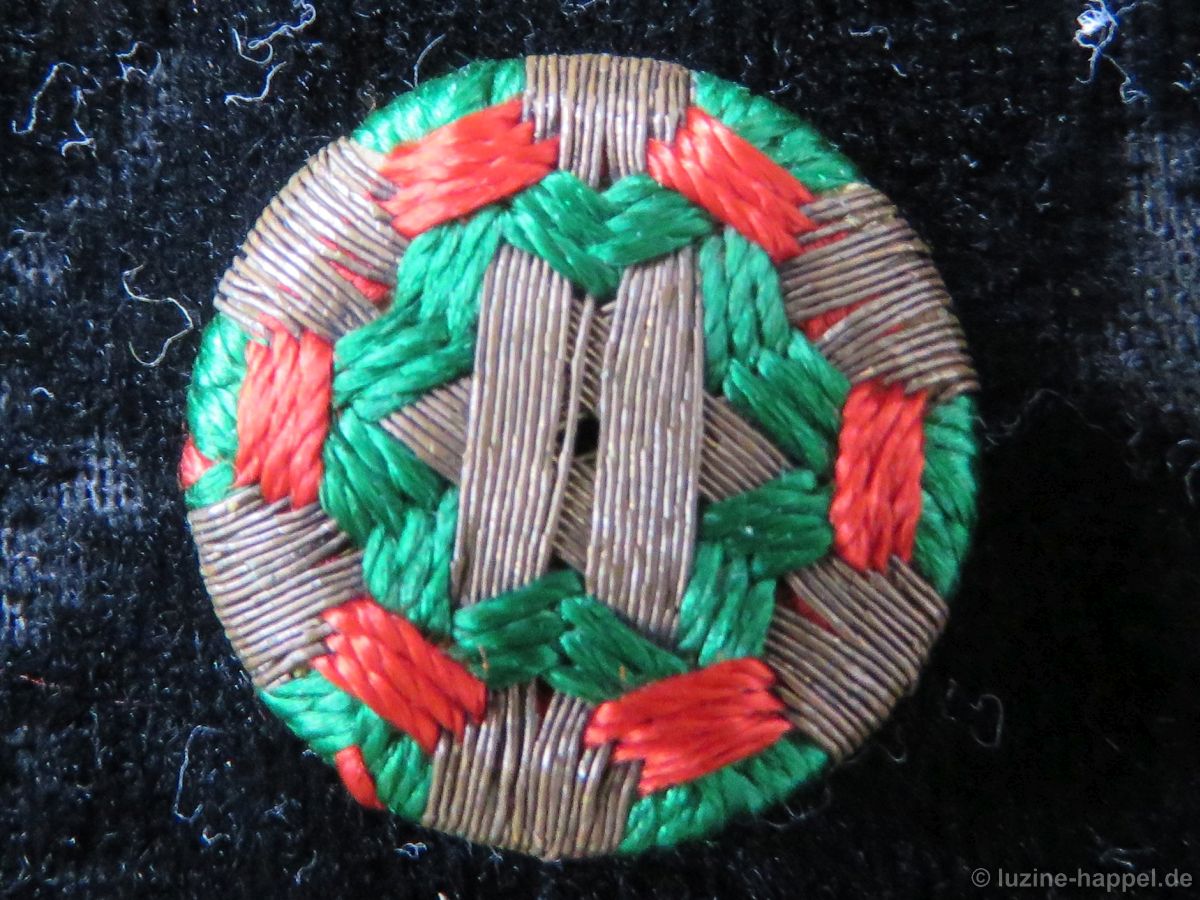
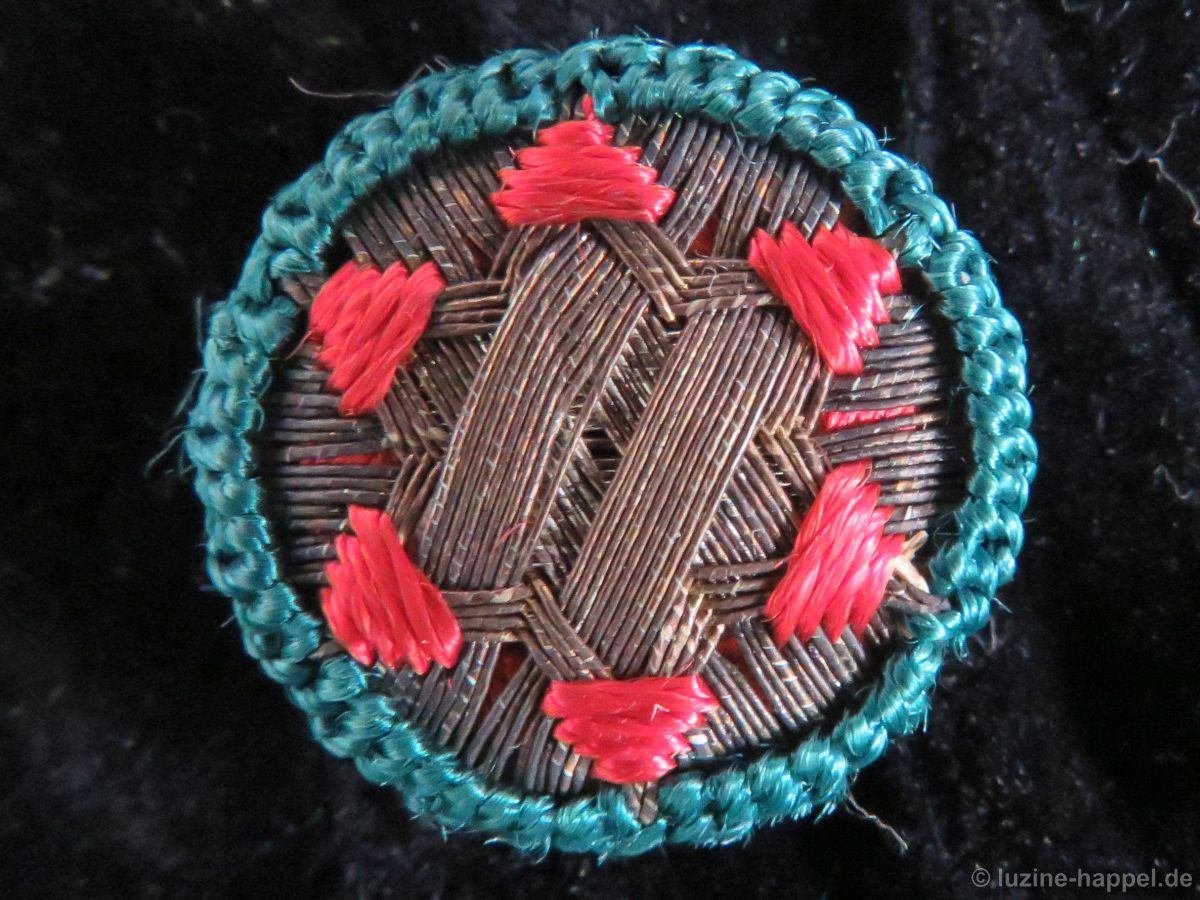
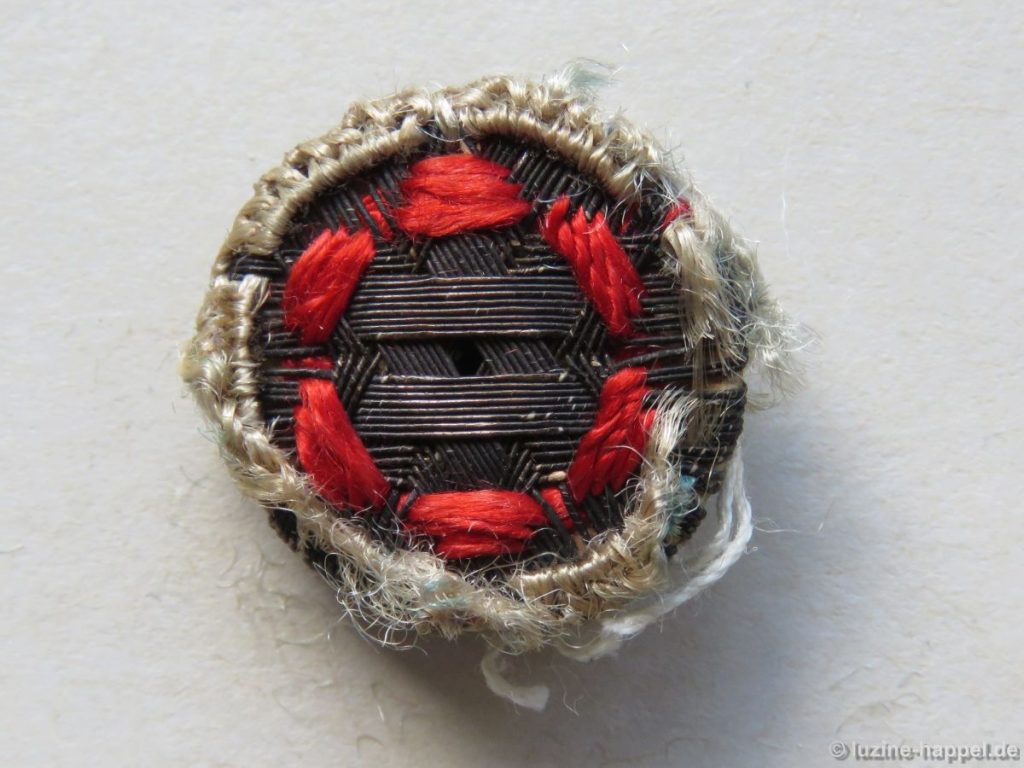
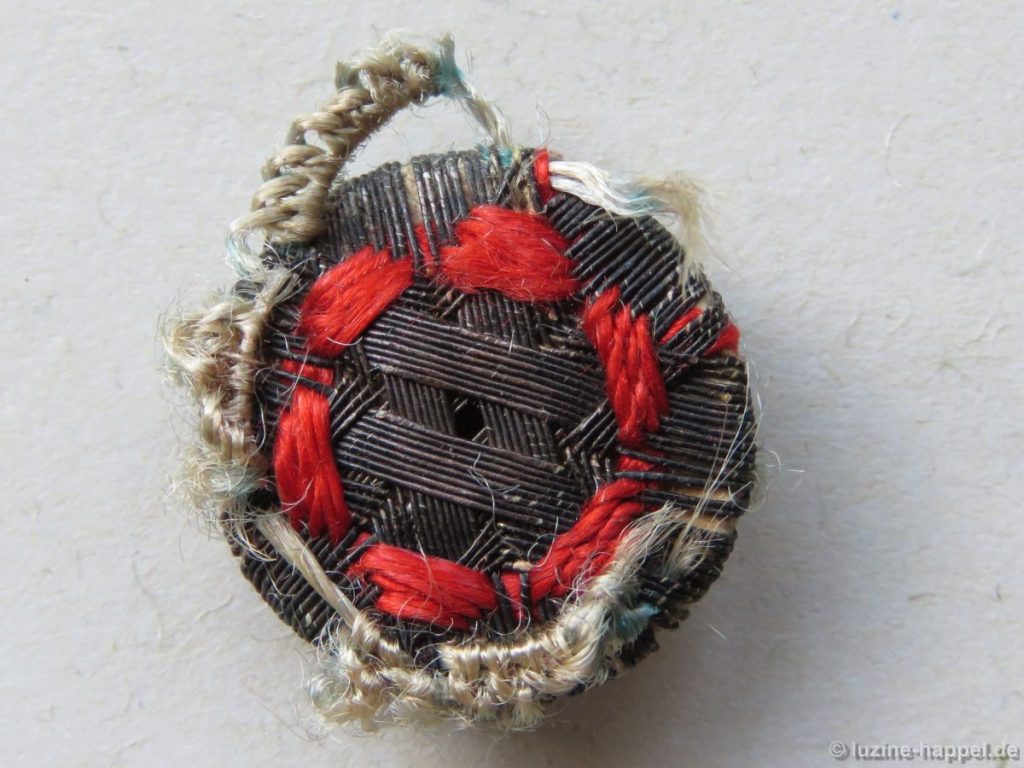
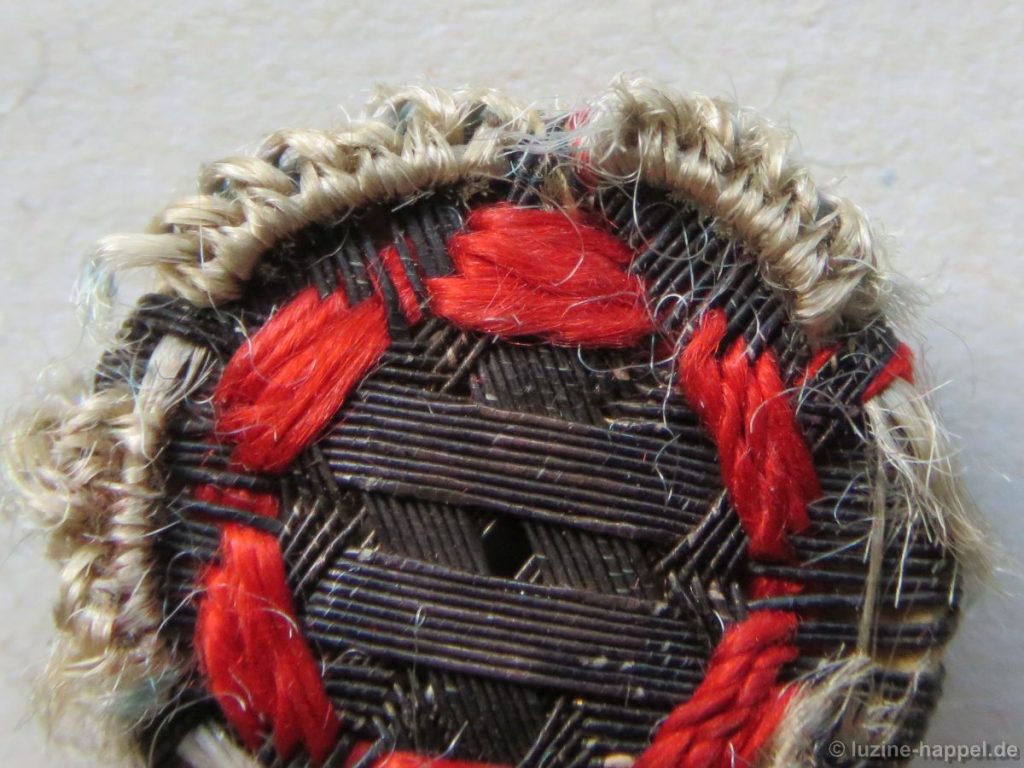
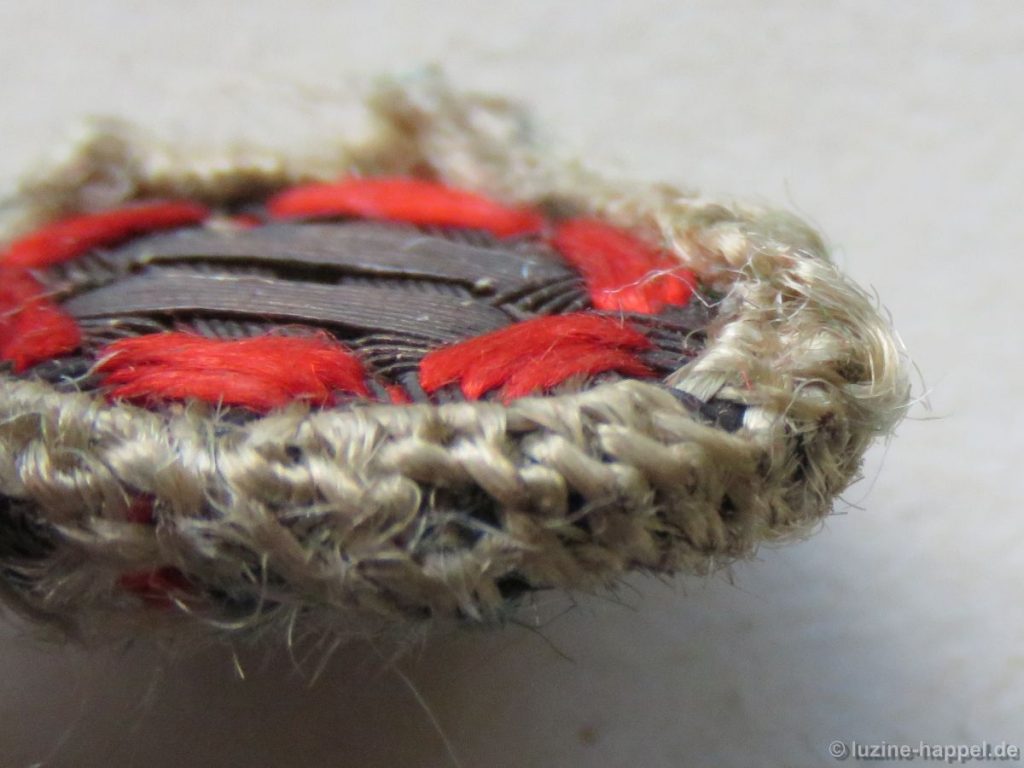
 Although considered one of the more simple button designs, a similar, but undamaged, button from the same garment shows the original beauty of these buttons.

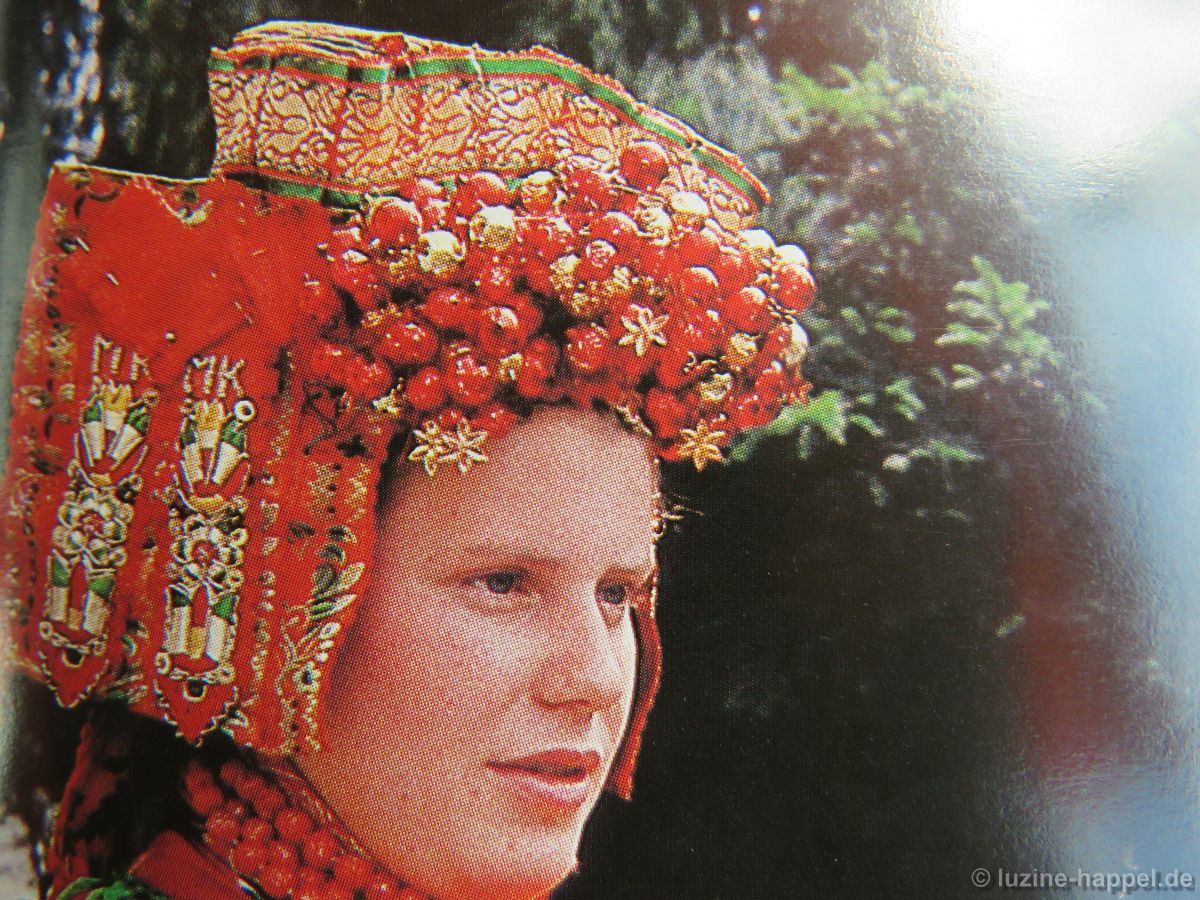
How many hours, how much patience, and how much craftsmanship were put into making a single
small button! And the garments of a Schwalm woman needed many buttons.

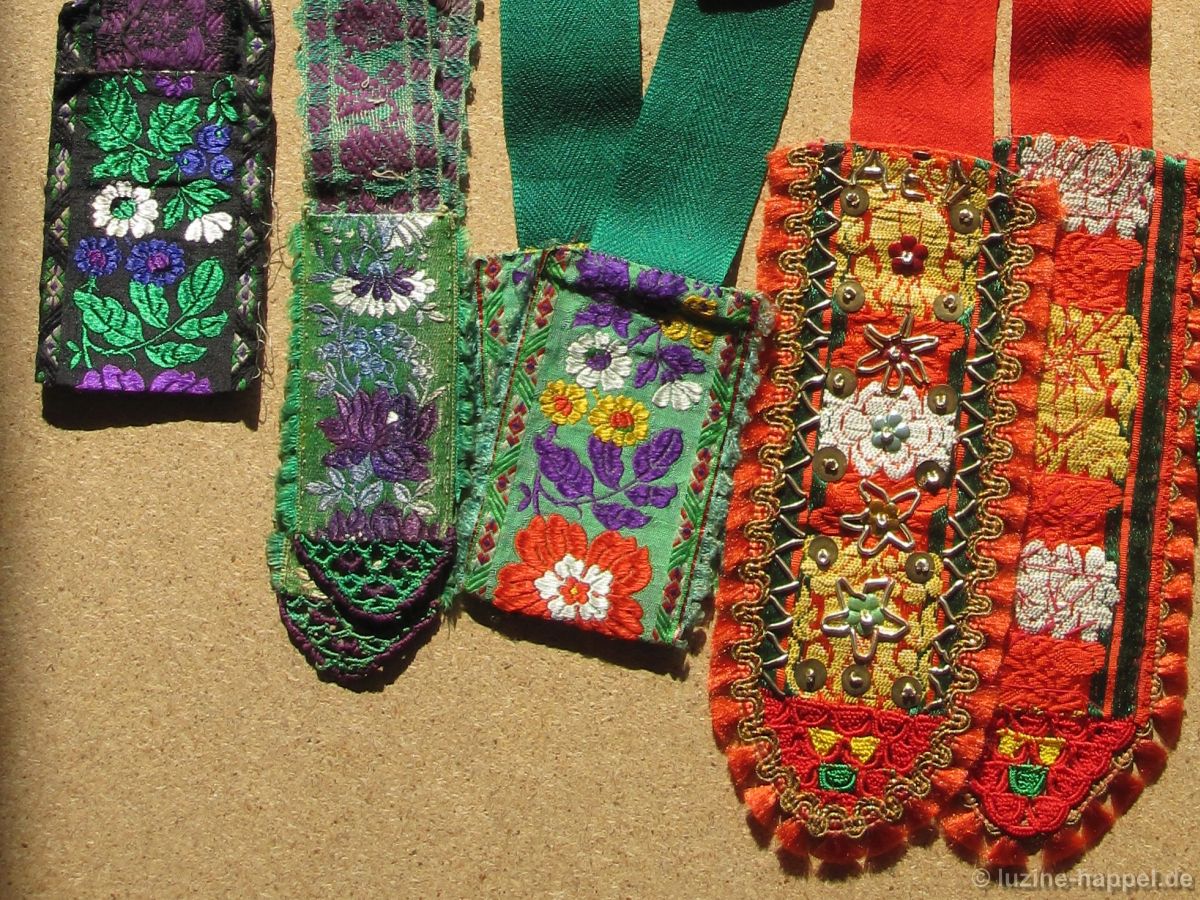
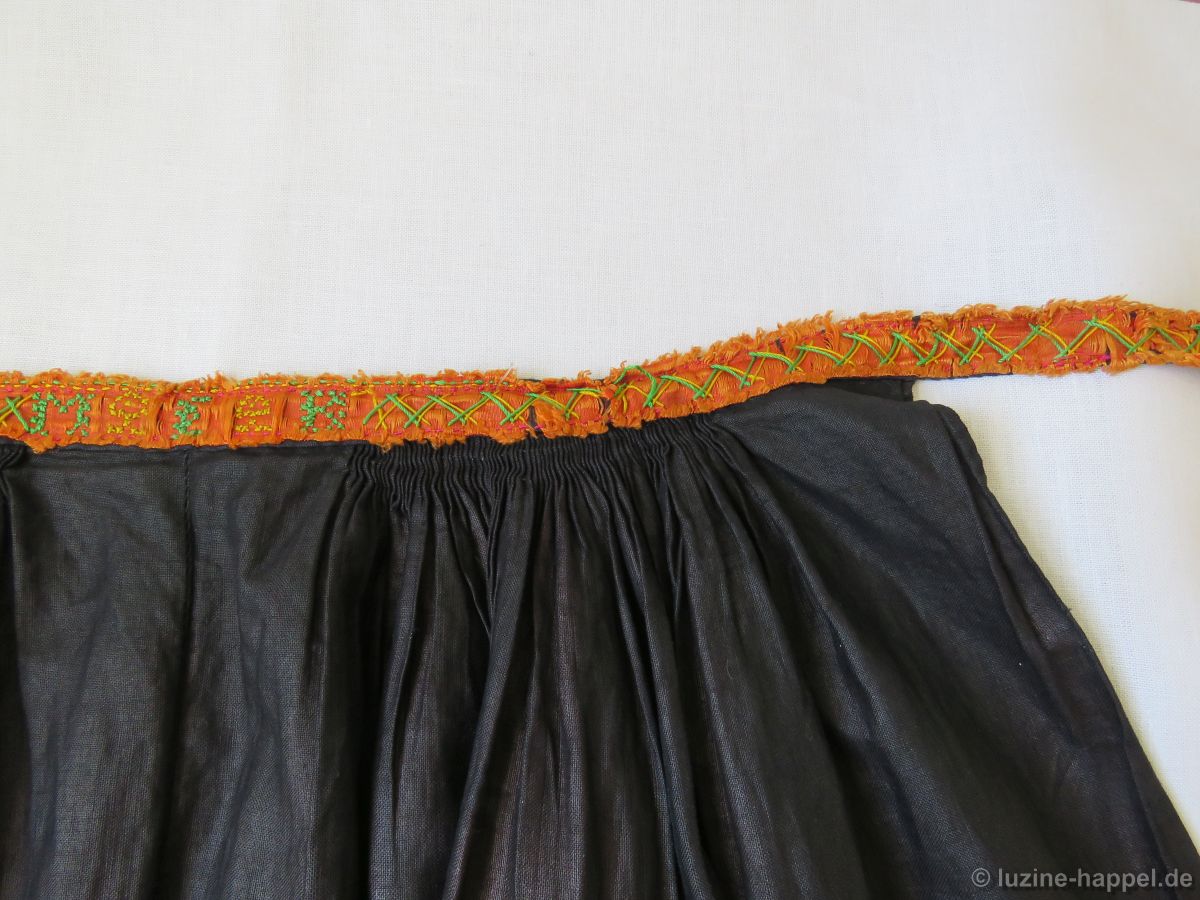 and then decorated with initials and small ornaments in Cross stitch and different coloured stitches.
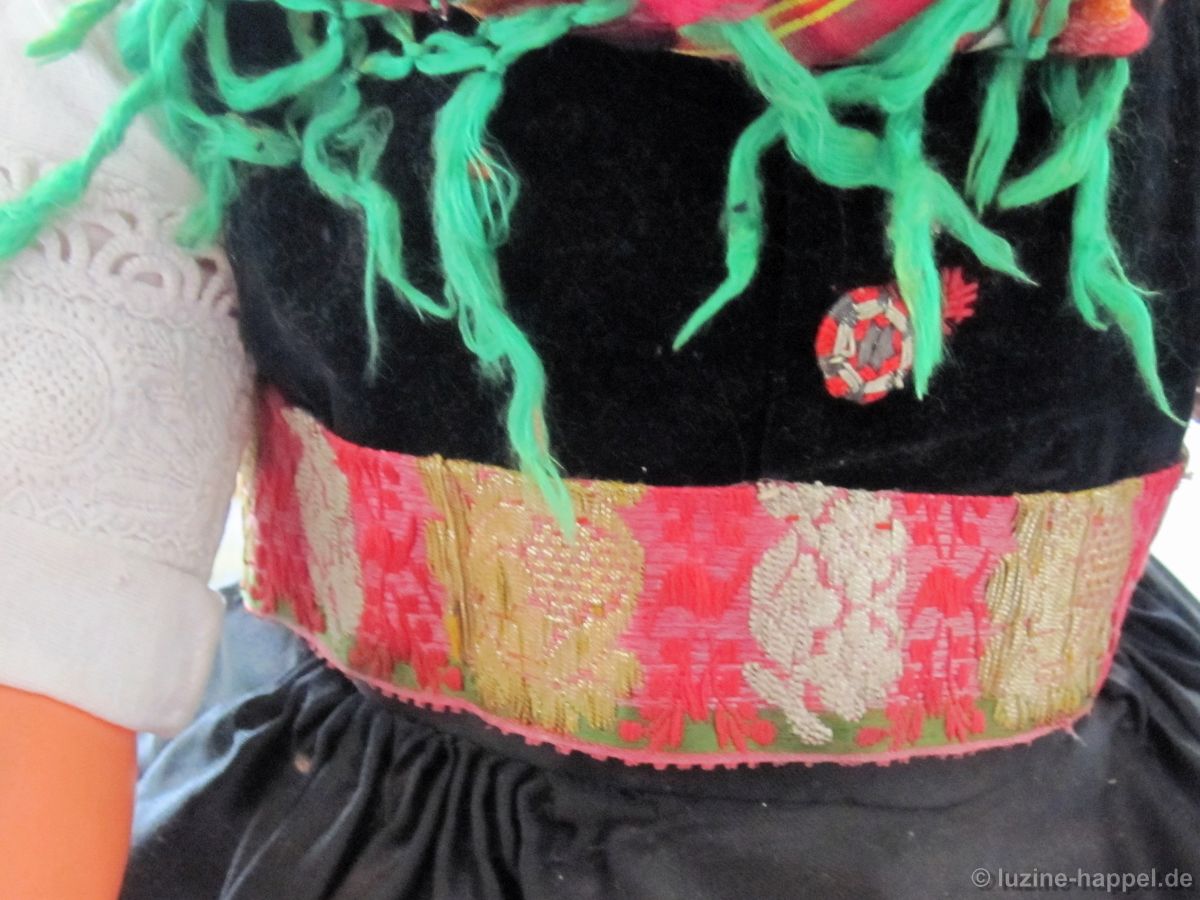
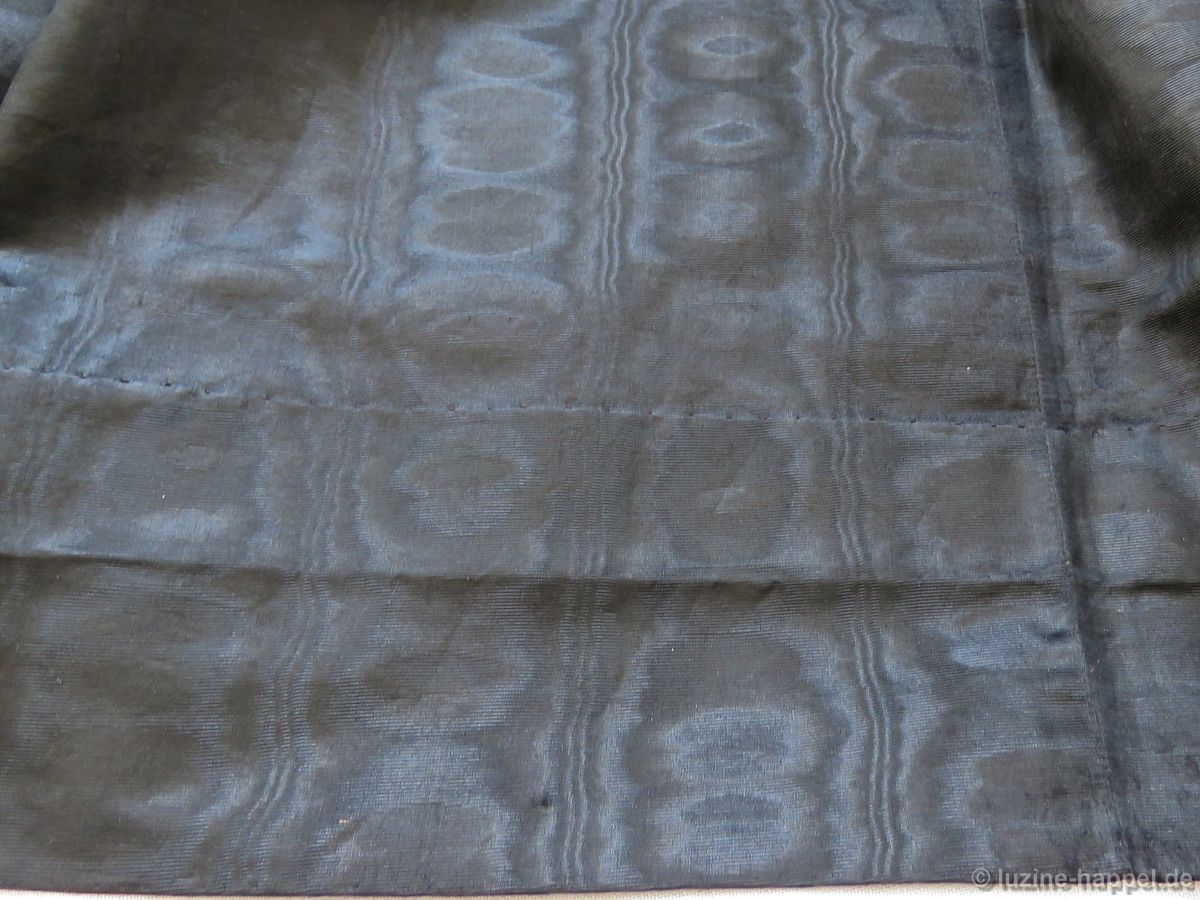
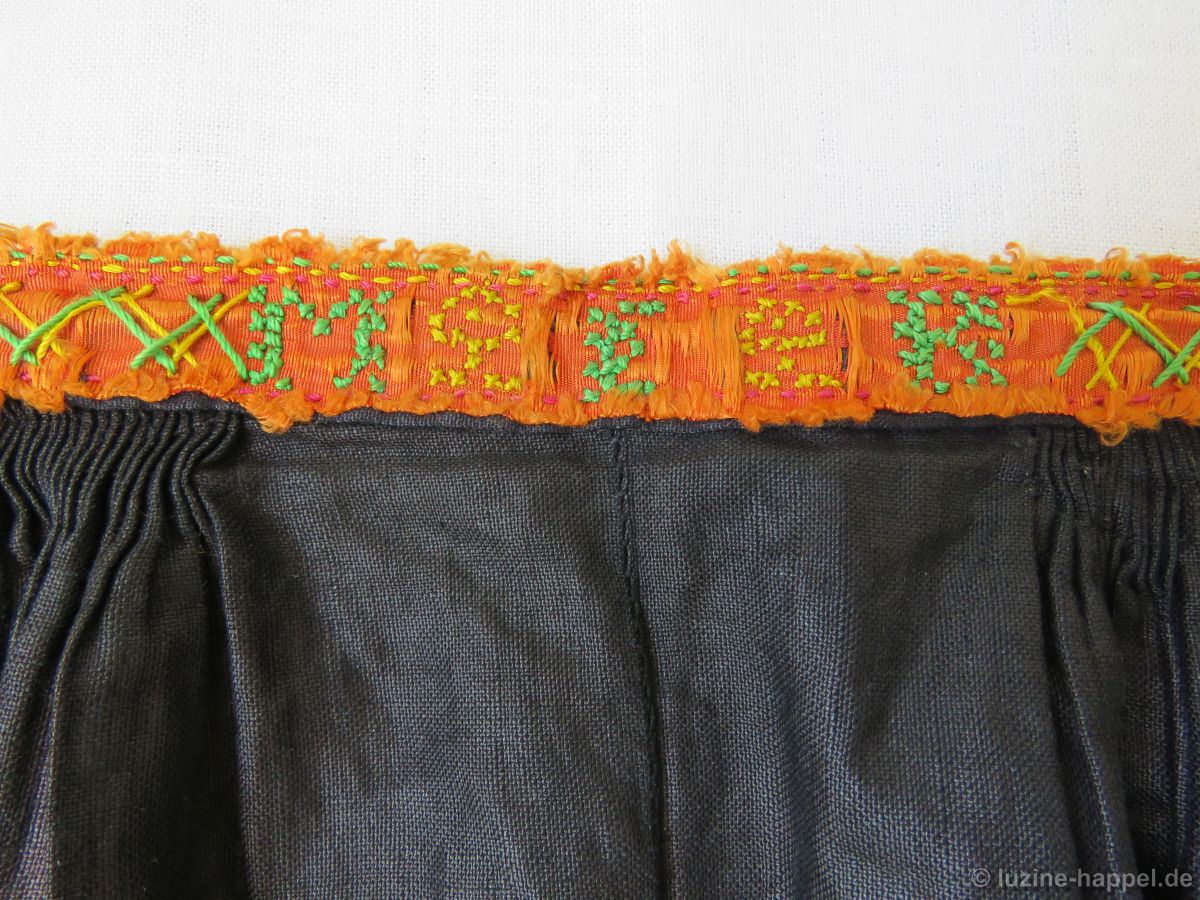 But there were much more elaborate bands worked to simulate a girdle. The unlined back side of such a band shows how it was made. A strong linen strip (ecru) was covered with a wider linen strip (blue), which was folded to the back over the edges. Small green silk ribbons were fastened at the edges.
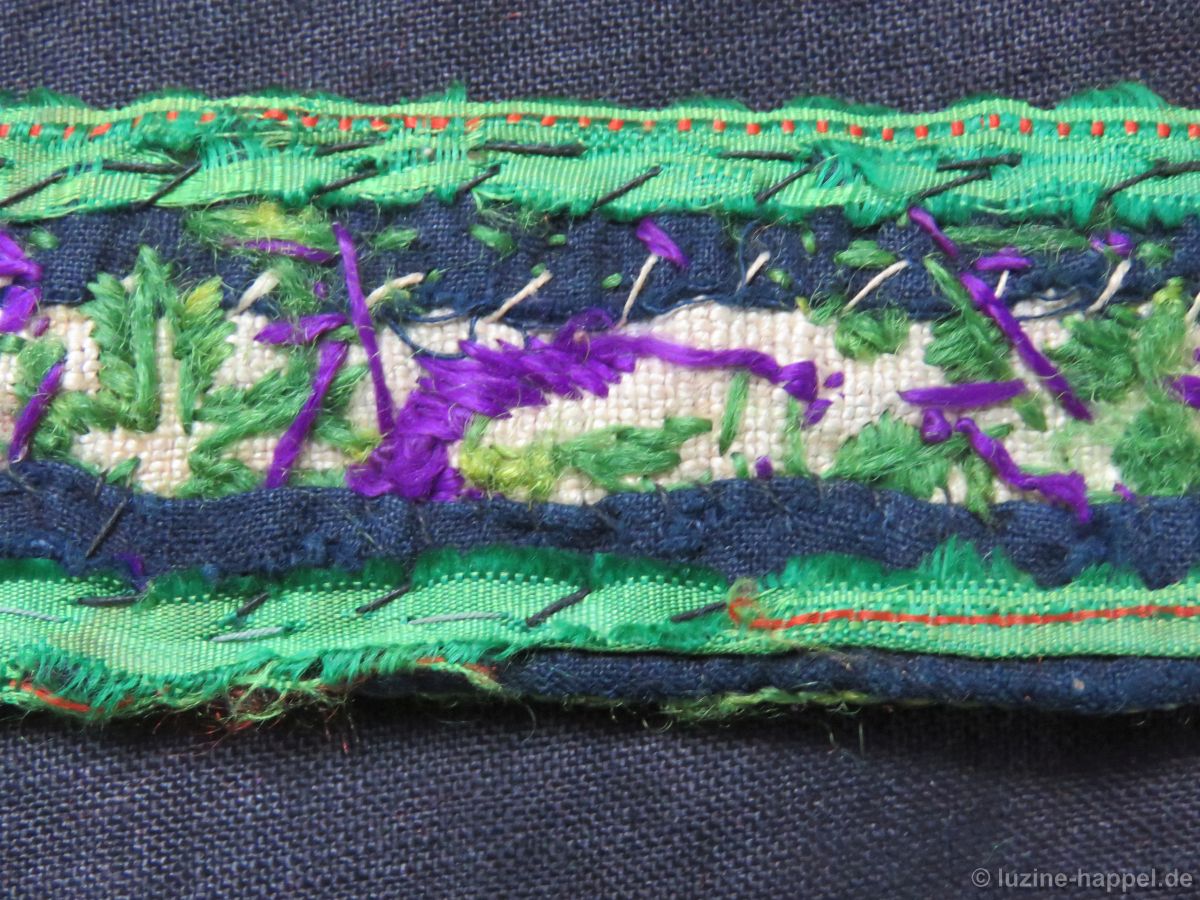 On the front different paper board shapes were fastened. The templates were embroidered with silk threads (lilac) and woolen yarn (green) with densely worked Satin stitches.
 Spaces between the template sections were painstakingly filled with Coral Knot stitches, Blanket stitches, Chain stitches, and Satin stitches.
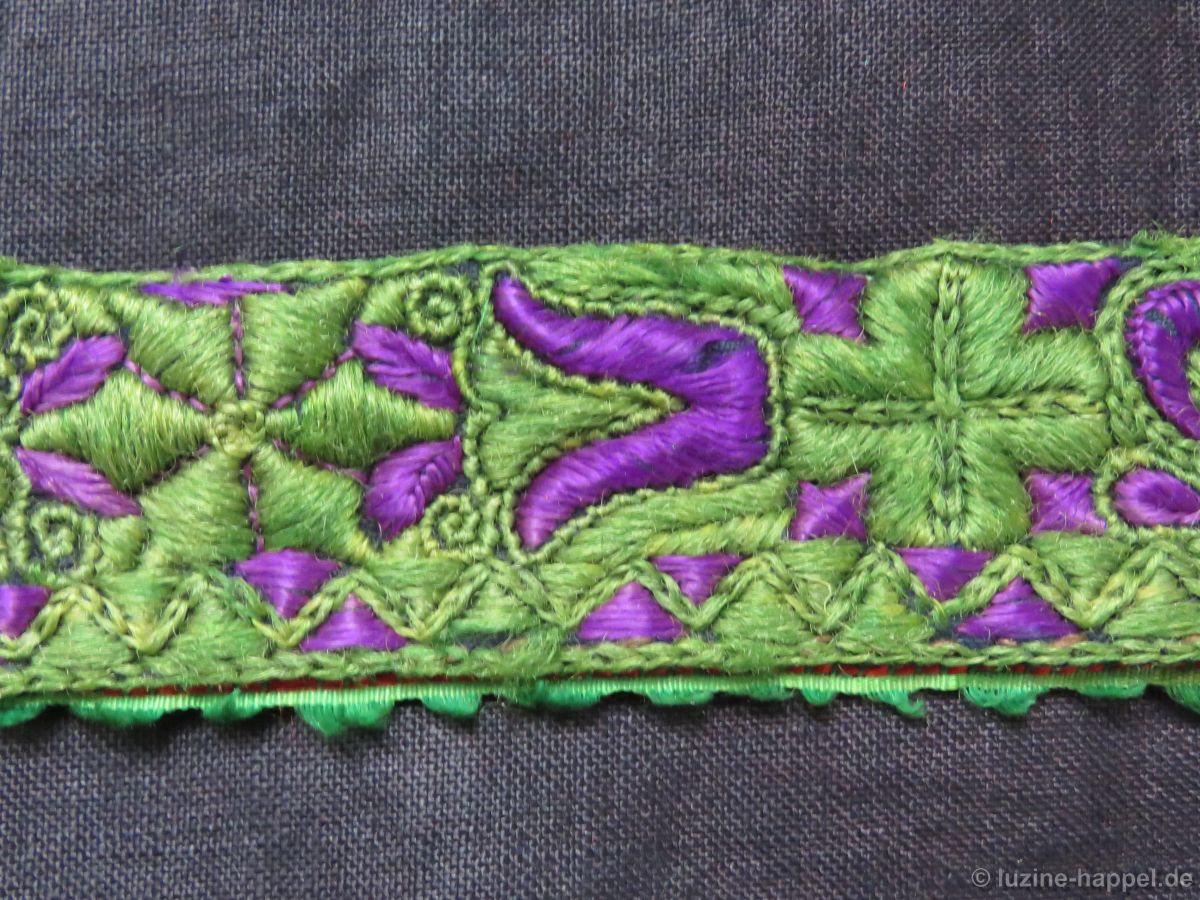 The main motifs in this example are heart, tulip, star, and cross.
 At the edges small borders were embroidered in a zigzag line.
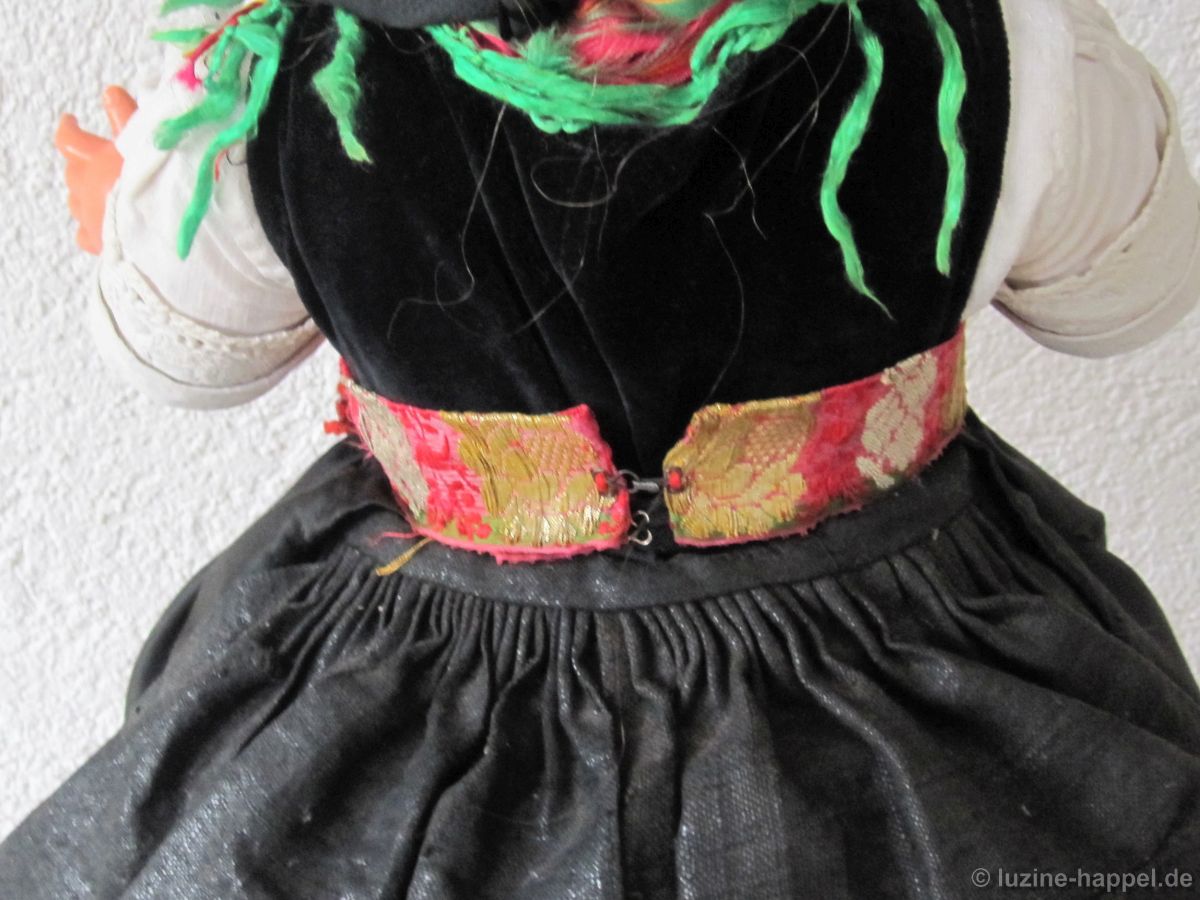
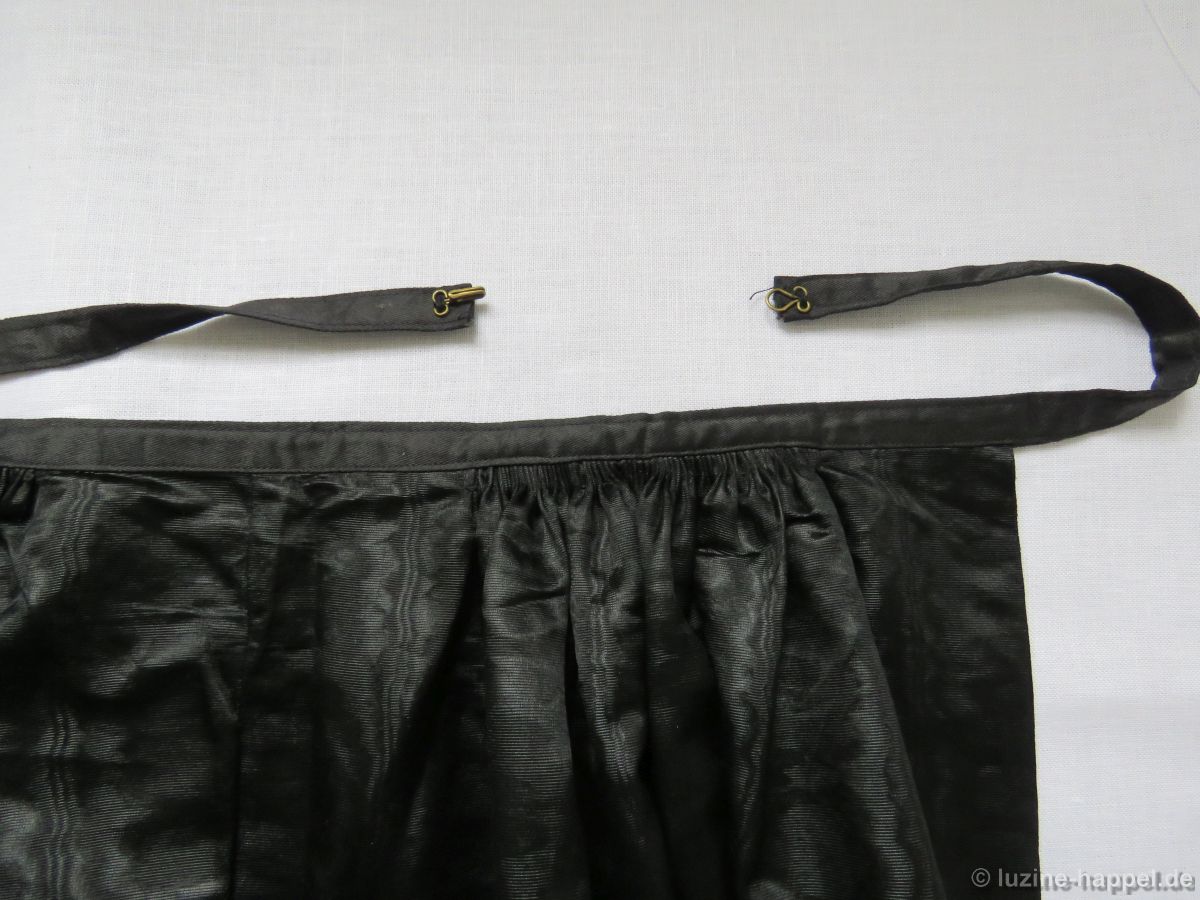
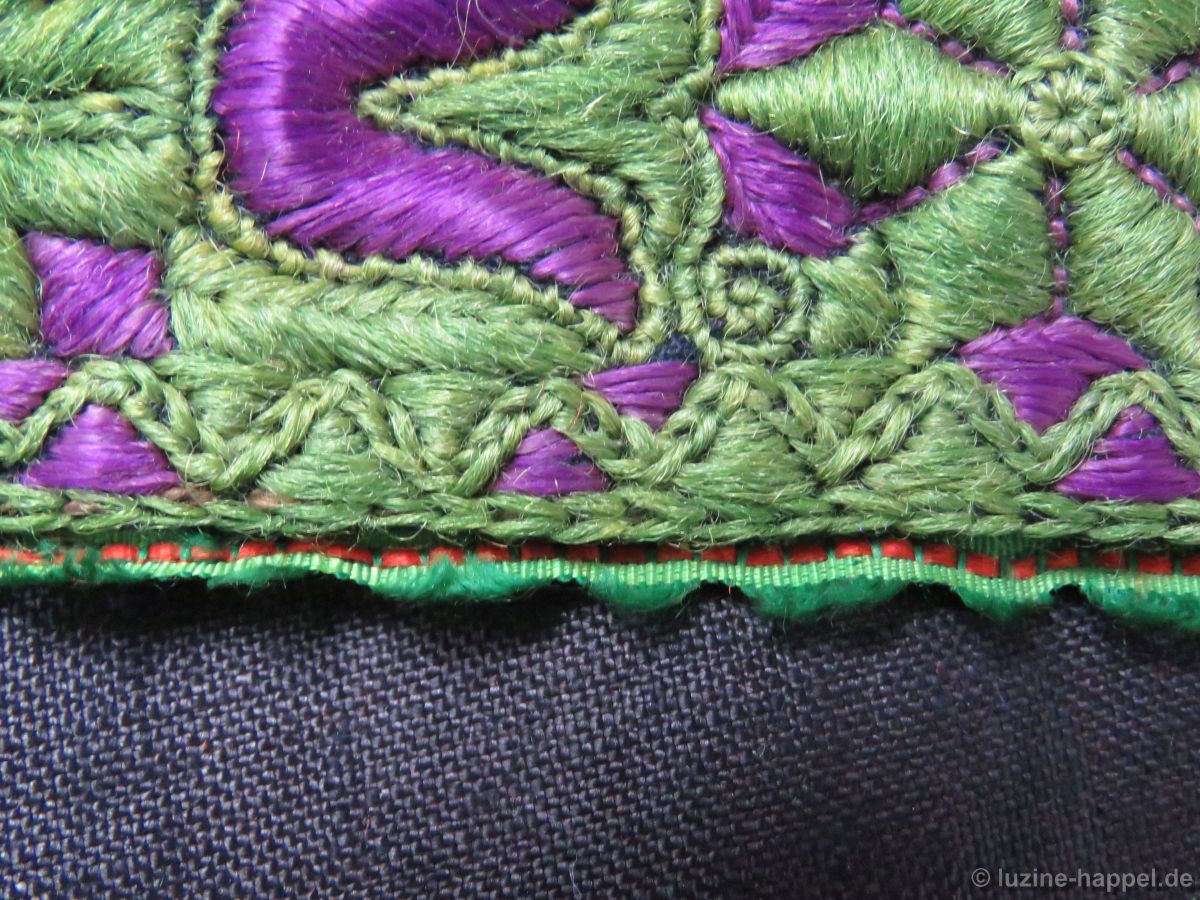 In the back, the waistbands were fastened with a gold-plated clasp – the small chains enabled the waistband to be adjusted to fit different girths.
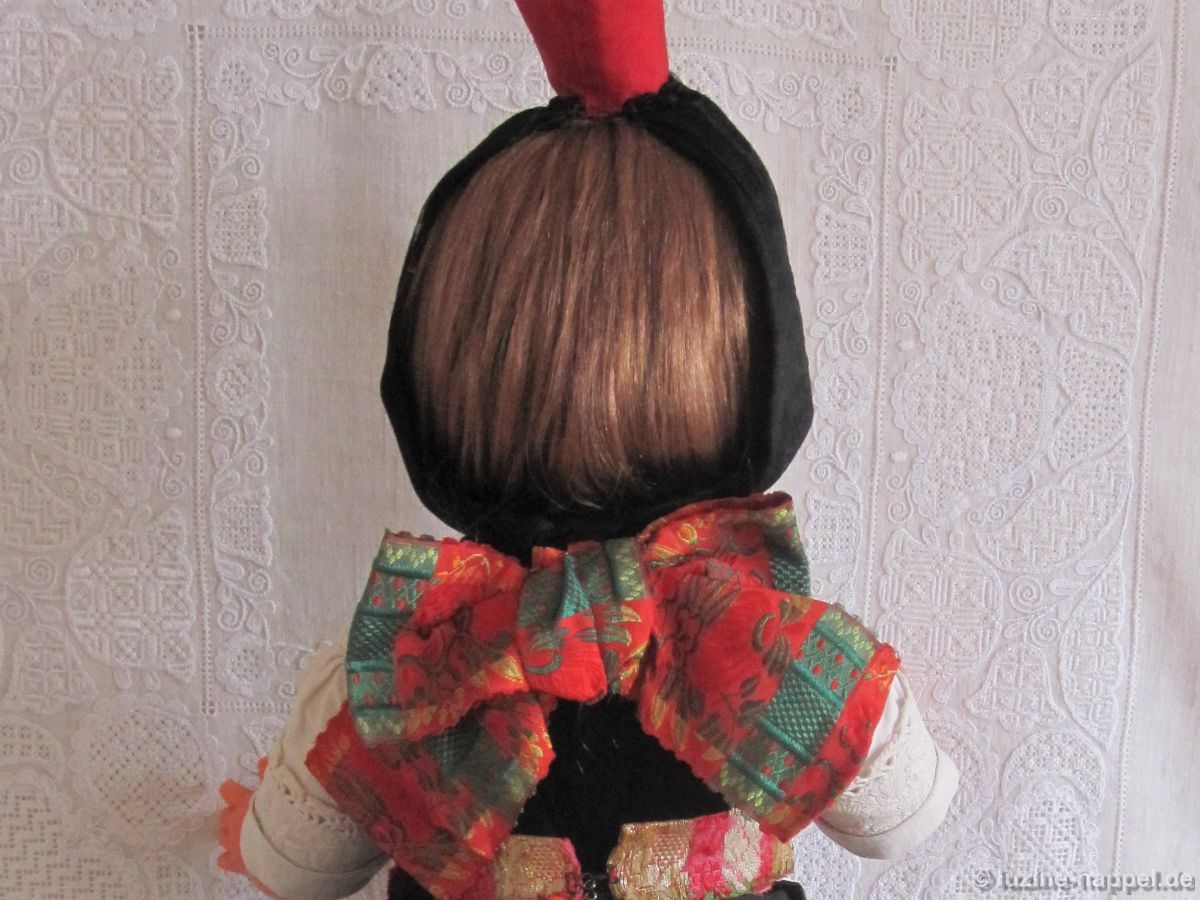
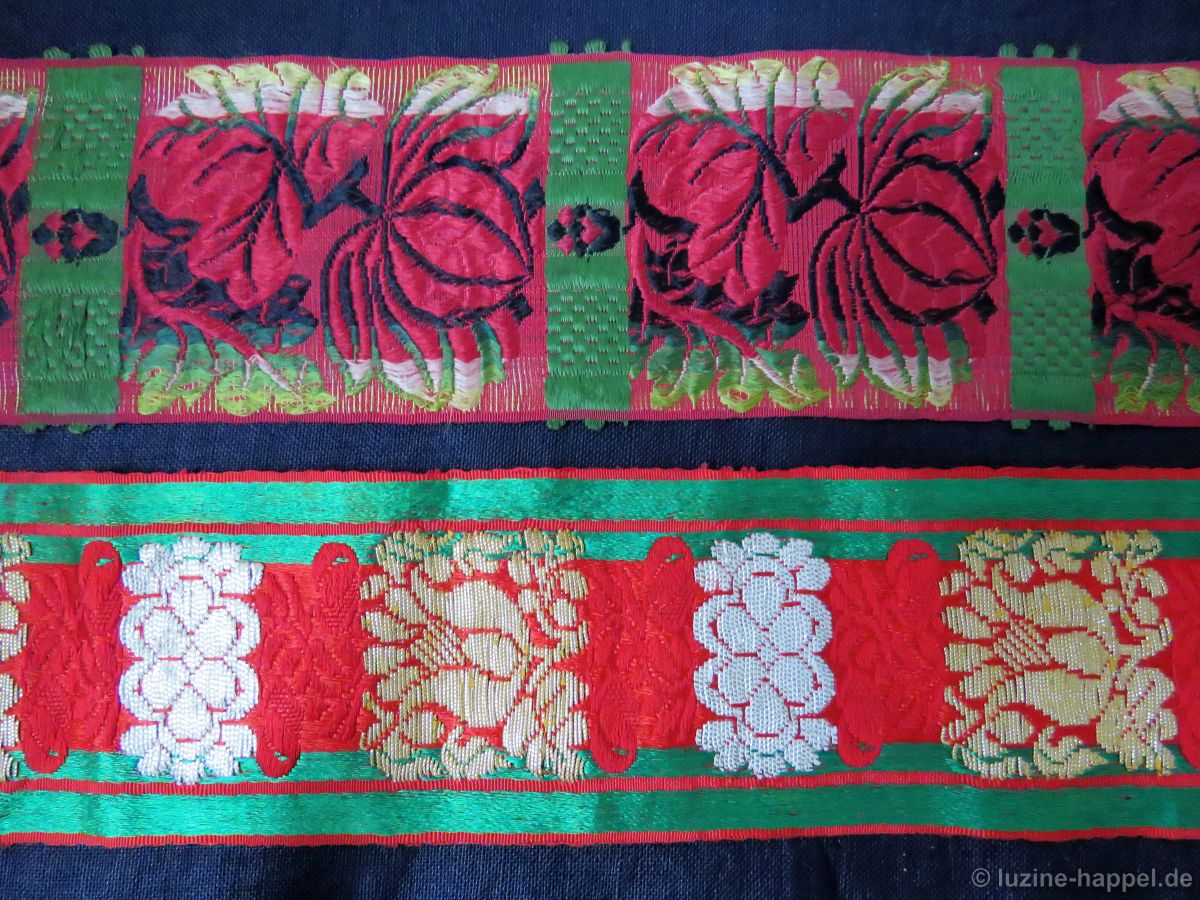
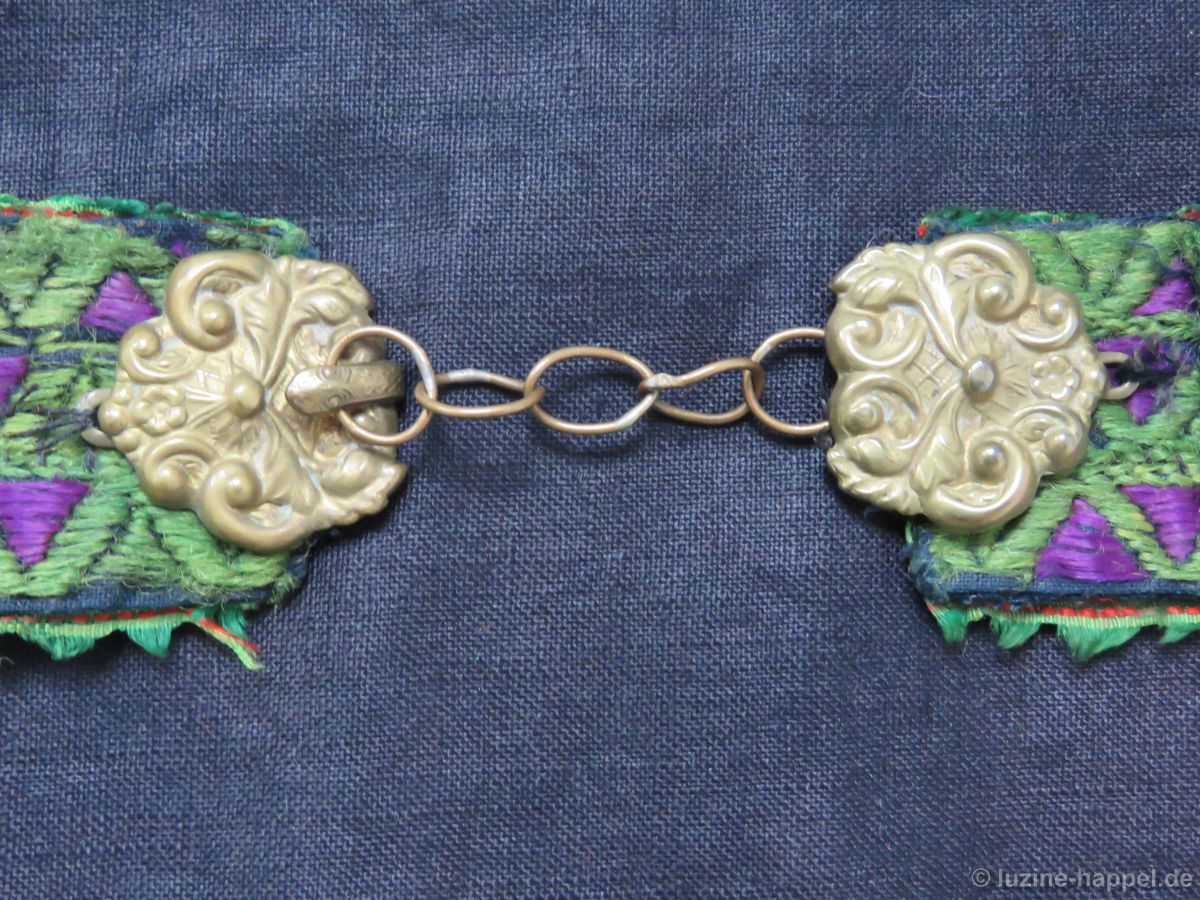 A band embroidered with silk threads only is very colourful. A green silk ribbon was laid onto a wider red silk ribbon. The templates were fastened onto the green ribbon
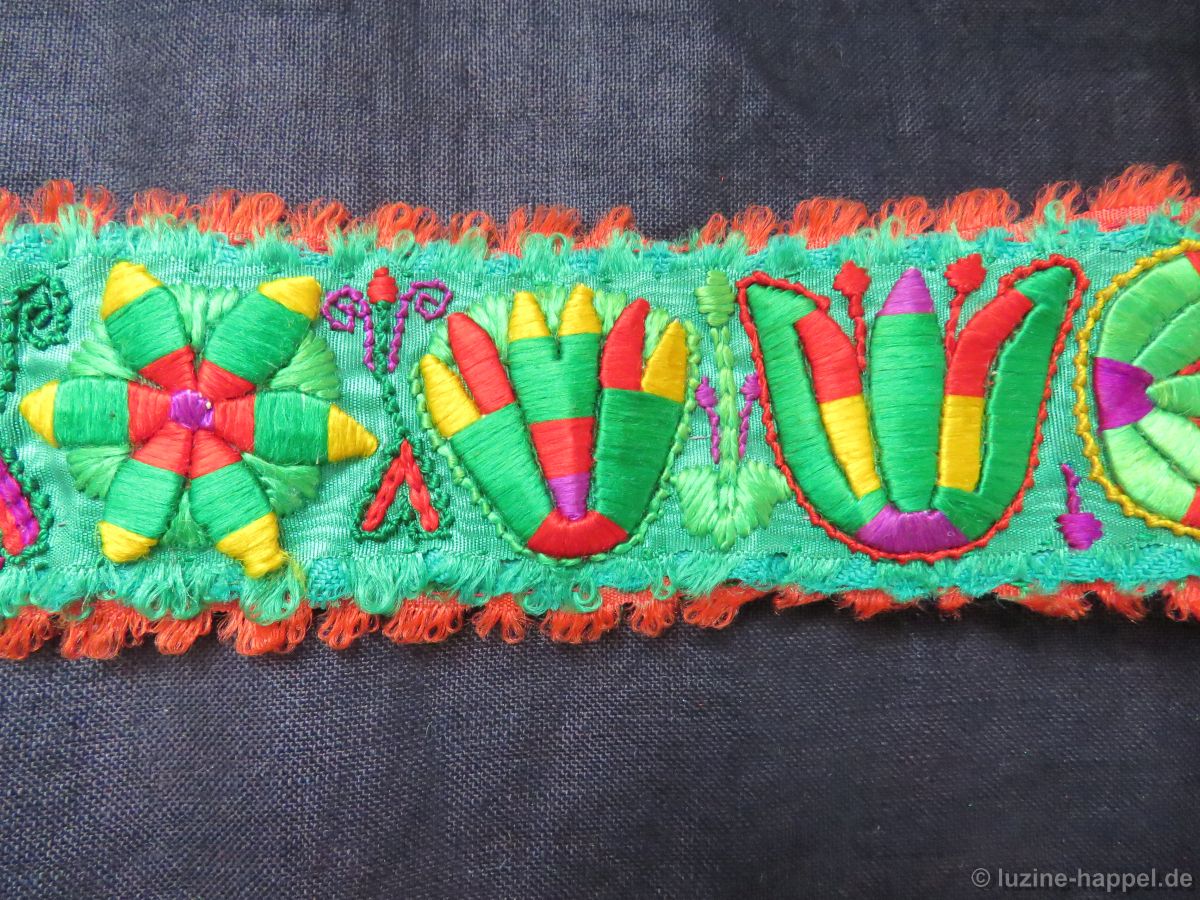 and embroidered with different colours.
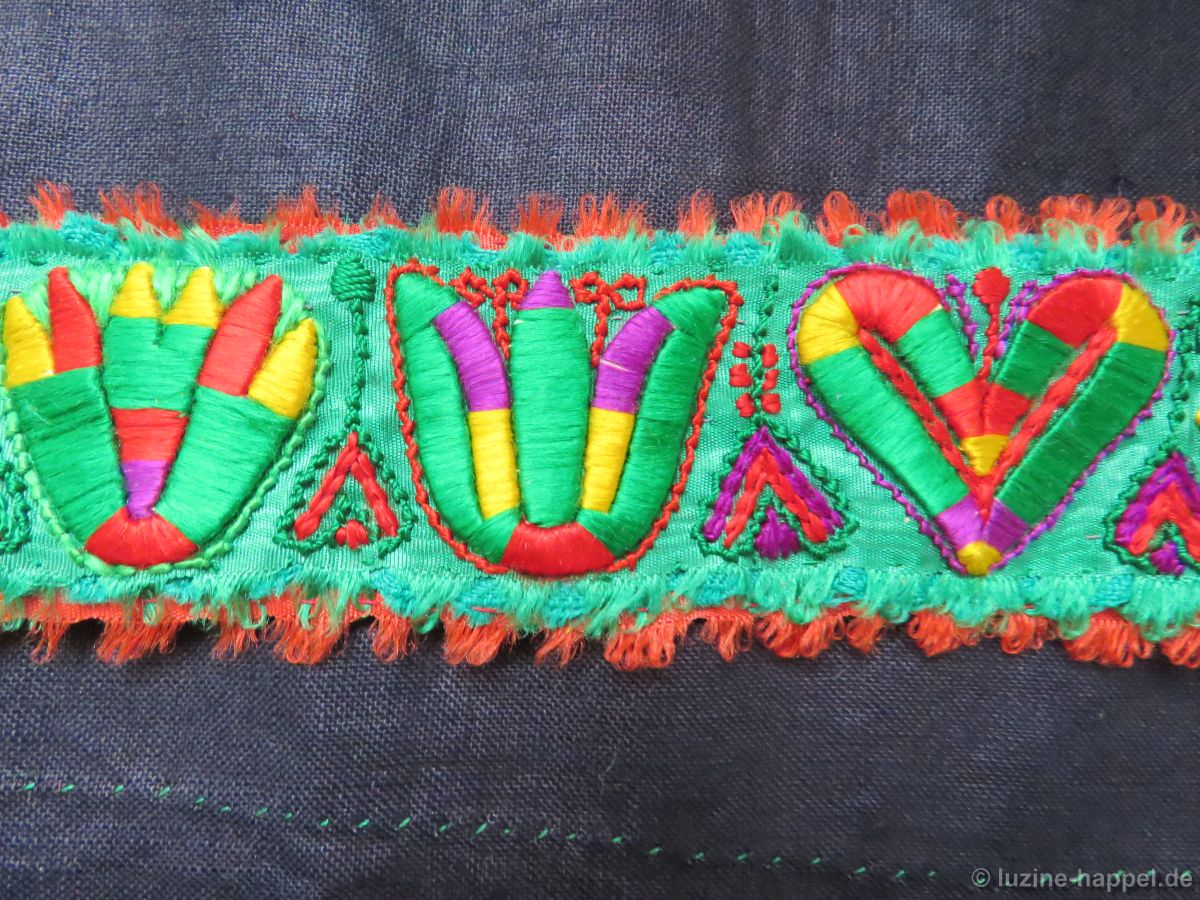 The spaces between the heart, tulip, star, and other motifs were only partially embroidered so that the silk ribbon can be seen.
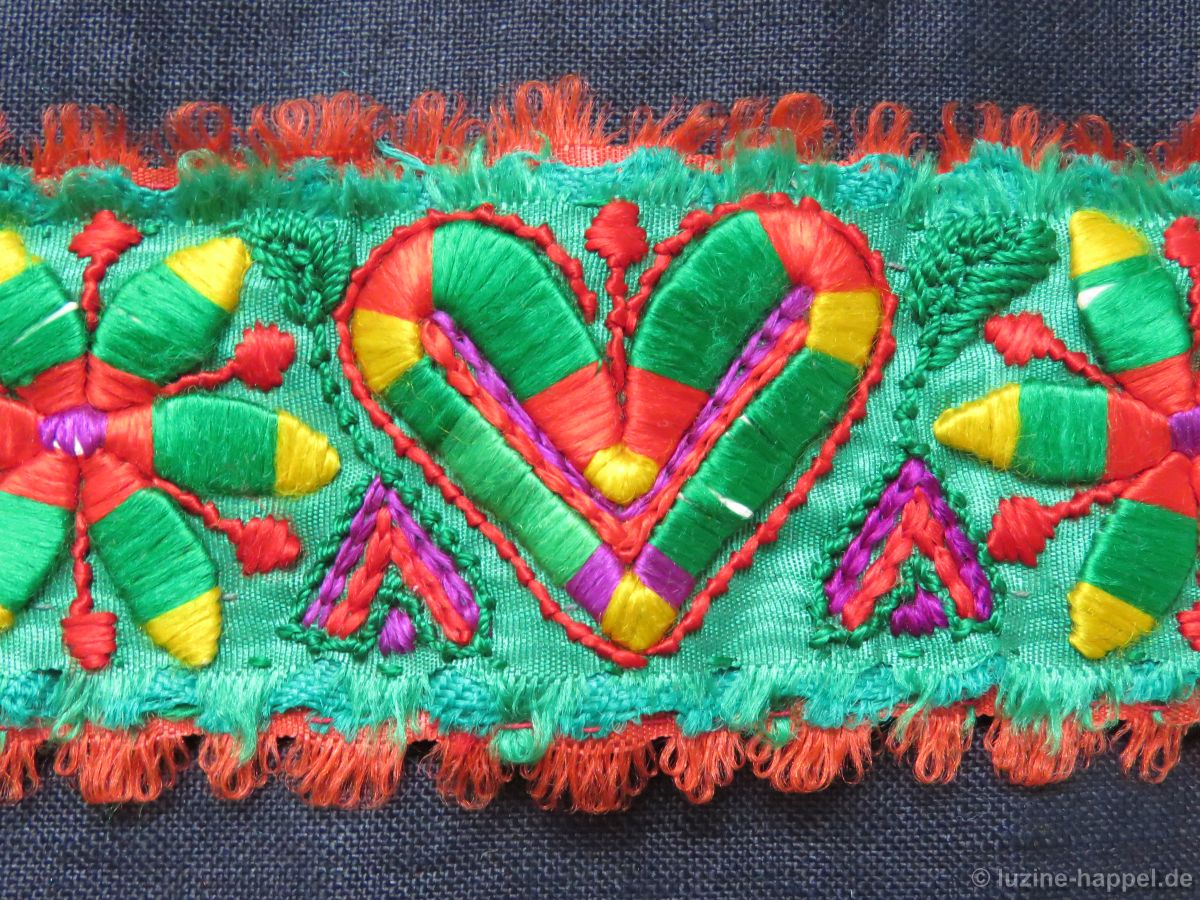 This apron waistband was lined with a colourful cotton fabric.
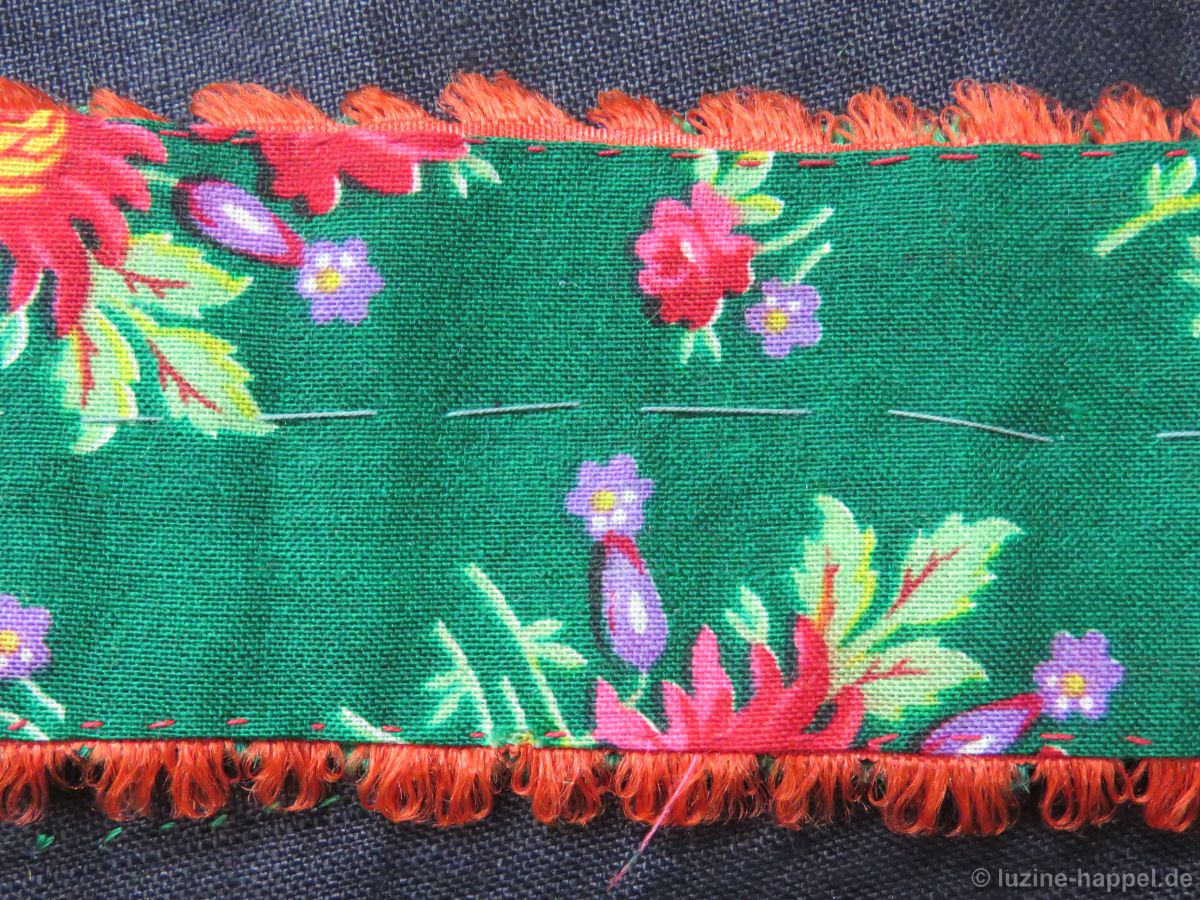 This apron waistband was also closed with a gold-plated clasp.
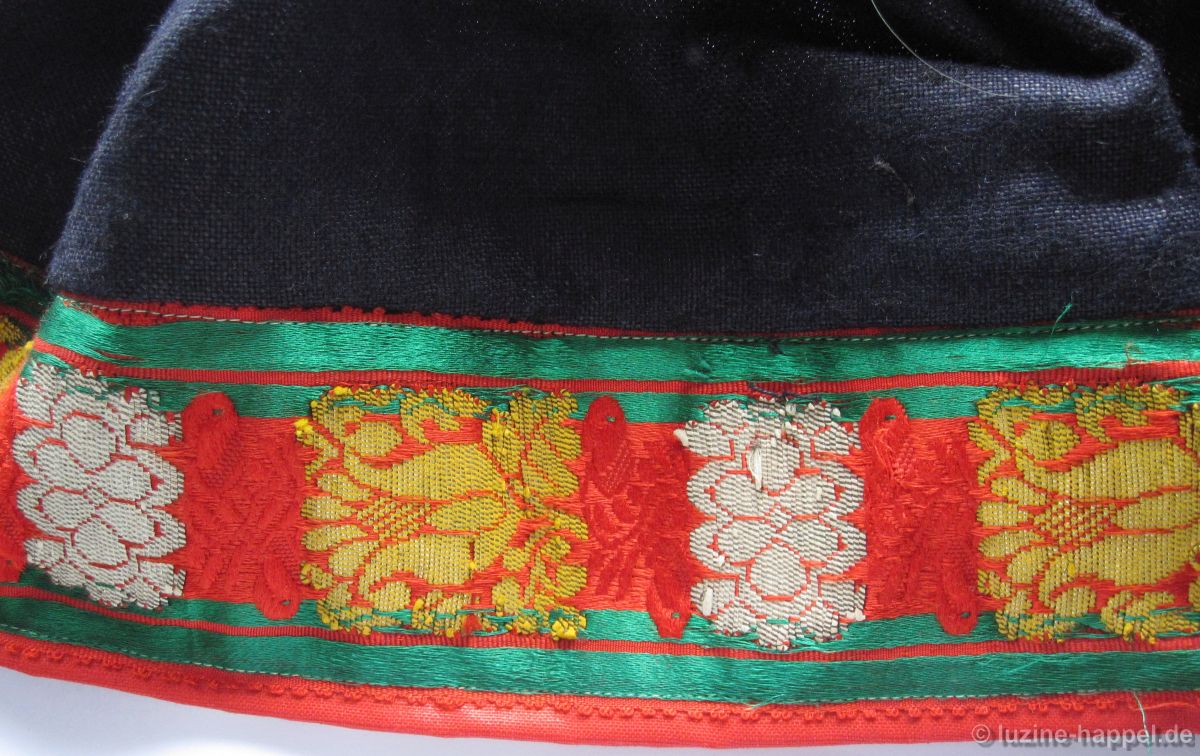
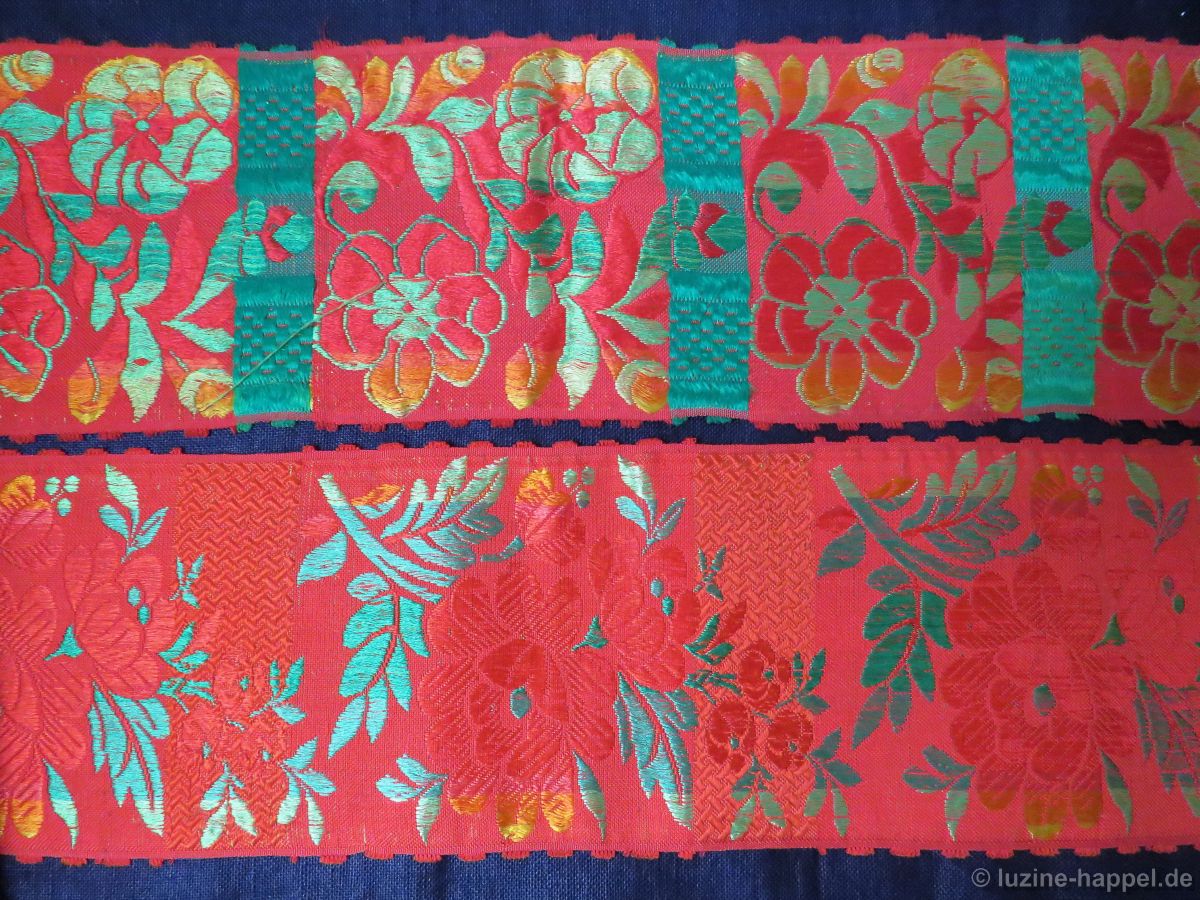
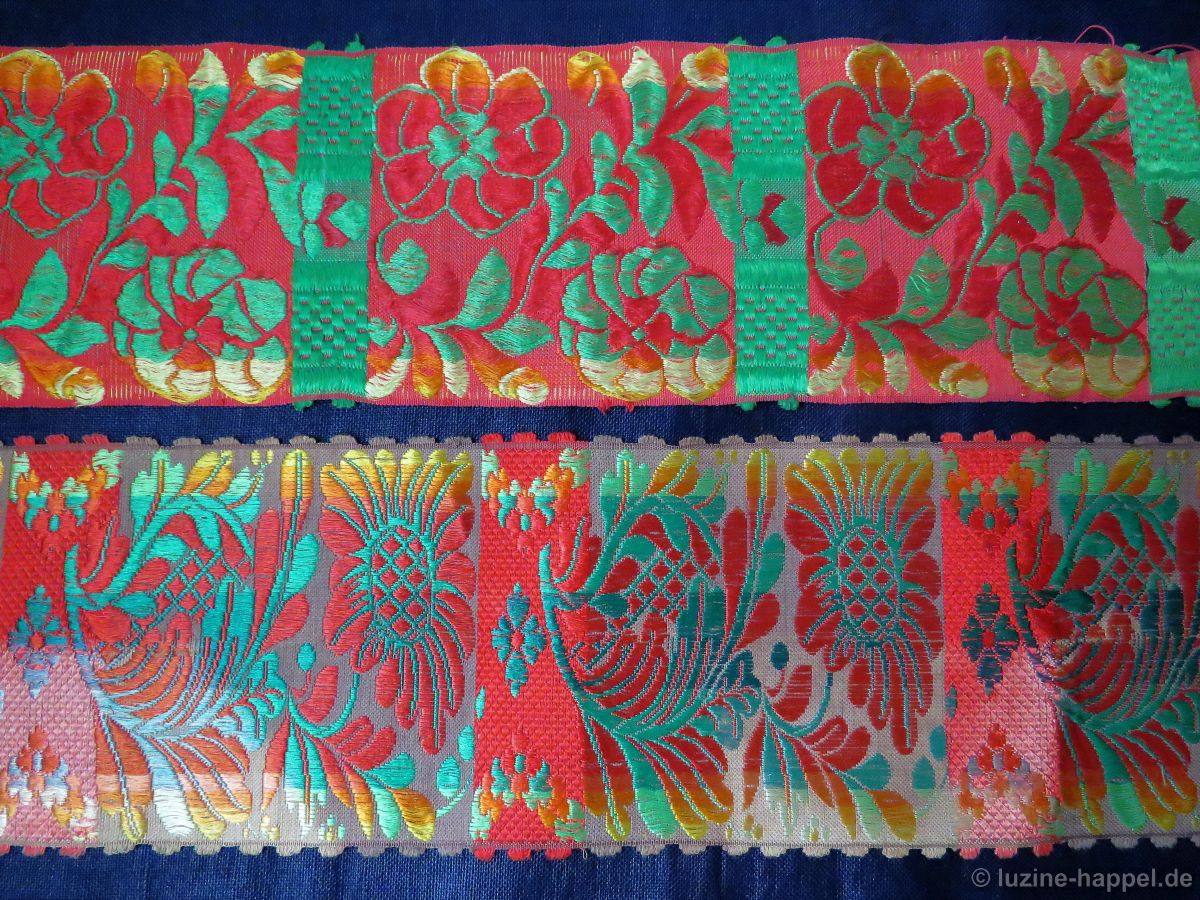
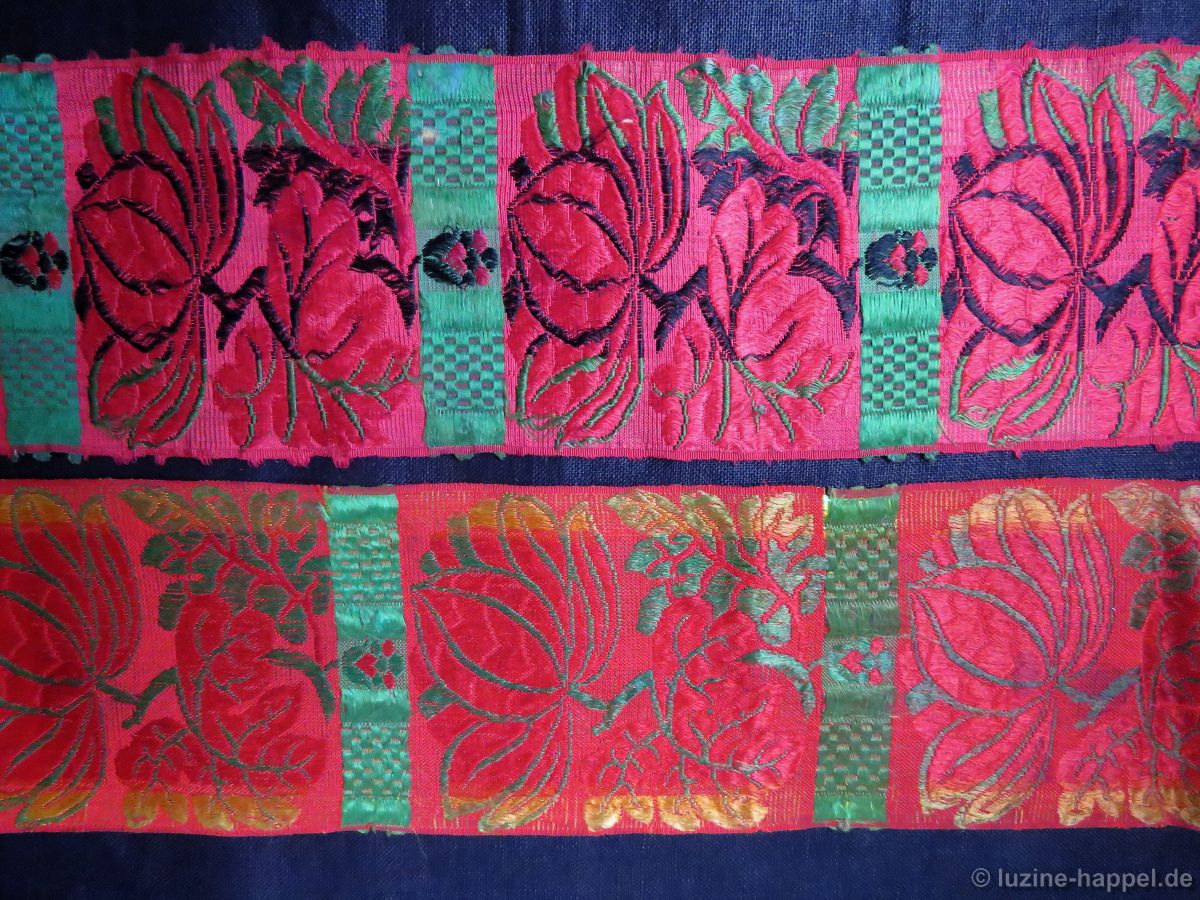
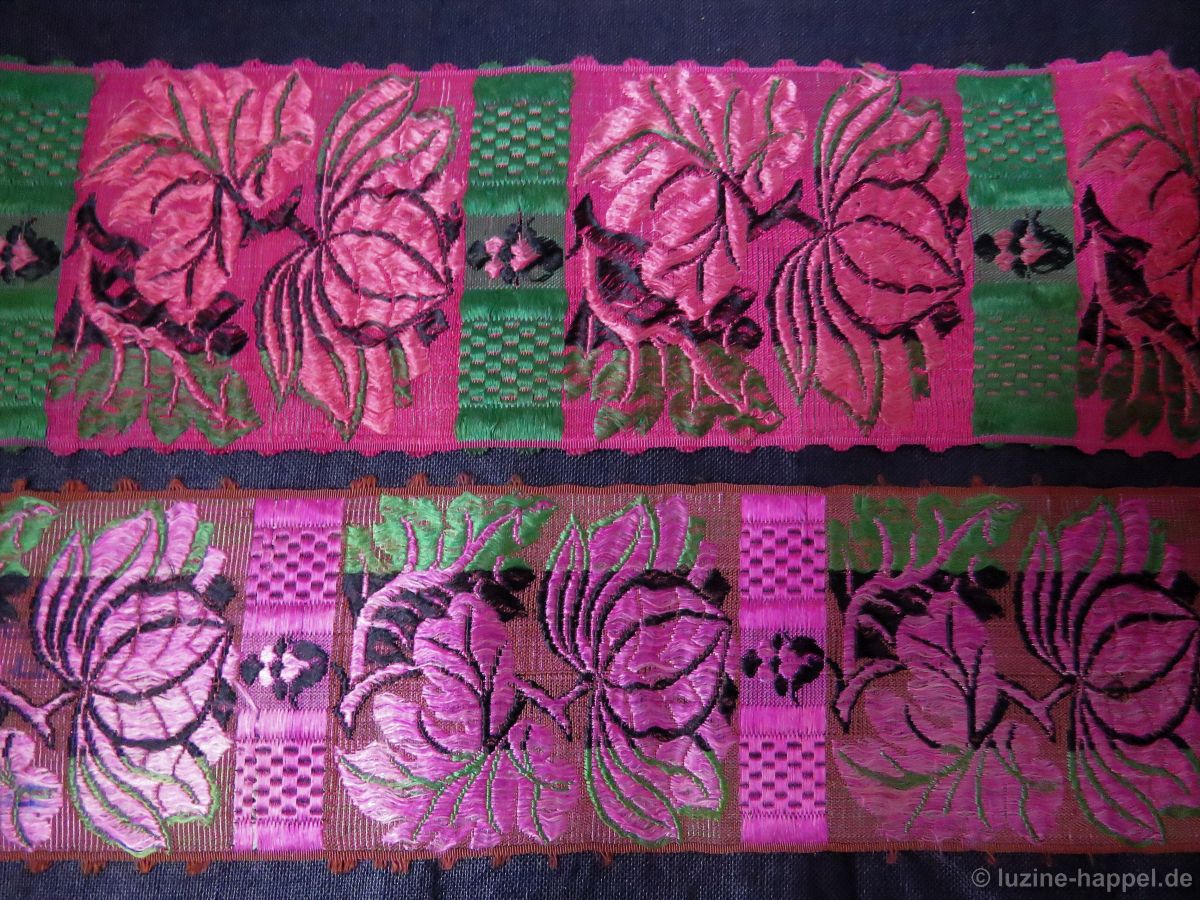
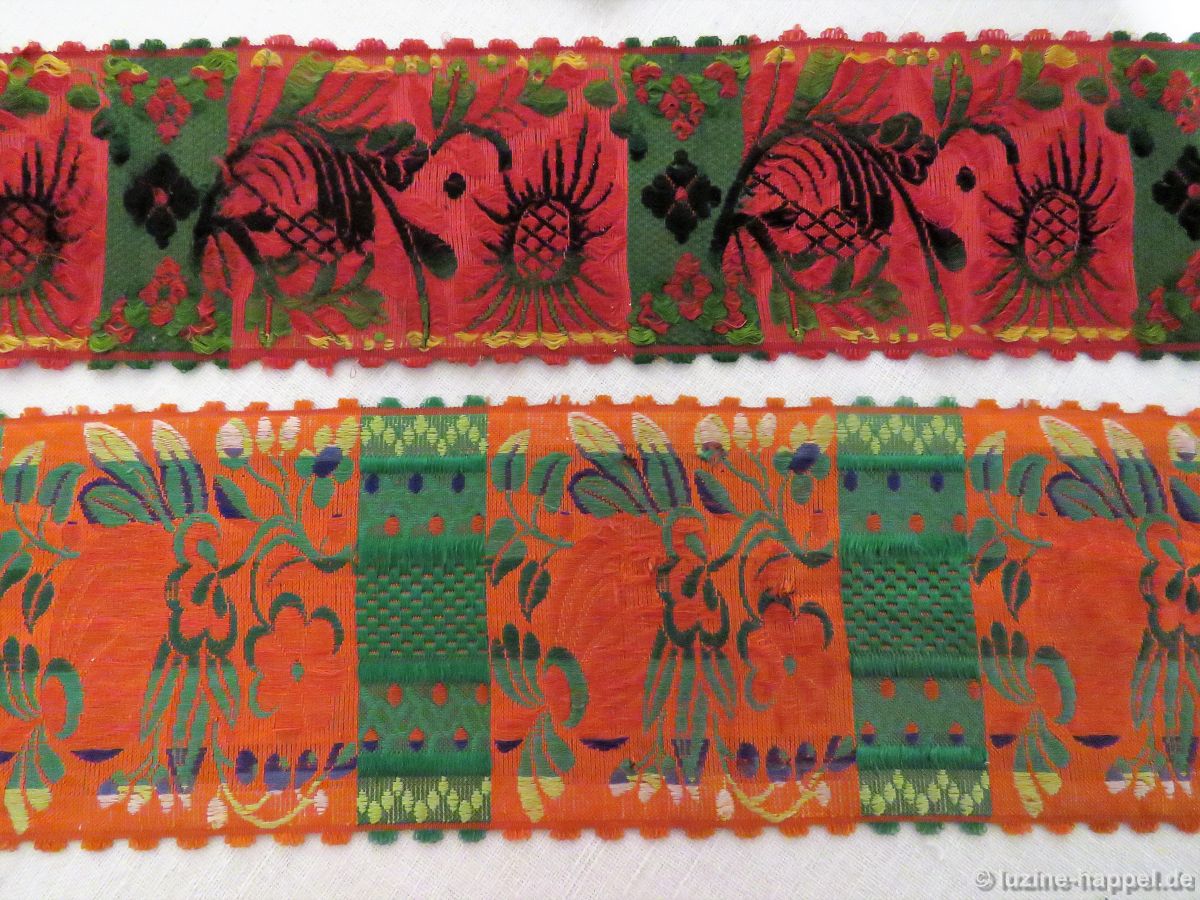
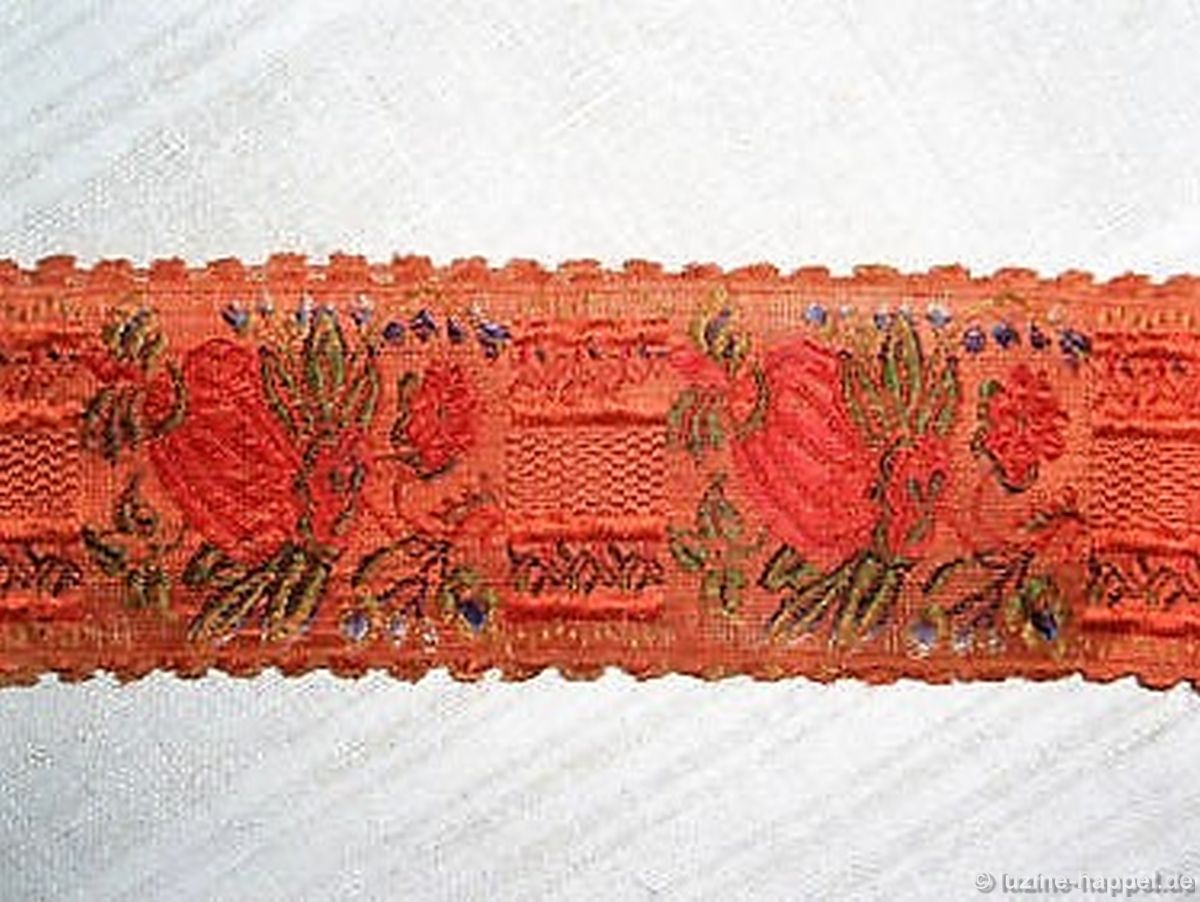
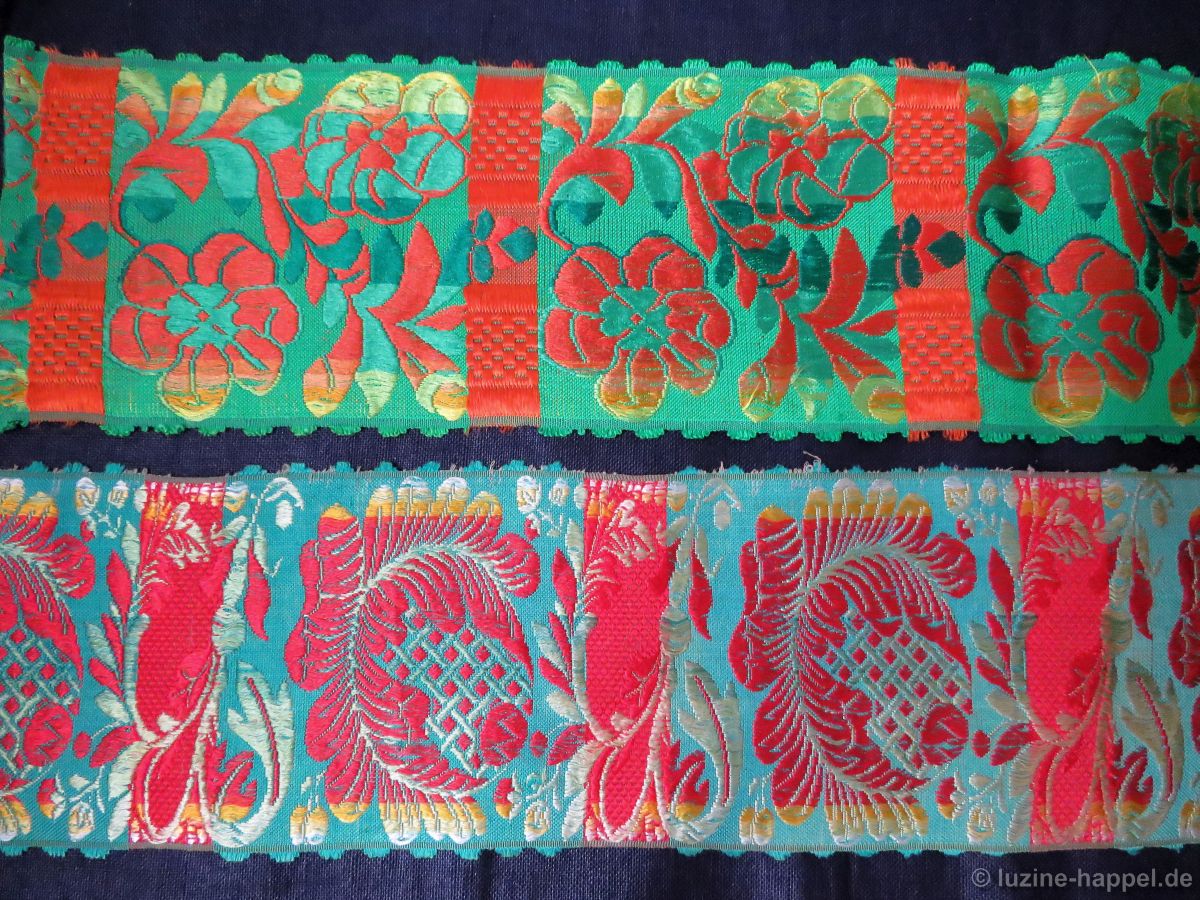
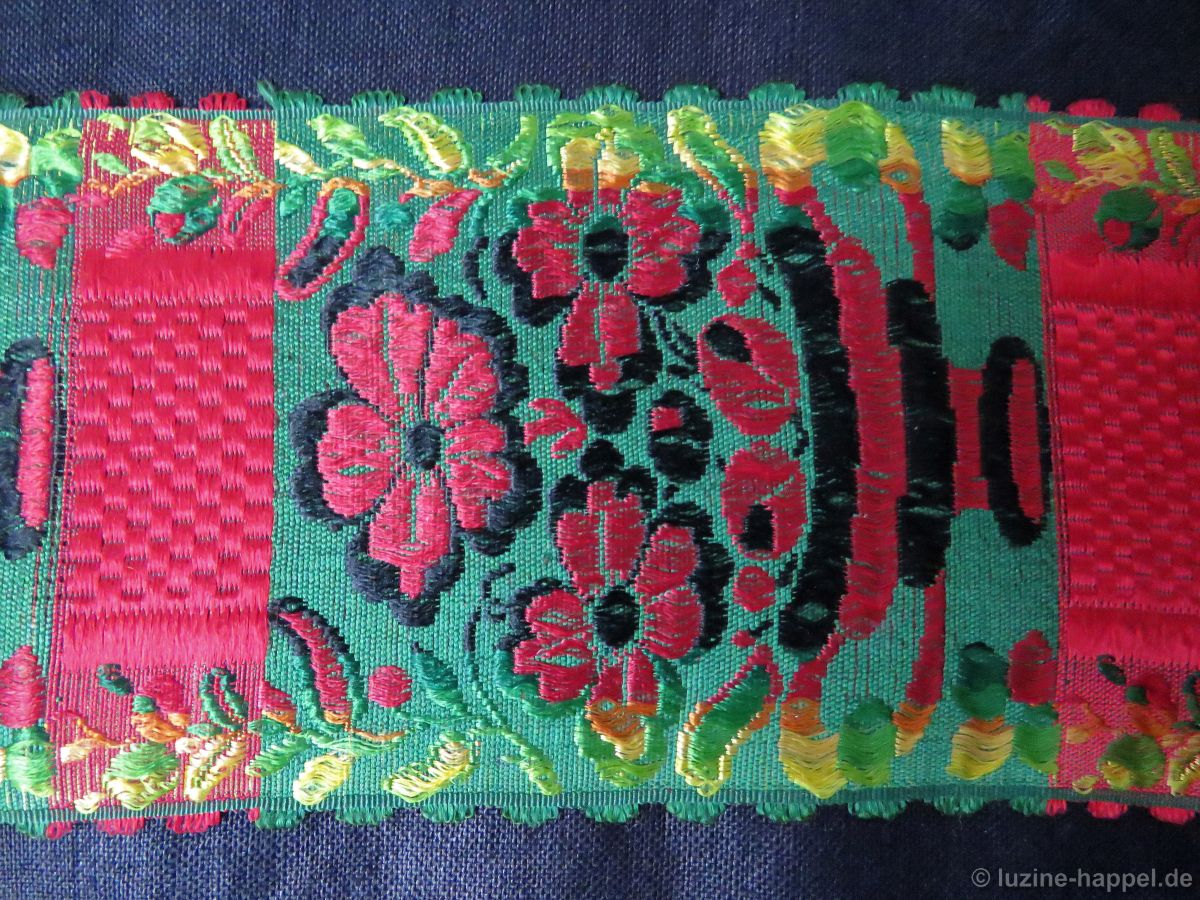
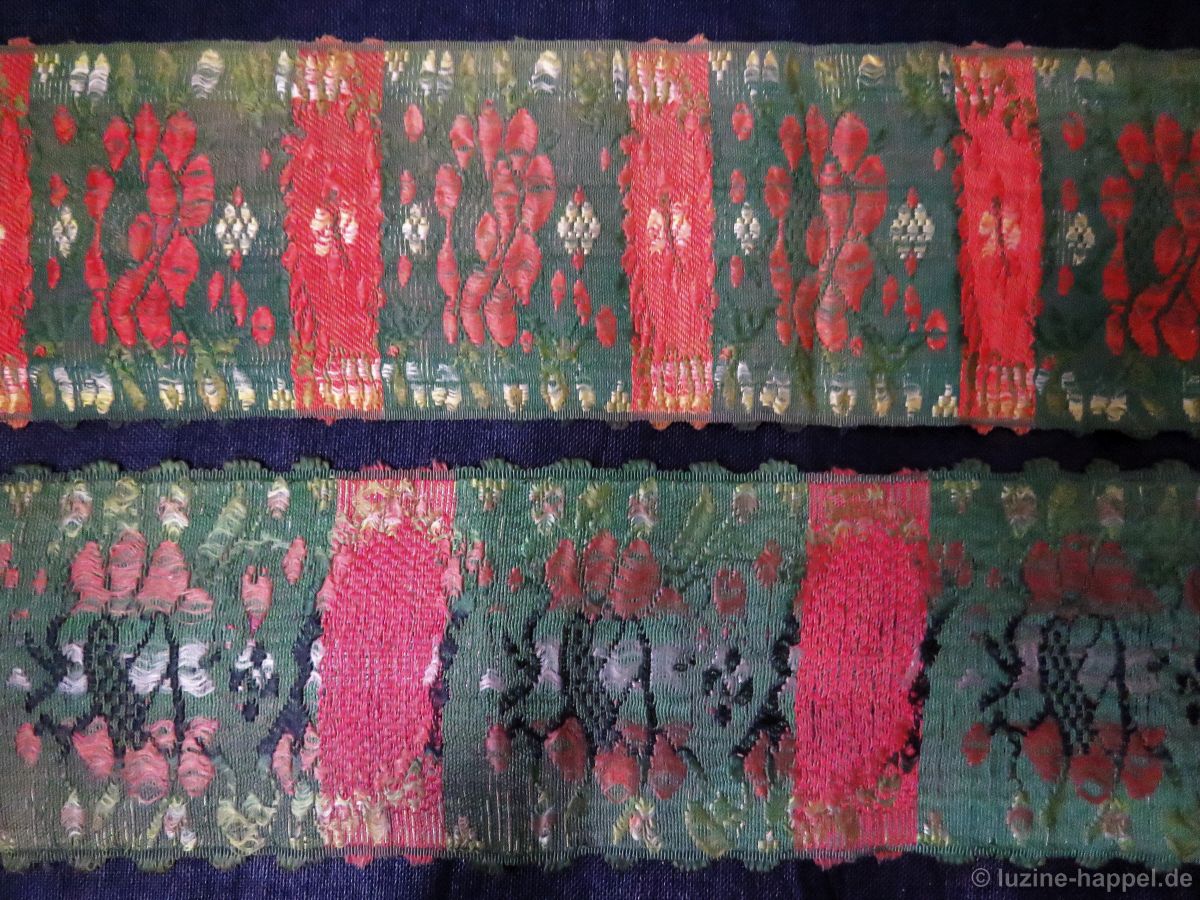
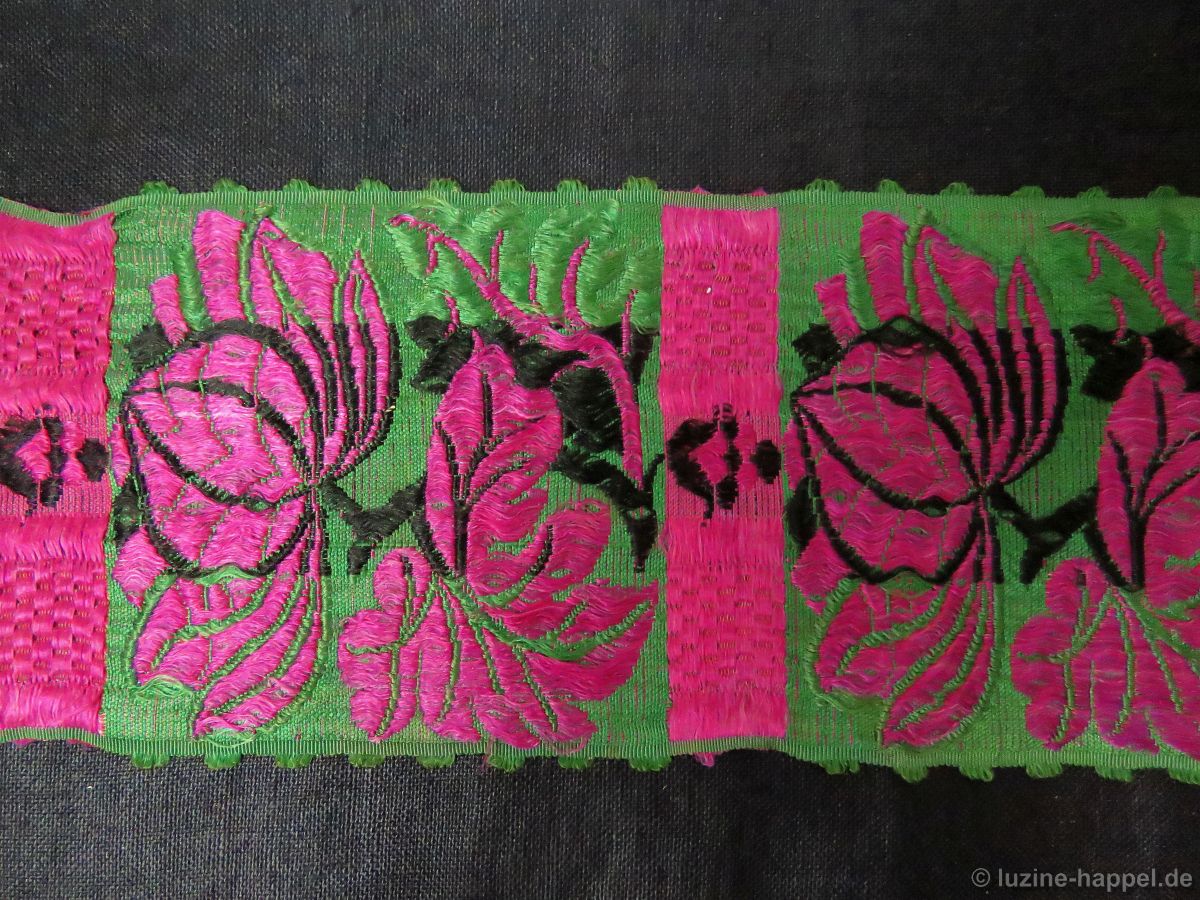
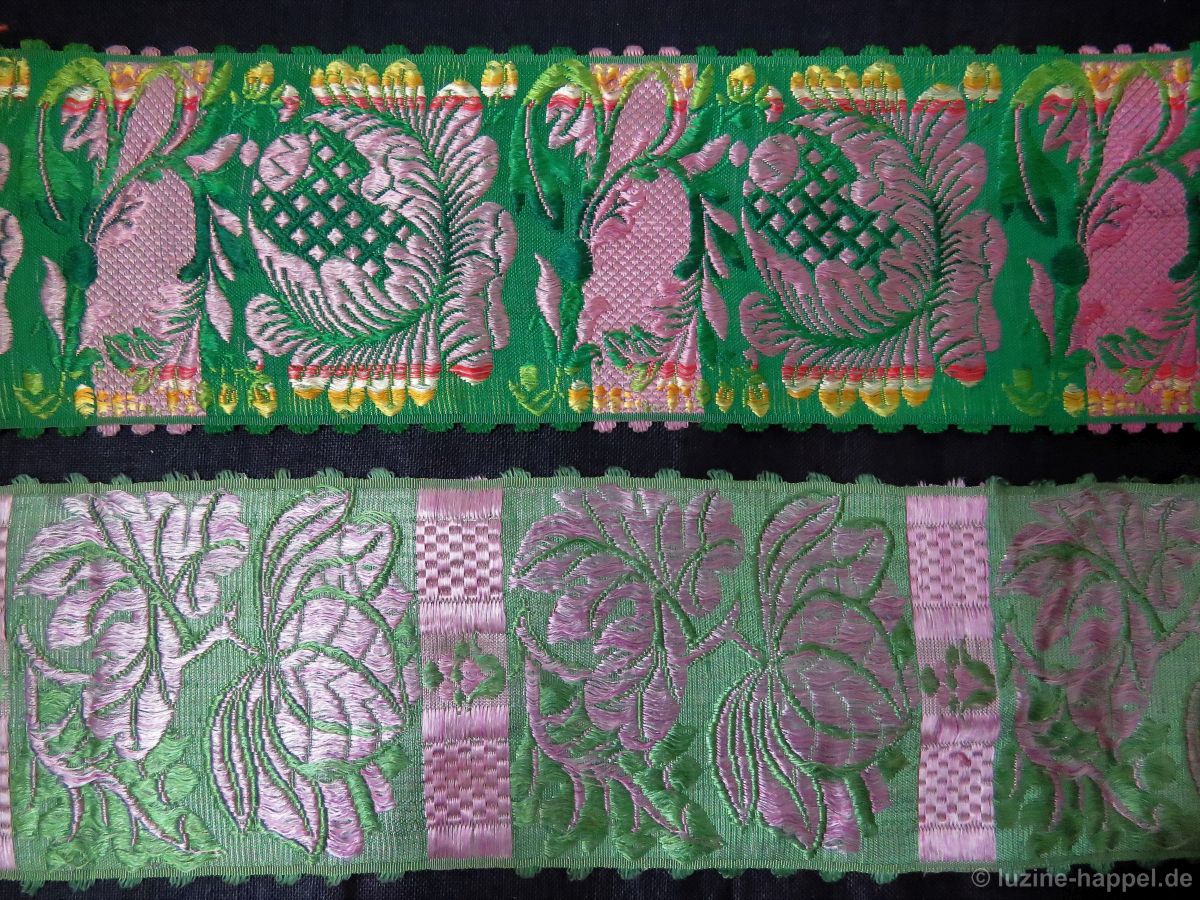
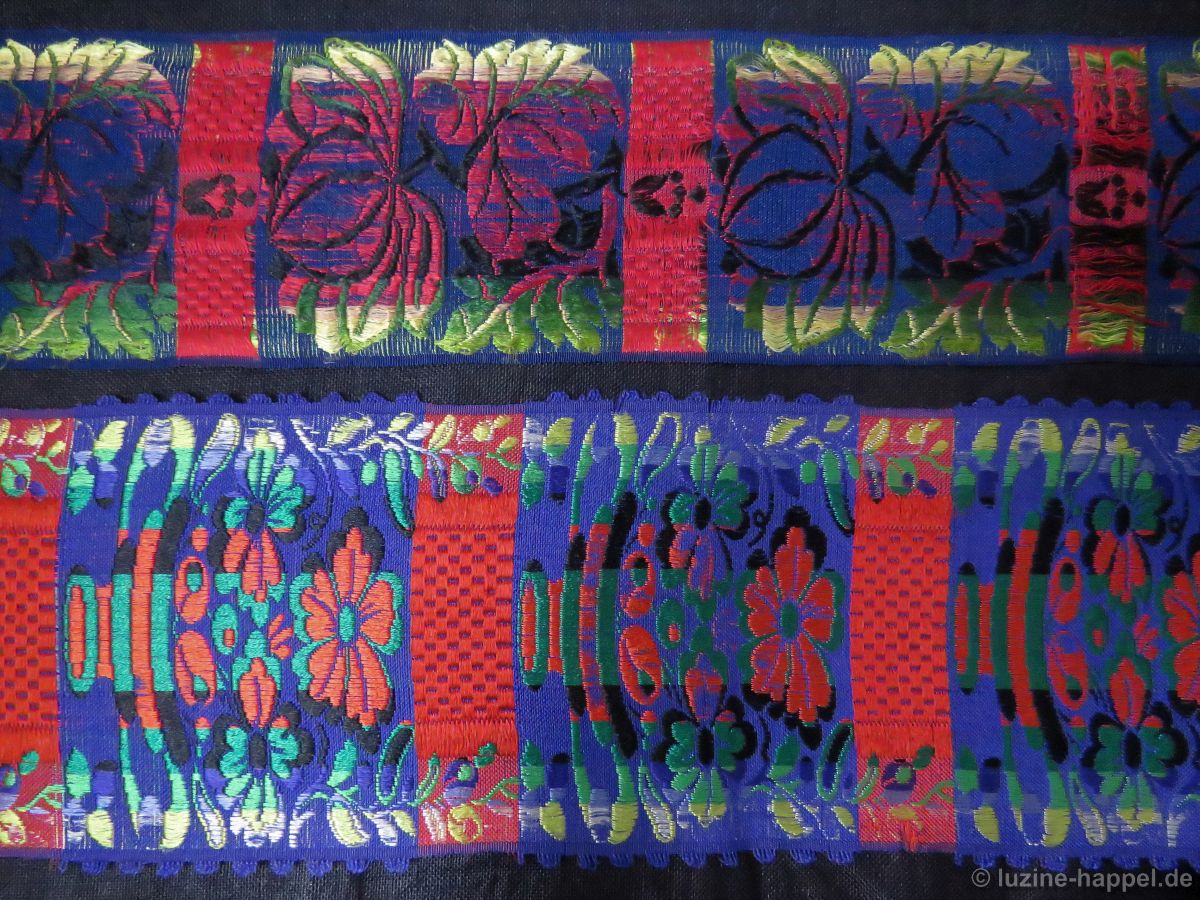
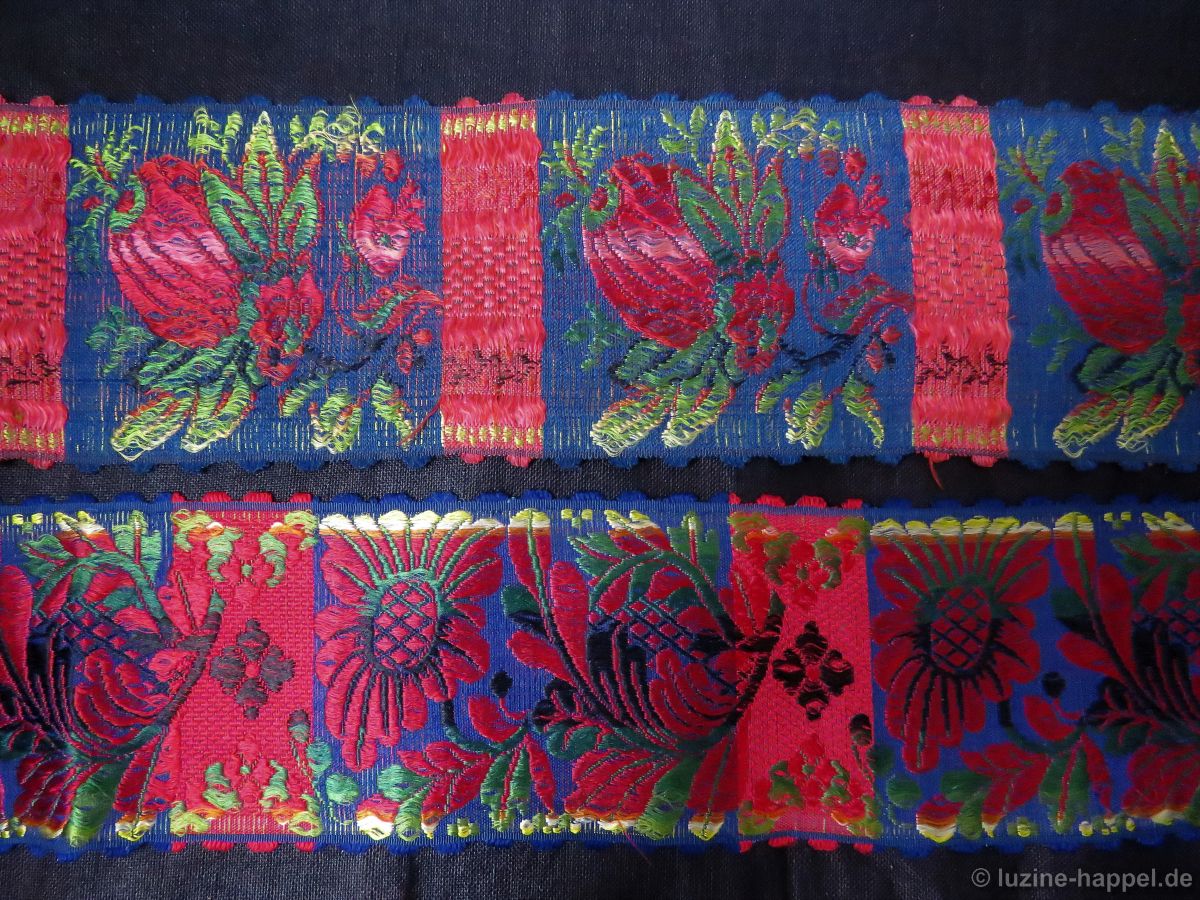
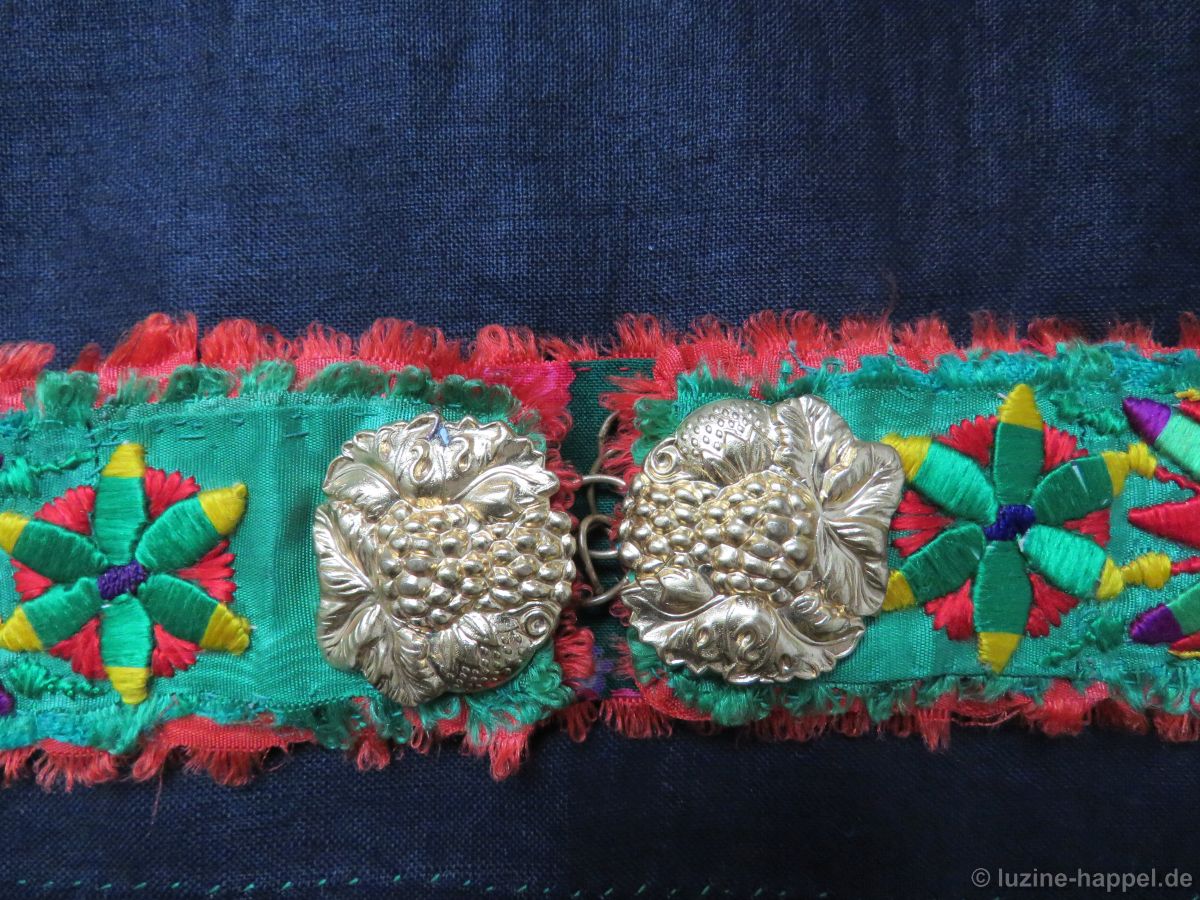 These special apron waistbands were fanciful and established a special splendor, but only wealthy women were able to afford such elaborate bands. The majority had to be content with the coloured woven silk bands.
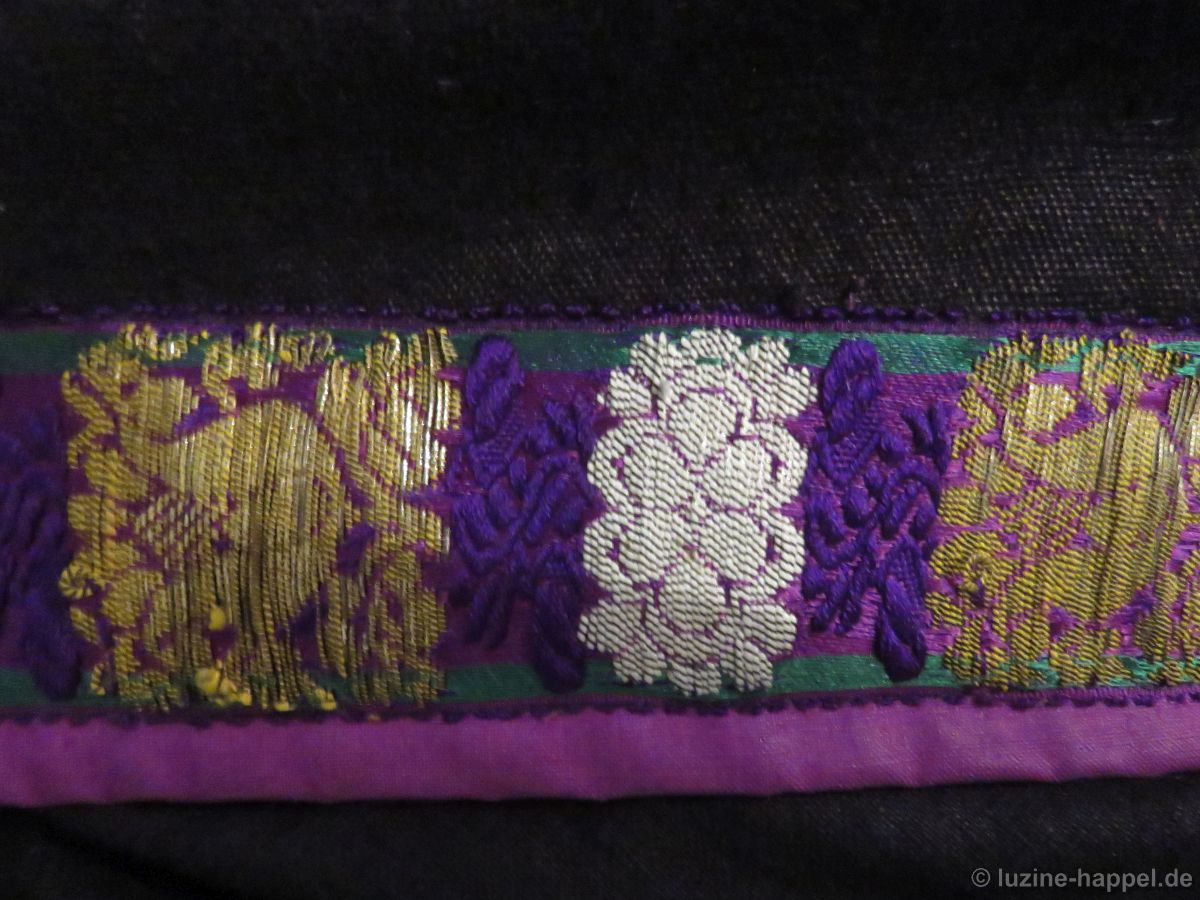