Tablecloth for all Seasons – December: Cones

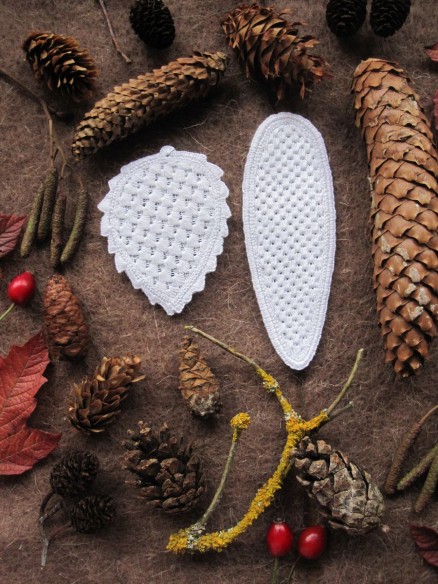
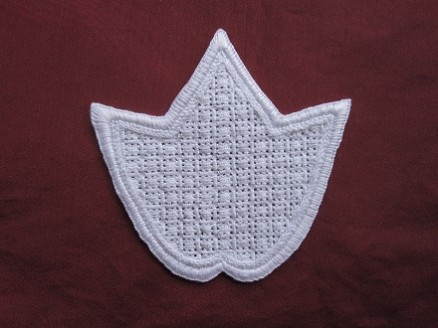
Fir cone and pine cone are the small projects for December.
I settled on the following shapes:
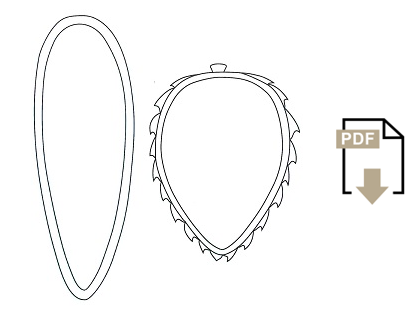
2014-12-13_pdf
Originally the pine cone shape measures approx. 6.5 cm in the width and 8.5 cm in the height.
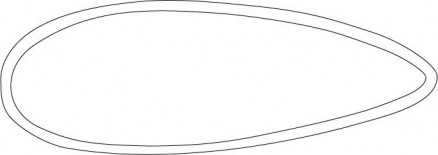
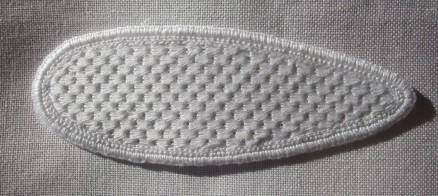
Cones_02Originally the fir cone shape measures approx. 13 cm in the width and 4.5 cm in the height.

First, the line drawing has to be transferred onto paper using an iron transfer pencil, and then transferred to Weddigen linen, 13.5/cm thread count.

The shapes need a Blanket stitch edge for securing the fabric from fraying.
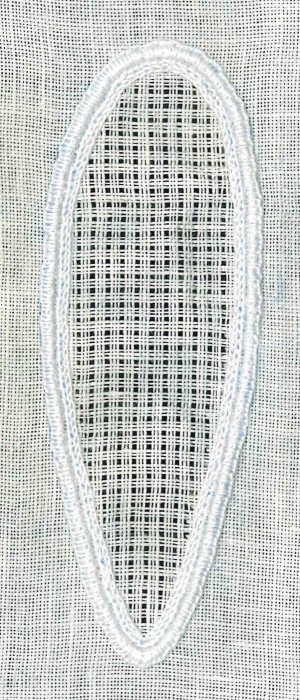
So, Coral Knot stitches are worked along the innermost lines using Coton à broder No. 20.
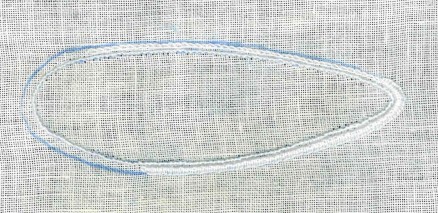
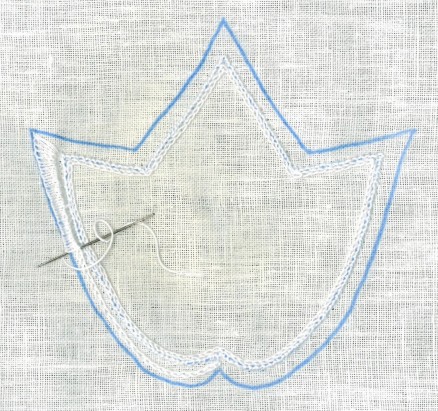
Cones_03For the fir cone shape, using Coton à broder No. 20 for both, Chain stitches are worked a small distance outside the Coral Knot stitches. The Chain stitches are covered with densely worked Blanket stitches.
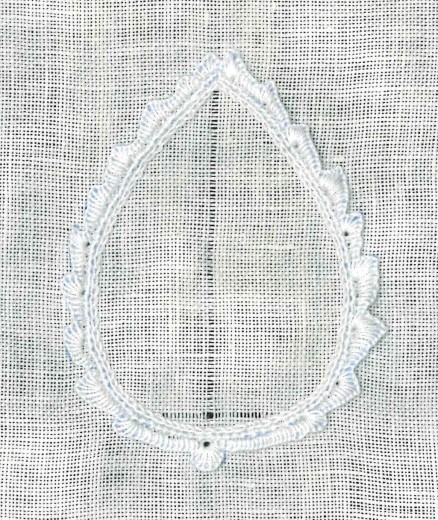
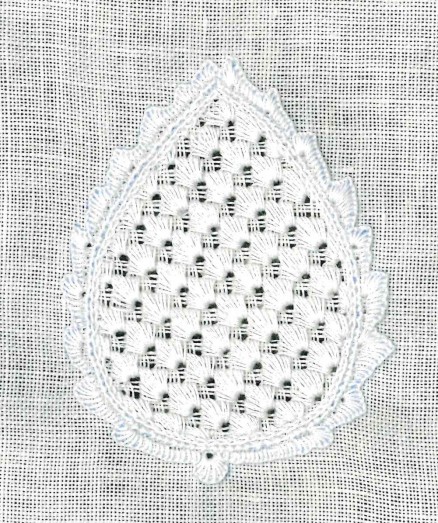
Cones_04For the pine cone shape, using Coton à broder No. 20 dense Blanket stitches are worked between the Coral Knot line and the pointed outline. Following the pointed outline, the Blanket stitches are worked as pointed half-eyelet scallops.

Using Coton à broder No. 30 Chain stitches are worked directly inside the Coral Knot stitches.

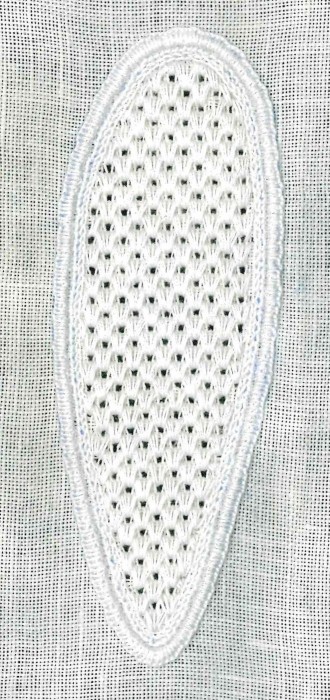
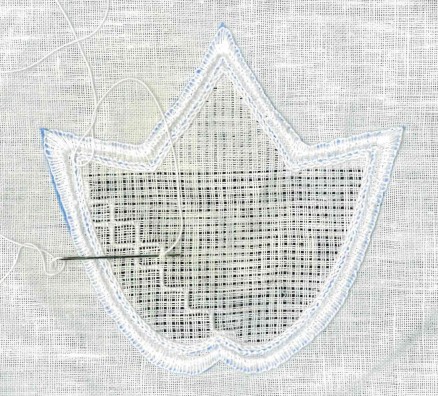
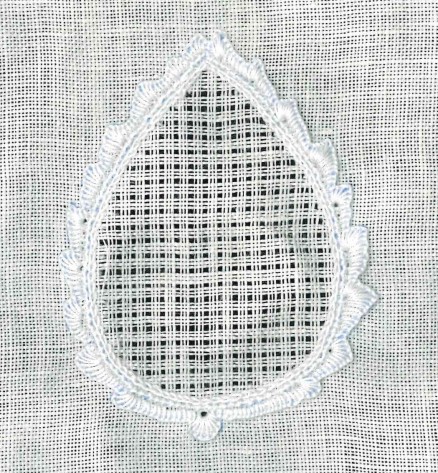
Both shapes were filled with Limet- filling patterns.

Cones_05
Cones_06

For the fir cone I chose pattern “Muscheln” (Limetrosen II, page 21).
Cones_07For the pine cone I chose pattern “Zapfen” (Limetrosen I, page 73).
Cones_08After finishing, the embroidered pieces were washed (boiled), starched and ironed. Then, the cones were cut. If needed, such closely trimmed embroidery can be washed and ironed – quickly and easily – at any time, but never spun in a washing machine!
Cones_09
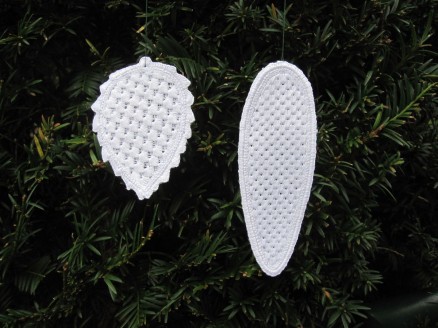
Cones_10In addition to adorning a tablecloth, the cones can also be used for autumnal decoration
Cones_11or trimming the holiday tree.
Cones_12

Tablecloth for all Seasons – November: Oak Leaves and Acorns

By special request from a South African lady, I decided to chose a leaf and the fruits of an oak tree for November.
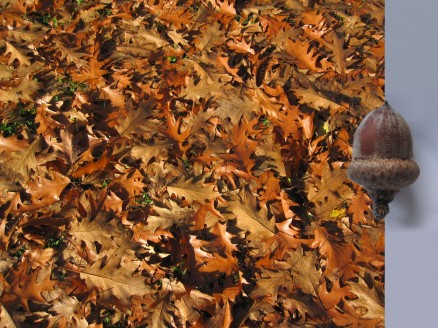
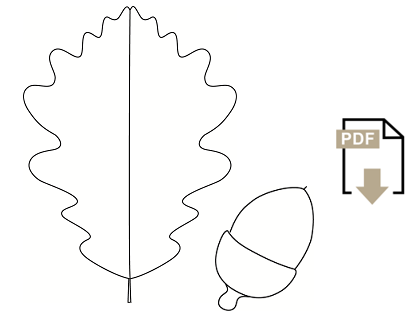
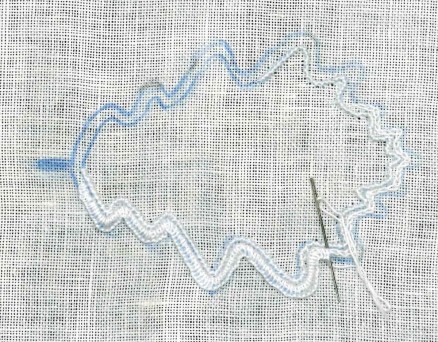
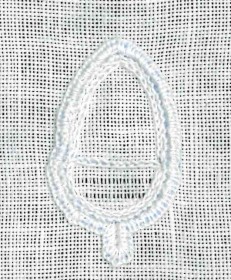
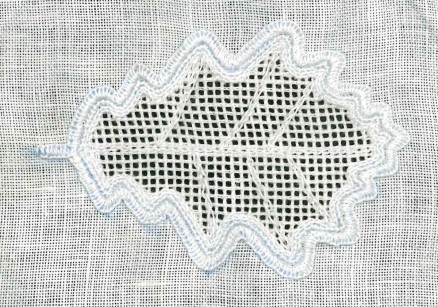
Eiche_01There are many different oak trees growing near our home. So, I went out to look and note the differences, always with the thought of transforming the shapes for whitework embroidery. A leaf with few sharp points would be good; I settled on the following shapes:
2014-11-01_pdf
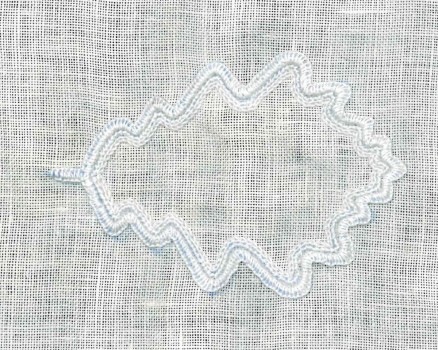
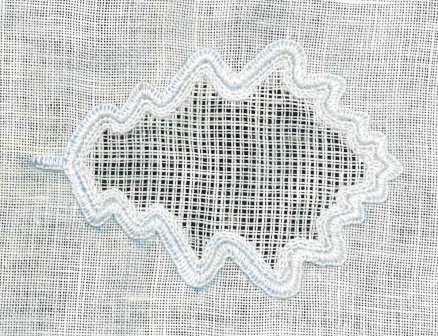
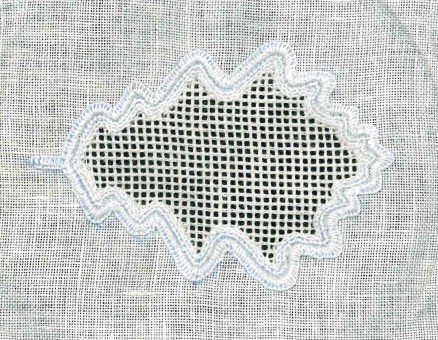
Originally the leaf shape measures approx.10 cm in the width and 7 cm in the height.
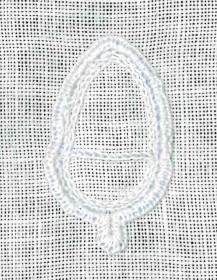
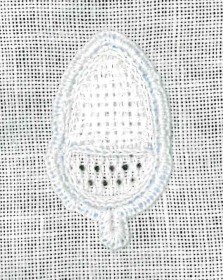
Originally the acorn shape measures approx. 2.4 cm in the width and 4.5 cm in the height.

First, the line drawing has to be transferred onto paper using an iron transfer pencil.
Eiche_07Eiche_08The shapes need a Blanket stitch edge for securing the fabric from fraying.
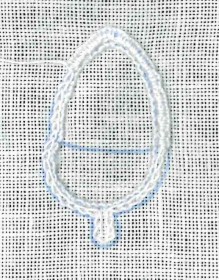
So, on Weddigen linen, 13.5/cm thread count, Coral Knot stitches are worked along the inside line using Coton à broder No. 20.
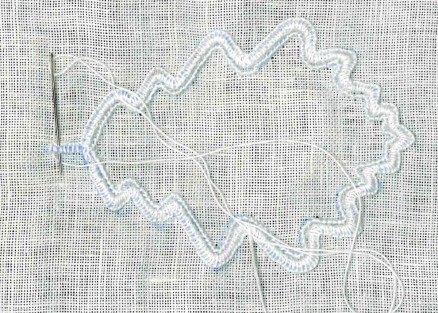
Using Coton à broder No. 20 for both, Chain stitches are worked a small distance outside the Coral Knot stitches. The Chain stitches are covered with densely worked Blanket stitches.
Eiche_09To get a small stem on the leaf, Blanket stitches are worked down one side and then up the other side. The Blanket stitches on the return pass are placed between the already worked Blanket stitches on the opposite side of the stem.
Eiche_10Eiche_11Using Coton à broder No. 30 Chain stitches are worked directly inside the Coral Knot stitches.
Eiche_12Eiche_13The acorn cap was filled with Wave stitches (Basic Priciples of Schwalm Whitework, pages 34-36). At first I wanted to fill the acorn seed with padded Satin stitches, but the stitches would become too long. So I decided to take a pattern used in early Schwalm Whitework – close, 2-thread weaving (Early Schwalm Whitework, page 19).
Eiche_14The leaf shape was filled with the openwork filling pattern Cable stitch grid (Basic Principles of Schwalm Whitework, pages 54-56, or Openwork Pattern Samplers, pages 58-61).
Please note that this grid was established by cutting only 1 thread and leaving 2, to keep the pattern compact.
Eiche_15This pattern is especially suitable because all small curves and corners can be covered well.
Eiche_16In the end I embroidered some of the leaf veins using Chain stitches.

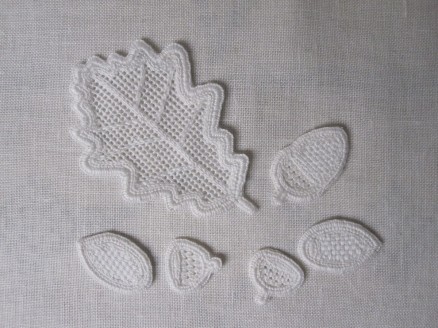
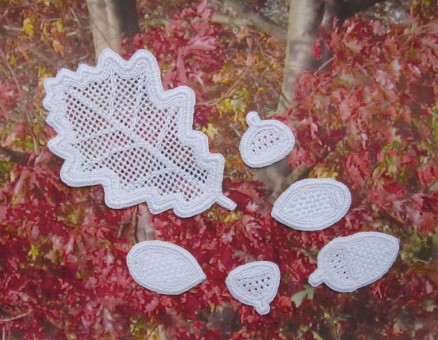
After finishing, the embroidered pieces were washed (boiled), starched and ironed. Then, the leaf and the acorn were cut. If needed, such closely trimmed embroidery can be washed and ironed – quickly and easily – at any time, but never spun in a washing machine!
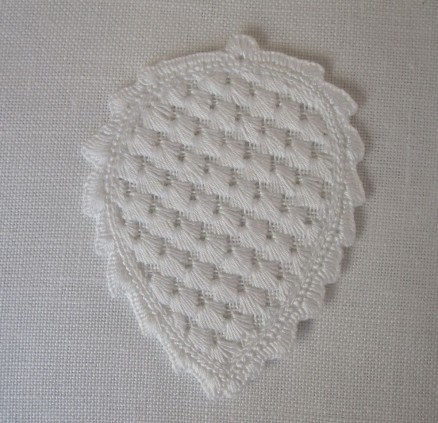
Eiche_17Some single acorns are easily and quickly embroidered … and now you have one more nice decoration!
Eiche_18

Tablecloth for all Seasons – October: Creepers and Grapes

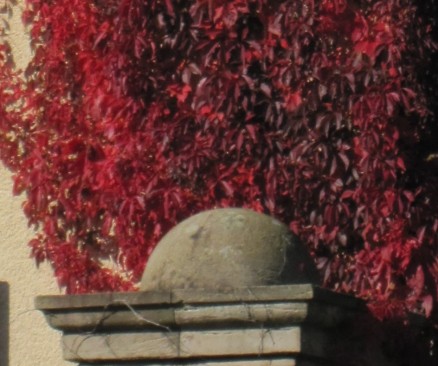
Creepers and vines climb on walls and shine replete with shades of red in the golden October sun.

Wein_01So, I chose the creeper leaf and a bunch of grapes for October.

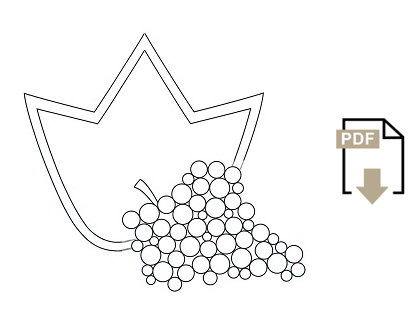
2014-10-19_pdf
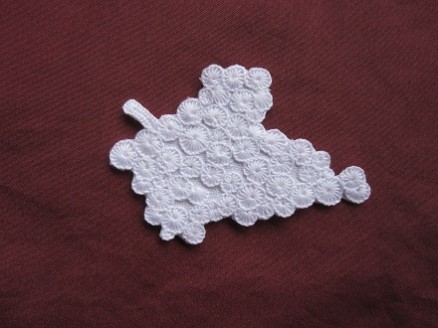
Originally the leaf shape measures 10 cm in the width and 9.5 cm in the height. Narrowed or enlarged shapes are also suitable.
Originally the bunch of grapes shape measures approx. 8 cm in the width and 6 cm in the height.
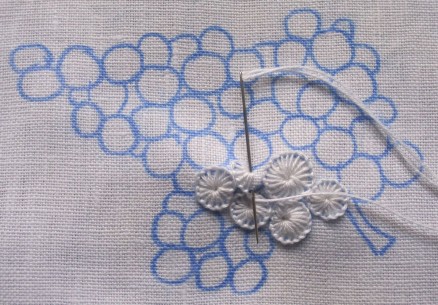
Small circles, here representing grapes, are perfect and easy to embroider; they can be stitched with Blanket stitch eyelets. Using this stitch facilitates cutting out the shape later, because it does not need to be secured with an additional Blanket stitch edge.

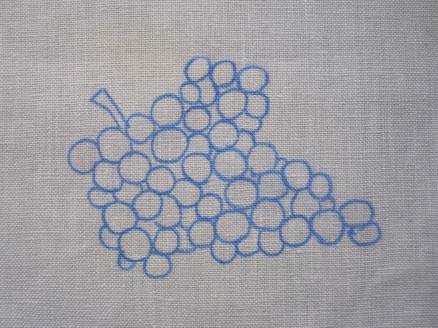
Wein_04First, the line drawing has to be transferred onto paper using an iron transfer pencil. Please note, that the shape ends up mirrored when ironed to the linen.

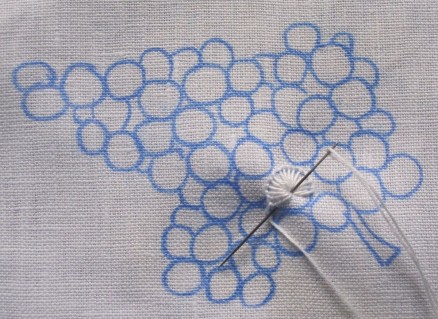
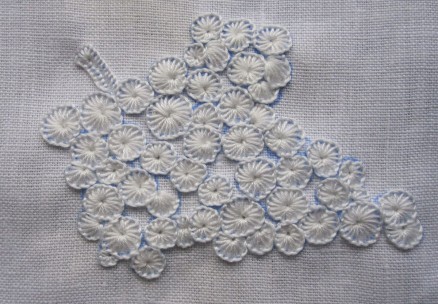
Wein_05On Weddigen linen, 20/cm thread count, Blanket stitch eyelets, using Coton à broder No. 25 were worked into the circles.

Wein_06All circles were filled. Small areas between “grapes” remain free, but partial “grapes” are embroidered.

Wein_07The stem is outlined with Blanket stitches.

Wein_08The leaf shape needs a Blanket stitch edge for securing the fabric from fraying.
So, on Weddigen linen, 20/cm thread count, Coral Knot stitches are worked along the inside line using Coton à broder No. 20.
Using Coton à broder No. 20 for both, Chain stitches are worked a small distance outside the Coral Knot stitches. The Chain stitches are covered with densely worked Blanket stitches.
Using Coton à broder No. 30 Chain stitches are worked directly inside the Coral Knot stitches.

Wein_09The shape was filled with the Limet filling pattern 469.
Many other filling patterns are also suitable for this motif. I wanted to achieve a delicate appearing pattern, so I chose fine linen.

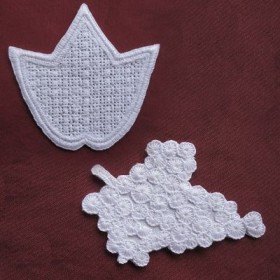
Wein_10After finishing, the embroidered piece was washed (boiled), starched and ironed. Then, the leaf and the bunch of grapes were cut. For cutting the small curves of the grapes, a sharp nail or very delicate embroidery scissors can help. If needed, such closely trimmed embroidery can be washed and ironed – quick and easy – at any time, but never spun in a washing machine!

Wein_11

Tablecloth for all Seasons – September: Mushrooms

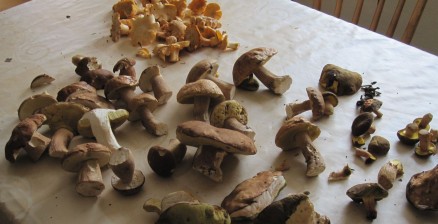
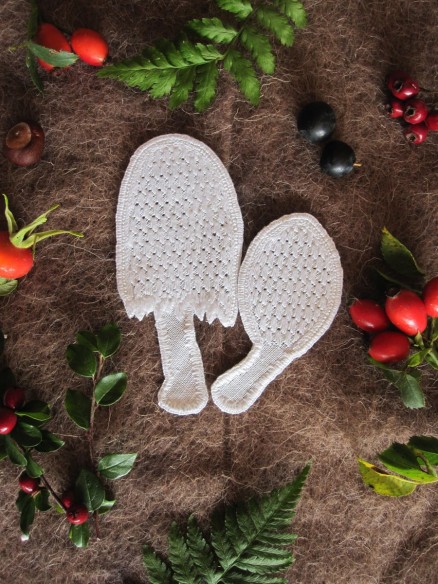
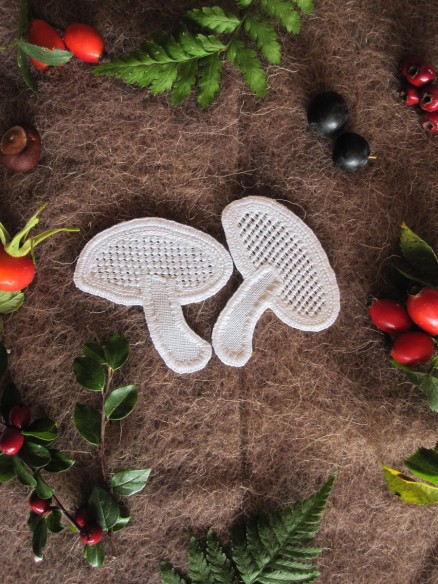
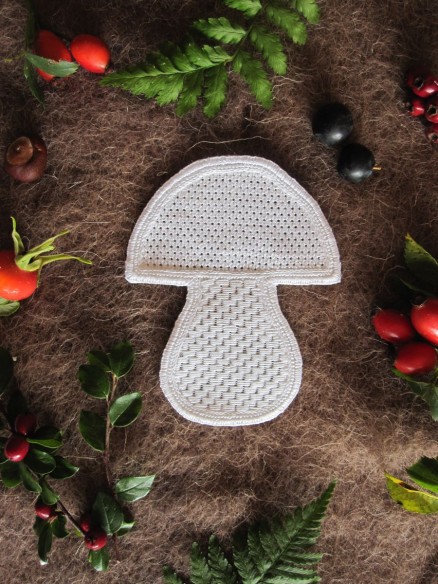
Currently, our forests are full of magnificent – edible and inedible – mushrooms. Nature provides a treasure trove of different models for me to draw.
Pilz | mushroom 1
So, for September, I have chosen mushrooms.

2014-09-20_pdf

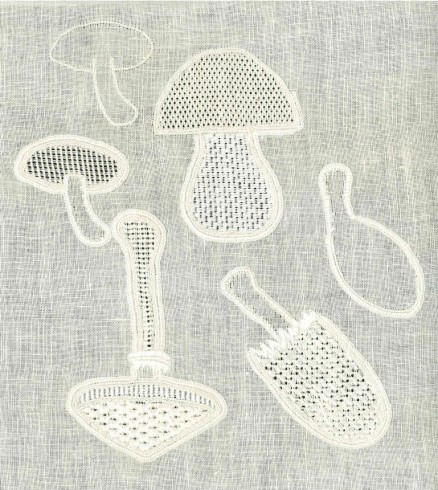
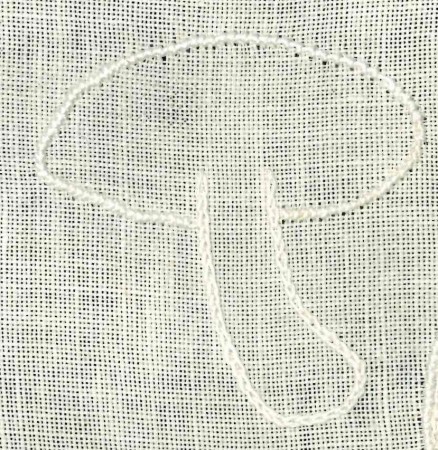
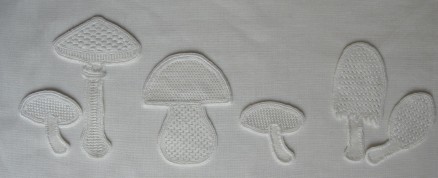
Pilz | mushroom 7First, the line drawing has to be transferred onto paper using an iron transfer pencil and then transferred to the linen. Because the pieces are cut out later and to not waste linen, the motifs can be placed on the linen close together and randomly. Some motifs will be placed on the straight of grain and others placed on the diagonal – depending on the intended filling pattern.

Pilz | mushroom 8On Weddigen linen, 13.5/cm thread count, Coral Knot stitches are worked along some lines using Coton à broder No. 16. All sections of a motif that will get a filling pattern later, are outlined with Coral Knot stitches.

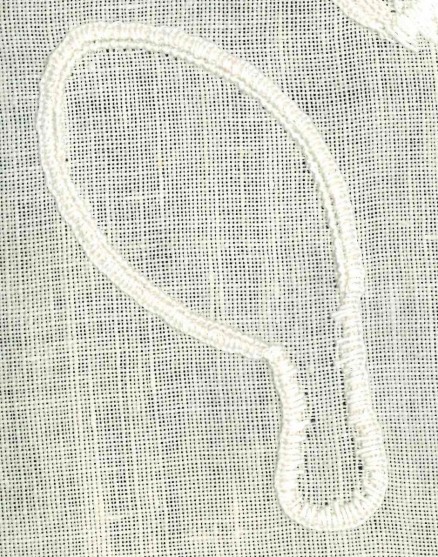
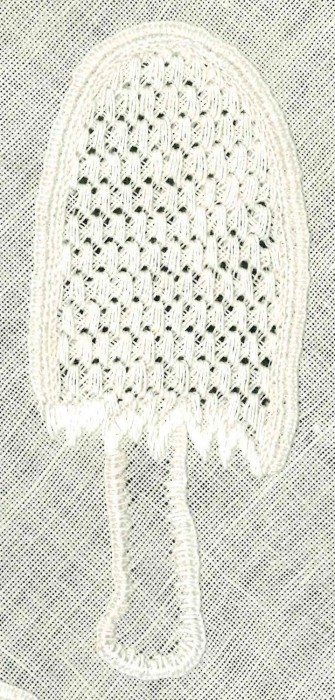
Pilz | mushroom 9Using Coton à broder No. 20 Chain stitches are worked a small distance outside the Coral Knot stitches. The Chain stitches are covered with densely worked Blanket stitches. Because the stems of the mushrooms are often very small, they are not filled with patterns; outline the stems with Chain stitches and cover them with Blanket stitches. Around the stems, the legs of the Blanket stitches should be differing lengths.

Pilz | mushroom 10Using Coton à broder No. 30 Chain stitches are worked directly inside the Coral Knot stitches.
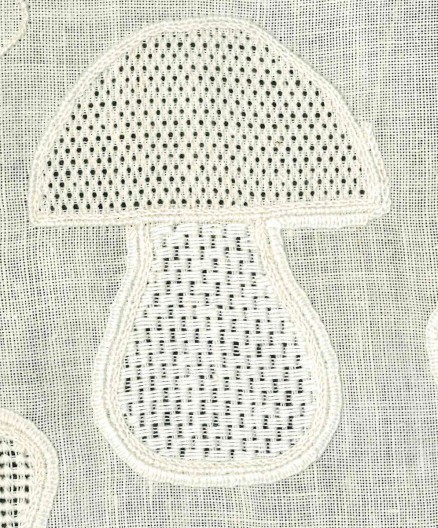
In the mushroom above, the sections of the mushroom were filled with matching patterns – see Limetrosen 1, Basic Principles of Schwalm Whitework, Wickelstiche.

Pilz | mushroom 11Some parts of the motif, such as the frayed bottom edge, are worked with Satin stitches.

After finishing, the embroidered pieces were washed (boiled), starched and ironed. Then, the mushrooms were cut. If needed, such closely trimmed embroidery can be washed and ironed – quick and easy – at any time, but never spun in a washing machine!

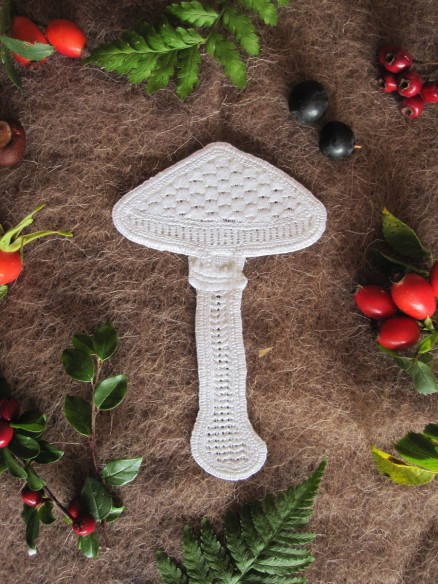
Pilz | mushroom 12Such mushrooms are nice to arrange – in groups or as a single specimen.

As already mentioned in a previous article, all these small projects are only the precursors of Schwalm whitework.

Pilz | mushroom 13

Pilz | mushroom 14

Pilz | mushroom 15

Pilz | mushroom 16

Pilz | mushroom 17

Tablecloth for all Seasons – August: Sunflowers

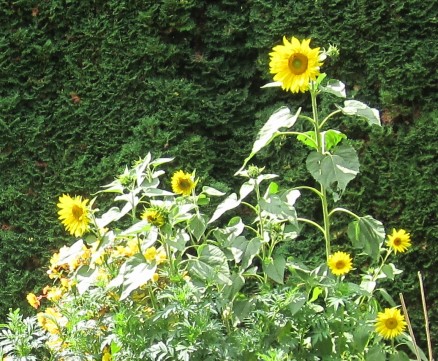
In August the summer climaxes. At this pinnacle, nature once again puts on a show with beautiful flowers of endless diversity. Sunflowers can be seen everywhere – in some places entire fields are turned into golden carpets, and in others a single tall specimen reaches to the sky.
Sonnenblume | sunflower aSo, I chose the sunflower for August.
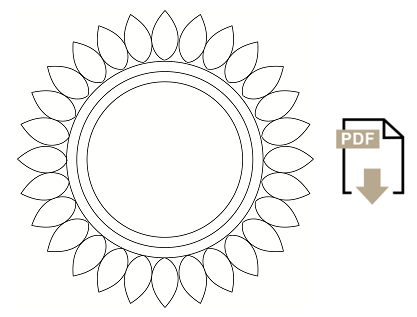
2014-08-30_pdf
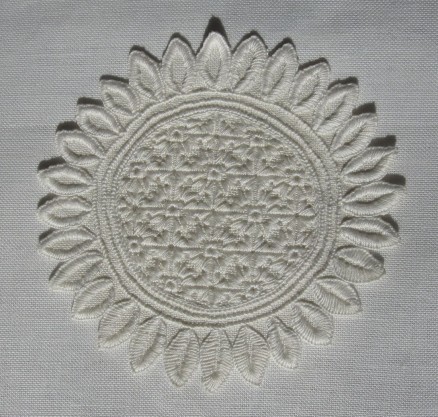
Originally the shape measures 14 cm in diameter.
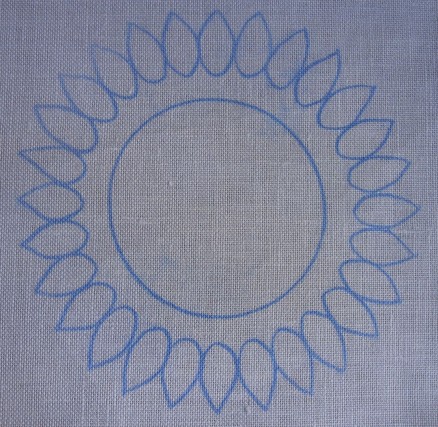
Sonnenblume | sunflower cFirst the line drawing has to be transferred onto paper using an iron transfer pencil. The circle turns out better if one uses a round template, pair of compasses, or a glass rim of the correct size.
Depending on the desired decoration at the inner edge of the petals, one or more rings can be arranged. If using more than one ring, the area of the innermost ring can be embellished with a filling pattern. The space between the outermost ring and the petals can remain unembroidered.
However, the area between the outer and inner rings can be filled with ornamental stitches (for example curved lines or “Kerrercher”) or with a narrow filling pattern (for example Cable stitch). An idea is to use three (or more) rings and to cover these with Coral Knot stitches. Or, perhaps, only the outside ring is used so to accommodate a spacious filling pattern.
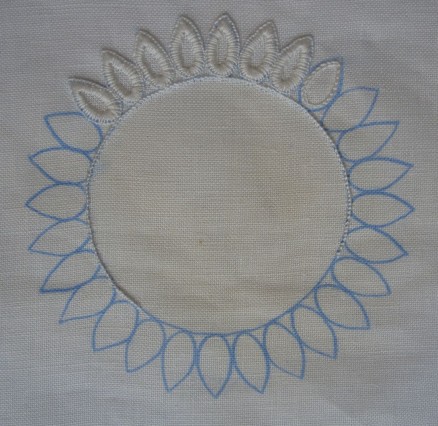
Sonnenblume | sunflower dOn Weddigen linen, 13.5/cm thread count, Coral Knot stitches were worked along the circle line(s) using Coton à broder No. 16. Using Coton à broder No. 20 Chain stitches were worked a small distance inside the lines of the petals. The Chain stitches were covered with densely worked Blanket stitches, also using Coton à broder No. 20. So that the blanket stitches do not get too long, a small space in the middle of the petal remains unembroidered.

Using Coton à broder No. 30 Chain stitches were worked directly inside the Coral Knot stitches.
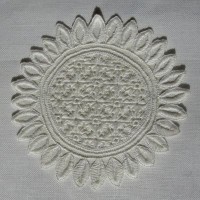
The shape was filled with the pattern “sunflowers” (Limetrosen II, pages 86-89). Many other filling patterns are also suitable for this motif.
Sonnenblume | sunflower eAfter finishing, the embroidered piece was washed (boiled), starched and ironed. Then, the sunflower was cut. If needed, such closely trimmed embroidery can be washed and ironed – quick and easy – at any time, but never spun in a washing machine!
Sonnenblume | sunflower fAlready with four or five such sunflowers one can establish a nice decoration.
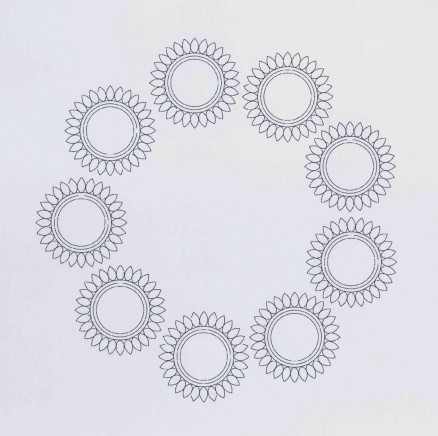
Sonnenblume | sunflower gUsing some more sunflowers one can get a small wreath.
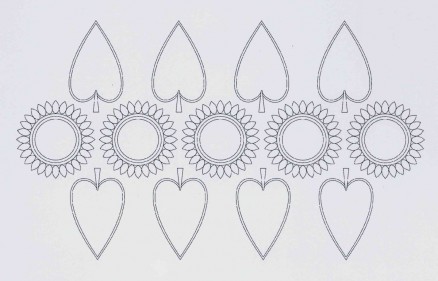
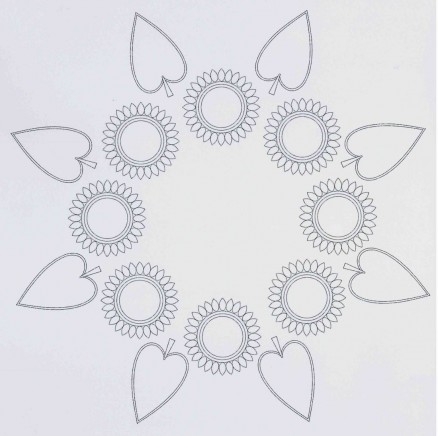
Sonnenblume | sunflower hCombined with leaves in a band or a wreath looks even prettier.
Sonnenblume | sunflower iAlso small groups can be nicely arranged.