Schwalm Whitework and Blue (3)

Leaned on embroidery that was worked on blue striped linen, there was also work on white striped linen that was stitched with blue thread.

In the example shown here, three graduated shades of blue were used –

dark blue for the Coral Knot stitches and the small leaves,

medium blue for the half-eyelet scallops and the large leaves

and light blue mainly for the filling patterns.

Embroidering the filling patterns in colour is very unusual. You have to have a lot of experience to do this, because every small, not completely cleanly worked area would immediately catch the eye.

The table cloth shown here is made from hand-woven striped linen. This linen was usually only woven in widths of around 80 cm. So here two lengths of linen were joined.

Schwalm Whitework and Blue (2)

Matching embroideries that were worked on blue striped linen, other pieces were also embroidered, but then often on white linen.
A particularly beautiful example is the counterpart to the table runner from 1993.

Christa Waldmann has embroidered a family tree as a wall hanging, using the same blue linen thread for the outline stitches and the surface embroidery.

Different withdrawn thread patterns

as well as very varied and

imaginative patterns that come from the early Schwalm whitework were worked into the motifs.

The name of the embroiderer can be found in the motifs.

The year of creation was placed at the bottom – with the individual digits separated by typical small Schwalm Cross stitch elements.

A 4-unit needle-weaving band is worked at the edge.

Schwalm Whitework and Blue (1)

Beside white linen also linen with different blue stripes used to be woven by hand in the Schwalm. Depending on the fineness, it served as sack or wagon cloth. Remainders of the finer linen are often used for embroidery these days.

These are then worked either with white threads

or with white for the filling patterns and a matching shade of blue for the outline stitches and the surface embroidery.

If the linen is woven finely enough, withdrawn filling patterns are worked into the motifs.

Slightly coarser linen is often embroidered with with stitches lying on top of the fabric – patterns that come from the Early Schwalm Whitework.

This offers another interesting variant of Schwälm Whitework.

A Design for Many Different Filling Patterns

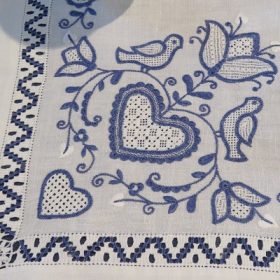
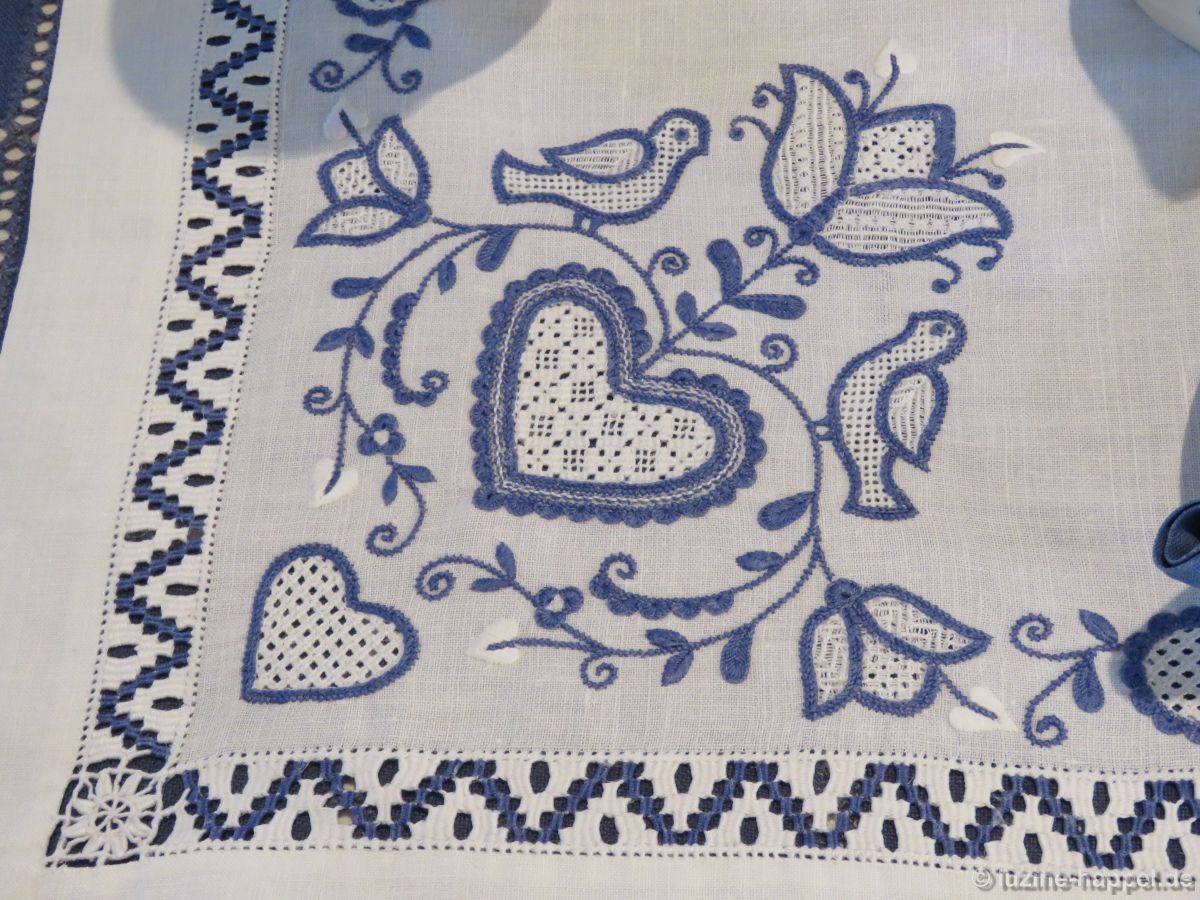
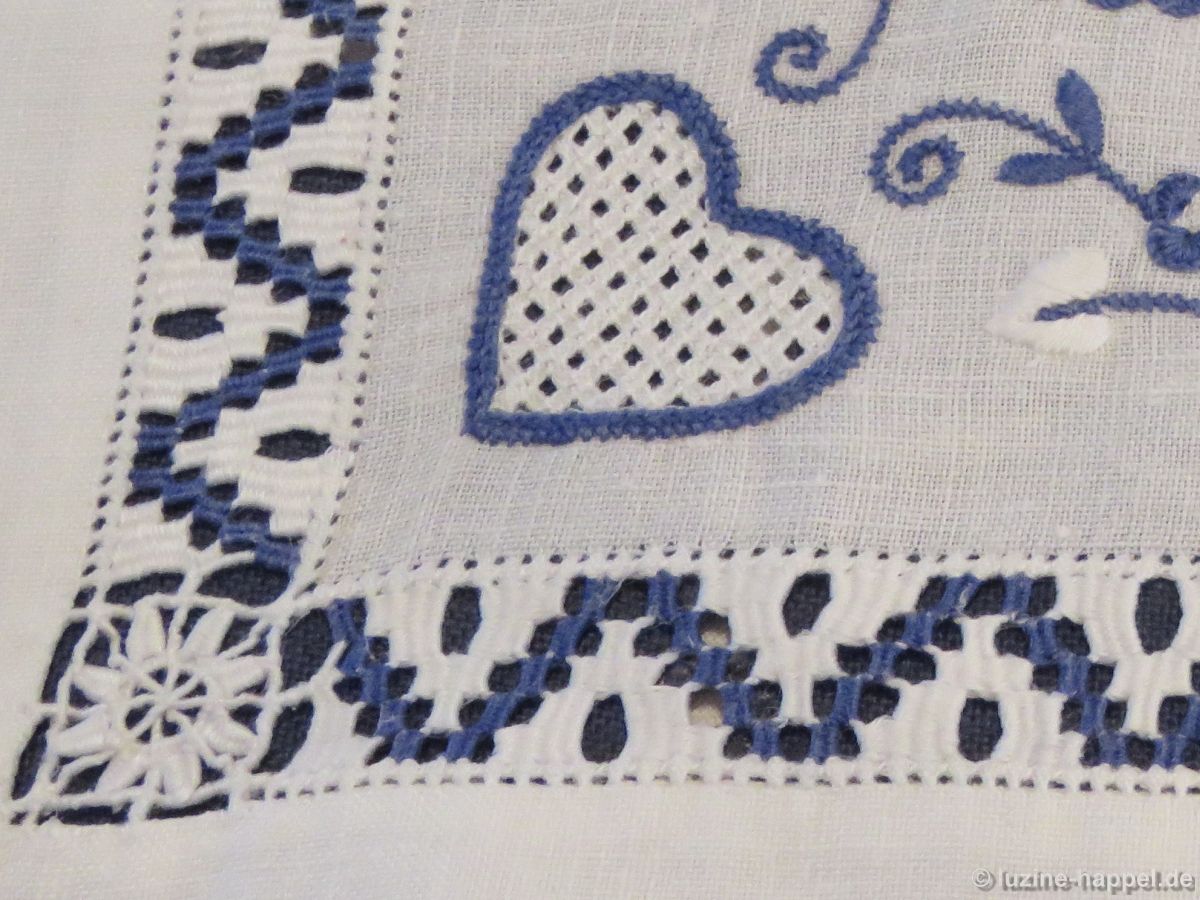
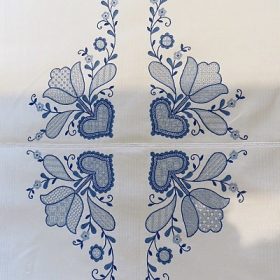
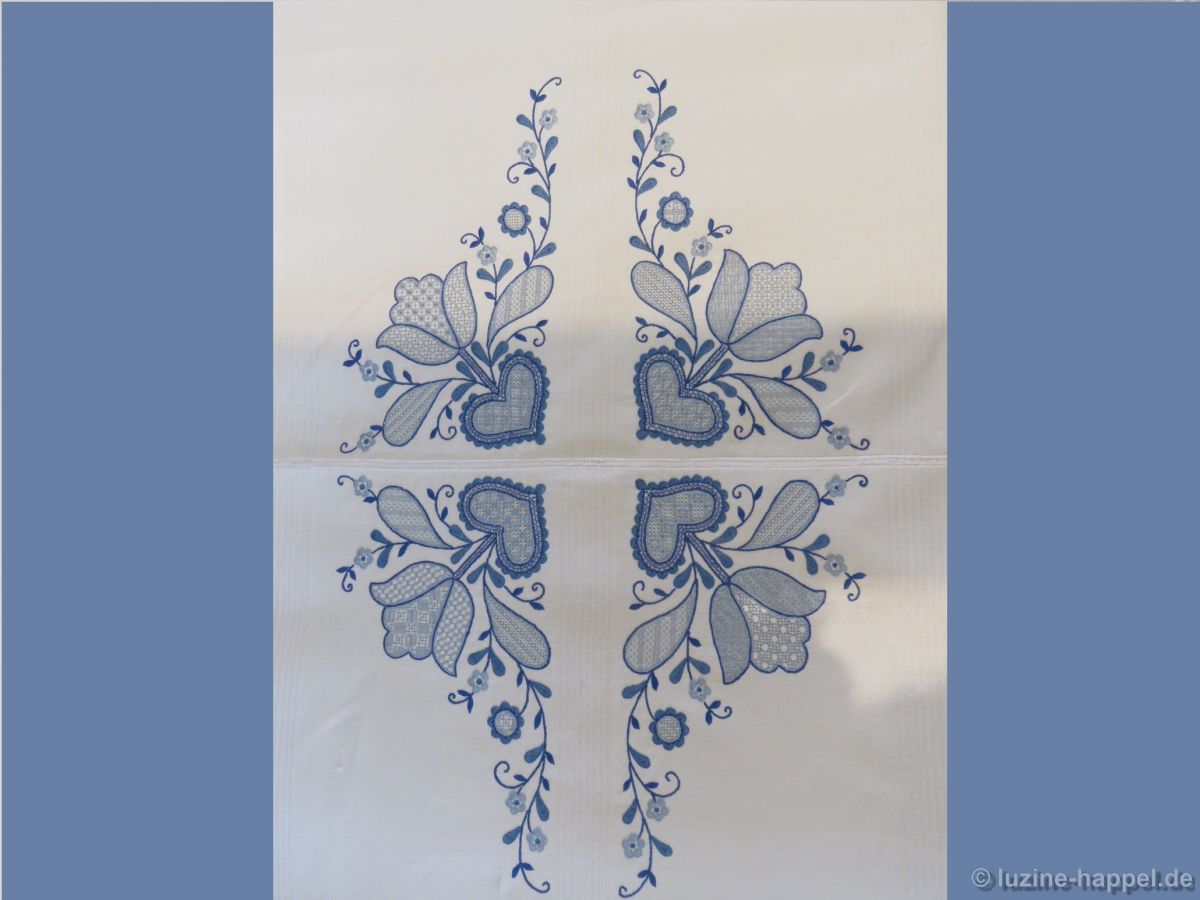
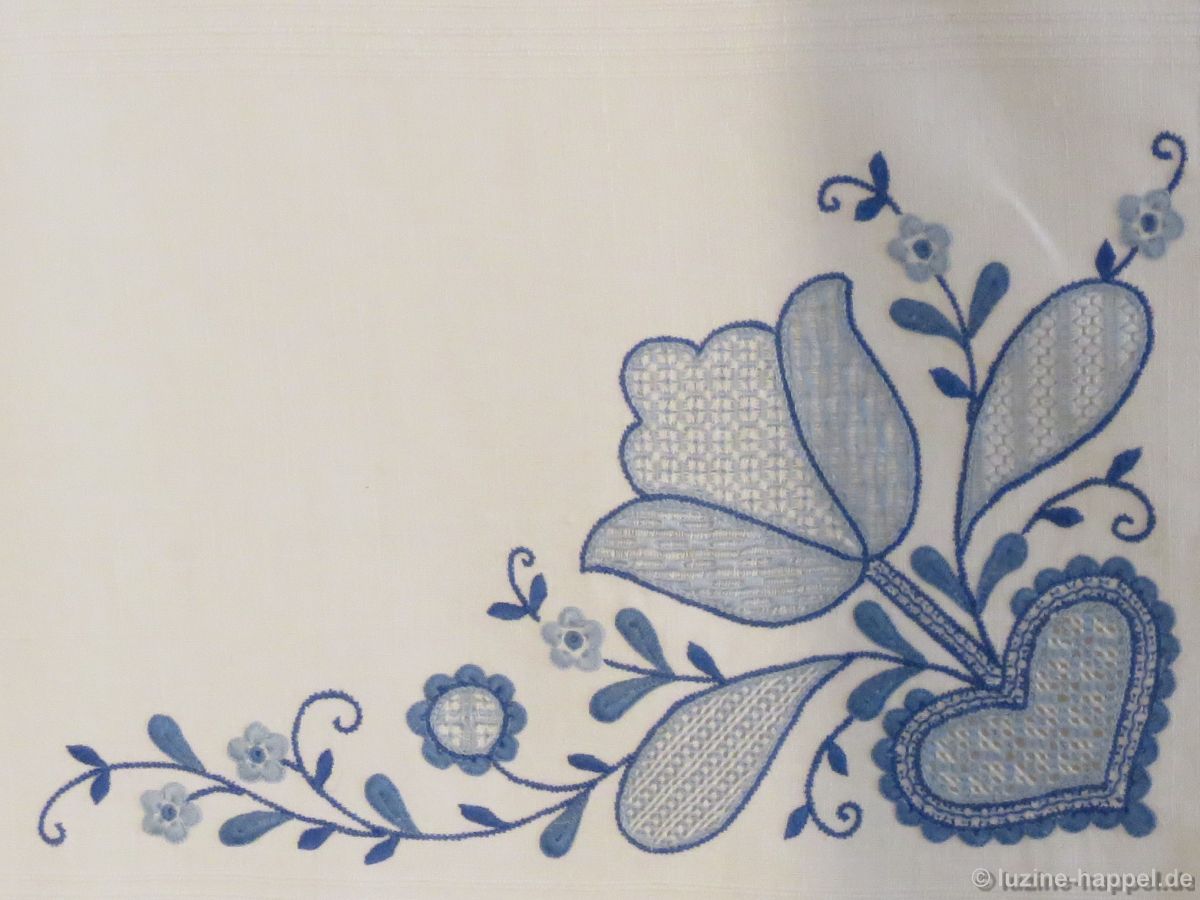
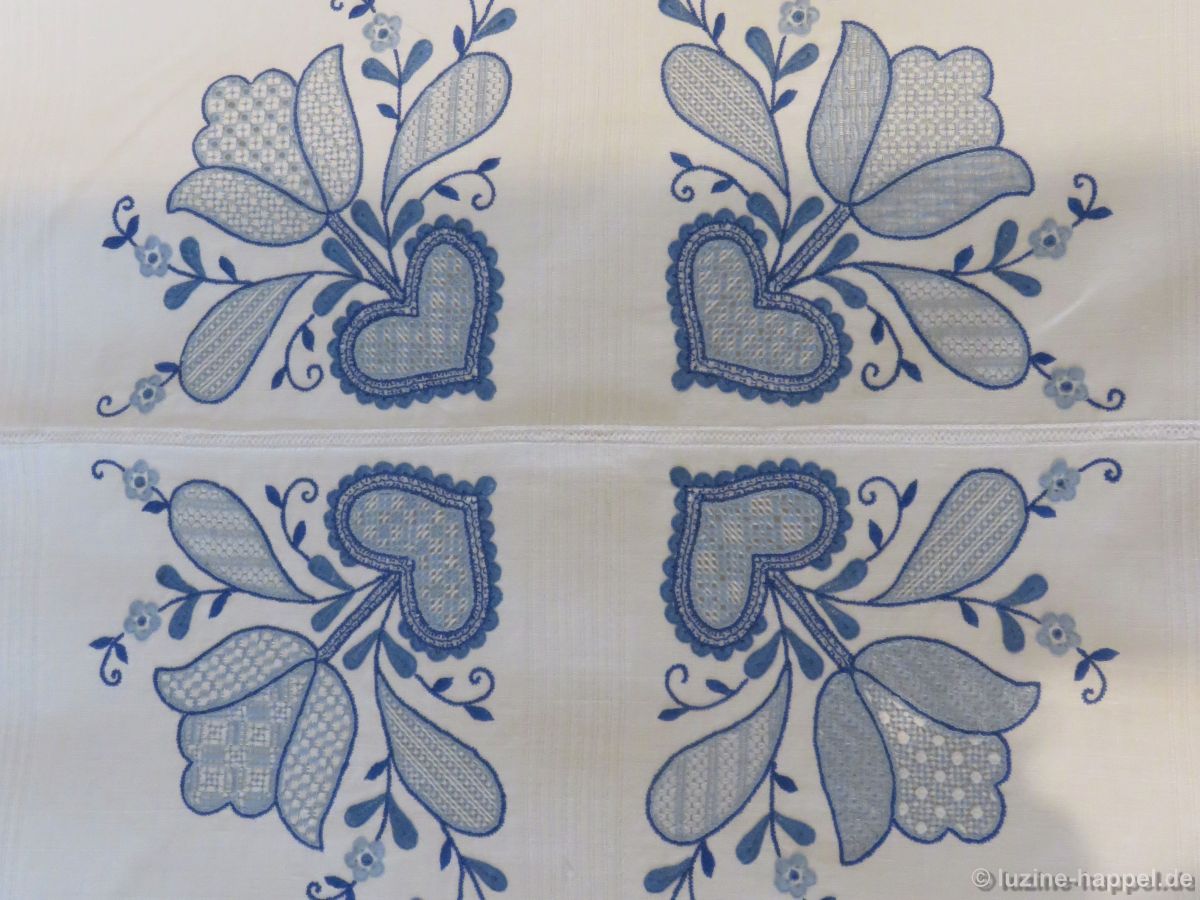
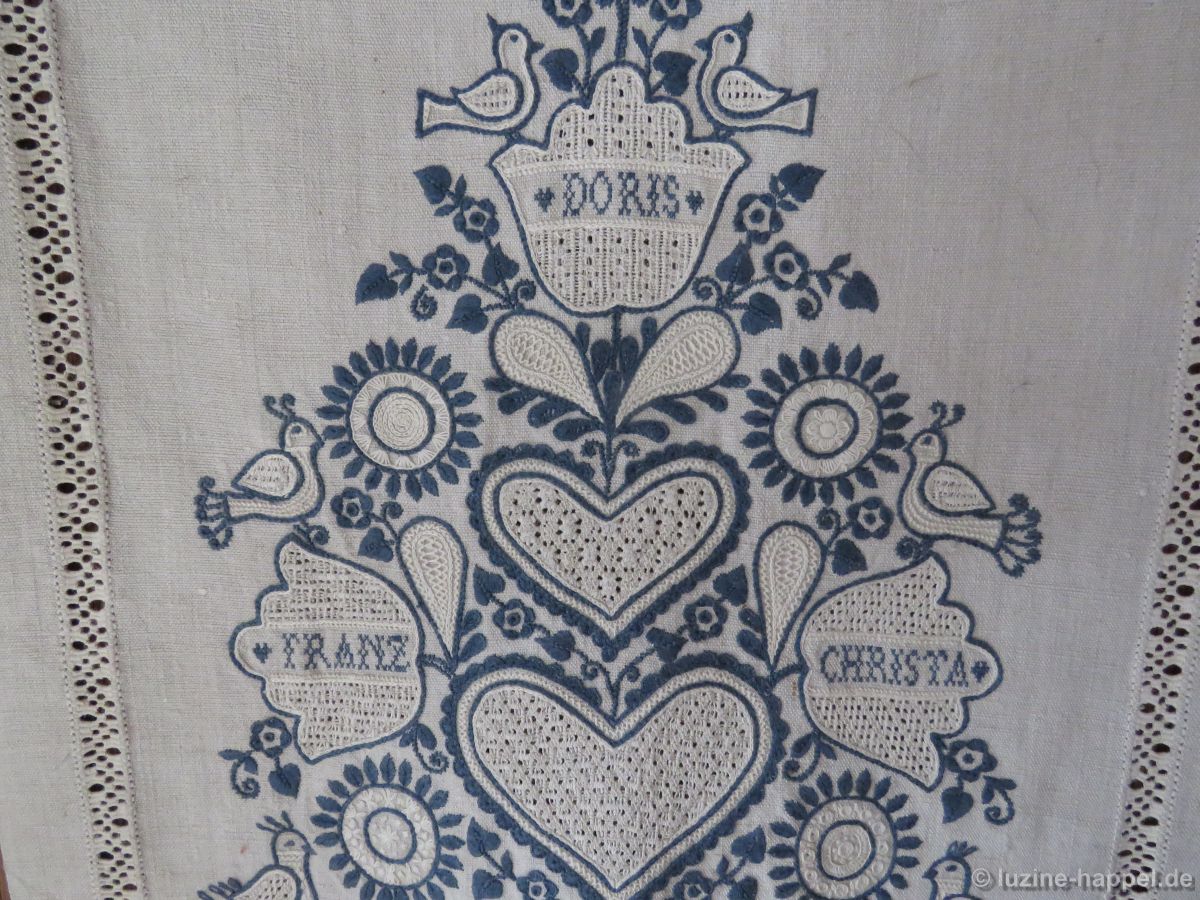
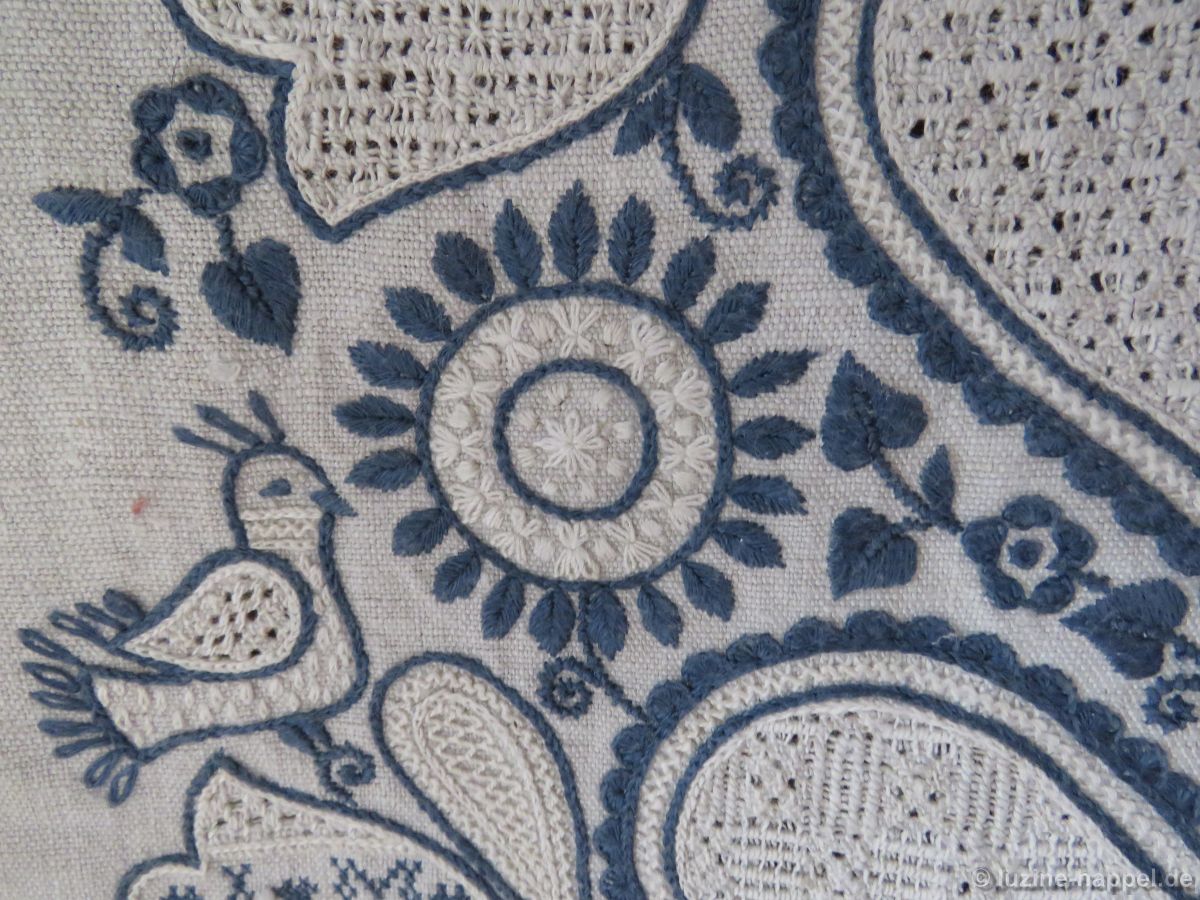
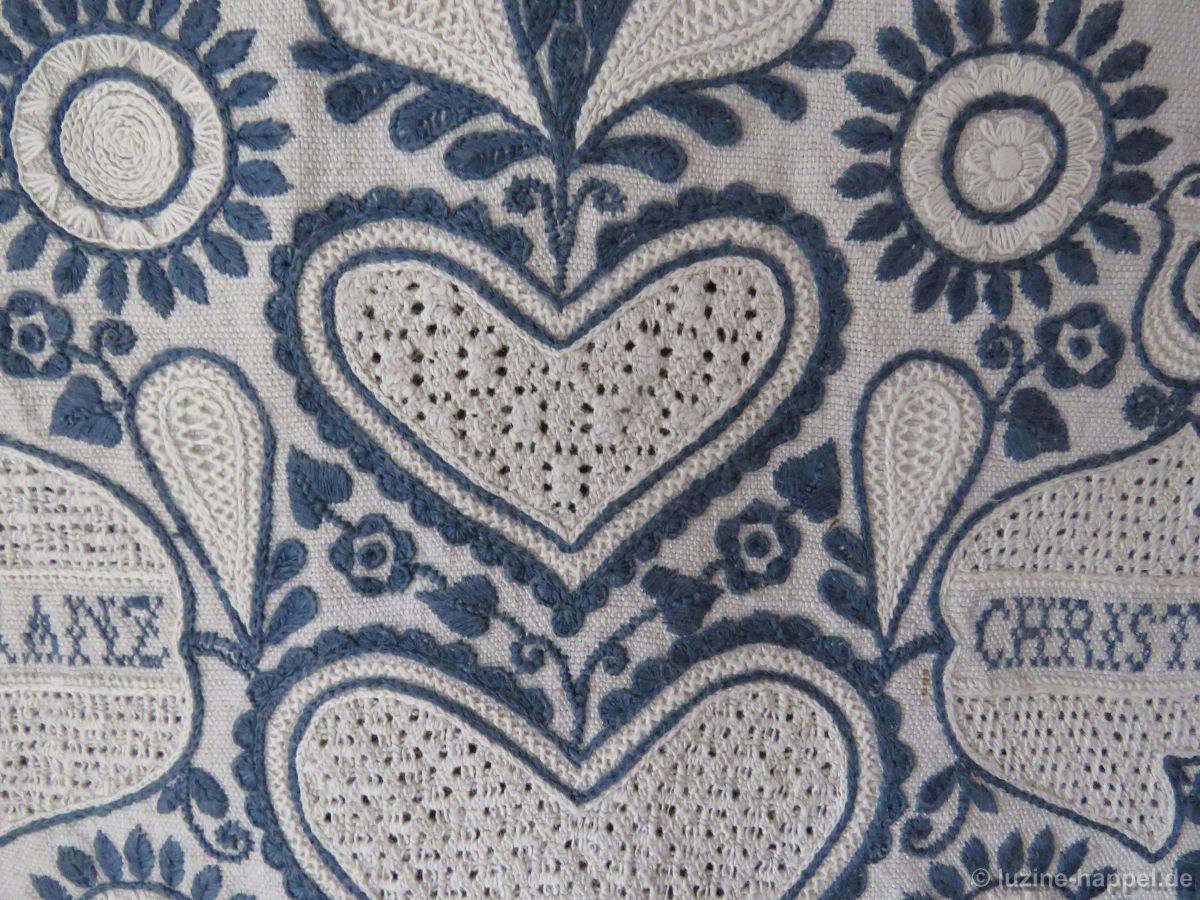
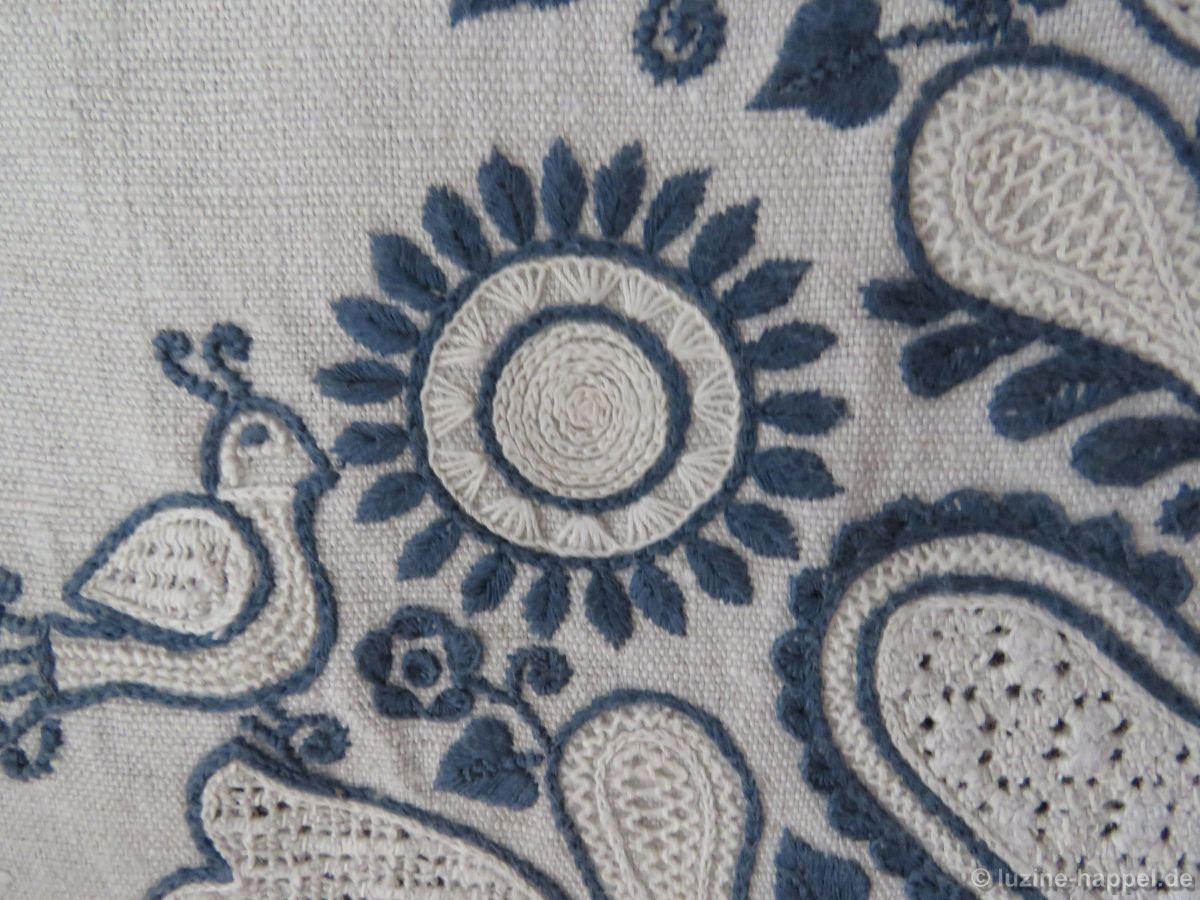
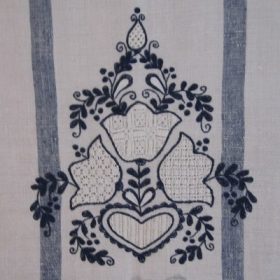
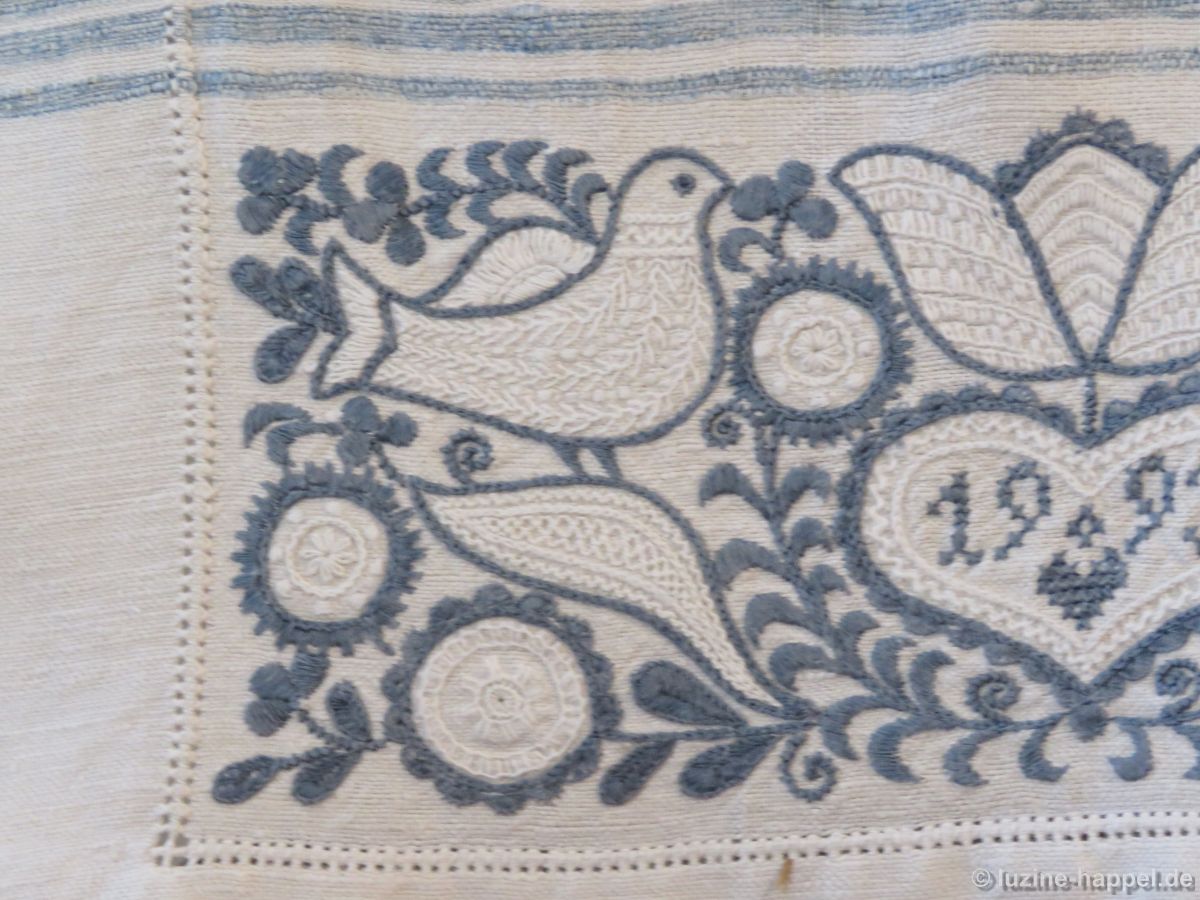
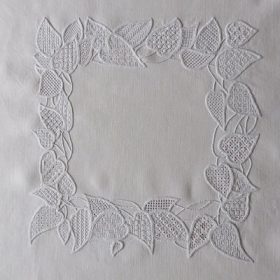
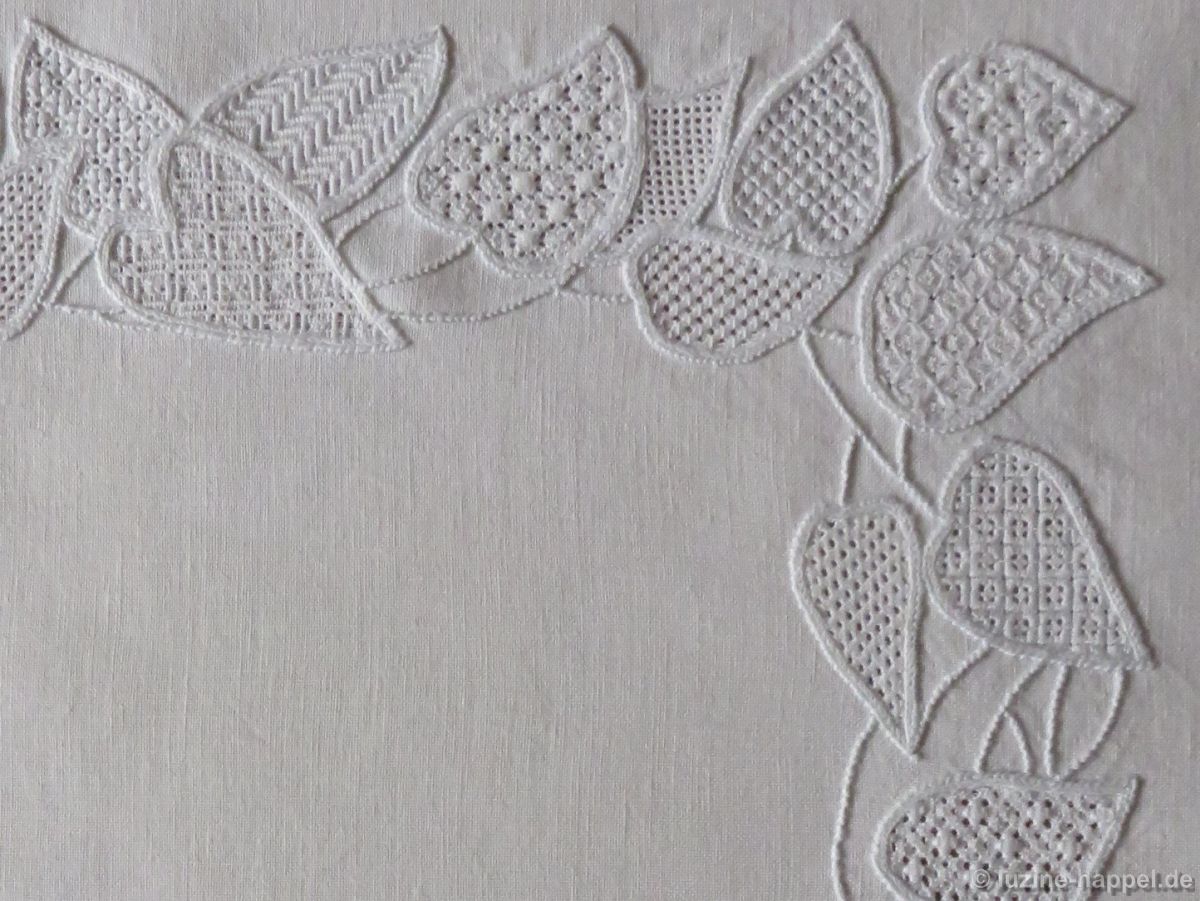
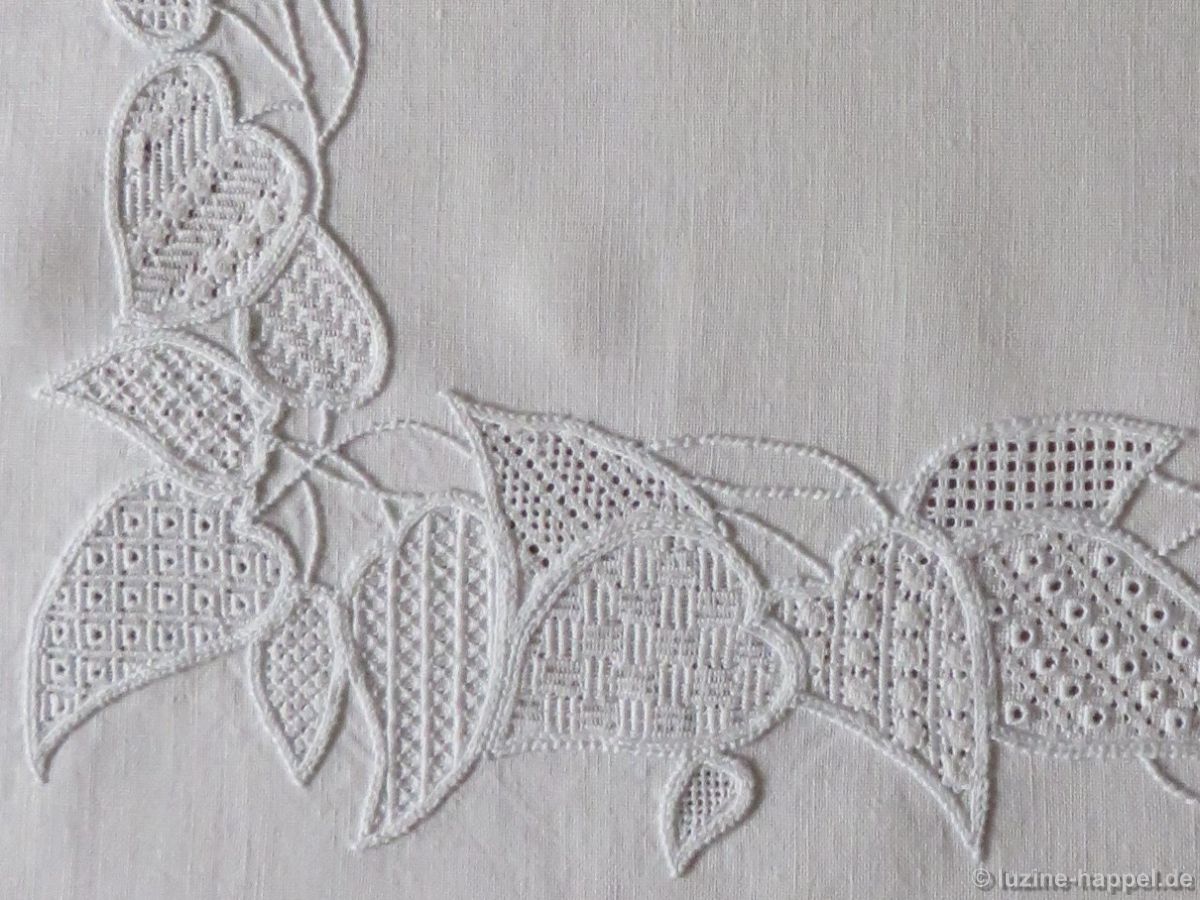
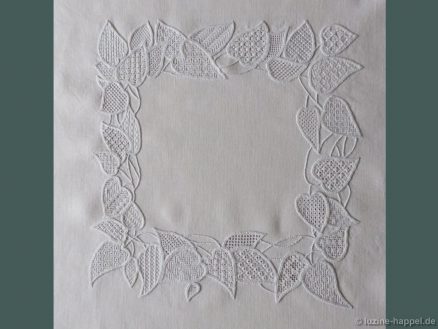
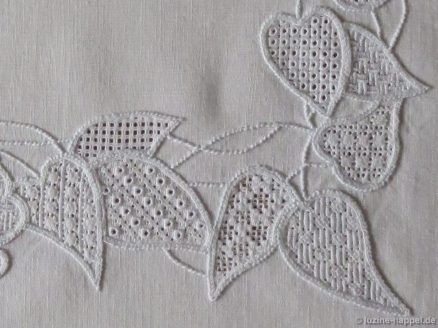
Ann Kennon from Australia is a member of the New South Wales Embroiderers’ Guild. She sent me a photo of her recently completed beautiful work. I was given permission to feature her embroidery on my blog because I think you too will be impressed by the choice of all the filling patterns and how they are assigned to the different areas. The distribution of denser and lighter patterns was very balanced and made the project a masterpiece.

She wrote:

“In March last year I ordered and received from you a pre-transferred linen – a “wreath” of leaves. I decided to give myself a challenge and stitch a different filling pattern in each leaf. This, of course, meant that I had to find 38 different patterns. My books provided a number, but the filling patterns on your blog, and in the Roserich book I bought from you, were invaluable, and make up almost half of the patterns I used.”

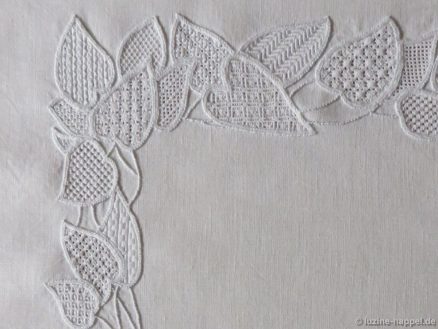
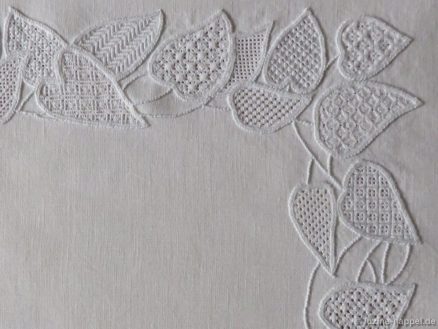
Can you figure out the patterns posted on my blog?

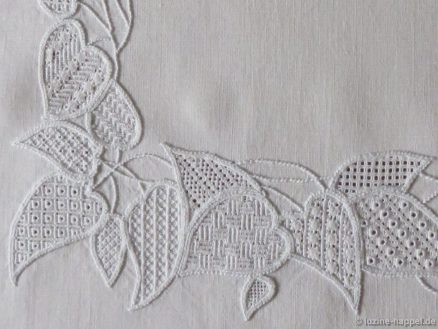
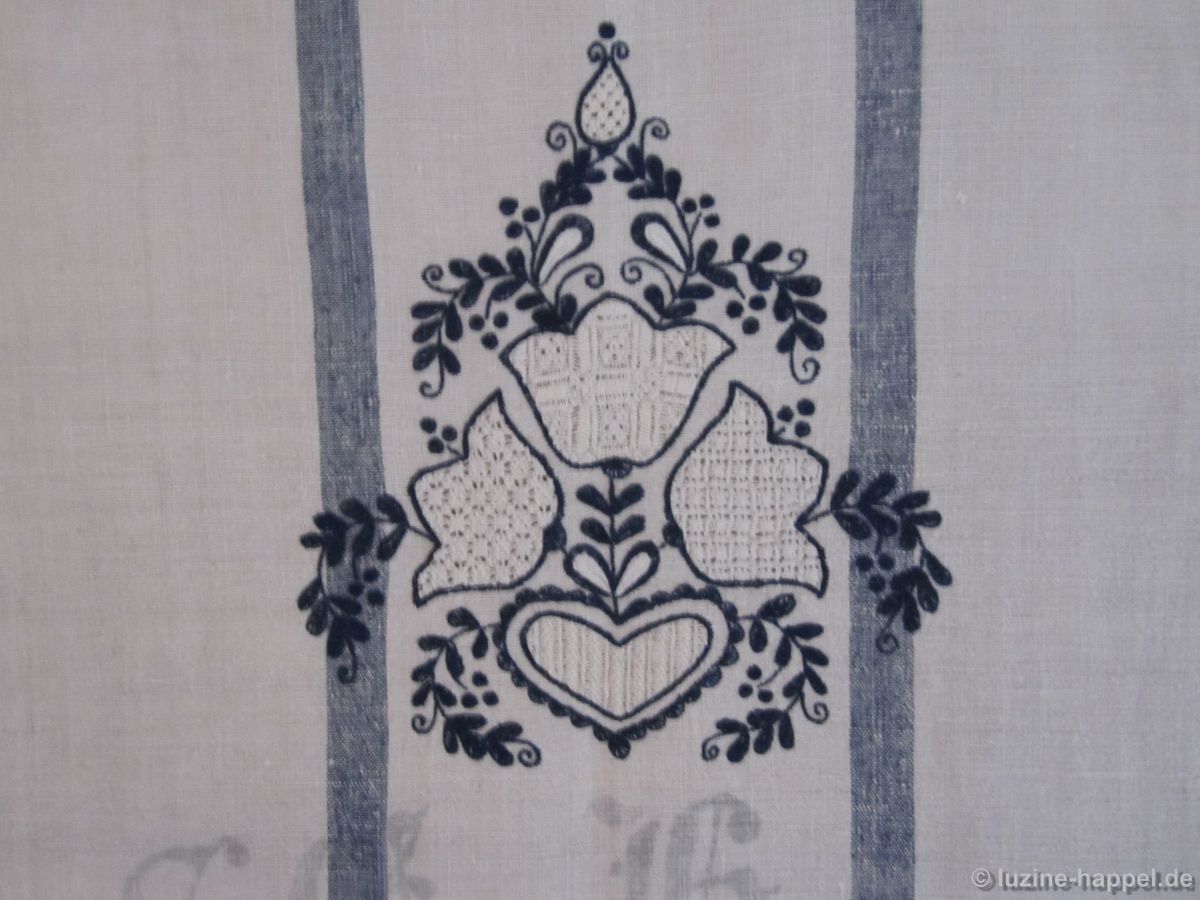
No traces of the blue outlines can be seen in the photos. Asked how she washed out the colour, Ann replied:

“I did find it difficult to remove the pre-printed design. First, as you had recommended in your blog, and using an appropriate amount of the washing powder you sent, I soaked the embroidery for 2 days, This made no impression on the pre-printing, so I took the fabric out, made up another similar solution with more of the washing powder and soaked the fabric again for another two days, with much the same result.  Having washed that solution out of the fabric, I then put it in a soaking solution using Vanish Napisan, which is an oxygen-based bleach (no chlorine).  After another 2 days the pre-printing was lighter, so I washed the first solution out, made up another and soaked the fabric again. After this there were only a few small patches where the blue was still showing, so I made up the concentrated paste recommended on the container. This was only to stay on the fabric for 5 minutes.  After the 5 minutes there were only small traces of the blue, so I washed the fabric under running water, then soaked it in clean water to ensure that all the bleach was removed. The traces are no longer visible – it all looks white.

It might have been better to put it in the Vanish Napisan from the beginning, but I don’t like using bleach (even the oxygen-based one) if normal washing does the trick.“

I am aware that unfortunately it is difficult to wash out the pre-printed outlines. In the meantime I have used many contacts to find out if there are better options. I learned from French embroiderers who use other powders to print their designs that they also use sodium percarbonate (= the main active ingredient in many household detergents with a bleaching effect, which are advertised with terms such as “active oxygen” or the prefix “Oxi-“) to remove the colour of the lines. They also told me about their experience that washing out becomes more and more time-consuming the older the outlines are.

At the moment I am testing different powder compositions for their durability and washability. I will report the result later.

Sofa Cushion Cover 2

I now have a wide variety of designs on the subject of „pomegranates and birds“. Visitors to my exhibition have already been able to take a close look at some of the embroidered items.

Christa Waldmann designed a second pattern for me to match the pattern of sofa cushion cover 1.

She skillfully arranged the branches with the pomegranate blossom buds so intertwined that the structure forms a nest on which the bird perches. The ripe pomegranates with the tempting fruits are close enough to be pecked at.

This time I used 17/cm count handwoven linen. The many satin stitches can be embroidered particularly well on the very dense fabric. The pattern was transferred using an iron-on pen.

The thicker stems were embroidered with Satin stitches, which first became wide and then simple Stem stitches. The motifs were surrounded with Stem stitches.

Only the motif areas of the bird were traced with wrapped Chain stitches.

The feather dress was modeled with Blanket stitches.

The eye has been outlined with wrapped backstitching

and the pupil filled with Satin stitches. The beak was also represented by Satin stitches.

The slightly larger leaves were designed as divided leaves.

The pomegranate blossom buds were first given a center Blanket stitch eyelet and then – working from the outside in – filled with a Satin stitches using two strands of 6-ply stranded cotton.

The braiding of the branches was then worked out with Coral Knot stitches.

The large leaves were given different filling patterns.

The pomegranate areas were filled with Diagonal Cross stitches. The large pomegranates also received an edge with a curved line pattern.

The bird’s head was decorated with Bullion stitches and Bullion knots, the bird’s back was decorated with the Limetrosen square eyelet pattern Magic Net.

The bird’s belly was filled with Wave stitches and the tail feather was given the square eyelet pattern “Federkleid (- feather dress)”. The remaining feathers were embroidered with Wing stitches.

By alternating between striking and less conspicuous filling patterns, the design could be presented well in terms of embroidery.

However, you can also use completely different filling patterns that slightly change the effect.

You can purchase both pillow patterns from me as pdf files (printout: double page) for €8.00 each.