Advent Calendar 2019 – No. 4

Little Angels (2) – Dresses and Wings

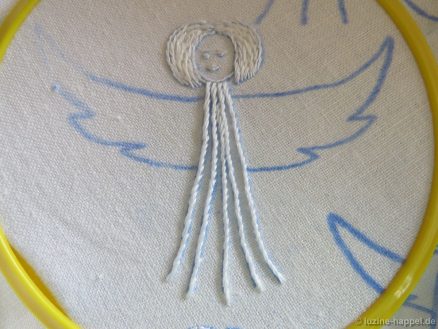
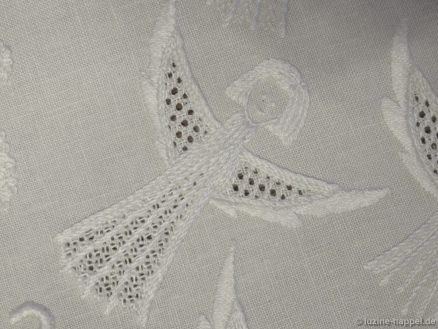
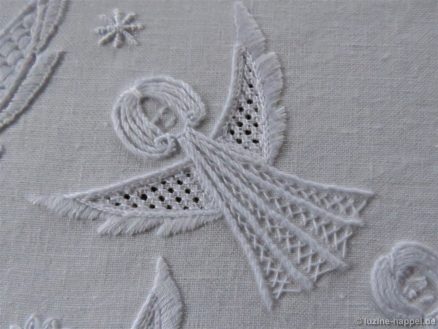
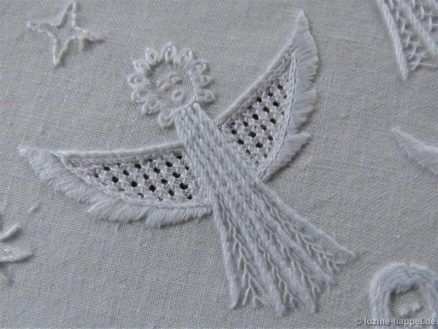
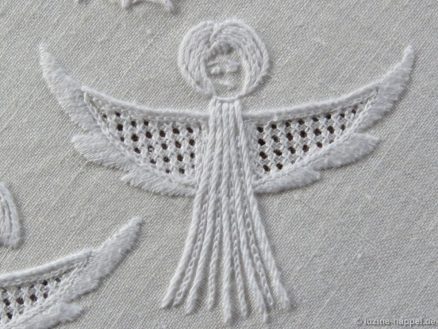
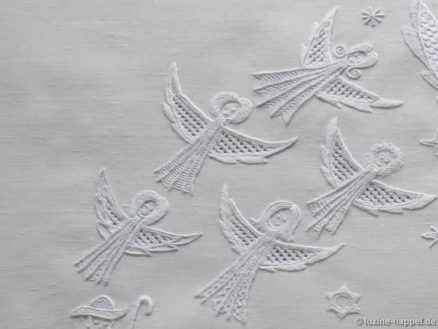
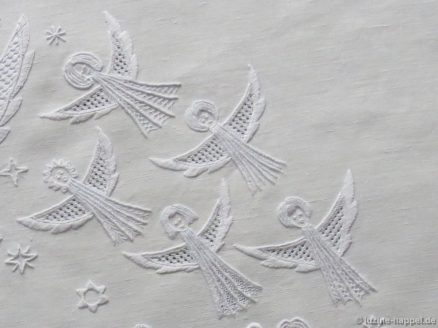
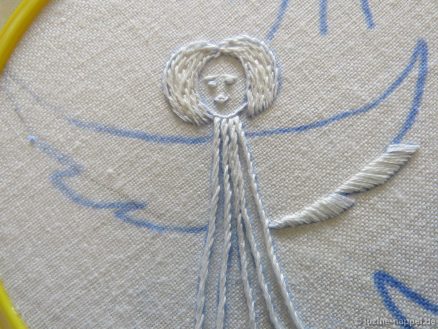
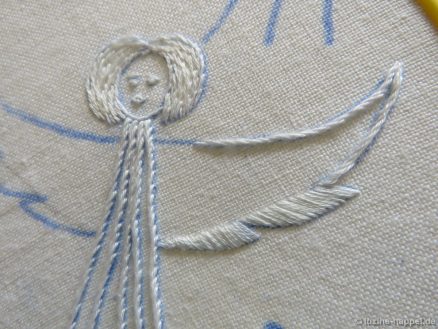
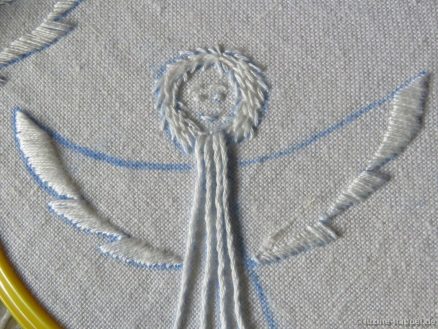
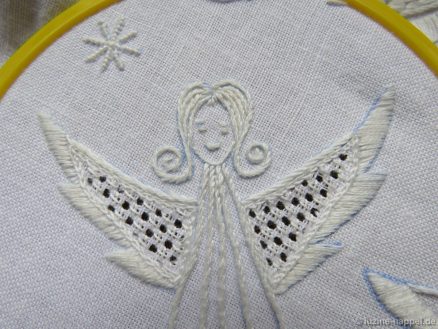
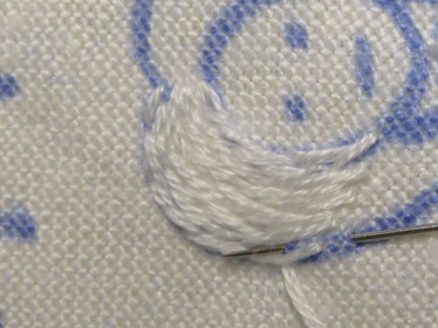
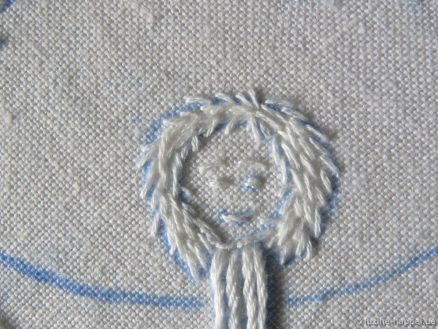
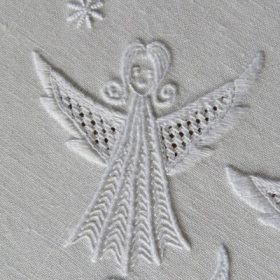
Since in this design the dress also covers the neck, the next step (after embroidering the head) is to embroider the dress. The dresses are designed like rays. To make them stand out, use coton à broder No. 16 to stitch a slanting wide Stem stitch (Early Schwalm Whitework). At the top the stitches are connected to the facial outline; at the bottom of the dress, the rows can end at different lengths to look a bit fringed. This, in my opinion, emphasizes the apparitional character of these angels.

In this project, I wanted to forego filling patterns in the dresses. But the appearance of the group of angels seemed to me to be incomplete. A discreet underlay under the rays would be good.

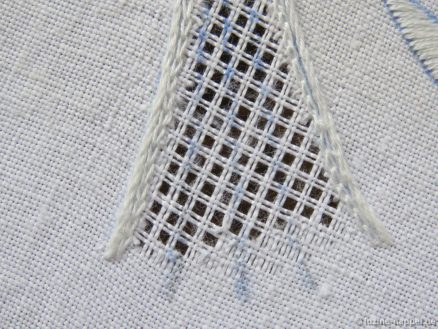
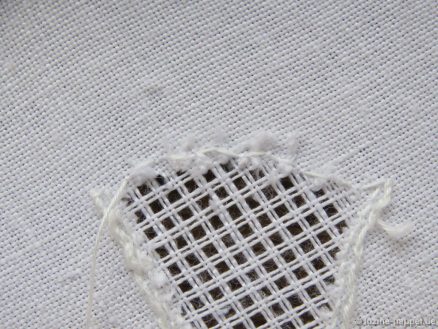
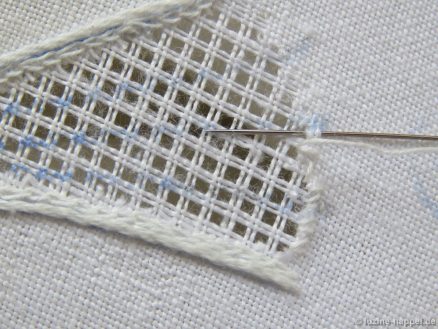
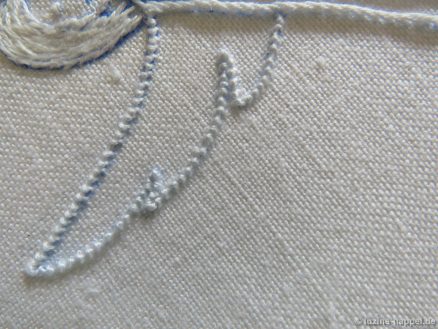
It is difficult to embroider filling patterns in such narrow shapes It works better if you first embroider only the two outer boundaries, insert the filling pattern and then embroider the other lines over the finished filling pattern. So I removed the middle rays of an angel´s dress, worked Chain stitches along the side edges, and withdrew threads (not quite to the bottom end of the dress) for an openwork pattern.

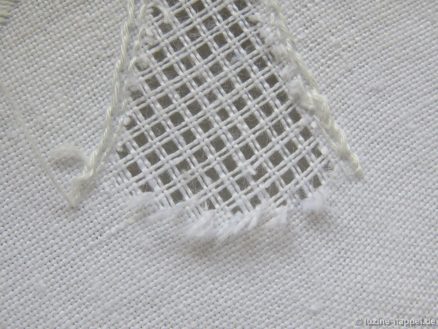
On the back the bottom thread ends were laid away from the grid,

fastened with short Running stitches,

and secured from the front with Whip stitches.

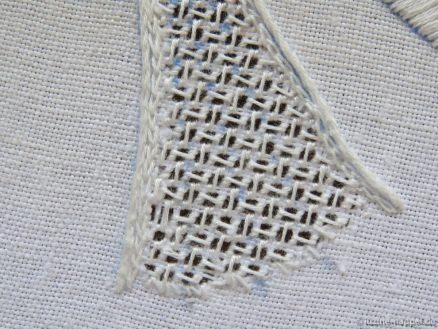
The filling pattern Diagonal Cross Filling-French Variation/”half” (Openwork Pattern Samplers) was worked.

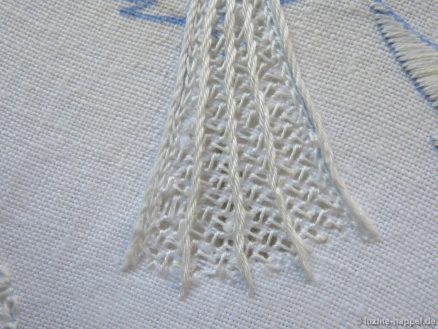
Afterwards the middle rays were embroidered again. The marking lines can be slightly seen through the pattern.

It is a little bit difficult to stitch the rays in the openwork filling pattern.

So I looked for other solutions.
Herringbone stitches – started at the bottom of the dress – are a good option.

Many other decorative stitches (Early Schwalm Whitework) are conceivable – here are some examples:

These patterns – modest in appearance – between the more prominent rays

improve the overall impression.

The outlines of the wings could be worked with Coral Knot stitches.

But because it is difficult to fill the small points with filling patterns, I marked a line separating the points from the remaining part of the wing. The points were filled with Satin stitches.

Continuing the outline of the wing, wide Stem stitches were worked (coton à broder No. 16).

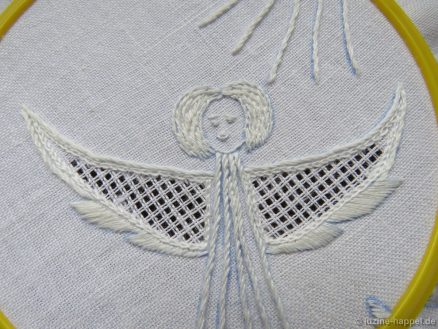
But it would be better yet to draw the separating line in a curve to the top of the wing so that the bottom edge of the wing gets three points and a complete row of Satin stitches.

Using coton à broder No. 30, Chain stitches were worked and then threads were withdrawn for an openwork pattern.

As quick and easy neutral filling pattern, Diagonal Cross Filling stitch (Openwork Pattern Samplers) , was chosen.

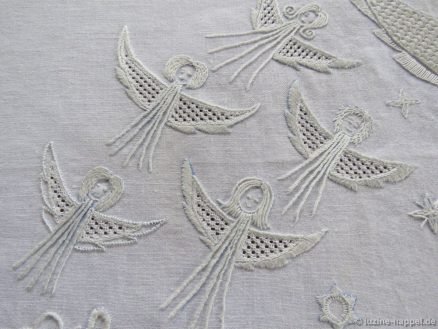
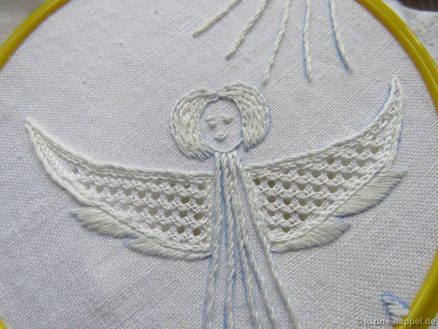
Although the wings in the image below are somewhat shorter then the wings in the picture above, one can see that the wings with three points look less sprawling then the wings with two points.

All wings of the little angels were filled with the same pattern.
Advent Calendar 2019 – No. 3

Little Angels (1) – Hairstyles and Faces

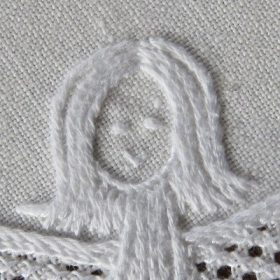
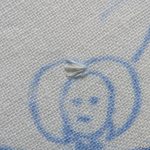
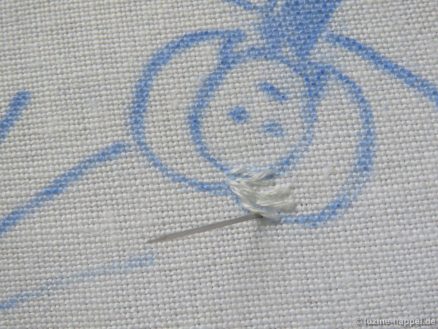
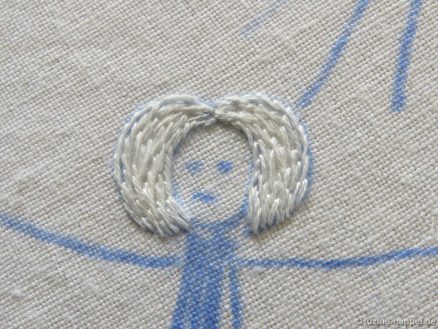
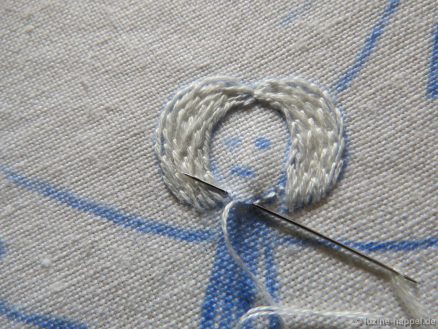
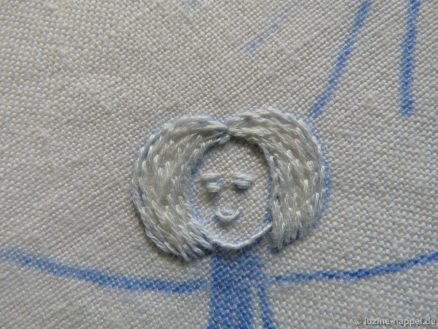
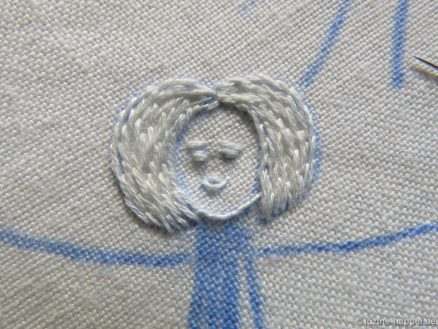
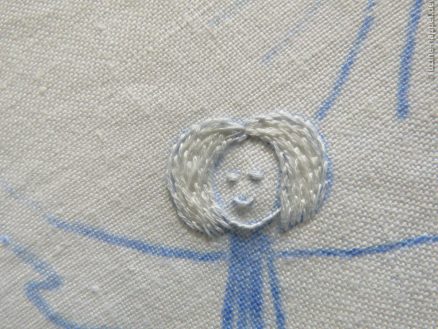
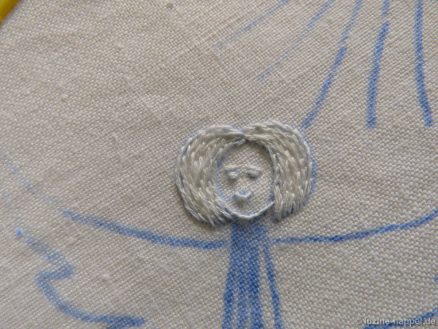
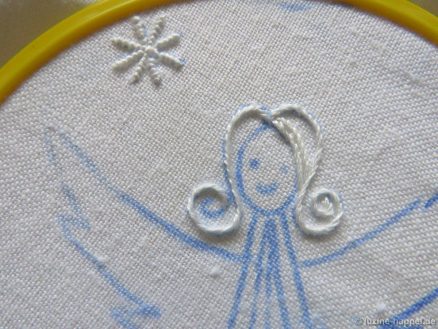
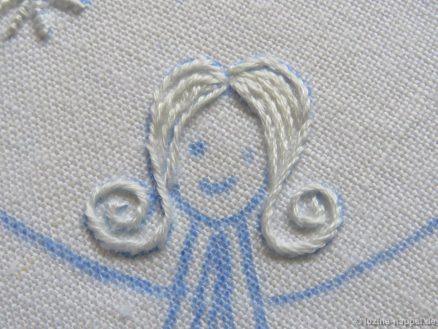
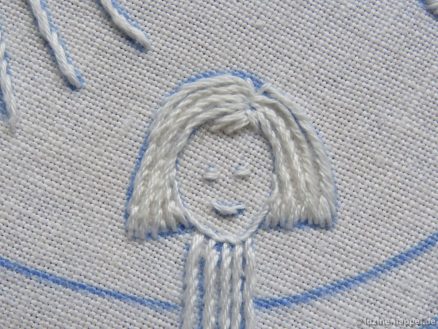
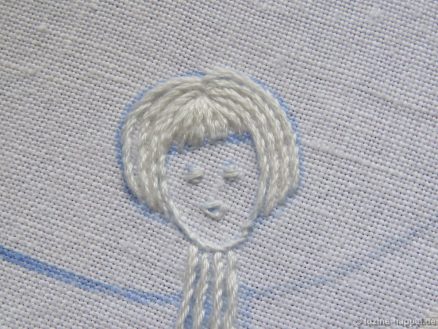
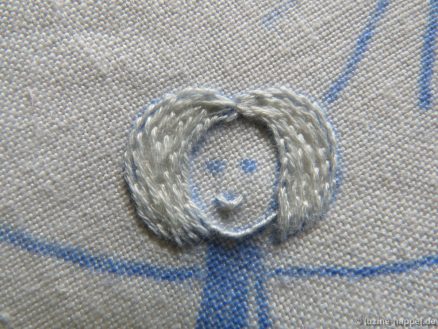
When embroidering the little angels, it makes sense to start with the hairstyle (2 strands of 6-ply stranded cotton). And depending on your preference, the angels can have the same or different hairstyles. With a parted hairstyle, the stitching should commence at the apex with alternating short and long stitches.

Subsequent rows of stitching consist of long stitches placed between the stitches of the previous row.

At the edge, the needle should emerge outside of the previous stitch. In this way, the edge becomes relatively smooth.

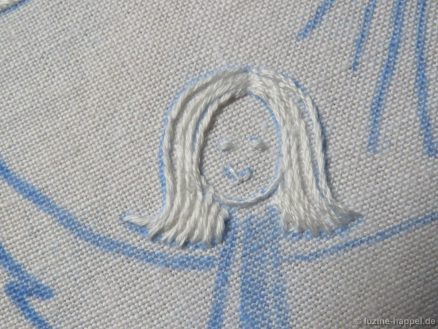
Stitching so that the needle emerges inside the previous stitches, one could create an overall shaggy effect.

After completing the hairstyle, the rest of the facial outline can be worked. It’s preferable to stitch the face’s outline after the hairstyle because one will be able to see the remaining parts of the head outline.

Fine outlining of parts such as face or hands is best done with wrapped Back stitches. One can use coton à broder No. 30 or 2 strands of 6-ply stranded cotton.

The outline is first covered with Back stitches.

On the way back, each Back stitch is wrapped once.

This creates a fine line that can adapt well to any curve.

Again, you can choose from many different possibilities for the design of the face – if you want to design it at all.

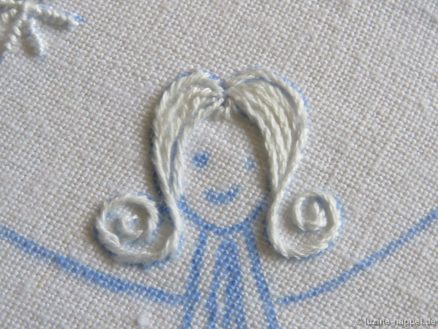
Here I have worked the mouth with a Straight stitch; it has been couched in the middle, which pulled the stitch downward into a smile.

One could complete the mouth with another short stitch

to establish an open mouth.

The eyes shown here were worked with three short stitches, which are very close to each other. The middle stitch is slightly longer than the lateral stitches.

Additionally, one can add eyebrows.

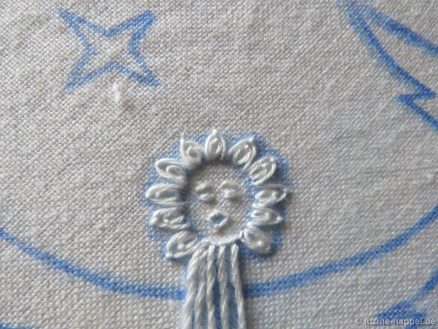
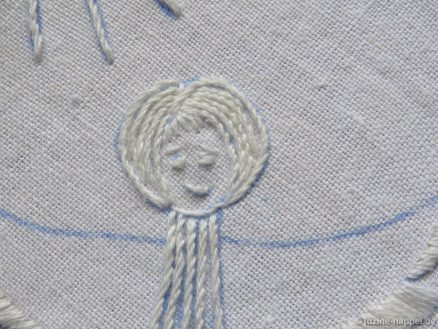
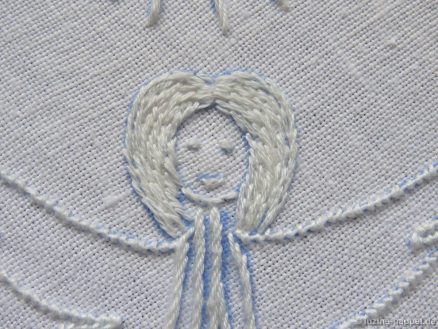
There are many possibilities for further hairstyles and facial designs. Here are a few examples:

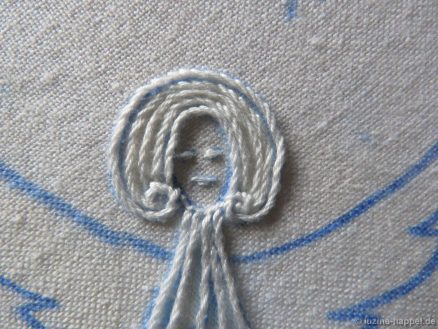
Flips can be worked with Wide Stem stitches (Early Schwalm Whitework, page 5).

And the space between the facial outline and hairstyle edge can be filled with several rows of Wide Stem stitches.

A small fringe adds a cute accent to the hairstyle.

Short curls can be worked with double open Lazy Daisy stitches.

Here are some more possibilities:

Many more possibilities for creating hairstyles can be found in the article Follow-up of the Angels Meeting (2) – The Hairstyles.

Advent Calendar 2019 – No. 2

Little Stars

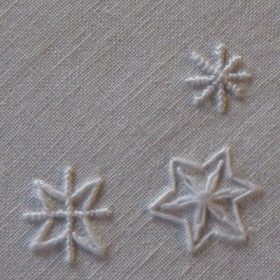
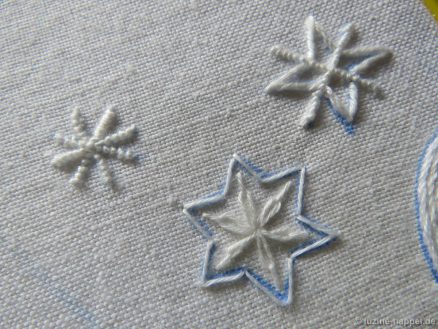
This year’s Advent design contains many different and variously worked little stars. In this article I present a variety of little stars and suggest some ways to work them. Of course, there is plenty of room for your own creativity.

Please note that these photos were taken during the stitching process. The true charm of the little stars is obstructed by the blue outlines. In addition, the images have been greatly enlarged thus showing every slight unevenness of the stitches.

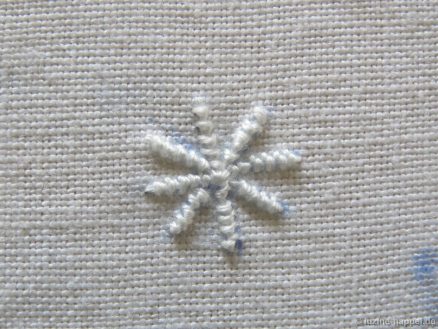
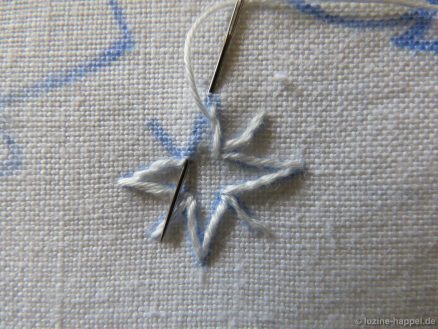
The little rays star is worked with Coral Knot stitches (coton à broder No. 16). It is best to not always start in the center but rather to work continuous rows from one end of a ray to the end of the opposite ray (sliding the working thread through previously worked stitches in the center).

It is also possible to work these little ray stars using other stitches. For example, Slanting Wide Stem stitches (Early Schwalm Whitework) are suitable. Also Chain stitches could be considered, but then one would want to start all rows in the center.

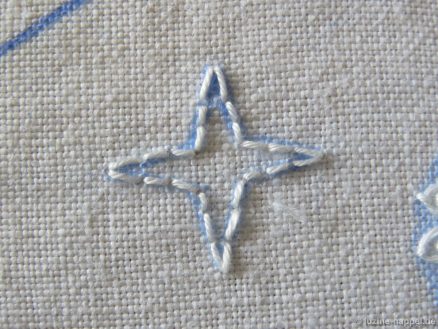
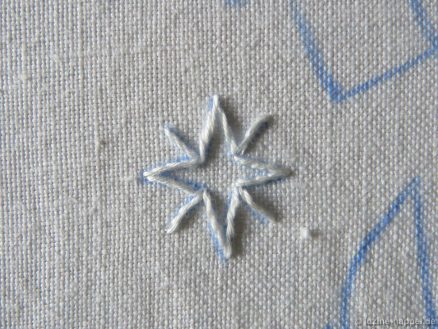
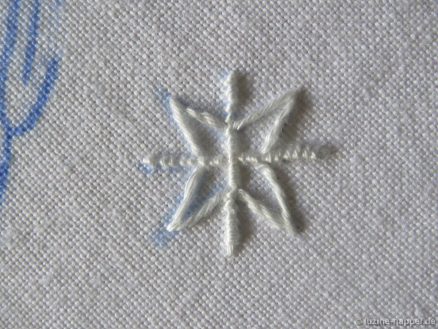
The four-pointed star can be worked with Back stitches (coton à broder No. 16) with three stitches each sides

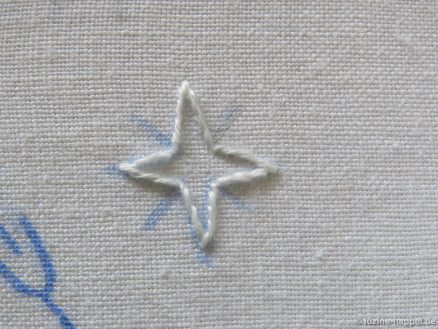
However, I think it better to work it with Stem stitches or Wide Stem stitches.

In this example, it is appropriate to always begin at the bottom and work up to the point. From the point, the working thread can be taken in one step to the bottom (it will be secured with the stitches being worked back from the point).

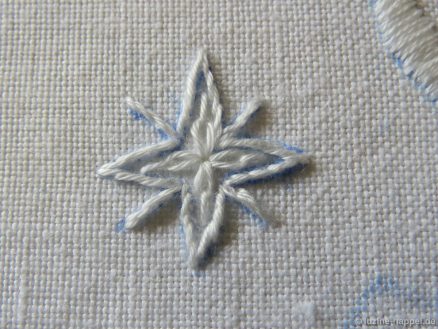
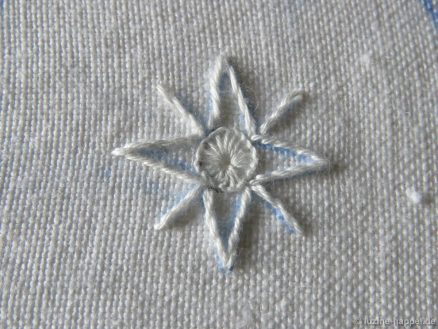
The four-pointed star with rays can be worked similarly – always alternating stitching a point and a ray.

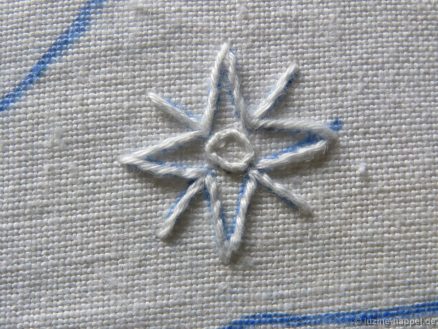
The space in the center can remain unworked,

or it can be filled in different ways. Here Lazy Daisy stitches with extra long couching stitches are inserted.

This example has a Blanket stitch eyelet.

And this example has a simple ring made with wrapped Back stitches. Both eyelet and ring should be worked before stitching the star outline.

One more possibility is work the rays as a continuous line; here they are worked with Coral Knot stitches.

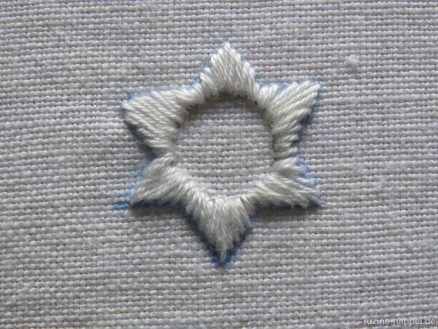
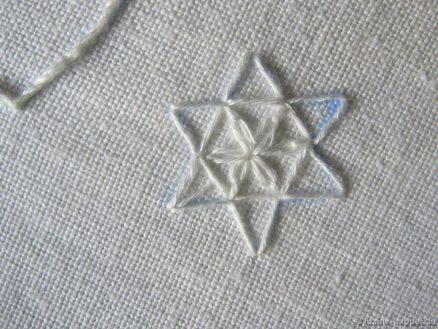
It is possible to work the six-pointed star in different ways.

It can be outlined using Satin stitches (coton à broder No. 20),

Blanket stitches (coton à broder No. 25),

or Straight stitches (coton à broder No. 16) and variously filled.

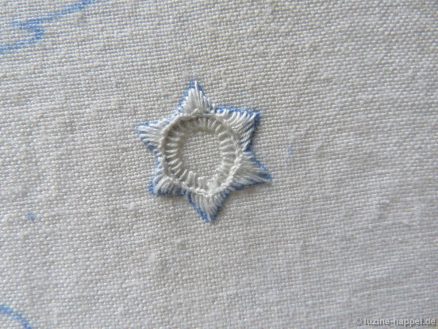
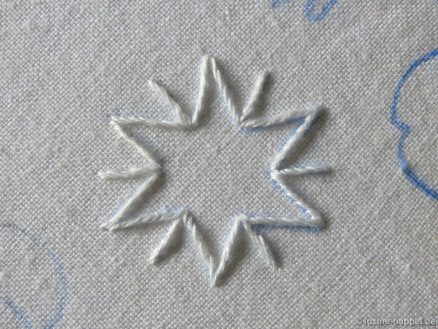
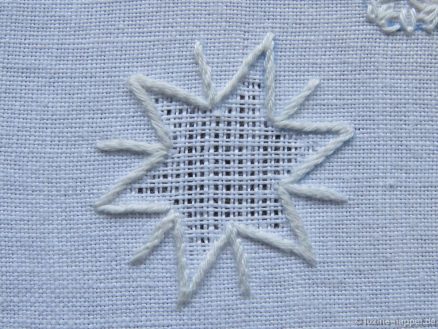
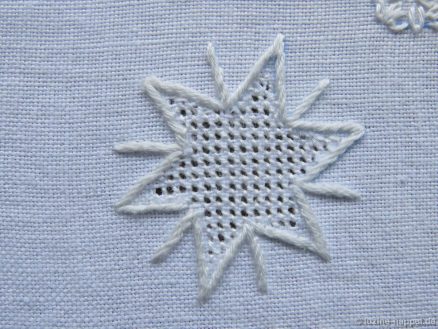
The somewhat larger star is outlined with Slanting Wide Stem stitches (coton à broder No. 16). The shape is large enough to be filled with a pattern.

To easily embroider the points, a narrow pattern was used with a grid established by cutting 1, leaving 2.

The star was filled with Single Faggot stitches (Openwork Pattern Samplers).

As seen in this small range of the little stars, the nativity design provides a lot of room for your own creativity, and that’s fun!

Advent Calendar 2019 – No. 1

Prep Work

The wreath’s outside diameter is approximately 60/66 cm. I chose a piece of Weddigen linen with 16 threads per cm (#925); it was cut 115 cm x 115 cm.

The Weddigen linen used was distributed in the United States as part of the Legacy Linen line. This specific linen was called Alba Maxima (approximately 40 tpi). Unfortunately, it is no longer being made in all the three formerly offered widths. Remaining stock is getting more and more difficult to find. The good news is that 1.40 m and 2.30 m widths are still available. I purchased a large quantity of this beautiful linen so that my customers could get the best fabric for Schwalm whitework! This means that it is possible to purchase from me the exact linen cut used for this project. Other cuts are also available; please email me with your request.

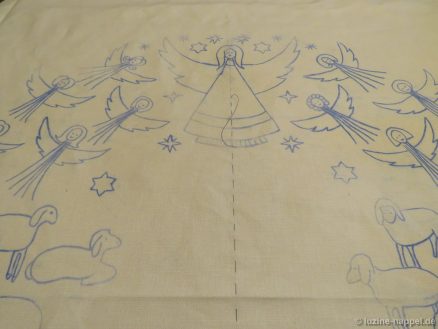
First, the pattern has to be transferred to the linen; this is best done in one step. Transferring with an iron-on pen is a little challenging, because it is difficult to check if the pattern transfer is dark enough. As you can see, my pattern has some parts that were scorched and other parts where the design is very faint. But all in all it is a usable pattern.
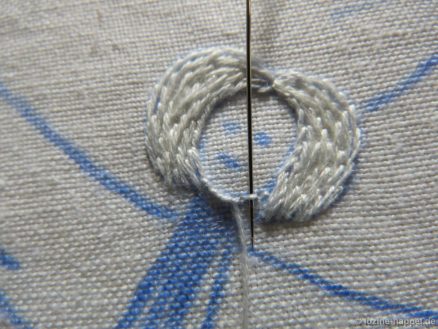
If the design were to be split up and individual batches transferred later, there would be a danger that these parts would slip a bit making the overall pattern look unharmonious later. So, you will need a flat surface that is large enough for the overall pattern. To transfer the design on the straight of grain, the middle transverse and longitudinal axis are both marked on the linen with short Running stitches using coloured yarn and on the drawing with a dashed line. After the transfer is complete, the marking threads are removed.
Now, as usual, all outlines must first be covered with stitches. Here the order often plays an important role. As is always the case when you embroider a pattern for the first time and don’t have a template for it, mistakes happen. I’ve embroidered a similar motif before. I have learned from my mistakes and can now share some useful tips with you. These will be shared piece by piece over the days of Advent.
A word about the embroidery threads:
I used coton à broder No. 16, 20, 25, and 30. Although I have indicated the weight used, you are free to improvise.
For Satin stitches I like to use 2 strands of 6-ply stranded cotton, because the two threads lie a little flatter on the fabric and thus cover it better than a twisted thread. But the difference is only marginal – you can just as well use coton à broder No. 30.

My embroidery took
5 skeins of coton à broder No. 16,
2 skeins of coton à broder No. 20,
4 skeins of coton à broder No. 25,
3 skeins of coton à broder No. 30, and
3 skeins of stranded cotton.

I used Chenille needles No. 24 and No. 26 and a Tapestry needle No. 26.

Advent Calendar 2019 – Christmas Wreath

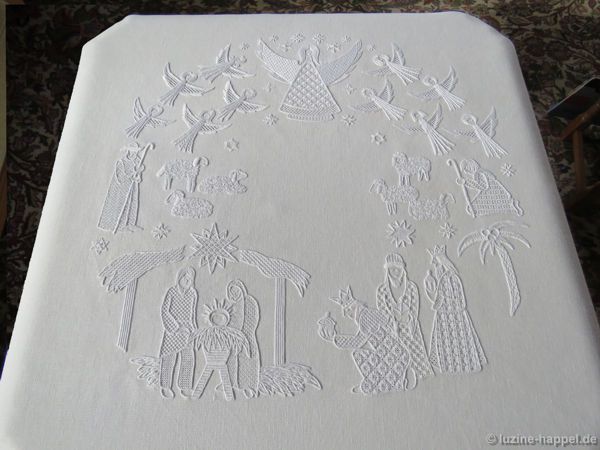
I would like to again end the year with another advent calendar. I began presenting advent calendars on my blog in 2016. That advent calendar consisted of twenty-four delicate wreath designs, and many of my blog readers were enthusiastic about them. Thus encouraged, I continued to think up holiday projects. In 2017 there were small projects embroidered with typical Schwalm motifs, and in 2018 there was a meeting of angels.

This year’s project is a big wreath motif – representing the

Nativity scene.

Some will surely ask: “Once again the Christmas story as the motif? Are there not yet enough different designs on this subject?” I don’t think so.
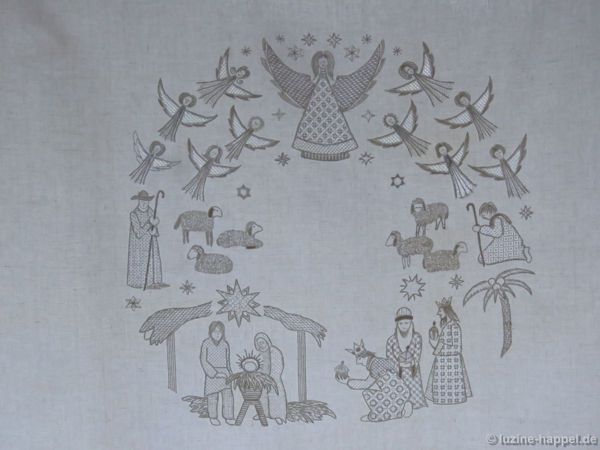
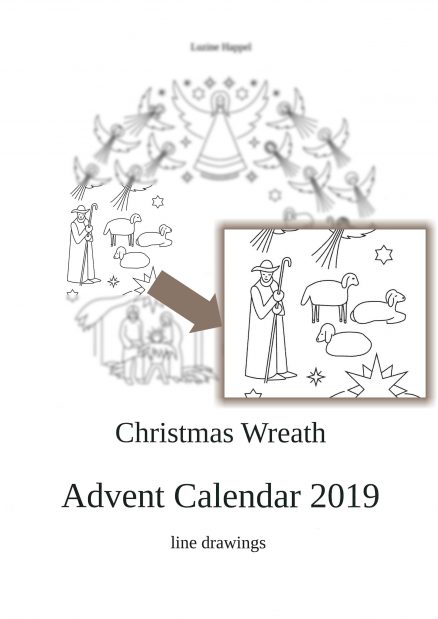
This pattern is something special. It is a beautiful and coherent composition that was designed by an artist; an embroidery designer made slight changes to ensure a better stitching experience, and finally a graphic designer rendered the pattern into the clean line drawing you see in the end of this article.

Even if you have already embroidered a project with the Christmas story, it is worth further realization with the present design. It’s a lot of fun to work out the very different characters. And although some might encounter difficulties in some details, rest assured that I will help you with suggestions, instructions, and many pictures. I hope the daily – starting tomorrow! – detailled instructions will delight you.

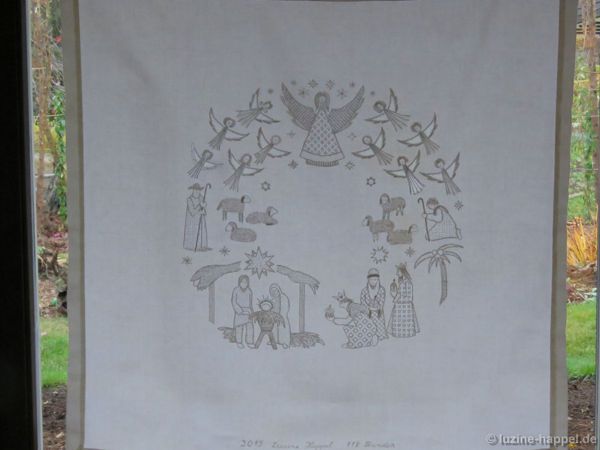
The design is laid out as a wreath. The external diameter measures between 60 cm and 66 cm. The design is suitable for a special cloth, a wall hanging, or a curtain.

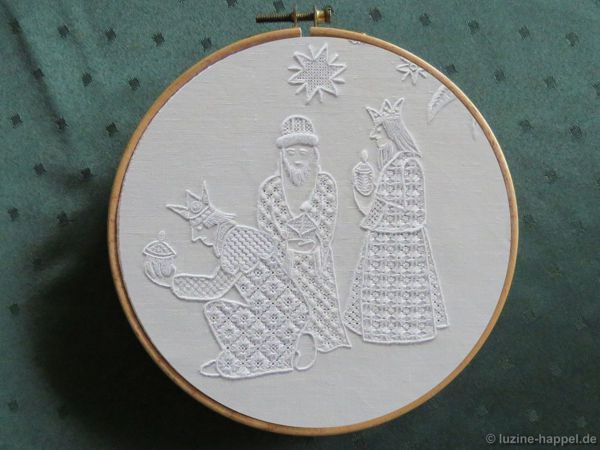
Of course the single characters or the groups of figures can be arranged in other ways. For example one might choose to create a band, to arrange them as a square or rectangle, or to cut them a little bit similar to Jessica Grimm´s project.

It is suitable and easy to mount single characters or groups of figures in an embroidery hoop for a casual holiday display, like the angels shown in the bottom parts of Advent Calendar 2018 – No. 1 and Advent Calendar 2018 – No. 15.

I can imagine very well the embroidery mounted on a LED panel for decorating a wall.

But if one wishes to hang it so that it is backlit (e.g., hung in a window), threads carried on the back side will be visible. One can remedy this by using double knots at the beginning and end of each small section separately and trimming the thread tails short.

The embroidery is richly diverse and leaves room for one’s own creativity. It is really fun to embroider this beautiful design!


Christmas Wreath
Advent Calendar 2019
line drawings
23 pages, text: englisch, 4.2 MB file size
EUR24.00
(inc. 19% sales tax, so it is EUR20.17 for customers outside the EU)
shop