Filling Patterns for Small Areas

Two of my blog readers recently told me about their search for patterns for small areas. Reason enough to deal with this topic in detail. At first one might think that the selection isn’t very large. But in fact there is a whole range of very different, well-suited patterns.

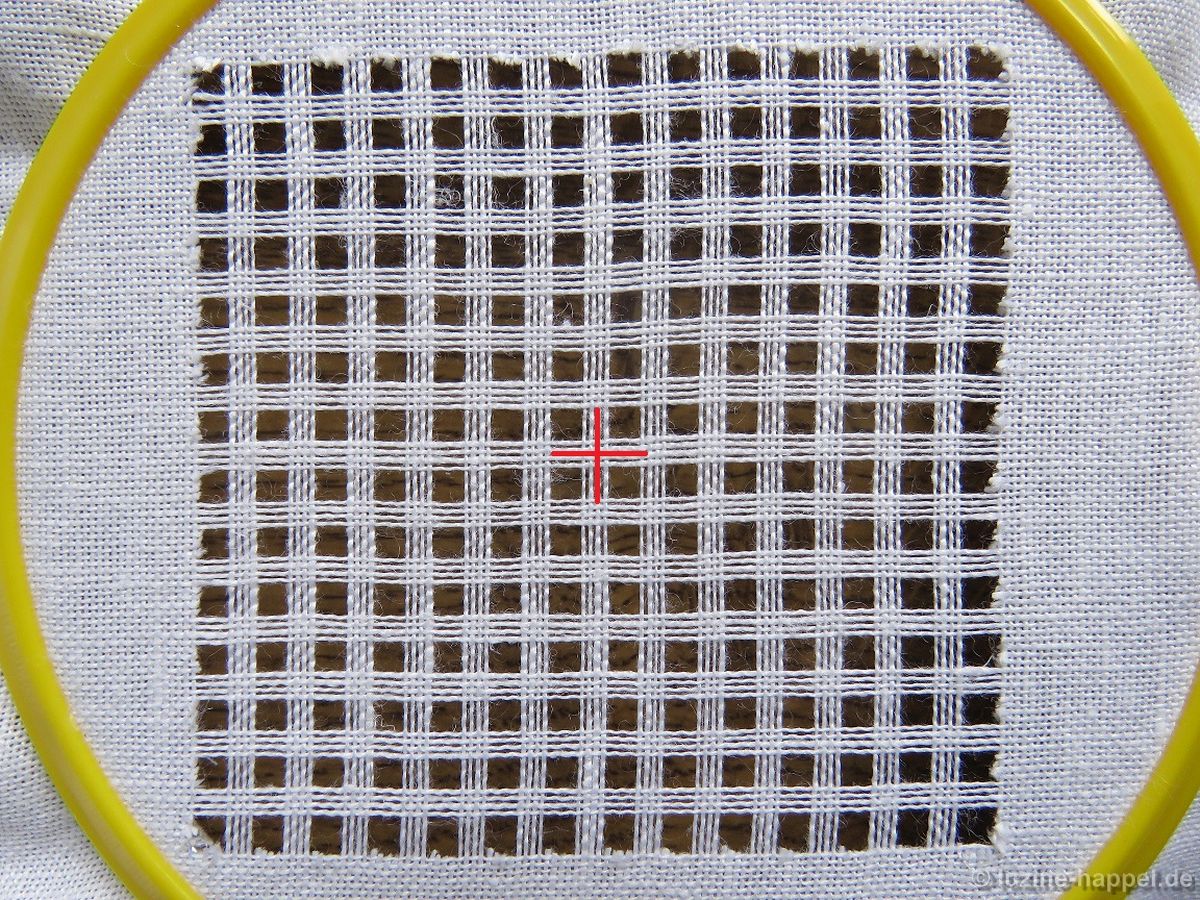
Typically, the smallest pattern segment – this section of a pattern that always repeats to establish the actual pattern – in all three categories – simple withdrawn thread, Limet, and openwork patterns – spreads over four fabric threads.

Such a segment should be repeated at least three times, preferably five times, in order to achieve an attractive and pleasing pattern.

Here one can work

• Wave stitches
• Satin stitch bars
• Four-Sided stitches
• Four-Sided stitches/wrong side up
• the Square Eyelet pattern Net
Cable stitches and
• Single Faggot stitches
• Cross stitches
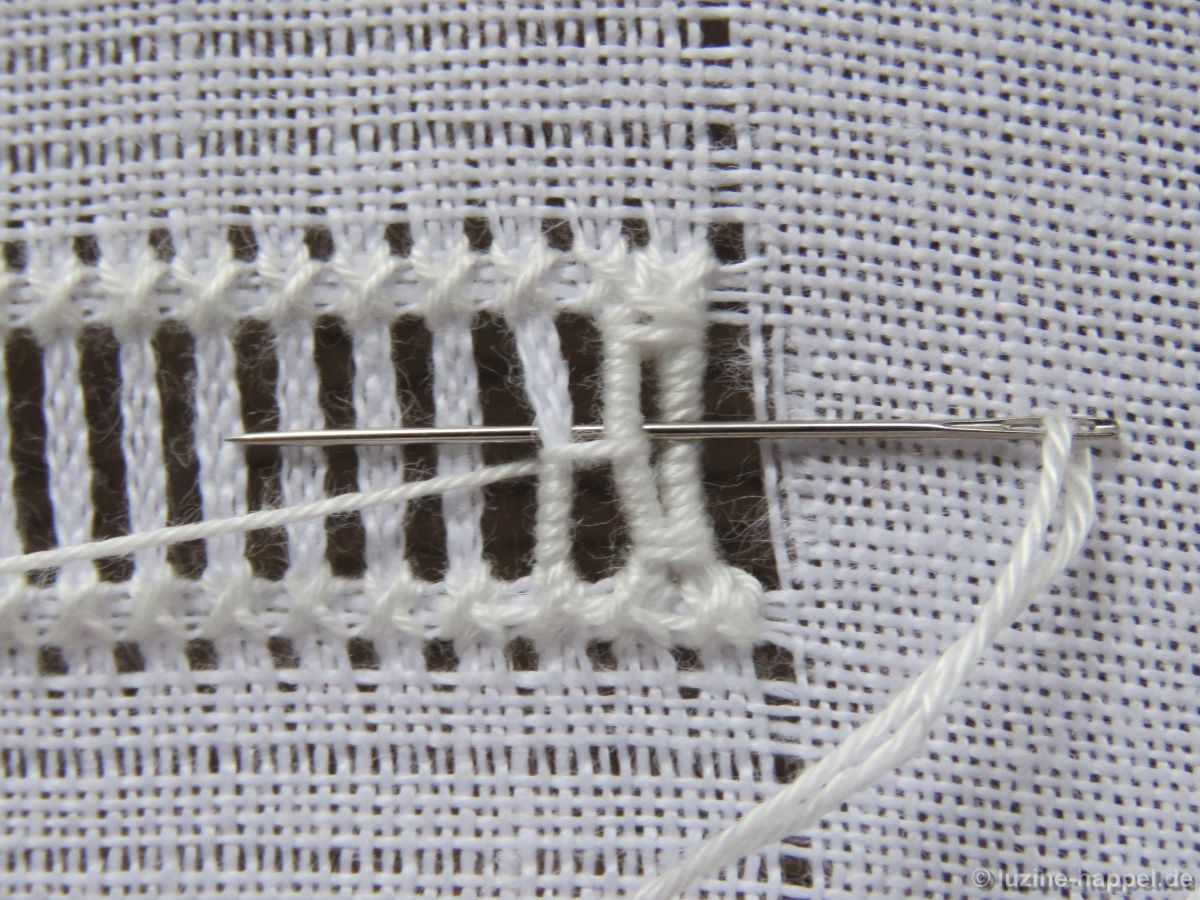
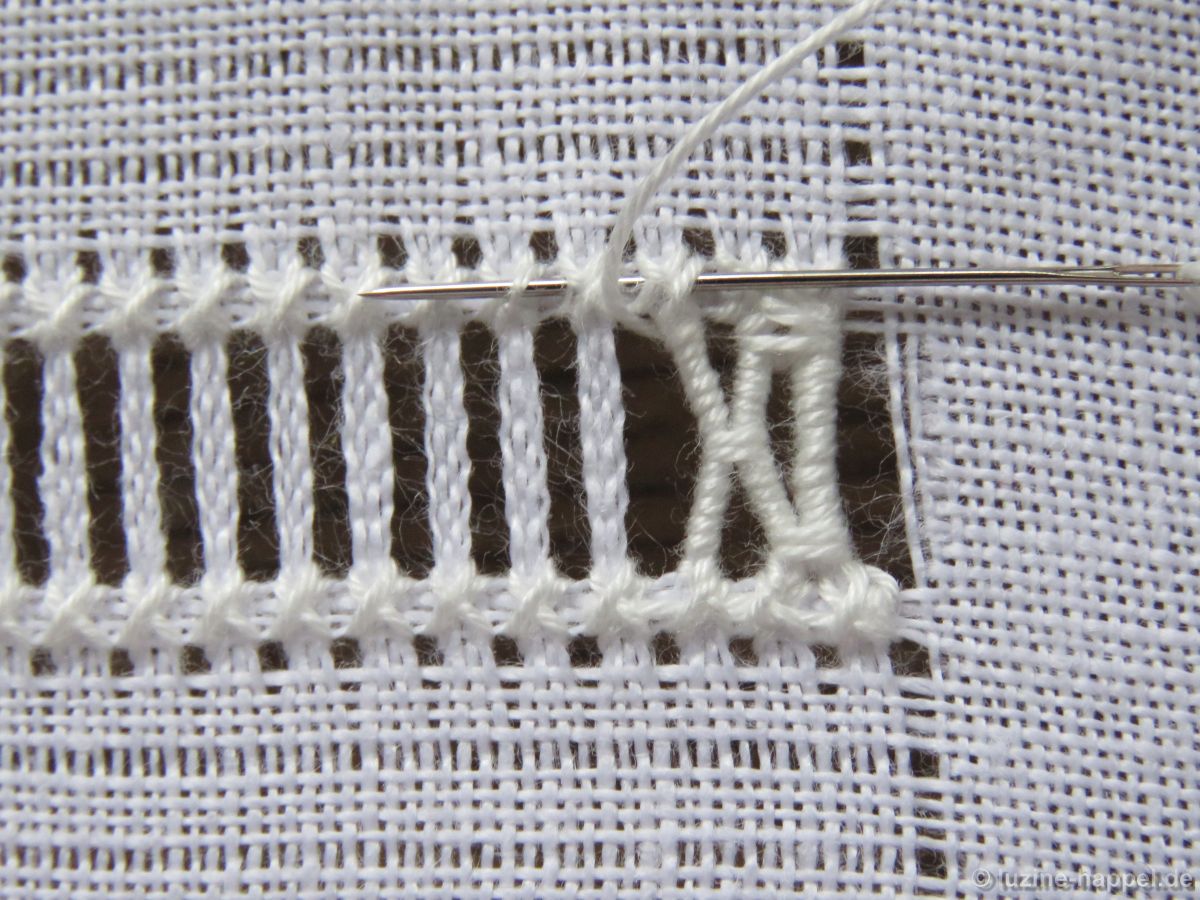
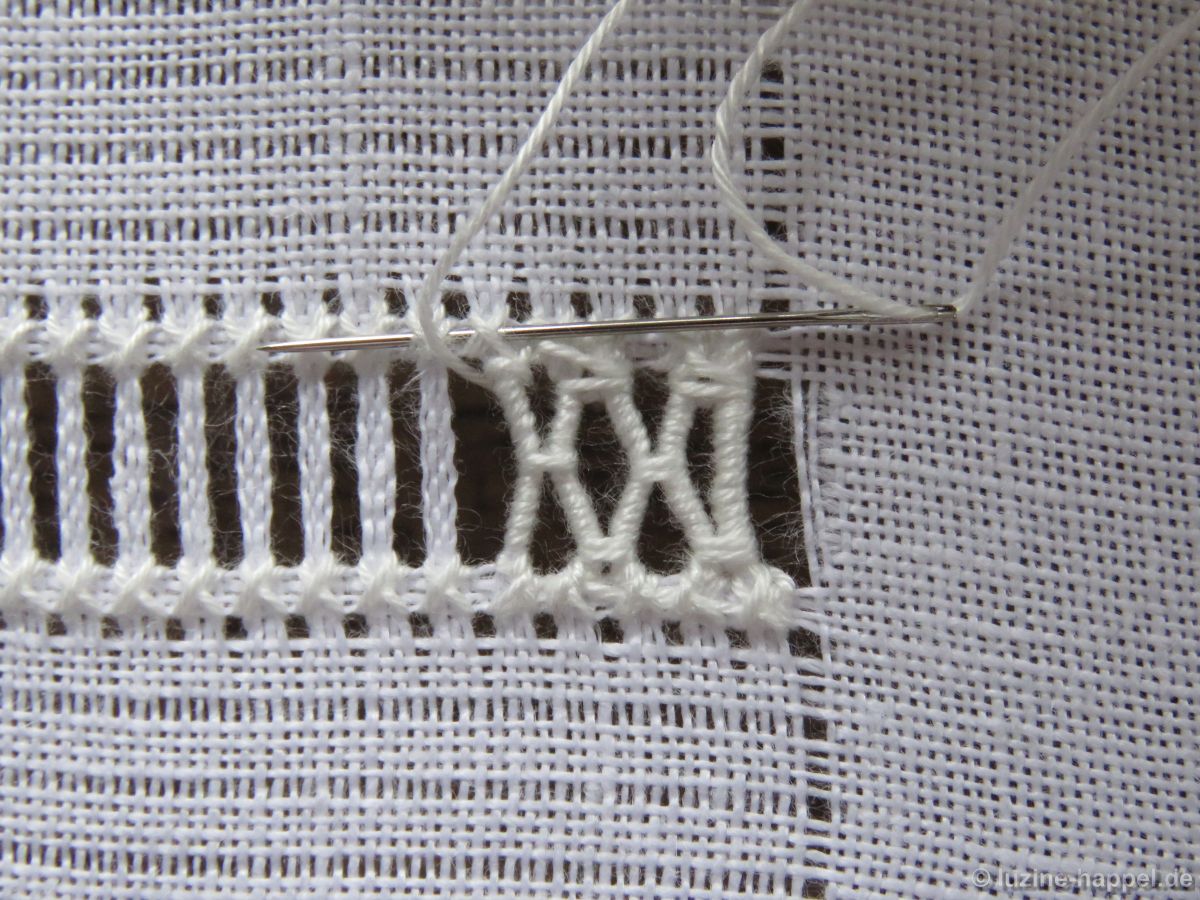
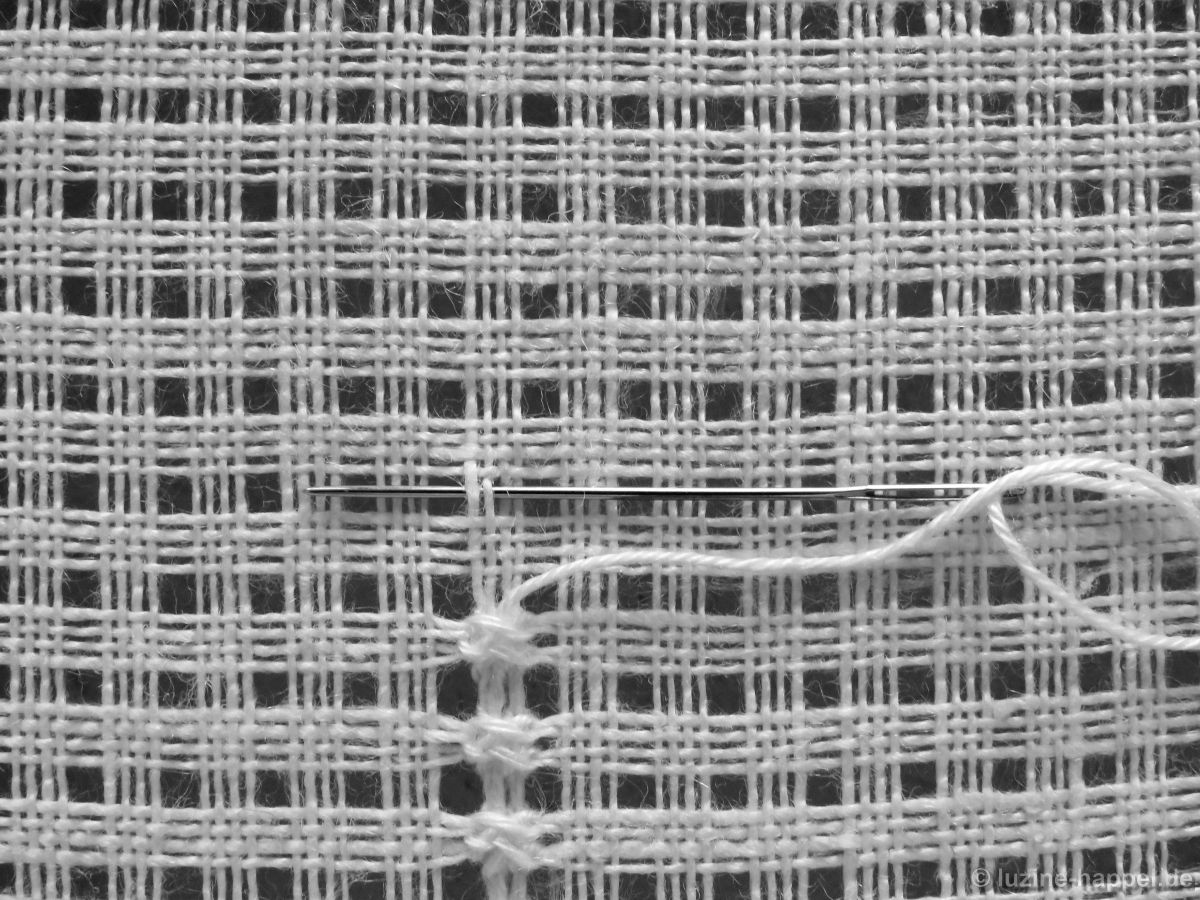
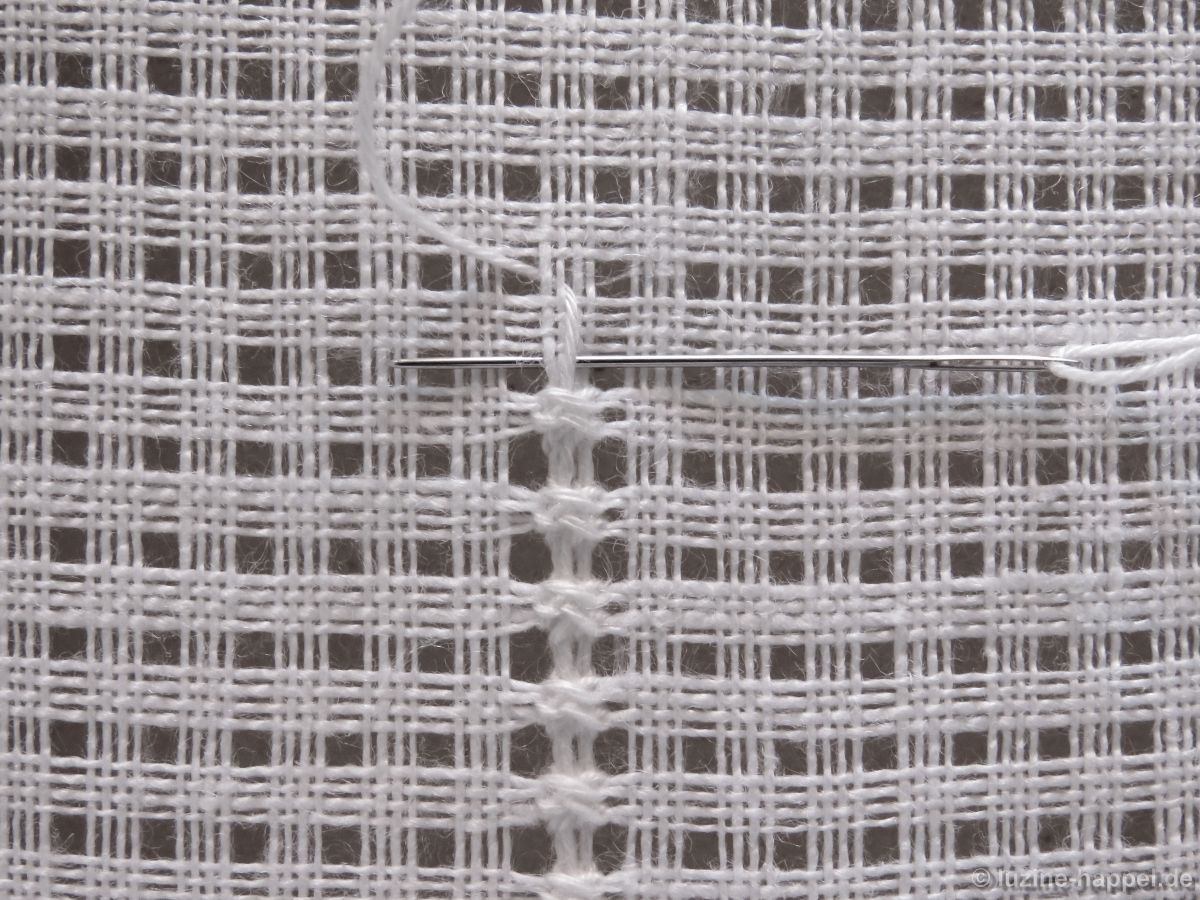
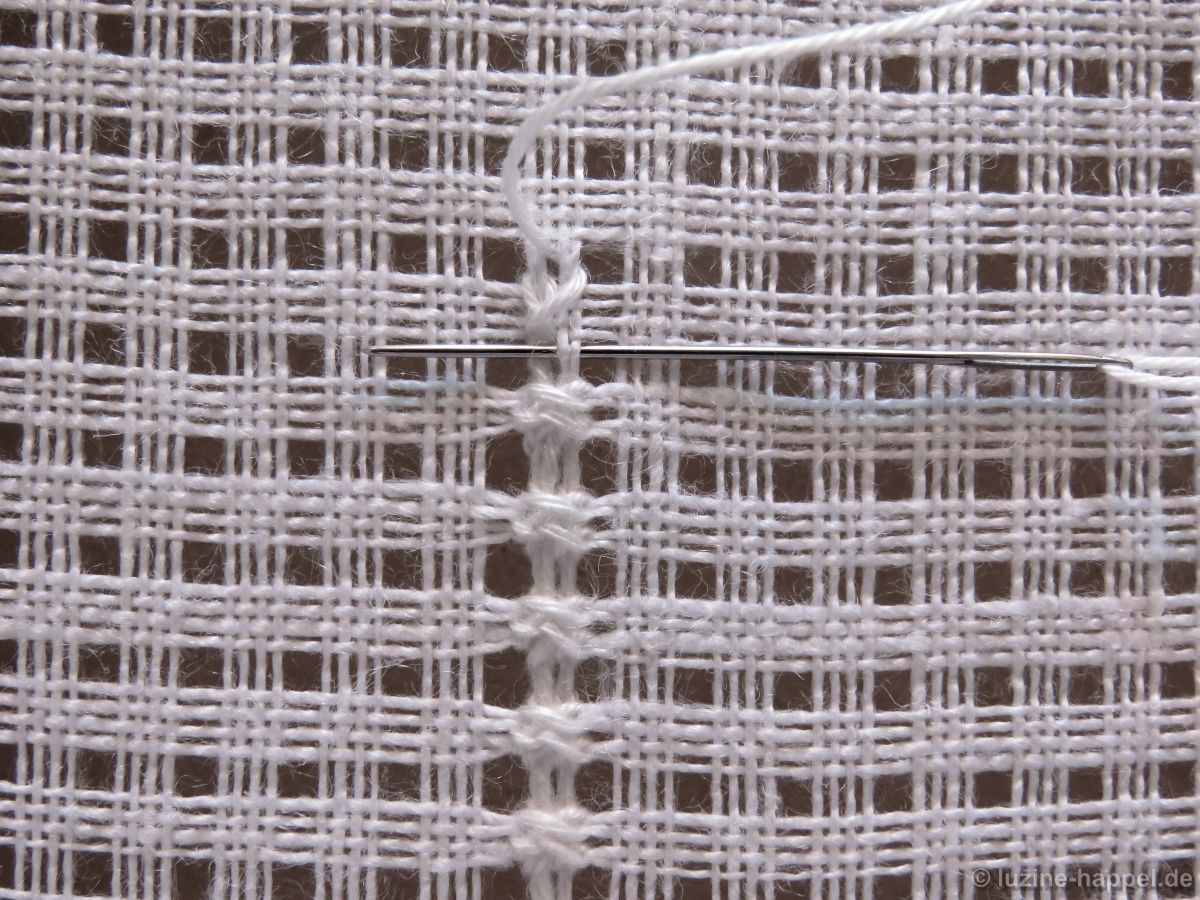
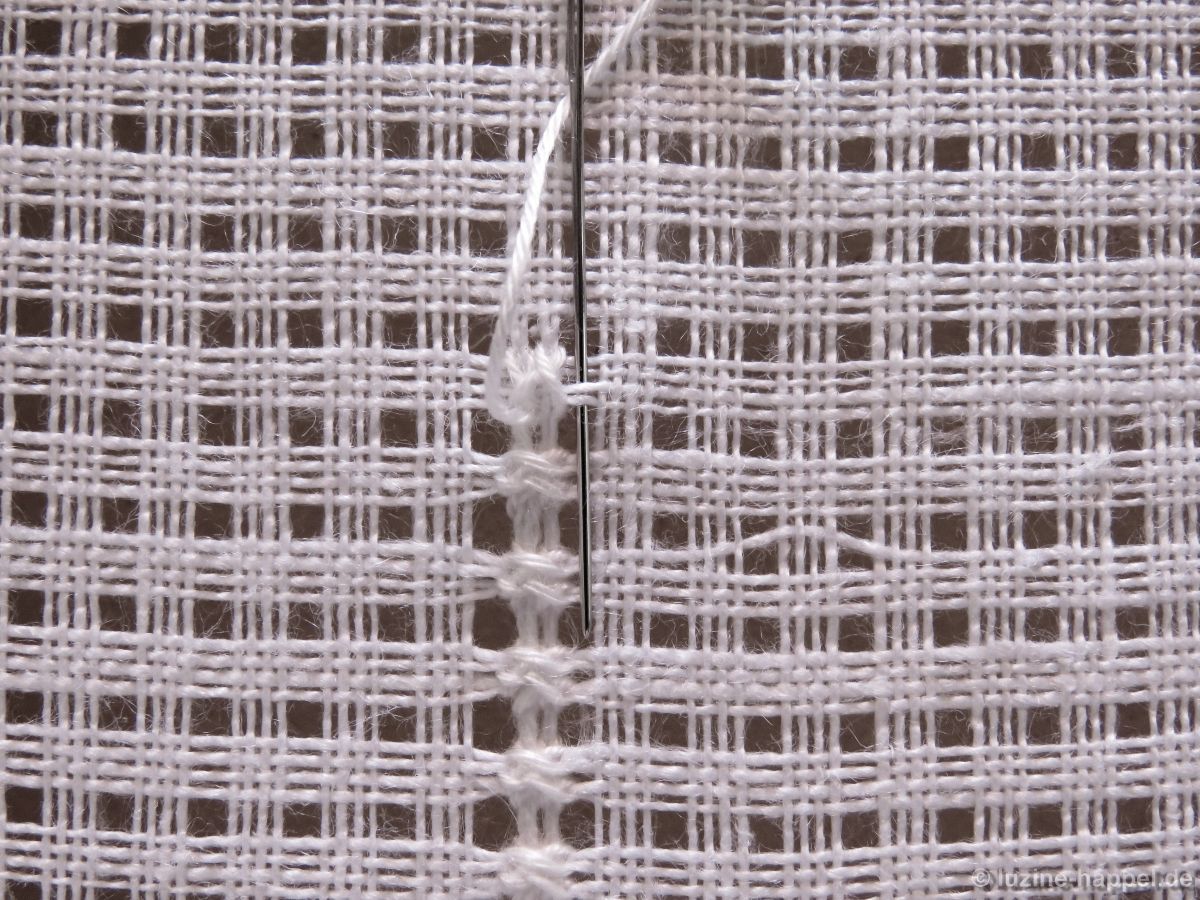
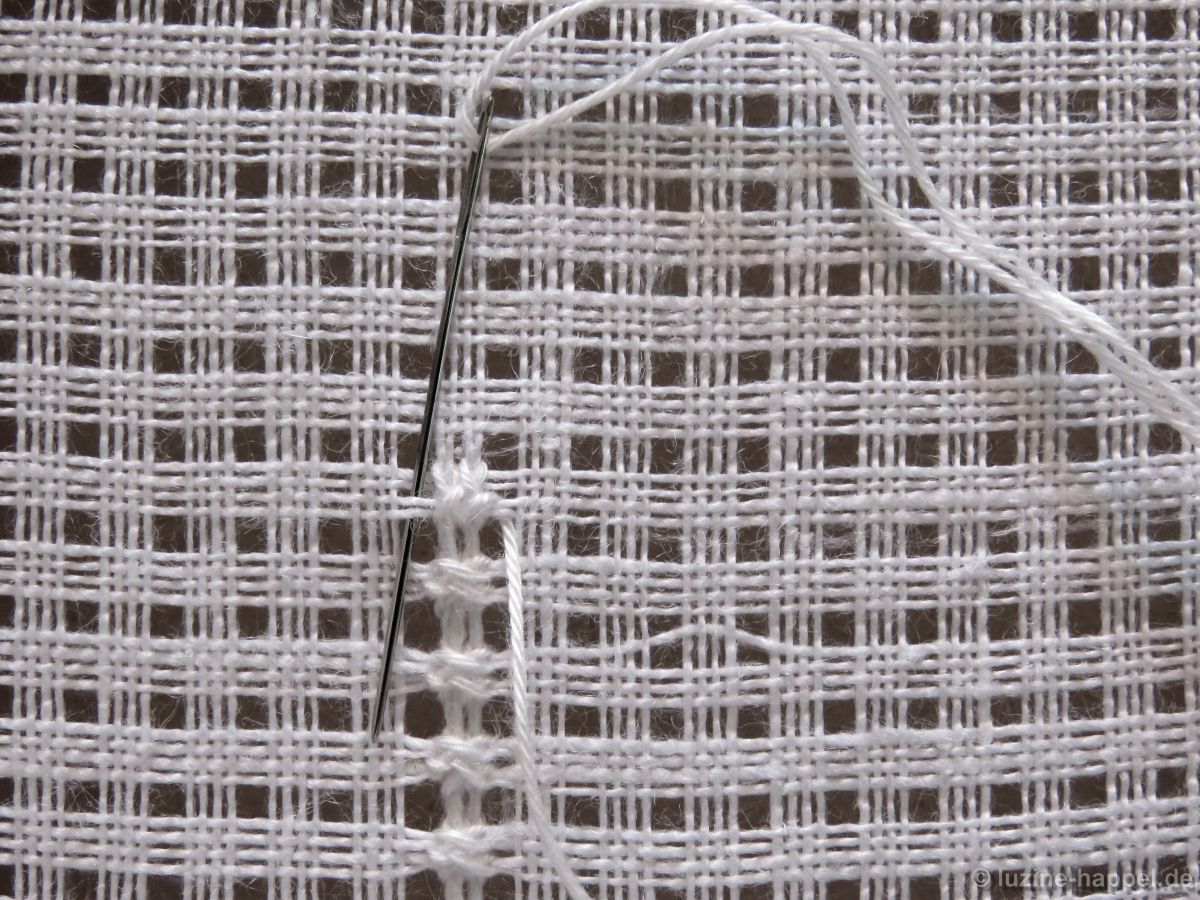
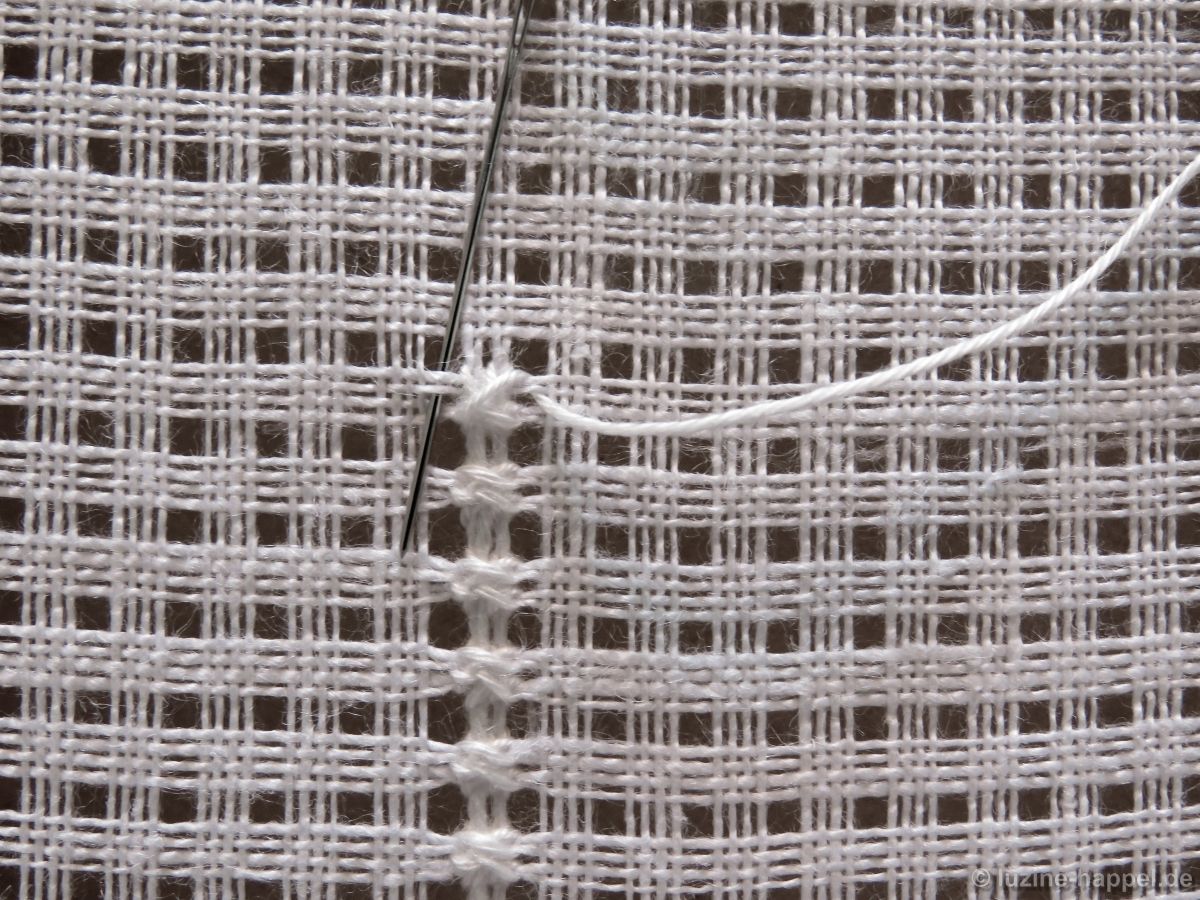
• Double Crosses – in straight rows (seen here)
• Double Crosses – in straight rows/wrong side up
• slanting Herringbone stitches and
• slanting Herringbone stitches/wrong side up

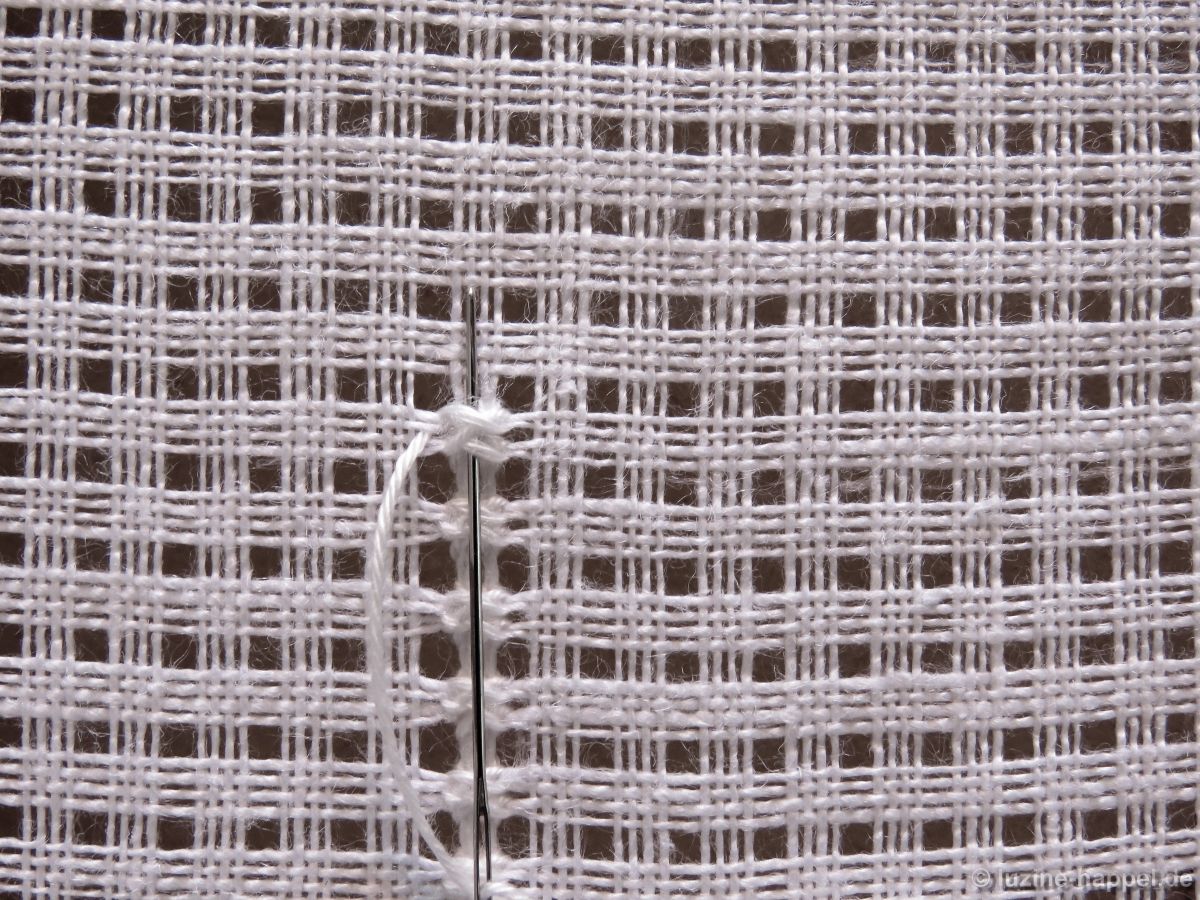
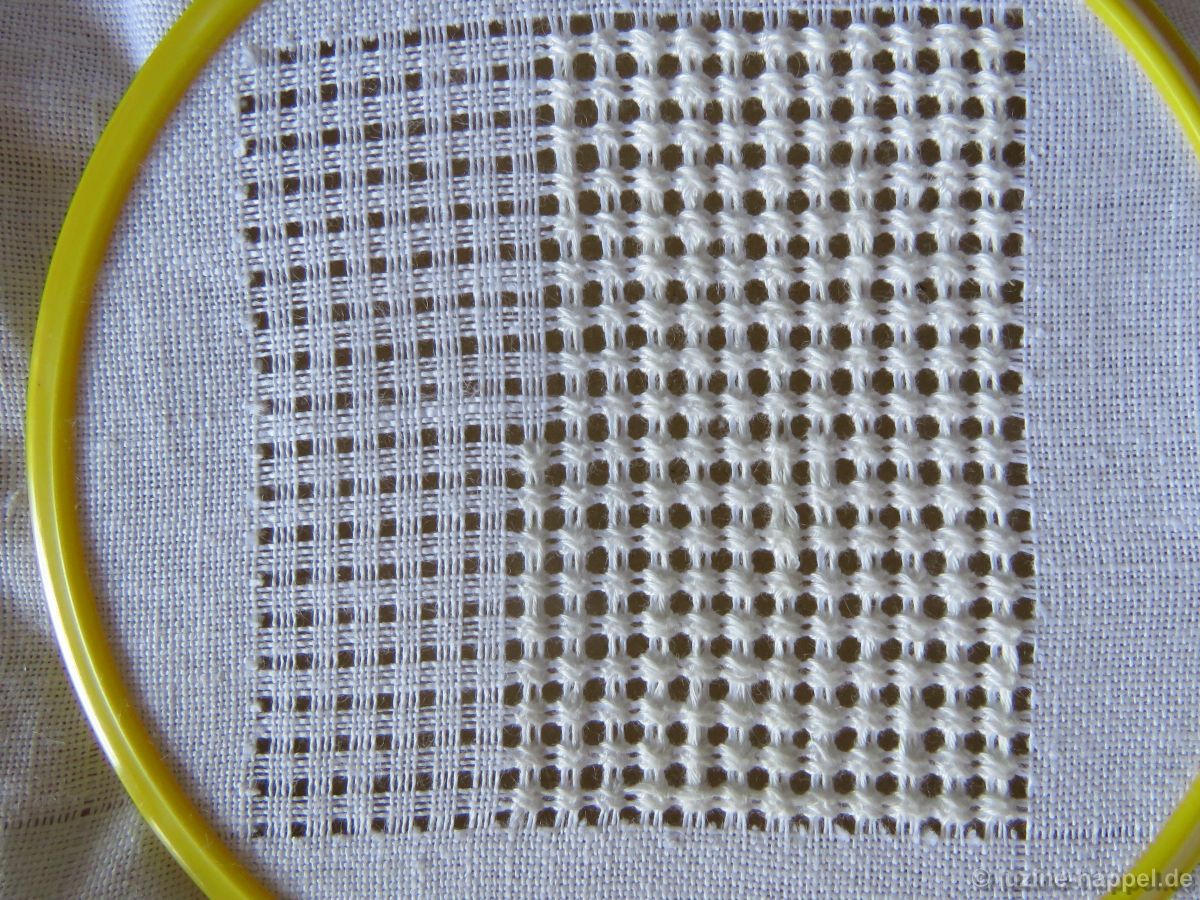
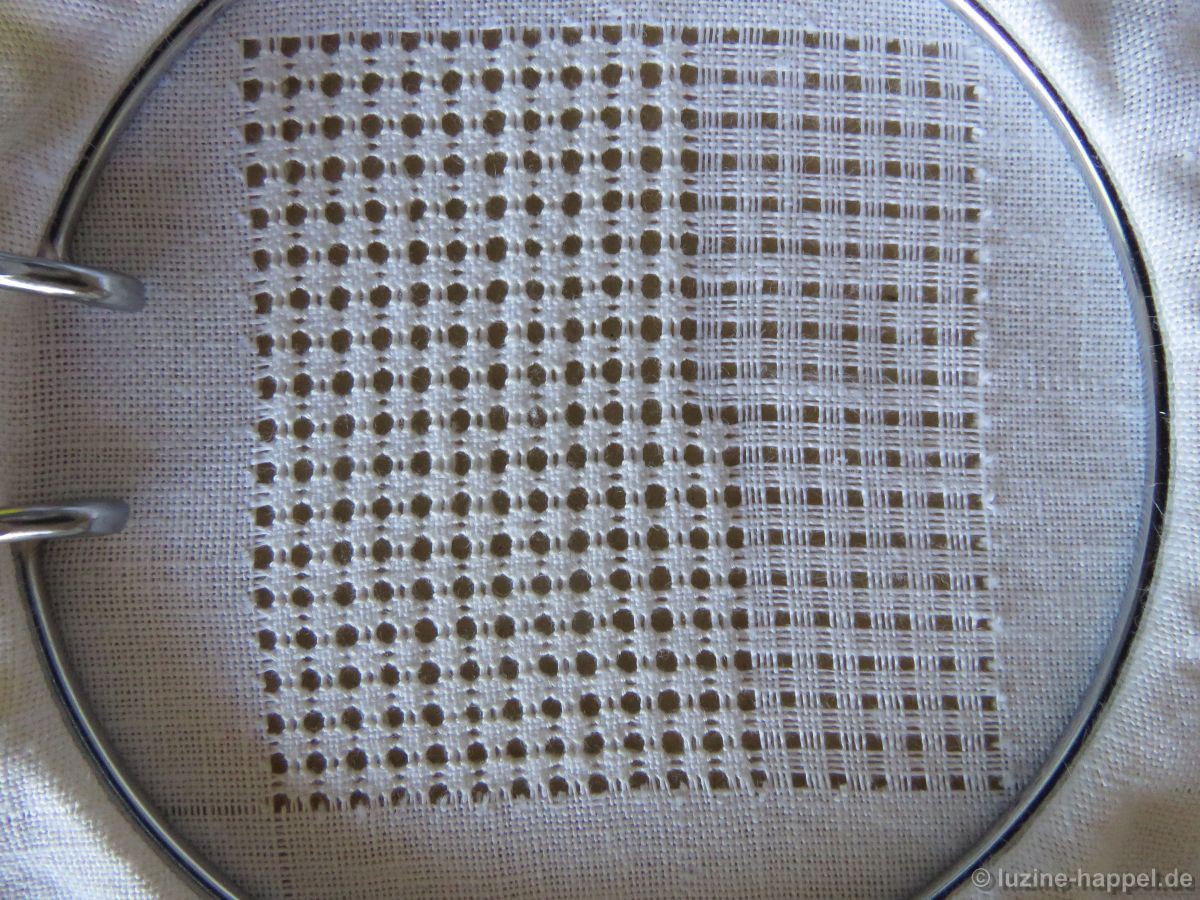
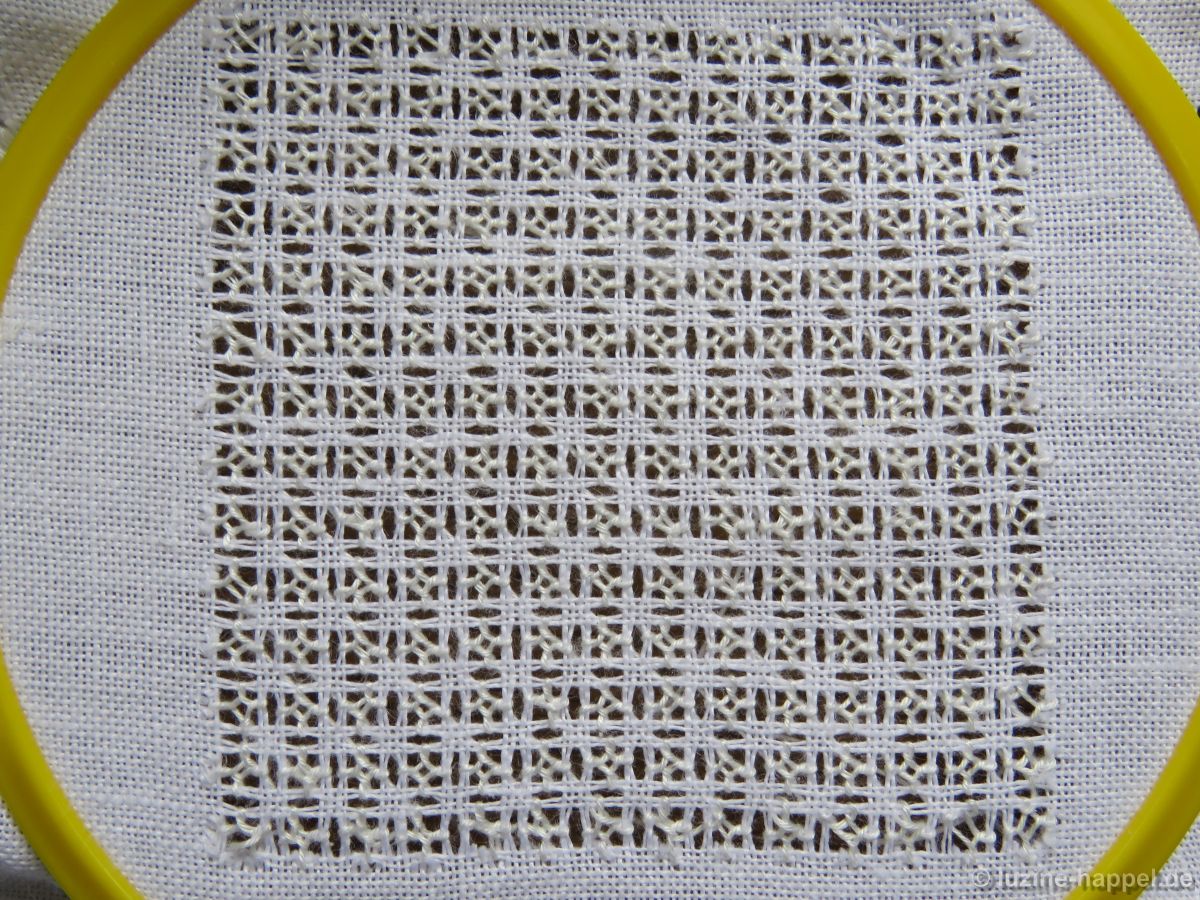
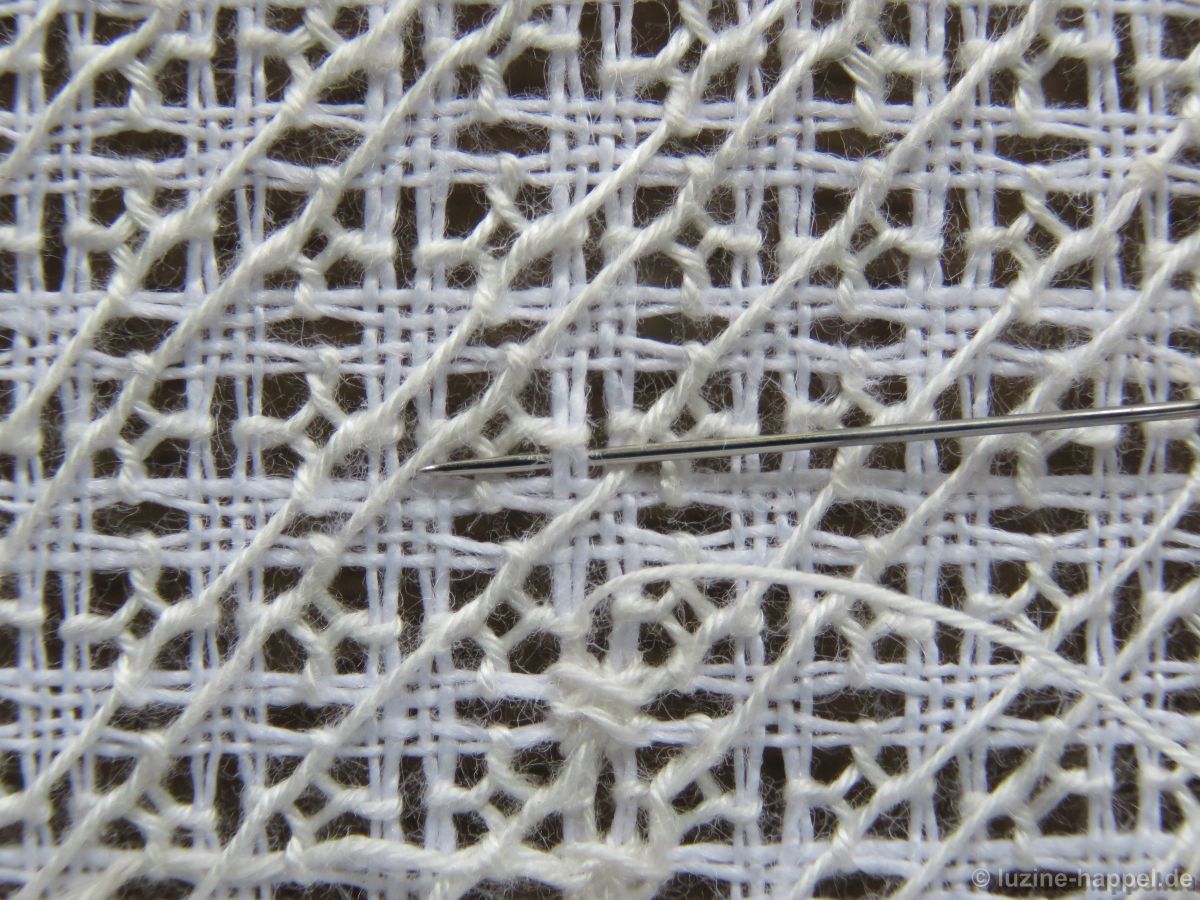
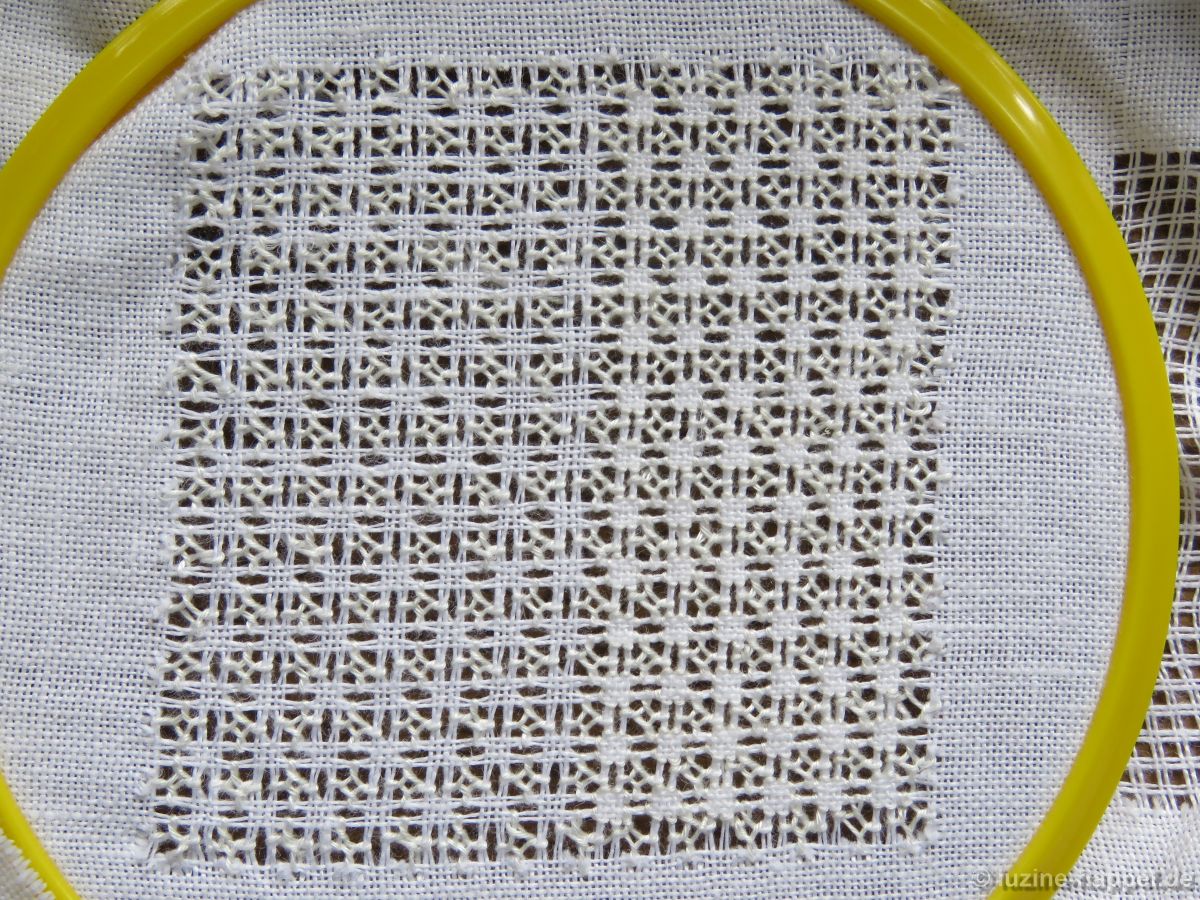
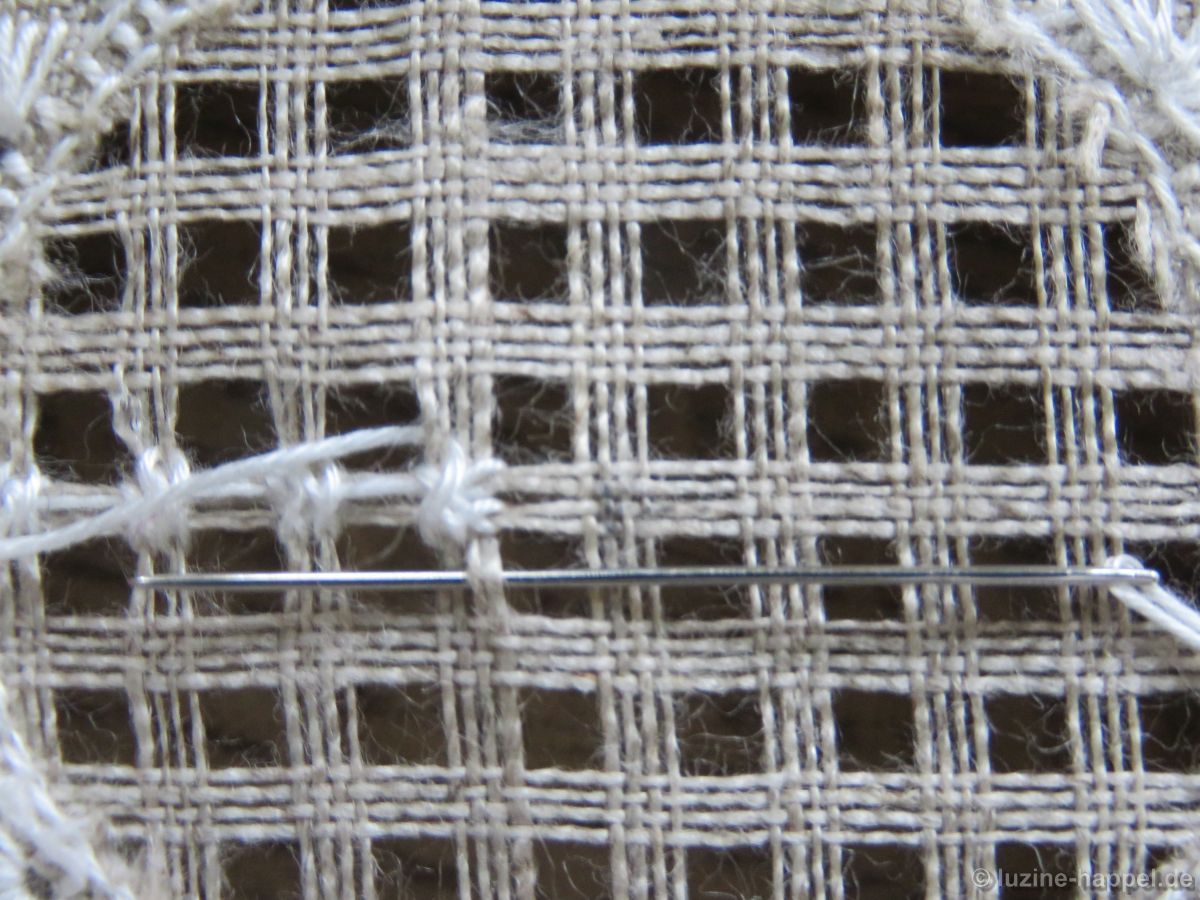
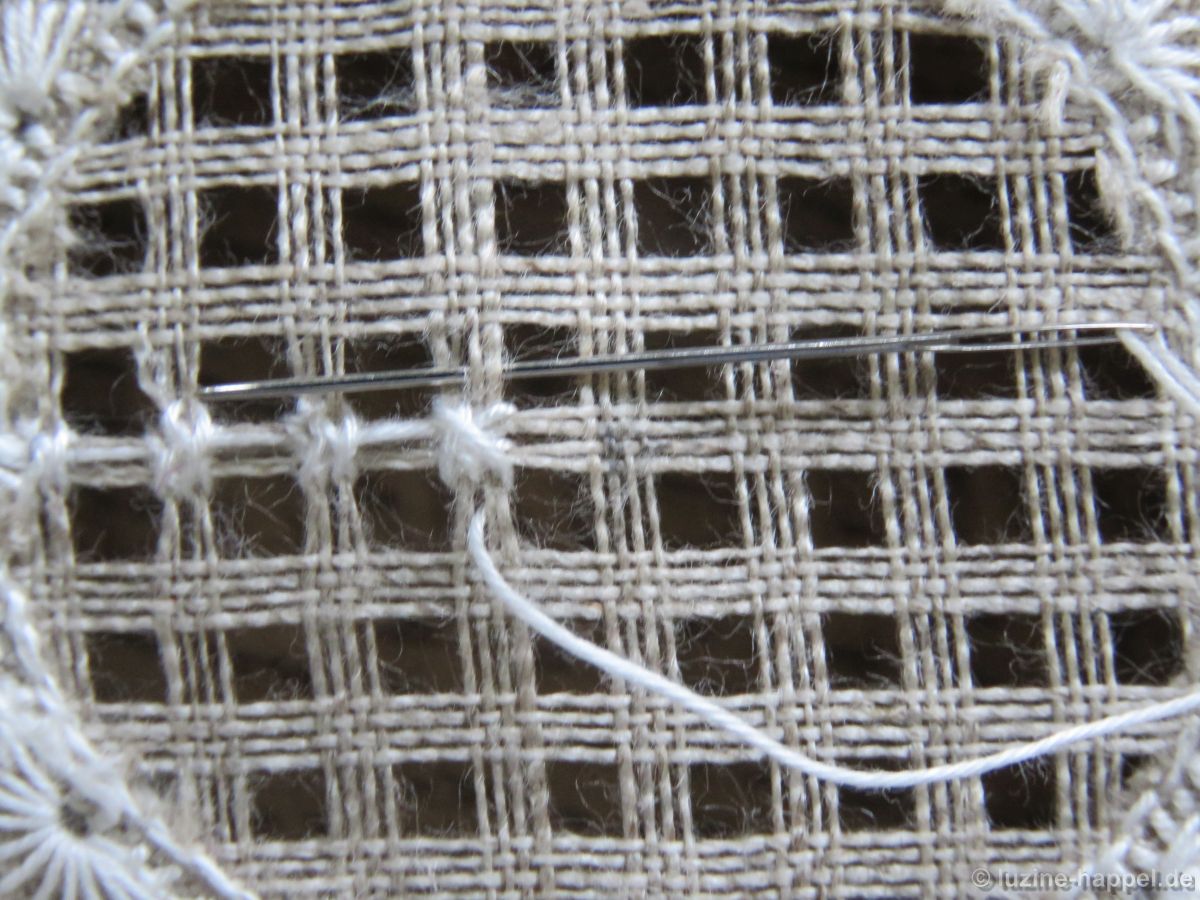
As has been shown repeatedly, the pattern segments can be reduced by changing the thread withdrawing and leaving two threads between one withdrawn thread. This again applies to all catogories, simple, Limet and openwork patterns.

In pictures 9 and 10 of Sofa Cushion Cover 1(B) you can see the Wave stitch in the reduced grid and compare in picture 7 with the Wave stitch in the usual grid. Pictures 12 and 13 of this article show the Cable stitch in the reduced openwork thread grid. In pictures 13 and 16 is the
Single Faggot stitch seen in both reduced and standard thread grids.

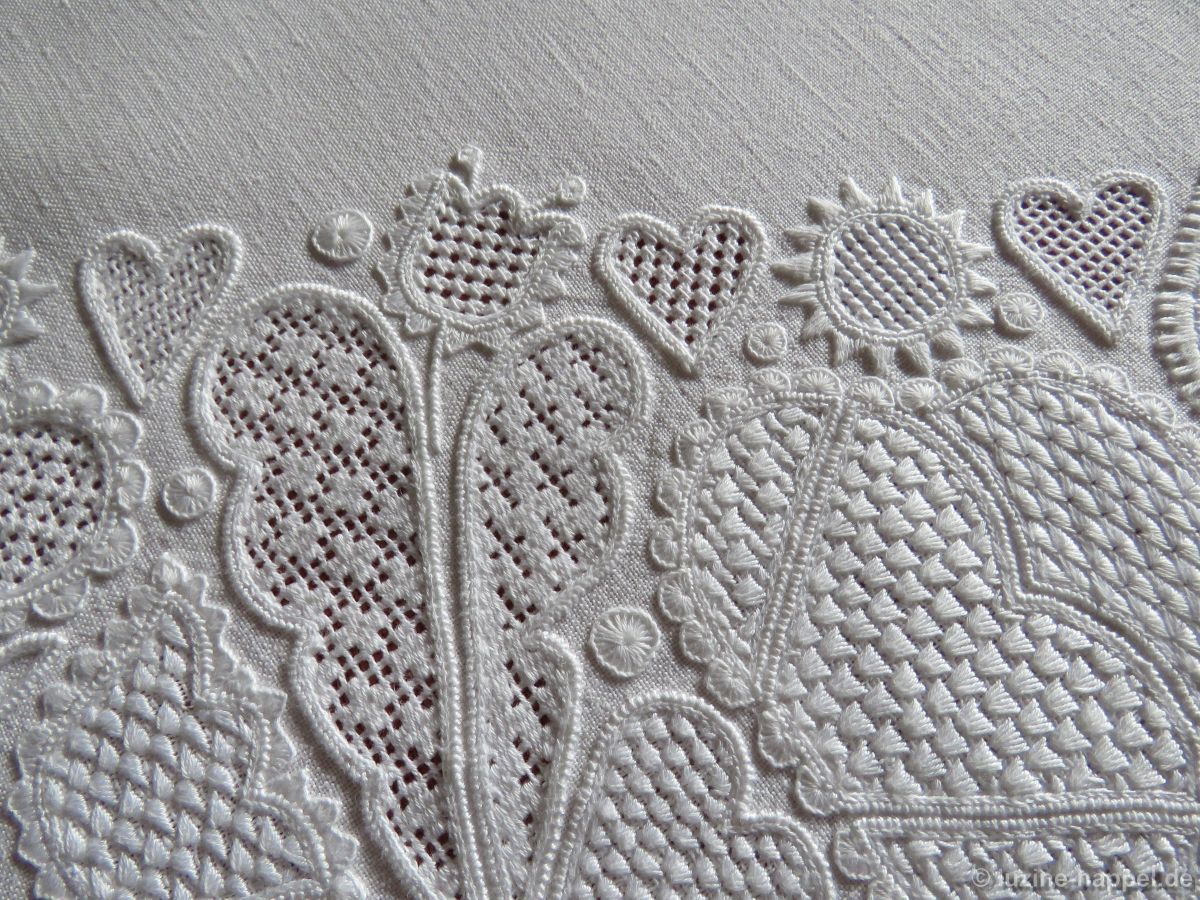
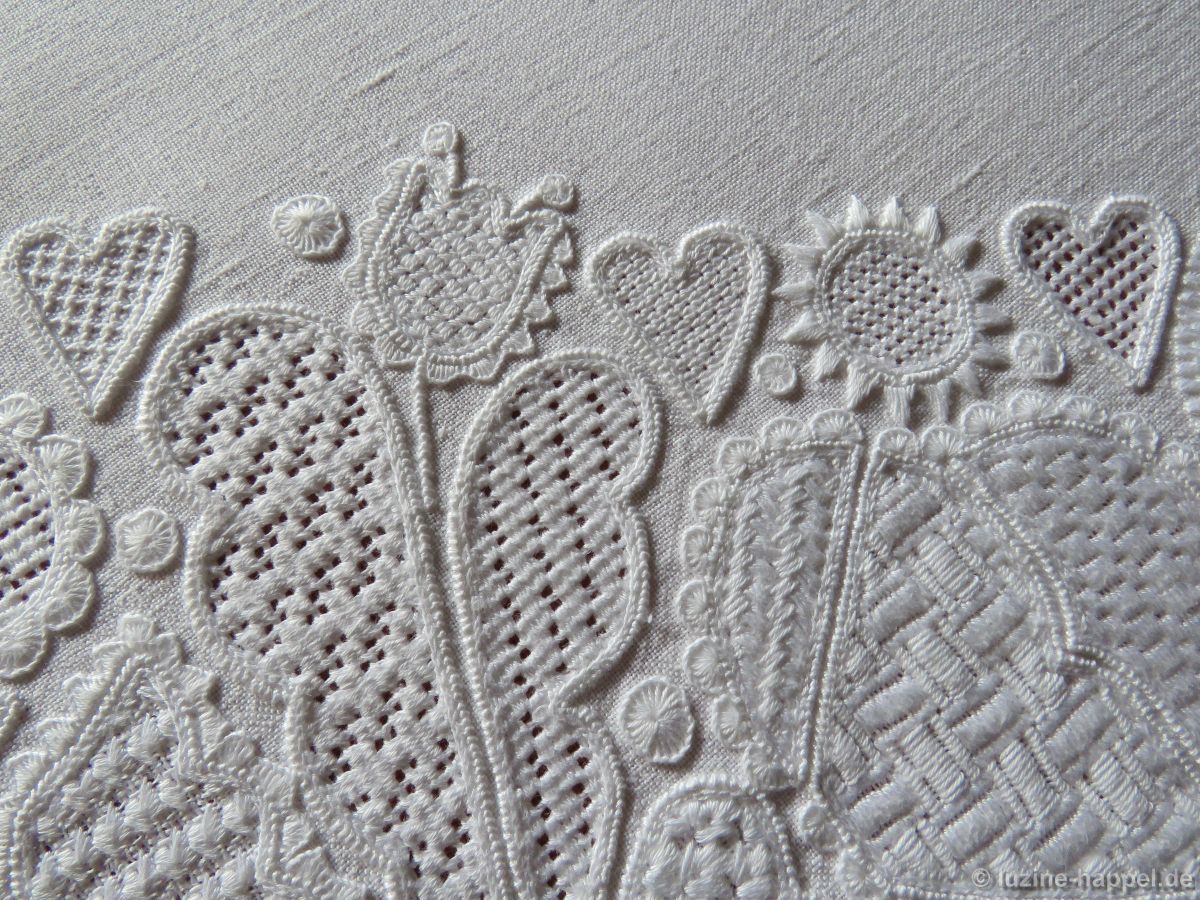
Also in the patterns of the poppy flower you can see the difference between reduced and usual thread withdrawing.

Another comparison can be found in this article on pictures 8 and 9.

If you have a little more space, you can work patterns with a segment of 8 threads (or 6 threads in the reduced thread grid). These patterns can also be described as small patterns. In these thread grids you can work

• Honey Comb Darning stitches ,
• different Satin stitch patterns
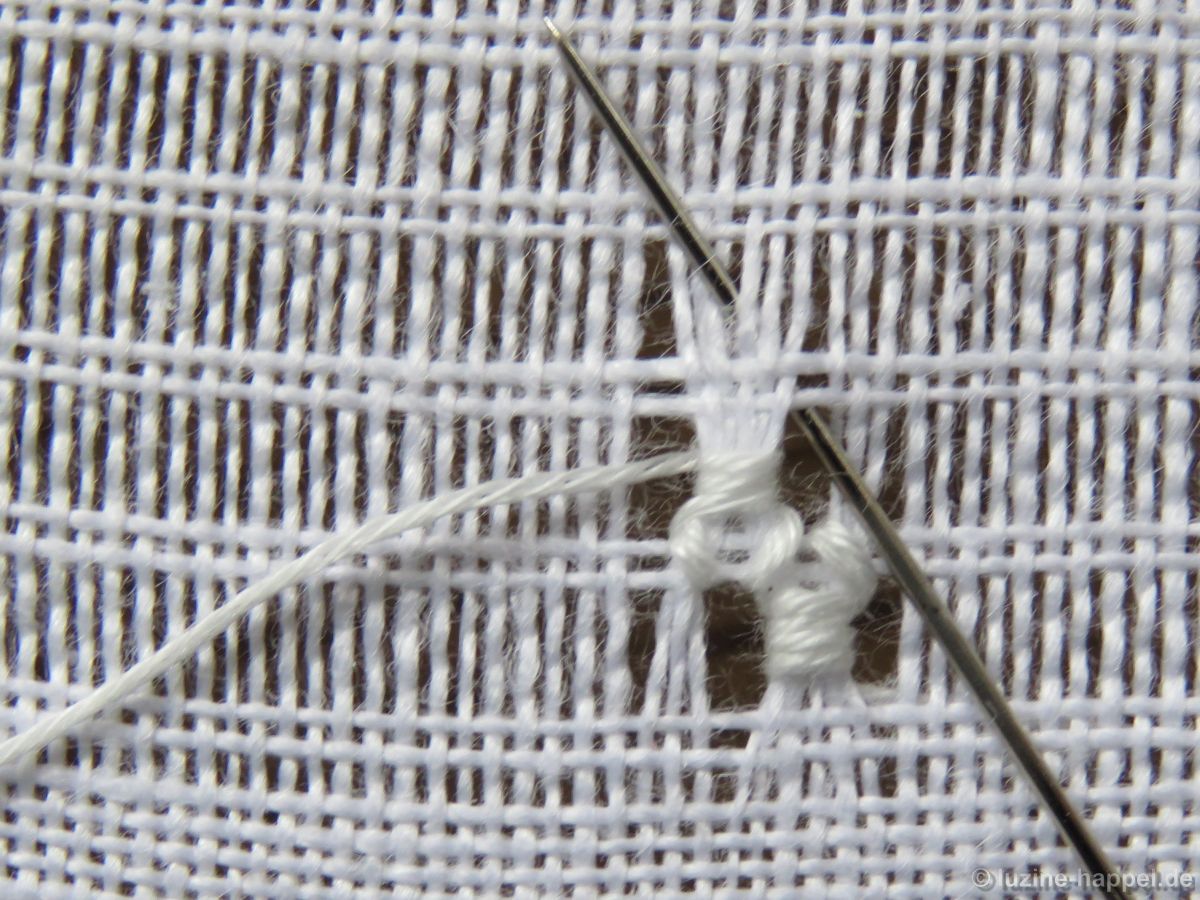
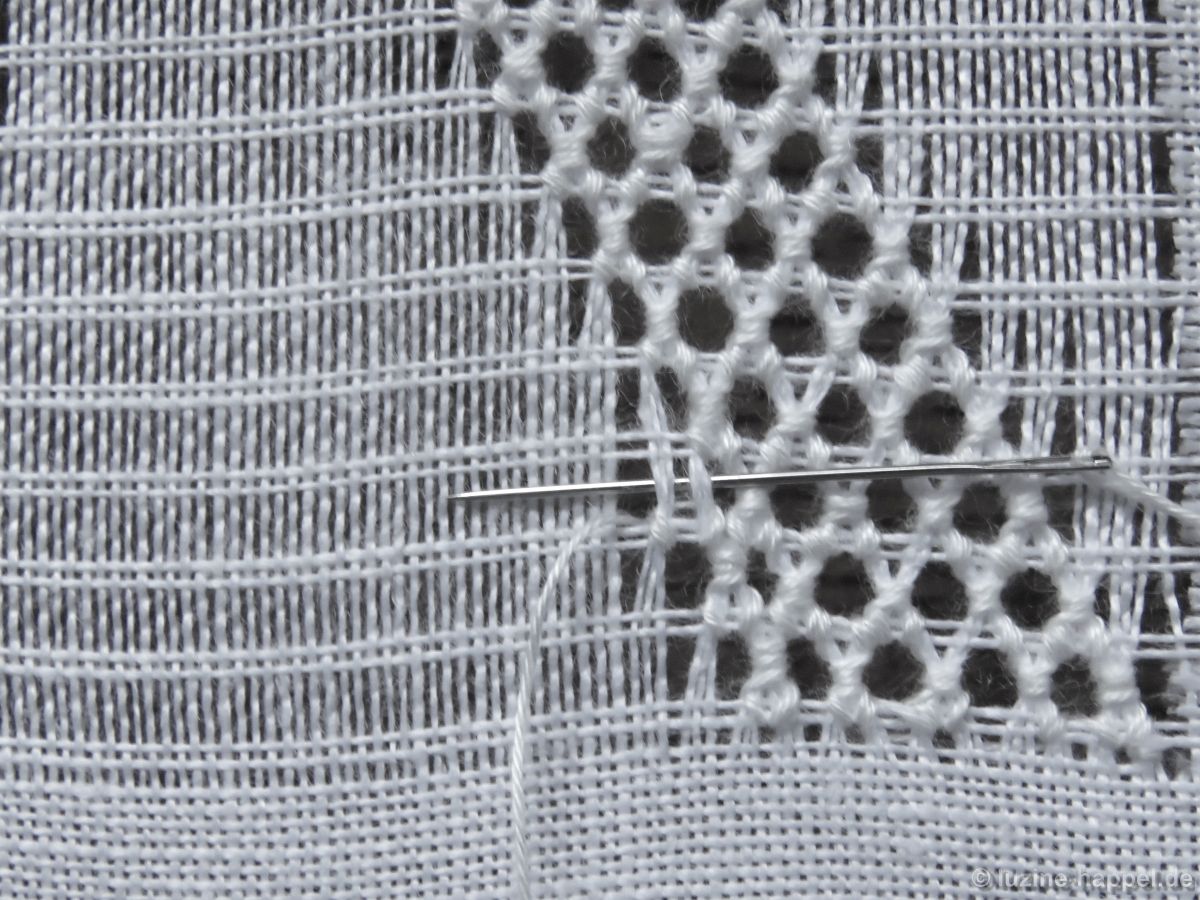
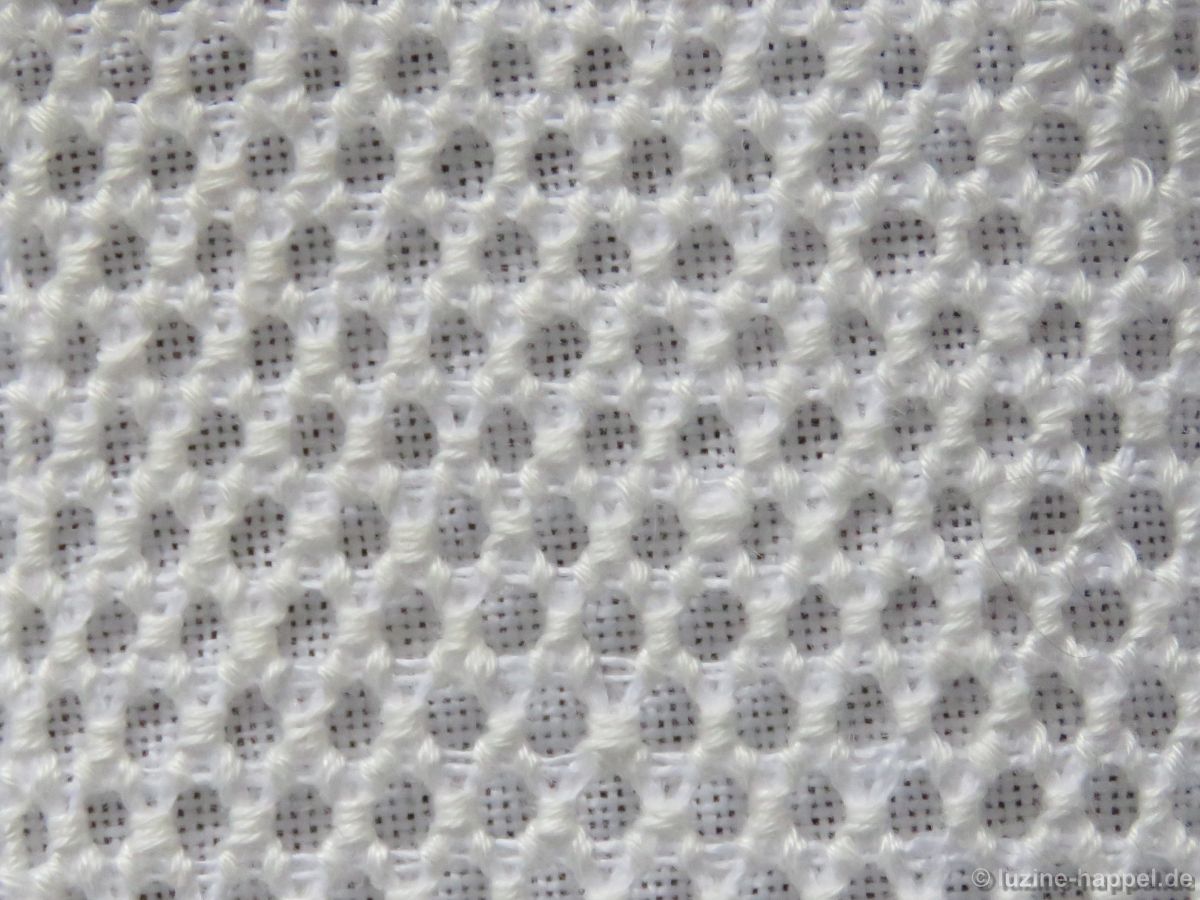
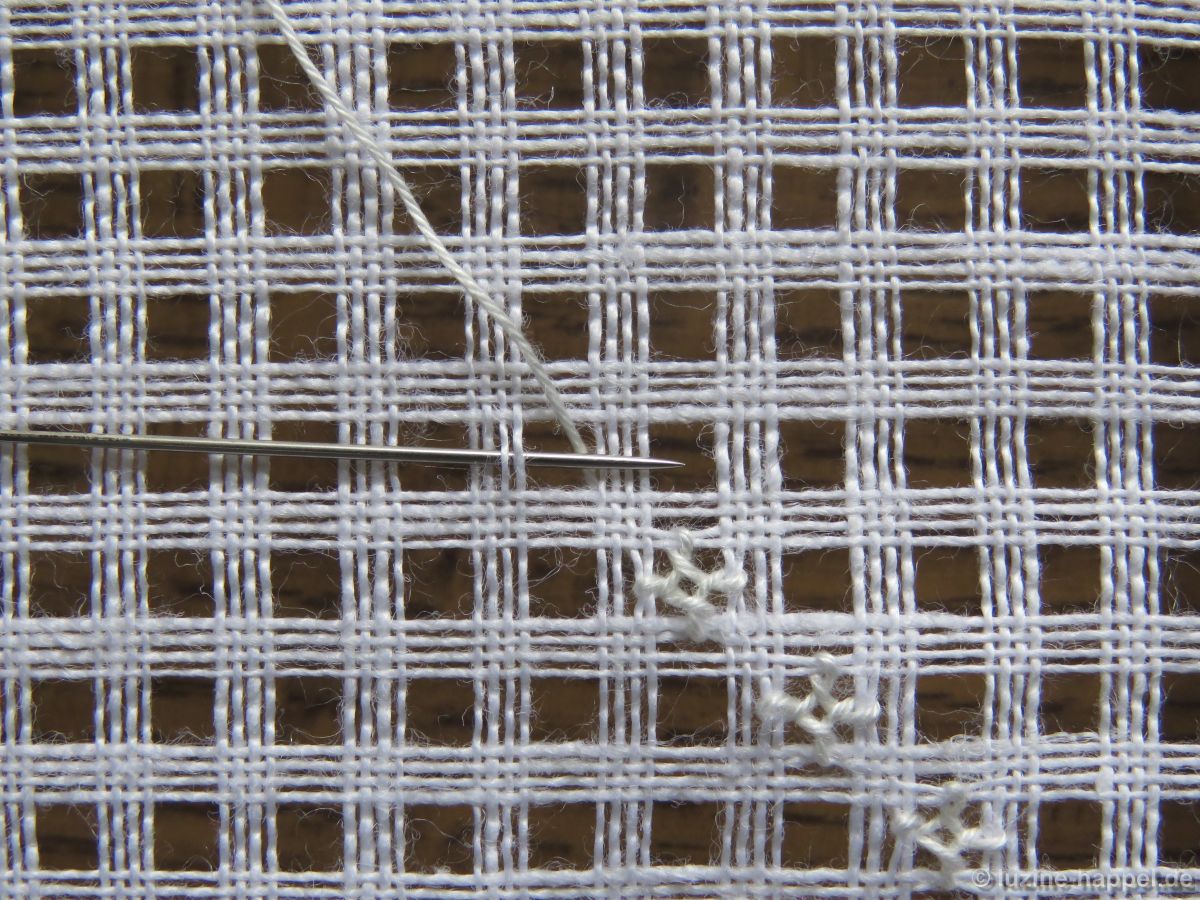
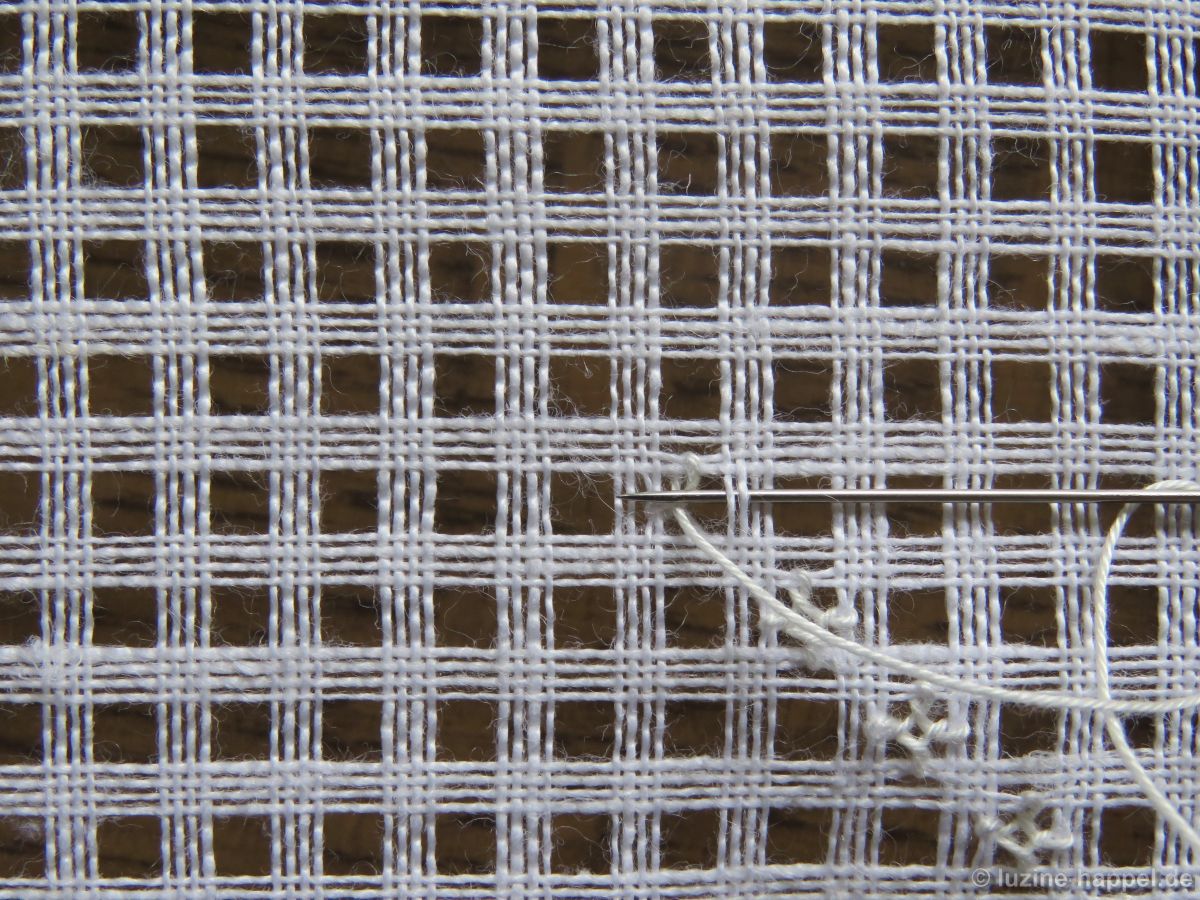
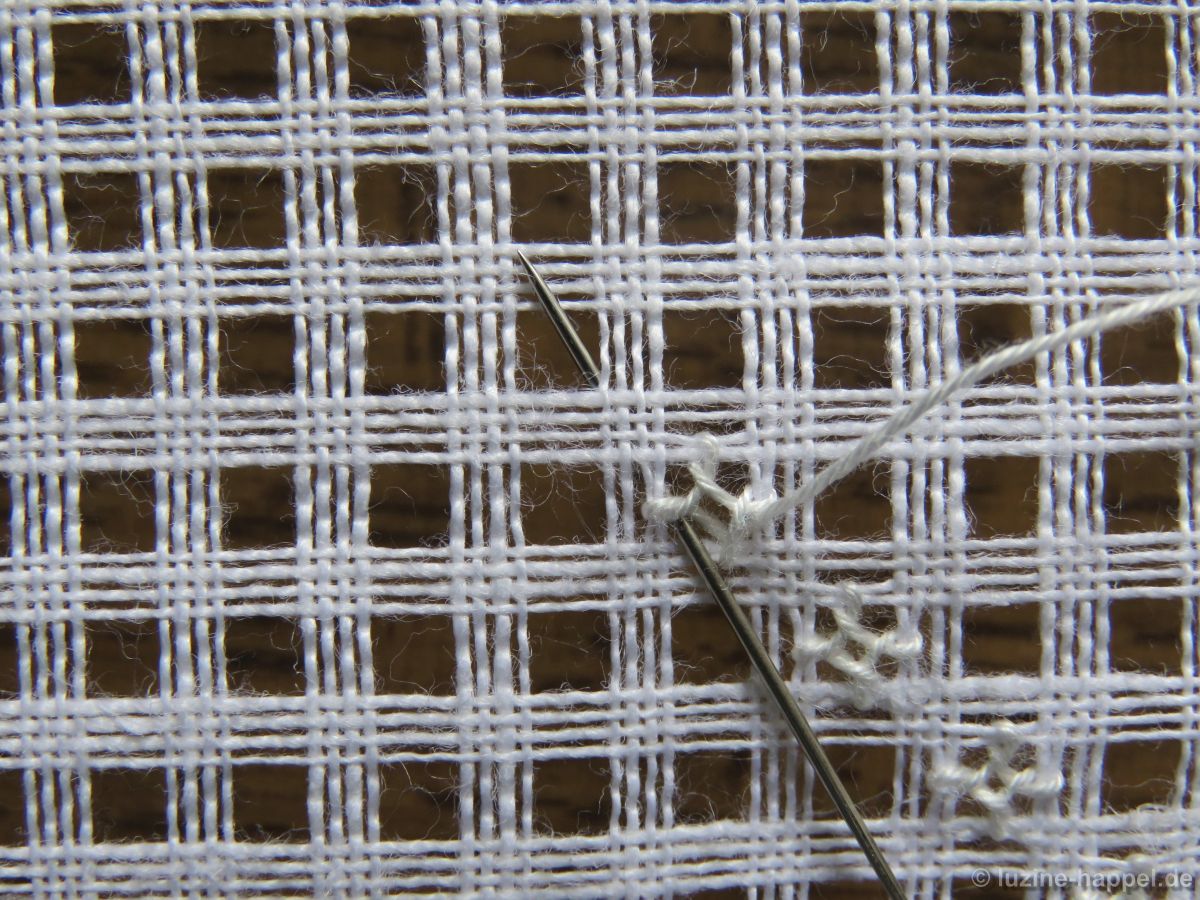
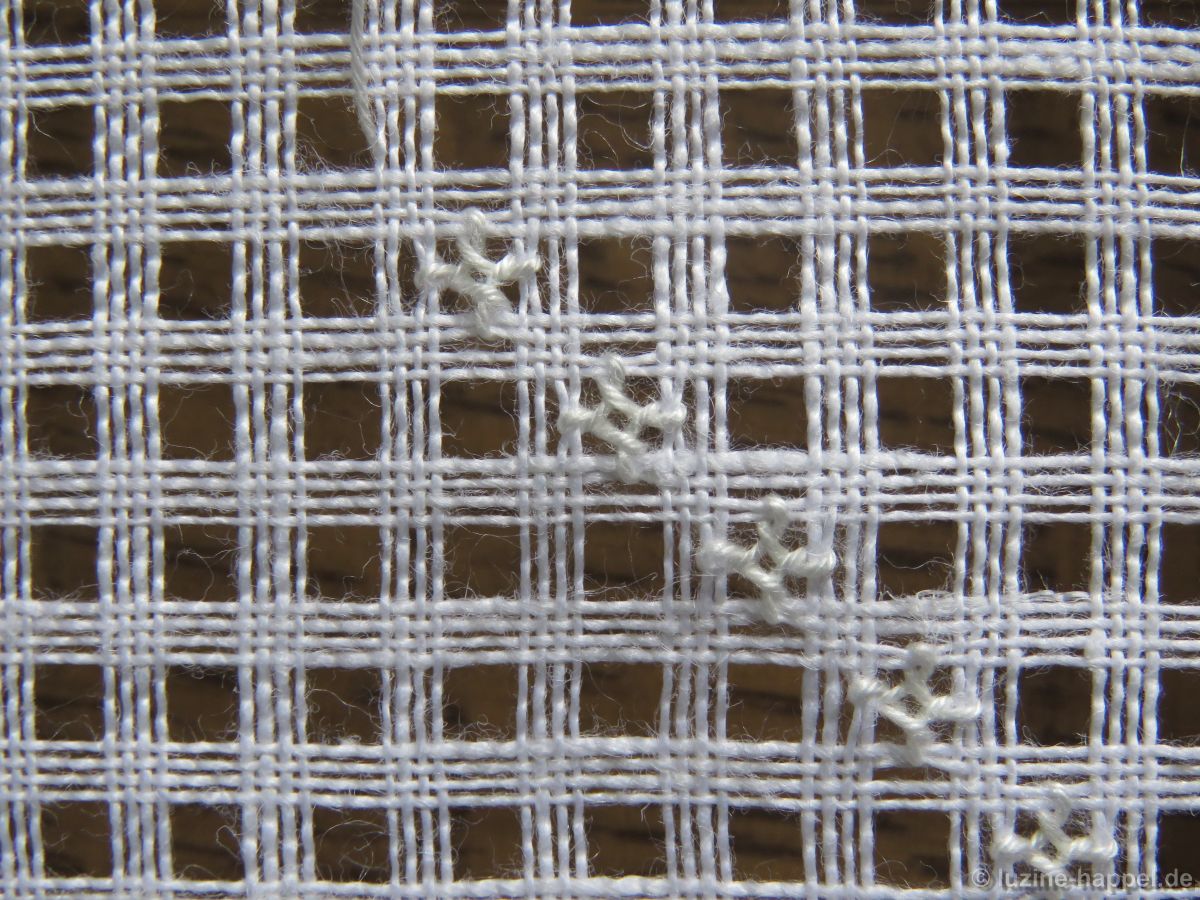
Rose stitches and the Rose stitch variant (seen here – pictures 3,4 and 5)
• different Square Eyelet patterns
• Diagonal Cross Filling
• Double Diagonal Cross Filling stitches
• Diagonal Cross Filling – French variation (seen here)
• Diagonal Cross Filling – French variation/wrong side up
• Diagonal Cross Filling – French variation/“half“(seen here)
• Diagonal Cross Filling – French variation/“half“/wrong side up
• Diagonal Cross Filling – French variation/“vertical half“ Double Back stitches
• Double Back stitches/wrong side up
Easy Eyelet stitches
• Easy Eyelet stitches/wrong side up (seen here pictures 11 and 12)
• Filling Pattern No. 555
• Filling Pattern No. 549
• Filling Pattern No. 479
• Filling Pattern No. 560

and certainly many more.

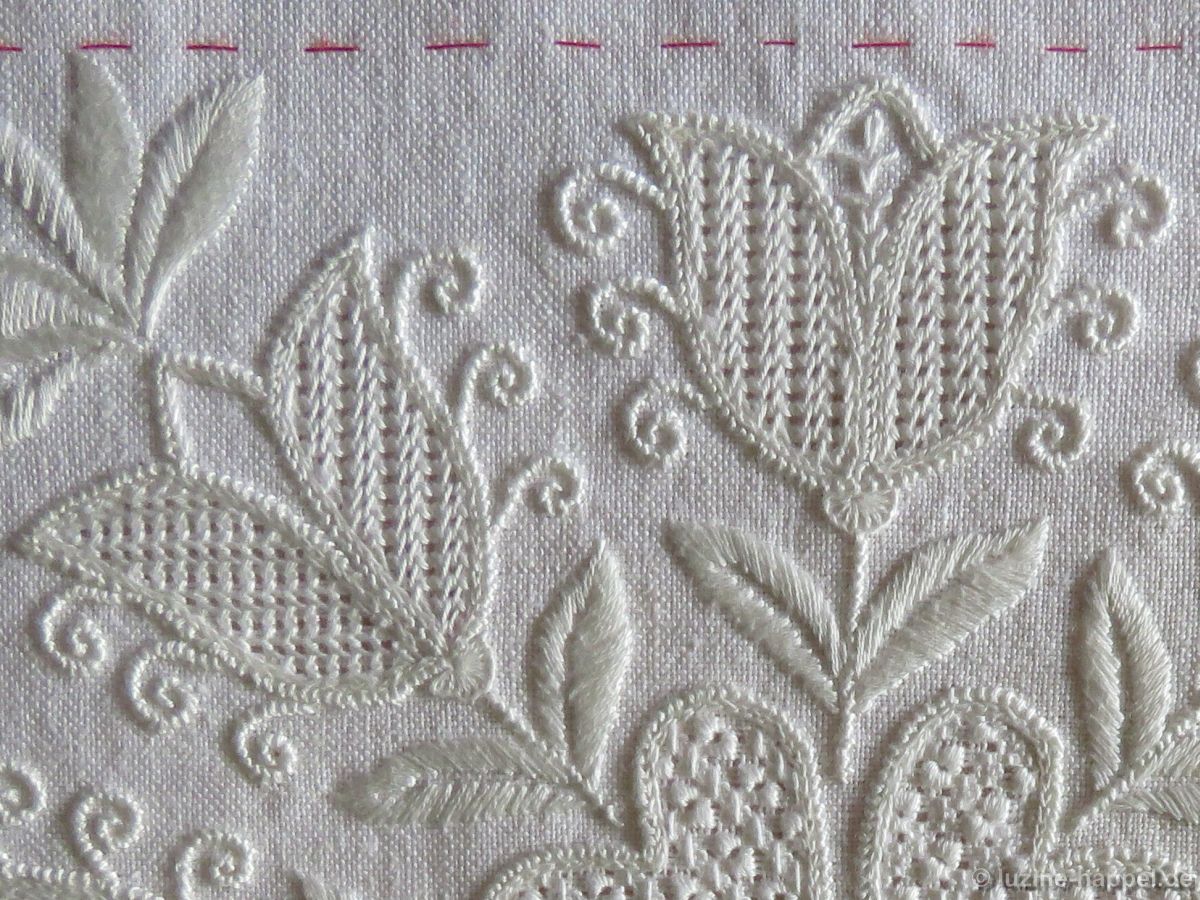
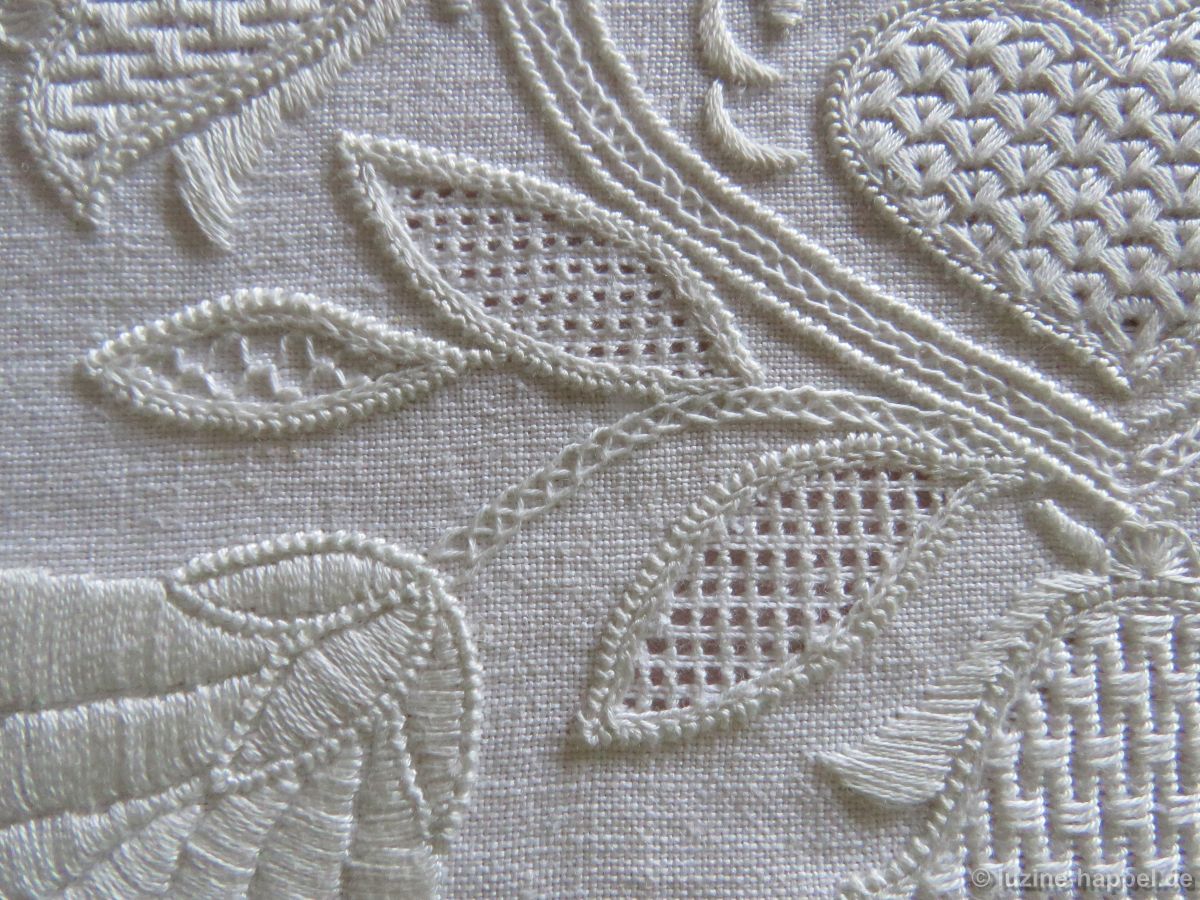
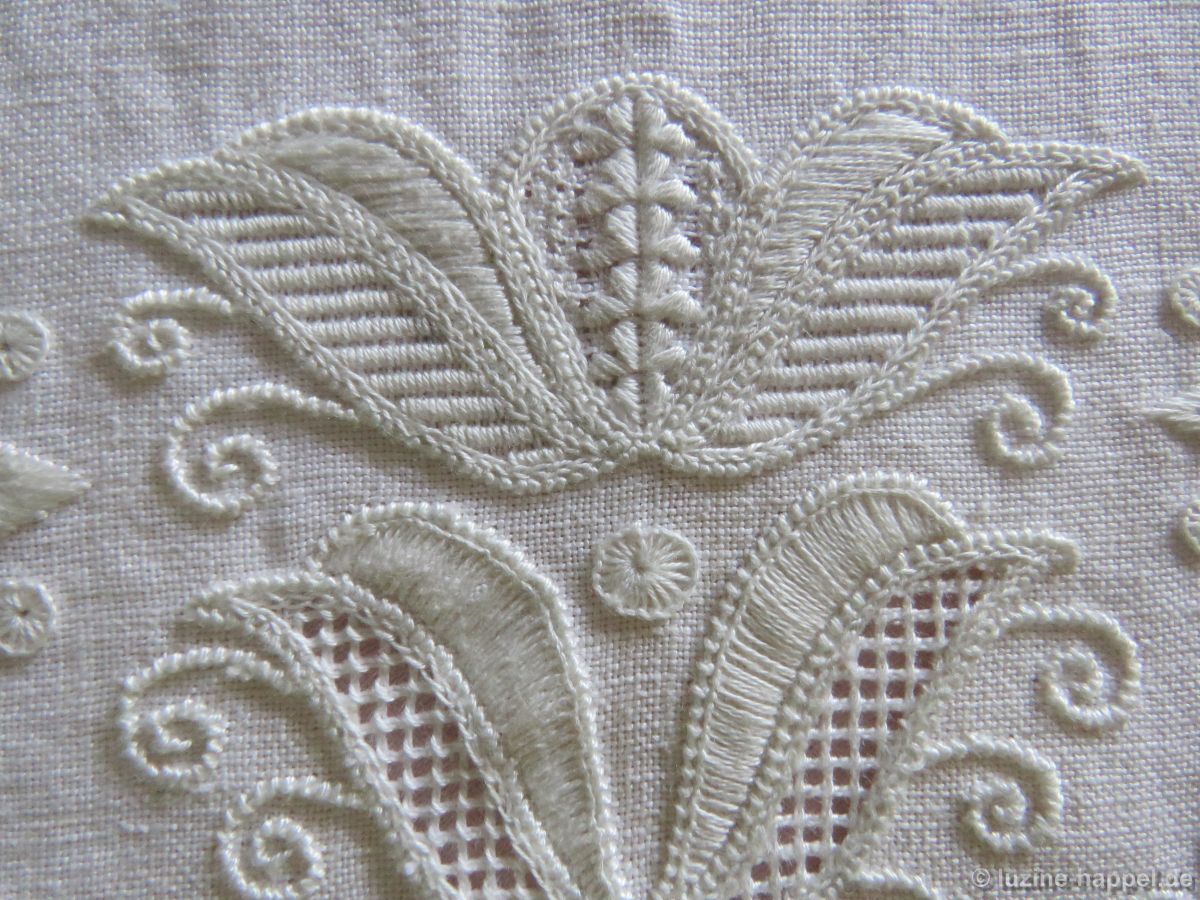
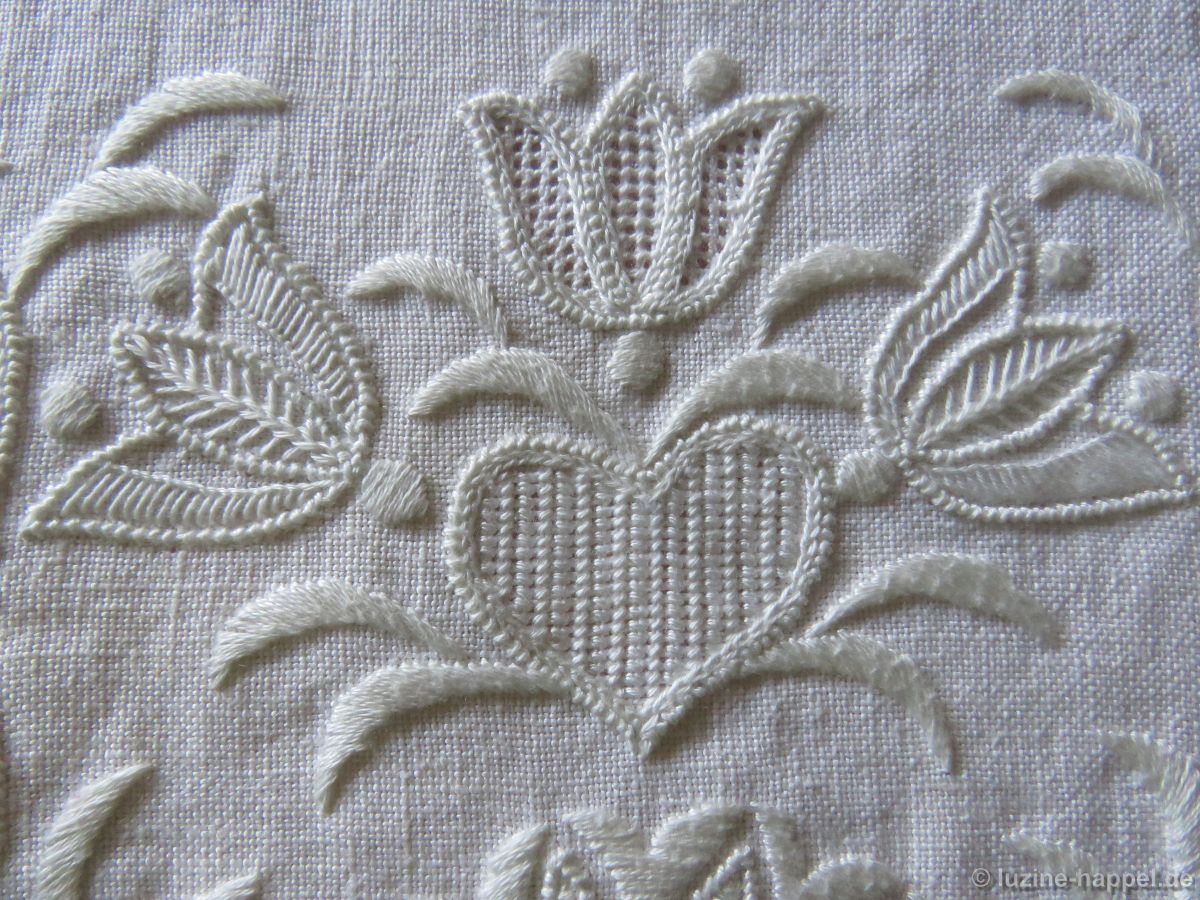
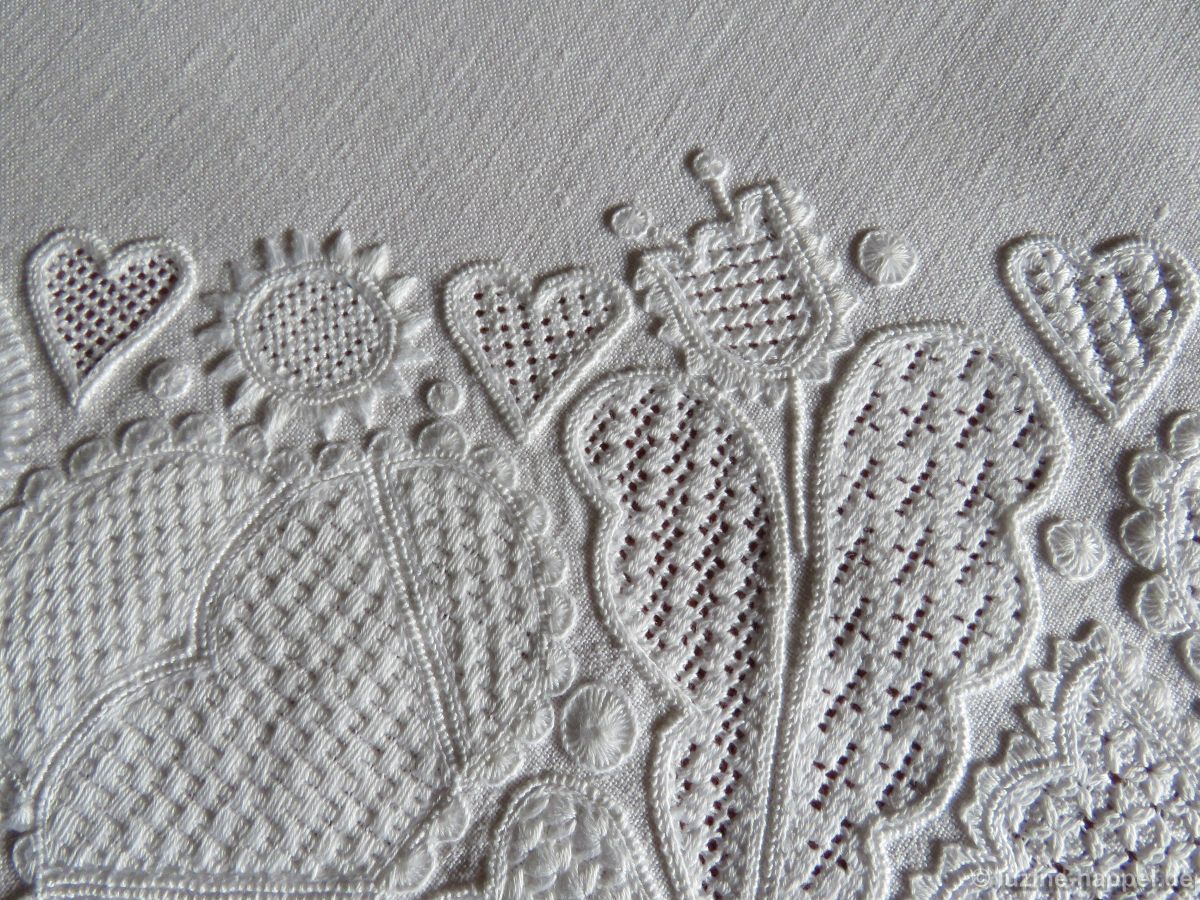
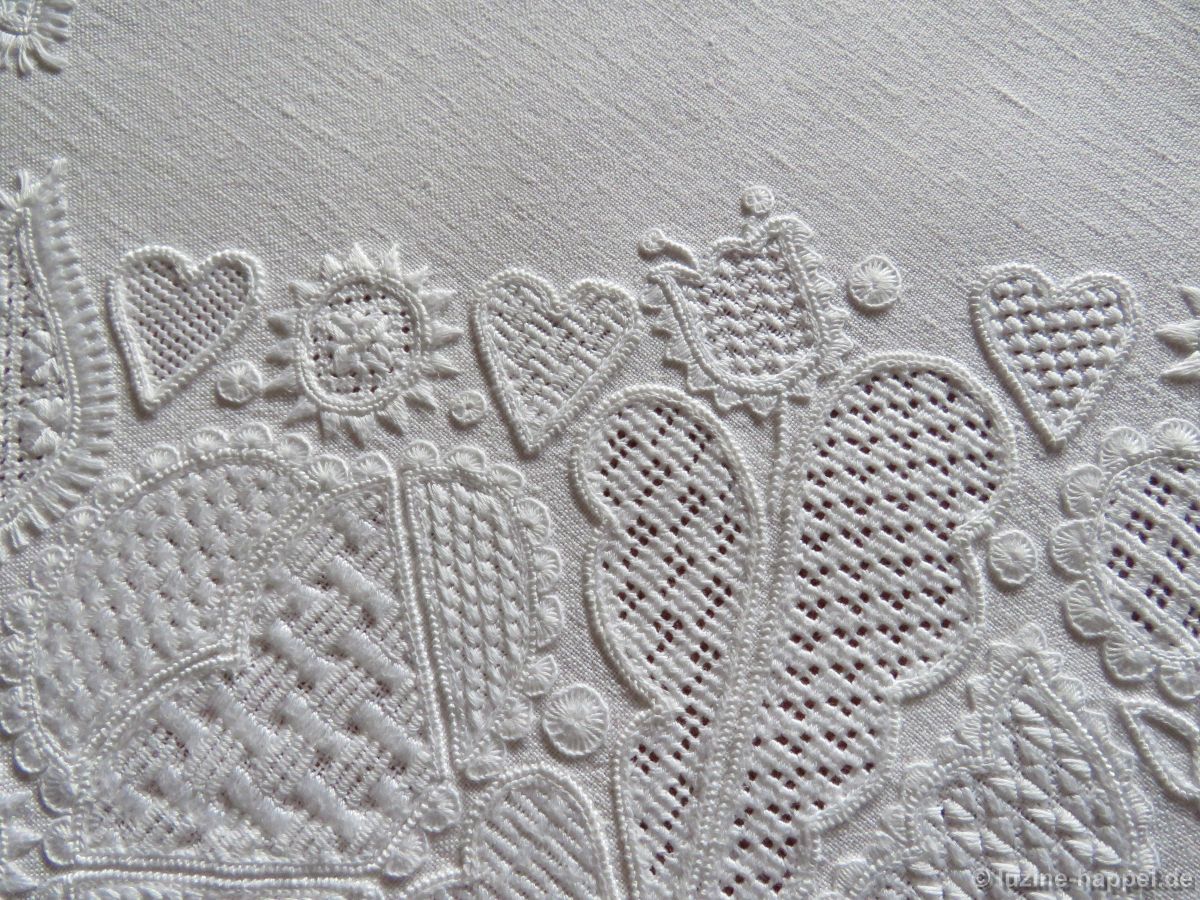
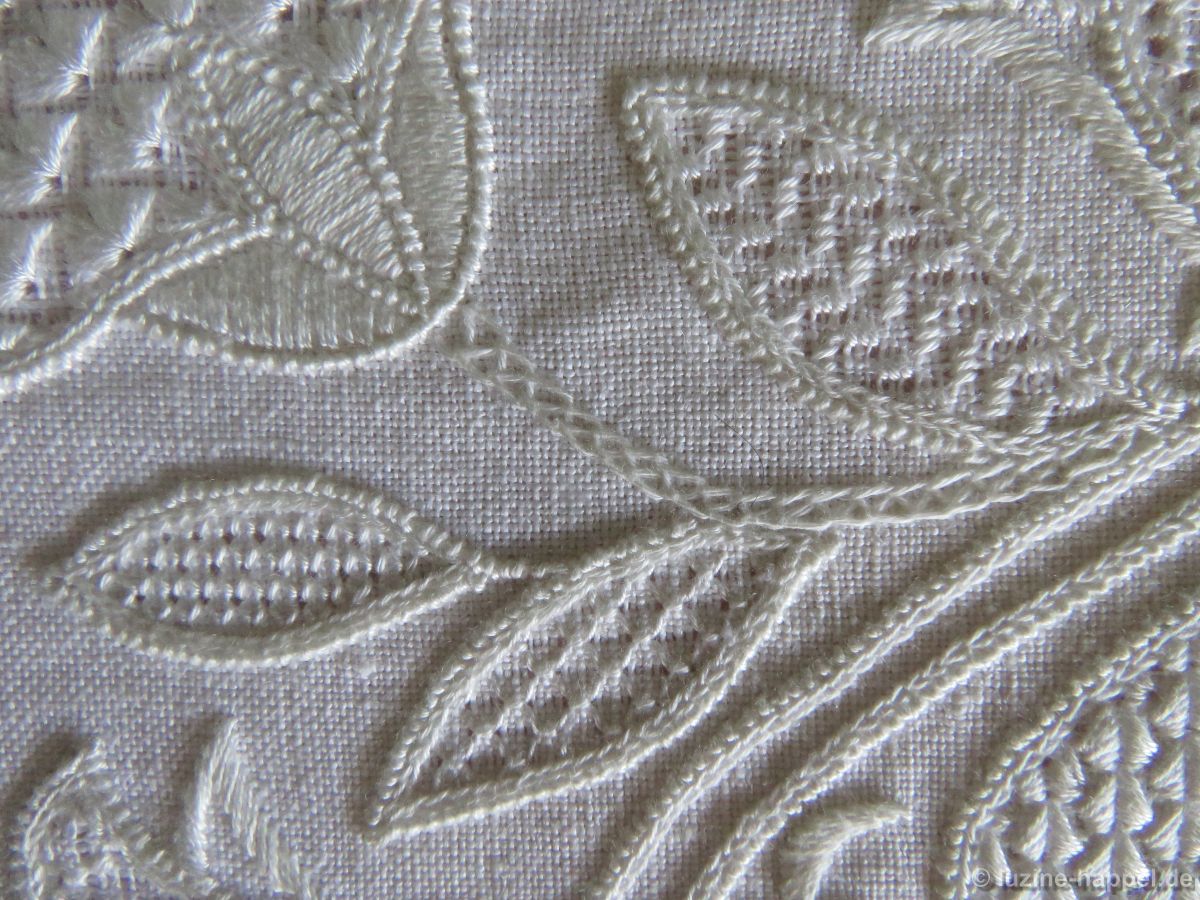
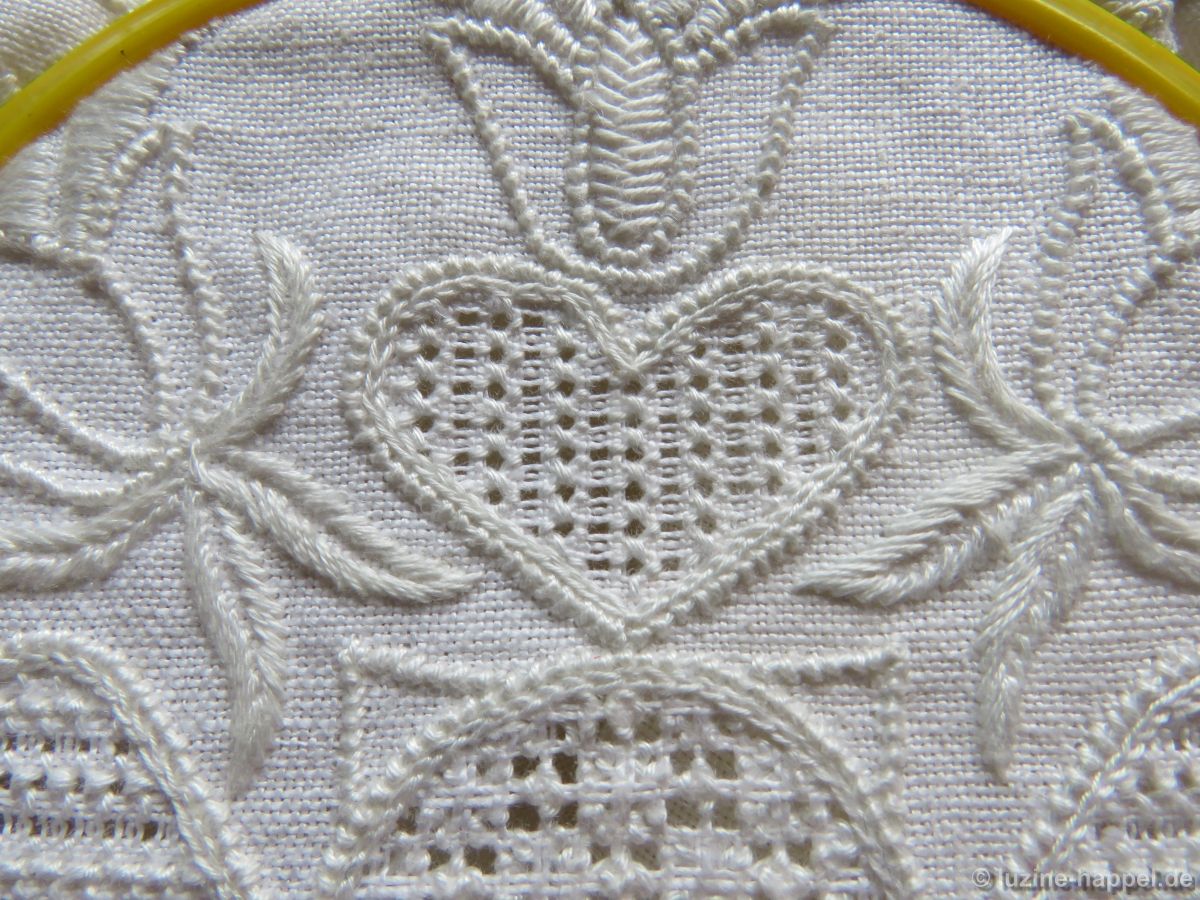
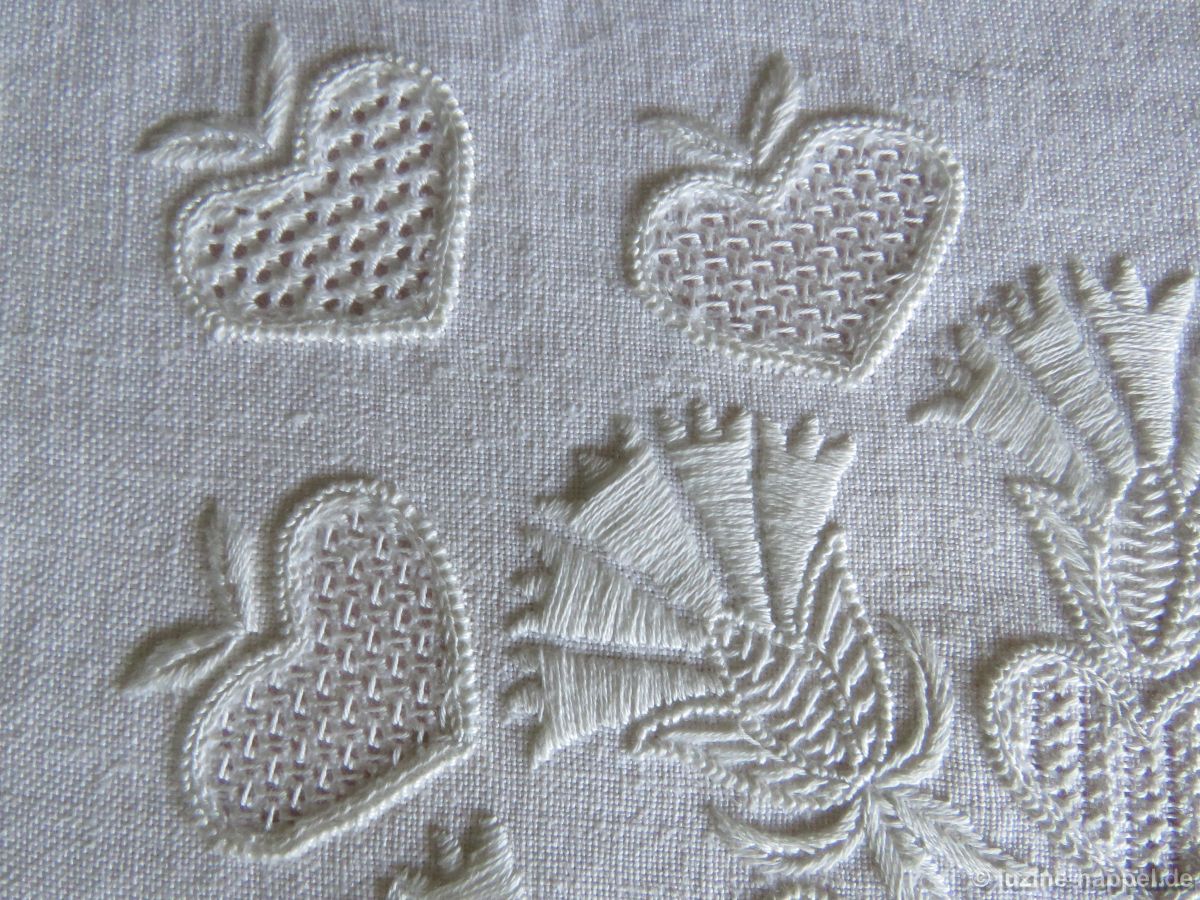
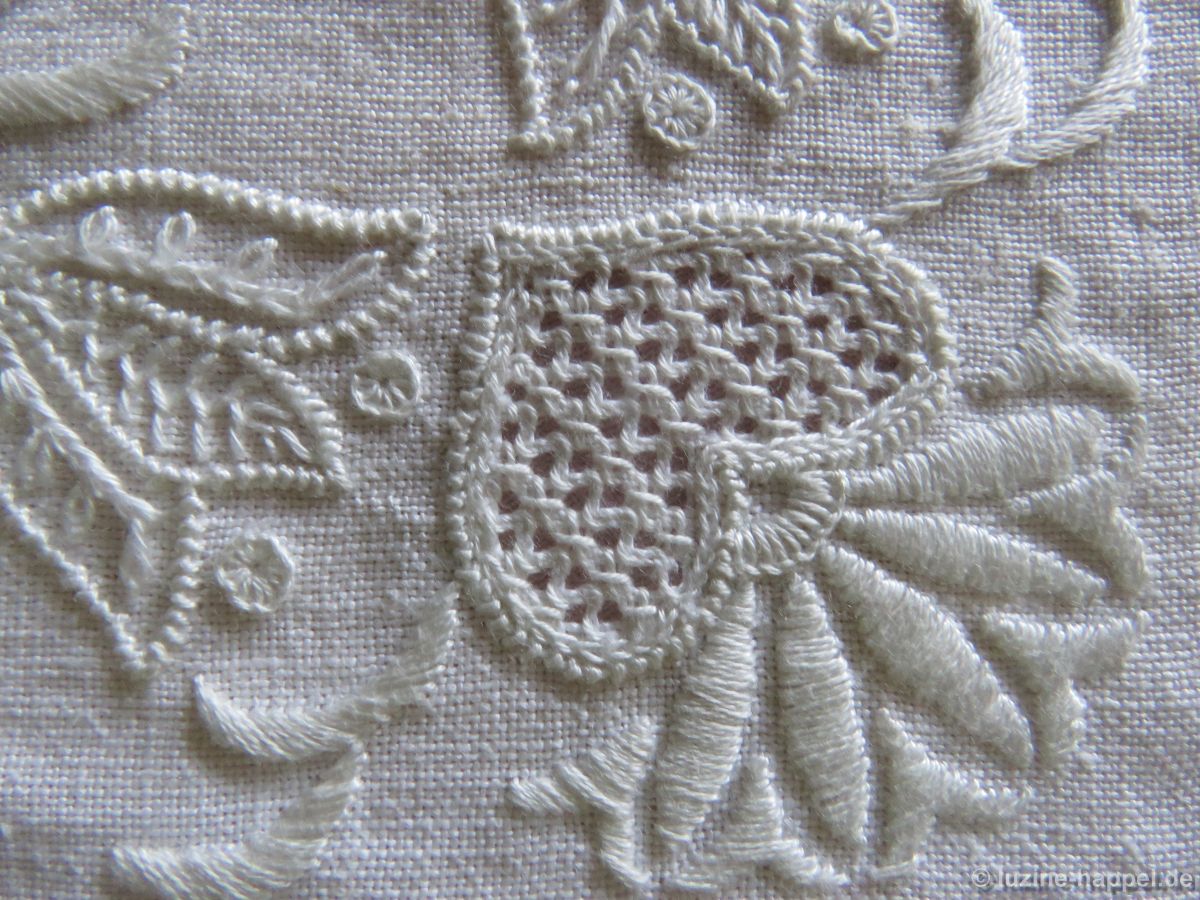
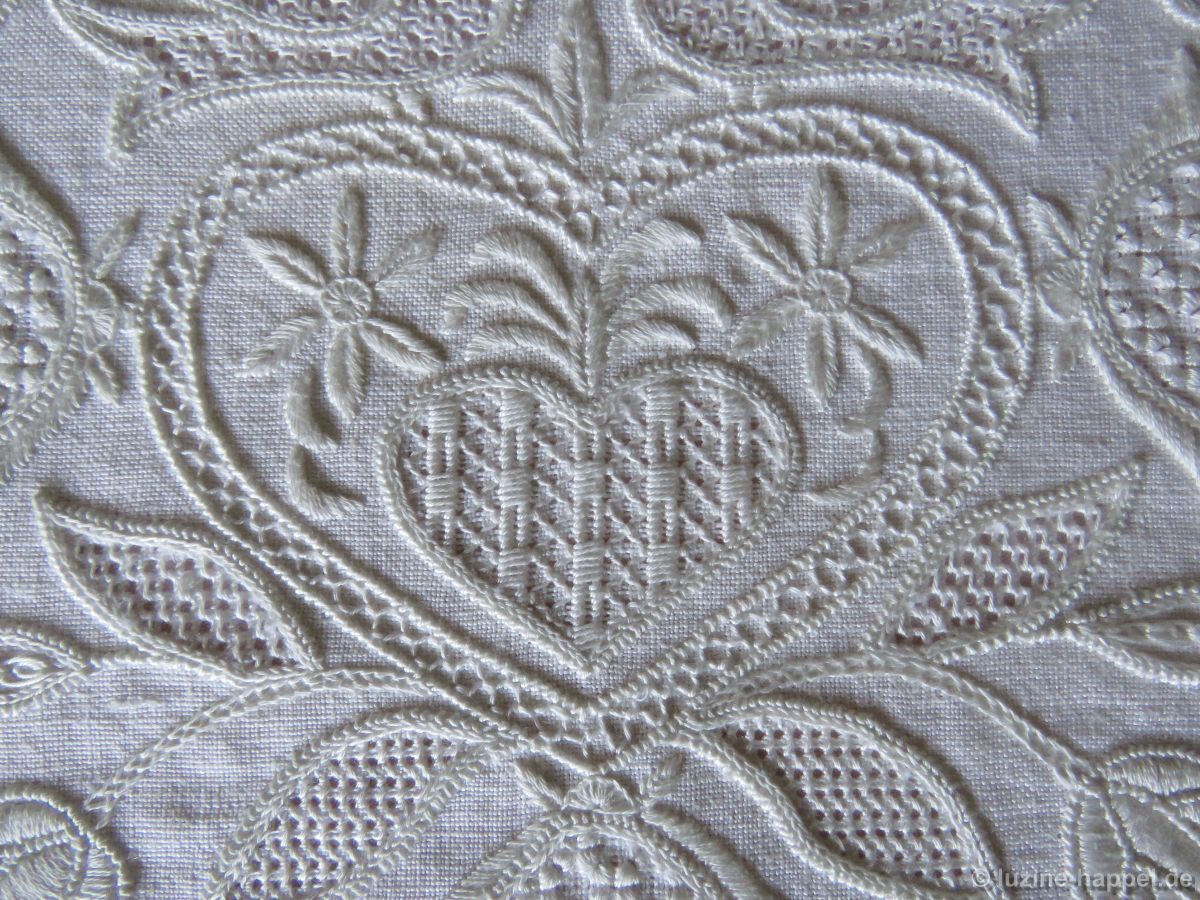
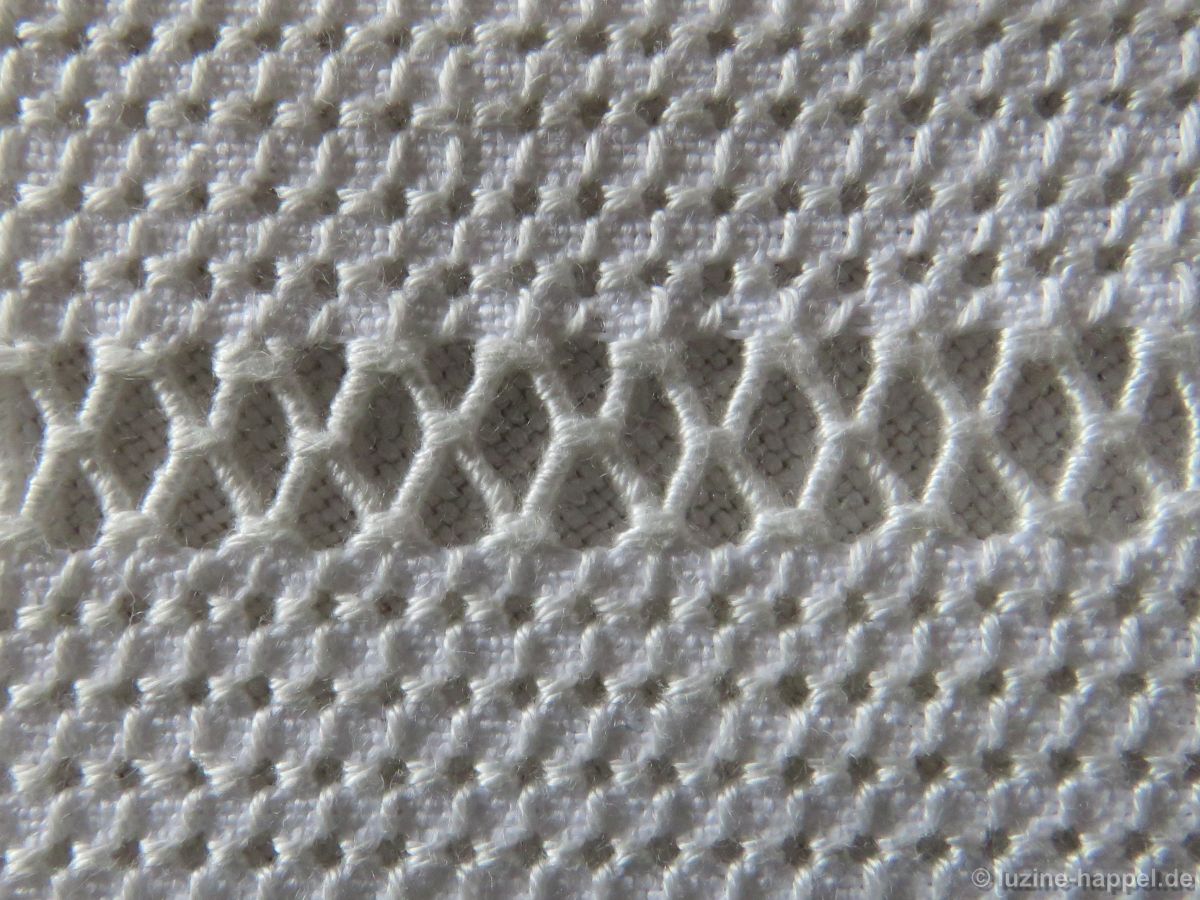
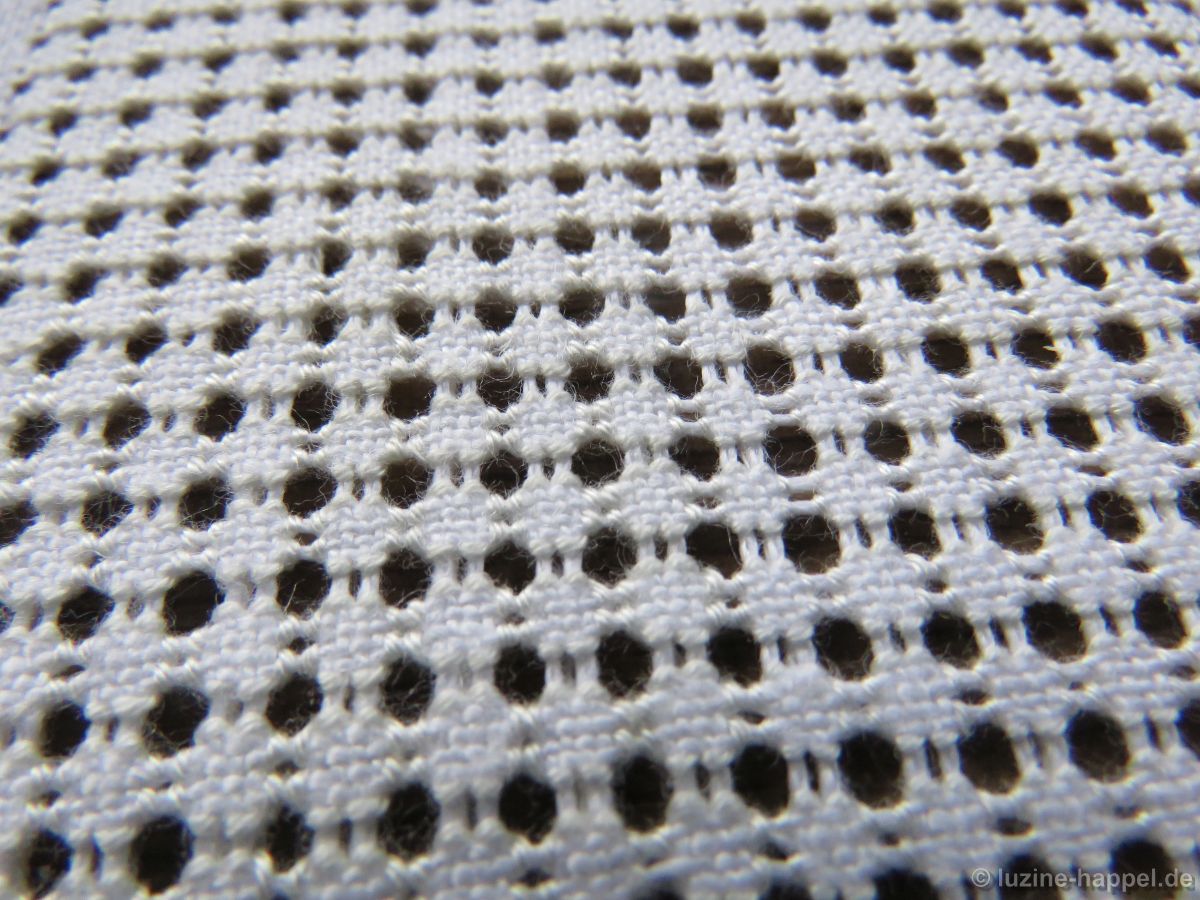
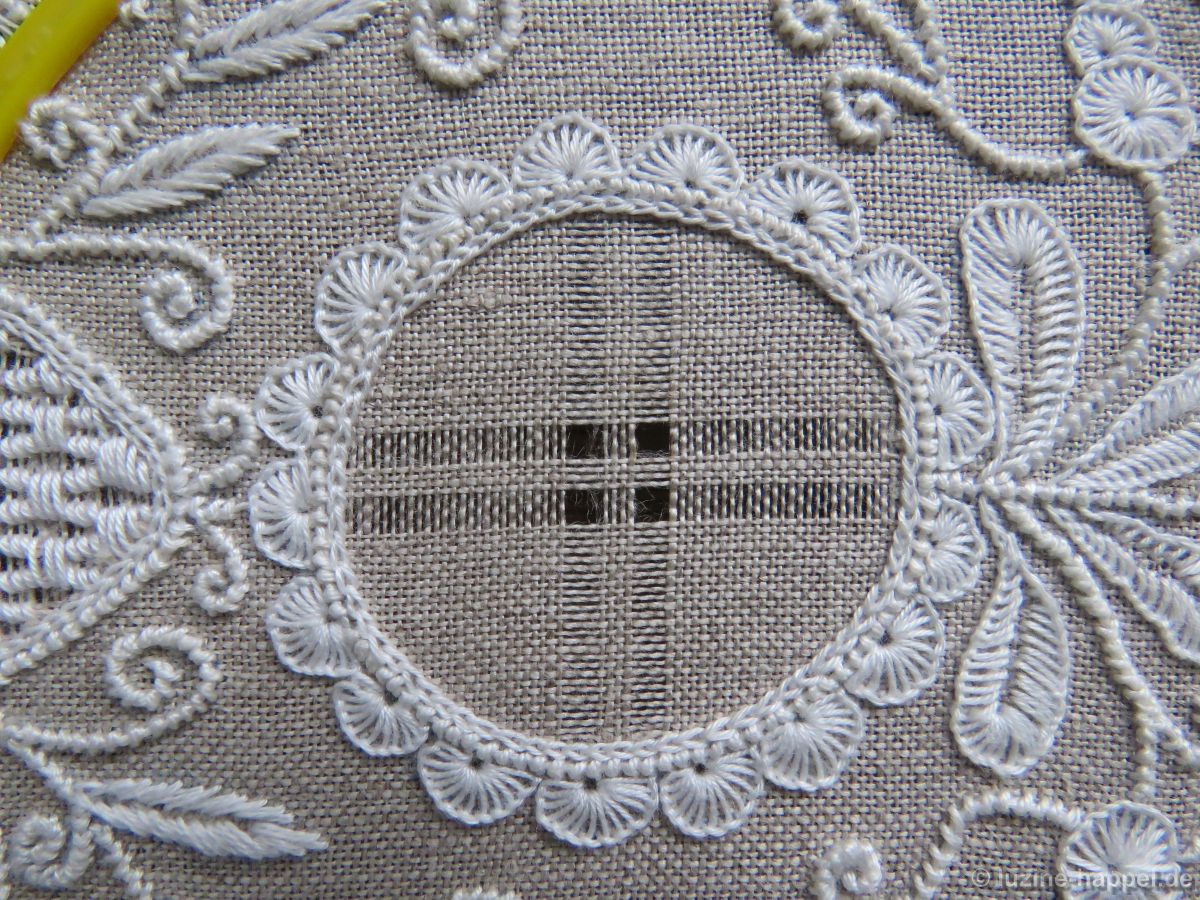
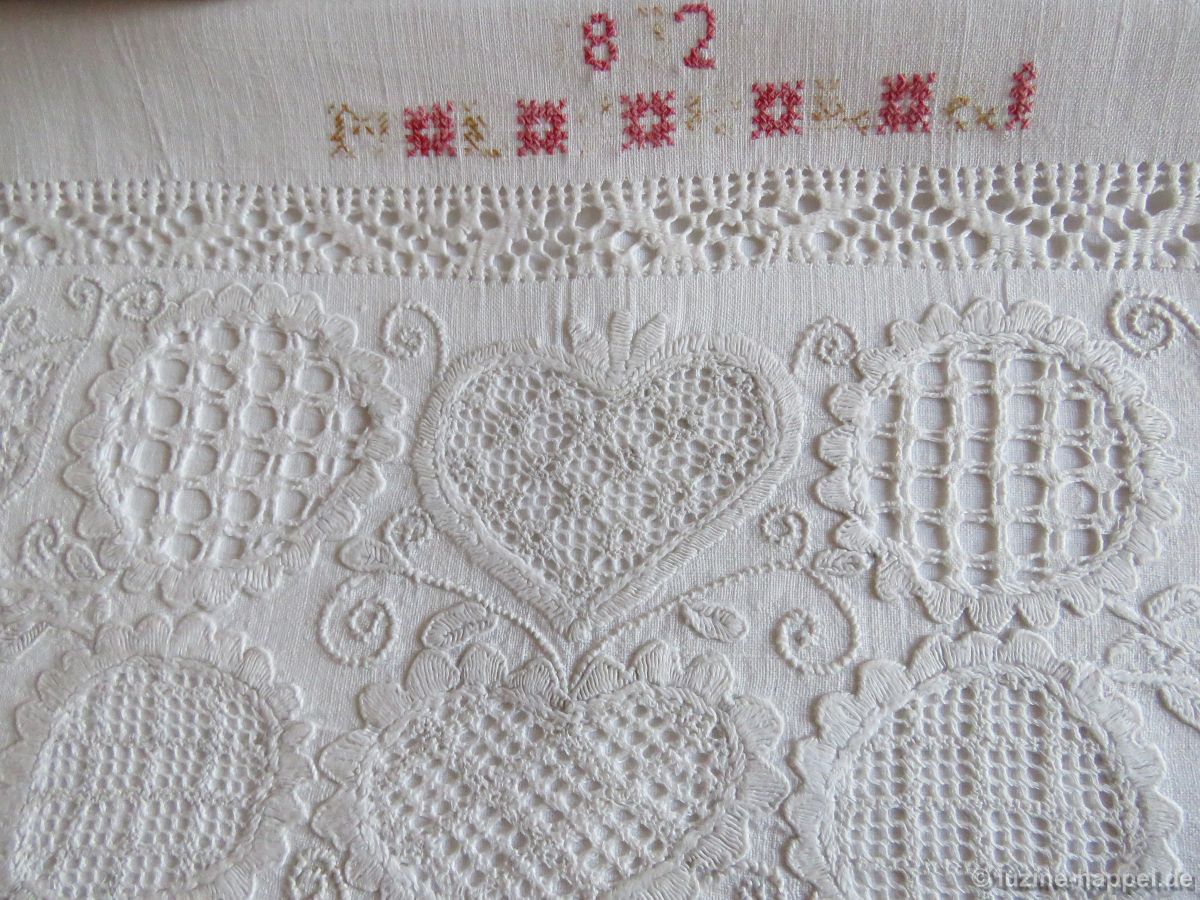
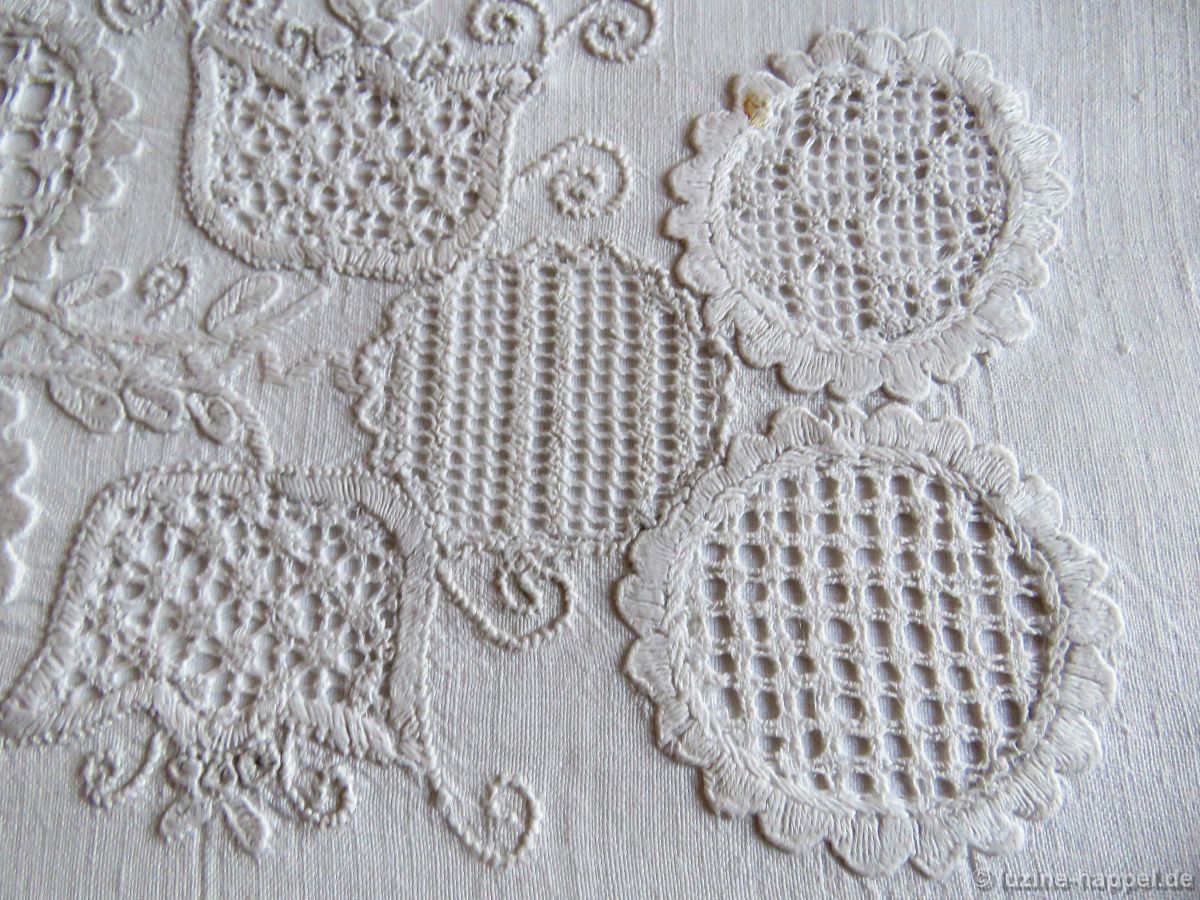
As you can see, the choice of patterns for small areas is huge!

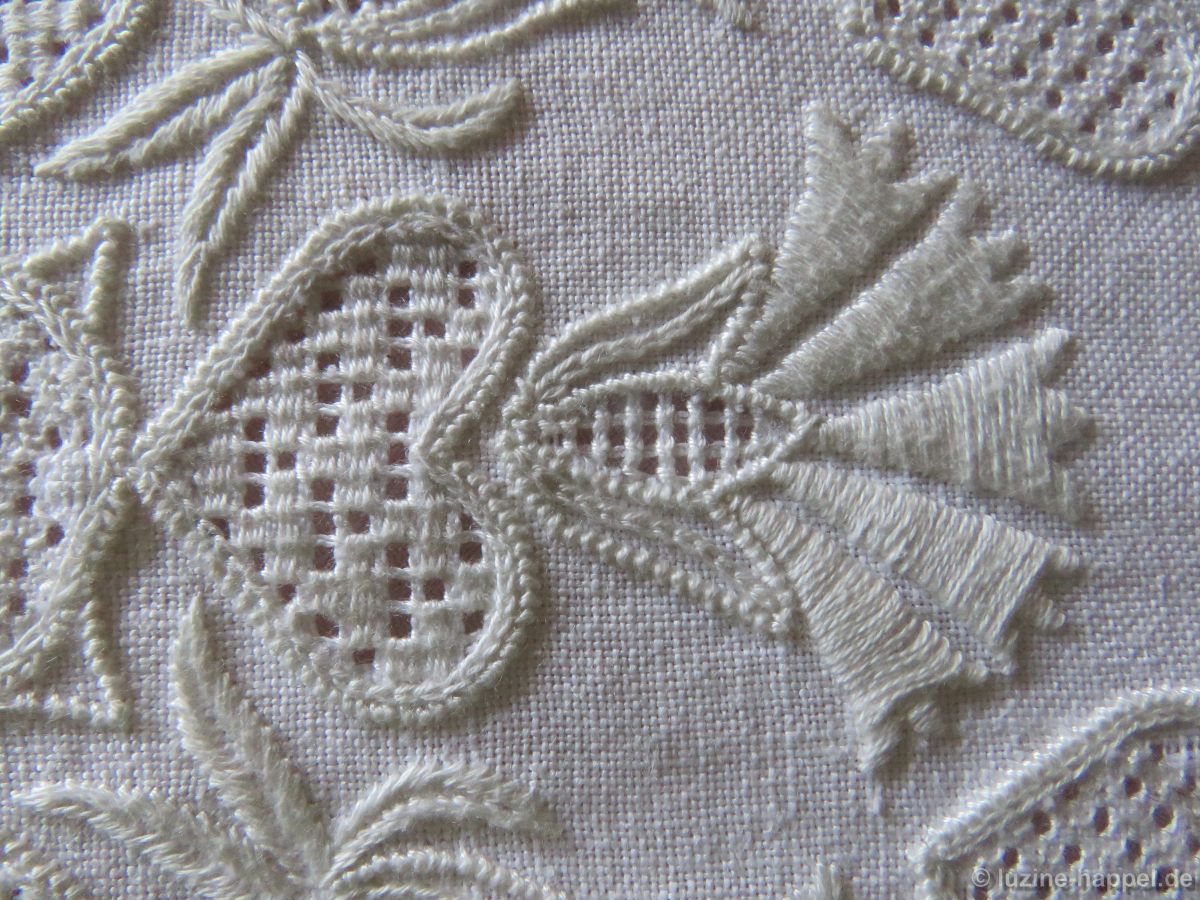
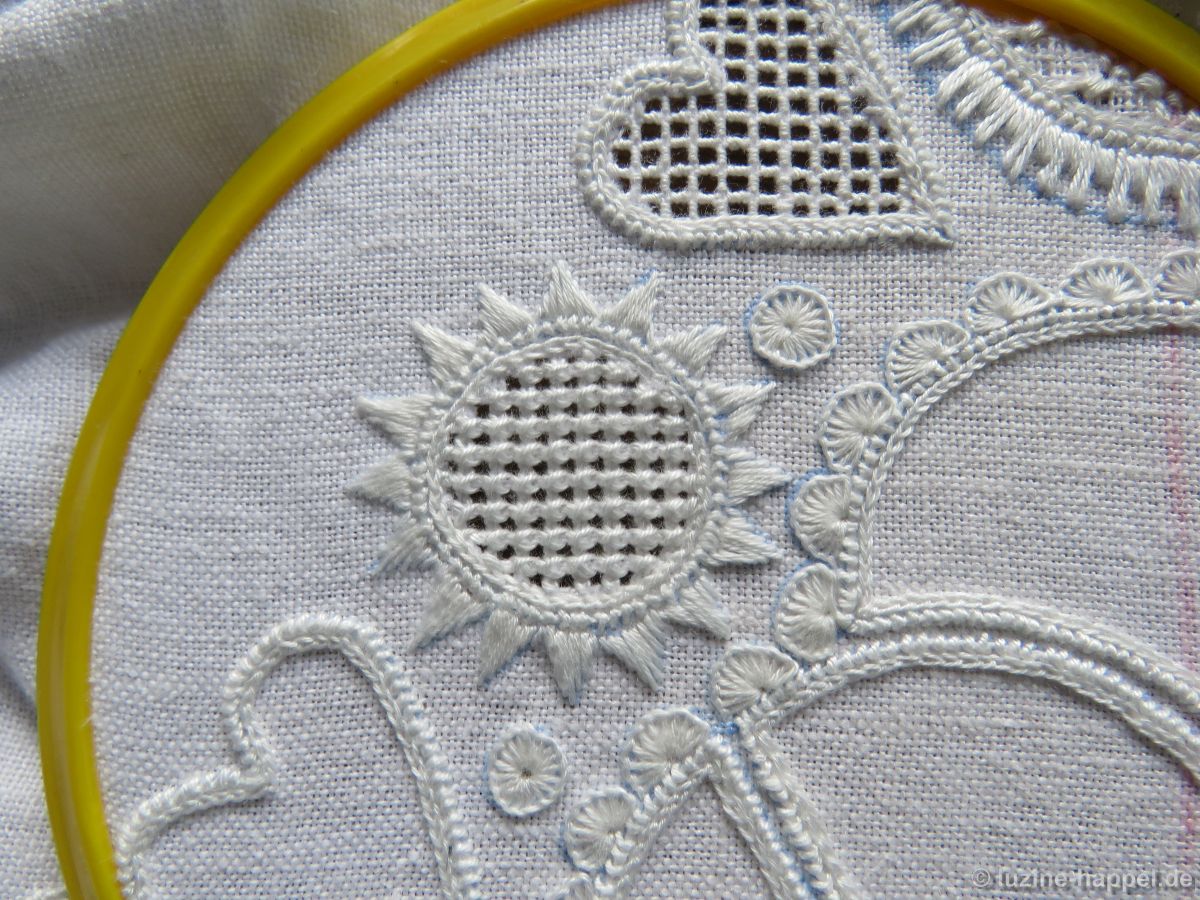
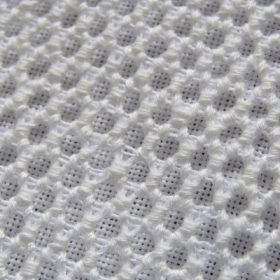
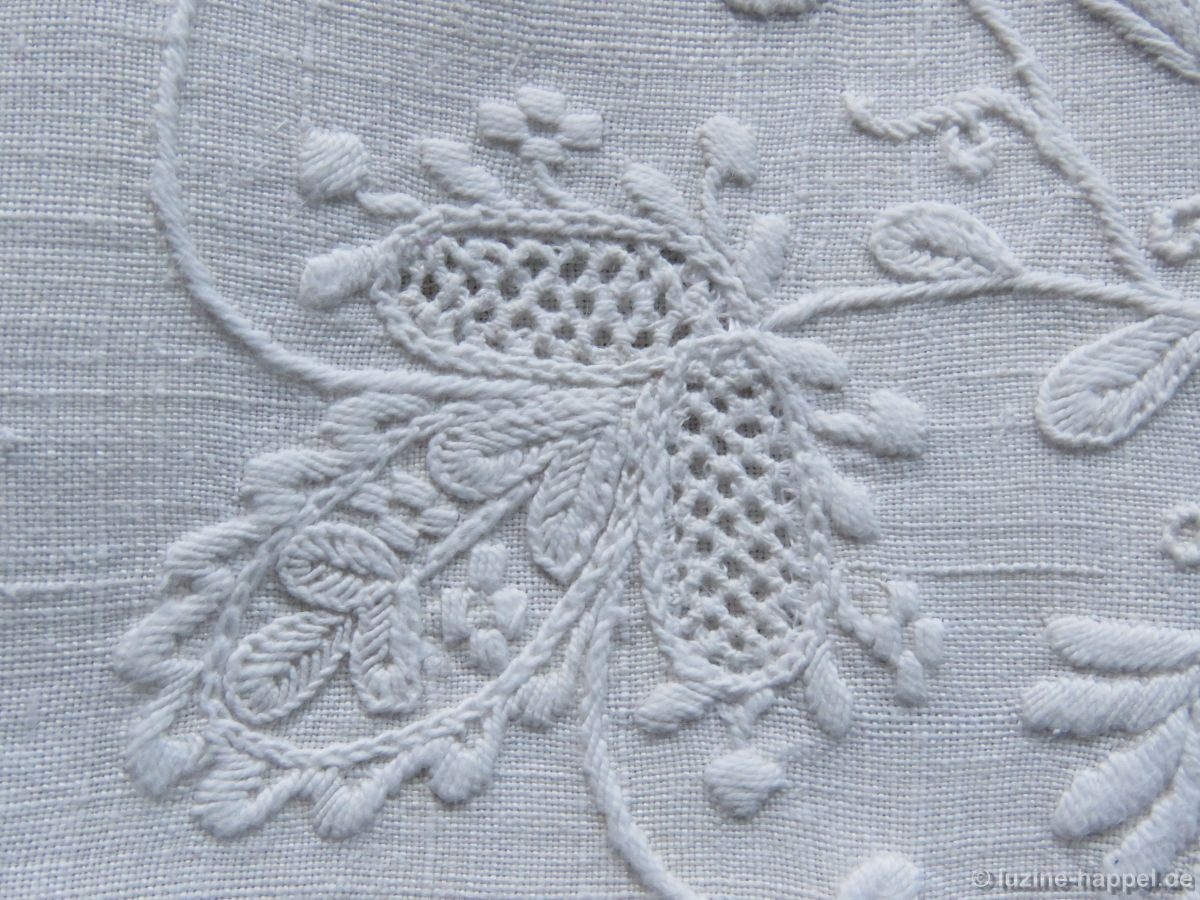
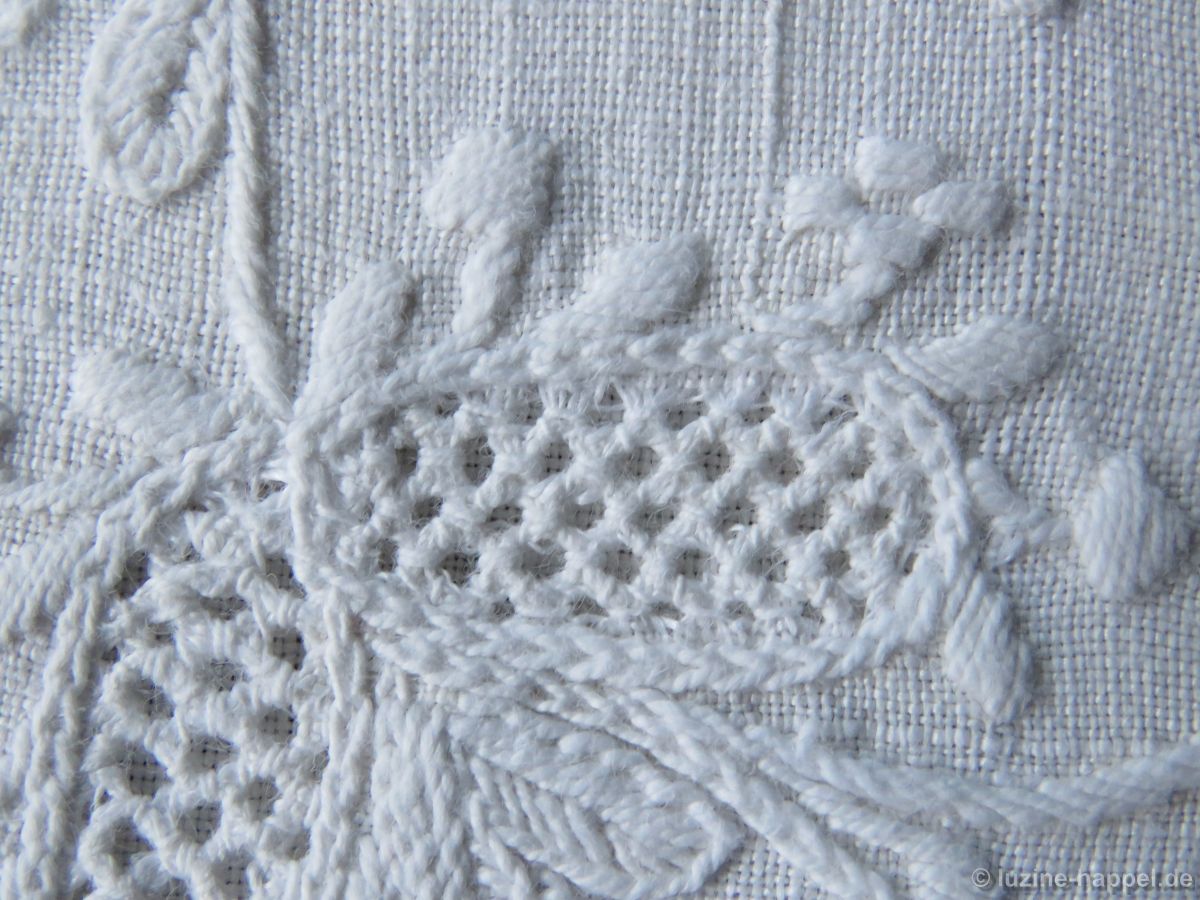
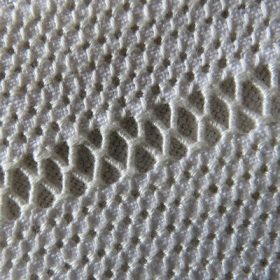
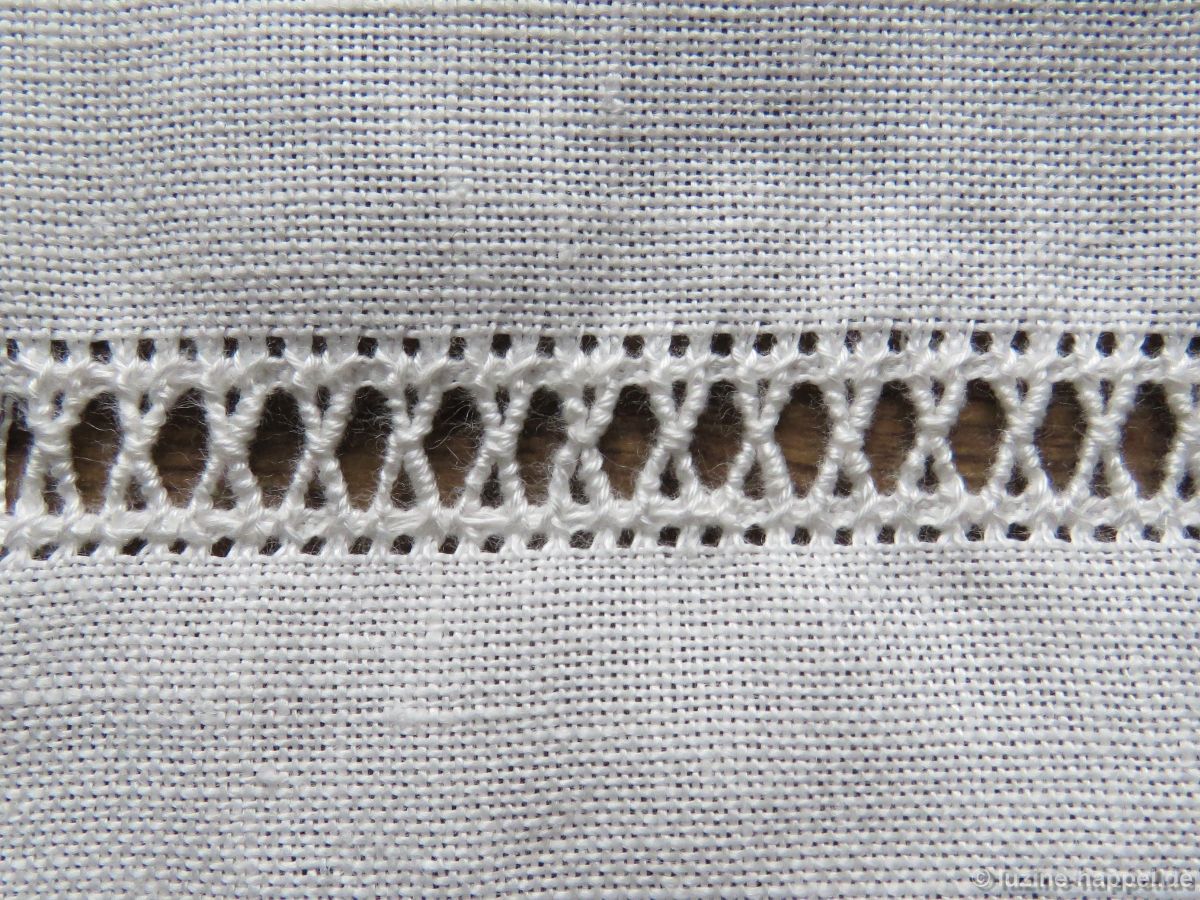
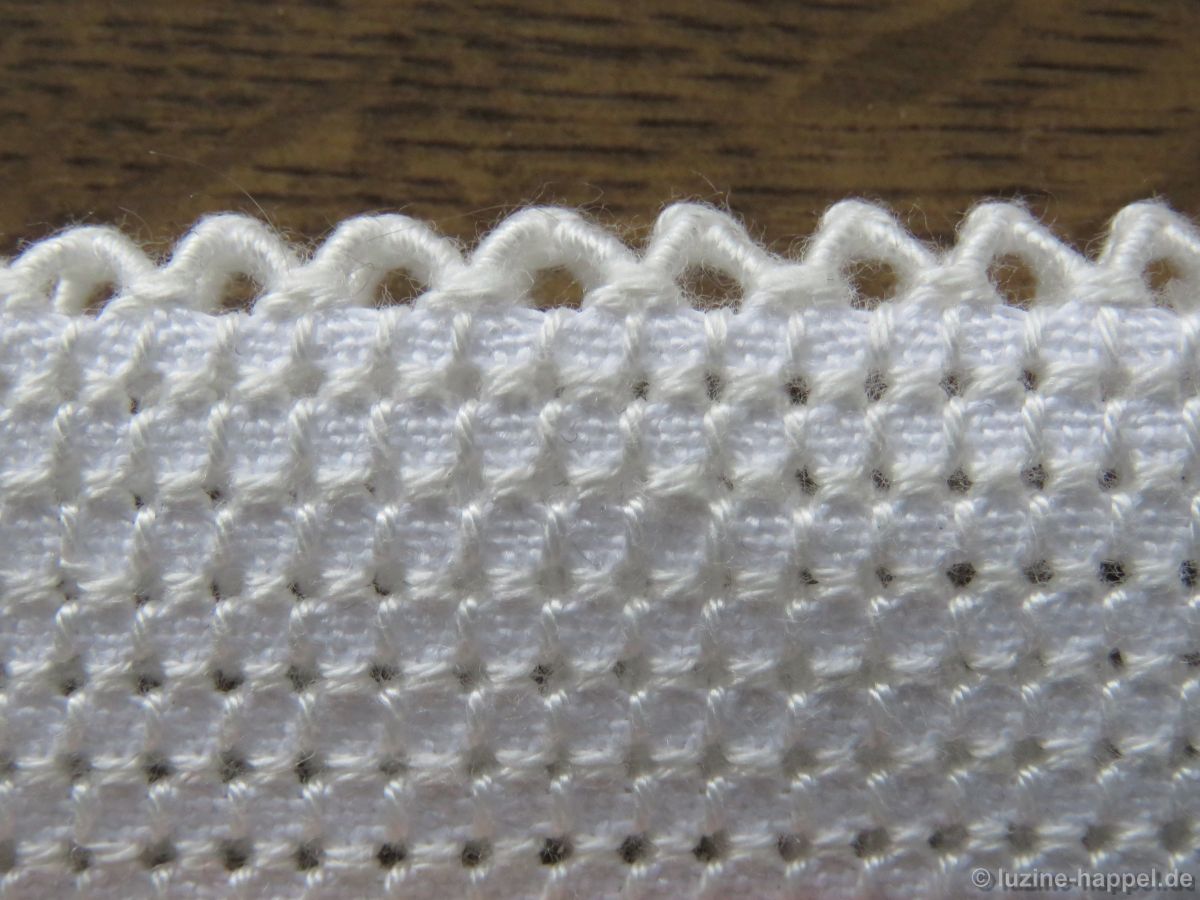
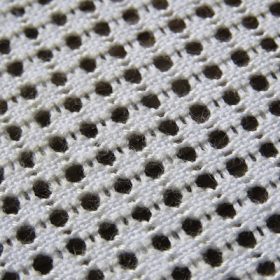
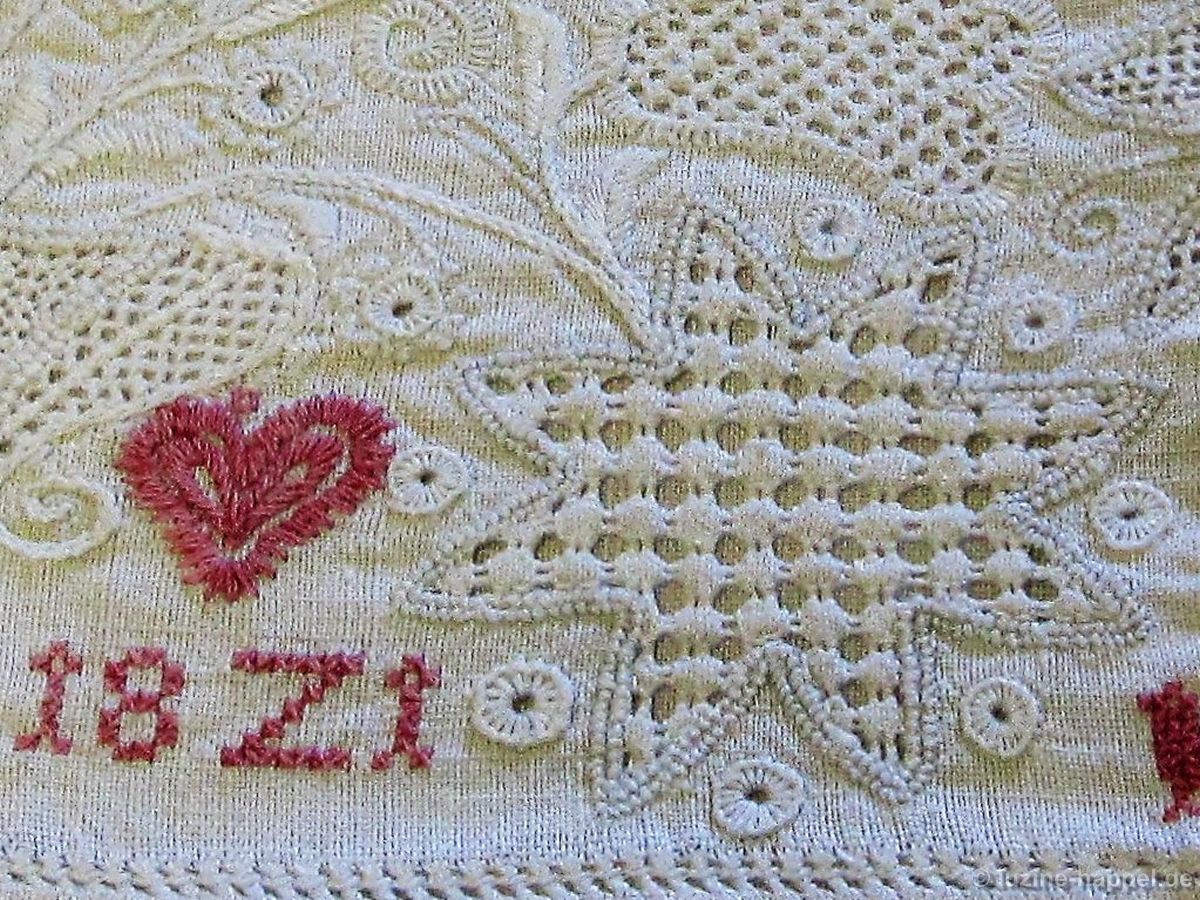
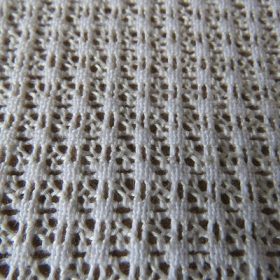
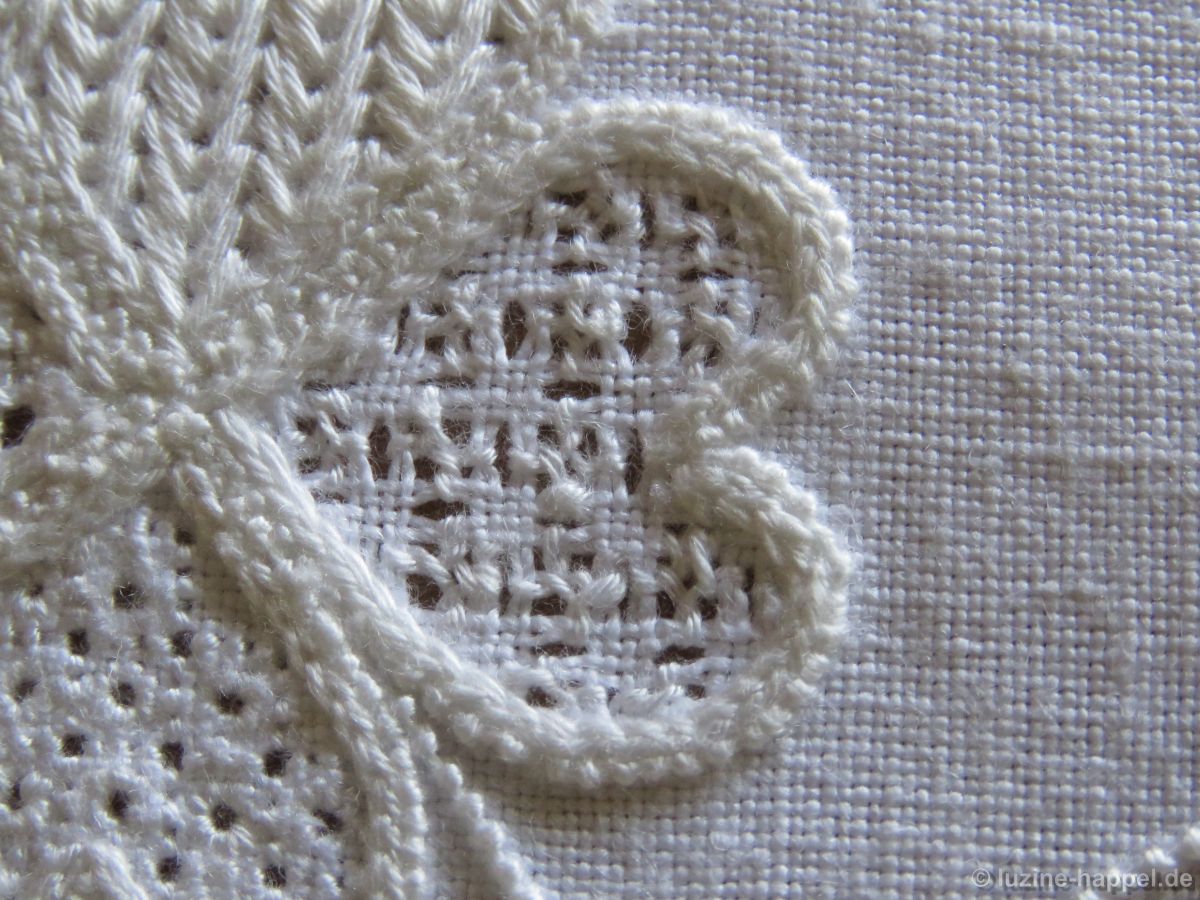
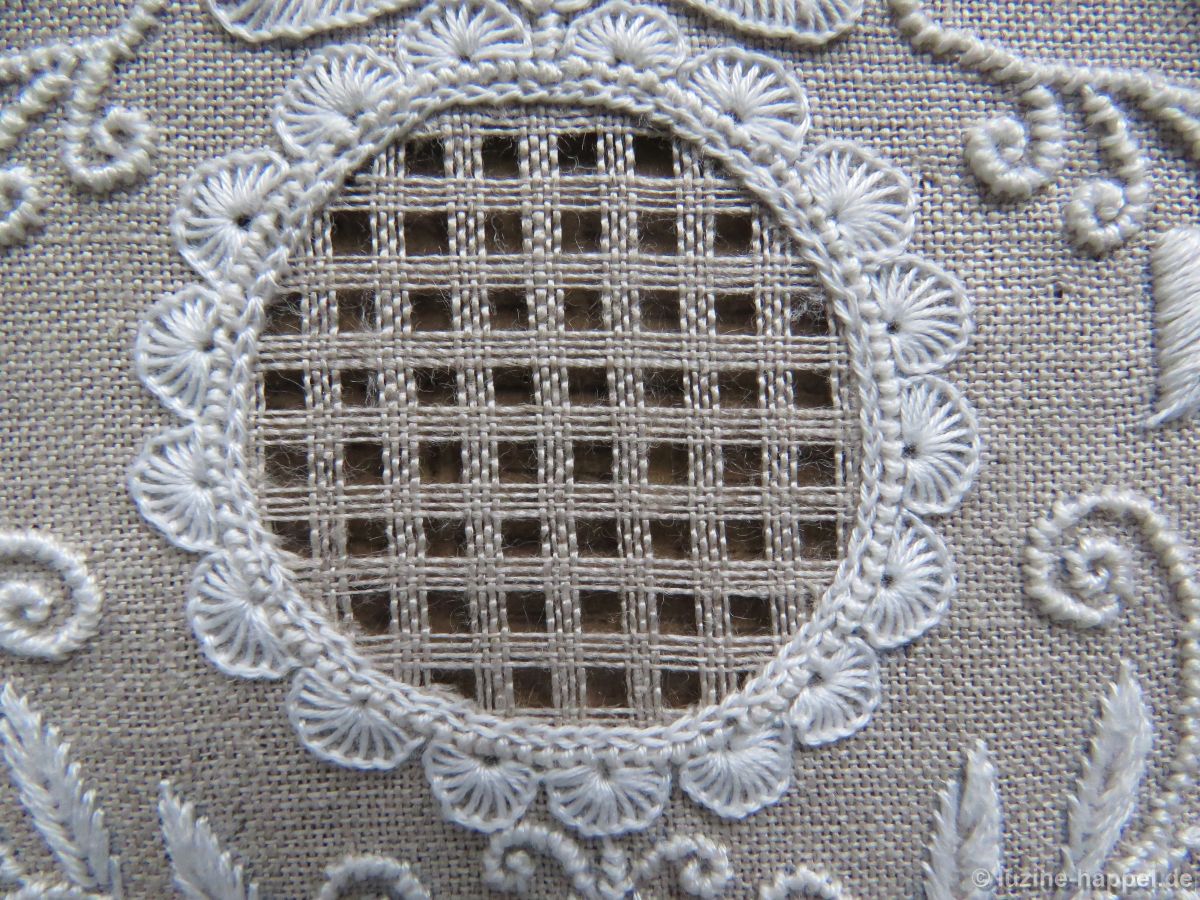
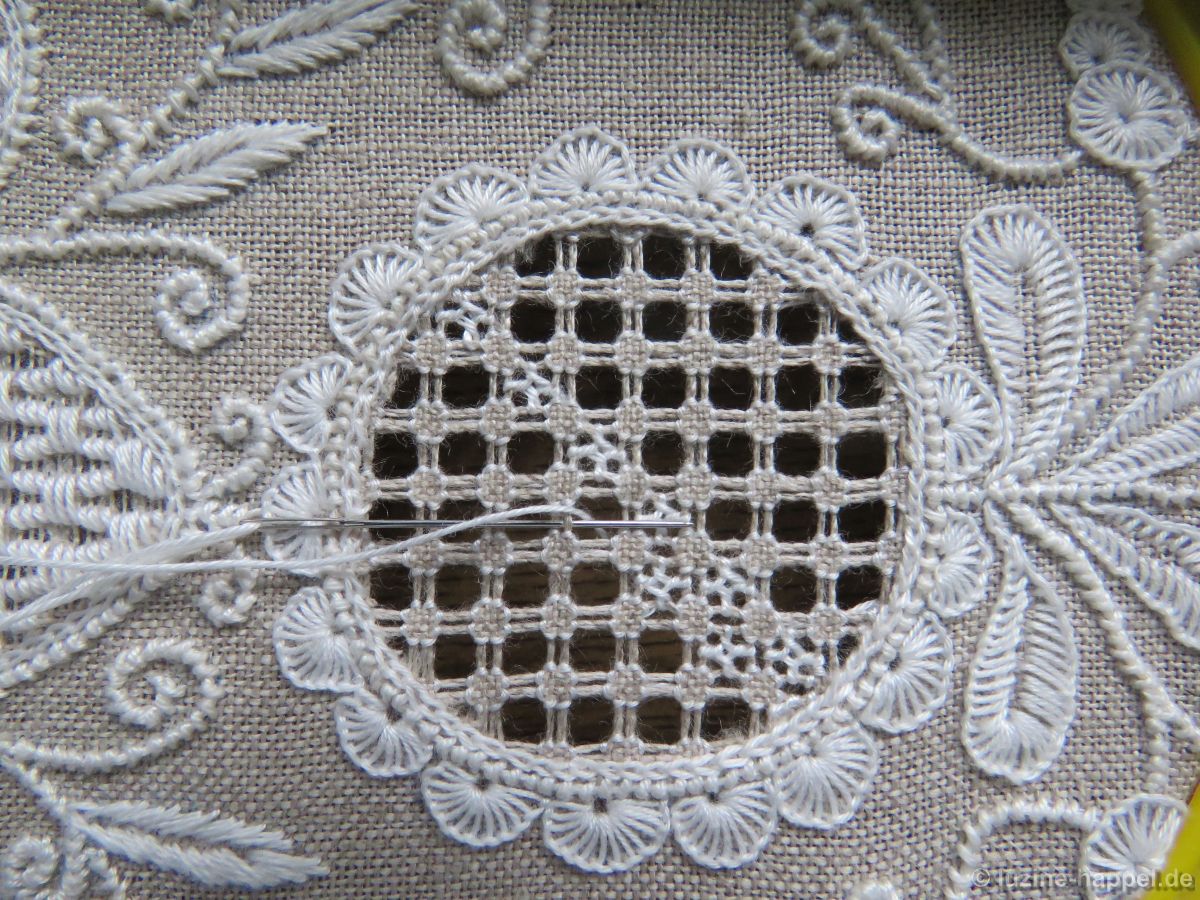
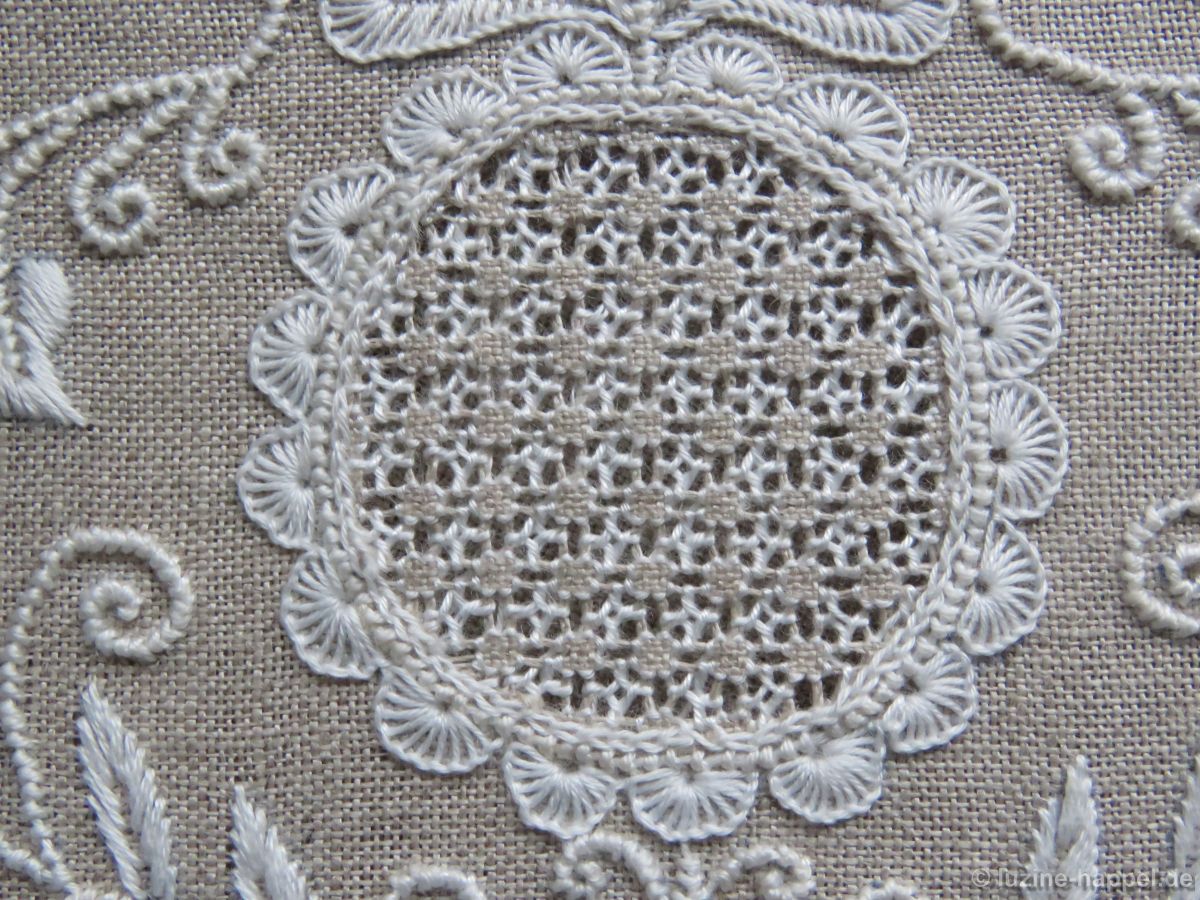
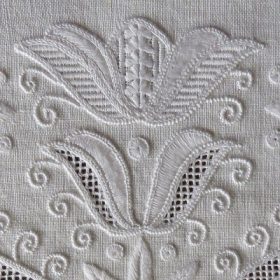
Here are a few impressions of differently embroidered small areas.

Filling Pattern – No. 562

category: simple drawn thread filling pattern
linen used: 13.5/cm thread-count
threads used: coton à broder No. 20
stitches used: Wrap stitches
horizontal center axis: quadruple withdrawn thread line

The flower motif with the openwork leaves is found on the Schwalm Parade Cushion Border (B).

As you can see from the detail of the original embroidery, it is a kind of staggered pea holes, which do not have Four-Sided stitches as a basis, but consist exclusively of wrap stitches.

I have tried different ways and recommend embroidering the pattern as described below.

Alternate withdrawing 4 fabric threads in one direction and leaving 2 in between. The pattern builds up from the bottom right to the top left.

To do this, wrap around 6 fabric threads of the lowest wide withdrawn thread line 3-4 times.

*Then slide the needle diagonally to the top left under the horizontal pair of fabric threads to the next withdrawn thread line and bring it up between the third and fourth thread of the bundle.

Repeat the stitch once,

return to the starting point and slide the needle under the wrapped bundle of threads to the opposite side.

From there, the needle is led diagonally to the top right crossing over the horizontal pair of threads, inserted again between the third and fourth thread of the bundle and emerges again at the starting point.

Once again, the needle is led diagonally to the top right crossing over the horizontal pair of threads, inserted again between the third and fourth threads of the bundle. This time bring the needle up 6 fabric threads to the left.

The 6 fabric threads lying on the needle form the next bundle. But before you can wrap it, you have to connect the left 3 threads to the underlying pair of threads.
To do this, the needle is led diagonally over the pair of threads to the bottom right, inserted next to the wrapped bundle and brought up again at the starting point.

This stitch is also repeated once,

to then wrap the two bundles of 3 threads together.*

Repeat the steps of working(*).

Reaching the top edge, turn the work 180° and embroider the next row next to the first.

In the places where the thread pairs are already wrapped, these steps can be omitted.
Some rows – not all – move close to the previous one. You can move the bundles slightly with the needle tip to achieve even distances.

In this way, an airy pattern is created that is suitable for filling not too large areas.

Filling Pattern – No. 561

category: simple drawn thread filling pattern
linen used: 13.5/cm thread-count
threads used: coton à broder No. 20 for the Four-Sided and No. 16 for the Peaholes
stitches used: Four-Sided stitches and a variation of wrapped Peaholes
horizontal center axis: double withdrawn thread line

The pomegranate motifs come from the Schwalm parade cushion border (B).

As you can see from the two pictures with the original embroidery, the pattern has been worked slightly differently.

Actually it is a variation of the wrapped Peahole,
which can be seen here from the front

and back.

Erbslochkante_7

The main difference is the use of thicker thread and additional wrapping of the ends of adjacent bundles of threads.
From this I derived a variation that does not fully correspond to the original, but comes very close.

The pattern shown below is a practice exercise only.

It makes sense to start thread withdrawing in the middle. Here I first have withdrawn the middle pair of threads and then removed 5 more fabric threads on each side, so a total of 12 threads.

Four threads are now alternately left on both sides of the withdrawn thread line and another is withdrawn.

Four-Sided stitches (coton à broder No. 20) are embroidered from the back over the four remaining threads, each bundling 4 fabric threads.

Using coton à broder No. 16 the resulting bundles of threads are wrapped and joined together into Peaholes.

Start with the right bundle of threads and wrap – from bottom to top – around it 12-14 times. The wrapping thread should lie evenly next to each other and should be the same in number across all thread bundles.

*The thread is slide under the crosses of the Four-Sided stitches to the next bundle of threads.

Now wrap from top to bottom. First, the unprocessed bundle and the one to the right of it are joined together by two wrappings.

Then continue to wrap the left bundle of threads until you reach the bottom edge.

There the two thread bundles are pulled together again by two wrappings

and the thread is slide under the crosses of the Four-Sided stitches to the next bundle of threads.

Again wrap from bottom to top, but this time only up to the middle. There, the partially unprocessed bundle of threads and the bundle of threads to the right of it are tightly pulled together with two wrappings.

Then the left thread bundle is wrapped until reaching the upper edge.*

The steps (*) are repeated, on the way down the bundles of threads are joined together at the edges

and on the way up in the middle.

From the front, it looks like this:

Then the remaining area is filled with Four-Sided stitches.

A pretty pattern – particularly suitable for long, narrow motifs – is established.

I have noticed that the variant of the peaholes, which are also wrapped together at the edges, makes working the folded peahole edging much easier.

Filling Pattern – No. 560

Filling Pattern – No. 560

category: openwork filling pattern without Cable stitch grid
linen used: 13.5/cm thread count
threads used: coton à broder No. 20
stitches used: Double Back stitches
center: intersection of four fabric threads
one pattern segment = 6 threads

The filling pattern shown here is a practice exercise only. You can see it used in a shape at the end of this article.

First, establish an openwork grid with an intersection of four threads in the center by cutting 2, leaving 4 (!) both vertically and horizontally.

Work Double Back stitches in eight steps as establishes in the article Filling Pattern – No. 559 (here shown without turning the piece).

Continue working Double Back stitches in the established way covering each intersection square to fil the entire shape.

From the front the pattern looks like this:

This pattern is similar to the “Filling Pattern – No. 469 “, but here the stitches of the working threads are not pulled together in the end.

As a result, the intersection squares remain relatively flat

Filling Pattern – No. 560 is also embroidered in an elaborate border of a parade cushion from 1821.

Filling Pattern – No. 559

Filling Pattern – No. 559

category: openwork filling pattern without Cable stitch grid
linen used: 13.5/cm thread count
threads used: coton à broder No. 20
stitches used: Rose and Double Back stitches
center: intersection of four fabric threads
one pattern segment = 8 threads

In Vivian Kwok’s contribution #85 to the Global Schwalm Sampler, I discovered a filling pattern that I found interesting because of the slit-like holes that were created by tightening the Rose stitches.

This pattern is not necessarily typical for Schwalm whitework. It seems to come from Hardanger embroidery. However, since Schwalm whitework often deviated from the thread extraction sequence that is common today, I am also showing this pattern for Schwalm border motifs.

The filling pattern shown here is a practice exercise only. You can see it used in a shape at the end of this article.

First, establish an openwork grid with an intersection of four threads in the center by cutting 4, leaving 4 both vertically and horizontally.

Rose stitches are worked into the holes created. Each single “leg” of a Rose stitch takes up only two of the four Fabric threads. Work is done in diagonal rows from bottom right to top left.

*Bring the needle up (point where the needle emerges = center of the stitch) in an empty square, loop the thread up and to the left, cross over two threads to the left, insert the needle and bring it up in the center again with the looped thread beneath the needle. Tighten thread, but not too much so.

Loop the thread to the right and up, cross over two threads up, insert the needle and bring it up in the center hole again. Notice that the looped thread is beneath the needle. Tighten thread.

Loop the thread downward and to the right, cross over two threads to the right, insert the needle and bring it up in the center again with the thread beneath the needle. Tighten thread.

Loop the thread down and to the left, cross over two threads at the bottom, insert the needle and bring it up in the center again with the looped thread beneath the needle. Tighten thread.

After working the fourth stitch, the working thread comes up to the right of the fourth stitch. Cross over the fourth stitch to the left and insert the needle at the bottom of the center hole.*

In this way, the working thread traveling from Rose stitch to Rose stitch is nearly invisible from the front.
Bring the needle up in the next center, one square diagonally left up. Continue working Rose stitches in the established way.

With the help of the needle, the single stitches of a Rose stitch can be shifted a little bit so that they lie in the middle of a square side.
Continue working in the same way, until the entire shape is filled.

I was not fully satisfied with my first attempt.
In order to give the pattern more stability, Double Back stitches are now worked – from the back and over the fabric thread intersections (Please see detailed steps further down.)

A comparison between the area with added Double Back stitches (see picture below, right side) and the area without shows that Double Back stitches helped to improve the pattern’s appearance.

Nevertheless, I was not satisfied and started a new attempt.

Again, first is to establish an openwork grid with an intersection of four threads in the center by cutting 4, leaving 4 both vertically and horizontally.

Because it is much easier, the Double Back stitches are now worked first. They are worked on the back of the fabric in 8 steps.

1. Coming from the bottom, pick up the left pair of threads on top of an intersection square from right to left. Pull the thread through.

2. Pick up the same pair of fabric threads underneath the intersection square from right to left. Make sure that you also catch the traveling working thread. Pull the thread through and tighten it.

3. Pick up the right pair of threads on top of an intersection square from right to left. Pull the thread through and tighten it.

4. Pick up the same pair of threads underneath the intersection square from right to left. Pull the thread through and tighten it.

5. Turn the piece 90° clockwise.

Pick up the now left pair of threads underneath the intersection square from right to left. Pull the thread through and tighten it.

6. Pick up the same pair of threads on top of the intersection square from right to left. Pull the thread through and tighten it.

7. Pick up the right pair of threads underneath the intersection square from right to left. Pull the thread through and tighten it.

8. Pick up the same pair of threads on top of the intersection square from right to left. Pull the thread through and tighten it.

Turn the piece back 90° counterclockwise and slide the working thread through the left side of the made crosses

to start the next Double Back stitch by picking up the left pair of threads on top of the next upward intersection square from right to left.

Continue working Double Back stitches in the established way covering each intersection square until the entire shape is filled.
From the front a nice pattern is seen.

Such patterns are also found in traditional Schwalm whitework, as in a border of a parade cushion from 1832.

It could stand alone, if fewer threads were cut. This filling pattern will be published as Filling Pattern No. 560 in an upcoming article.
In the circle motif I added Rose stitches from the front of the fabric as explained at the top of this article.

Working this pattern the other way around is not only easier but it also makes the pattern appearance more even.