
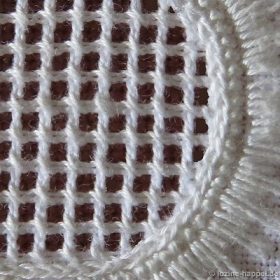
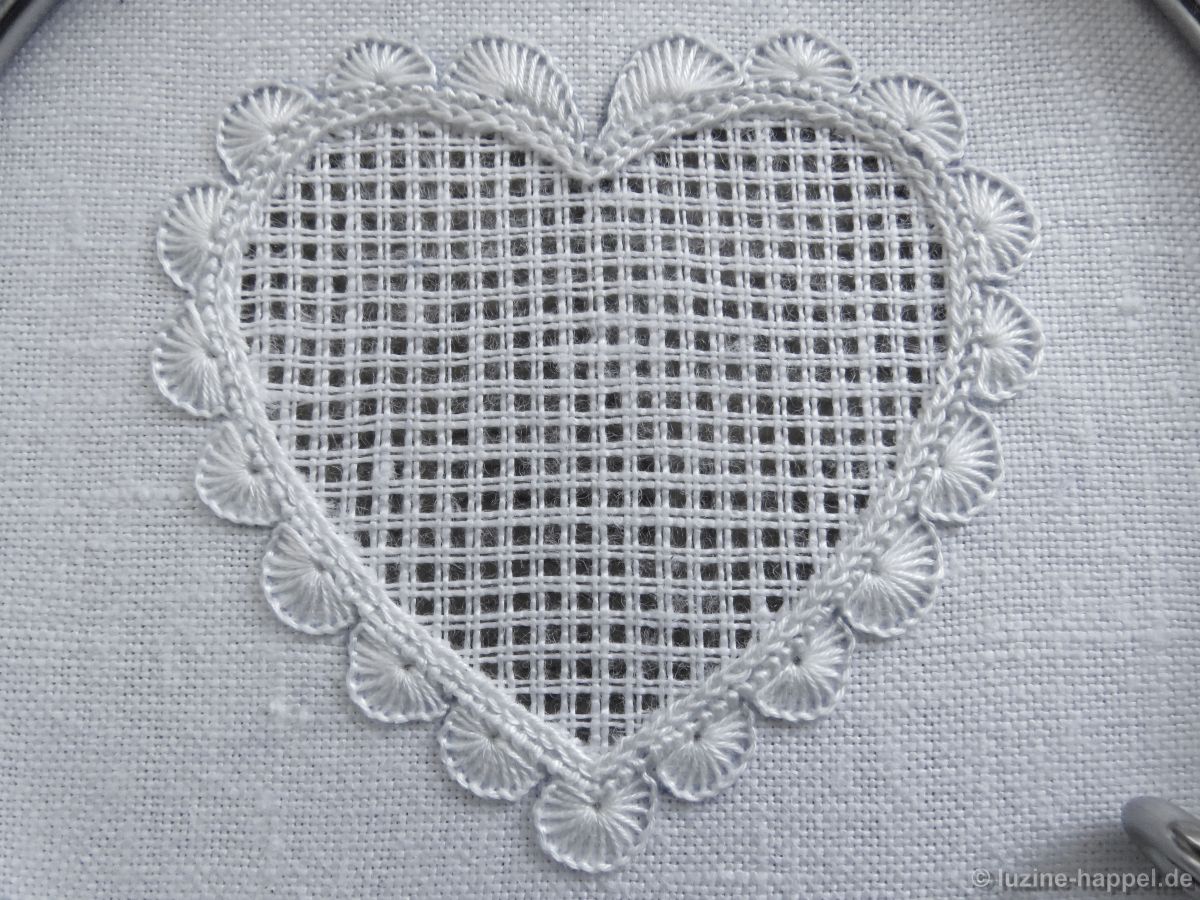
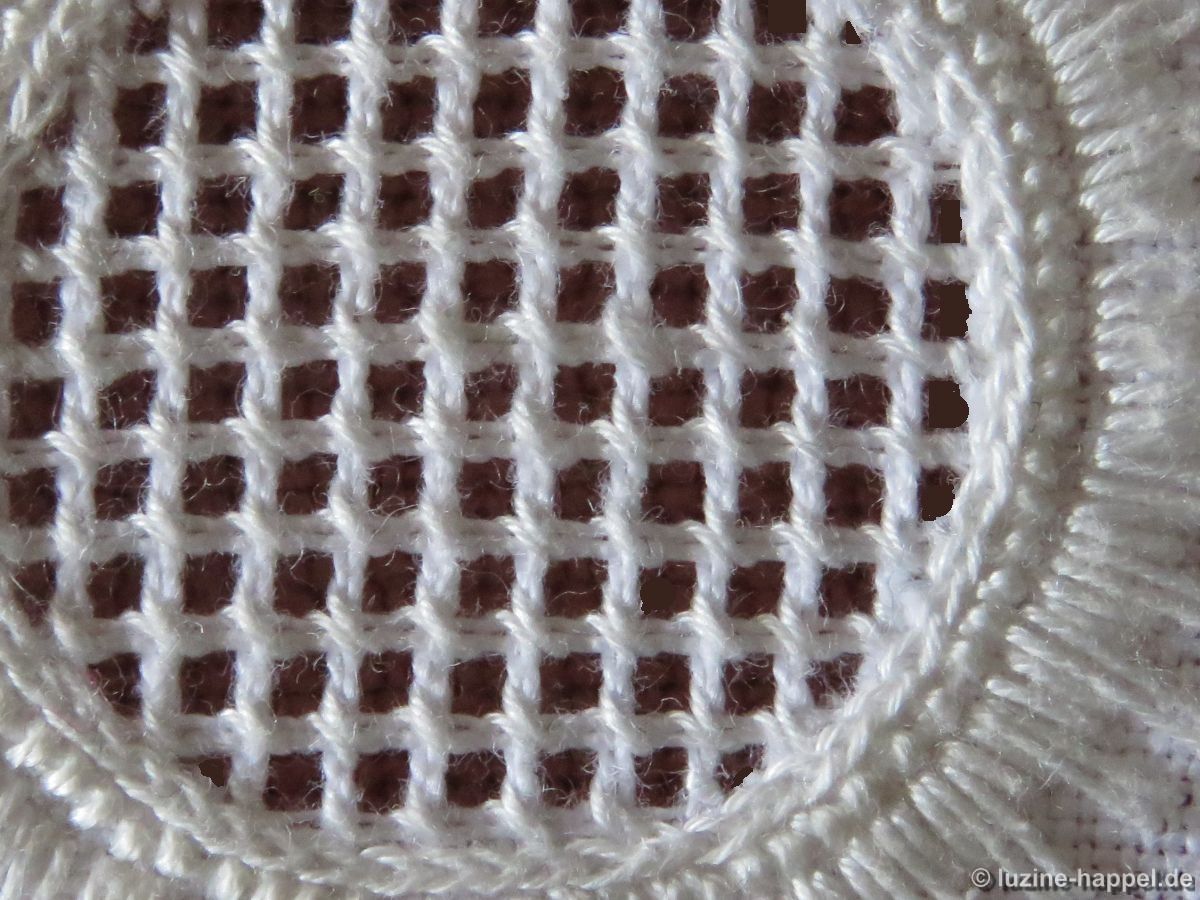
Filling Pattern Cable Stitch Grid
In the future I would like to present openwork patterns more often. Many of them first need to stabilize the grid with basic stitches. These are easy to work with, but some embroiderers have difficulty starting the rows. Therefore I explain this stitch in detail here.
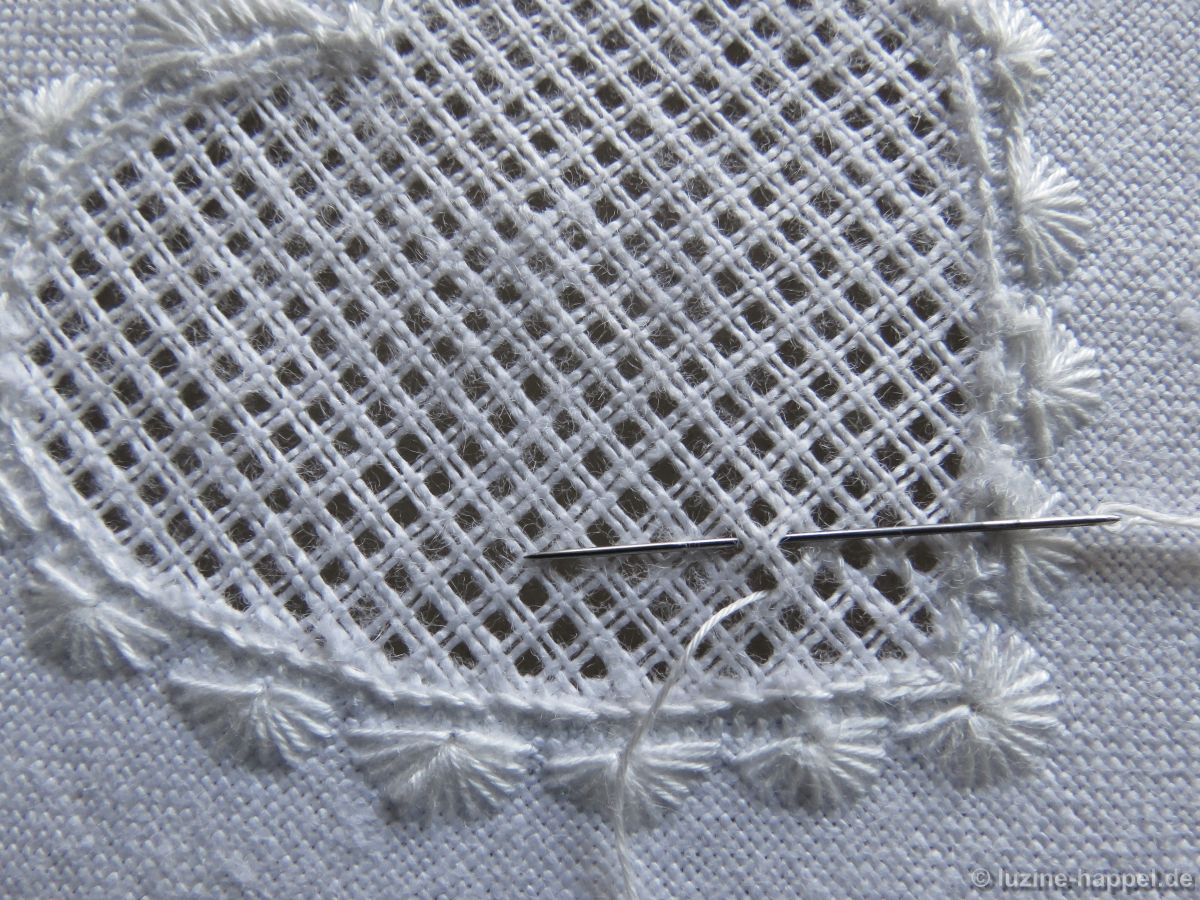
In Schwalm whitework, these stitches are traditionally worked in such a way that the slanting stitches that run crossing the intersections of fabric threads appear on the front of the embroidery.
One can work these basic stitches from both, the front and the back. From the front it is made with Cable stitches, from the back with Single Faggot stitches.
Working from the back is much quicker and gentler to the wrist. Therefore I explain this version.
The stitch is closely related to the Wave stitch, but here it is passed diagonally through the fabric. The Single Faggot stitch is worked from right to left. It is embroidered between two adjacent lines that run diagonally through the intersections of the fabric threads.
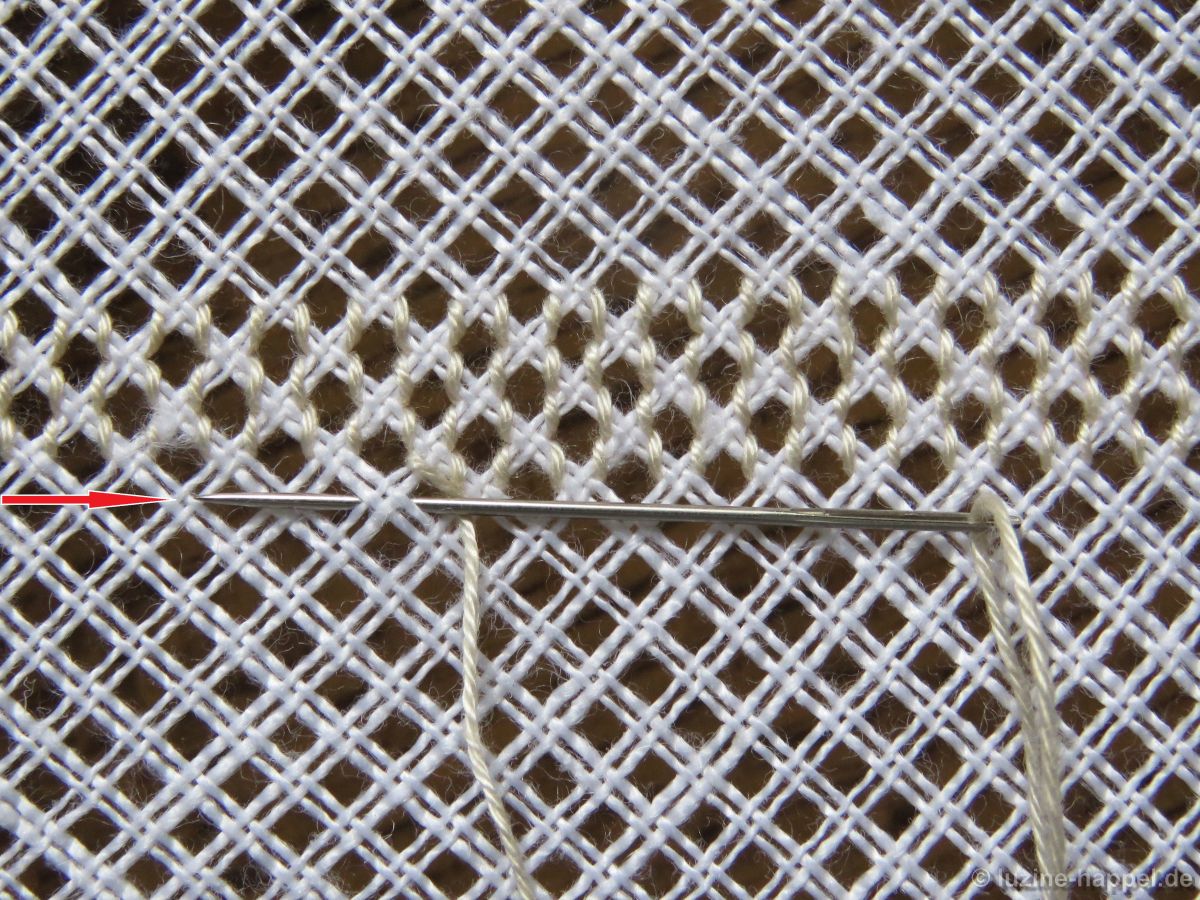
The lower line is marked with the red, the upper one with the green arrow.
One crosses under each intersection, one after the other, constantly alternating between the upper and the lower intersectional lines. The next row of stitches is directly adjacent to the previous one. In this way, each pair of fabric threads is wrapped around once and the typical double slanting stitch is established on the front (Cable stitch), which runs over the fabric thread intersections.
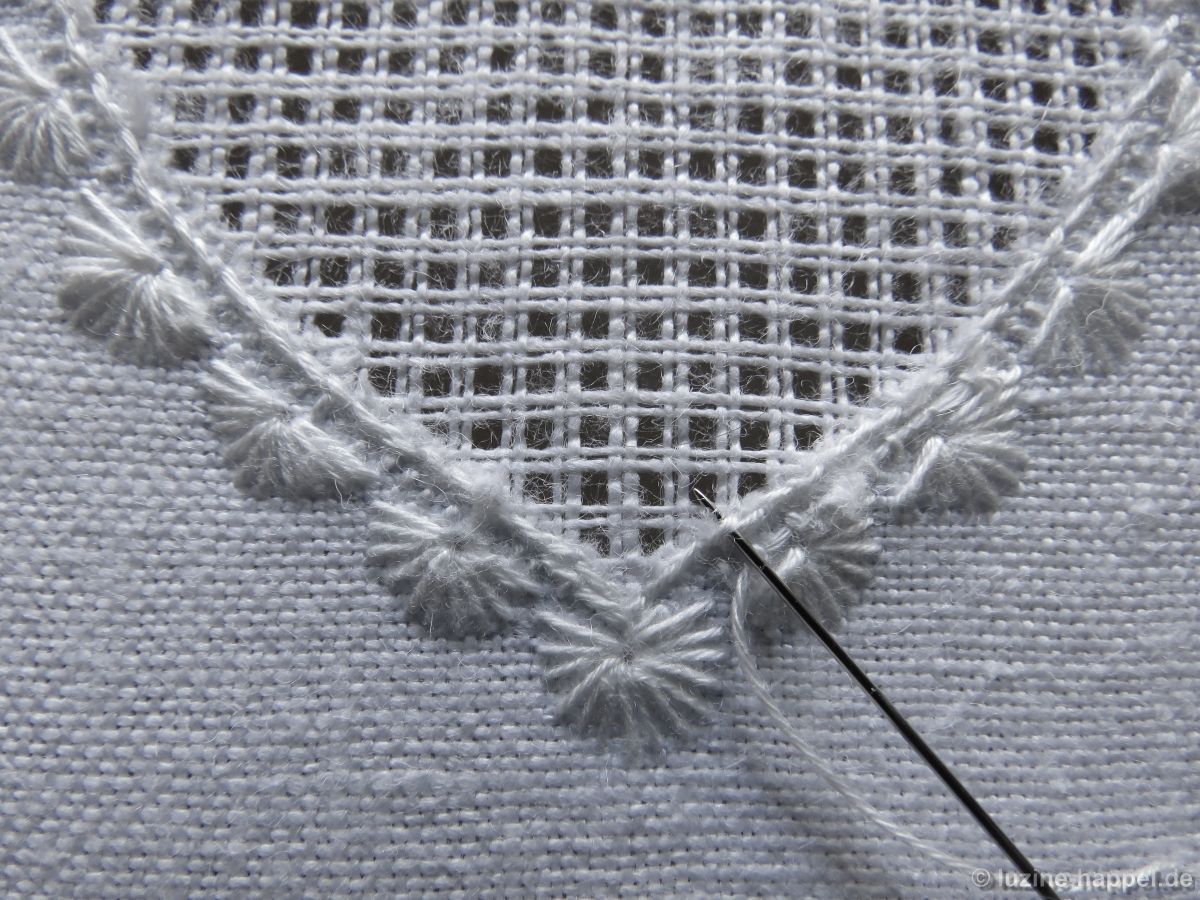
To keep the edge neat and tidy, it is important to respect some things and to start in the right way.
First: It is good to have the Chain stitches though close to the Coral Knot stitches, but not too tiny and too small – as seen in the last four stitches of the example. The loops of the Chain stitches should appear more circled than as an oval.
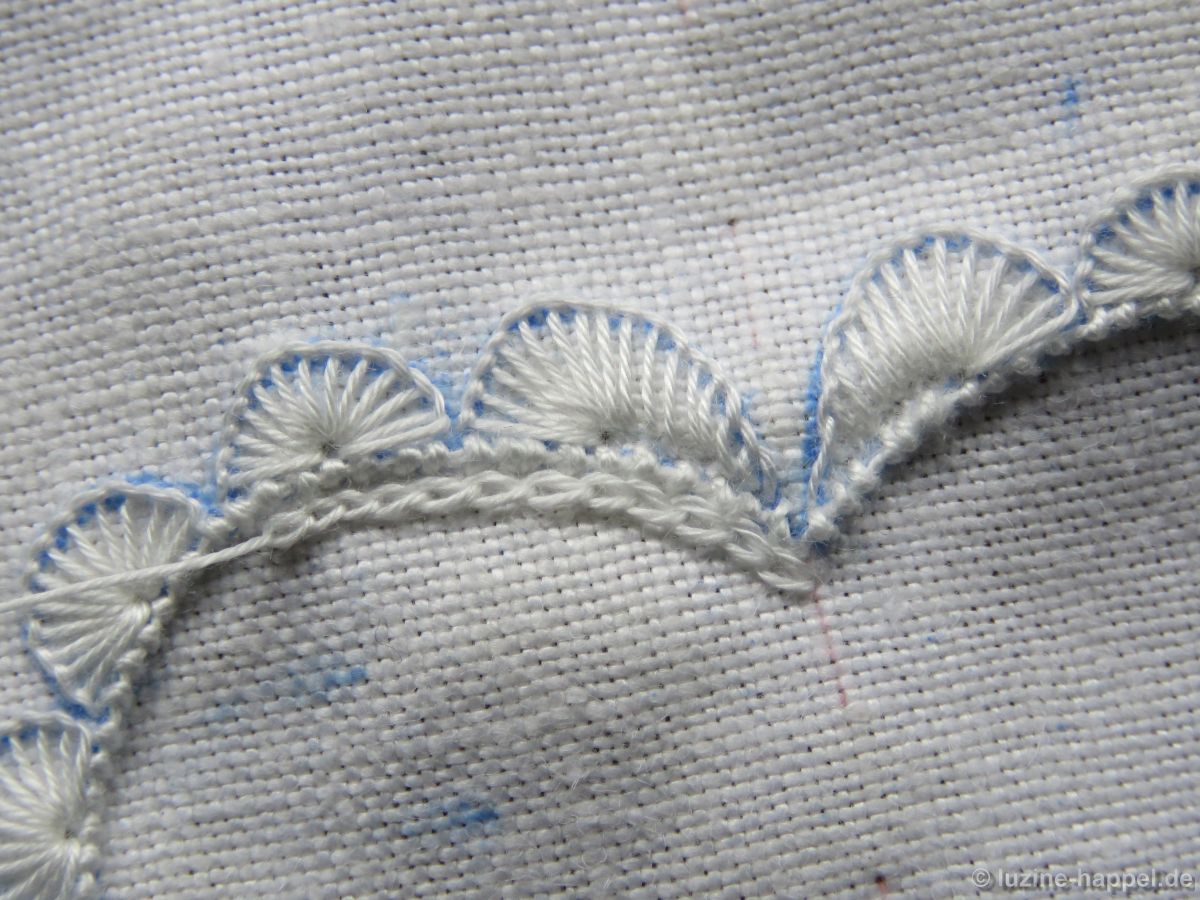
The difference seems to be only marginal, but it is of the essence to cover the small thread ends on the edge better, especially in openwork grids.
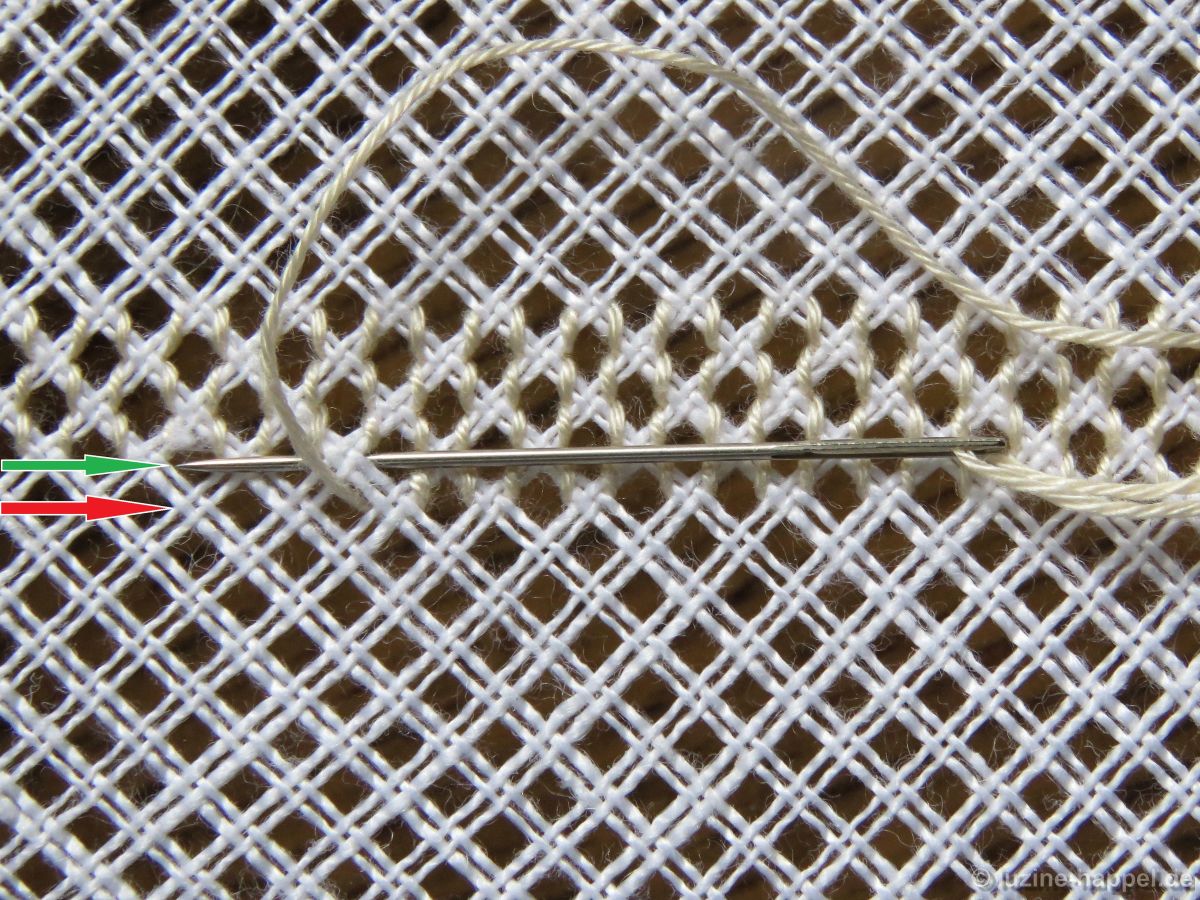
Second: To keep also the holes on the edges well defined and open, it is important to start in the right way.
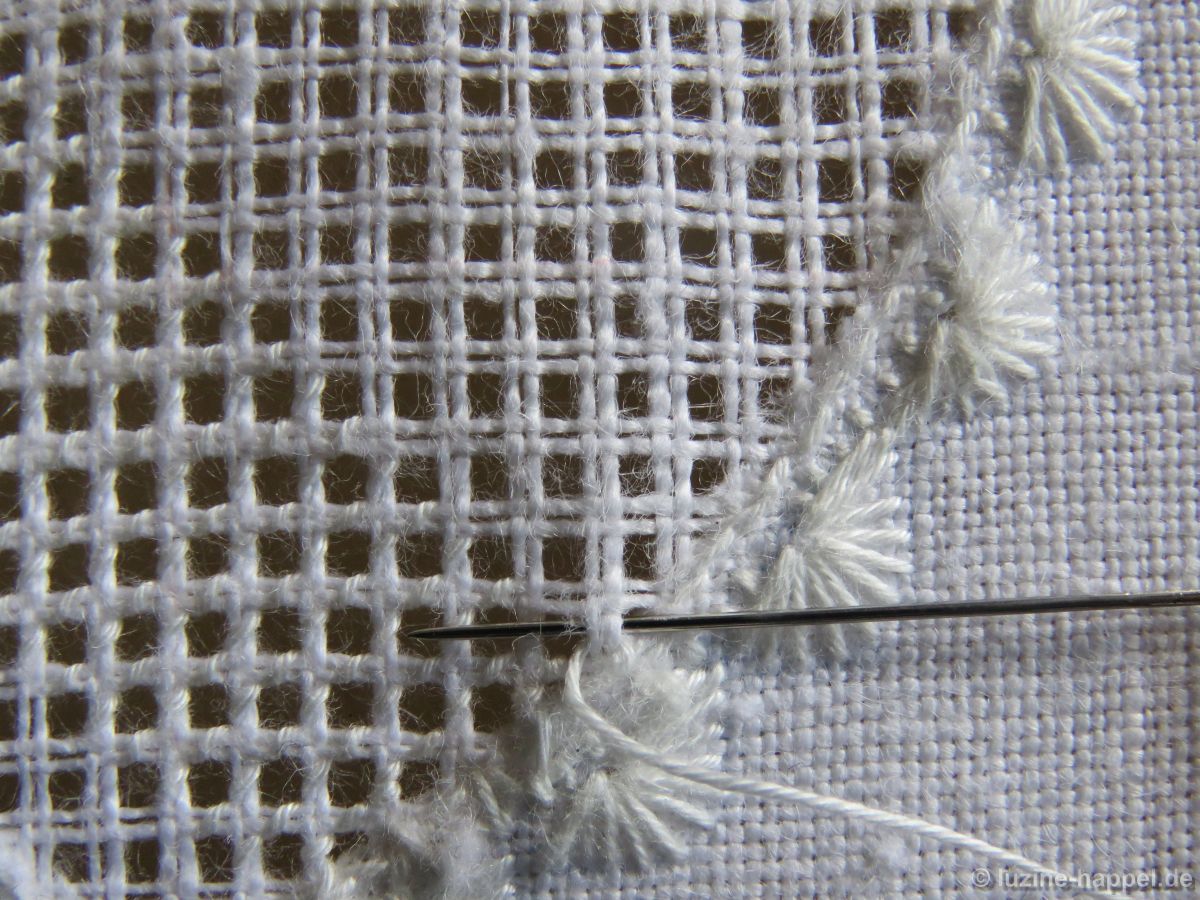
Sometimes there is a fabric thread intersection (green arrow) right on the edge. Sometimes a pair of fabric threads (red arrows) must first be wrapped around from the edge in order to reach the first intersection. This is important to do even if the pair of fabric threads is only short (see example in the left of the red arrow).

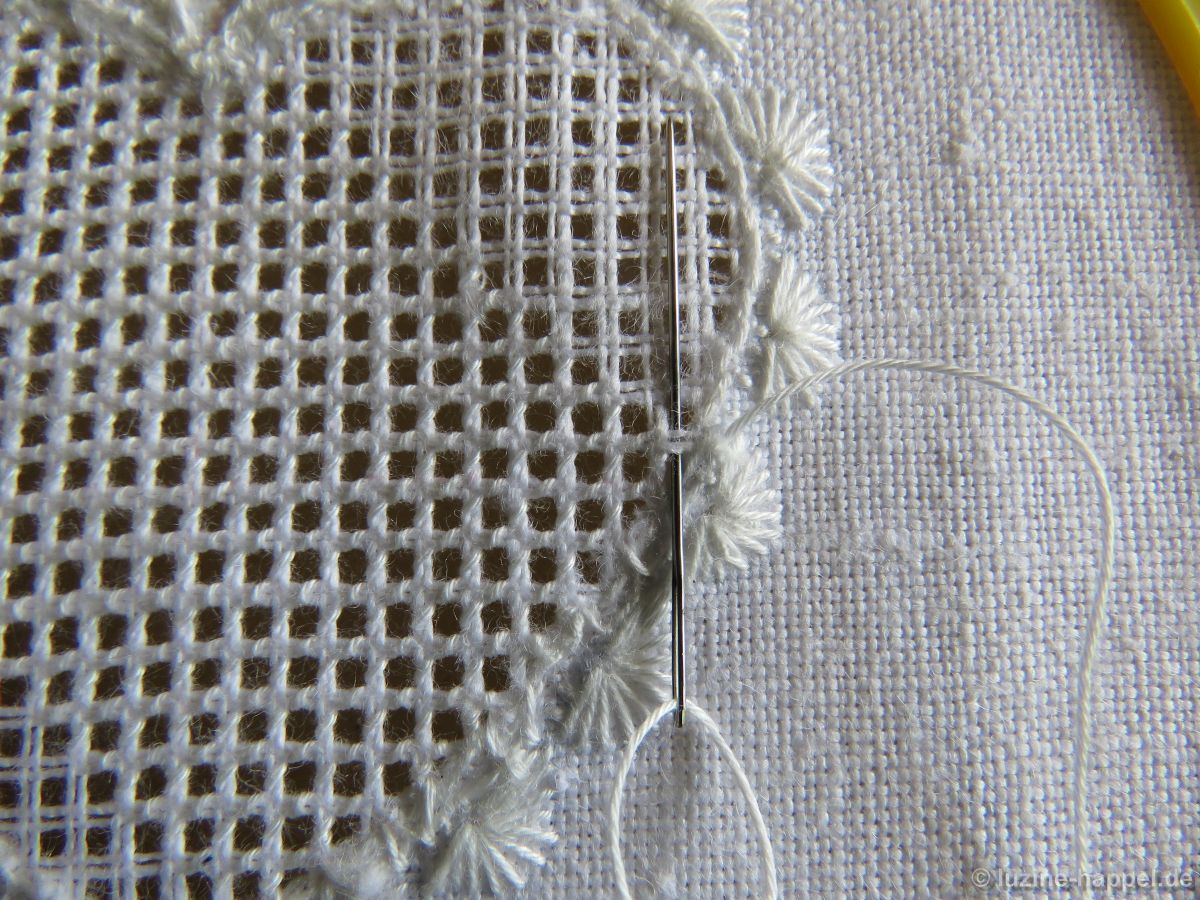
This is easier if the work at the beginning is turned so that the fabric threads are vertical or horizontal. In all cases the working thread is pulled through under the edge fastening.

If there is an intersection of fabric threads (green arrow) directly on the edge, it is easier to start. The working thread is led under the edge fastening to the intersection that is to be crossed under.
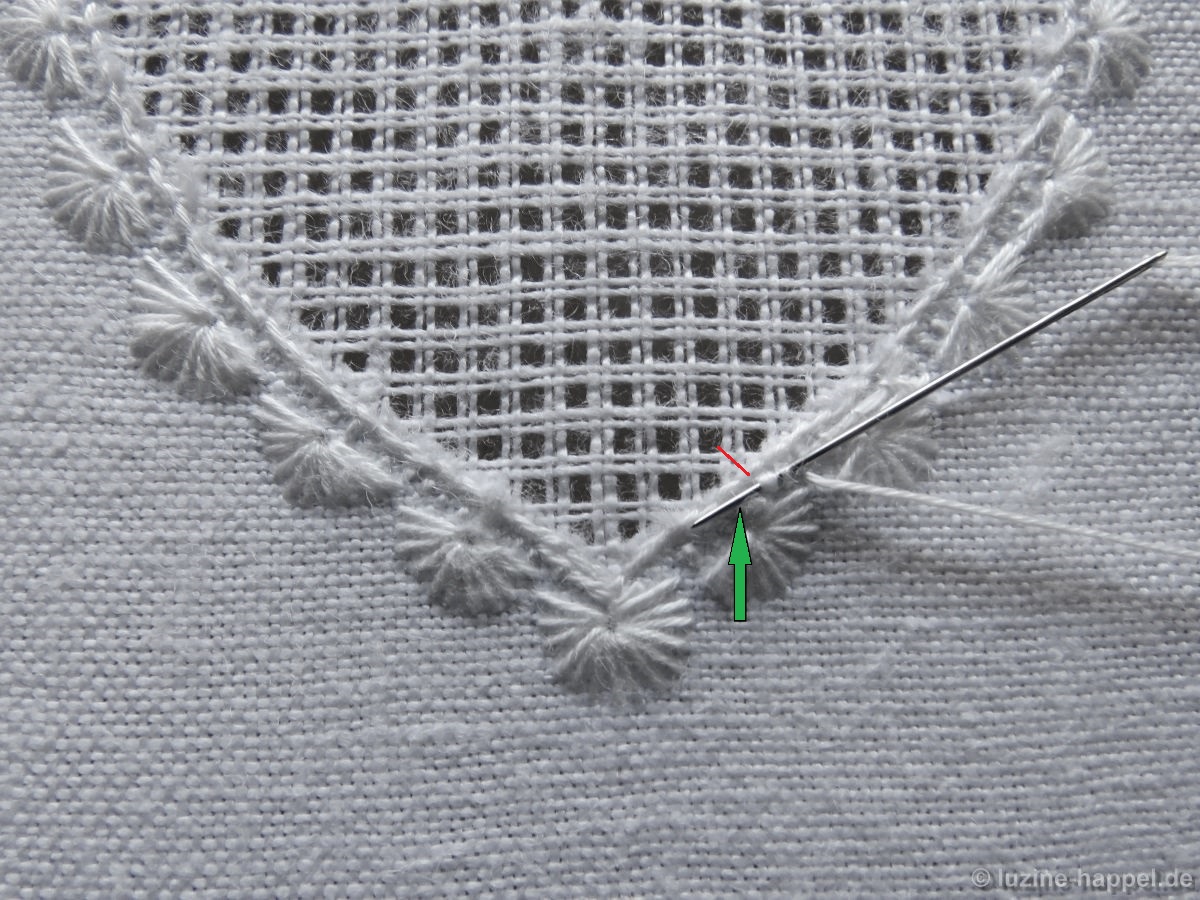
There the needle is inserted between the edge attachment and the intersection in order to start the Single Faggot stitch from there by crossing under the intersections.
Make sure, that in the front you did not catch the Chain stitch.

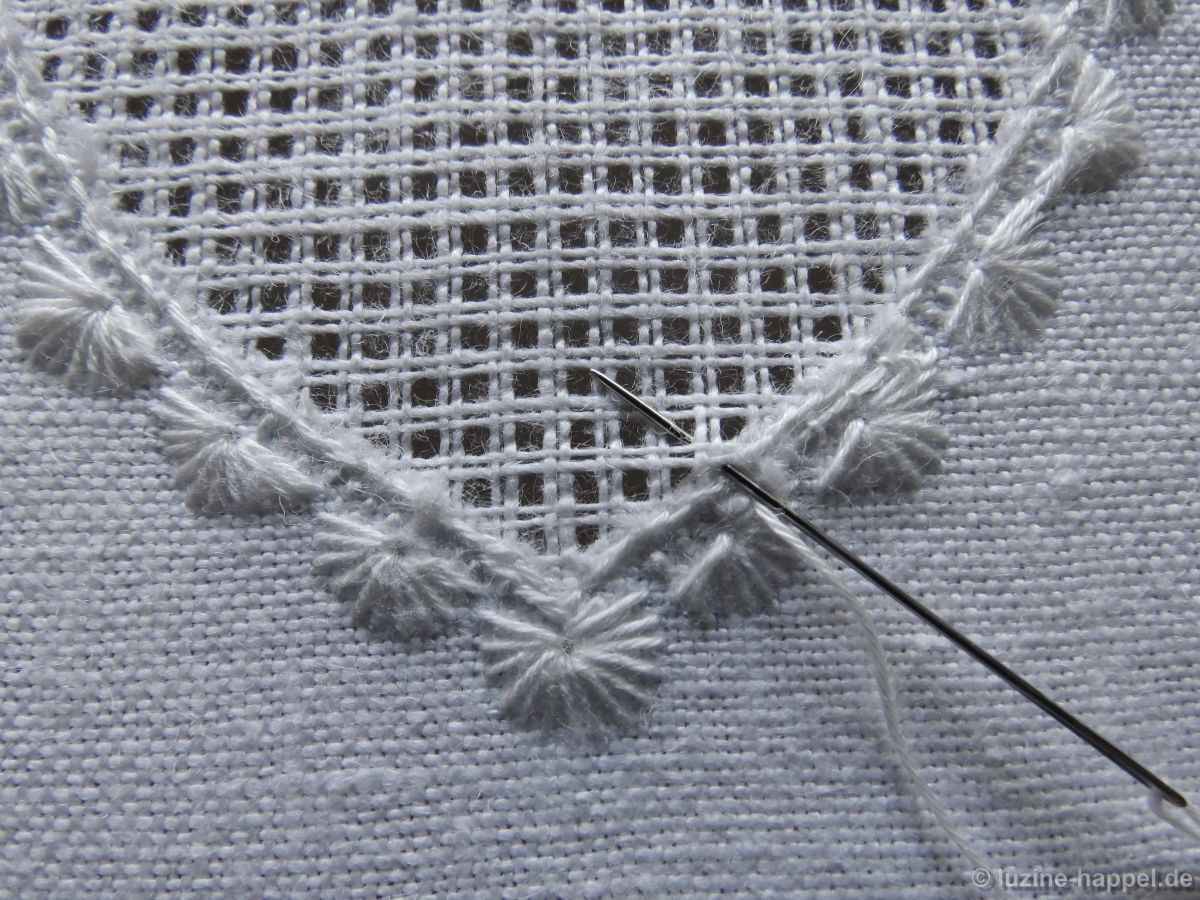
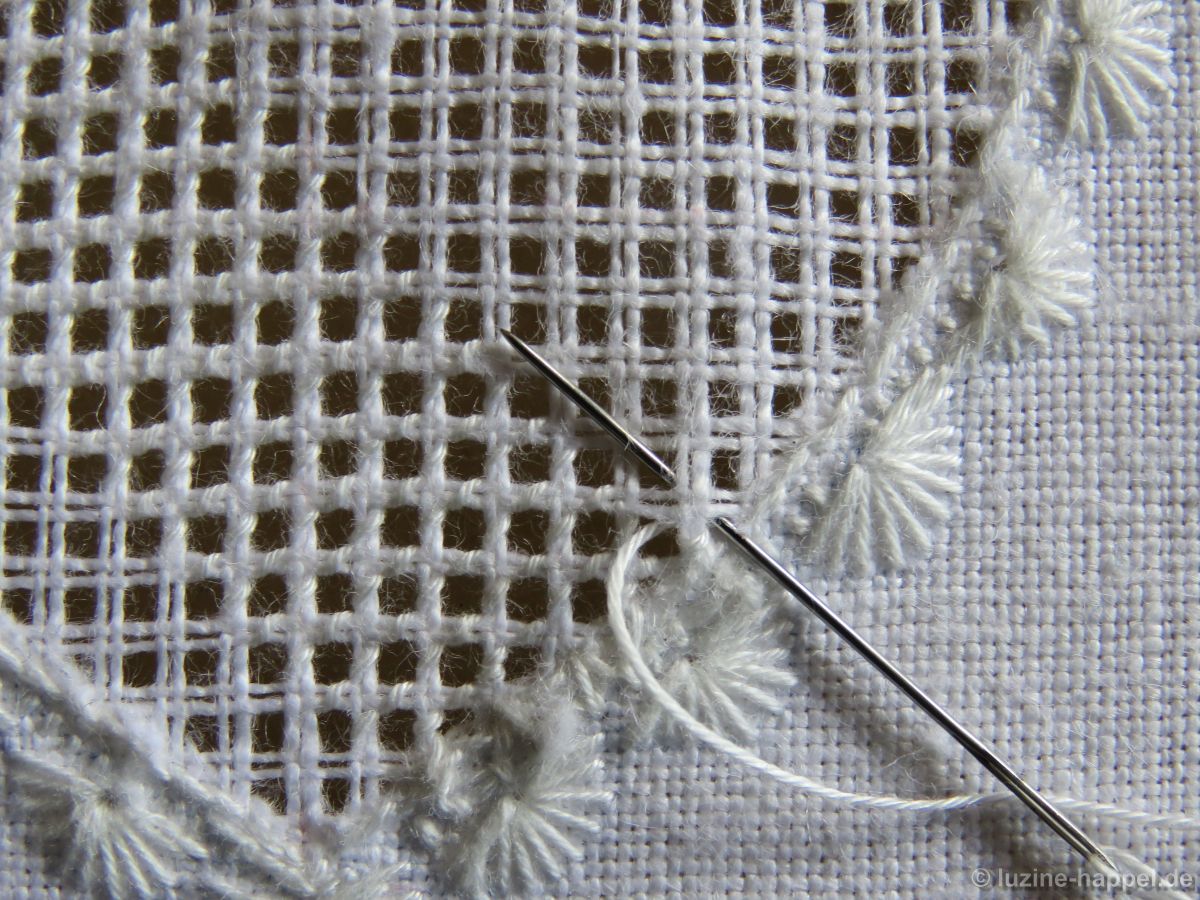
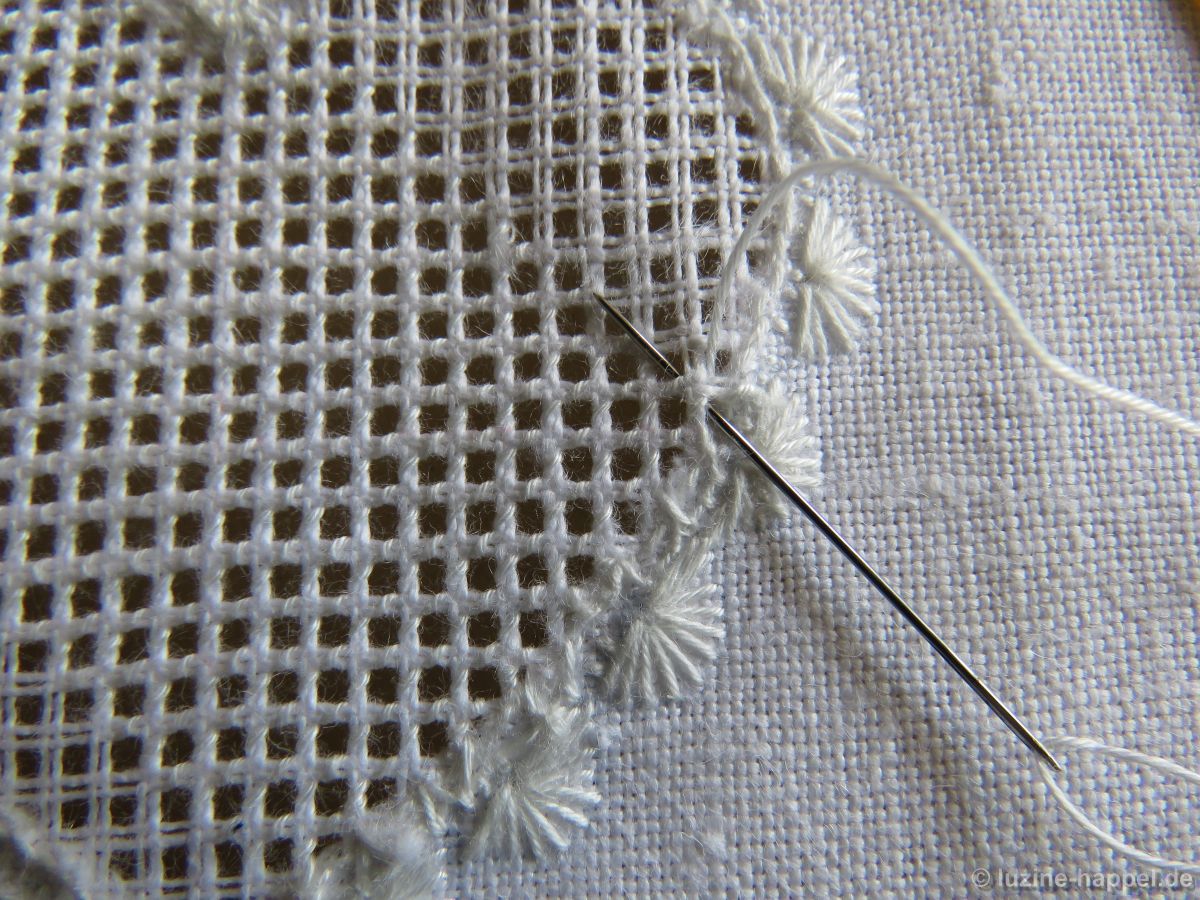
From there the work is turned so that the threads of the fabric are diagonal.
If in the beginning a vertical pair of threads is to be wrapped, the needle emerges on the left of it,
wrappes once around it,
crosses it again and inserted again to the right of it, in order to start the Single Faggot stitch from there by crossing under the intersections.
From there the work is turned so that the threads of the fabric are diagonal.
If in the beginning a horizontal pair of threads is to be wrapped, the needle emerges on top of it, wrappes once around it,
crosses it again and inserted again on bottom of it, in order to start the Single Faggot stitch from there by crossing under the intersections.
Reaching the opposite side cross under the last intersection

and then wrap around the pair of threads to reach the edge.

Slide the working thread through the edge fastening,

turn the work and start in the established way.

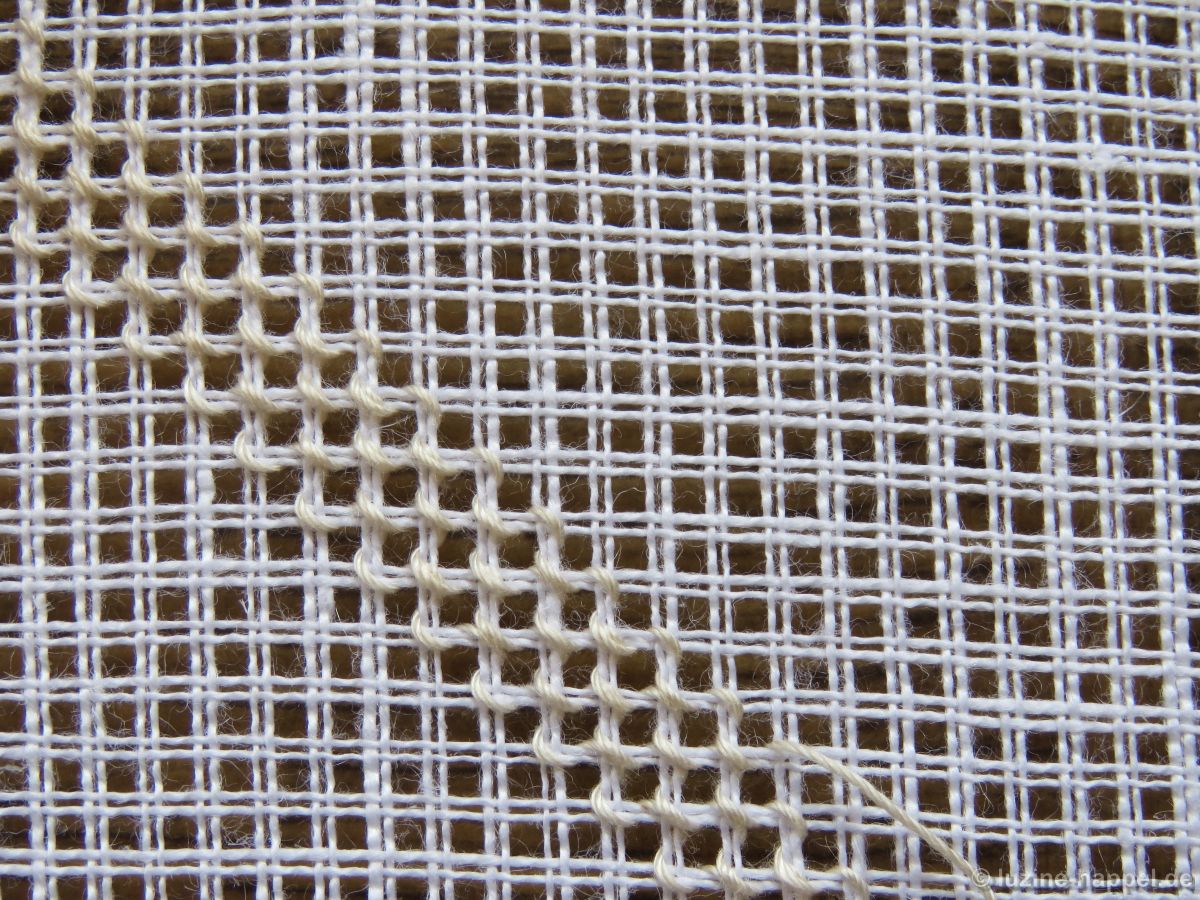
In this way, one gets openwork grids also neatly worked out at the edge,
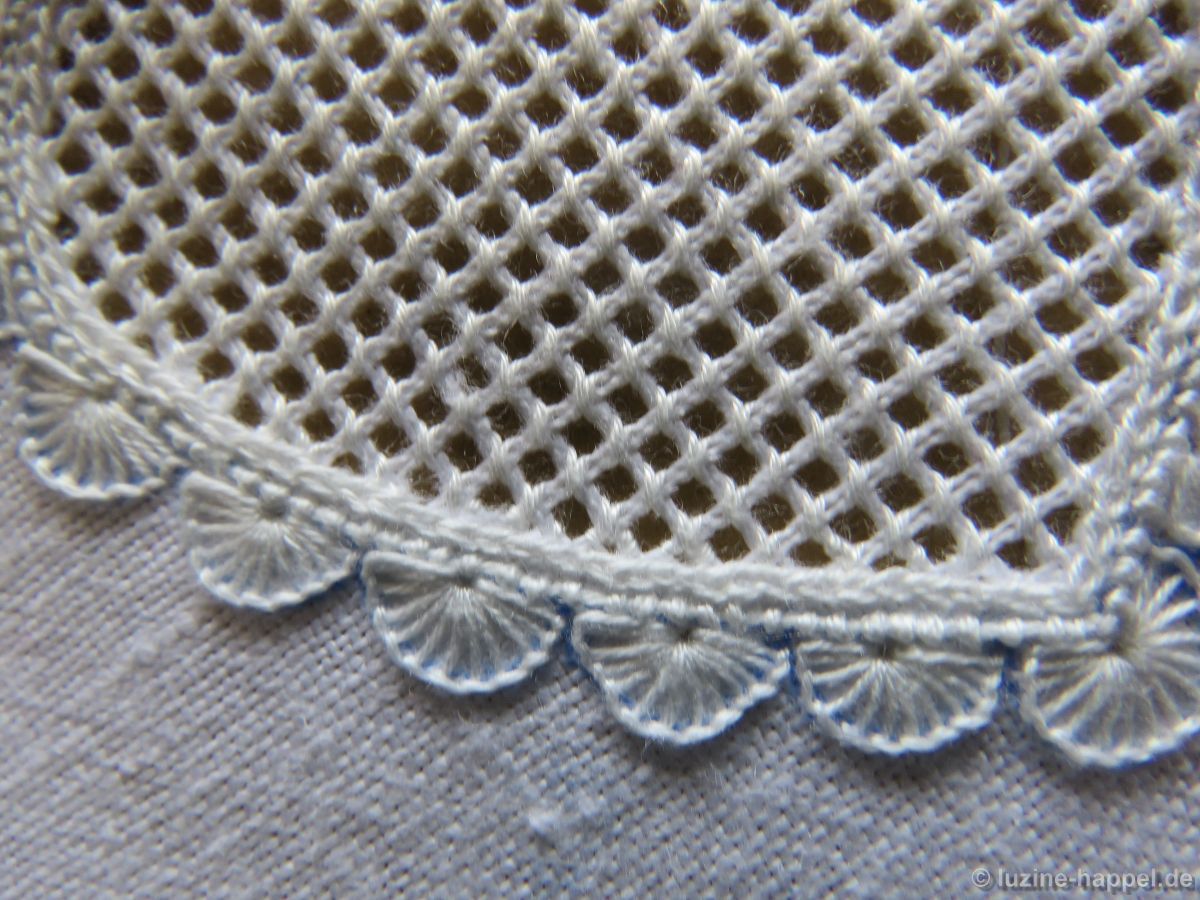
in which then patterns can be inserted.
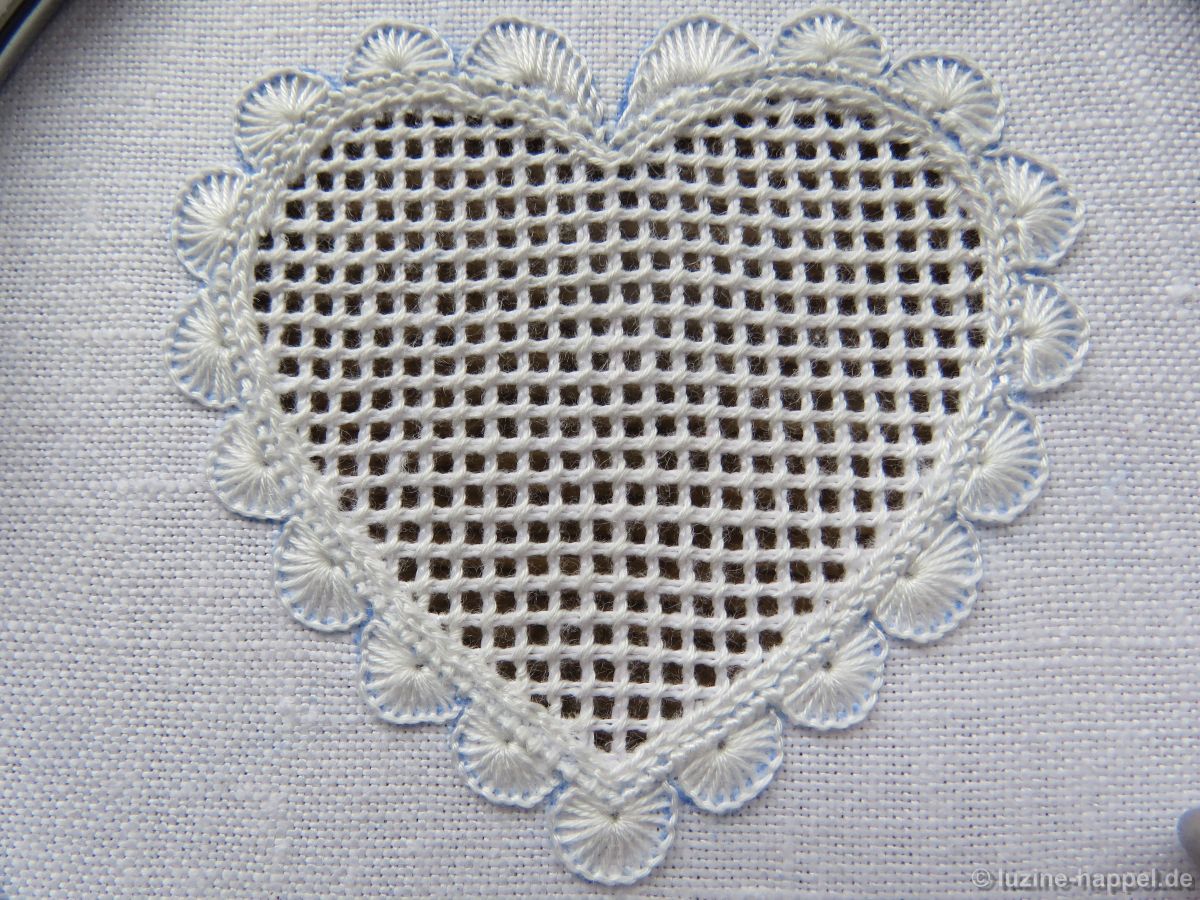
The Cable stitch grid is worked alone only in small areas. Then a slightly thicker thread is usually used to make the fine pattern a little more prominent.
If you want the Cable stitch grid as a basis for Rose and Needle-Weaving stitch patterns, it is done with thin thread – Coton à broder No. 30.

Ce fut mon travail du week-end dans mes soleils…j’ai beaucoup aimé vos explications qui m’ont aidé un faire un travail propre..Merci..
Merci ça me fait très plaisir!