(If you came to this blog post via pinterest, please take a look here too.)
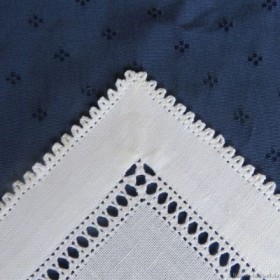
In previous articles I showed how to work a folded Peahole edging and how to work the corner of the folded Peahole edging. Now I present a wide hem with a mitered corner and a folded Peahole edging.
Linen with a 13.5/cm thread count is cut to measure 26 cm X 26 cm. The center is marked.
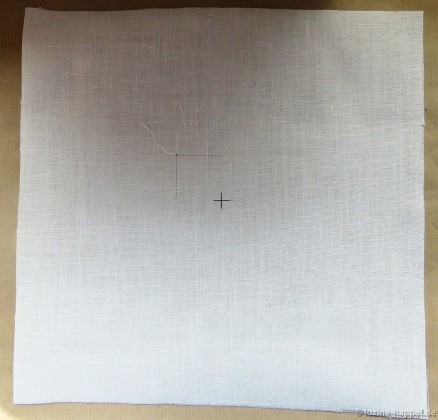
From the center point, count 40 horizontal and 40 vertical threads, and cut the forty-first thread; withdraw the threads to their intersection point.
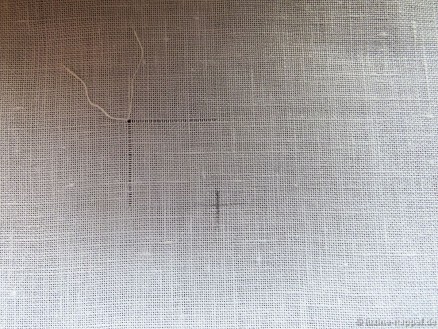
The section of the withdrawn thread measures 3 cm. The opposite thread end is now withdrawn about 3.5 cm.
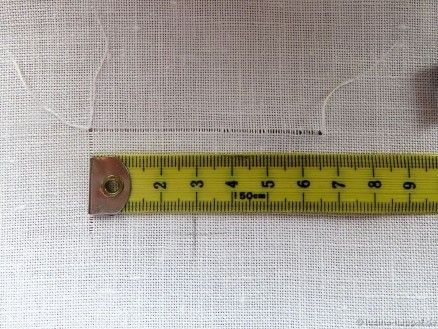
Outward from the withdrawn-thread line, leave 4 threads, and cut the fifth thread where it aligns with the center; withdraw it about 3.5 cm to both sides.
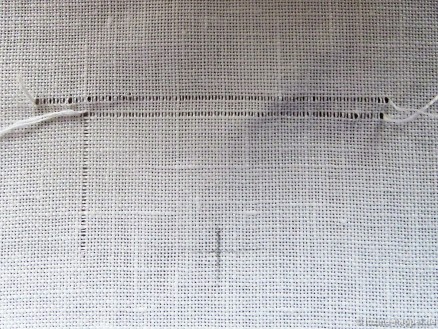
Starting at the left at the vertical withdrawn-thread line, work Four-Sided stitches over 4 threads between the two horizontal withdrawn-thread lines. Work 20 stitches in all and stop.
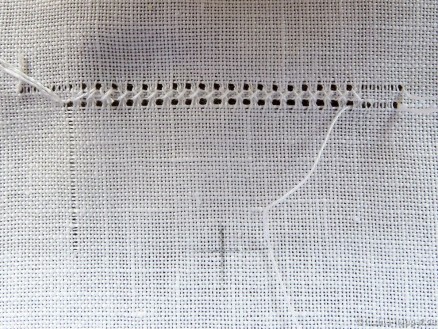
Cut the vertical thread to the right of the center mark (again, the forty-first thread) and withdraw it about 3.5 cm in both directions.
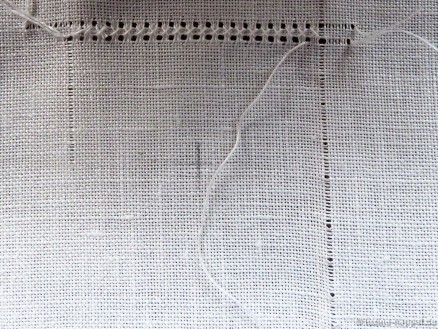
Leave 4 threads to the right, and withdraw the fifth. Turn the work 90° counterclockwise,
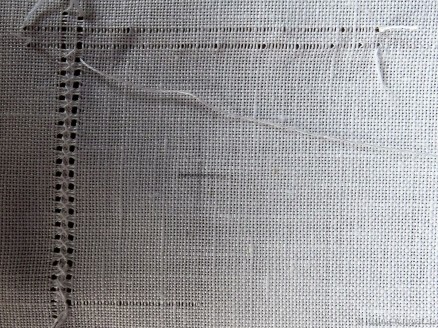
and continue working Four-Sided stitches around the corner.
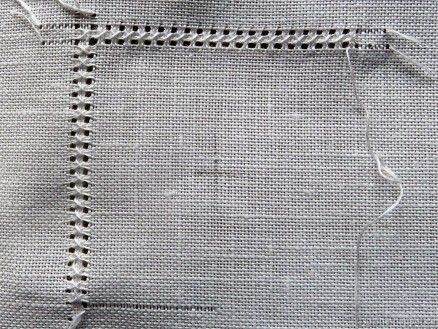
After working 21 (counting the Four-Sided stitch at the corner) Four-Sided stitches, withdraw perpendicular threads in the established way. Also withdraw the cut thread of the first withdrawnthread line about 3.5 cm and the fifth thread outward from this line. Work Four-Sided stitches around the entire square.
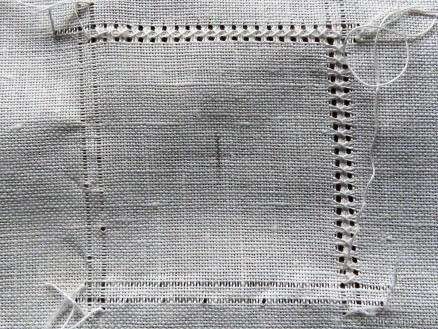
Leave 6 threads outward each side, and cut the seventh in the middle of the side. Leave 4 threads outward, and cut the fifth in the middle. Withdraw the thread ends of the outermost cut threads to their respective intersection points.
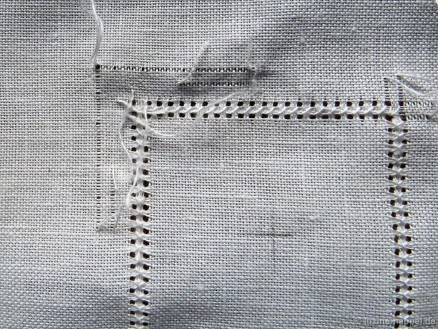
Now withdraw all the cut threads on the inside up to these lines. The thread ends remain there. They will disappear in the hem later.
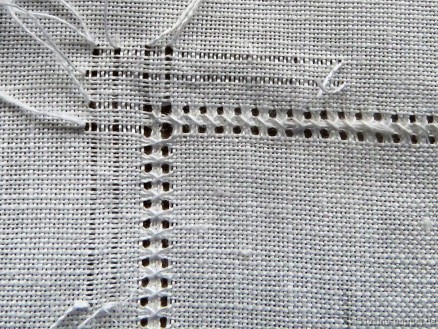
Around the square work 20 Four-Sided stitches between the outside withdrawn-thread lines on each side; these stitches must match the inner Four-Sided stitches. The corner sections remain free.
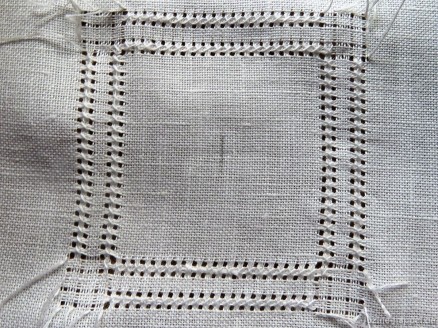
Cut and withdraw the remaining 6 threads. Baste the thread ends in place and work Peaholes.
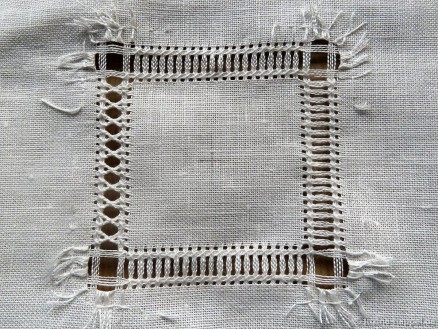
Now prepare the section for the wide hem. Therefore, a number of threads divisible by 8 plus 2 are needed. In this example I chose 34.
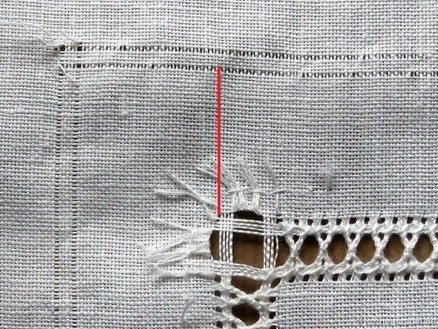
So, out from the outer withdrawn-thread line count 34 threads, and cut the thirty-fifth thread. From now on all threads can be withdrawn up to the edge of the linen.
Please note, if you will work a wide hem as I show here, this counted section is the front of the hem.
You must have enough remaining fabric for working the Peaholes, the back side of the hem, and a fold. Please keep this in mind so that you do not have too little fabric in the end.
Leave 4 threads outward and withdraw the fifth.
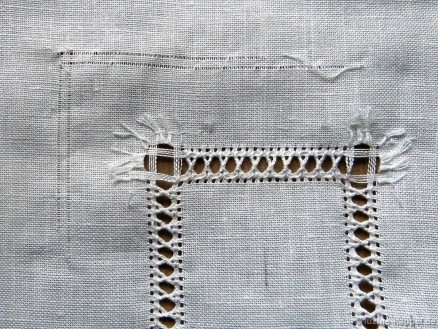
Work Four-Sided stitches around the entire square.
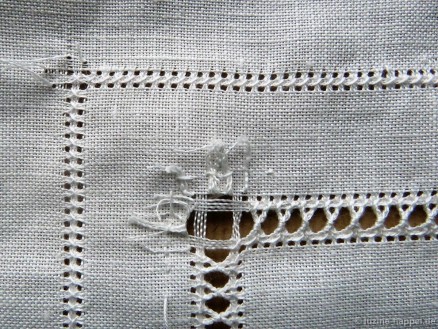
Withdrawn more threads:
leave 4 cut 1
leave 34 cut 1
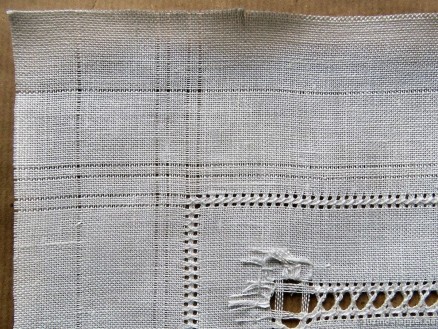
Work the Peaholes for the folded Peahole edging and trim the fabric for the hem fold to about 1 cm.
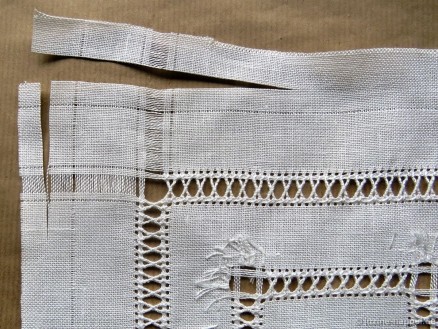
Mark the sewing line for the mitered corner. The line should run diagonally through the outside Four-Sided stitches.
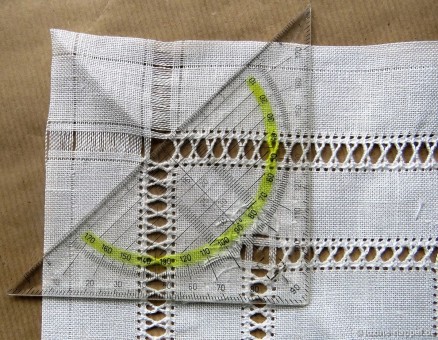
Fold the piece exactly – right sides together. Sew by hand or by machine.
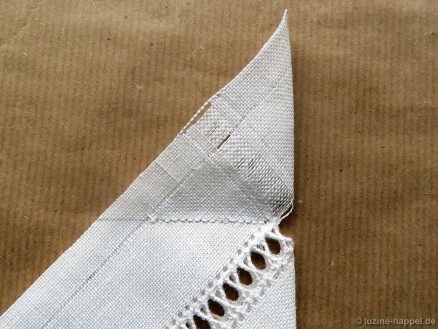
Trim the seam allowance to about 1 cm.
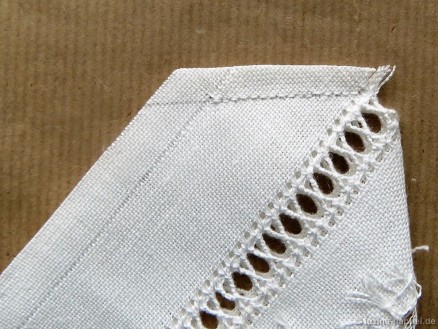
Turn the hem corner. For more information about hemming please look to my book Basic Principles of Schwalm Whitework.
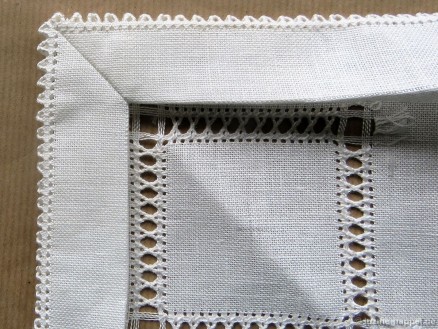
Fasten the hem, work the corners of the inside Peahole hem. Continue working the folded Peahole edging.
Wash, starch and iron the piece. Leave it as it is – a nice little doily. Or use it for making a beautiful lavender sachet. If you were to add a loop for hanging and a tassel, it is also well-suited for a lovely ornament for trimming the tree.
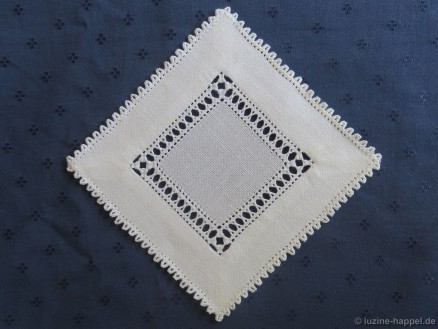
If you would like to work a larger project, square or rectangle in any size, counting fabric threads from the center of the piece is nearly impossible. And the order of working is somewhat different from the order presented in this blog post.
So, I made a leaflet for downloading; it explains in great detail how to withdraw fabric threads, how to work wrapped Peaholes for both the hem and the folded edging, how to make a mitered corner in the hem, and finishing.
On 17 pages, illustrated with 70 pictures, you will find all the needed step-by-step instructions for working a wide hem with a folded Peahole edging.
described in great detail
and
illustrated with step-by-step instructions
17 pages
7,8 MB file size
Text: English
15,00 € (12,61 € + 19 % value added tax)
download here


Thank you for this wonderful tutorial, I can’t wait to try. I use Peahole Hemstitch all the time, it is a traditional edge for my embroidery, Punto Antico Fiorentino. I have several of your books but haven’t tried Schwalm embroidery yet, it’s on my “wish list”. Patricia
Excelente…Hermoso, un trabajo que facil de hacer, gracias
gracias por el cumplido
Hi..it’s very best and very beautiful too. I always do the hem on my serviates with a peahole on drawn threads.
I will try your tutorial.
Thank you…
Mona
Yes, Mona, please try it. After making a little practicing exercises it should turn out well. I look forward to see your report on experience!
I have a question. Are the basted stitches holding the withdrawn threads in place removed when the hem is complete?
Yes, of course the basted stitches holding the withdrawn threads in place are removed when the hem is complete. Sorry, I forgot to mention it – thanks for asking.