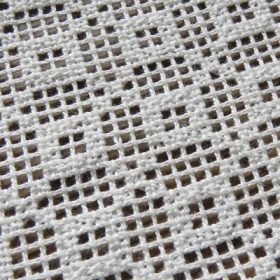
category: Limet-Filling pattern
linen used: 13.5/cm thread count
threads used: coton à broder No. 20
stitches used: Rose and diagonal Back stitches
center: intersection of withdrawn thread lines (in other shapes or motifs: longitudinal axis = withdrawn thread line)
one pattern segment = 40 threads
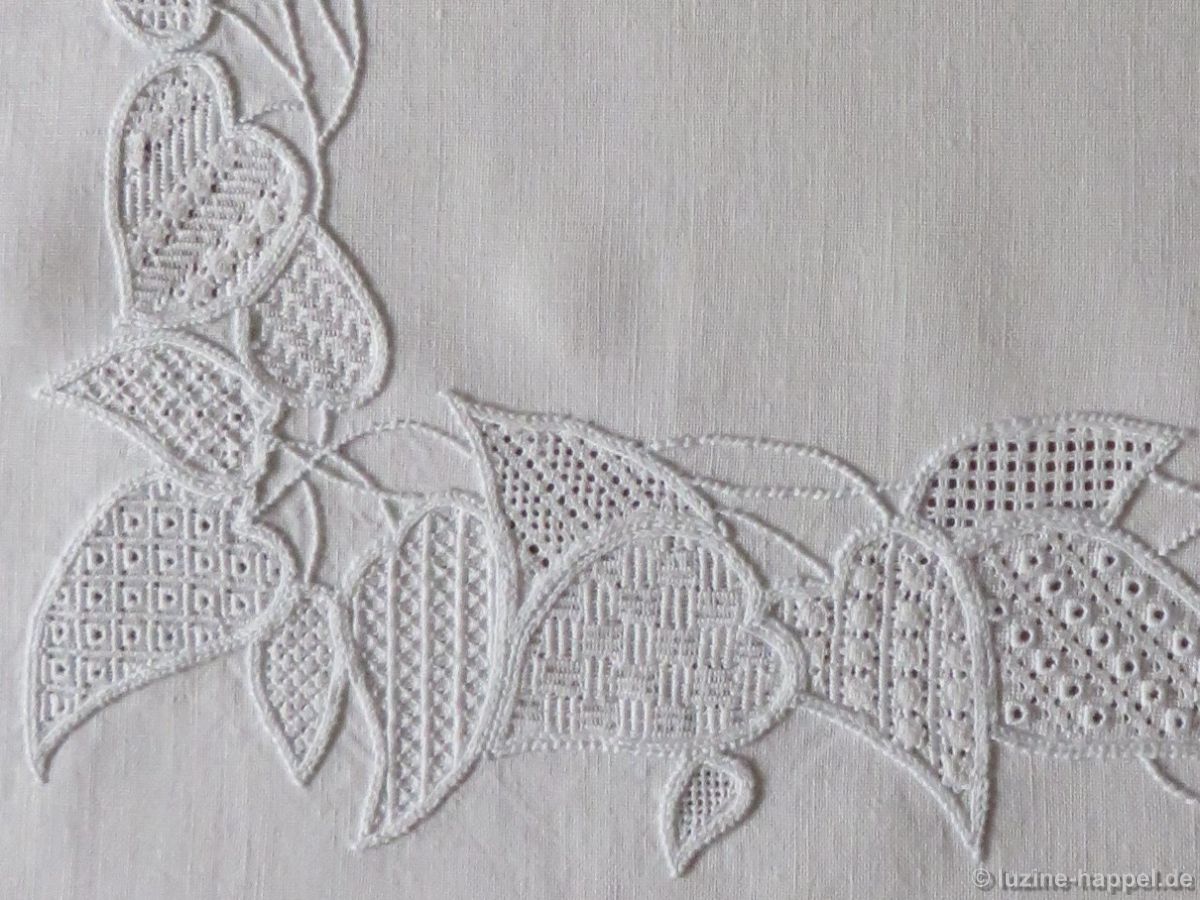
After many patterns for small and medium-sized areas, I will now present one for very large areas. A single pattern segment spans 10 squares – that’s 40 threads of fabric!
I came across the pattern years ago when I was visiting an exhibition.
Of course, I immediately tried to find out how it was worked. My pattern is slightly different.
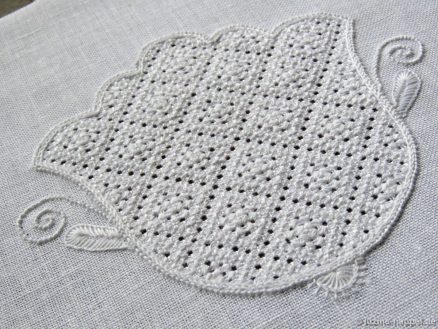
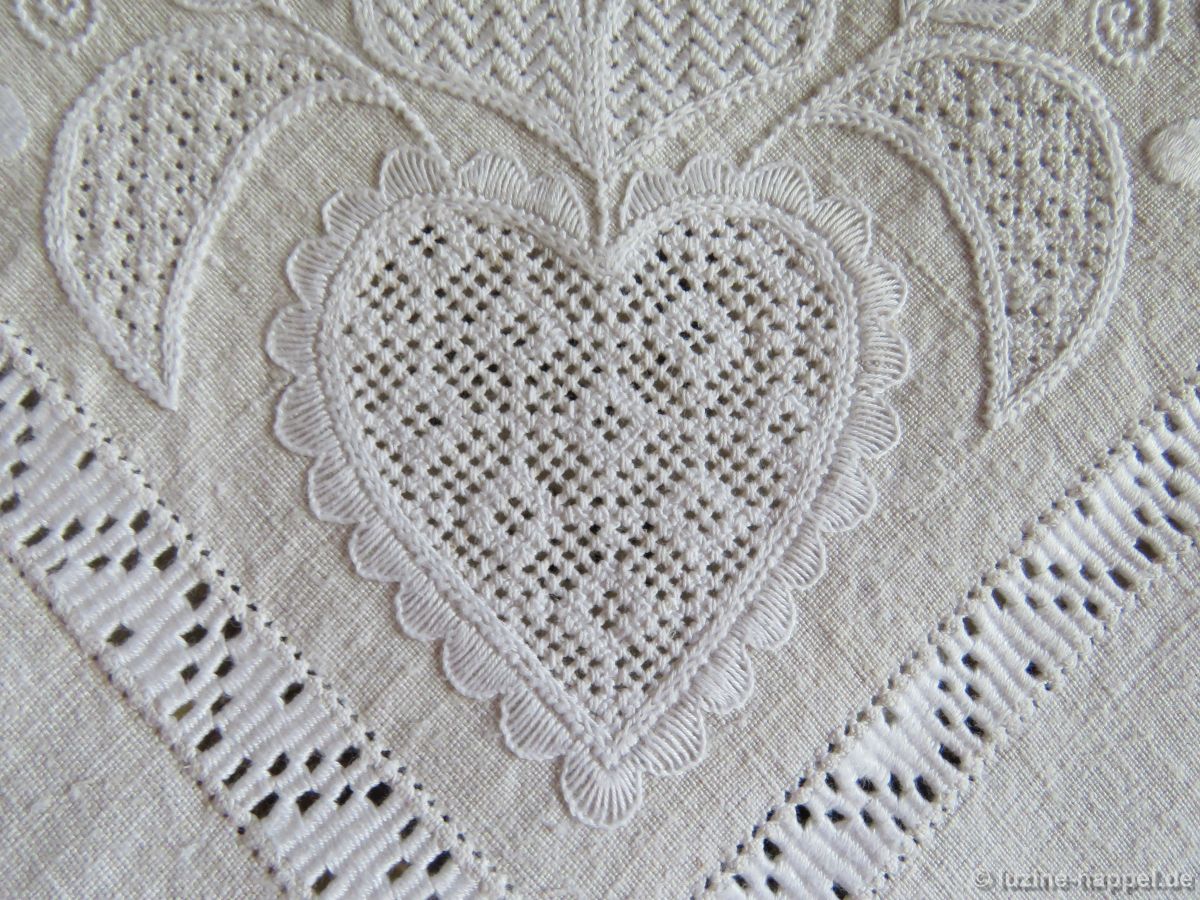
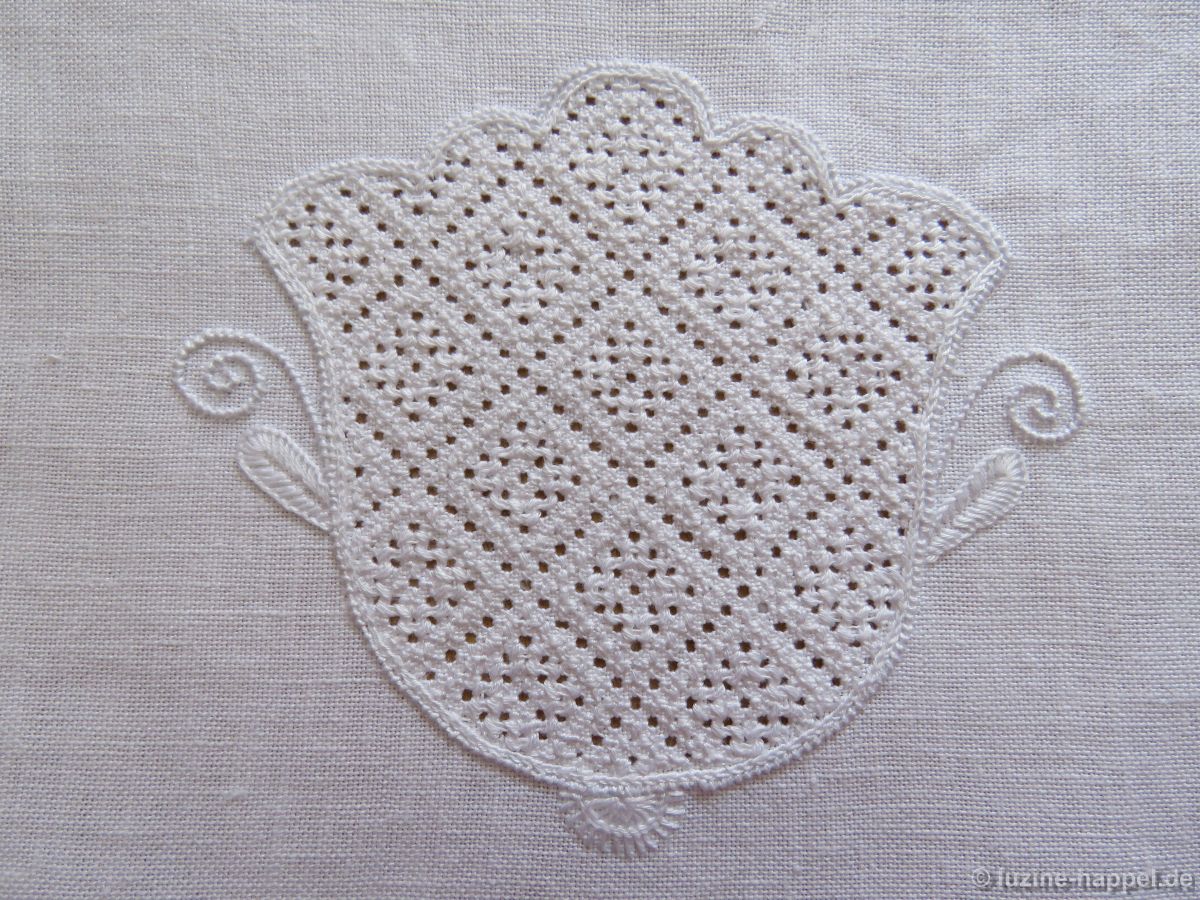
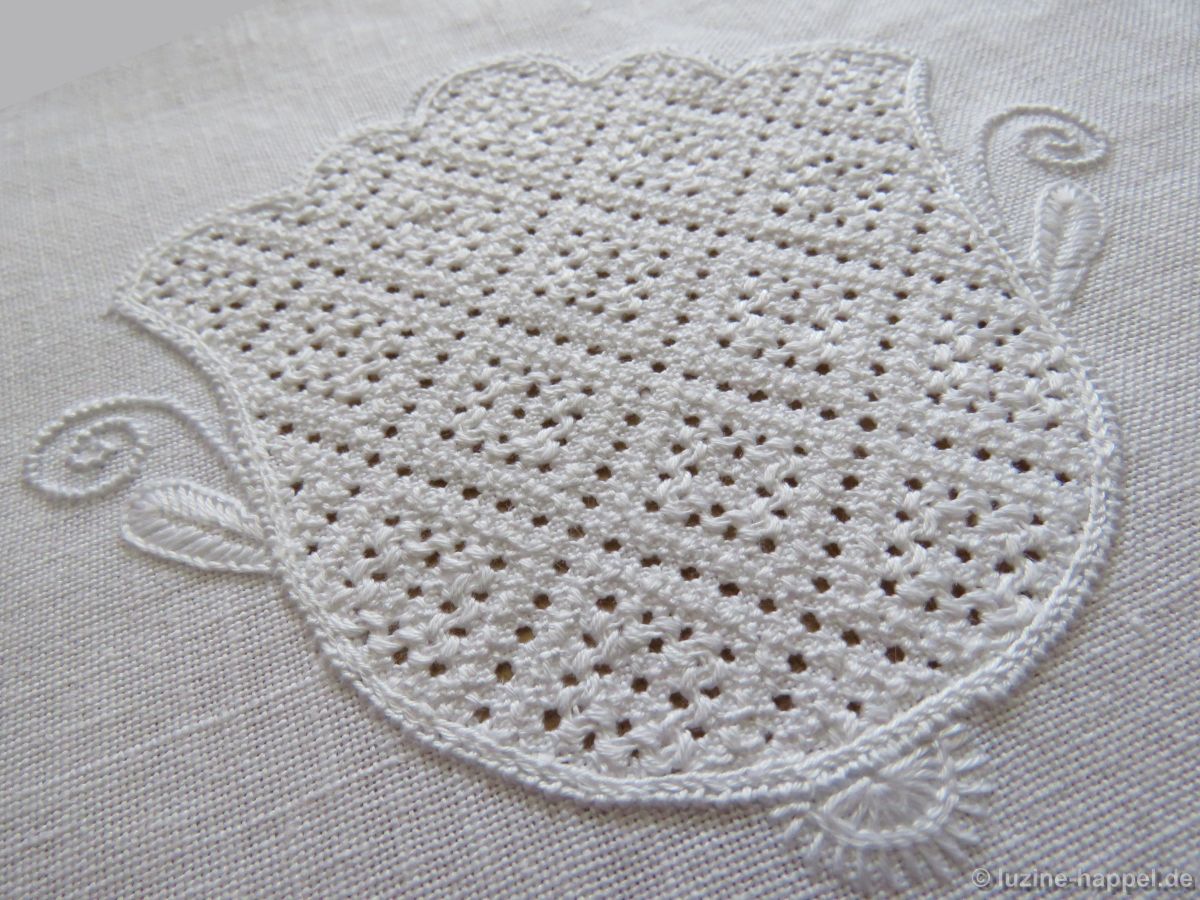
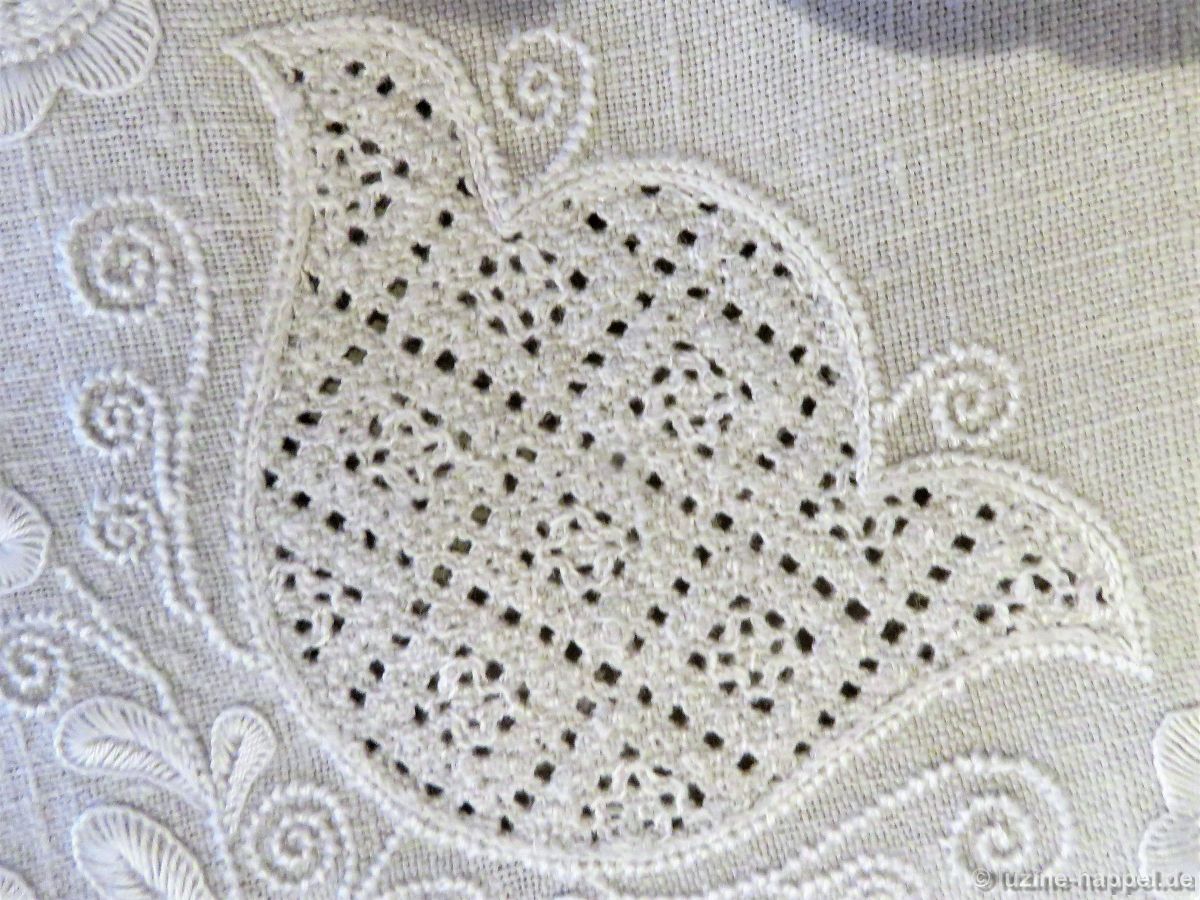
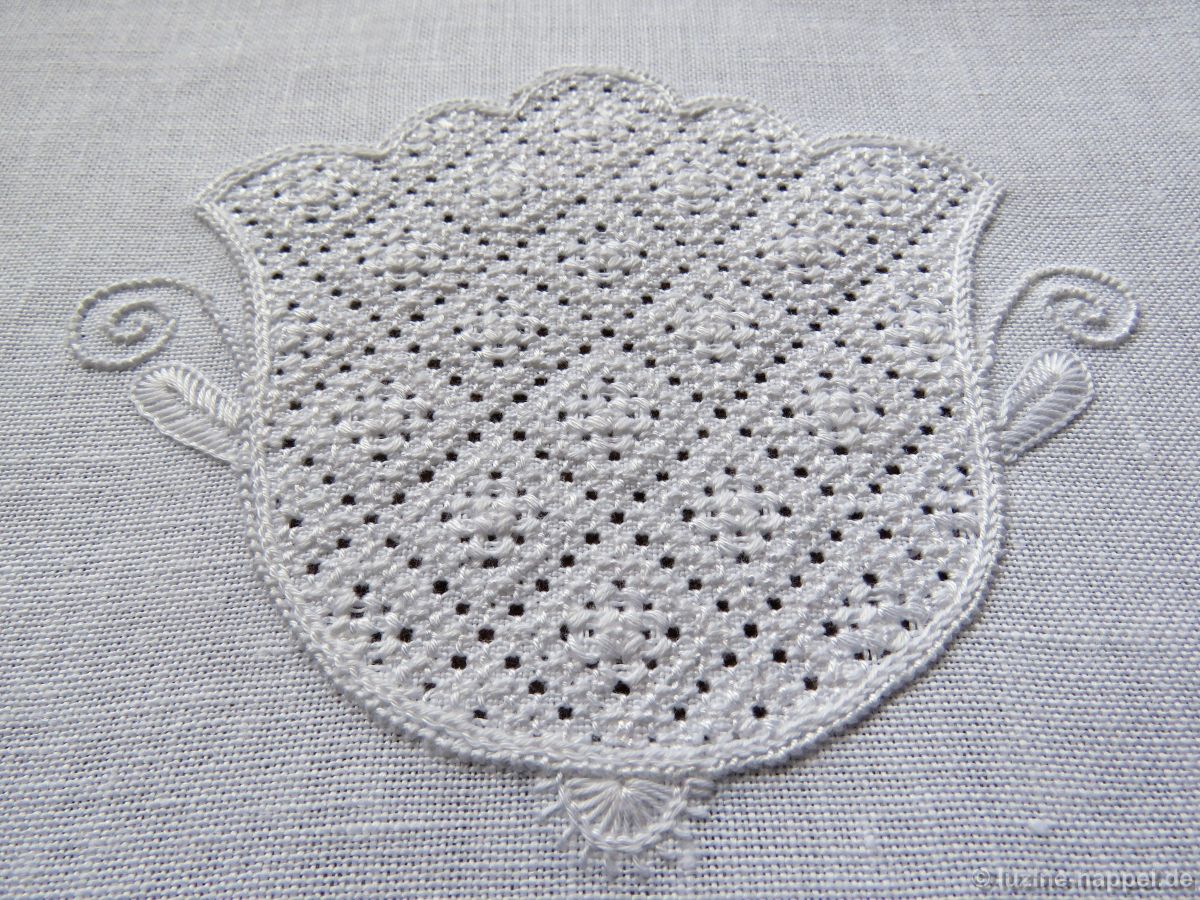
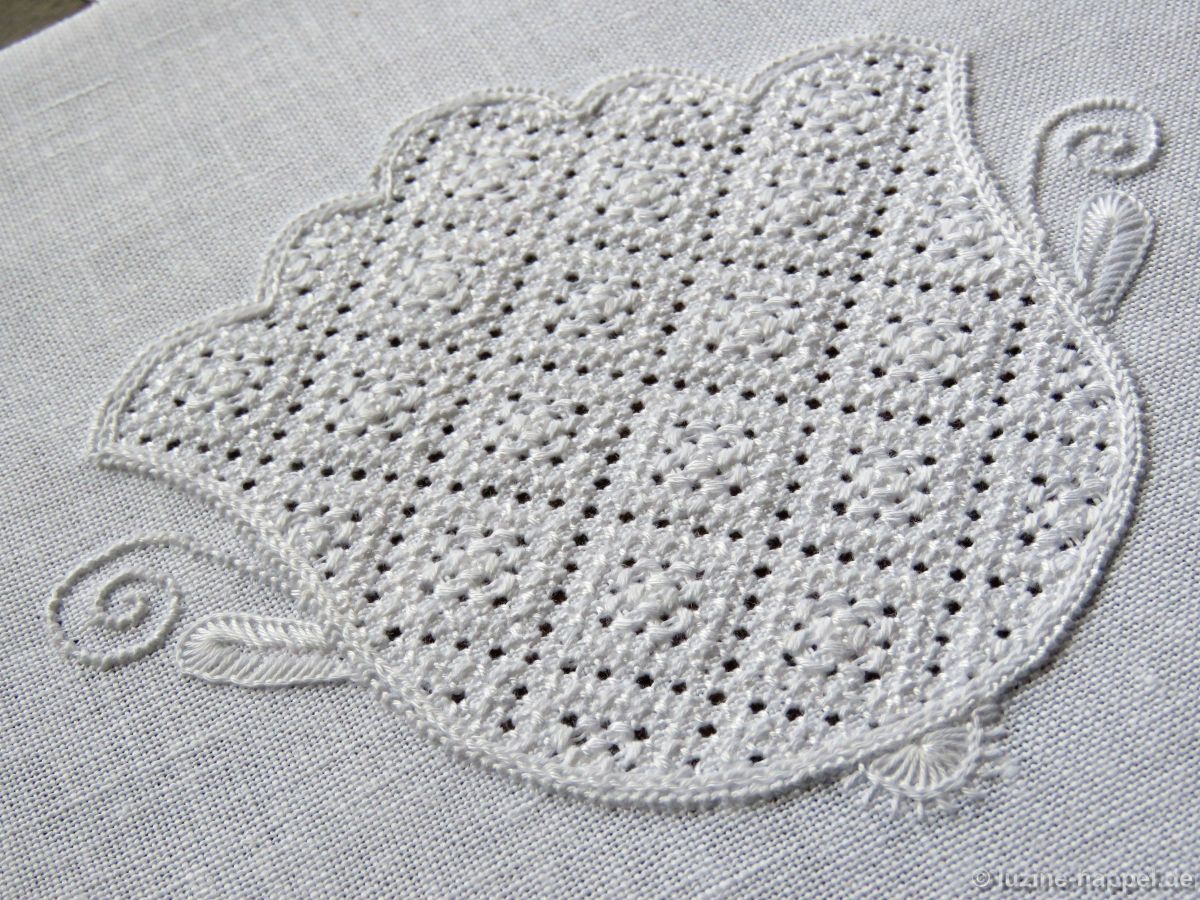
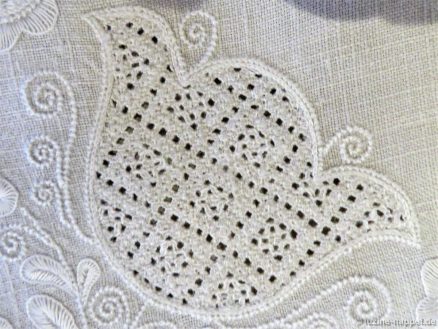
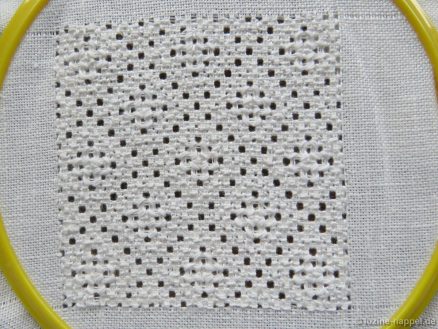
The filling pattern shown here is a practice exercise only. You can see it used in a shape at the end of this article.
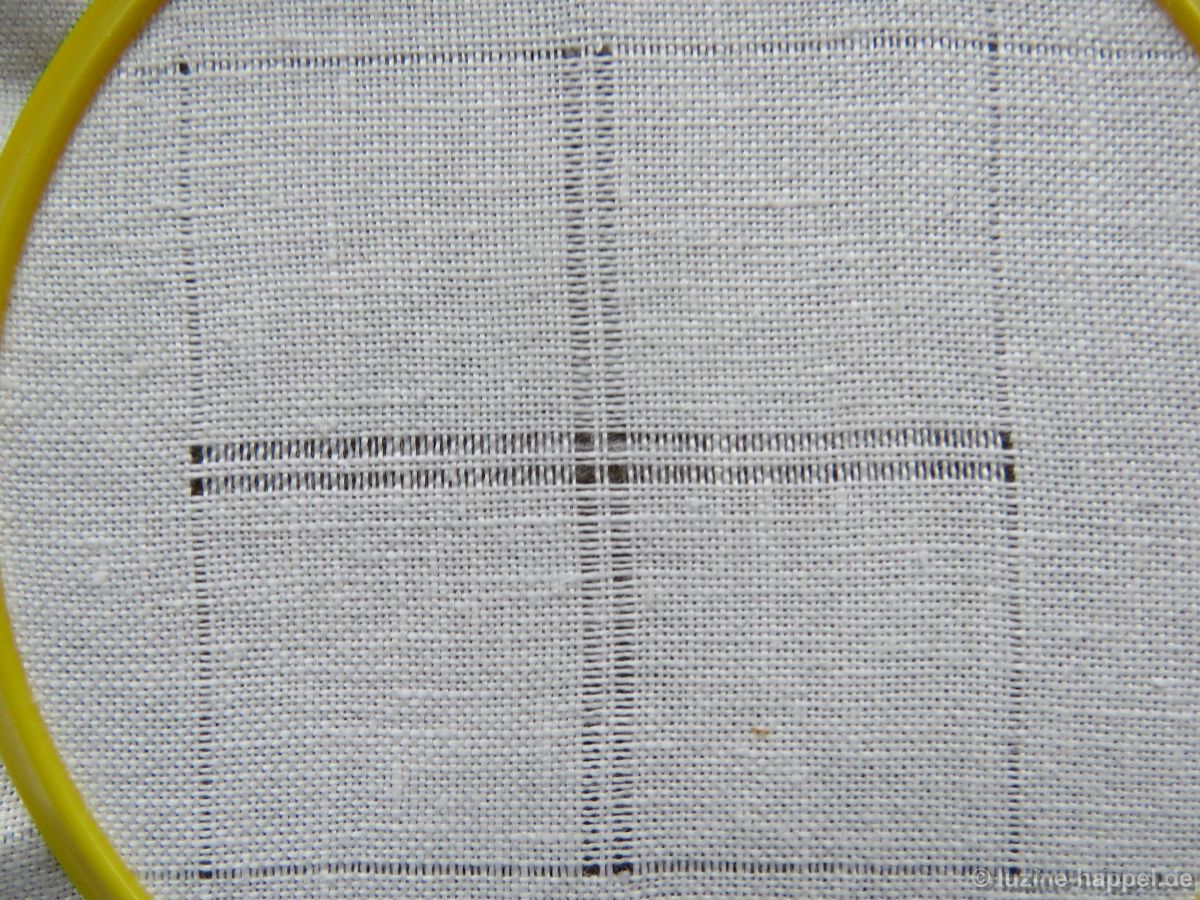
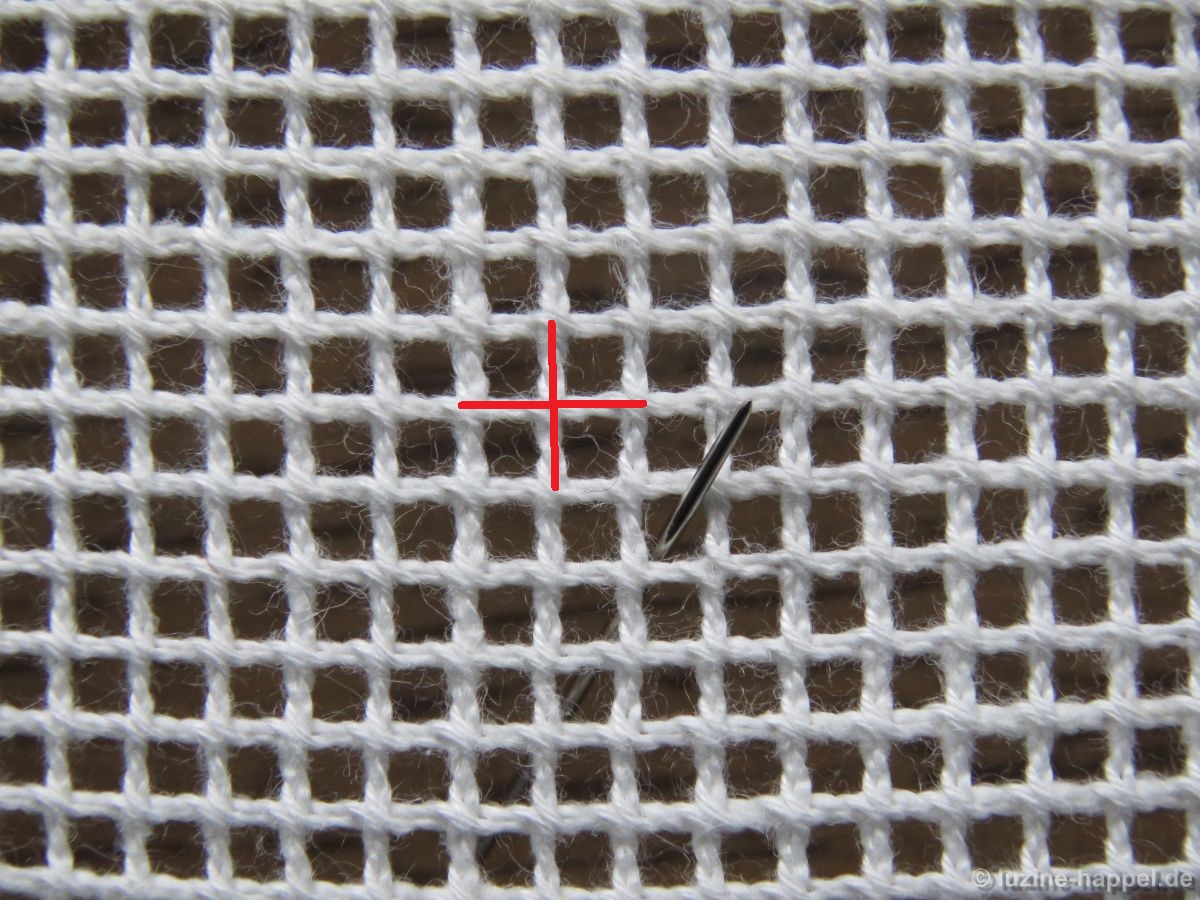
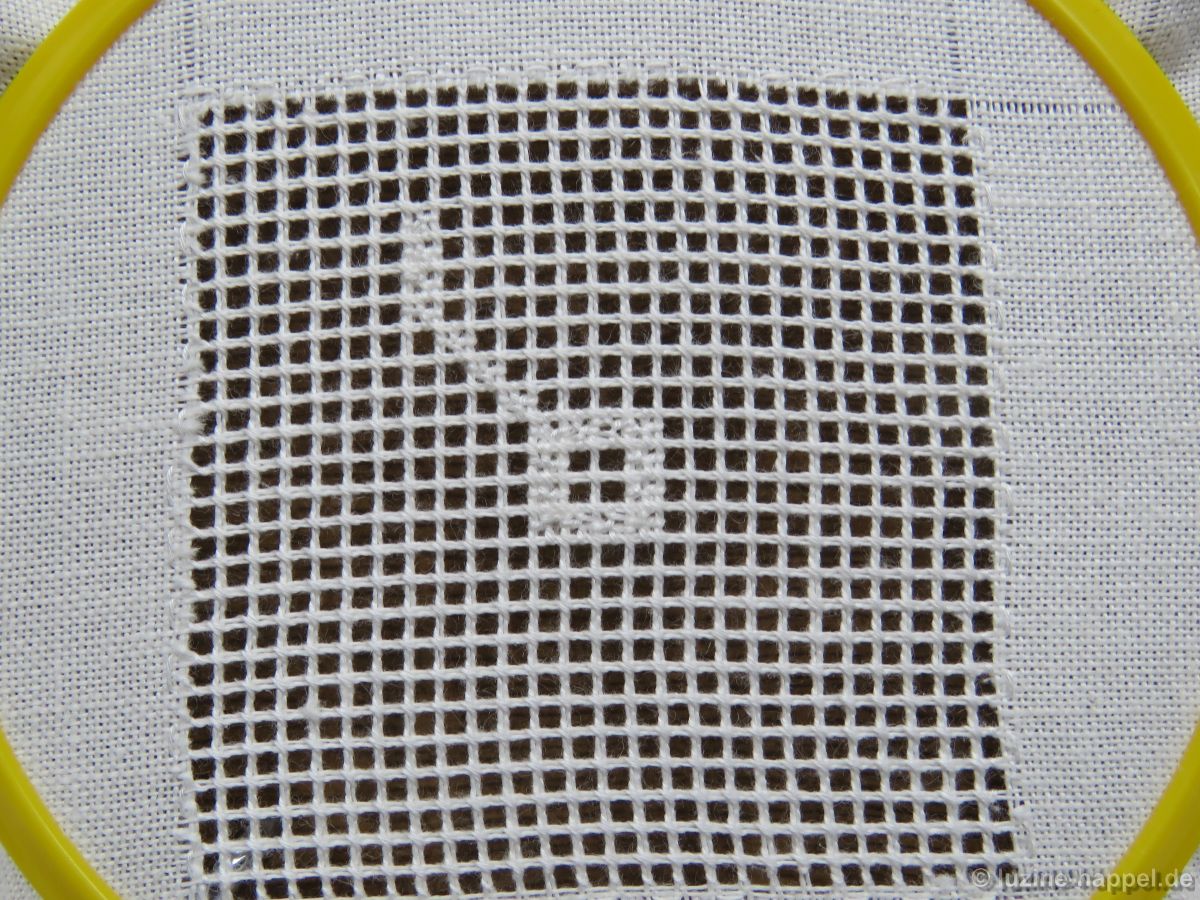
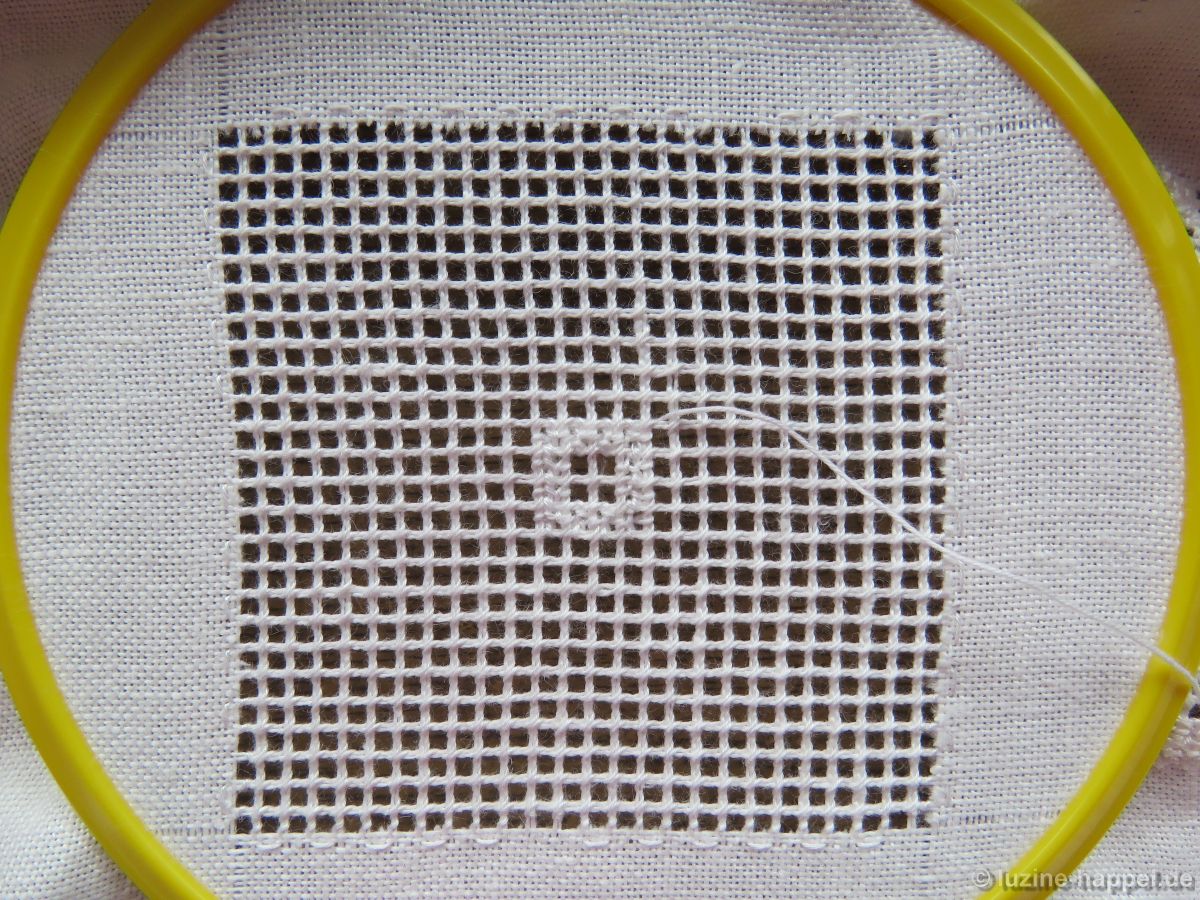
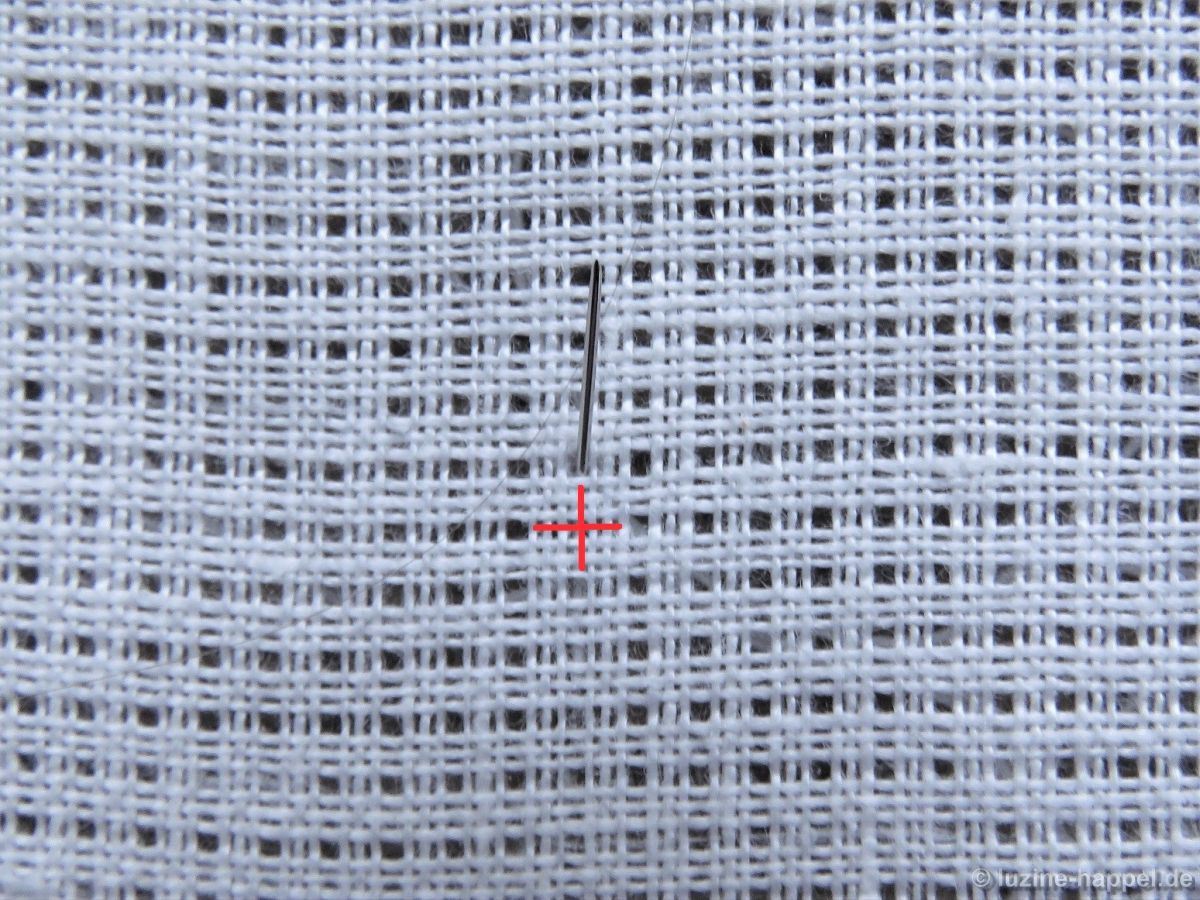
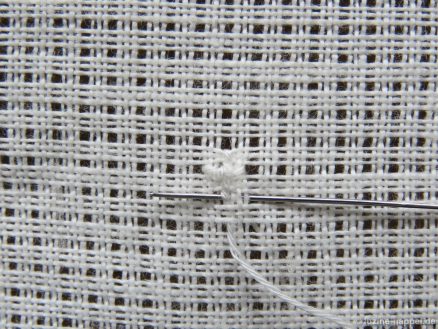
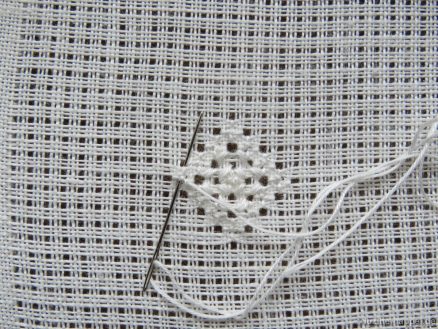
First, establish a Limet grid with an intersection of withdrawn thread lines as center by alternately cutting 1, leaving 3, vertically and horizontally.
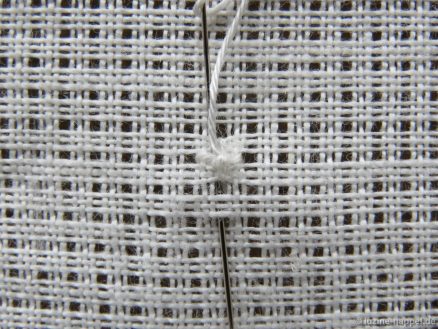
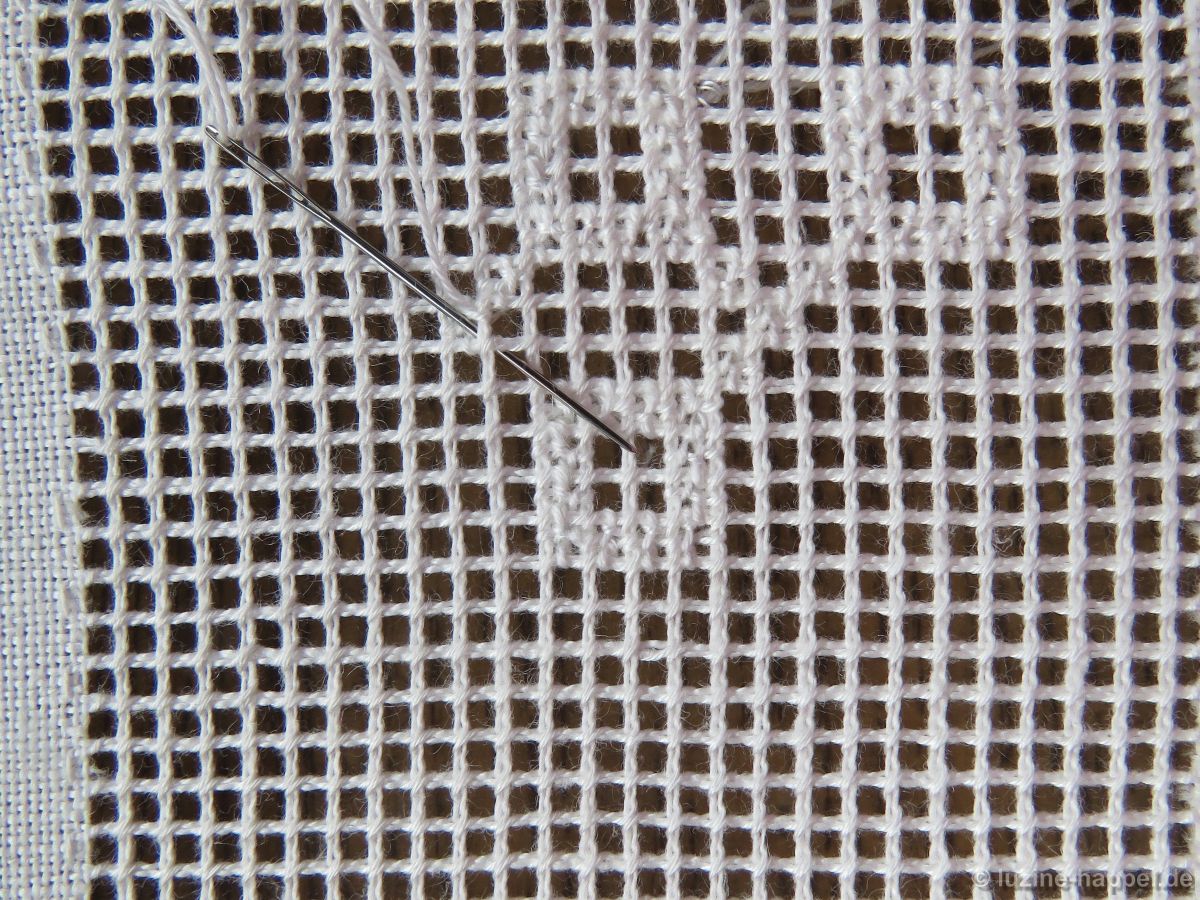
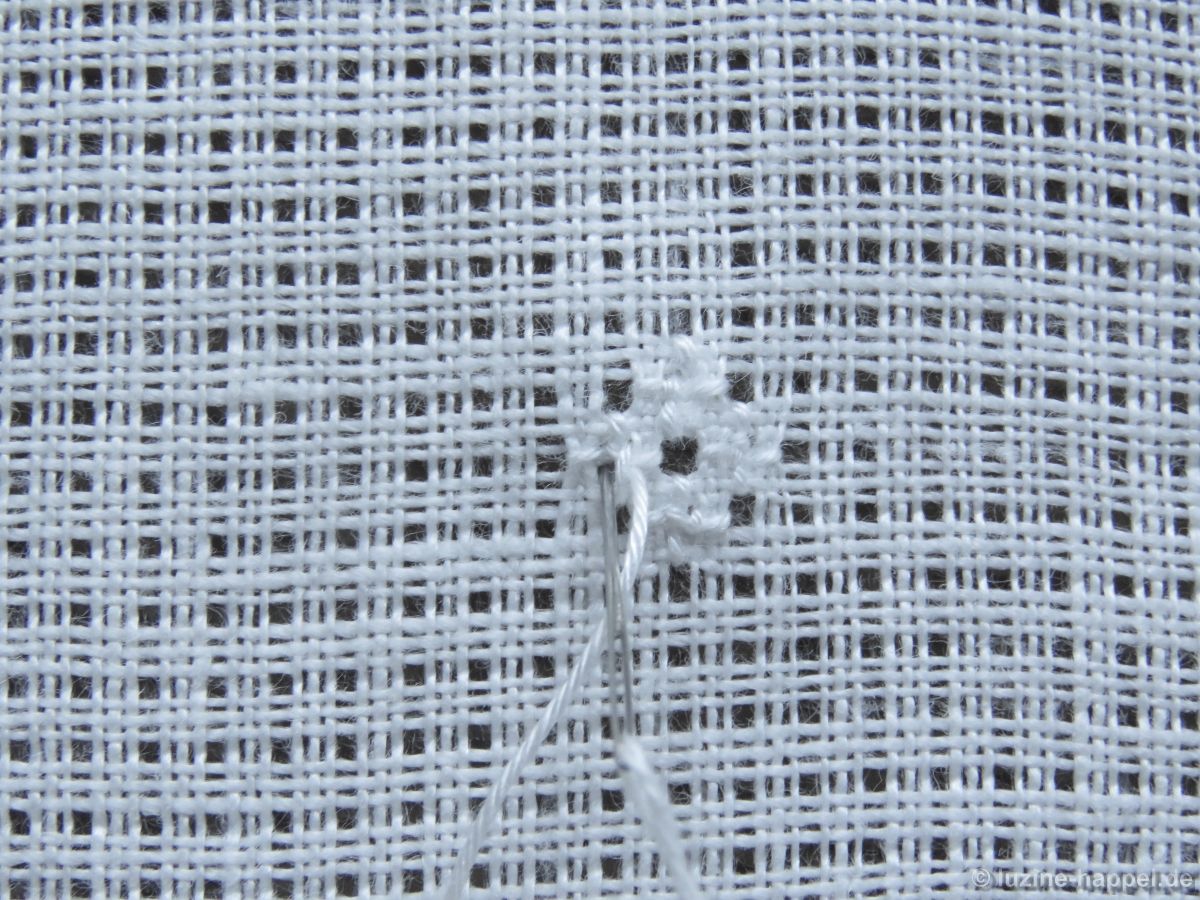
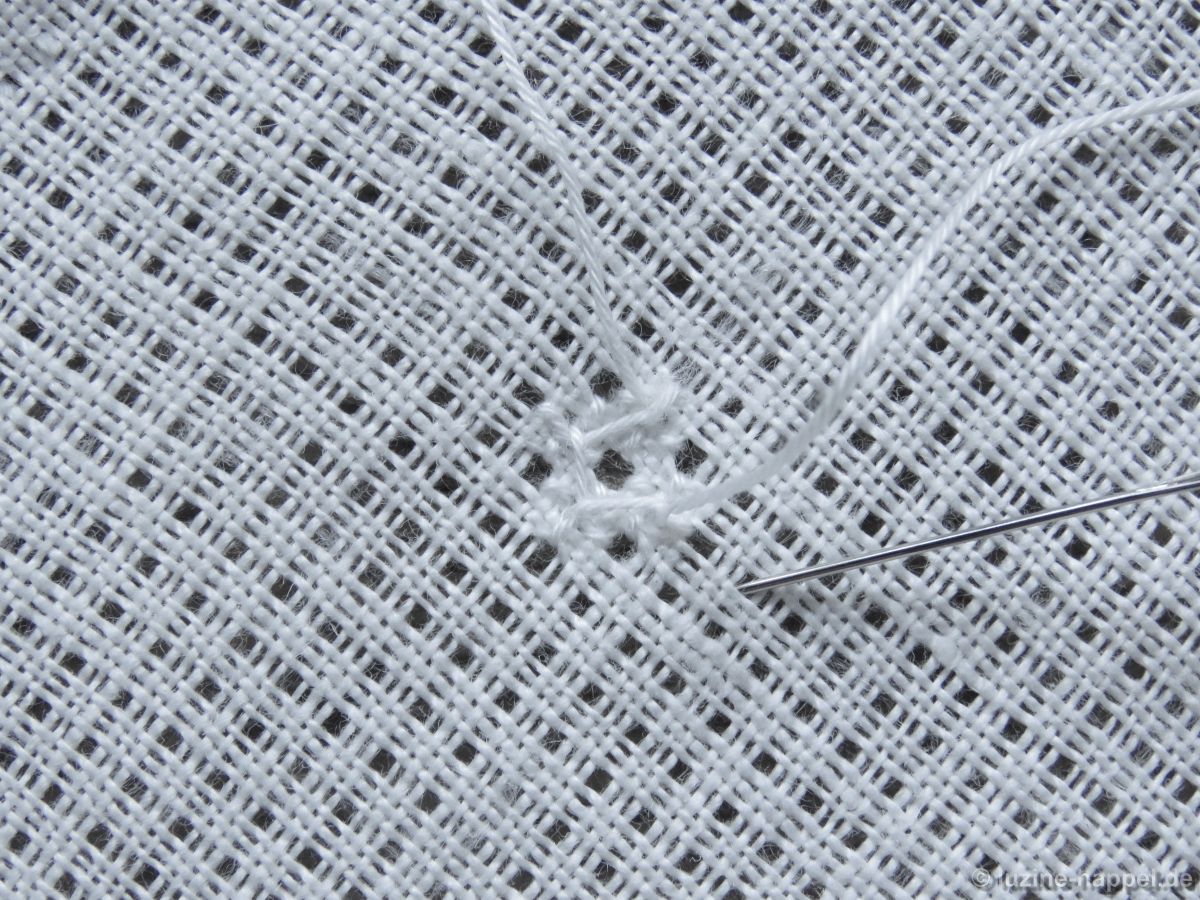
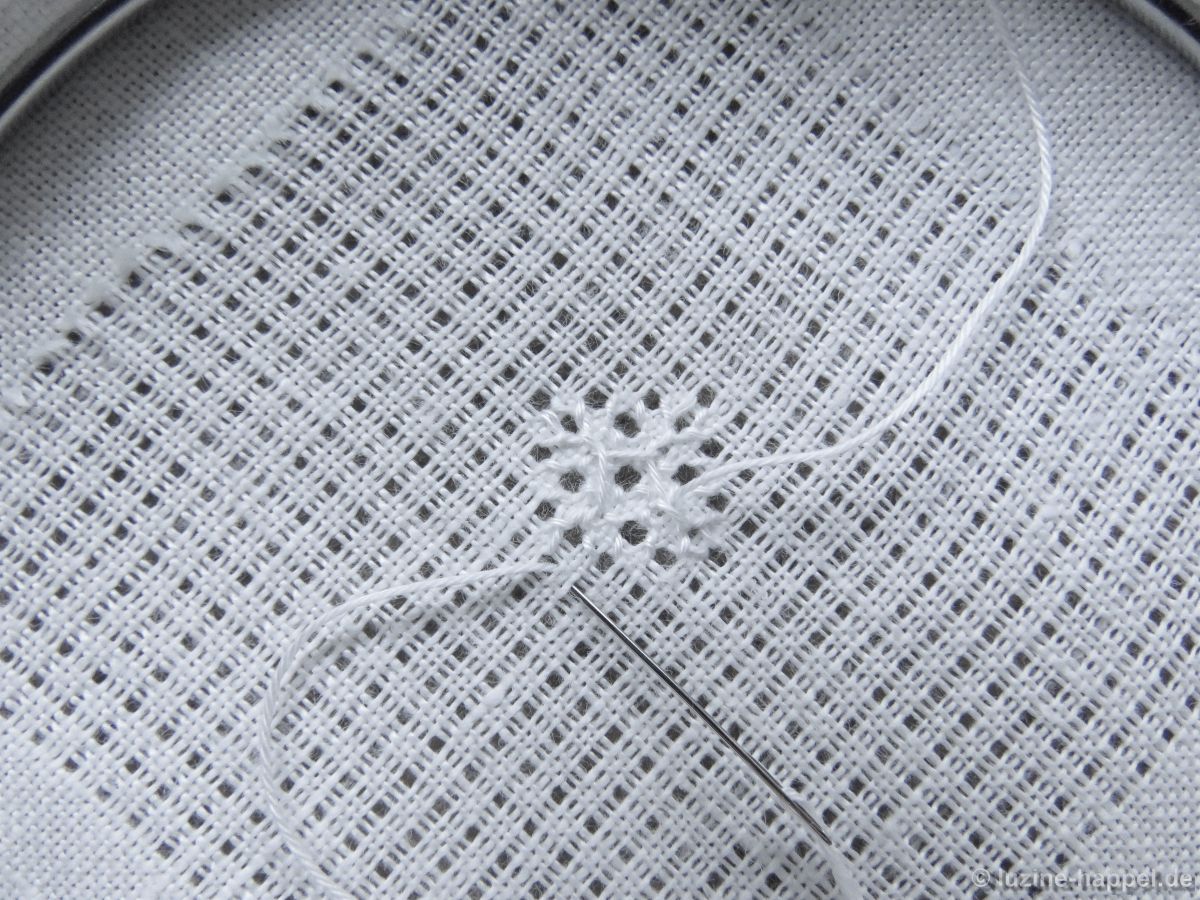
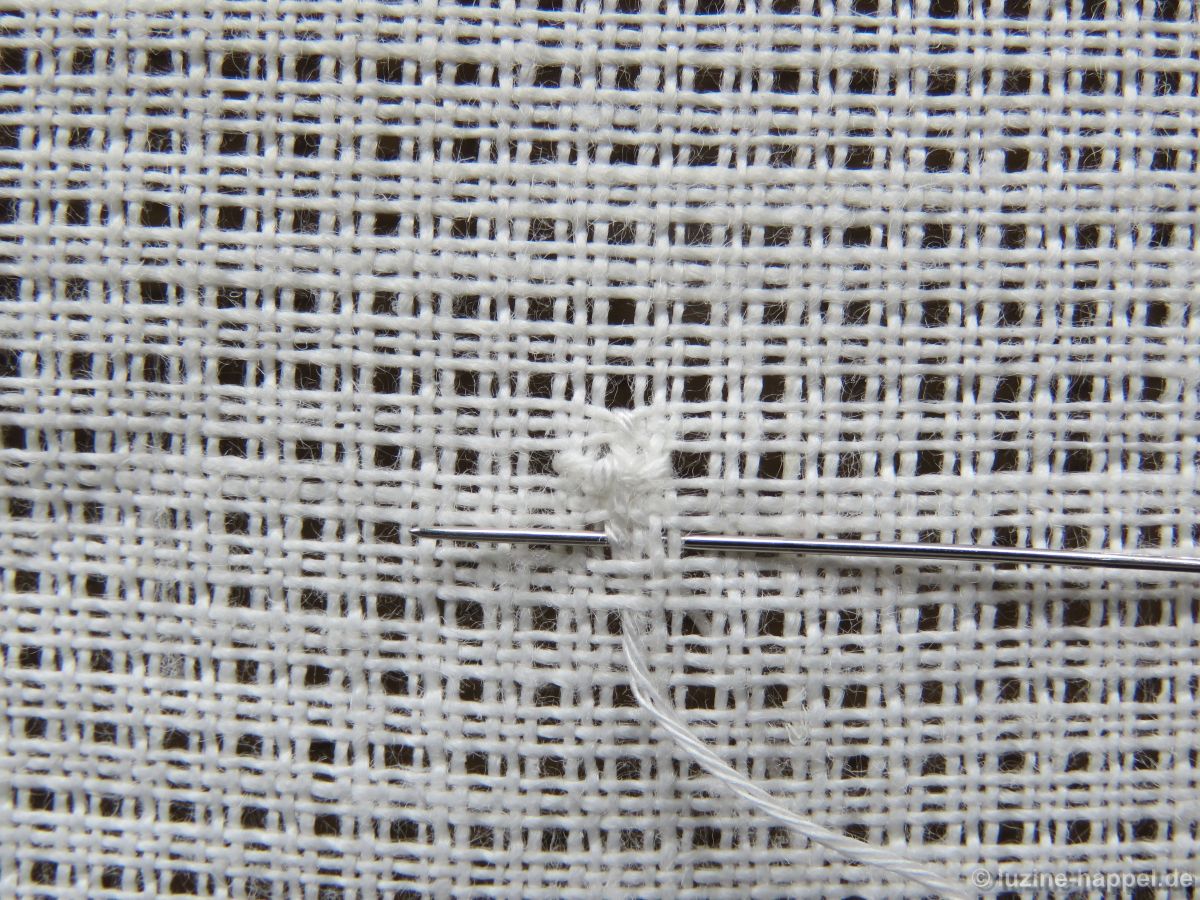
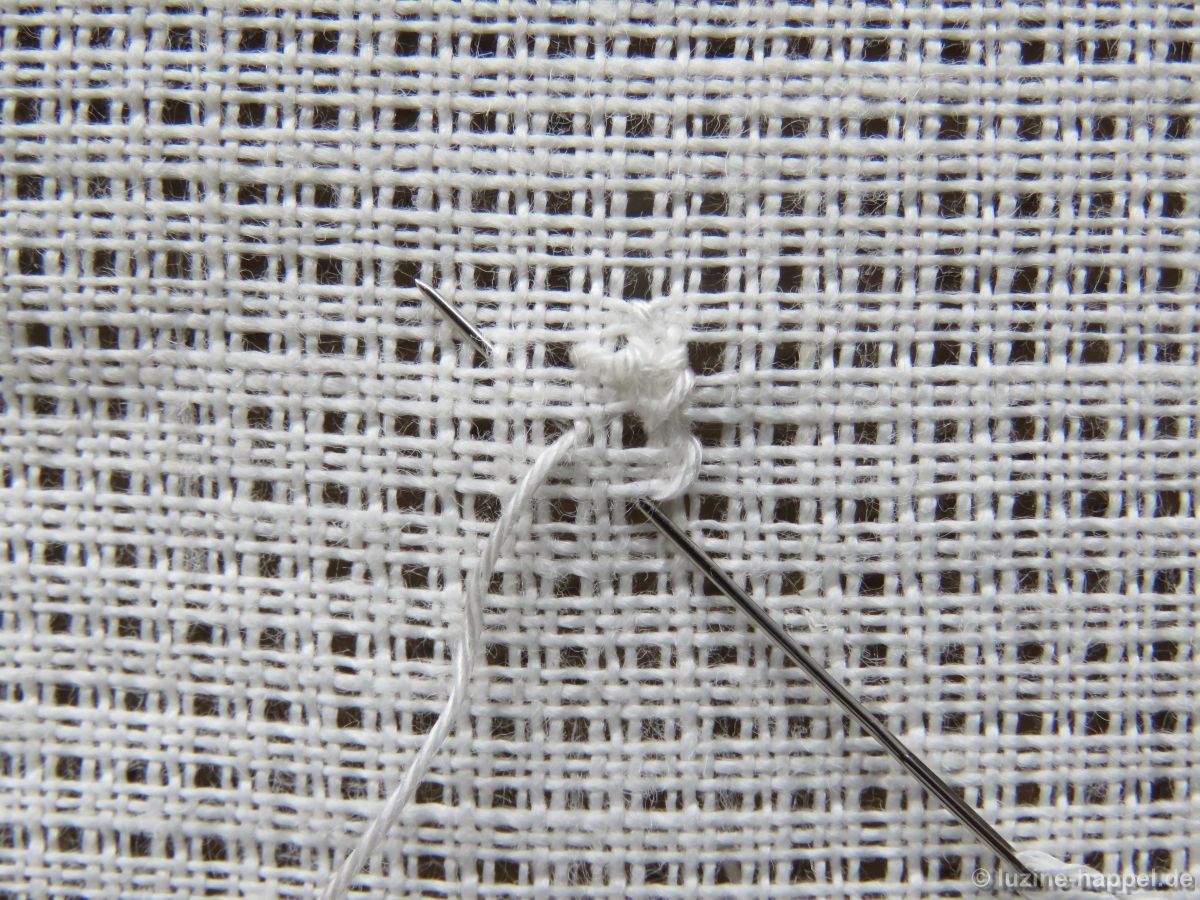
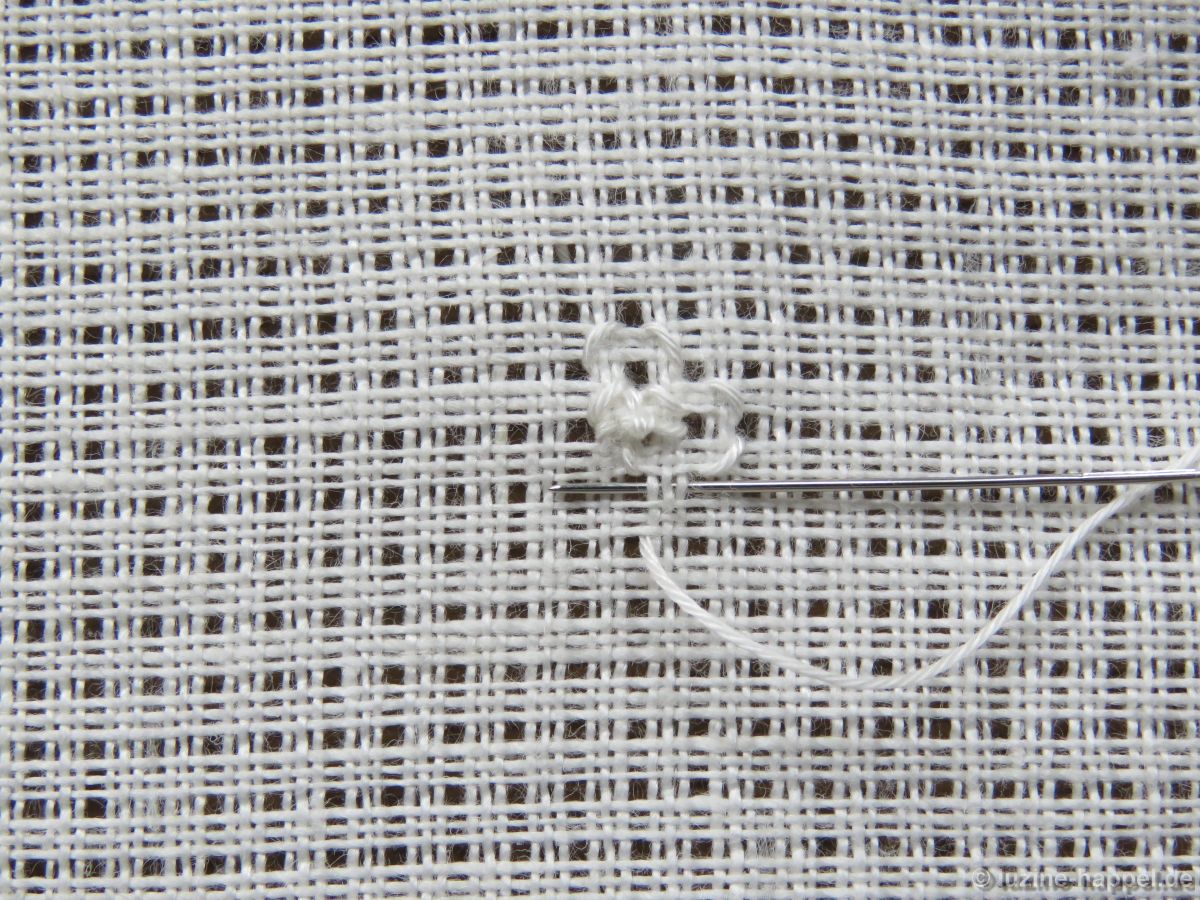
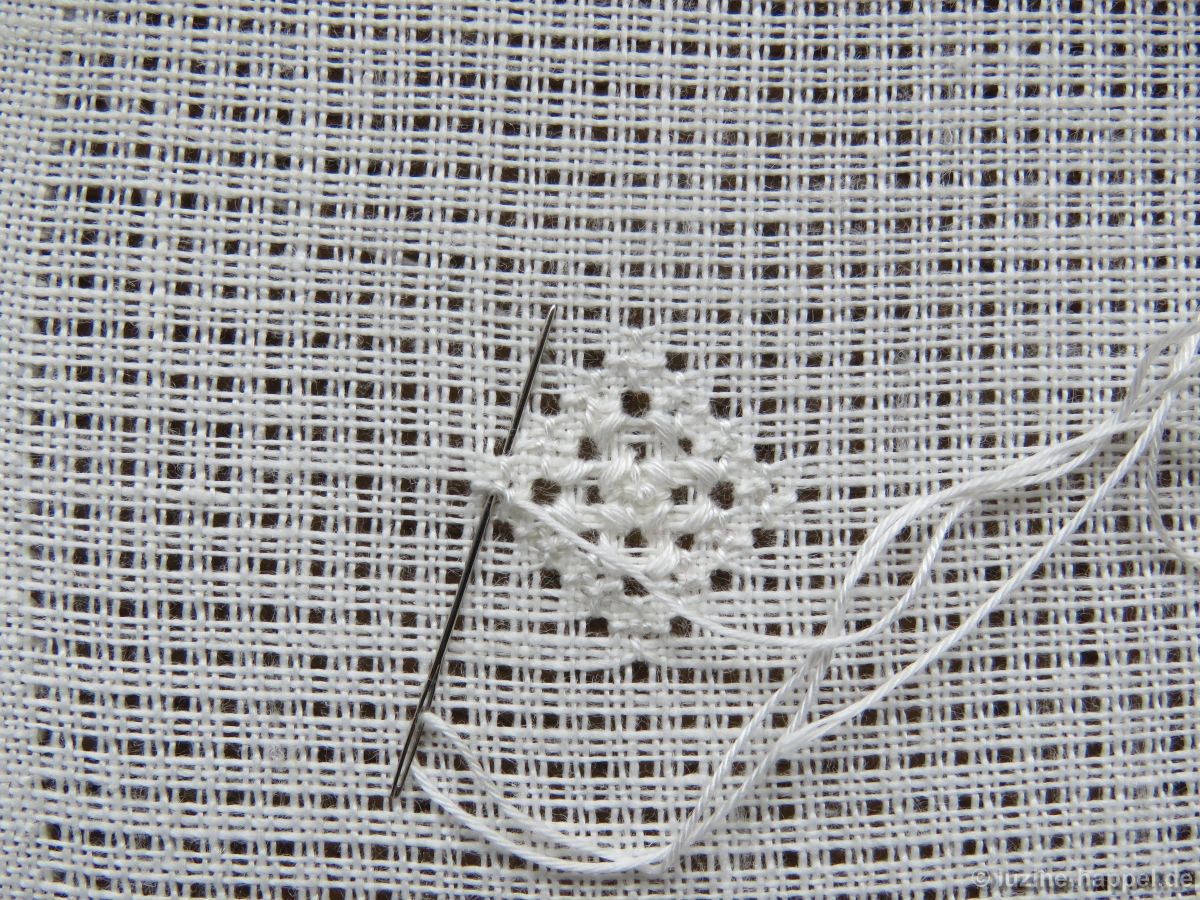
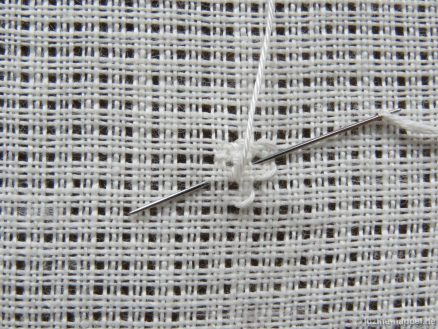
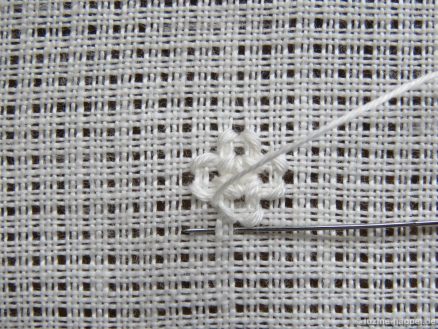
First work one Rose stitch around the center. Then bring the needle up two squares below the center.
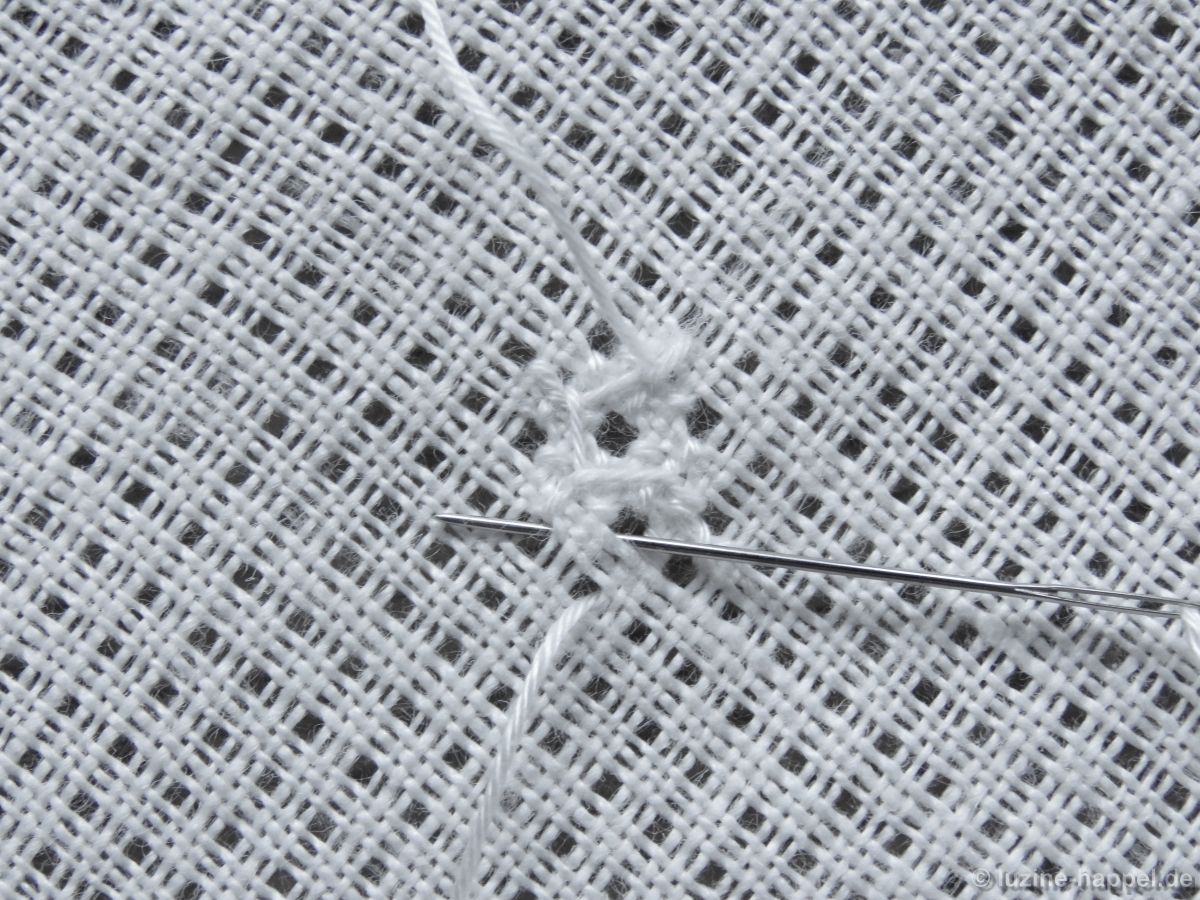
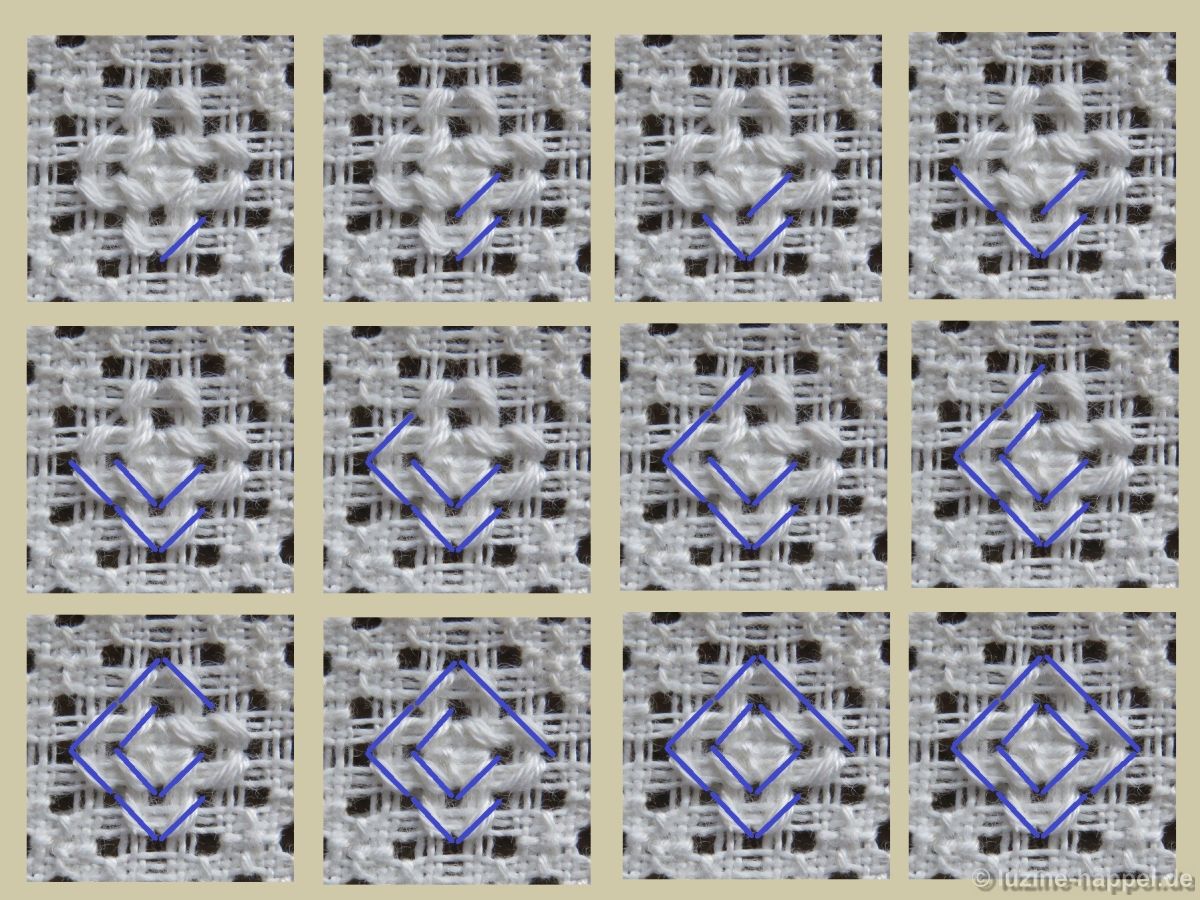
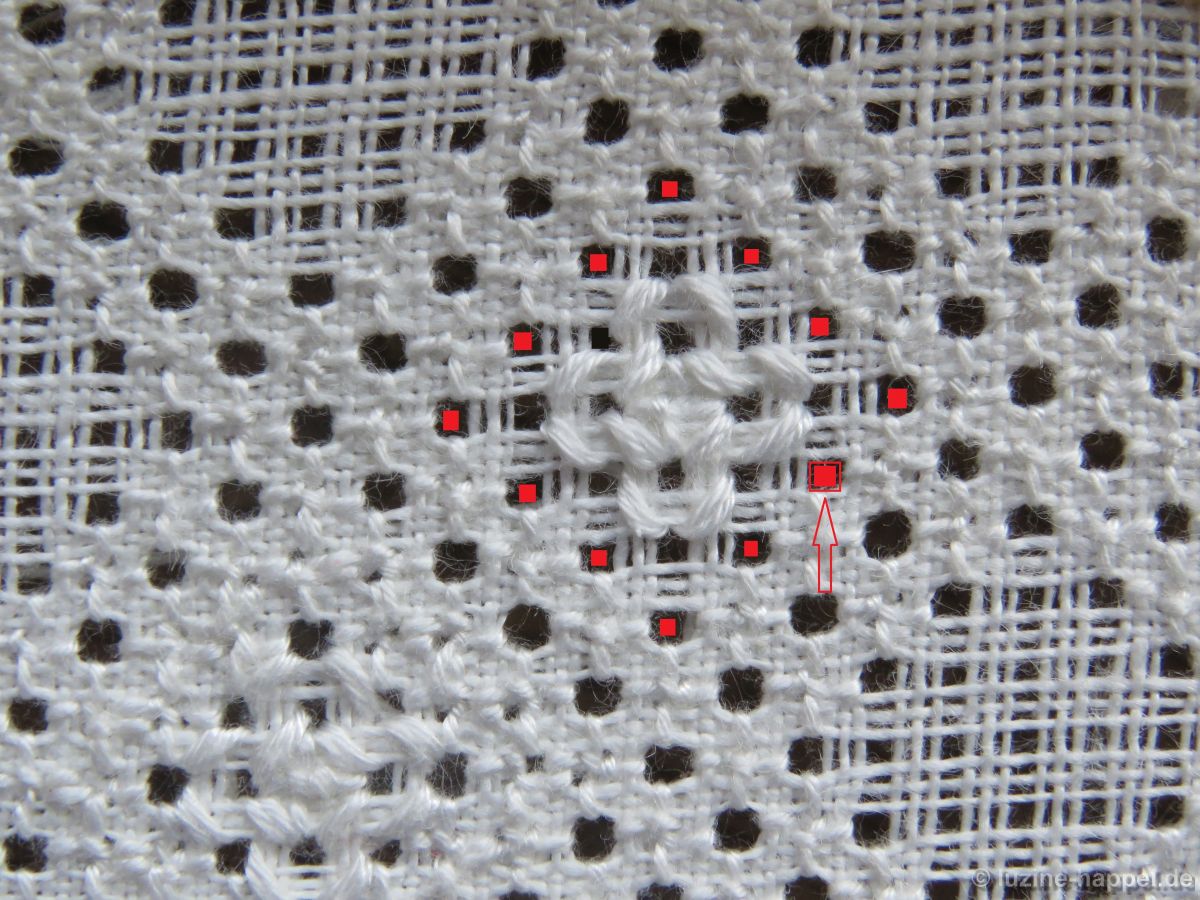
Now work 12 Back stitches diagonally across the squares around the Rose stitch. To clarify the run of the stitches, I have created an overview:
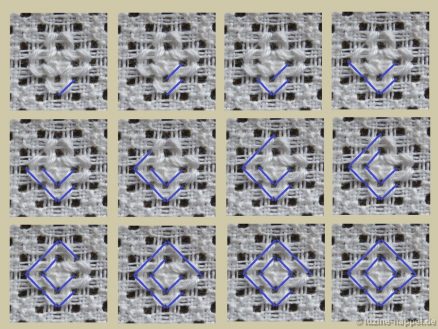
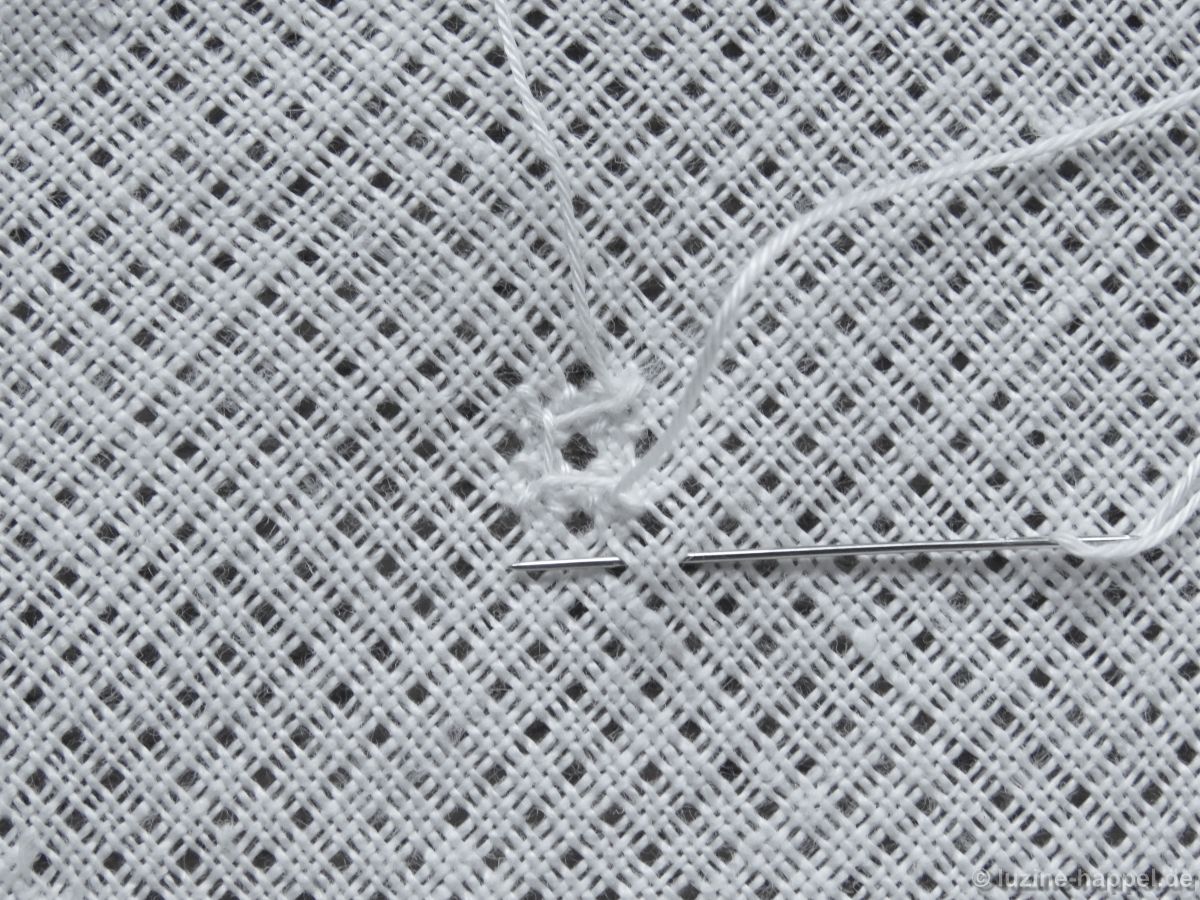
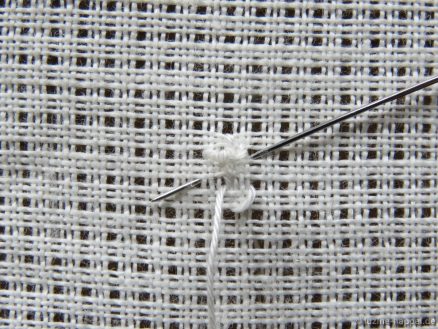
From the emerging point two squares below the center point, move 1 square diagonally to the top right, insert and bring the needle up 1 square to the left again. It is important that you catch the working thread that runs along the back. Always take care to keep the holes between the stitches well defined and open. As a result, the pattern appears clear and sharply defined in the end.
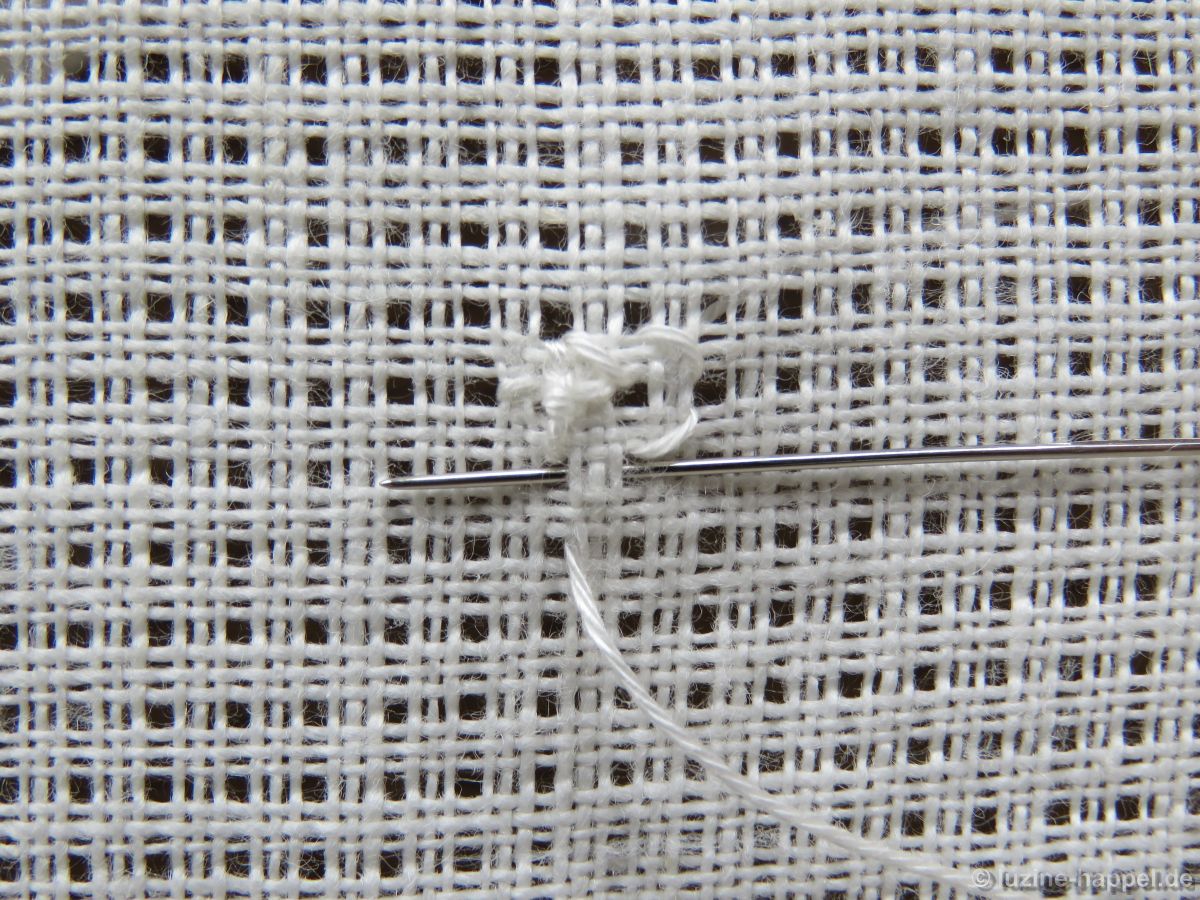
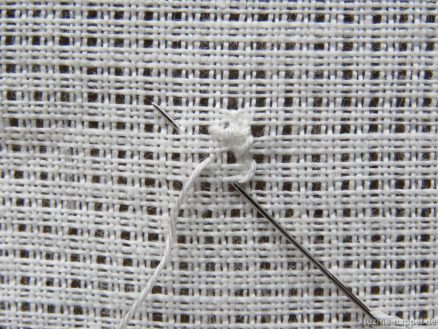
Again move the needle over 1 square diagonally to the top right, insert and bring it up again 2 squares to the left and 1 square down.
Move the needle over 1 square diagonally to the bottom right, insert and bring it up again 2 squares diagonally to the top left.
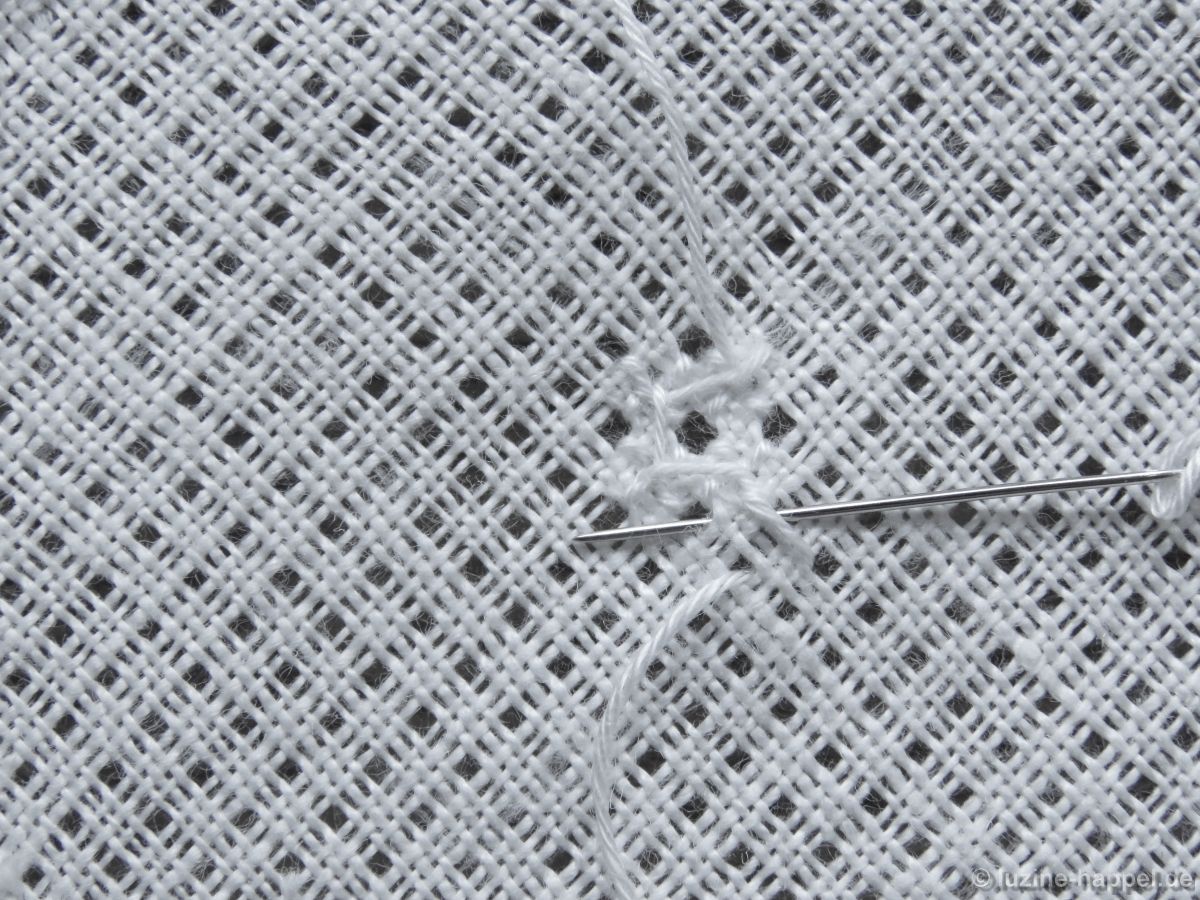
Rotate the work 90° counter-clockwise. From here you repeat the first three Back stitches by moving 1 square diagonally to the top right, insert and bring the needle up 1 square to the left again.

Again move the needle over 1 square diagonally to the top right, insert and bring it up again 2 squares to the left and 1 square down.
Move the needle over 1 square diagonally to the bottom right, insert and bring it up again 2 squares diagonally to the top left.
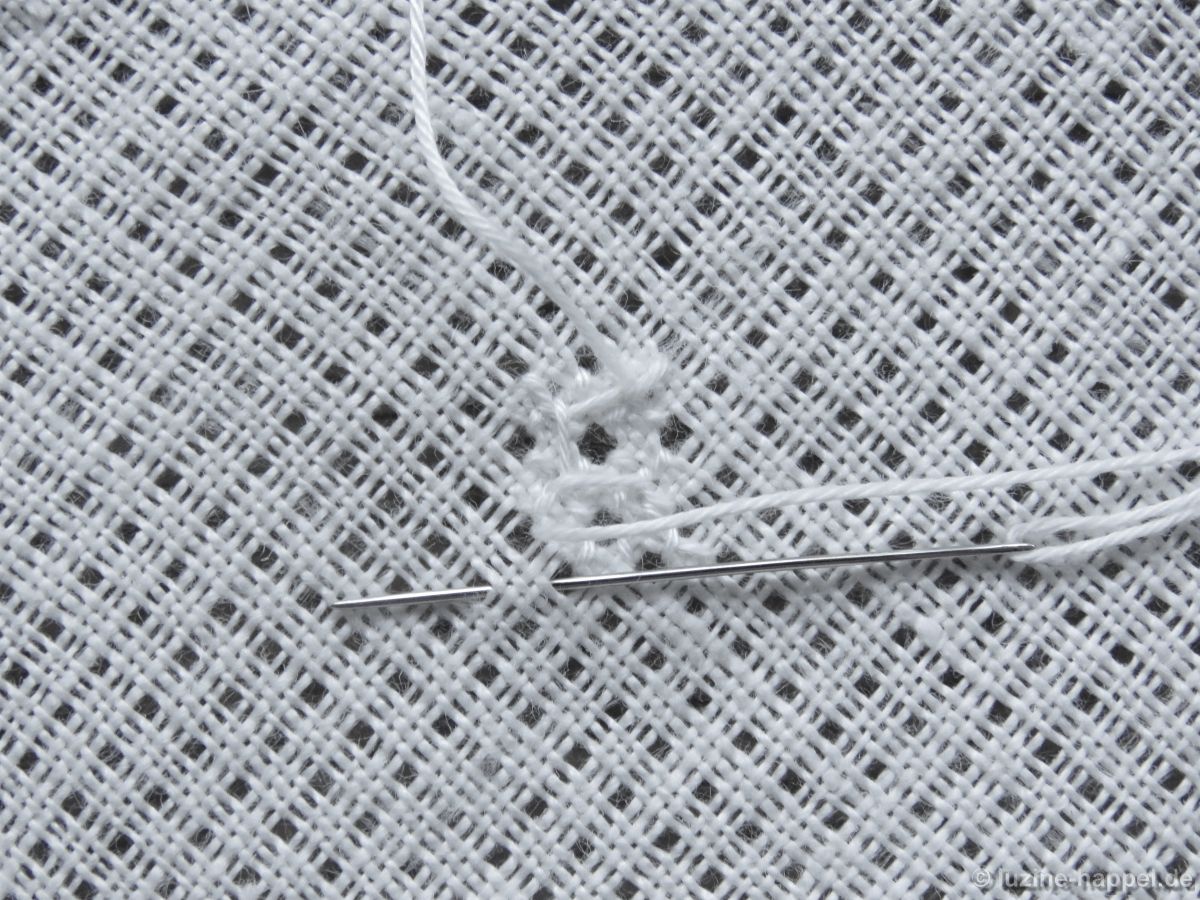
Again rotate the work 90° counter-clockwise. From here you repeat the first three Back stitches by moving 1 square diagonally to the top right, insert and bring the needle up 1 square to the left again.
Again move the needle over 1 square diagonally to the top right, insert and bring it up again 2 squares to the left and 1 square down.
Move the needle over 1 square diagonally to the bottom right, insert and bring it up again 2 squares diagonally to the top left.
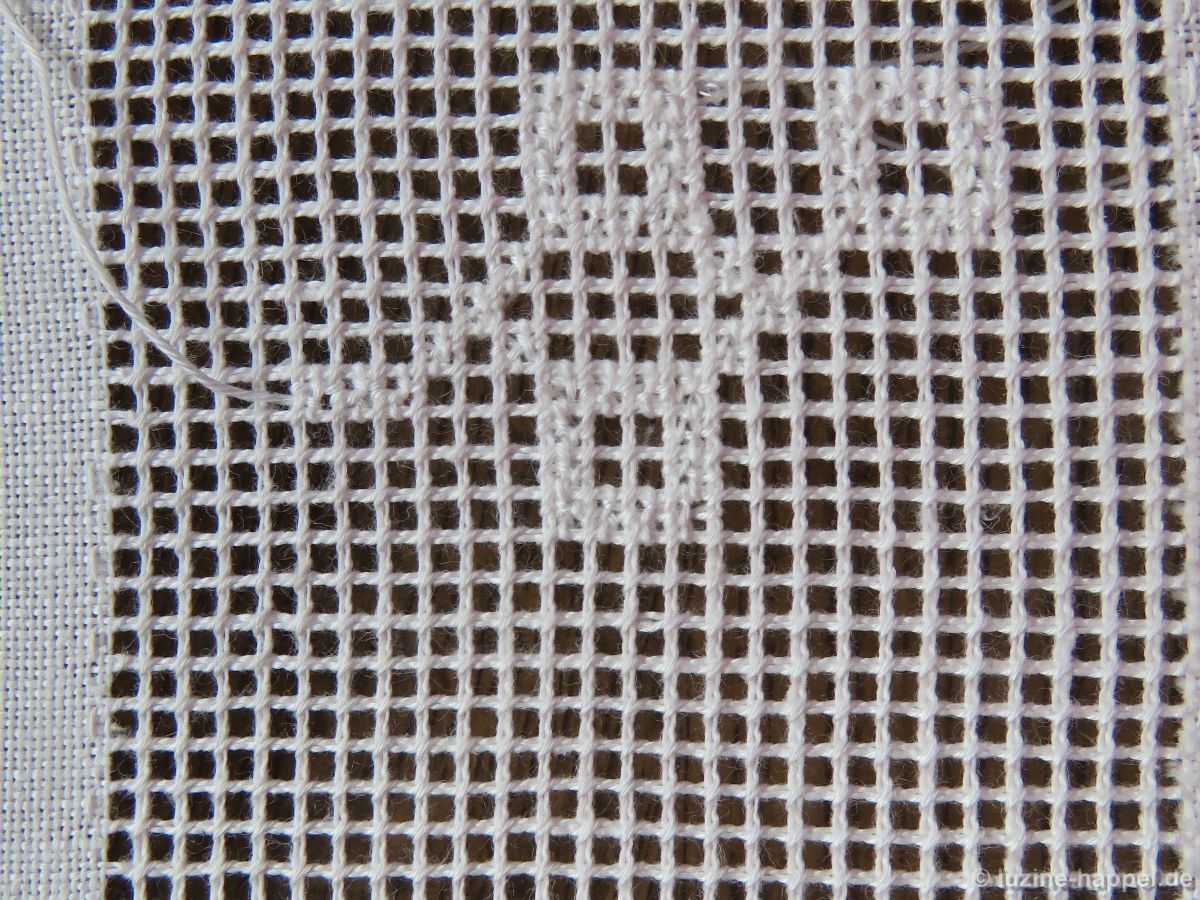
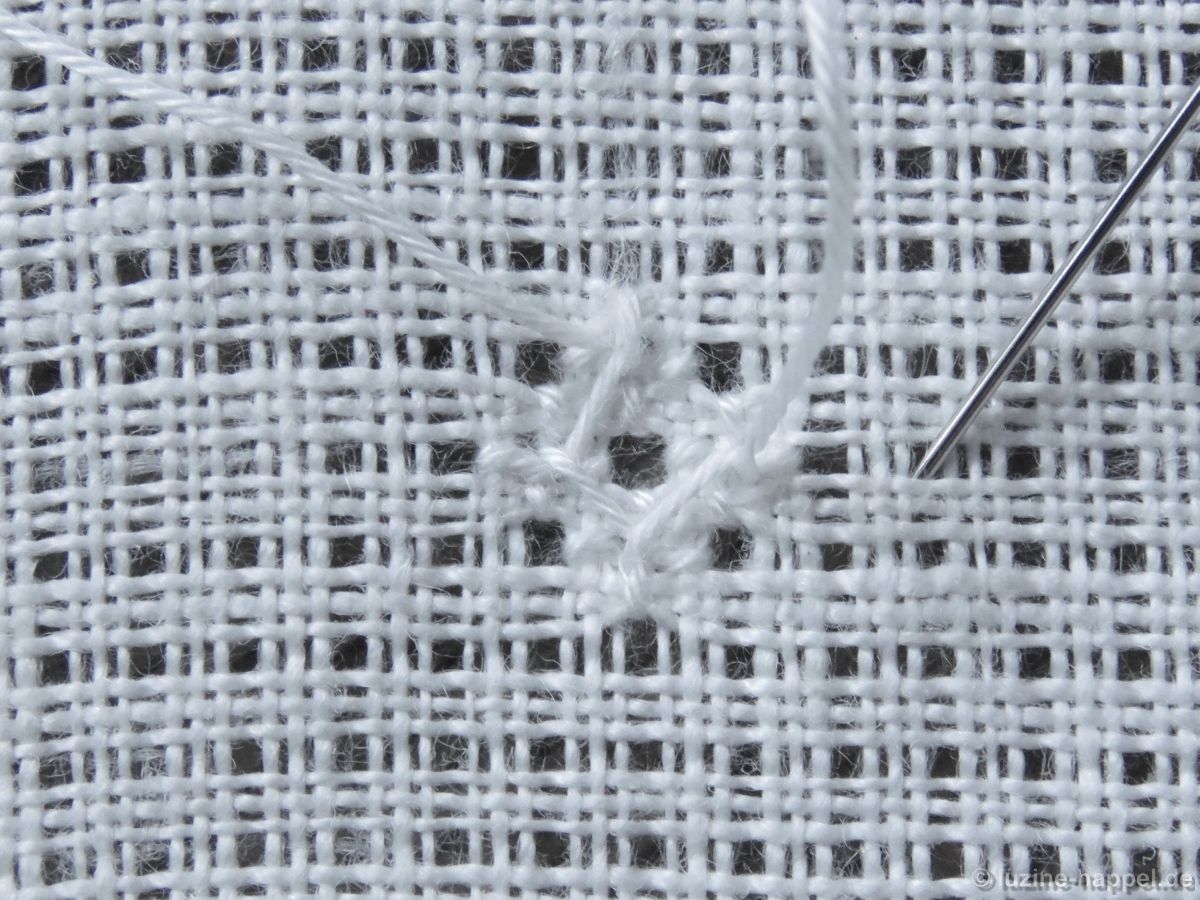
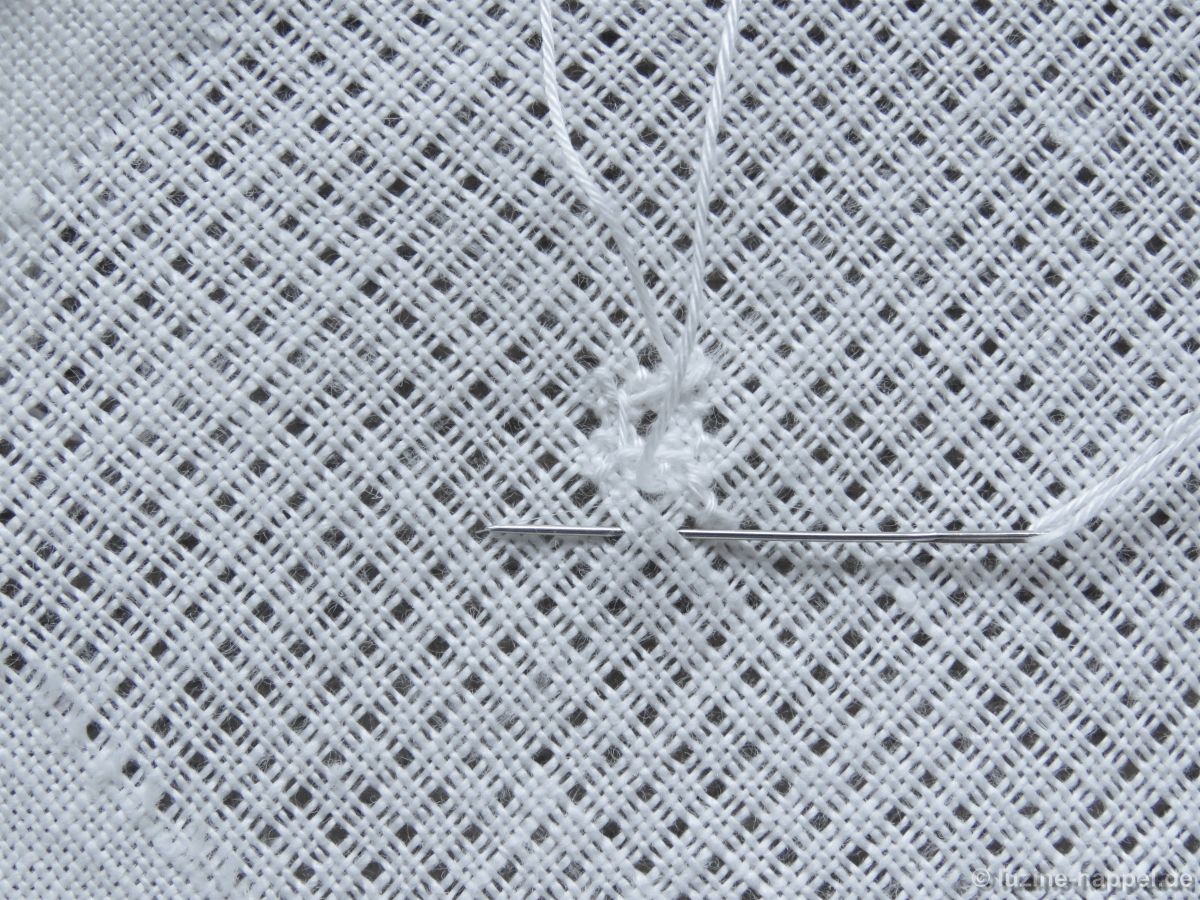
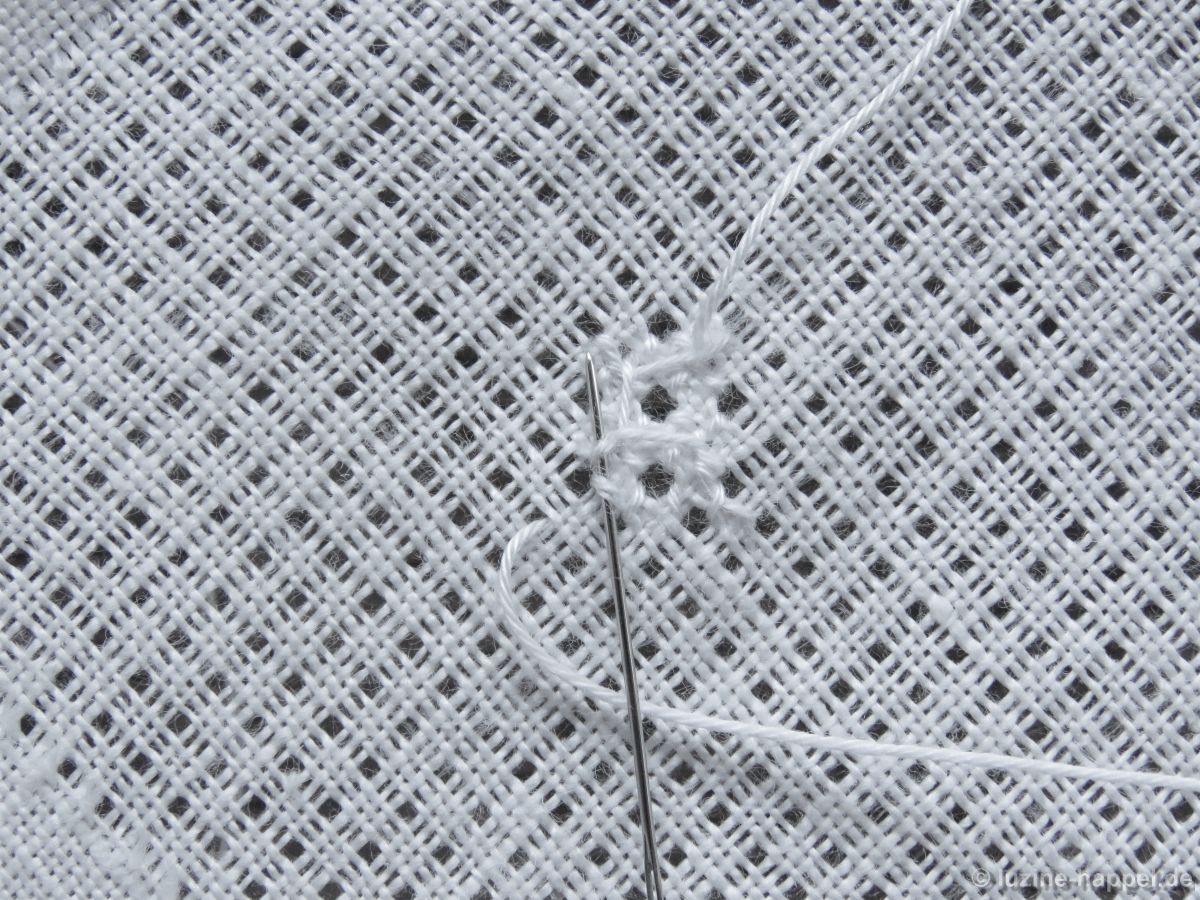
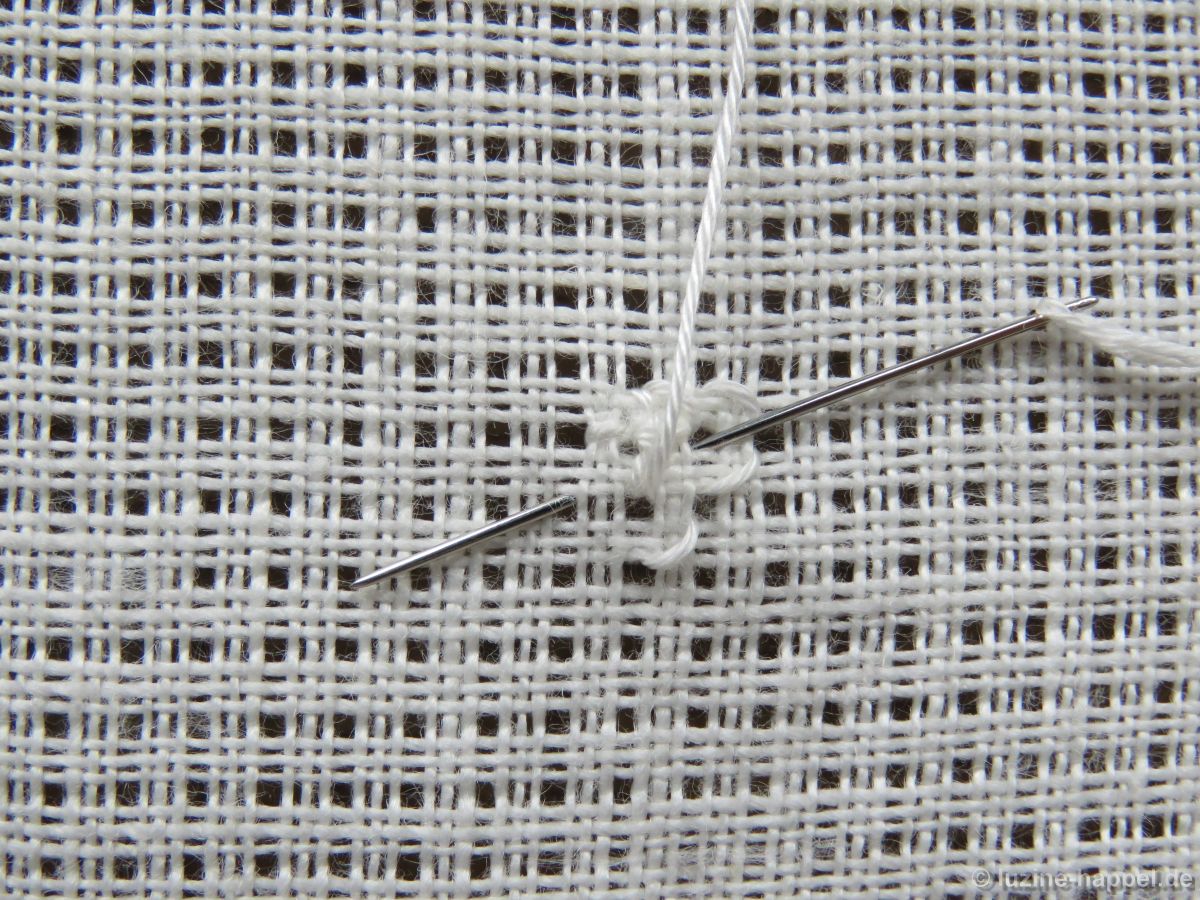
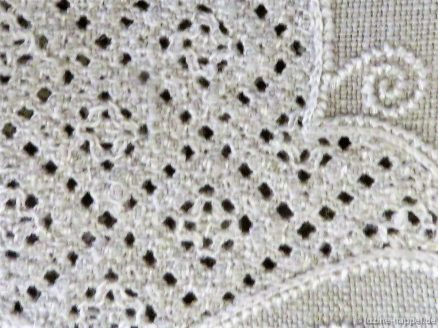
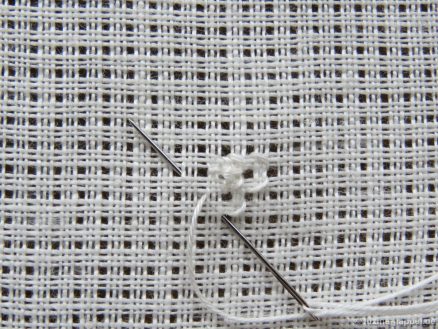
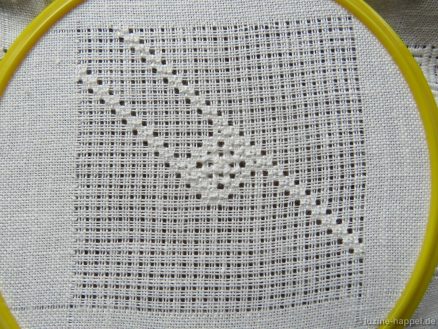
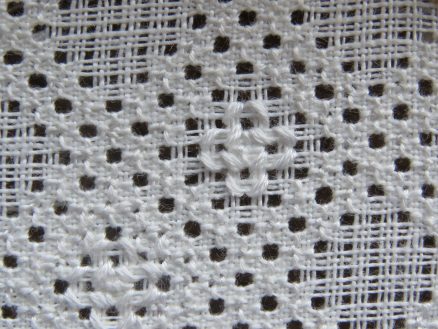
The round closes with the twelfth stitch. A criss-cross pattern of stitches has emerged around the Rose stitch. I don’t think this formation is prominent enough. So I repeat the twelve stitches.
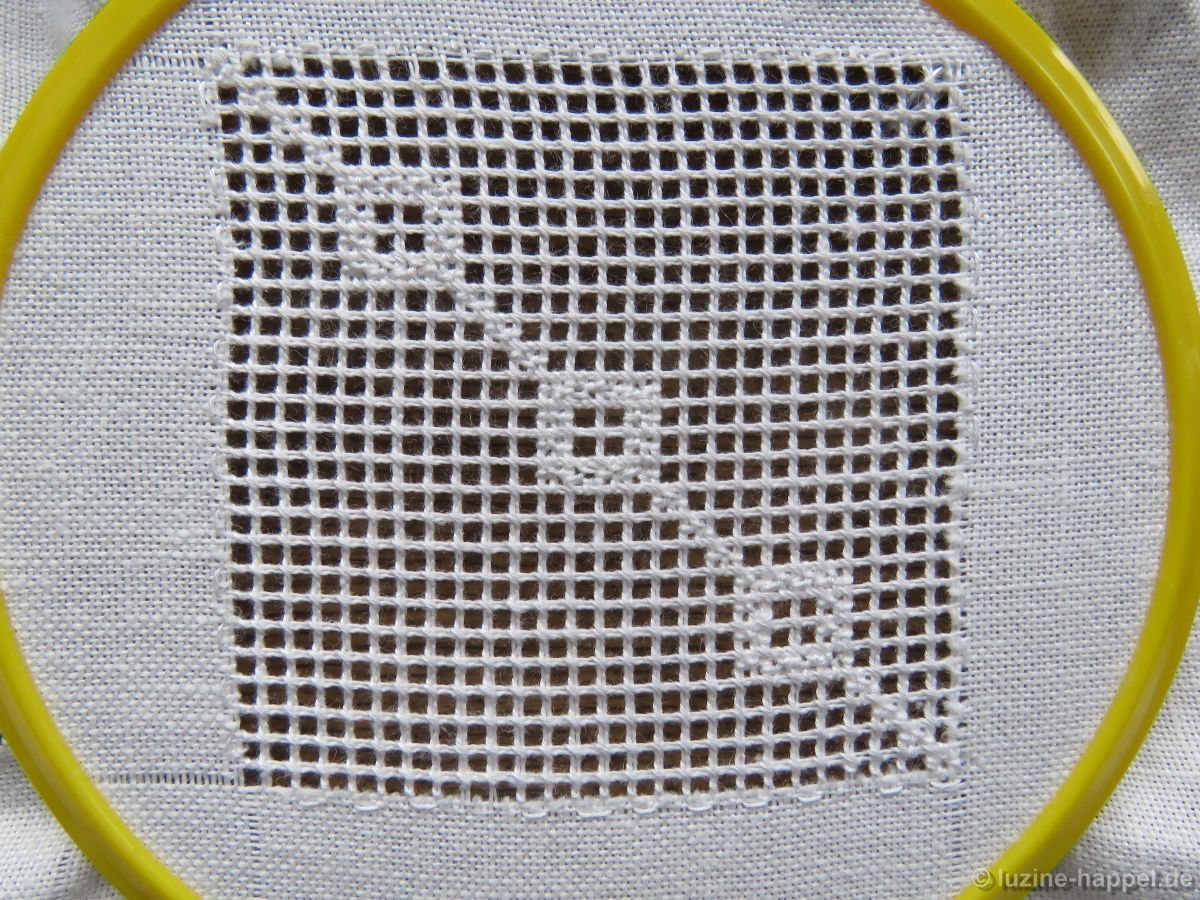
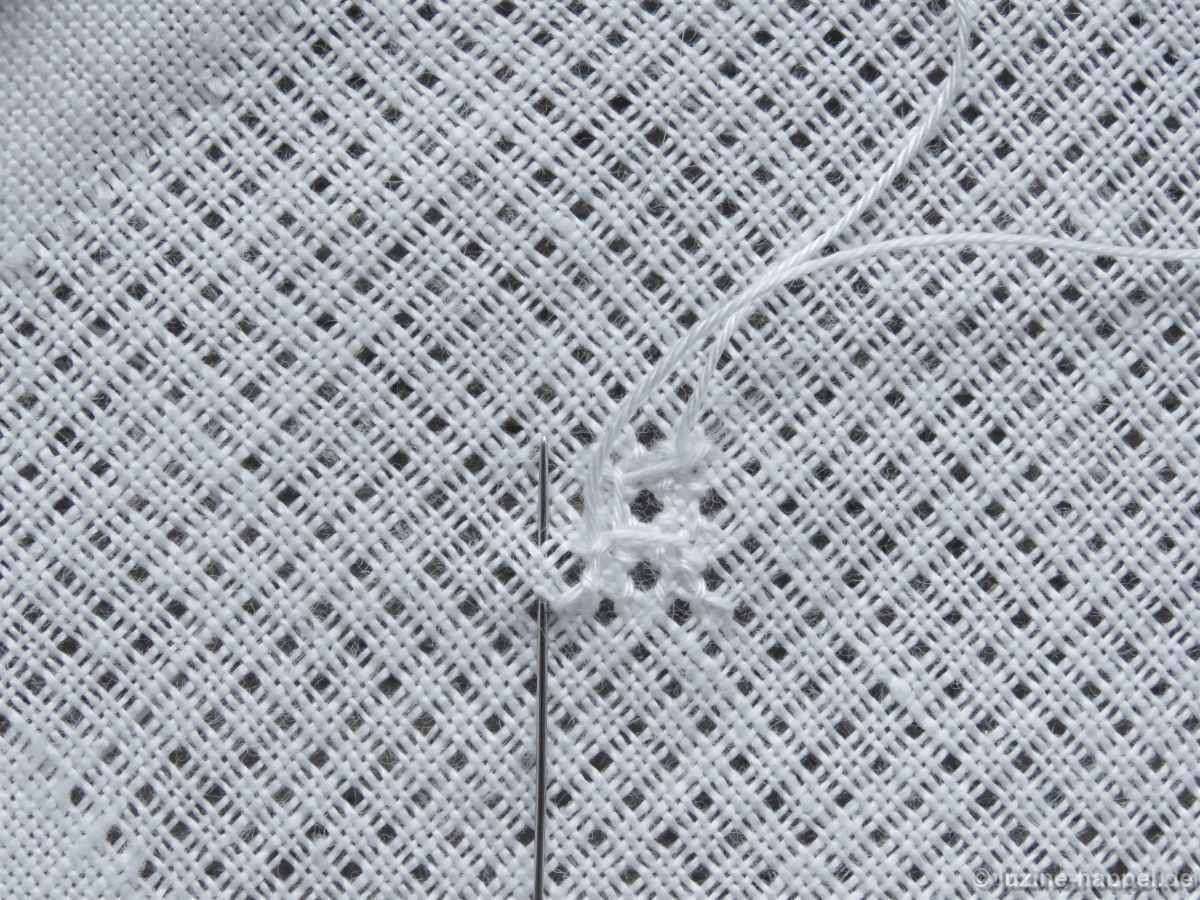
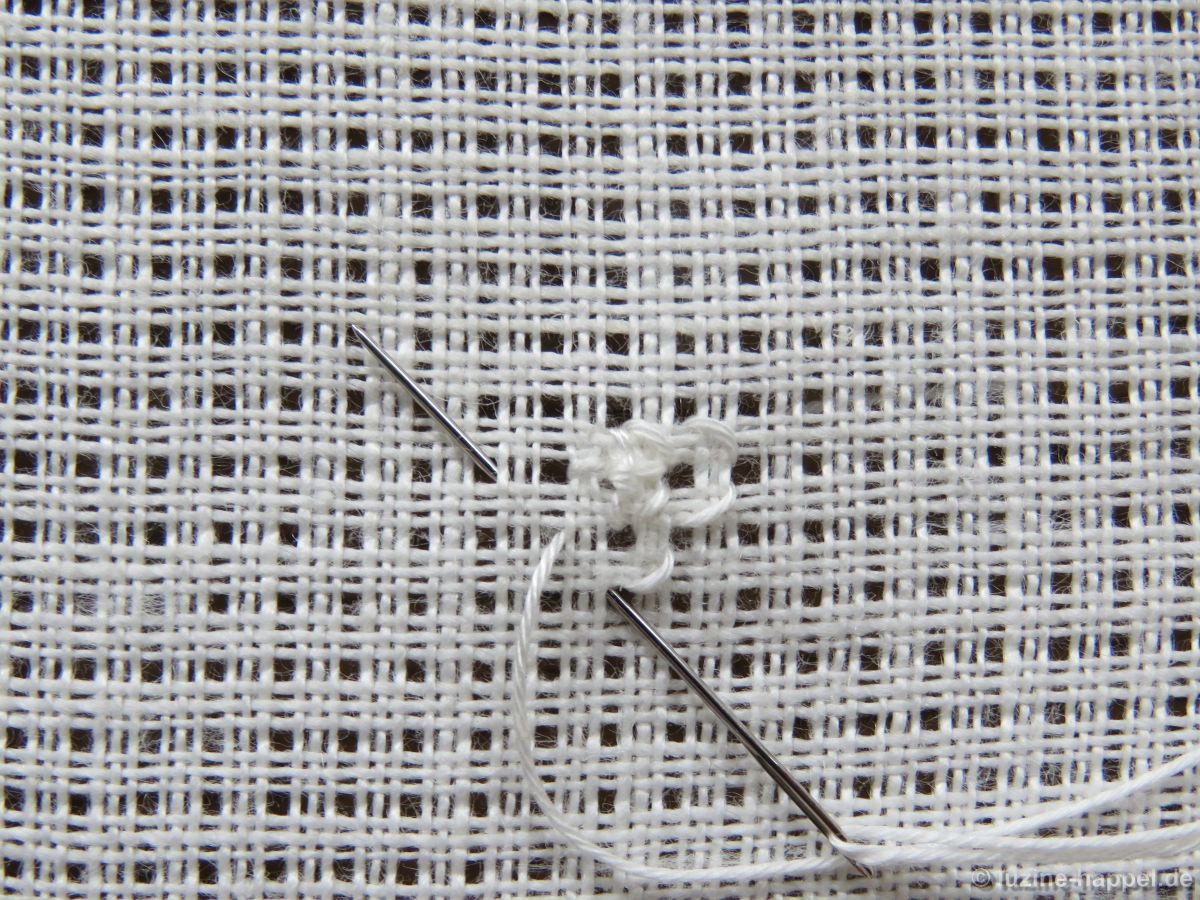
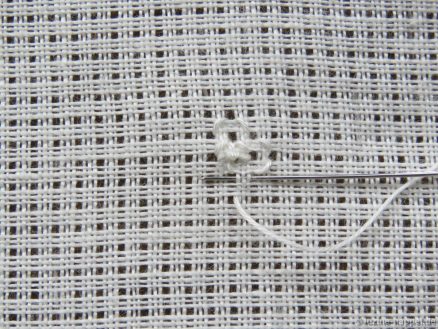
From the stitch after the last Back stitch, the needle is moved 1 square to the left. There is the center of the first surrounding Rose stitch.
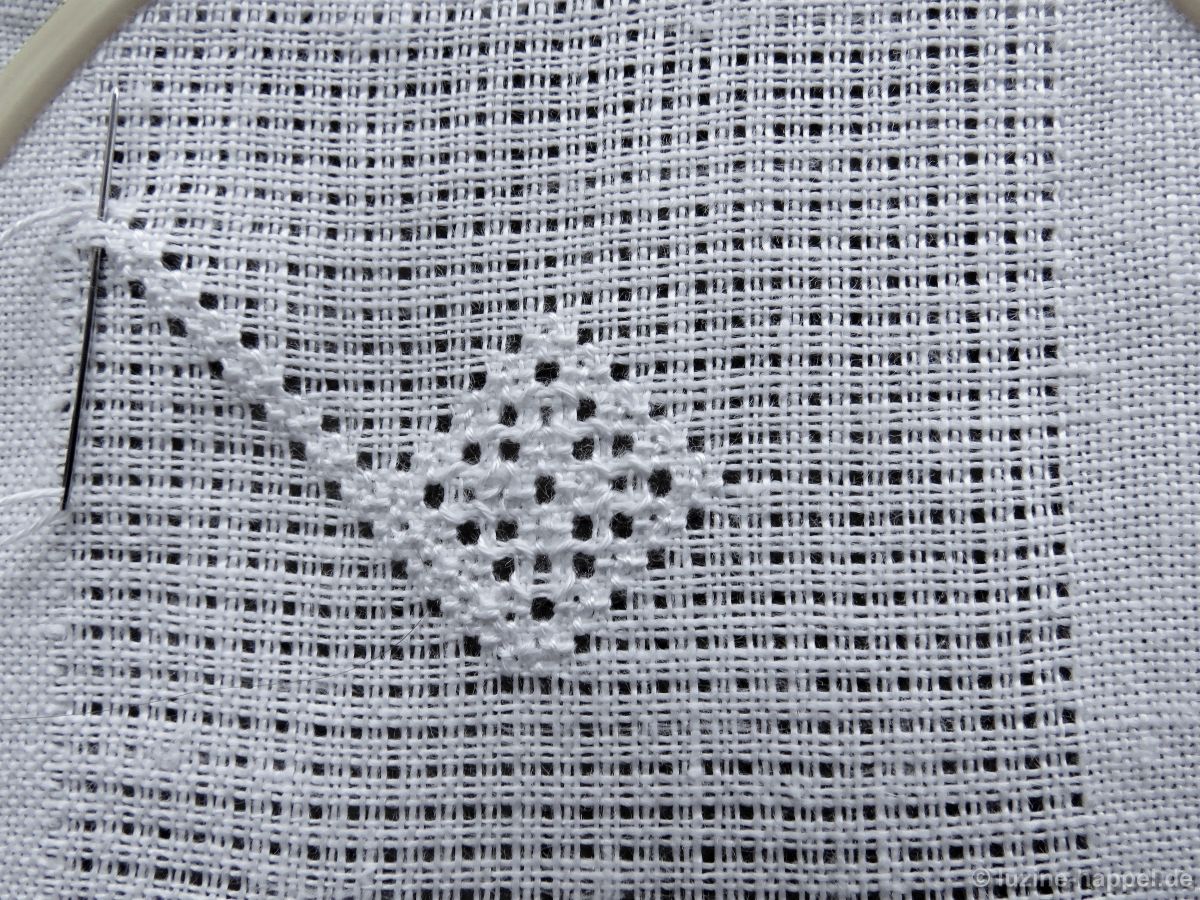
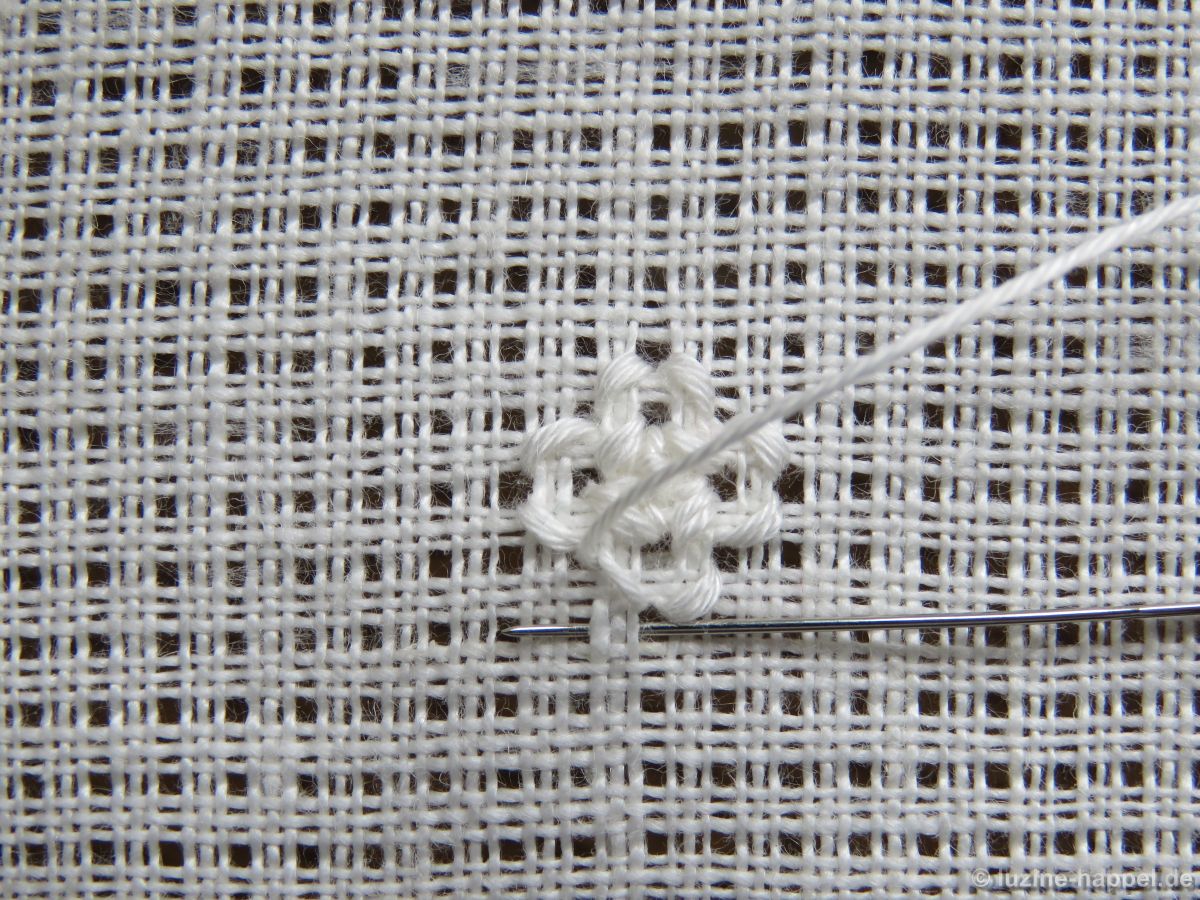
A total of 12 Rose stitches are worked around the cross.
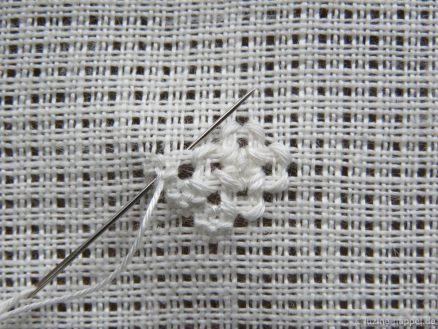
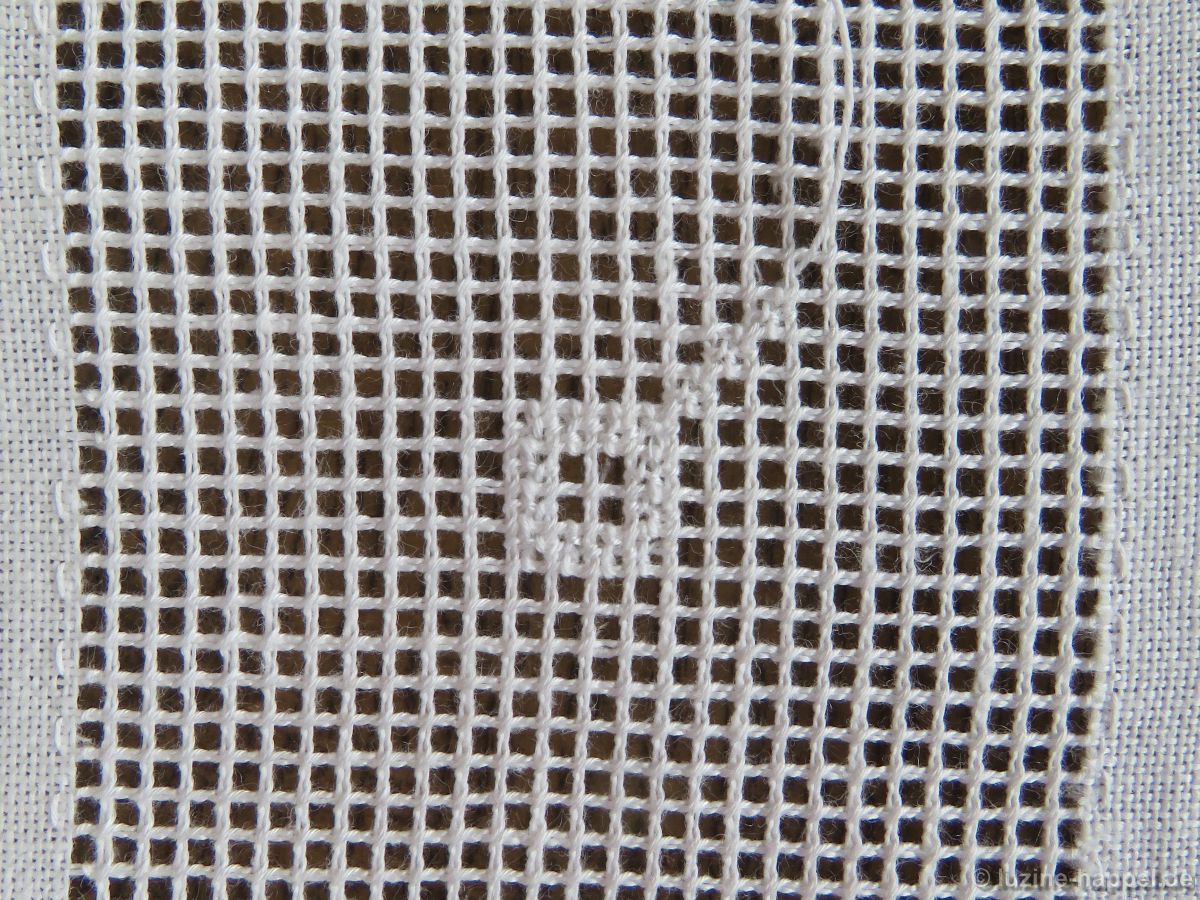
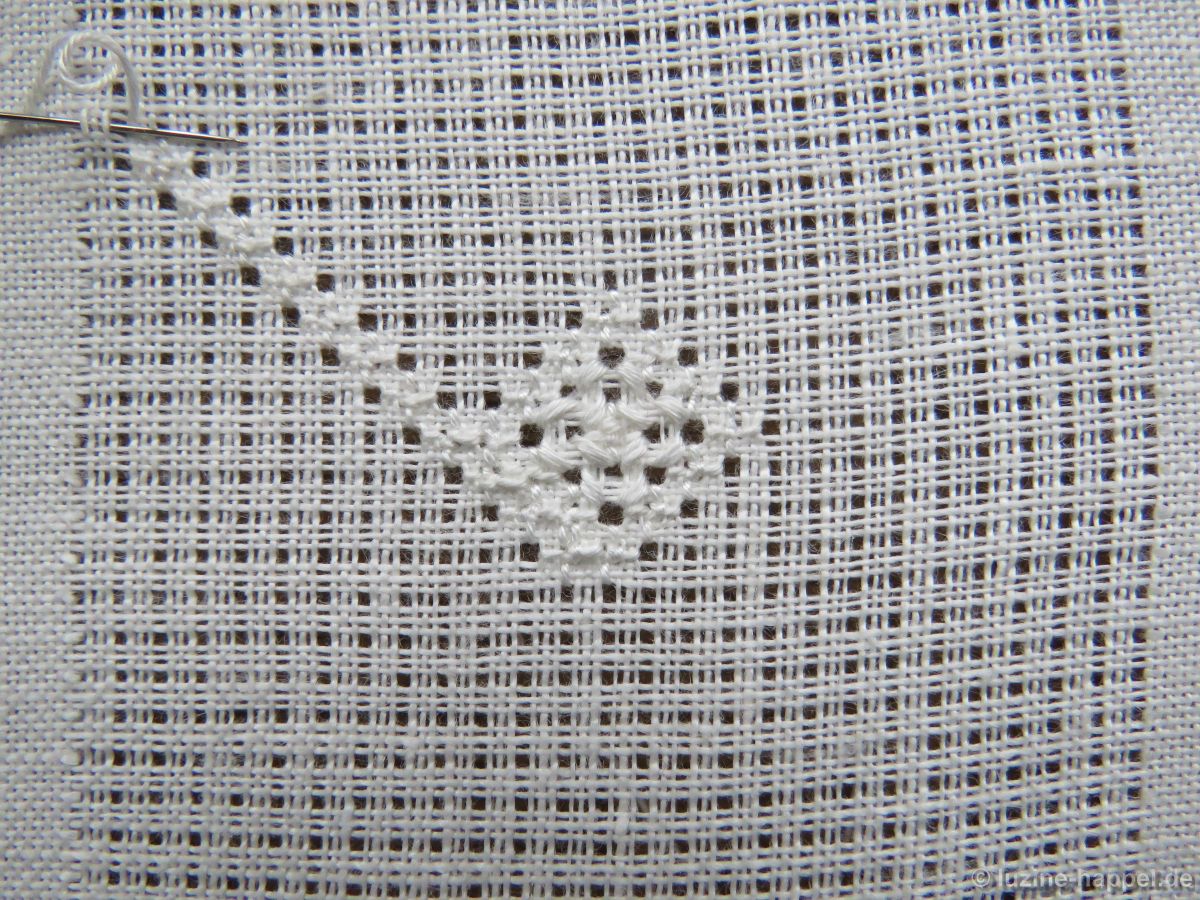
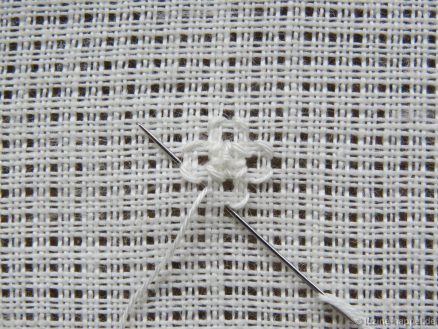
With the center section complete, it now makes sense to create the Rose stitch grid for the entire pattern.
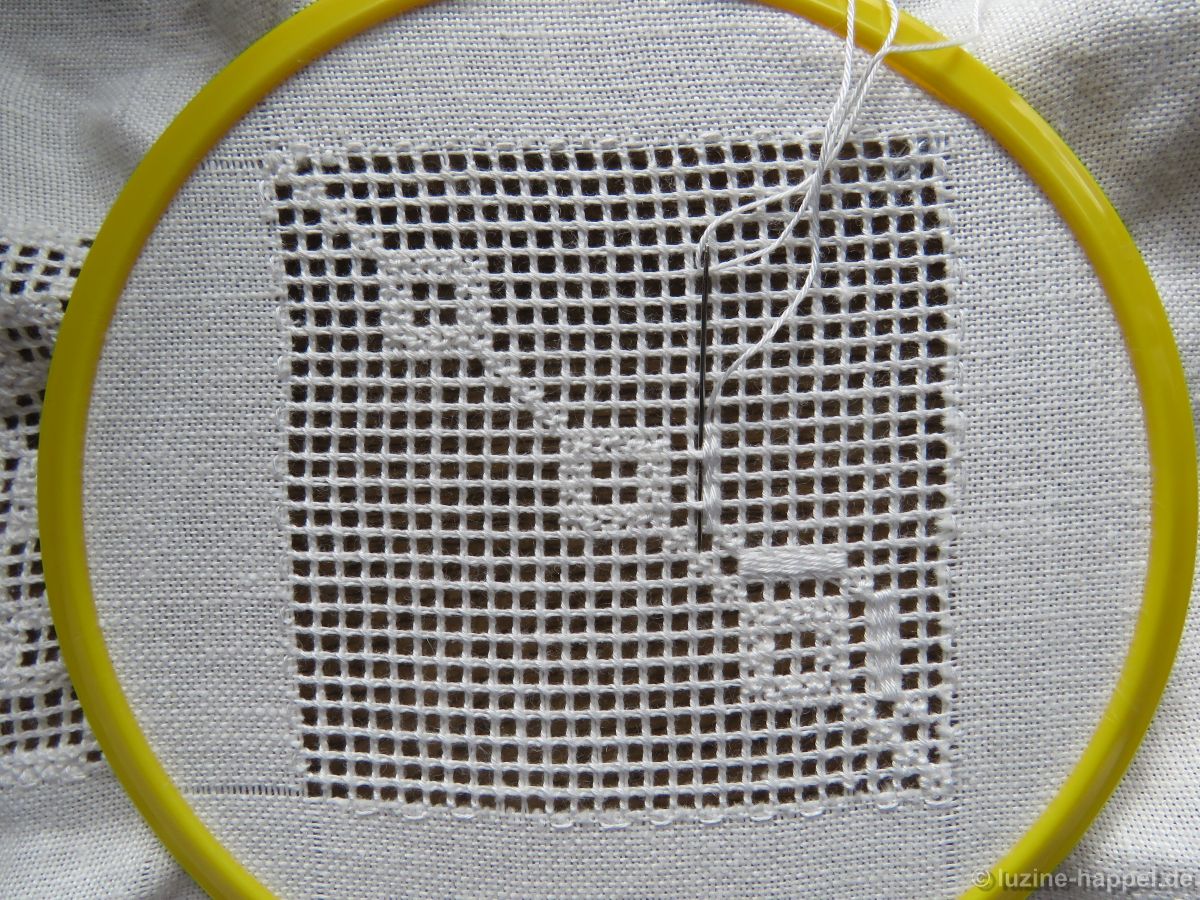
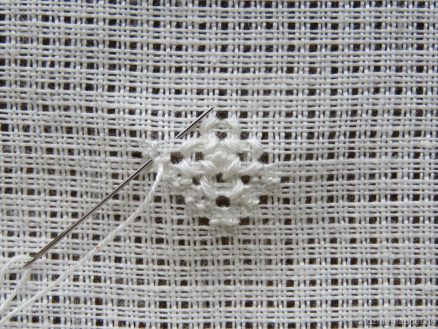
From the center of the last Rose stitch, move the needle up 1 square up, bring it up and turn the work 90° counter-clockwise. From here work a diagonal row of Rose stitches to the edge. These stitches intertwine into the Rose stitches of the middle section.

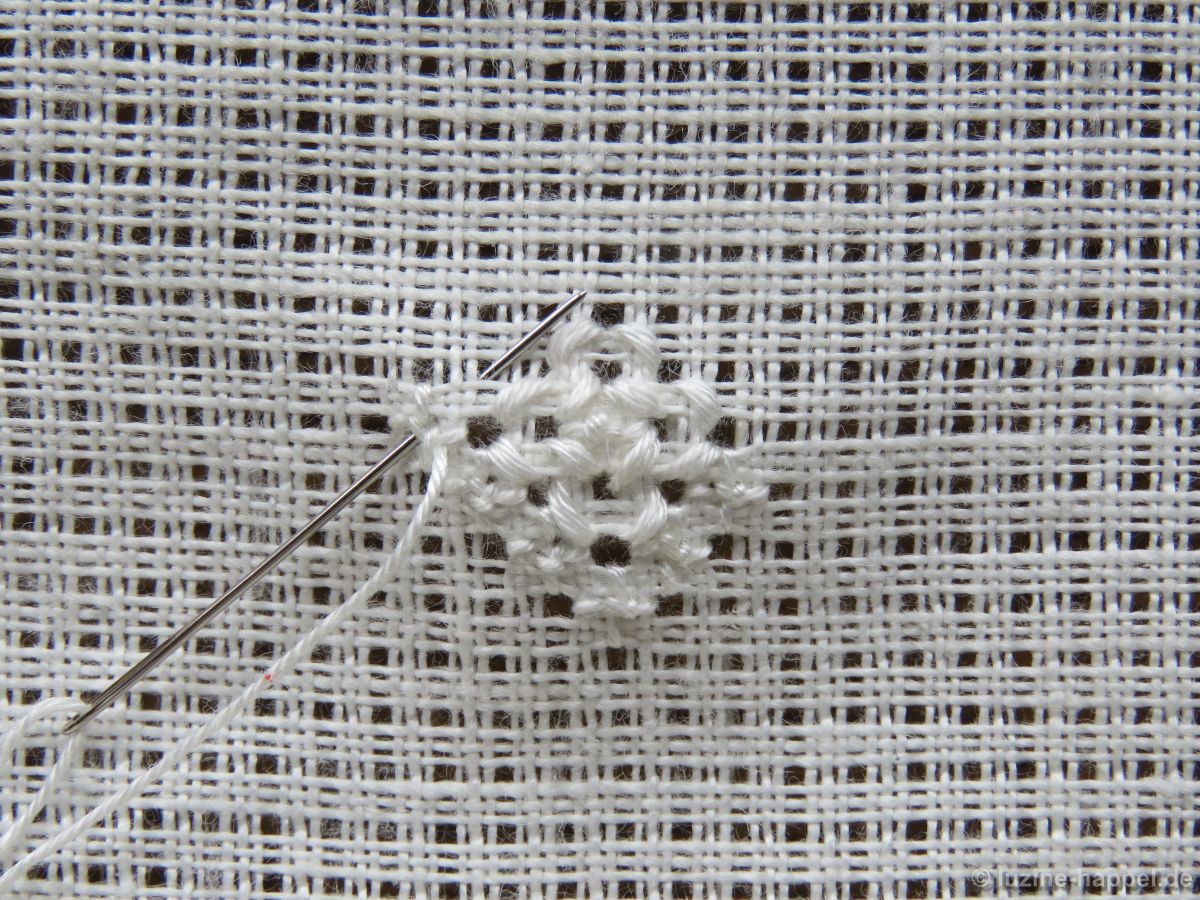
Parallel to this and at a distance of 7 free holes – seen on a horizontal line – between the centers of the Rose stitches of both rows, another Rose stitch row is embroidered along the middle part.
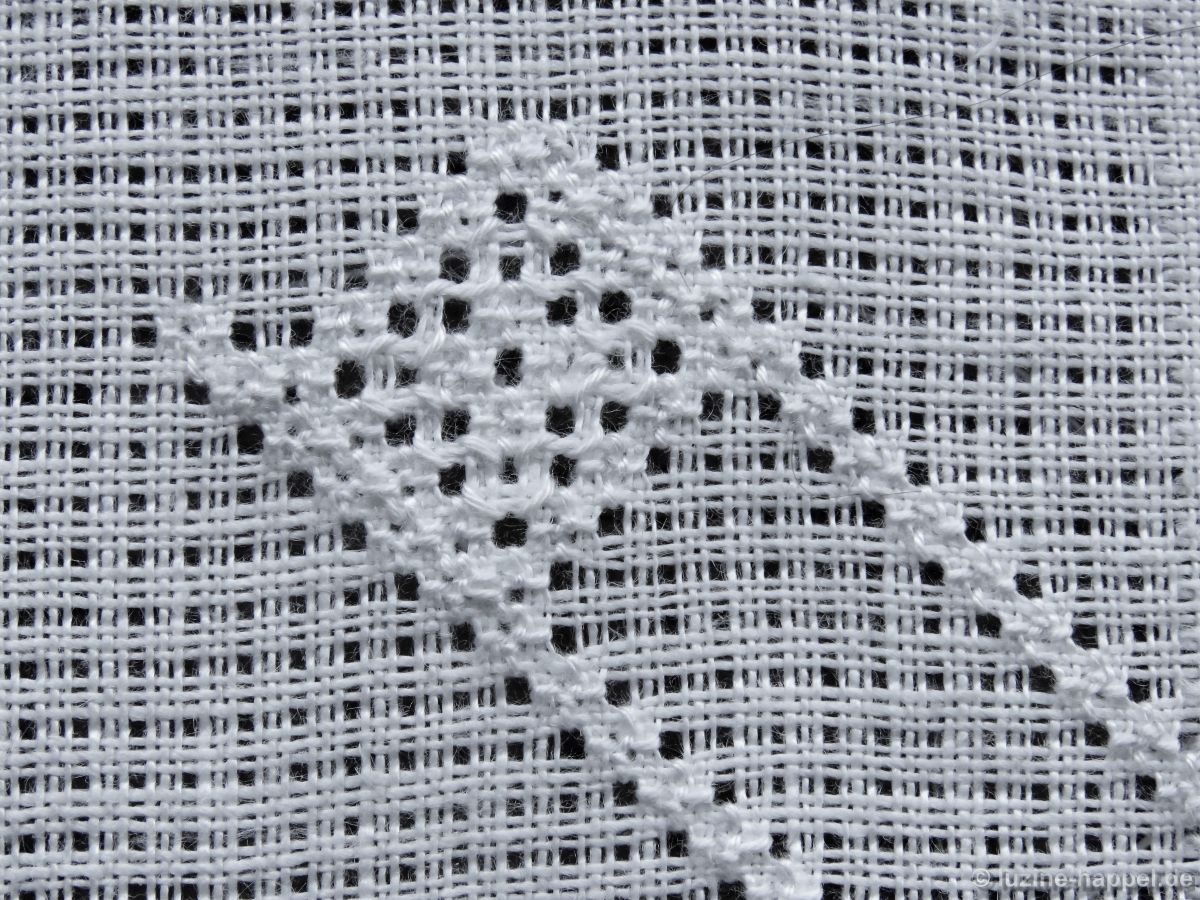
Two further rows of Rose stitches are worked crosswise.
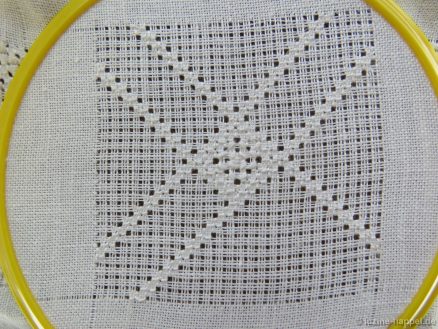
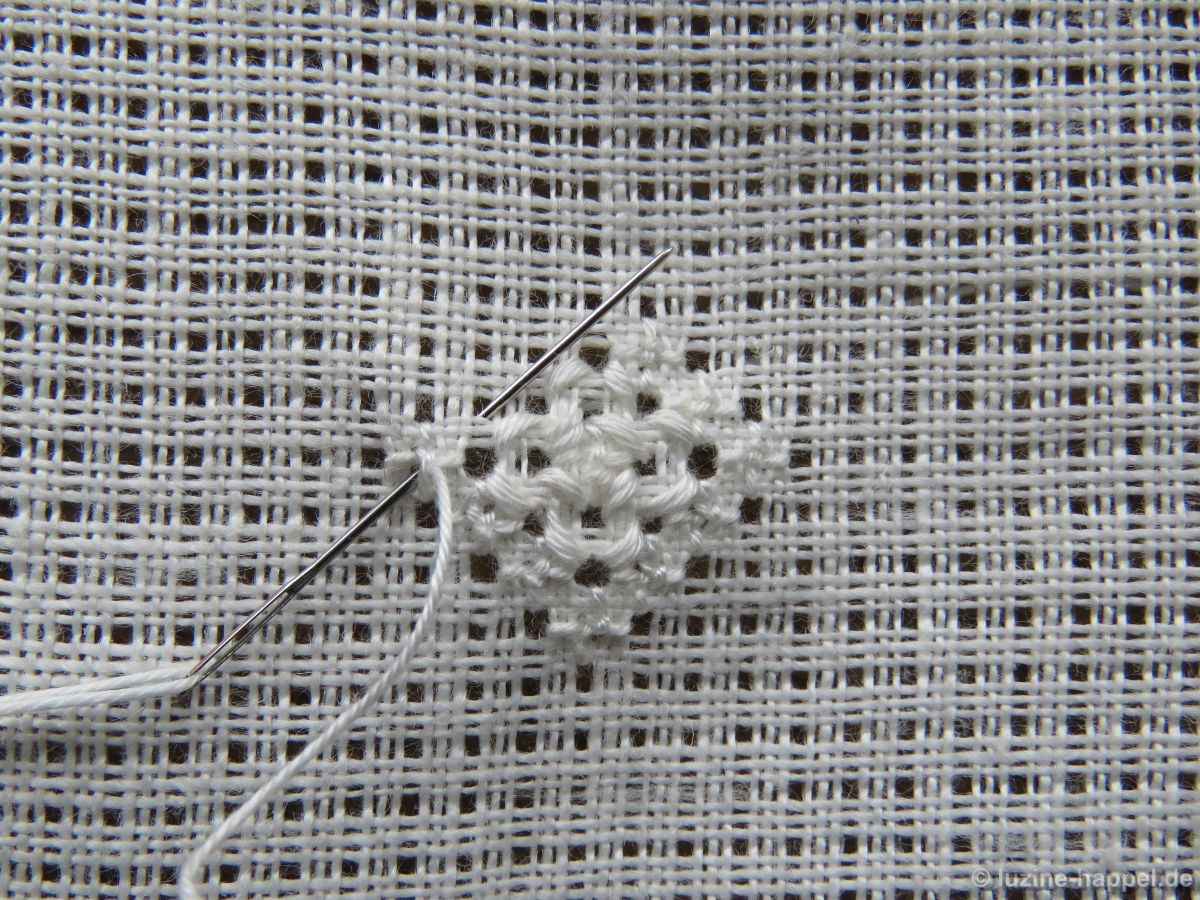
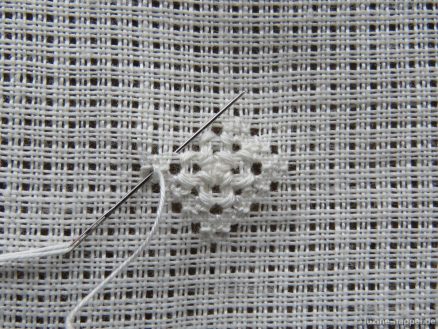
One further Rose stitch row is embroidered outwards each existing one.
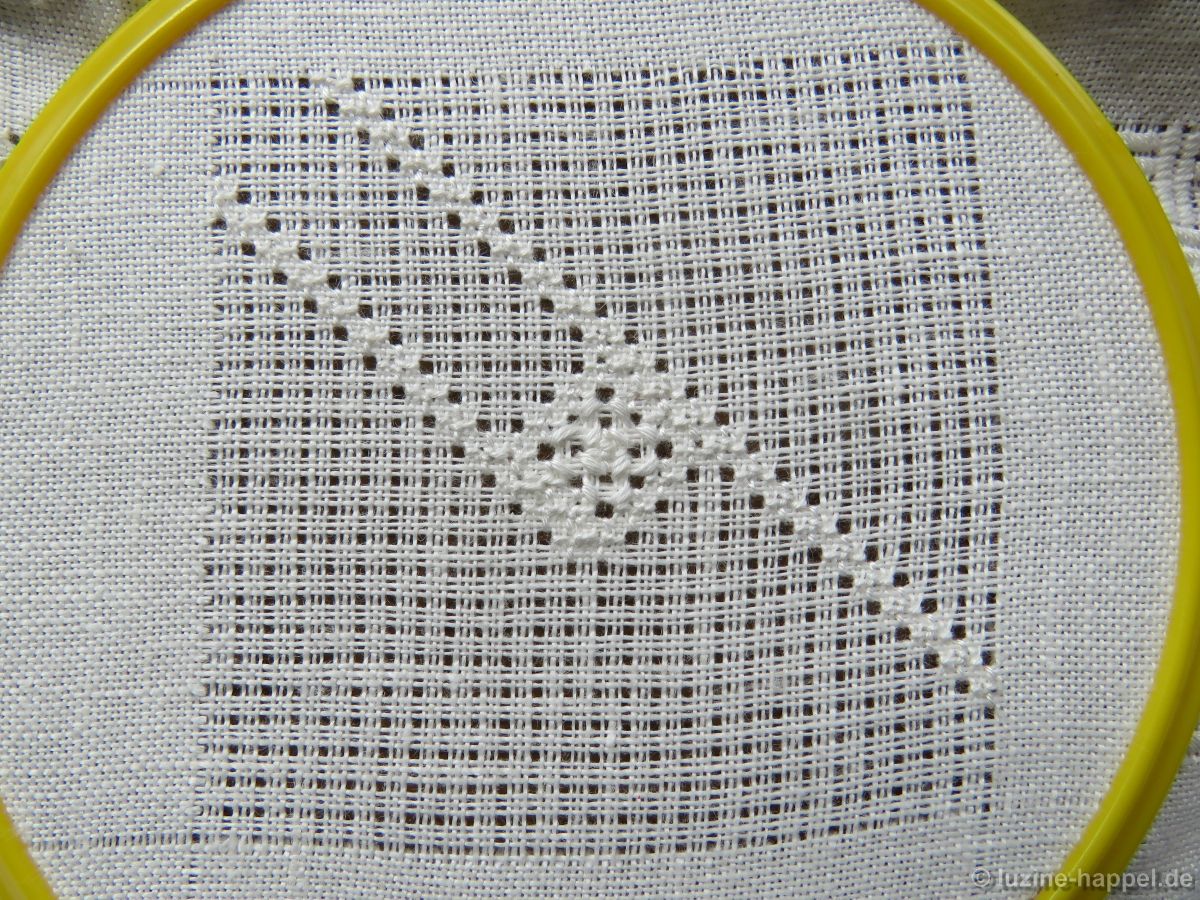
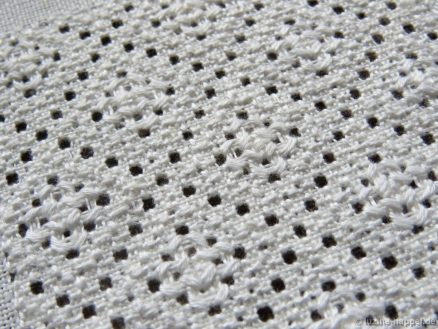
The grid is completed with double rows of rose stitches across the entire shape.
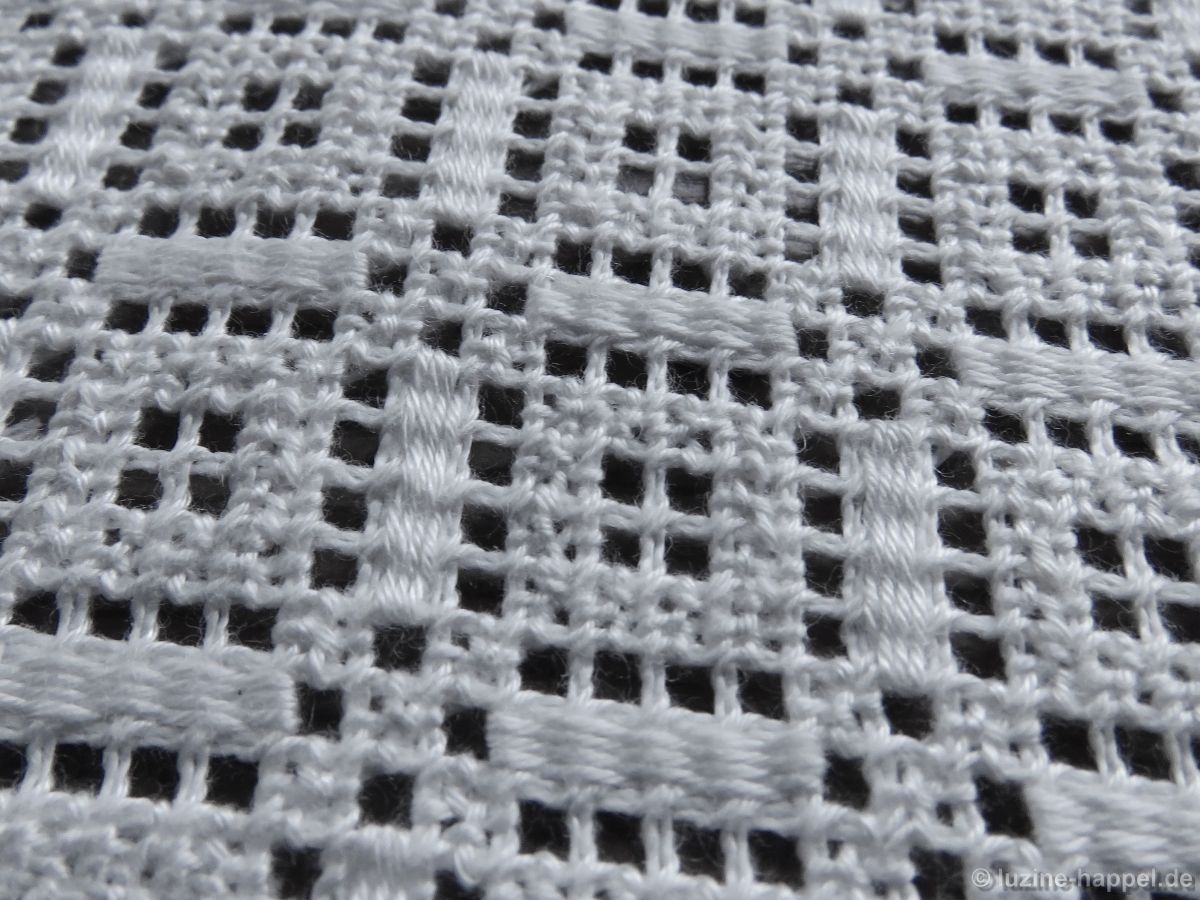
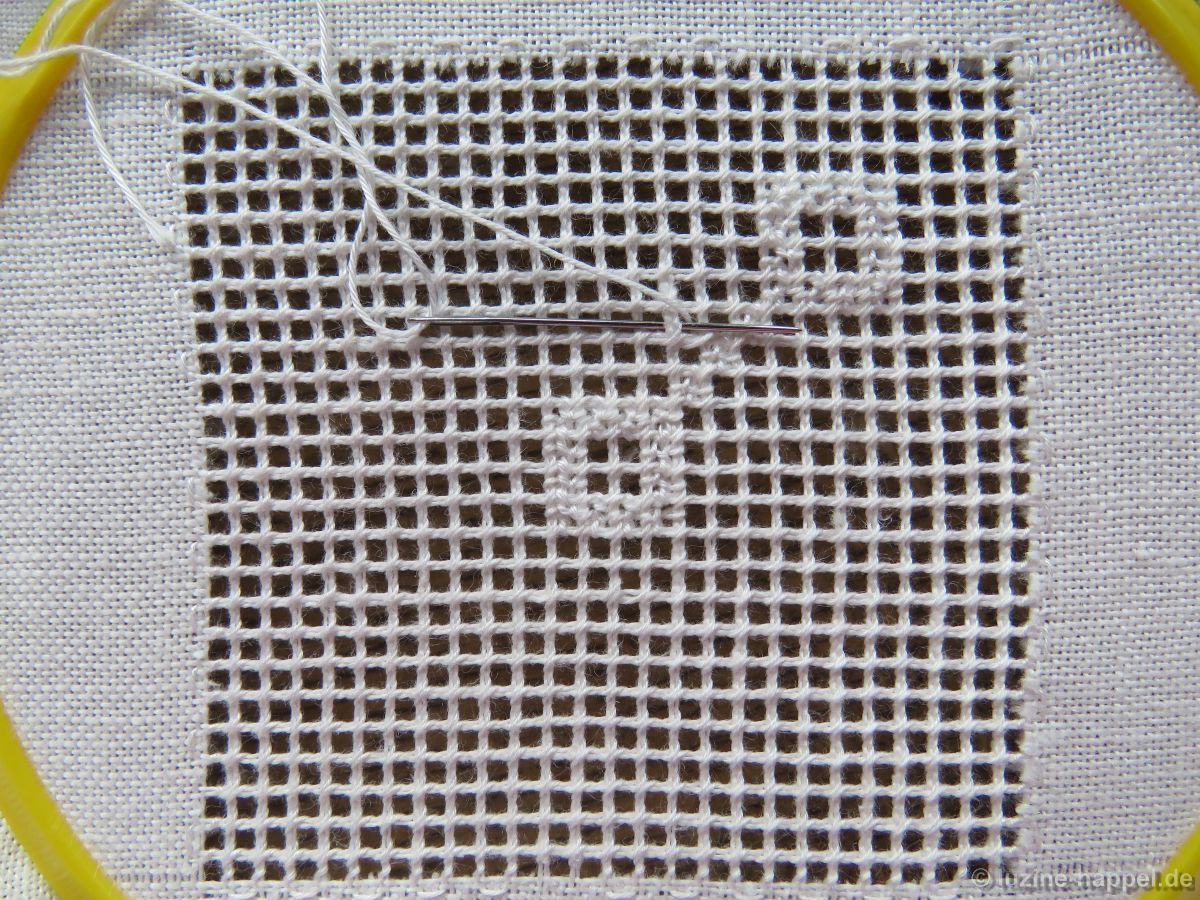
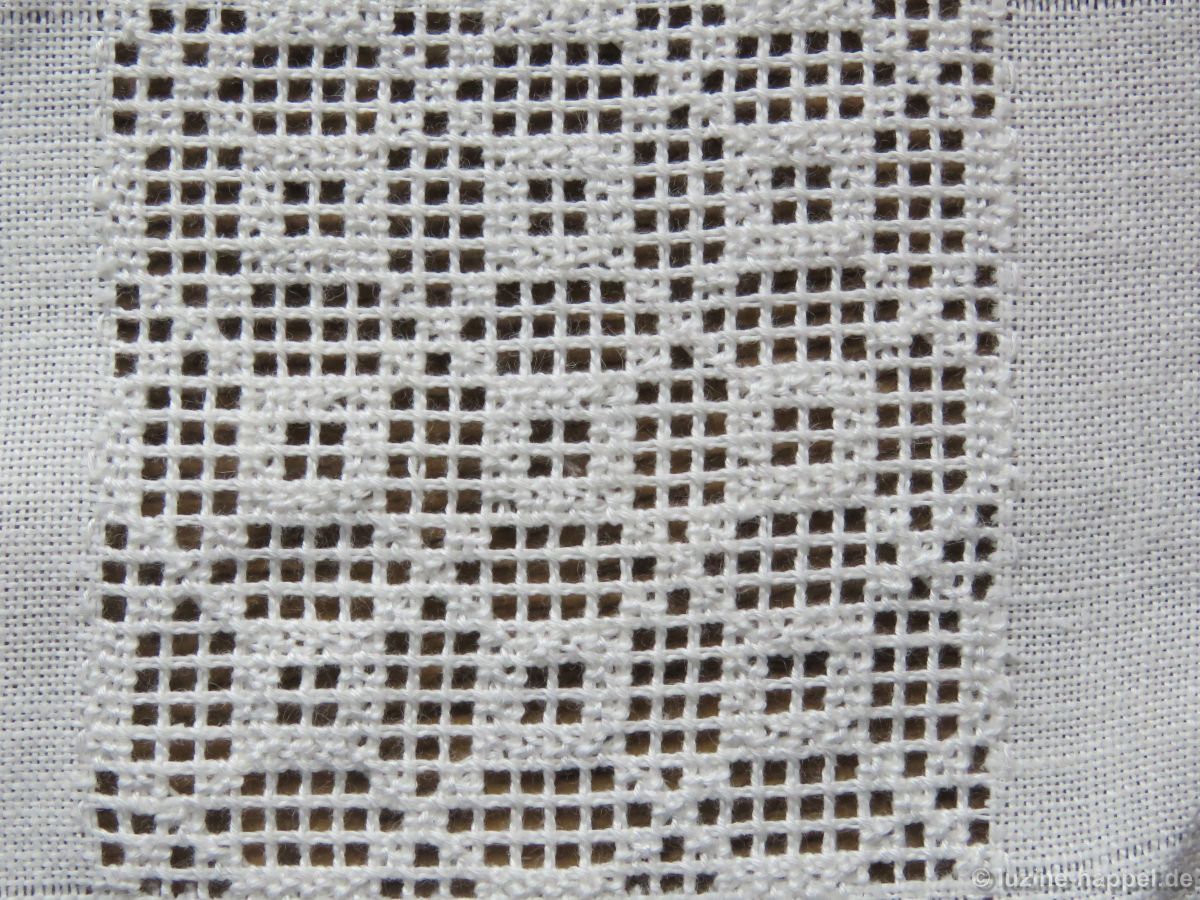
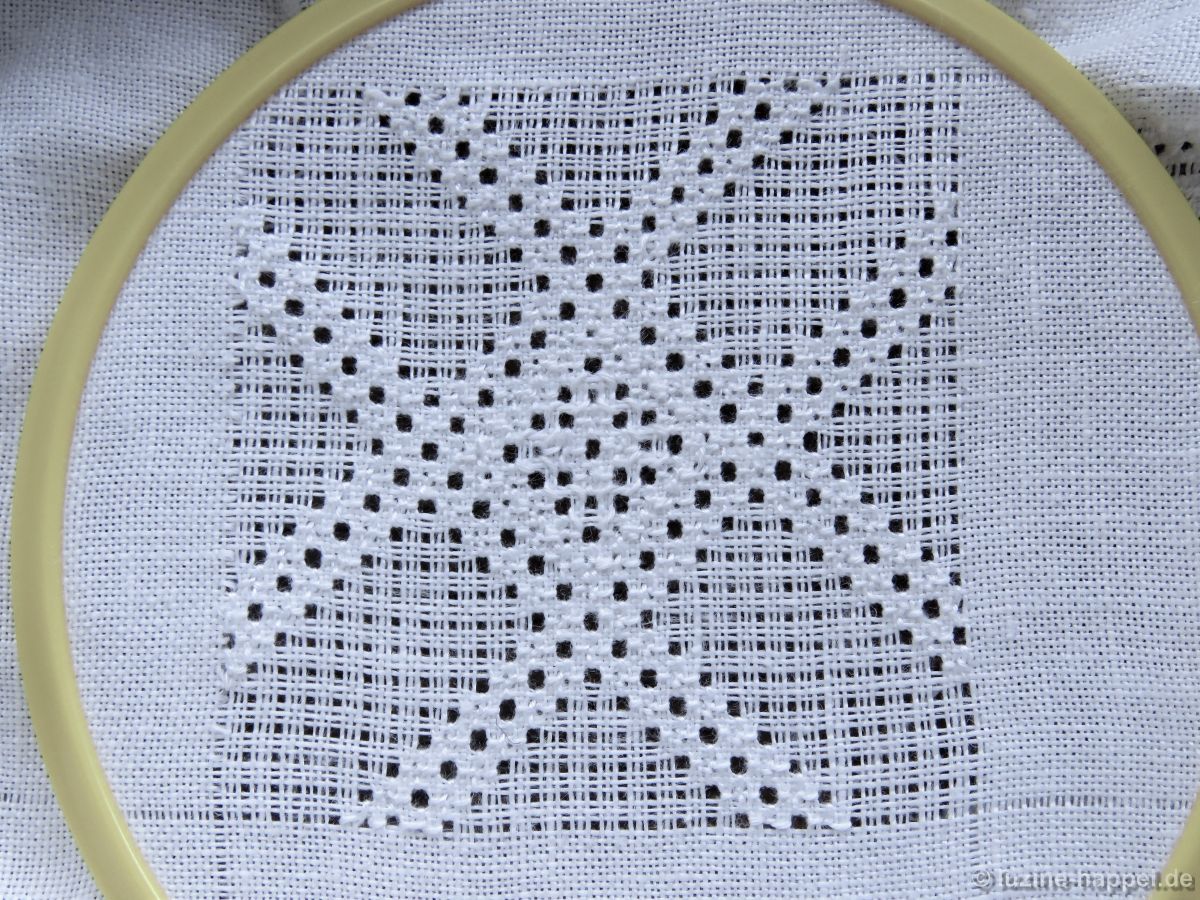
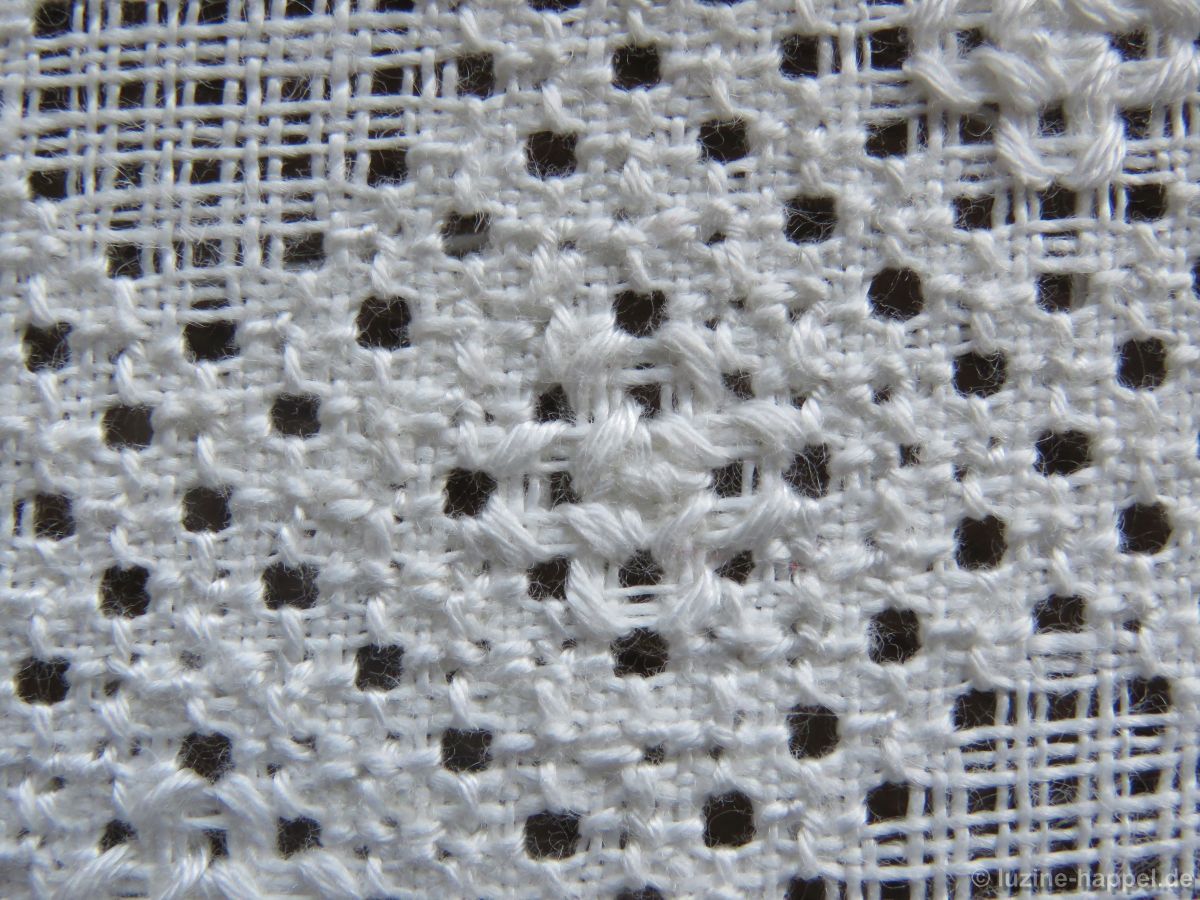
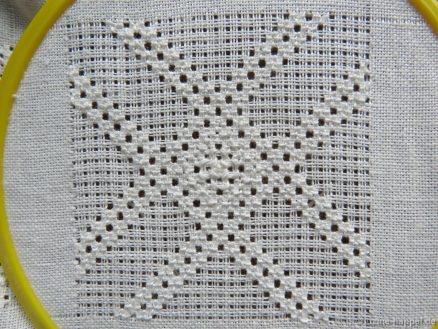
First, the cross formations with the Rose stitch centers are embroidered in the remaining spaces.
One could leave the Rose stitches surrounding the cross, but I embroidered them for completion.
The positions of the centers of the Rose stitches are shown in the graphic by red dots.

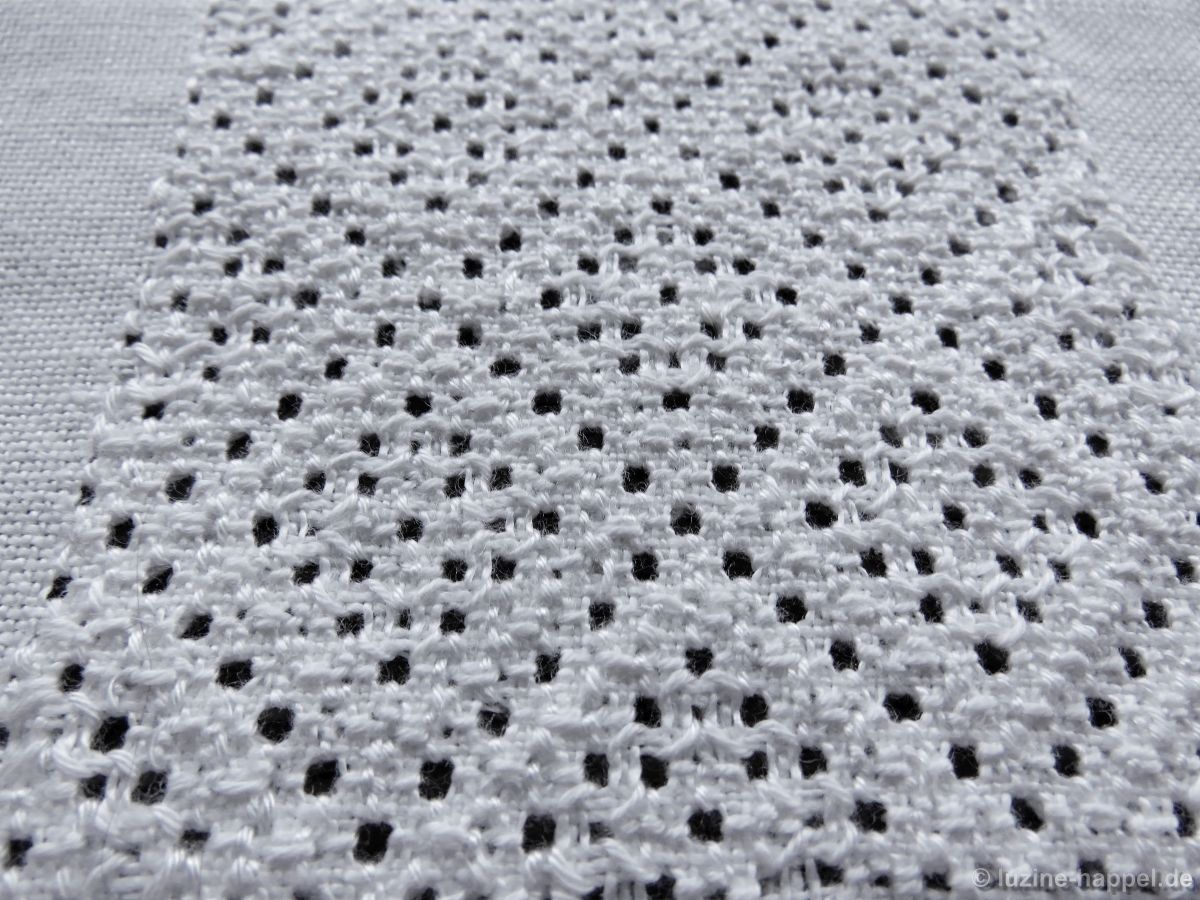
Embroidered it looks like this:

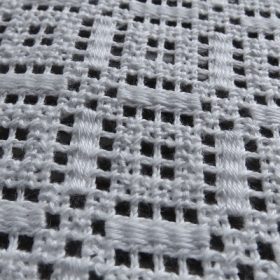
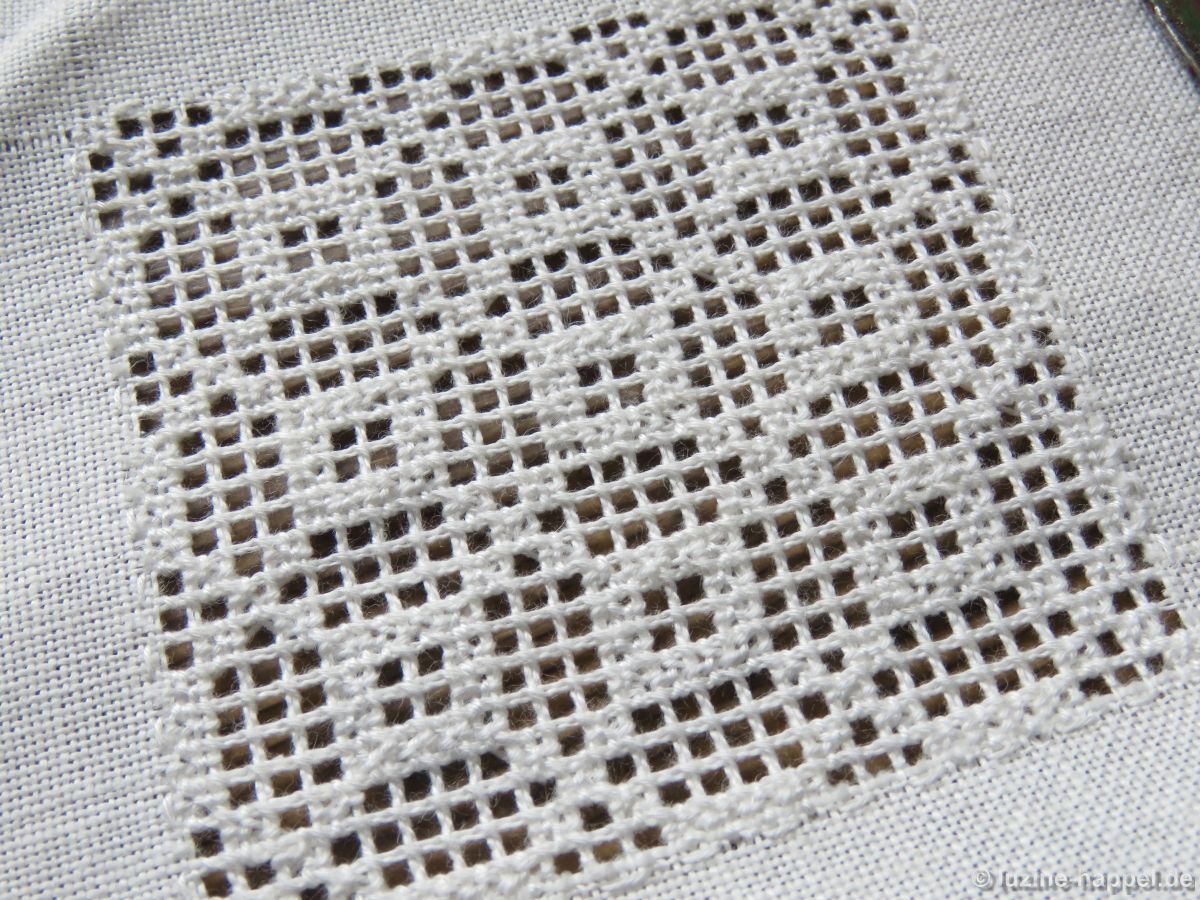
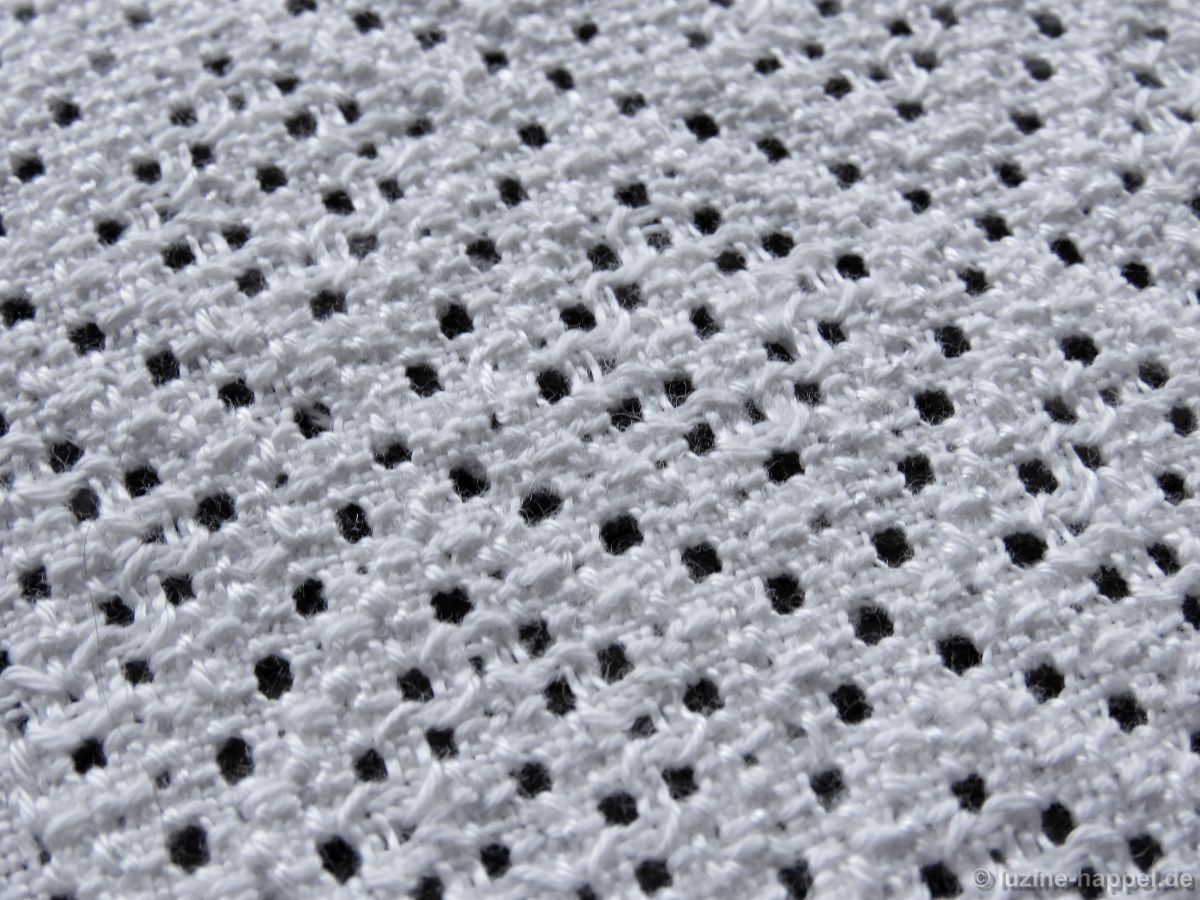
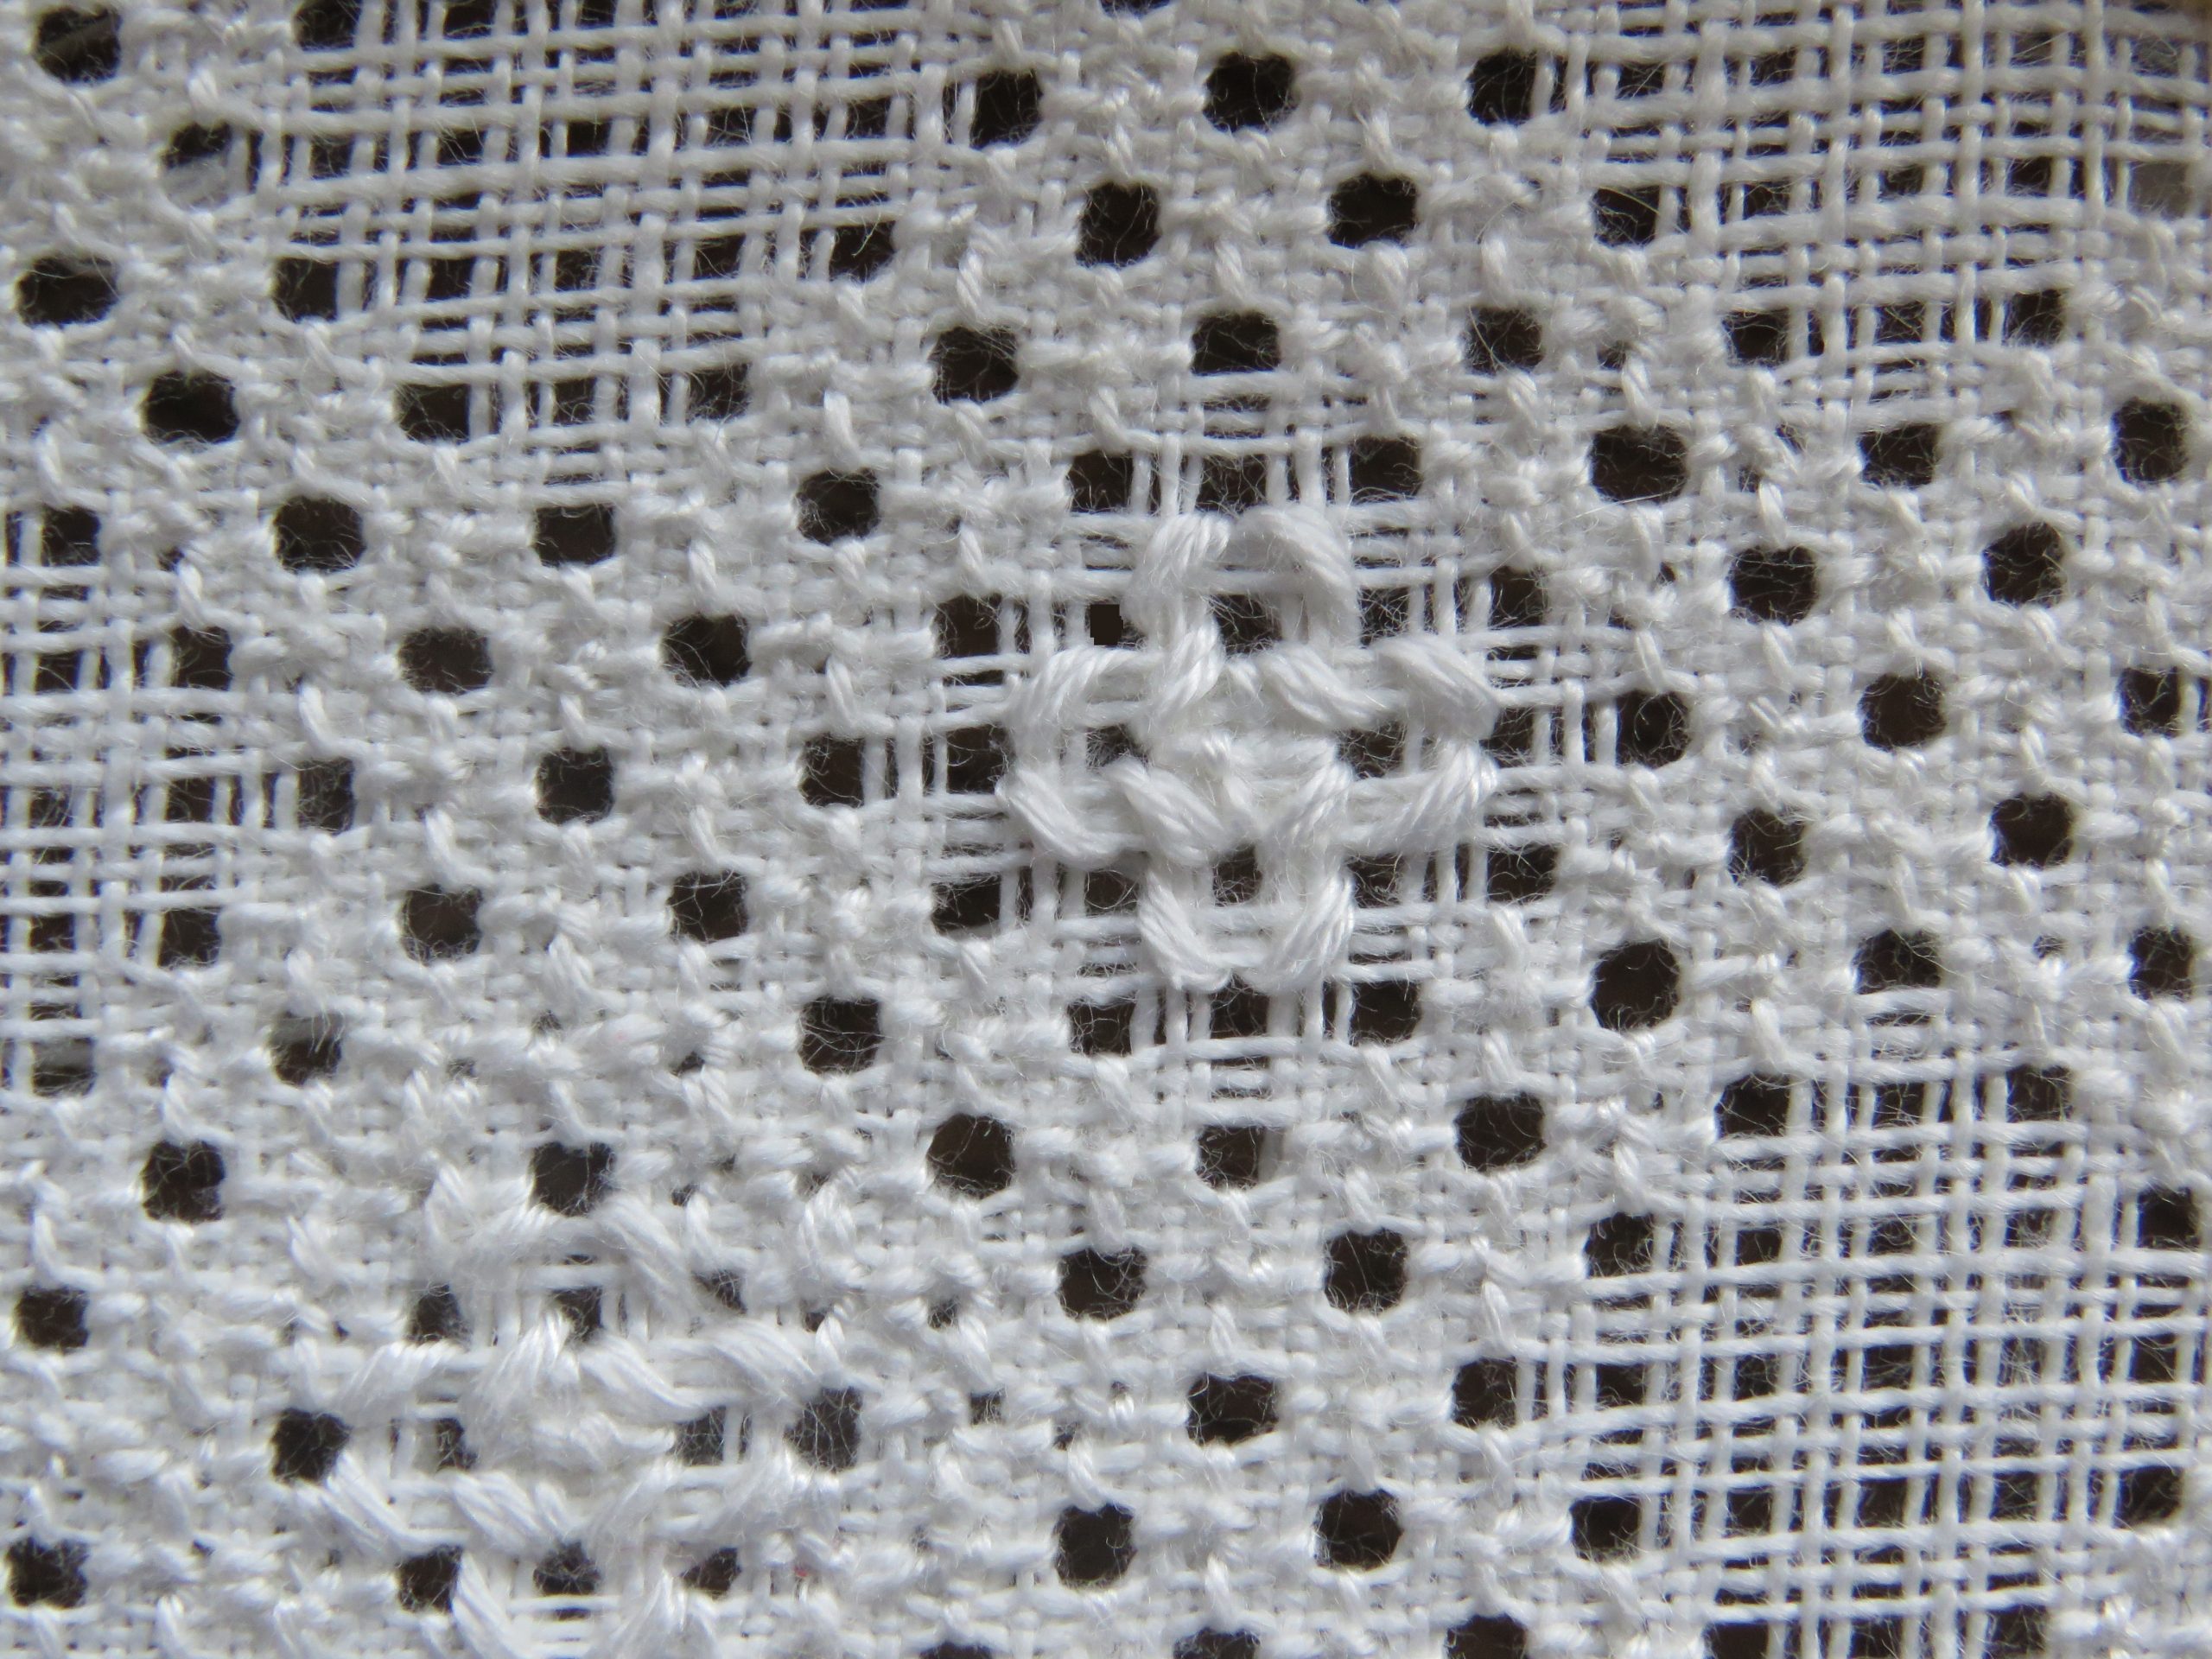
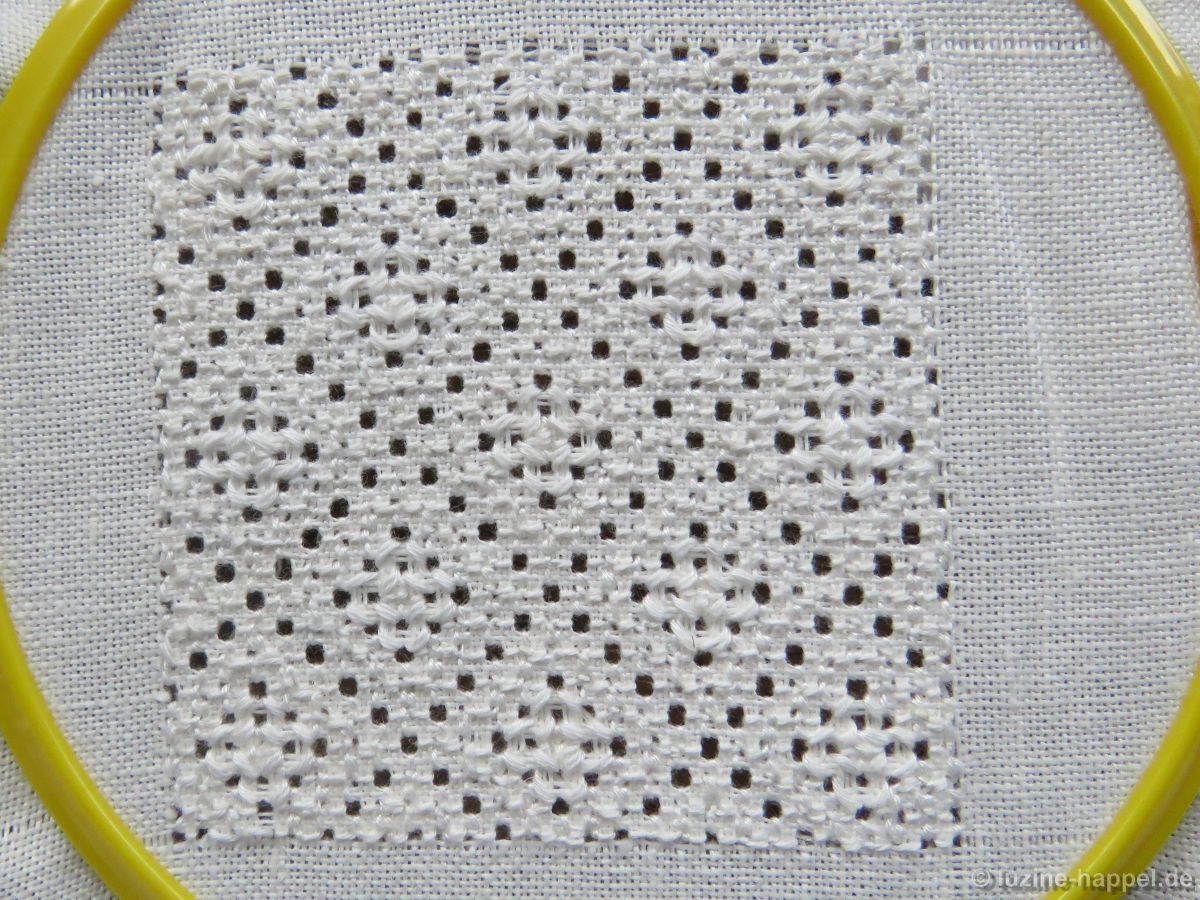
If all remaining spaces of the grid are filled, it looks like this:
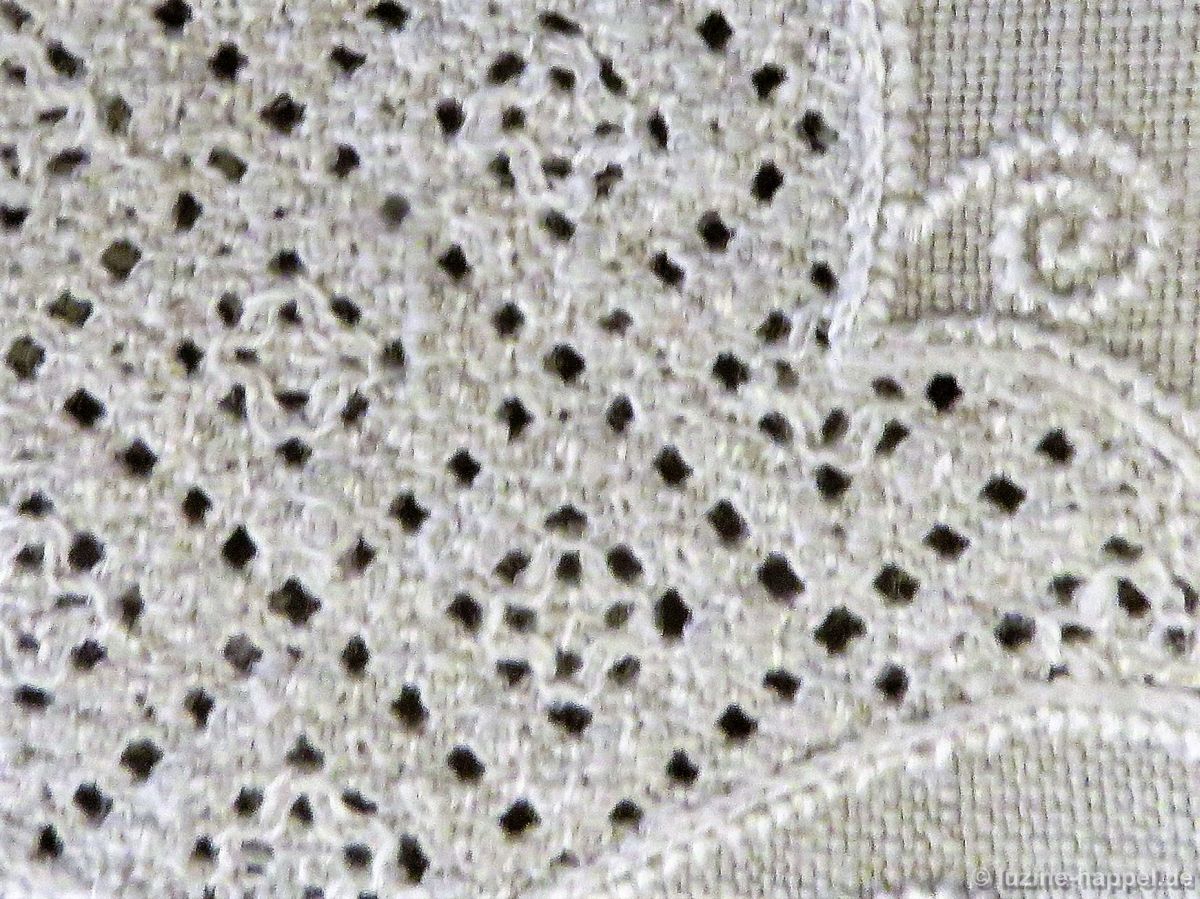
One can only divine the contrast between the flat Rose stitches and the raised cross formations.
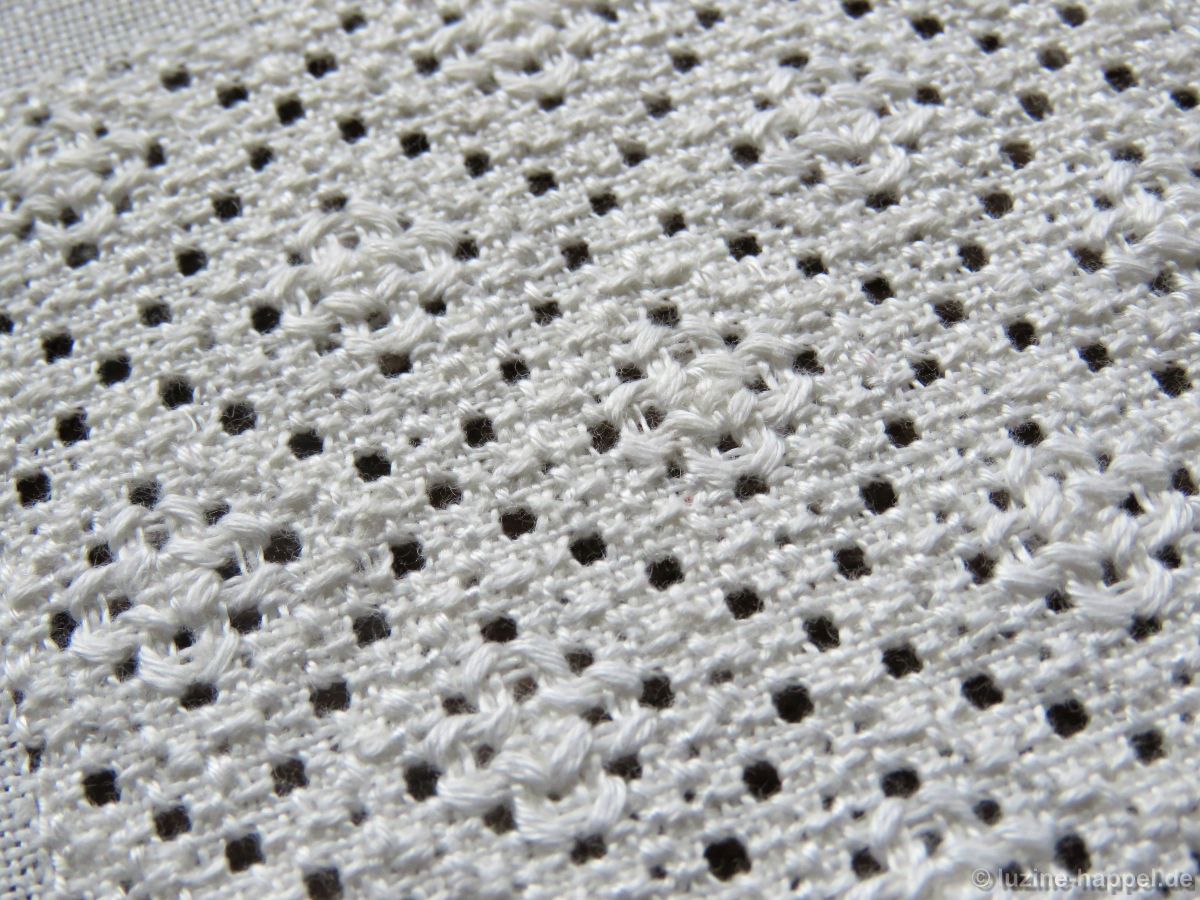
After laundry, it becomes clearer.
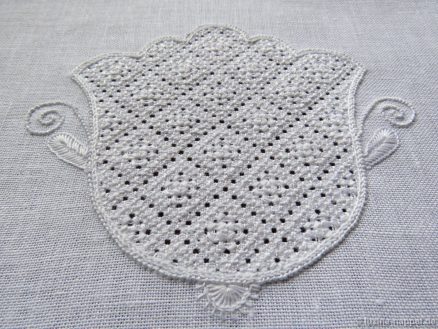
In the original it appears as its small rose flowers embedded in the rose stitch grid.