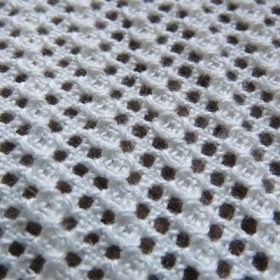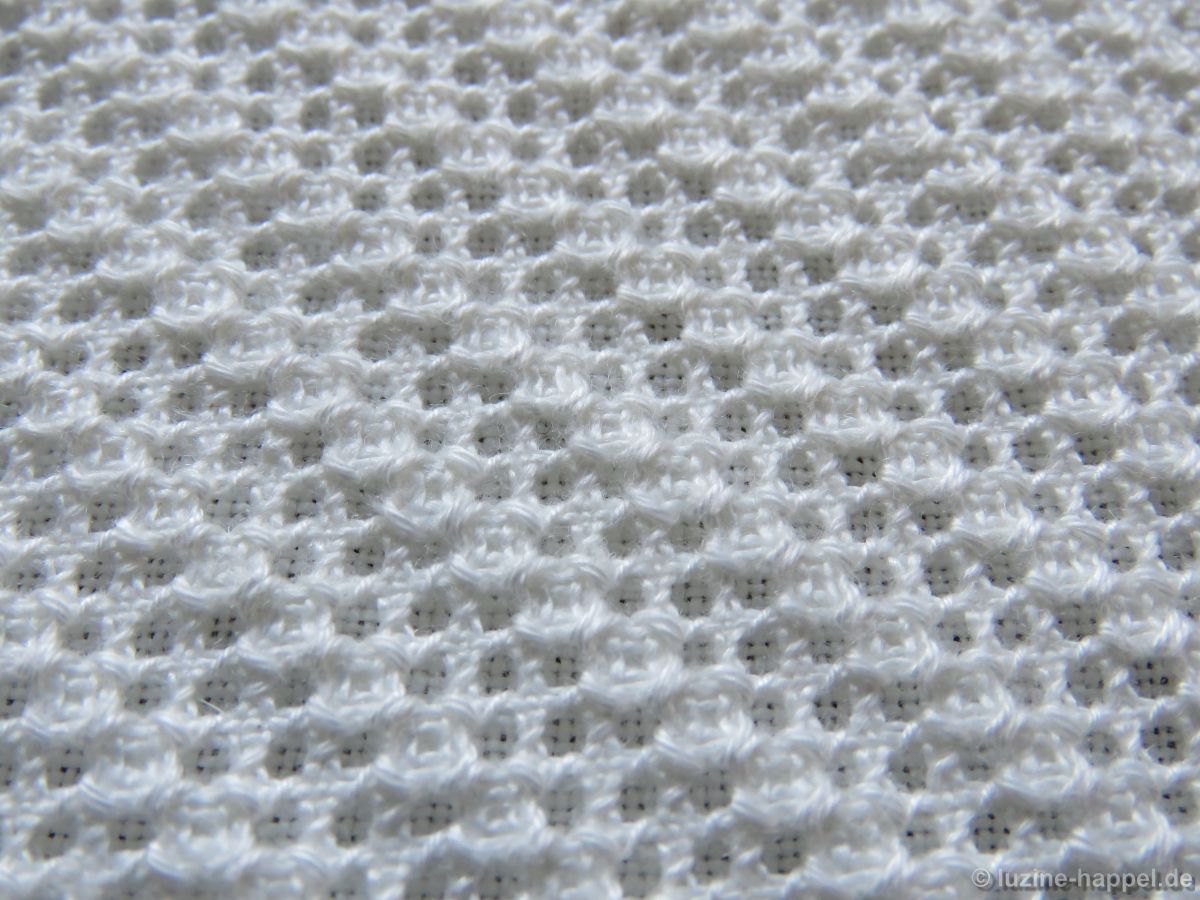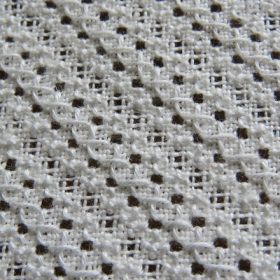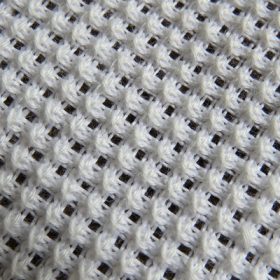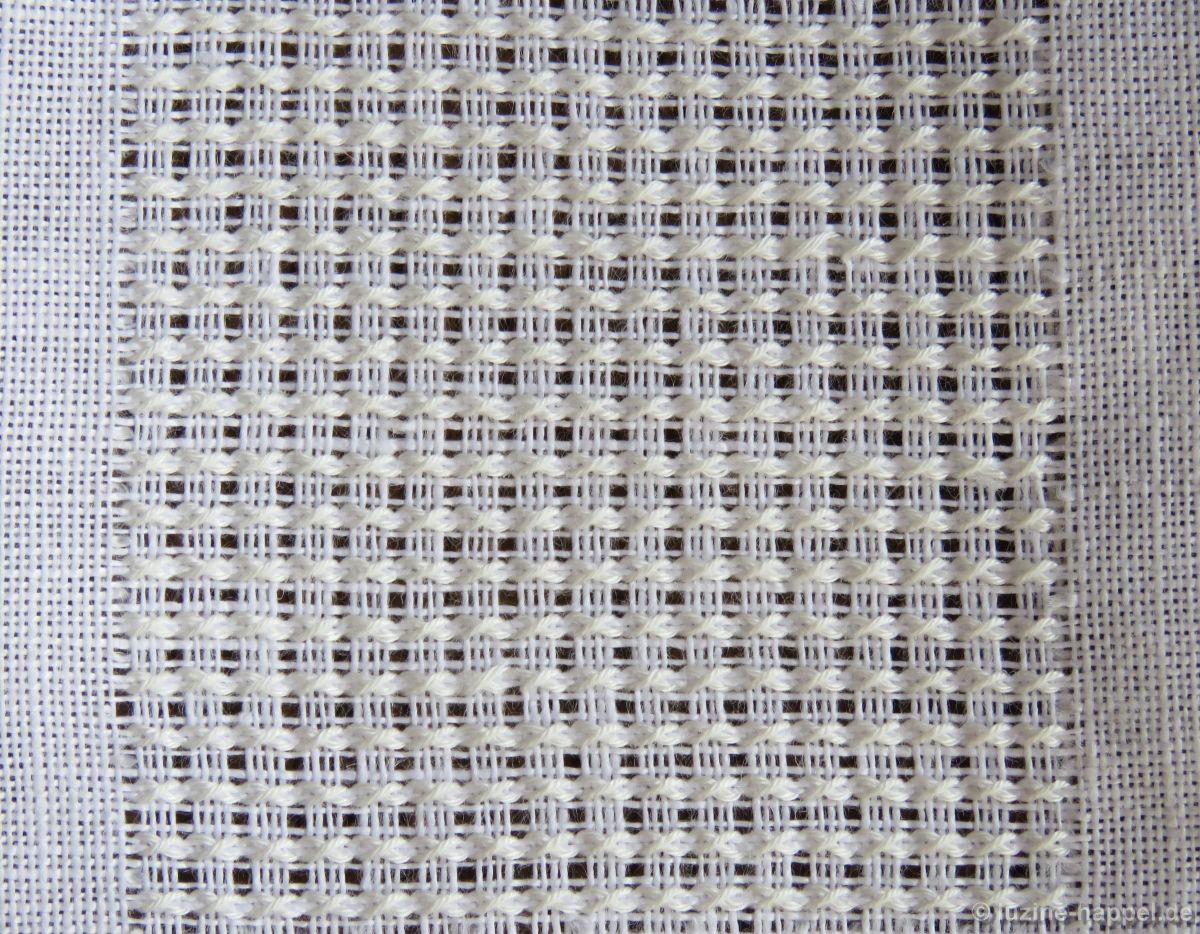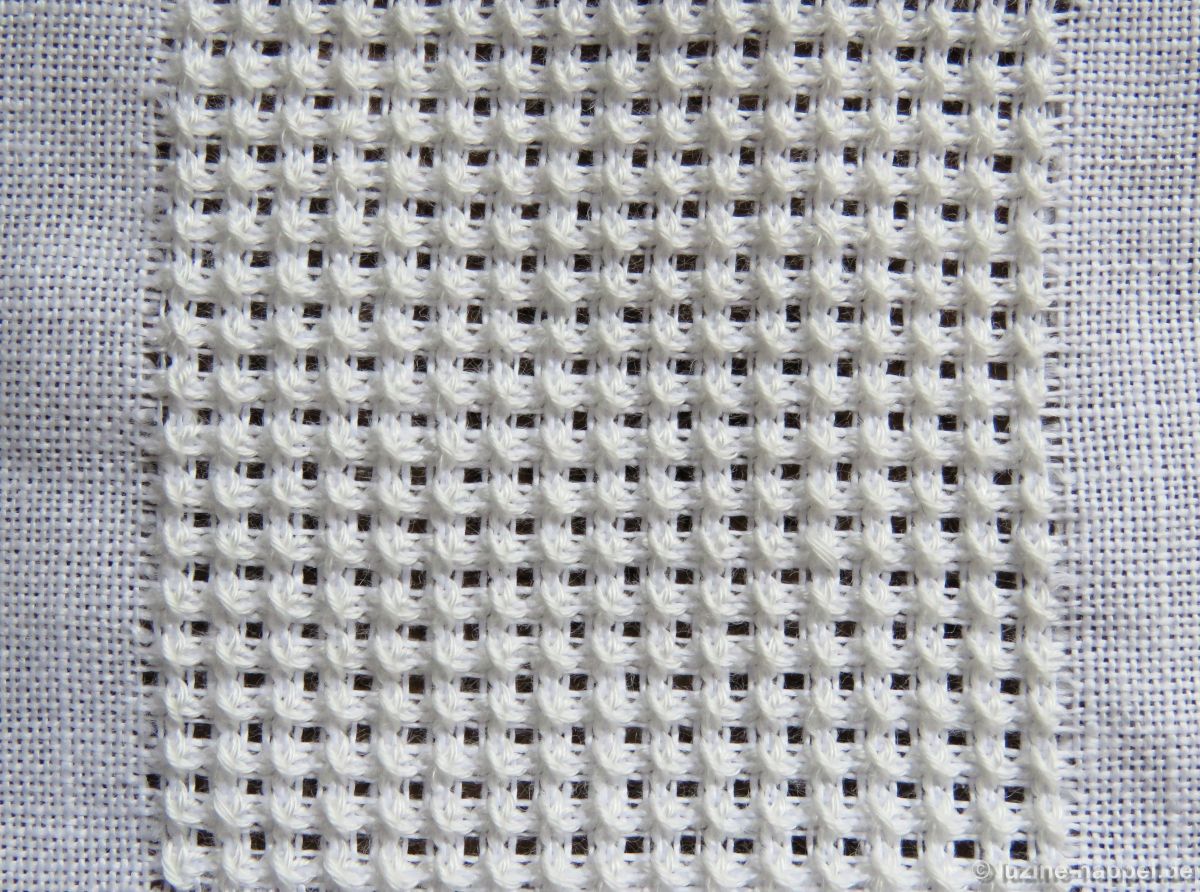
category: Limet filling pattern
linen used: 13.5/cm thread count
threads used: coton à broder No. 30
stitches used: Crossing Straight and Rose stitches
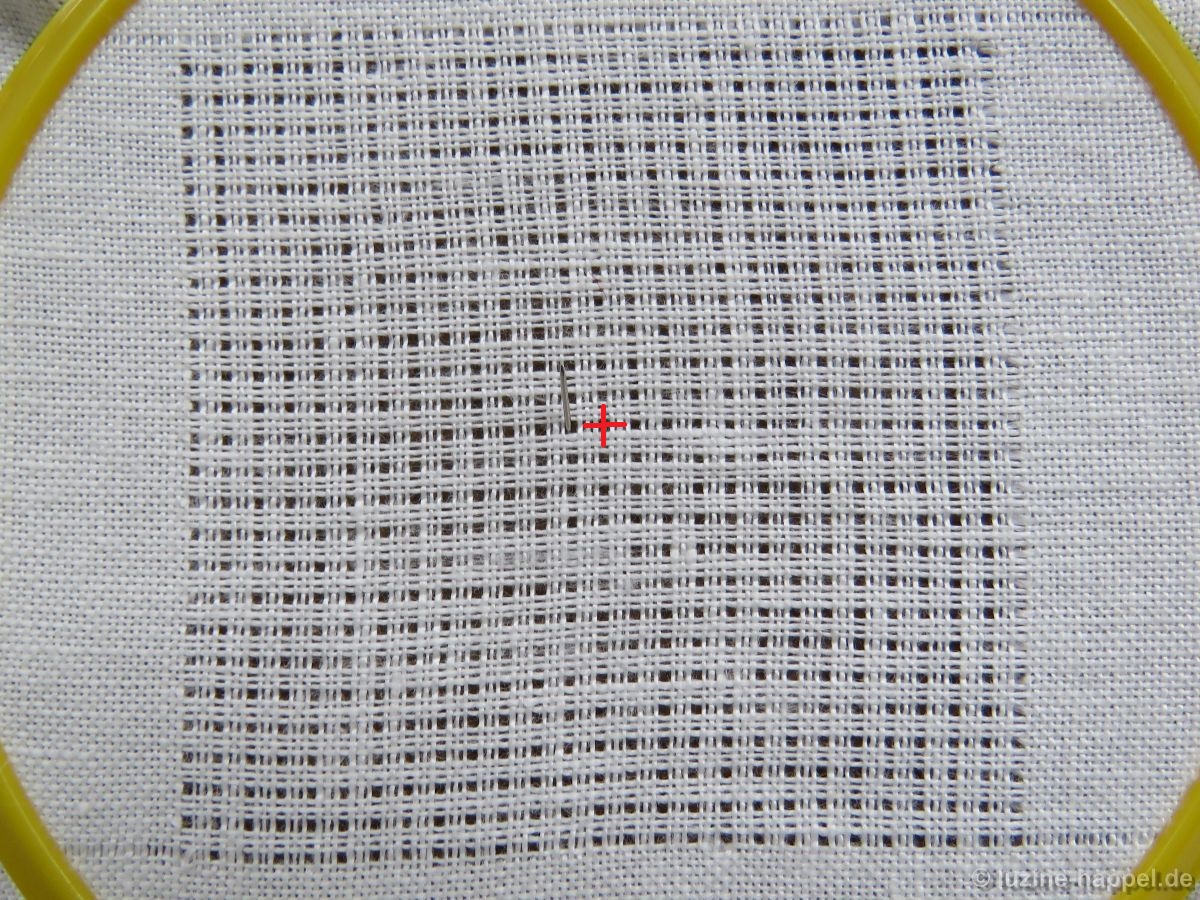
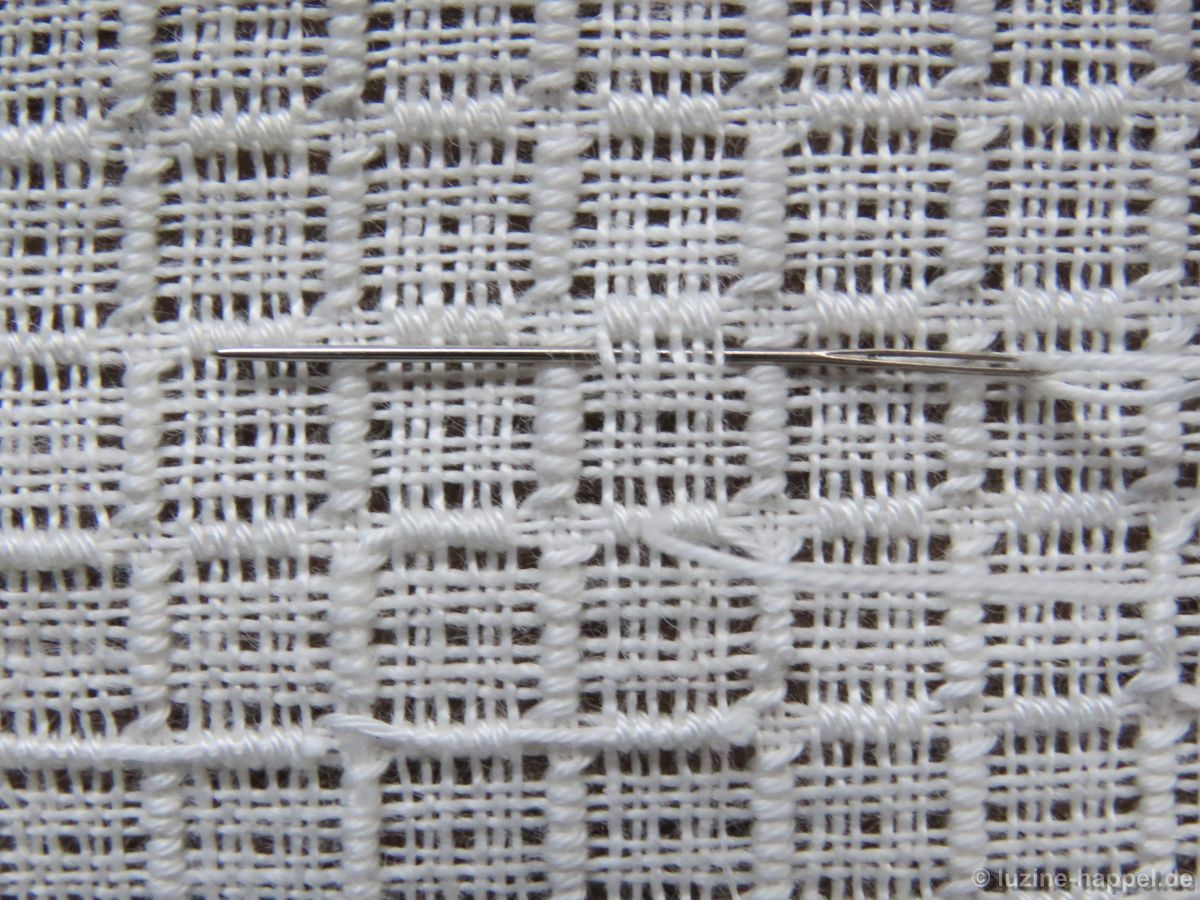
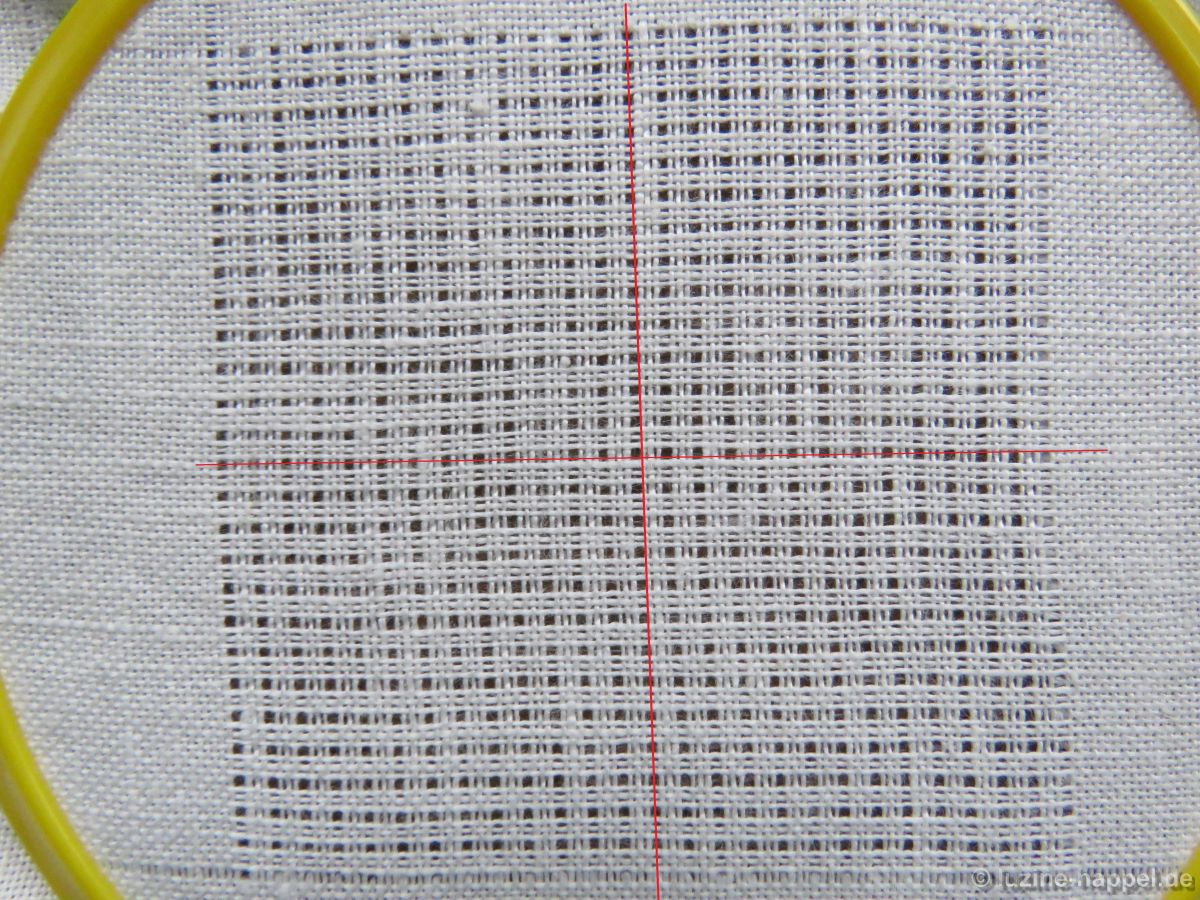
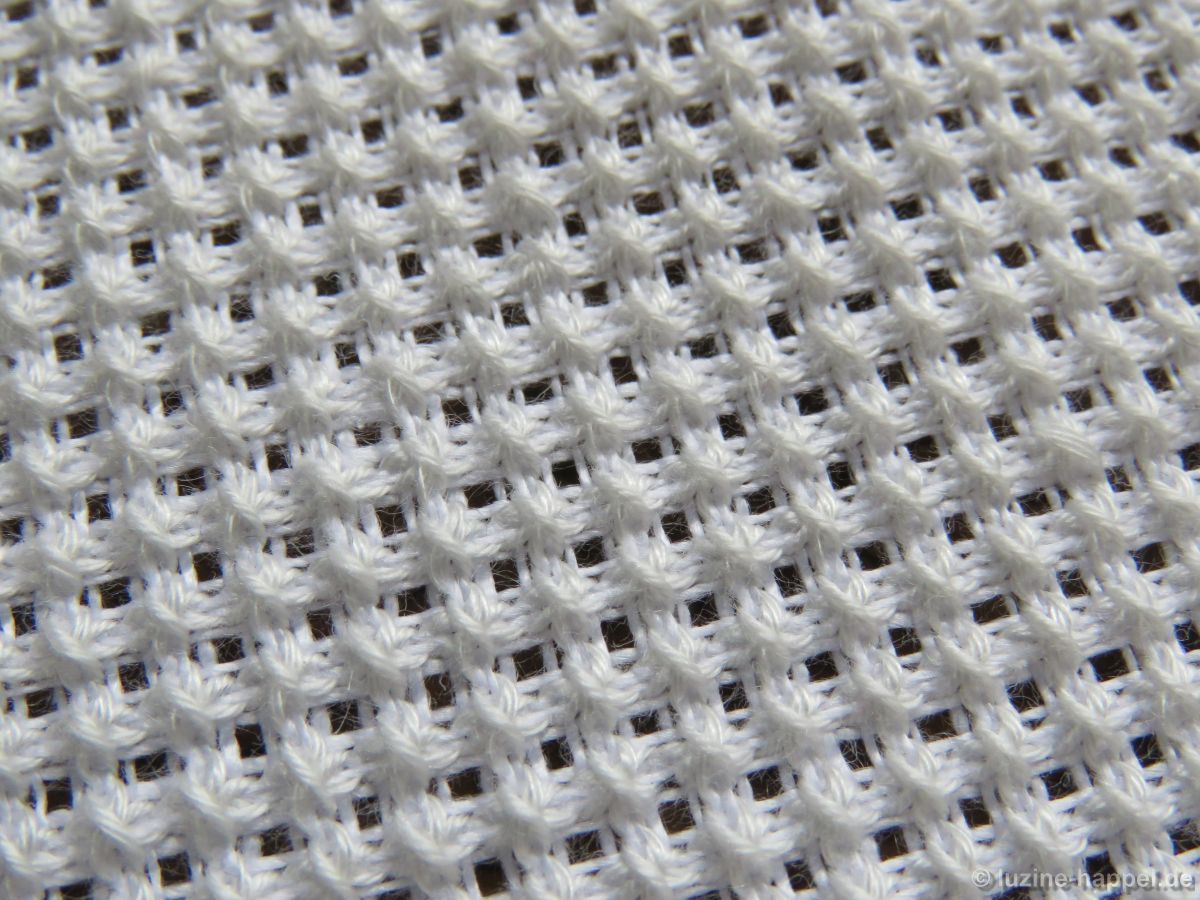
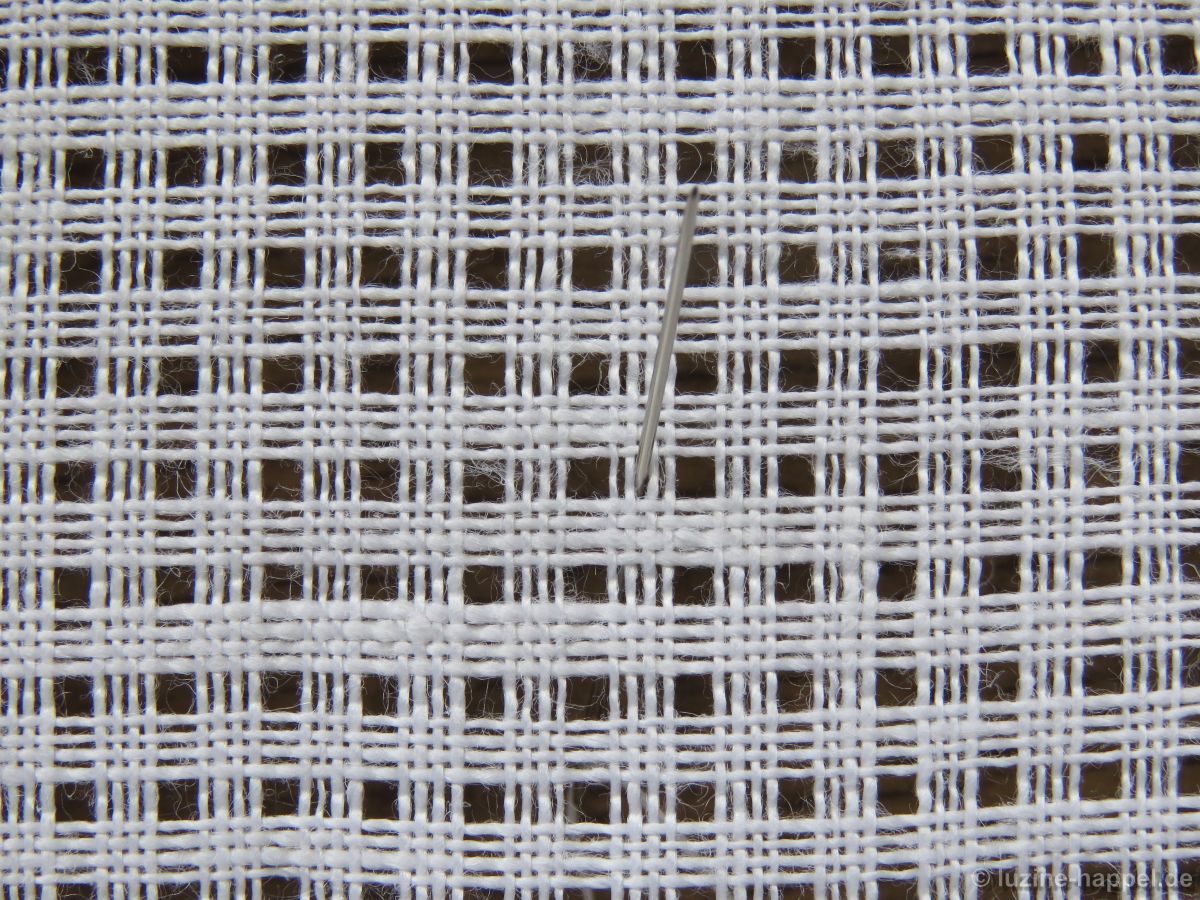
center: intersection of withdrawn thread lines
one pattern segment: = 6 threads
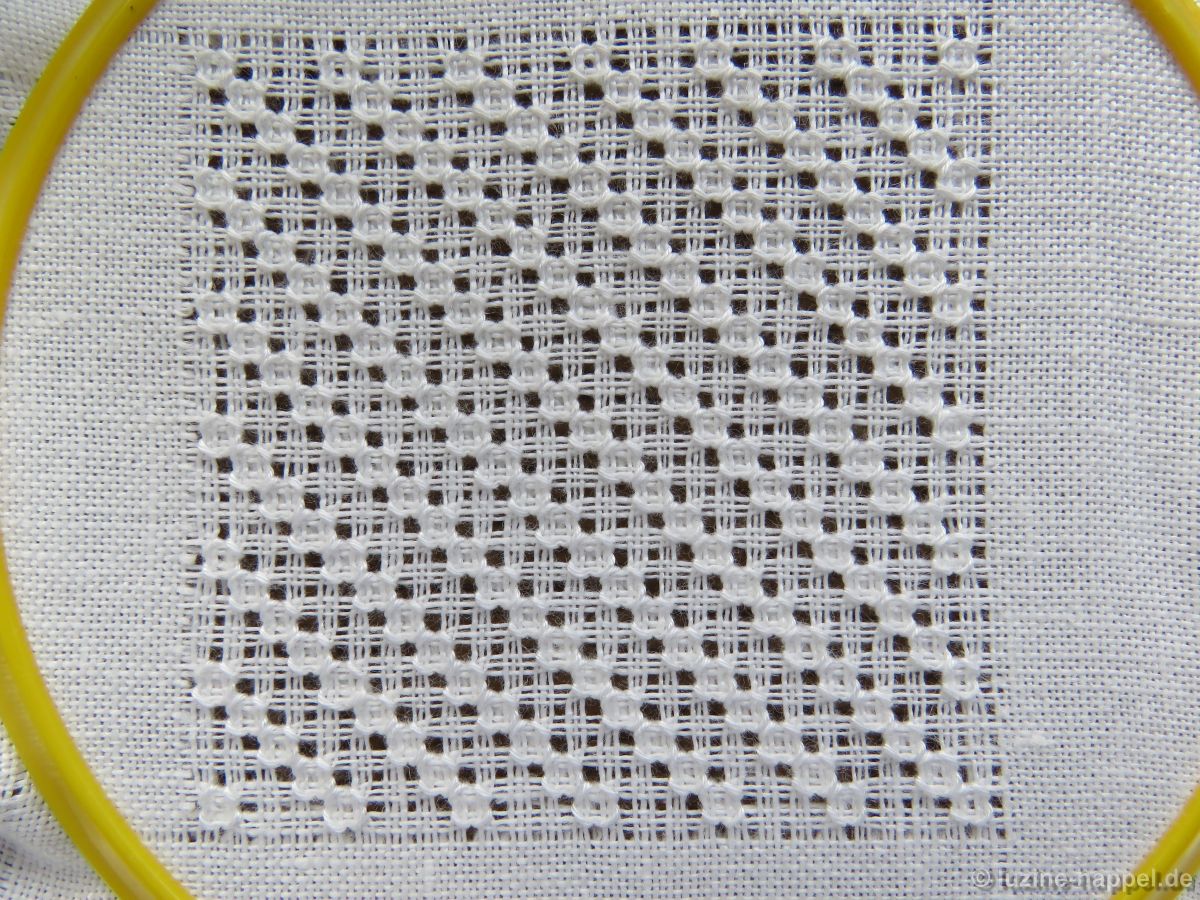
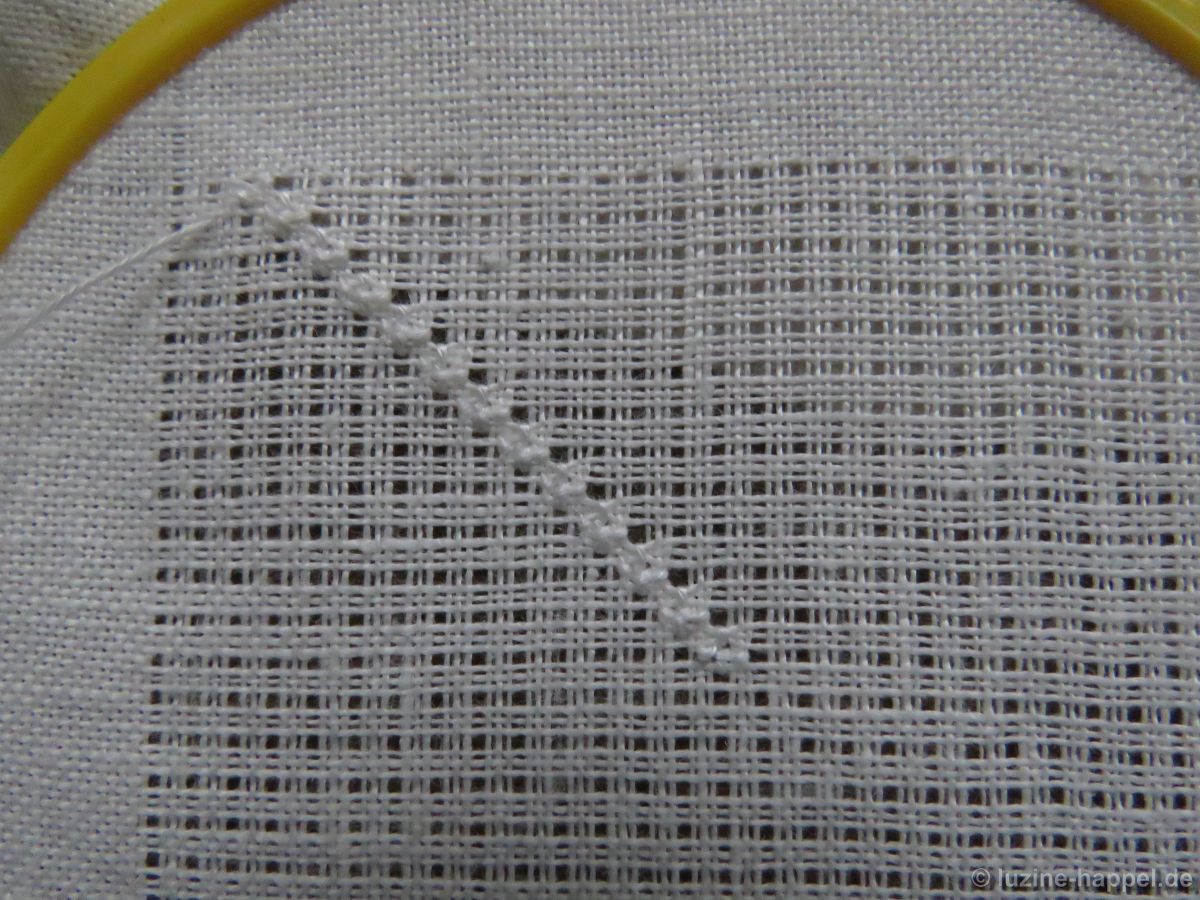
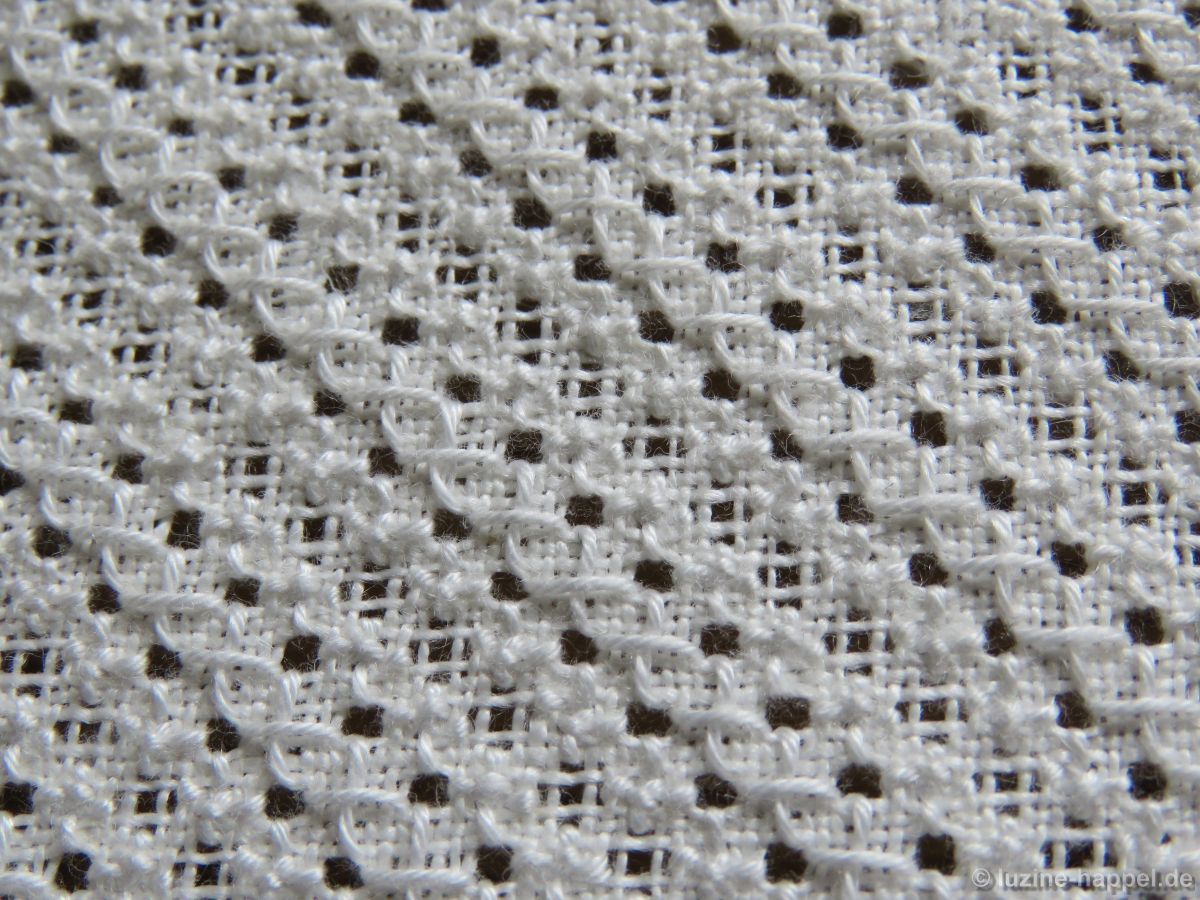
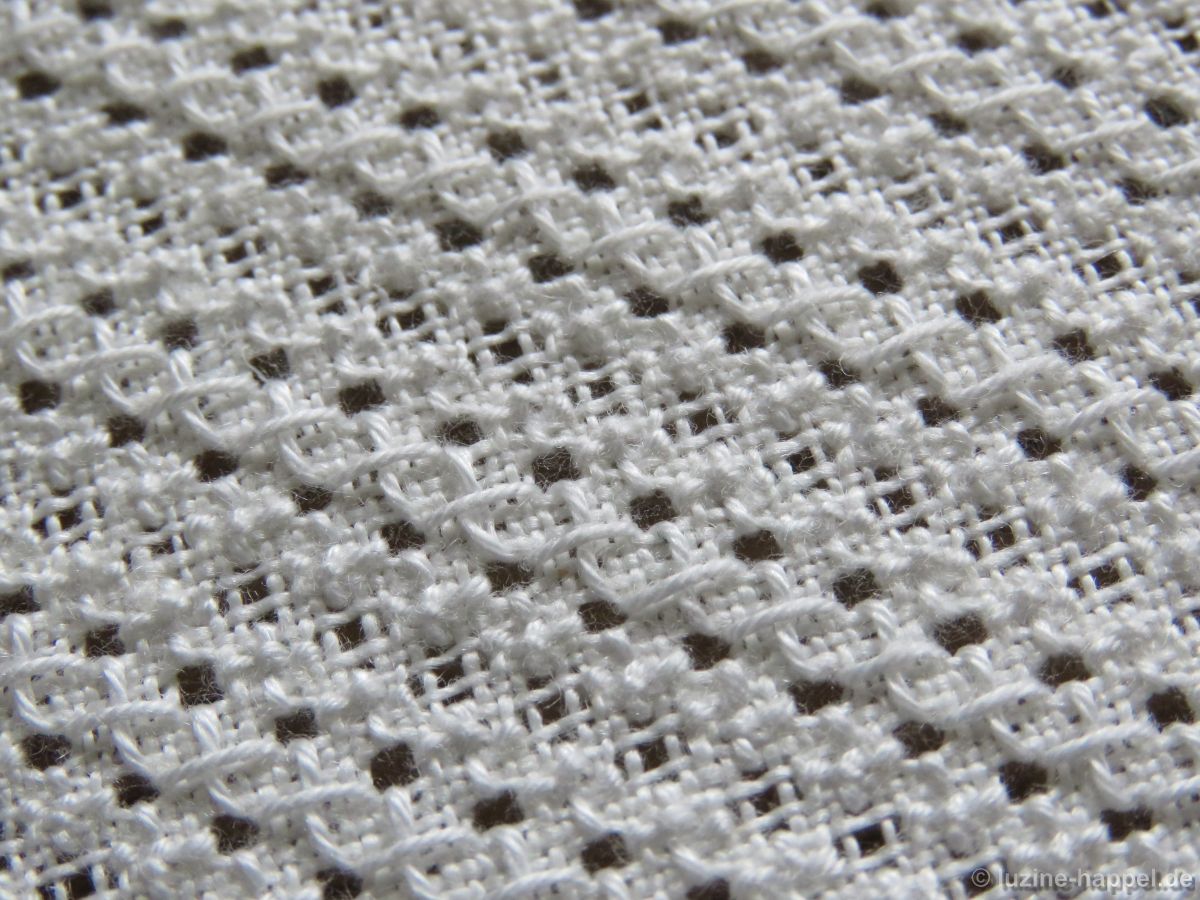
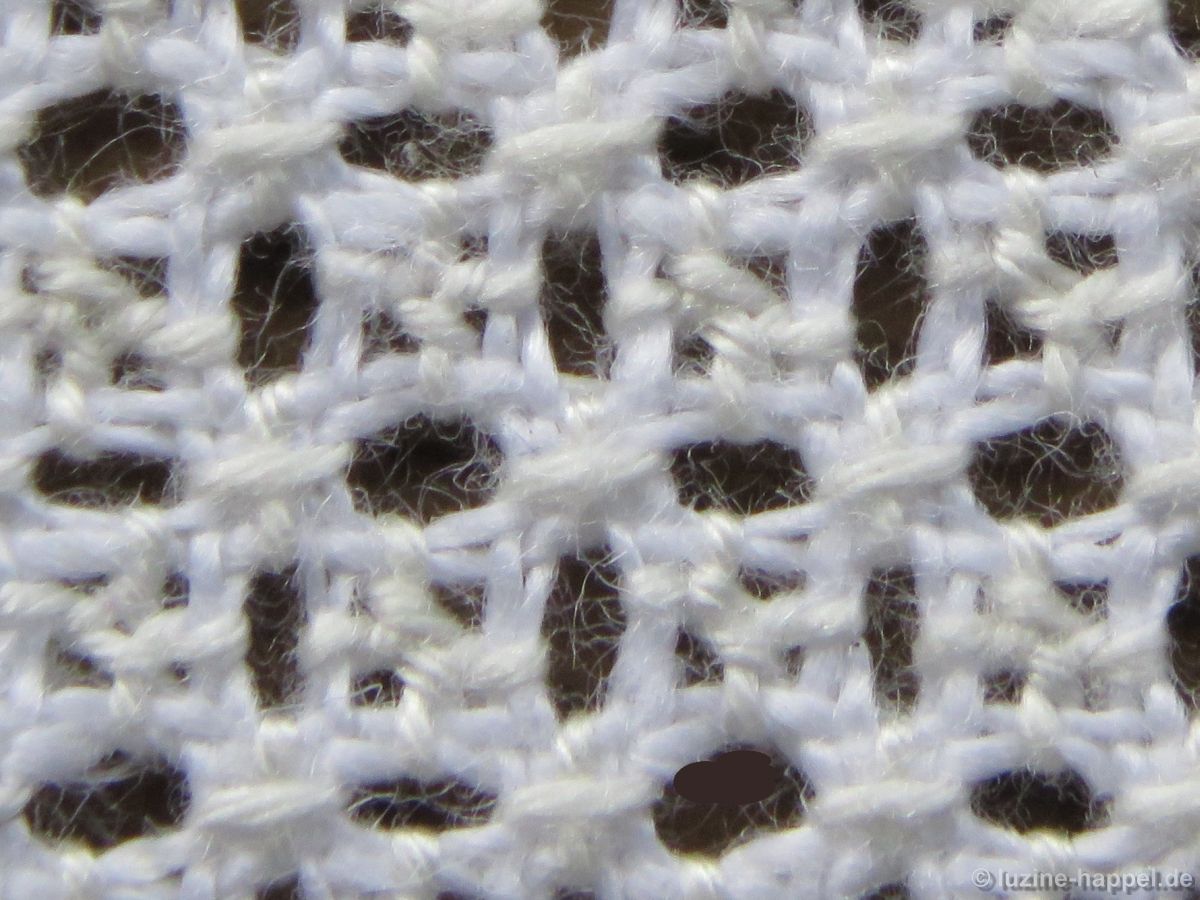
After I presented with No. 576 a filling pattern for large motifs, I will now show a pattern for small areas. If one pattern segment of No. 576 had a width of 40 fabric threads, this pattern only has a segment of 6 fabric threads.
Since more threads are left than are withdrawn, I call it a Limet pattern, even though it is not a typical Limet pattern.
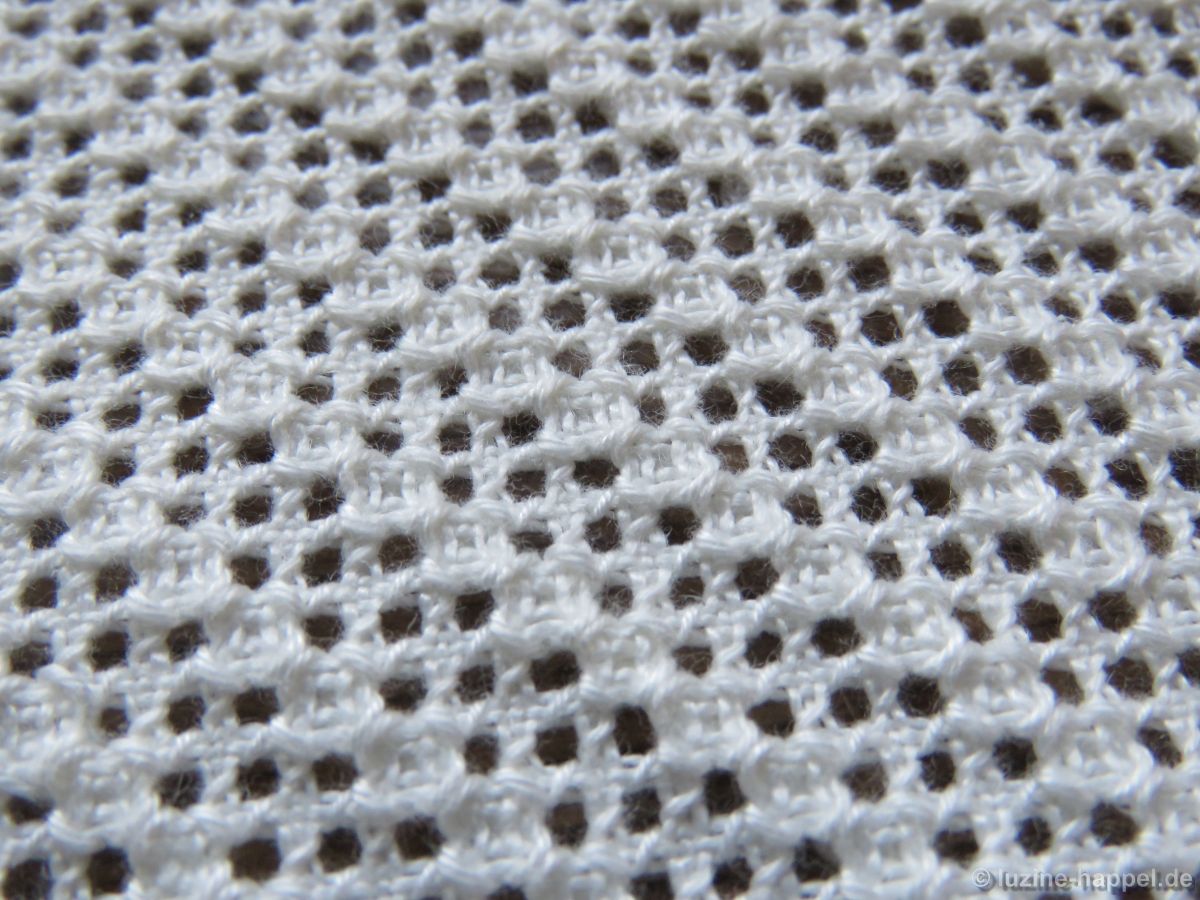
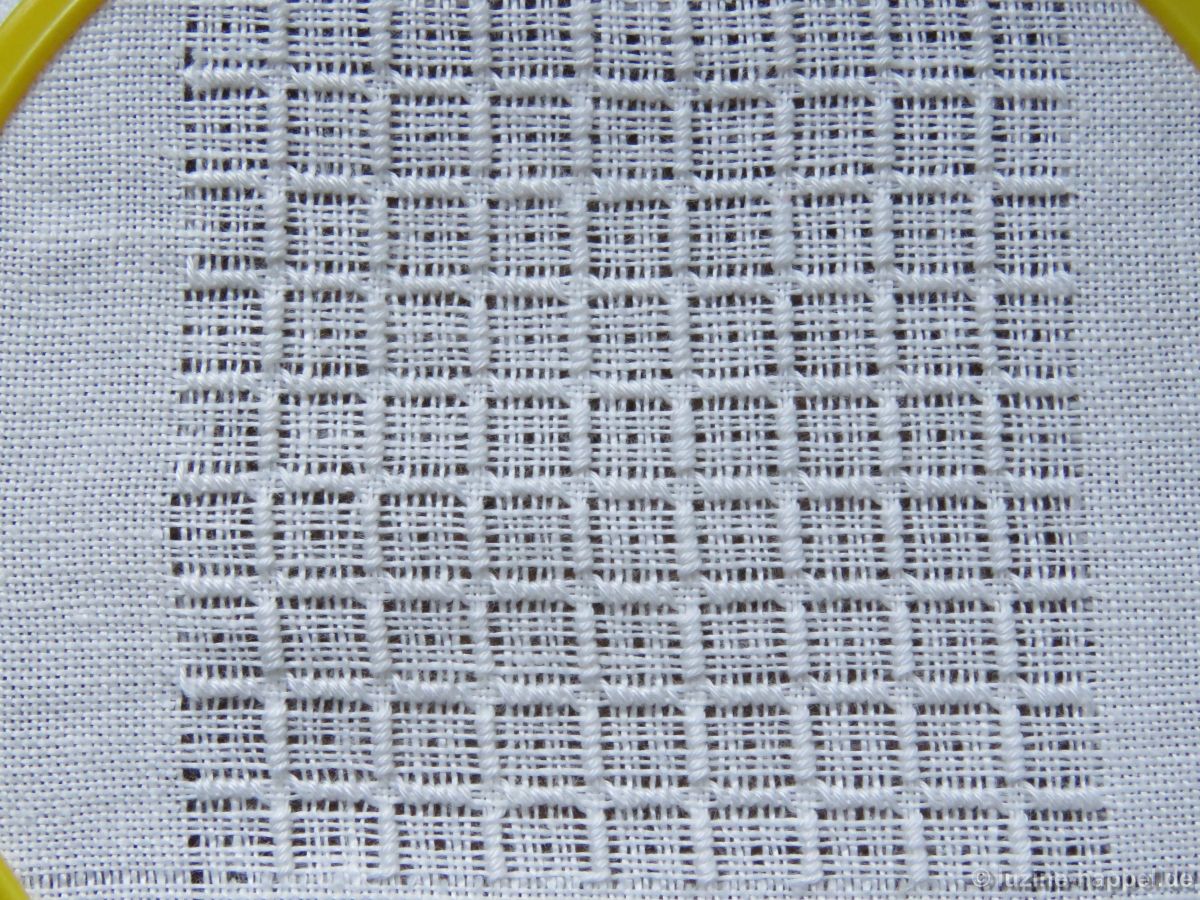
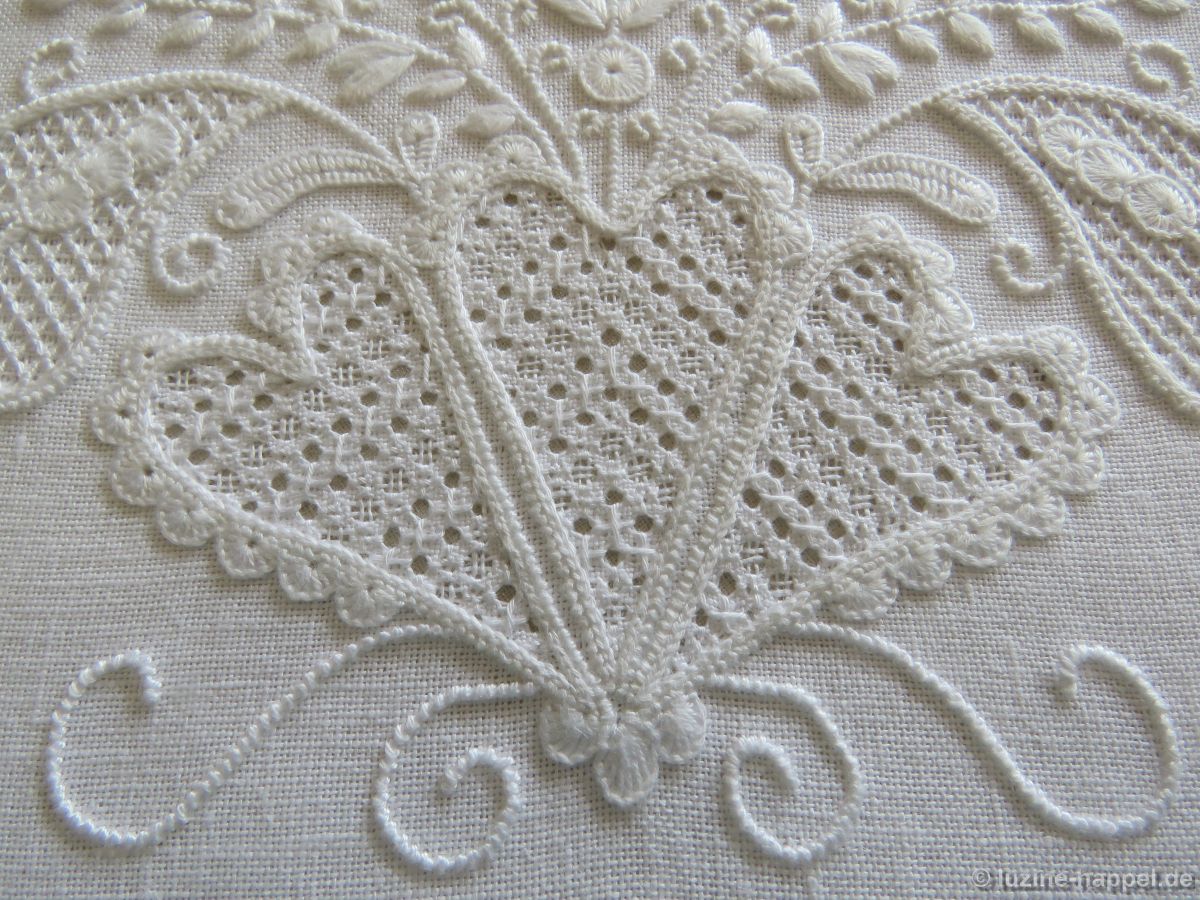
The filling pattern shown here is a practice exercise only.
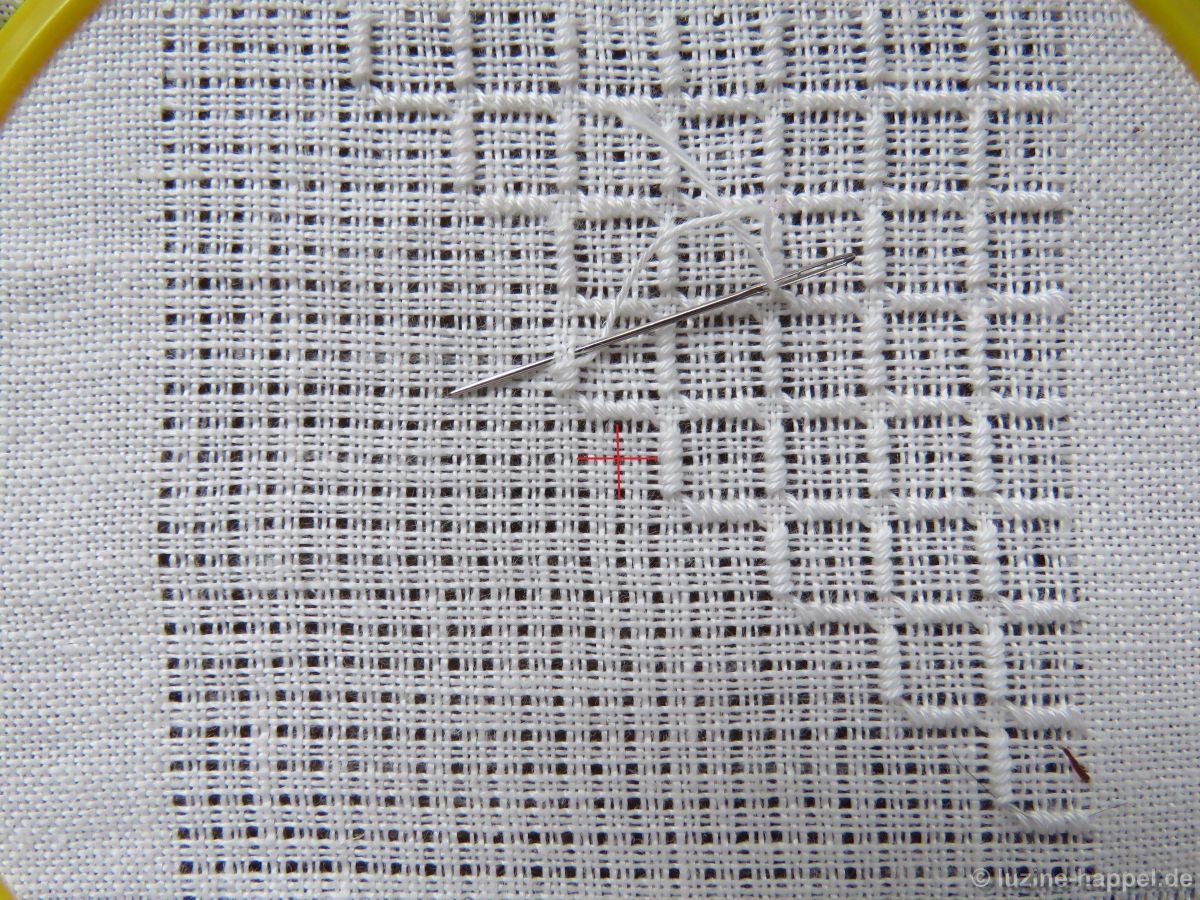
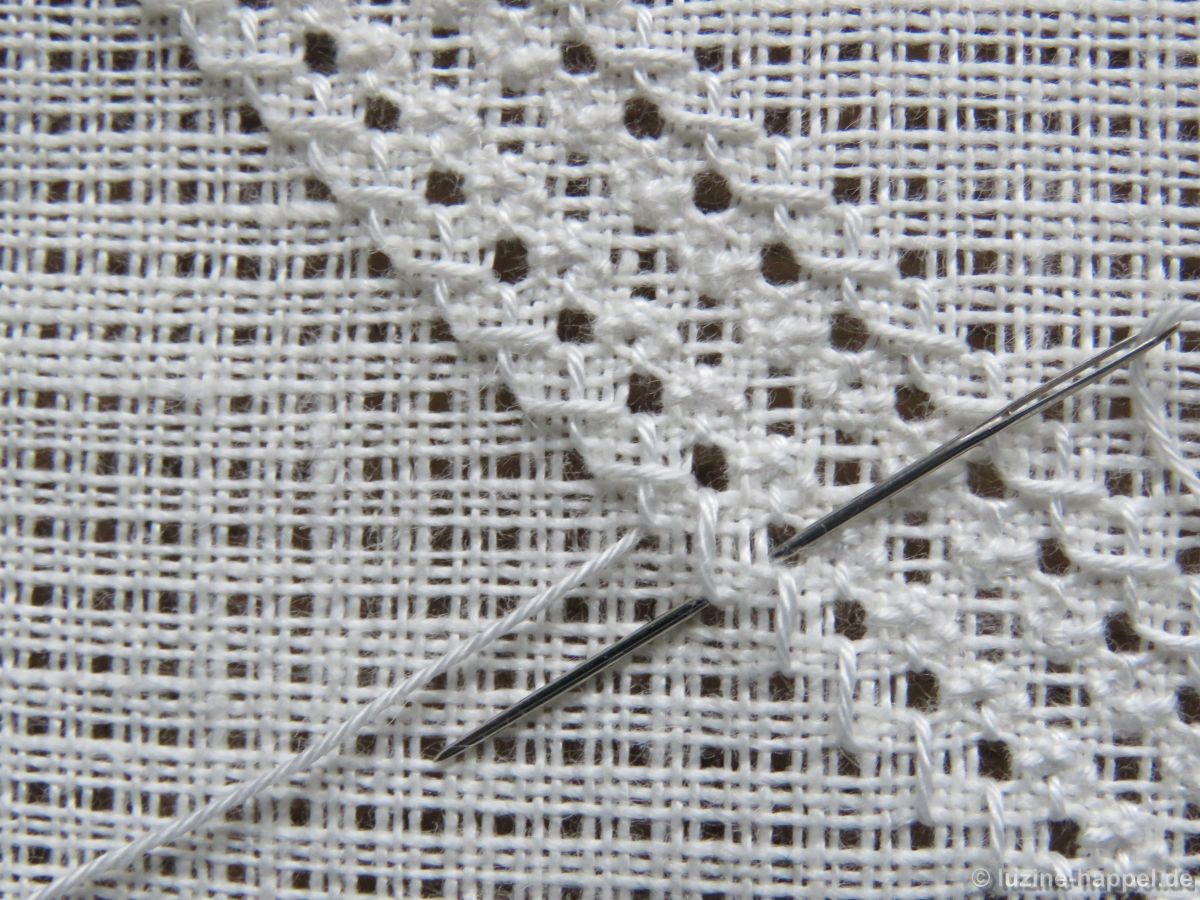
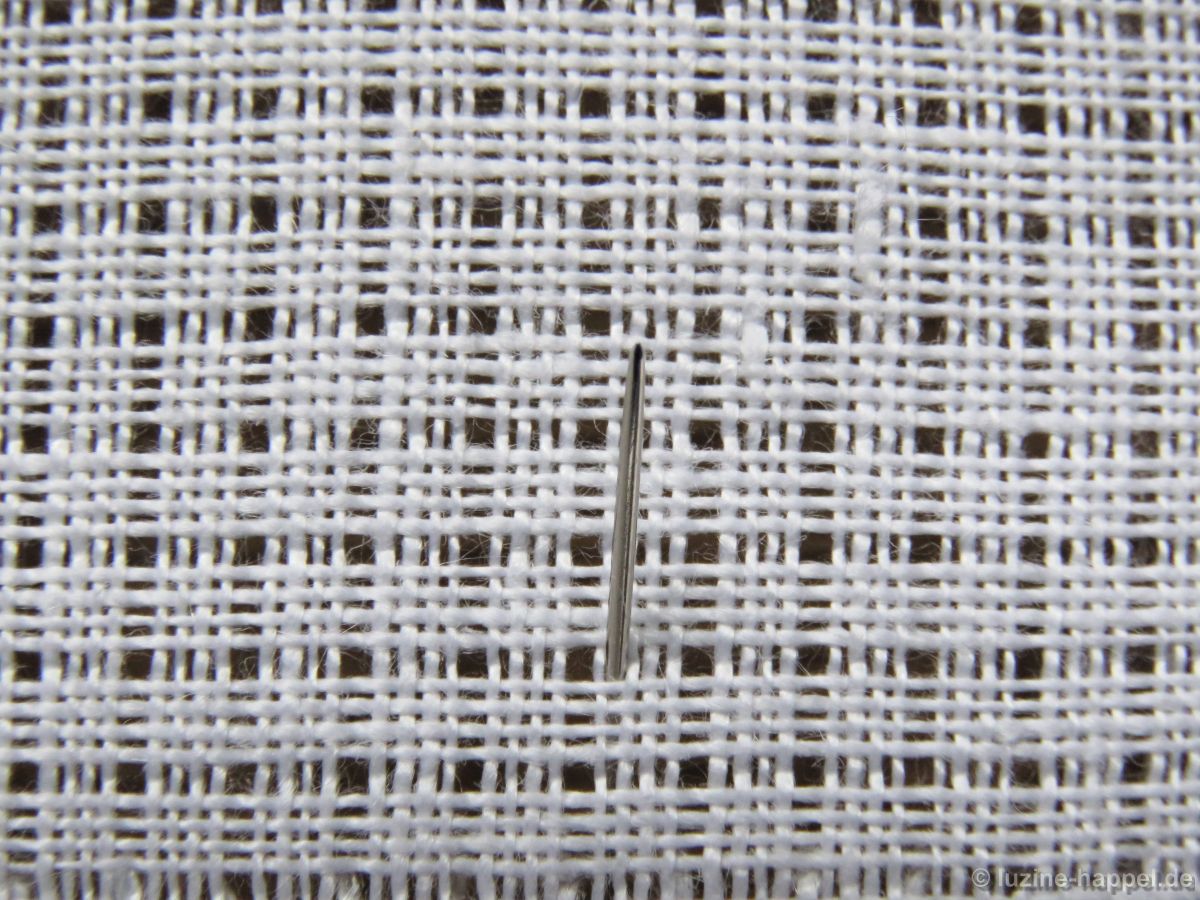
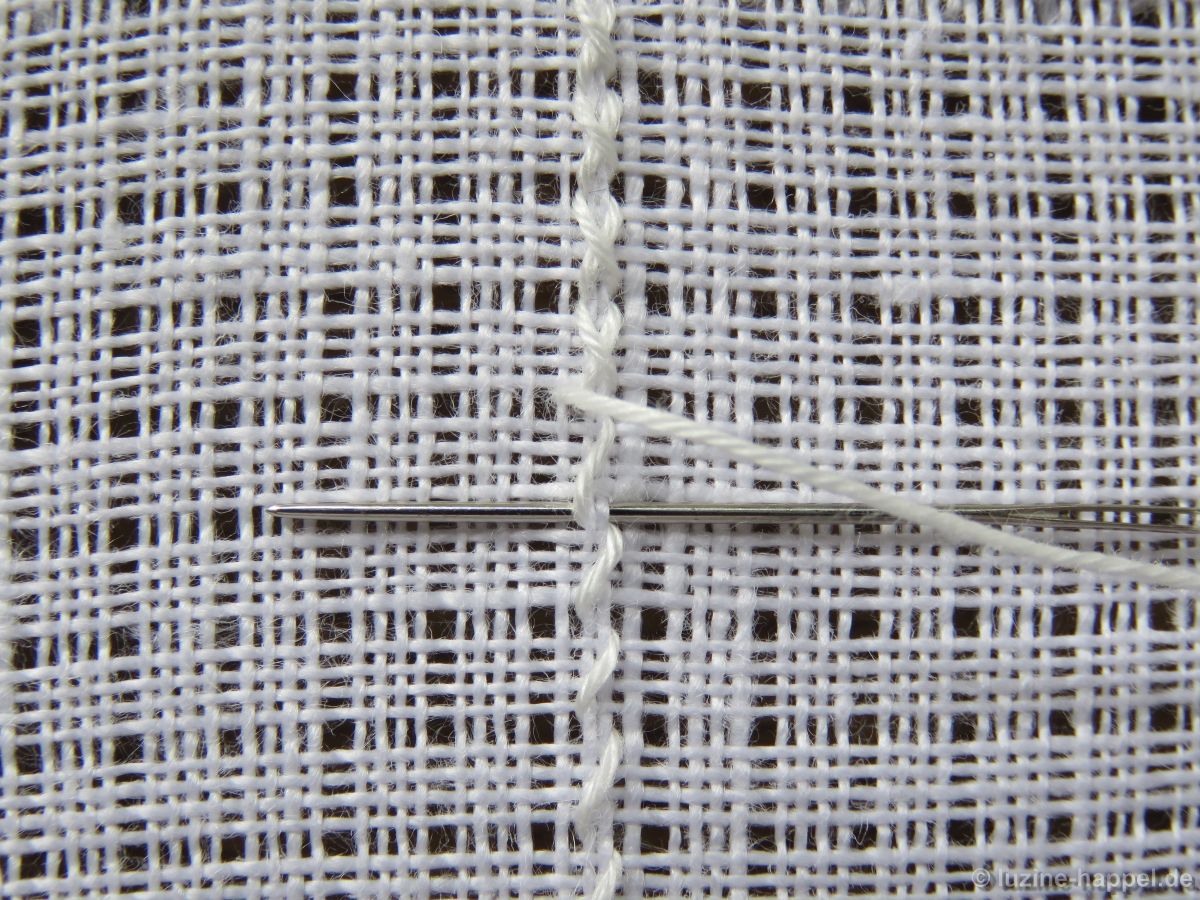
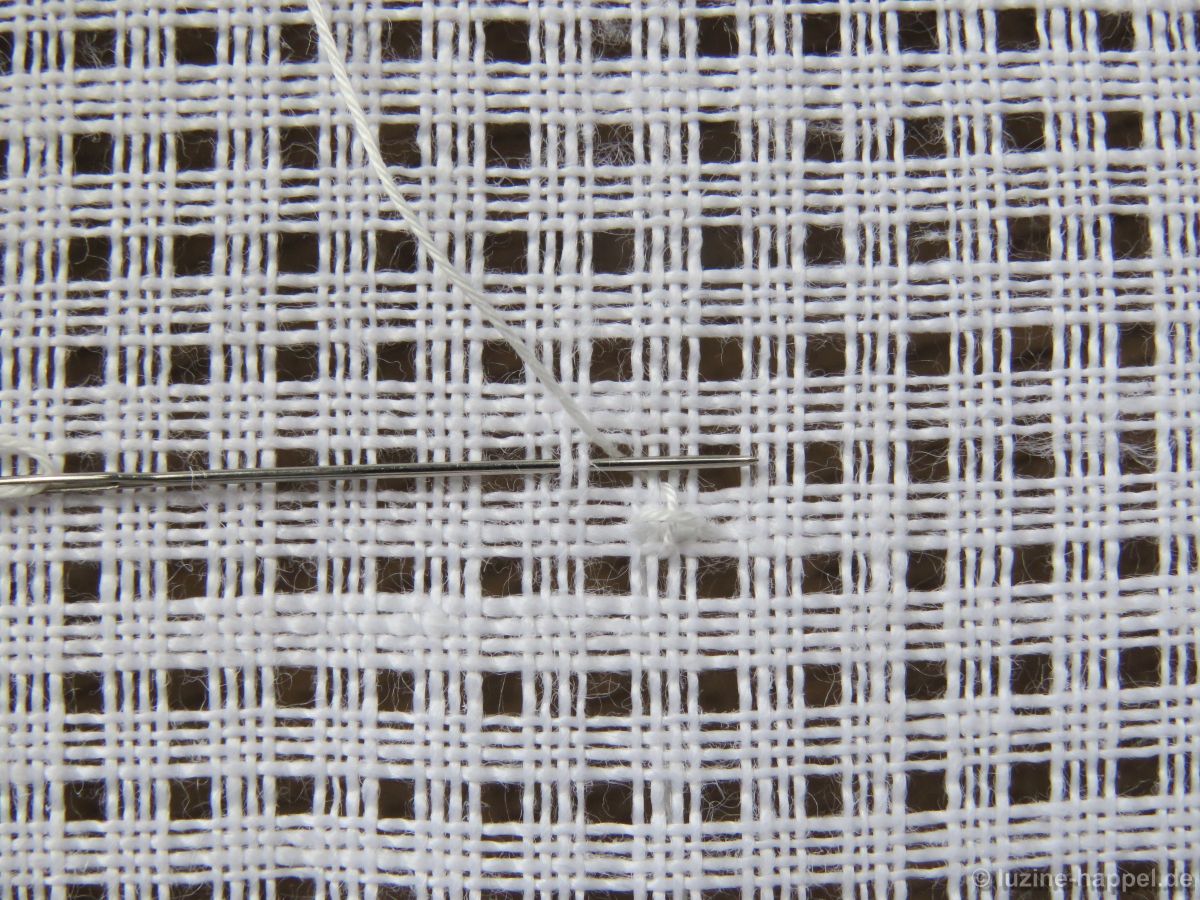
First create a grid with an intersection of withdrawn thread lines in the center,
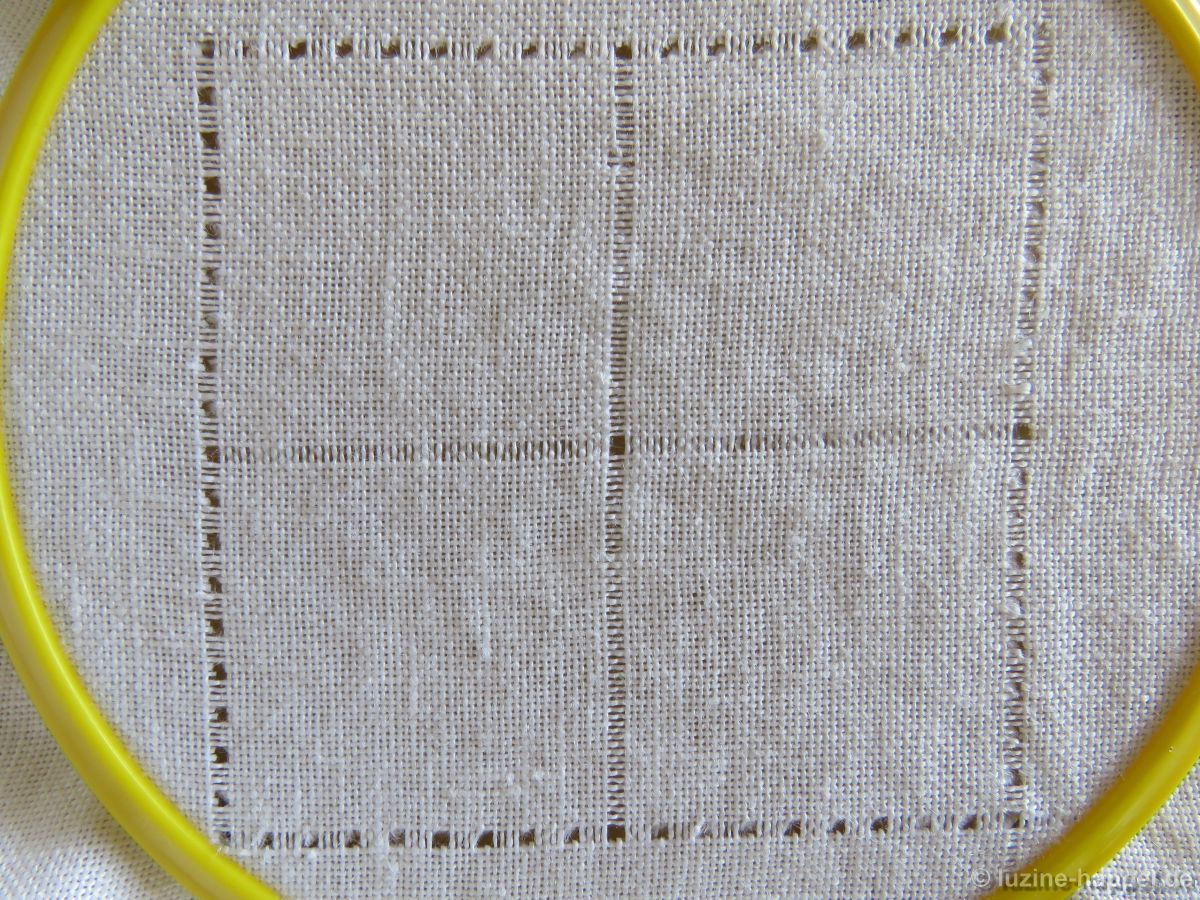
by alternately withdrawing 2 and leaving 4 threads both horizontally and vertically.

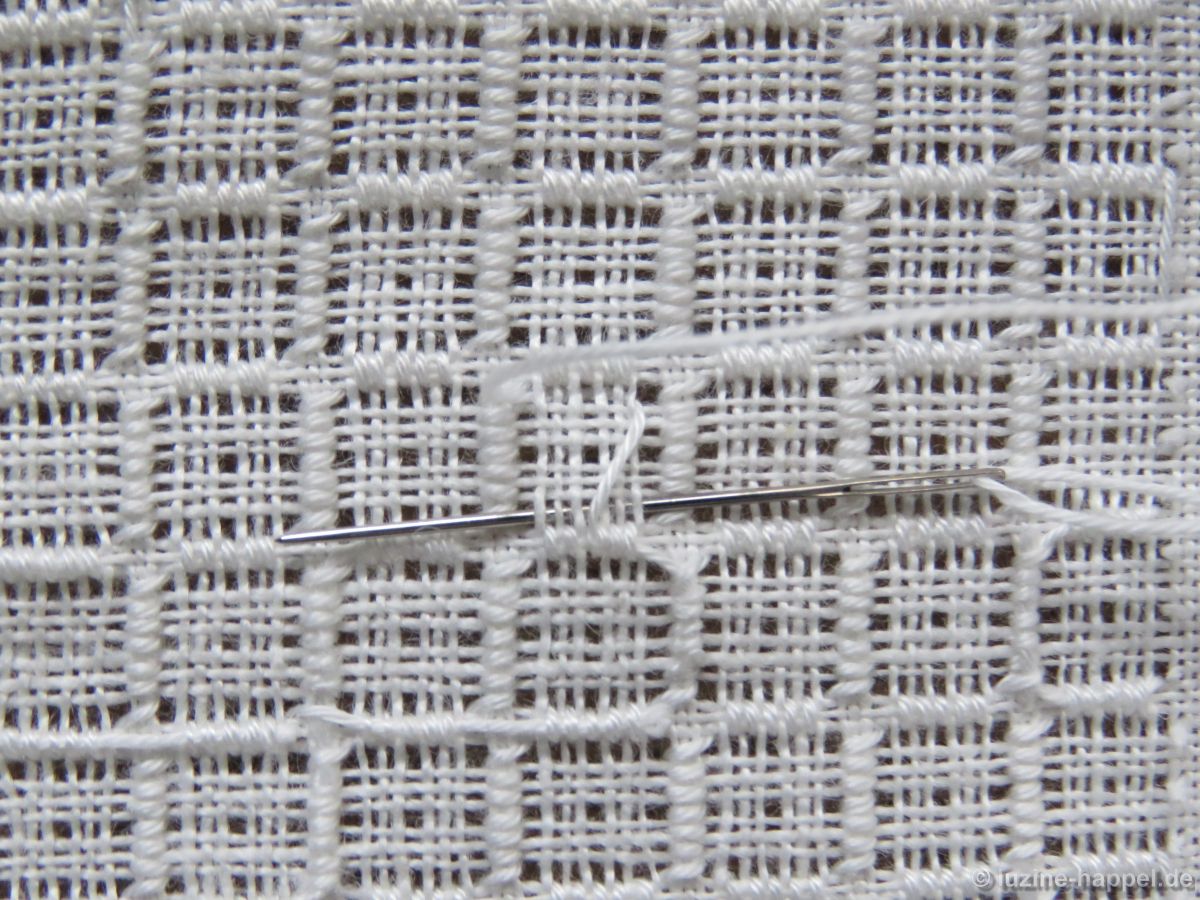
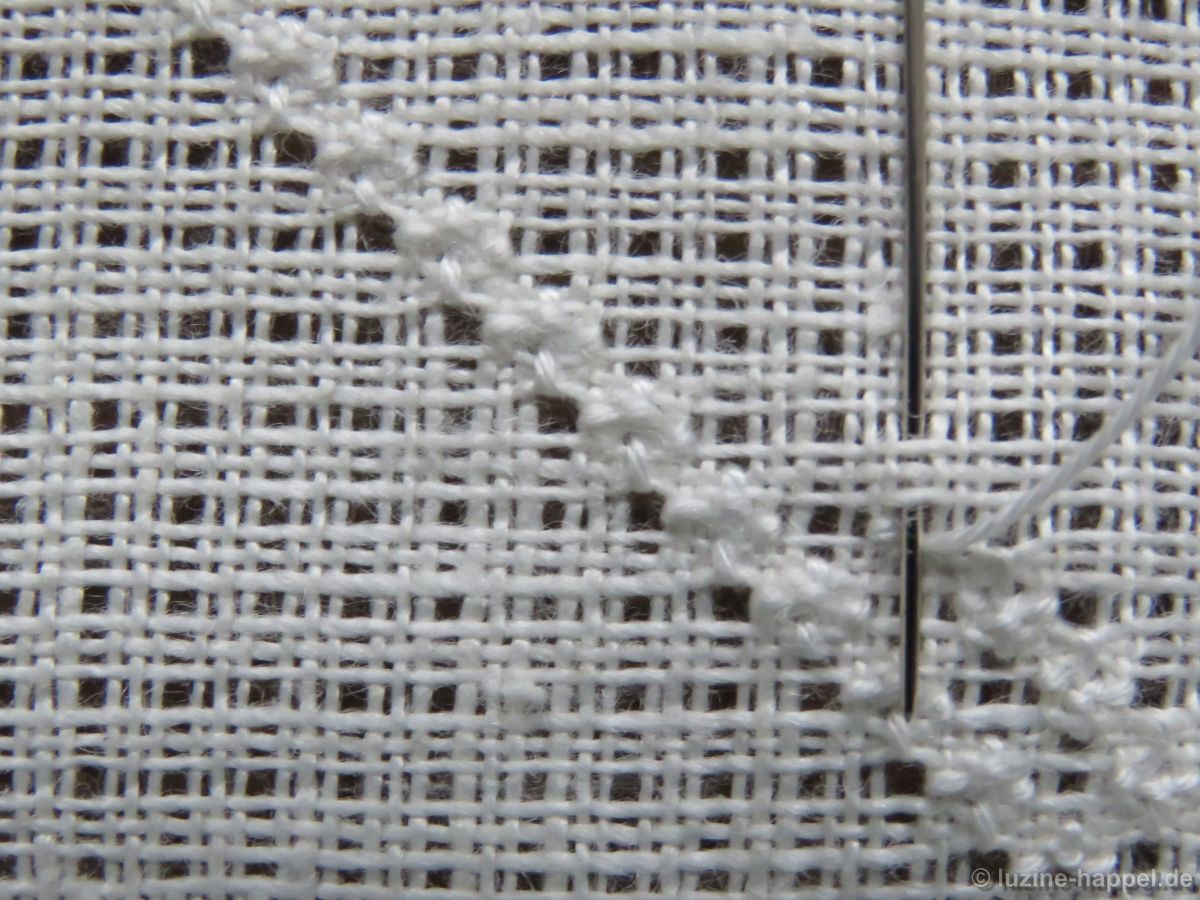
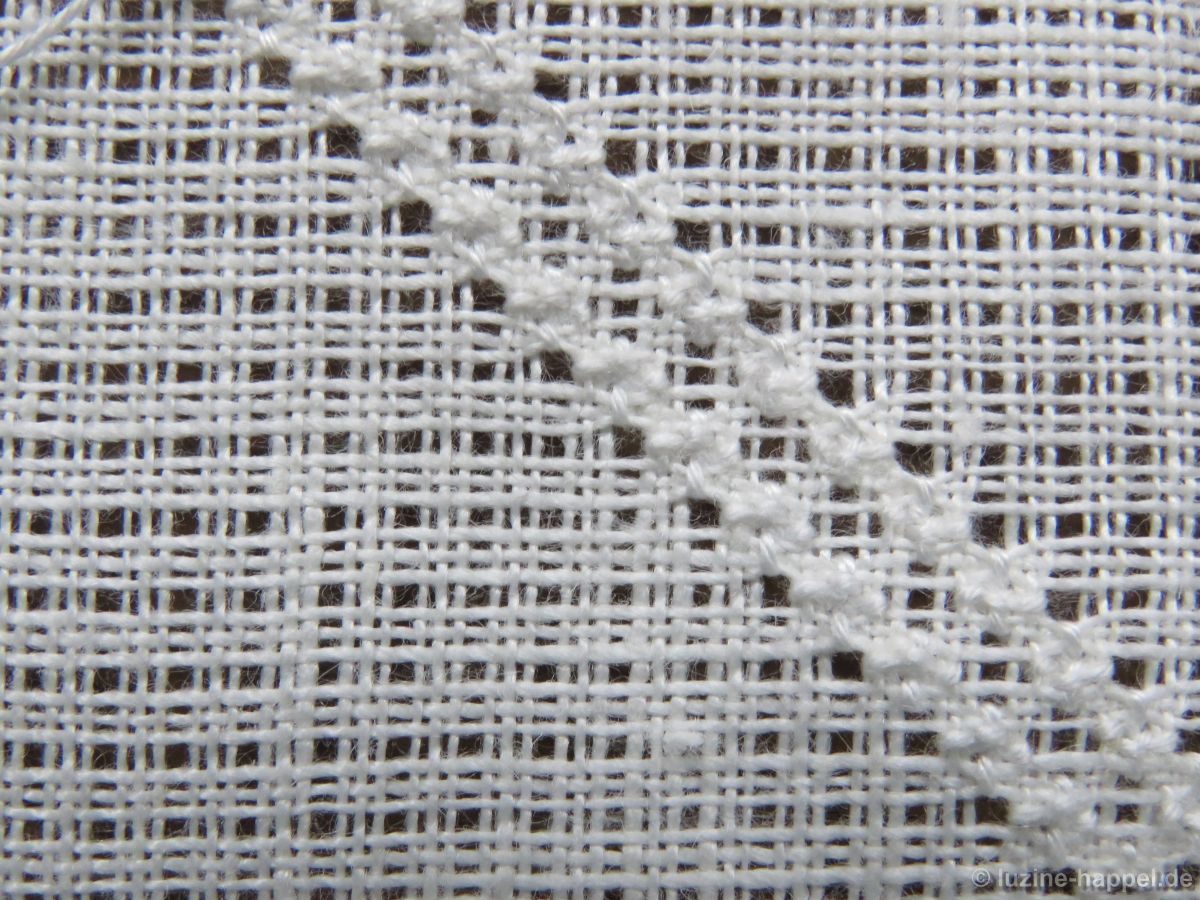
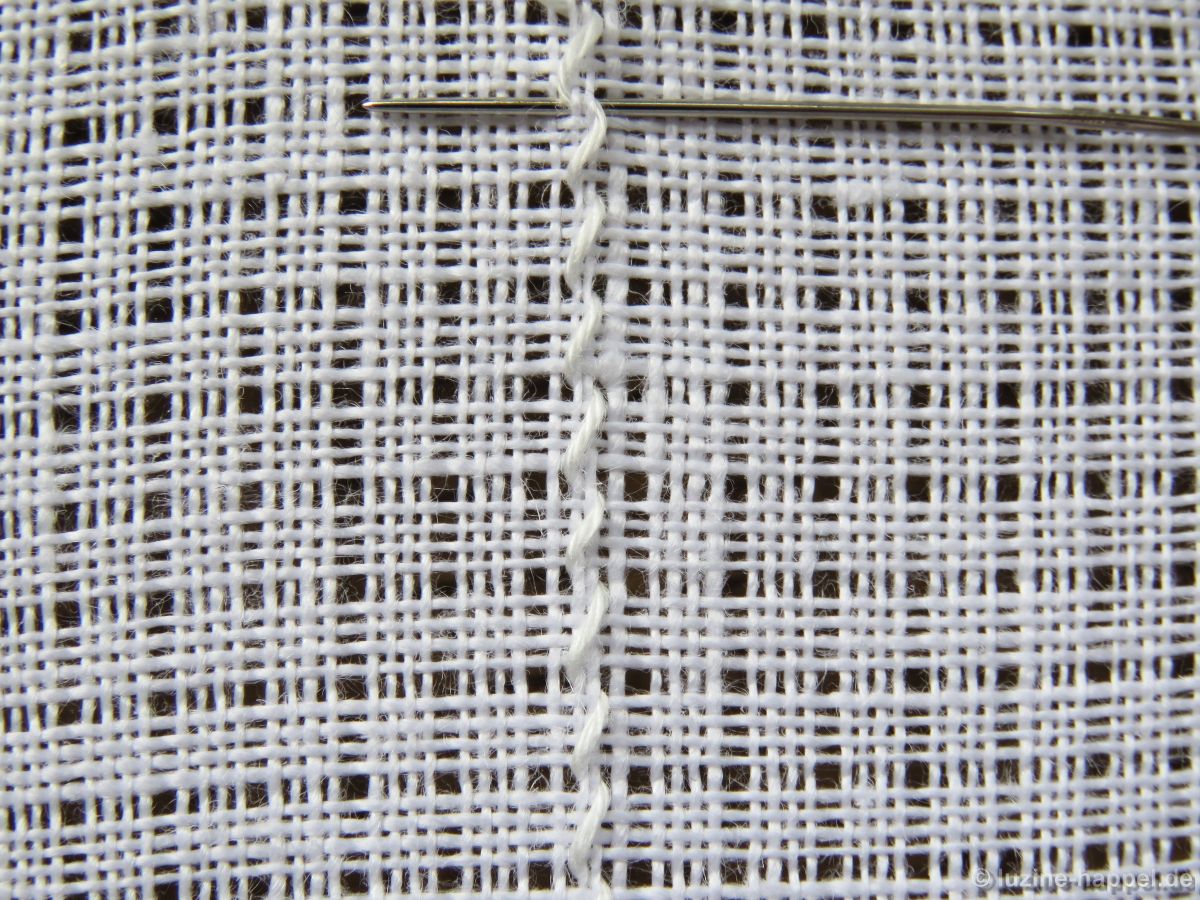
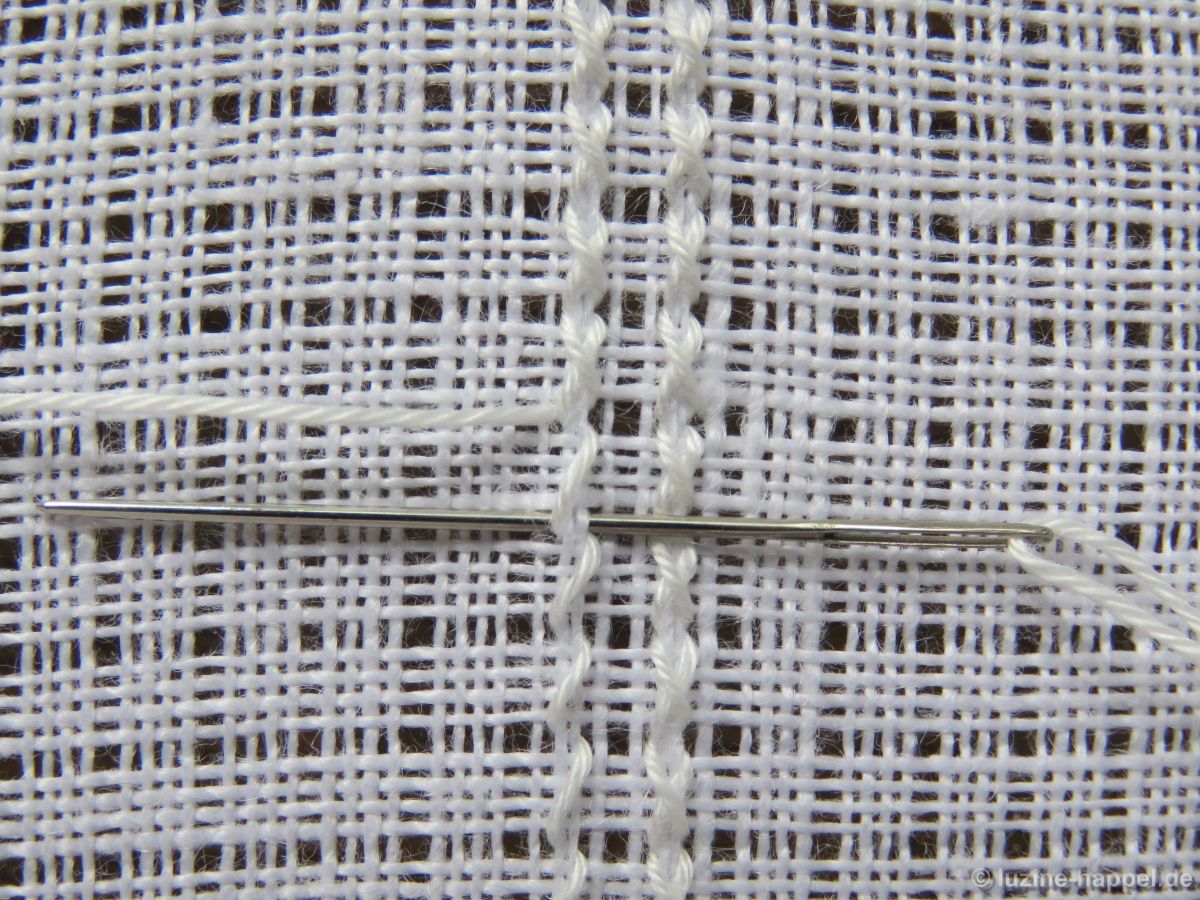
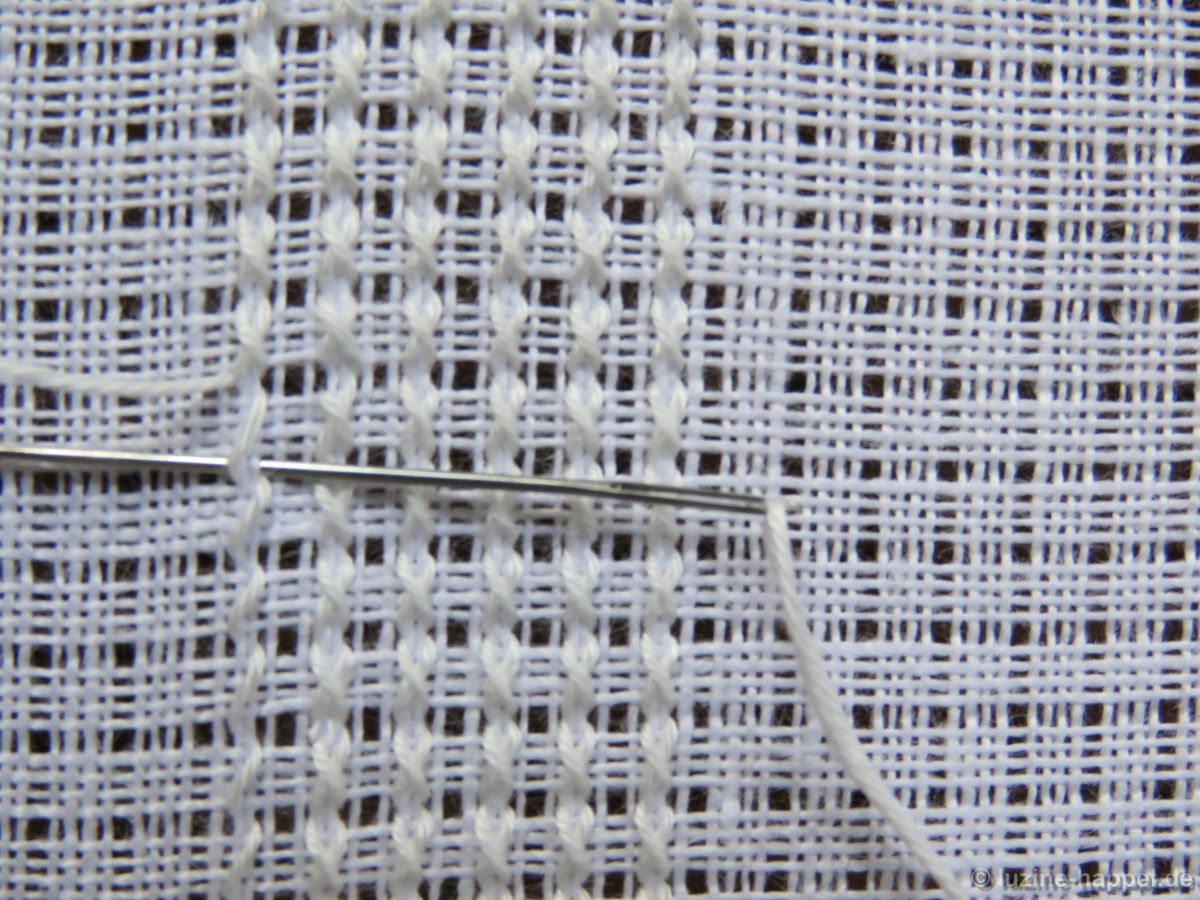
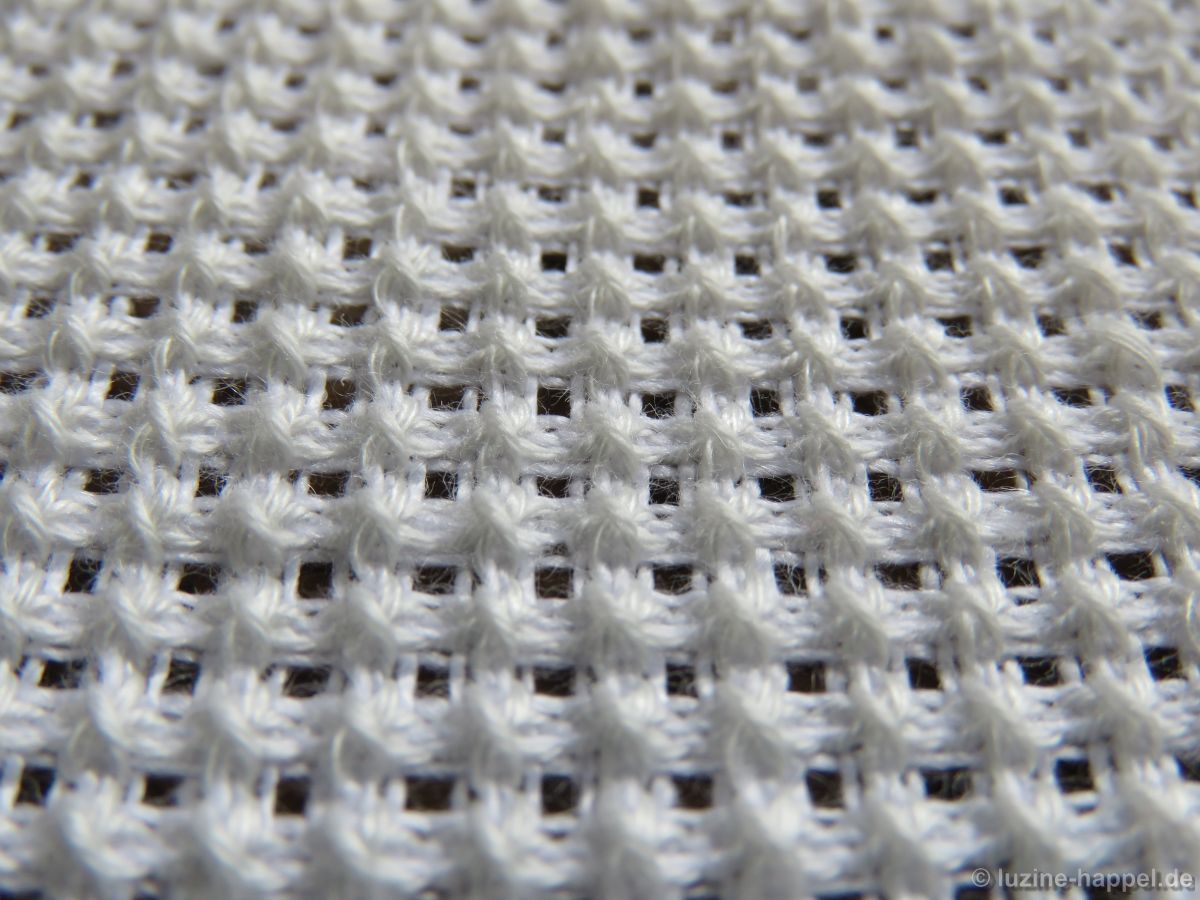
The pattern is formed from diagonal rows of alternating Straight stitches that run vertically and horizontally across the 4-thread squares of fabric,
and Rose stitches, the centers of which lie in the free squares and which pick up 2 fabric threads on each side.
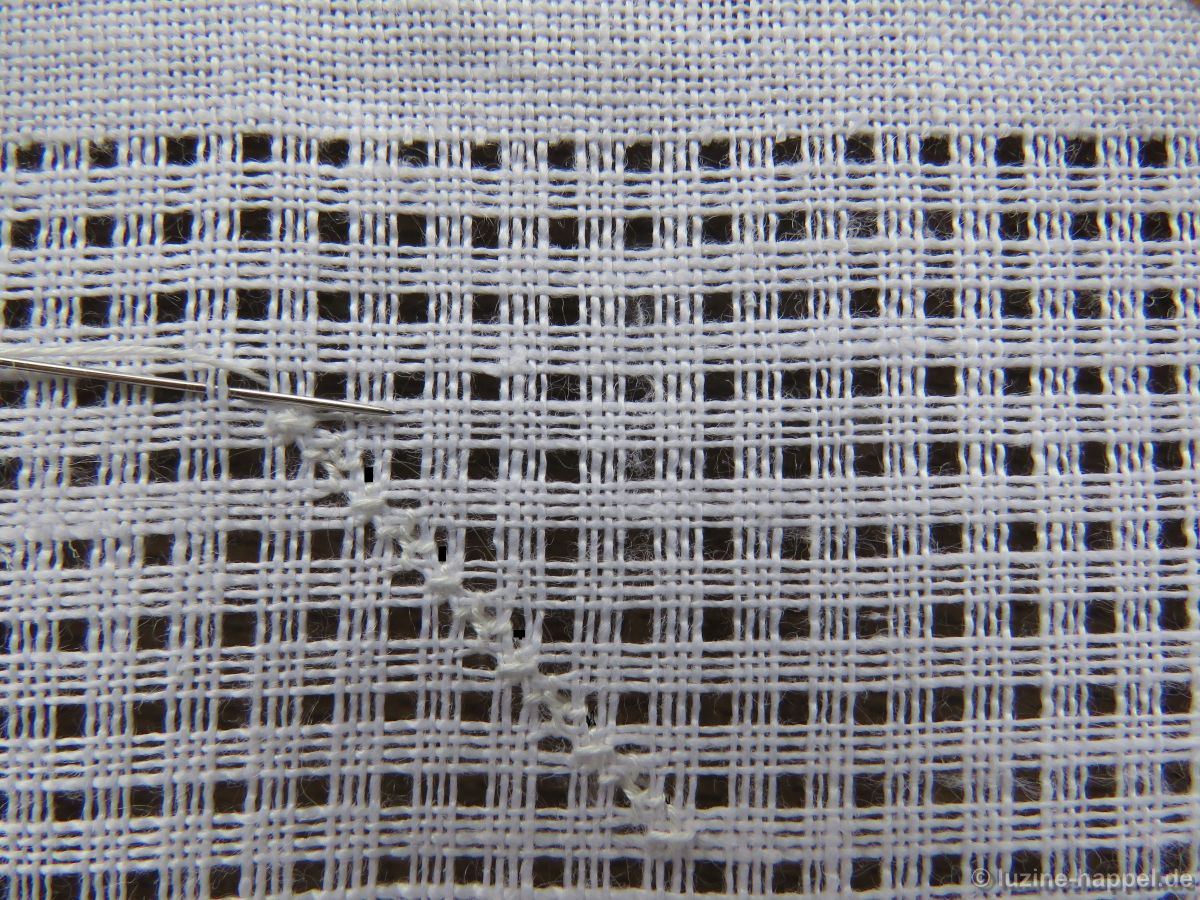
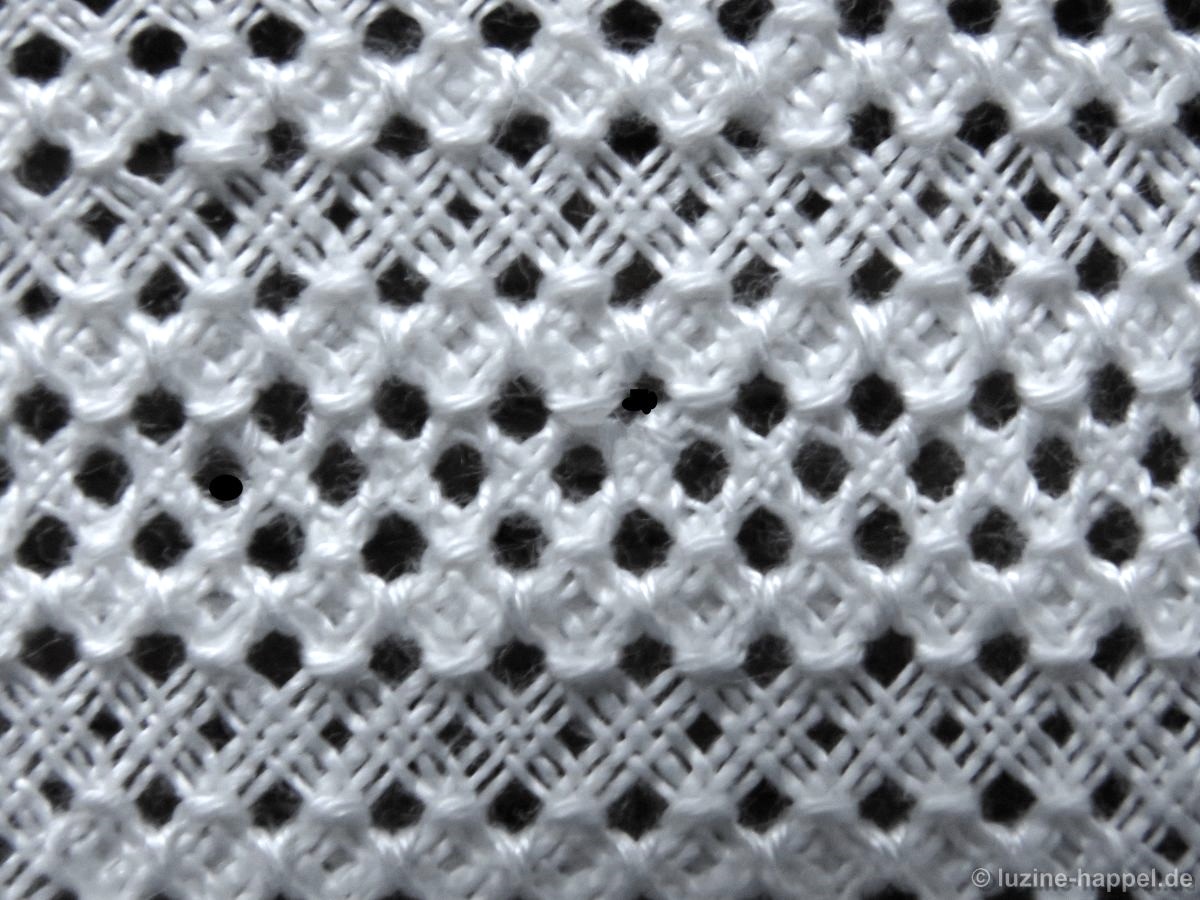
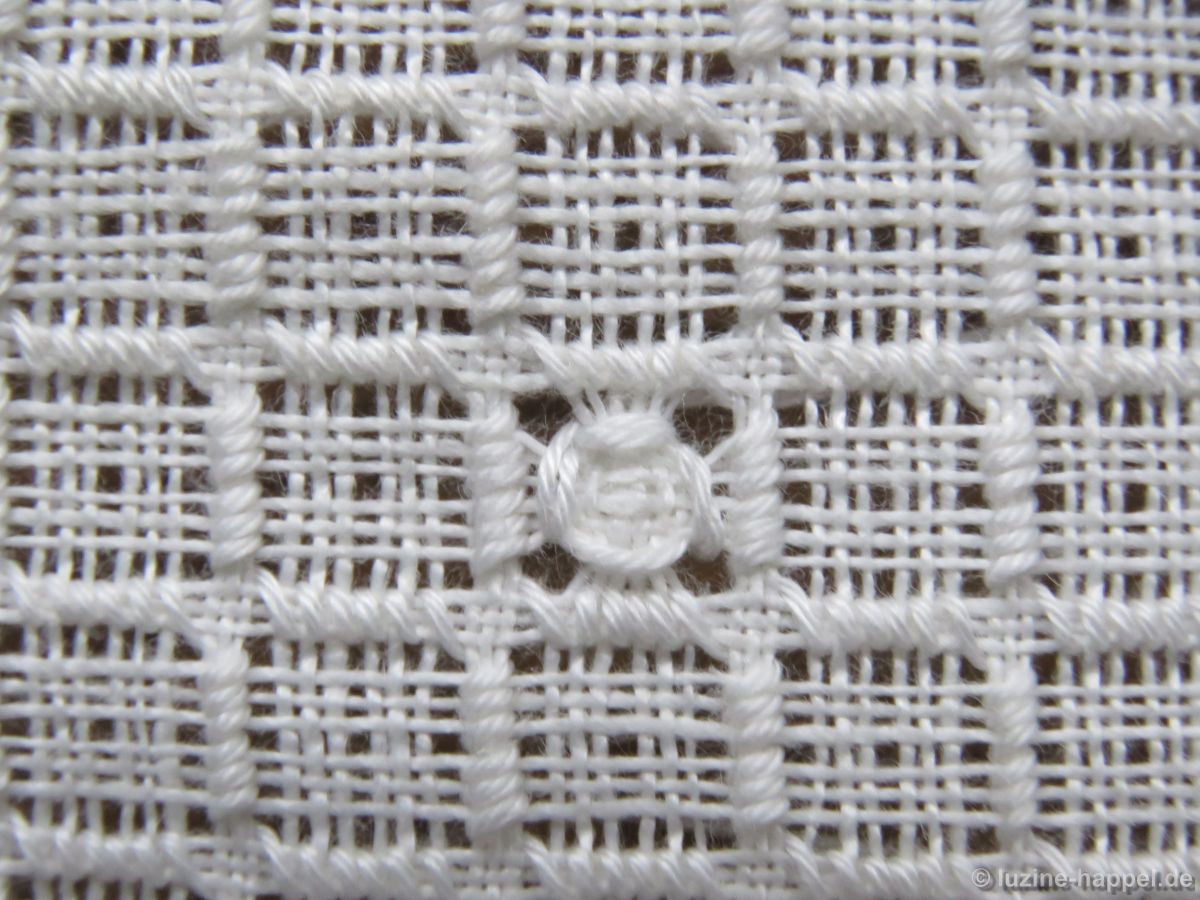
This changes the position of the fabric threads. Small oval gaps are created that make up the pattern at the end.
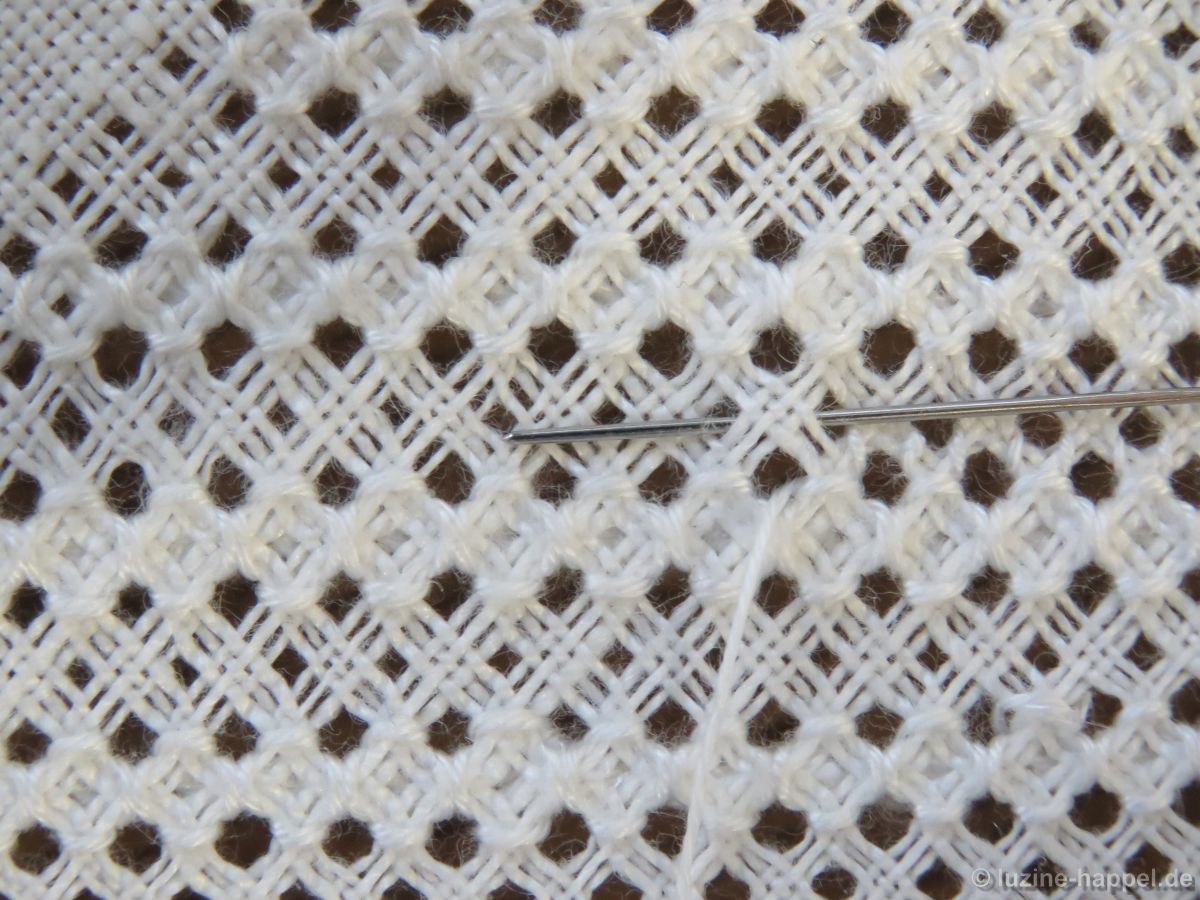
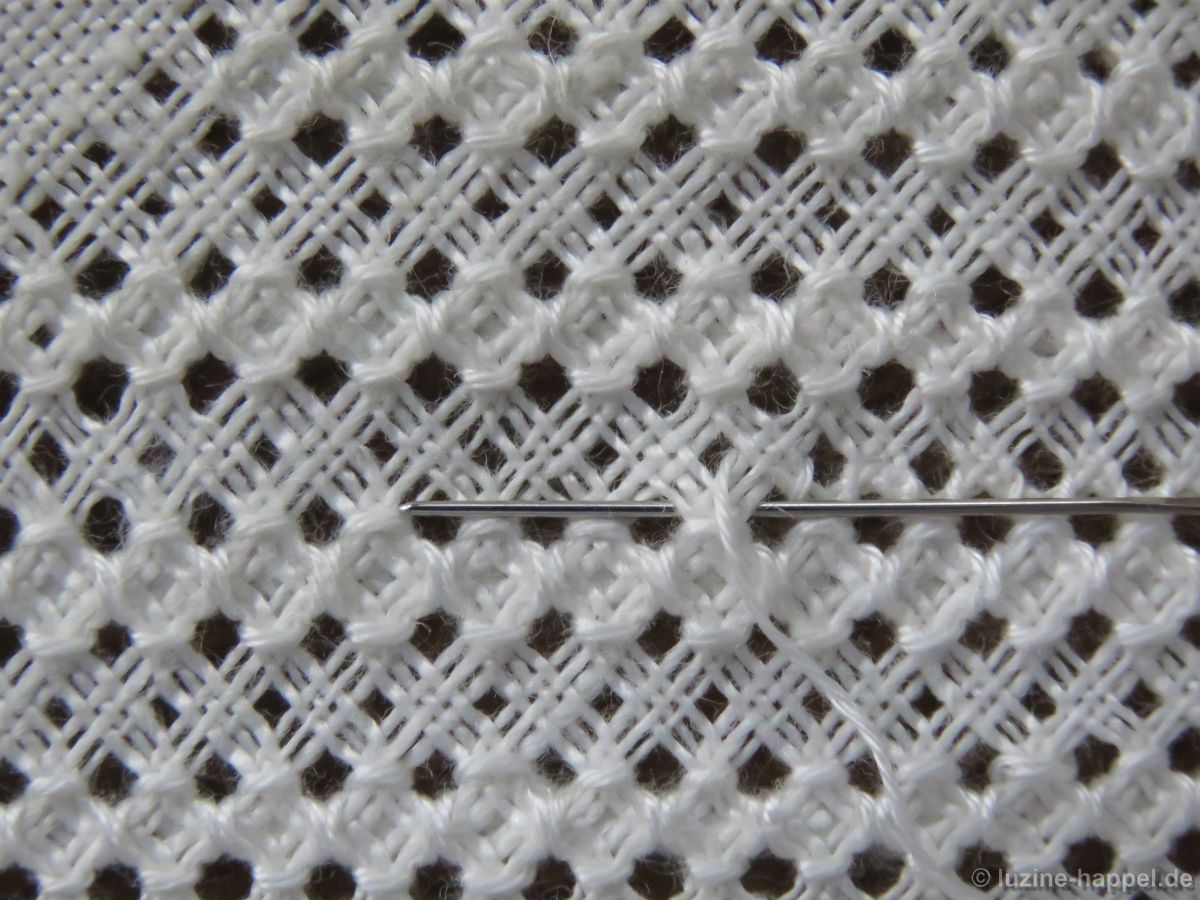
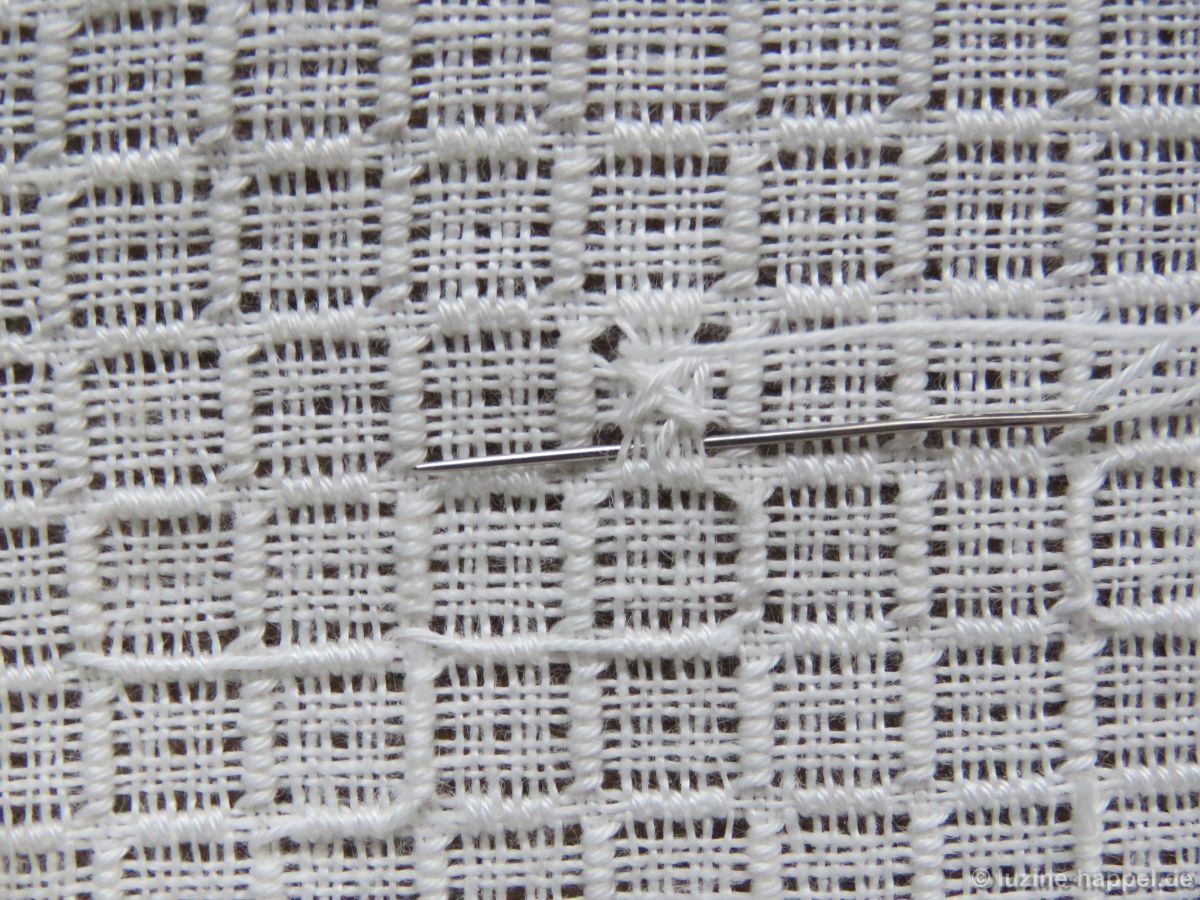
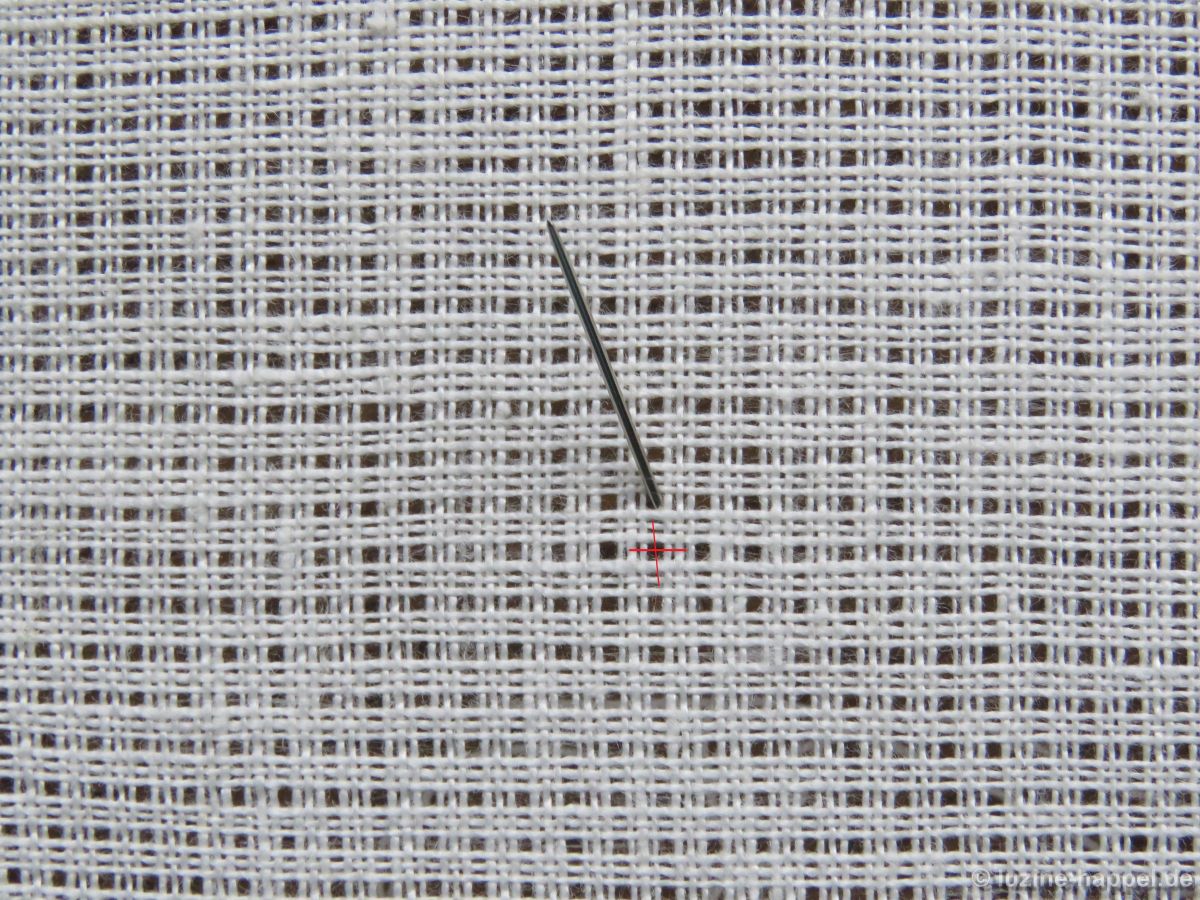
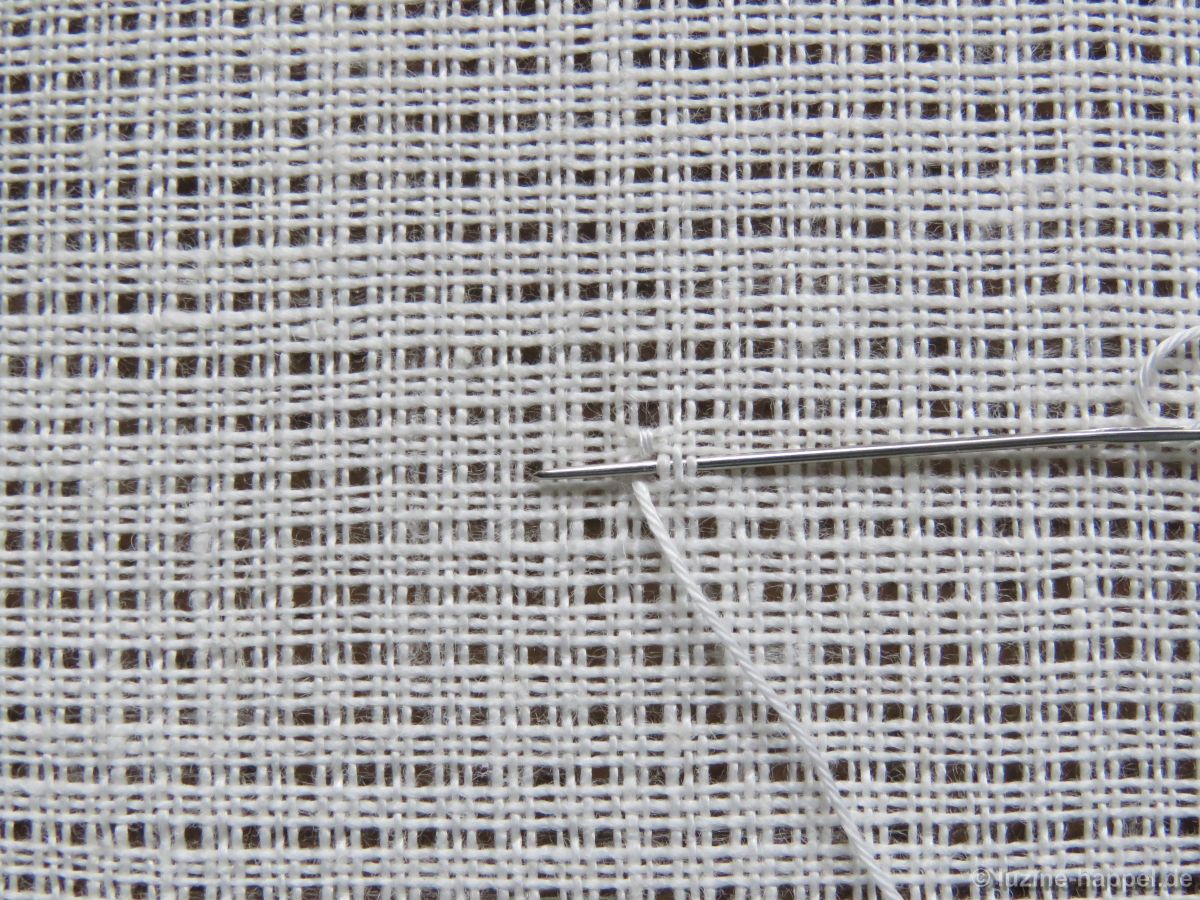
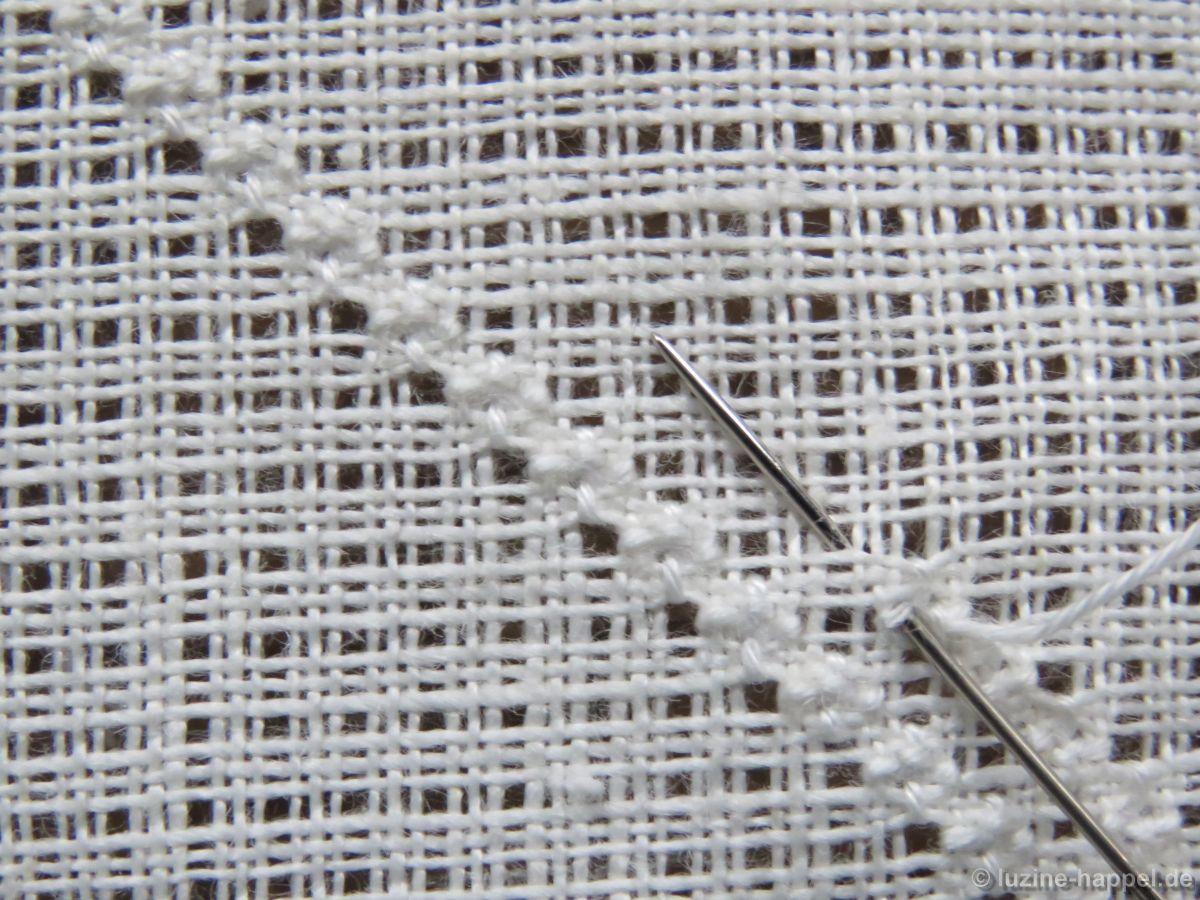
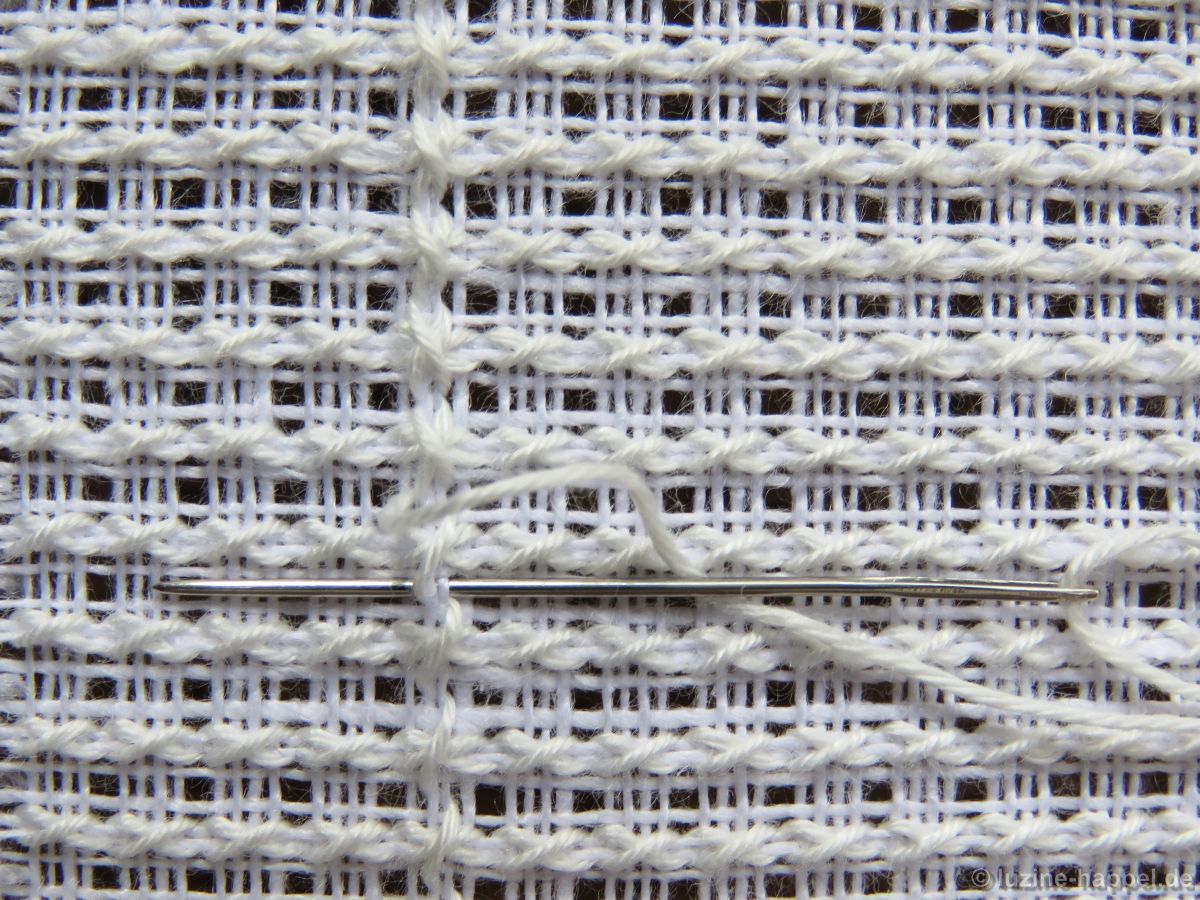
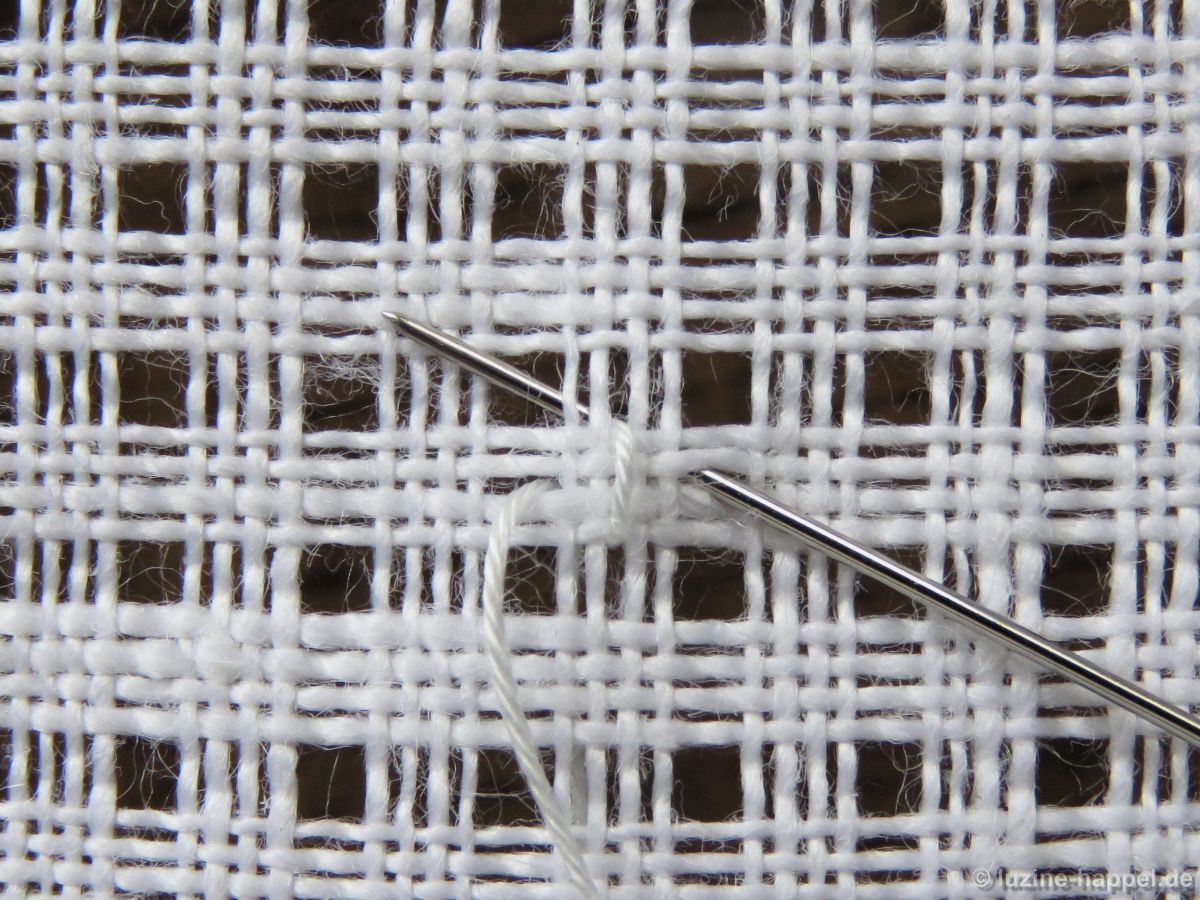
Bring needle up in the middle of the upper edge of a square of 4 fabric threads,
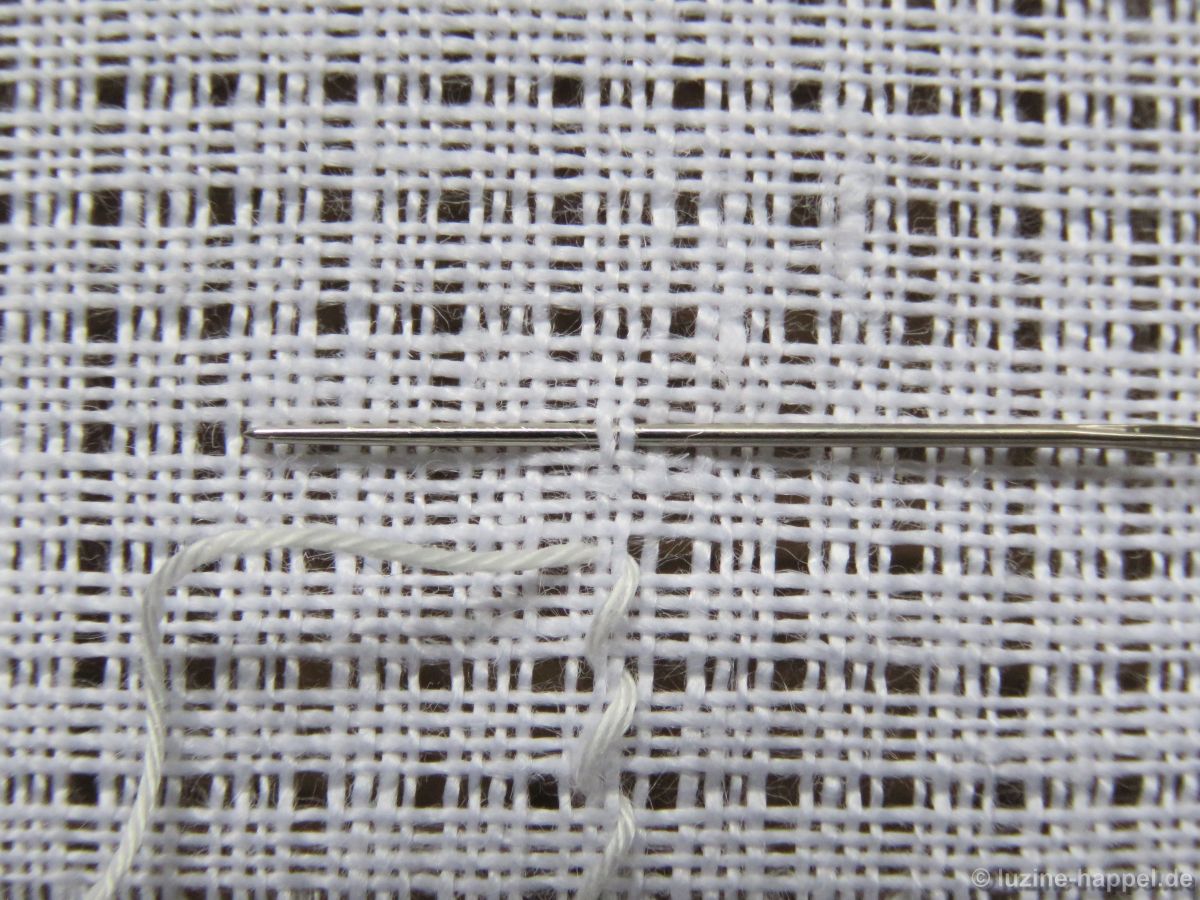
*move the needle vertically downwards, insert there and bring needle up two fabric threads diagonally to the top left.
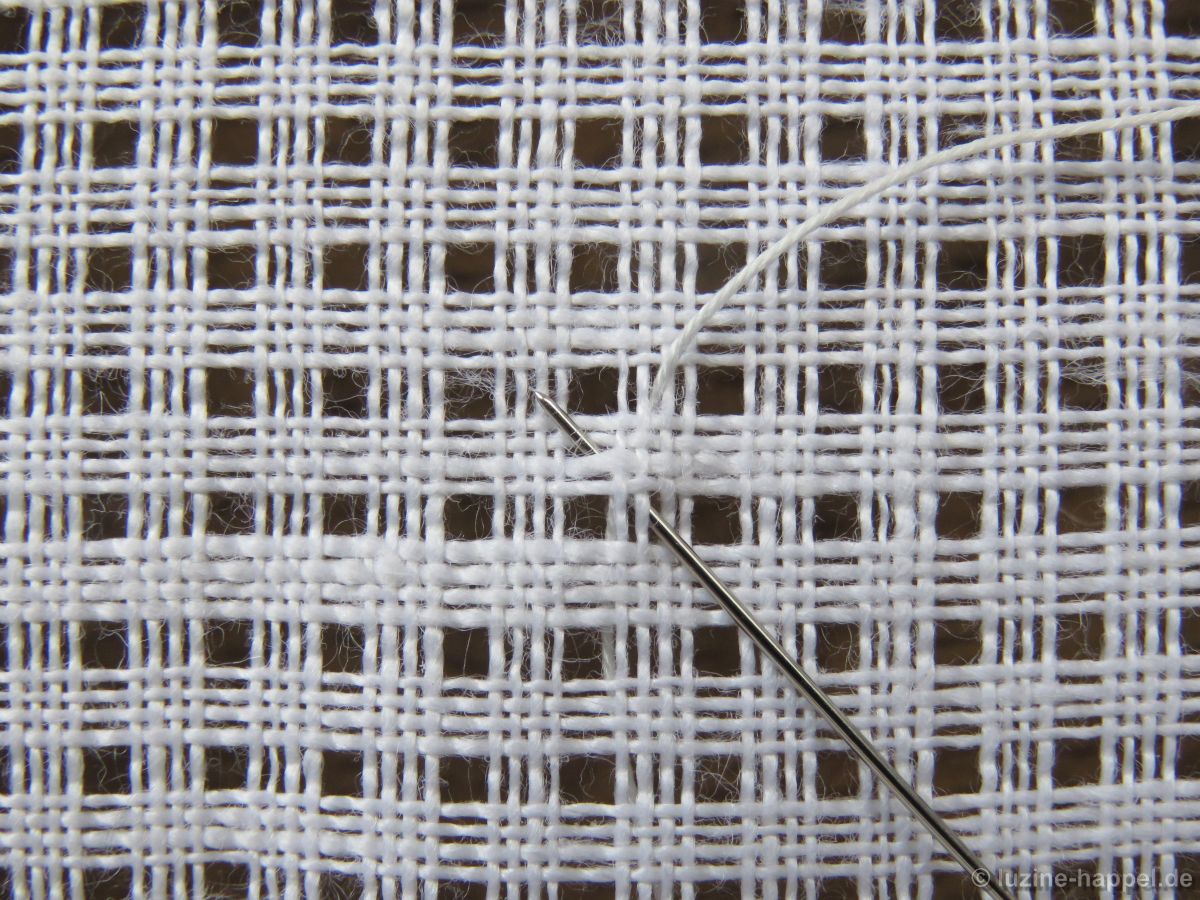
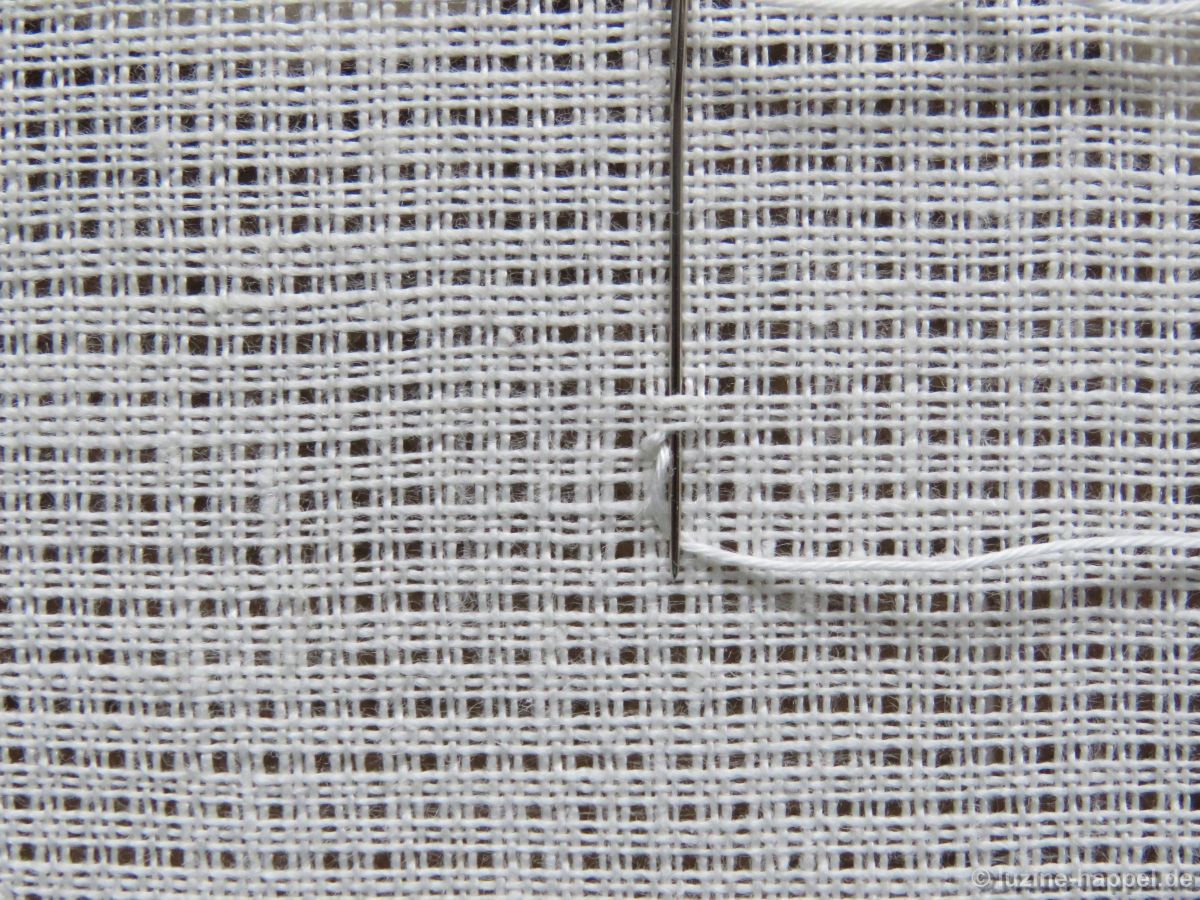
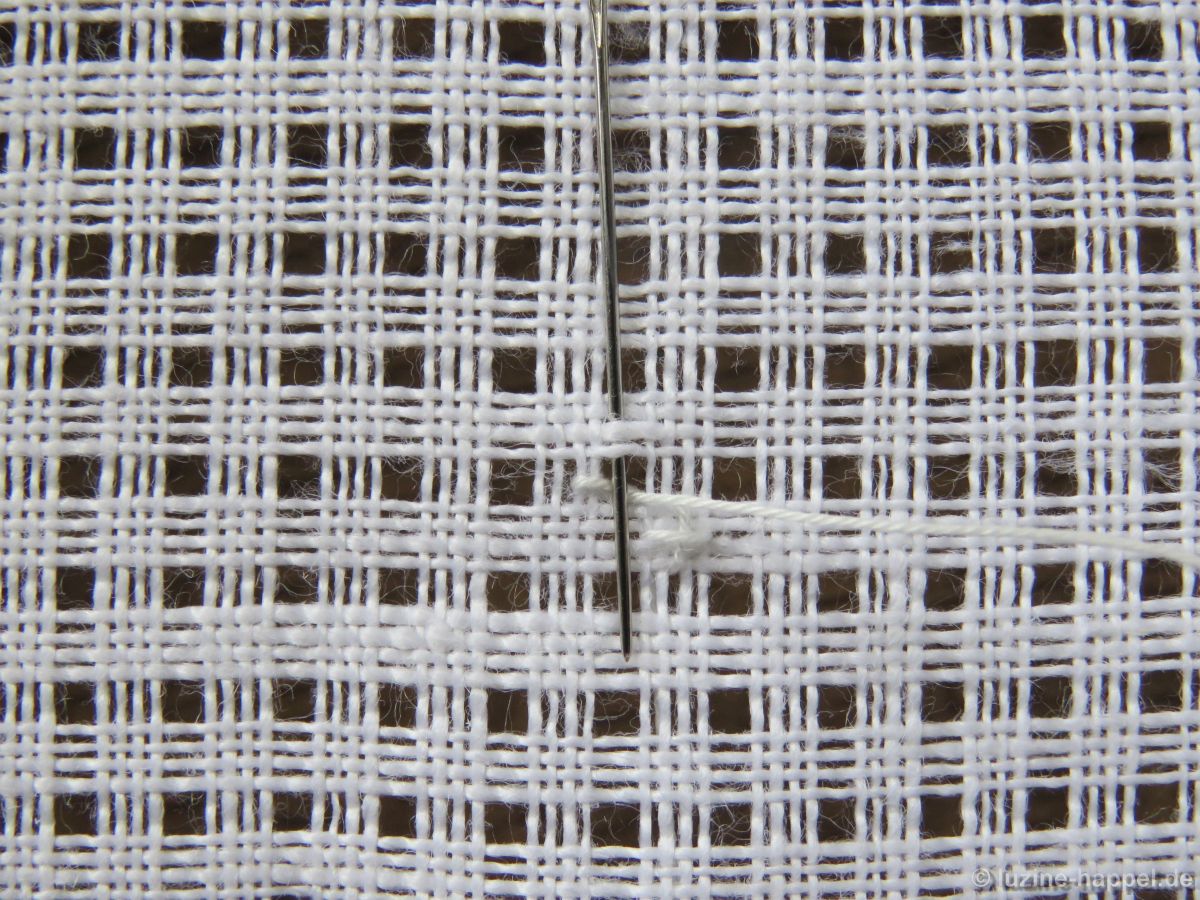
Move the needle horizontally to the right, insert it and bring it up in the free square on the left above the square of 4 fabric threads.

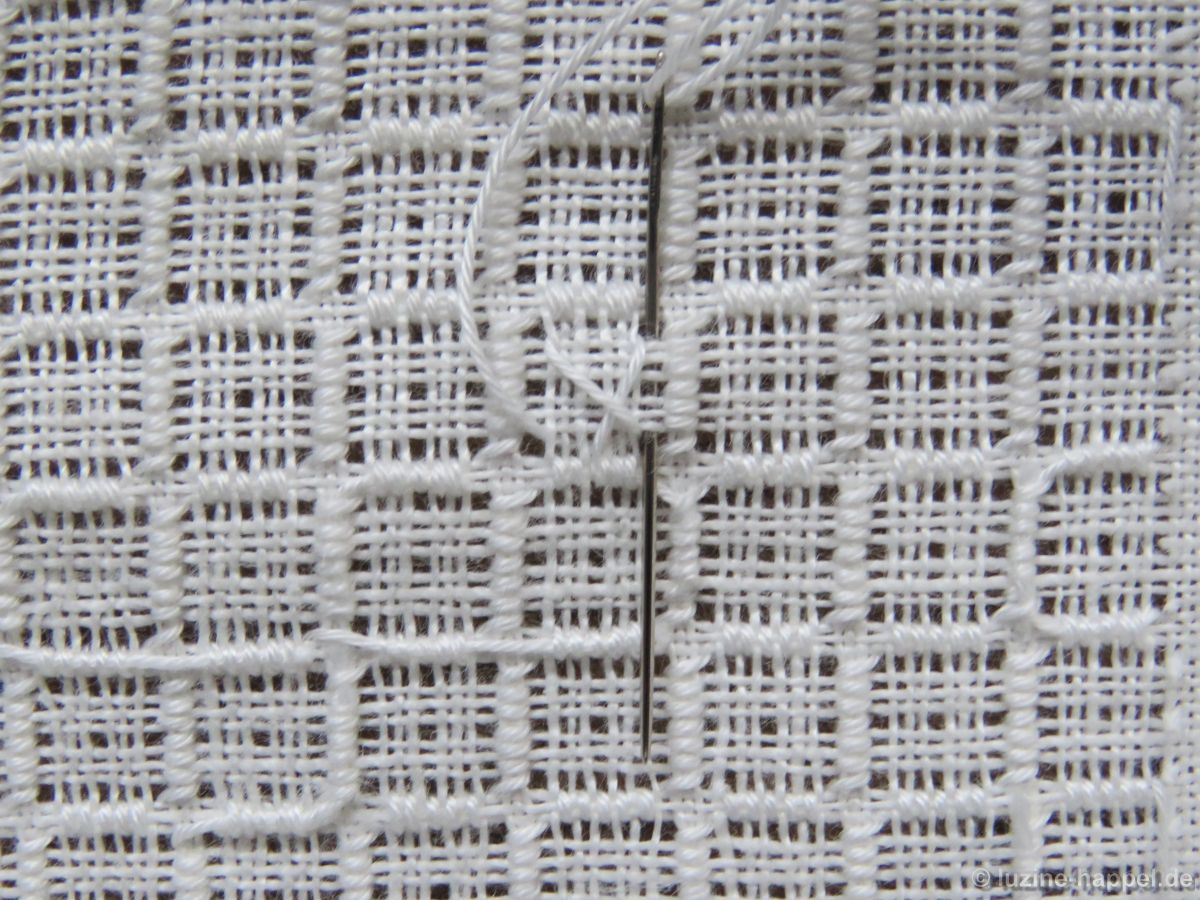
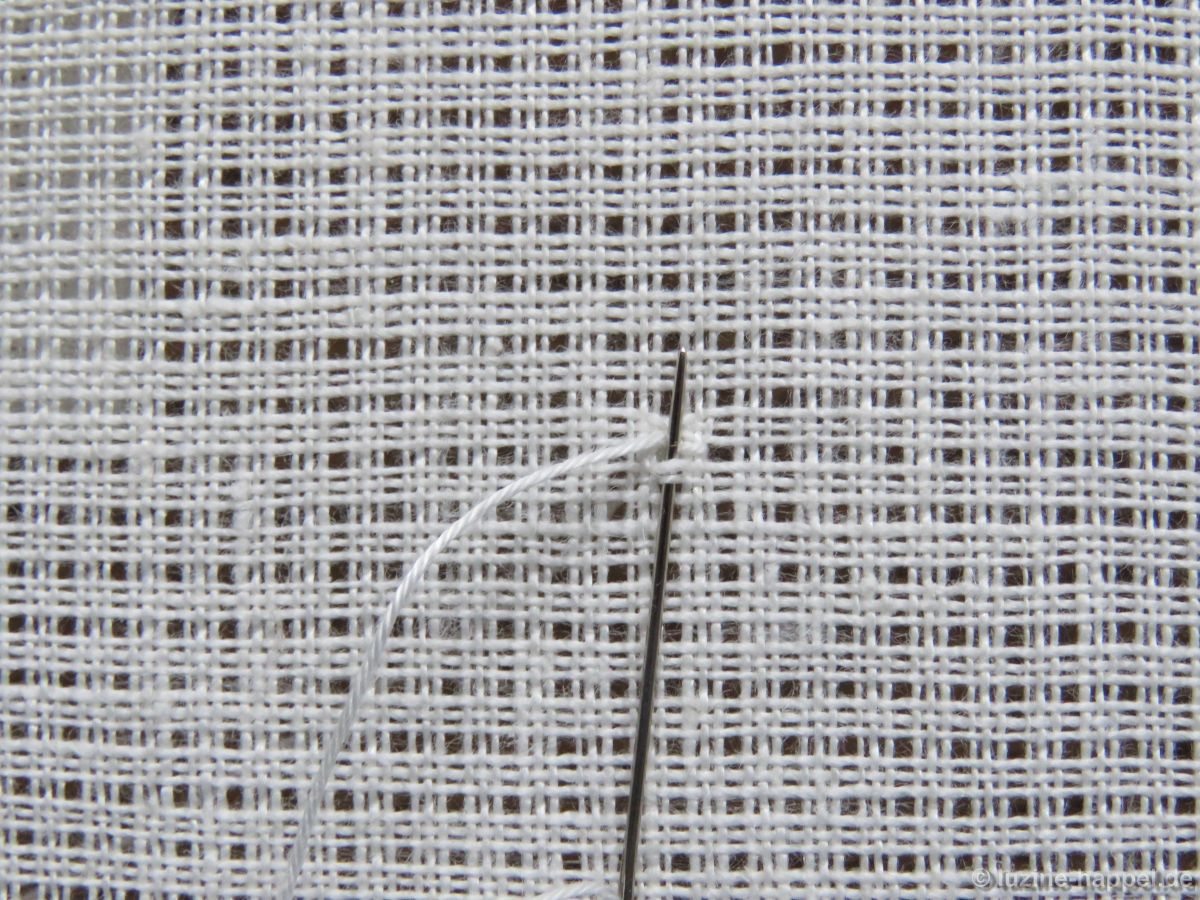
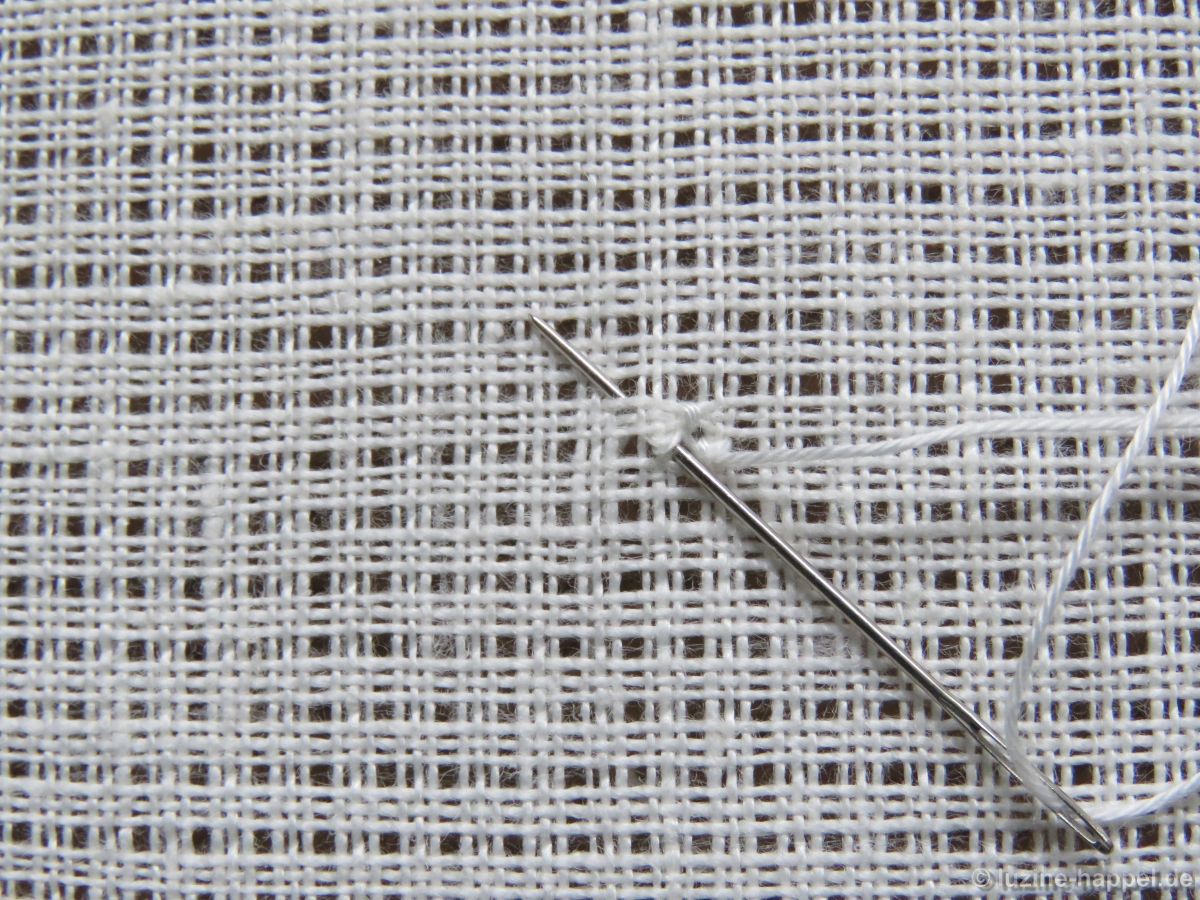
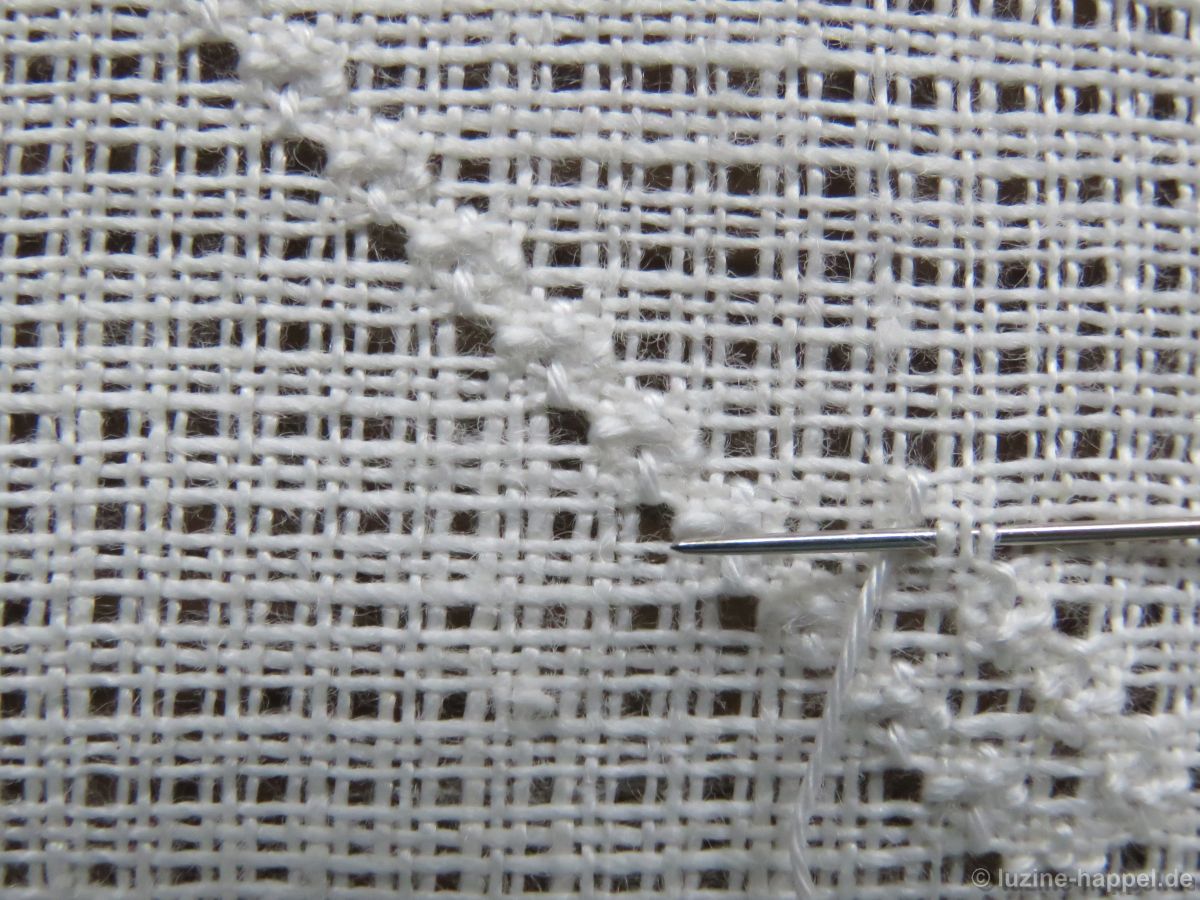
This is the center of the first Rose stitch, which started with a stitch to the left
and continues counterclockwise.
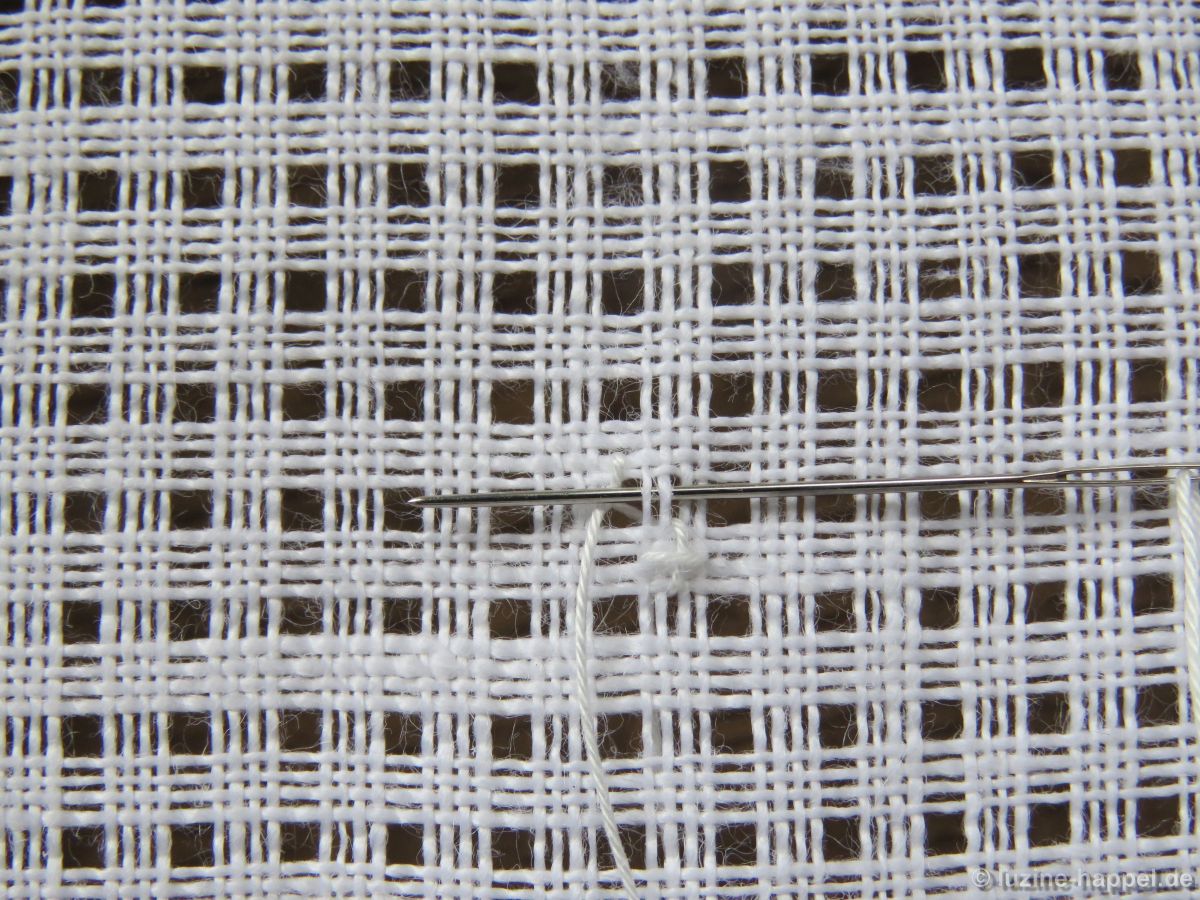
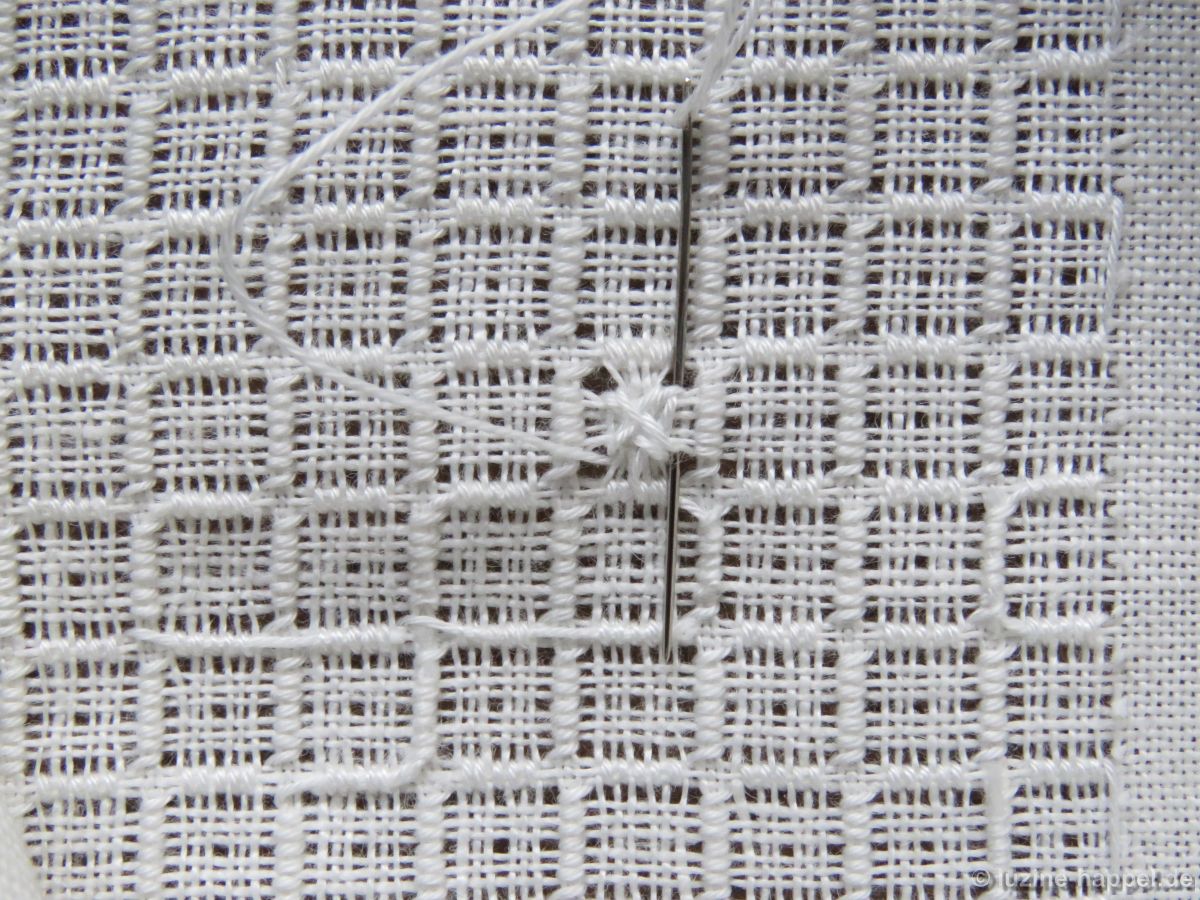
With the fourth stitch – unfortunately not visible here in the picture – you also have to pick up the sliding thread on the back so that the newly created holes remain open and clearly defined.
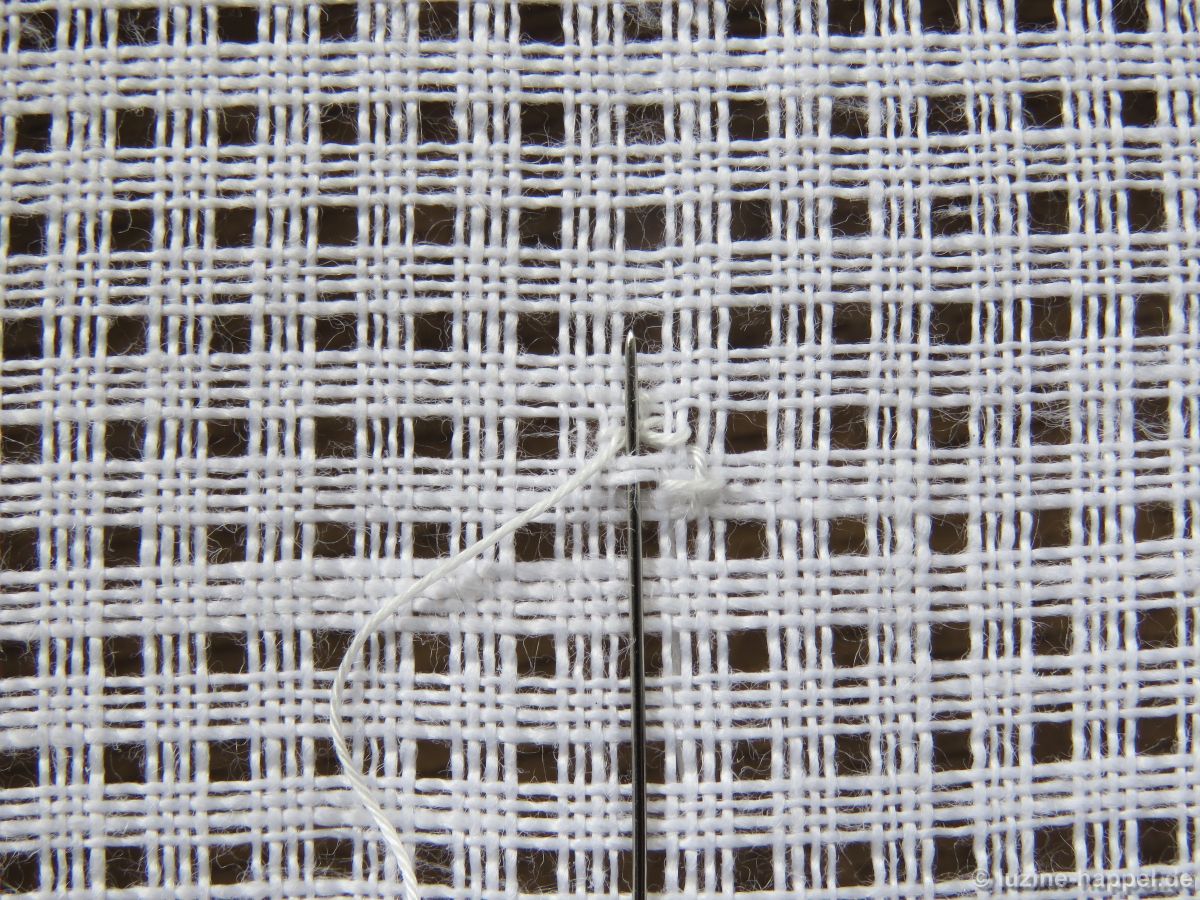
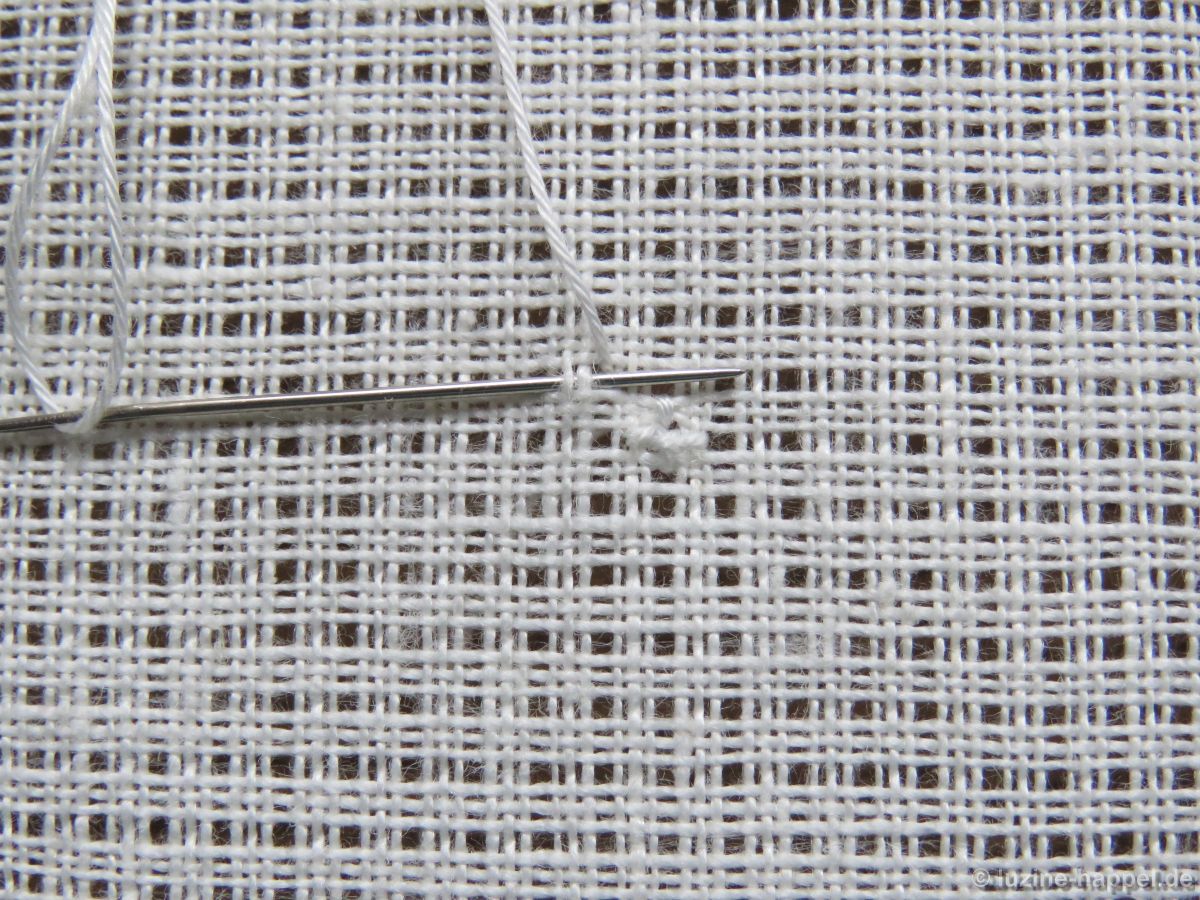
From the end of the Rose stitch, move the needle diagonally to the left to the middle of the upper edge of the next 4-thread square.*

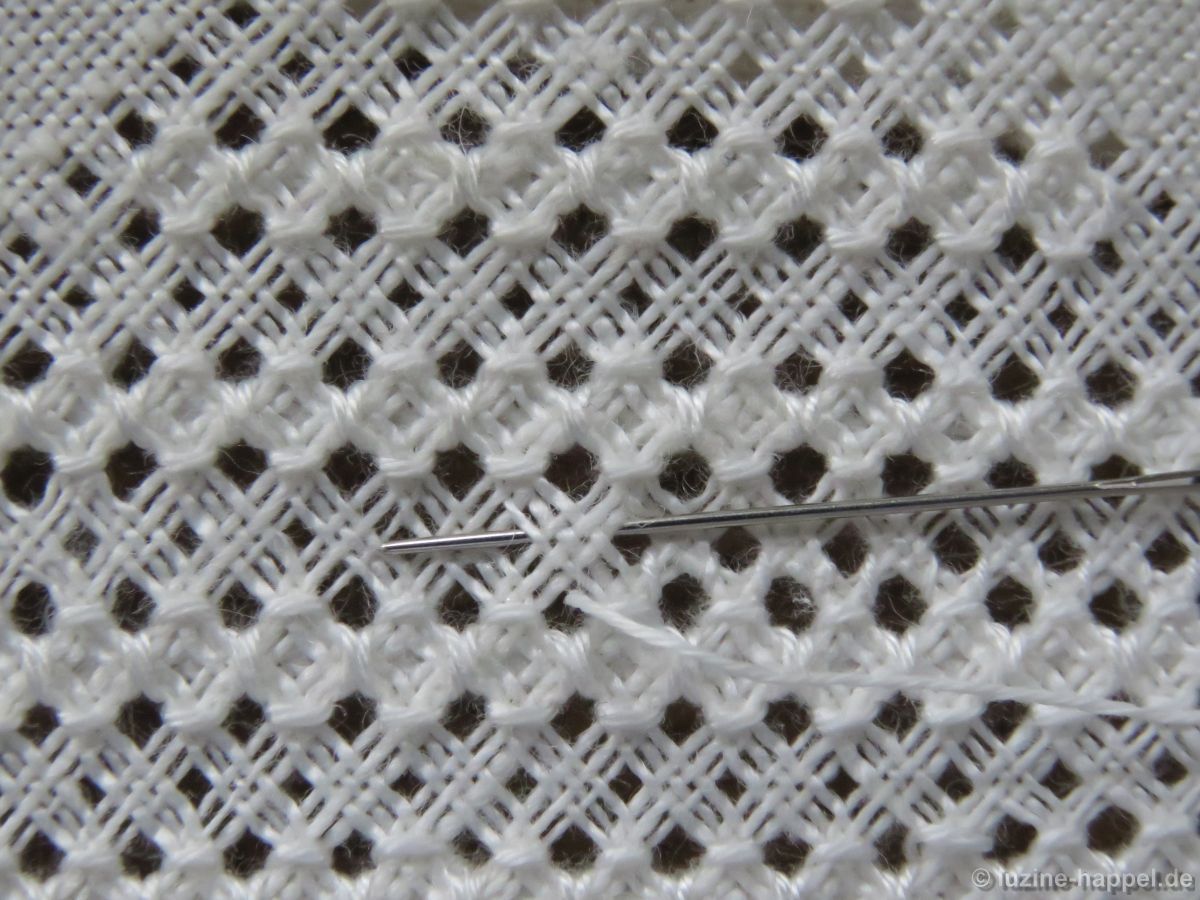
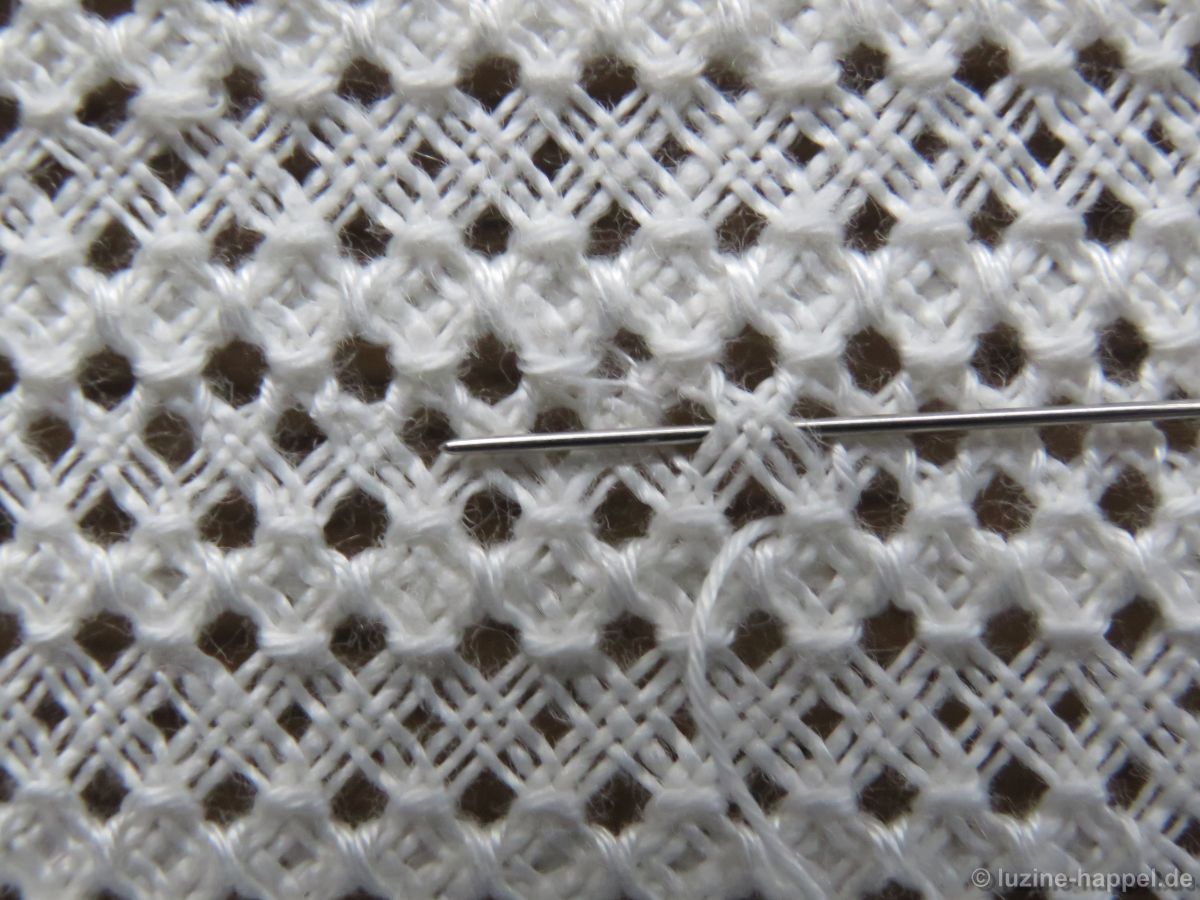
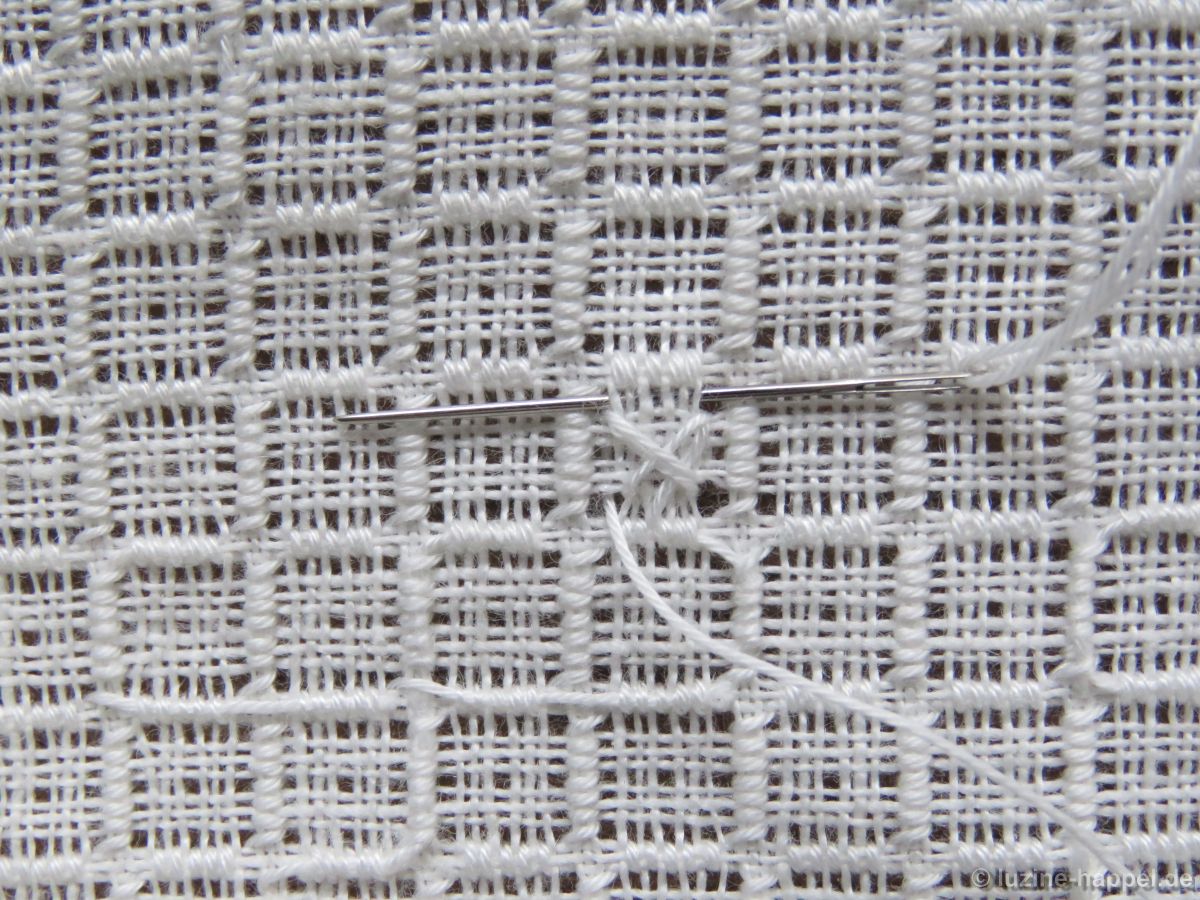
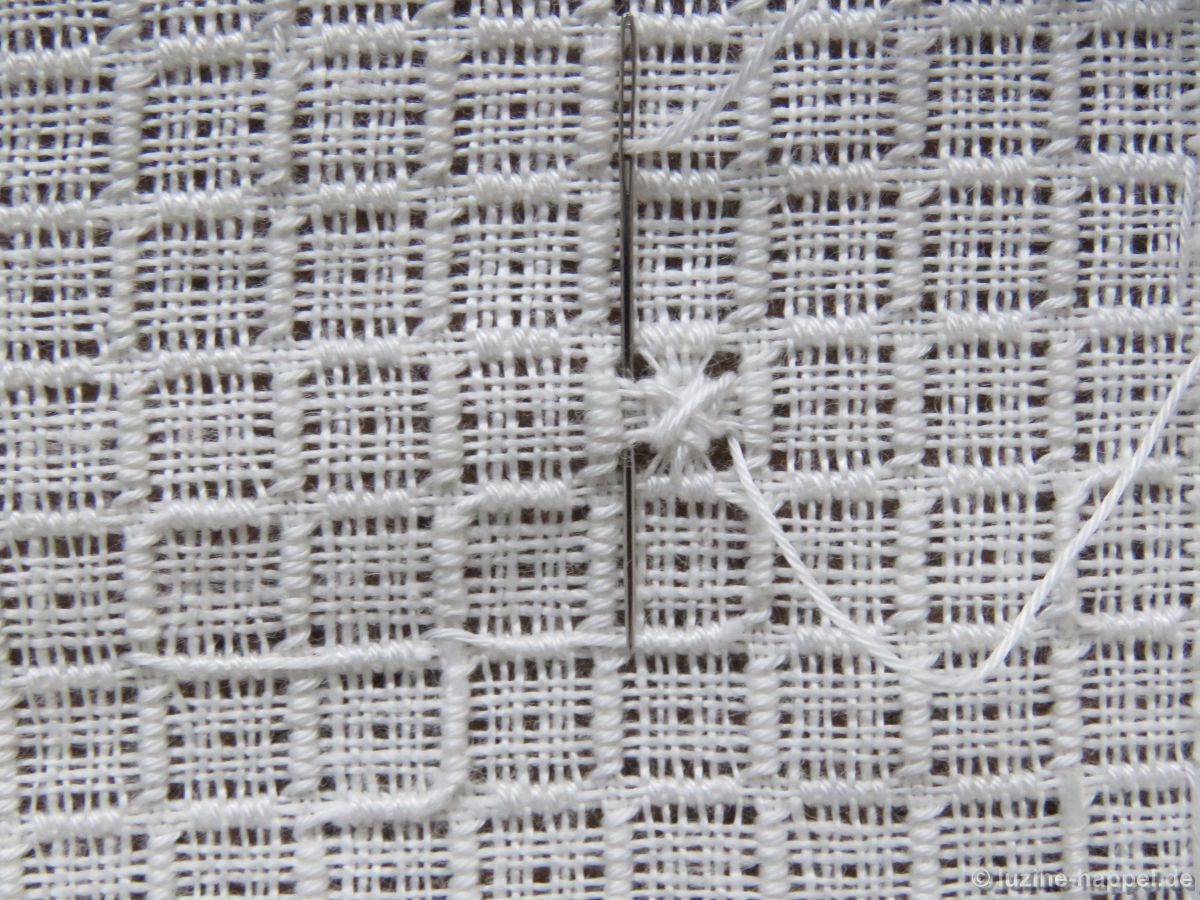
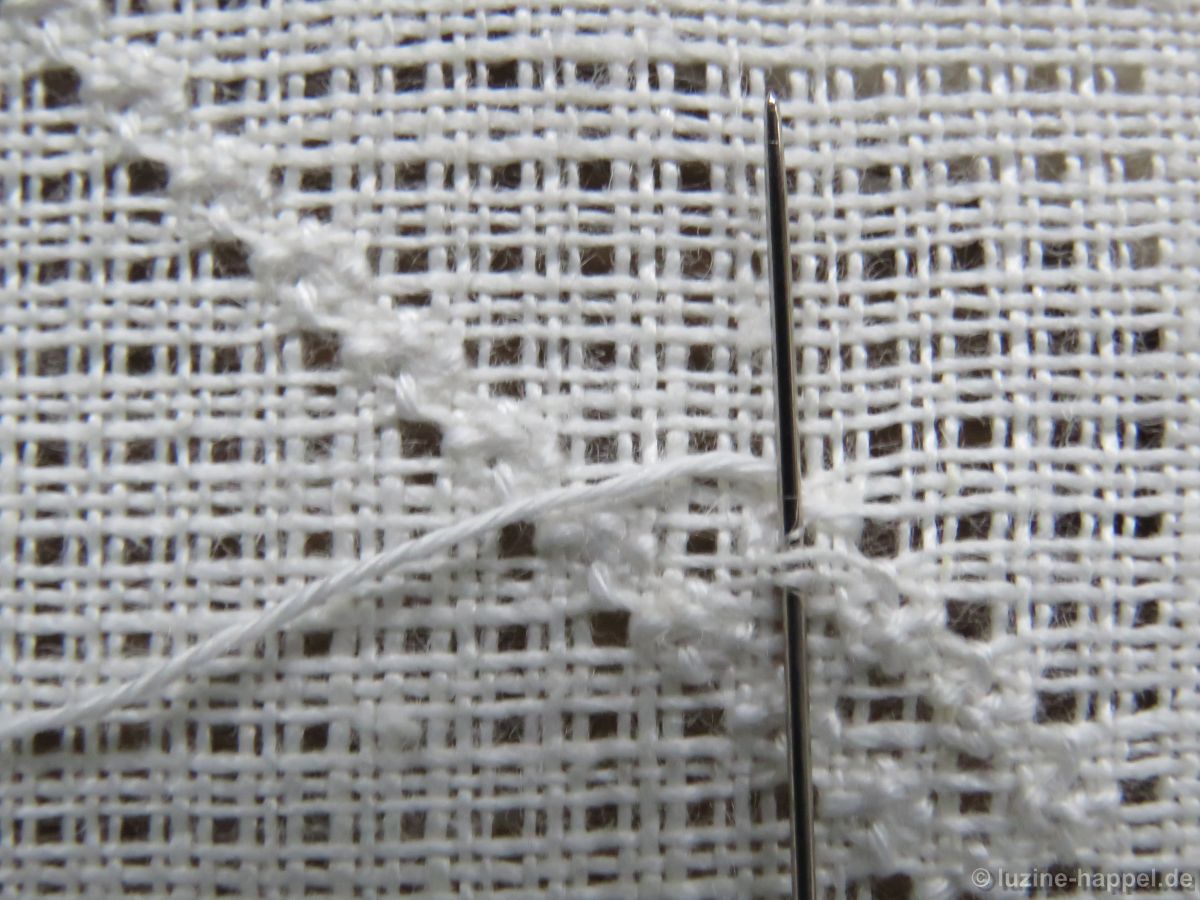
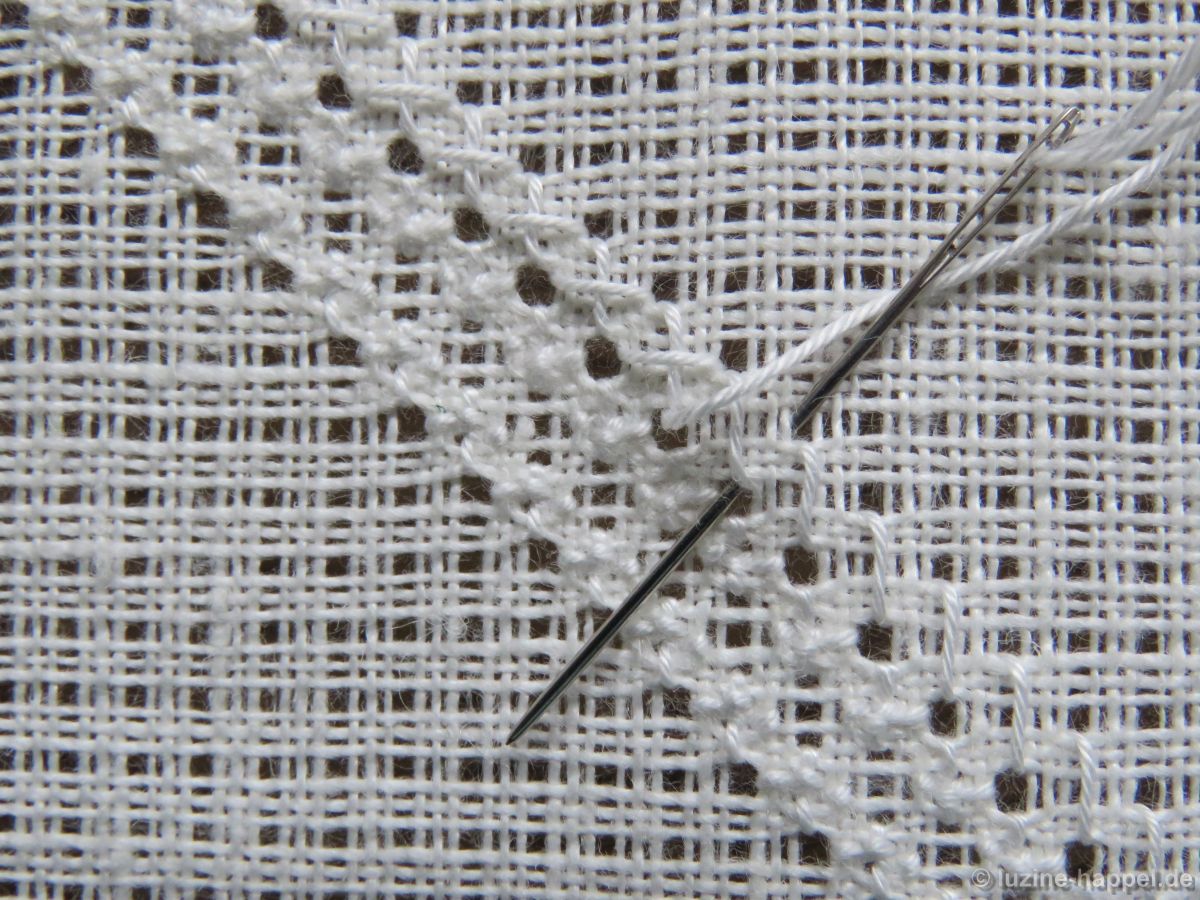
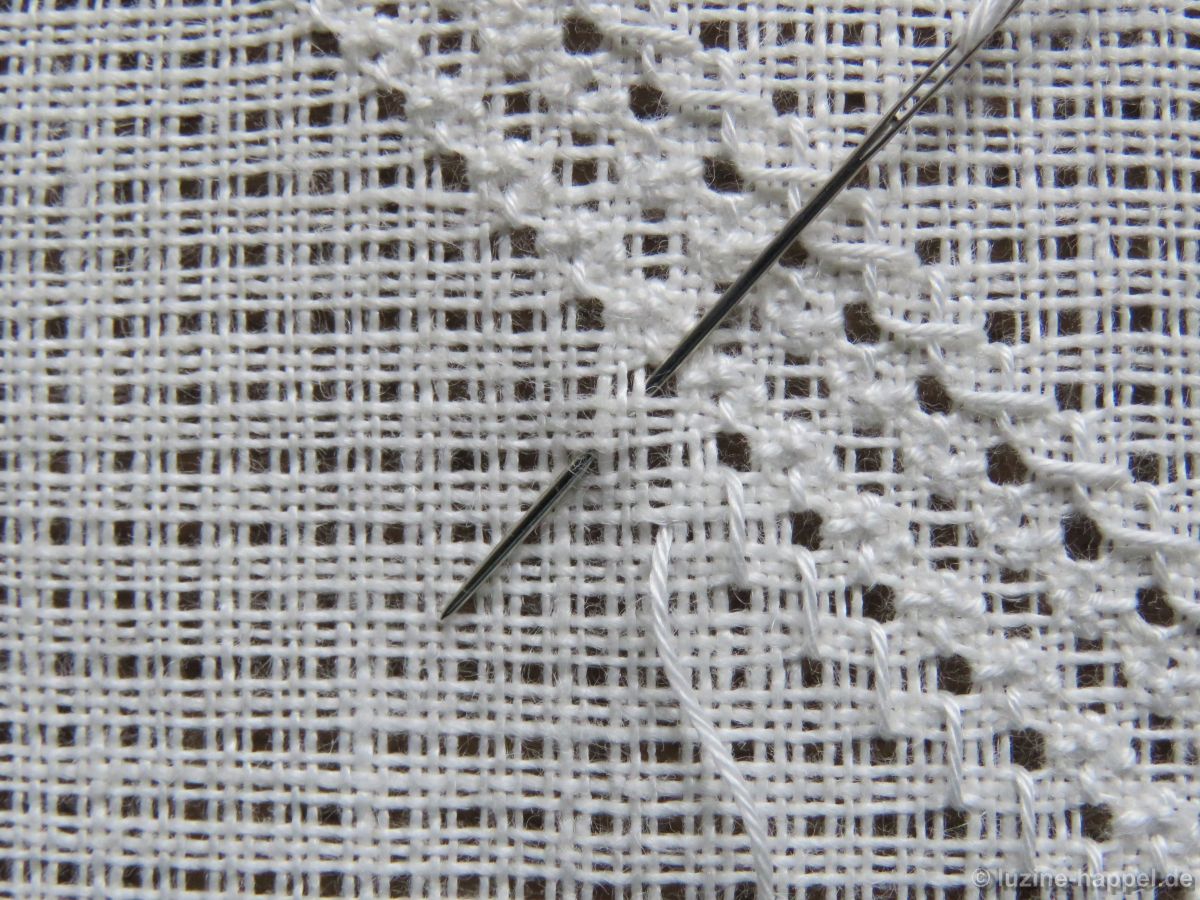
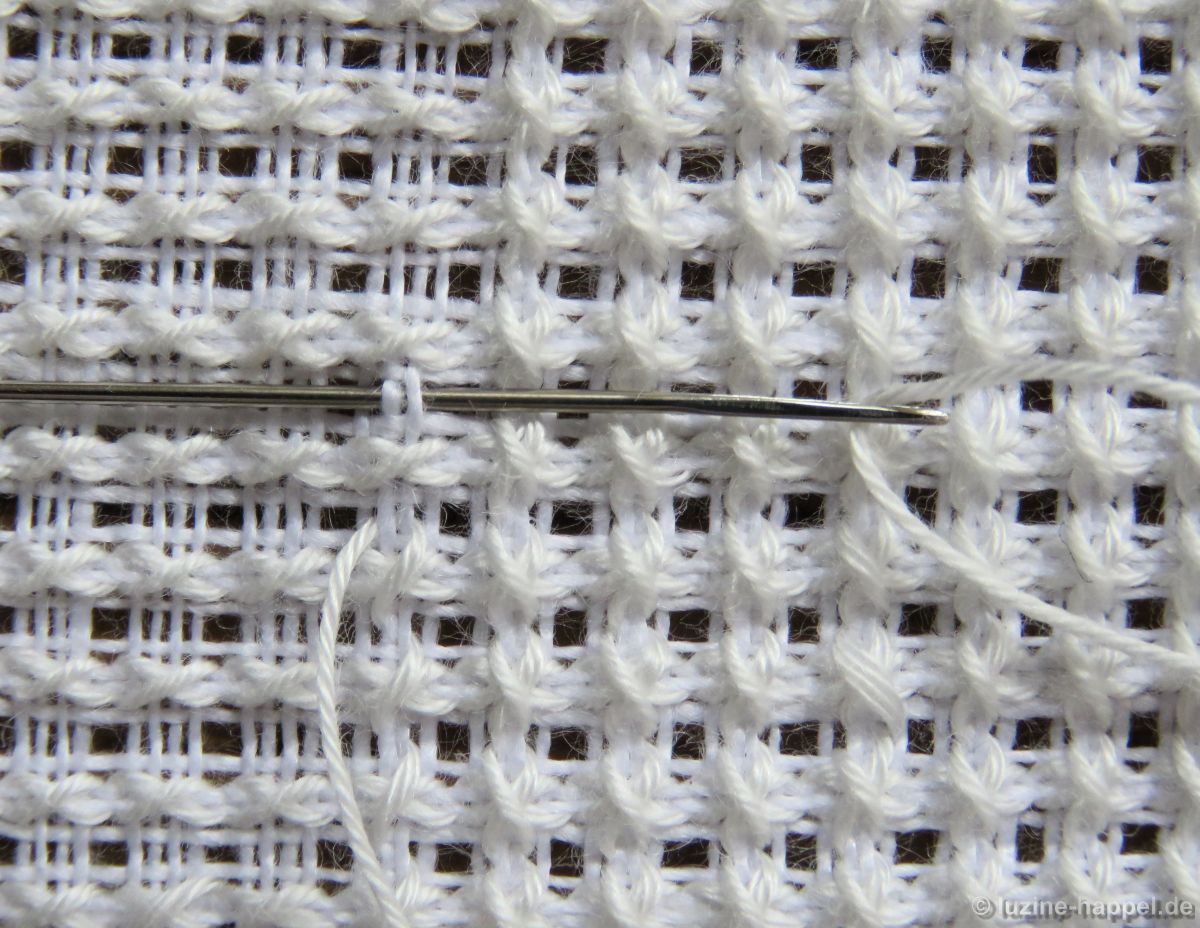
Always repeat the steps (*)
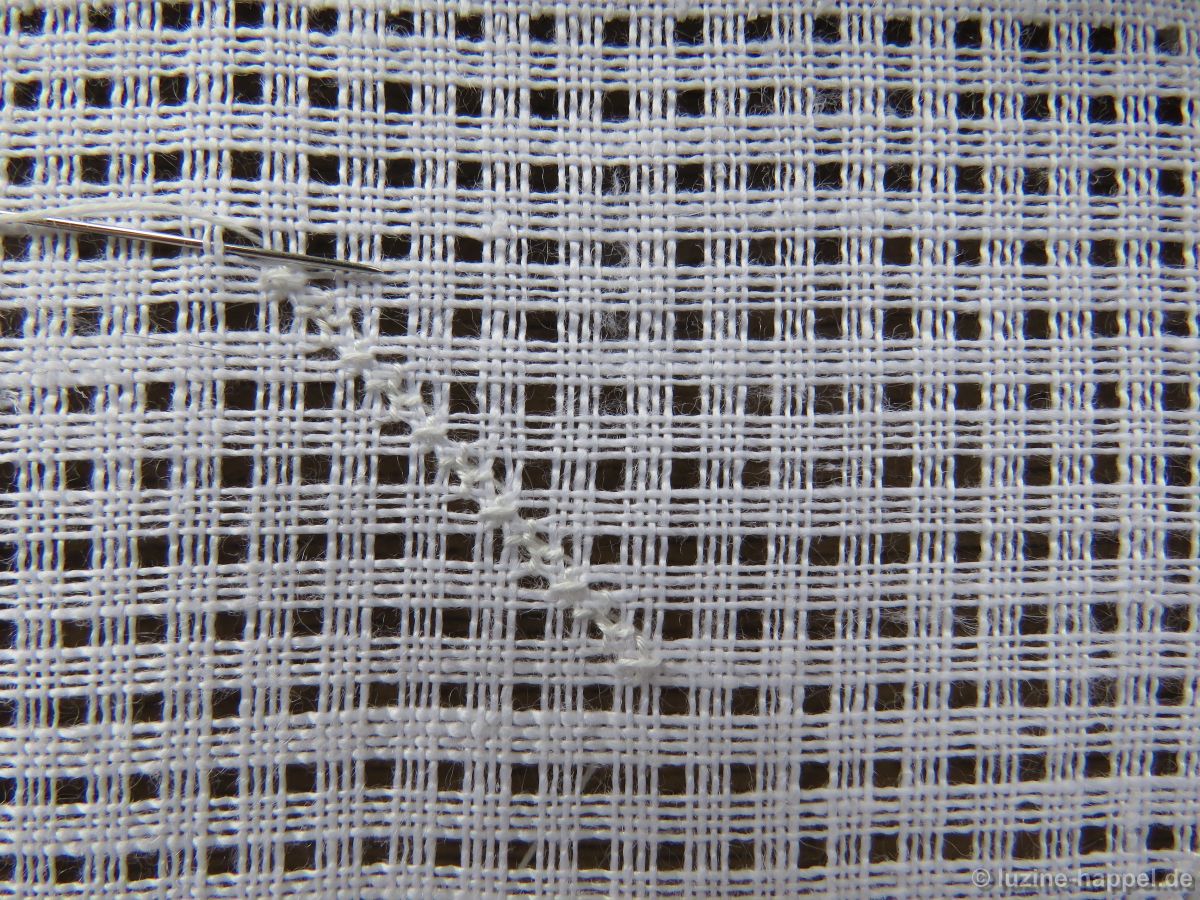
and embroiders row after row,

until the entire area is filled.


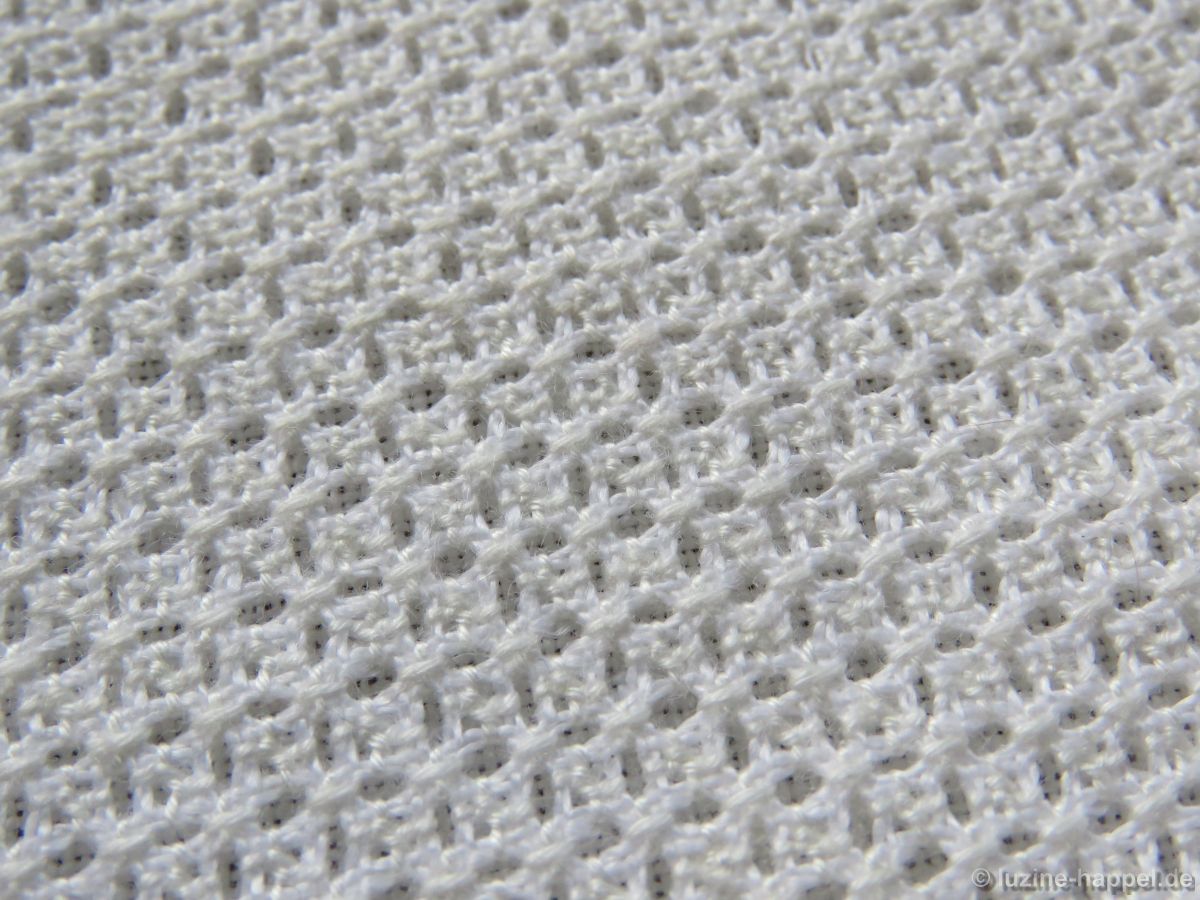
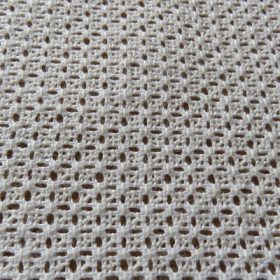
Only after washing does the pattern developes its full effect.