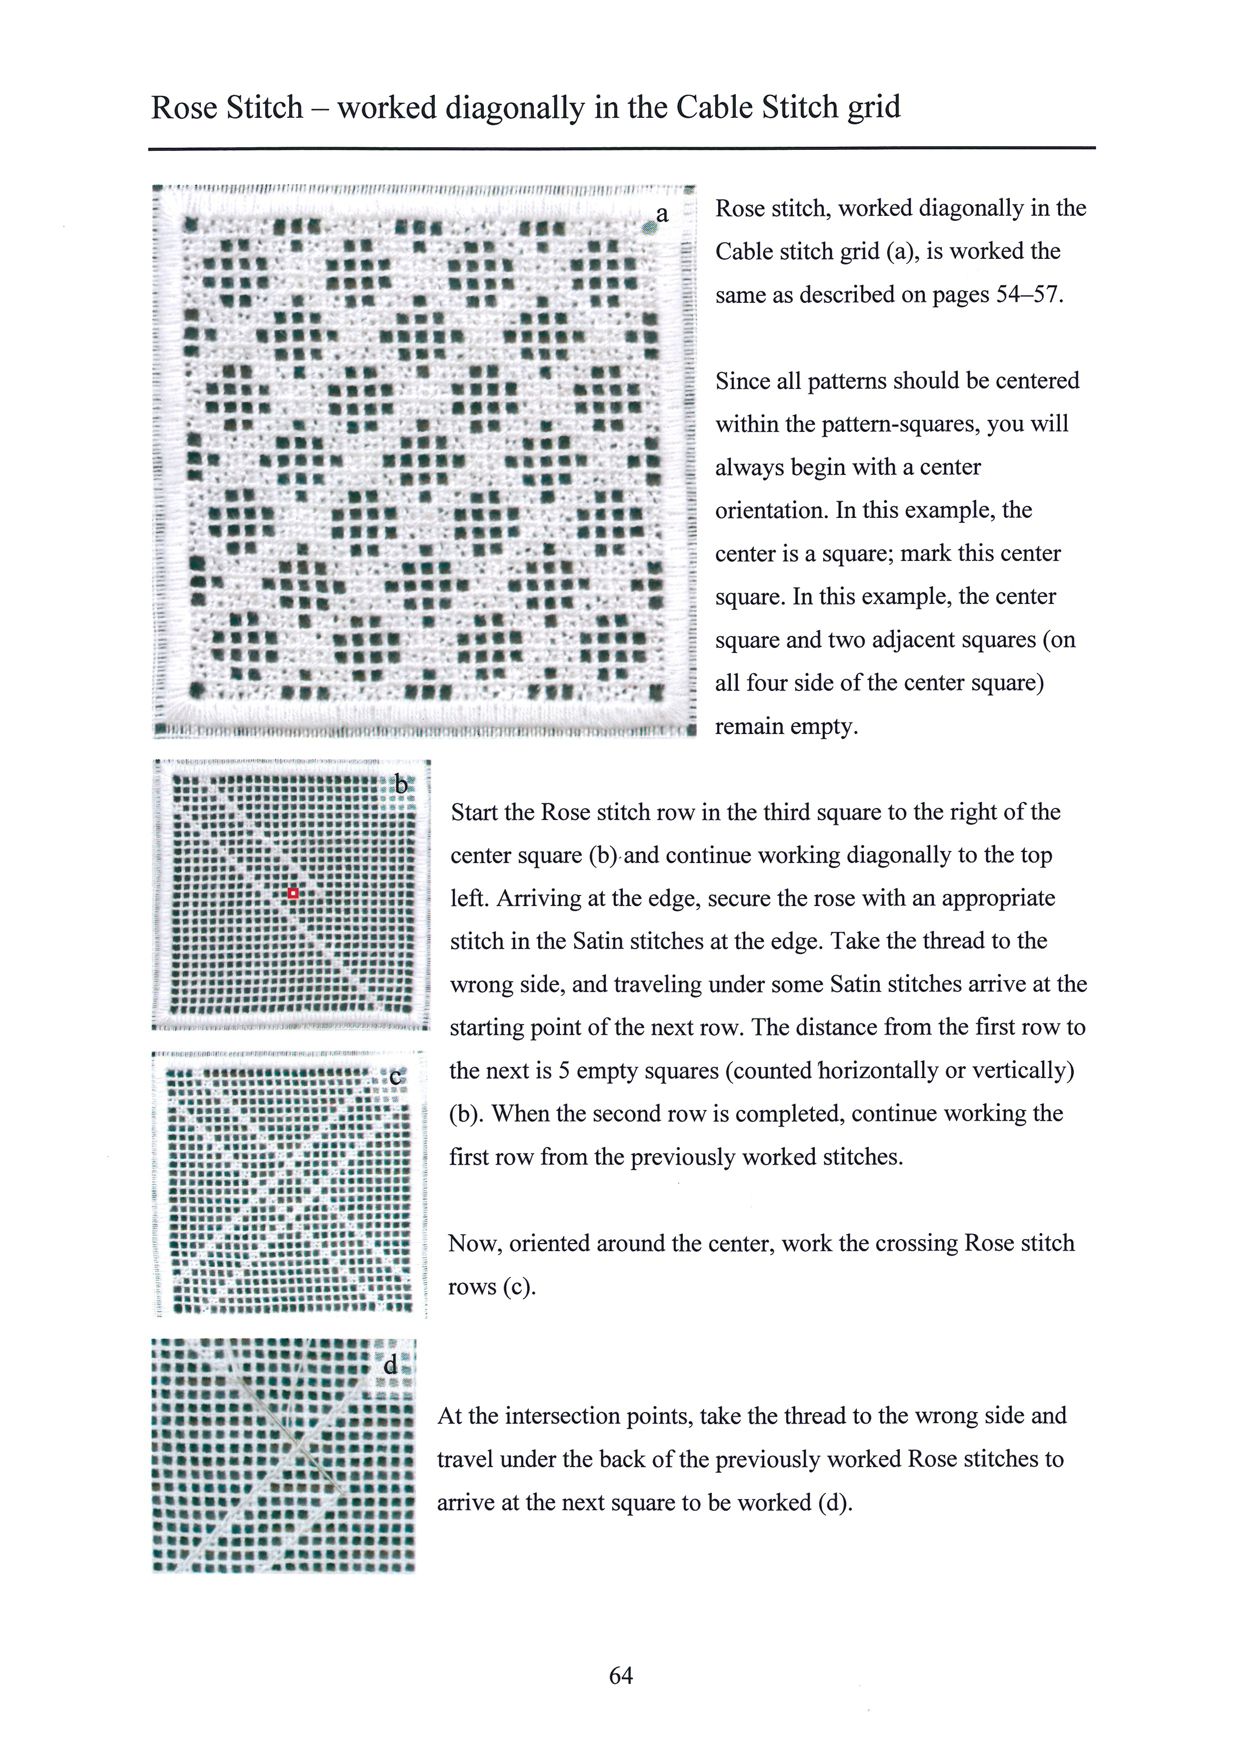
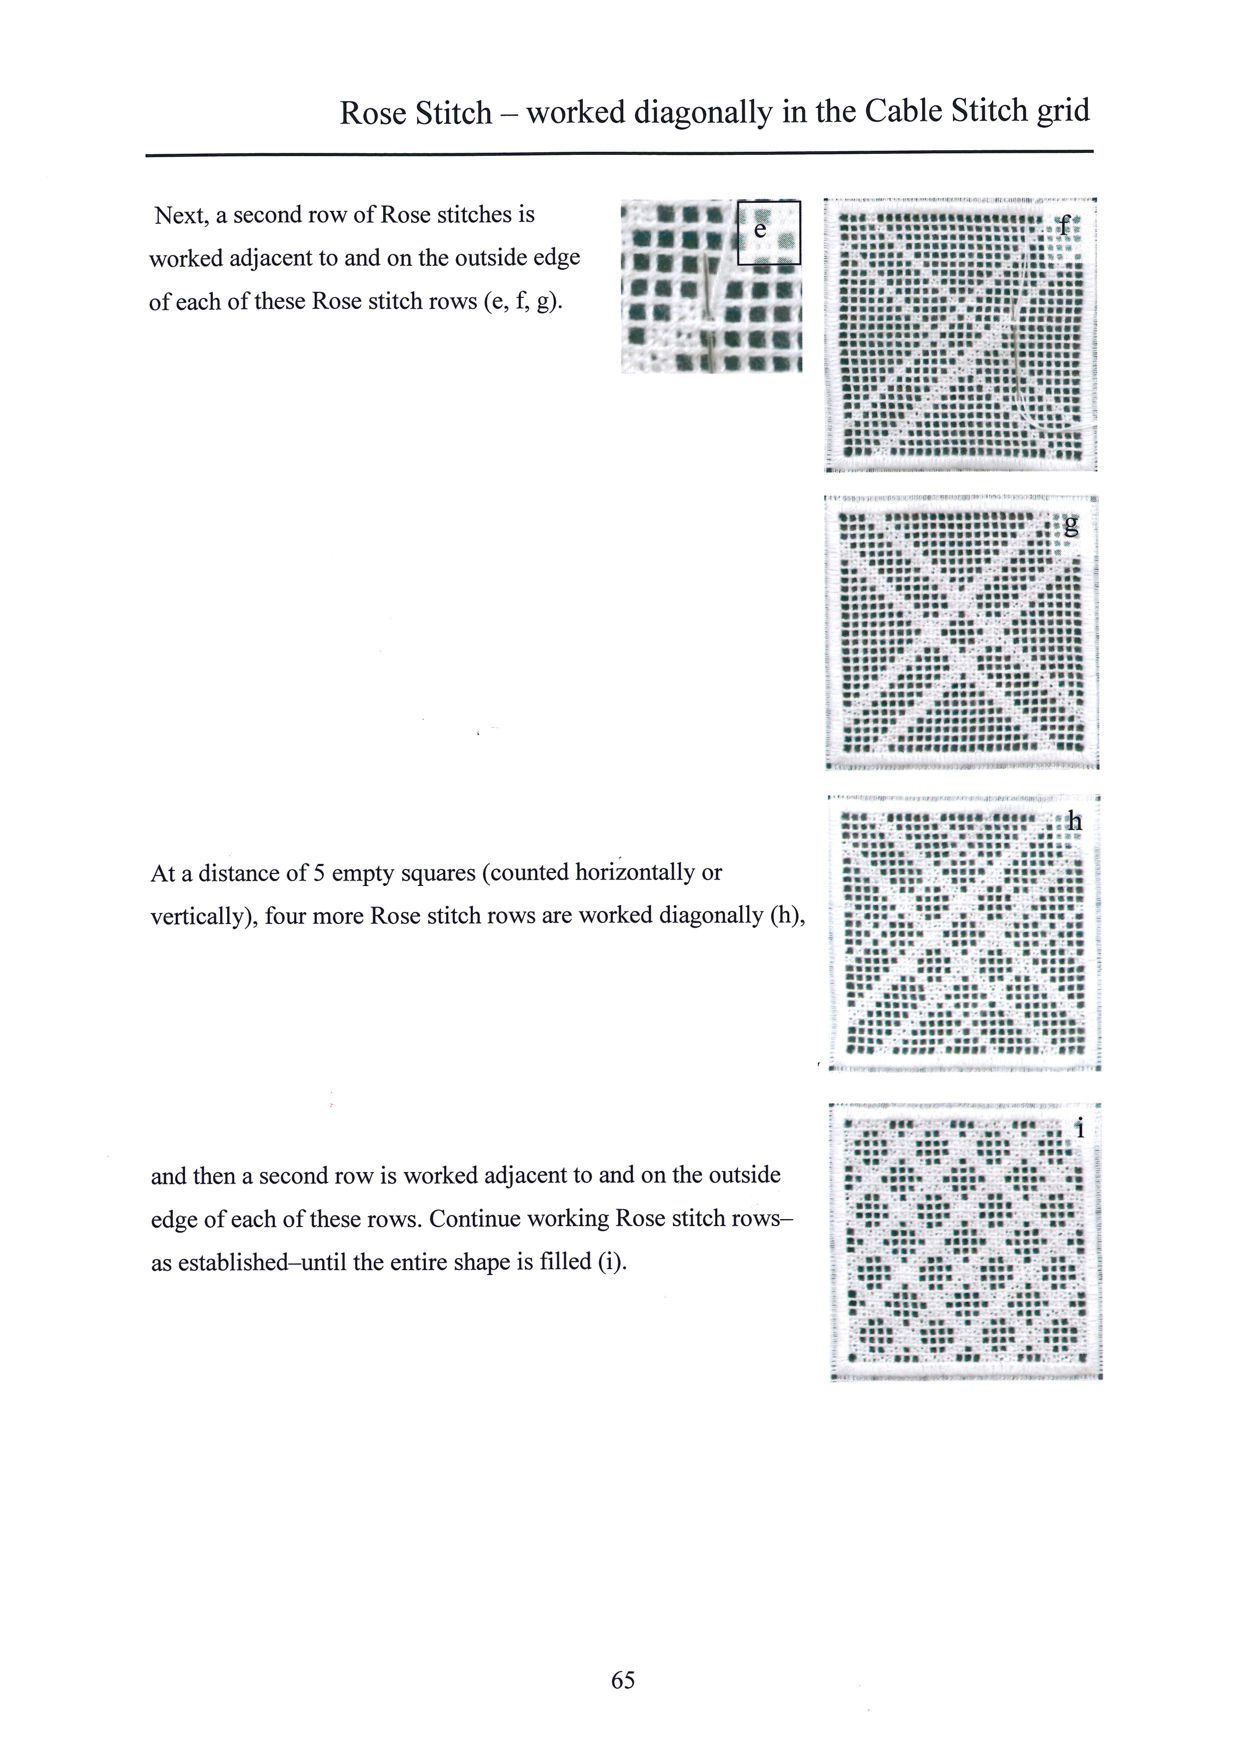
(If you came to this blog post via pinterest, please take a look here too, to find many other interesting subjects.)
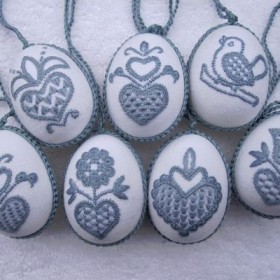
Easter Eggs embroidered with Schwalm Whitework motifs
Plastic eggs, the size of chicken eggs, are covered with embroidered linen. Because eggs decorated with whitework embroidery are not very eye-catching, it is better to work the Easter egg embroidery modestly coloured.
Materials:
- Plastic eggs the size of chicken eggs (eggs made of styrofoam or rubber are not suitable)
- Pieces of linen 15 cm X 15 cm . The linen should not be woven too densely because creases are unavoidable. It should also not be too coarse, because here the joins cannot be worked cleanly. 13/14 threads per cm thread count linen from the Weddigen company is well suitable
- iron transfer pencil, carbon paper or water erasable pen
- stranded cotton
- Chenille needles No. 24 or No. 26 for the Coral Knots, Blanket, Satin and Chain stitches
- Tapestry needle No. 26 for the filling patterns
- wide rubber band
- pen
- white glue
- paint brush
- small and sharp embroidery scissors
- small velvet ribbon or ribbon of crocheted stranded cotton (ca. 0.5 cm wide and 50 cm – 70 cm long) matching the color of the embroidery
(Because ribbon is applied with glue, satin ribbons are not suitable. Velvet ribbons are not always available in the matching color, so another ribbon which will not allow glue to show through may be substituted.)
Cut the linen to squares of 15 cm X 15 cm. If you want to embroider more than one egg, it is best to cut a linen strip with the width of 15 cm and to divide this strip into squares, without cutting, with pencil lines. This way it is easier to mount the linen into a hoop and it is easier to prevent fabric edges from fraying.
Prevent the fabric edges against fraying.
It is possible to situate the motif either on grain or diagonally to the grain. Depending on the filling pattern you will use later, with a pencil line or with some short running stitches in a contrasting colored sewing thread, mark either the longitudinal axis or the diagonal axis of the square.
Design a motif or use one of mine. The motif should not measure more than 4 cm in the width and 5 cm in the height.
In the Shop you will find for sale a pdf document with 24 different designs appropriate for Easter egg decoration.
Transfer the design onto the fabric using your preferred method.
Once the design is transferred, you can start stitching.
Stranded cotton is used for stitching the motifs. This 6-strand thread is divided, and 2 strands are used in the needle. One strand is used for most of the filling stitches.
First work all the outlines of the shape, the tendrils and stems with Coral Knot stitches. Half eyelets are worked with Blanket stitches and leaves and dots are worked with Satin stitches. For more detailed information please refer to “Basic Principles of Schwalm Whitework”.
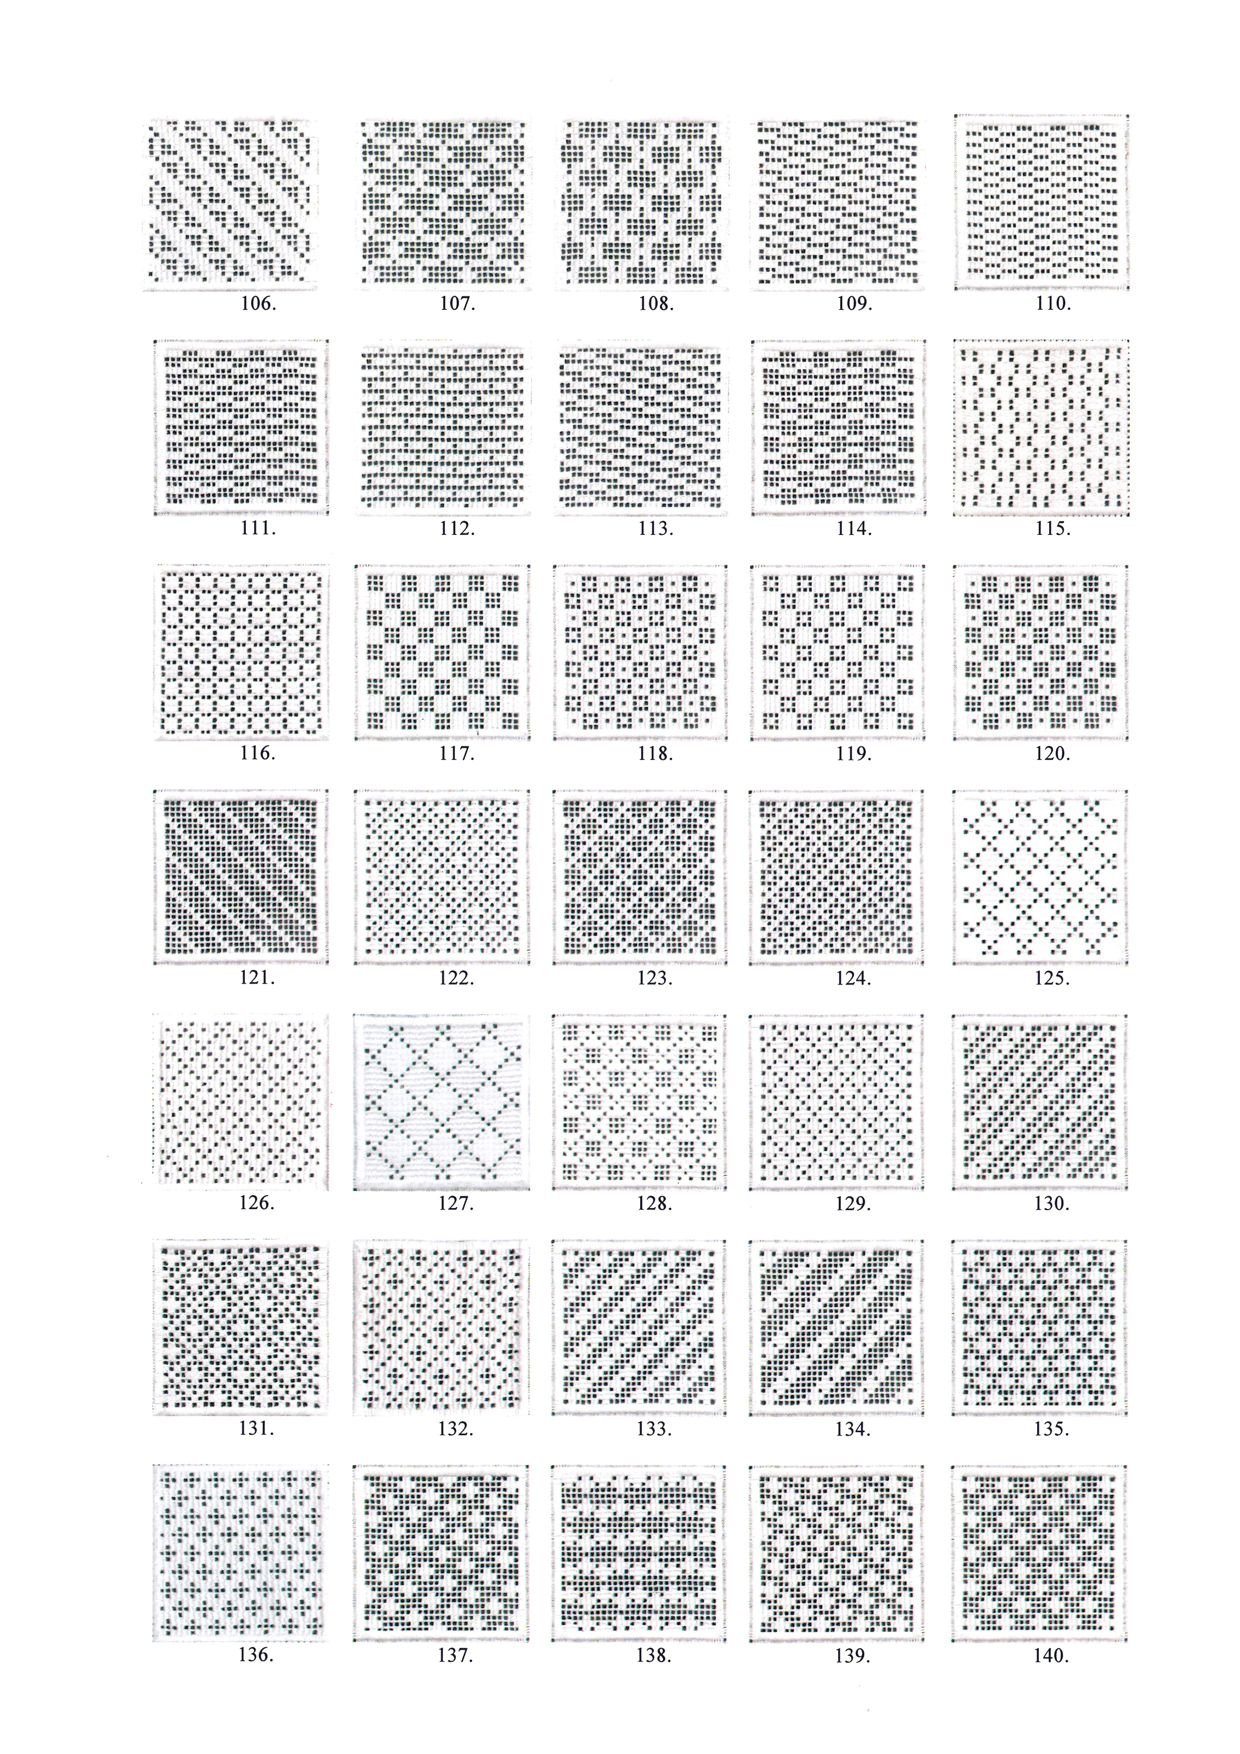
Then fill the motif areas with patterns. Because the areas are so very small here no withdrawing of threads is done.
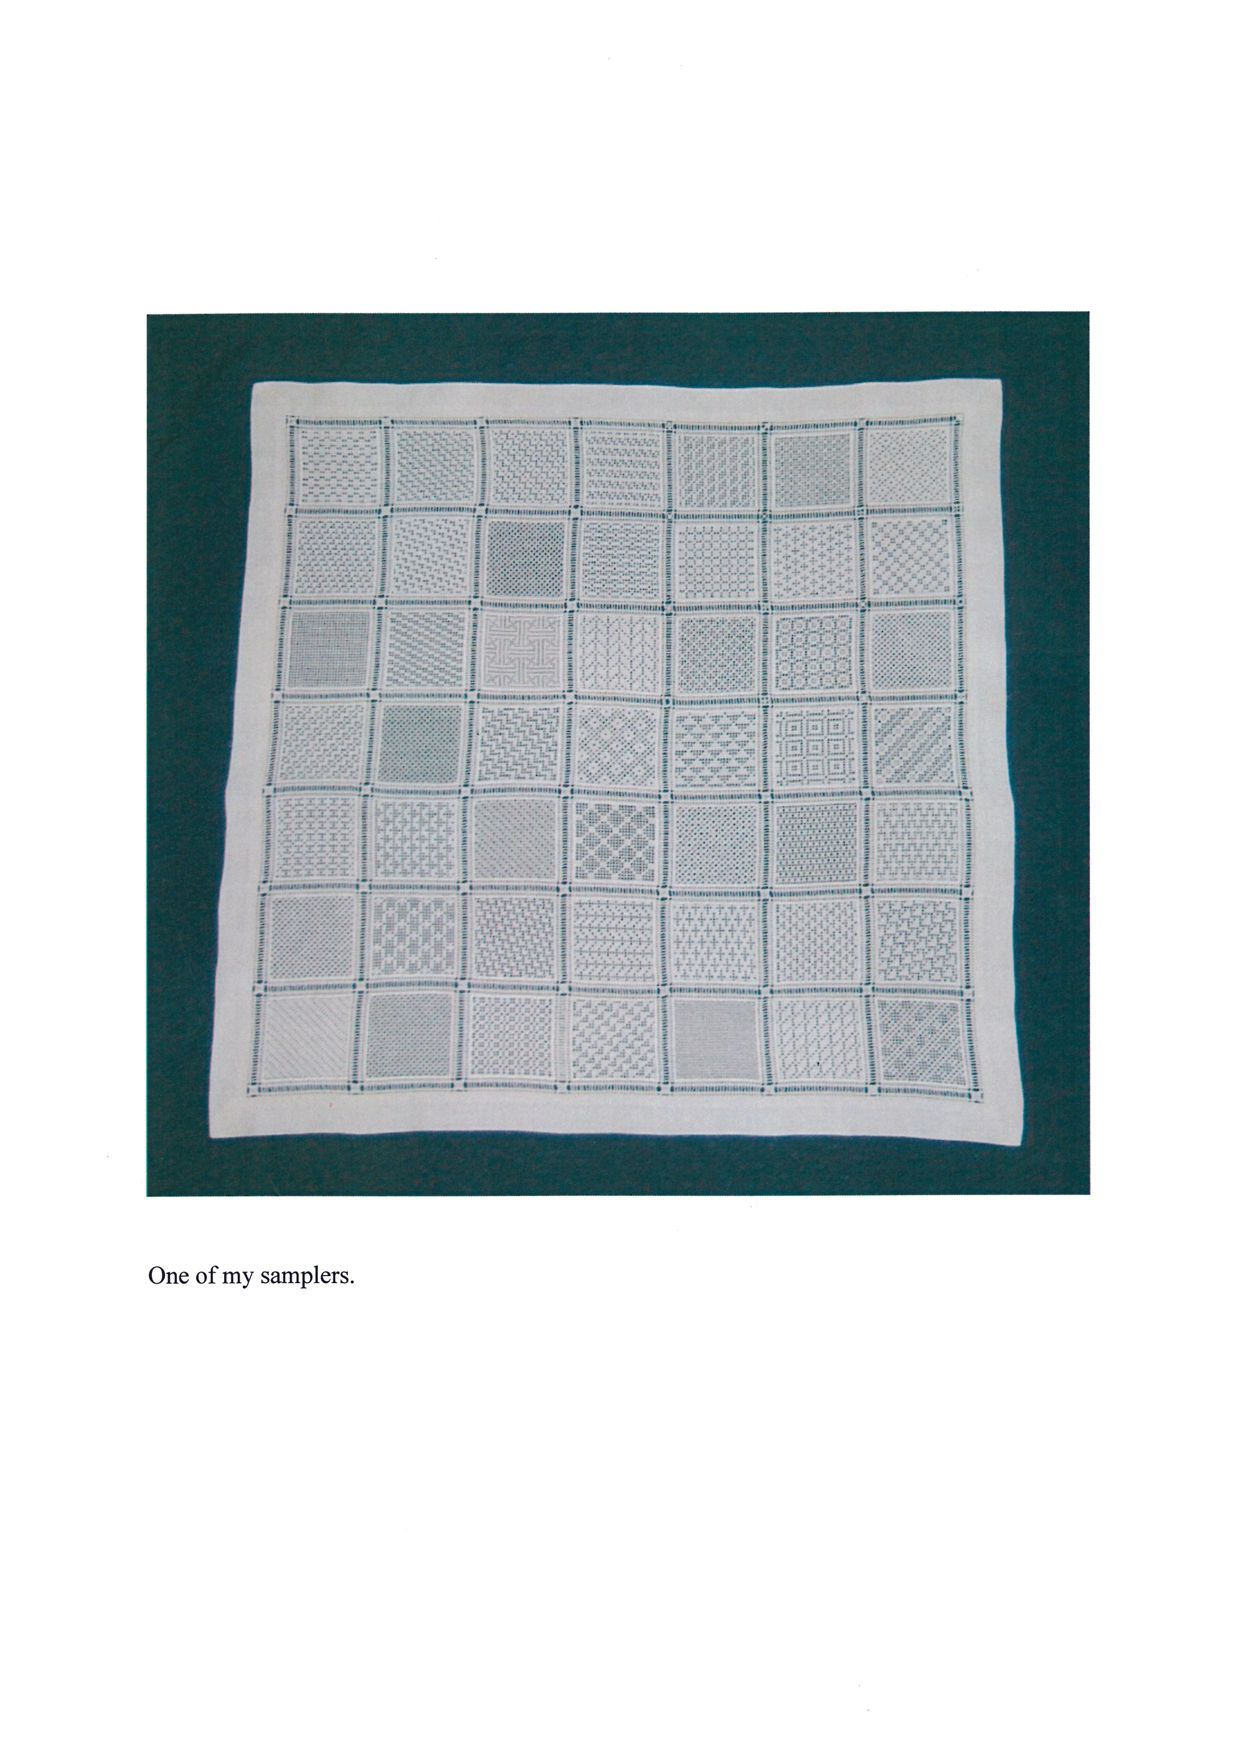
Especially suitable for filling the motifs are small patterns from my books “Basic Principles of Schwalm Whitework“, “Limetrosen I” and “Wickelstiche (Satin stitches)”. In the picture above the pattern “Wave“ of “Limetrosen I, page 11“ was used.
After finishing the embroidery, wash out the color of the outlines.
Iron the linen and, if you embroidered on a strip of linen, cut into squares.
Now the more difficult part of the project starts.
Some plastic eggs are put together in two parts. In this instance, the joins are visible. Mark a pencil line along the join. Eggs not having such a join need to be prepared. Therefore take a rubber band and position it so that one edge of the band lies along the longitudinal axis of the egg. Mark a pencil line along the band. The pencil lines are necessary. They will be seen through the linen later and so you can cut the linen along this line. Take the rubber band away. The egg is divided into two parts.
The following steps need to be practiced first. So take an unembroidered piece of linen. Should the work turn out well, the unembroidered half of the egg can be used as back side of the decorated egg.
For all the following steps it is necessary to have the hands washed very carefully.
Now look for the center of one half of the egg, place a small drop of white glue on it and paint it with the brush. Push one of the embroidered squares into the glue.
The center of the embroidered motif should meet the center of the half egg. So that you can find the correct position more easily, it is best to lay the embroidery face down on a table and push the glue in the center of the embroidery. Bring the motif into the correct position and hold it pressing a little while. Now turn it over and hold it pressed in your hand for some minutes, then let it dry for about 10 minutes.
It is very important to fasten the linen in the center. It has to be stretched and pulled and drawn later; this would not be possible without the linen being securely fastened in the center.
Now take a small, flat brush and paint the remaining part of the half egg (exactly up to the pencil line) with a thin coating of white glue.
Starting from the center take both your hands and stretch the linen across the half egg. Take care to not get creases or folds! For a long while you have to hold the egg in your hands, always pressing and smoothing the linen until it is nearly dry.
Trim the linen directly along the middle line; it is best to use a very sharp craft knife. Using scissors it may happen that the glued linen will come undone and the edge will fold later. So please, if using scissors do so very carefully.
After trimming, the edge of the linen needs to be softly tapped using the grip of the knife or the scissors. This will eliminate some bulk later. Again, allow the piece to dry for another 10 minutes.
Work the second half of the egg in the same manner.
You can use the same embroidered motif for the second half, you can use a linen piece with an embroidered “ Happy Easter”, or you can use a plain piece of linen.
To cover the joins of the linen pieces, a small ribbon will be glued.
To avoid a mess caused by too much glue oozing out at the ribbon edges, it is best to take a piece of paper or some similar disposable sheet, put some white glue on it, take the back of the knife, dip it into the glue and bring it–bit by bit–onto the join so that the whole join is covered with a narrow strip of glue.
Take the middle of the ribbon and start at the bottom middle of the egg to glue the ribbon over the join and up to the top middle of the egg. Push the ribbon onto the egg.
Repeat the same procedure on the other half.
Now sew together both ribbon parts at the top of the egg with some small stitches.
The remaining part of the ribbons will make a loop. Therefore, either knot together the ends of your trimming. The velvet ribbons need to be sewn together, so lay one end of the ribbon 1 cm over the other end and secure with small stitches.
With a loop the eggs can hang on a branch.
Also it is possible to create small loops at the top of the egg and secure them by sewing.
Happy Easter
Have I piqued your interest? I have written a more detailed description with step-by-step instructions! Also included in this, my latest leaflet, are many examples of appropriate filling patterns as well as 60 different small designs.

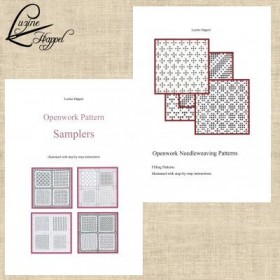
“Embroidered Easter Eggs” is a 21-page leaflet with plastic comb binding, and you may order it through my shop.

„24 small Designs” you may order as download product through my shop.