Schwalm Designs (4) – Scallops (3)

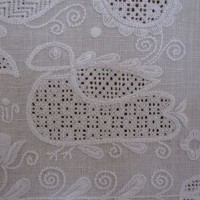
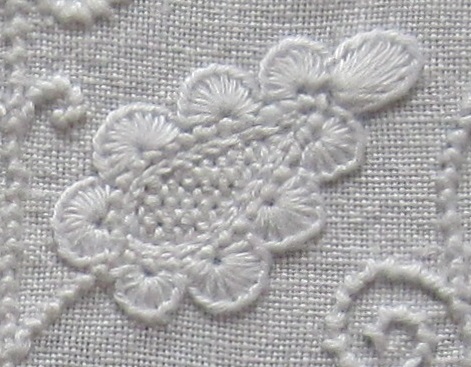
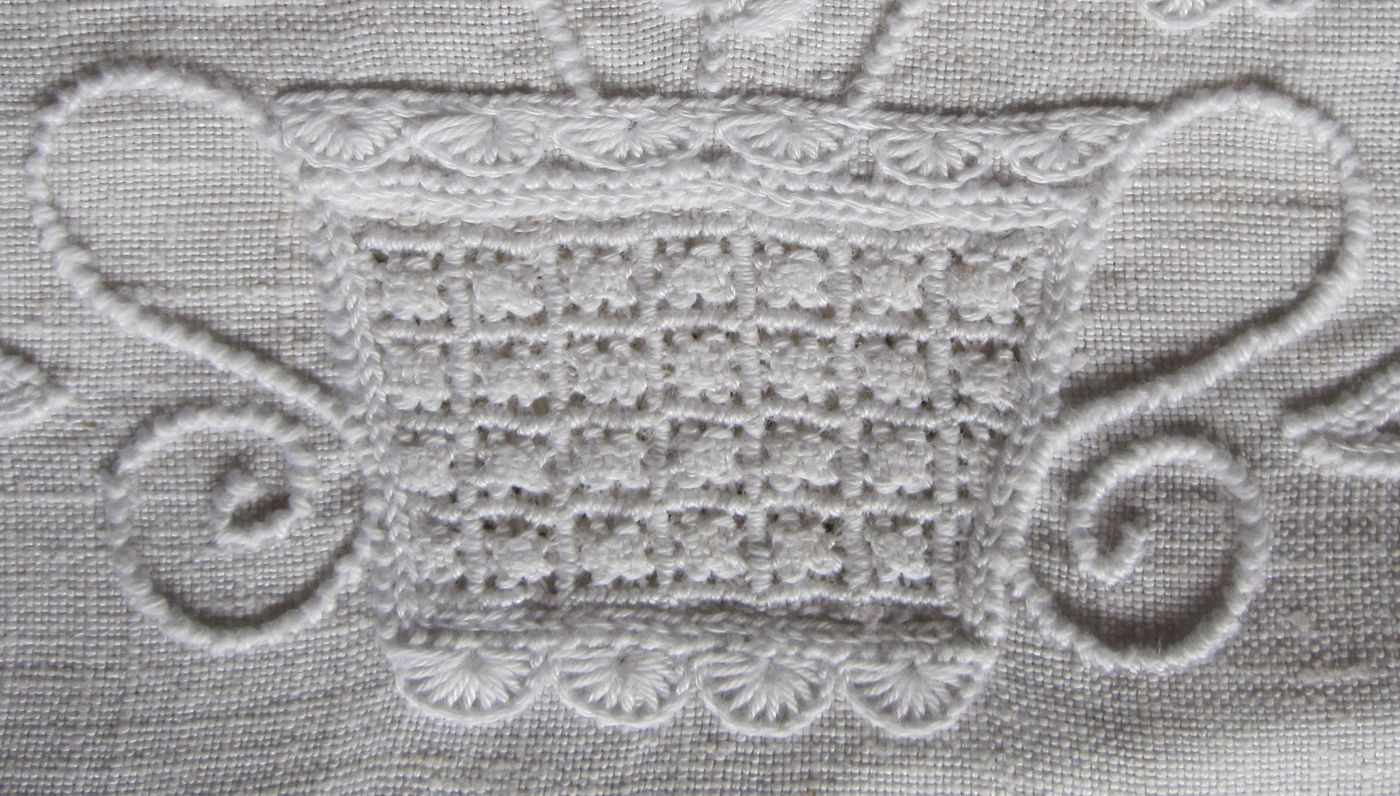
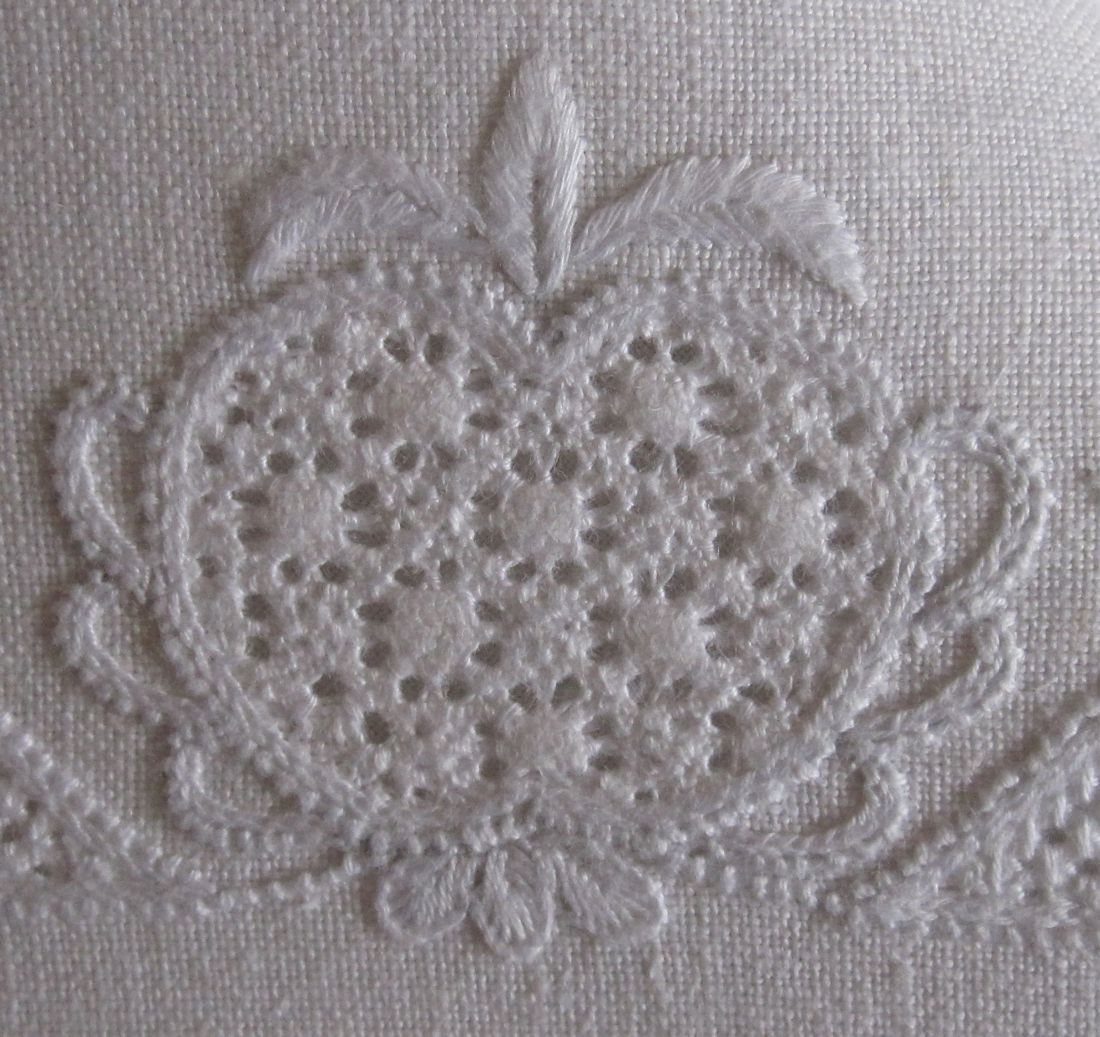
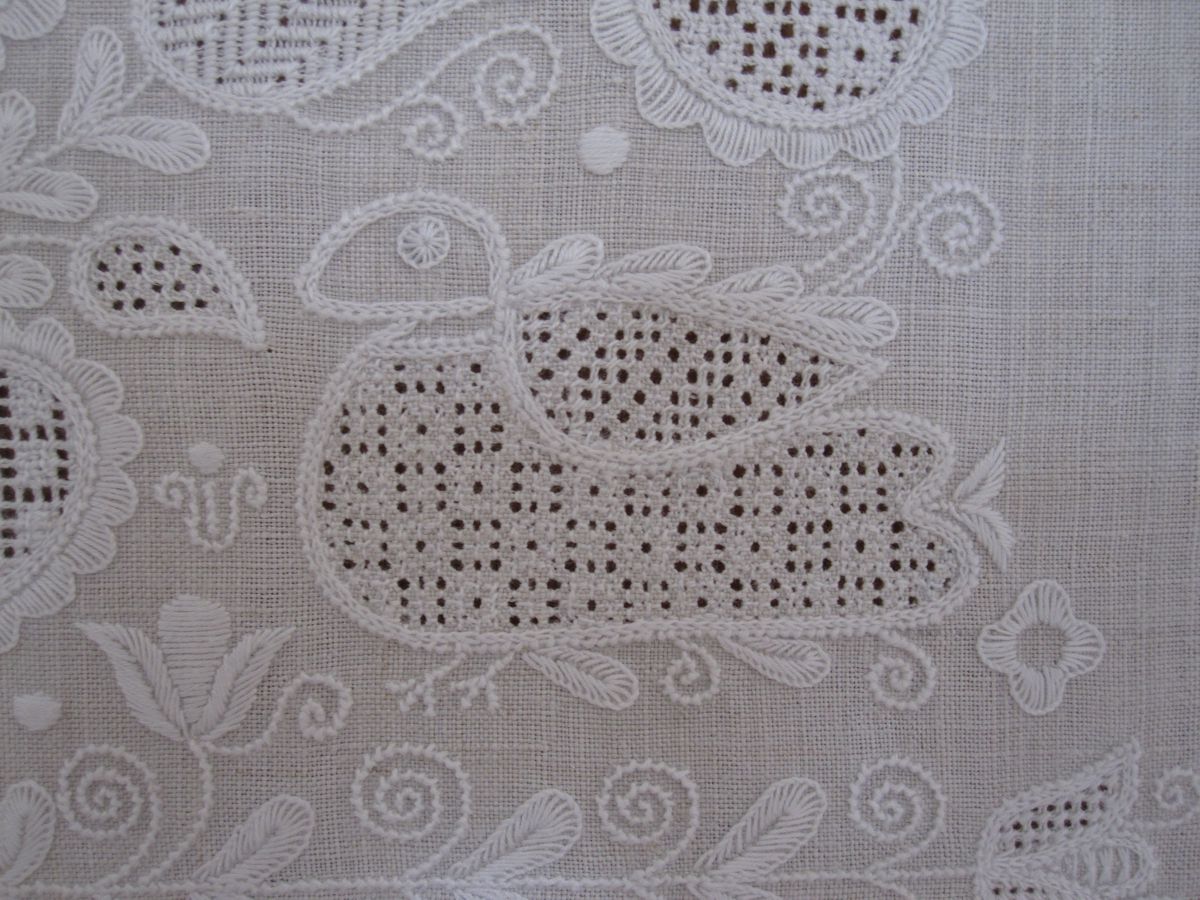
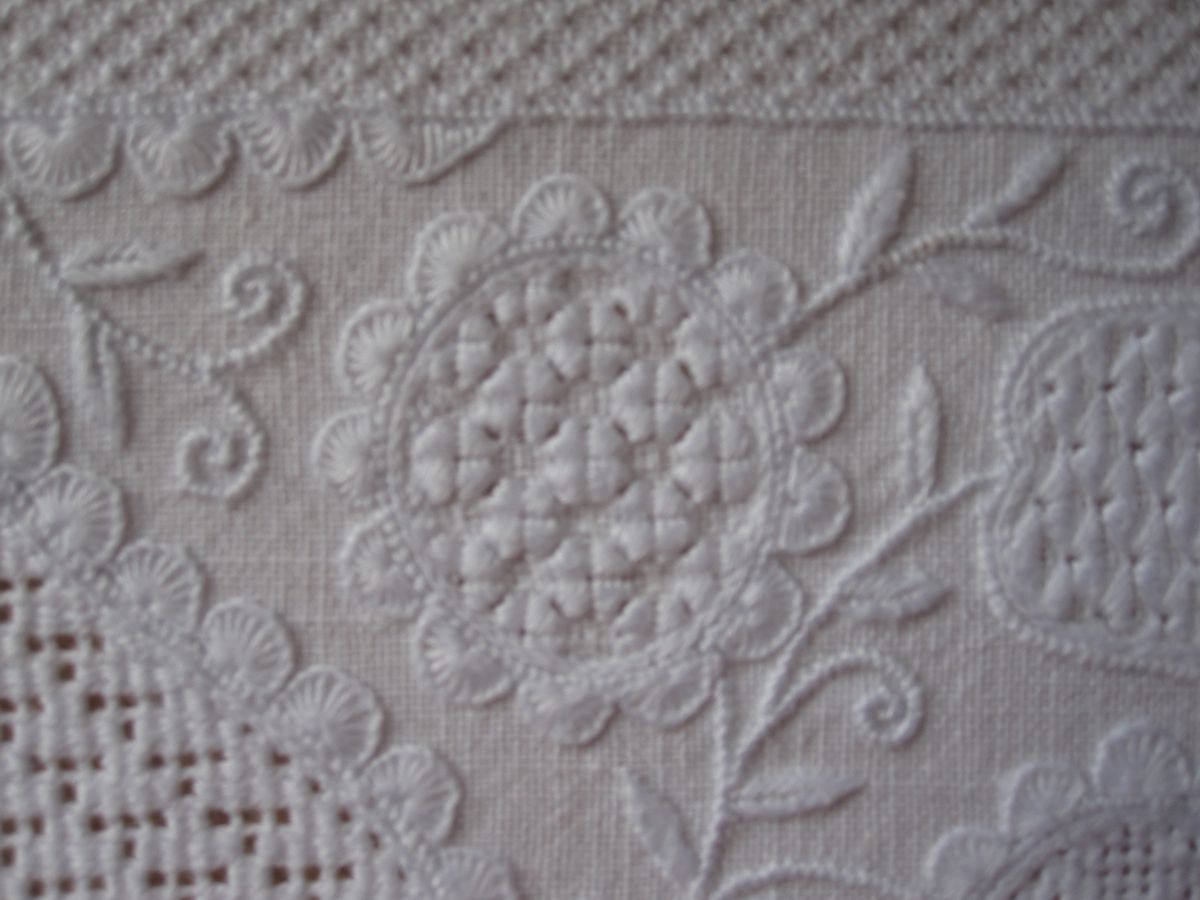
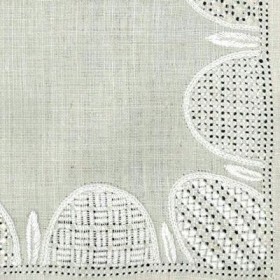
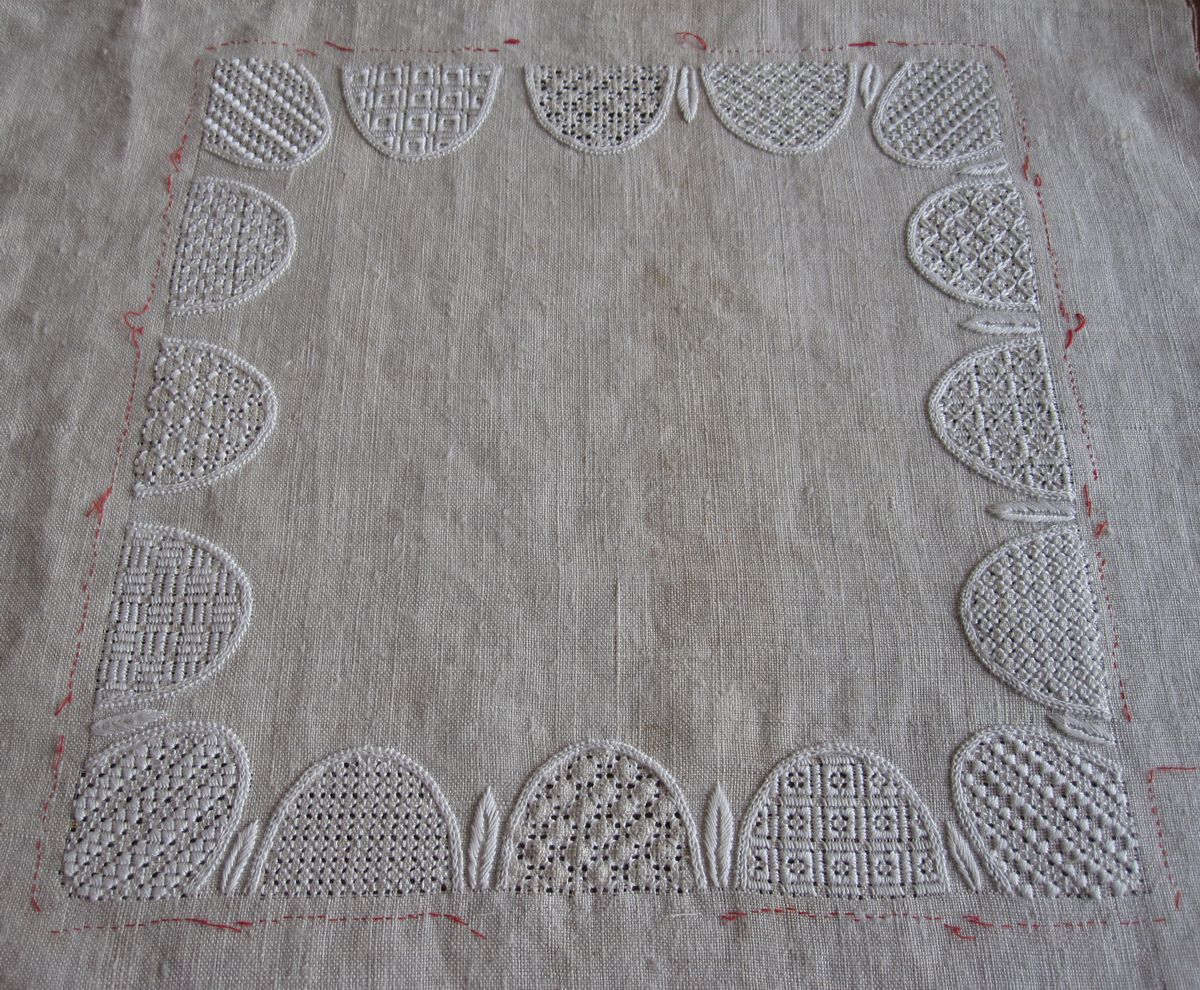
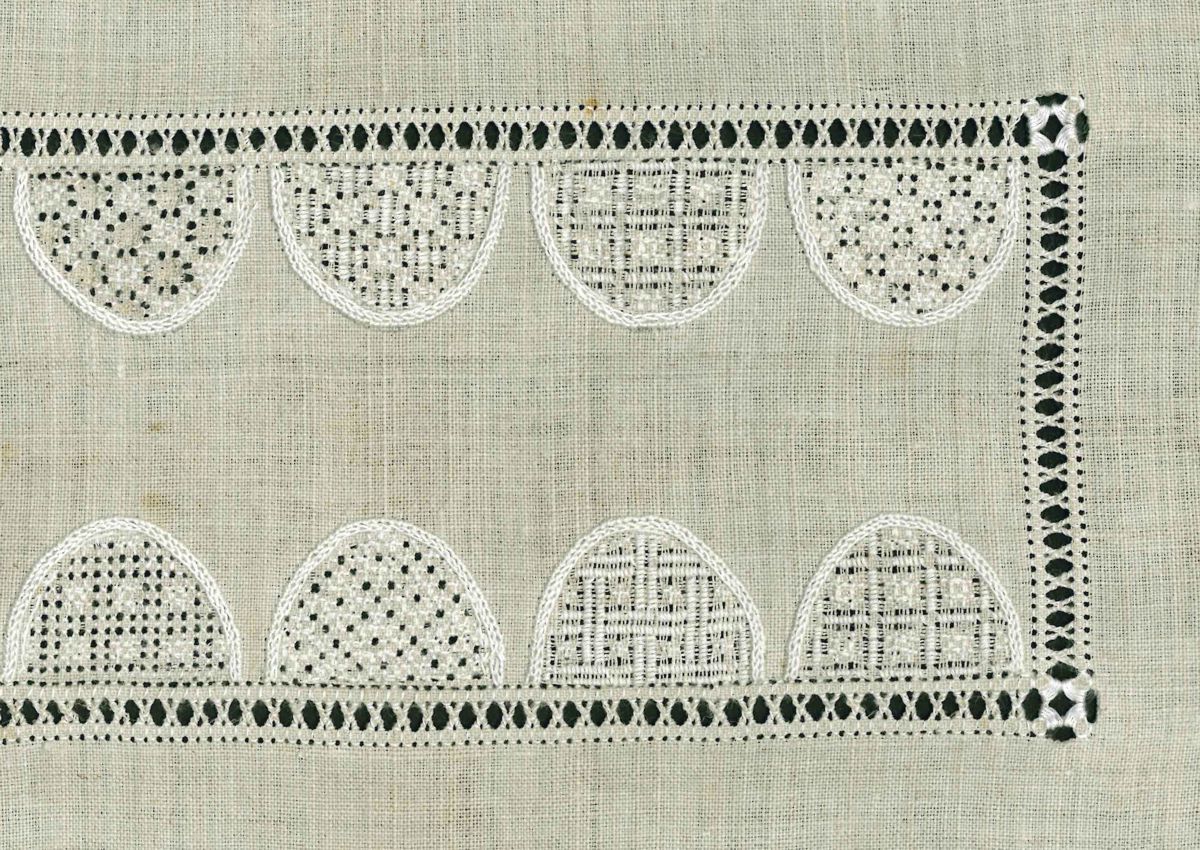
As already mentioned in the article Schwalm Designs (2) – Scallops (1), it is customary to decorate simple Schwalm motifs by outlining the shapes with scallops placed close together.

But how can one get uniformly sized and evenly distributed scallops around the edges of a shape if a computer drawing program is not available?

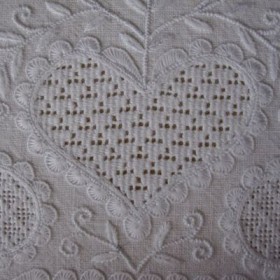
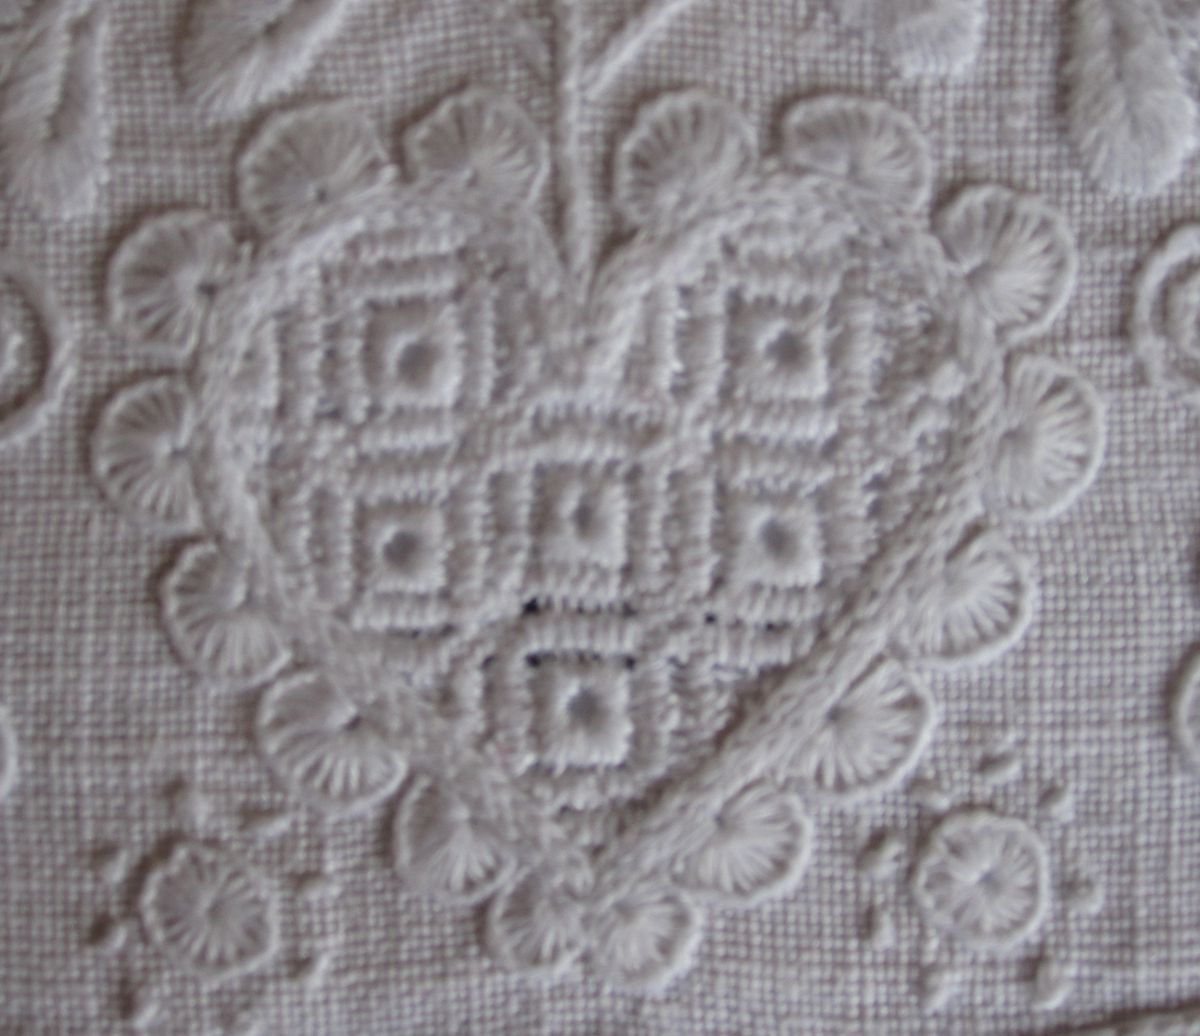
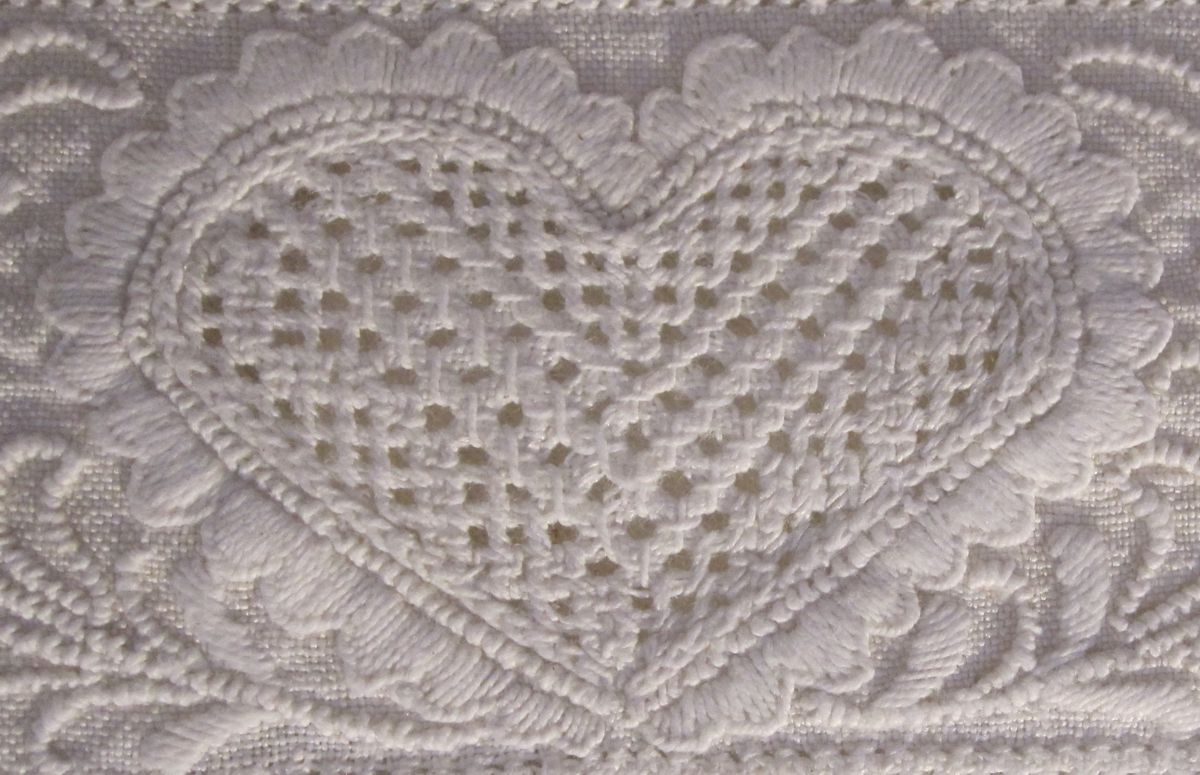
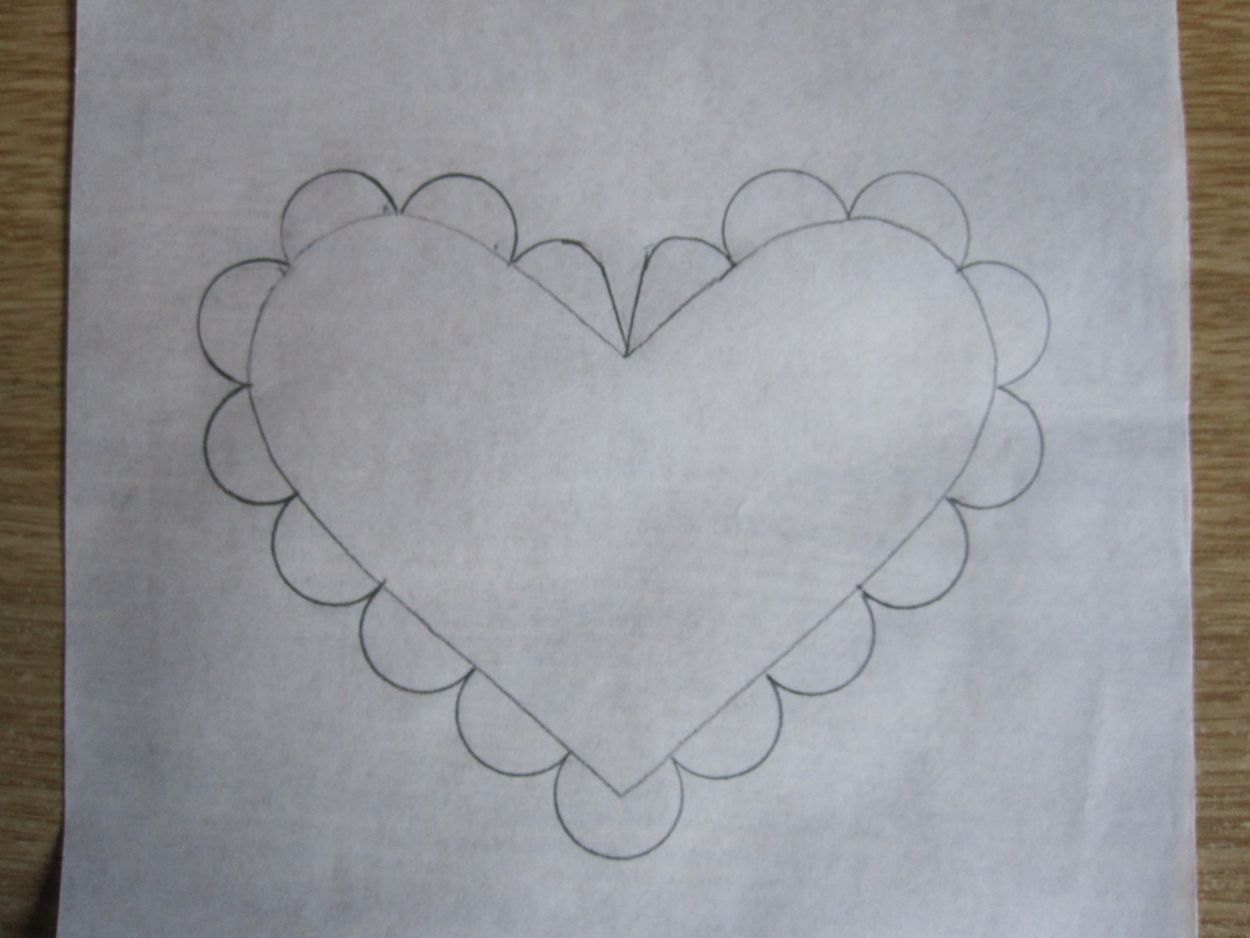
It’s easy to do on motifs that are not completely outlined with scallops. For an example, I will describe the process for adding scallops to a heart shape.

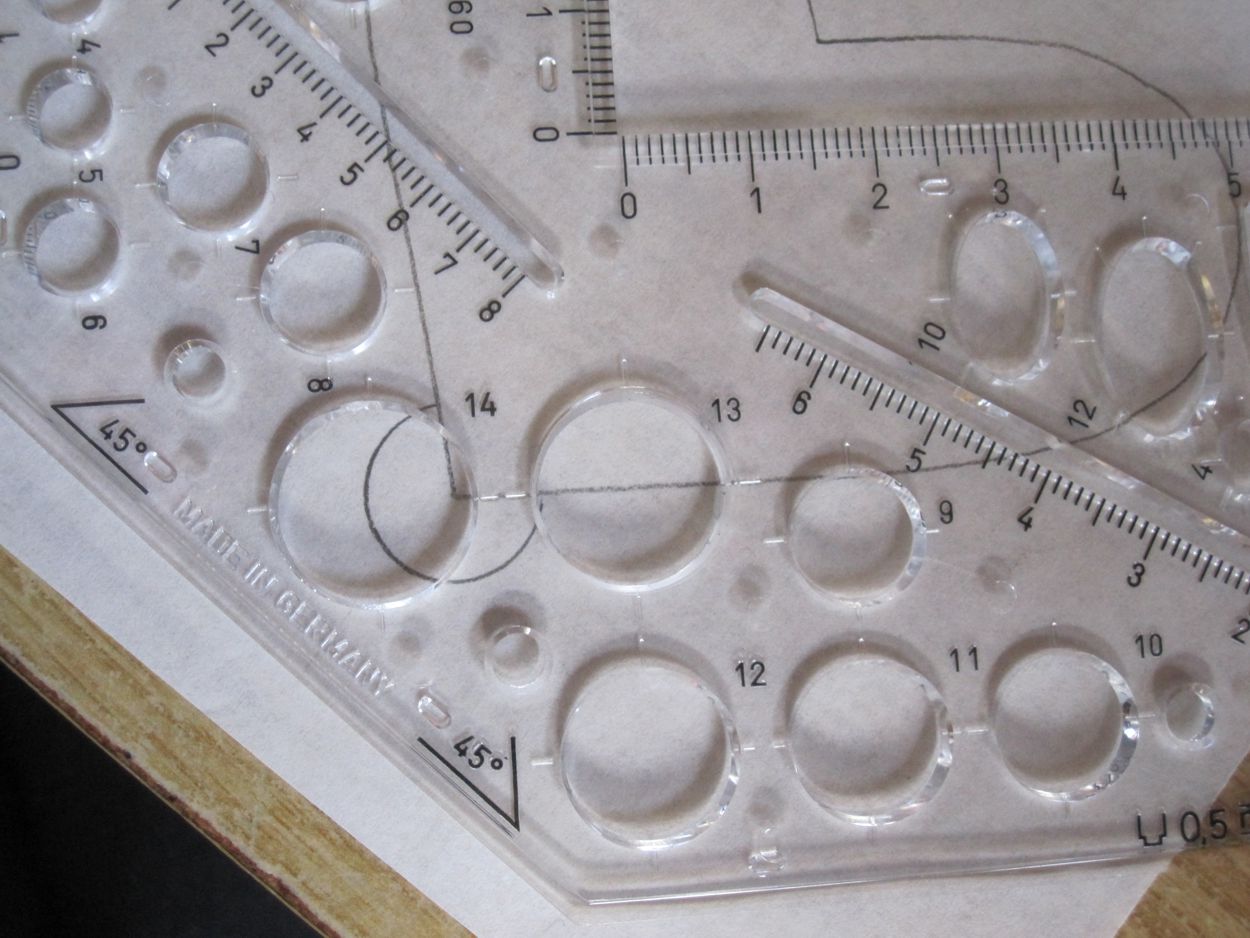
Supplies needed: a stencil for the motif, tracing paper, a sharp pencil – a mechanical pencil is best – a circles template and an eraser.
01_SK4
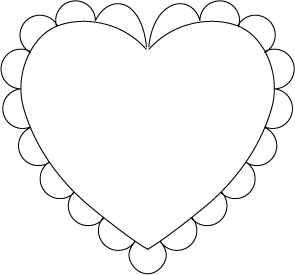
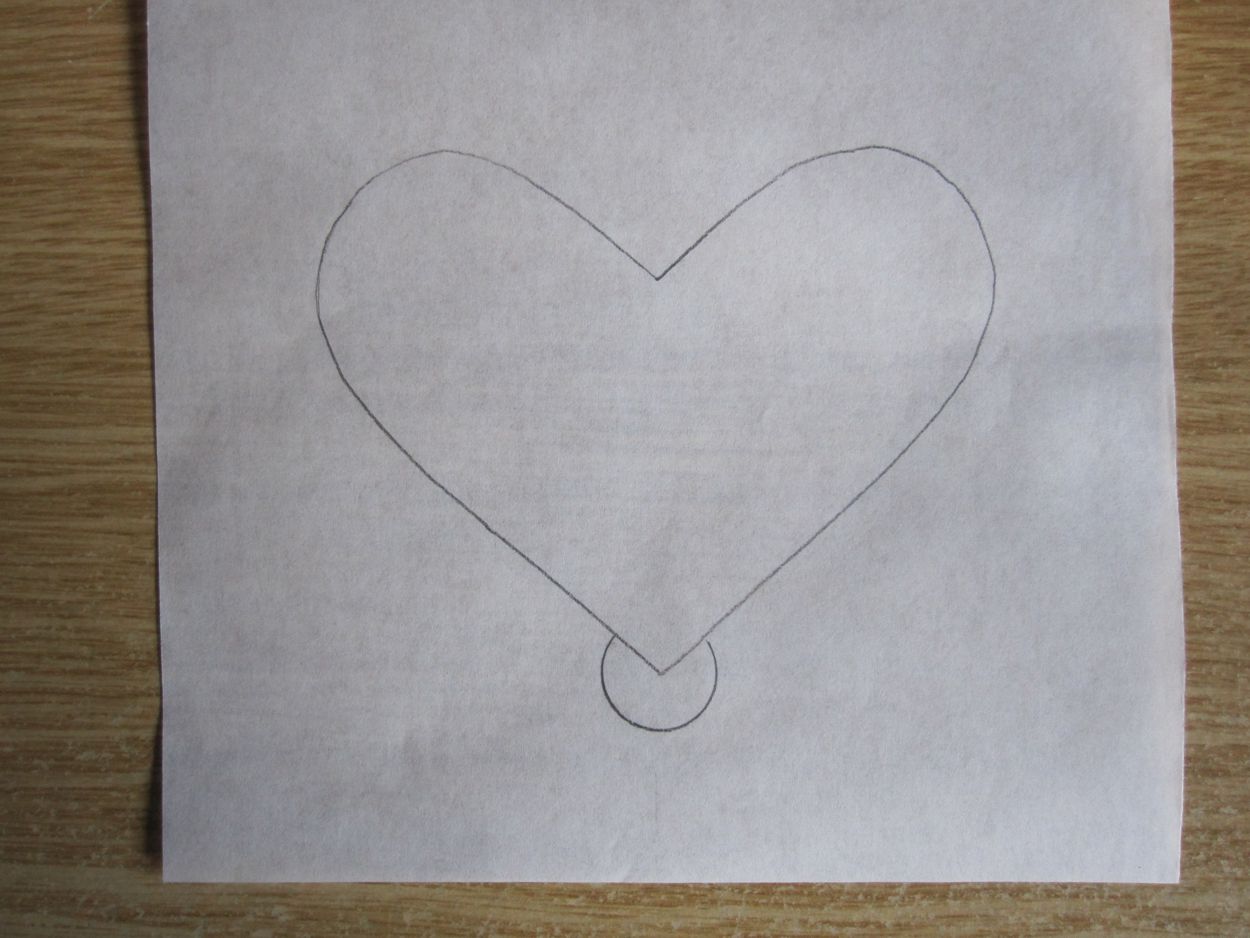
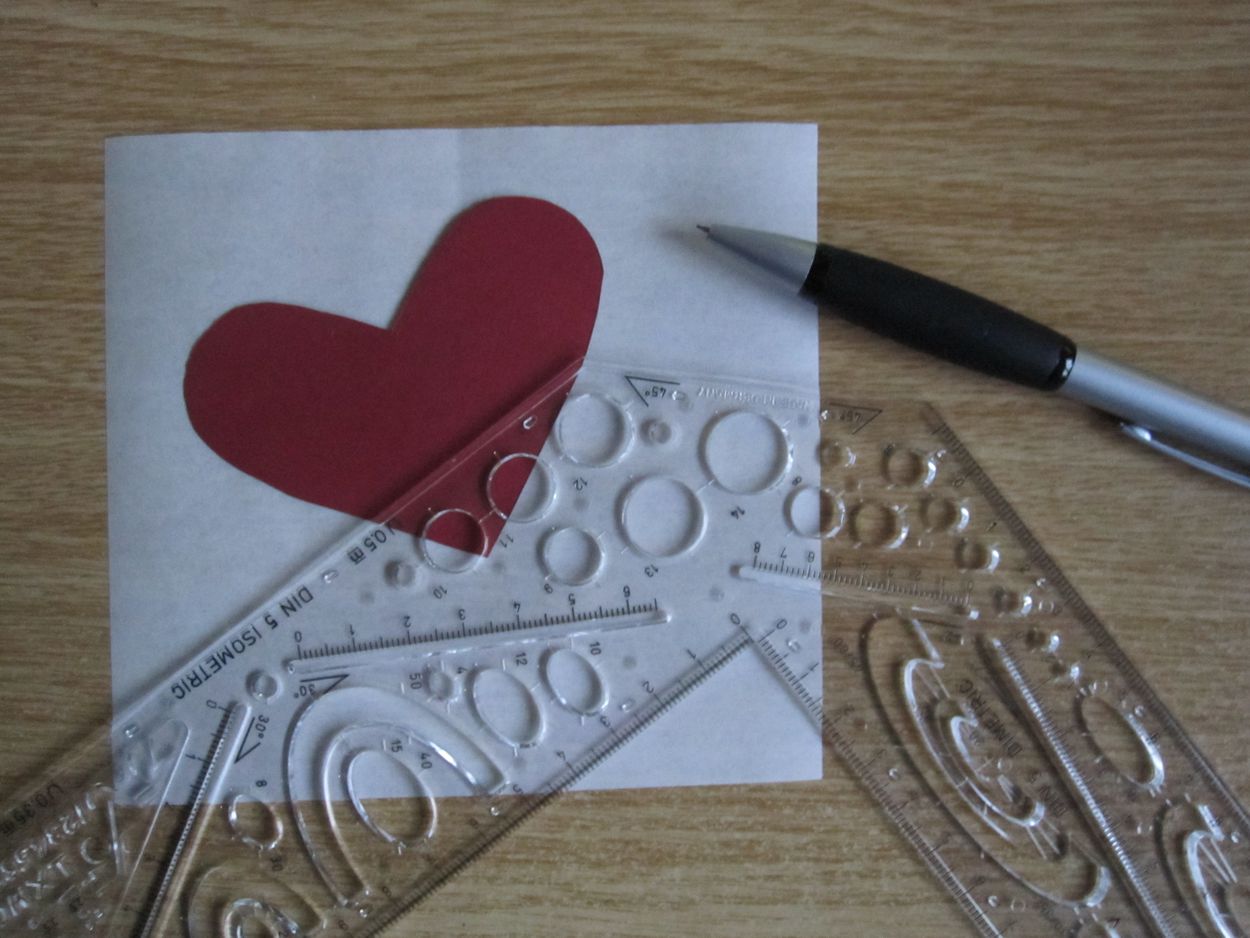
Using the stencil a heart shape is drawn on the paper. On the template, a circle of a proportionate size is chosen to draw a scallop at the heart’s lower point. This point should either match the center of the circle or should be placed slightly above the center of the circle.
02_SK4Using the same circle template, additional scallops are drawn next to it.
Each circle stencil has four marks ().
03_SK4
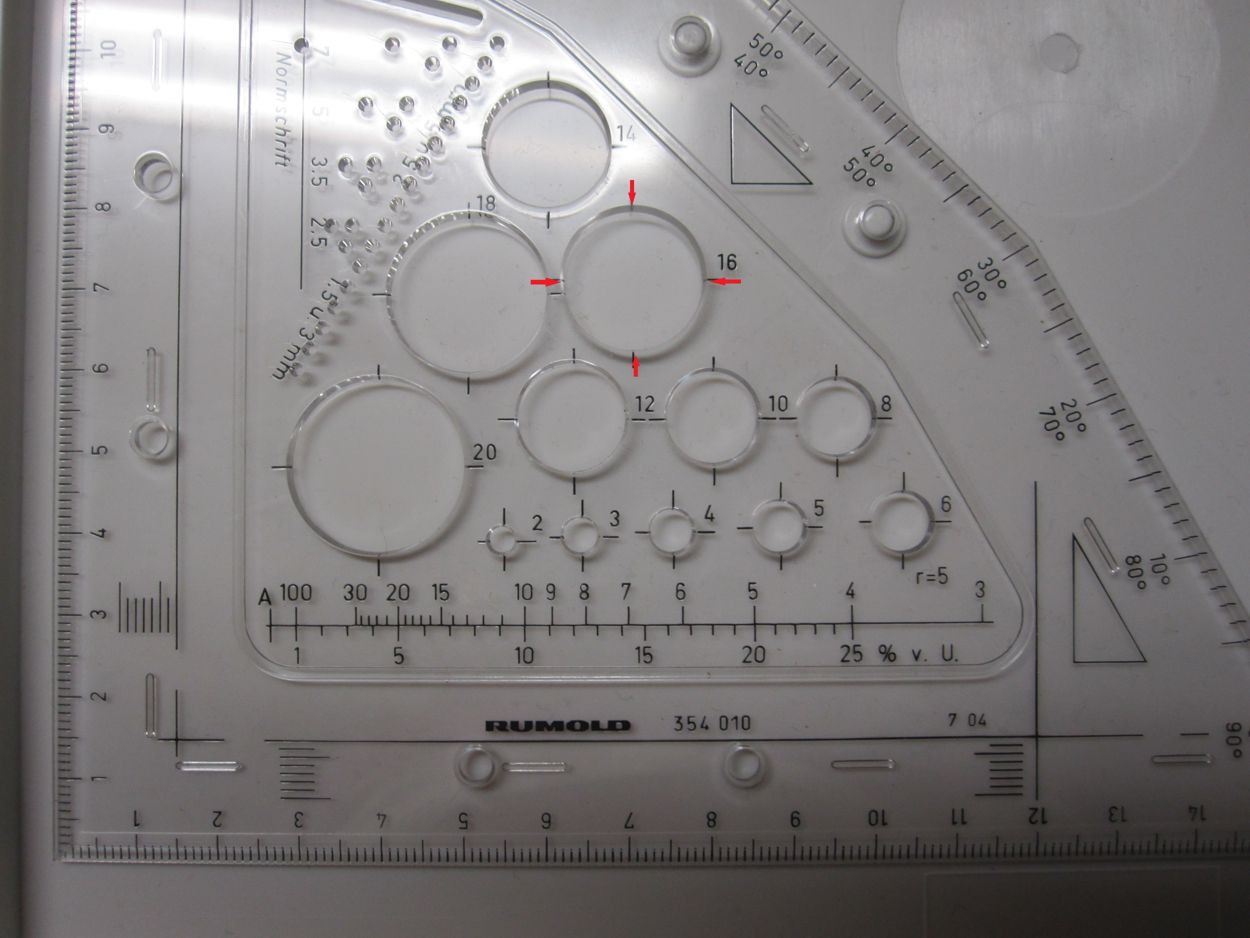
Two opposite marks should match the outline of the heart.
04_SK4In this way the semi-circles makes scallops.
05_SK4
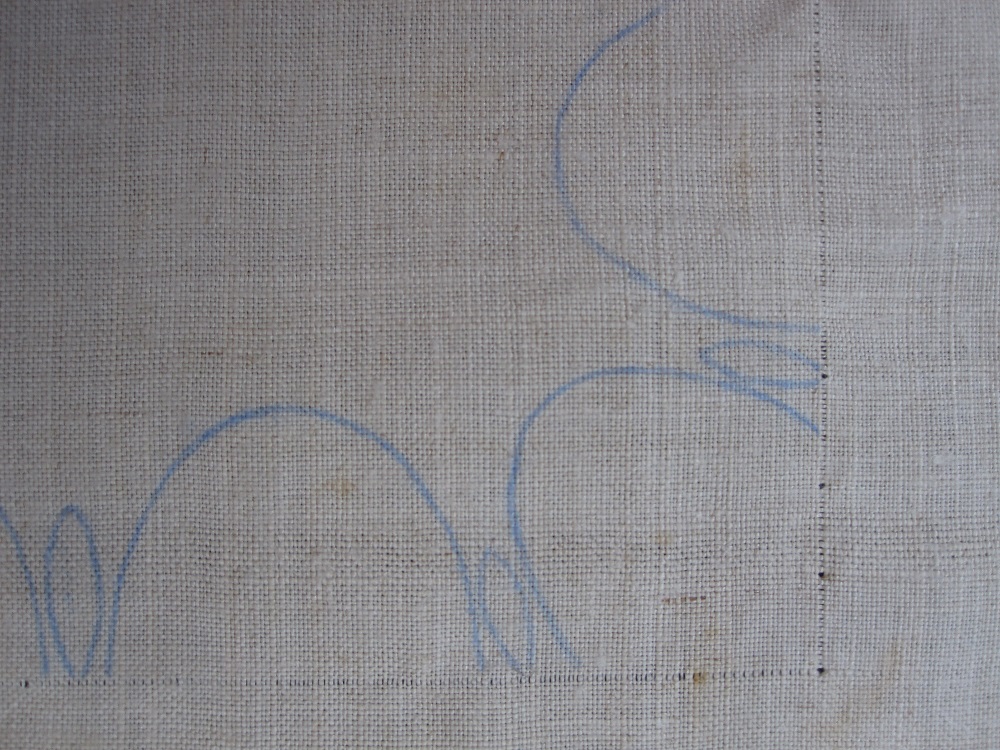
If the outline is curved, the template has to be positioned as shown in the picture above. The center of the circle (the diameter of the circle is marked in red as a visual aid) meets the outline of the motif. If care is not taken when placing scallops on a curve, the scallops could get distorted.
06_SK4
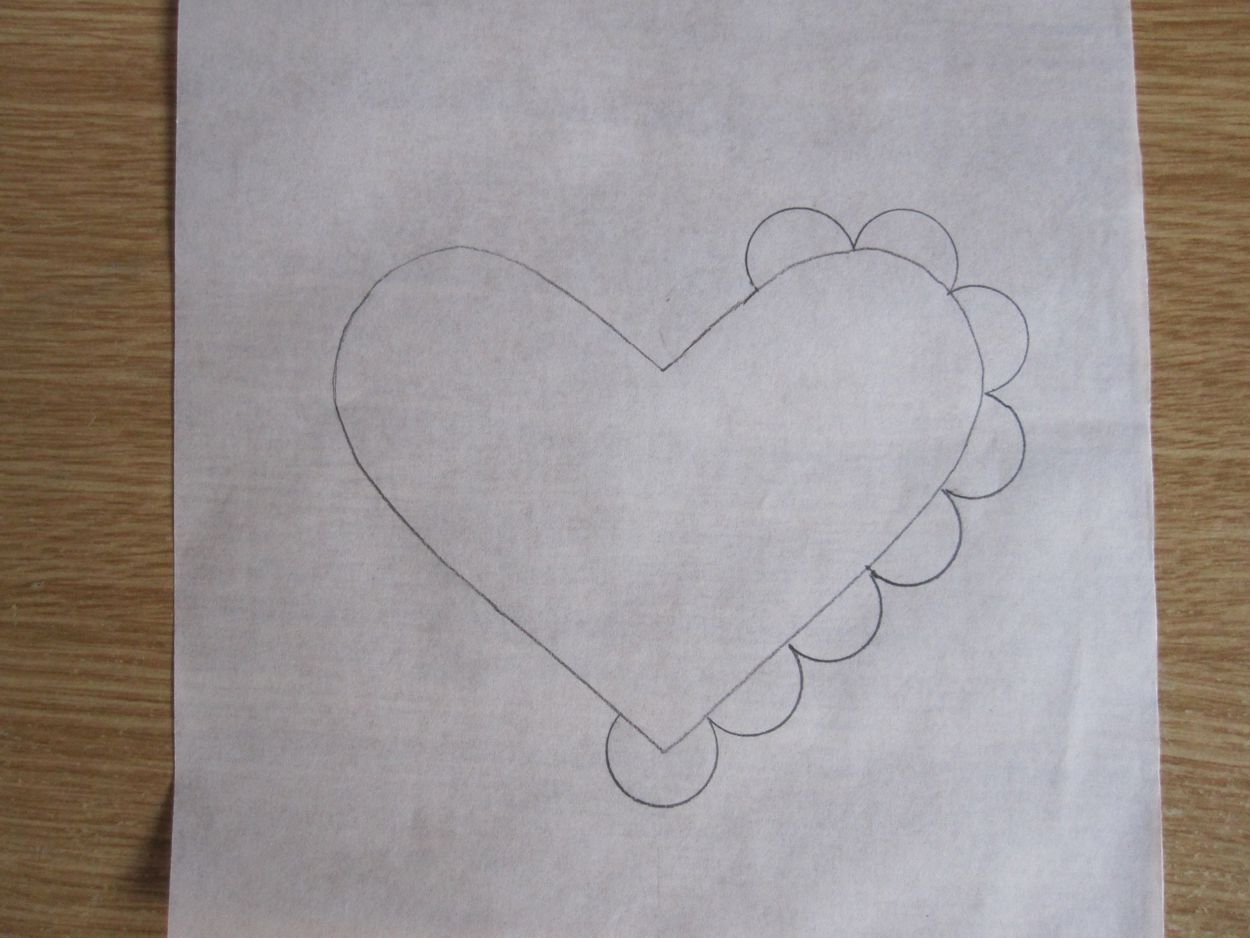
Reaching the top of the heart, either the scallop line ends before the center point – leaving a small distance free between the last scallop and the hearts upper point
07_SK4
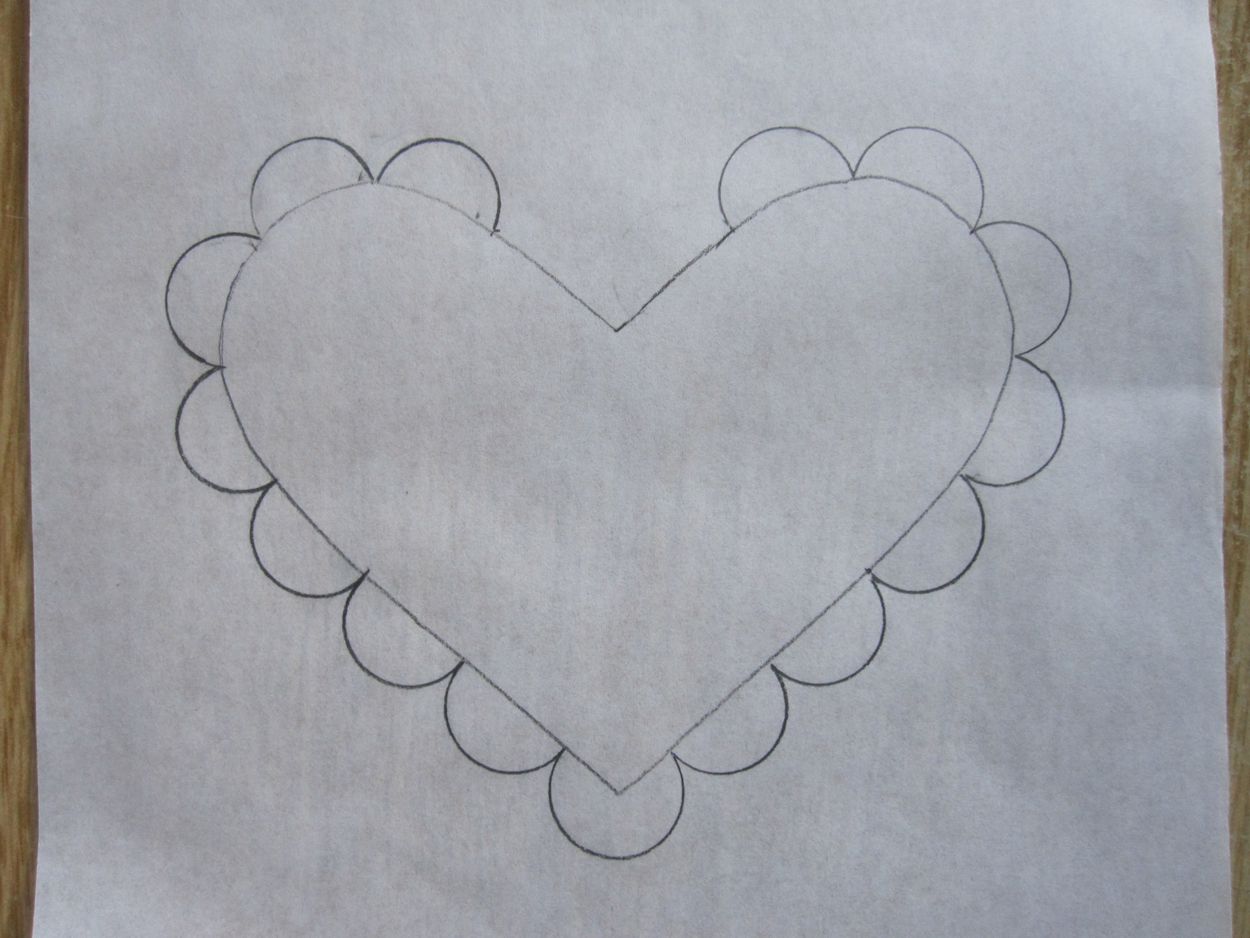
or the last scallops (on both sides of the concave point) are slanted a little so to be able to fit down into the concave point.
08_SK4It is more difficult to embellish circles with scallops. It is possible to calculate it using geometry, but this is too complicated for an embroiderer.
09_SK4
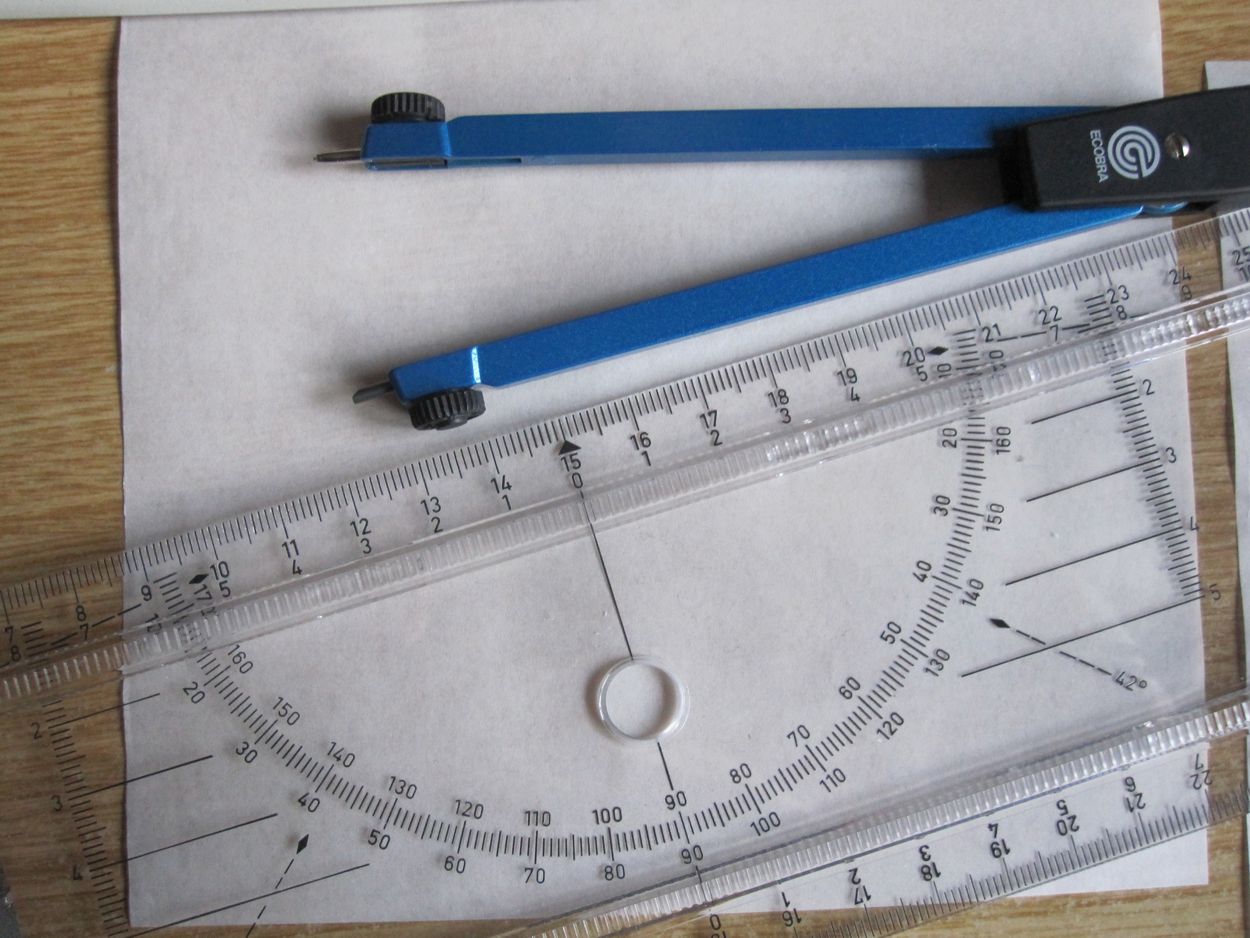
So one could utilize either paper, a pair of compasses and a protractor,
10_SK4or tracing paper, a stencil of the shape and a pencil.
11_SK4
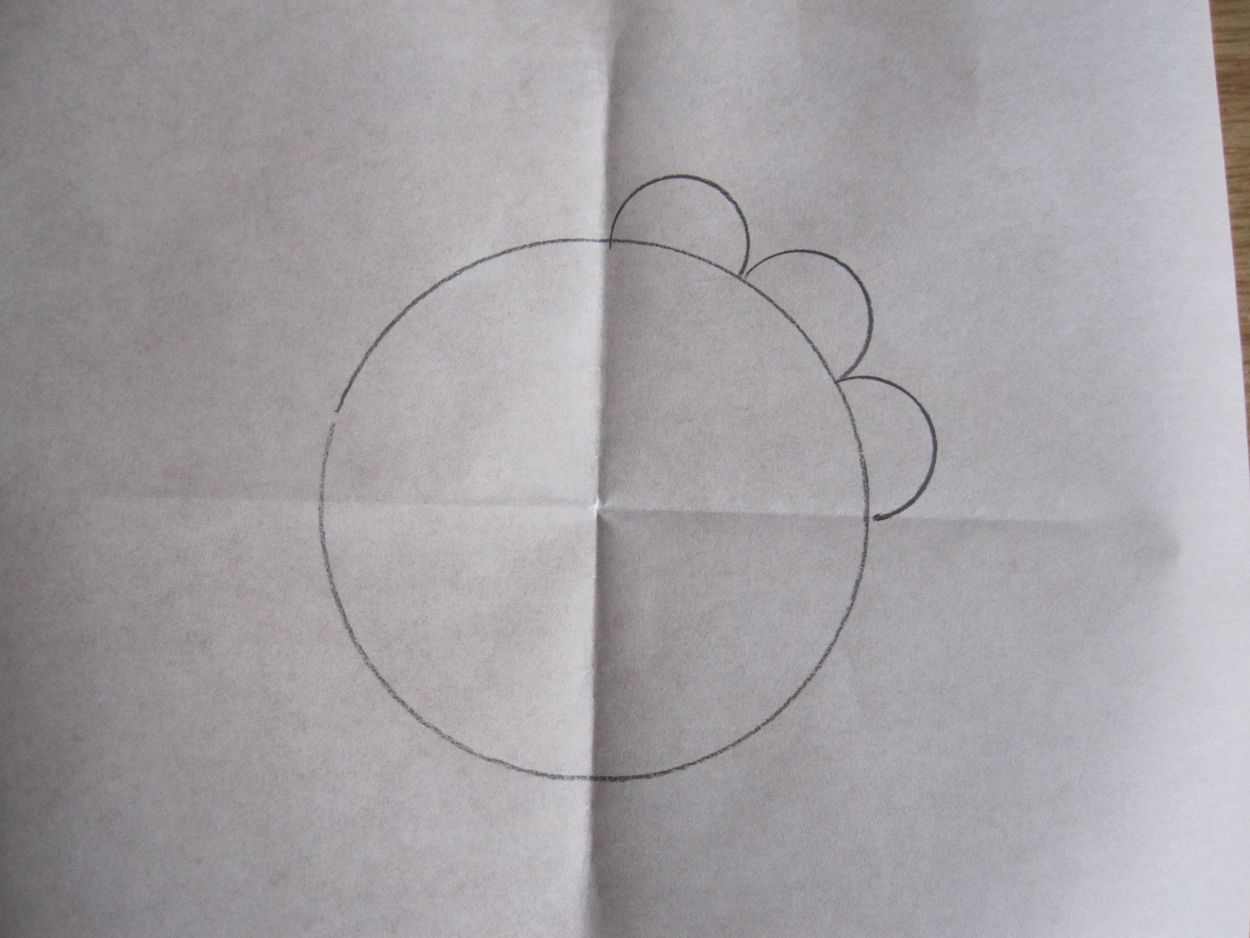
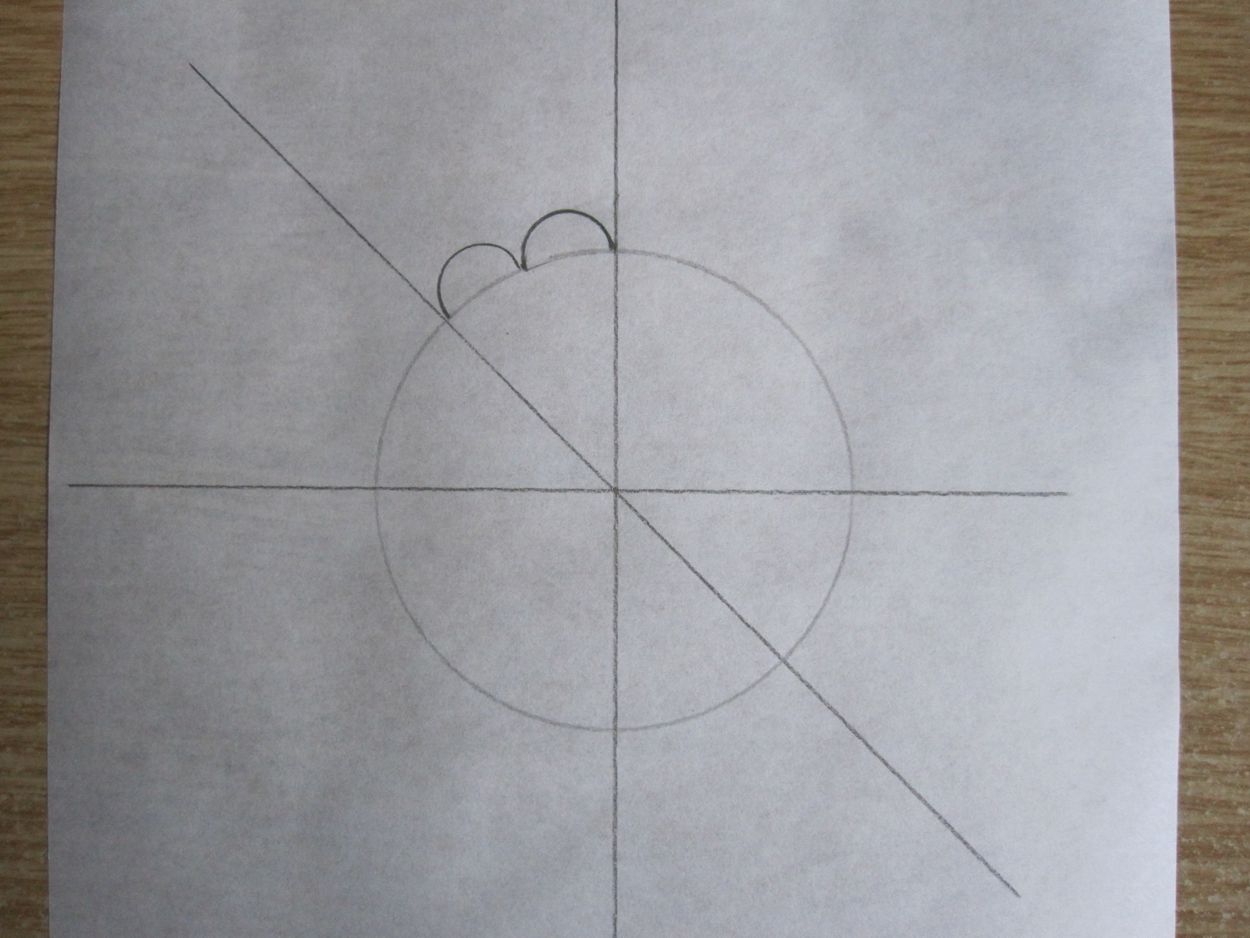
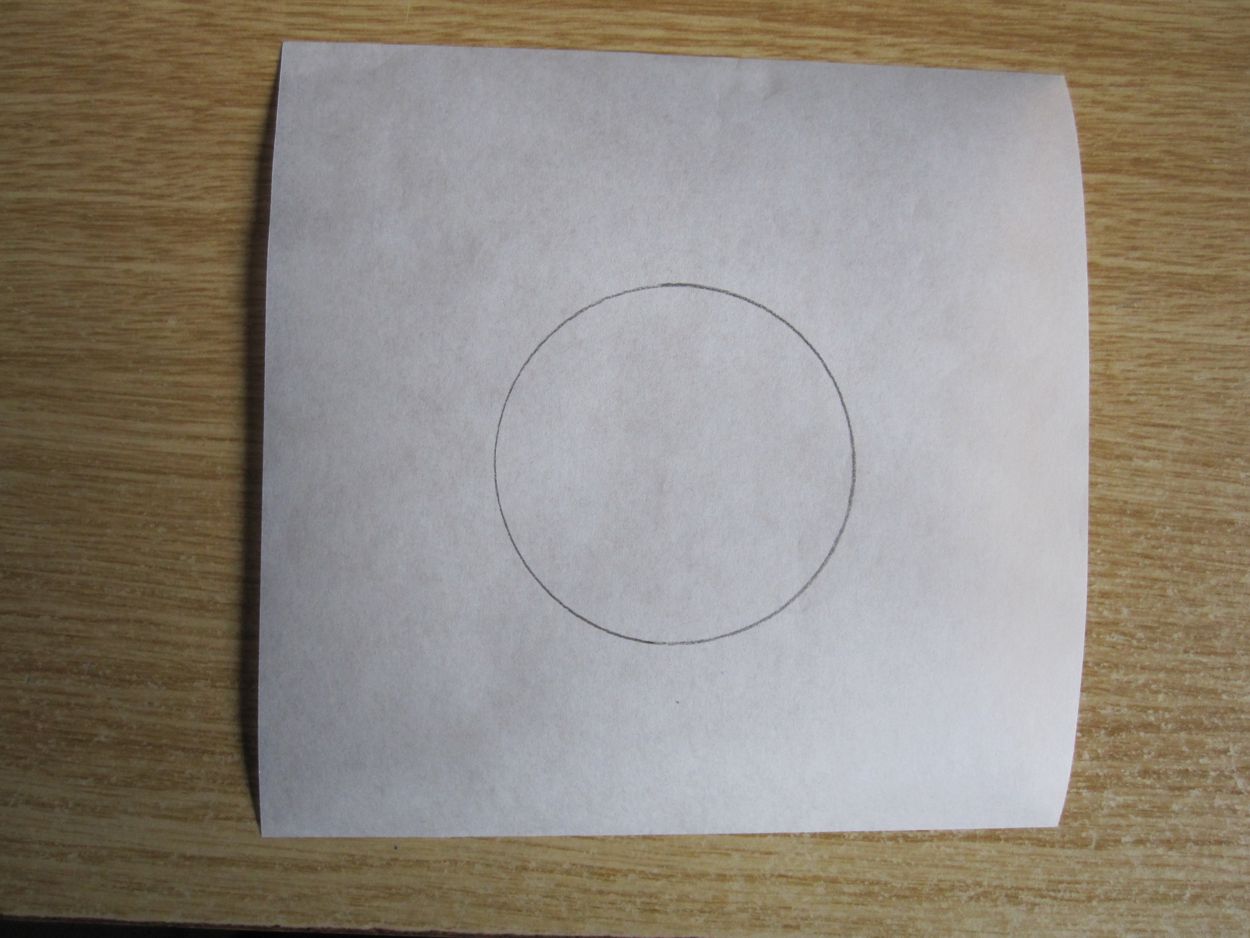
A circle is drawn on the paper
12_SK4
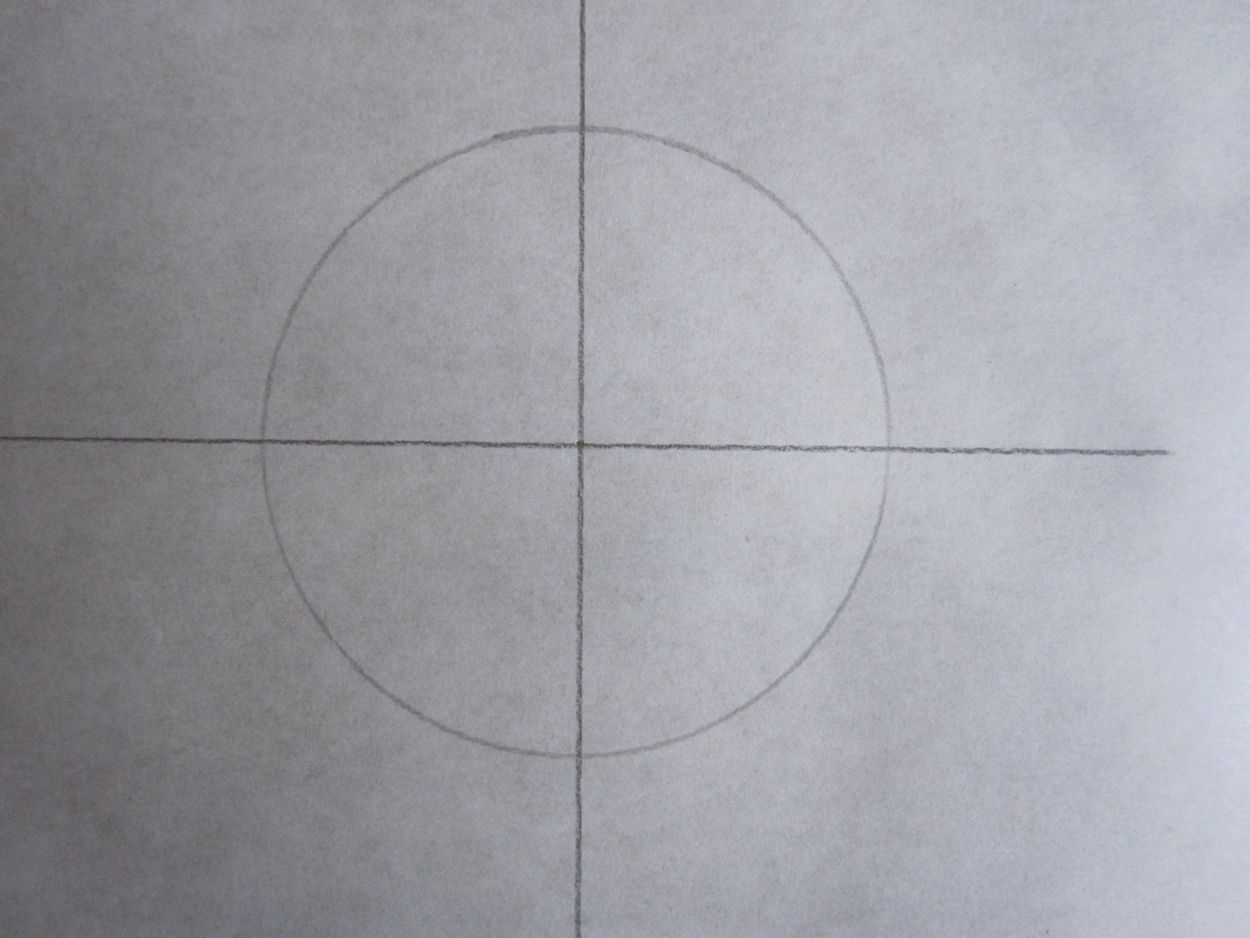
and divided into quarters using the protractor or
13_SK4
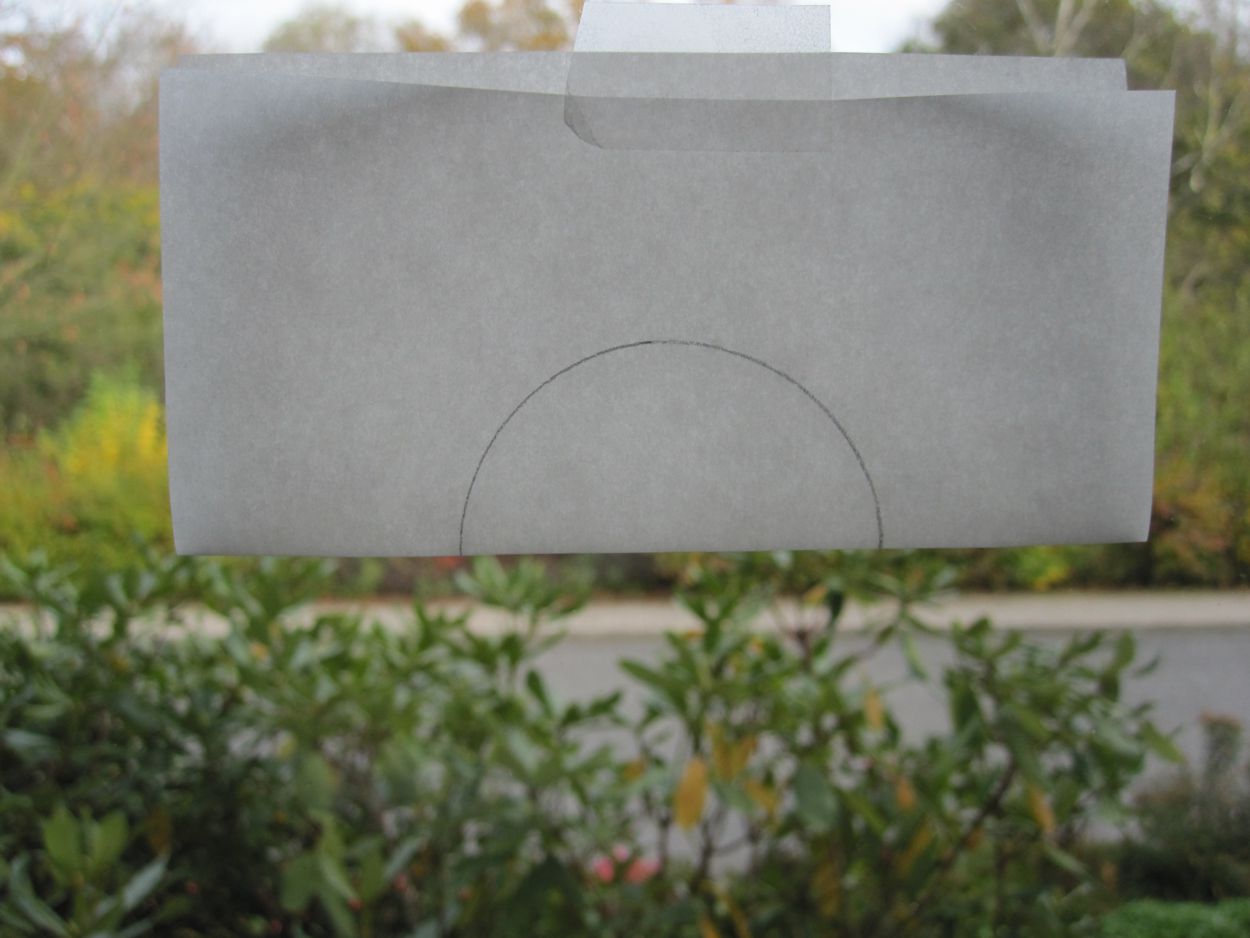
by folding. The slightly transparent paper is held against a window or other light source. It is folded – so that lines match – first in half
14_SK4and then into quarters.

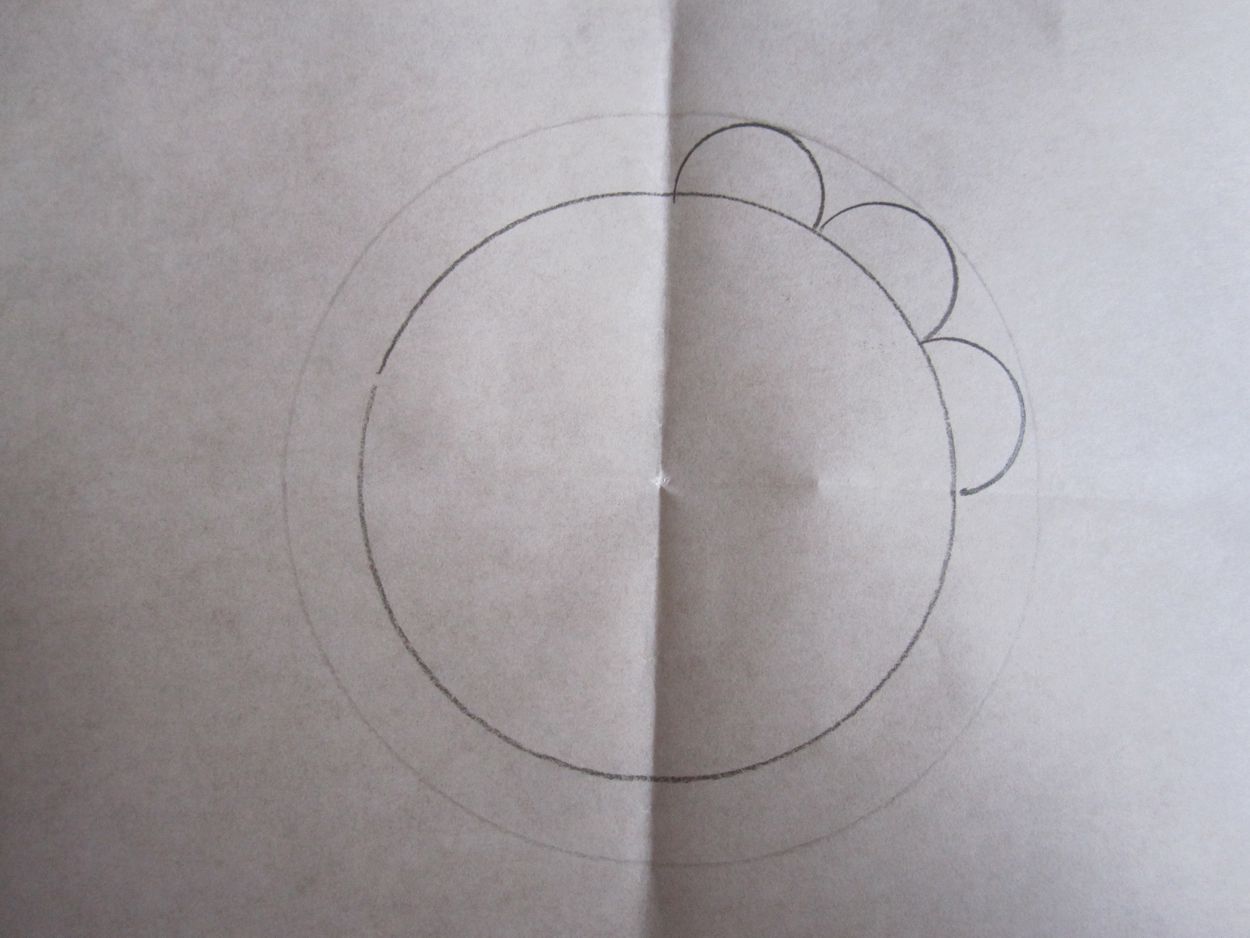
From the template, a circle of a proportionate size is chosen to draw scallops along the outline of the shape. For my circle, I started with a 13 mm diameter circle from the template – three scallops did not exactly fill the quarter.
15_SK4
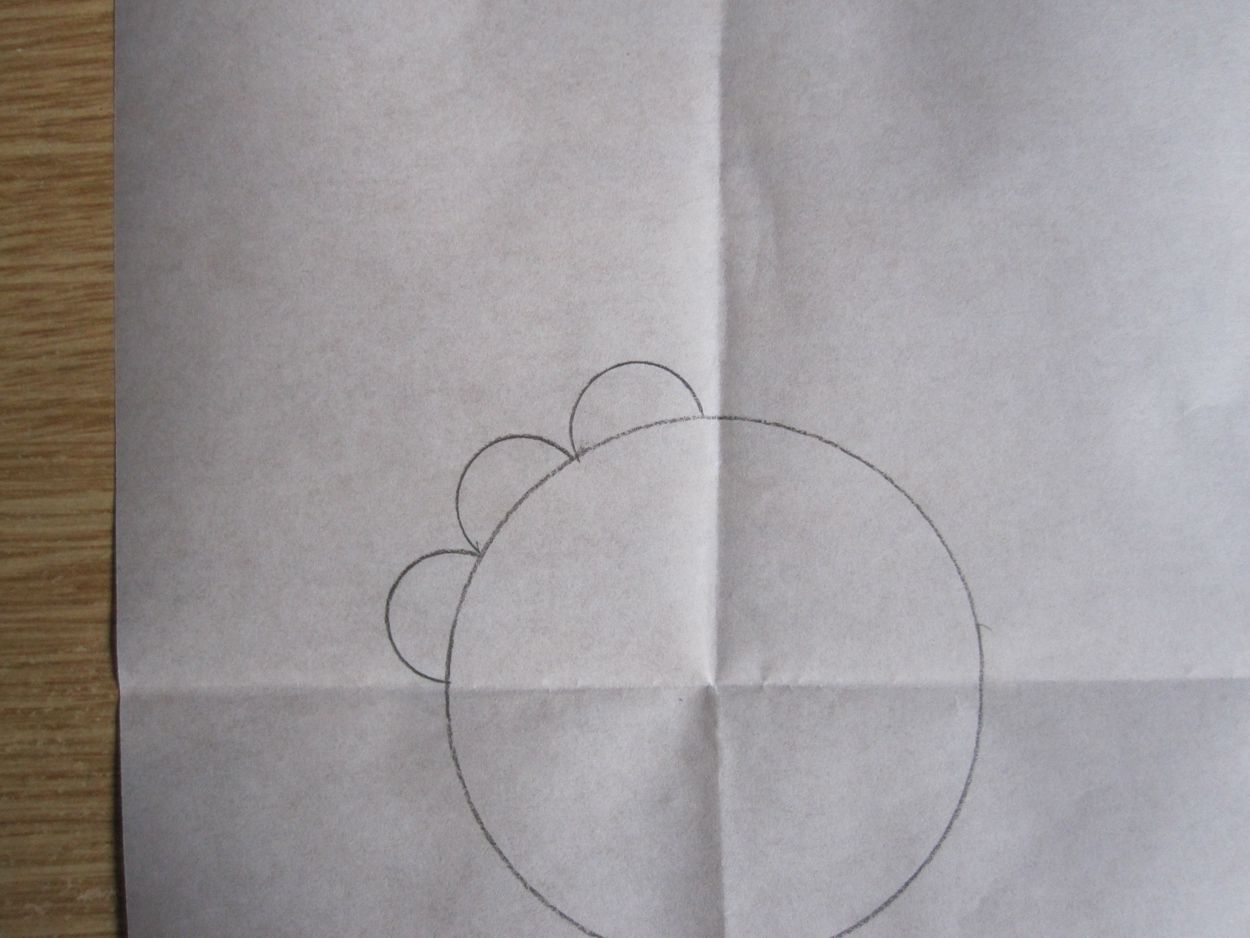
So, I tried a 14 mm circle; three scallops fit in the quarter exactly.
16_SK4To facilitate getting the scallops the same height, an additional marking line can be drawn with a pair of compasses.
17_SK4
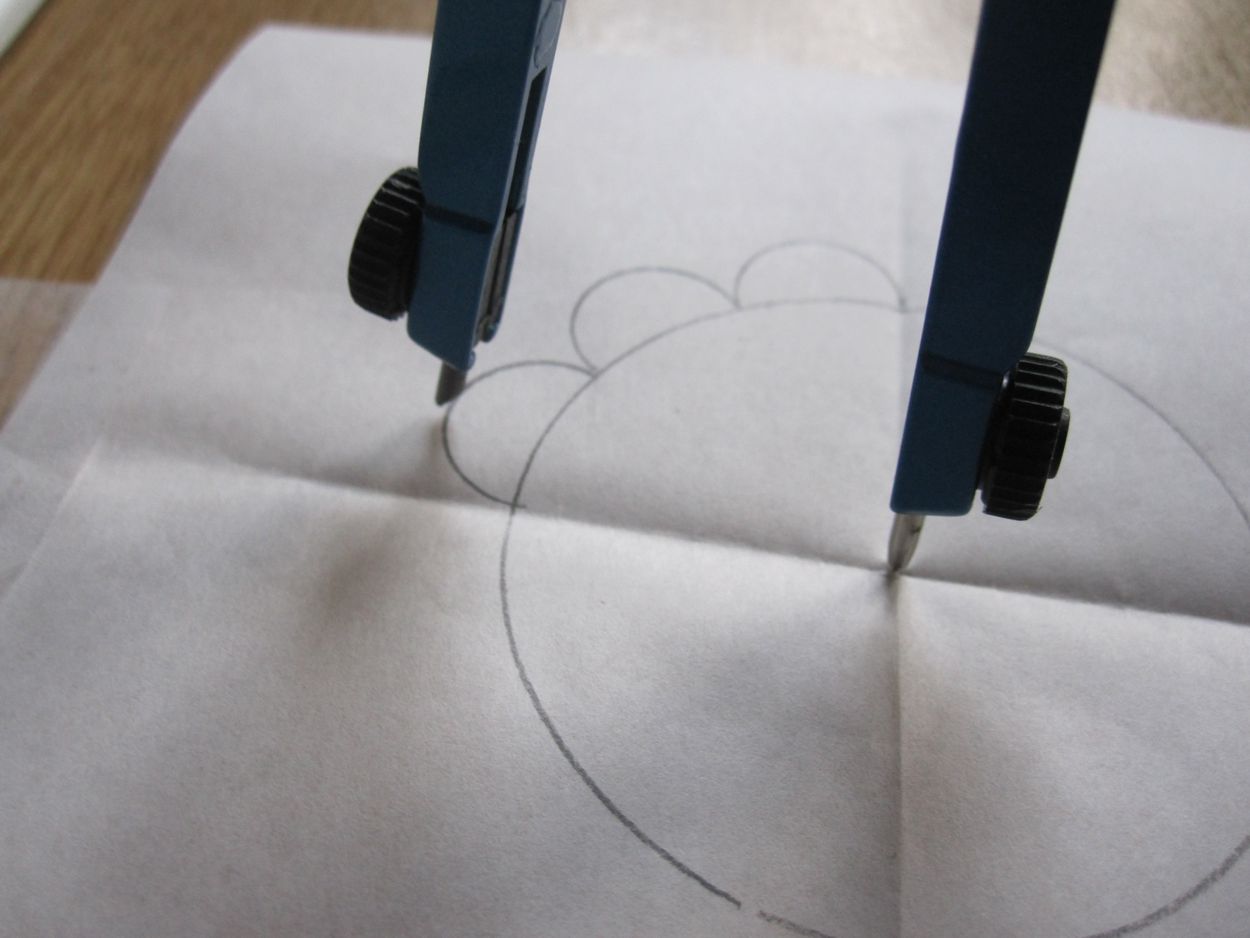
Such a line eases the work enormously.
18_SK4Proceeding carefully, in the end the scallops meet exactly.
19_SK4
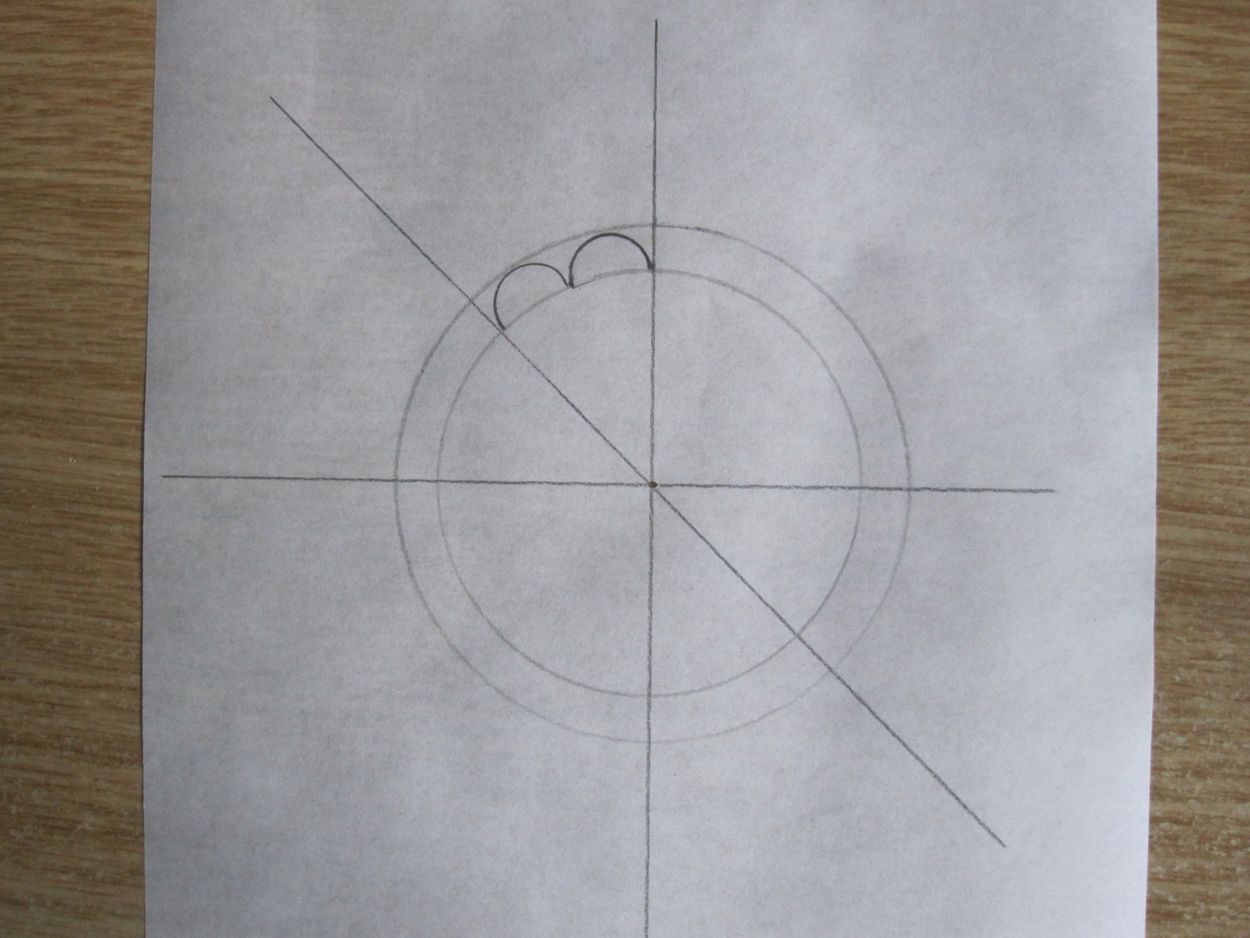
To ease the work on larger shapes, the circle should be divided once more – into eighths.
19a_SK4
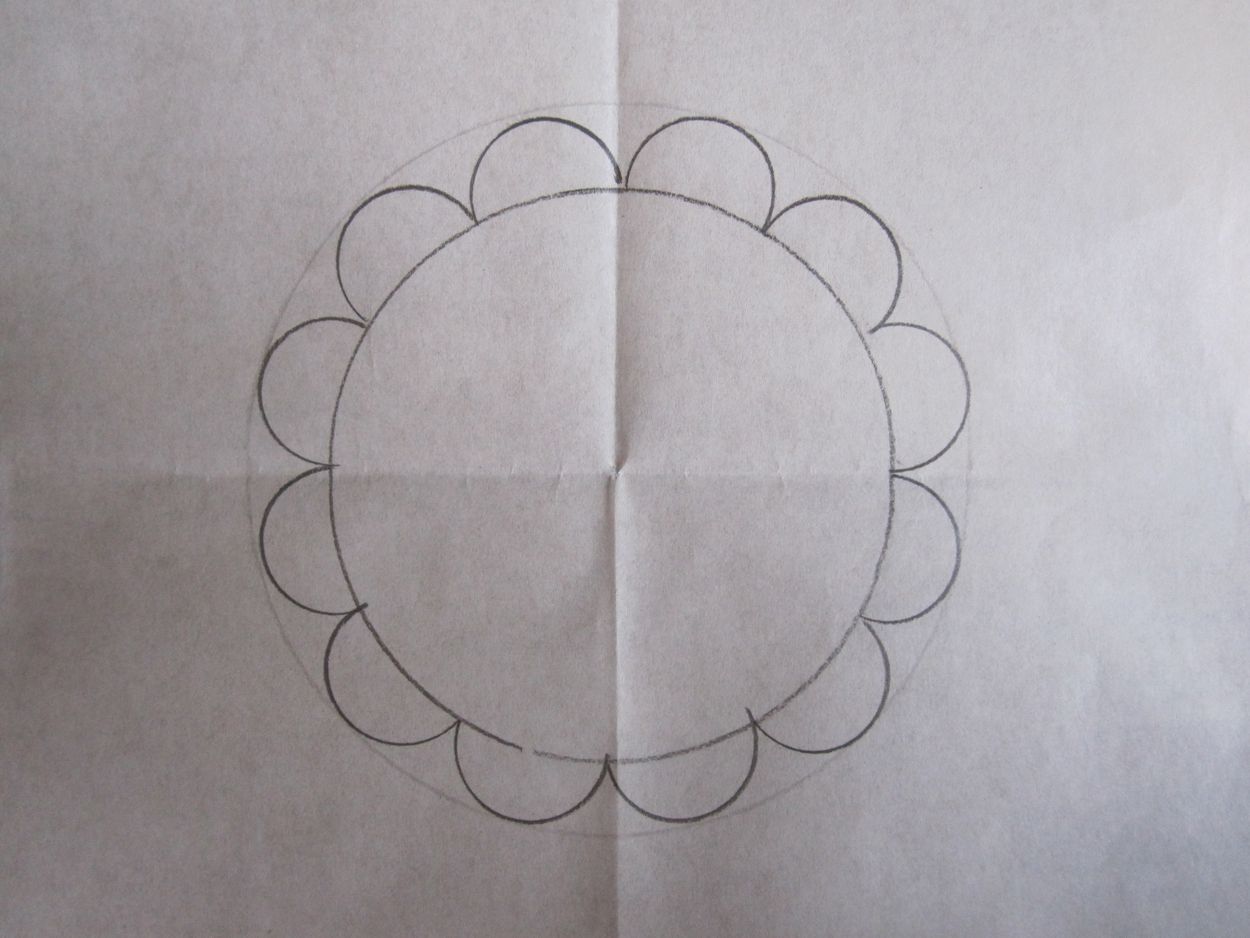
Again, drawing an additional outer circle (for scallop height) will further aid you in drawing perfect scallops.
20_SK4
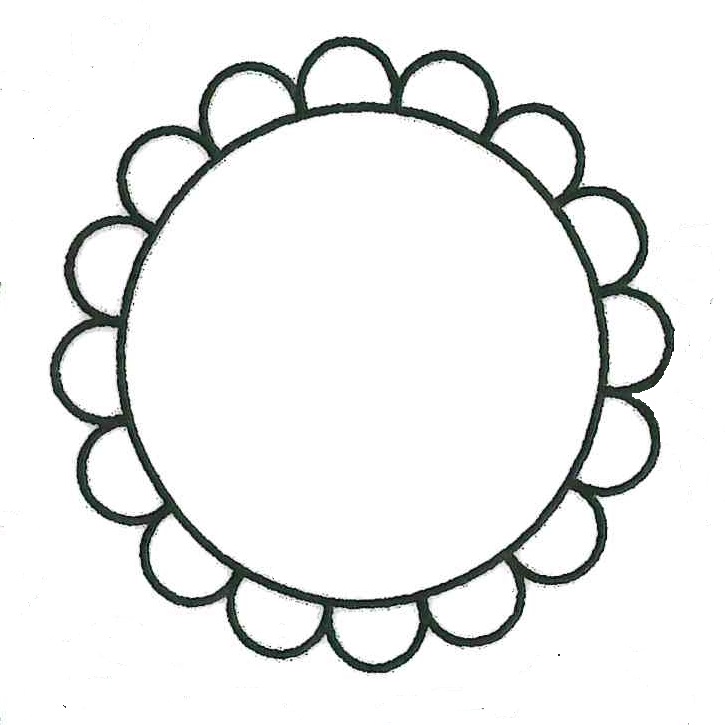
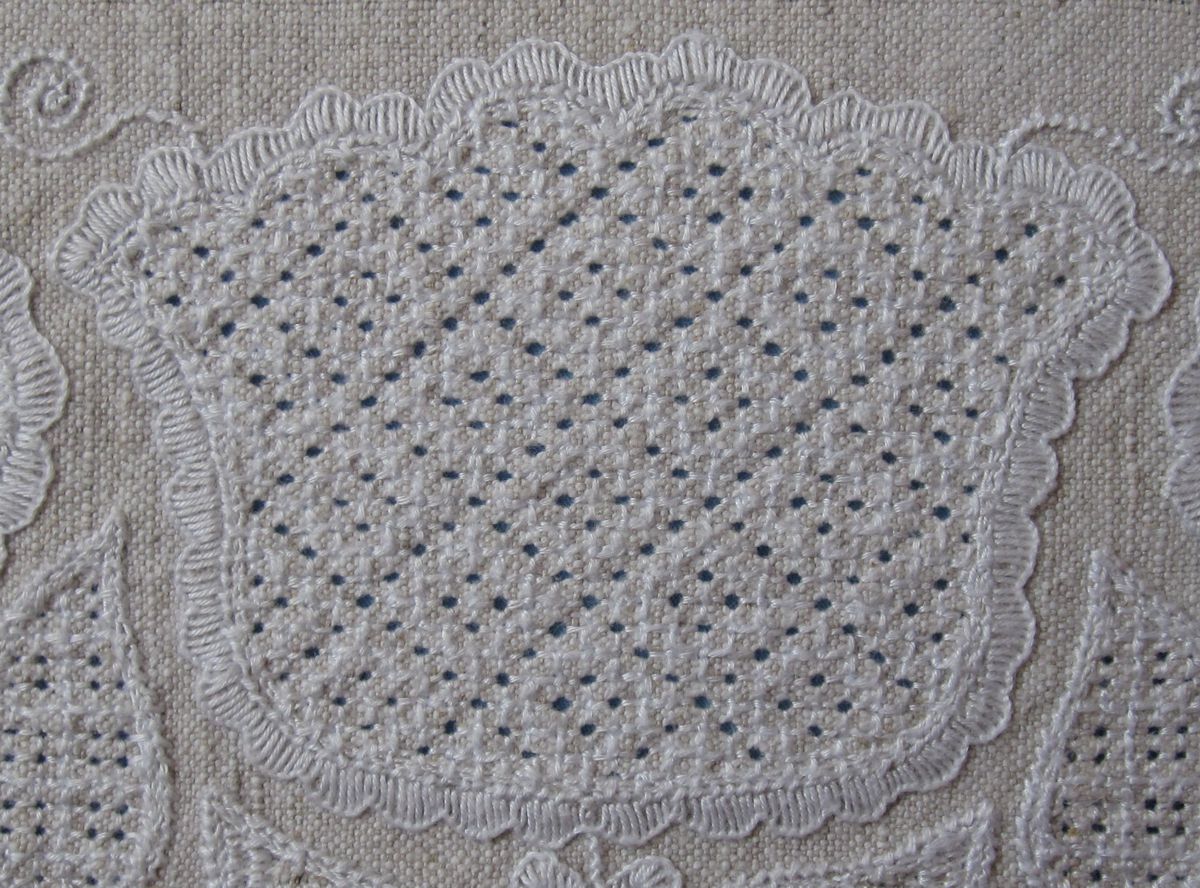
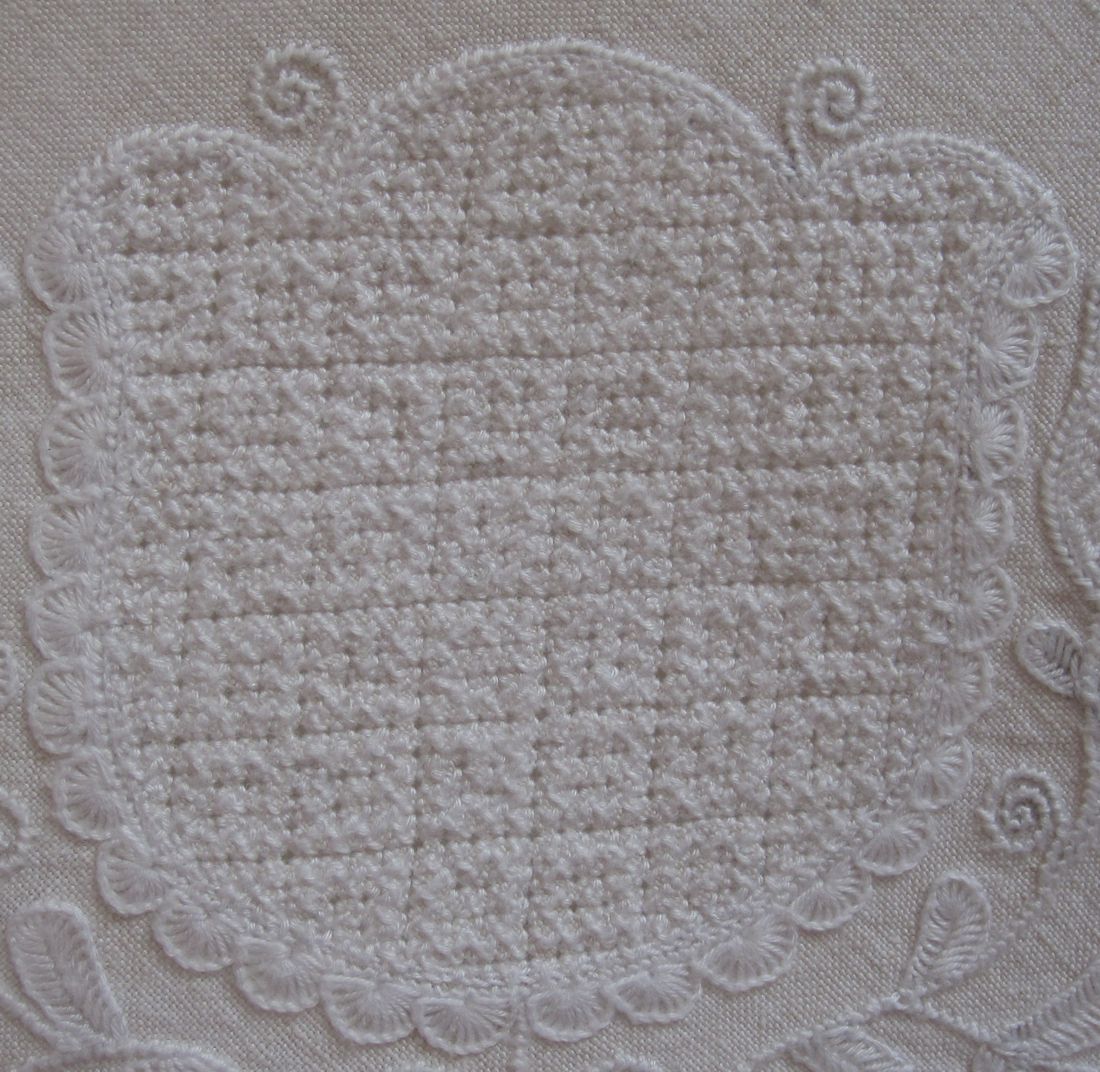
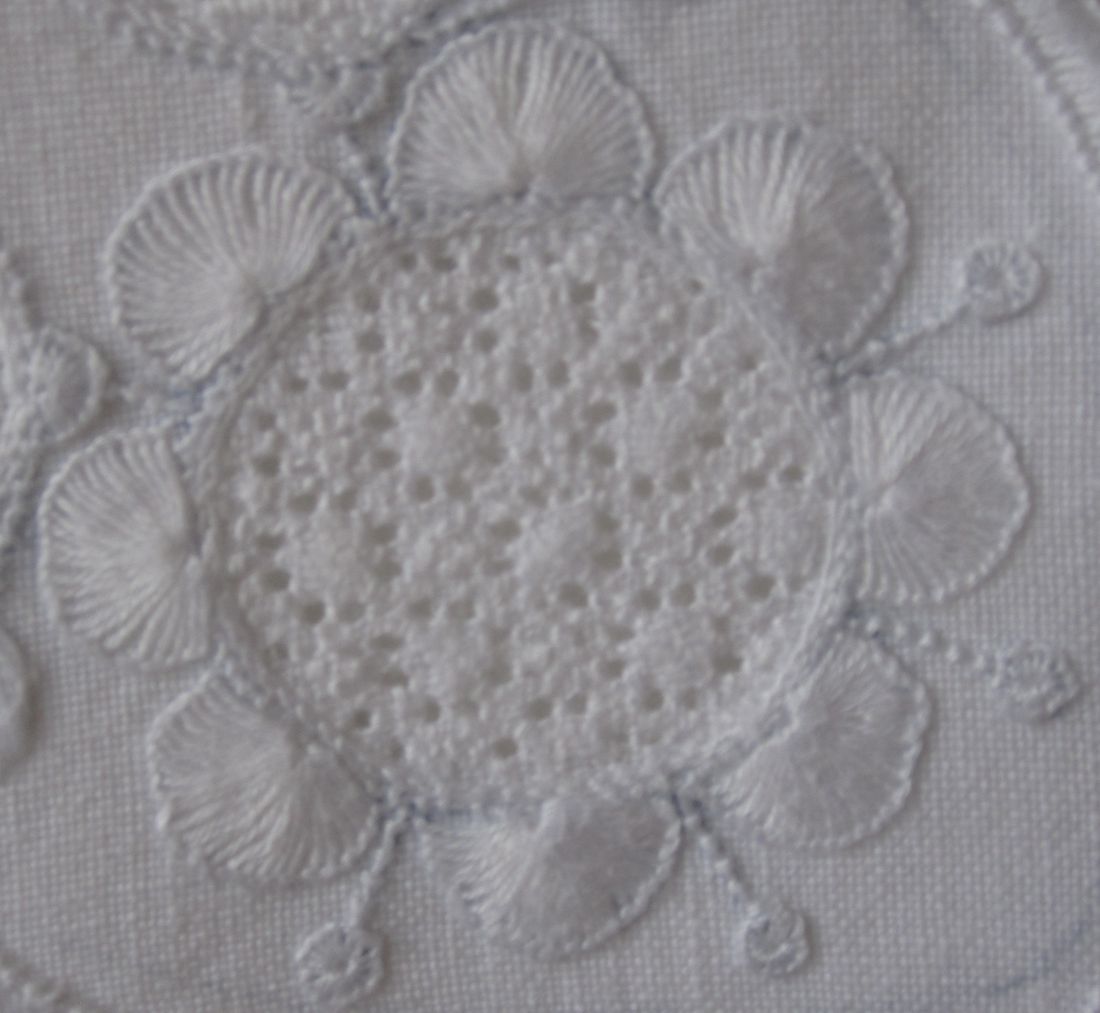
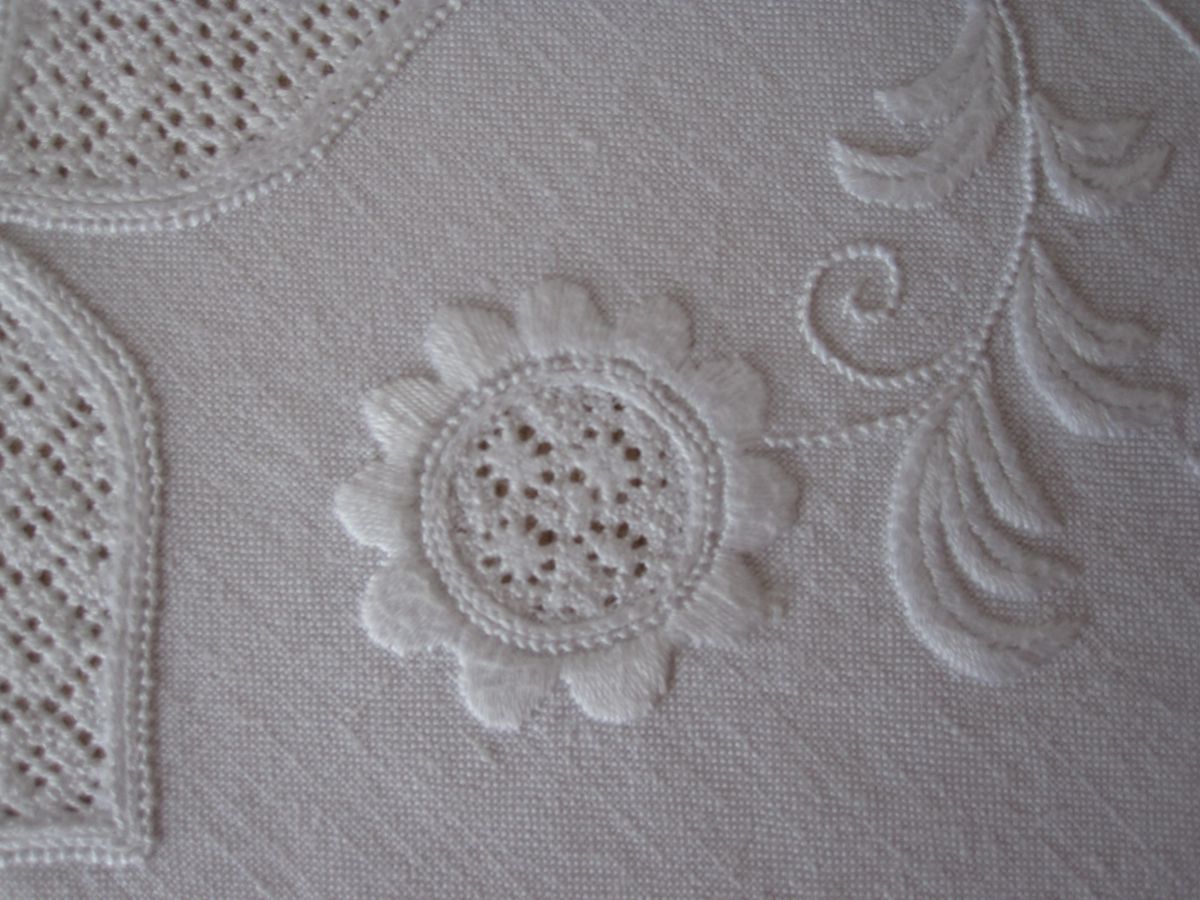
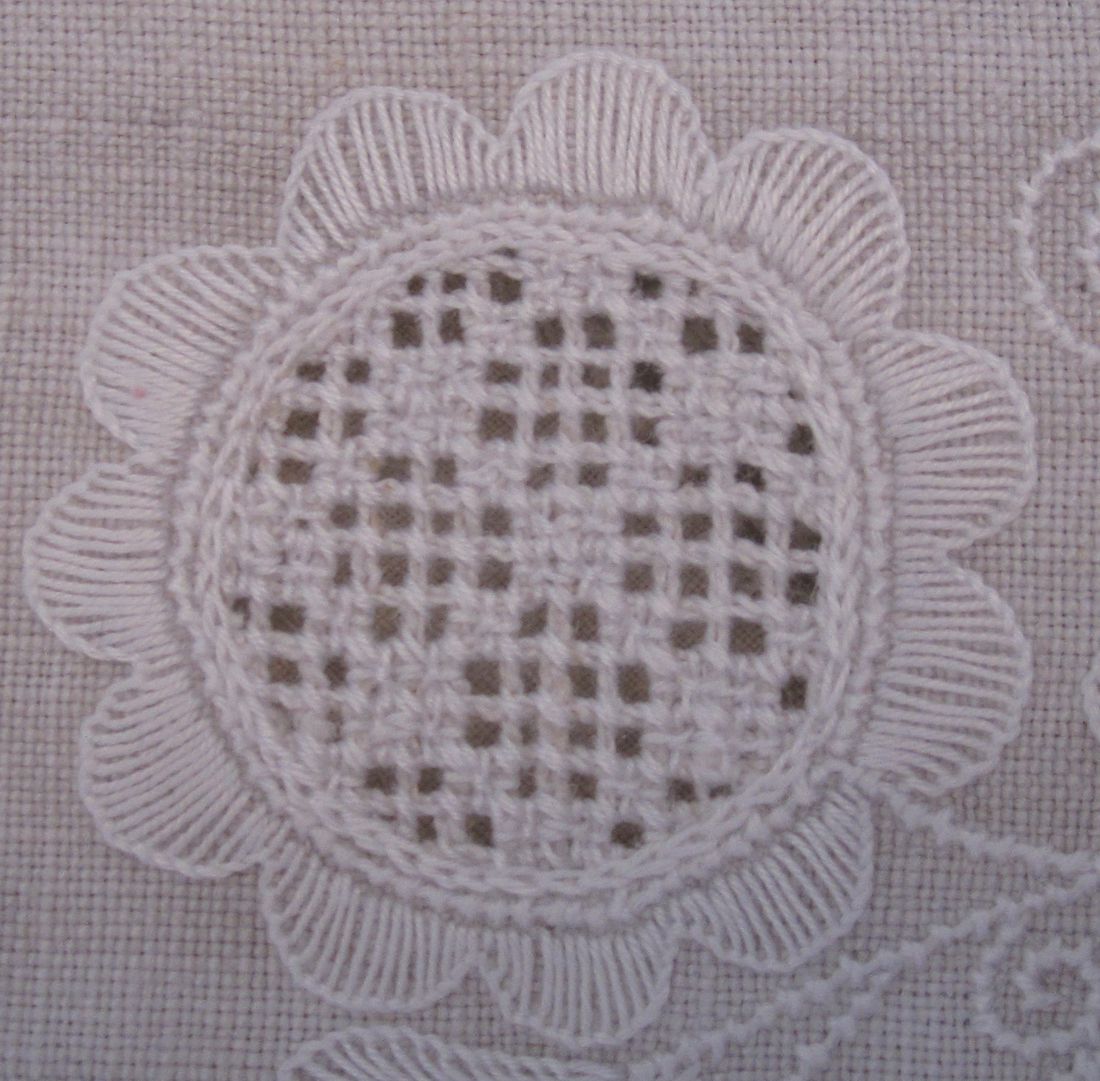
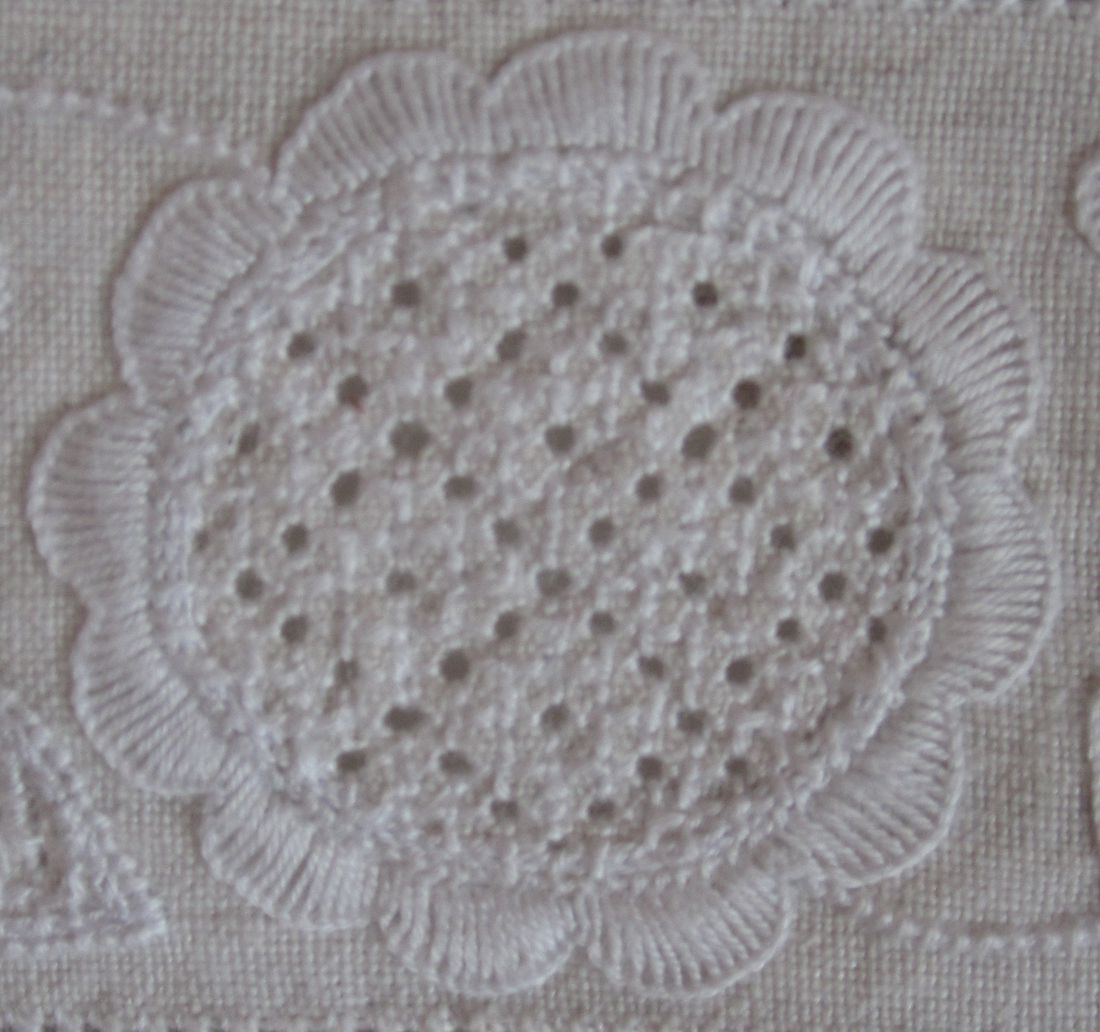
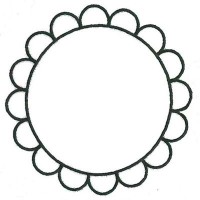
In the end, uniform and evenly distributed scallops outline the circle.
21_SK4

Schwalm Designs (3) – Scallops (2)

Scallops are not only used to completely outline a shape, as seen here on the small bud,

small bud outlined with half-eyelet scallops

small bud outlined with half-eyelet scallops

but they are also an effective embellishment, for example, on baskets, buds, birds or making stems more prominent.
basket decorated at both the top and bottom edges with uniform half-eyelet scallops

basket decorated at both the top and bottom edges with uniform half-eyelet scallops

bud decorated with uniform half-eyelet scallops

bud decorated with uniform half-eyelet scallops

bird decorated with uniform half-eyelet scallops

bird decorated with uniform half-eyelet scallops

stem decorated with uniform half-eyelet scallops

stem decorated with uniform half-eyelet scallops

Scallops in graduated sizes
bud decorated with half-eyelet scallops in graduated sizes

bud decorated with half-eyelet scallops in graduated sizes

or arranged fan-like
bud decorated with Satin stitch scallops arranged fan-like and in graduated sizes

bud decorated with Satin stitch scallops arranged fan-like and in graduated sizes

are often found in different variations along small buds
bud decorated with scallops arranged fan-like and worked with Coral Knot stitches and Chain stitches

bud decorated with scallops arranged fan-like and worked with Coral Knot stitches and Chain stitches

or pomegranate motifs.
pomegranate decorated with scallops arranged fan-like and in graduated sizes,worked with Coral Knot stitches and Chain stitches

pomegranate decorated with scallops arranged fan-like and in graduated sizes, worked with Coral Knot stitches and Chain stitches

pomegranate decorated with scallops of differing sizes, worked with Blanket stitches

pomegranate decorated with scallops of differing sizes, worked with Blanket stitches

Scallops in the shape of leaves sometimes decorate hearts
leave-shaped scallops in different sizes outline a heart, worked with Blanket stitches

leave-shaped scallops in different sizes outline a heart, worked with Blanket stitches

or birds
uniform leave-shaped scallops as decoration for a bird, worked with Blanket stitches

uniform leave-shaped scallops as decoration for a bird, worked with Blanket stitches

Schwalm Designs (2) – Scallops (1)

The simple motifs are often enhanced with embellishment. So, a circle is seldom seen unadorned, and hearts are usually decorated.
The customary form of decorating simple Schwalm motifs is to outline the shapes with scallops; they look nice and they are easy to embroider.
Bogenverzierung | scallop design 01
The scallops are placed close together.

Circle outlined with uniform and evenly distributed half-eyelet scallops. The thread weight is correct, and the stitches have been worked with the appropriate density.

Circle outlined with uniform and evenly distributed half-eyelet scallops. The thread weight is correct, and the stitches have been worked with the appropriate density.

Circles are outlined with scallops of the same size, evenly distributed around the edge of the circle.
Heart outlined, except for the bottom and top center, with uniform and evenly distributed half-eyelet scallops. The thread weight is correct, and the stitches have been worked with the appropriate density.

Heart outlined, except for the bottom and top center, with uniform and evenly distributed half-eyelet scallops. The thread weight is correct, and the stitches have been worked with the appropriate density.

Also, hearts are outlined with such scallops. The scallop at the bottom of the heart should be drawn somewhat longer making it look almost teardrop shaped. It is best to start the line drawing here (at the bottom of the heart) and to work to the top in even steps on the right and on the left side of the heart. Meeting at top of the heart, either the scallop spacing needs to be adjusted or they are slanted a little bit.
Heart outlined with half-eyelet scallops. The thread weight is correct with appropriately dense stitches. Some of the scallops should be closer together and the bottom point should have only one scallop.

Heart outlined with half-eyelet scallops. The thread weight is correct with appropriately dense stitches. Some of the scallops should be closer together and the bottom point should have only one scallop.

It does not look very elegant to have two scallops meet at the lower heart point.
Heart outlined with scallops. The thread weight is correct and the density of the stitches is good. However, the treatment of the scallops at the heart’s lower point is not attractive.

Heart outlined with scallops. The thread weight is correct and the density of the stitches is good. However, the treatment of the scallops at the heart’s lower point is not attractive.

Also, the effect is not harmonious to have scallops becoming smaller at the heart’s lower point.
Tulip outlined with scallops utilizing the correct thread weight. The density of the stitches is not consistent. In this example, one can see that the embroiderer had difficulty distributing the scallops evenly – especially along the curved line at the top of the tulip.

Tulip outlined with scallops utilizing the correct thread weight. The density of the stitches is not consistent. In this example, one can see that the embroiderer had difficulty distributing the scallops evenly – especially along the curved line at the top of the tulip.

Tulips completely outlined with scallops are rare. It is difficult to distribute the scallops evenly –
especially along the curved line at the top of the tulip.
Tulip embellishment with half-eyelet scallops. The thread weight and the density of the stitches are both correct.

Tulip embellishment with half-eyelet scallops. The thread weight and the density of the stitches are both correct.

On very large tulip motifs a scallop embellishment along the sides and the bottom is often seen.
Tulip embellishment with half-eyelet scallops of differing sizes. The thread weight and the density of the stitches are both correct.

Tulip embellishment with half-eyelet scallops of differing sizes. The thread weight and the density of the stitches are both correct.

Smaller tulip motifs have scallops (if they have them at all) of differing sizes at the top edges,
Tulip embellishment with uniform half-eyelet scallops. The thread weight and the density of the stitches are both correct.

Tulip embellishment with uniform half-eyelet scallops. The thread weight and the density of the stitches are both correct.

and to achieve a more harmonious effect, a single scallop can be placed at the lower center of the tulip.
Tulip embellishment with uniform half-eyelet scallops. The thread weight and the density of the stitches are both correct. However, it would be more aesthetically pleasing to put a single scallop at the center point, rather than having two scallops meet there.

Tulip embellishment with uniform half-eyelet scallops. The thread weight and the density of the stitches are both correct. However, it would be more aesthetically pleasing to put a single scallop at the center point, rather than having two scallops meet there.

The scallops are worked with Blanket stitches, and the half-eyelet scallop is preferred. Blanket stitch half-eyelet scallops ease the attractive finish.
Heart outlined, except for the bottom and top center, with uniform and evenly distributed half-eyelet scallops. The thread weight is correct, but the density is not. The scallops should have more stitches.

Heart outlined, except for the bottom and top center, with uniform and evenly distributed half-eyelet scallops. The thread weight is correct, but the density is not. The scallops should have more stitches.

The scallops should be easy to stitch, that means they should not be too small, nor too large.
Scallops with a radius of 1 cm are perfect. Of course, the scallops must be in proportion to the motif – smaller motifs need smaller scallops. However, a scallop’s radius should not be smaller than ½ cm.
Circle outlined with uniform and evenly distributed half-eyelet scallops. However, they are too large. The thread weight and the density of the stitches are both correct. A larger scallop needs more stitches to become sufficiently covered; it is difficult to get an orderly appearance with so many stitches radiating from the same point.

Circle outlined with uniform and evenly distributed half-eyelet scallops. However, they are too large. The thread weight and the density of the stitches are both correct. A larger scallop needs more stitches to become sufficiently covered; it is difficult to get an orderly appearance with so many stitches radiating from the same point.

Circle outlined with uniform and evenly distributed half-eyelet scallops. The individual scallops are divided and worked with the appropriate thread weight, and the stitches have been worked with the appropriate density. The additional embroidered parts also utilize the correct thread weight.

Circle outlined with uniform and evenly distributed half-eyelet scallops. The individual scallops are divided and worked with the appropriate thread weight, and the stitches have been worked with the appropriate density. The additional embroidered parts also utilize the correct thread weight.

Larger scallops can be managed by dividing the individual scallops and embroidering both parts separately.
Circle outlined with uniform and evenly distributed scallops. The scallops have been embroidered using precisely placed Satin stitches.

Circle outlined with uniform and evenly distributed scallops. The scallops have been embroidered using precisely placed Satin stitches.

Sometimes scallops are also worked with Satin stitches. This needs much more practice than embroidering with Blanket stitches.
Circle outlined with uniform and evenly distributed scallops. However, the thread is too thin and the stitch density is not correct.

Circle outlined with uniform and evenly distributed scallops. However, the thread is too thin and the stitch density is not correct.

The thread should not be too thin and the stitches should lie densely together.
Circle outlined with fairly uniform and evenly distributed scallops. The thread weight is correct, but the Blanket stitches could be more dense.

Circle outlined with fairly uniform and evenly distributed scallops. The thread weight is correct, but the Blanket stitches could be more dense.

Schwalm Hems – The Arch Border (6)

To use the arch border as an all-around decoration, I came up with a corner arch solution. (One can find another design of a corner solution in the downloadable file “Arch Borders – instructions with close-up photographs and line-drawn designs”.)
Bogenborte | arch border
The arch is 3 cm high and 4.3 cm at its widest point. I want to decorate a doily with 3 arches per side plus the corner arches. To this end, I make a corresponding drawing. The square has a side length of 24.6 cm. My doily will have a 3 cm hem plus 1 cm fold. So, I cut the linen to the size of 2 x 7cm + 24.6 cm = 38.6 cm. On all sides, 7 cm from the edges, I withdraw a thread to the respective intersection points.
Bogenbortenquadrat | arch border square
Using an iron transfer pencil, I transferred the pattern to the smoothly ironed and aligned linen. Please proceed extremely carefully.
Aufbügeln entlang des Fadenauszuges | iron on transfer along the withdrawn-thread line
I want to work a single row of Four-Sided stitches around the border, so I let remain 4 threads outside the withdrawn thread lines and withdraw the fifth one up to the respective intersection points.

In the shapes, I withdraw the threads for the grids depending on the chosen patterns. The vertical threads are cut at the curve and withdrawn back to the perpendicular withdrawn-thread line that the arch sits upon.

So that the withdrawn threads do not interfere with the embroidery to be done on the grid, lay them away from the grid and baste them in place with short Running stitches using a coloured sewing thread. Trim the ends of the withdrawn threads. Now work the filling patterns.
Rückseite der Kästchenstiche | back of the Four-Sided stitches
When all shapes are filled, from the front of the fabric Four-Sided stitch is worked (from the front one can see the number of the threads better). While working the Four-Sided stitch, the short thread ends on the back are covered. Every few stitches one should check to make sure that every thread is secured in the stitching.
Fertige Muster | finished patterns
The hem is fastened by Antique Hem stitch. The coloured sewing threads are removed. The doily is washed, starched and ironed. A nice small sampler is finished.
fertiges Deckchen | finished doily
To ease working along with the posted instructions on my blog, I made a downloadable file: “Arch Borders – instructions with close-up photographs and line-drawn designs”.
Arch Borders - Cover - english
As already mentioned in an earlier post, in Schwalm whitework hems are not only decorated with Four-Sided Hem stitch, Peahole Hem stitch or Needleweaving; they are also adorned with small decorative borders worked along the seam. The arch border is a very special adornment. There are different versions of arch borders seen on both traditional and contemporary embroidered pieces.

Pictures of these embroideries, as well as their line-drawn designs, are presented in the downloadable booklet. In addition to the version presented here on my blog, the document includes six different, very nice arch border designs with corners (some with additional variations). Also included are instructions with close-up photographs to work an all-around arch border along a Four-Sided stitch row, and an arch border without corner embellishment along a Peahole hem. Note: these instructions have been posted on my blog, but in the downloadable document they are all in one place, and edited for absolute clarity.
Not included are the filling patterns or instructions for basic stitches. For detailed instructions of basic stitches used, please refer to my book, Basic Principles of Schwalm Whitework. And for detailed instructions for filling patterns, please refer to this blog or my other books.

The first sixteen pages of the document show the examples of the different arch borders, and outline, in detail, the order of working. The last four pages contain line-drawn sections of seven different arch borders in their original size as well as reduced sizes with corners.

If you like arch borders, I think you will enjoy having this detailed document at your fingertips.

Schwalm Hems – The Arch Border (5)

previous post: Schwalm Hems – The Arch Border (4)

Note: When I embroidered the original arch border, I did not think to take pictures of the steps presented here. So, I made a new sample to illustrate this step. Because the filling patterns under the arches, in this step, are of minor importance I chose not to embroider them at this time.

To work the opposite side mirrored, withdraw one vertical thread at the right of the first arch to the desired distance between the two arch border rows.
Up from there withdraw the threads for the Peahole hem.
Fadenauszug 1 | thread withdrawing 1
First, work Four-Sided stitches over 4 threads between the two outside withdrawn-thread lines.
Then start working the arches at the innermost thread-line.
Kästchenstiche 1 | Four-Sided stitches 1
Once all arches and the Peahole hem have been worked, the fabric allowance on the narrow sides is cut to the chosen length. (In my example I have chosen a hem measuring 3 cm plus a 1 cm wide fold; so I need an allowance of 7 cm. The measurement depends on the hem one wants to work.
Should the hem be secured with Antique hem stitch, start the measurement at the remaining withdrawn thread-line.
Fadenauszug für Hohlsaumstich | thread withdrawing for Antique Hem stitch
Should the hem get one row of Four-Sided stitches, leave 4 threads outside the withdrawn threadline and cut 1.
Fadenauszug für Kästchenstiche | therad withdrawing for Four-Sided stitches
Work Four-Sided stitches between the two thread-lines and then start measuring from the outermost thread-line.
1 Reihe Kästchenstiche | 1 row of Four-Sided stitches
Should you desire to also work Peaholes along the narrow sides, make the additional thread withdrawals — leave 6, cut 1, leave 4, cut 1 — and work the Peahole hem. Then start measuring from the outermost thread-line.
Erbslochhohlsaum | Peahole hem
Work the opposite side mirrored.
fertiges Band | finished band
The hem is fasten (BPSW, pages 79-84) and the corners are worked (BPSW, pages 85/86).

In a future article I will show the option to continue the arch border around the corners.