The 13 basic stitches of Schwalm whitework
A. The decorative stitches
1. The Coral Knot stitch
This stitch is used to embroider the outlines of the motifs, the stems and the tendrils.
thread weight: depending on the fineness of the linen, coton à broder thread No. 16 or No. 20
building the rows: from bottom to top
direction of needle movement: from right to left
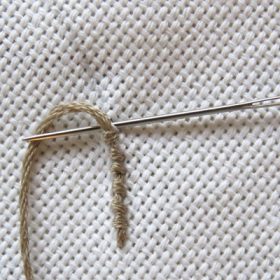
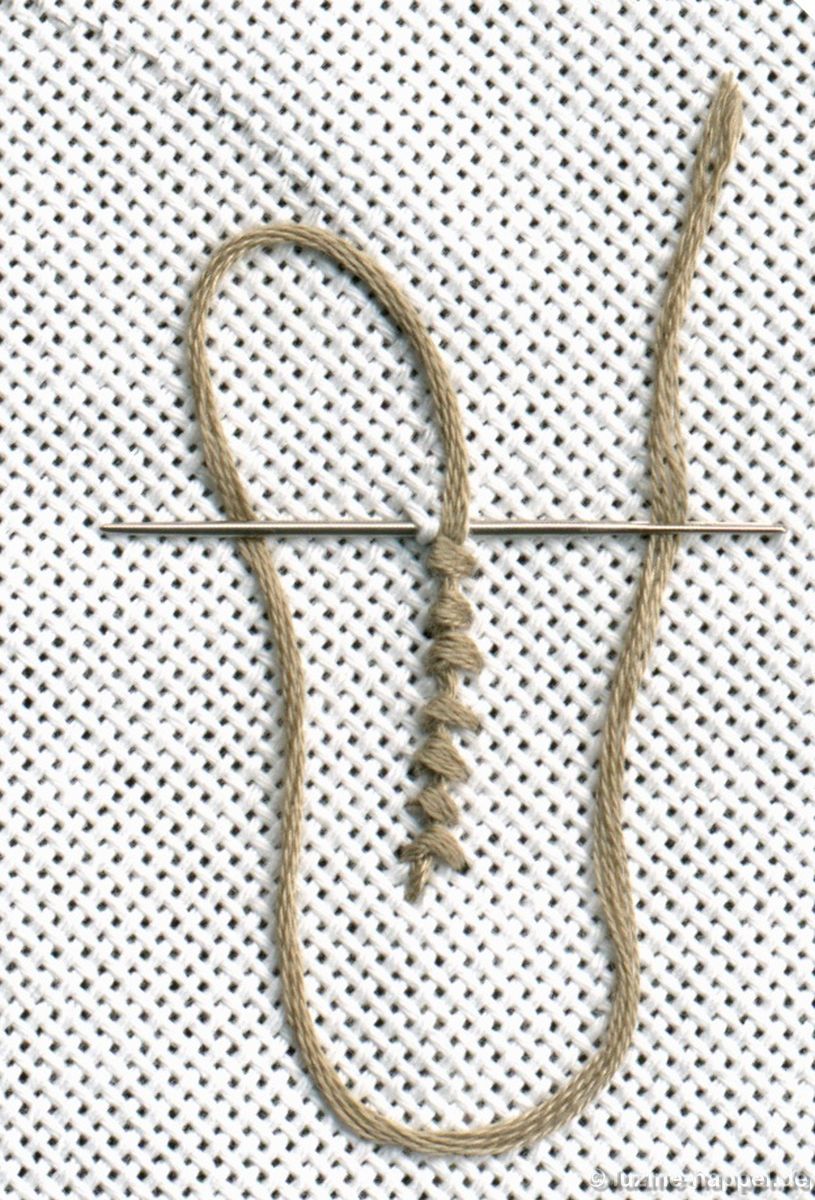
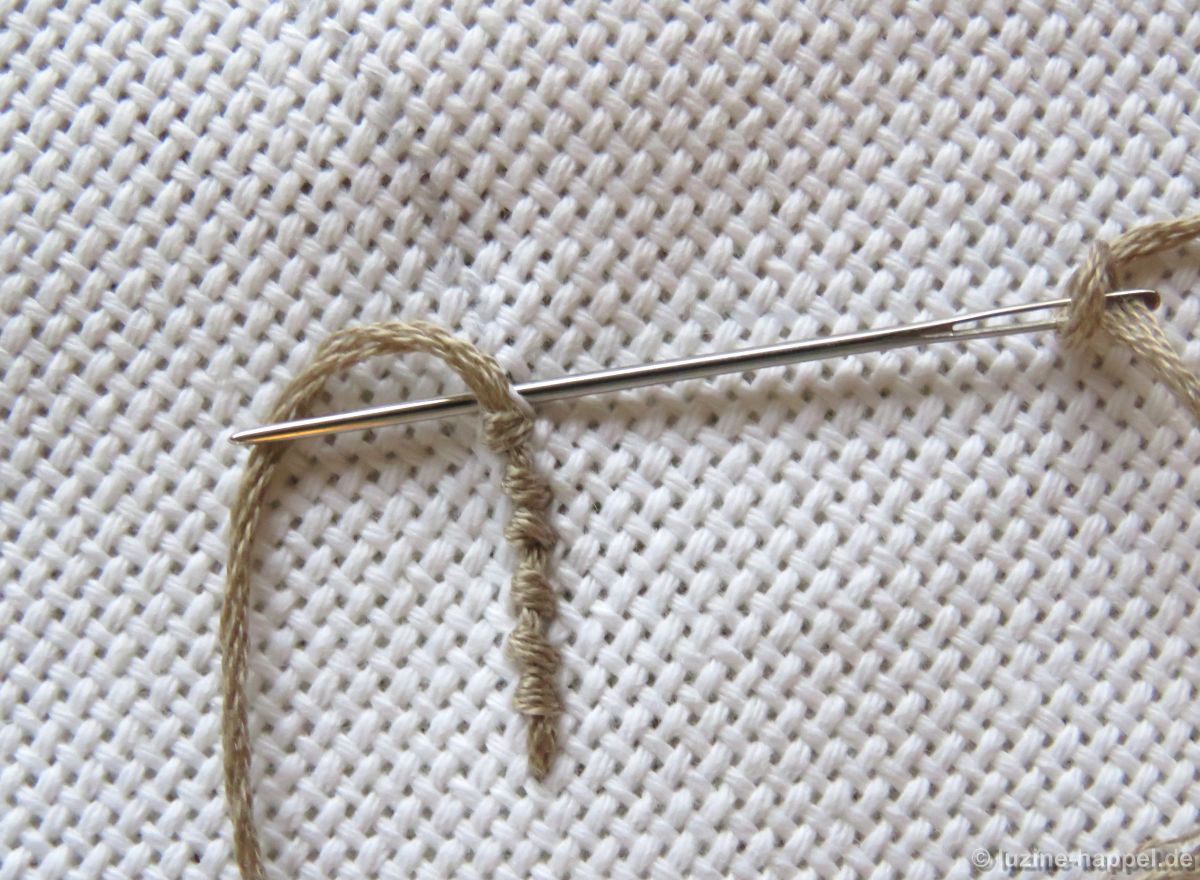
way of working: Place the working thread a bit over the line to be embroidered and then loop it to the left and down.
Insert the needle to the right of the placed thread—just a short distance from the previous knot—then pass under the fabric below the placed thread and emerge to the left, close to it. The looped thread is below the needle tip.
Pull the needle through and the thread vertically into the air.
The distance between the knots should be approximately one needle width.
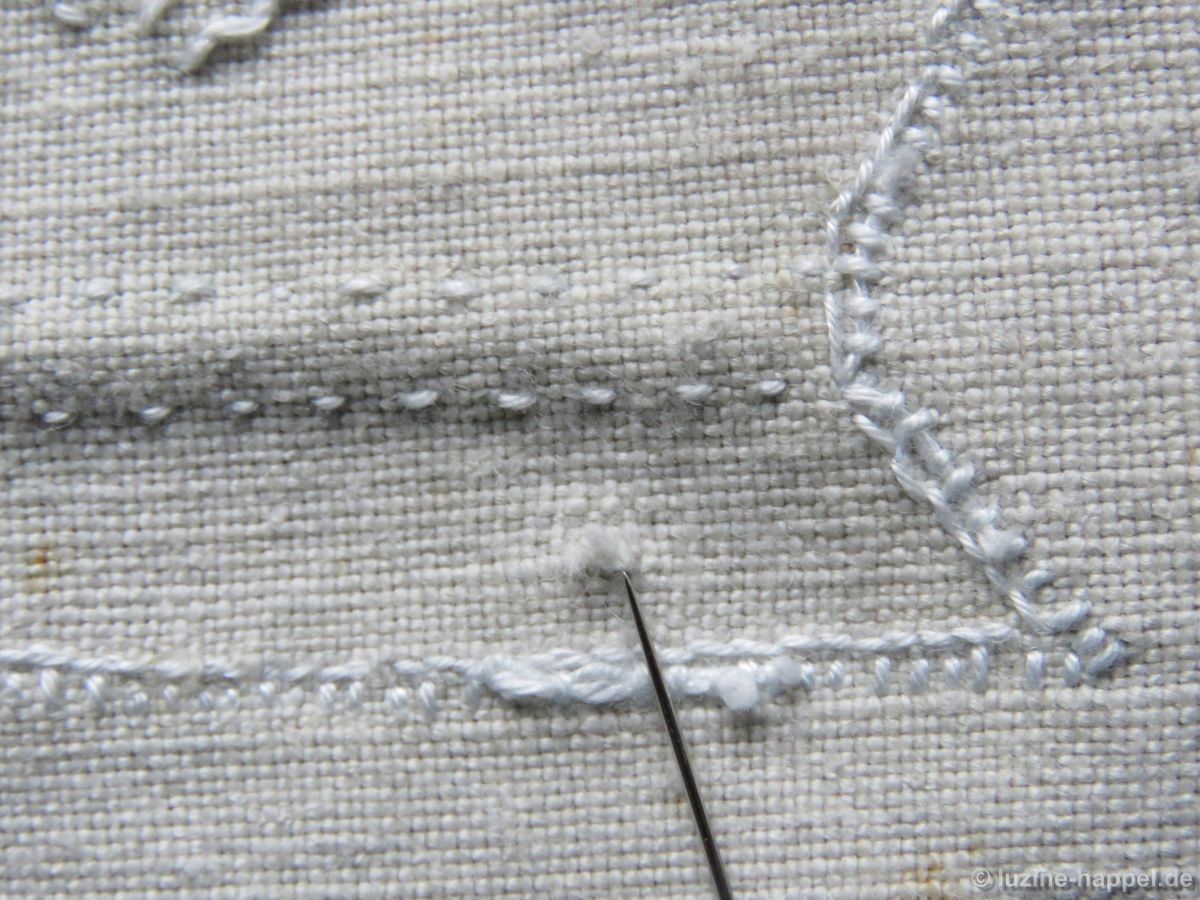
For beginners it is easier to take the fabric below the line from right to left just above the emerging point,
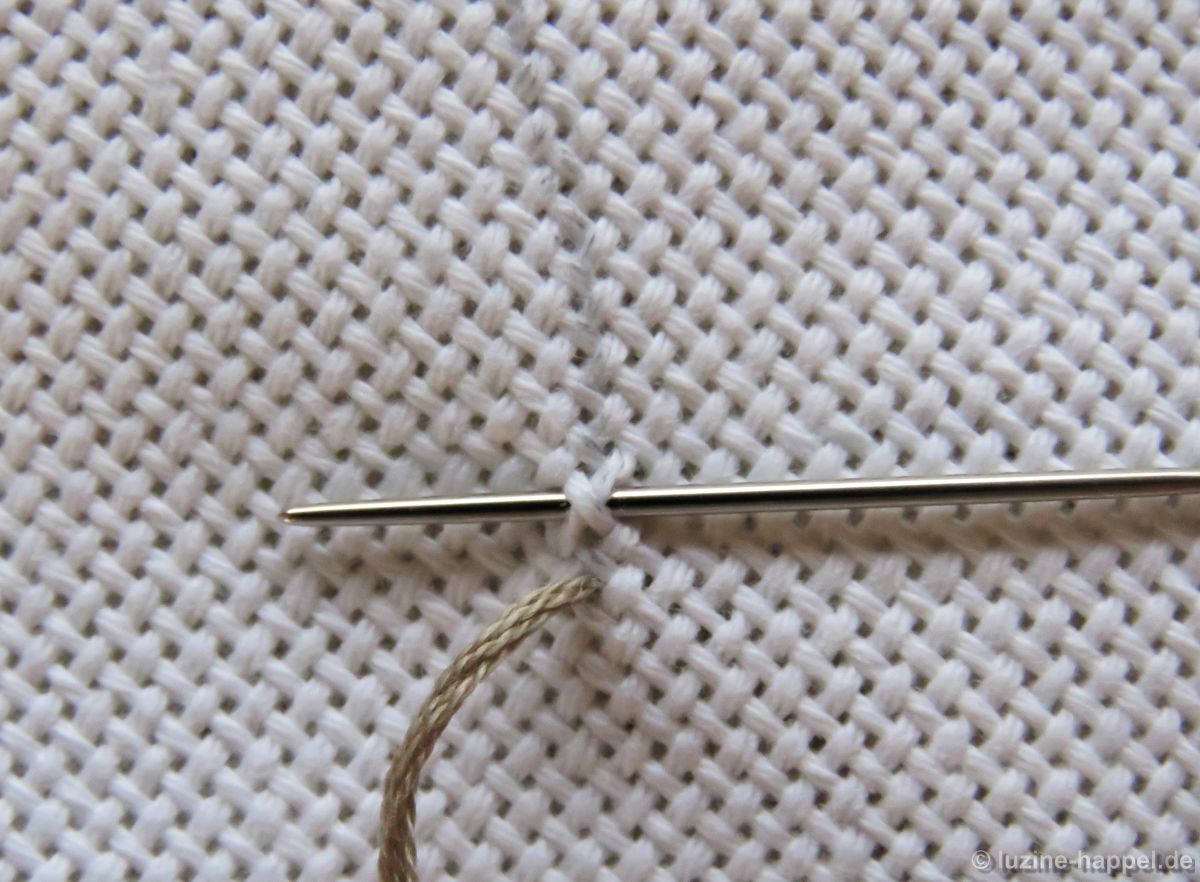
then to lay the working thread up over the needle tip and down again under the needle tip,
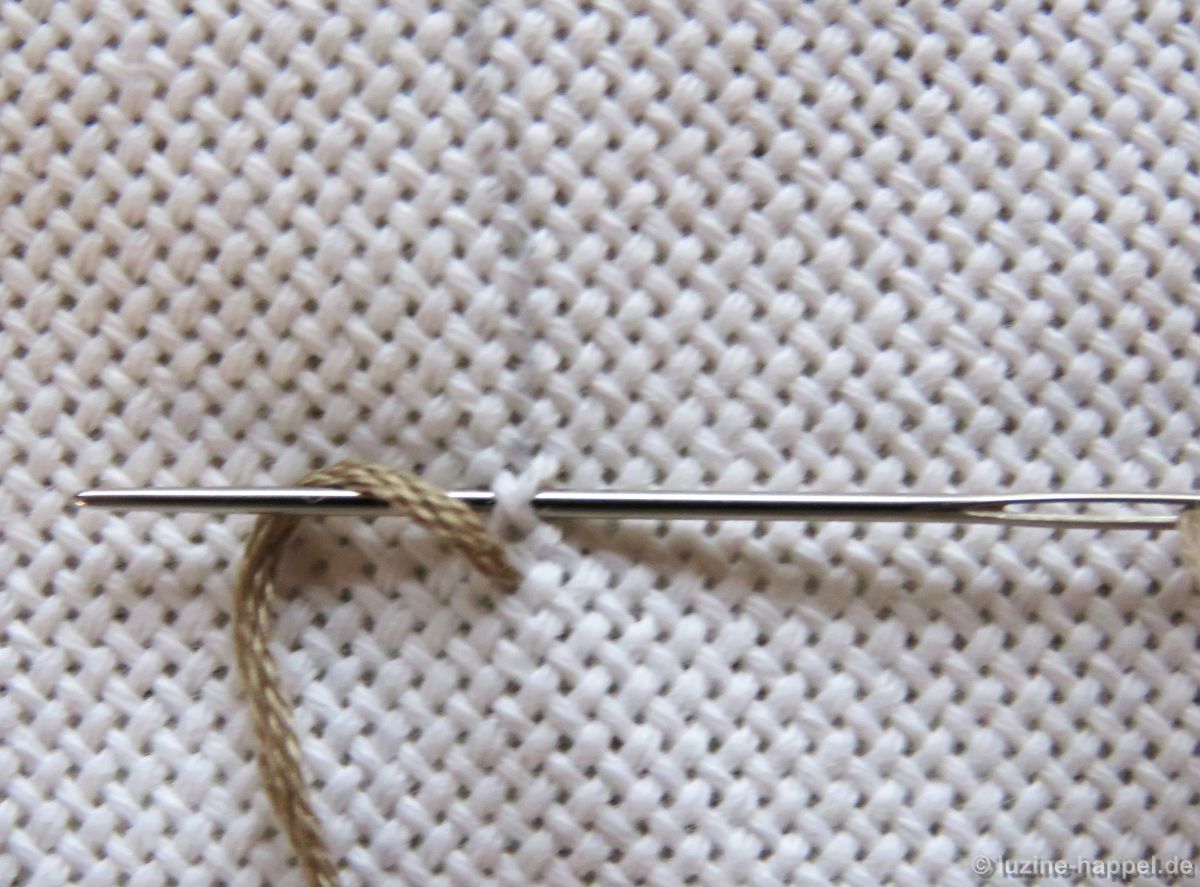
to pull the needle through and the thread vertically into the air.
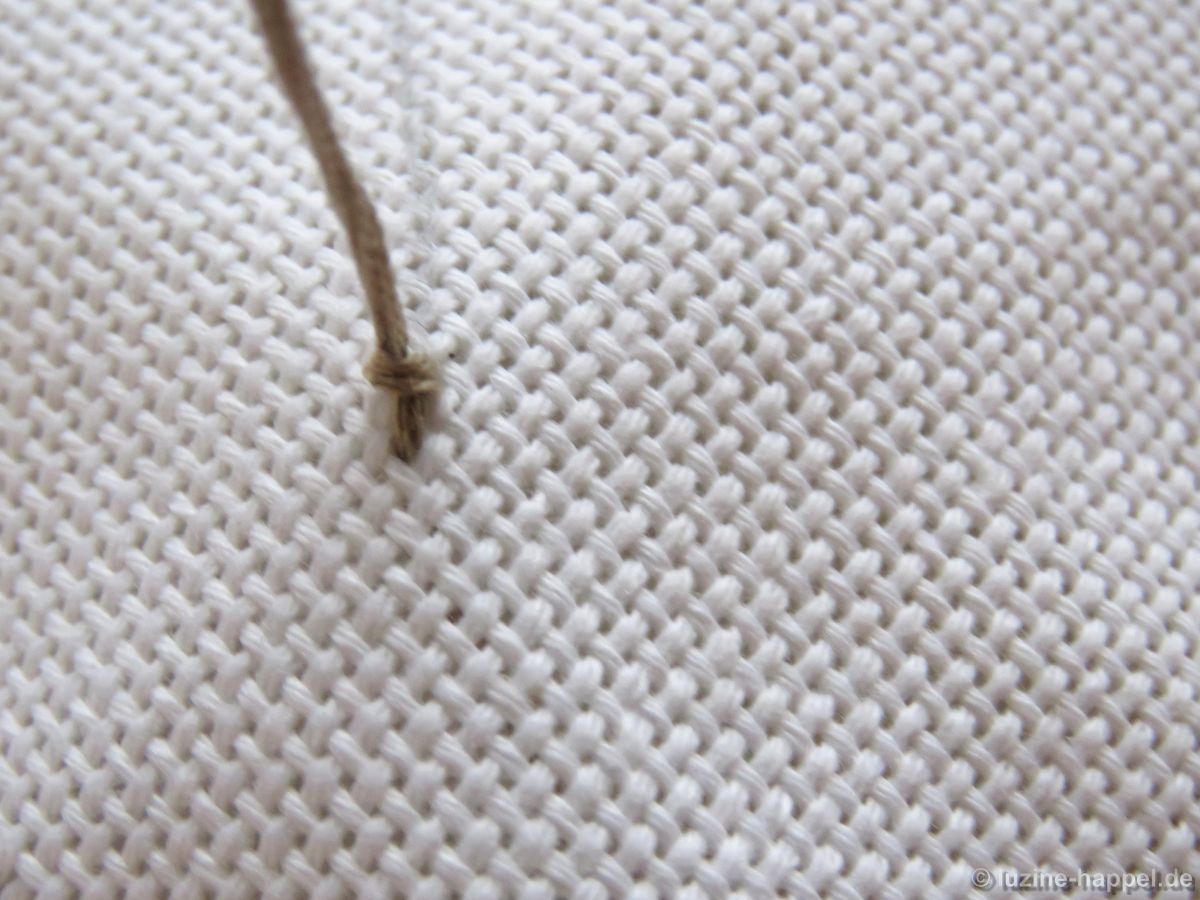
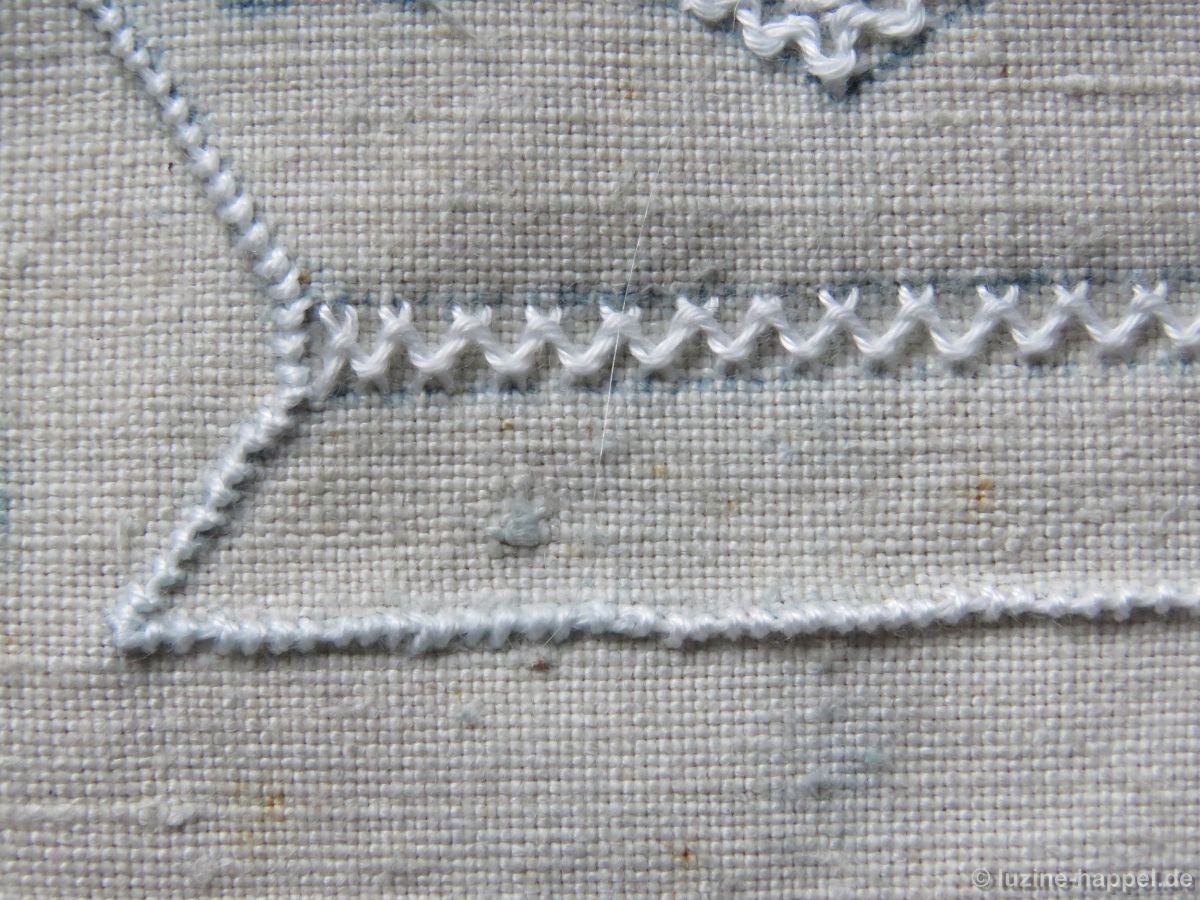
The shorter the stitch that takes off the fabric below the line, the rounder the knots appear.
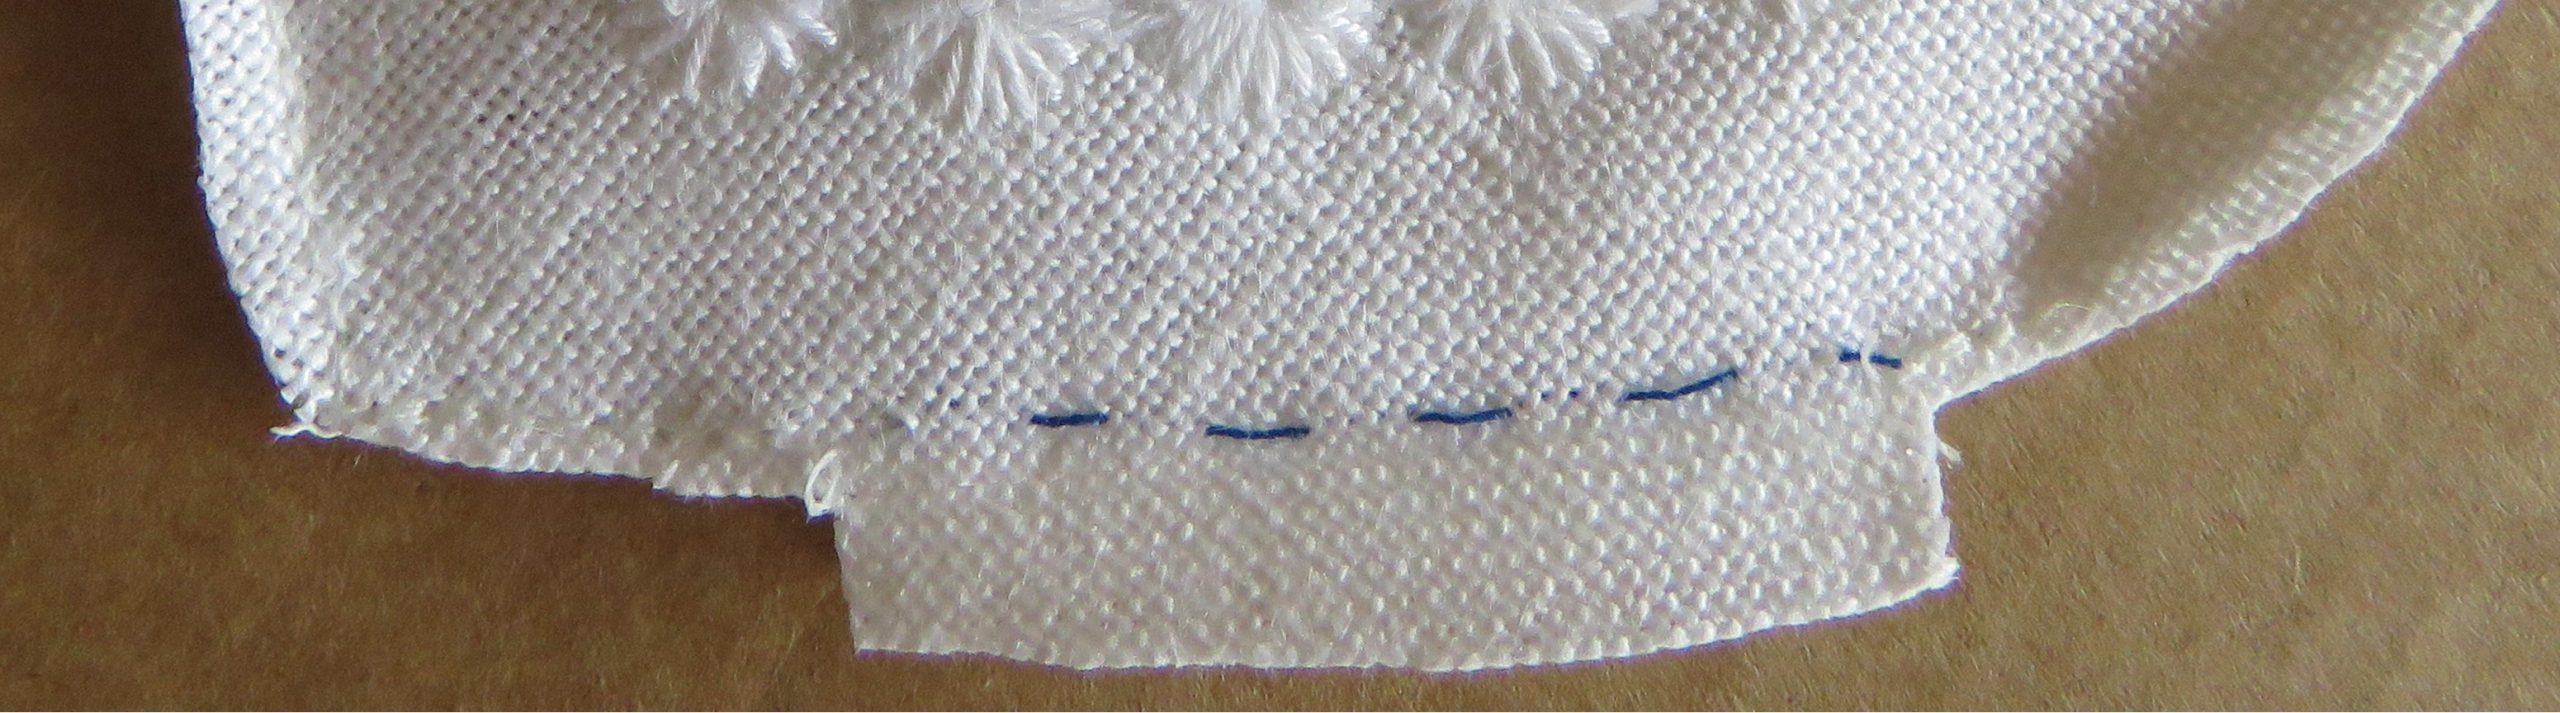
If you were to pull the thread in the direction of the free line instead of vertically in the air, as can be seen in the last four stitches in the picture below, the knots would look more like slanting stitches.
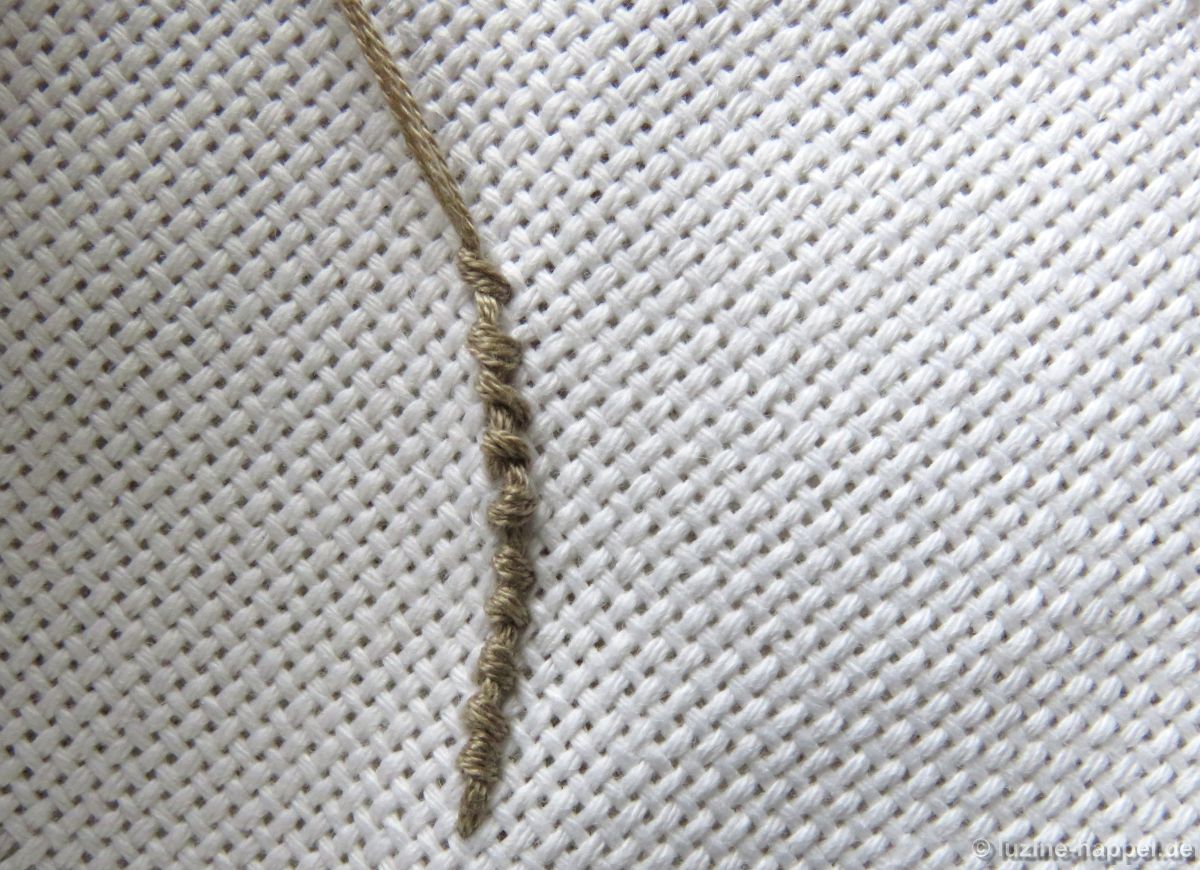
But don’t worry: The images above show greatly enlarged details.
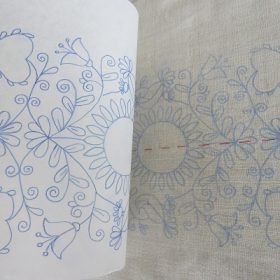
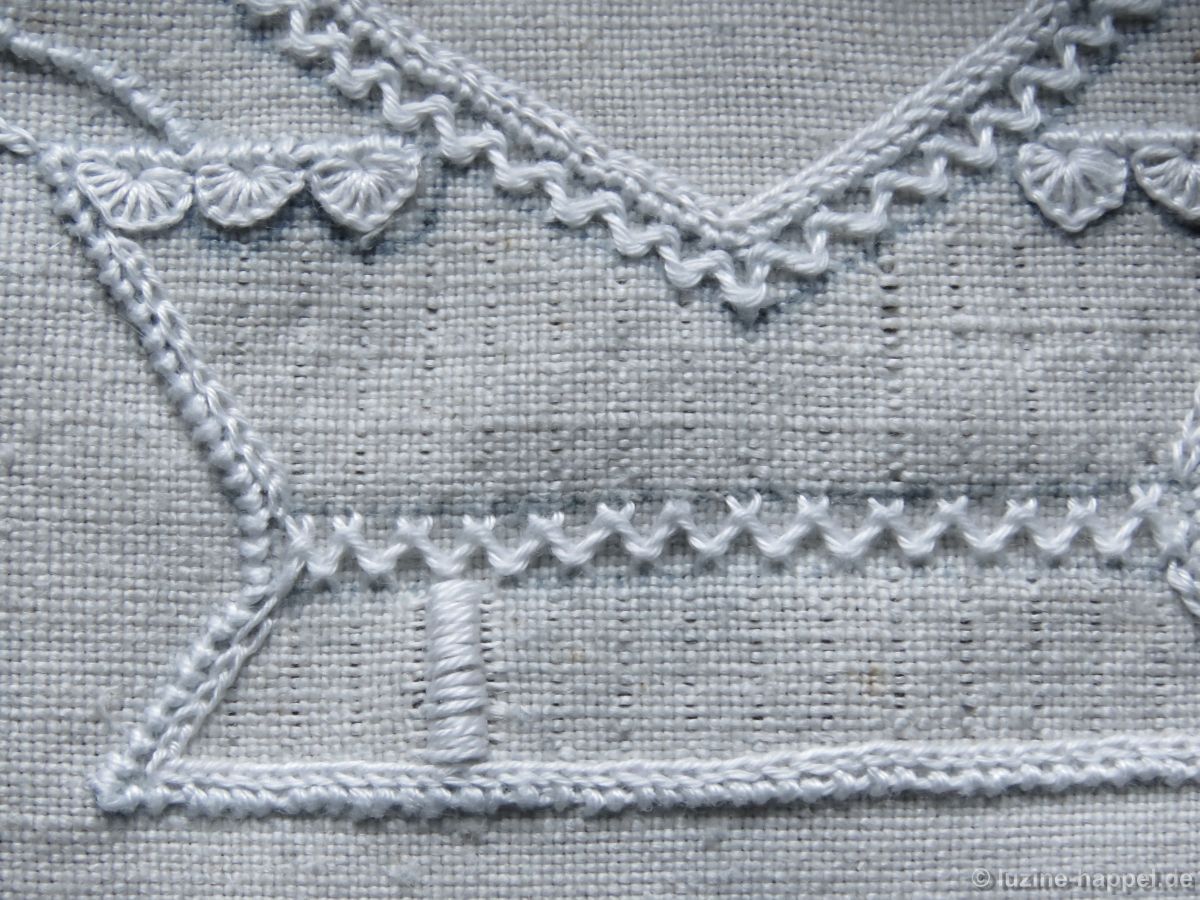
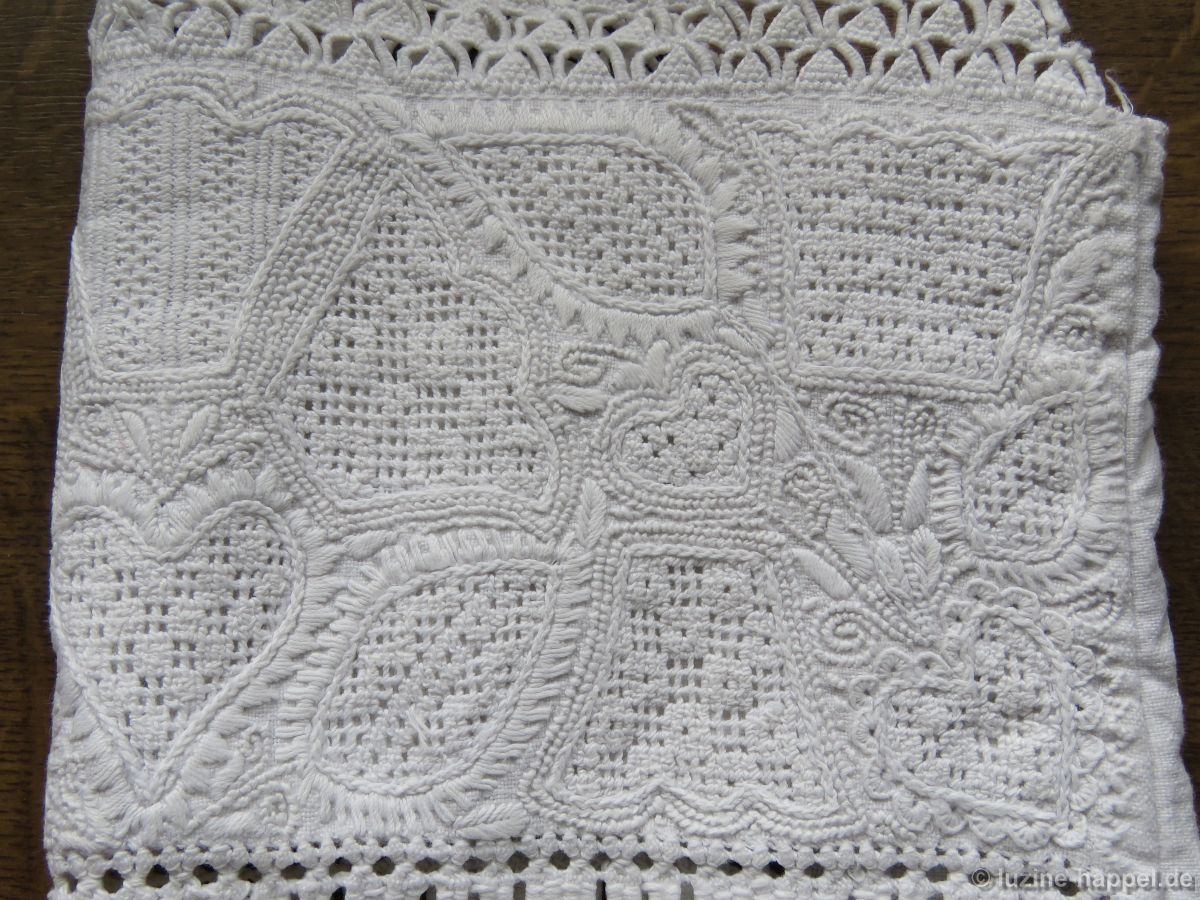
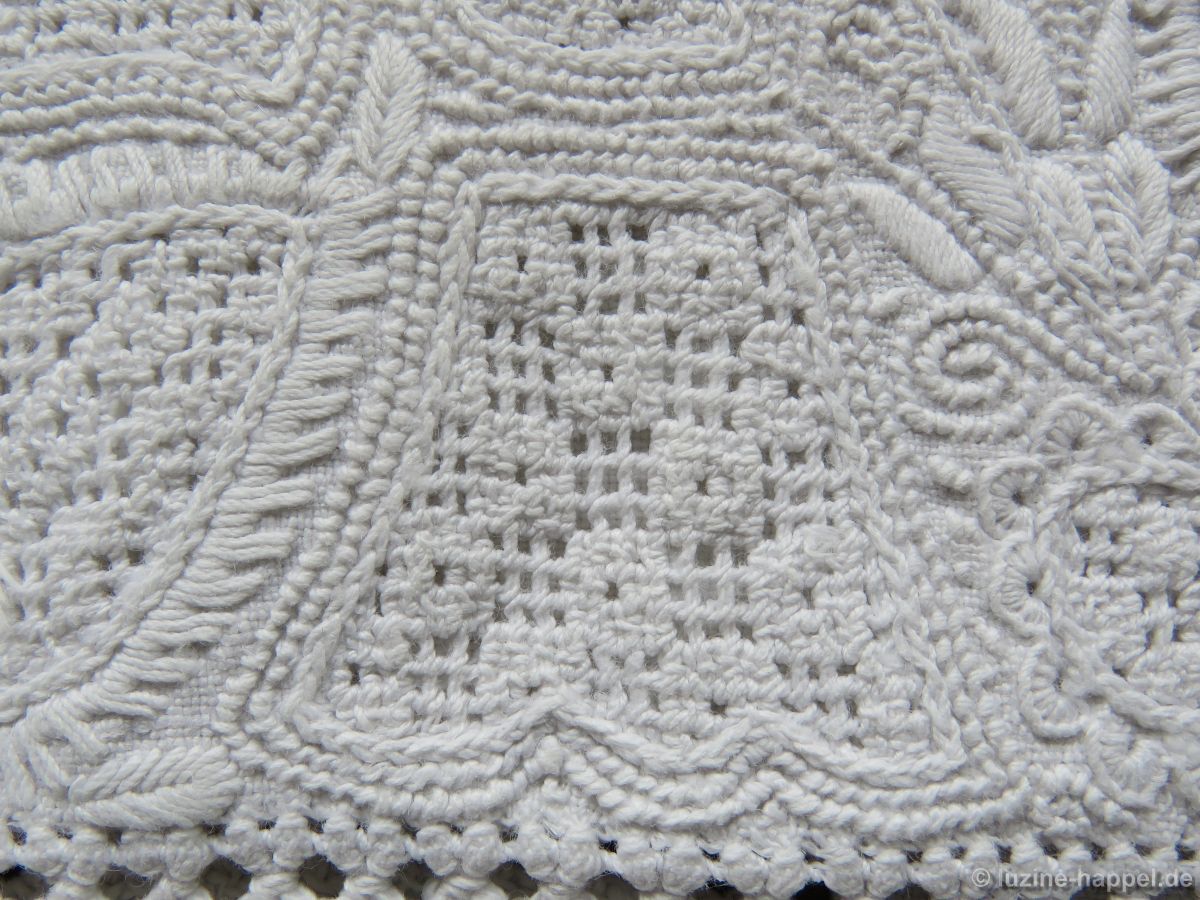
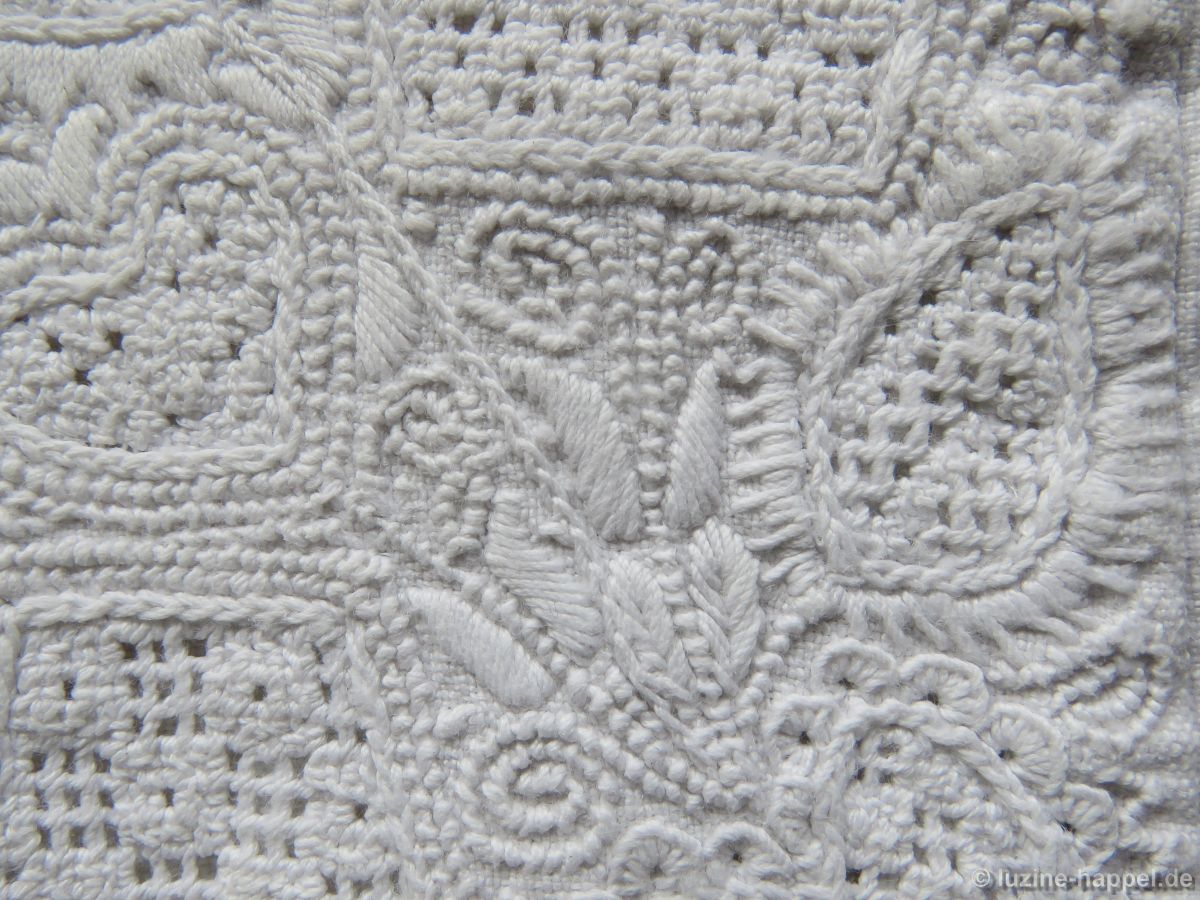
Shown at the correct size and in conjunction with the other stitches, most coral knot stitches look quite acceptable, as shown in the photo of an old bodice sleeve border.
If you look at the stitches in magnification, you will notice quite different levels of perfection.
The coral knot stitch is one of the most important stitches in Schwalm whitework. The earliest evidence of this stitch in Schwalm I have found so far is in the crown of a door hanging, dated 1762 and on display in the Schwalm Museum in Ziegenhain.
The Royal School of Needlework describes the stitch as a line stitch interspersed with evenly spaced knots. It is considered a stitch used by ancient Egyptian seamstresses. It was found in an English sampler from 1598 and an English headdress from the late 16th century. In the 17th and 18th centuries, it was a popular stitch in English crewelwork. At the end of the 18th and beginning of the 19th centuries, it became an integral part of Schwalm whitework. It is also used in Sardinian knotwork from Teulada (Sardinia) as Punt ‘e Nù.
In other regions and countries, the stitch was probably largely unknown. There, the whiteworkers of the time used either stem stitches or monastery stitches—including embroideries similar to Schwalm whitework, such as those in what is now the Czech Republic or the early Hedebo embroidery from Denmark.
It’s not surprising, then, that Thérése de Dillmont doesn’t mention this stitch in her groundbreaking work, *Encyclopedia of Needlework* (1893).
However, variations can be found in my old needlework books. For example, Emilie Stiasny, in her 1910 book *Stickerei-Techniken für Schule und Praxis* (K.K. Hof- und Staatsdruckerei, Vienna), shows the “verdrehten Schlingstich – twisted loop stitch” (Fig. 340a). This is similar to the coral knot stitch, except that the working thread is pulled in the direction of the needle move rather than vertically into the air.
Schwalm whitework designs often feature very distinctive tendrils. These can be stitched particularly precisely with coral knot stitch. Lines embroidered with this stitch also appear stronger, more pronounced, and more striking than those embroidered with other stitches. Perhaps this is one reason why coral knot stitch was common in Schwalm.
See also:
How to Work Tendrils?
Tendrils – Practice Exercises (1)
Tendrils – Practice Exercises (2)
Tendrils – Practice Exercises (3)
How to Work Forks of Stems and Tendrils?
Forks – Practice Exercises (1) A Sampler
Advent Calendar 2016 – No. 5
Advent Calendar 2016 – No. 20
Forks – Practice Exercises (2)
Forks – Practice Exercises (3)
Tendrils and Forks – Practice Exercises