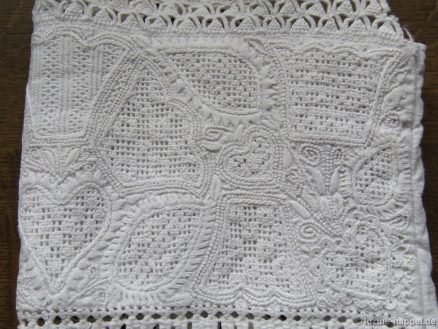
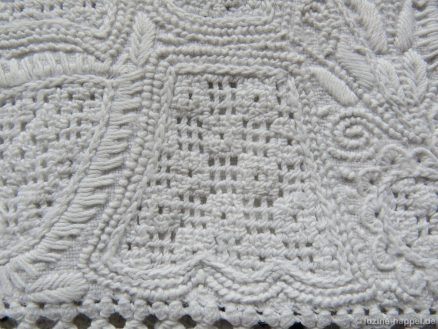
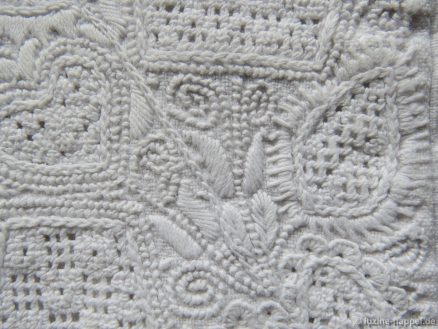
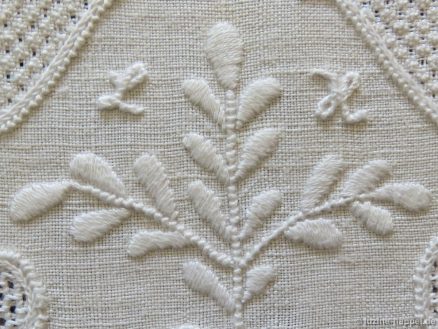
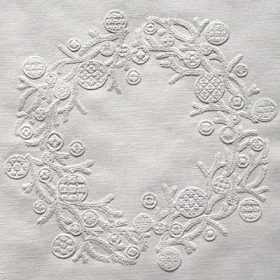
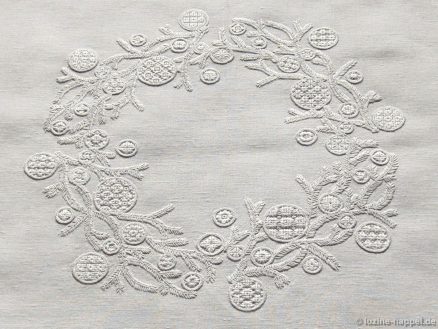
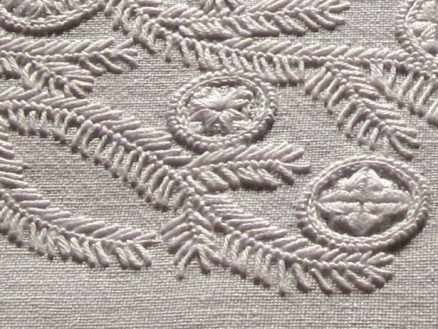
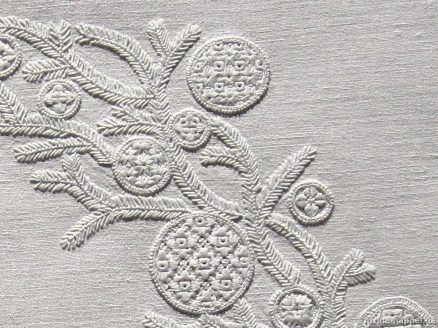
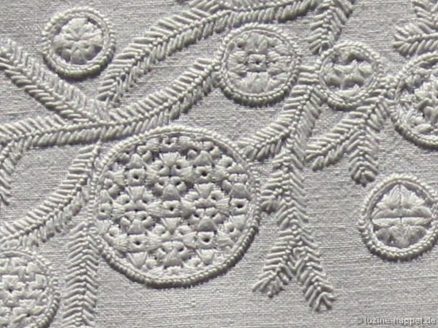
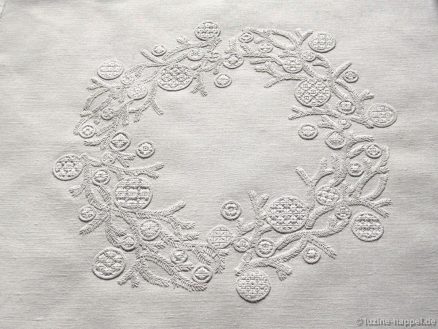
Schwalm Band (3)

Preparatory work of section 4 of the outline design.

There are actually only three considerations to make for the next short sub-section.
1. How to embroider the oxeye daisy?
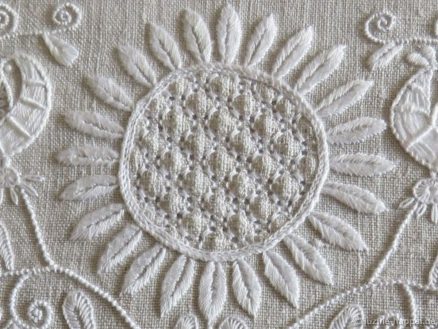
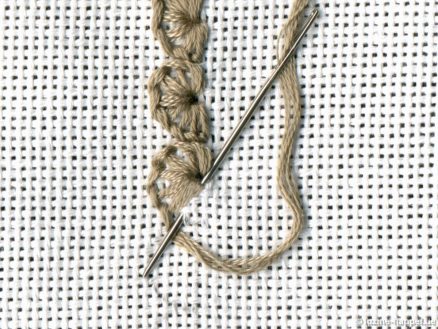
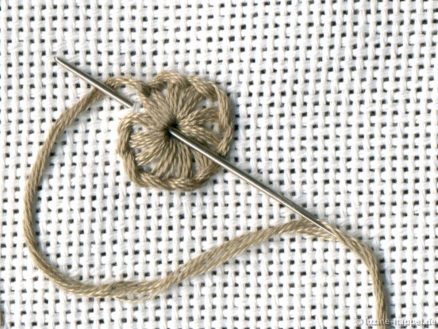
I opt for divided Blanket stitch leafs and a ring of Blanket stitches around the center circle (coton à broder No. 20)
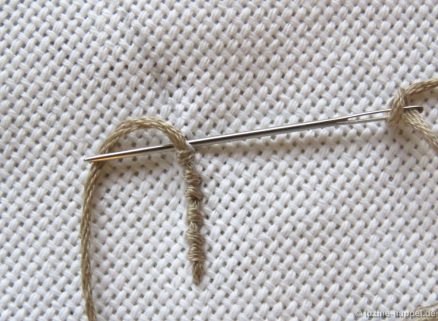
and test the same with an extra Blanket stitch eyelet in the center.

2. How to embroider the little bellflower ?
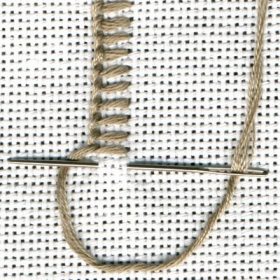
It receives outlines of Coral Knot stitches and a middle section of Blanket stitches.
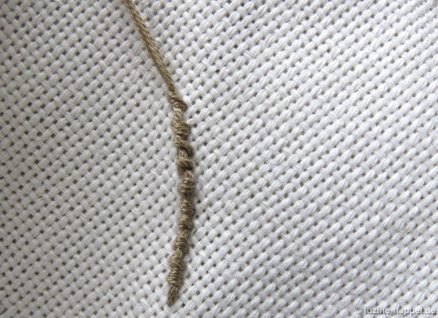
3. Most of the thoughts go into the design of the middle element, the circle with the “fool’s cap”.

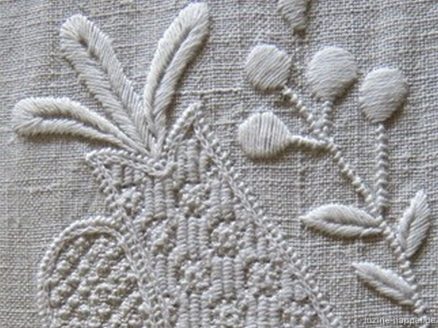
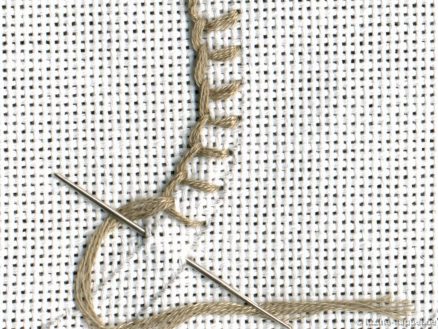
To get more room for a filling pattern, I decide not to hold account on the center circle. The outer circle is worked with wrapped Chain stitches (coton à broder No. 20), as well as the middle tip. The side tips are embroidered with Stem stitches on the lower edges and Blanket stitches (coton à broder No. 20) on the upper edges.

This means that the preparatory work of the next short section has already been completed.

The heart of section 4 is surrounded by Coral Knot stitches (coton à broder No. 16) and Blanket stitch half eyelet scallops (coton à broder No. 25).

The birds are given an outline of wrapped Chain stitches (coton à broder No.20).

The beak is worked as a Satin stitch knife point, eye, comb and

tail feathers are embroidered as Blanket stitch eyelets respective Blanket stitch half eyelet scallops (all coton à broder No. 30).

The bird sitting opposite is worked in a similar way.

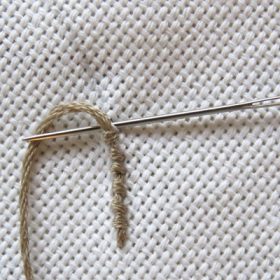
The bellflower (Coral Knotstitches, coton à broder No. 16) has stamens made of bullion knots and in the middle part a lower edge of Blanket stitches (coton à broder No. 25),

the oval flower divided Blanket stitch leaves and Blanket stitch eyelets (also coton à broder No. 25).

The large tulip is outlined only with Coral Knot stitches.

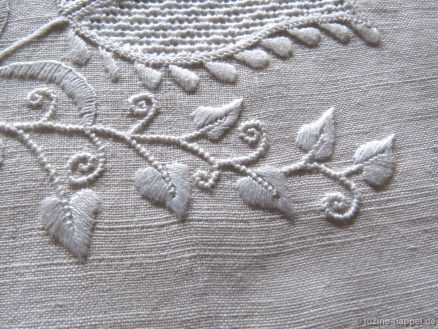
The next sub-section contains many very small pattern elements. That’s why I embroider some Coral Knot stitches with coton à broder No. 20, like the small tendrils on the circle. The circle is given a border of 2short-2long (coton à broder No. 20). It is good to mark the direction of the stitches before stitching.

The bird outline is worked with coton à broder No. 20, eye, beak and the small Blanket stitch eyelets with coton à broder No. 30. The small rounded leaves and the heart-shaped petals are worked with Satin stitches (2 threads of the 6-thread embroidery twist). However, the flower seems too massive to me in this form,

that’s why I actually wanted to make it with wrapped Chain stitches (coton à broder No. 30). But then I realized that the Chain stitch border looks good too and leave out the wrapping. The mini carnations are embroidered once with Blanket stitches (coton à broder No. 30) and the other time with Satin stitches (2 threads of the 6-thread embroidery twist). Both variants are not optimal.

The small bleeding-heart is bordered with Coral Knot stitches and Chain stitches (coton à broder No. 30). The daisy stitches are worked with coton à broder No. 20.

The mini leaves are also worked as divided leaves (2 threads of the 6-thread embroidery twist). They usually turn out better than one-piece leaves (see right edge of the picture).

So the preparatory work of the next sub-section has already been completed.

The scallops of the large clover leaves are embroidered with coton à broder No. 20 and Blanket stitches.
The row of tiny Blanket stitch eyelets is worked with coton à broder No. 30, as well as the final heart.

The Blanket stitch half eyelet scallops at the end of the bird’s tail are embroidered with coton à broder No. 30, the remaining Blanket stitch half eyelets with coton à broder No. 25. The divided leaves and the undivided ones on the central axis are designed with Satin stitches using 2 threads of the 6-thread embroidery twist.

The rounded leaves are embroidered with coton à broder No.20 and Blanket stitches, as well as the middle part of the small tulip. The ends of the stamens receive bullion knots with 3 wrappings (coton à broder No. 16).
The bird’s eye is worked with Satin strtches (coton à broder No. 30). The Blanket stitches of the little flower are made with coton à broder No. 25. The outline of the little heart is embroidered with wrapped Chain stitches using coton à broder No. 25.

This completes the preparation of the last part of section 4.

Schwalm Band (2)

Schwalm Band (2)
Preparatory work of section 5 of the outline design.

As you will notice, I experimented a bit with stitches and thread sizes as the project progressed. My descriptions are intended to serve as suggestions only. Of course you can work many things differently. I would be happy to see a few pictures of your creative work at the end.

So that the fabric is easier to handle when embroidering and the outlines are not too exposed to light, I roll up the upper part and secure the roll with two safety pins.

The heavy linen is initially quite stiff. Only after I had embroidered it in my hands for about ten hours did it become pleasantly soft.

As is common practice, all outlines are first embroidered to avoid fading as much as possible. I start at the bottom and embroider the Coral Knot stitches there. Since I want this to be distinctive, I use coton à broder thread No. 16. You could also choose coton à broder No. 20.

Due to age and also because of the heavy and stiff linen, my stitches no longer turn out evenly. The strong magnifications make this mercilessly clear. Nevertheless, I show the pictures. Not all embroiderers are perfect, and they should be encouraged not to give up.

In addition, the finished embroidery looks completely different after washing, as a “look through the keyhole” shows.

During many hours of past embroidery, I have found that it takes my hands about half an hour to “warm up” and allow even stitches. So during this time I try to place stitches where they will later be bordered by other stitches, like at the top of the basket. Surrounding stitches soften the irregularities of the Coral Knot stitches.

My tip: Always start larger tendrils with a new thread so that you don’t have to secure inside the tendril and start again . Short thread ends can be used for short stems etc.
I embroider the rounded leaves and the half-eyelet scallops on the upper edge of the basket with coton à broder No. 25 – you could also choose No. 20.

I embroider the bottom edge of the basket with wrapped Chain stitches using coton à broder No. 20. I leave the division lines of the basket ignored for now – you can still embroider them if you know how you want the pattern to be designed.

I actually wanted to surround the circle with 2short-2long, but there wasn’t enough space. So I chose eyelash stitches and embroidered with coton à broder No. 20.

If it happens that an outline fades too much, I have the Pilot Frixion pen on hand to trace. I have now observed the reaction of the pens on the linen over several years and have not noticed any discoloration. Some of my blog readers who use the pen frequently also didn’t notice any negative effects.

For the single Blanket stitch eyelets I also use coton à broder No. 20.

The oval should have a distinctive border that is as even as possible. Therefore, I create the outline with coton à broder No. 20 and wrapped Chain stitches. The bottom of the basket is also embroidered in this way.
The small heart and the tulip are given an outline using Coral Knot stitches.

This means that – after approx. 6 hours – all the preparatory embroidery in Section 5 II has been completed.

I provide the wide petals of the flowers with an imaginary center line and embroider them with satin stitches using 2 strands of 6-ply stranded cotton.

The corresponding small circle is embroidered as Blanket stitch eyelet with coton à broder No. 20.

The smaller leaves were worked undivided with 2 strands of 6-ply stranded cotton.

How should the bird be embroidered, how should the tail feathers be designed? For example, you could leave out the dividing lines in the wings, making room for a filling pattern.

But I choose a different version. To create a few distinctive lines, I use wrapped Chain stitches using coton à broder No. 20.

I use this to create the middle tail feather

and embroider the inner wing part, the legs, the belly outline and the ruff. Depending on your taste, you can also leave out the wrappings on the neck brace.

Starting at the tip of the wing, Blanket stitches (coton à broder No. 20) are embroidered around the line of wrapped Chain stitches. The inclination of the stitches is adjusted to the curve. Then the outer wing edge and the remaining tail feathers are embroidered in the same way. The middle tail feather and the inner part of the wing are filled with Satin stitches (2 strands of 6-ply stranded cotton).

In the close-up, the patterning done looks a bit rough. But I think that the type of embroidery will fit well into the overall picture.

Coton à broder No. 25 and wide Stem stitches surround the bird’s head, wrapped Back stitches around the comb.

If you finish embroidering the comb arches individually and start at the bottom, you can clearly separate them from each other.

The comb parts are filled with satin stitches using 2 strands of 6-ply stranded cotton.

The eye also initially receives a border made of wrapped Back stitches. I’m thinking about putting a small Blanket stitch eyelet or a Satin stitch point as the inside eye.

For the outer petals of the flower next to the bird I want to use one-piece Satin stitch. To do this, I first surrounded the outline with Backstitches and filled the inside with Chain stitches. With this underlay, I embroidered the petal. It seems too massive to me. On the next attempt I embroidered Satin stitches without underlay, but they didn’t turn out very neatly at the edge.

So I ended up embroidering a border with wrapped Back stitches (coton à broder No. 25) and filling the inside surfaces with Satin stitches (2 strands of 6-ply stranded cotton). This way the edges were even and the filling didn’t look too bulky.
For short lines that need to be embroidered exactly with Coral knot stitches, like the arches of the heart shape here, I use coton à broder No. 20. This makes the lines finer and more precise.


I embroidered the similar leaf elements between the bird bellies once with and once without a center line. Using 2 strands of 6-ply stranded cotton, long-and-short stitches were embroidered with a wide free leaf center for the larger leaves and with a narrow center leaf axis for the smaller leaves.

The calyx of the carnation was designed like a rounded leaf, the narrow petals similar to the bird’s comb with wrapped Back stitches (coton à broder No. 25). They should remain unfilled.

The middle petal was decorated as a divided leaf with Satin stitches.
I embroidered a small Blanket stitch eyelet in the left bird’s eye and a Boullion knot with 3 wraps in the right one. I like this version better.

The final consideration for completing the preliminary work of the second section belongs to the centers of the small flowers. Blanket stitch eyelets (coton à broder No. 25) decorate the surrounding petals; another Blanket stitch eyelet in the middle would be conceivable.

I tried a version – on the left in the picture below – with Daisy stitches. One or more Boullion knots – on the left and on the right in the picture above – would probably look best.

With the design of the little flowers, the preparatory work for Section 5 I has already been completed – another nine hours were spent with embroidery fun.

Tulip & Sunflowers

I am happy to announce that another one of my Schwalm whitework projects has made it into the world-class magazine Inspirations – the world´s most beautiful needlework.

This time they wanted me to work a small Schwalm typical border with tulip and sunflower motifs on a hand towel. So I created a matching design, embroidered it on white linen and finished it as hand towel.

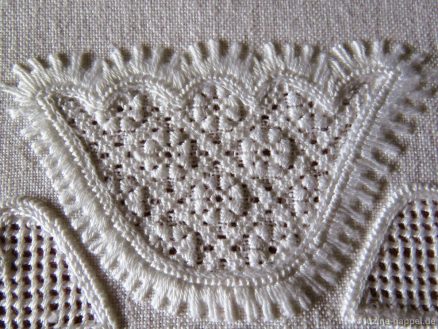
I was looking for special filling patterns that reflect the shape of the respective motif and chose Limet withdrawn-thread patterns. A couple of different leaves, stems, tendrils and small flowers completed the embroidery.

Inspirations named it Tulip & Sunflowers. The professions brought the small project beautifully to life on the pages of the magazin.

Detailed instructions can be found in the magazine.

Best of all, Inspirations has put together a kit. With the right materials, one can easily start embroidering such a project.

Schwalm Whitework and Bobbin Lace (1)

Recently I have shown many design options with needle-weaving hems.

Sylvia Sellmaier has now created an interesting alternative on a pillowcase.

She combined typical Schwalm whitework borders and a Schwalm crown with a bobbin lace insert.

Bobbin lace has a long tradition in the Schwalm (see also: Bobbin lace in the Schwalm (1) and Bobbin lace in the Schwalm (2) ).

Neukirchen was a center of Schwalm bobbin lace production for a long time. However, bobbin lace was mostly used as an edge finish.
But I also know of historical pieces with bobbin lace inserts.

Bobbin lace can be found both as an edge decoration and as an insert combined with a fillet embroidery border on a Schwalm bed cover from the late 18th century.

A bed cover from the beginning of the 19th century shows a wide bobbin lace insert between needle-weaving hems. The edge of the cloth was decorated with the machine lace/ trimmings that were just emerging at the time.

In my large collection I have five other pieces with different bobbin lace inserts:
• a bed cover with elaborate early Schwalm whitework and very fine bobbin lace,
• a parade cushon with needle-weaving hems and gimp (?) bobbin lace
• a parade cushon with a very wide Schwalm whitework border, needle-weaving hems and a wide bobbin lace insert,
• a bed cover with various bobbin lace bands and a crown as well as
• another bed cover from 1844 with a crown, elaborate openwork pattern borders, a wide bobbin lace insert and a machine-made trimming.

I will introduce these pieces in later blog posts.

But now to the pillowcase from Sylvia Sellmaier.

She embroidered the initially continuous fabric for her pillow with two identical whitework borders – each bordered by a row of Four-sided stitches.

She chose the classic motifs of heart, tulip, leaf and

circle as well

Oval. She filled the areas between the motifs with tendrils, leaves, Blanket stitch eyelets and satin stitch points. As border stitches she used Blanket stitch scallops, 2short – 2long and the rarely seen variant with scallops made of Coral knot stitches, filled with groups of 3 Daisy stitches.

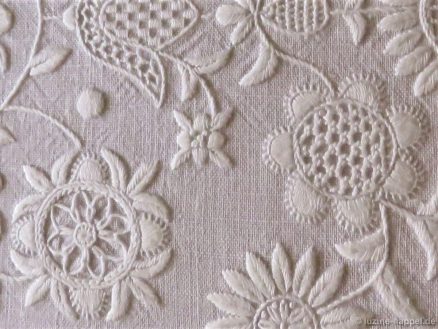
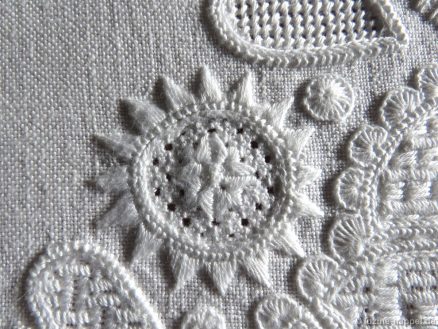
To fill the motif areas, she used traditional openwork patterns, usually with Rose stitches.

A popular Schwalm crown shape with a basket, palmette branches, flowers and tendrils – embroidered with stranded cotton in Anchor colour 888 – “crowned” her embroidery.

Her initials and the year were attached to the crown, separated by small cross-stitch crown ornaments.

The borders were spaced the same width as the bobbin lace that was used later. After the embroidery was finished, the fabric was cut apart and folded to the back at a distance of 10 fabric threads from the Four-sided stitches.

Each edge was finished with two rows of stitches. The first row is a “half Four-sided stitch.” Sylvia Sellmaier found it in a lace book. The second stitch is a traditional Four-sided stitch. Both stitches were worked through two layers of fabric. After completing the edge stitches, the excess fabric was cut off

and the lace sewn on.

For the insert, Sylvia Sellmaier worked

from a pattern from the book

24_KS_2

Freihandspitzen in Schwälmer Textilien
Ingrid Hick, Christa Röhr, Marianne Stang
Zu beziehen bei:
Forum Alte Spitze GbR
Am Tomberg 18
52531 Übach-Palenberg

However, she made the lace using the torchon technique.

Sylvia Sellmaier hopes that through this blog post embroiderers/lace makers will be found who have similar pieces and are willing to show them or share their insights with her.

Sofa Cushion Cover 3

As already announced in the article “Selling handwoven linen”, I am now showing a pillowcase made from this linen.

44 cm was cut off from the 92 cm wide linen to end up with a pillow measuring 40cm X 40cm.

A matching motif was printed.
In the enlargements you can clearly see the faults of the linen: passages with thicker threads alternate with those with thinner threads;

many small and large stains are spread over the entire area;

a clear fault can be seen in the lower area of ​​the basket motif. I’ll show how the fault was dealt with in the next blog post.

The linen has been embroidered, washed/boiled and ironed. Afterwards the piece measured 92 cm x 43 cm – so it only shrunk very slightly.

Since the linen is relatively thick and very tightly woven, you have to get used to it. A little more effort is required to pull the needle through the fabric. But you can place the stitches very precisely,

which creates beautiful small leaves and tendrils.

Despite the density of the threads, the thread withdrawing is quite acceptable – the threads hardly break in both the warp and the weft – even over longer distances.

Both simple withdrawn thread patterns

as well as openwork

and Limetpatterns

have a good effect. This only comes into its own after boiling, as the pictures before

and after the wash clearly show.

Decorative stitches can also be positioned precisely,

which leads to a very positive overall impression.

In the pictures you can clearly see the thread thickening of the linen, small knots and small faults in weaving. They do not have a negative effect on the overall impression. The stains disappeared without residue after washing.