Poppy

Poppy motifs as a wreath design

In our region the poppy has just started to bloom. The beautifully lit fields, visible from afar, attract thousands of visitors every year. There is something magical about poppy flowers. Maybe it’s the impressive play of colors, but probably the entire interesting plant that provides insects with plenty of food.

I am also fascinated by poppy flowers. The orange-red appearing poppy fields,

the scarlet flowers of the Turkish poppy, the pink ones of the opium poppy or the tones of the new varieties – they all have something special.

Poppy is one of the oldest cultivated plants in Europe. However, it has not yet played a role as a motif in Schwalm whitework.

To change that, I commissioned the designer Christa Waldmann to design a wreath motif with poppies. She has succeeded in doing this exceptionally well: be it the massive outflow of the petals that are “wrinkled” together when the buds burst open.
Be it the delicate and ever-so-perishable petals of the opened flower,

the numerous fine stamens with their threads and sacs, which are grouped around the pistil

or the majestic appearing seed capsules.

She skilfully put everything on paper with sweeping lines and recorded it as an outline drawing. The delicate leaves are also present.

The wreath has a diameter of approximately 54 centimeters. It will be my next larger embroidery project. With its rather playful motifs, it is a completely different design than the Schwalm Band pattern.
As with all designs for which you don’t yet have a template, embroidering them will be a nice little challenge. Sometime later I will share the results with you.

Delicate Poppy and Noble Linen
Tablecloth for all Seasons – June: Poppy Flower

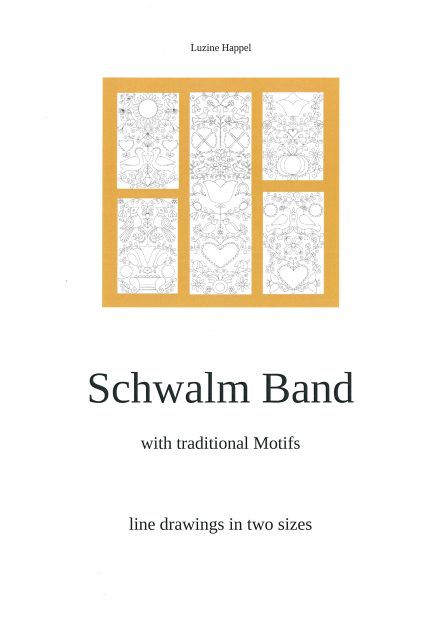
Schwalm Band – Outline Designs

I recently embroidered a long band border with traditional Schwalm motifs.

Because I believe that such a project will be of great interest, I would like to share it with you. Here comes the design first. In later blog posts I will walk you through the entire project.

This outline design can be used very flexibly.

It actually consists of 5 separate sections of different heights, which can be placed on top of each other as required or separated into many smaller sections – this creates more than 20 different outline patterns. They can be used as individual patterns or combined as desired.

You can place all the sections together in the order of the printed sheets and at their full length, or you can shorten the band pattern section by section to achieve the desired length.
You can also combine the sections in a different order or mirror them.

The template sheets offer unimagined possibilities – give it a try!

The original design was based on a 16 cm wide band.

I gave up my initial plan to embroider on industrially woven striped linen. Therefore it was also possible to make the band wider than 16 cm. The patterns were expanded to 18 cm wide. This made my embroidery 165 cm long.

So that you too can embroider a project with these outline patterns, I offer them for purchase. The document contains 35 reduced size design suggestions on three pages, and then the 5 original size design sections – both 16cm and 18cm wide.

You can either download this document

Schwalm Band
with traditional motifs
line drawings
22 pages
Text: English
7.51 MB file size
€19
(incl. 7% sales tax)
(€17,76 for customers outside the EU.)
Shop

or order as a print version.

In the print version, the line drawings are printed on high-quality tracing paper. This makes putting the sections together very easy.

Schwalm Band
with traditional motifs
line drawings
22 pages
Text: English
€25
(incl. 7% sales tax)
(€ 23,36for customers outside the EU.)
Shop

The Arduous Work of Designers

Not everyone has the aptitude to come up with and draw their own designs. Usually, when embroidering Schwalm patterns, already existing designs are used. This saves you a lot of work and allows you to choose the right one from the wide range of products that now exists.

But how are such drawings created?

First you need an idea. The typical Schwalm designs should contain larger elements such as areas suitable to embroider with filling patterns and small surrounding and connecting ones such as stems and leaves. Of course, the pattern should also differ from existing designs.

After the idea, a rough sketch is made and then gradually developed into a balanced pattern. What size should the pattern have? What form should it take? In what proportion of size and at what distance should the individual motifs stand from each other?

What kind of leaves should be added – pointed or rounded, divided or undivided? How many should there be? At what angle should branches of stems take place? How often should tendrils twist in? Which enhancing embellishment should the motifs get – half-eyelet scallops, knife points, 2short-2lang? ….. and, and and.

Once the sketch has finally matured and the pattern appears balanced, a thin-line final drawing is usually created by hand with the help of pencil and eraser, drawing board, ruler, triangle, protractor, a pair of compasses and various drawing devices or stencils. (Computer drawing programs have so far only been used extremely rarely by the mostly older designers for Schwalm whitework patterns.)

In order to move from the idea to a coherent, sophisticated and precisely drawn Schwalm outline pattern, a lot of work and time is required to create a design.
In most cases, the designers only charge a very small amount for their services, and many of the designs are only redistributed in very small quantities. So the wage for the hours of painstaking work is rather meagre.

Therefore, it should be self-evident that the copyright of the designers is respected.

An Old Traditional Method for Transferring Designs onto Linen

An Old Traditional Method for Transferring Designs onto Linen

Some time ago, an embroiderer enthusiastically told me that she accidentally discovered a detergent that easily removes pencil marks from white embroidered linen without leaving any residue.

She uses an old method for transferring the design outlines of her embroidery projects: using a #2 pencil, the design paper is blackened on the back side in the area of the outlines. With the blackened side positioned on the linen, the outlines are traced using a pen with a strong point (old pen or embossing pen), and thus it is transferred to the fabric.

This method has been in disuse more and more because the pencil lines have been very difficult to remove. Could there now be a remedy with a special detergent?

This method of design transfer sounded interesting. And since one only needs things that are normally close at hand anyway, I decided to test it.

At first I approached the matter a little tentatively and perhaps a little light-handedly. On the back of the tracing paper on which the pattern was printed, I slightly blackened the line areas with an #2 pencil.

With the blackened side down and using removable adhesive strips, the pattern is attached to the linen in the desired position. The outlines are transferred by tracing them firmly with an embossing tool or old pen (with no ink).

After removing the template, one can see that the outlines are recognizable but very weak.

But you can now easily trace over them with a #2 pencil.

If there are any flaws, you can simply erase those lines with a soft eraser.

Any eraser “crumbs” can be removed with a toothbrush.

I embroidered the pattern, even worked the filling pattern first, to see how long the outlines would last. They were easily recognizable to the end.

Nevertheless, I retraced the remaining lines so that I could better see whether they were actually being removed during the wash. It can also be clearly seen that the Coral knot stitches have absorbed the pencil marks quite a bit.

In the next post I will report how the pencil marks can be removed.

Since not everyone has the desired design outline on tracing paper, I did another test. This time it was printed on regular printer paper. With the design lying on a white background, one can see the lines on the back.

One can also hold the paper against a window or light box ­– then the lines can be seen much better.

The paper is blackened on the back side in the area of the outline. This time I wasn’t so tentative.

With the paper correctly positioned with the blackened side against the linen, the transfer begins with a pen – here with an old ballpoint pen empty of ink. I transferred the left side of the semicircle on a hard surface, the rest of the pattern on a slightly softer surface. Work was more pleasant on the latter.

After removing the template, one can see that there were hardly any differences in the intensity of the lines – all of them are clearly visible. The lines transferred on the soft surface are, however, more rounded.

The lines do not have to be redrawn – at least for the time being. One can start embroidering right away. This time, however, some lines had to be touched up during the work because they threatened to fade too much.

However, there is still a lot of pencil residue – especially under the Coral knot stitches – as can be clearly seen in the picture of the embroidery lying in the washing water.

Then I put pencil lines on various types of linen – unwashed industrial linen and washed old linen

and some of the lines are embroidered with Coral knot stitches.

Will they be easy to remove?

You will see the results in next week’s article.