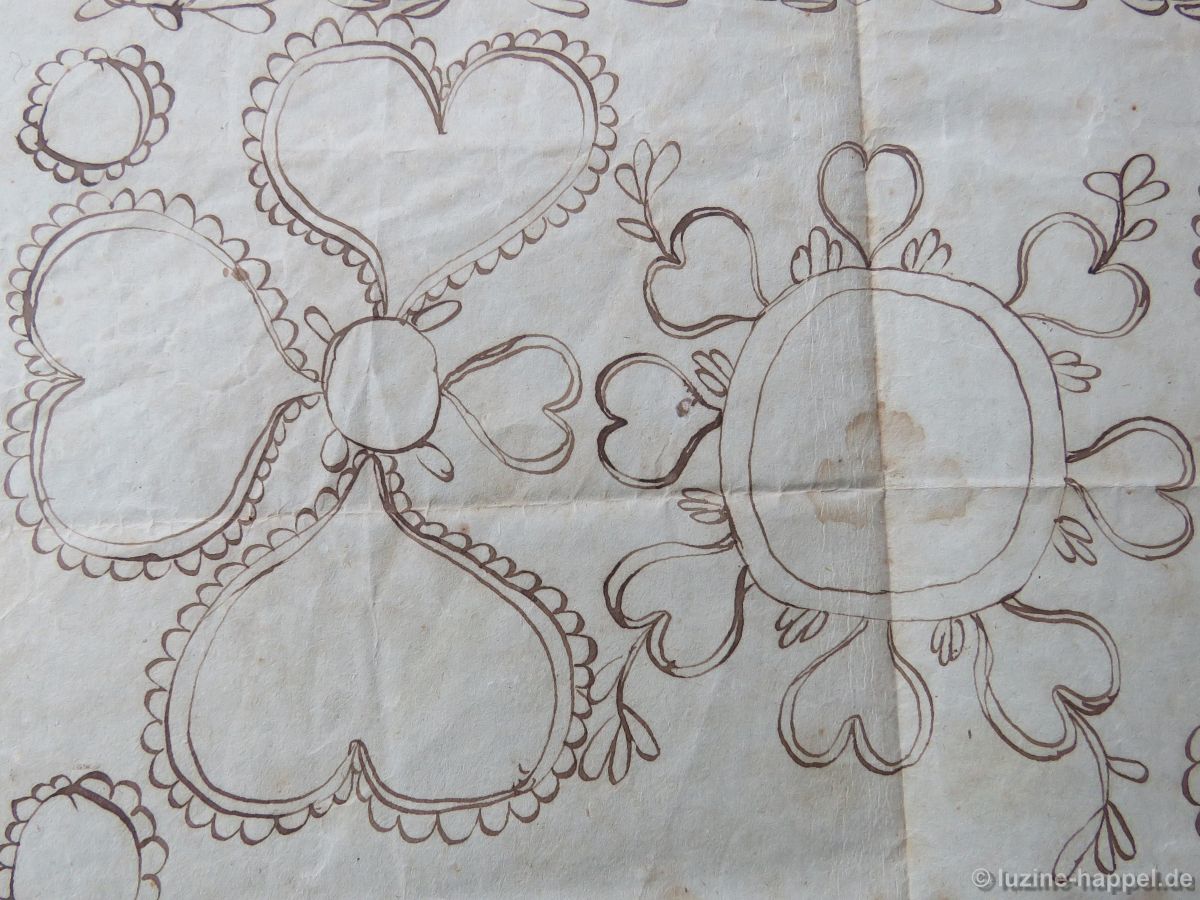
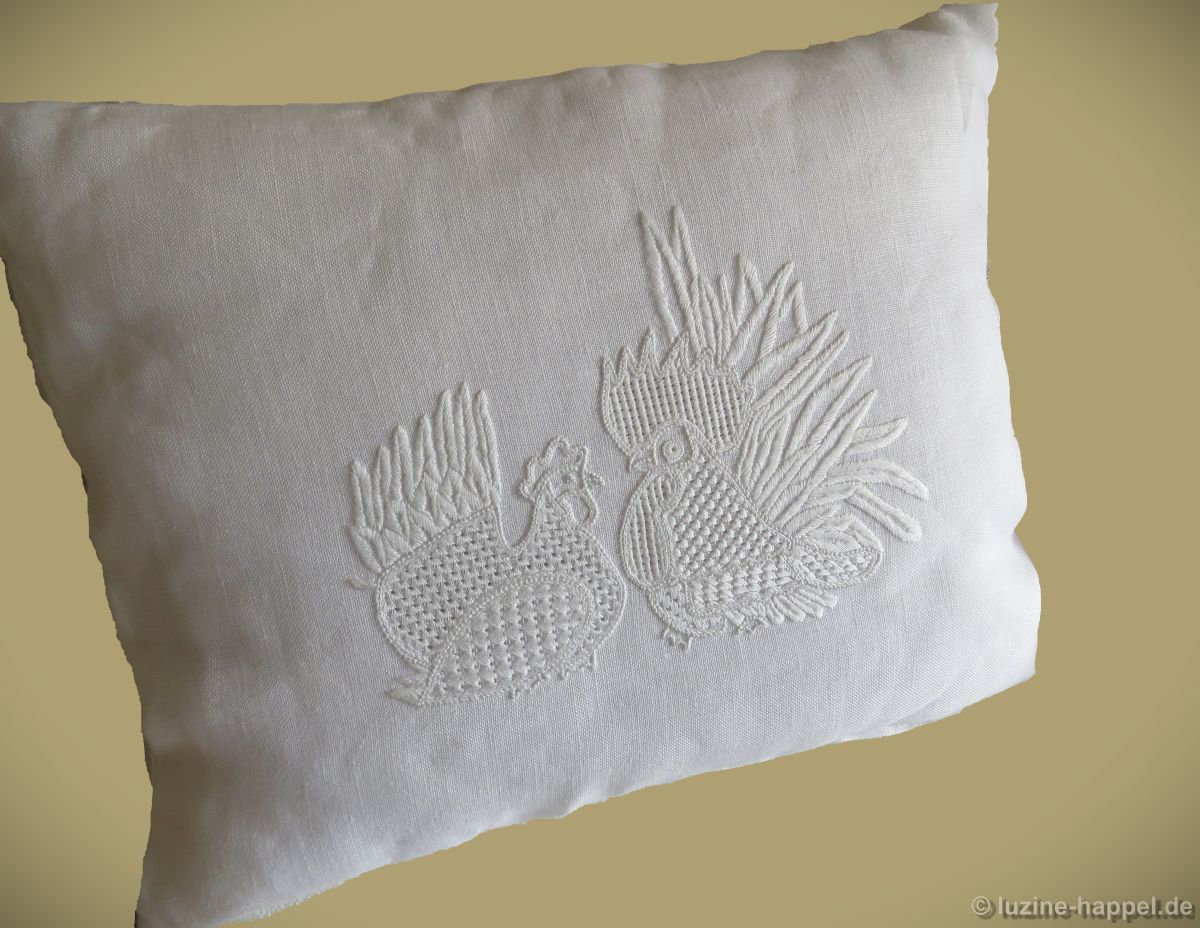
Easter is approaching, so I’ve been looking for a suitable motif. I’ve embroidered eggs and bunnies many times before. But roosters and hens are also a popular Easter theme. So here are these figures – perched on the ground in cozy togetherness.

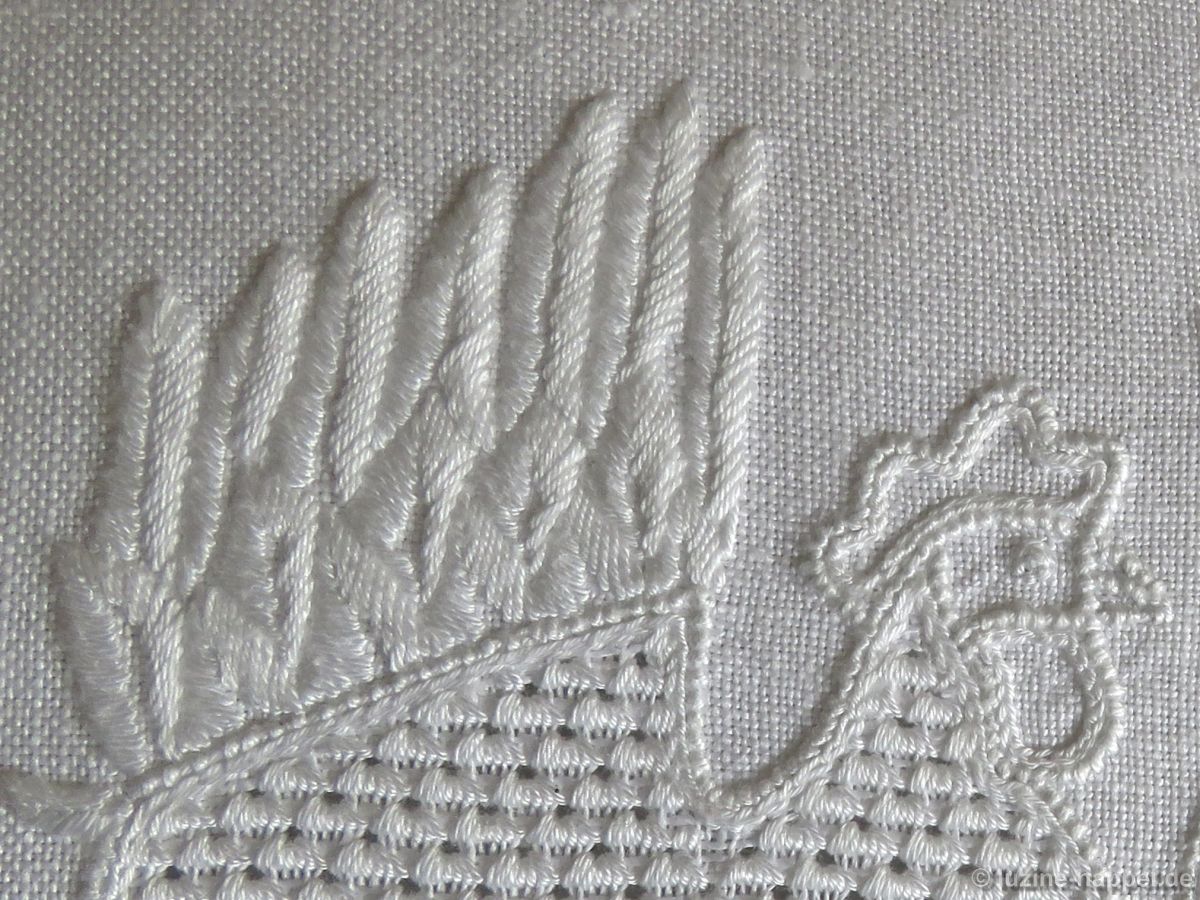
The rooster with its bushy and fluffy tail feathers
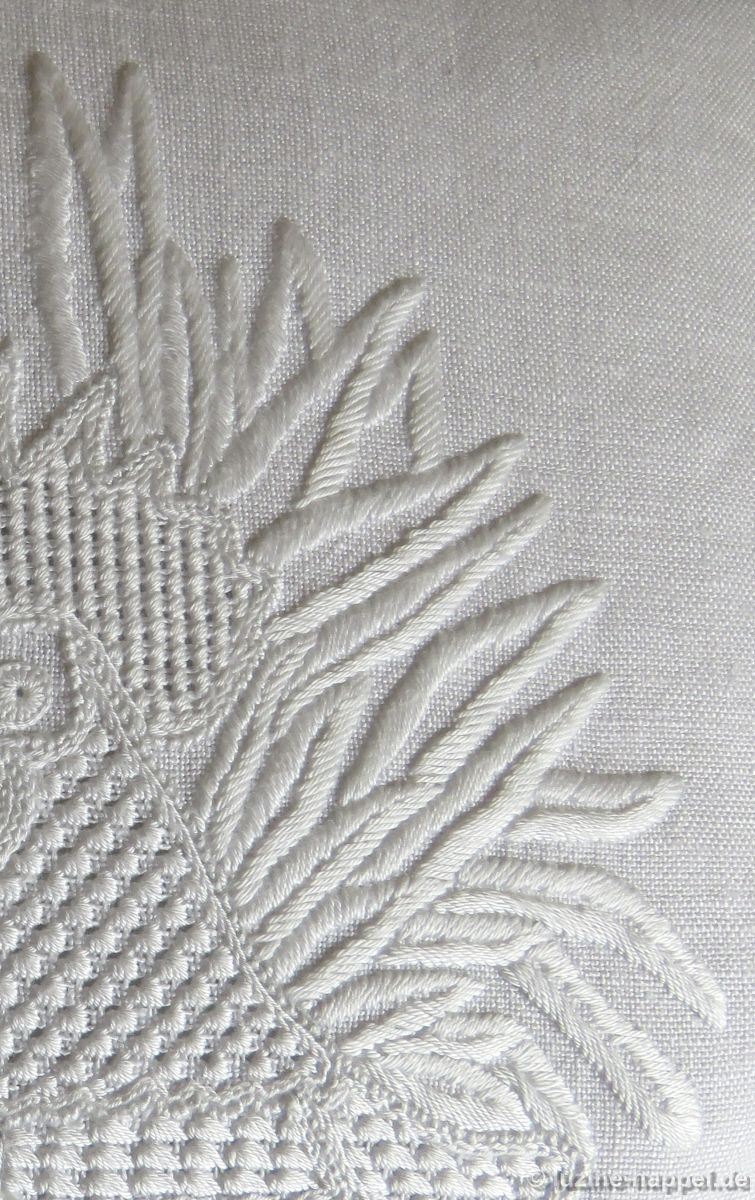
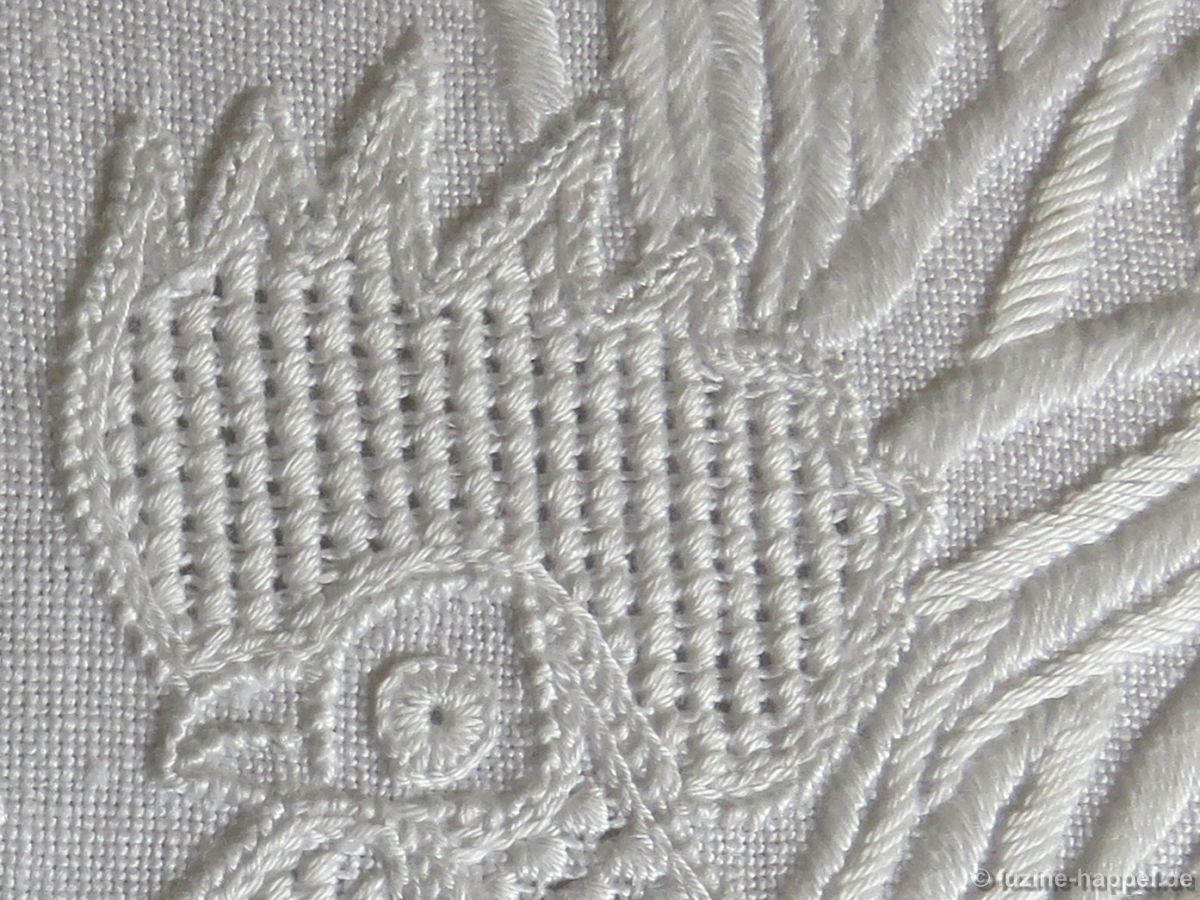
and its powerful comb and wattle
stands in stark contrast to the moderately shaped hen.
To match the striking outline design, all areas were embroidered with patterns from the books Limetrosen I and Limetrosen II. For example, the hen’s wing was decorated with the “Hare Ears” pattern (Limetrosen I, page 50) and her belly with the “Wave” pattern (Limetrosen I, page 17).

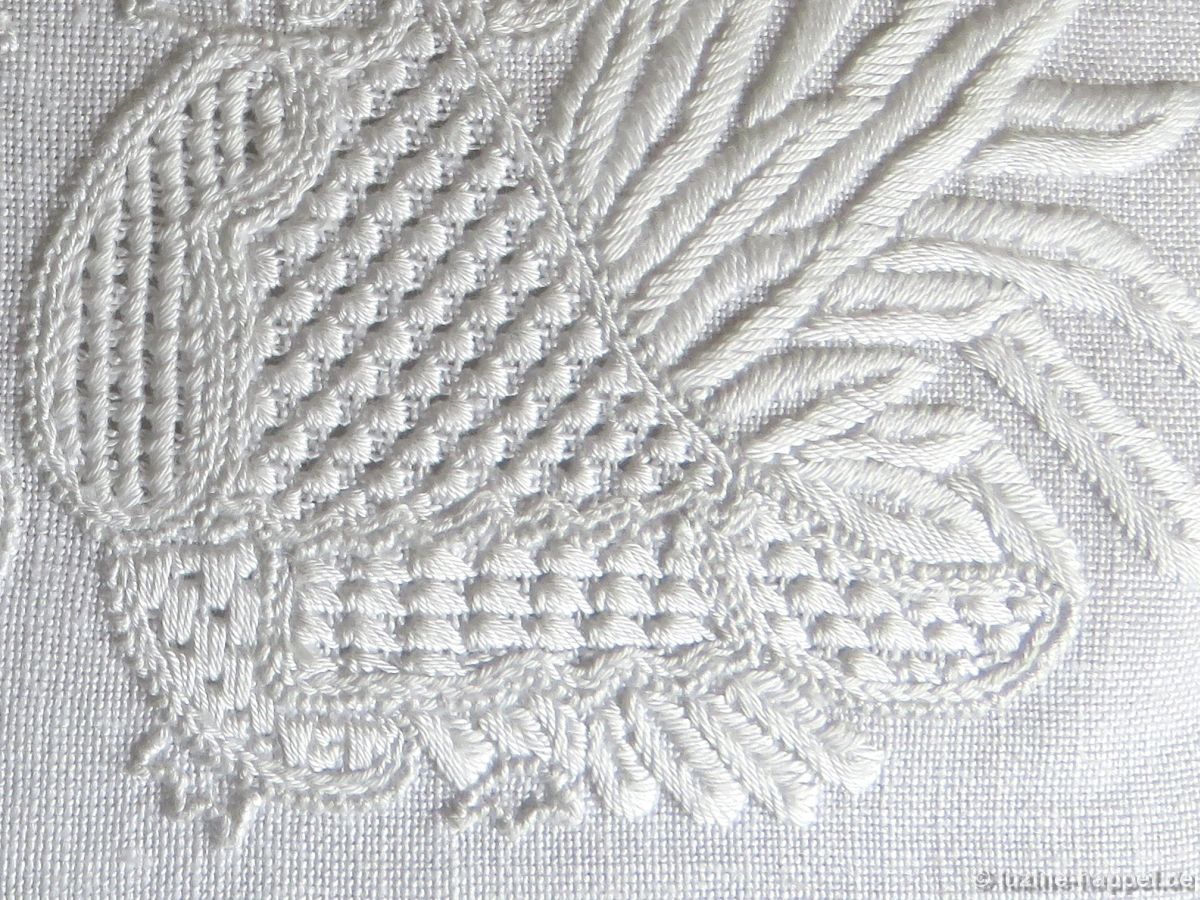
The rooster’s comb and wattles are decorated with the “Net” pattern (Limetrosen I, page 12). The neck received the “Plumage” pattern (Limetrosen I, page 15), the breast “Cascade” (Limetrosen II, page 20), the belly “Ribs to the Left” (Limetrosen II, page 9), and the wing “Feathering” (Limetrosen II, page 11).
I have this pattern on a cushion. I can also easily imagine it on a runner or a bag.
You can purchase the outline pattern (22,5 cm X 16 cm) from me as a hand-drawn PDF file for €3.00. If desired, I can also print the pattern on linen.
You can find many more ideas for Easter embroidery on my blog:
Bunnies between Daisies
Easter Greetings from Colette Bonnet
The Hare and the Hedgehog
Easter Eggs Embroidered with Schwalm Whitework Motifs (2)
Spring Greeting
Rabbits
Easter Egg 2019
A Very Special Easter Egg
Easter Decoration 2018
Embroidered Easter Egg Wreath
Hare Circle Dance
Coloured Easter Eggs
An Easter Egg Border
A Easter Egg
A Prize-Winning Easter Egg
Tablecloth for all Seasons – April: Easter Eggsr
Easter Eggs Embroidered with Schwalm Whitework Motifs