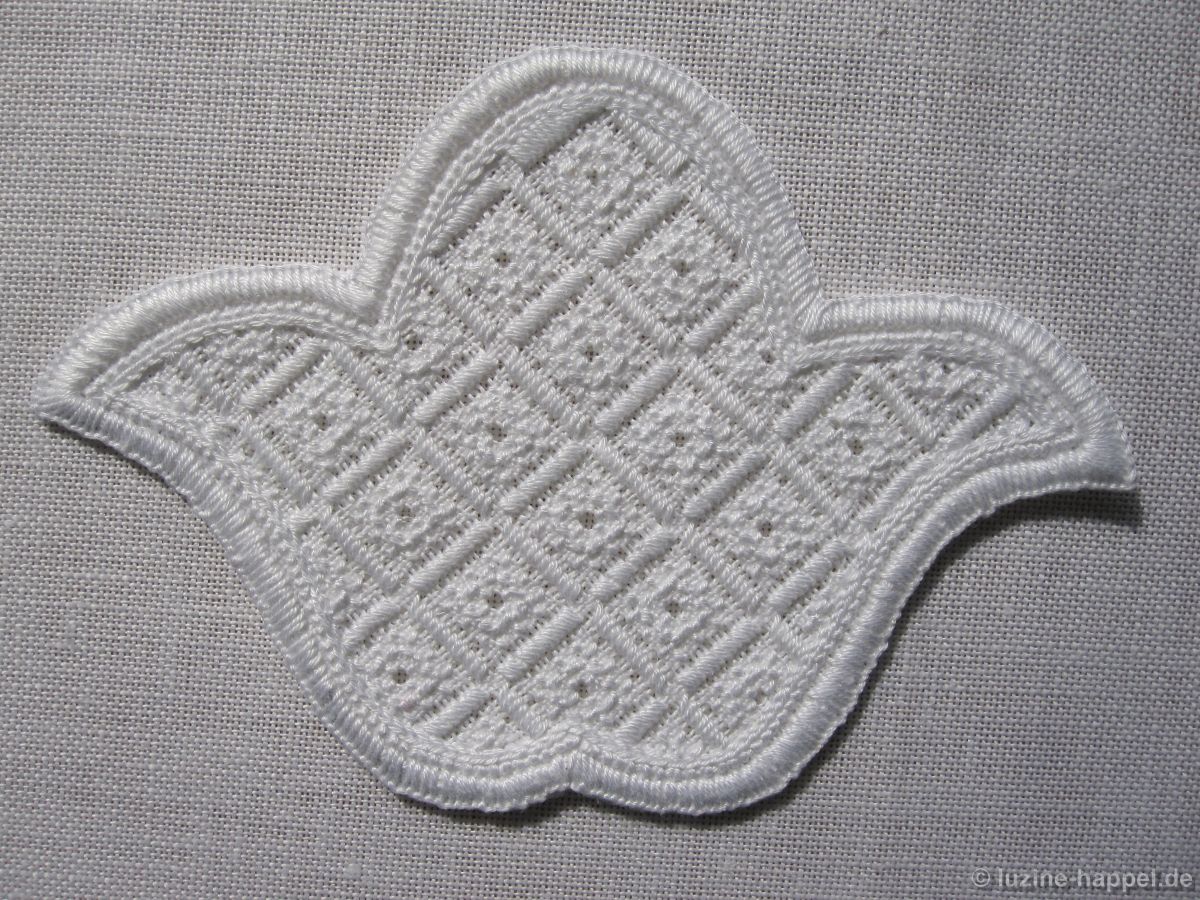
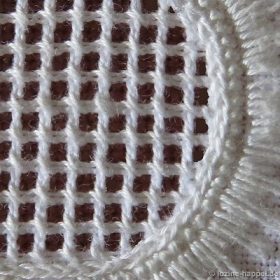
Filling Pattern Cable Stitch Grid

Filling Pattern Cable Stitch Grid

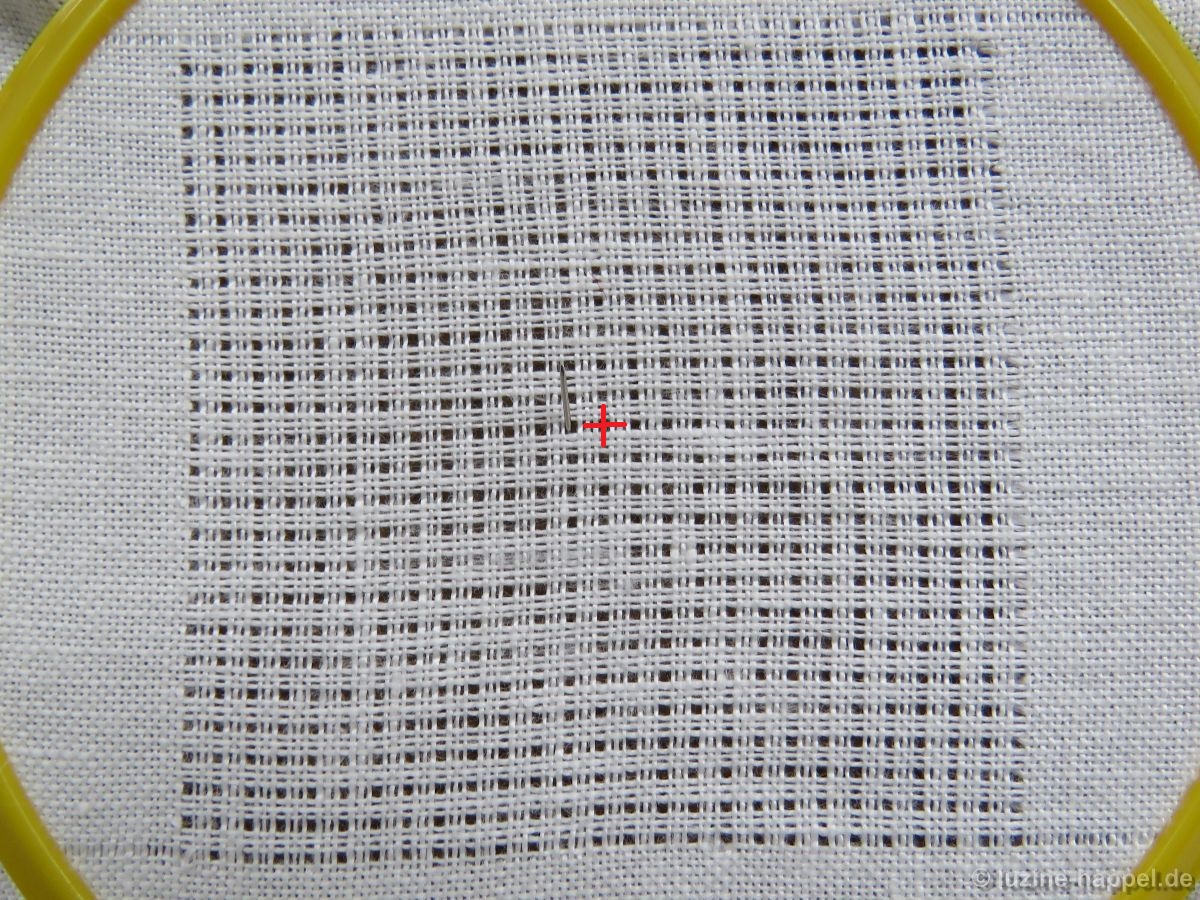
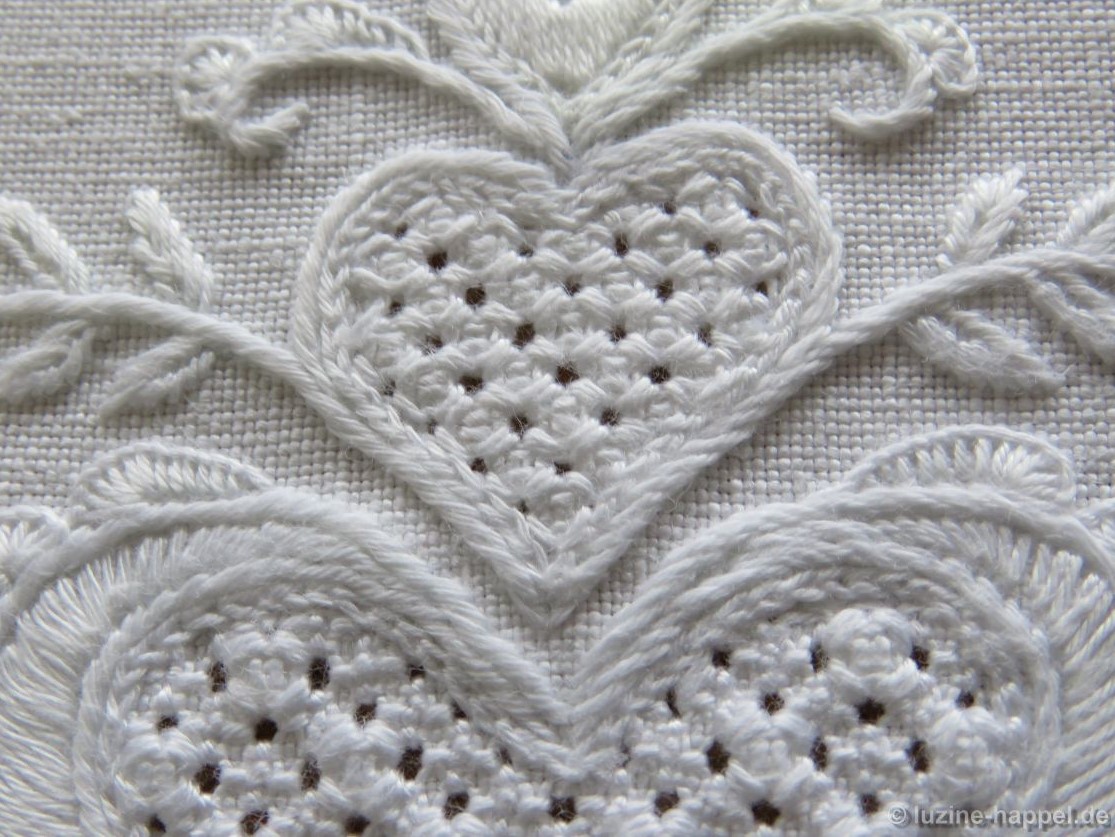
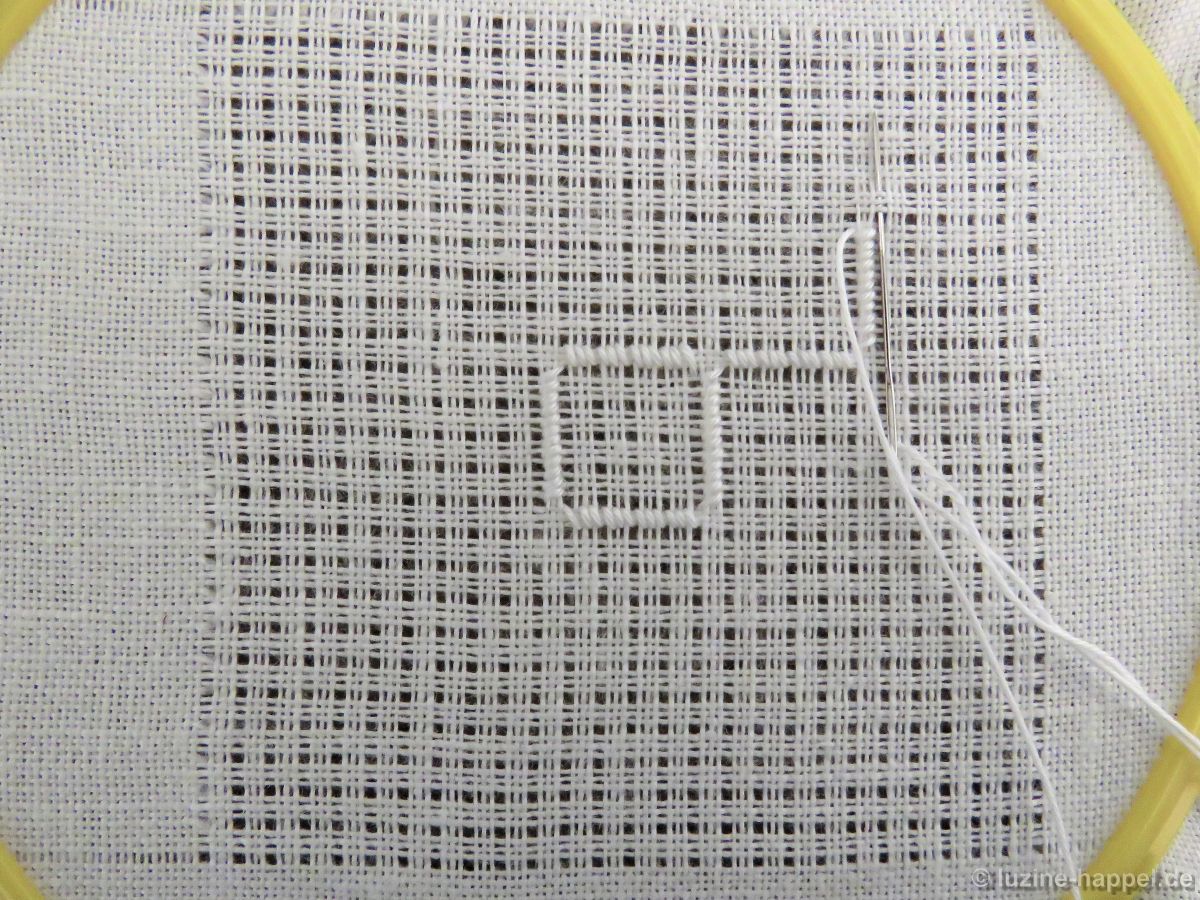
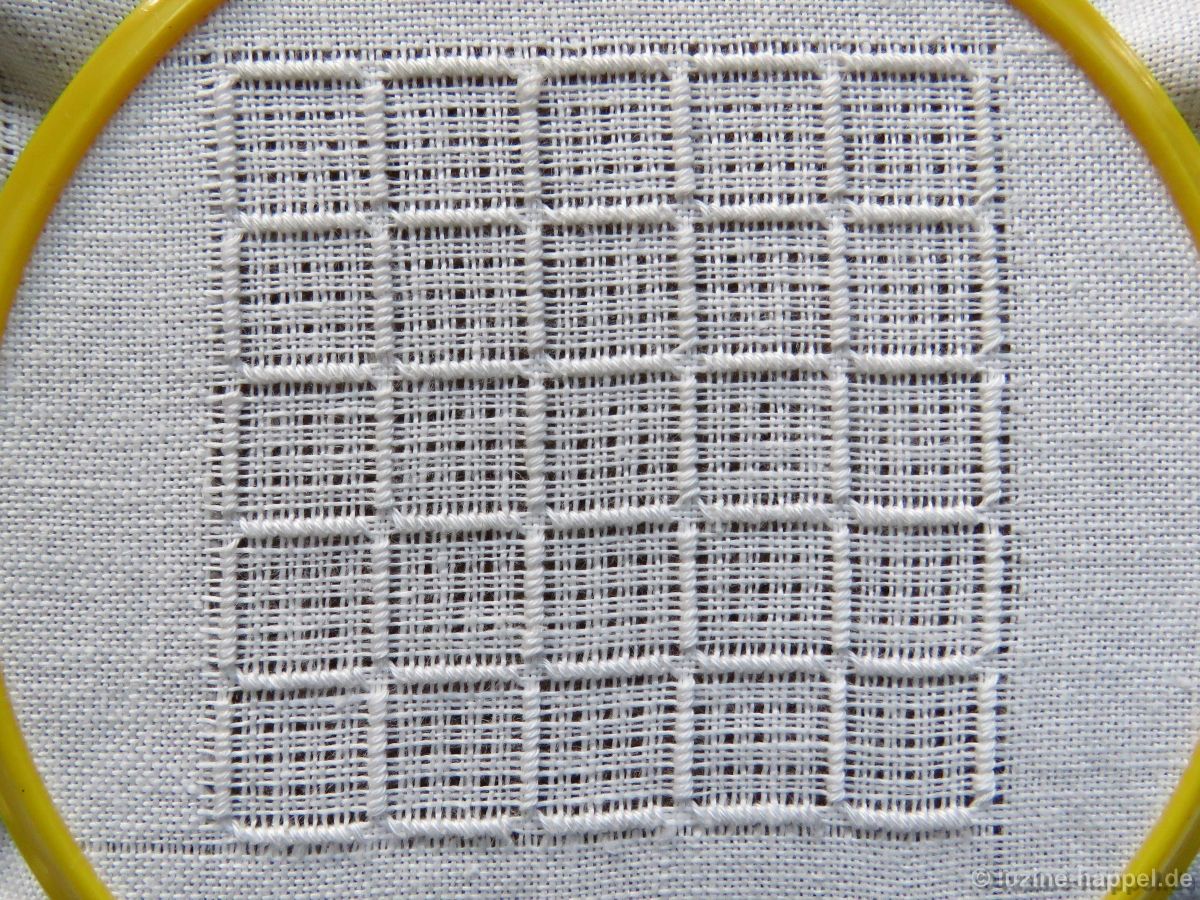
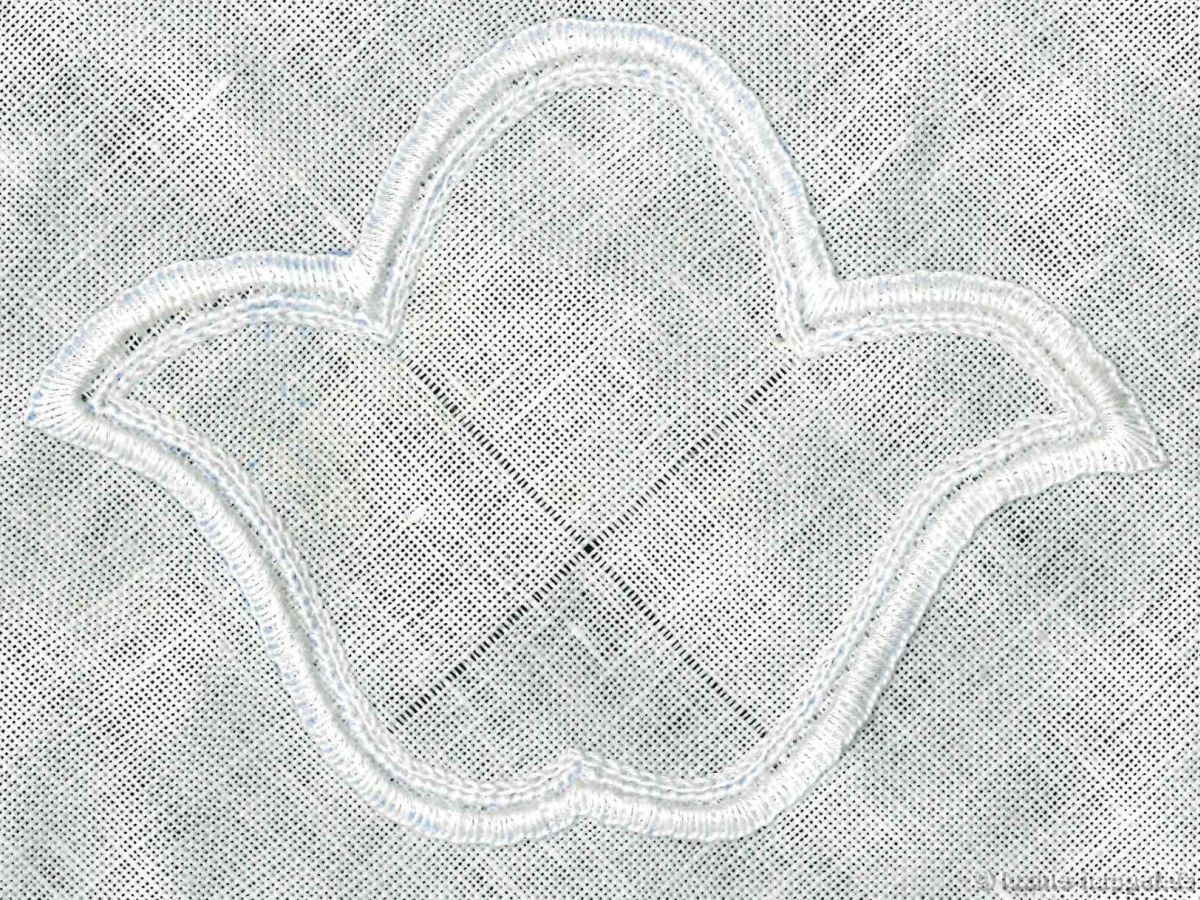
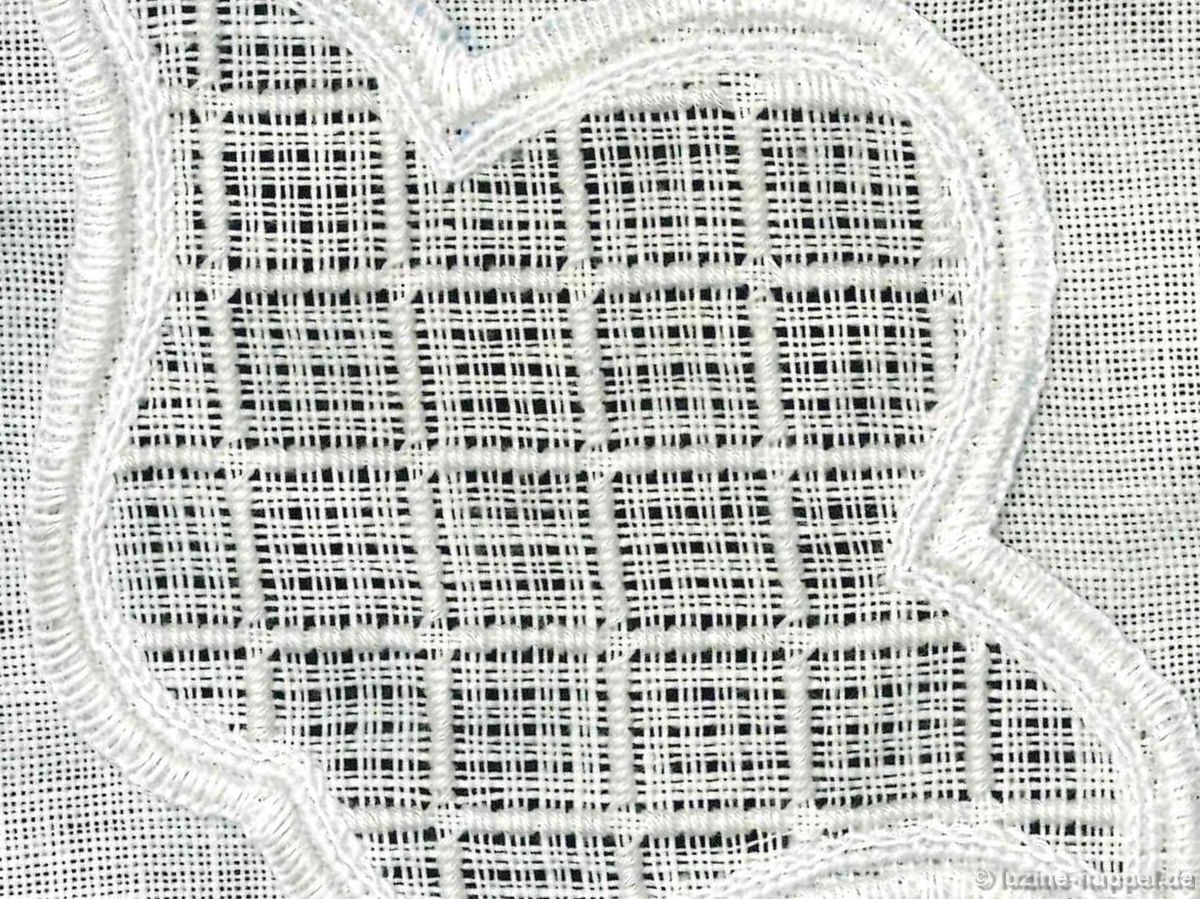
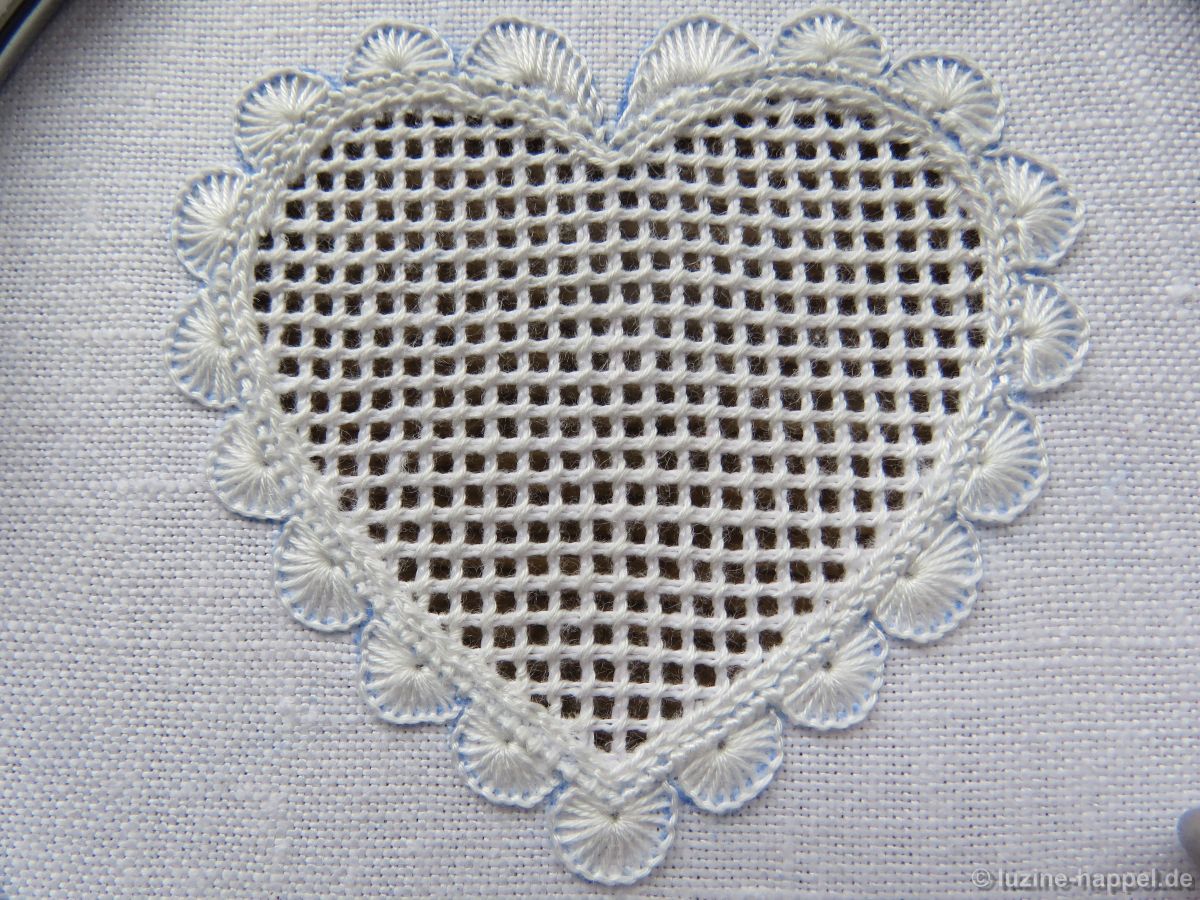
In the future I would like to present openwork patterns more often. Many of them first need to stabilize the grid with basic stitches. These are easy to work with, but some embroiderers have difficulty starting the rows. Therefore I explain this stitch in detail here.

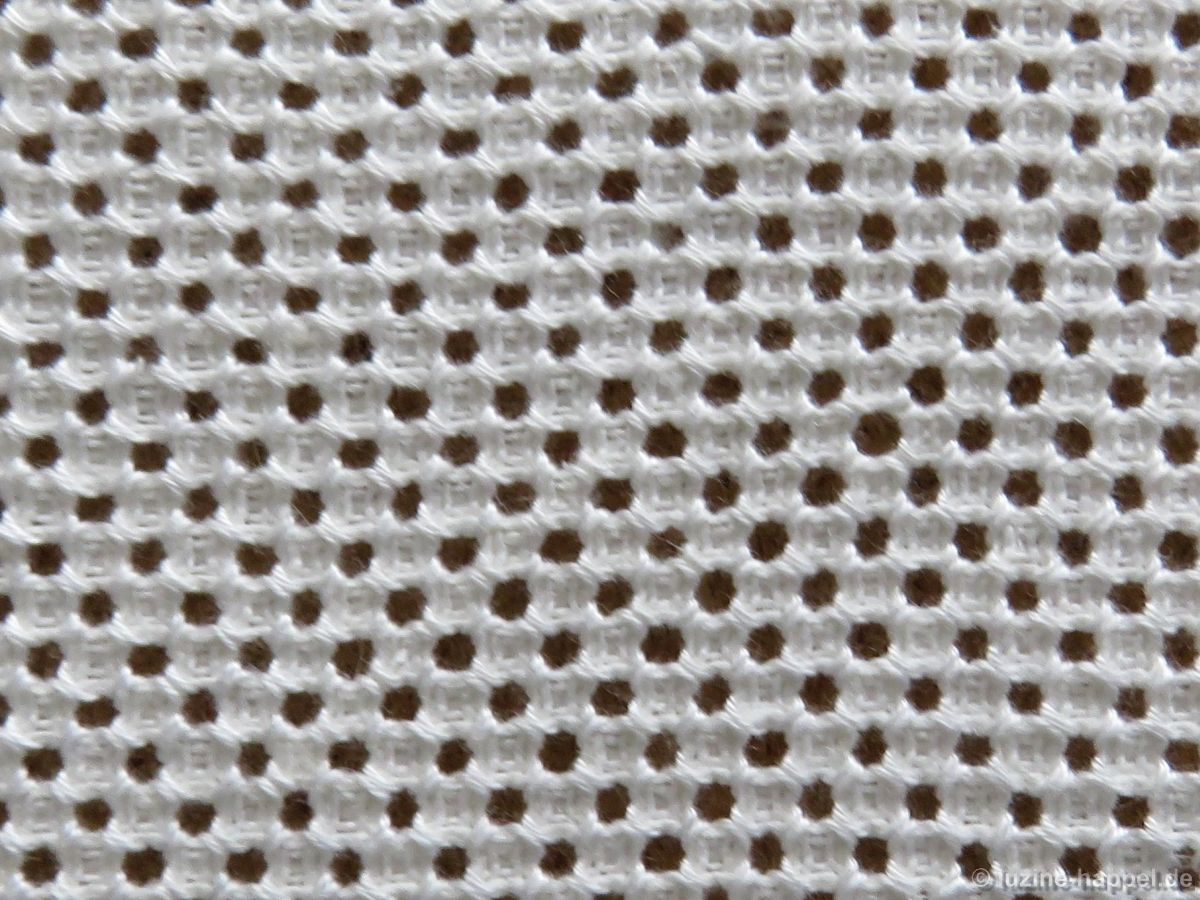
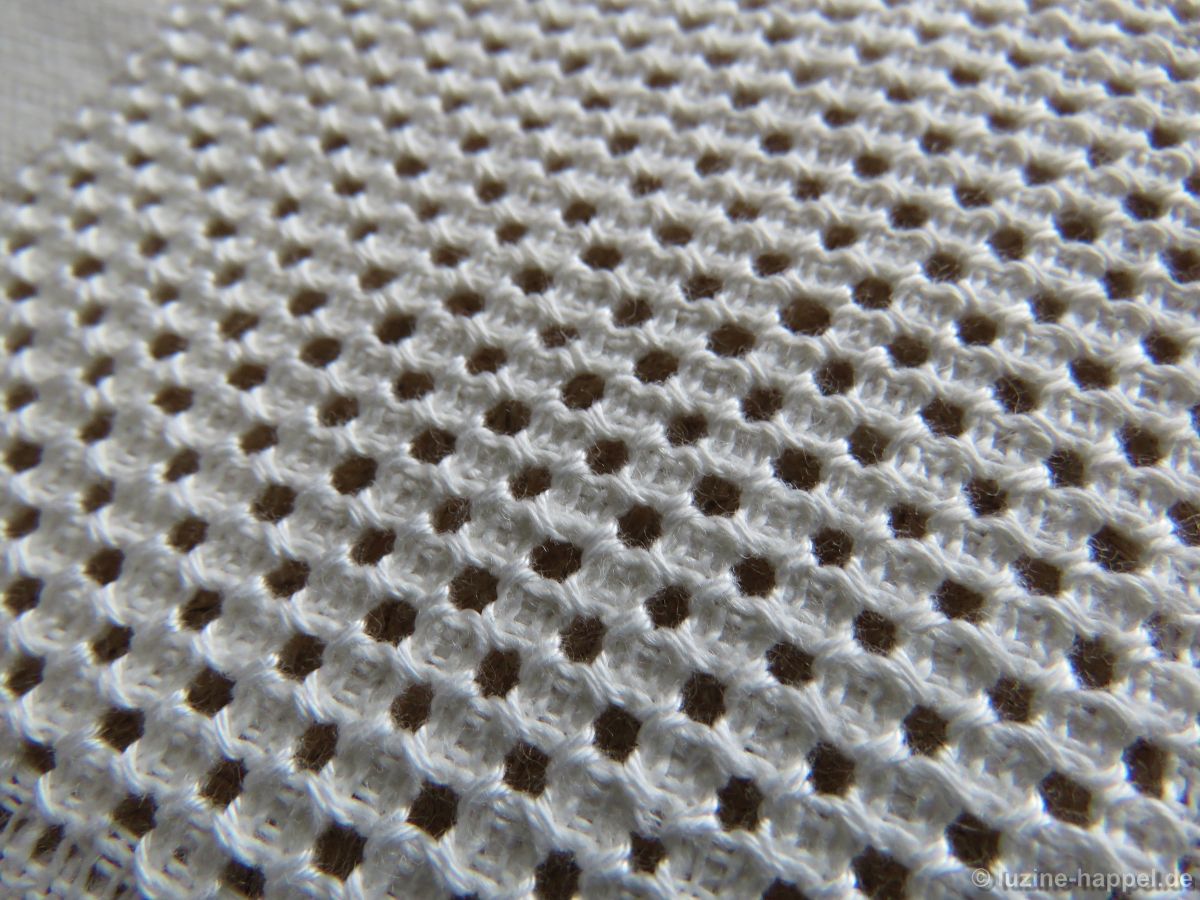
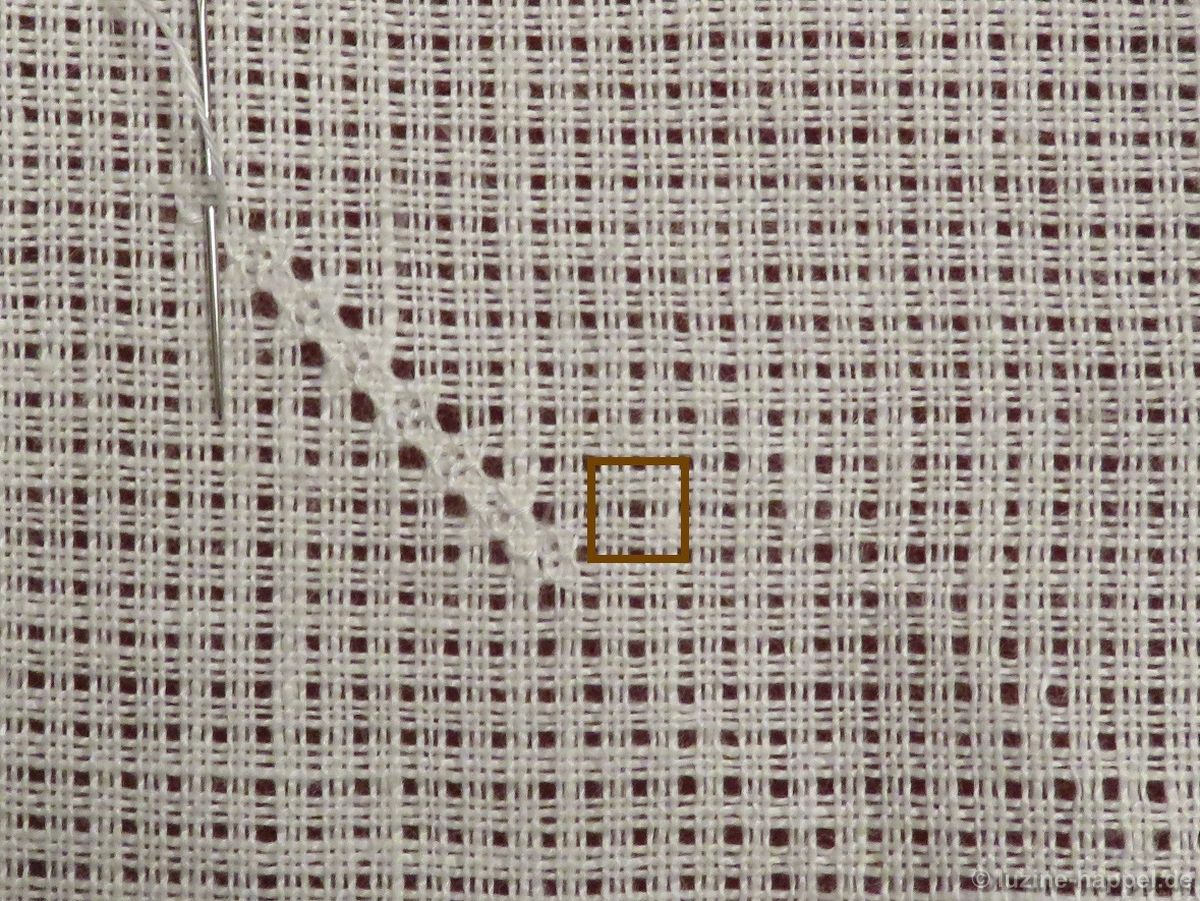
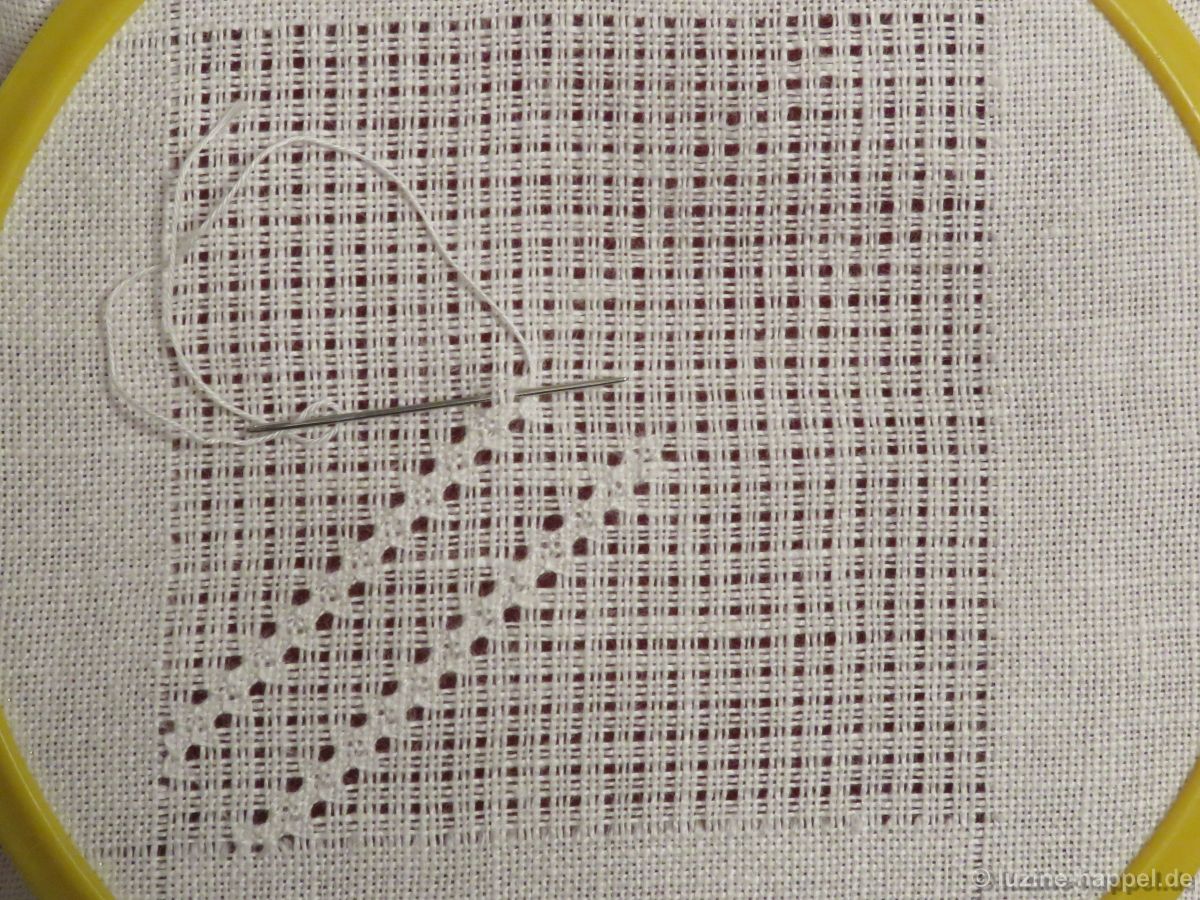
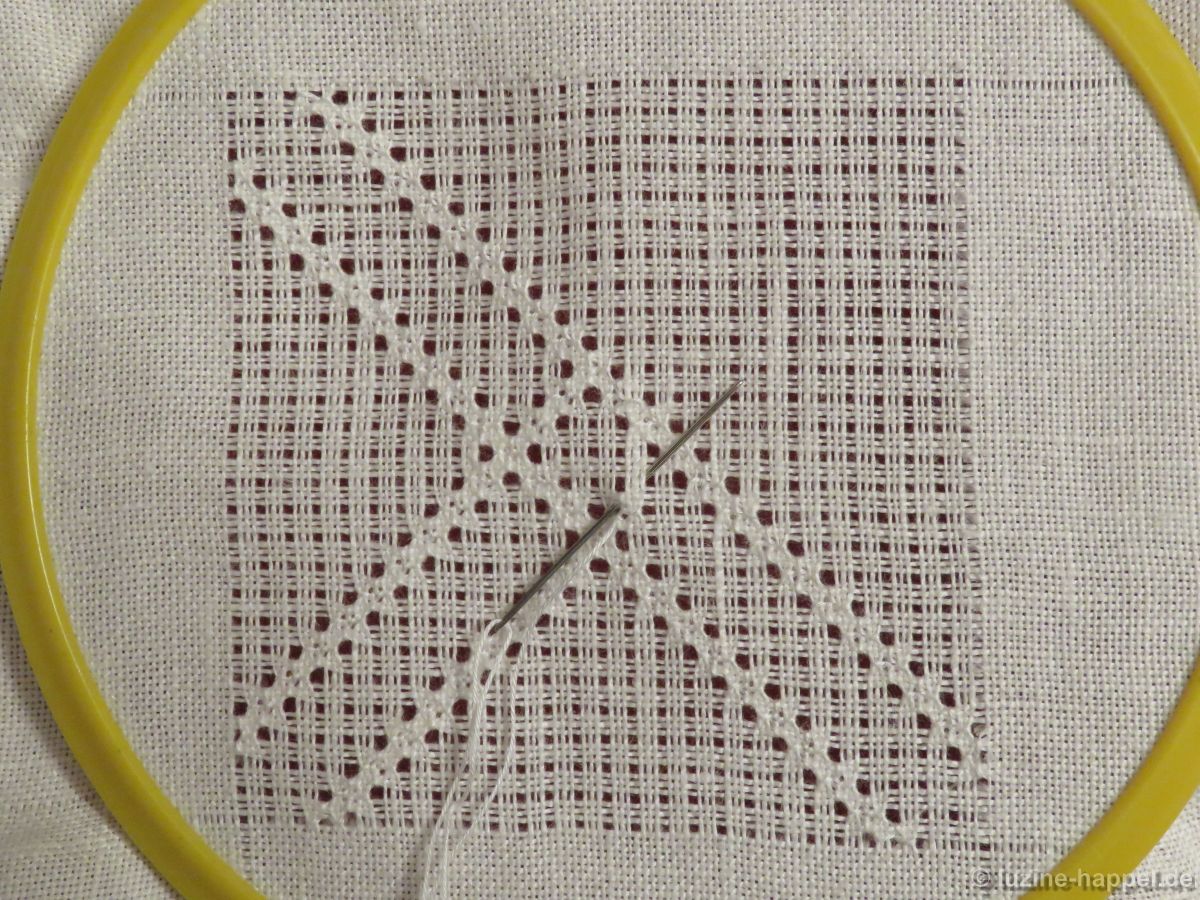
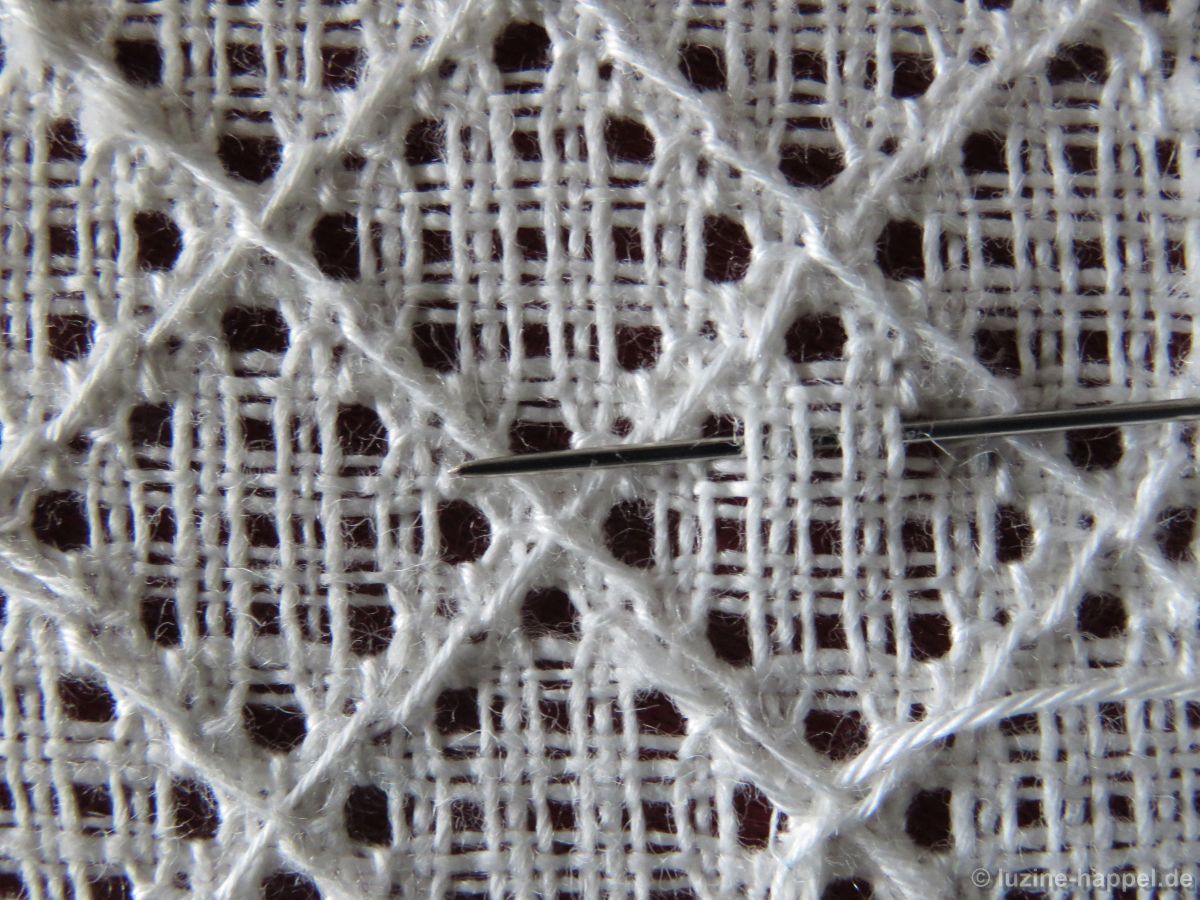
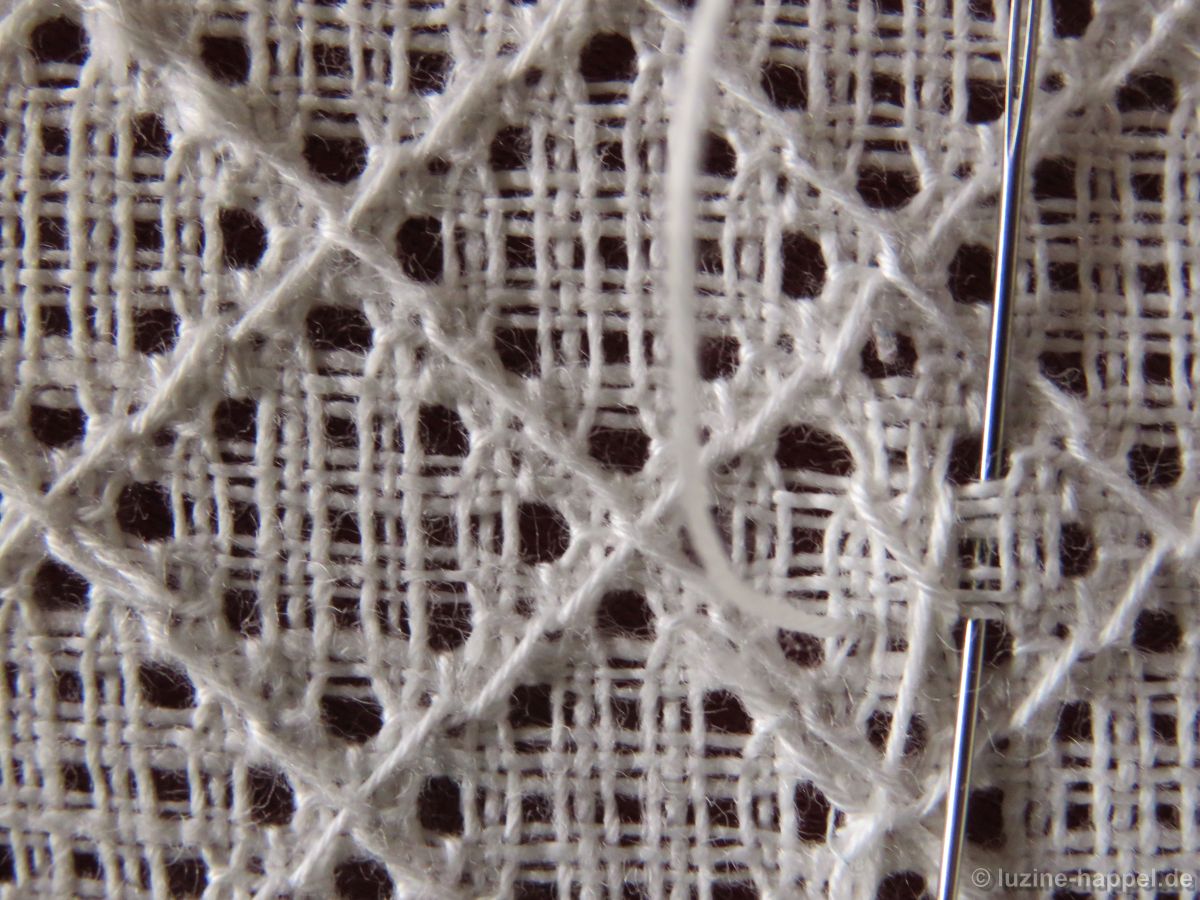
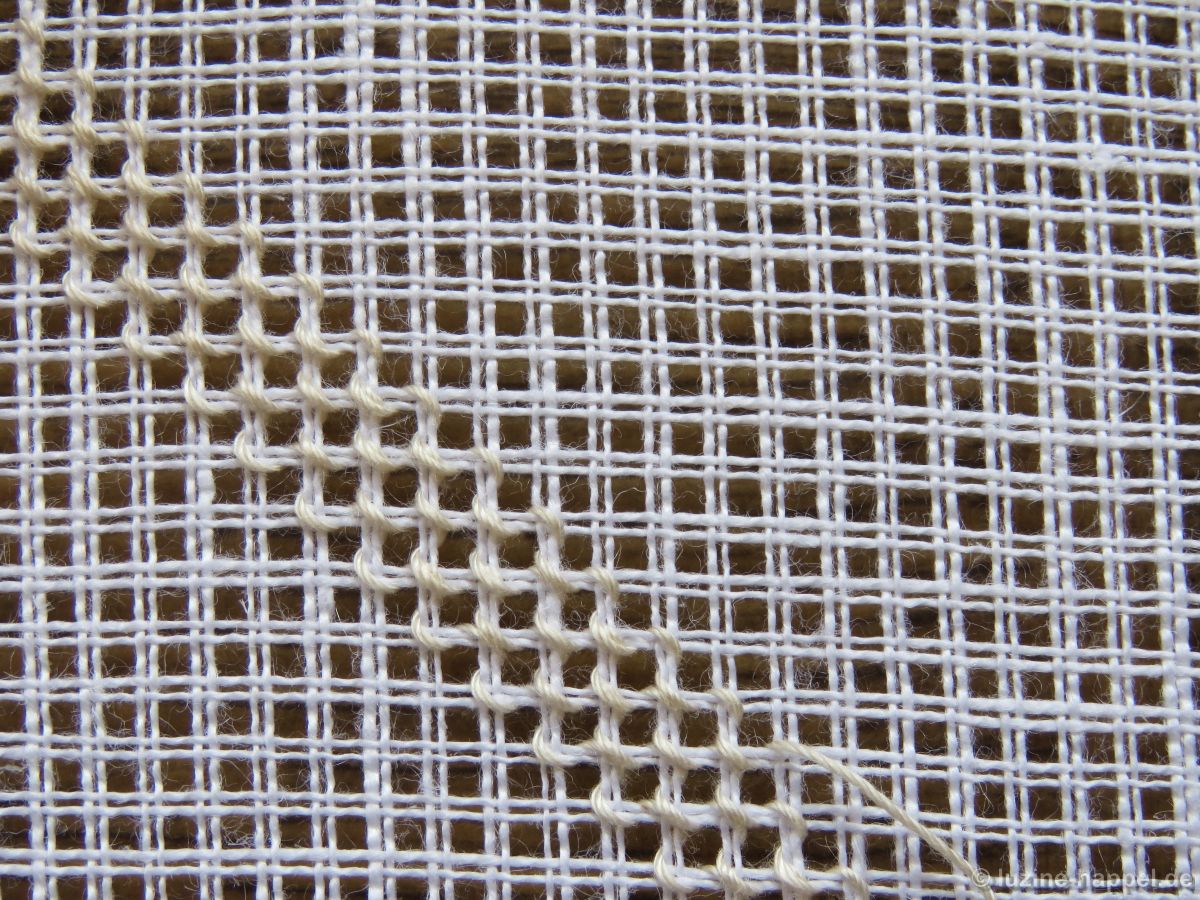
In Schwalm whitework, these stitches are traditionally worked in such a way that the slanting stitches that run crossing the intersections of fabric threads appear on the front of the embroidery.

One can work these basic stitches from both, the front and the back. From the front it is made with Cable stitches, from the back with Single Faggot stitches.
Working from the back is much quicker and gentler to the wrist. Therefore I explain this version.

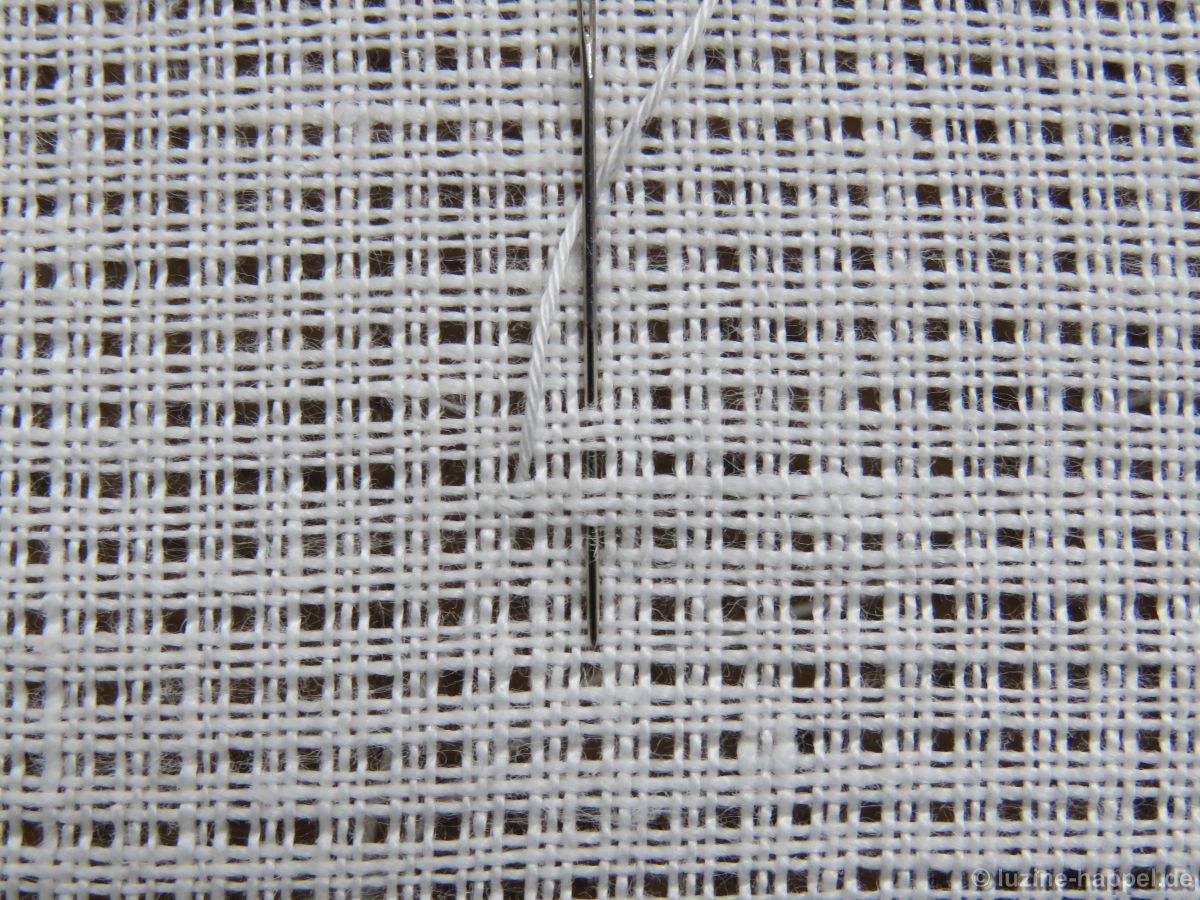
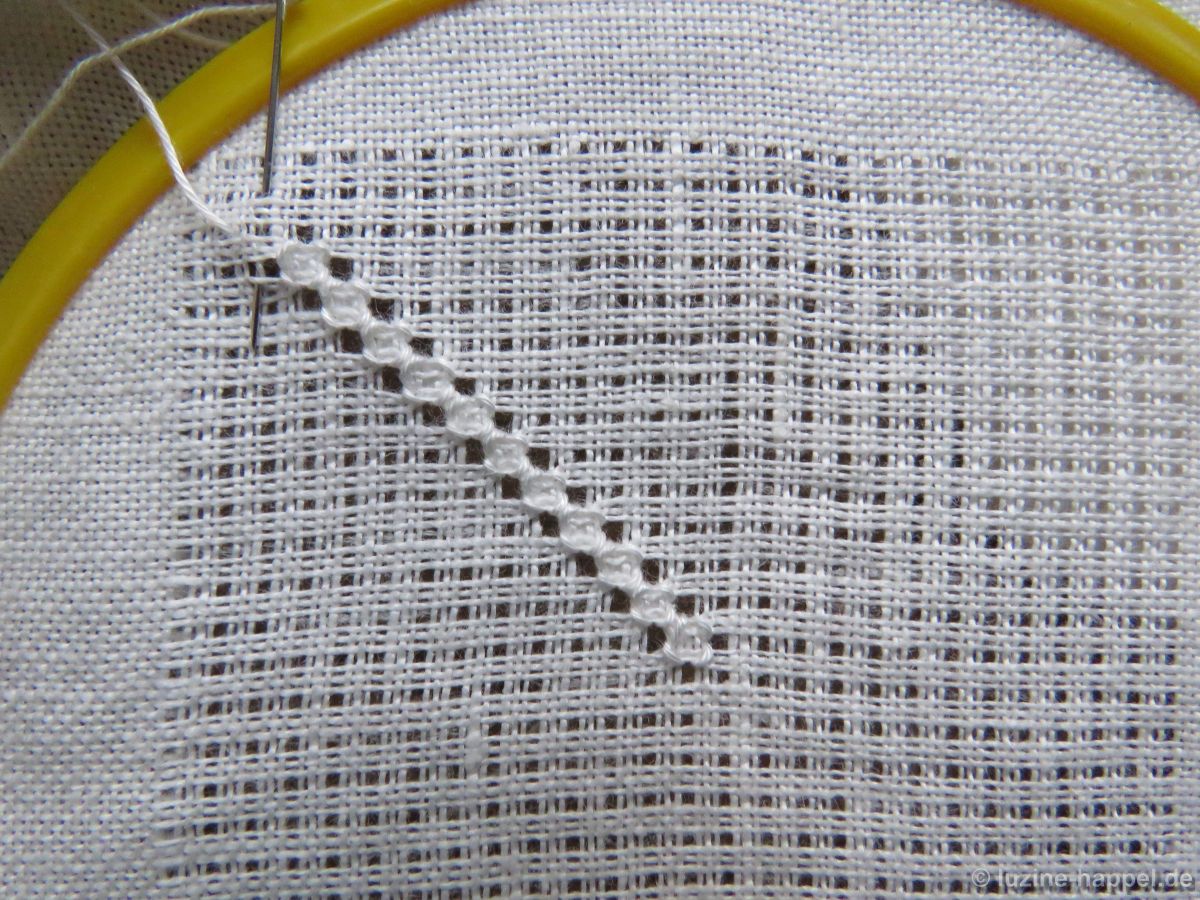
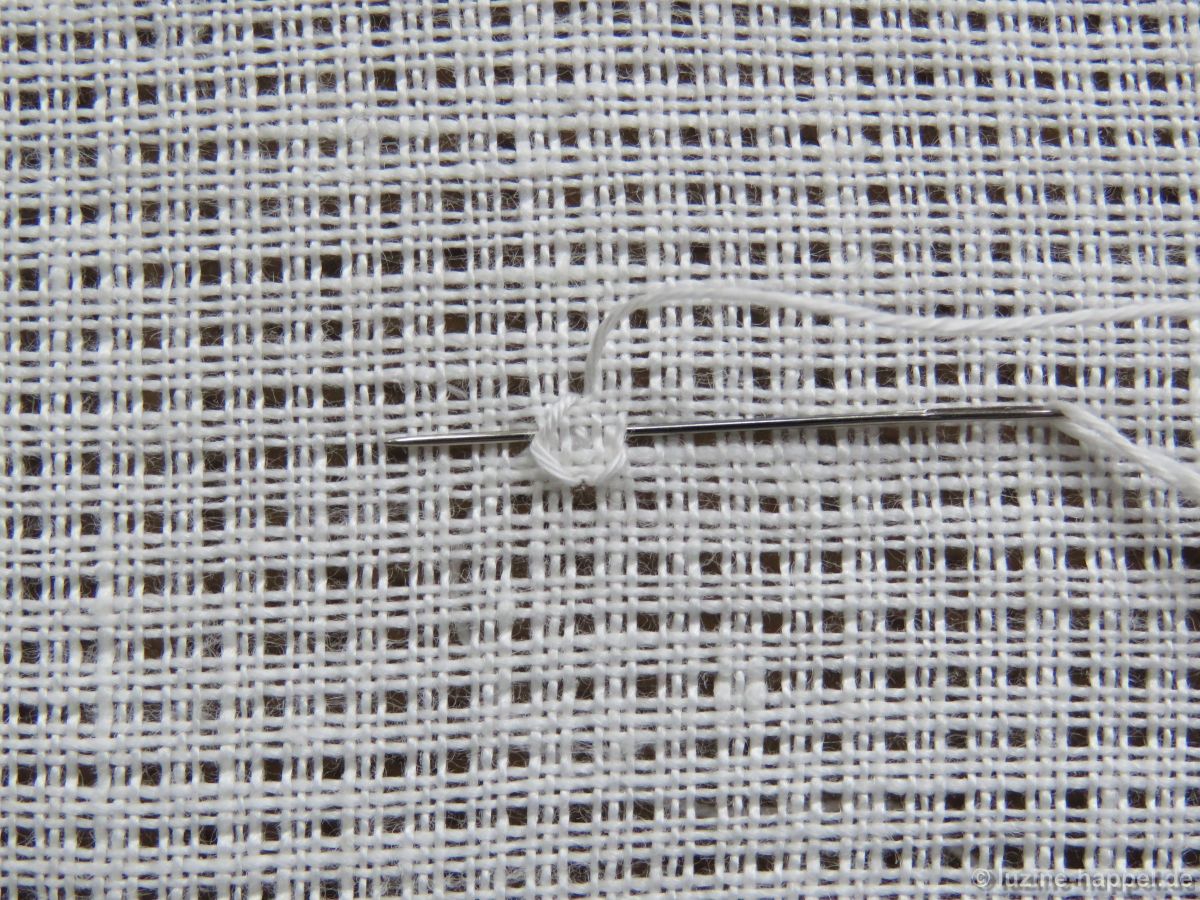
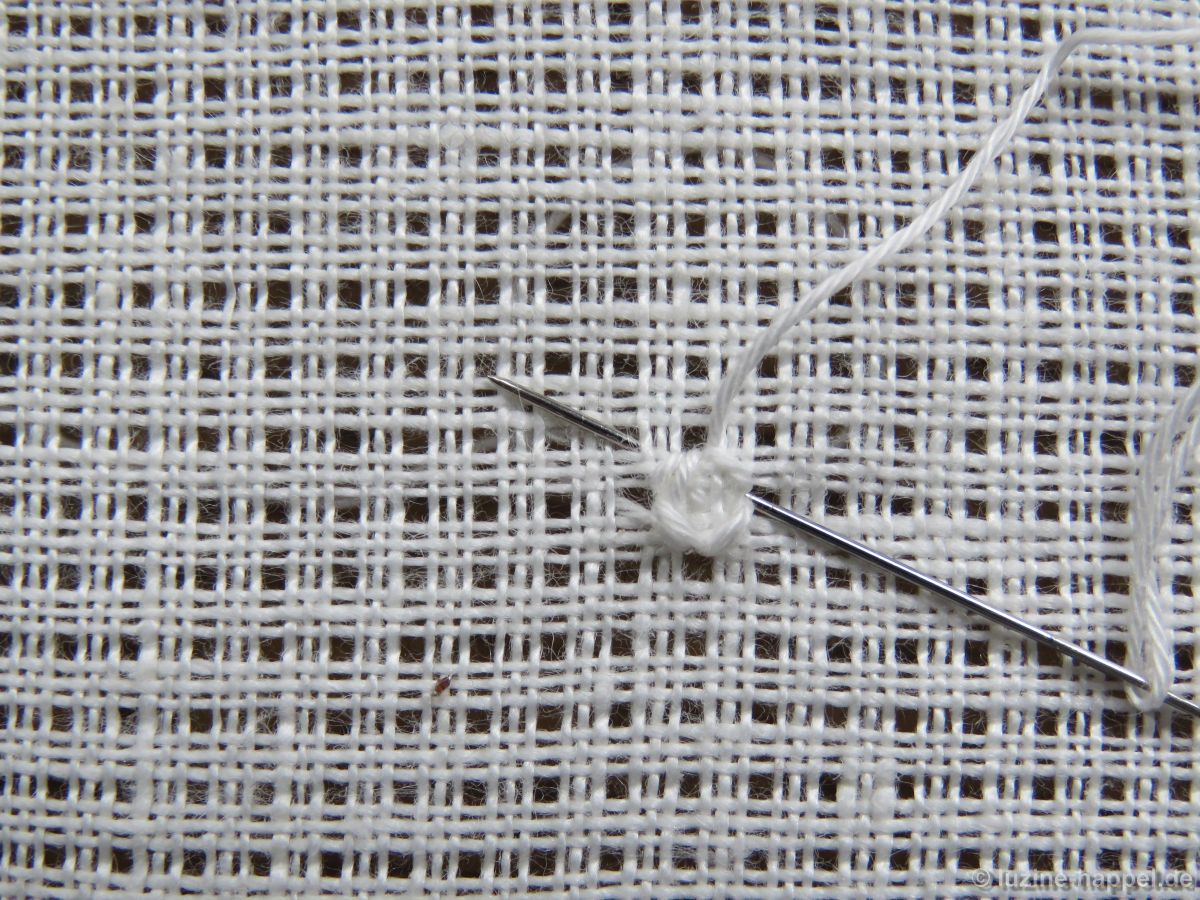
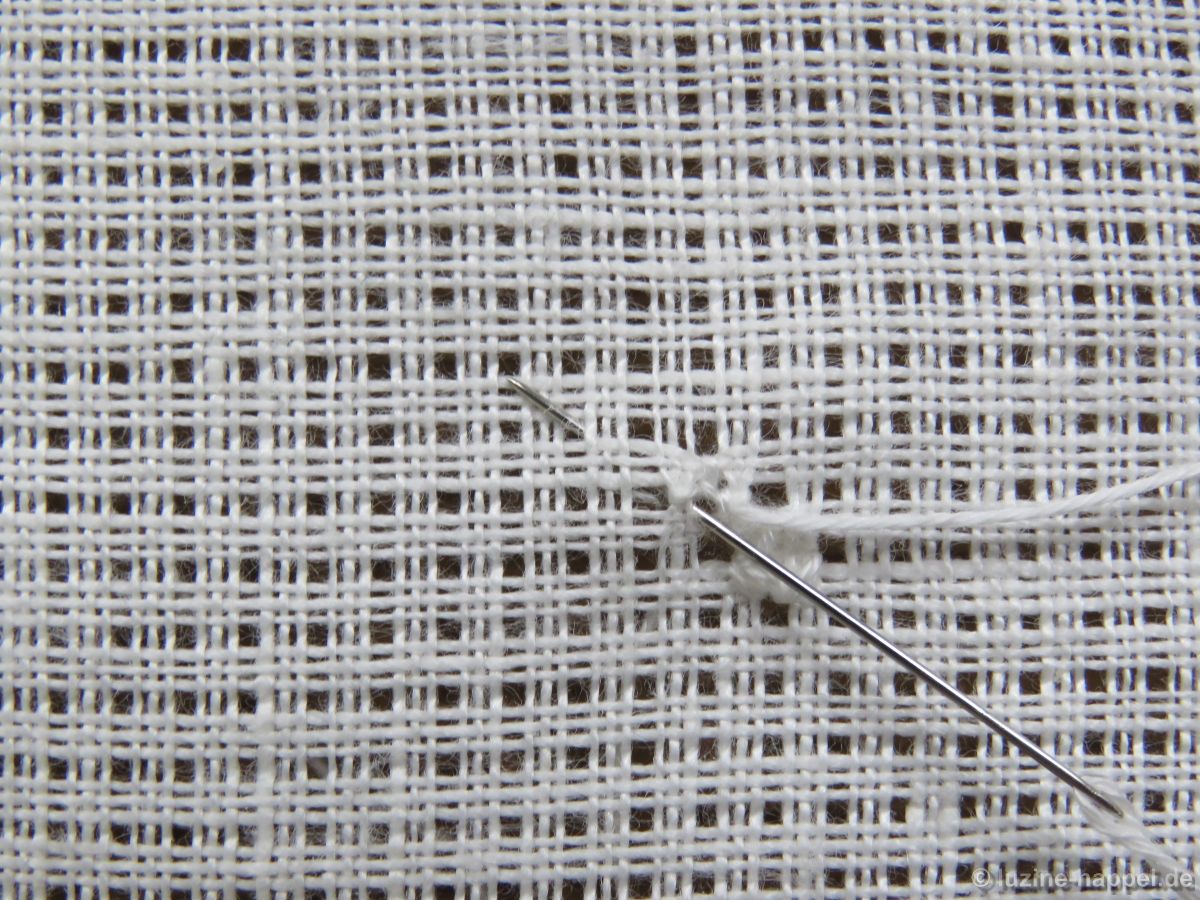
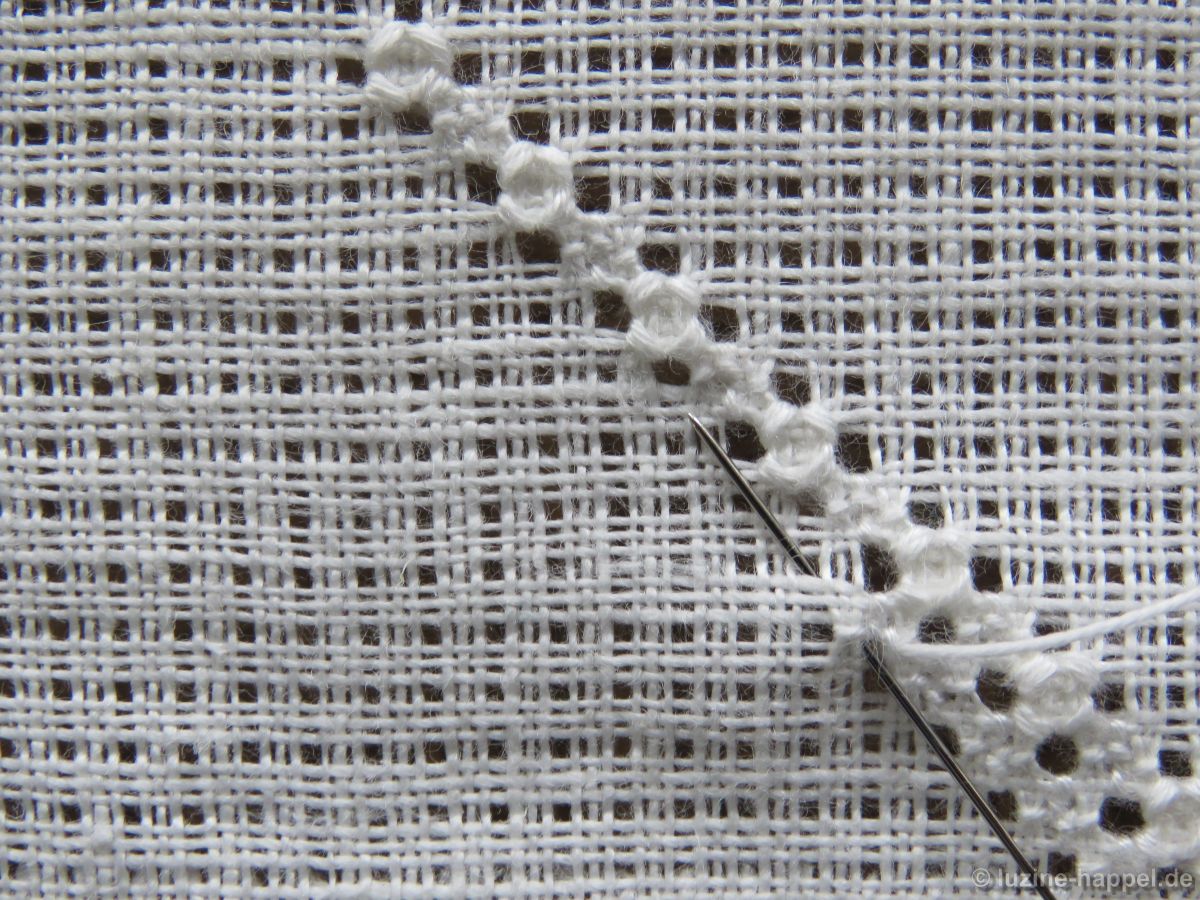
The stitch is closely related to the Wave stitch, but here it is passed diagonally through the fabric. The Single Faggot stitch is worked from right to left. It is embroidered between two adjacent lines that run diagonally through the intersections of the fabric threads.
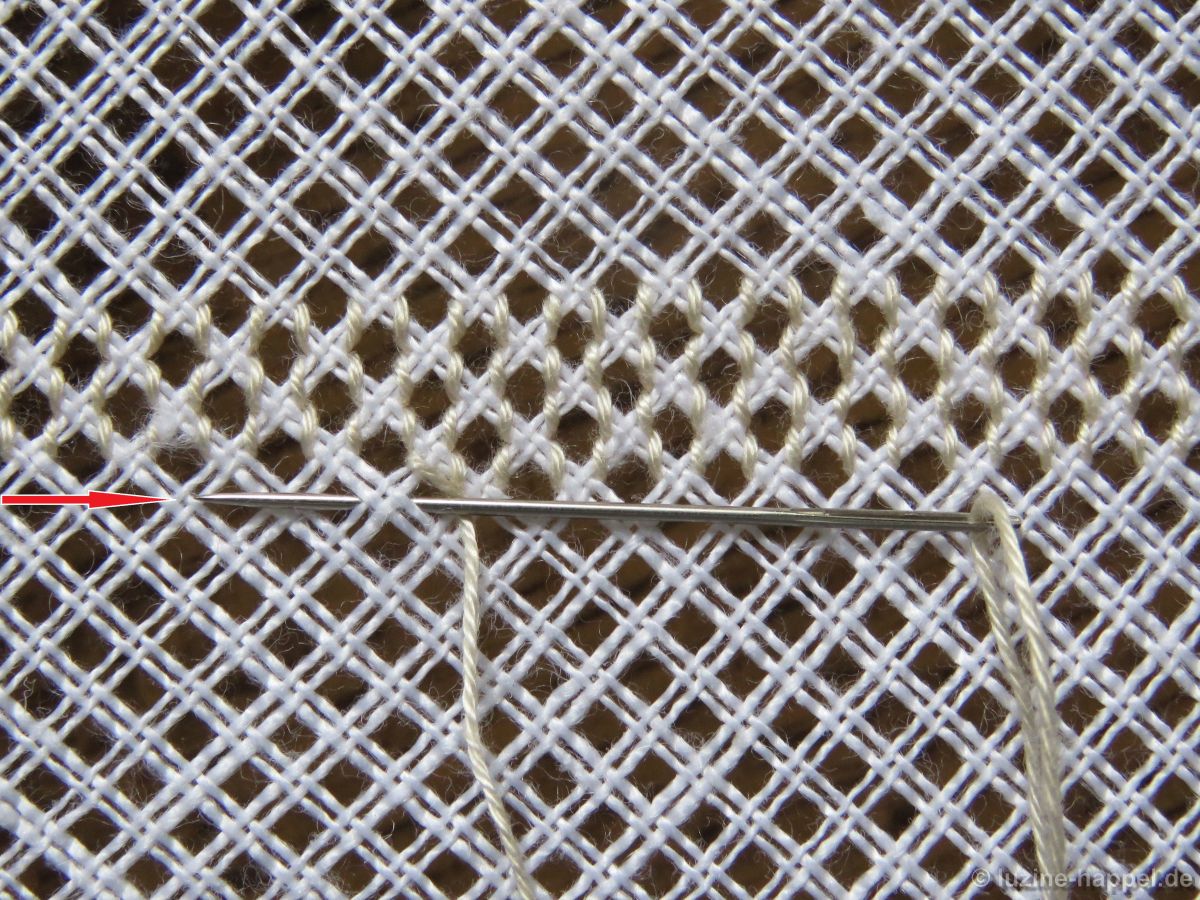
The lower line is marked with the red, the upper one with the green arrow.
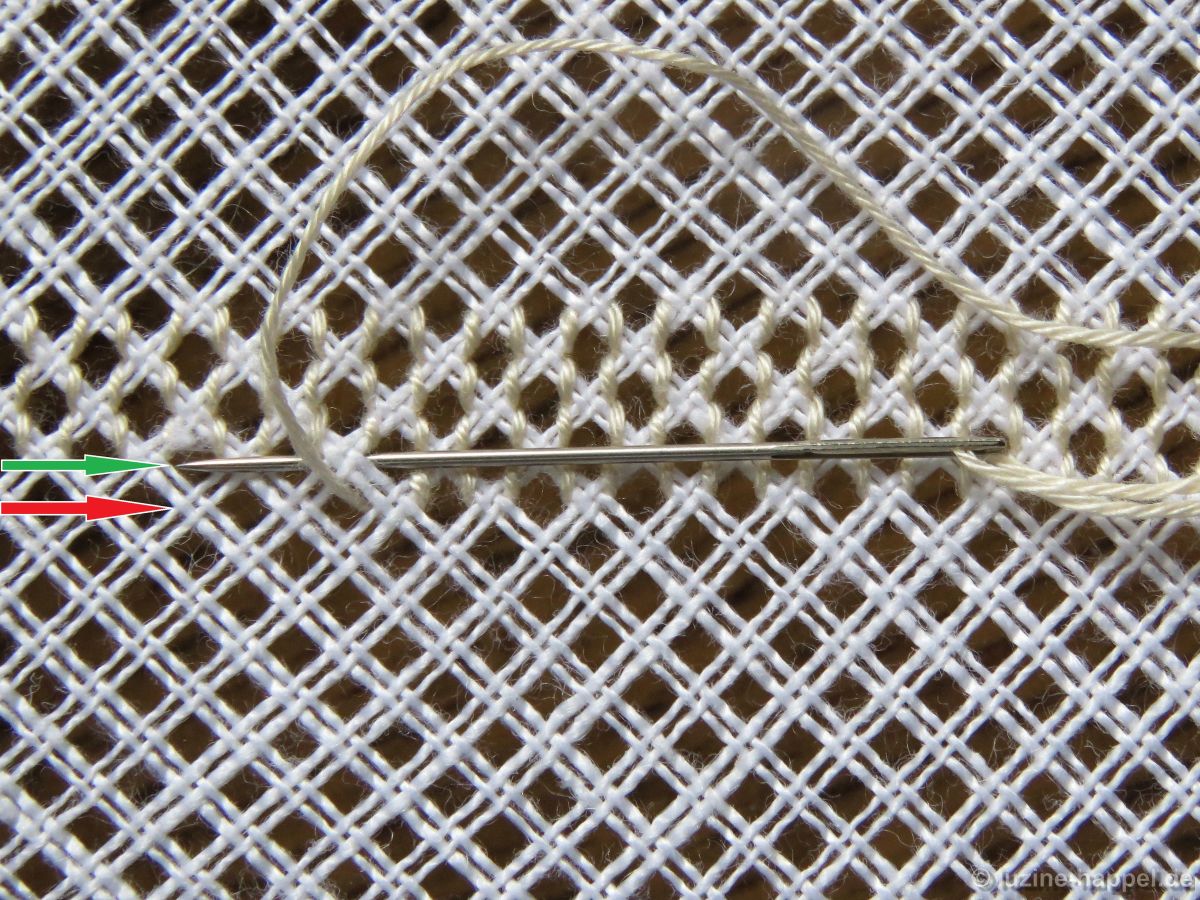
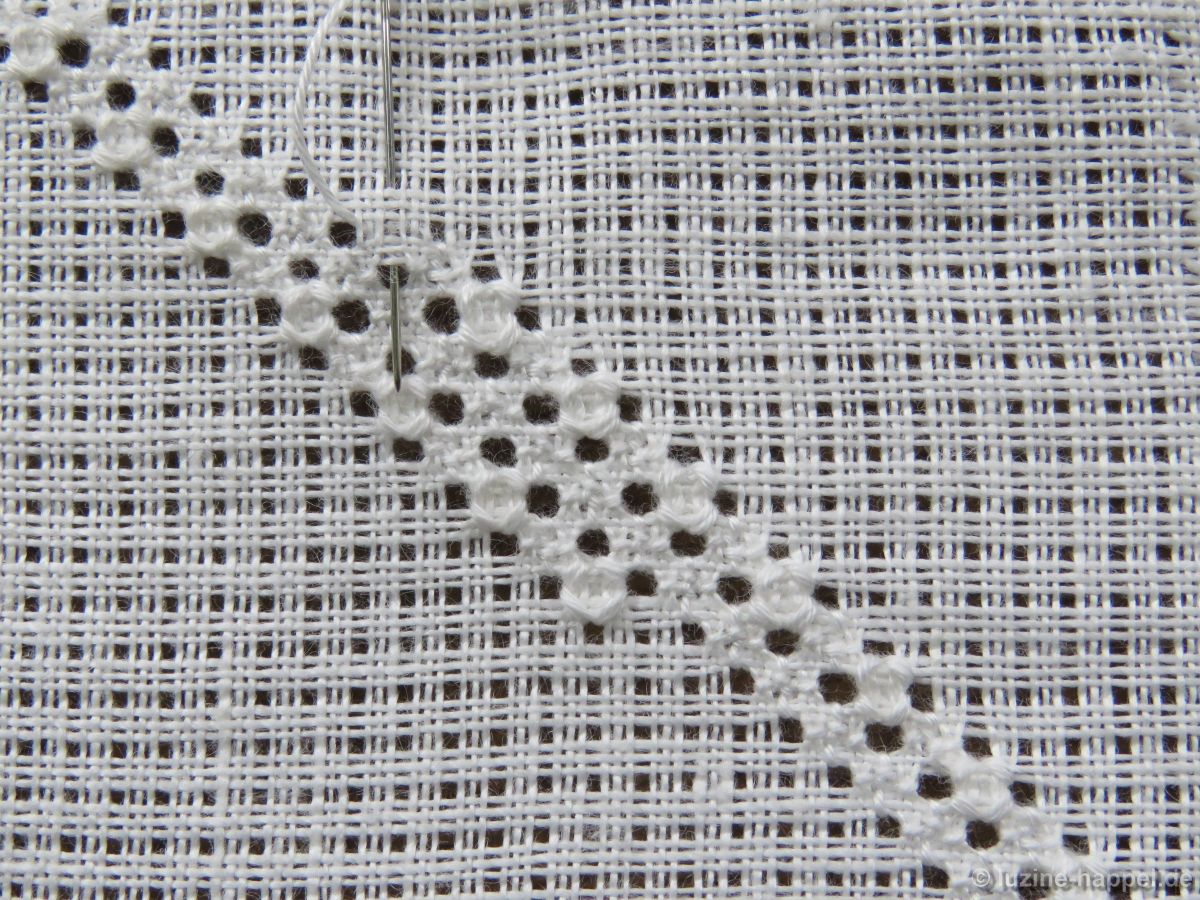
One crosses under each intersection, one after the other, constantly alternating between the upper and the lower intersectional lines. The next row of stitches is directly adjacent to the previous one. In this way, each pair of fabric threads is wrapped around once and the typical double slanting stitch is established on the front (Cable stitch), which runs over the fabric thread intersections.
To keep the edge neat and tidy, it is important to respect some things and to start in the right way.

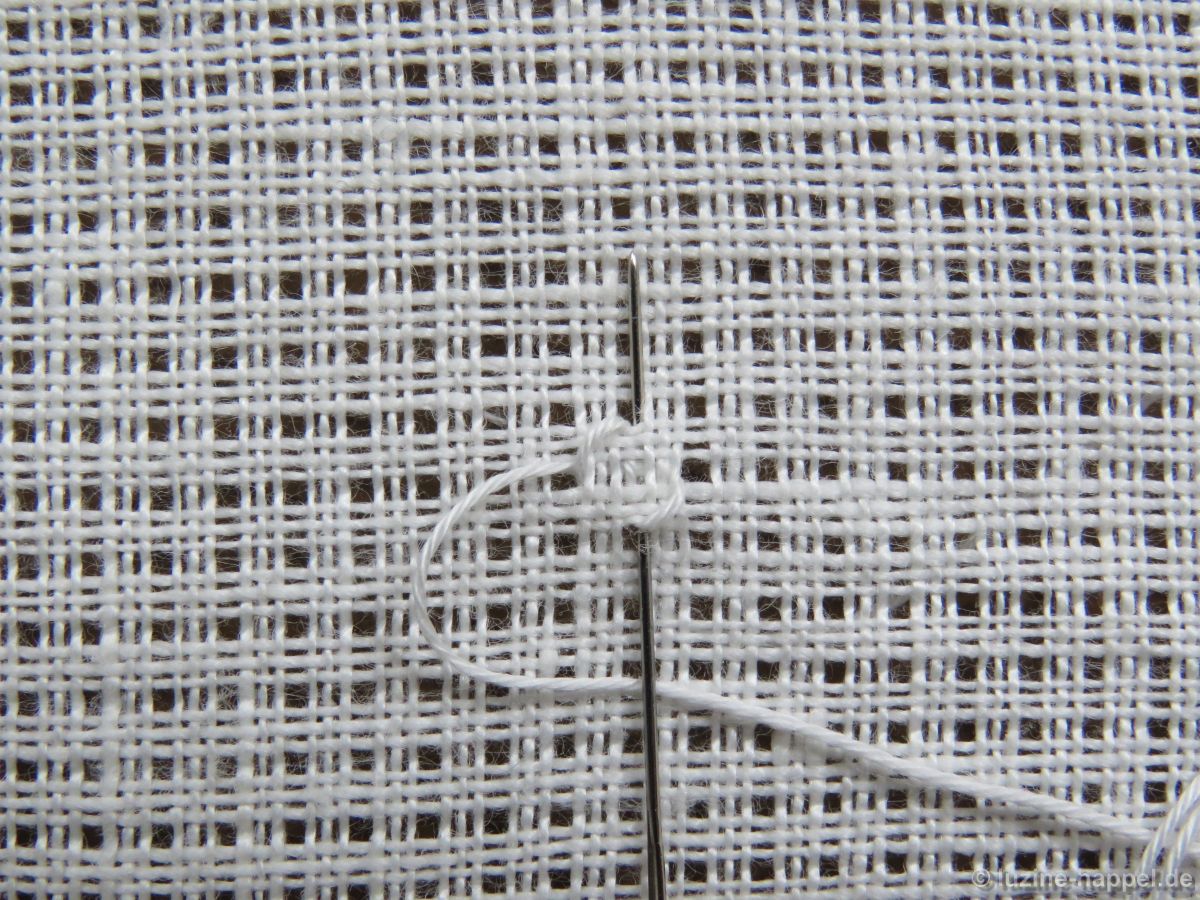
First: It is good to have the Chain stitches though close to the Coral Knot stitches, but not too tiny and too small – as seen in the last four stitches of the example. The loops of the Chain stitches should appear more circled than as an oval.
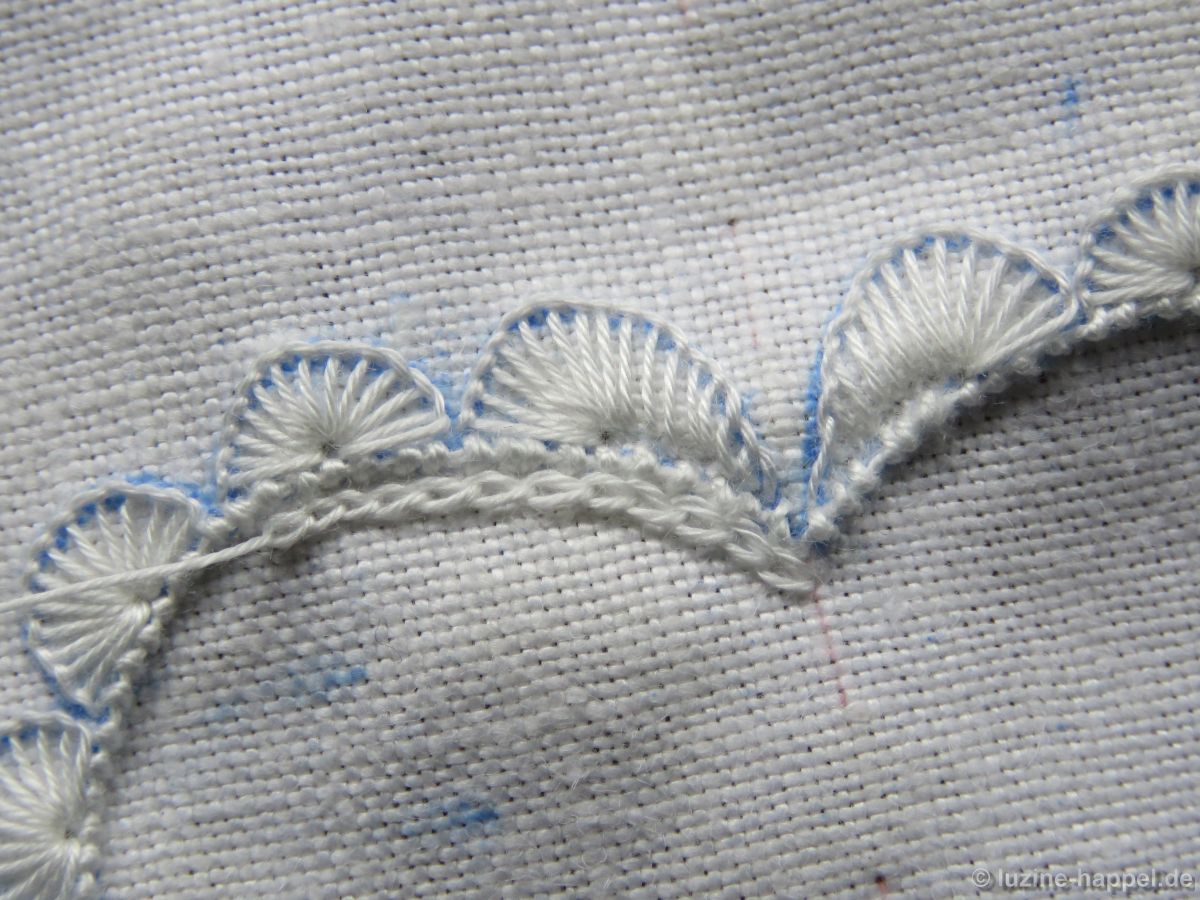
The difference seems to be only marginal, but it is of the essence to cover the small thread ends on the edge better, especially in openwork grids.
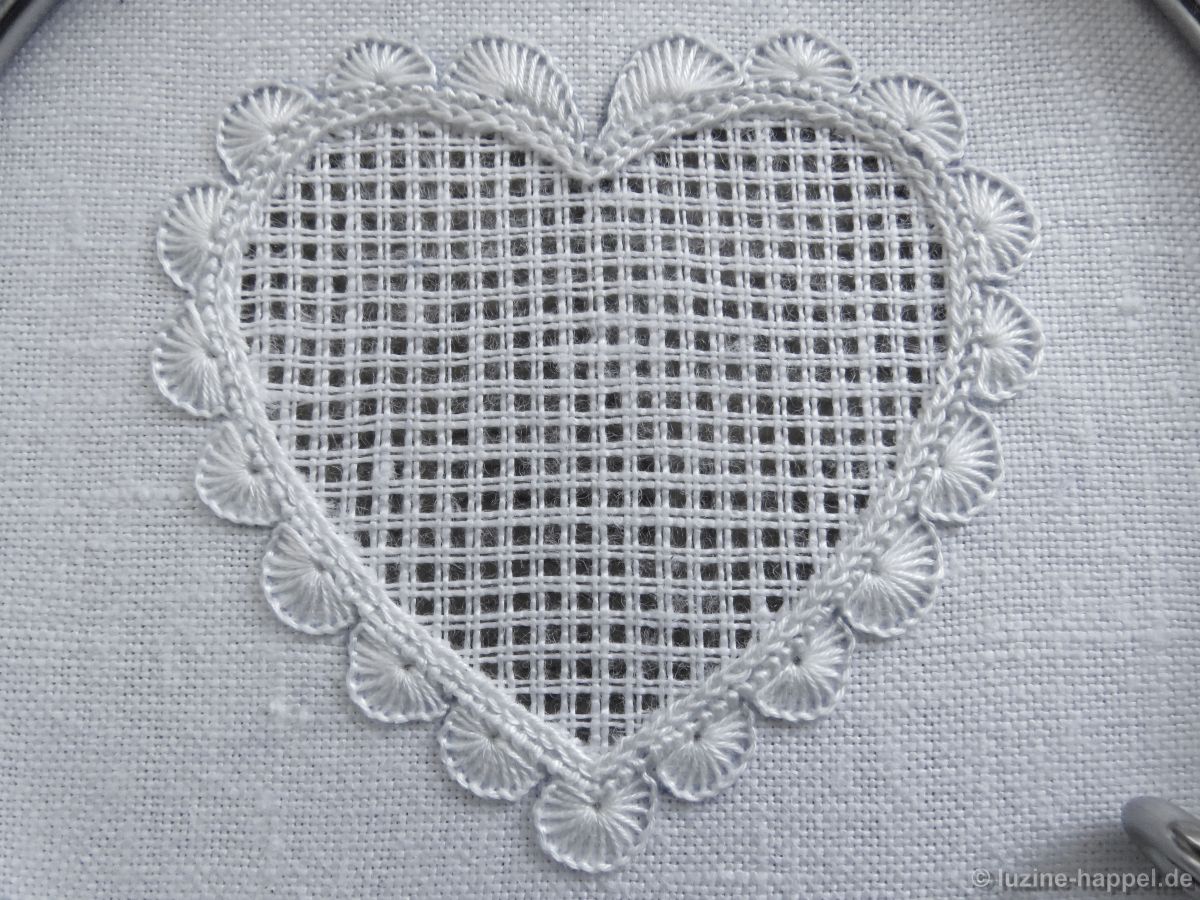
Second: To keep also the holes on the edges well defined and open, it is important to start in the right way.

Sometimes there is a fabric thread intersection (green arrow) right on the edge. Sometimes a pair of fabric threads (red arrows) must first be wrapped around from the edge in order to reach the first intersection. This is important to do even if the pair of fabric threads is only short (see example in the left of the red arrow).

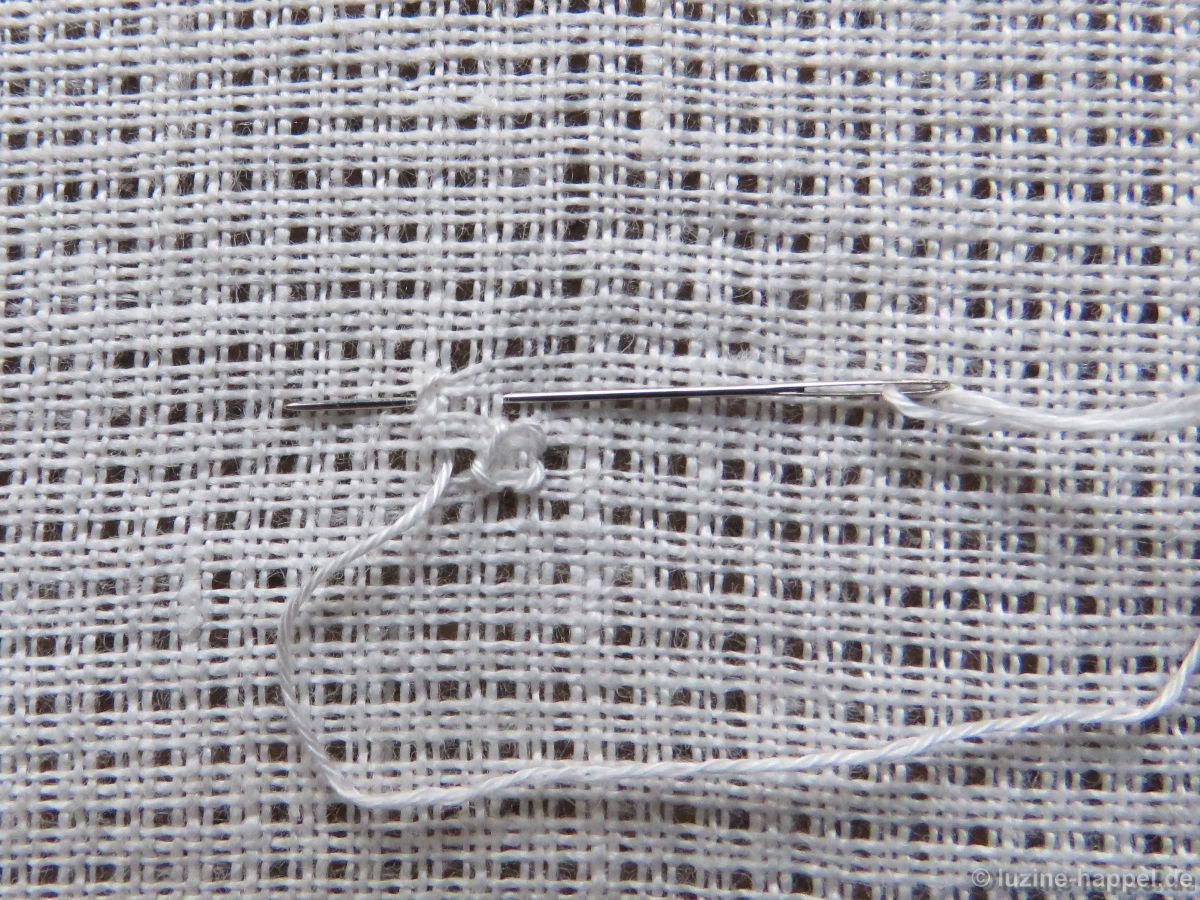
This is easier if the work at the beginning is turned so that the fabric threads are vertical or horizontal. In all cases the working thread is pulled through under the edge fastening.

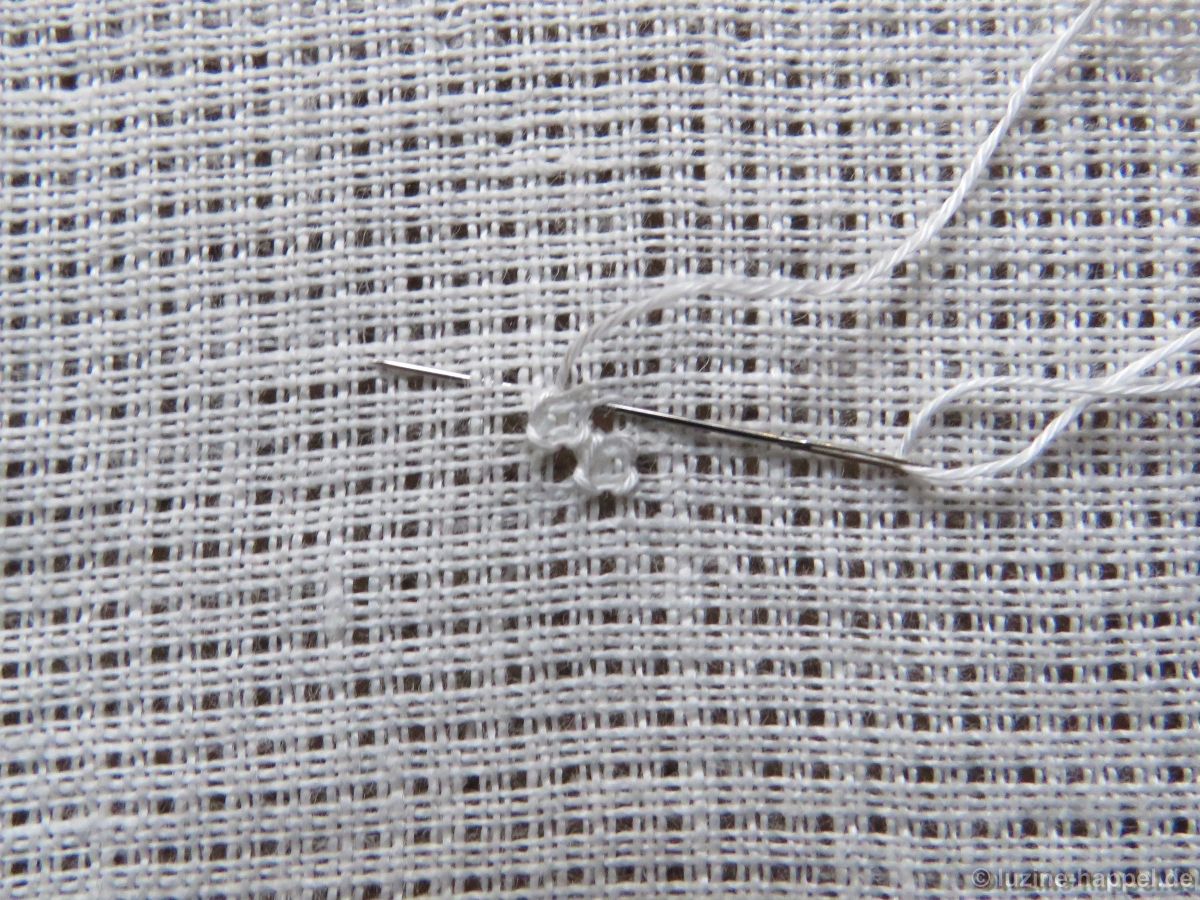
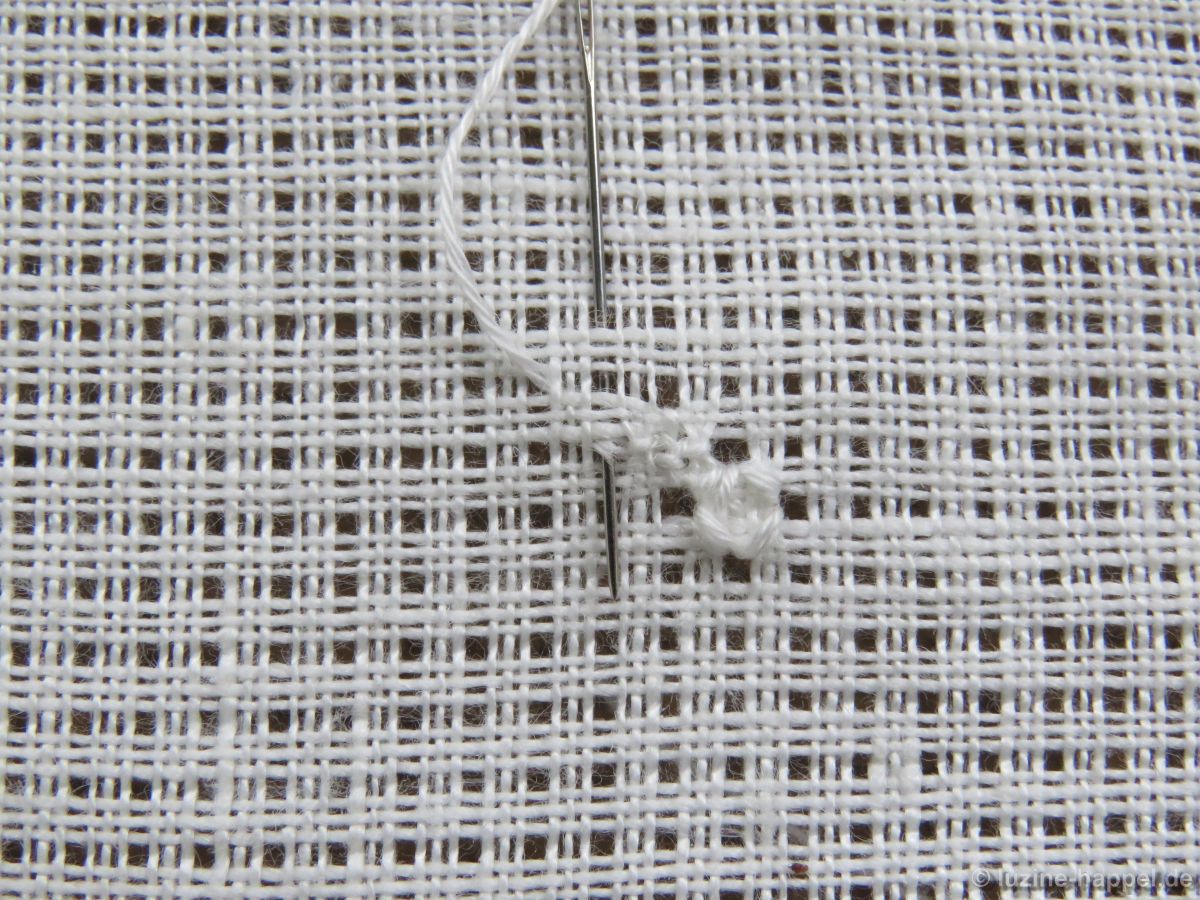
If there is an intersection of fabric threads (green arrow) directly on the edge, it is easier to start. The working thread is led under the edge fastening to the intersection that is to be crossed under.
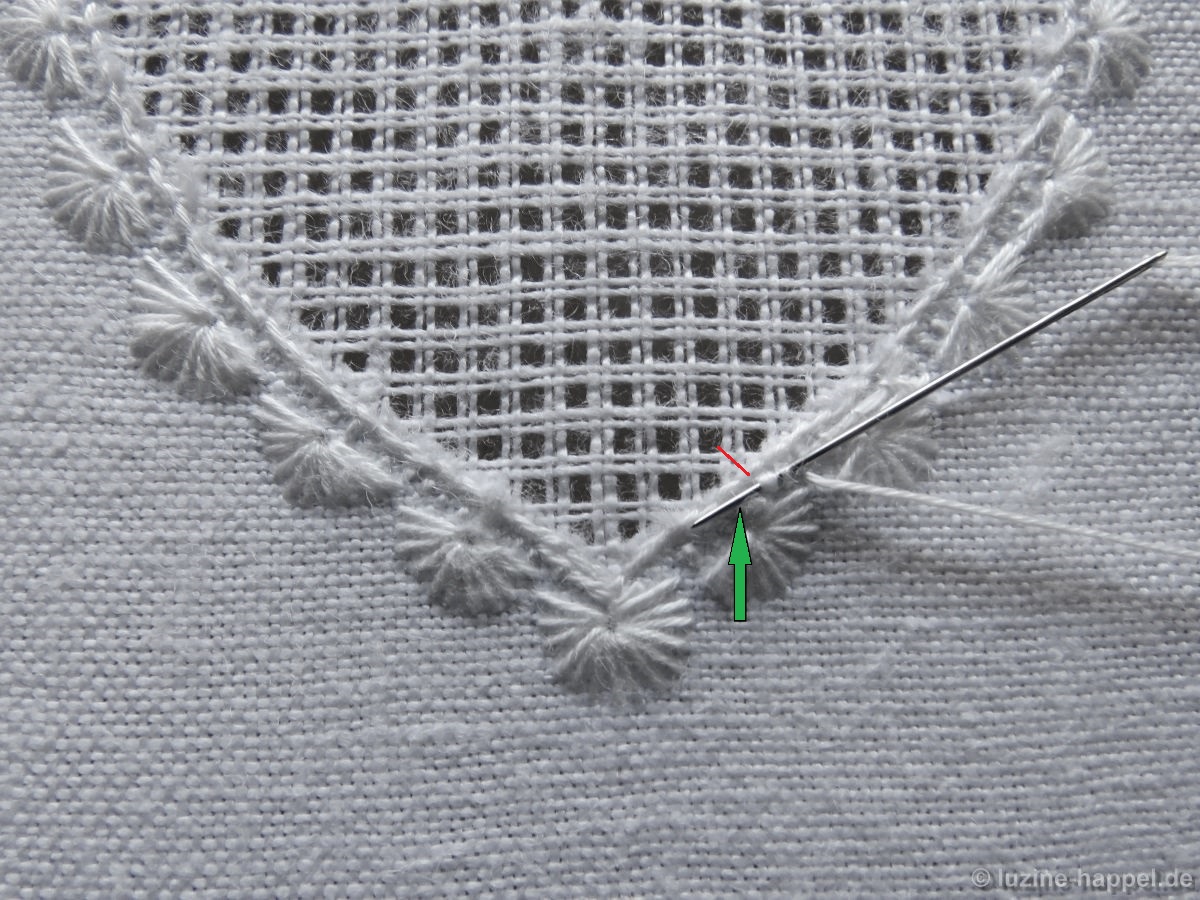
There the needle is inserted between the edge attachment and the intersection in order to start the Single Faggot stitch from there by crossing under the intersections.
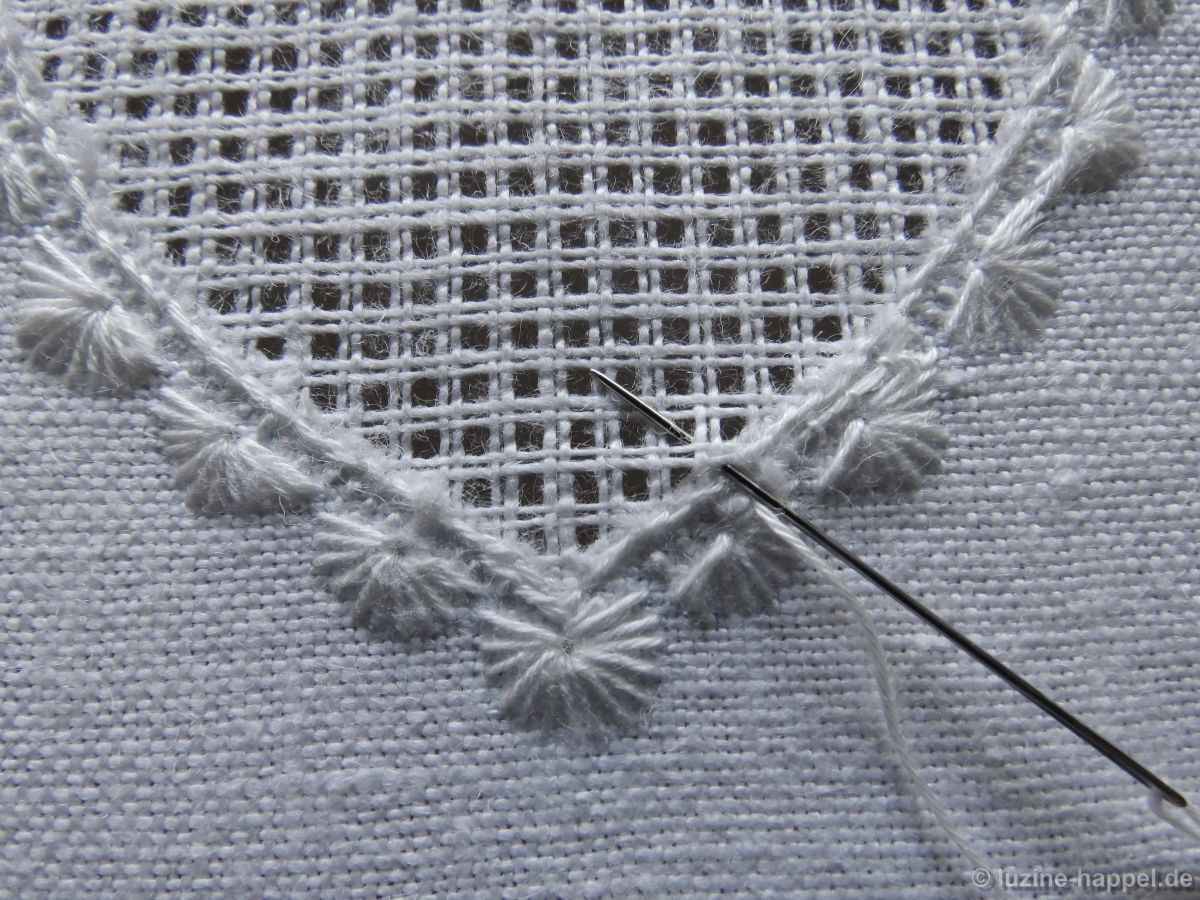
Make sure, that in the front you did not catch the Chain stitch.
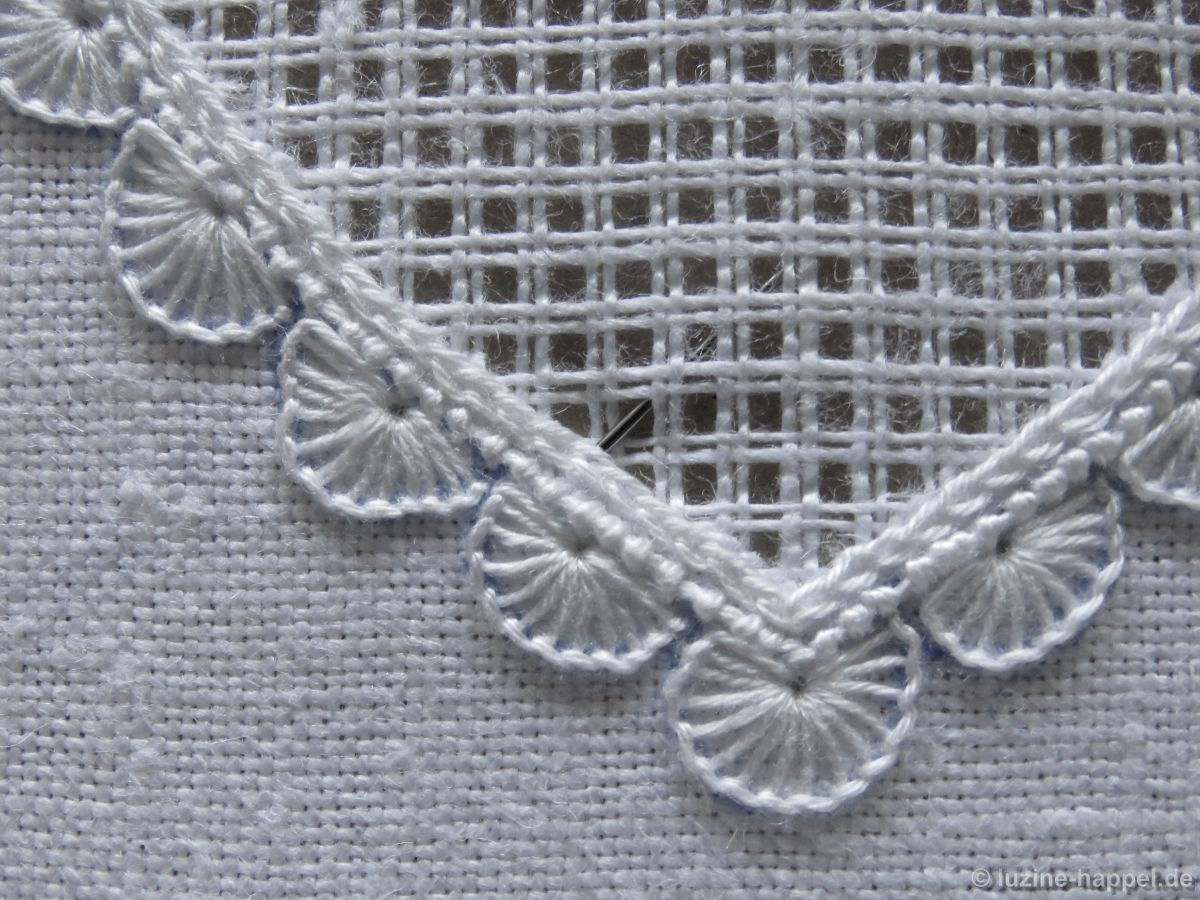
From there the work is turned so that the threads of the fabric are diagonal.
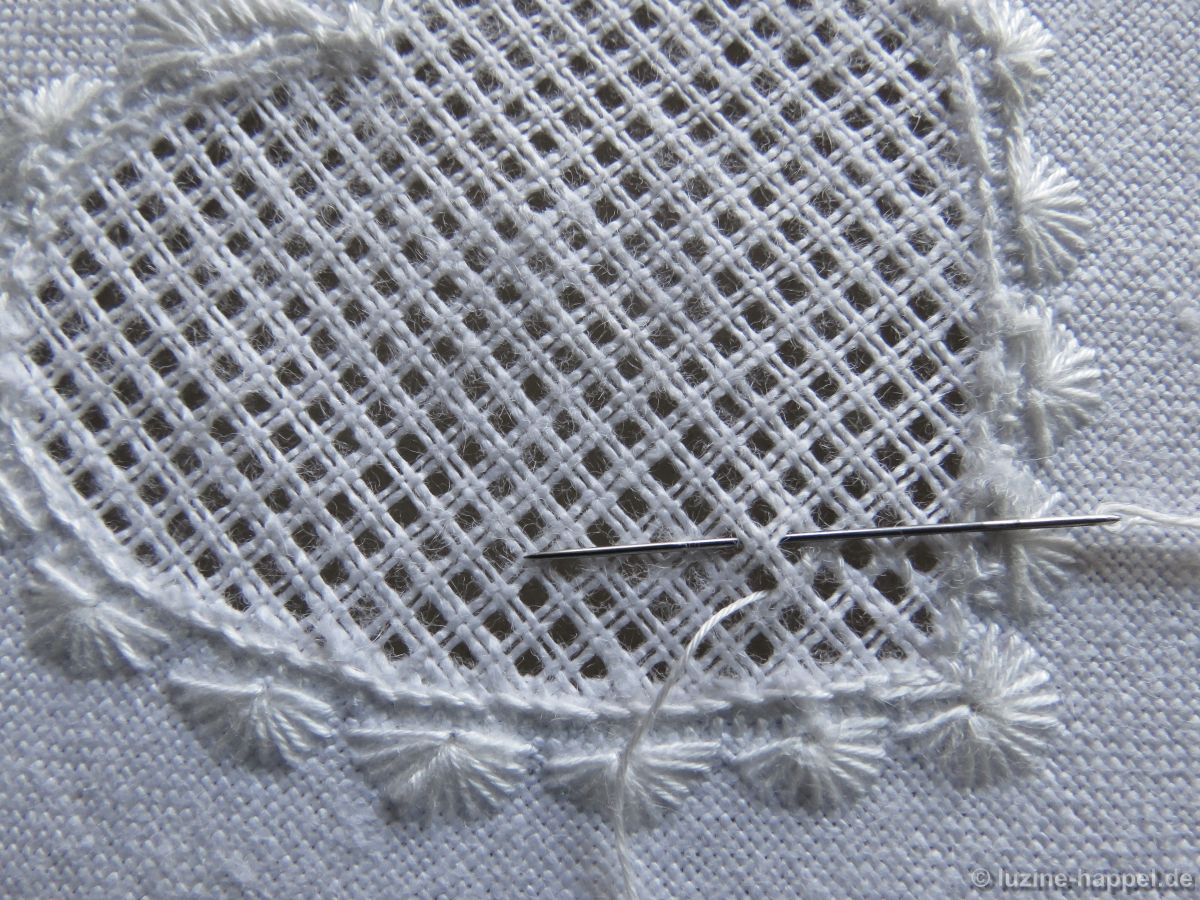
If in the beginning a vertical pair of threads is to be wrapped, the needle emerges on the left of it,
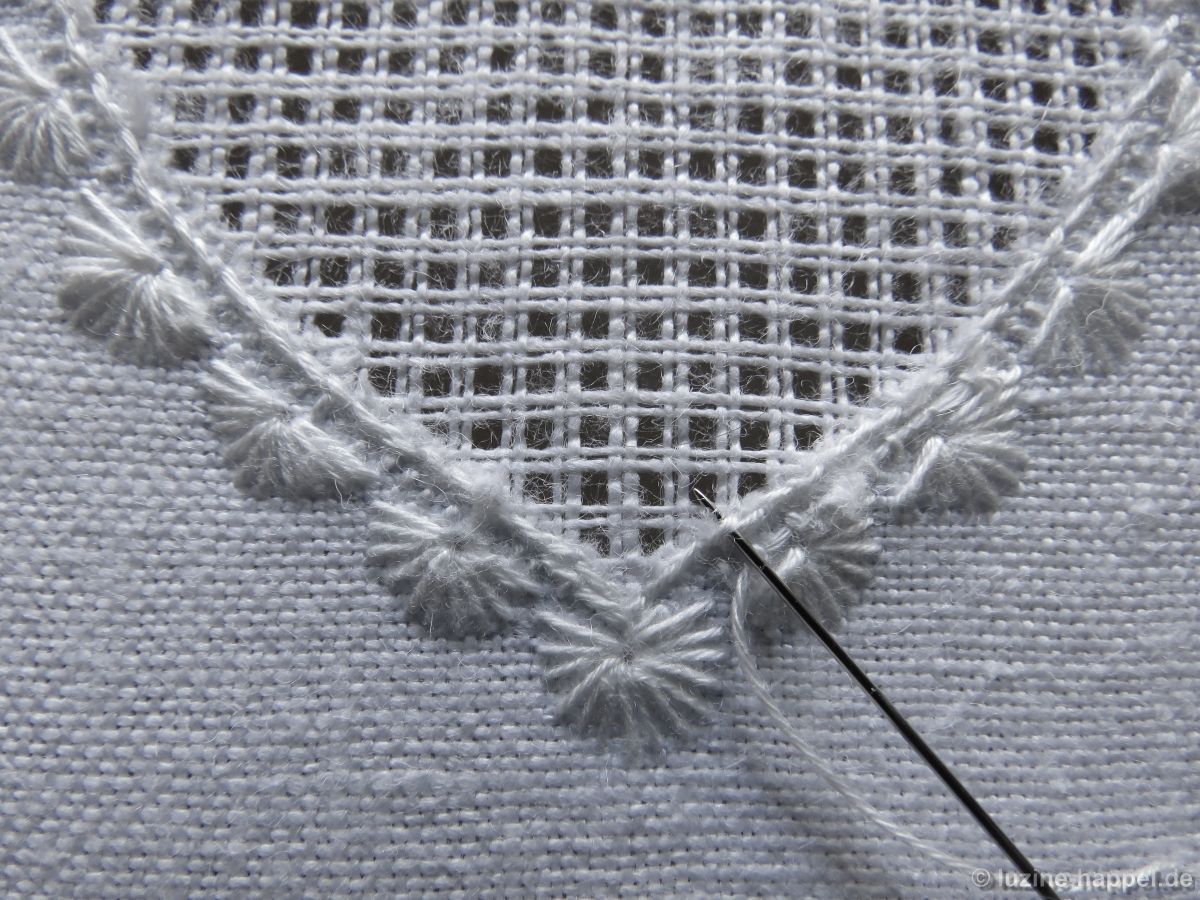
wrappes once around it,
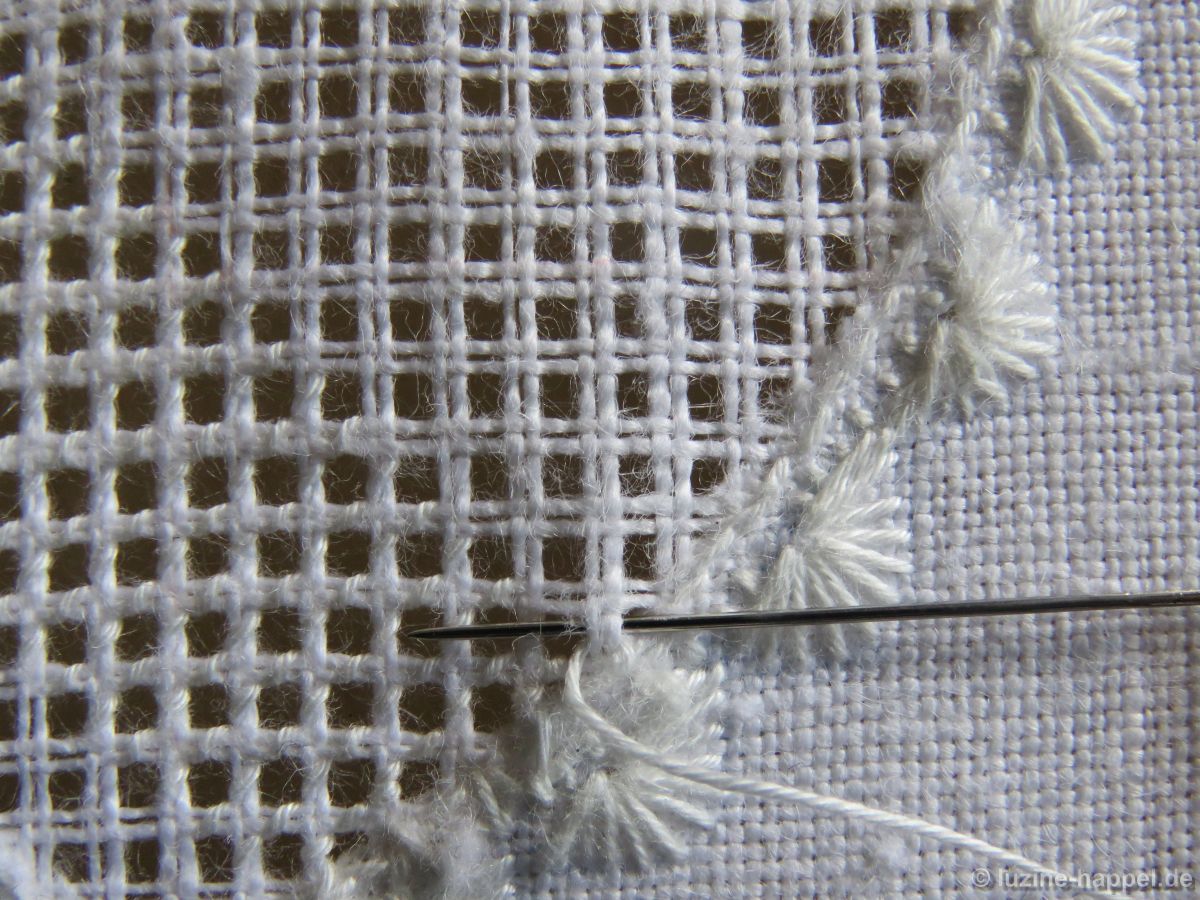
crosses it again and inserted again to the right of it, in order to start the Single Faggot stitch from there by crossing under the intersections.
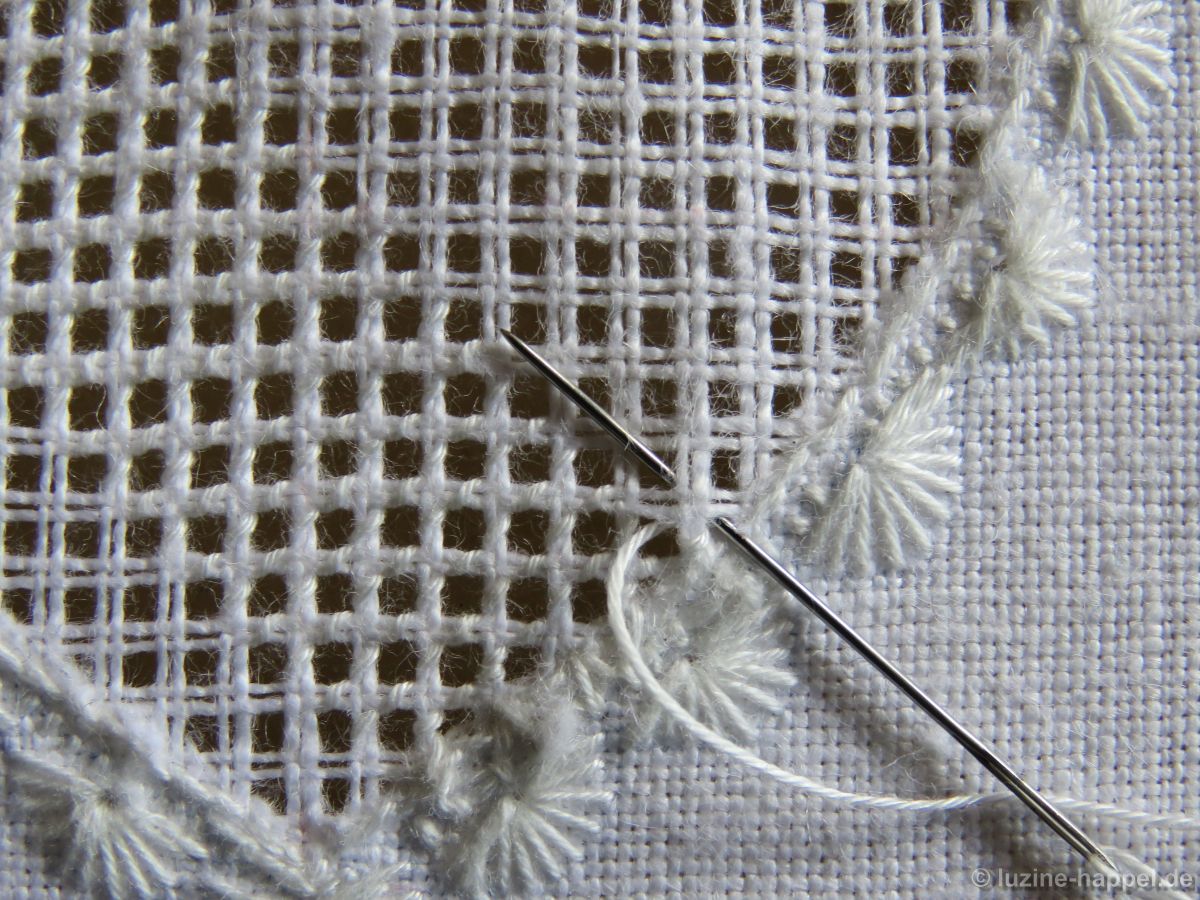
From there the work is turned so that the threads of the fabric are diagonal.

If in the beginning a horizontal pair of threads is to be wrapped, the needle emerges on top of it, wrappes once around it,
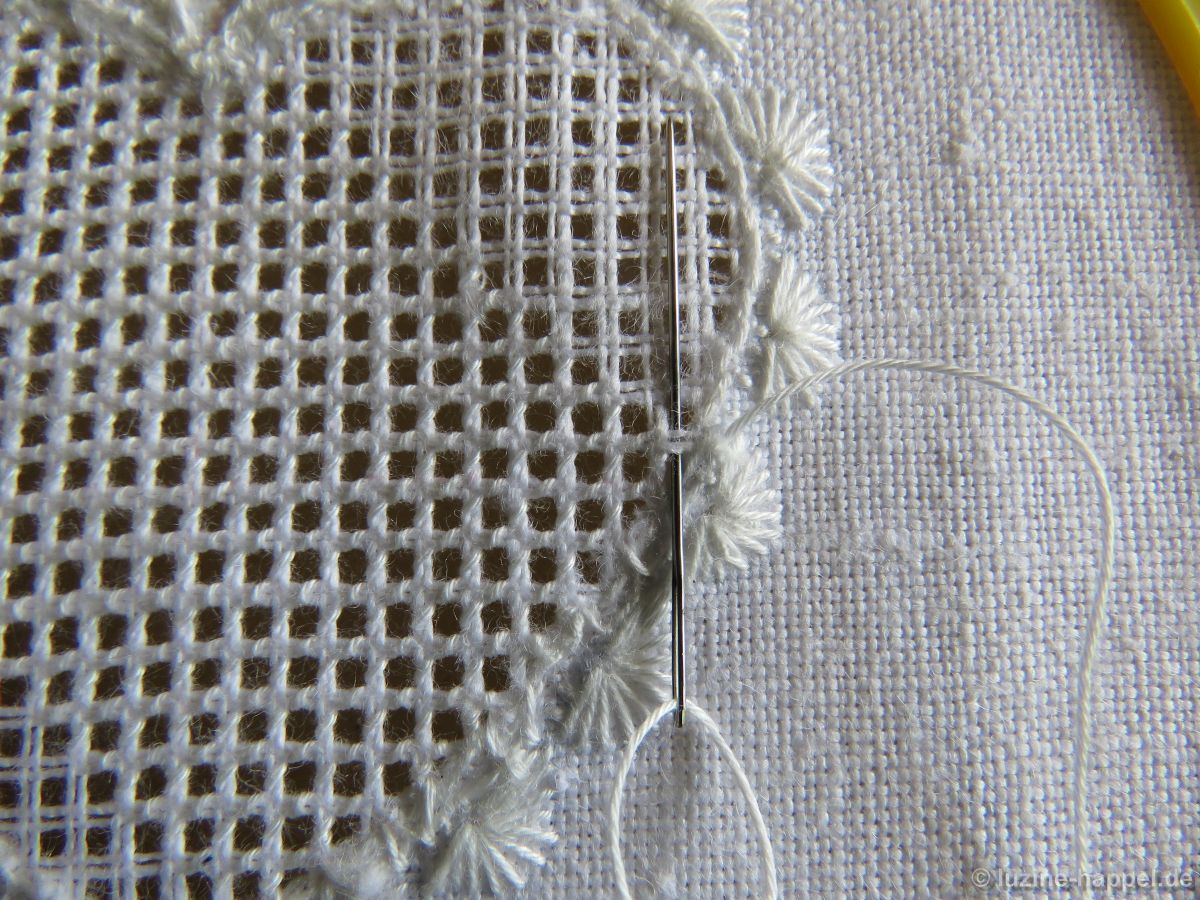
crosses it again and inserted again on bottom of it, in order to start the Single Faggot stitch from there by crossing under the intersections.
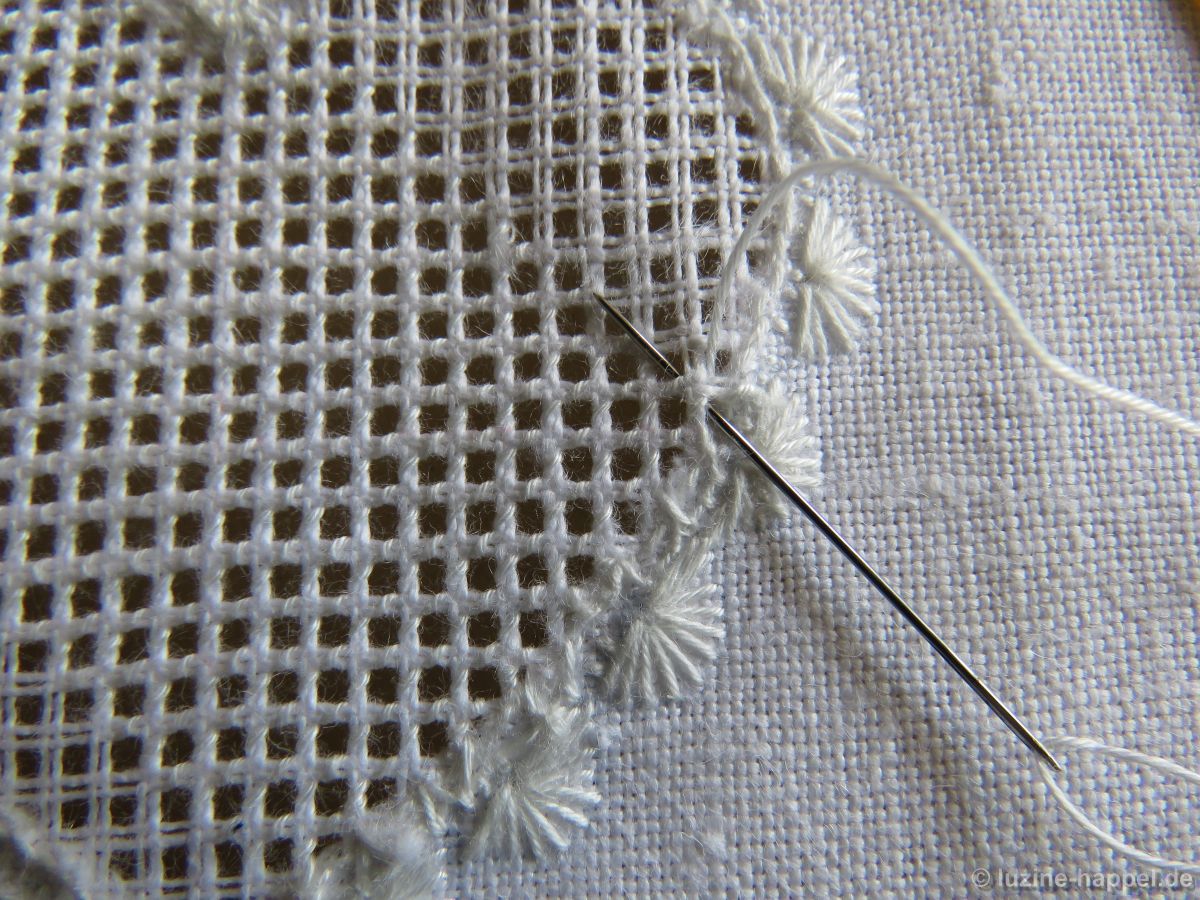
Reaching the opposite side cross under the last intersection

and then wrap around the pair of threads to reach the edge.

Slide the working thread through the edge fastening,
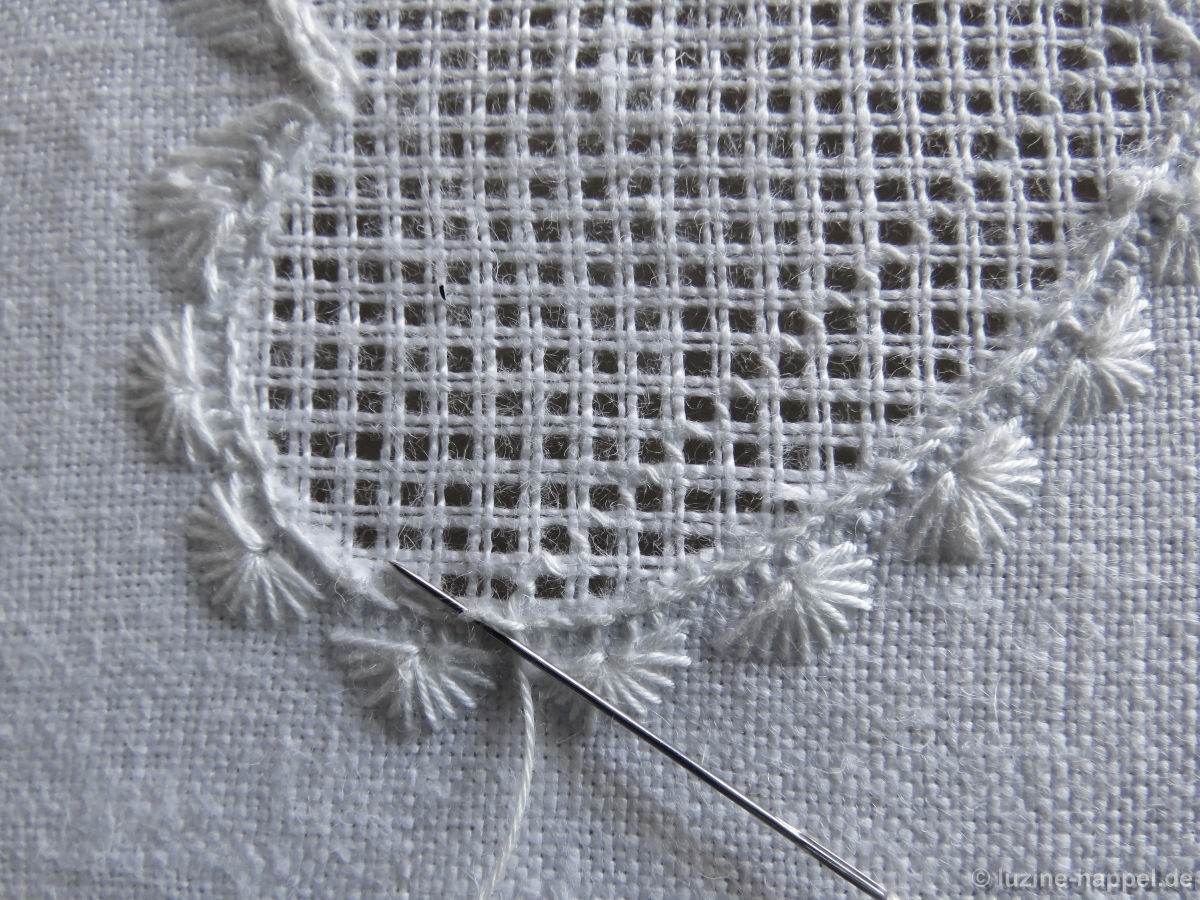
turn the work and start in the established way.
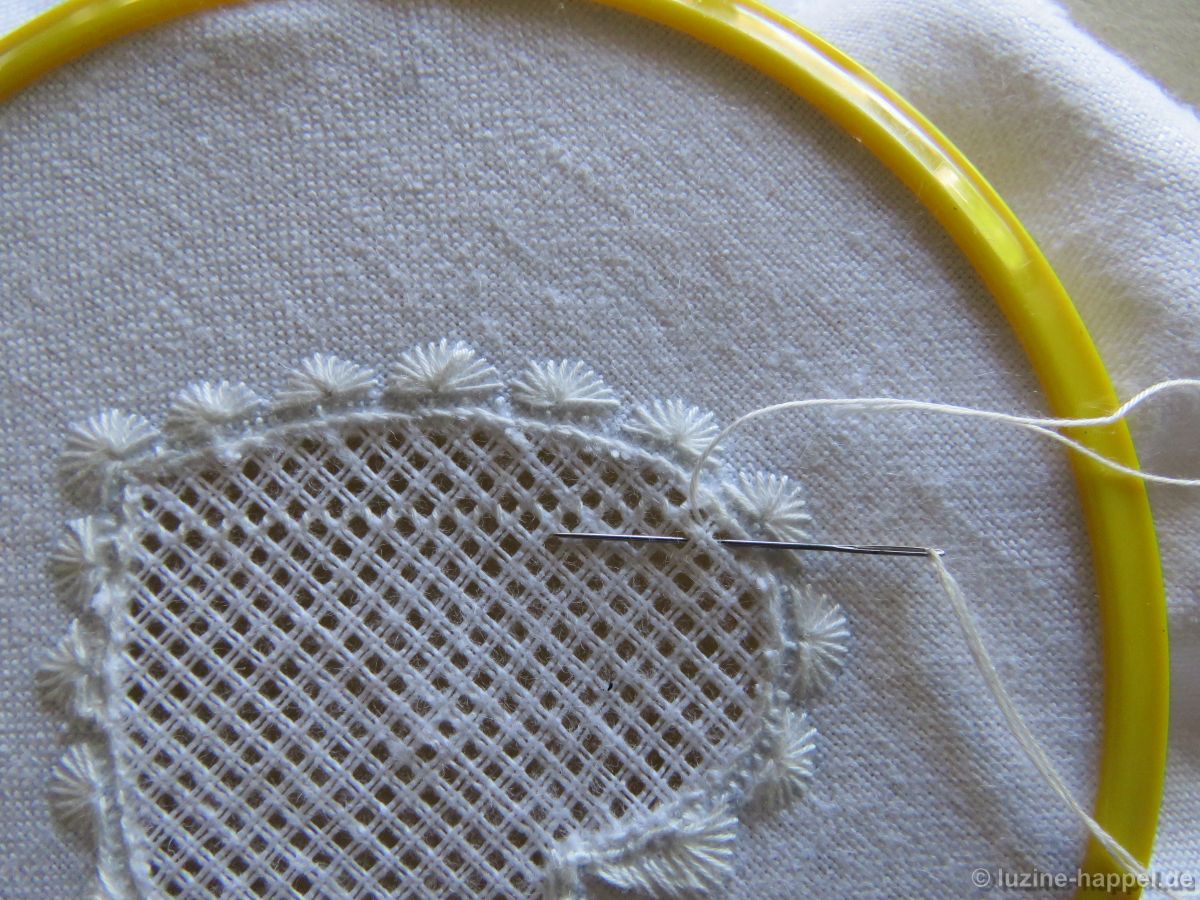
In this way, one gets openwork grids also neatly worked out at the edge,
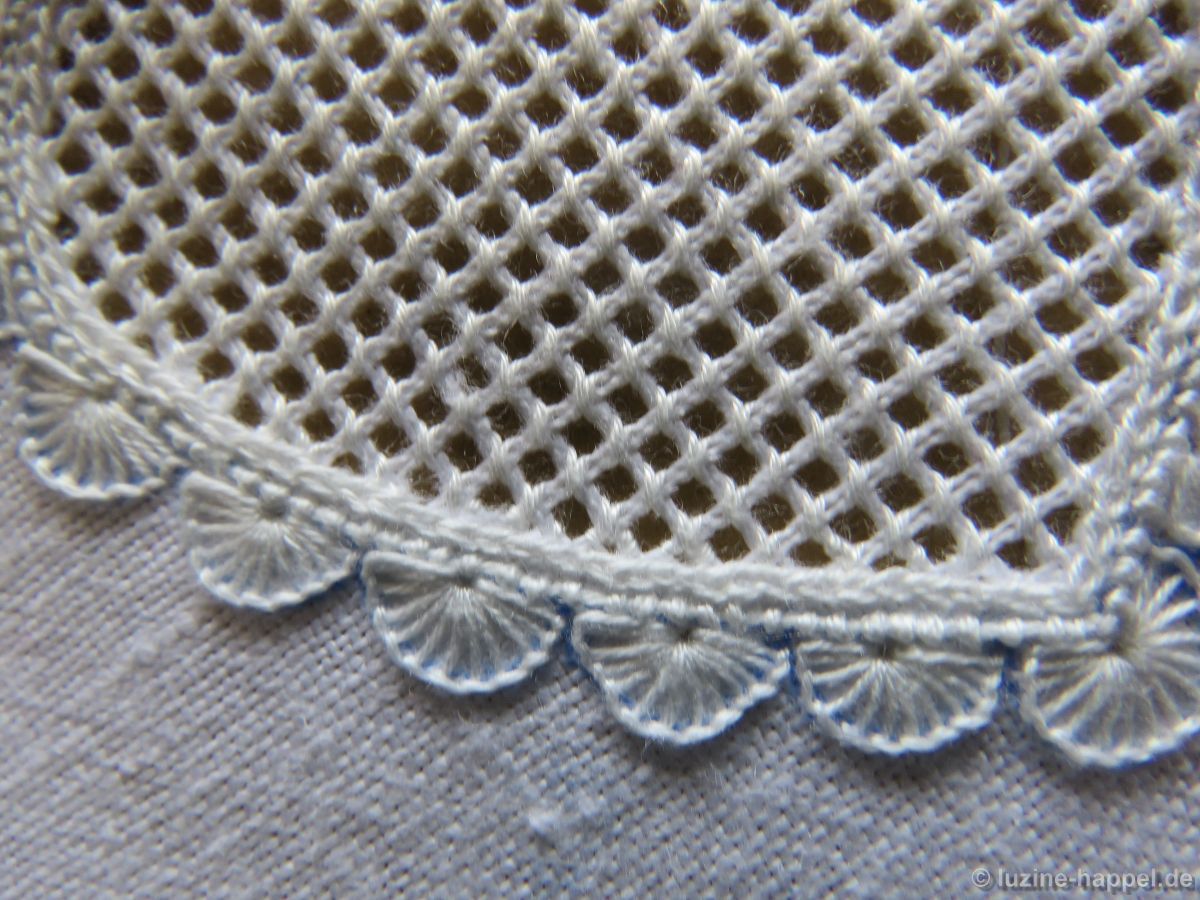
in which then patterns can be inserted.

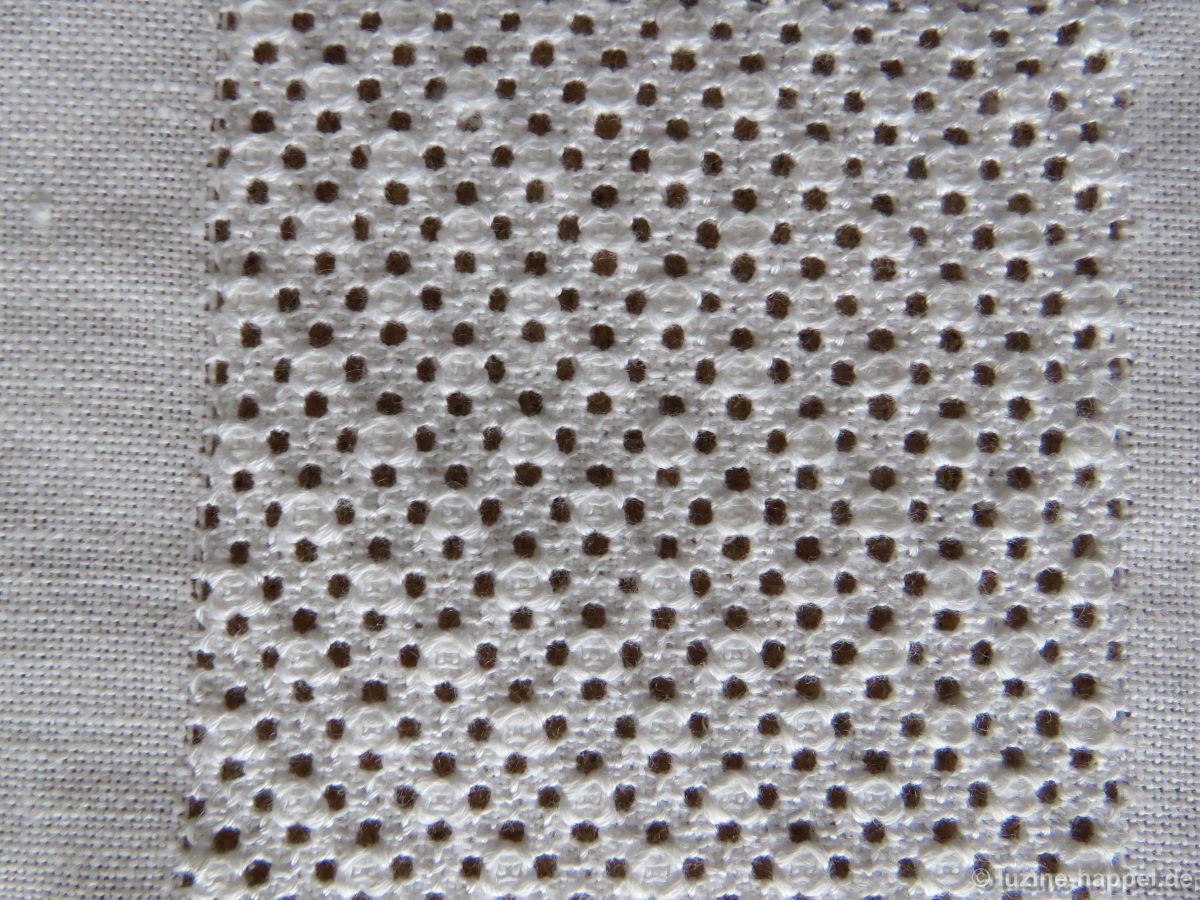
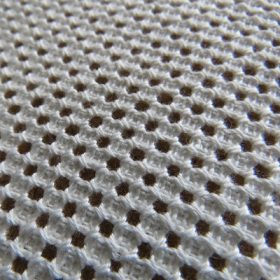
The Cable stitch grid is worked alone only in small areas. Then a slightly thicker thread is usually used to make the fine pattern a little more prominent.
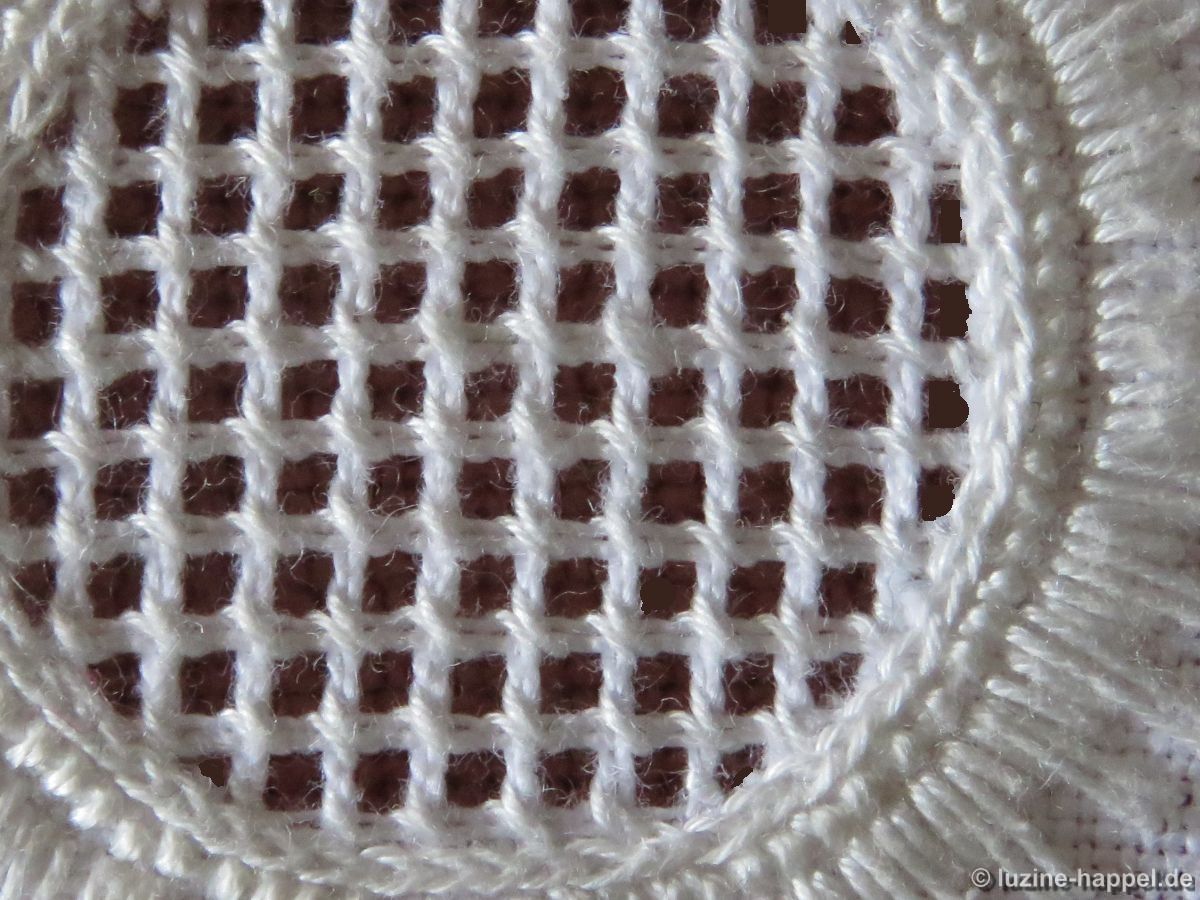
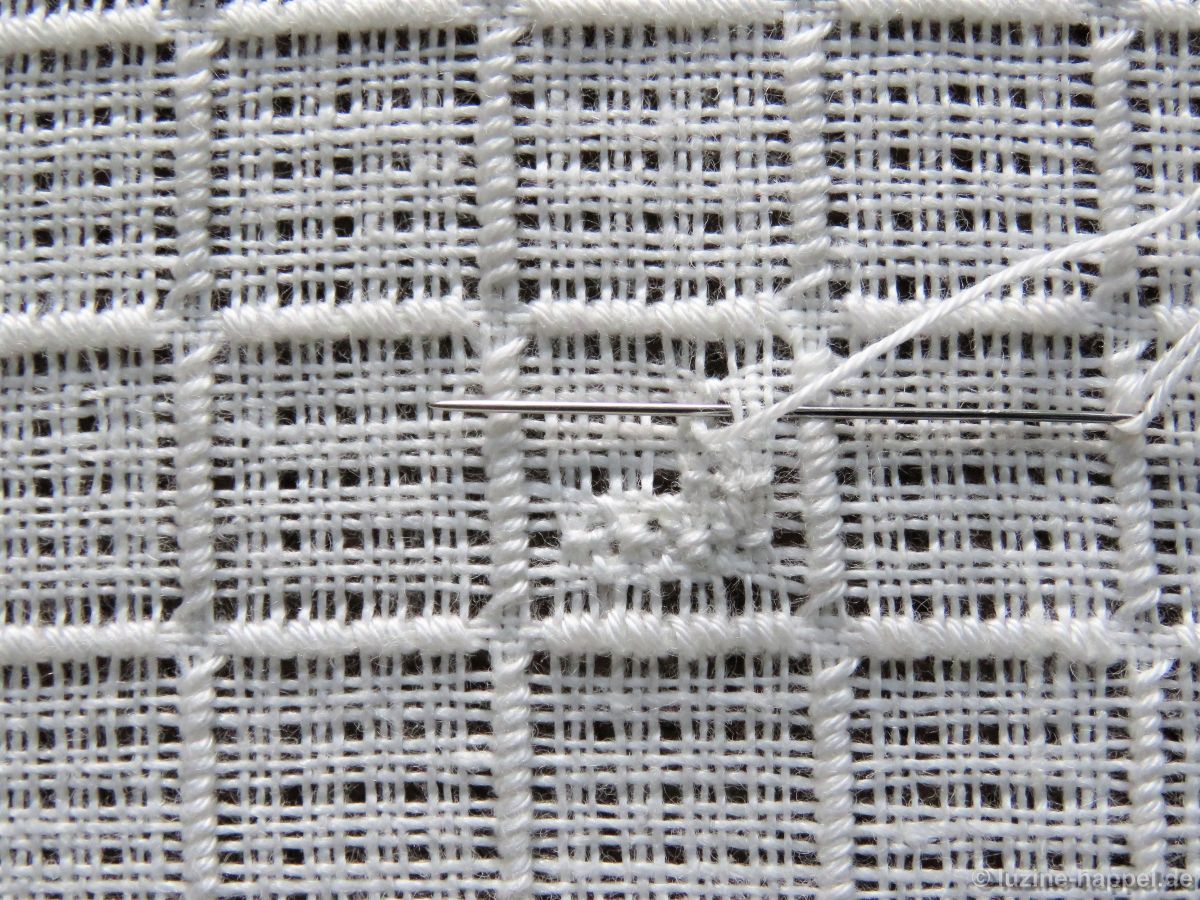
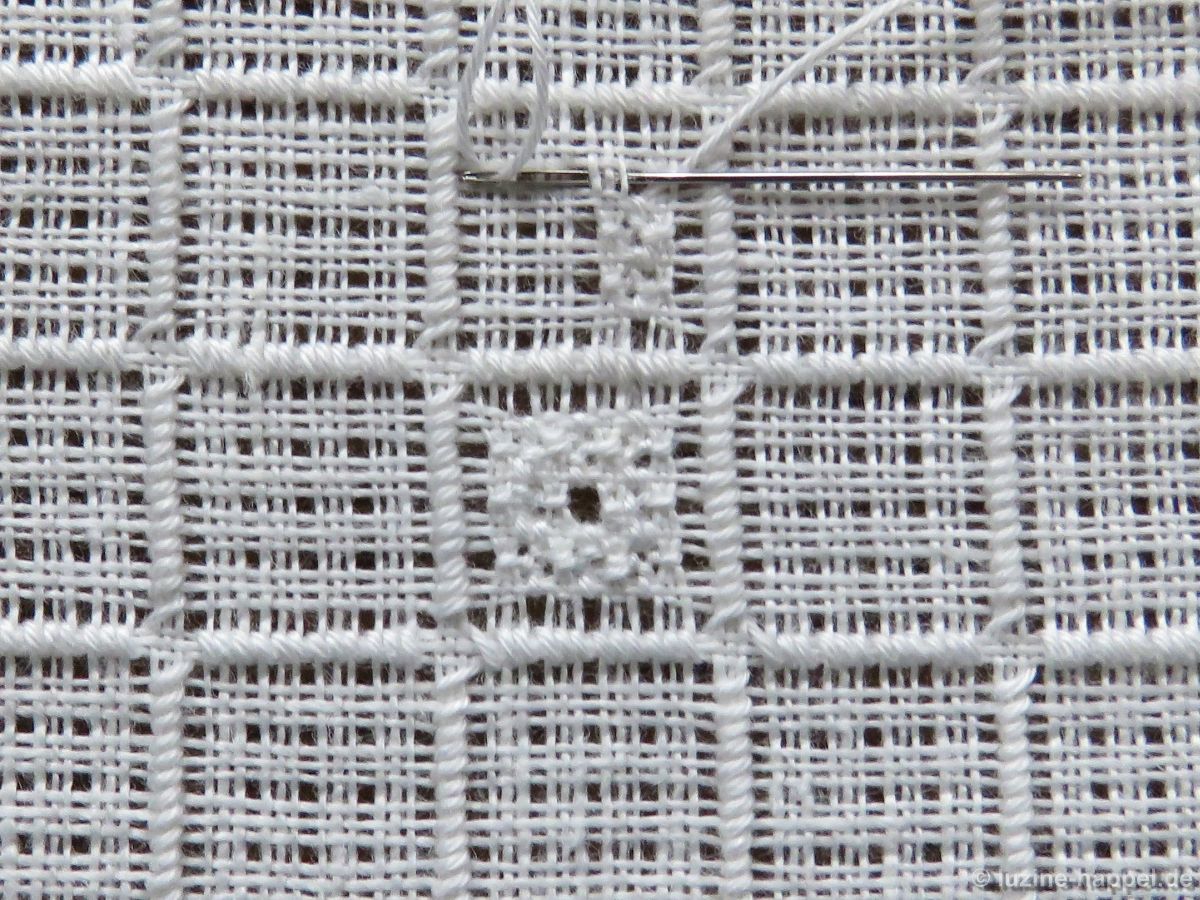
If you want the Cable stitch grid as a basis for Rose and Needle-Weaving stitch patterns, it is done with thin thread – Coton à broder No. 30.
Filling Pattern – No. 555
Filling Pattern – No. 555

category: Limet-Filling pattern
linen used: 13.5/cm thread count
threads used: coton à broder No. 20
stitches used: Diagonal Four-Sided stitches
center: intersection of withdrawn thread lines (in other shapes or motifs: longitudinal axis = withdrawn thread line)
one pattern segment = 8 threads

While embroidering the filling pattern No. 554, I got the idea to create a pattern using diagonal Four-Sided stitches only – one more pattern for smaller shapes.

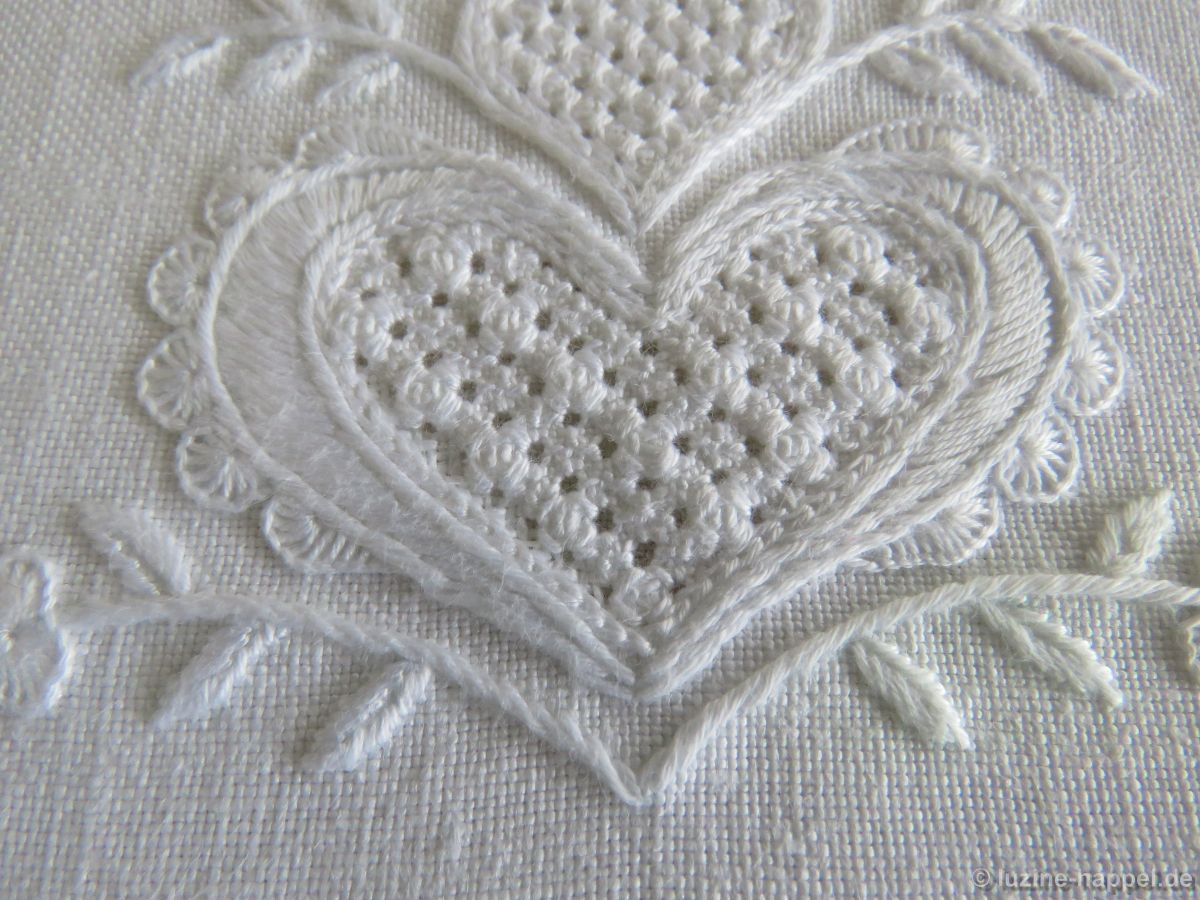
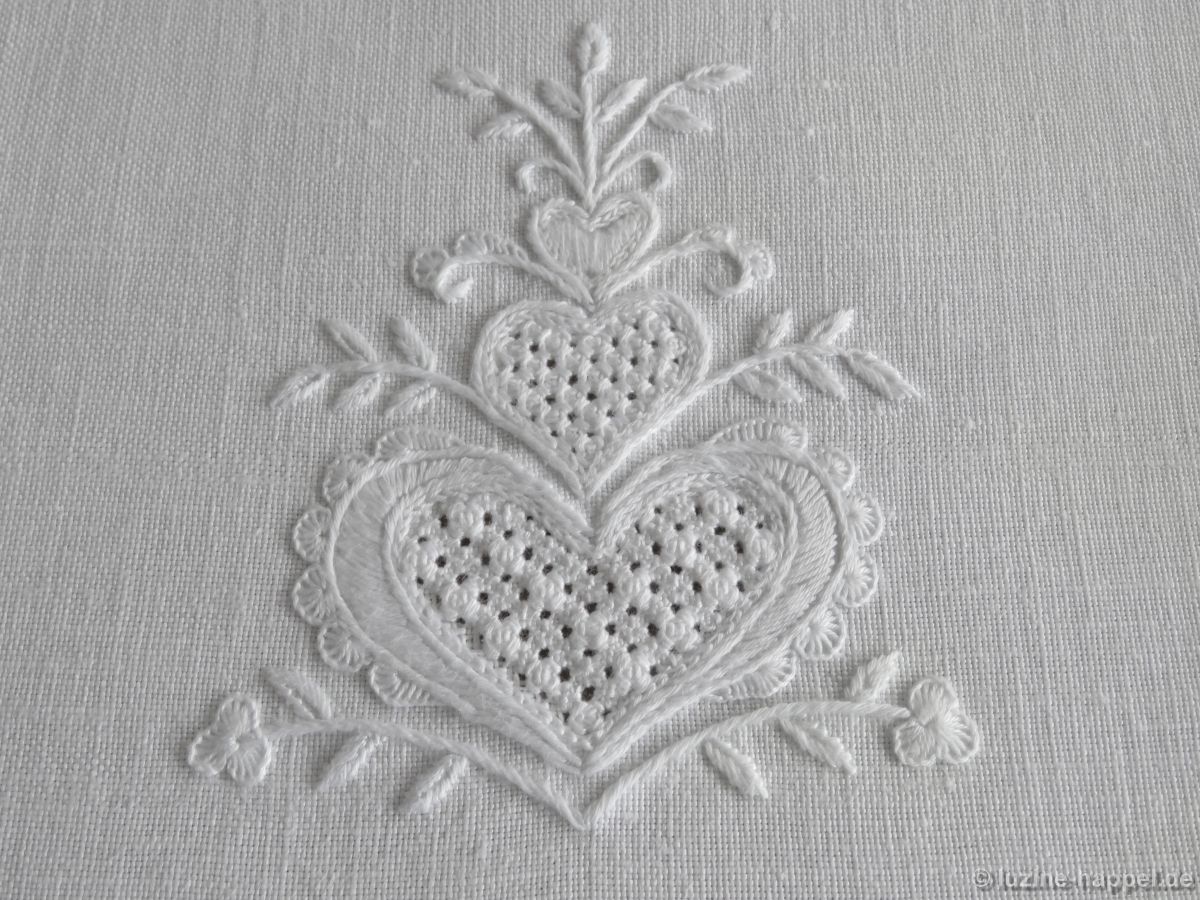
The filling pattern shown here is a practice exercise only. You can see it used in a shape at the end of this article.

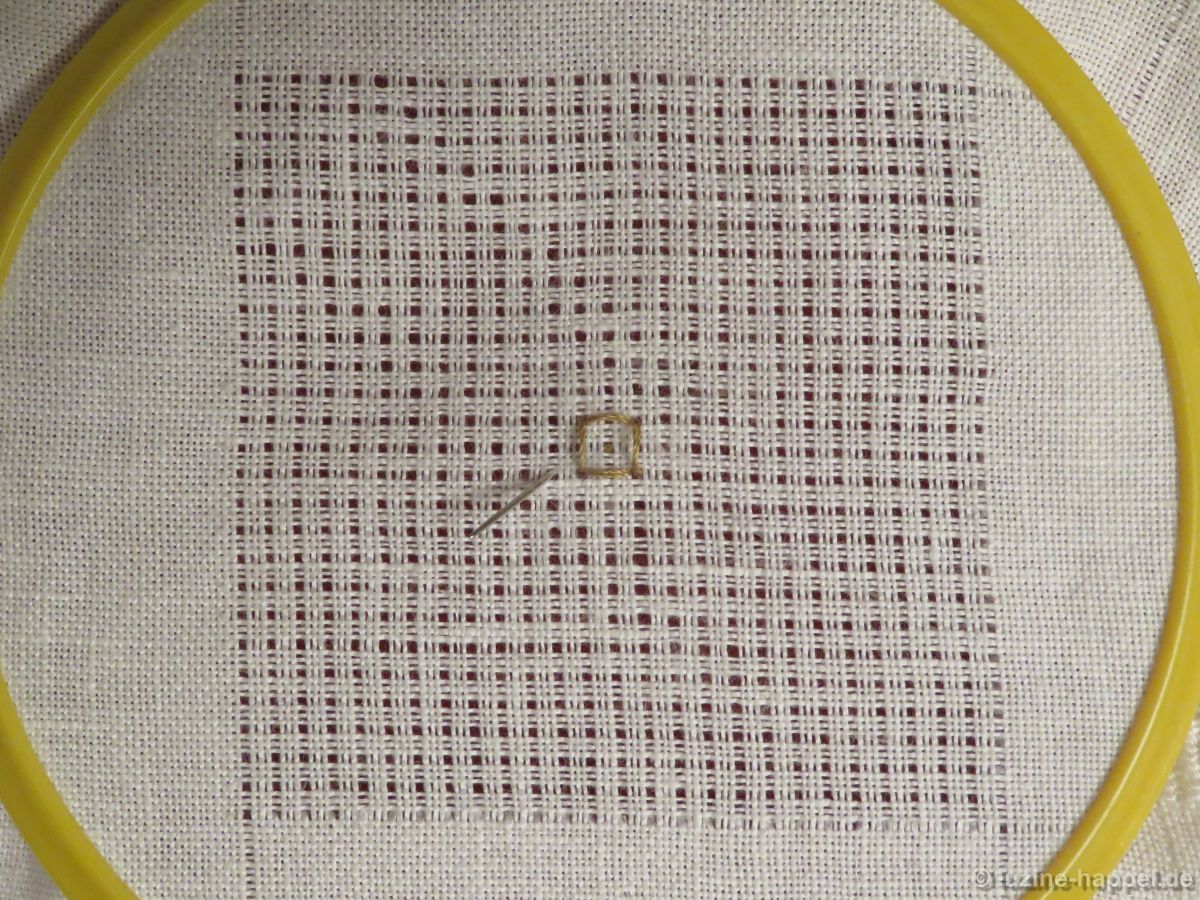
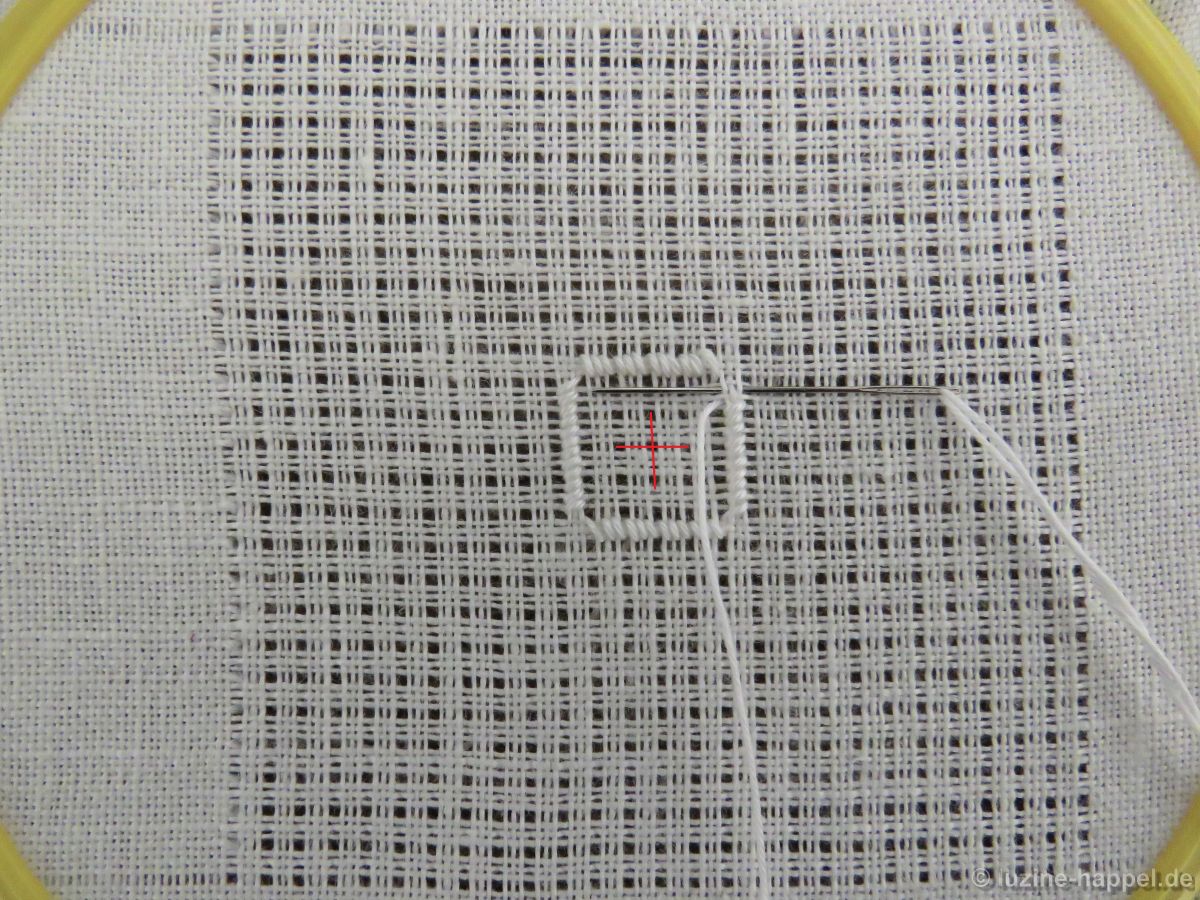
First, establish a Limet grid with an intersection of withdrawn thread lines at the center by alternately cutting 1, leaving 3, vertically and horizontally.

Mark the center point. Bring the needle up in the next hole left of the center. From there start to work a Four-Sided stitch in a diagonal row – as a rhombus around the center point.

Therefore, *travel one square diagonally right up, insert the needle and bring it up again two squares downward.

Travel one square diagonally right up, insert the needle and bring it up again two squares to the left.

Travel one square diagonally right down, insert the needle and bring it up again two squares upward.

Travel one square diagonally right down and insert the needle.

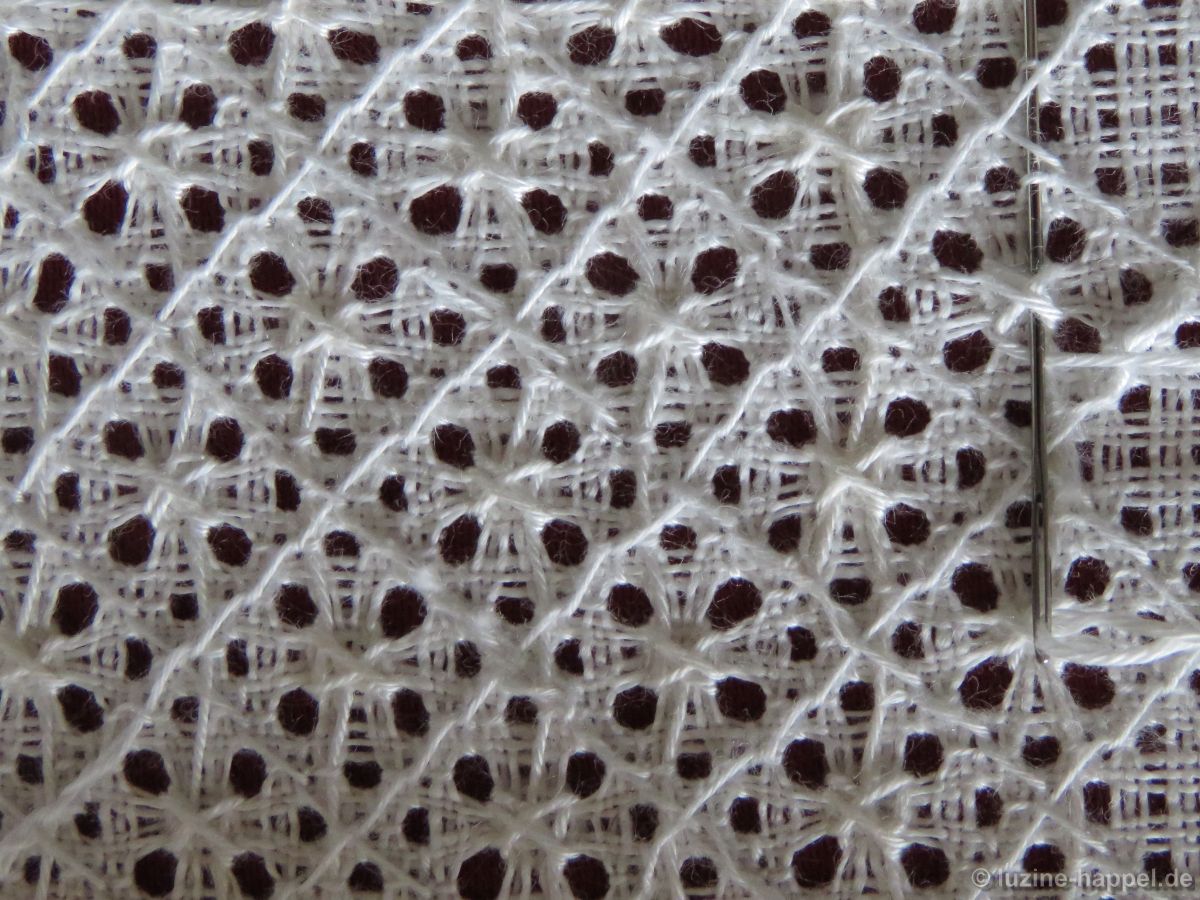
In this way and always tightening the working thread, a prominent stitch sequence is established.

This time it is not necessary to work the Four-Sided stitch twice. By working these stitches side by side to the next, in the end all four sides of the stitch will be doubled.

So, after the fourth stitch, insert the needle and bring it up one square up and three squares to the left to work from there the next diagonal Four-Sided stitch in the established way.

So that the holes keep well defined and open, please make sure to catch all the working threads on the back with the stitches.

Work diagonal Four-Sided stitches up to the end of the row.

Try to always keep the same tension to establish an even structure throughout the entire pattern.

Turn the piece and then work a next row of diagonal Four-Sided stitches beside.

Work row beside row until the entire shape is filled. Make sure that you always turn the work so that the rows are oriented from bottom right to top left.

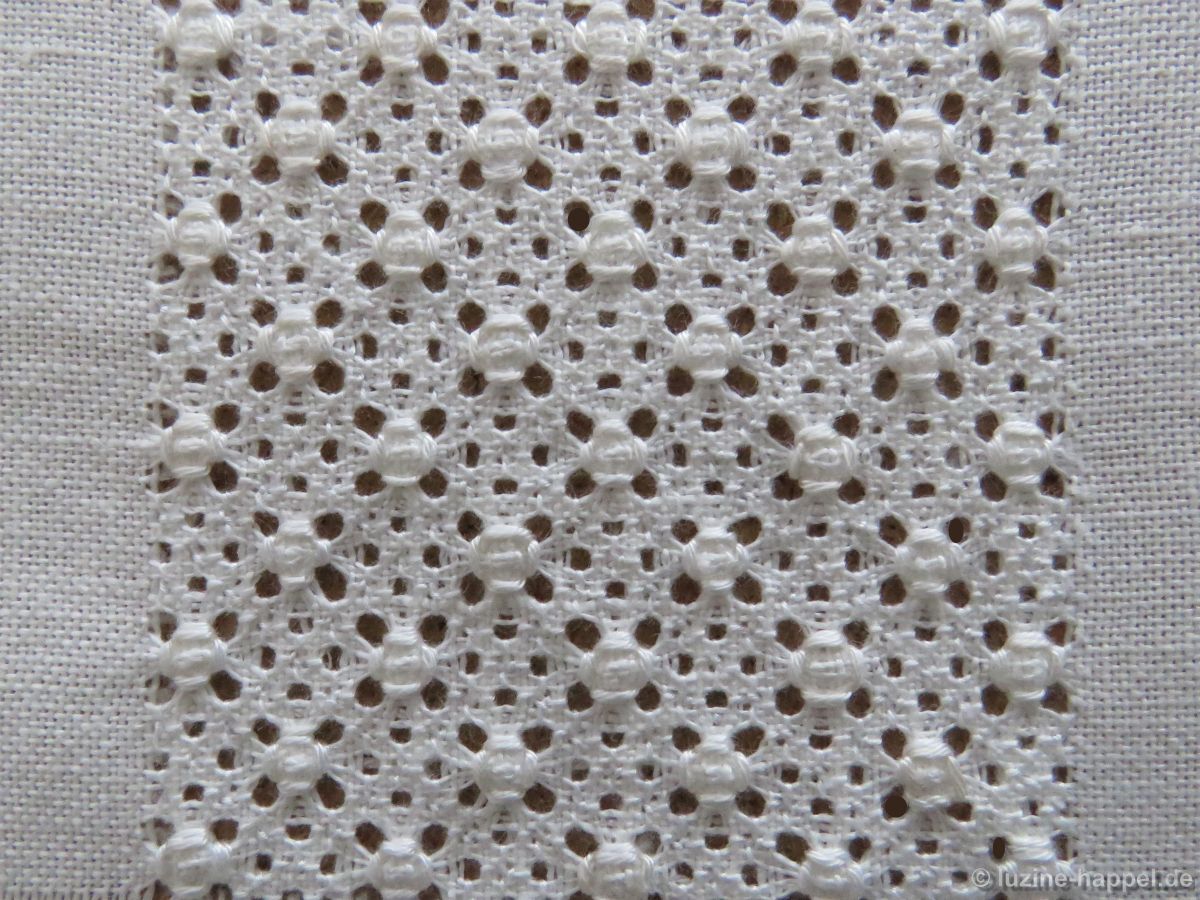
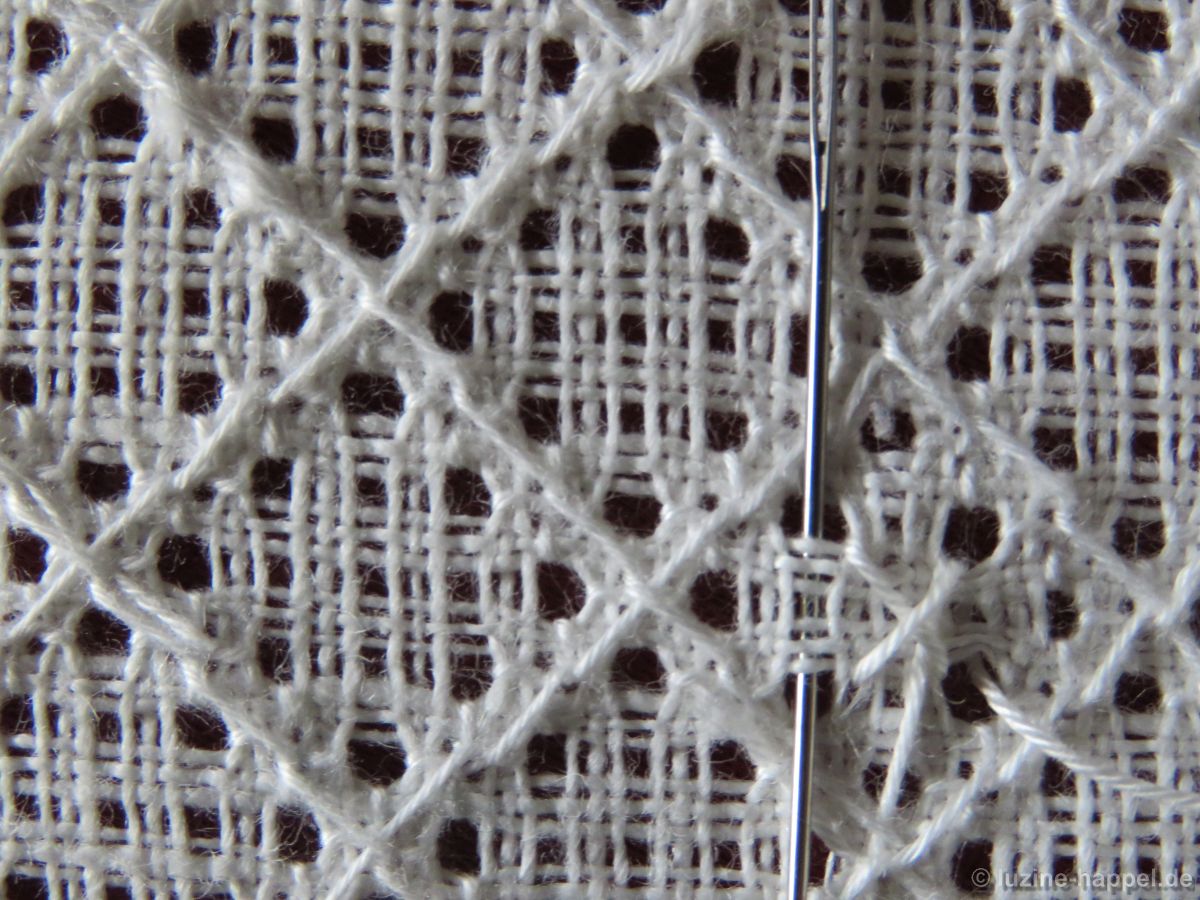
Once the entire shape is filled, a pattern is created which, viewing from the top, looks similar to other patterns with same sized segments.

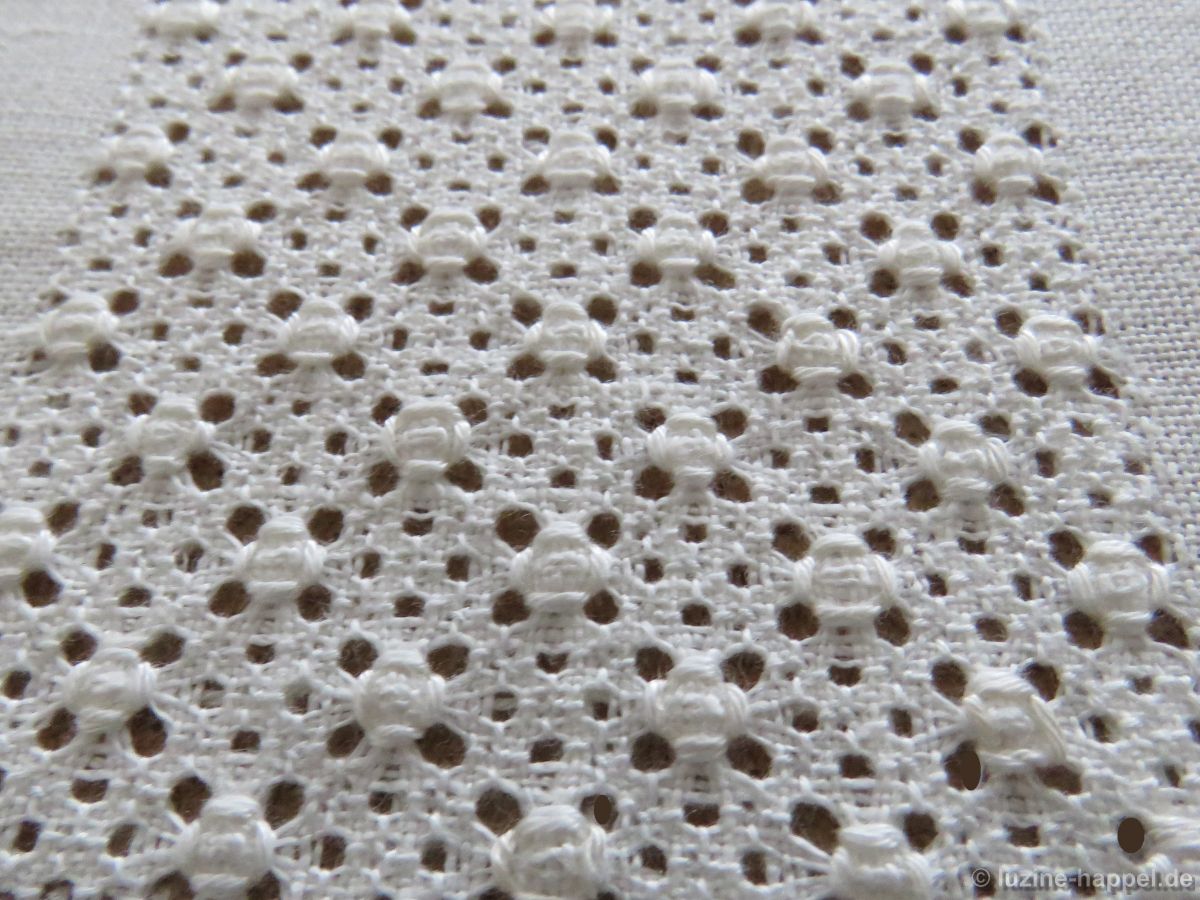
But the side view shows another structure.

After boiling and ironing the pattern develops its full charm.

Filling Pattern – No. 554

Filling Pattern – No. 554

category: Limet-Filling pattern
linen used: 13.5/cm thread count
threads used: coton à broder No. 20
stitches used: Rose and diagonal Four-Sided stitches
center: intersection of withdrawn thread lines (in other shapes or motifs: longitudinal axis = withdrawn thread line)
one pattern segment = 16 threads

While embroidering the filling pattern No. 553, I got the idea to create a similar pattern in a narrower Rose stitch grid.
This allows one to work the pattern in one step – alternating rows of Rose stitches with rows of alternating diagonal Four-Sided and Rose stitches. The pattern begins with a diagonal Four-Sided stitch.

The filling pattern shown here is a practice exercise only. You can see it used in a shape at the end of this article.

First, establish a Limet grid with an intersection of withdrawn thread lines as center by alternately cutting 1, leaving 3, vertically and horizontally.

Mark the center point. Bring the needle up in the next hole left of the center. From there start to work a Four-Sided stitch in a diagonal row – as a rhombus around the center point.

Therefore, *travel one square diagonally right up, insert the needle and bring it up again two squares downward.

Travel one square diagonally right up, insert the needle and bring it up again two squares to the left.

Travel one square diagonally right down, insert the needle and bring it up again two squares upward.

Travel one square diagonally right down, insert the needle* and bring it up again two squares to the left.

In this way and always tightening the working thread, a prominent stitch sequence is established.

But this stitch will turn out much more prominent, working the Four-Sided stitch twice. This also enables one to better tighten the working thread and so to establish a more even structure of the complete pattern. So repeat the four steps (*) once.

After the eighth stitch, insert the needle and bring it up one square up and two squares to the left to work up from there a Rose stitch.

Please note that the centers of the alternating diagonal Four-Sided and Rose stitches lie along a diagonal line.

So, finish the Rose stitch by inserting the needle in the center hole and bring it up two squares to the left and one square up. From there start to work the next double diagonal Four-Sided stitch as established (*).

Always alternate working Rose stitches and double diagonal Four-Sided stitches up to the end of the row.

Then work a row of Rose stitches beside.

Always alternate working these two rows. Make sure, that you always turn the work so that the rows are oriented from bottom right to top left.

So that the holes keep well defined and open, please make sure to catch all the working threads on the back with the stitches

If the entire shape is filled, a nice pattern is created.

Unboiled the contrast of prominent and flat areas is visible.

After boiling and ironing the pattern develops its full charm.

I think it will become one of my favorite filling patterns for medium sized shapes.

Filling Pattern – No. 553

Filling Pattern – No. 553

category: Limet-Filling pattern
linen used: 13.5/cm thread count
threads used: coton à broder No. 20 for the Rose and No. 16 for the Four-Sided stitches
stitches used: Rose and Four-Sided stitches
center: intersection of withdrawn thread lines (in other shapes or motifs: longitudinal axis = withdrawn thread line)
one pattern segment = 24 threads

The filling pattern shown here is a practice exercise only. You can see it used in a shape at the end of this article.

First, establish a Limet grid with an intersection of withdrawn thread lines as center by alternately cutting 1, leaving 3, vertically and horizontally.

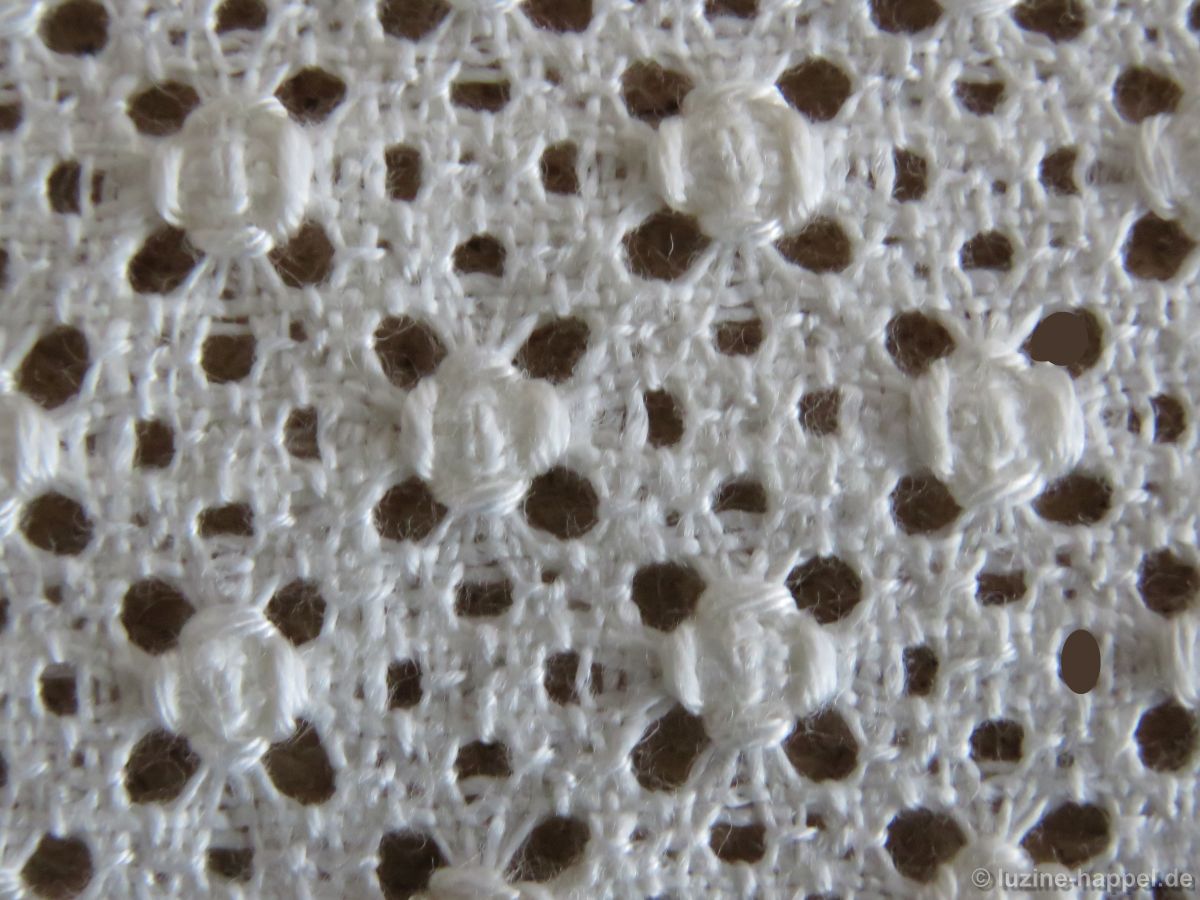
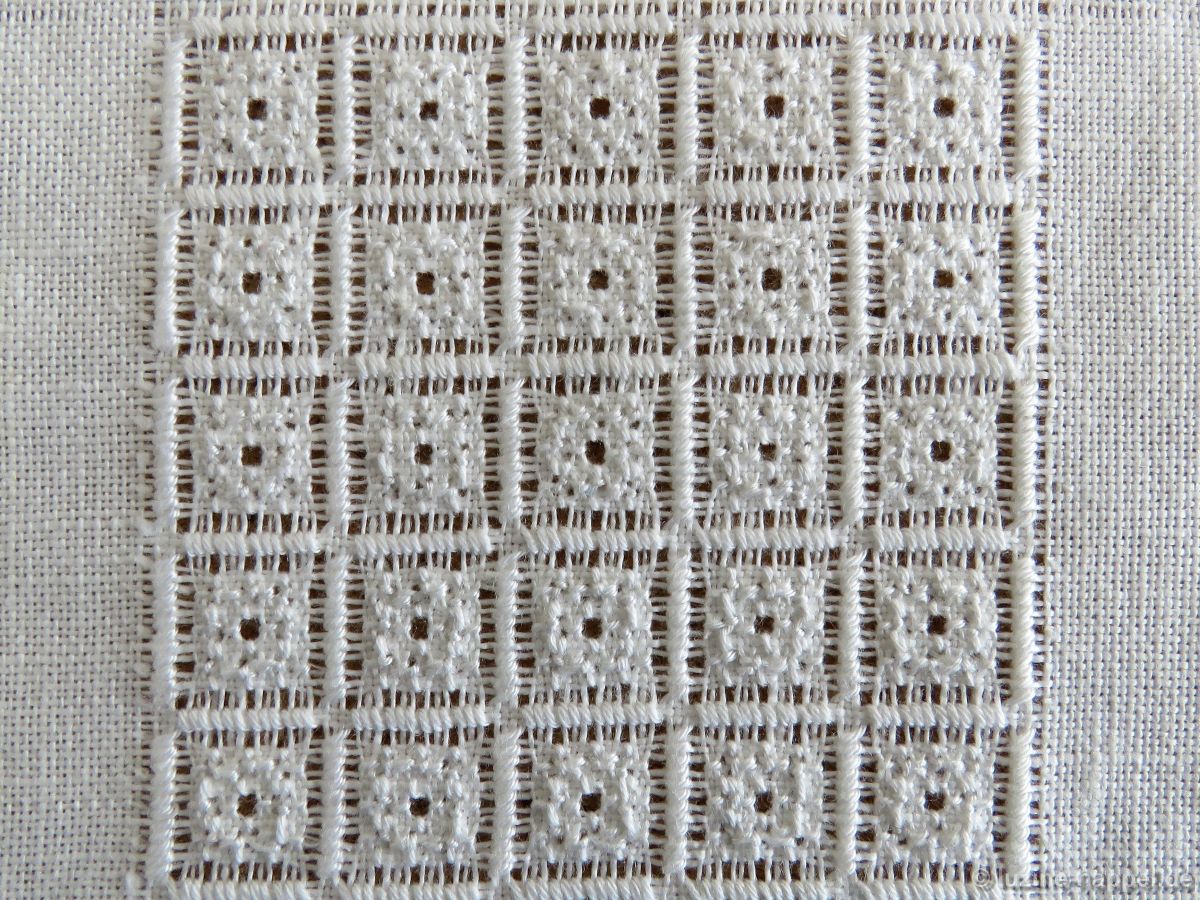
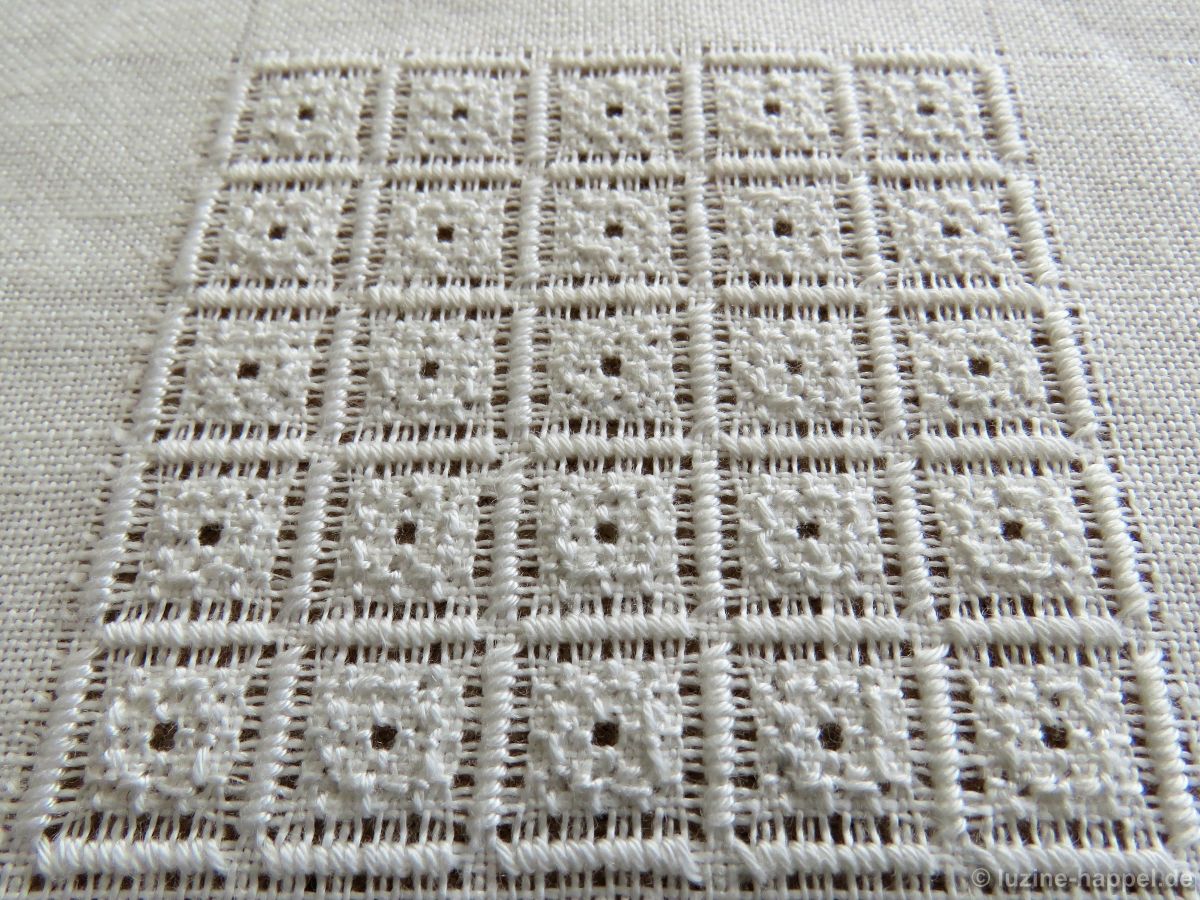
Mark around the center point a square of 2 X 2 squares. Bring the needle up in the next hole left of the bottom left corner. This is the center of the first Rose stitch.

Work Rose stitches in a diagonal row.

Work a second row of Rose stitches parallel to the first and at a distance of 2 empty holes (counted in a diagonal line from one Rose stitch center of the first row to a Rose stitch center of the second row).

Do the same in the crossing direction.

Up from there lay a grid of Rose stitch rows across the entire shape in the established way. Each area of the grid has a remaining section of 2 X 2 squares around the respective center hole, which now should be covered with Four-Sided stitches.

Because the working thread has to be slid under previously worked stitches to travel from one stitch to the next, it is easier to work the stitches from the back.

Secure the working thread very well and bring it up at an intersection of two Rose stitch rows.
It is important to choose the opposite side for starting the Four-Sided stitch to get the corner holes clean and open and the stitch centered.

*Start on the top of the center square, inserting the needle in the top right hole and bringing it up in the top left hole.

Travel to the bottom, insert the needle in the bottom right hole and bring it up in the bottom left hole. With this stitch the thread can be tightened a little bit more to pull together the threads of the center square.

Insert the needle in the top right hole again, but bring it up in the bottom right hole.

Insert the needle in the top left hole and bring it up in the bottom left hole.* In this way and always tightening the working thread, a prominent center is established on the front.

But this stitch will turn out much more prominent, working the Four-Sided stitch twice. This also enables one to better tighten the working thread and so to establish a more even structure of the complete pattern. So repeat the four steps (*) once.

Then, traveling straight up to the next center square, slide the working thread through the cross that has been made with the Four-Sided stitches and then through the stitches of the right three-thread column.

Work one Four-Sided stitch two times in the established way in each section center of the Rose stitch grid.

I discovered this stitch in the contribution of Ekaterina Khokhlova to the Global Schwalm Sampler.

Filling Pattern – No. 552

Filling Pattern – No. 552

category: Limet-Filling pattern
linen used: 13.5/cm thread count
threads used: coton à broder No. 20
stitches used: Satin and Rose stitches
center: intersection of withdrawn thread lines (in other shapes or motifs longitudinal axis = withdrawn thread line)
one pattern segment: 20 fabric threads

This pattern for larger motifs can be used for shapes both on the straight of grain and shapes on the bias.

The filling pattern shown here is a practice exercise only. You can see it used in a shape at the end of this article.

First, establish a Limet grid with an intersection of withdrawn thread lines at the center by alternately cutting 1, leaving 3, vertically and horizontally.

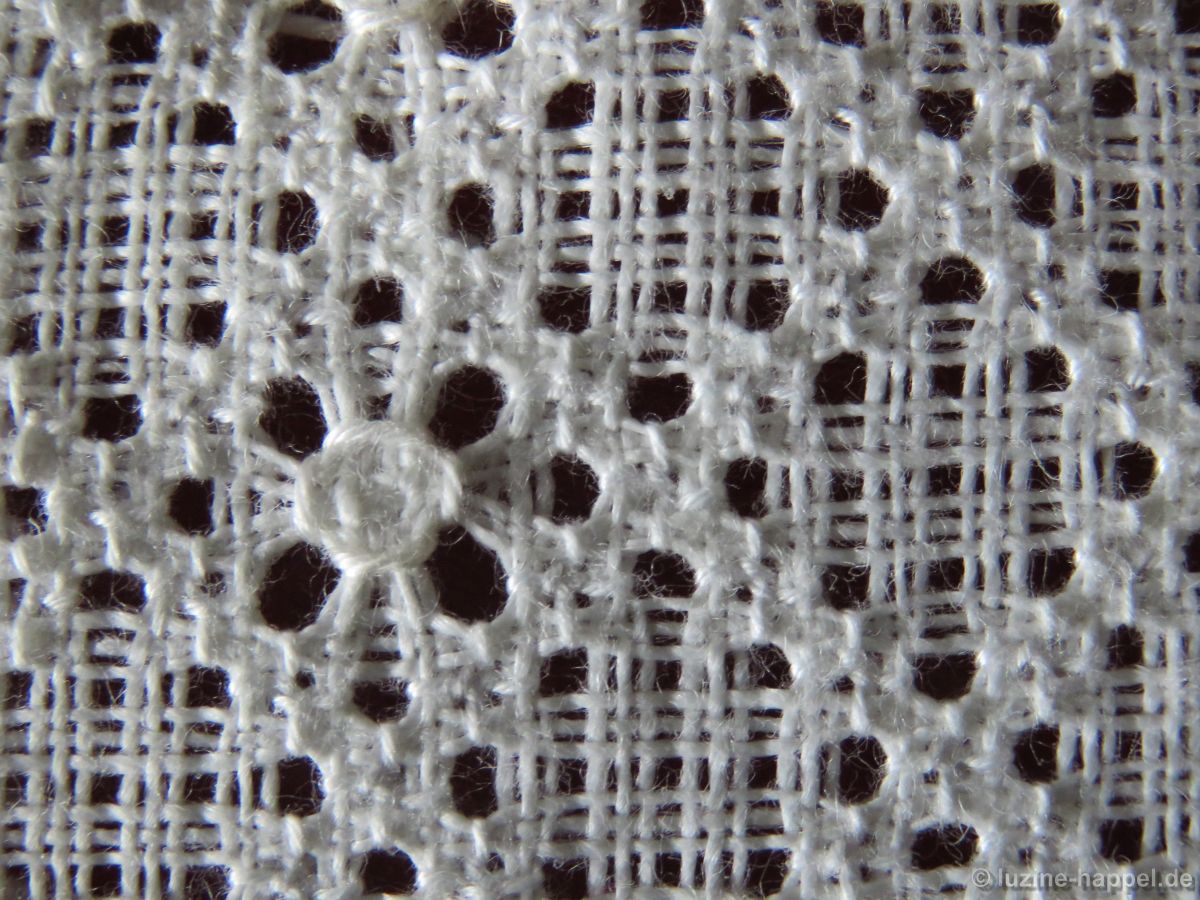
Mark around the center point by working Satin stitch bars around an area of 4 X 4 squares (the center point situated directly in center).

Continue working Satin stitch bars over one square (3 threads) in the width and 4 squares (12 stitches) in the length in a stair-step manner

until the entire shape is filled.

Work squares consisting of 8 Rose stitches in straight rows inside each Satin stitch grid area.

Ensure that the center holes are kept well defined and open.

Continue working squares of 8 Rose stitches until the entire shape is filled.

Remember that the Limet grid is prepared differently for shapes positioned on the bias. Please refer to this article.

and then continue in the established way.