Schwalm Costume – The Shoes

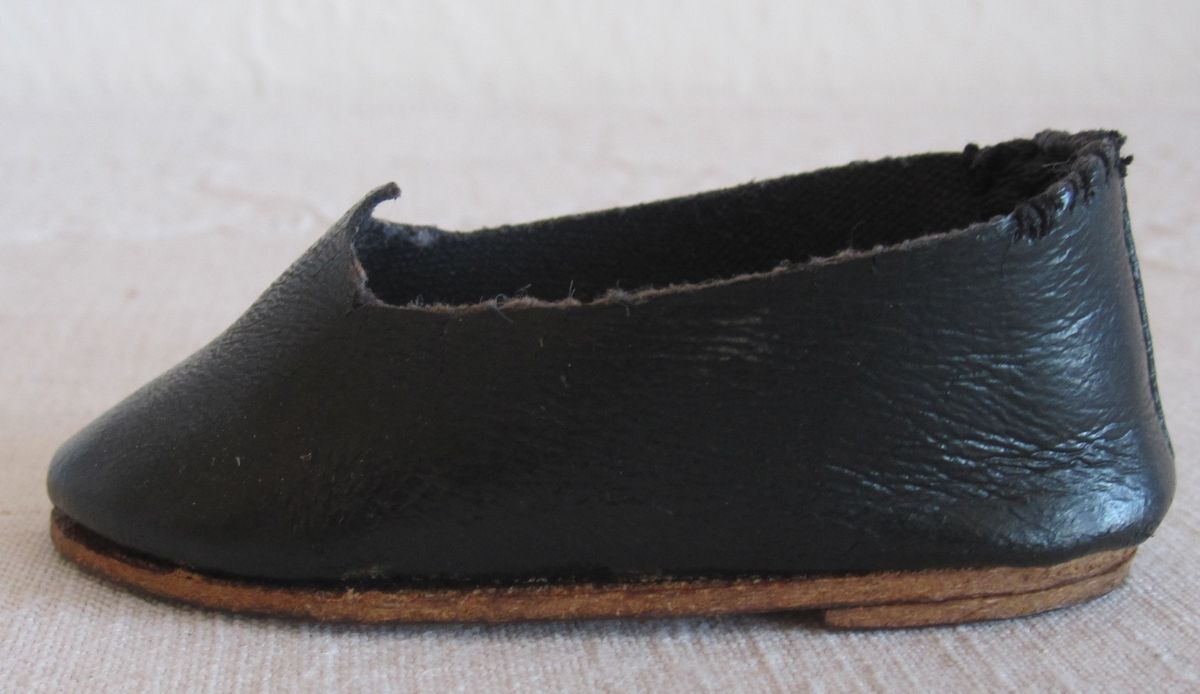
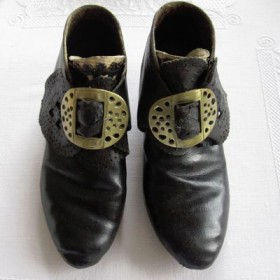
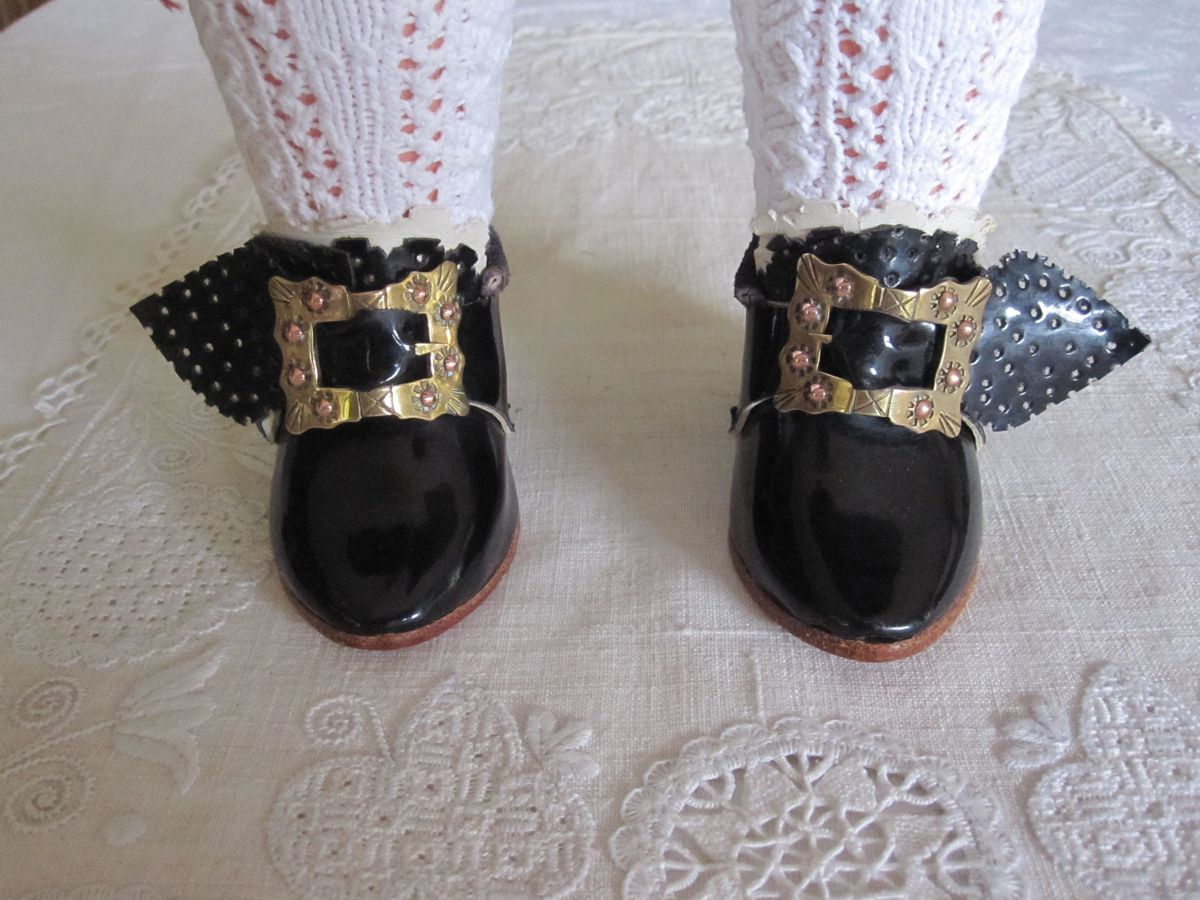
Women always wore buckle shoes with the festive Schwalm costume. Men also had, in addition to the high-necked buckle shoes, lace-up shoes or boots.
Schwälmer Schnallenschuhe | Schwalm buckle shoes
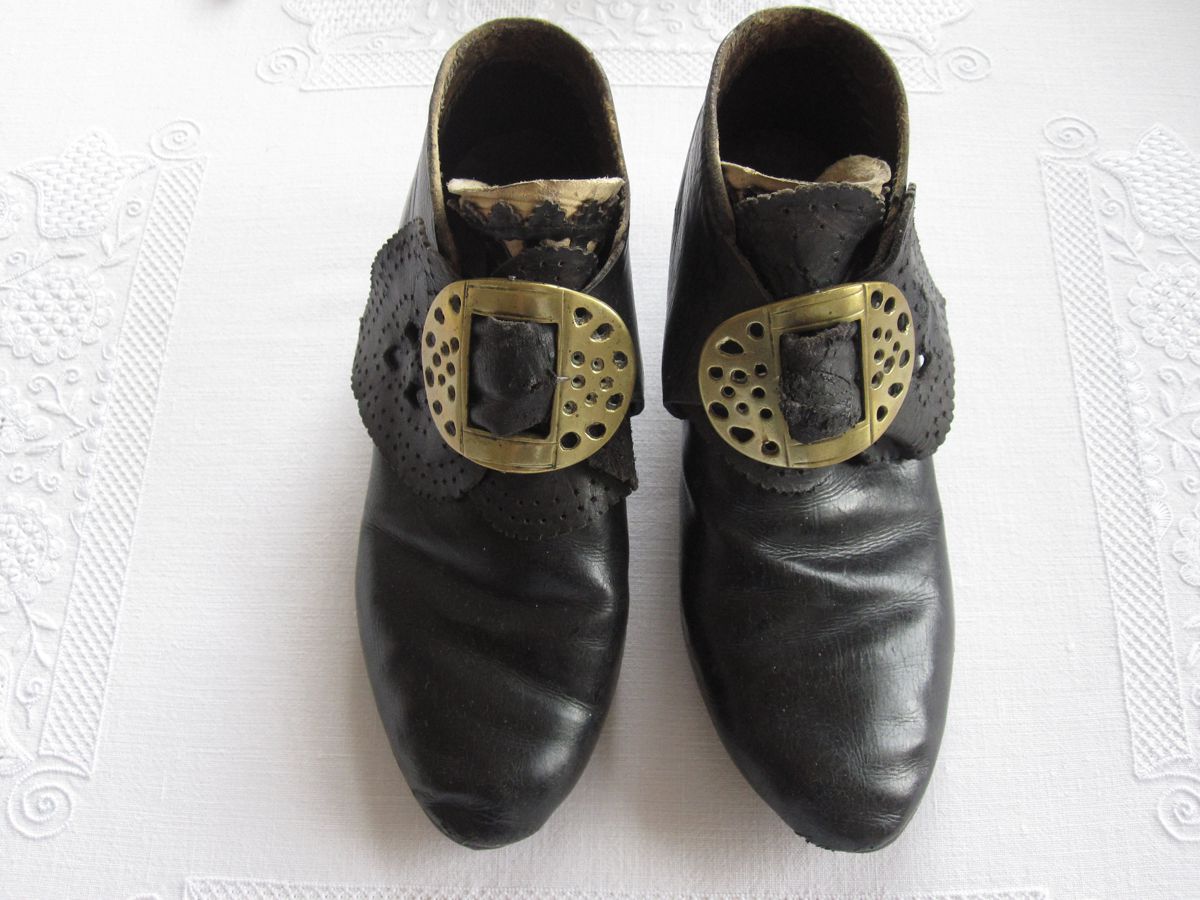
The buckle shoes had rounded toes. The heels were not high and some were smaller than the shoes so that it looked like small blocks lay below the shoes.
`Kletzschuhe´ | `block´ shoes
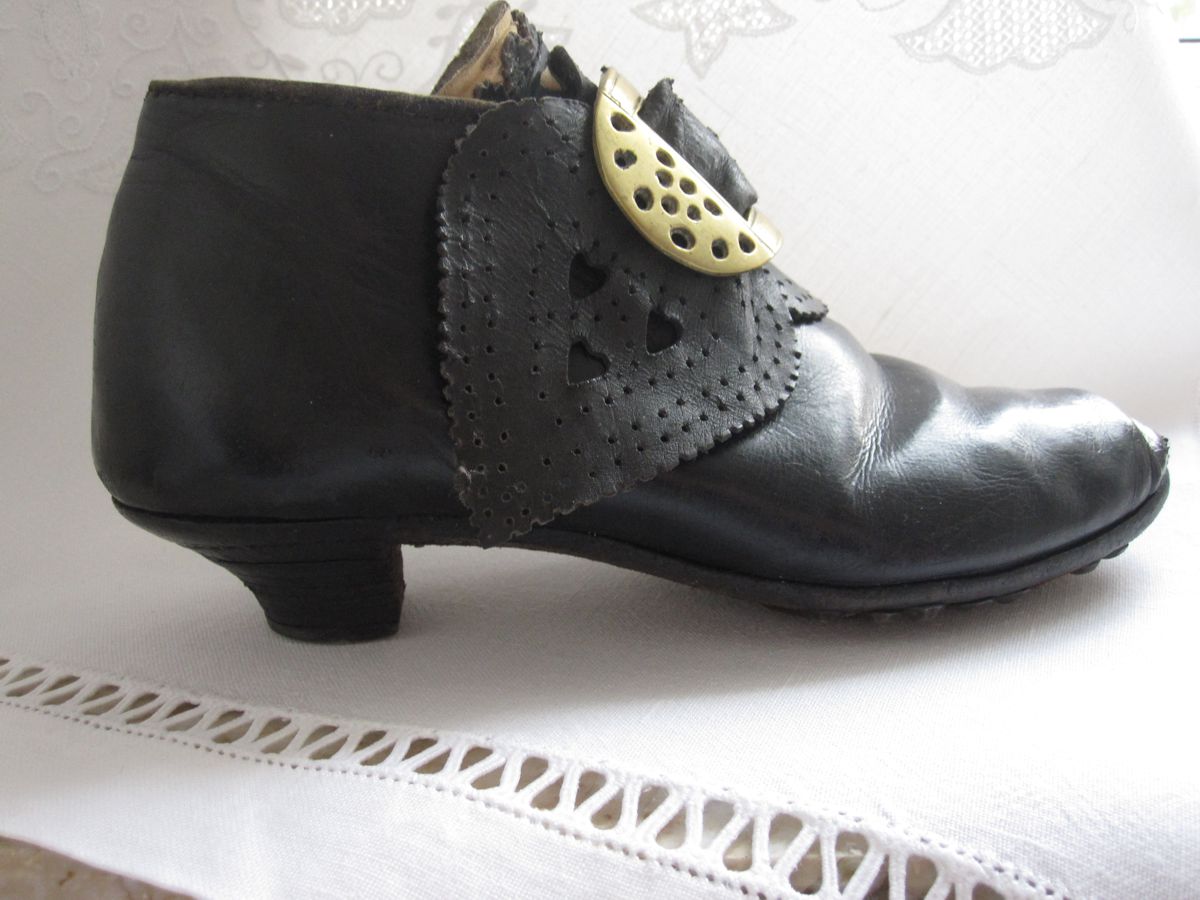
For better footing and longer life some heels were shod.
mit Eisen beschlagener Absatz | heel, shod with iron
For women’s shoes the shoemaker had only one shoe last, this means, there was no left or right shoe; both were the same and the ladies would alternate wearing them on the left and right feet so that the shoes would wear equally.

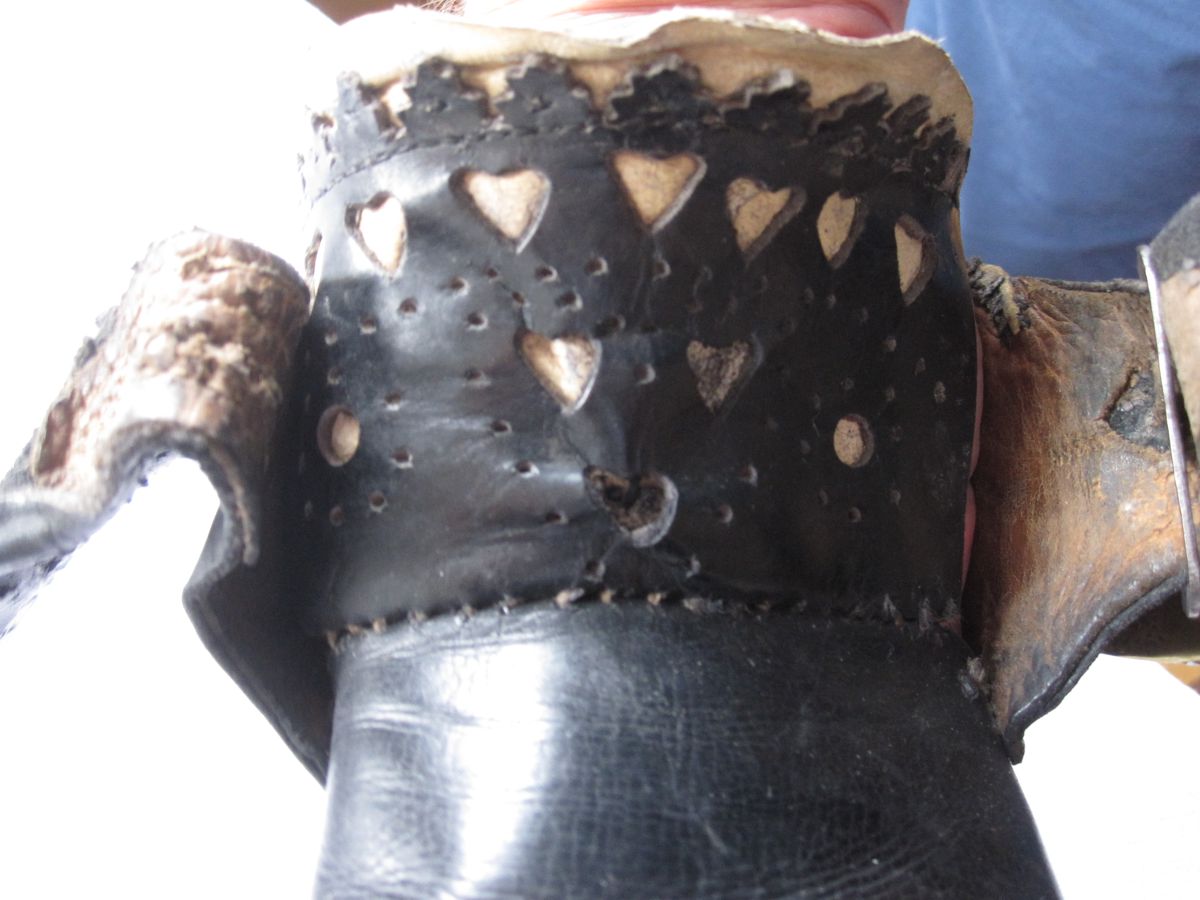
Mostly, the shoes were made from calfskin. The punch-decorated tongues of the women’s shoes were serrated at the top edges and accented with white sheep hide.
weiß hinterlegte Lasche eines Frauenschuhes | white highlighted tongues of a woman´s shoe
The tongues of the men’s shoes had red piping.
rot paspellierte Lasche eines Männerschuhes | red piping on a man´s shoe
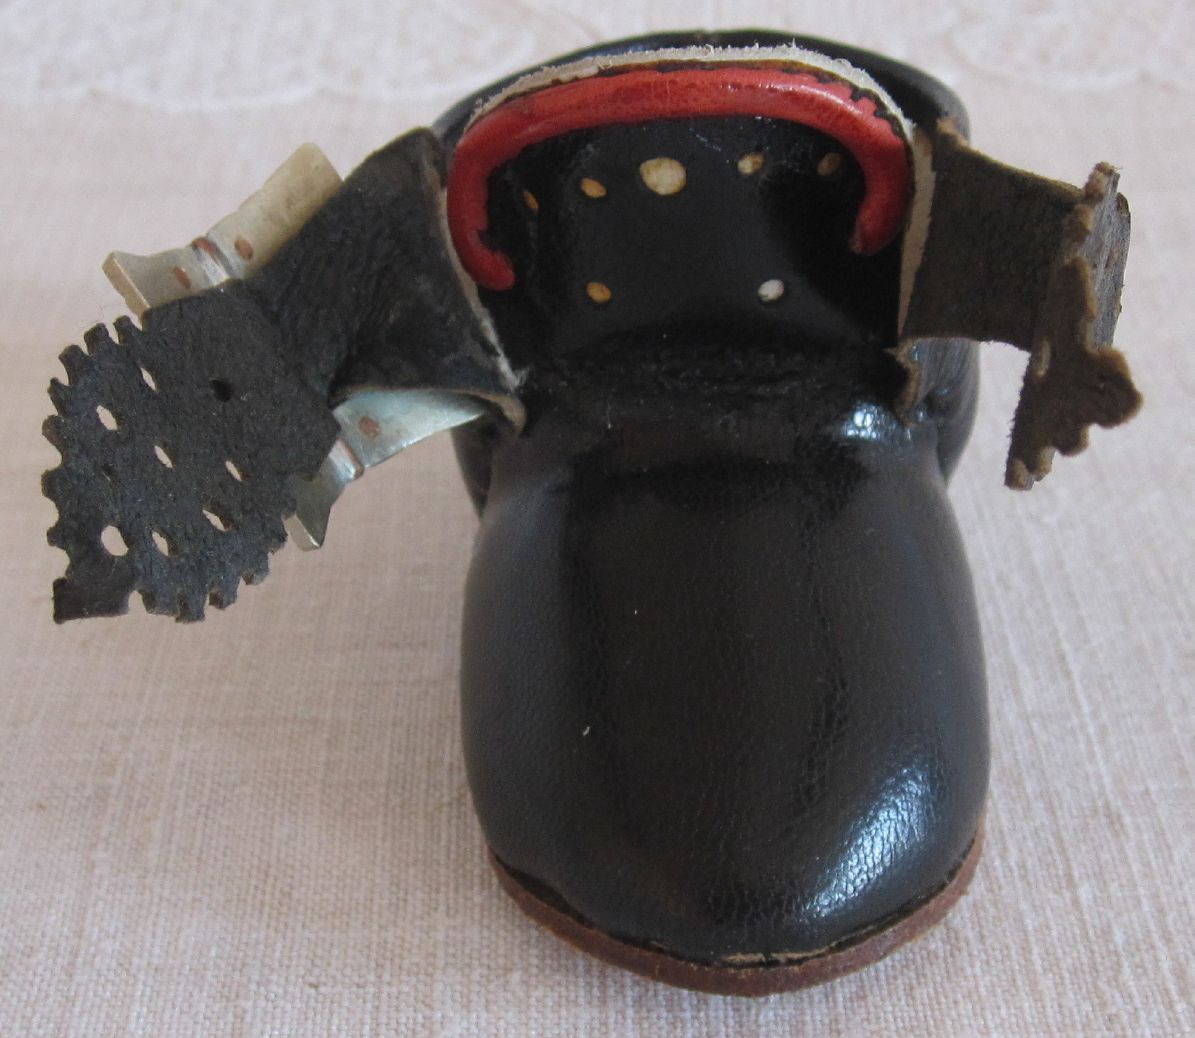
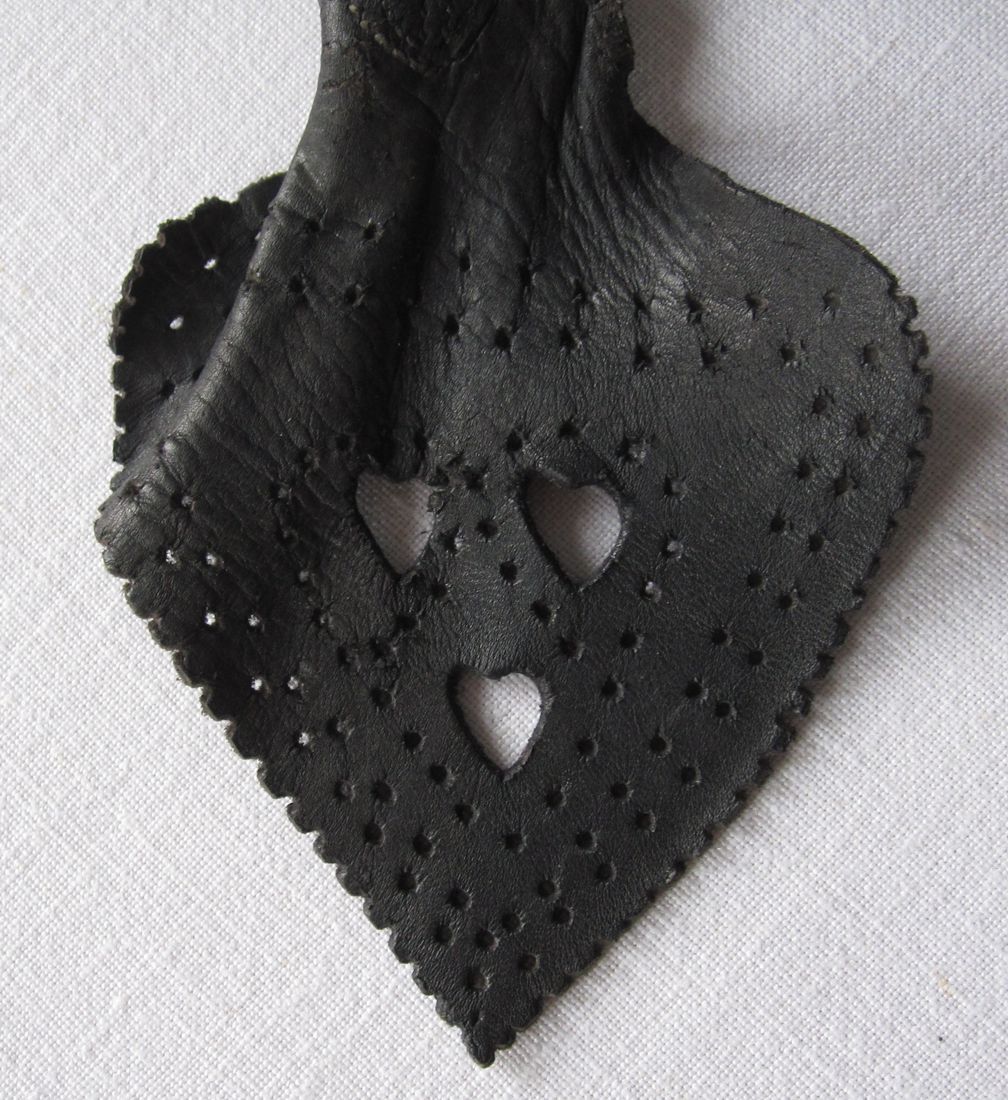
On the sides, there were large tabs in a shape similar to a heart – the “ears”.
herzförmige Verlängerungen der Seitenteile, die sog. Ohren | heartformed lengthenings of the side parts, the so calles ears
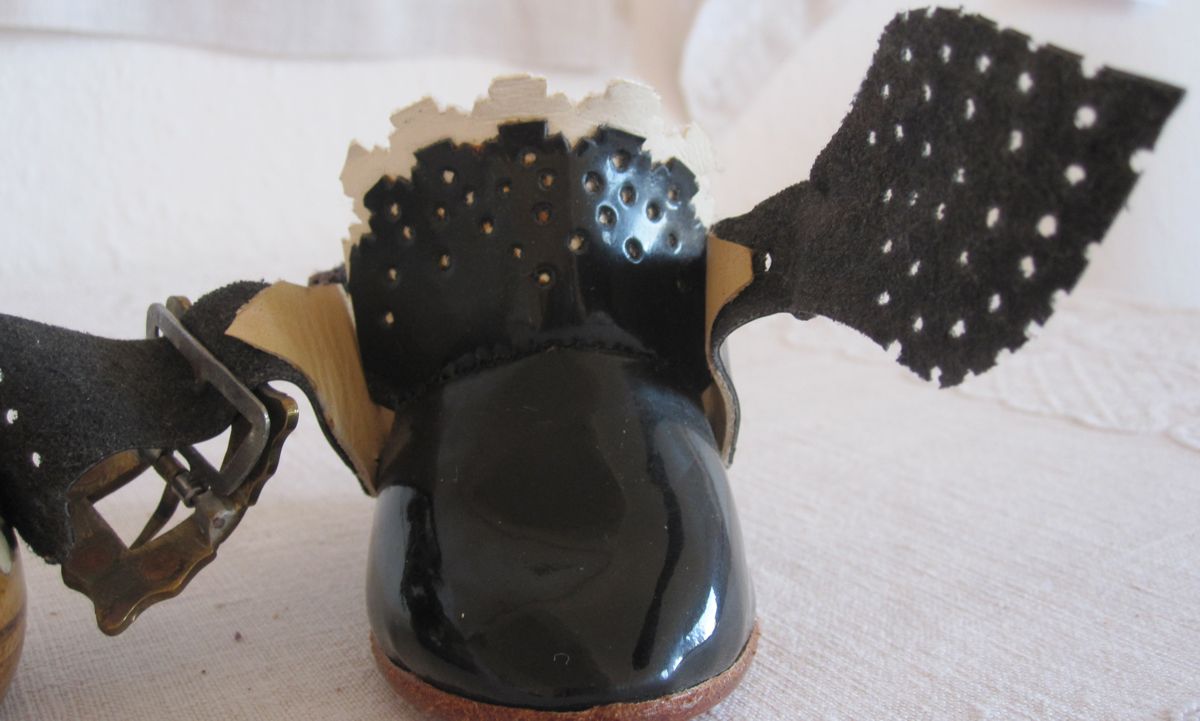
These were decorated with hole ornamentation made with prickers. For marriage shoes, the year was also pricked into the tabs.
lochverziertes `Ohr´ | hole ornamented `ear´
The “ears” were slid through buckles and draped. Thus the Schwalm buckle shoes made an extravagant impression.
mit Schnallen geschlossene Schuhe | shoes closed with buckles
Besides the buckle shoes, the Schwalm women had some more comfortable shoes, the so-called “Kommod” (=commodious) shoes. With flat heels and low cut, they were worn for everyday life and during old age.
Commod-Schuhe | comfortable shoes

Schwalm Hems – The Arch Border (6)

To use the arch border as an all-around decoration, I came up with a corner arch solution. (One can find another design of a corner solution in the downloadable file “Arch Borders – instructions with close-up photographs and line-drawn designs”.)
Bogenborte | arch border
The arch is 3 cm high and 4.3 cm at its widest point. I want to decorate a doily with 3 arches per side plus the corner arches. To this end, I make a corresponding drawing. The square has a side length of 24.6 cm. My doily will have a 3 cm hem plus 1 cm fold. So, I cut the linen to the size of 2 x 7cm + 24.6 cm = 38.6 cm. On all sides, 7 cm from the edges, I withdraw a thread to the respective intersection points.
Bogenbortenquadrat | arch border square
Using an iron transfer pencil, I transferred the pattern to the smoothly ironed and aligned linen. Please proceed extremely carefully.
Aufbügeln entlang des Fadenauszuges | iron on transfer along the withdrawn-thread line
I want to work a single row of Four-Sided stitches around the border, so I let remain 4 threads outside the withdrawn thread lines and withdraw the fifth one up to the respective intersection points.

In the shapes, I withdraw the threads for the grids depending on the chosen patterns. The vertical threads are cut at the curve and withdrawn back to the perpendicular withdrawn-thread line that the arch sits upon.

So that the withdrawn threads do not interfere with the embroidery to be done on the grid, lay them away from the grid and baste them in place with short Running stitches using a coloured sewing thread. Trim the ends of the withdrawn threads. Now work the filling patterns.
Rückseite der Kästchenstiche | back of the Four-Sided stitches
When all shapes are filled, from the front of the fabric Four-Sided stitch is worked (from the front one can see the number of the threads better). While working the Four-Sided stitch, the short thread ends on the back are covered. Every few stitches one should check to make sure that every thread is secured in the stitching.
Fertige Muster | finished patterns
The hem is fastened by Antique Hem stitch. The coloured sewing threads are removed. The doily is washed, starched and ironed. A nice small sampler is finished.
fertiges Deckchen | finished doily
To ease working along with the posted instructions on my blog, I made a downloadable file: “Arch Borders – instructions with close-up photographs and line-drawn designs”.
Arch Borders - Cover - english
As already mentioned in an earlier post, in Schwalm whitework hems are not only decorated with Four-Sided Hem stitch, Peahole Hem stitch or Needleweaving; they are also adorned with small decorative borders worked along the seam. The arch border is a very special adornment. There are different versions of arch borders seen on both traditional and contemporary embroidered pieces.

Pictures of these embroideries, as well as their line-drawn designs, are presented in the downloadable booklet. In addition to the version presented here on my blog, the document includes six different, very nice arch border designs with corners (some with additional variations). Also included are instructions with close-up photographs to work an all-around arch border along a Four-Sided stitch row, and an arch border without corner embellishment along a Peahole hem. Note: these instructions have been posted on my blog, but in the downloadable document they are all in one place, and edited for absolute clarity.
Not included are the filling patterns or instructions for basic stitches. For detailed instructions of basic stitches used, please refer to my book, Basic Principles of Schwalm Whitework. And for detailed instructions for filling patterns, please refer to this blog or my other books.

The first sixteen pages of the document show the examples of the different arch borders, and outline, in detail, the order of working. The last four pages contain line-drawn sections of seven different arch borders in their original size as well as reduced sizes with corners.

If you like arch borders, I think you will enjoy having this detailed document at your fingertips.

Tablecloth for all Seasons – July: Butterfly

Since my garden is in full bloom, I can watch many butterflies everyday. They dance from flower to flower in the sunlight. So, for July I decided to feature the butterfly. There are so many different butterfly shapes – I have chosen a very simple one.
2014-07-26_pdf
My shape measures 16 cm in the width and 11 cm in the height, but one could use a smaller shape if the linen has a higher thread count.

The vertical and the horizontal axes are marked on the linen so that the design outline can be transferred precisely.

Using Coton à broder No. 16, on Weddigen linen, 13.5/cm thread count, Coral Knot stitches are worked along the inner lines of the wings.
Knötchen-, Ketten- und Schlingstiche | Coral Knots, Chain- and Blanket stitches
Using Coton à broder No. 25 Chain stitches are worked a small distance outside the Coral Knot stitches along the outside edges of the wings. And Chain stitches are also worked just inside the outline of the body. The Chain stitches are covered with densely worked Blanket stitches along the outside edges of the wings, and around the body using Coton à broder No. 20.
Chain stitches are worked along the inner areas of the wings using Coton à broder No. 25.
Limet-Fadenauszug | limetgrid
A grid is made by cutting 1, leaving 3. Please proceed carefully: both the horizontally and the vertically withdrawn thread lines should match in the adjacent and mirrored areas.
einfacher Marburger Grundstich | Diagonal Cross stitch
Using Coton à broder No. 20 Diagonal Cross stitch (Basic Principles of Schwalm Whitework, pages 39 – 40) is worked mirrored in the top part of the wings.
Röserich-Variante | Röserich variation
Using Coton à broder No.20 a variation of the “Röserich” is worked diagonally in the bottom part of the wings. The areas remaining outside the “Röserich” (the upper part of the lower wing sections) are filled with Rose stitches using Coton à broder No. 25.

Soon, a downloadable booklet will be available showing one of the most prominent filling patterns of Schwalm – the “Röserich”. I found so many beautiful and , until now, undocumented variations, that I decided to publish a booklet with a description in great detail and illustrated with step-by-step instructions.
Please look forward to it!

Wickelstiche | satin stitches
The inside remaining areas are filled with Satin stitches using Coton à broder No. 20.
fertiger Schmetterling, ungewaschen | finished, but unwashed butterfly
After finishing, the embroidered piece is washed (boiled), starched and ironed. Then, the butterfly is cut. If needed, such closely trimmed embroidery can be washed and ironed – quick and easy – at any time, but never spun in a washing machine!
Fühler | antennae
For the antennae, a thicker cotton thread is passed through some Blanket stitches of the head, cut to the right length, knotted at the ends and covered with starch (or hair gel) to achieve the right form.
fertiger Schmetterling | finished piece
Doesn’t the butterfly look as though it will fly away any moment?

Schwalm Knitting Patterns (1)

In the Schwalm, stockings, gloves, baby christening caps and baby wraparounds were knitted.

.
Schwälmer Strumpf | Schwalm stocking
Taufmützchen und Handschuh | baby cap and glove

During the time when skirts were longer, lacy designs were common, later the stockings and gloves were knitted with dense, fancy cable designs.

“Wickelschnüre” – baby wraparounds were needed at a time when mothers did not have the diapering conveniences that are available today. The linen diaper was held in place by wrapping the band around the baby. Most wraparound bands were knitted with different patterns and so they ended up also functioning as knitting-pattern samplers.

The traditional shapes of heart, tulip, star and circles were common in knitting patterns used for stockings and gloves. However, the heart and its many variations was the most widely used motif.

The name “Schleifen” (bow ties) was given to designs where the stitches were crossed so that they lay together like small stripes.

“Doppelt” (double) means that the shapes were surrounded by a double line.

simple heart

simple heart

double heart with bow tie

double heart with bow tie

bow tie heart

bow tie heart

bow tie hearts alternating outwards and inwards

bow tie hearts alternating outwards and inwards

double heart with crosses

double heart with crosses

double trellis heart

double trellis heart

bow tie heart with cross

bow tie heart with cross

circle with cross (8 stitches)

circle with cross (8 stitches)

double-circle with cross (10 stitches)

double-circle with cross (10 stitches)

If a circle was knitted with more than 10 stitches, they called it “star”.
double star with trellis

double star with trellis

double star with crosses

double star with crosses

bow tie

bow tie

bow ties with crosses

bow ties with crosses

For the pattern in the picture below, I found two names: “bow tie heart with eye” and “flower with eye”.
flower with eye
The wristband pattern of a glove, shown below, has a lovely design of “hearts and flowers”.
hearts and flowers
Up to this point, I could not locate and photograph a knitted item with a tulip pattern. However, in the German books, Schwälmer Strickereien – traditional knitted pieces of the Schwalm shown with descriptions and patterns, by Anka Becker,
Tulip design shown by Anka Becker

Tulip design shown by Anka Becker

and Die Schwälmer Tracht, by Dirk Ordemann, tulip patterns are shown.
Tulip design shown by Dirk Ordemann

Tulip design shown by Dirk Ordemann

The “stolzen” (proud) Schwalm knitting patterns are usually established by incorporating several of these single elements.

If you are interested in trying this intricate knitting yourself, Anka Becker’s book illustrates the fancy patterns and gives instructions for knitting.
Buch Schwälmer Strickereien | book
Buchseite | book page
Anka Becker
Schwälmer Strickereien
2000 Verlag Dirk Ordemann
ISBN 3-9802008-4-1

Filling Pattern No. 450

No. 450
category: Limet-Filling pattern
stitches used: Fours blocks of Satin stitches over one square (3 threads) in the width and 4 squares (12 threads) in the height as well as Rose stitches
longitudinal axis: withdrawn thread line

It is expedient to begin thread withdrawal for the Limet grid in the prepared tulip design here :
Fadenauszug | withdrawing threads First, in the established Limet grid, work Satin stitches as blocks of four bars consisting of 12 stitches (4 squares) over one square (3 threads). Start at the top middle – so that the pattern can fully develop in the upper part of the motif – working the blocks in a stair-step manner, changing the direction of the stitches with each block.
4-er Wickelstichbloecke | fours blocks of Satin stitchesWork the blocks like a checkerboard all over the shape.
4-er Wickelstichblöcke, schachbrettartig | blocks like a checkerboard
5 Rosenstiche je freies Quadrat | 5 Rose stitches in each squareWork five Rose stitches in each of the remaining squares.
fertiges Muster | finished patternWashed, starched and ironed the pattern gets its full charm. This example was worked on 13.5 /cm thread-count linen. For the Satin stitches Coton à broder No. 20 was used and for the Rose stitches Coton à broder No. 25.