Entry in the Nationwide Register of Intangible Cultural Heritage

I am pleased to announce that Schwalm whitework was added to the nationwide register of intangible cultural heritage yesterday.

With this award, the cultural form “Schwalm Whitework” bears the title “intangible cultural heritage” – not to be confused with “world (cultural) heritage”.

I would like to thank all of my supporters very much.
In no particular order, I will present the efforts of groups, individuals and the Schwälmer Heimatbund e.V. and show their conservation measures.

The registration is a great success and makes a valuable contribution to arousing new interest and supporting the transfer and preservation of cultural assets.

Shortly after the announcement, I was asked about the topic by Hessischer Rundfunk. The interview was broadcast on the radio station HR1 on the same day. The Hessenschau on HR television brought a short report from the Schwalm Museum and you can also find a report on the Hessenschau website.

Now a new chapter of work begins, because receiving the title should not rest on one’s laurels – it requires appropriate measures to be passed on and preserved. My colleagues and I face this challenge with vigor and enthusiasm.

Bunnies between Daisies

Easter is coming soon – time to think about a new Easter tea cloth again.

I picked out a pricked template to make prints. My choice fell on “Bunnies between Daisies”.

The motifs are relatively easy to embroider

and the areas of the bunnies can be filled in a variety of ways.

I now offer such tea cloths for sale.
Used is 16 tpcm linen (Weddigen #925) in off-white, cut to size 70 cm X 70 cm. The design square has a size of 48 cm X 48 cm.

First the selvedges have to be cut off, then the cloths have to be cut to size.
So that the prints can be placed in the middle and appear in the straight of grain, a total of 6 marking threads must be inserted.

Based on this, the four prints are carefully performed.

Tea cloths with this printed design can be purchased for €34.55 (including 19% VAT, plus shipping costs). It is €29,03 for people out of the EU.

Since this item is not listed in my shop, you can order via my email address info@luzine-happel.de.

If you would rather transfer a pattern onto linen yourself, I can recommend the “Hare Circle Dance”. – a very soberly and yet very effective Easter outline design.

Embroidery Exhibition

Embroidery exhibition

Margarete Grandjot has been running her embroidery studio for 30 years now.

Congratulations!

For this admirable occasion, she has prepared an exhibition entitled “Foray through 30 Years”.

This will take place on

Saturday, March 2nd, 2024 from 11 a.m. to 6 p.m. and on
Sunday, March 3rd from 10 a.m. to 5 p.m

in the

Karl-Bissinger-Gemeindehalle
Raiffeisenstraße 40
71083 Herrenberg-Kuppingen

One can also enjoy coffee and cake.

Schwalm Whitework and Bobbin Lace (1)

Recently I have shown many design options with needle-weaving hems.

Sylvia Sellmaier has now created an interesting alternative on a pillowcase.

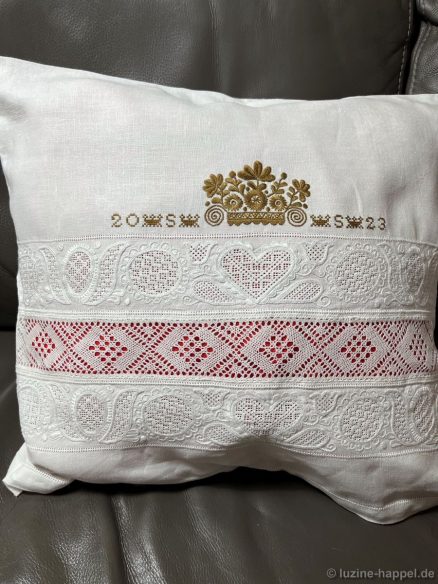
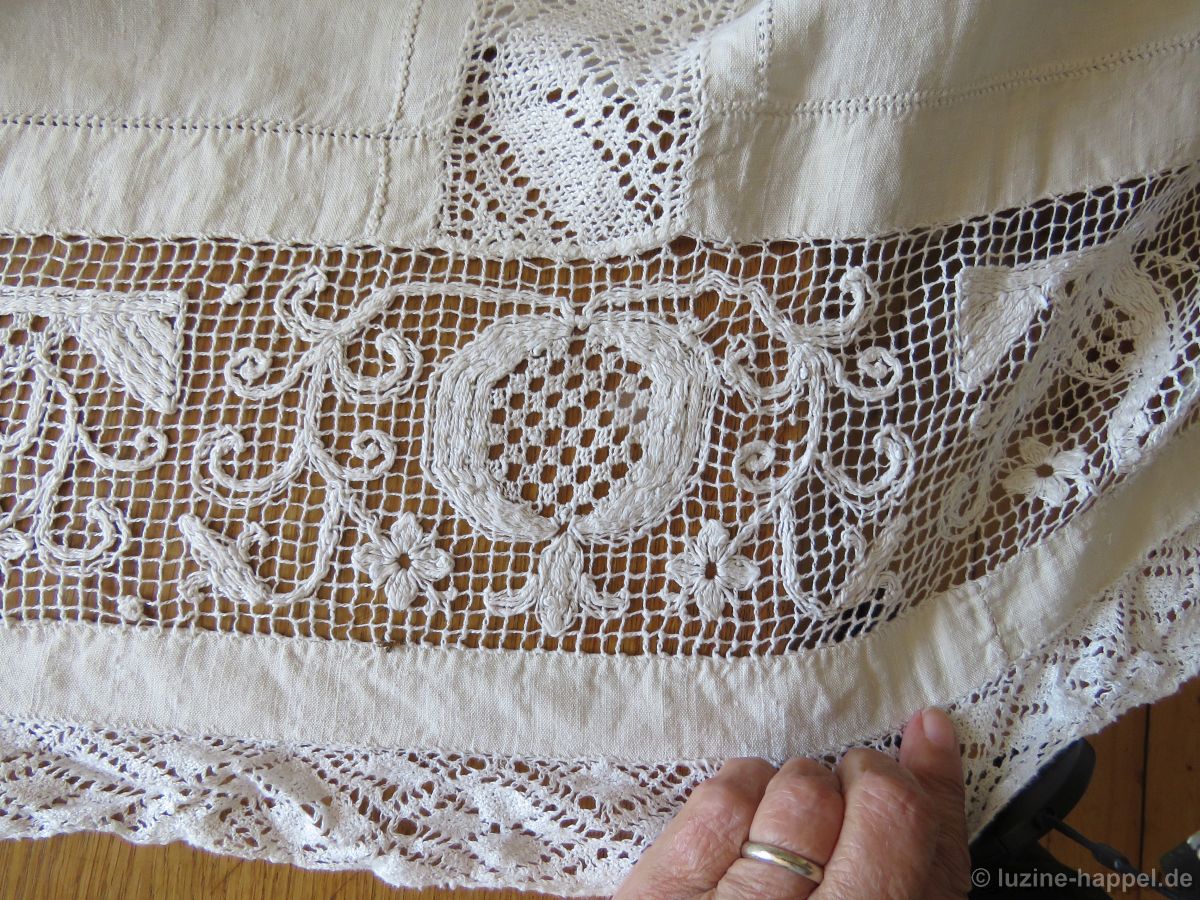
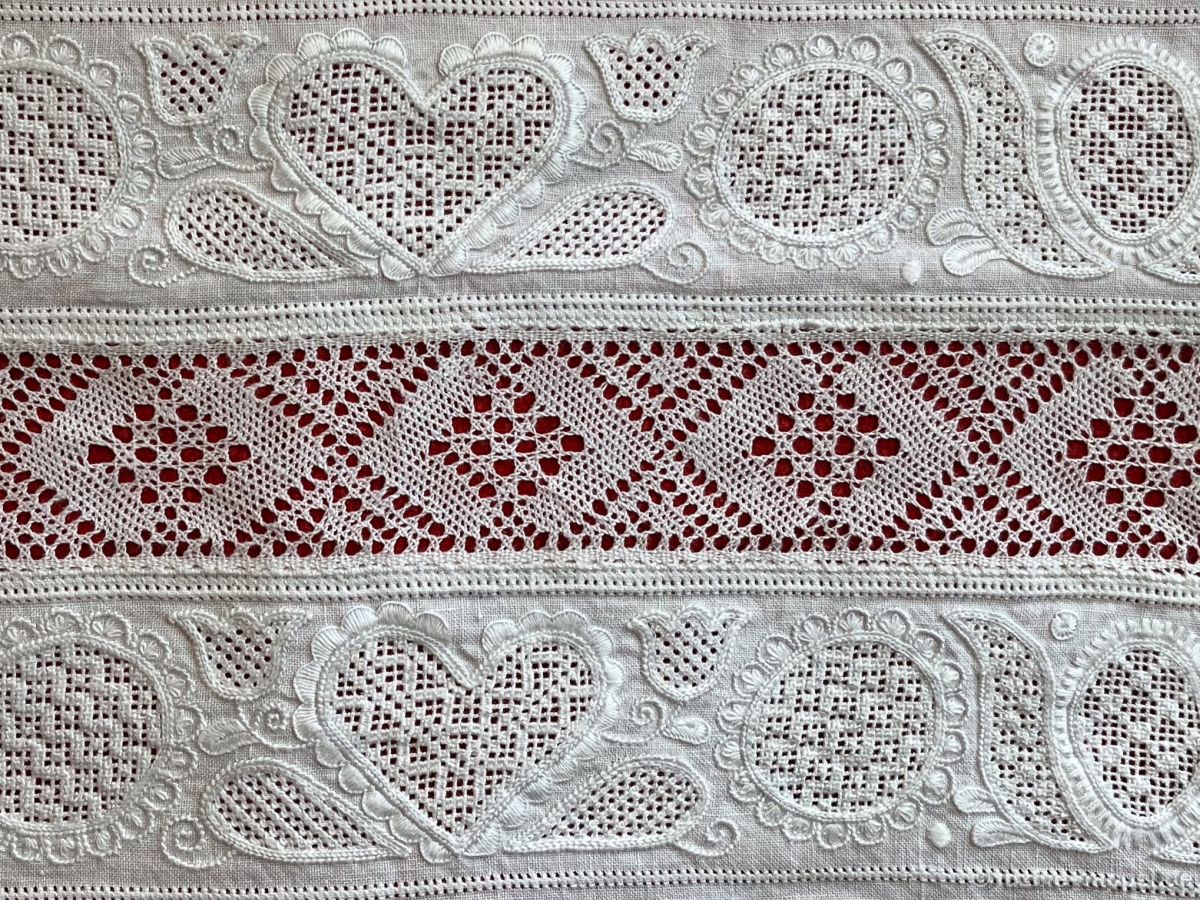
She combined typical Schwalm whitework borders and a Schwalm crown with a bobbin lace insert.

Bobbin lace has a long tradition in the Schwalm (see also: Bobbin lace in the Schwalm (1) and Bobbin lace in the Schwalm (2) ).

Neukirchen was a center of Schwalm bobbin lace production for a long time. However, bobbin lace was mostly used as an edge finish.
But I also know of historical pieces with bobbin lace inserts.

Bobbin lace can be found both as an edge decoration and as an insert combined with a fillet embroidery border on a Schwalm bed cover from the late 18th century.

A bed cover from the beginning of the 19th century shows a wide bobbin lace insert between needle-weaving hems. The edge of the cloth was decorated with the machine lace/ trimmings that were just emerging at the time.

In my large collection I have five other pieces with different bobbin lace inserts:
• a bed cover with elaborate early Schwalm whitework and very fine bobbin lace,
• a parade cushon with needle-weaving hems and gimp (?) bobbin lace
• a parade cushon with a very wide Schwalm whitework border, needle-weaving hems and a wide bobbin lace insert,
• a bed cover with various bobbin lace bands and a crown as well as
• another bed cover from 1844 with a crown, elaborate openwork pattern borders, a wide bobbin lace insert and a machine-made trimming.

I will introduce these pieces in later blog posts.

But now to the pillowcase from Sylvia Sellmaier.

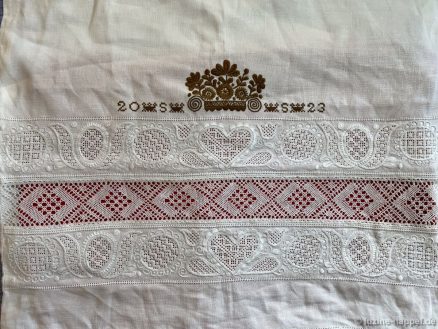
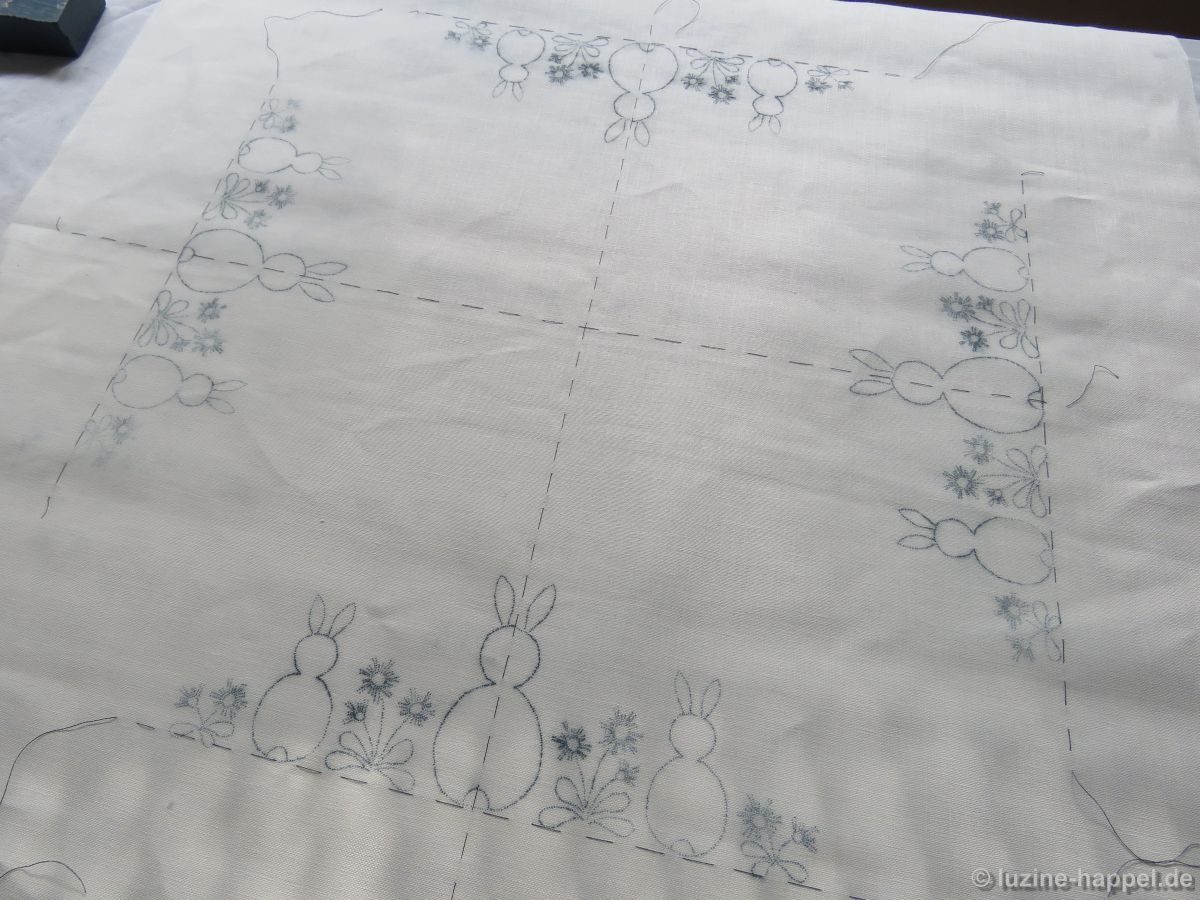
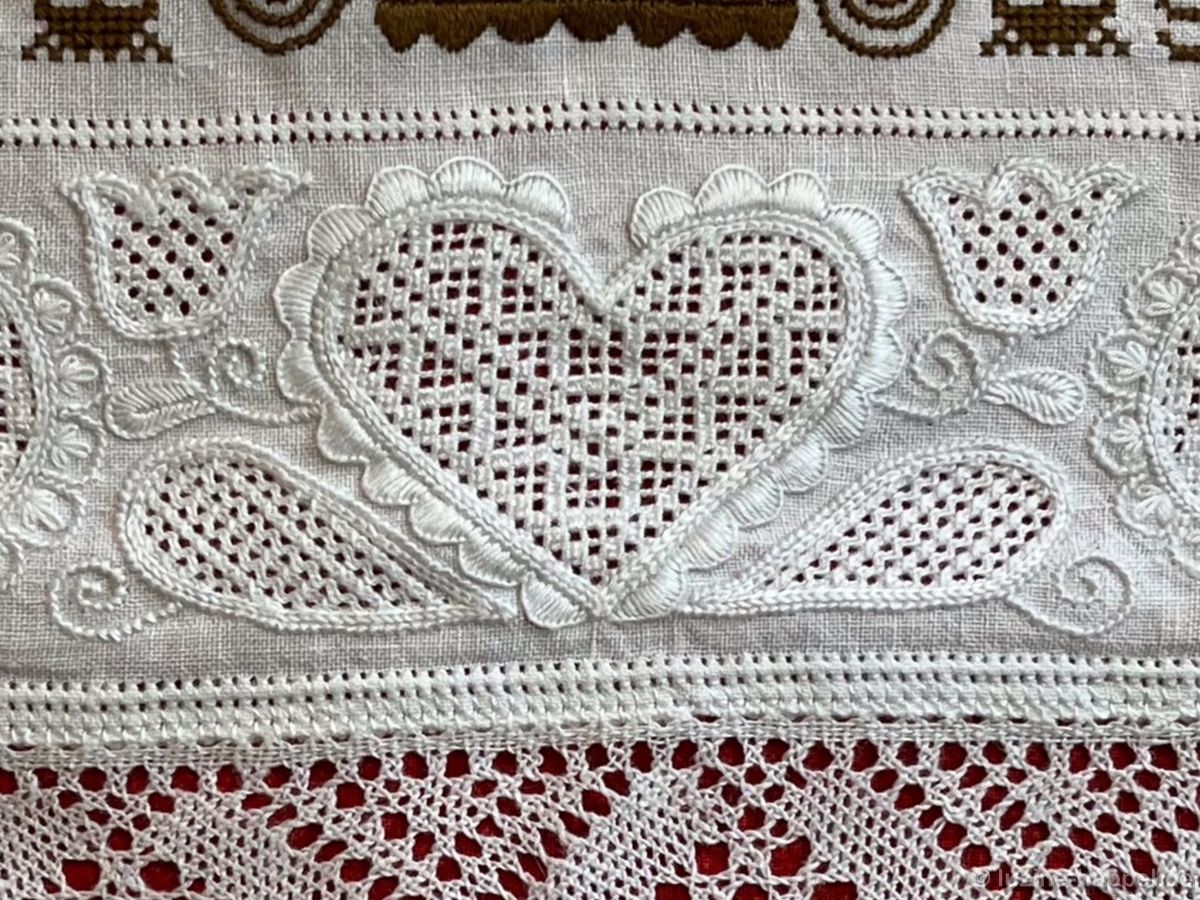
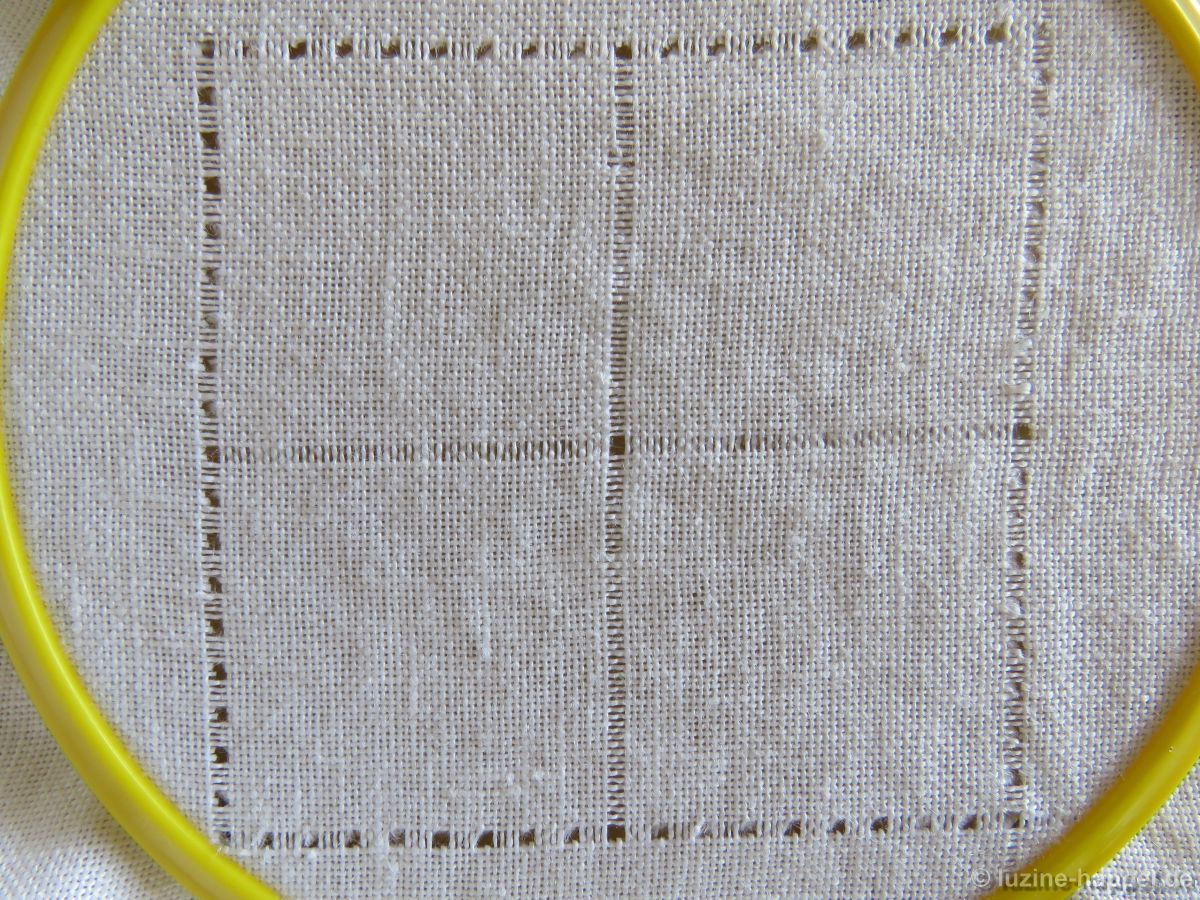
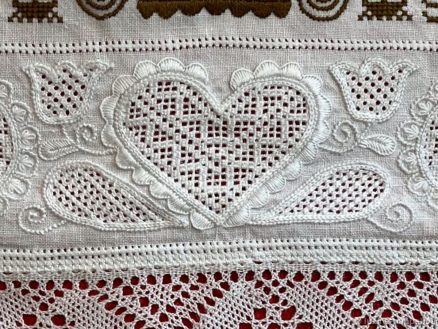
She embroidered the initially continuous fabric for her pillow with two identical whitework borders – each bordered by a row of Four-sided stitches.

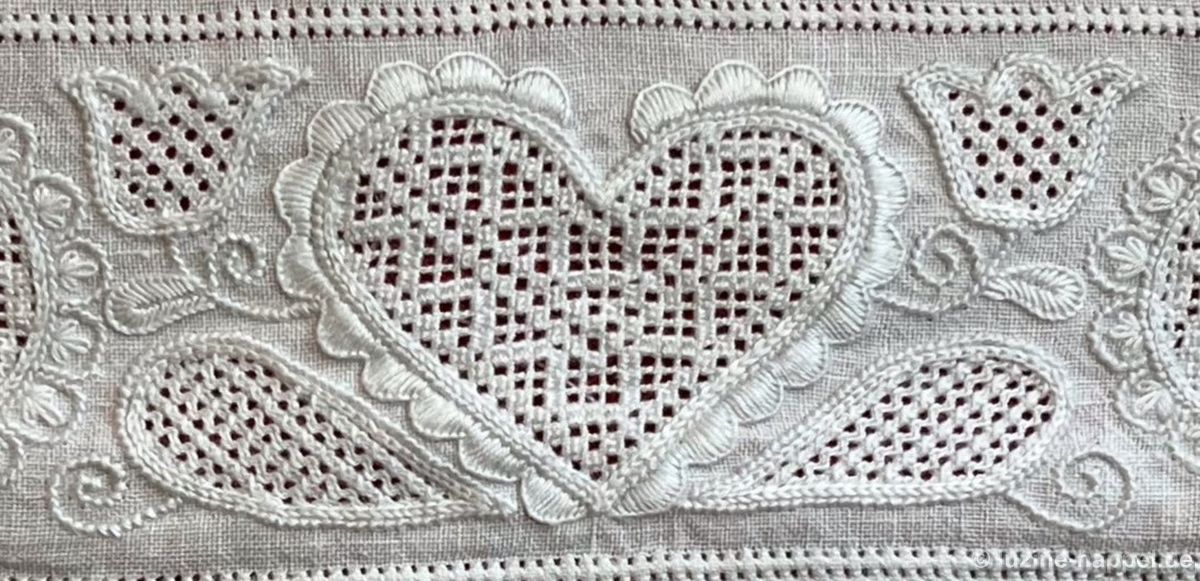
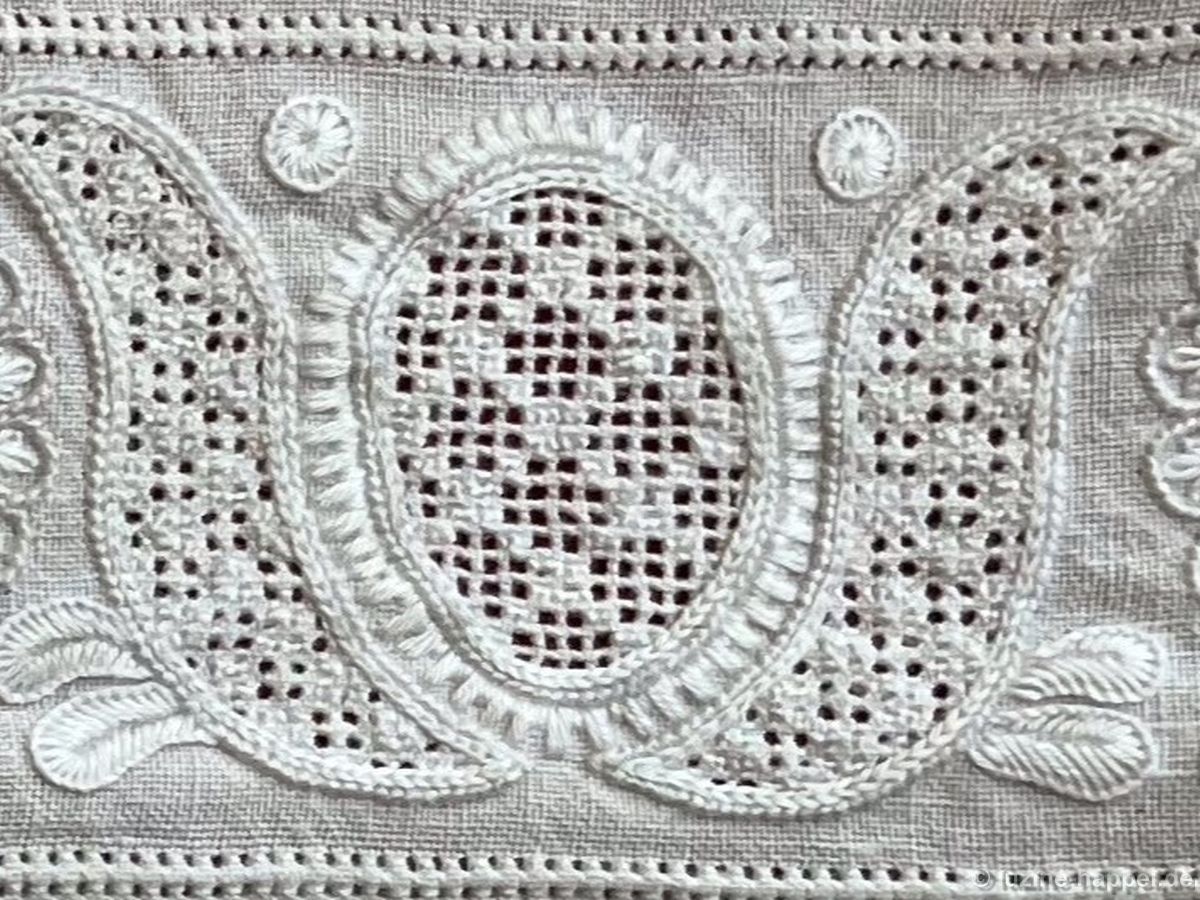
She chose the classic motifs of heart, tulip, leaf and
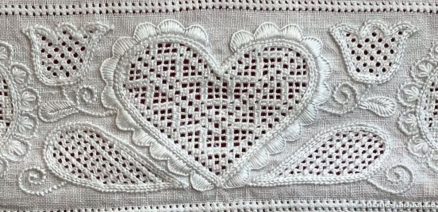
circle as well

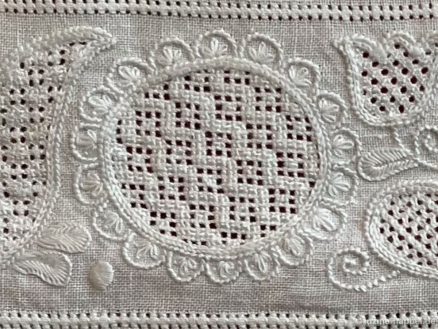
Oval. She filled the areas between the motifs with tendrils, leaves, Blanket stitch eyelets and satin stitch points. As border stitches she used Blanket stitch scallops, 2short – 2long and the rarely seen variant with scallops made of Coral knot stitches, filled with groups of 3 Daisy stitches.

To fill the motif areas, she used traditional openwork patterns, usually with Rose stitches.

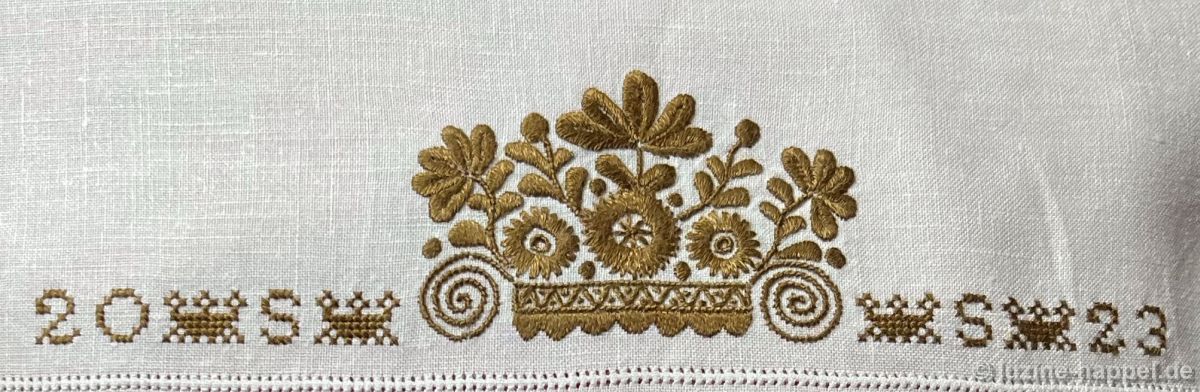
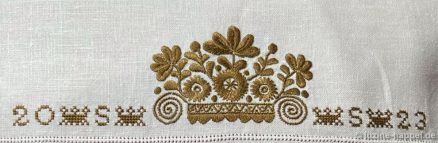
A popular Schwalm crown shape with a basket, palmette branches, flowers and tendrils – embroidered with stranded cotton in Anchor colour 888 – “crowned” her embroidery.

Her initials and the year were attached to the crown, separated by small cross-stitch crown ornaments.

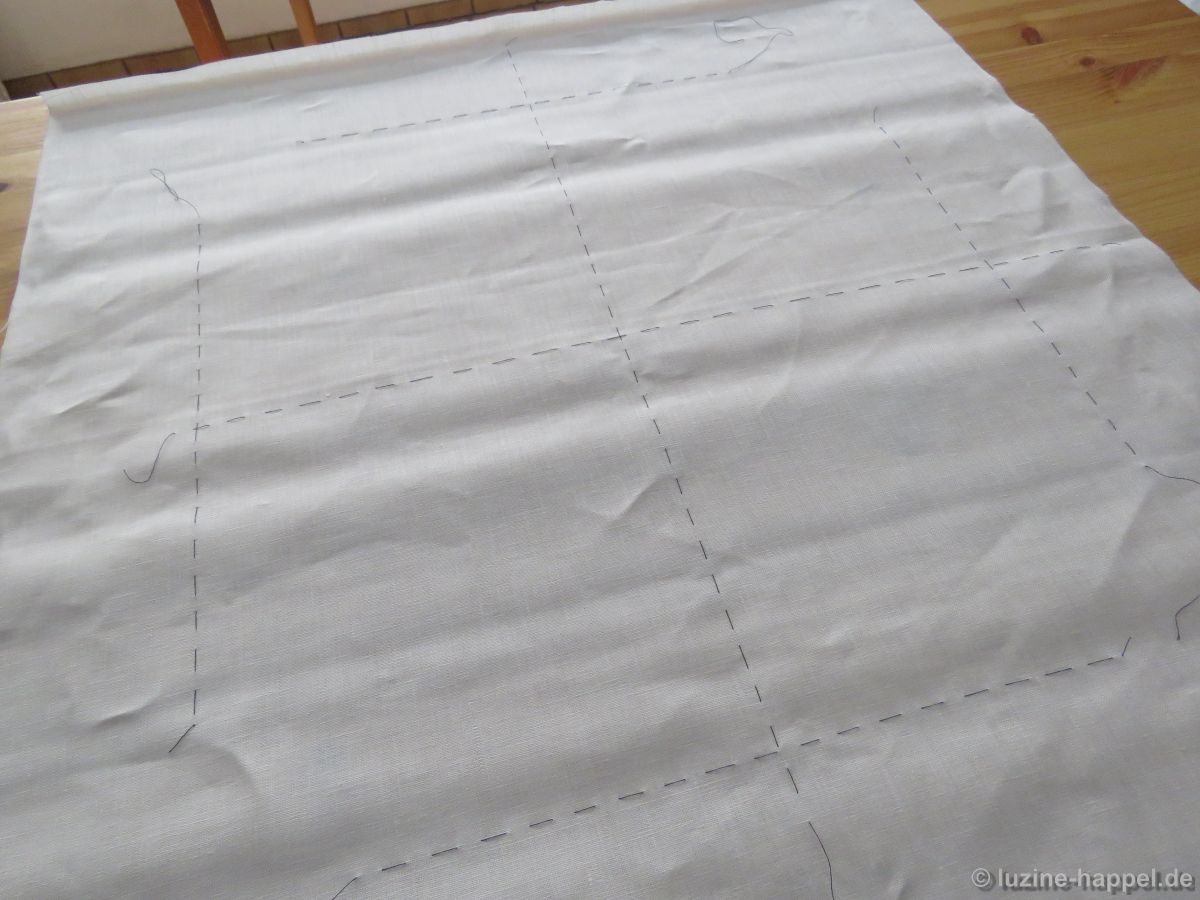
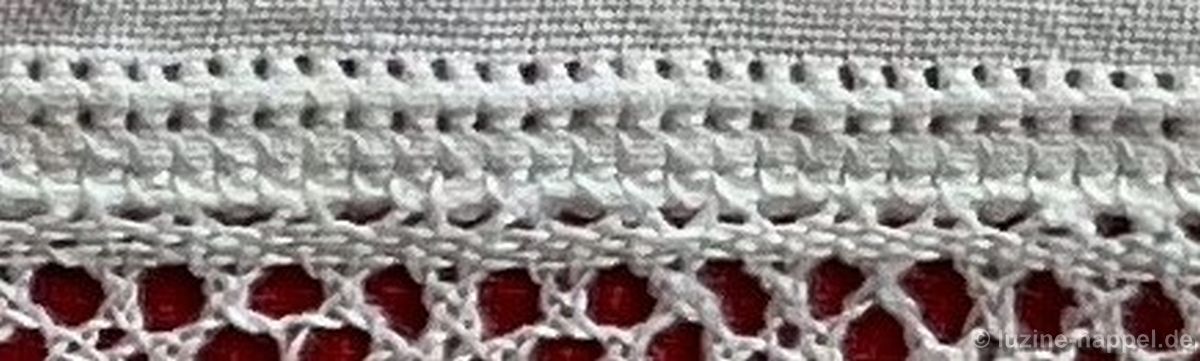
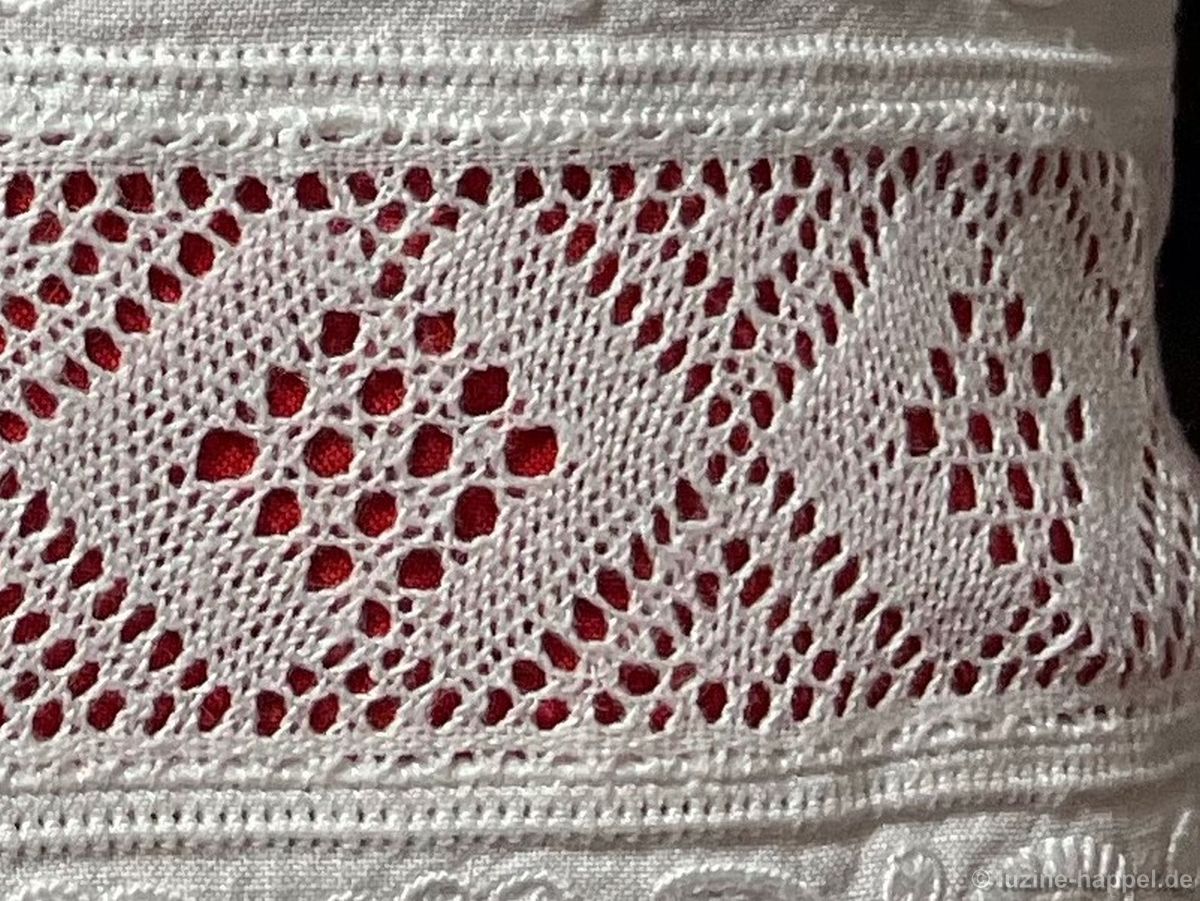
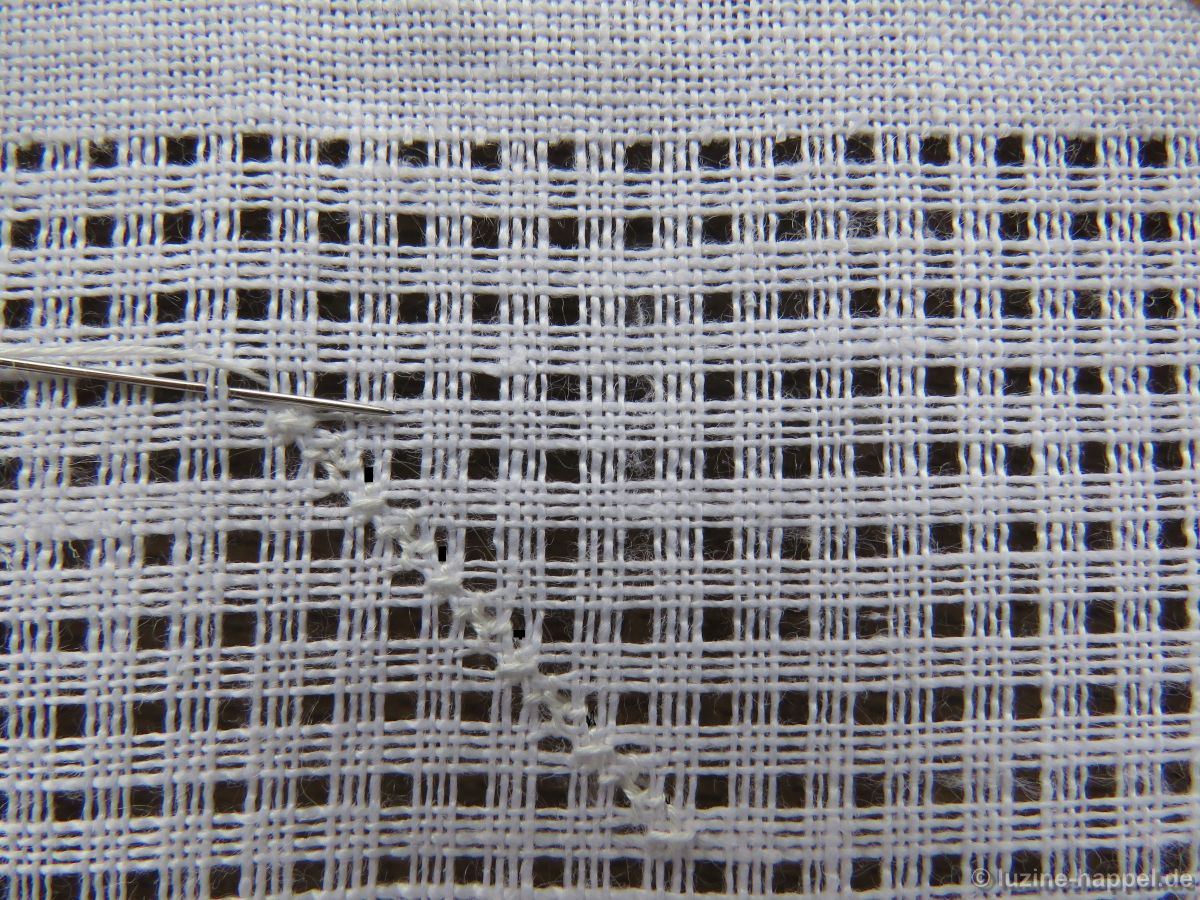
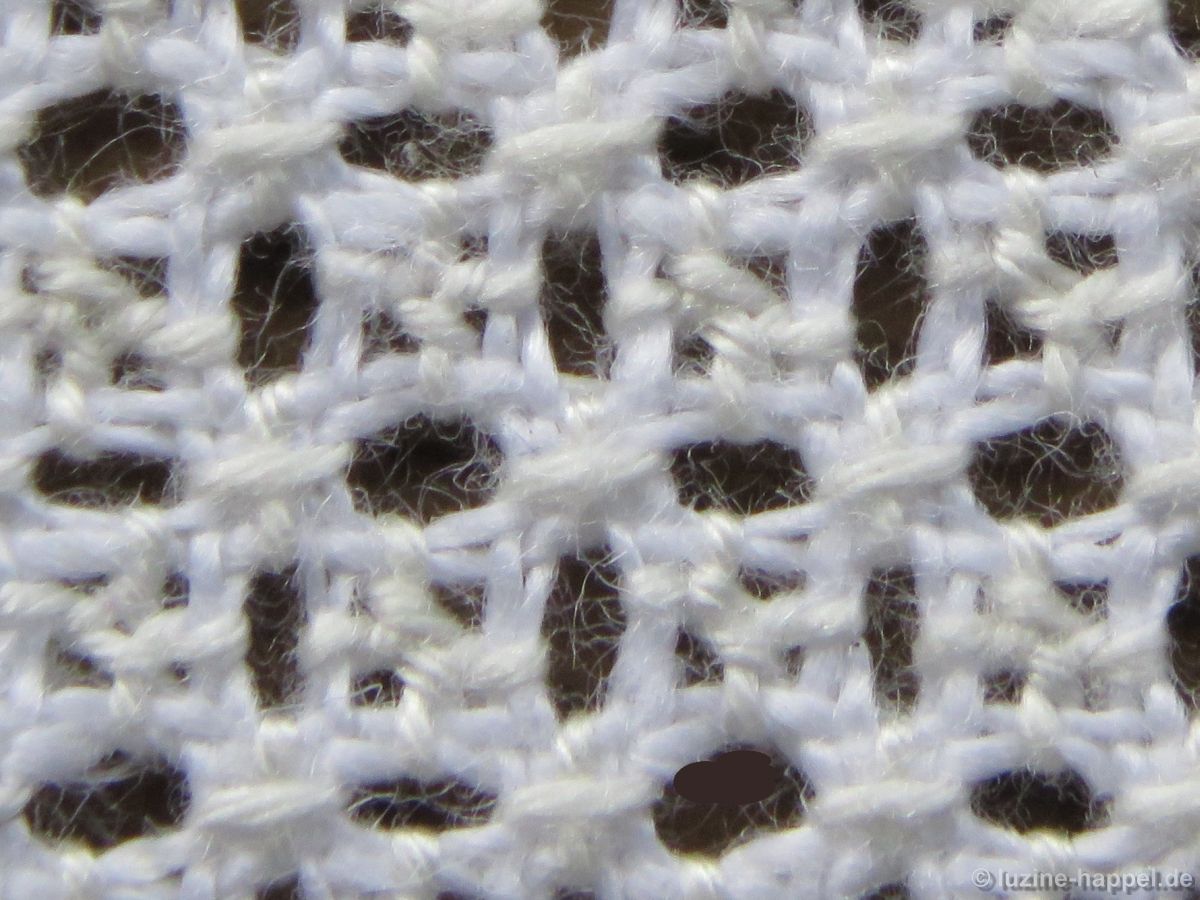
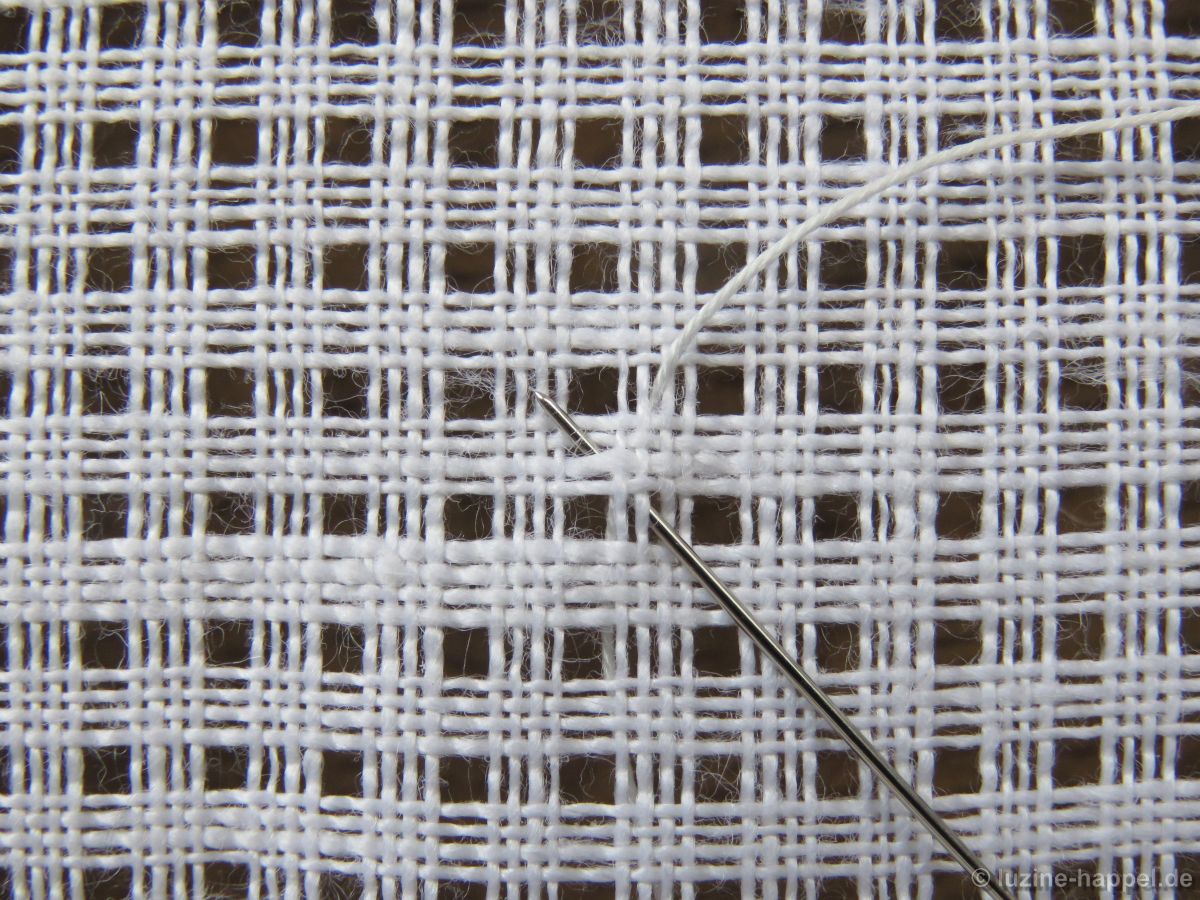
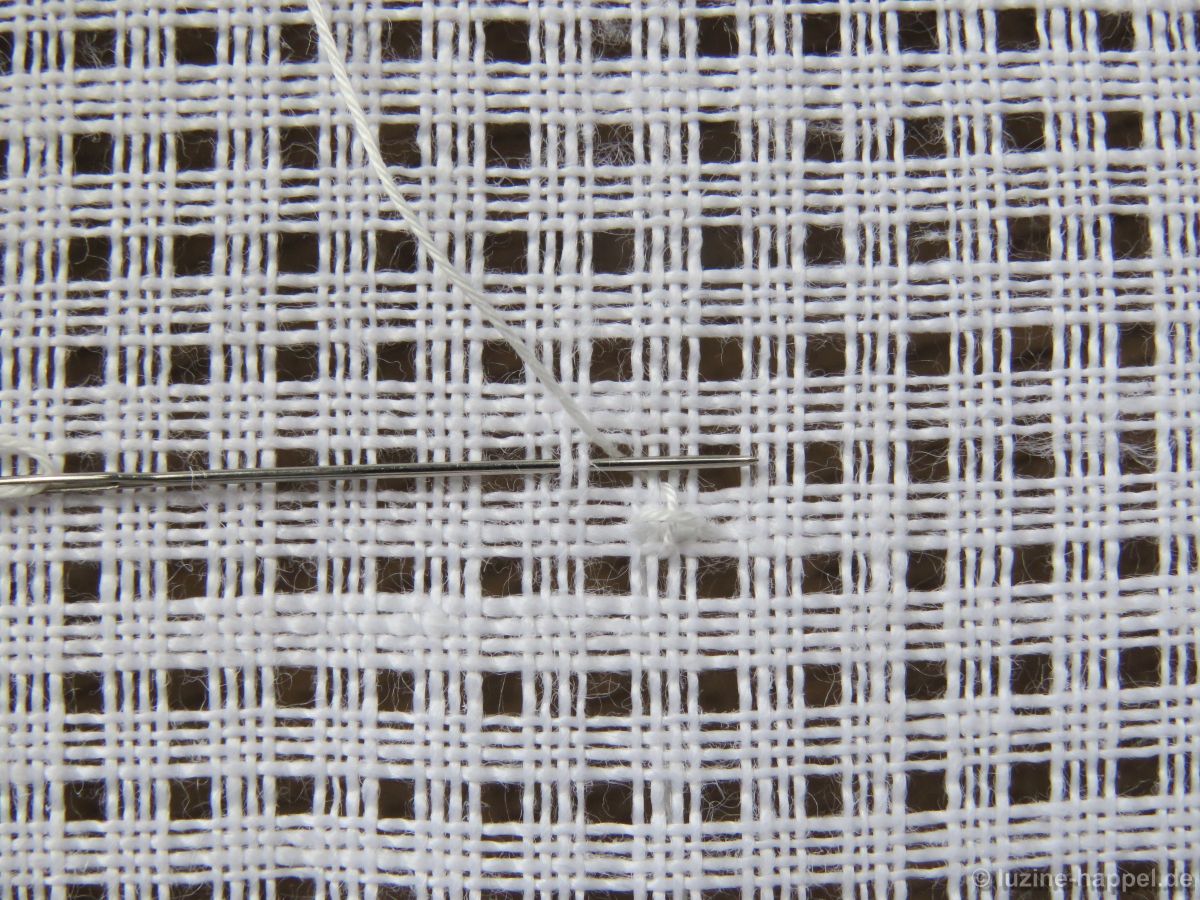
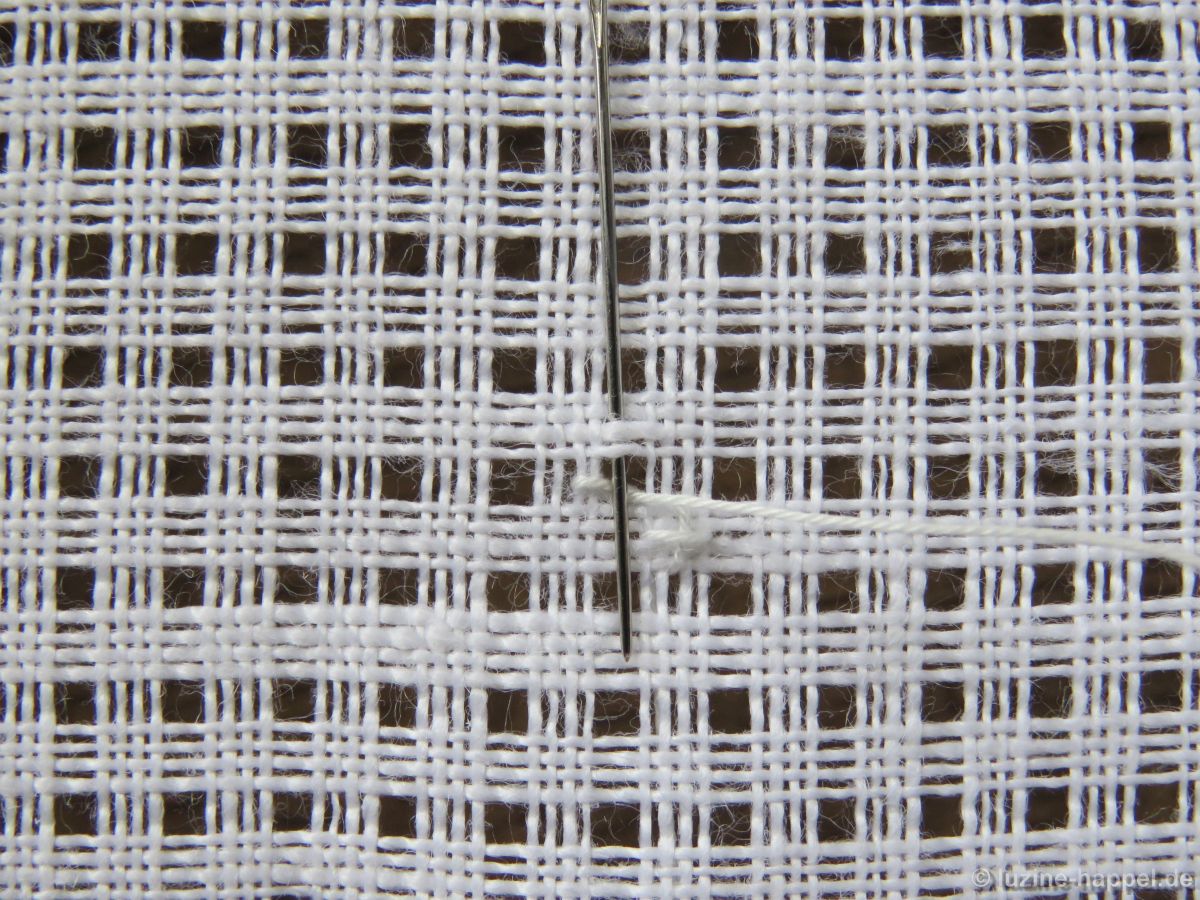
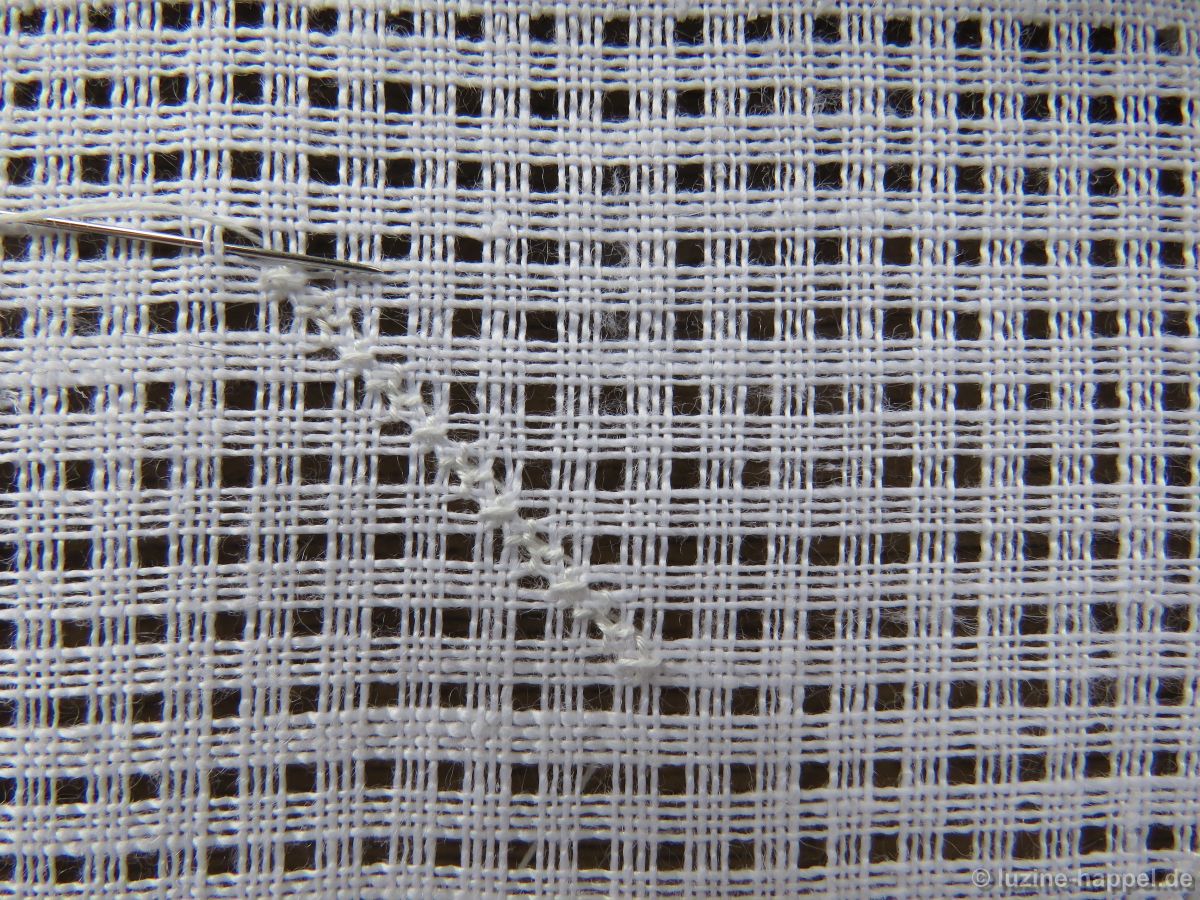
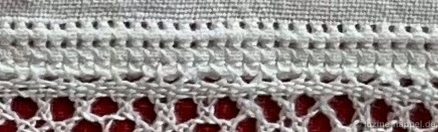
The borders were spaced the same width as the bobbin lace that was used later. After the embroidery was finished, the fabric was cut apart and folded to the back at a distance of 10 fabric threads from the Four-sided stitches.

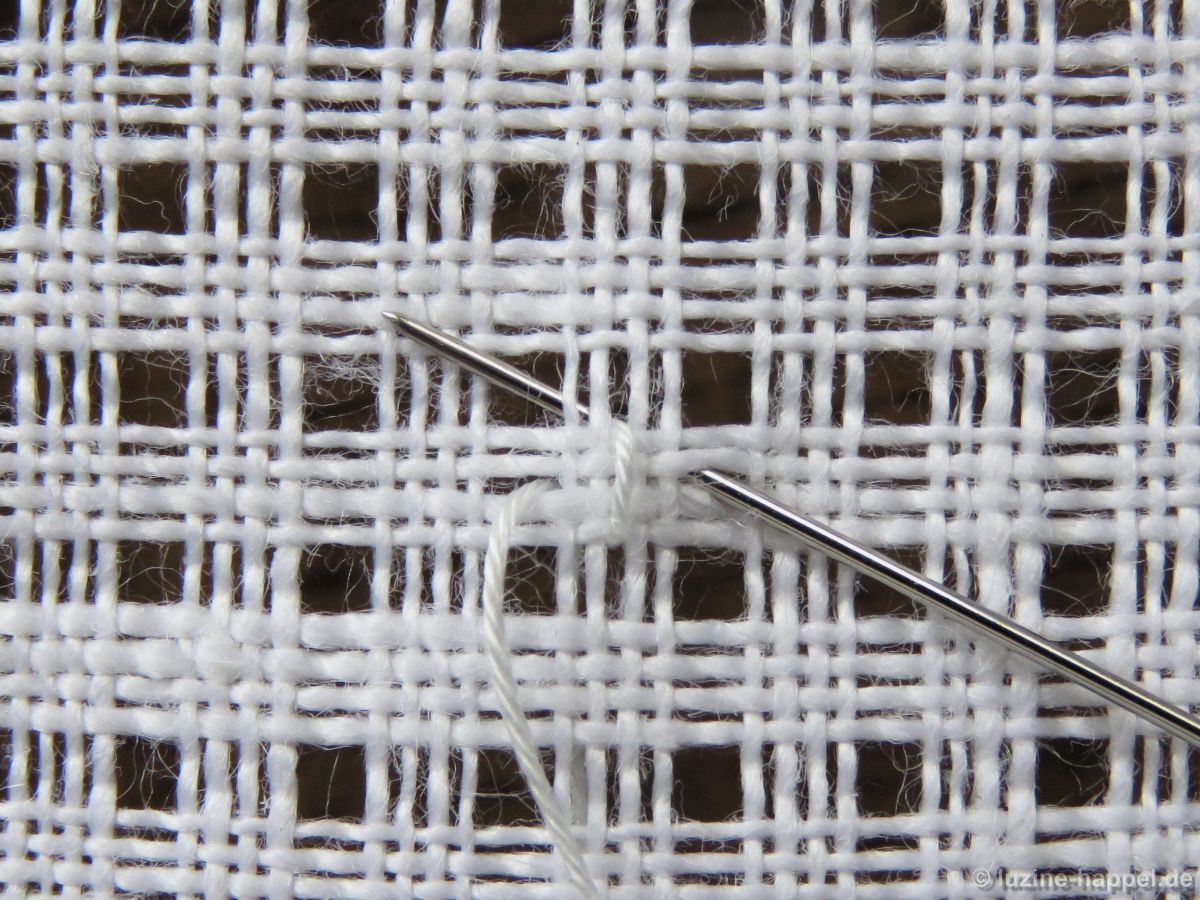
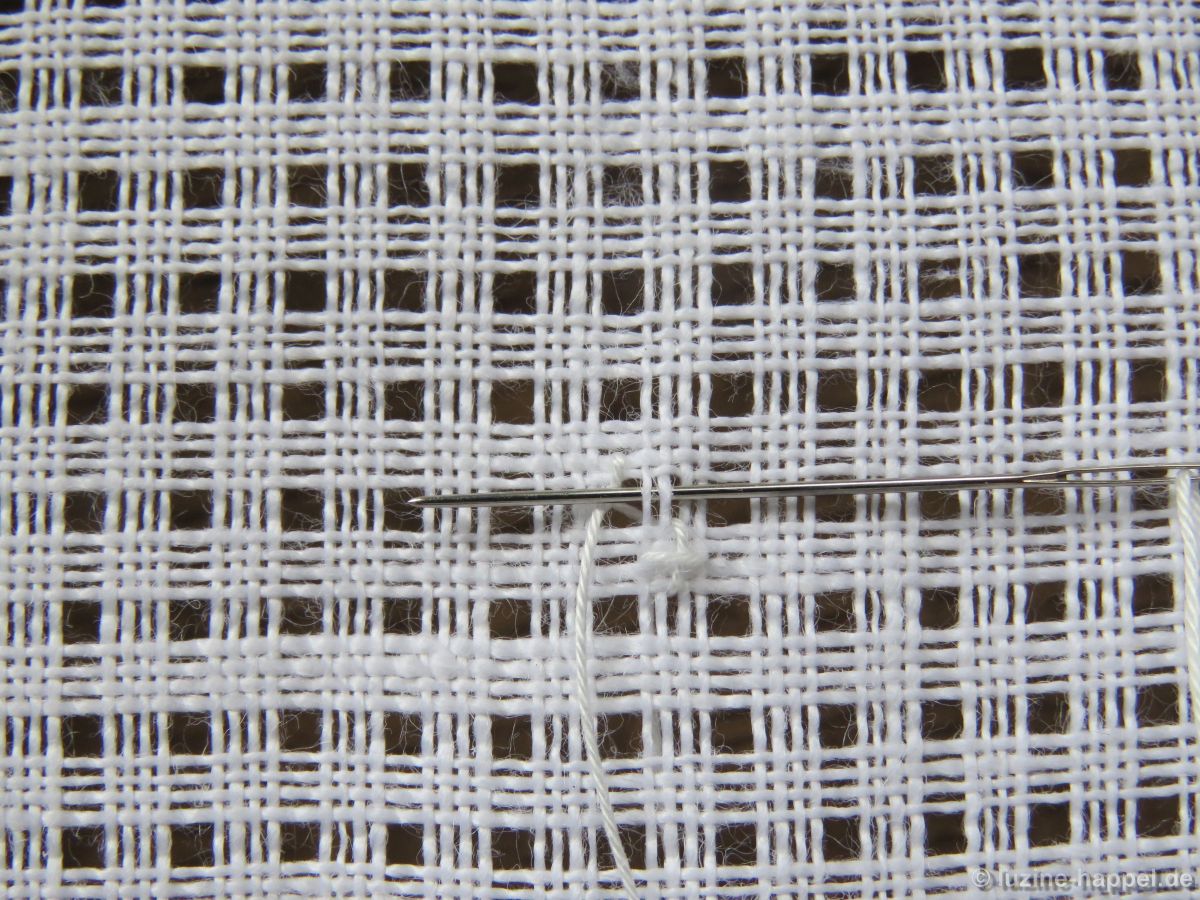
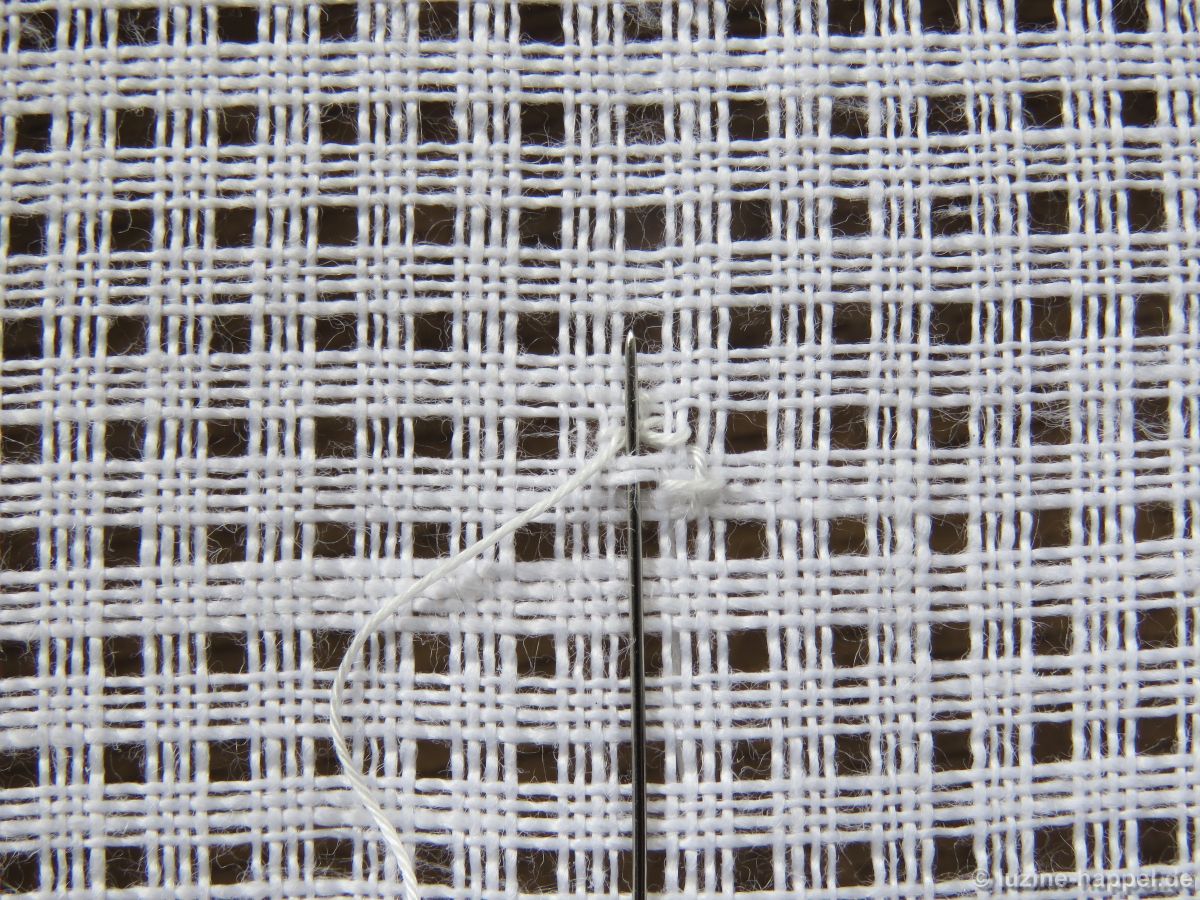
Each edge was finished with two rows of stitches. The first row is a “half Four-sided stitch.” Sylvia Sellmaier found it in a lace book. The second stitch is a traditional Four-sided stitch. Both stitches were worked through two layers of fabric. After completing the edge stitches, the excess fabric was cut off

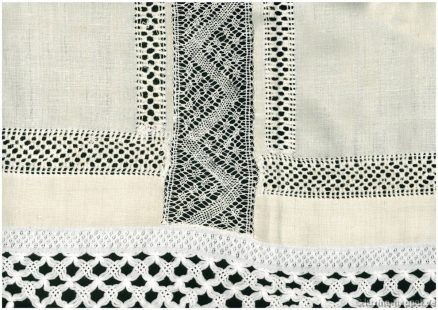
and the lace sewn on.

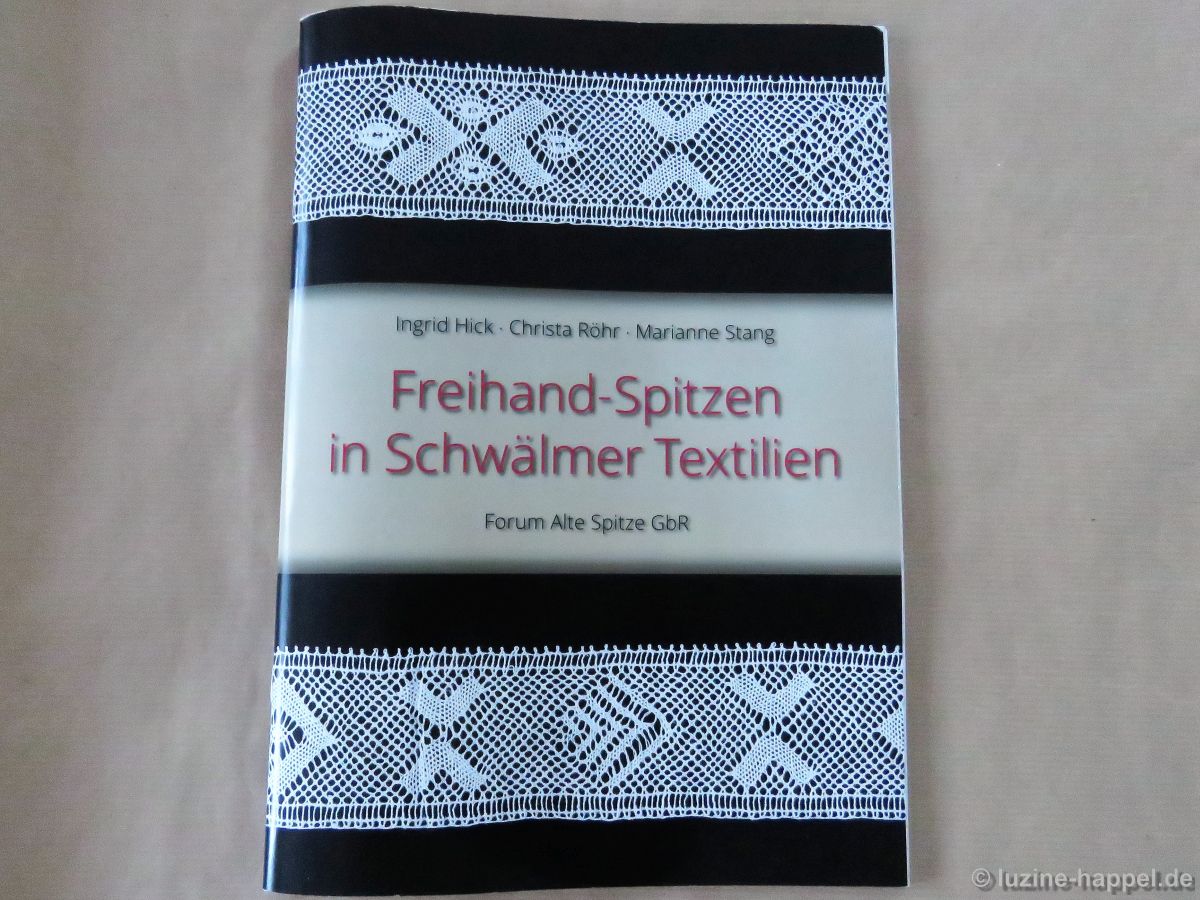
For the insert, Sylvia Sellmaier worked

from a pattern from the book

24_KS_2

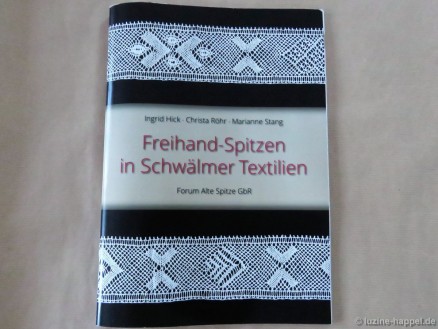
Freihandspitzen in Schwälmer Textilien
Ingrid Hick, Christa Röhr, Marianne Stang
Zu beziehen bei:
Forum Alte Spitze GbR
Am Tomberg 18
52531 Übach-Palenberg

However, she made the lace using the torchon technique.

Sylvia Sellmaier hopes that through this blog post embroiderers/lace makers will be found who have similar pieces and are willing to show them or share their insights with her.

Filling Pattern – No. 576

category: Limet filling pattern
linen used: 13.5/cm thread count
threads used: coton à broder No. 30
stitches used: Crossing Straight and Rose stitches
center: intersection of withdrawn thread lines
one pattern segment: = 6 threads

After I presented with No. 576 a filling pattern for large motifs, I will now show a pattern for small areas. If one pattern segment of No. 576 had a width of 40 fabric threads, this pattern only has a segment of 6 fabric threads.

Since more threads are left than are withdrawn, I call it a Limet pattern, even though it is not a typical Limet pattern.

The filling pattern shown here is a practice exercise only.

First create a grid with an intersection of withdrawn thread lines in the center,

by alternately withdrawing 2 and leaving 4 threads both horizontally and vertically.

The pattern is formed from diagonal rows of alternating Straight stitches that run vertically and horizontally across the 4-thread squares of fabric,

and Rose stitches, the centers of which lie in the free squares and which pick up 2 fabric threads on each side.

This changes the position of the fabric threads. Small oval gaps are created that make up the pattern at the end.

Bring needle up in the middle of the upper edge of a square of 4 fabric threads,

*move the needle vertically downwards, insert there and bring needle up two fabric threads diagonally to the top left.

Move the needle horizontally to the right, insert it and bring it up in the free square on the left above the square of 4 fabric threads.

This is the center of the first Rose stitch, which started with a stitch to the left

and continues counterclockwise.

With the fourth stitch – unfortunately not visible here in the picture – you also have to pick up the sliding thread on the back so that the newly created holes remain open and clearly defined.

From the end of the Rose stitch, move the needle diagonally to the left to the middle of the upper edge of the next 4-thread square.*

Always repeat the steps (*)

and embroiders row after row,

until the entire area is filled.

Only after washing does the pattern developes its full effect.