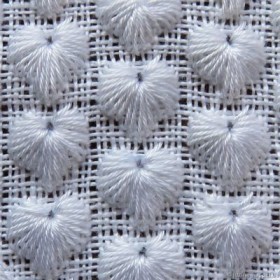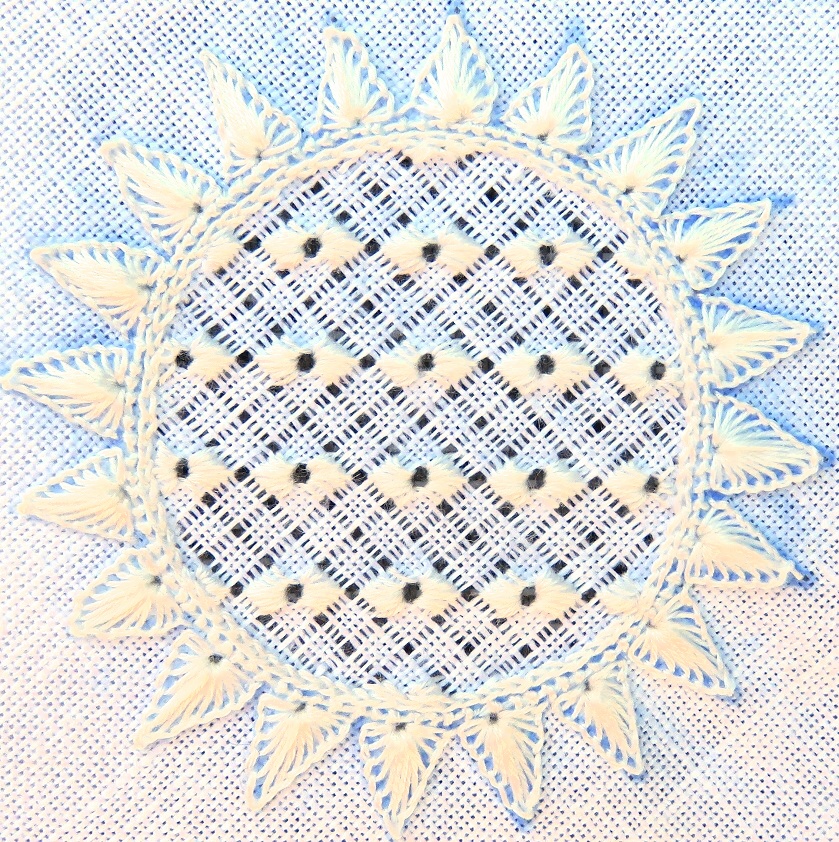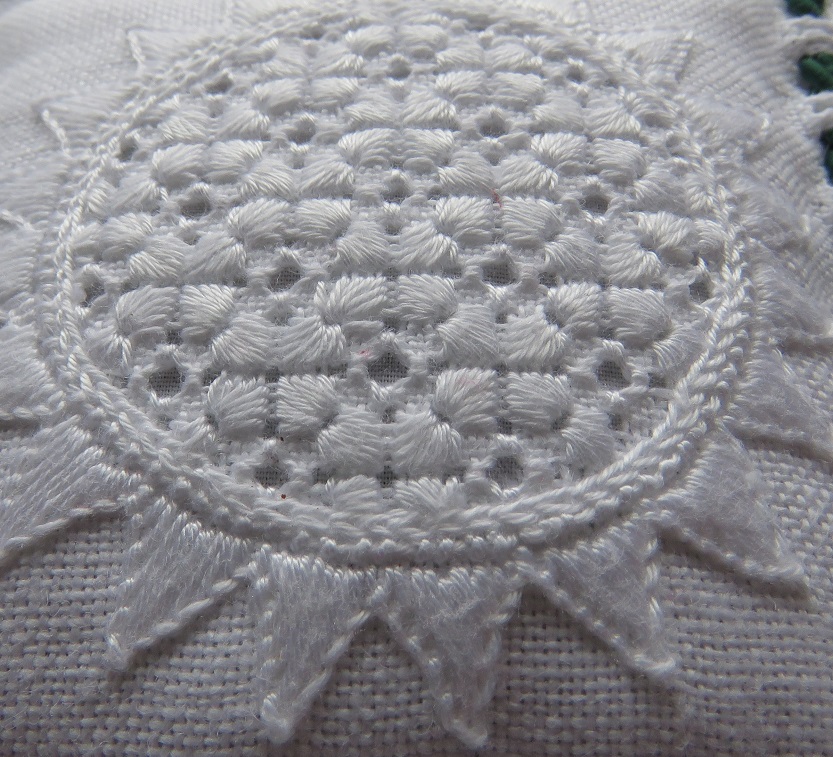
category: Limet-Filling pattern
stitches used: Lazy Daisy and Rose stitches
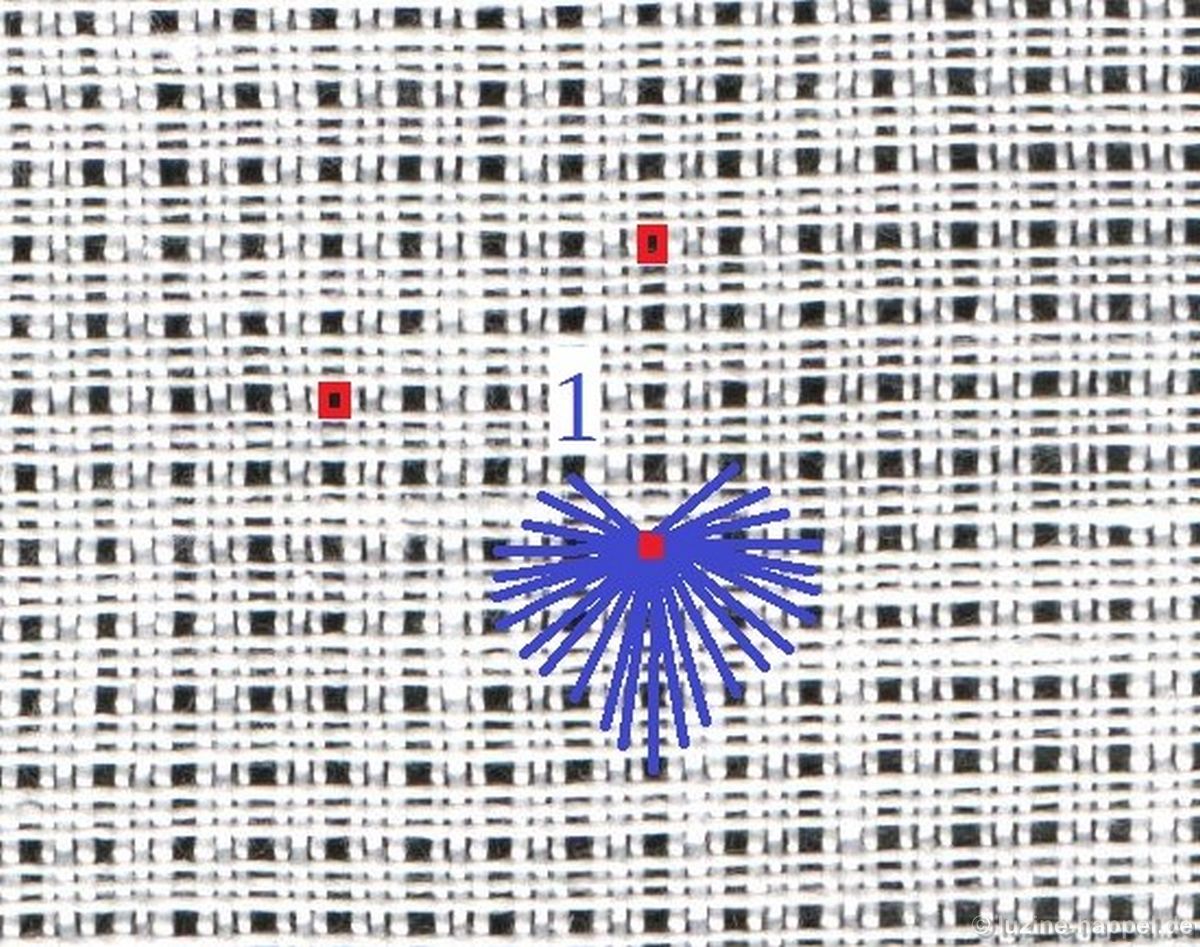
center: intersection of withdrawn thread lines (in other shapes or motifs: longitudinal axis = withdrawn thread line)
The last filling pattern on my blog was number 481.
Since then I published the Star book that contains 58 different star filling patterns.
So the next filling pattern on my blog is number 540.
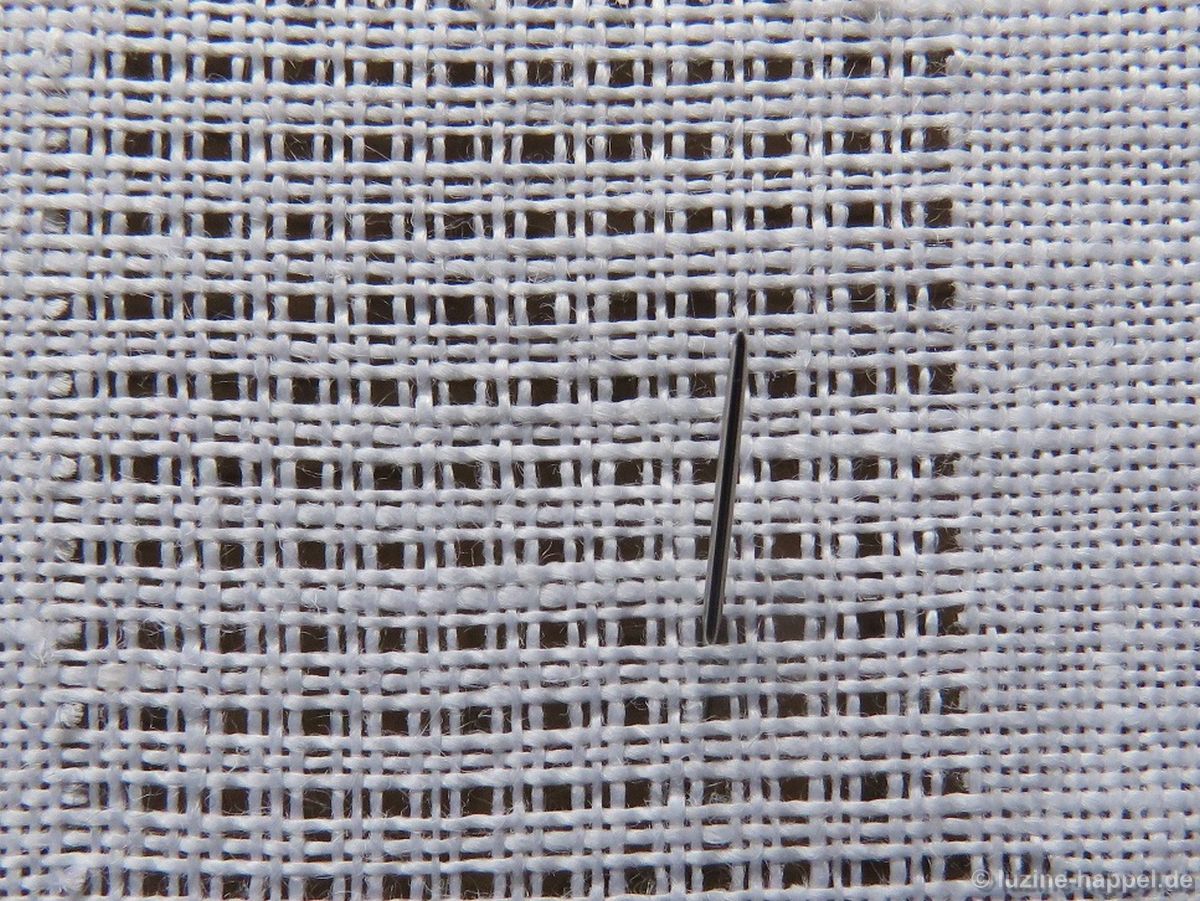
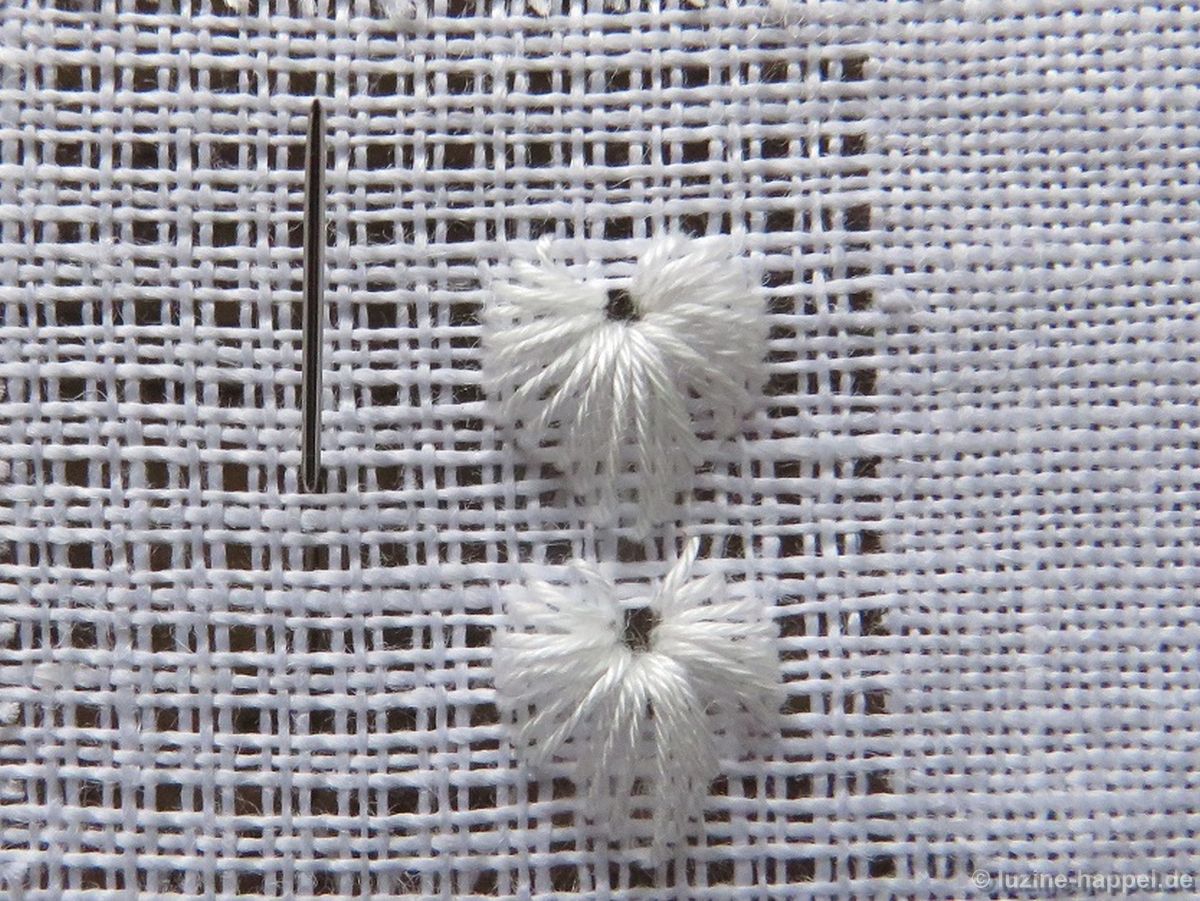
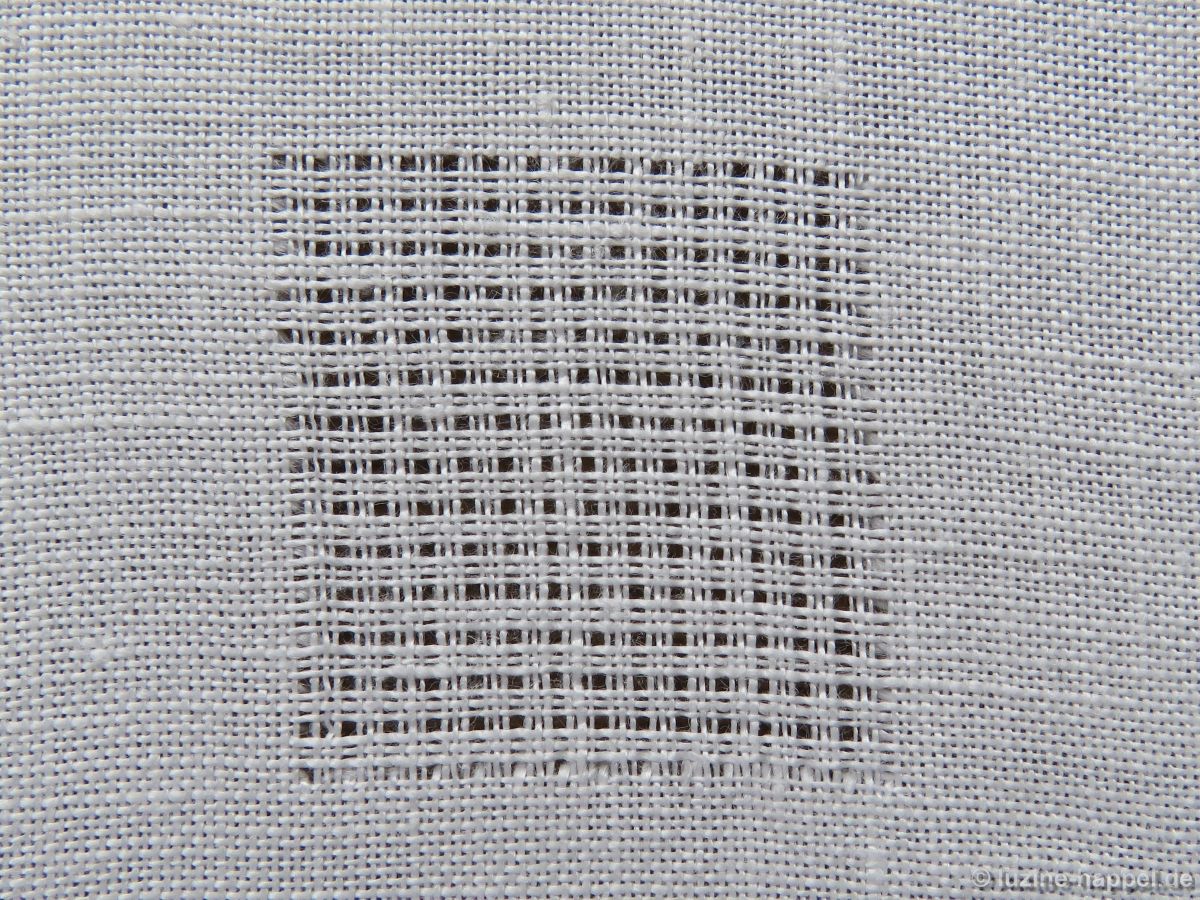
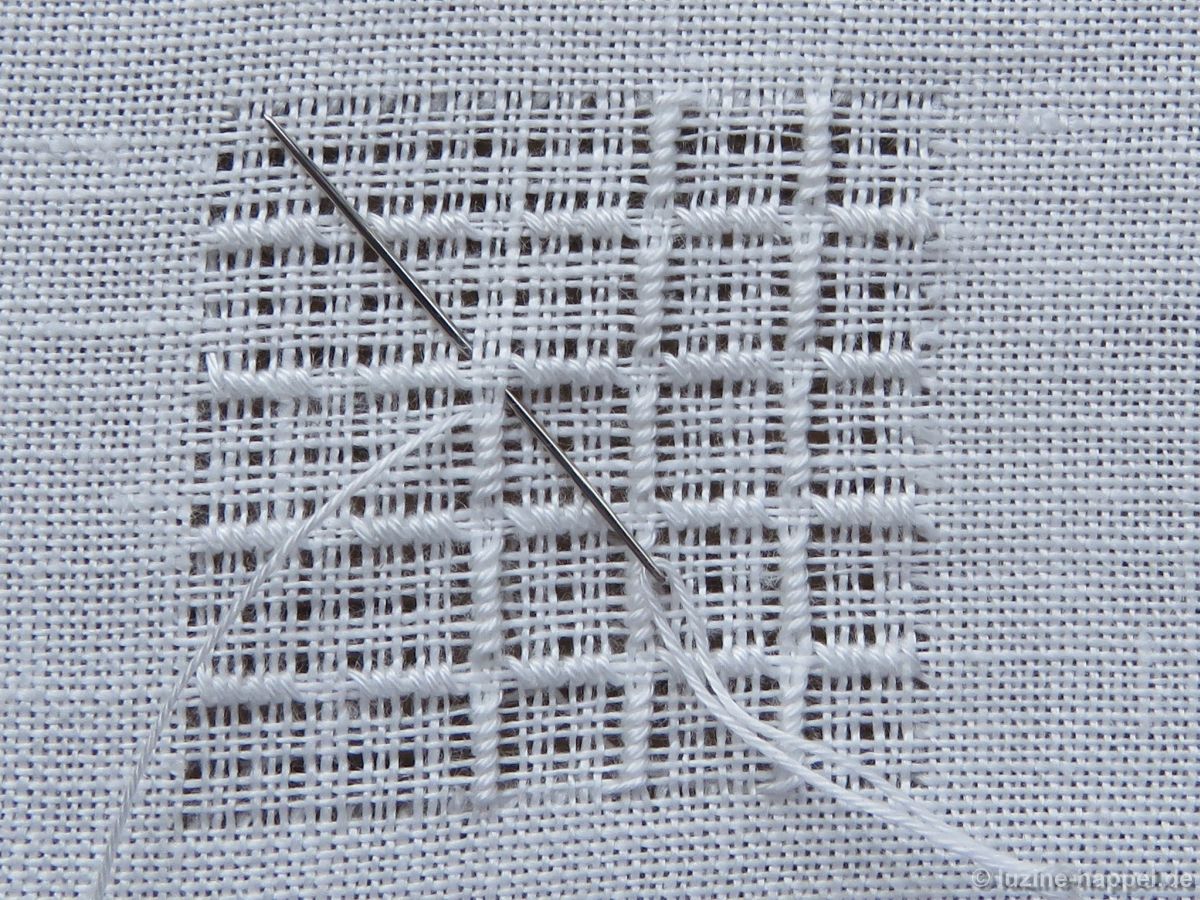
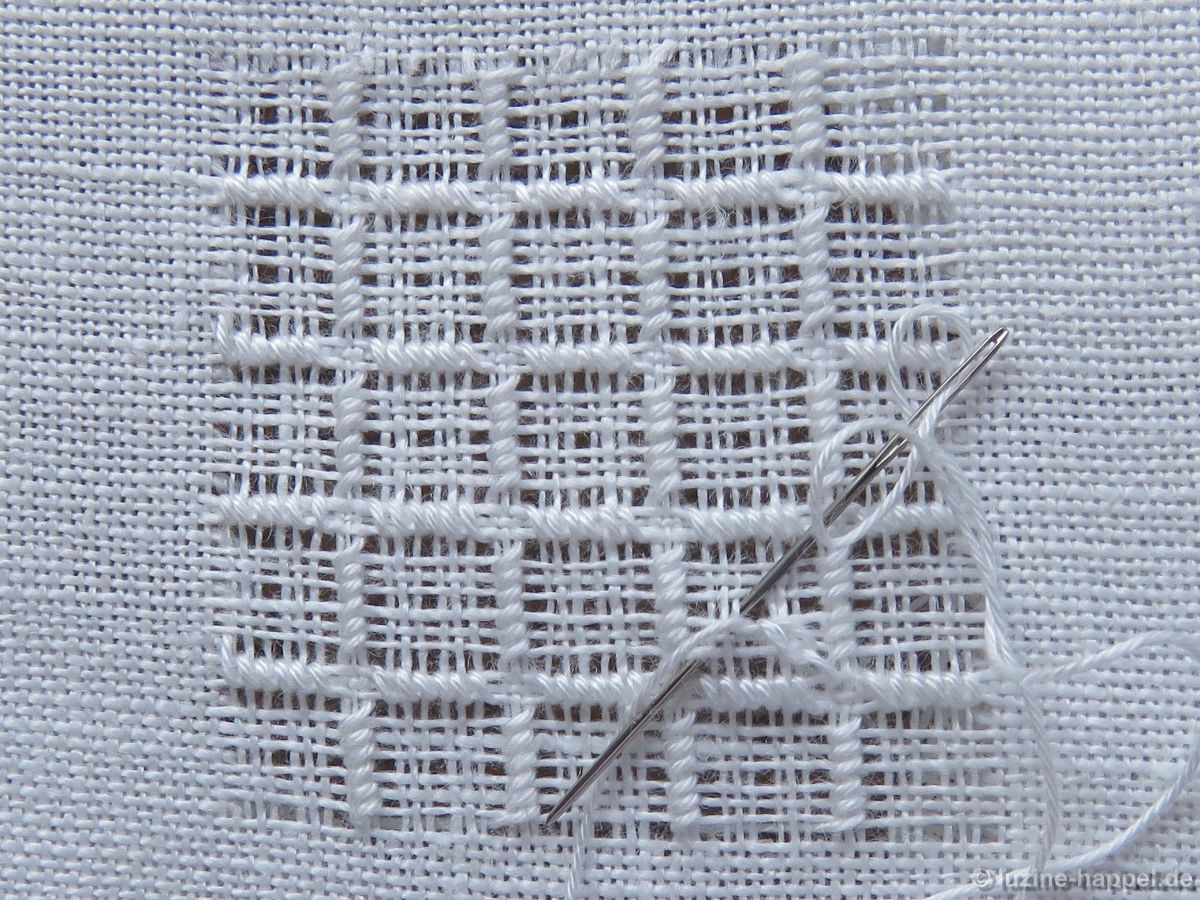
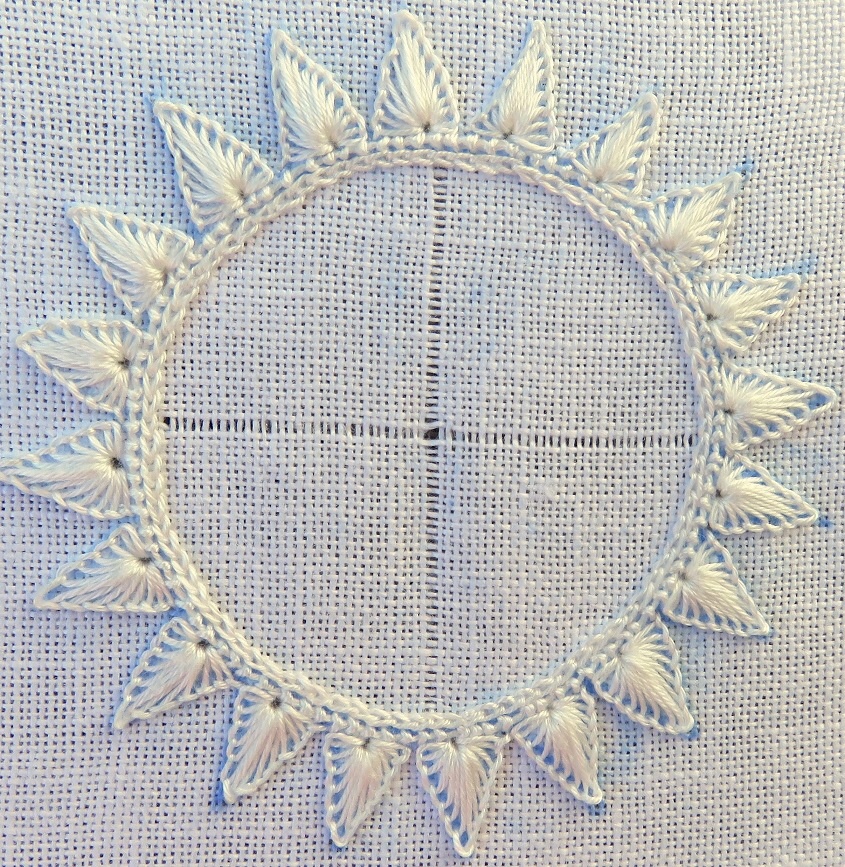
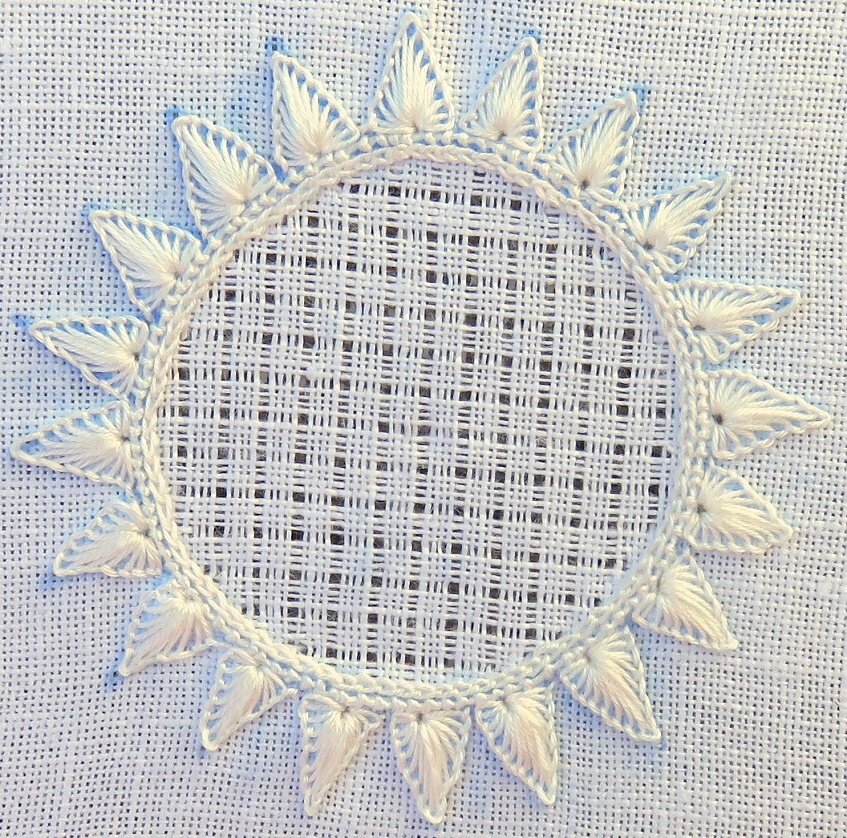
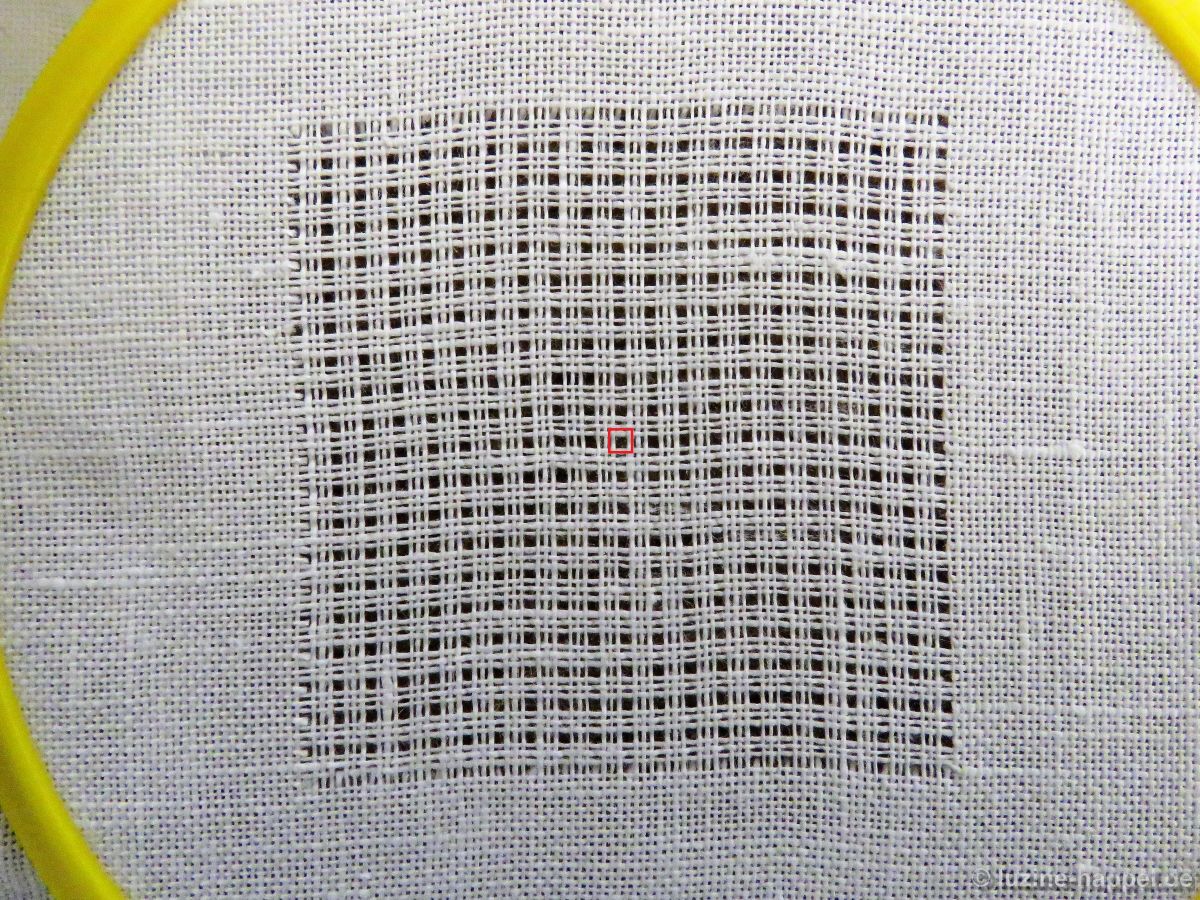
First, establish a Limet grid by cutting 1, leaving 3, vertically and horizontally.
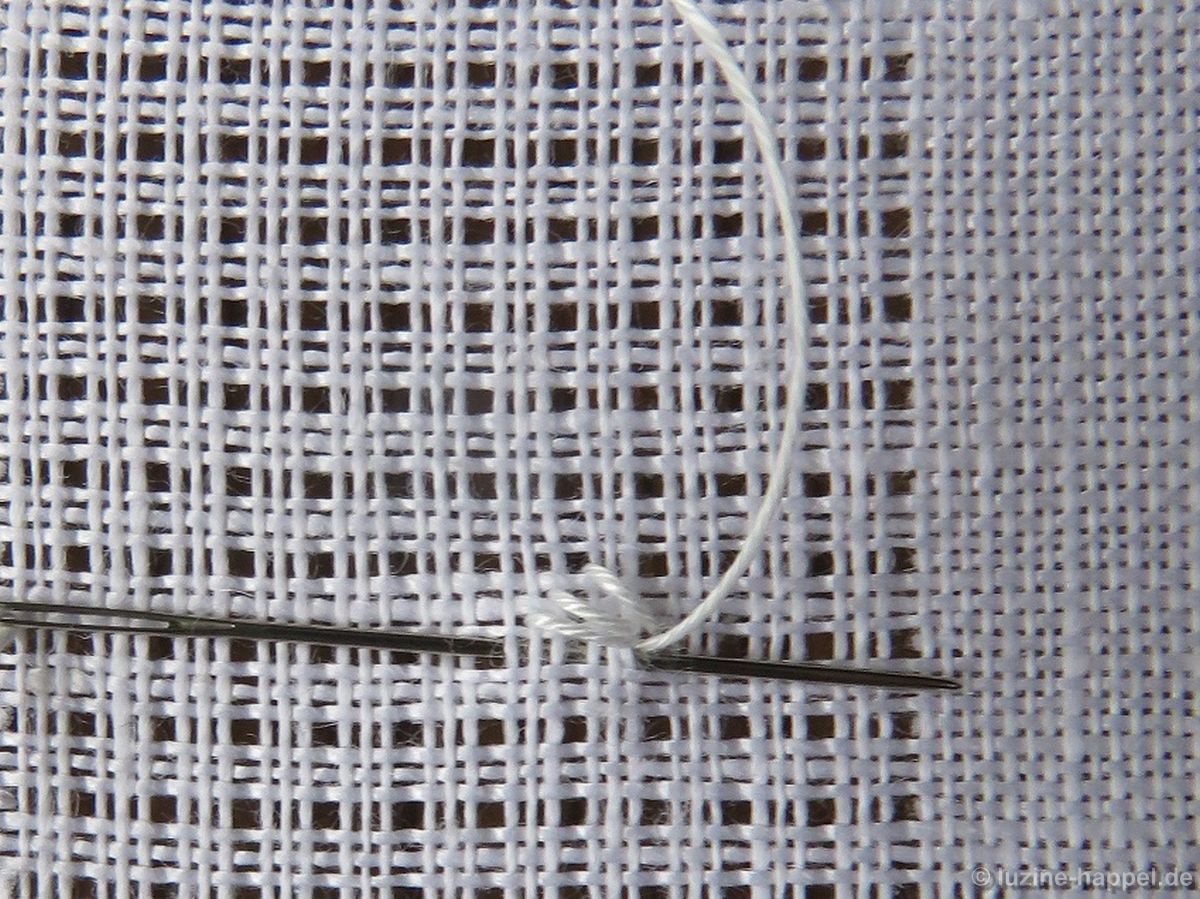
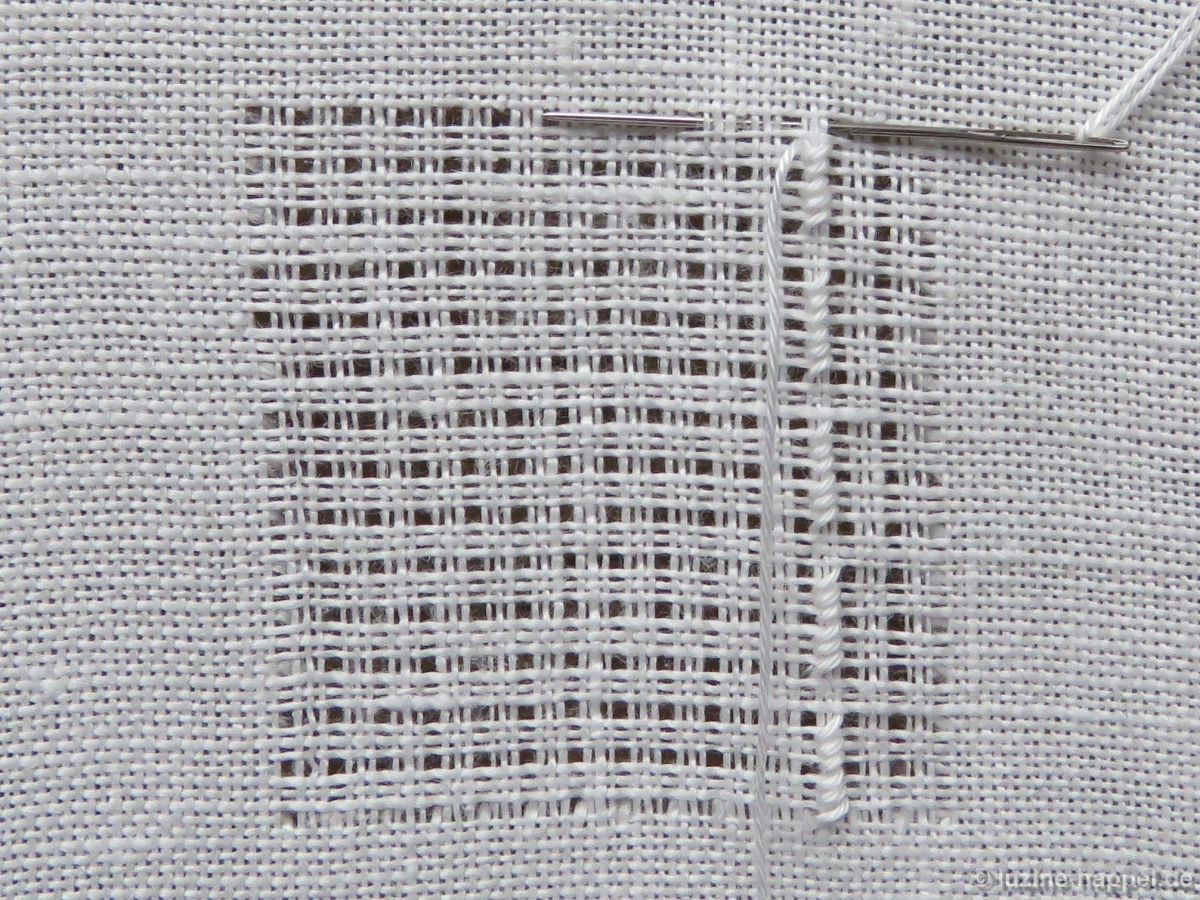
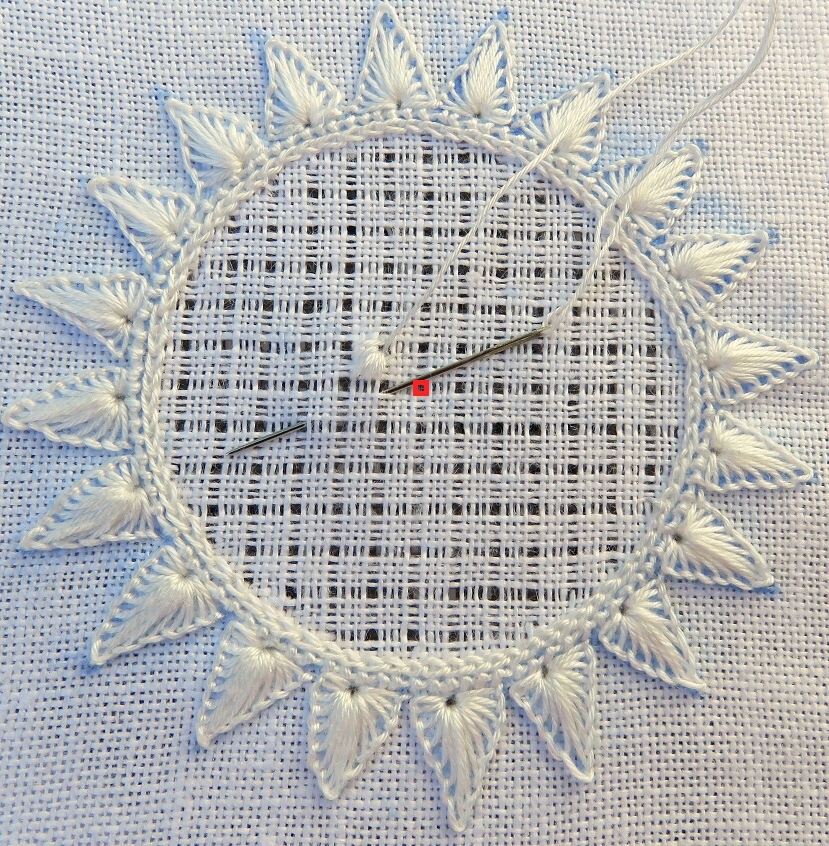
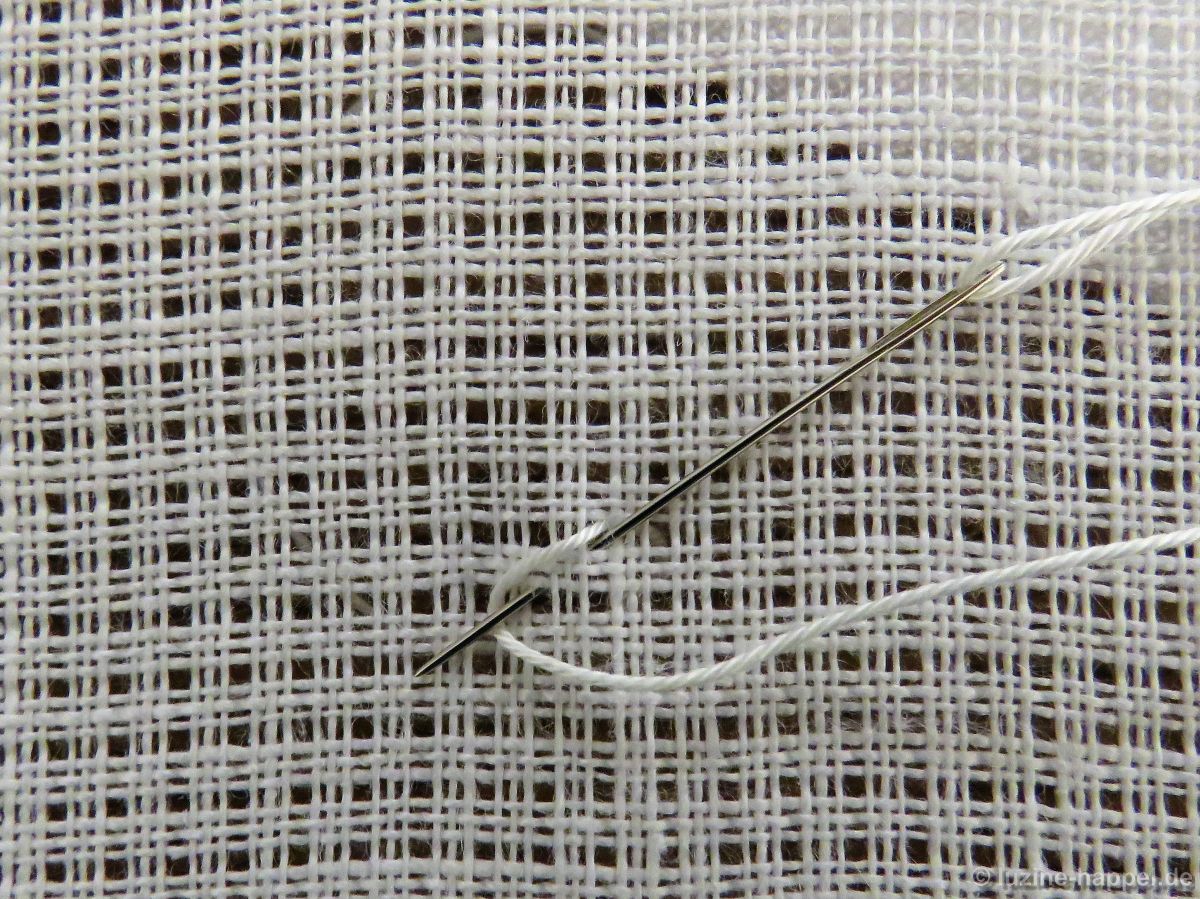
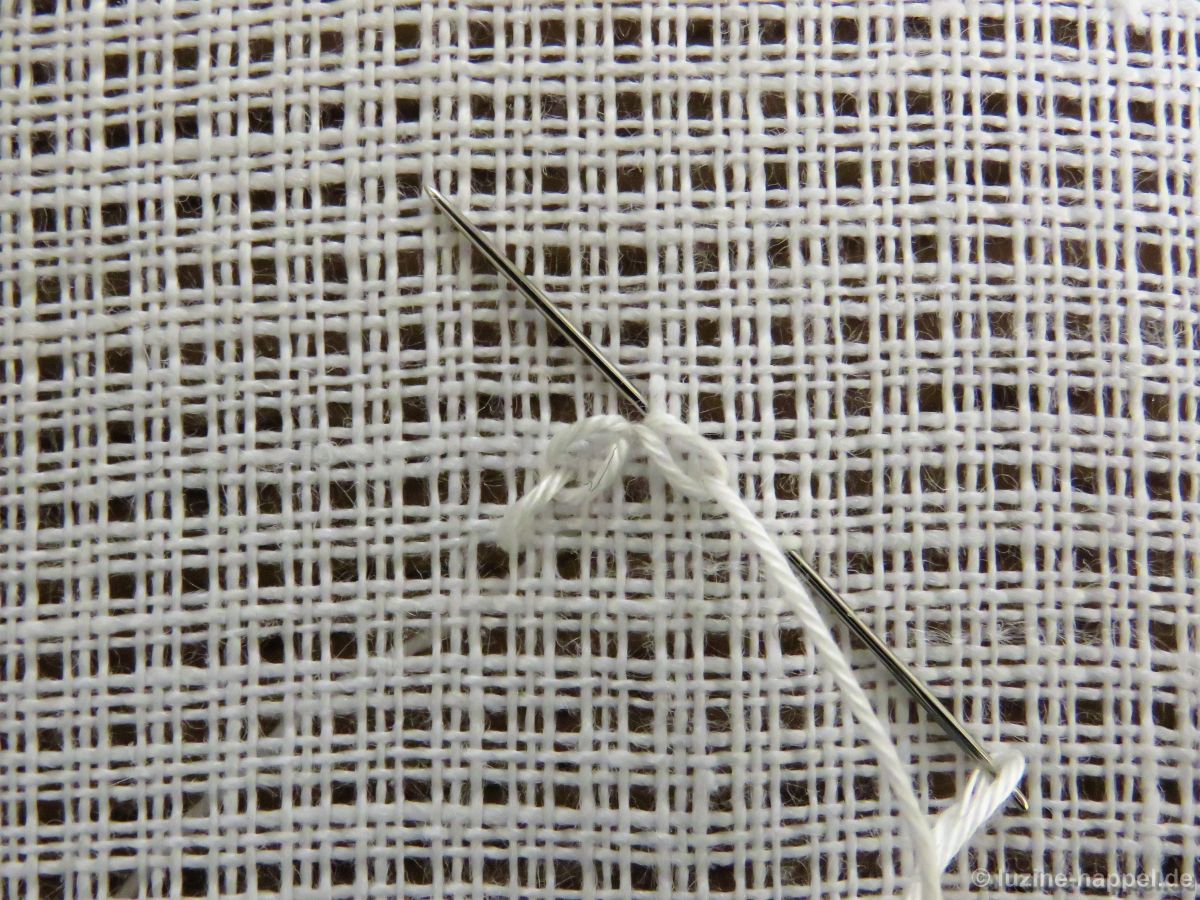
Bring the needle up in the center hole and pull the thread through.

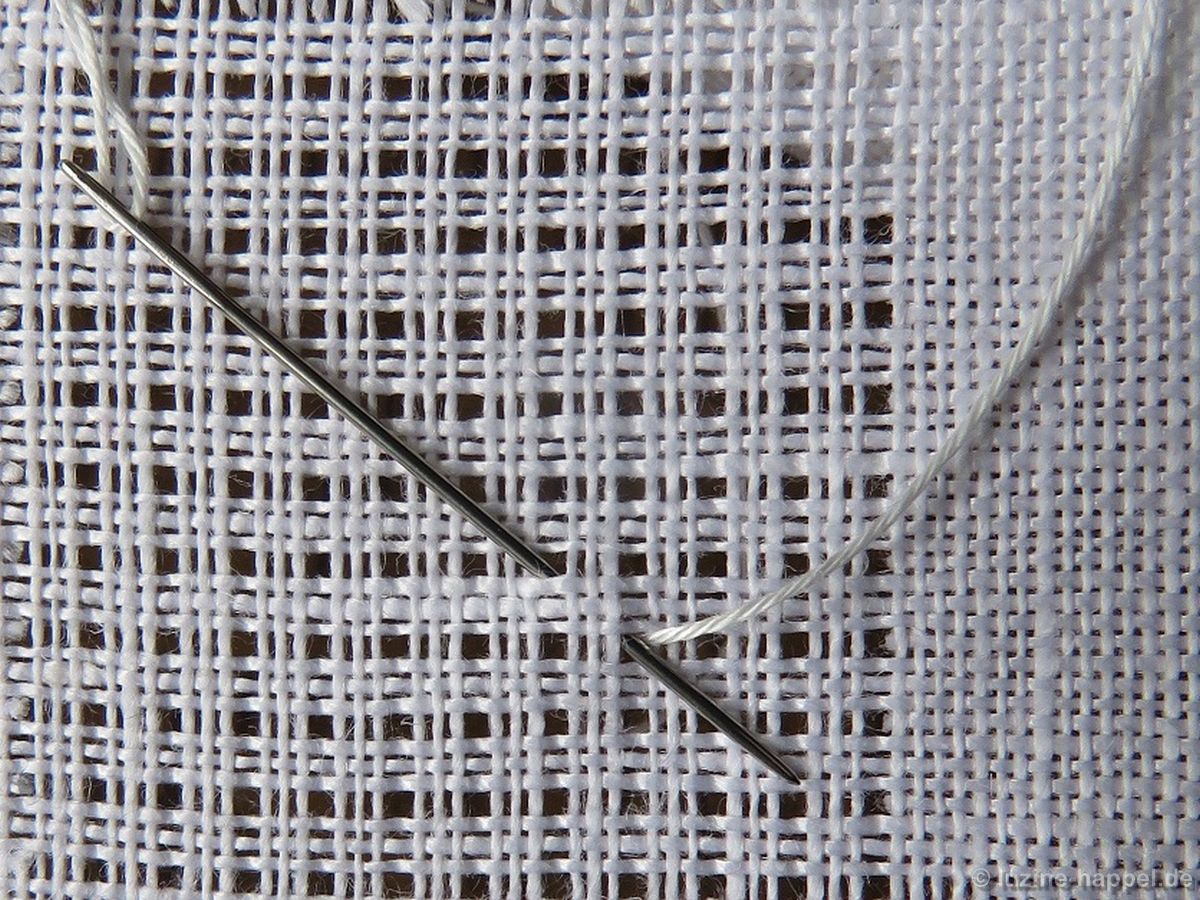
Lay the thread in a loop to the left and down.
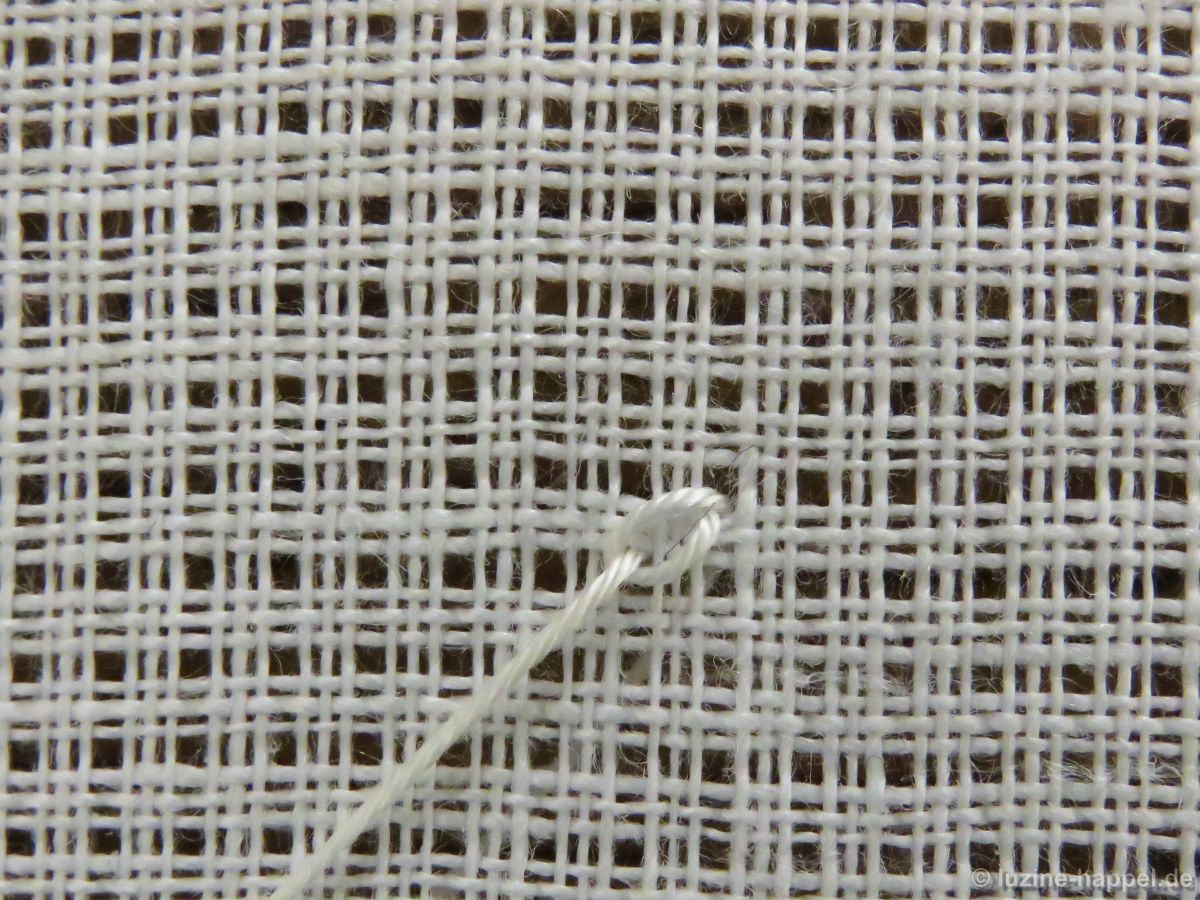
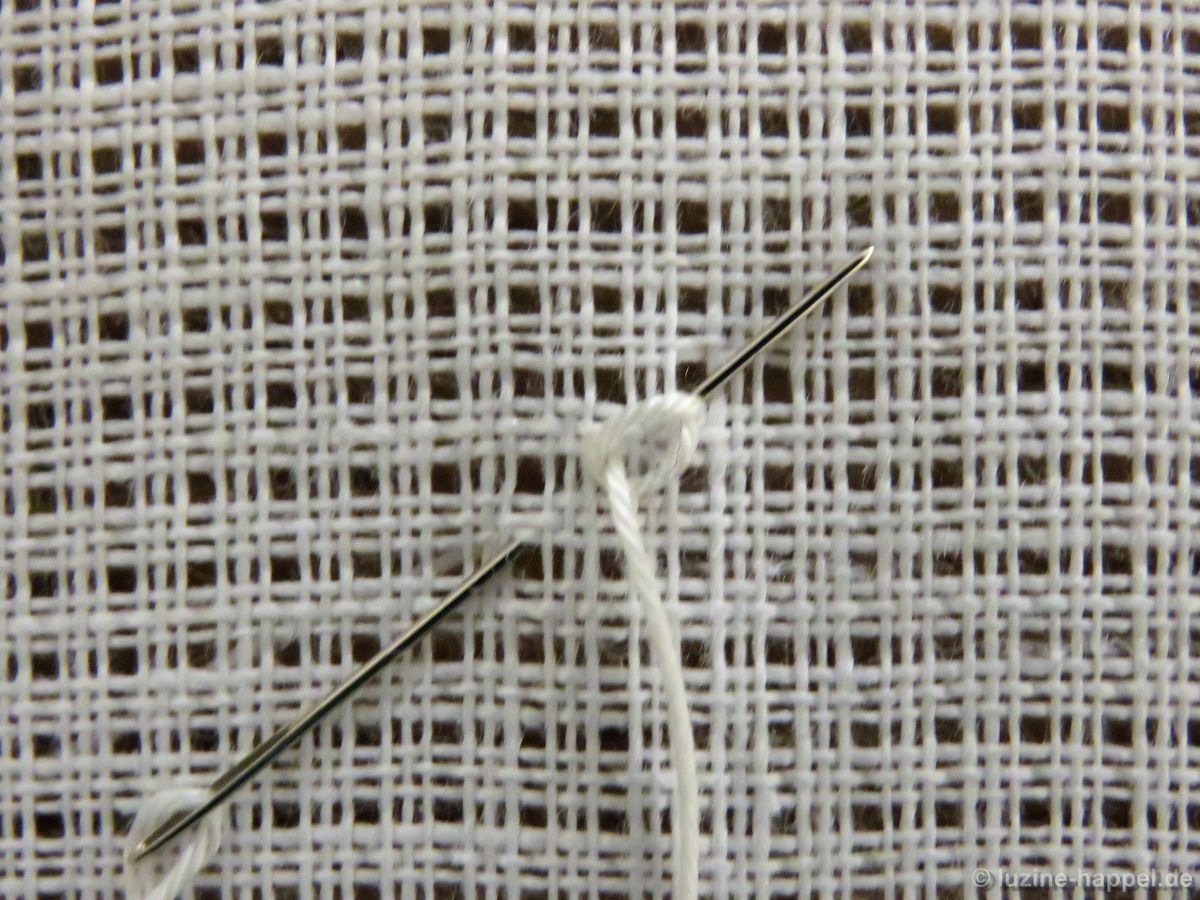
Insert the needle again in the center hole and bring it up 1 square diagonally left down (3 threads down and 3 threads to the left).
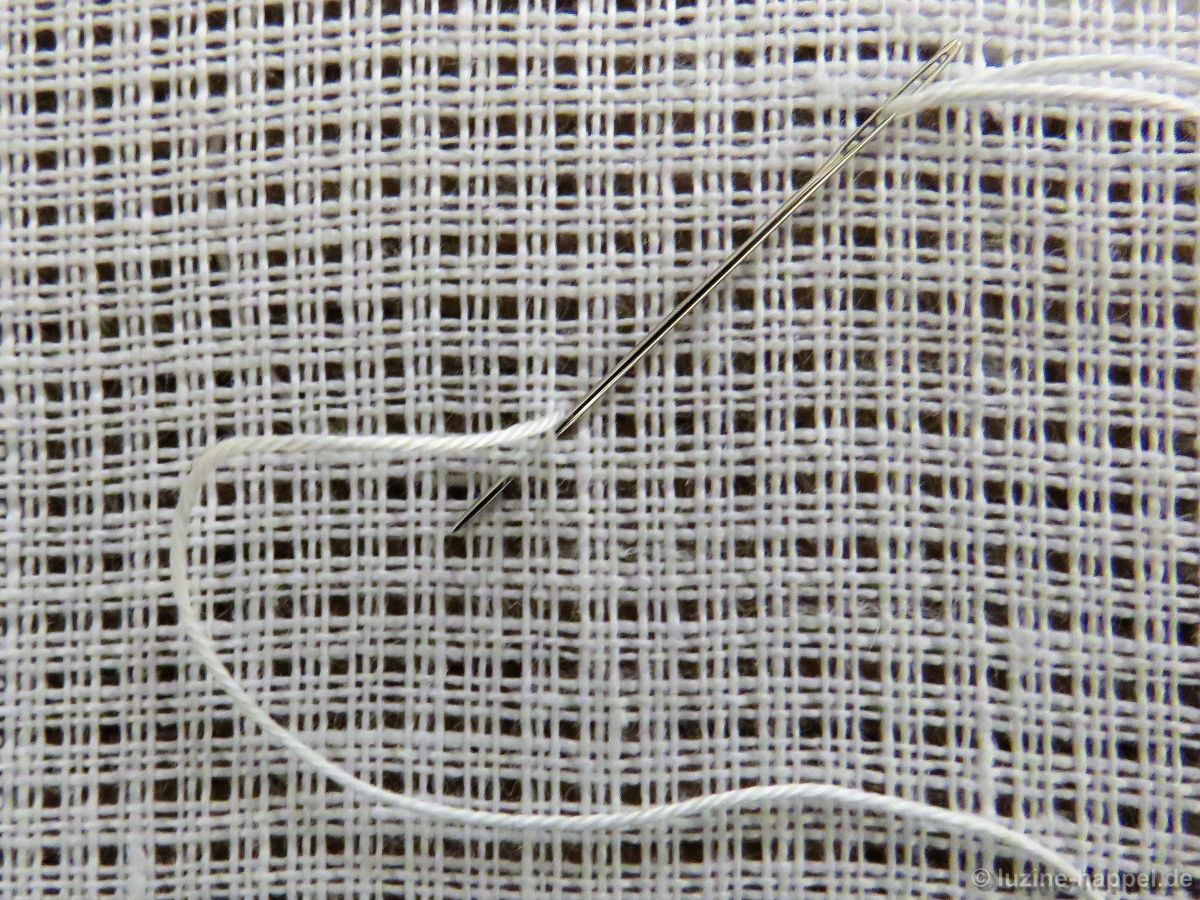
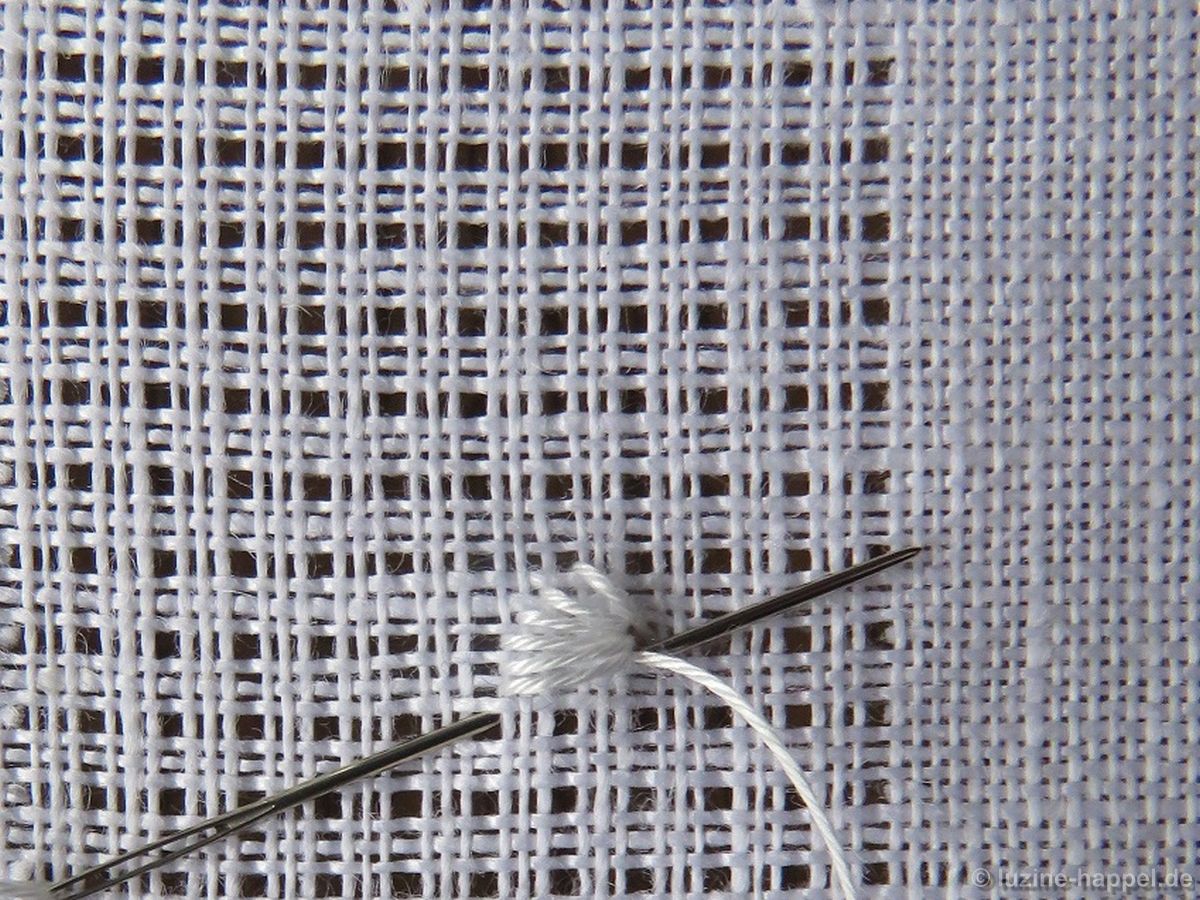
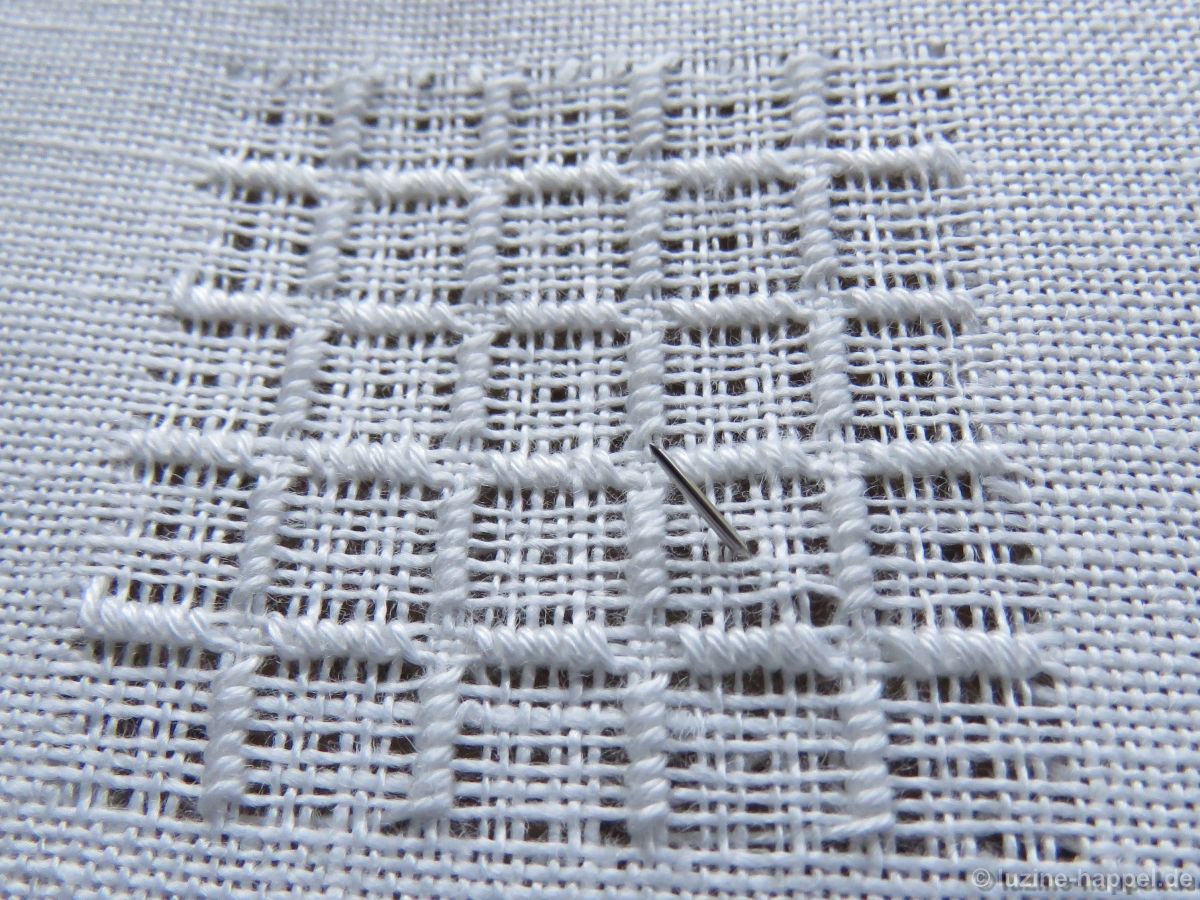
Lay the loop beneath the needle.
Pull the thread through and tighten it a little bit drawing it in the direction of the loop. Be careful to not tighten too much – the loop should keep its hoof shape.
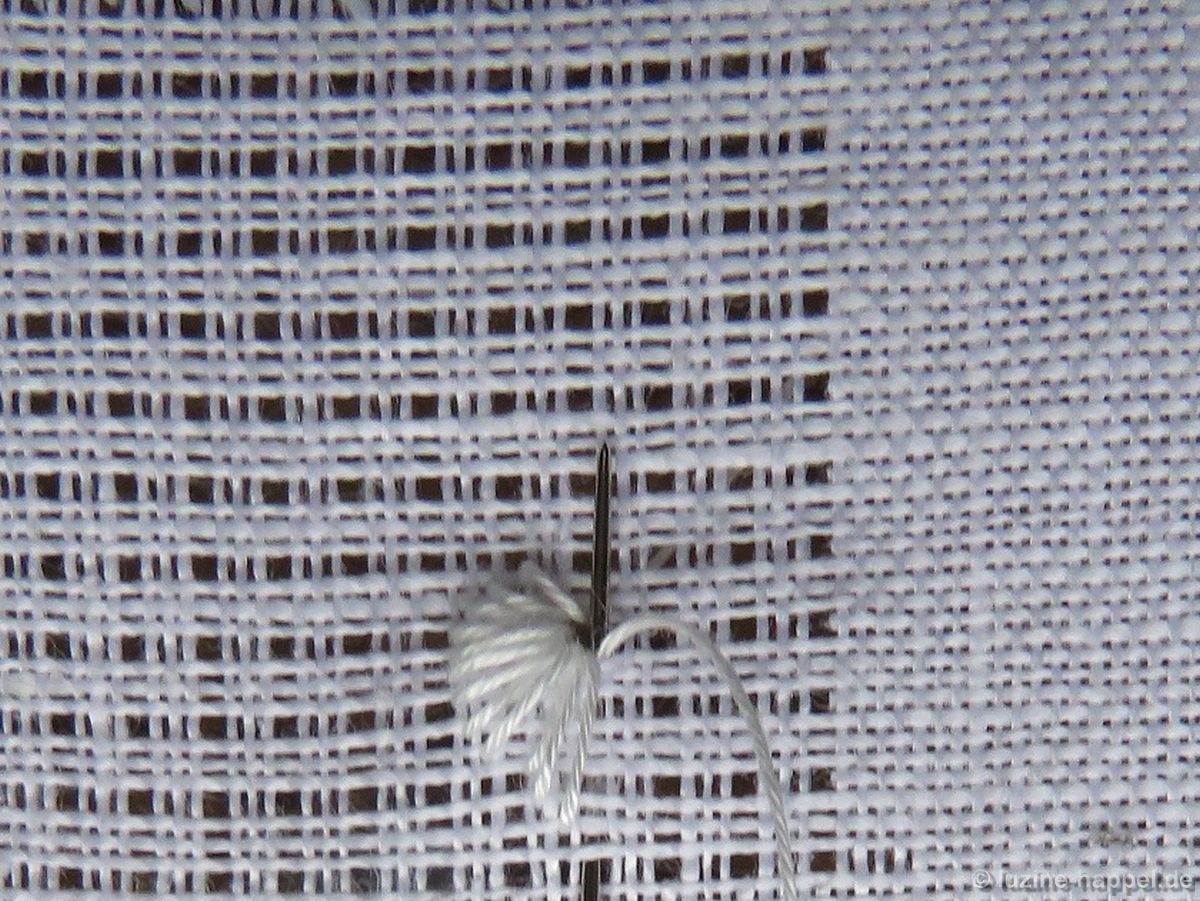
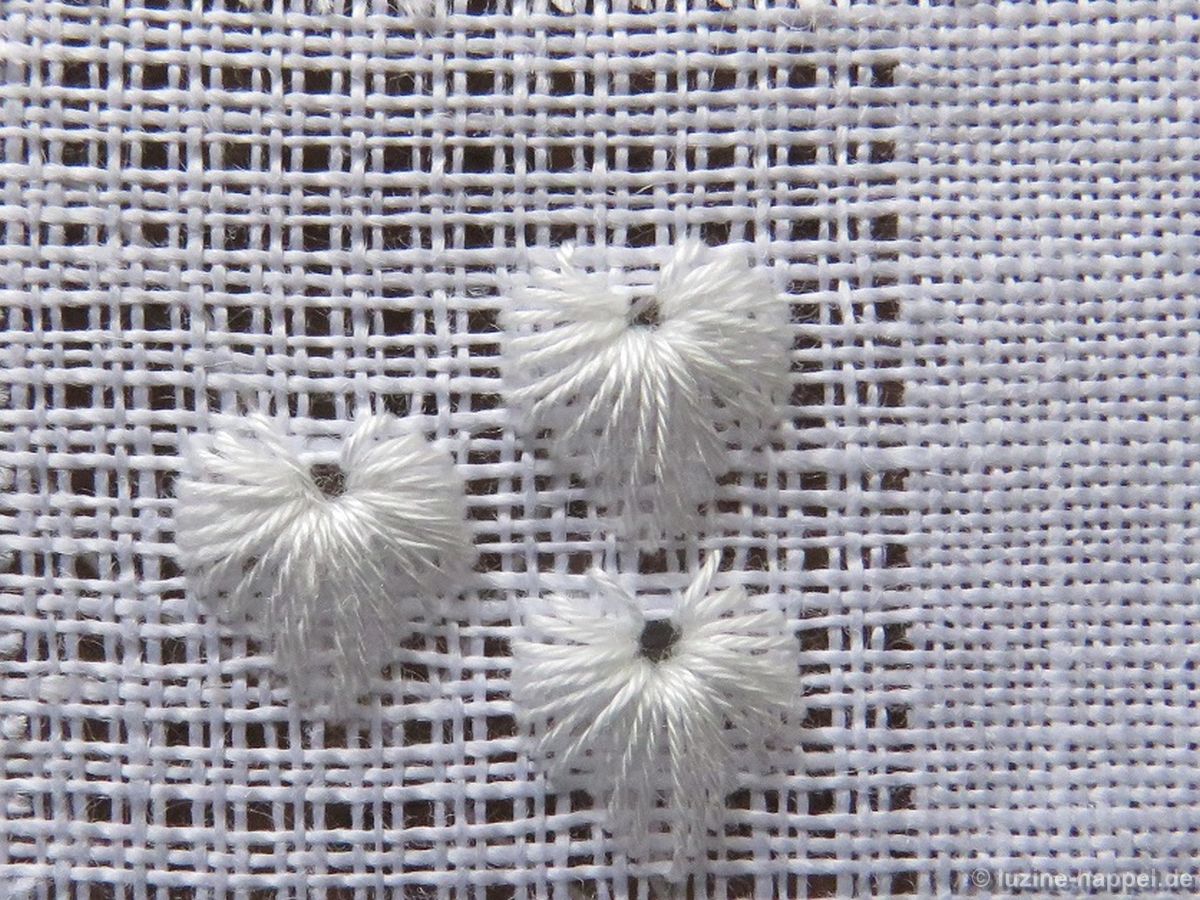
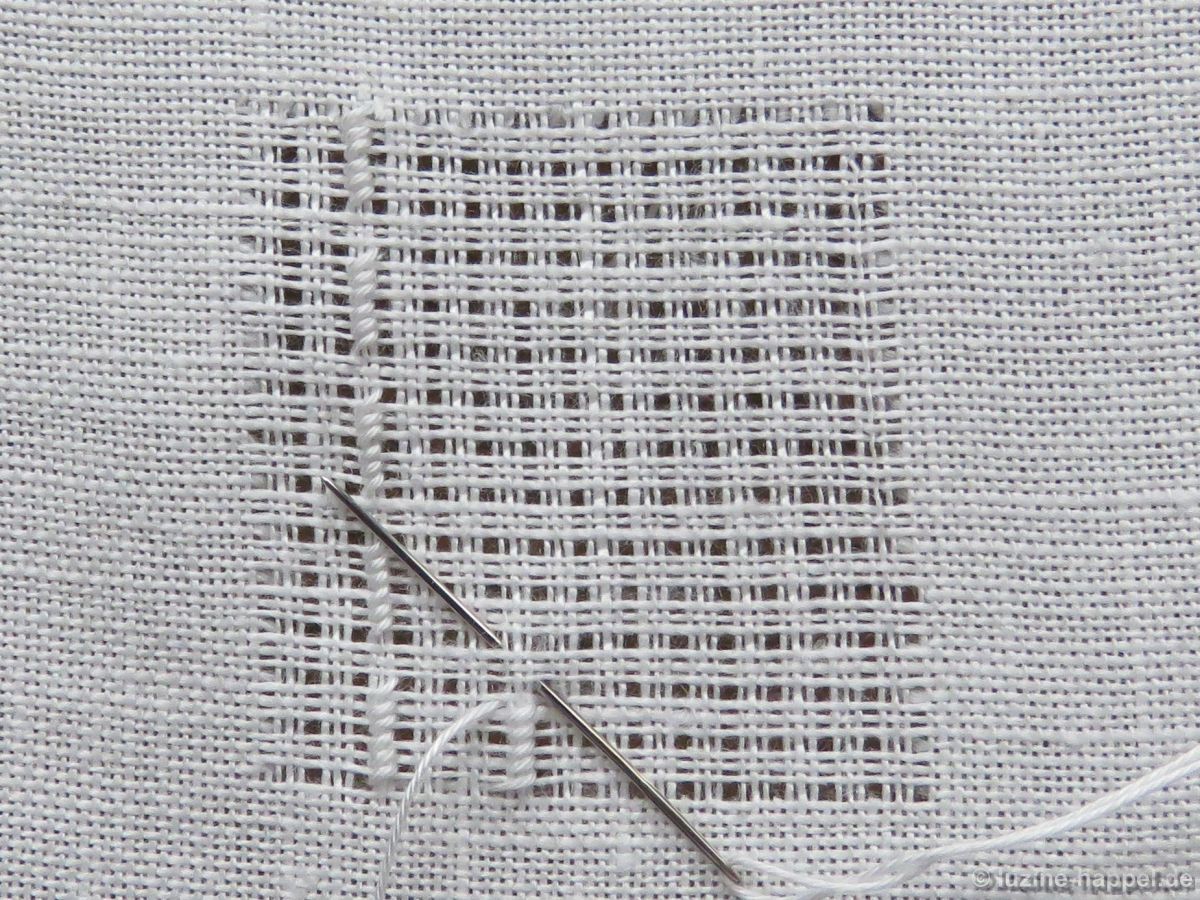
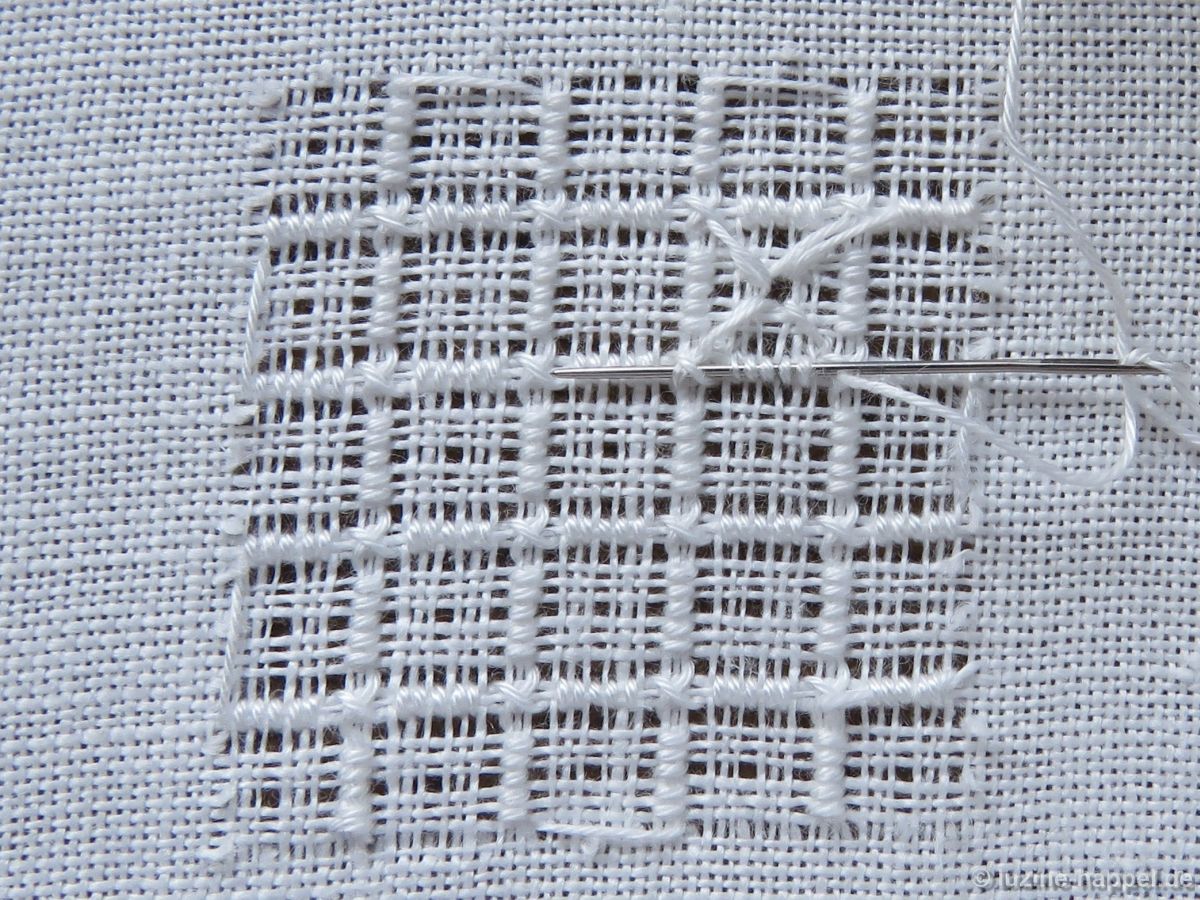
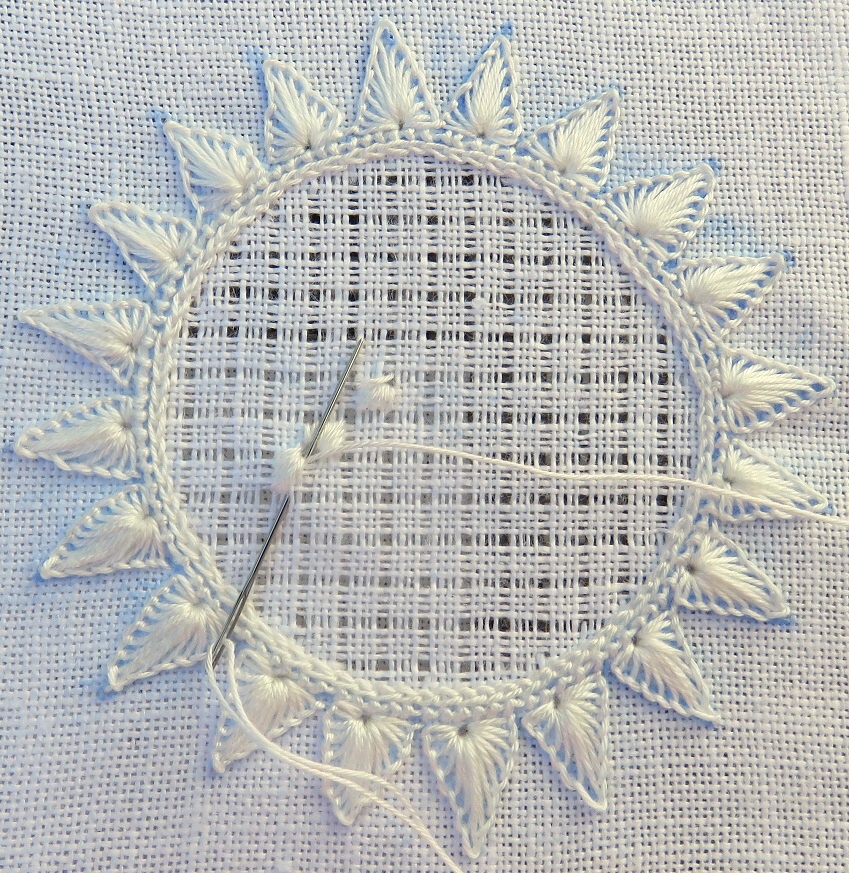
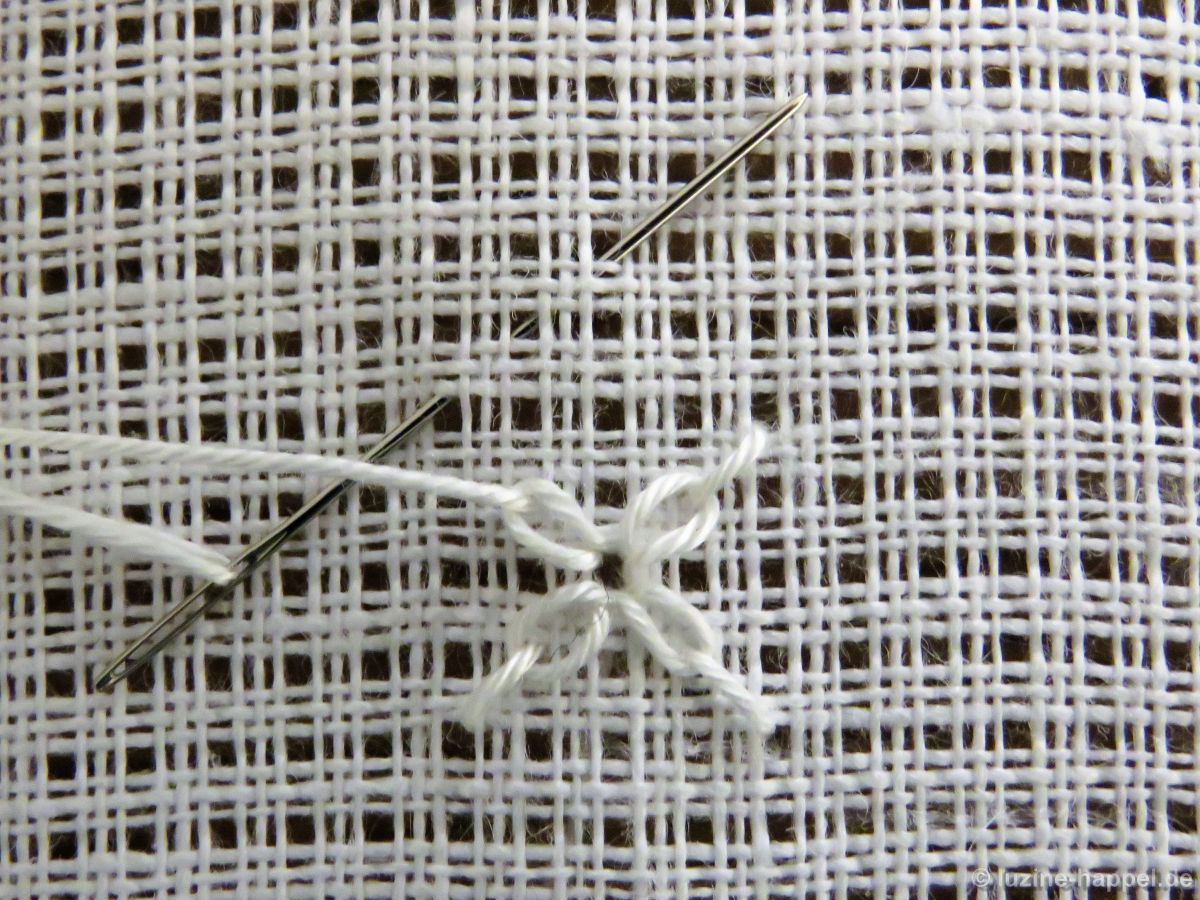
Cross over 1 square diagonally left down, insert the needle and bring it back up through the center hole.
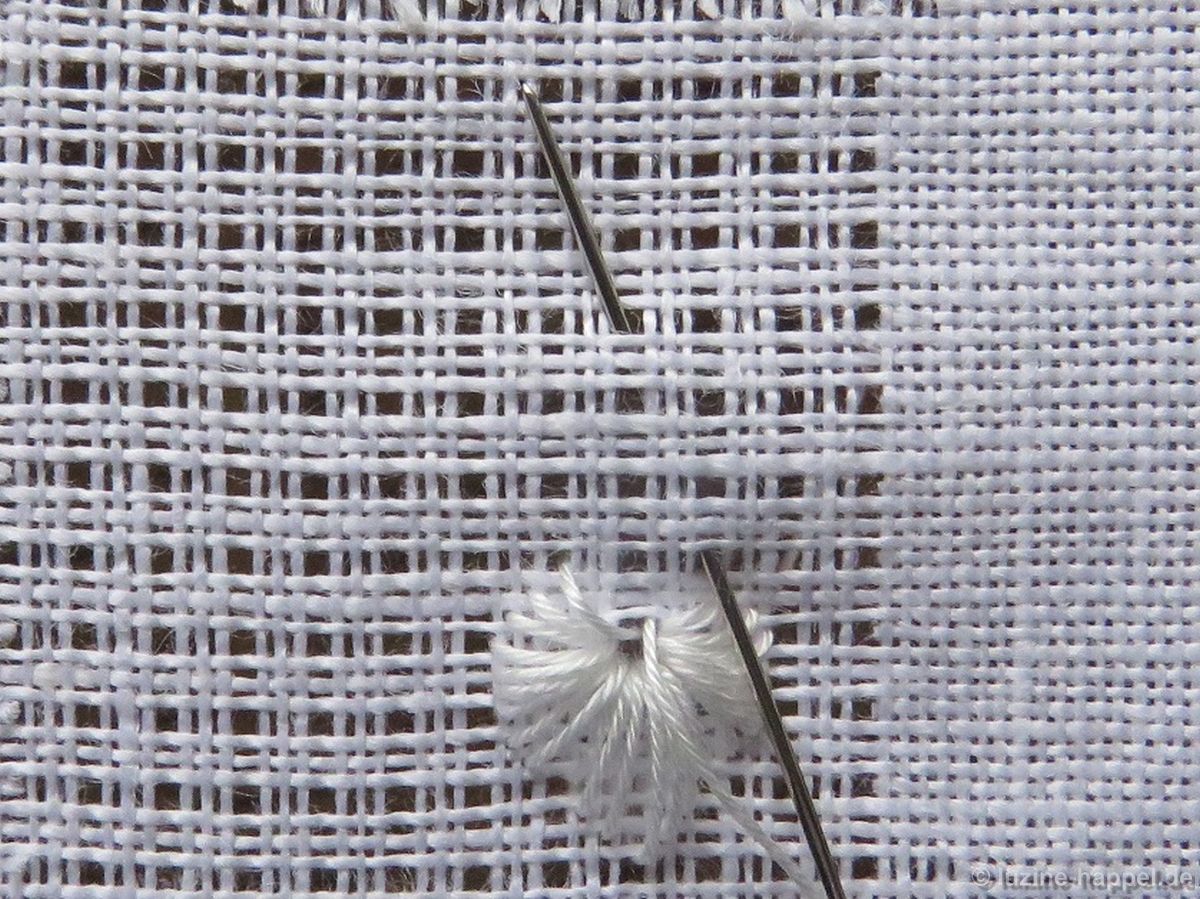
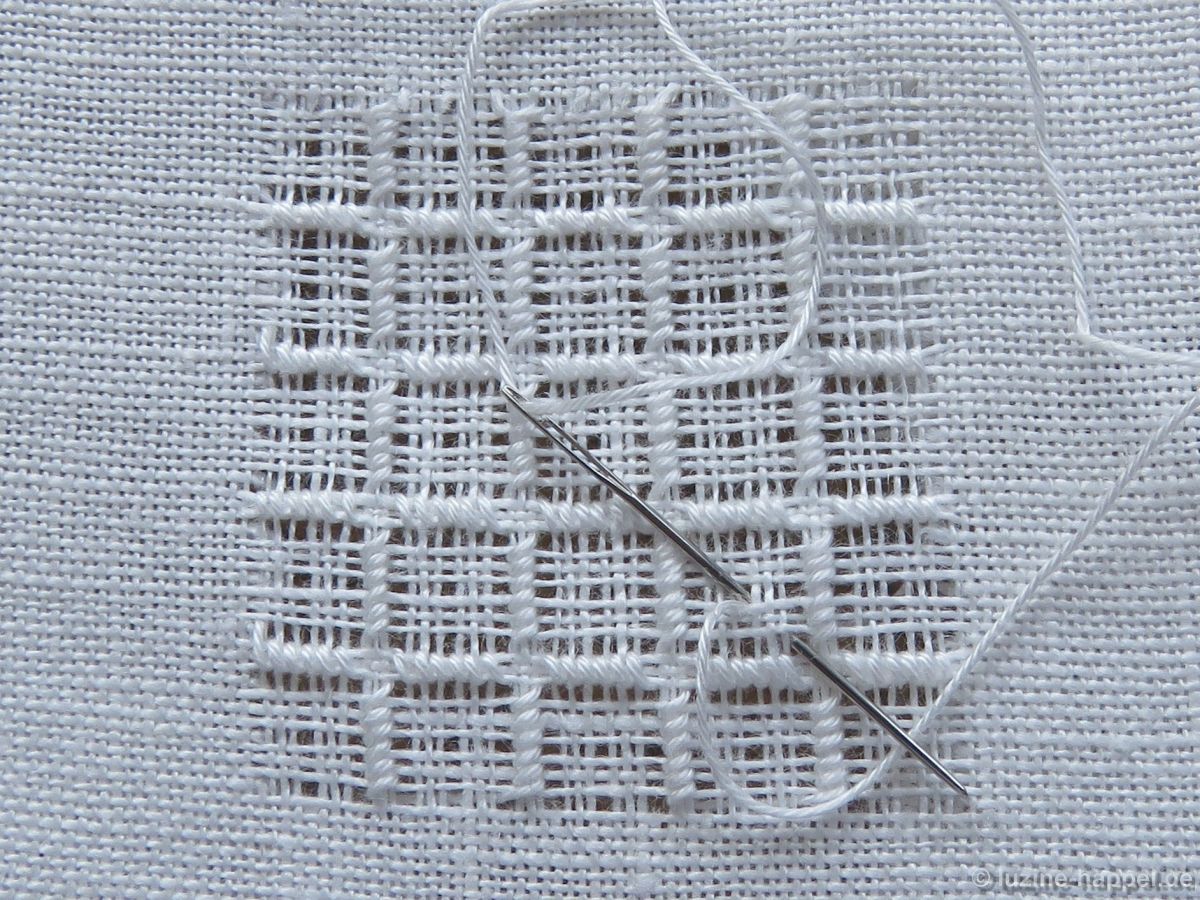
Work 3 more Lazy Daisy stitches counterclockwise
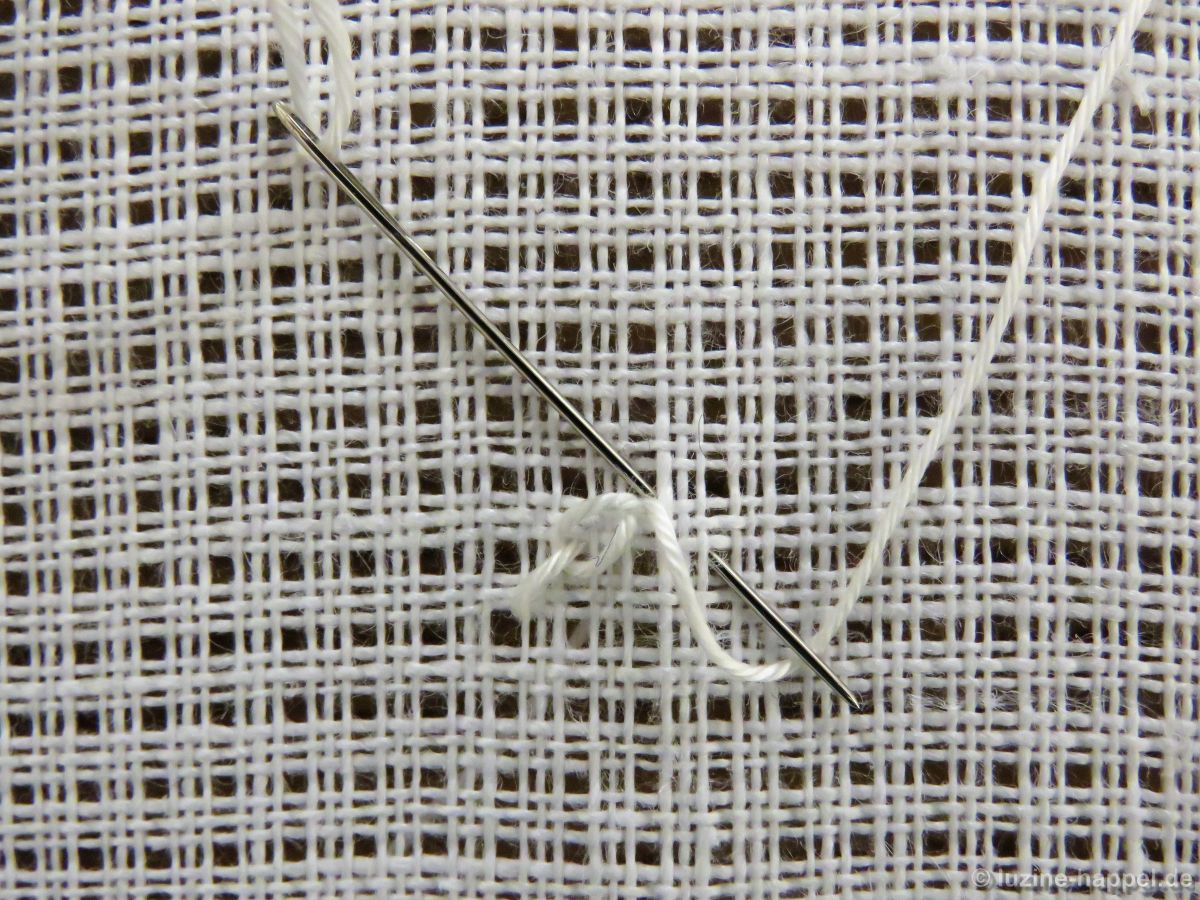
in the established way.
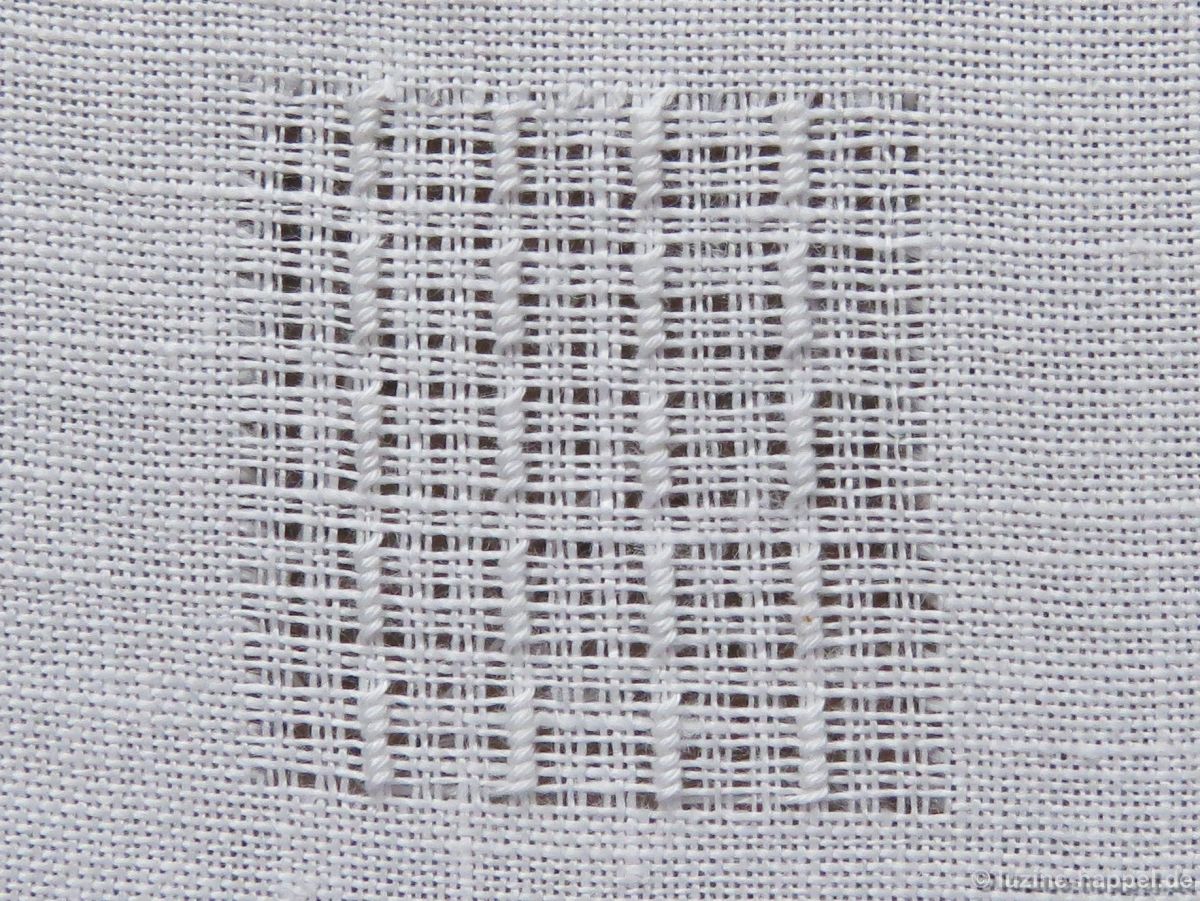
When one round (one element) is complete, continue to work the row of elements by crossing diagonally under 2 squares to bring the needle up in the next center.
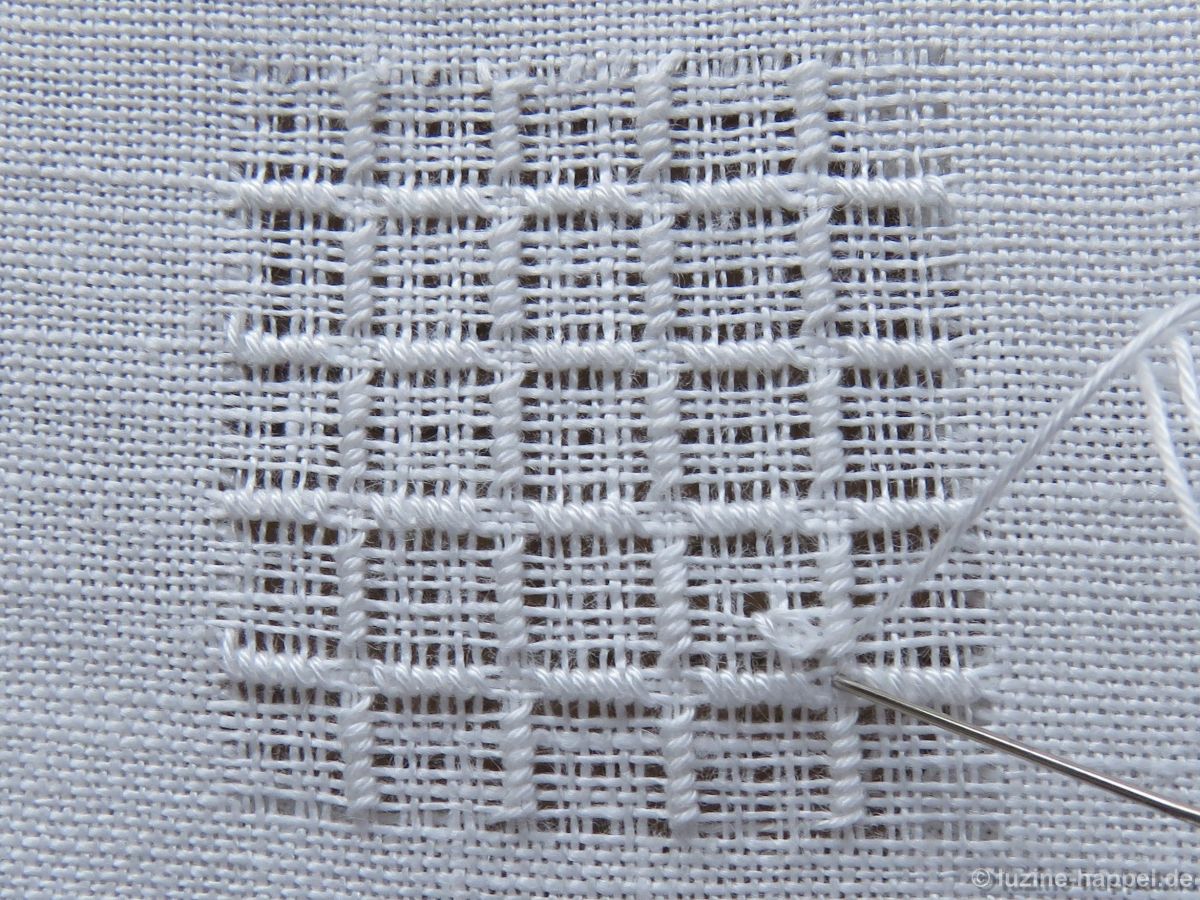
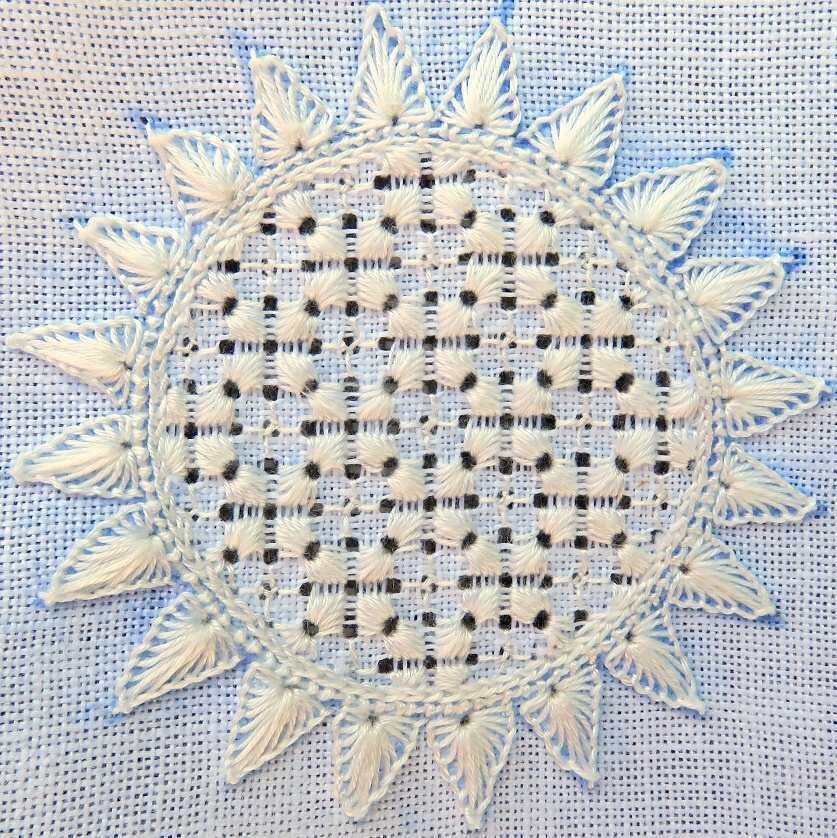
In the established way work rows up
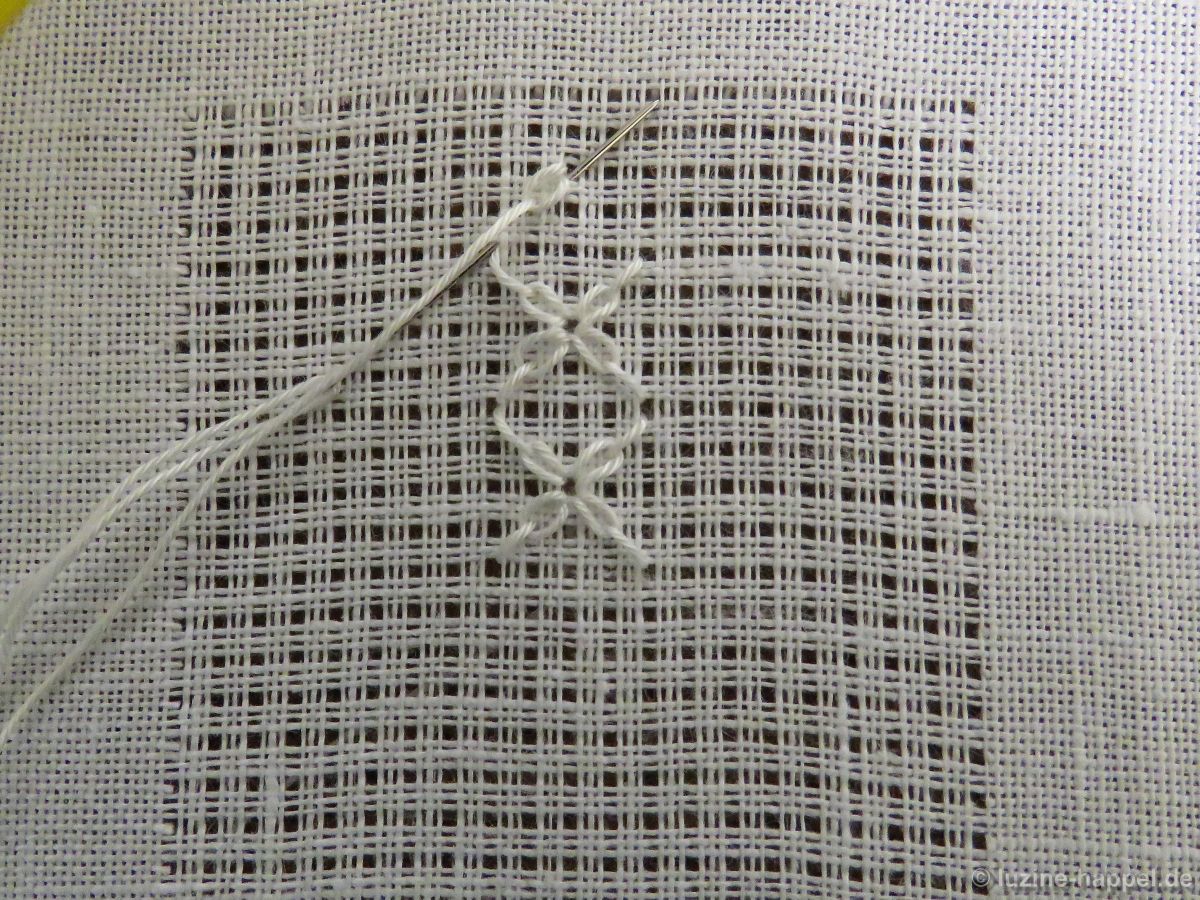
and down
until the entire shape is filled.
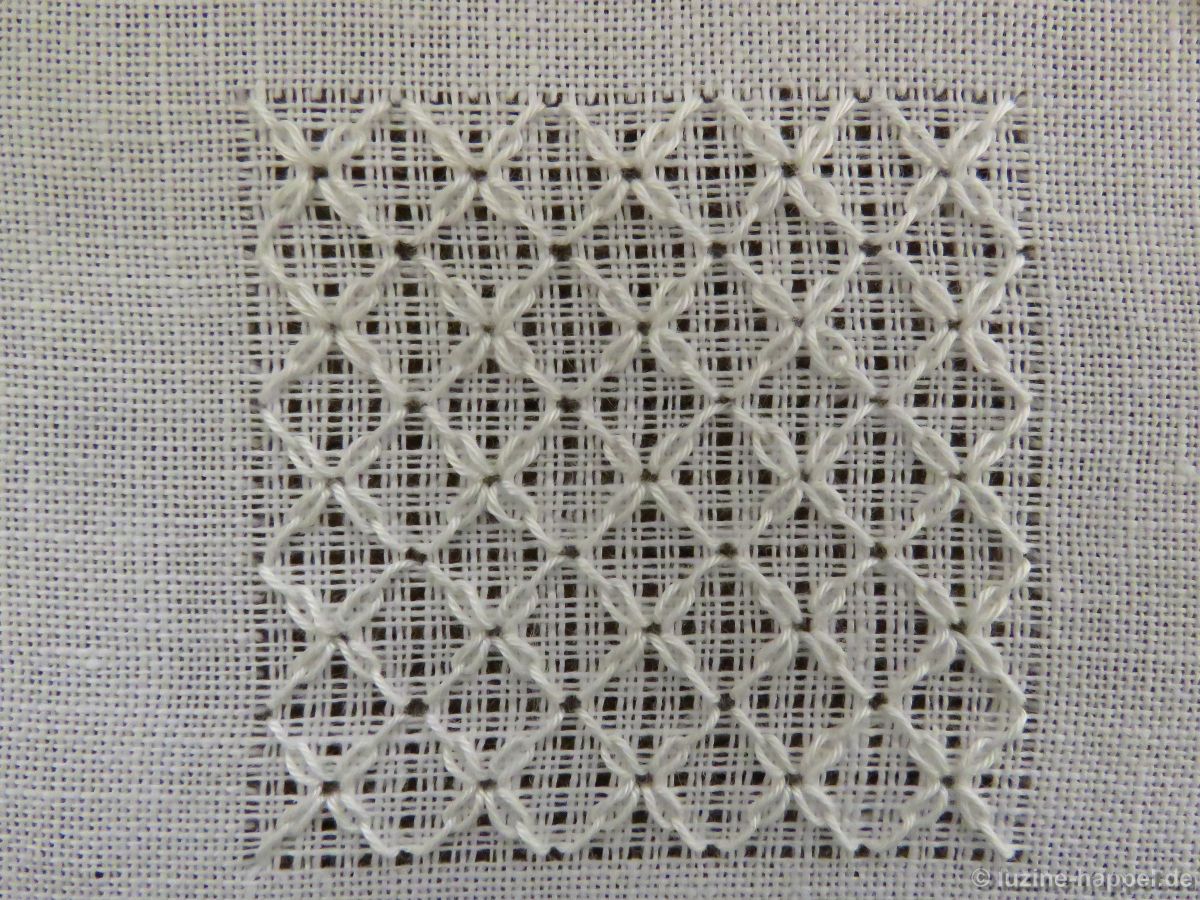
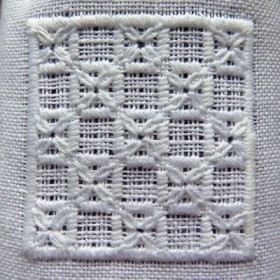
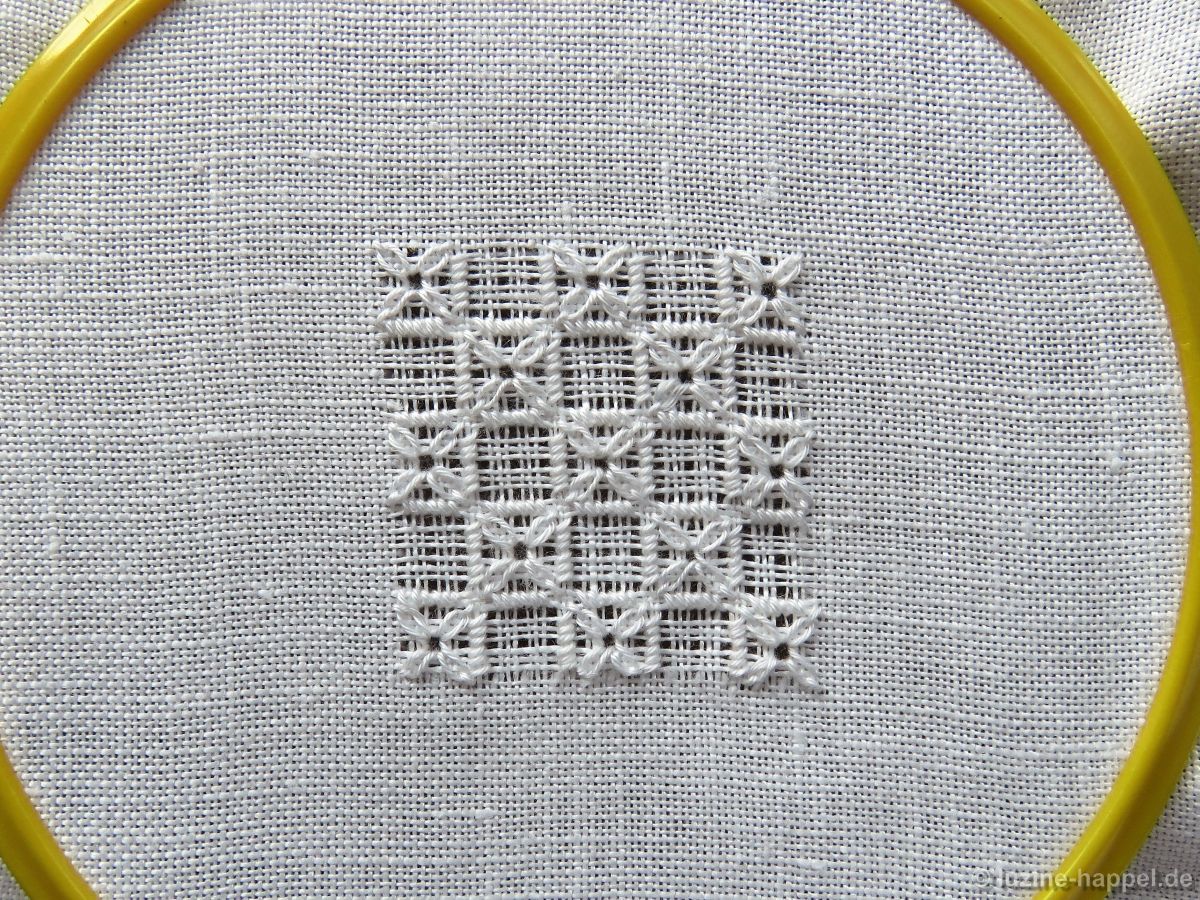
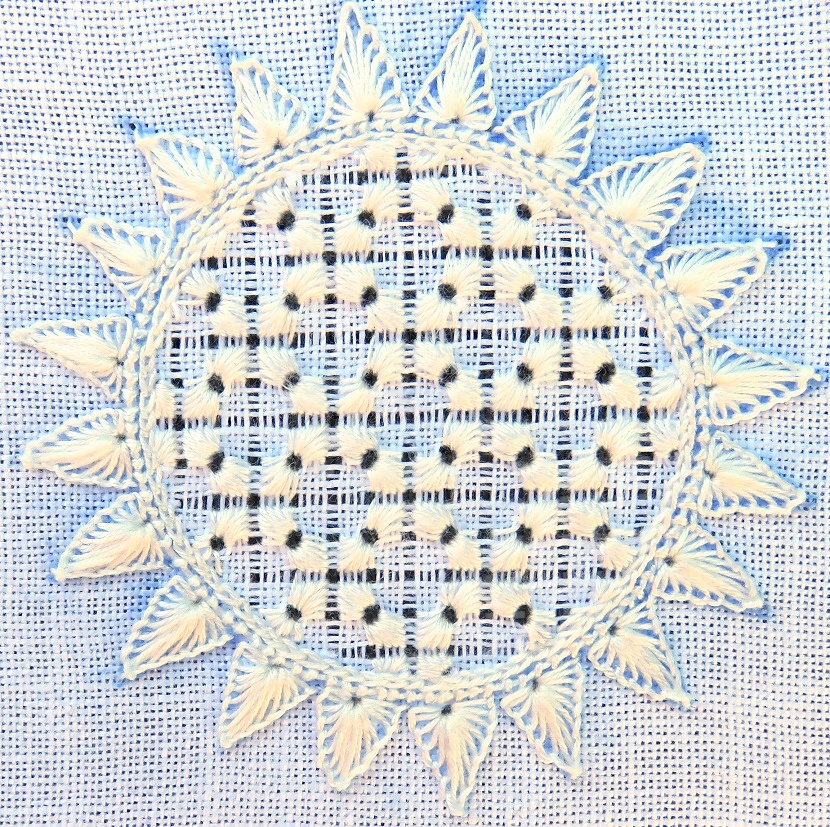
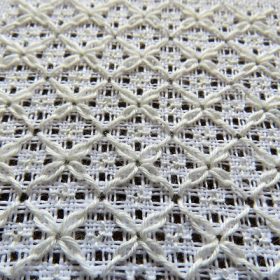
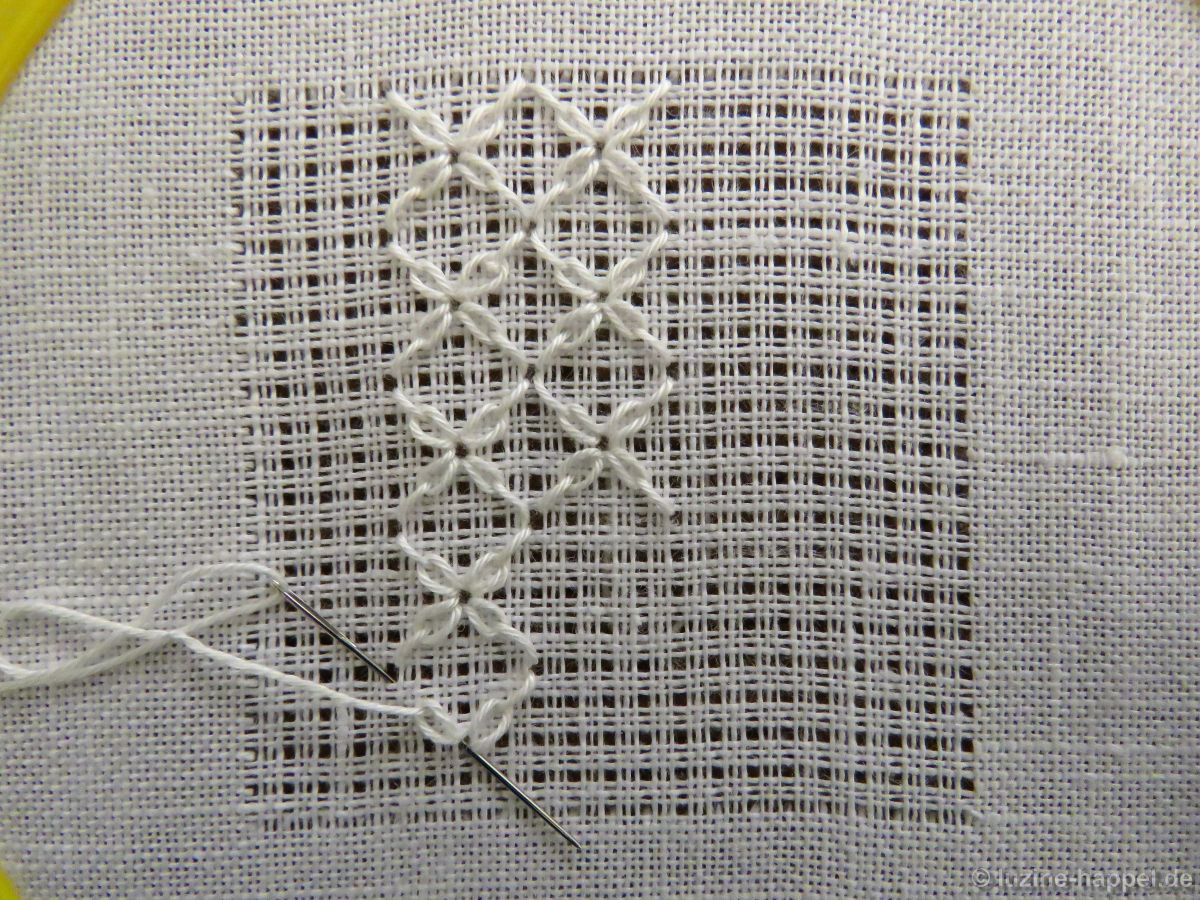
Now start to work Rose stitches in diagonal rows,
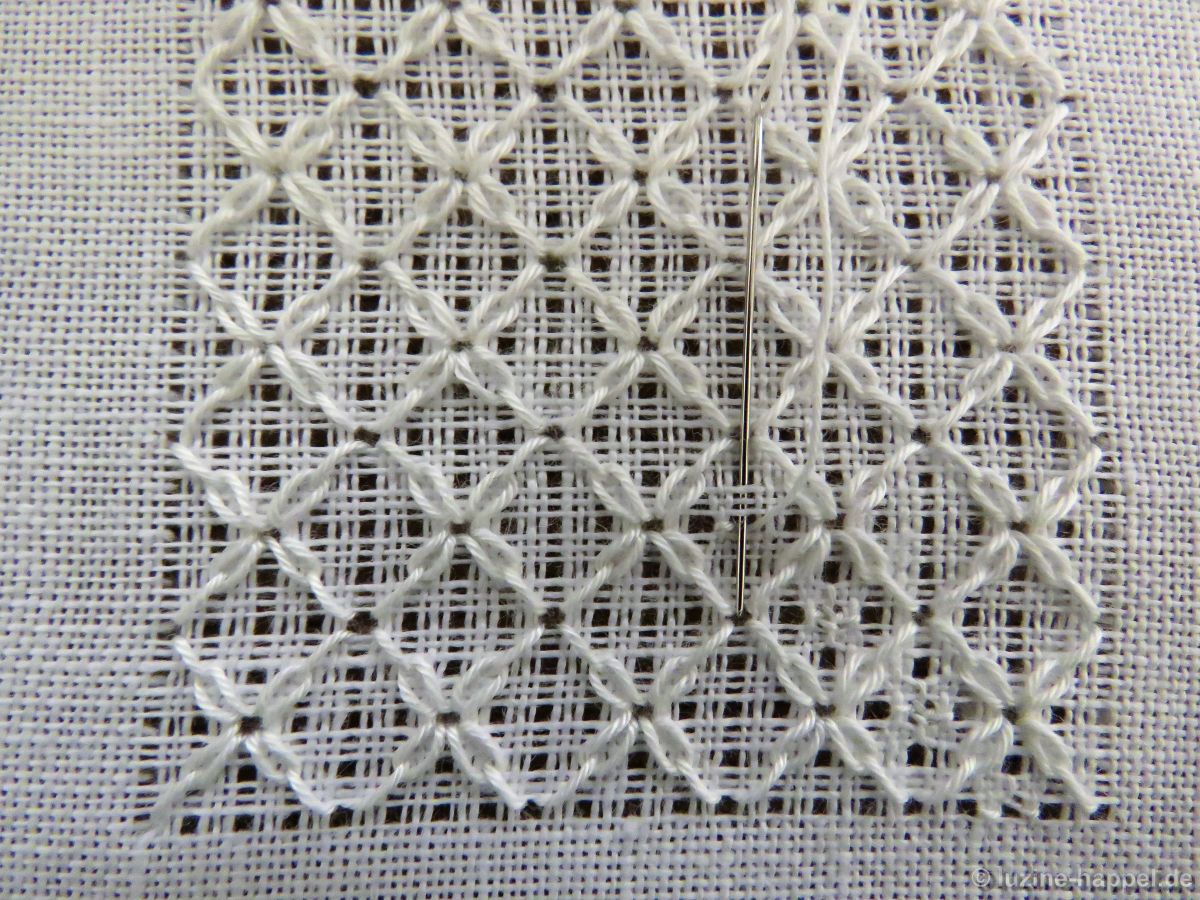
1 in each of the spaces that remain between the Lazy Daisy elements.
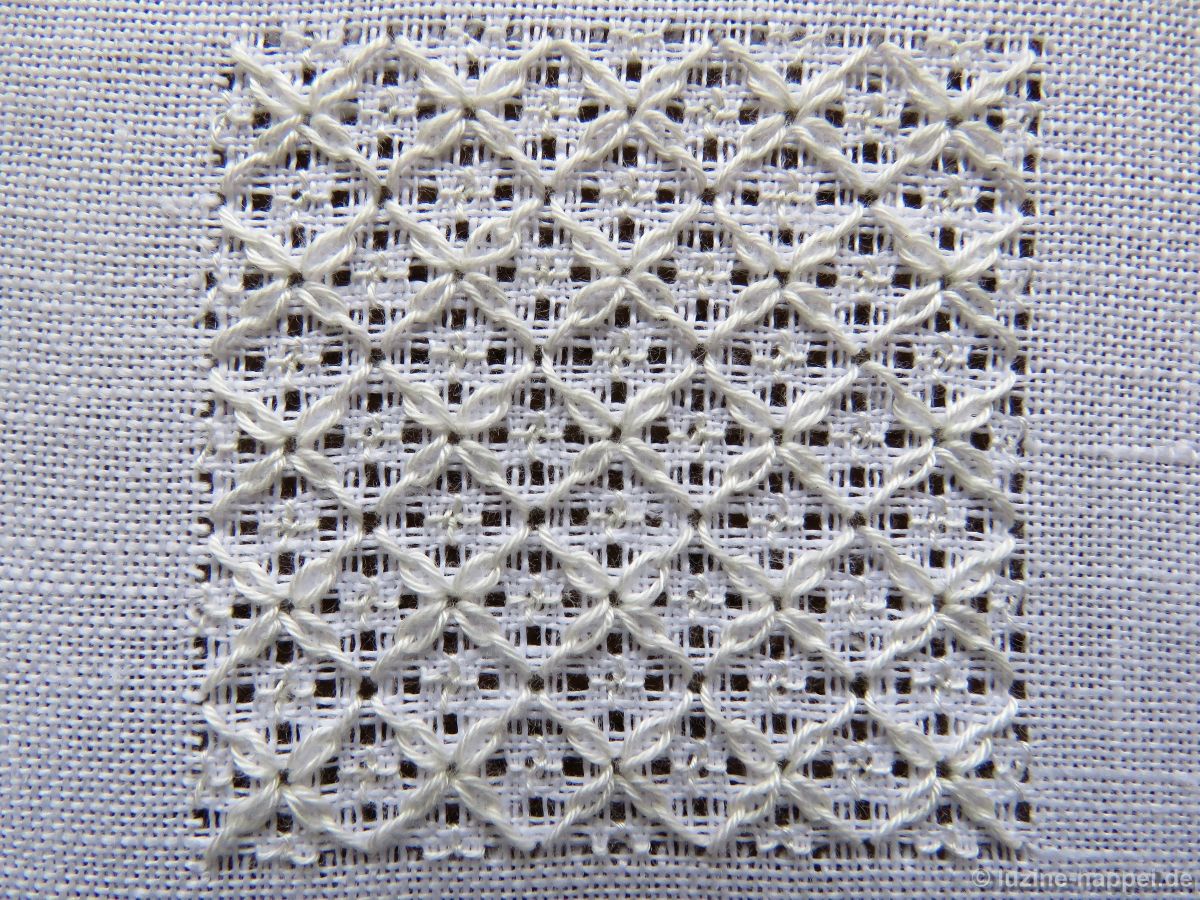
Another easy to work and attractive pattern is established.