Advent Calendar 2023 – No. 3

Advent Calendar 2023 – Nativity Scene
Hands

The hands of all three Wise Men are embroidered with wrapped Back stitches (coton à broder No.25). It makes sense to wrap from the inside to the outside on the way to the fingertip,

to lay the thread around your fingertip

and embroider the downward stitches from the outside to the inside.

Turn again at the base of the finger.

In this way you can achieve well-formed individual fingers.

If the hands are shaped so that the fingers lie together, work Back stitches up to the base of a finger and wrap them on the way to the tip up to the vertex. Then continue working with Back stitches. In the end, all that remains to be wrapped is the thumb, fingertips and the side of the palm.

Advent Calendar 2016
Advent Calendar 2017
Advent Calendar 2018
Advent Calendar 2019
Advent Calendar 2023 – Outline Designs
Advent Calendar 2023 – Prep Work
Advent Calendar 2023 – Hairstyles and Facial Features of Wise Men

Advent Calendar 2023 – No. 2

Advent Calendar 2023 – Nativity Scene
Hairstyles and Facial Features of Wise Men

As usual, the outlines have to be embroidered first so that the lines don’t fade in the meantime.
It is advisable to start with the delicate parts, as precise lines are particularly important here. The order of the figures is up to each individual.

Many of the following pictures do not show perfect embroidery. On the one hand, the stitches during the work process and with the translucent outlines always look messier than those of a freshly washed and well-ironed item. On the other hand, my stitches are becoming more wobbly due to age, and I also had to embroider quickly so that the project could be finished on time. Nevertheless, I show details in close-ups.

The first Wise Man gets hair from wrapped Chain stitches (coton à broder No. 16)

and a profile of wrapped Back stitches (coton à broder No. 25).

Likewise the second Wise Man, whose turban outlines are embroidered with Chain stitches (coton à broder No. 16).

If you want to avoid the working threads on the back traveling from one part to the next showing through,

you have to embroider each facial detail with a short single thread, knot the ends of the thread on the back and trim them.

For the hair and face of the third Wise Man, coton à broder No. 20 is used.

Advent Calendar 2016
Advent Calendar 2017
Advent Calendar 2018
Advent Calendar 2019
Advent Calendar 2023 – Outline Designs
Advent Calendar 2023 – Prep Work

Lampshade with a Needle-Weaving Hem

A combination of hem and decorative stitches decorates a rustic lampshade.

In the middle runs a band of a 13-unit mirrored needle-weaving hem, which is bordered at the top and bottom by a row of Peahole hemstitch.

The Peahole hem is followed by a needle-weaving hem with an A-pattern over 4 units. Blanket stitch half-eyelet scallops complete the border.

The entire combination reaches a height of 12 cm.

The embroidered and washed fabric was sewn together in a tubular shape and – with a hem at the top and bottom – pulled over a wire frame.

Rubber bands were pulled into the hems. This allowed the fabric to turn around the edges

and hold the lampshade in place.

At the upper end, the fabric was folded and shaped with a ribbon.

Schwalm Tablecloth – round (3)

Fascinated by the care and precision with which brubi creates her beautiful Schwalm tablecloth and the attention to detail with which she prepared the embroidery, I wanted to share it with my blog readers. To do this, brubi opened her folders again so that she could create the corresponding images – thank you very much for that.

First tests at embroidery: Coral Knot stitch in different thread thicknesses and types, Chain stitch, Satin stitch, Macrame stitch

Overview 1: thread allocation, thread weight and thread length to the individual objects, definition of stitch types.

Section 1 from Overview 1: thread length for the individual objects, definition of stitch types

Section 2 from Overview 1: thread allocation and thread weight

Overview 2: initially only numbering of the motifs,
later, after drawings and test embroidery, gradually determining the course of the pattern, the thread withdrawing, the embroidery direction and the embroidery patterns.

Embroidery samples: tried out various types of stitches, embroidered combinations of embroidery stitches.

Section 1 from Overview 2

Section 2 from overview 2 with details 1, 2 and 3

Detail 1 large flower (in the straight of grain) flower center – sketched

Detail 1, 2 and 3 – finished embroidered

Embroidery samples:
small patch at the top left –
2nd pattern from above = embroidered in detail 10 (top petals).
small patch at the top right –
sample bottom left = embroidered in detail 3 (outer petals),
sample bottom right = embroidered in detail 2 (inner petals).
large patch below –
sample between middle and right cross, upper area = embroidered in detail 5 (large tulip inclined 22.5 degrees).

Detail 5 (a + b) – large tulip (inclined 22.5 degrees): determination of thread lines (sketched on tracing paper – so you can get the mirror image motif by turning it over.

Embroidery samples of the patterns in question

Detail 5 (a + b) – large tulip (inclined 22.5 degrees): design sketches and arrangement of the individual stitch elements

Detail 5 finished embroidered

For detail 6 (a + b) bud (slightly inclined), center of flower

“Diagoanl Cross filling – French variaton/”half” was sketched in mirror image

and embroidered.

For detail 8 – large flower (diagonal) flower center –

various filling patterns were sketched.

The left checked pattern was embroidered, the others were discarded.

Detail 8 embroidered

Sketches for patterns for detail 9 (large flower (diagonal) outer petals) – left side embroidered, right side discarded

Sketch for detail 9 – pattern run vertical – discarded

Sketch for detail 9 – pattern run horizontal – embroidered

Detail 9 embroidered

Detail 10 (a + b): large flower (diagonal) upper petals: sketches for star stitch

Detail 10 embroidered

large flower diagonally with details 8, 9 and 10 embroidered

Many people might think that so much effort for embroidery is excessive. But if you consider that these preparations only took about 40 days, but the final embroidery took almost four years (not including the interruption), the ratio is quite acceptable. And only with such an accurate preparation was such a unique result possible. The effort was truly worth it.

Thanks again to brubi for providing all the information. Hardly anyone will probably undertake the entire accuracy, but you can definitely incorporate some suggestions into your own work.

Schwalm Tablecloth – round (2)

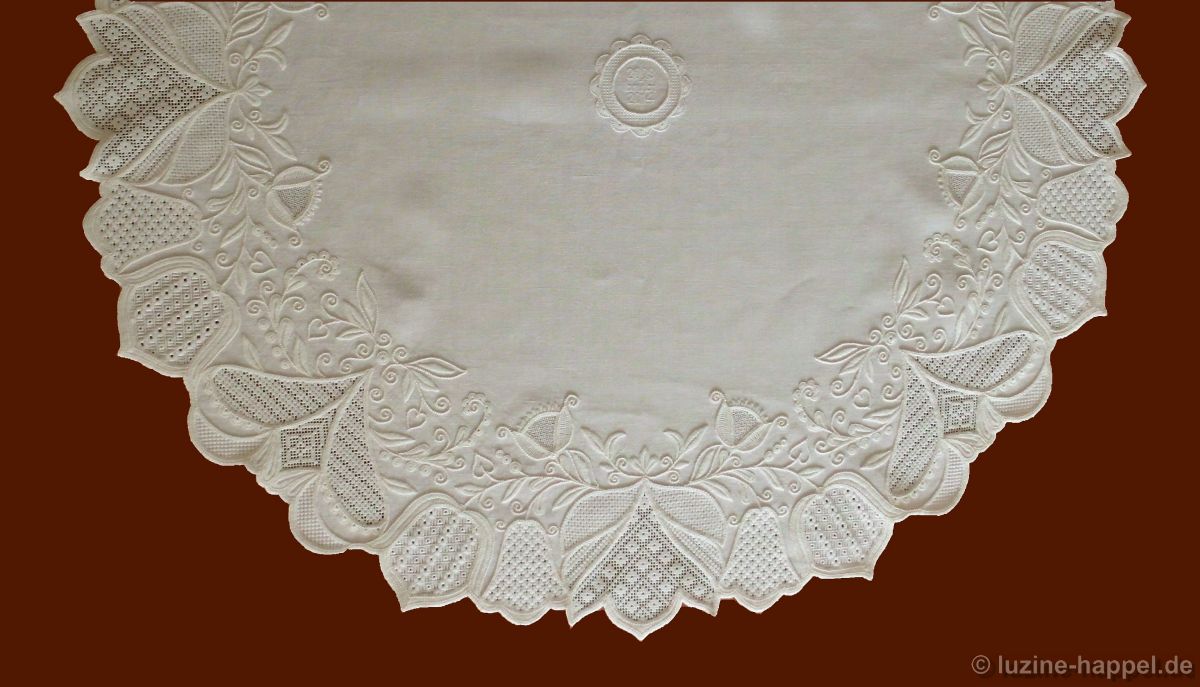
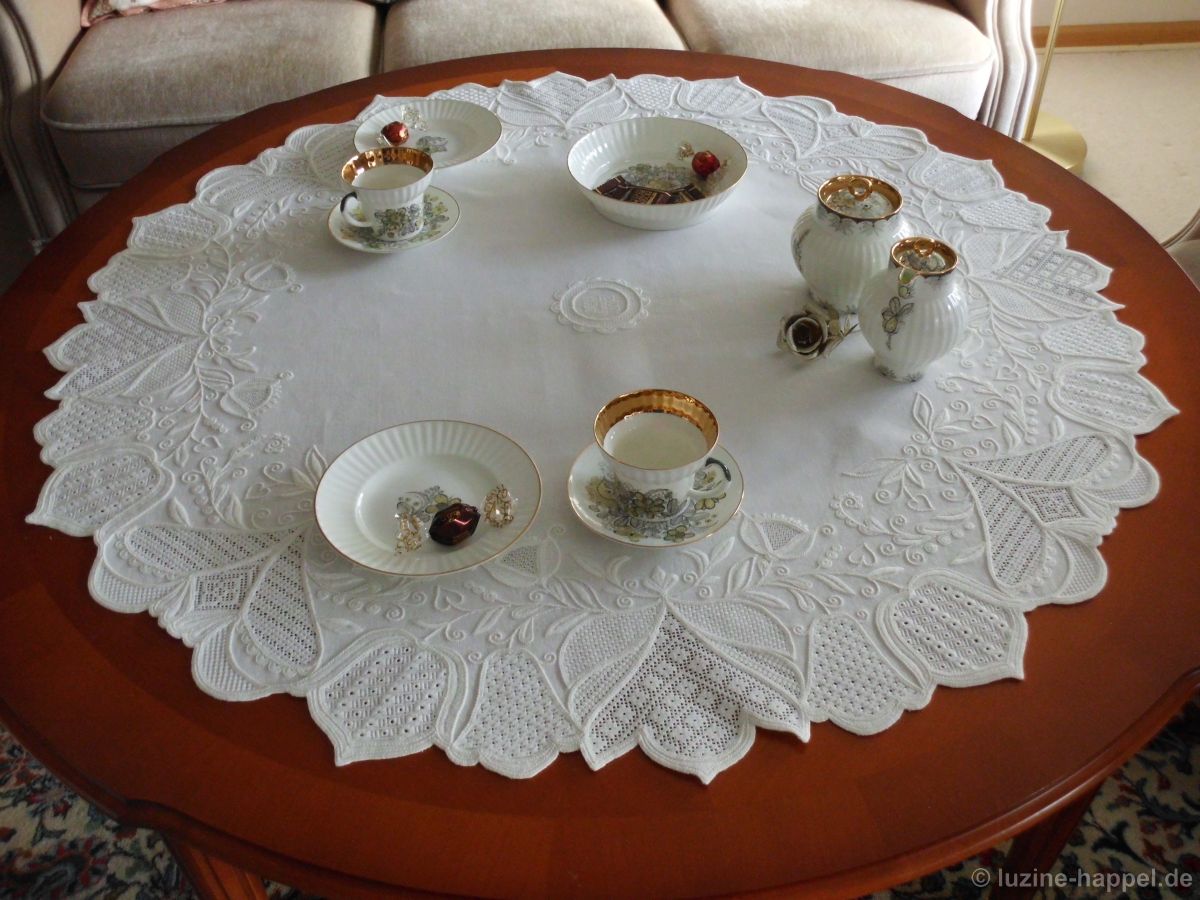
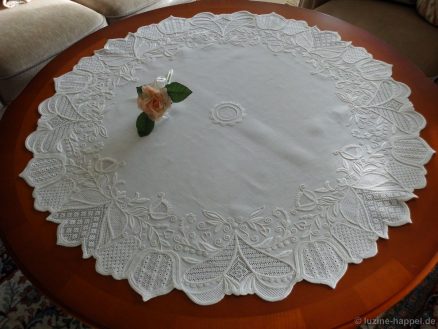
brubi – an embroiderer who wants to remain anonymous – has described her dreamy Schwalm tablecloth in detail and has kindly allowed me to share these descriptions with you:


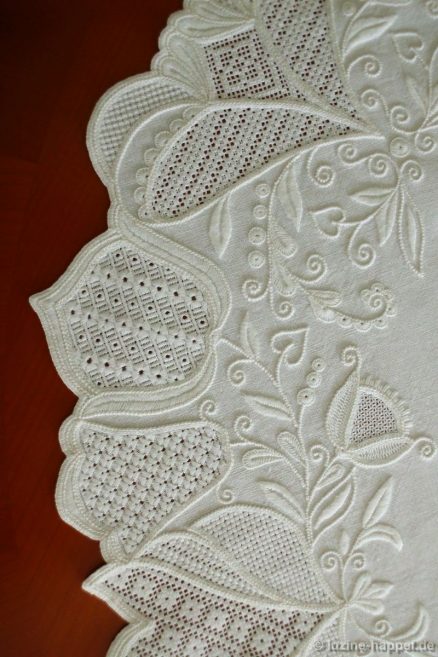
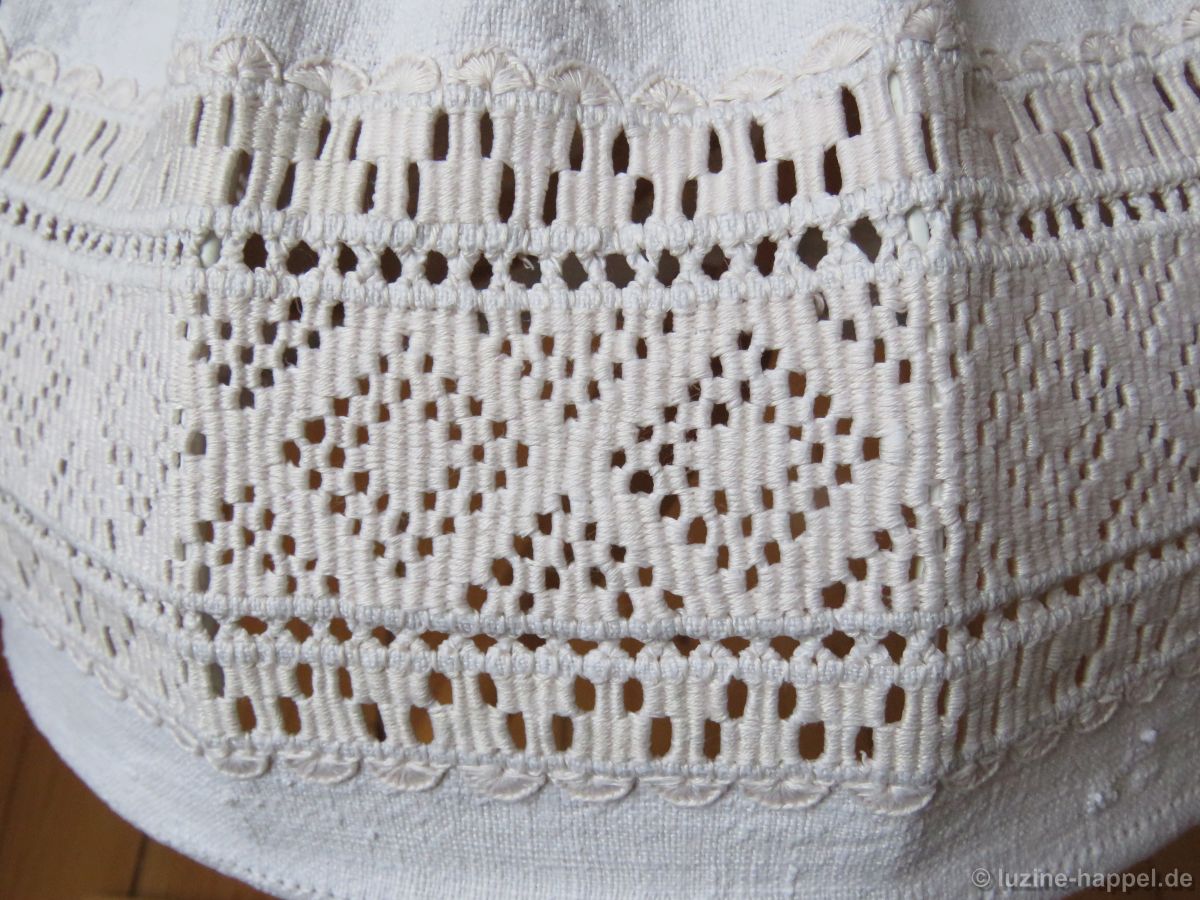
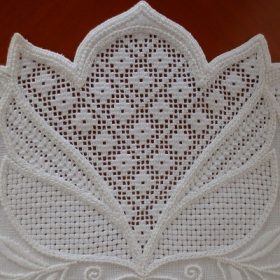
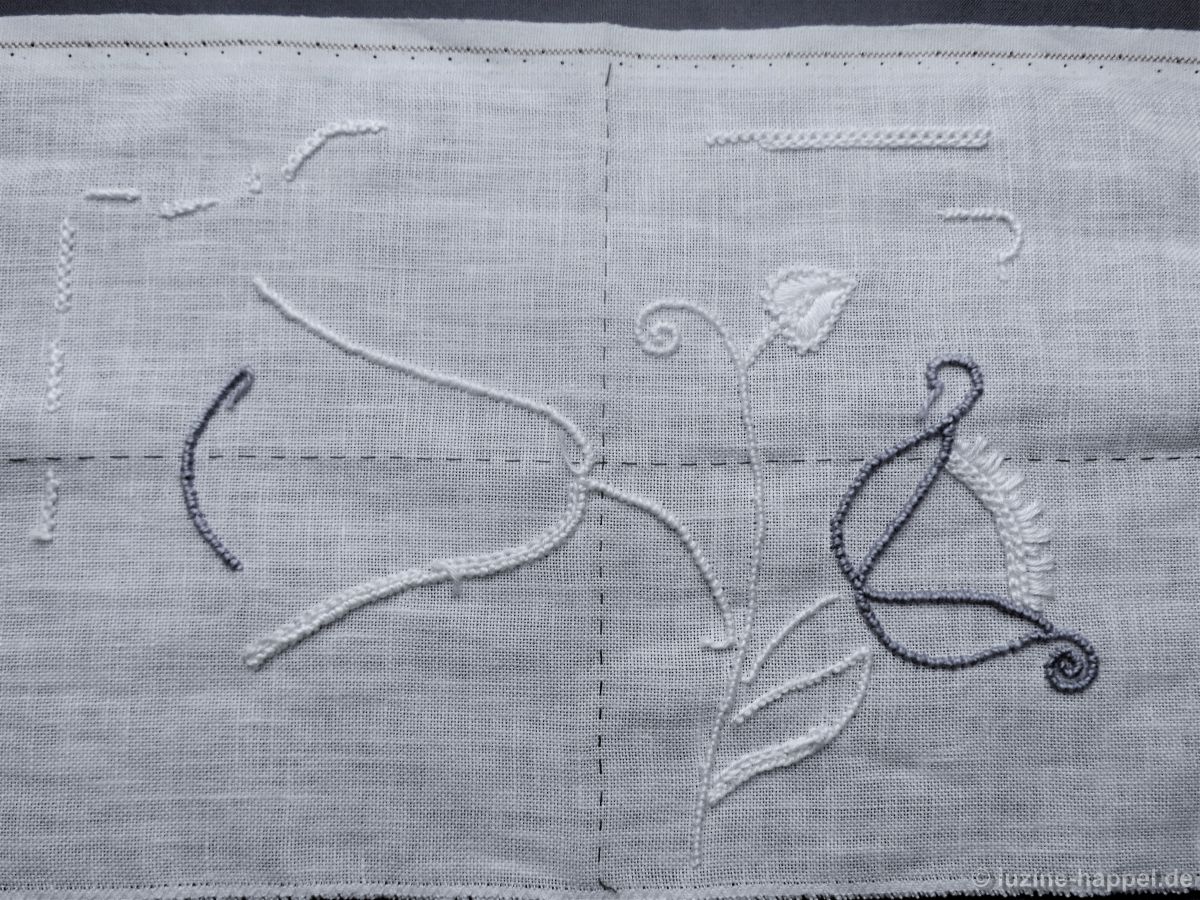
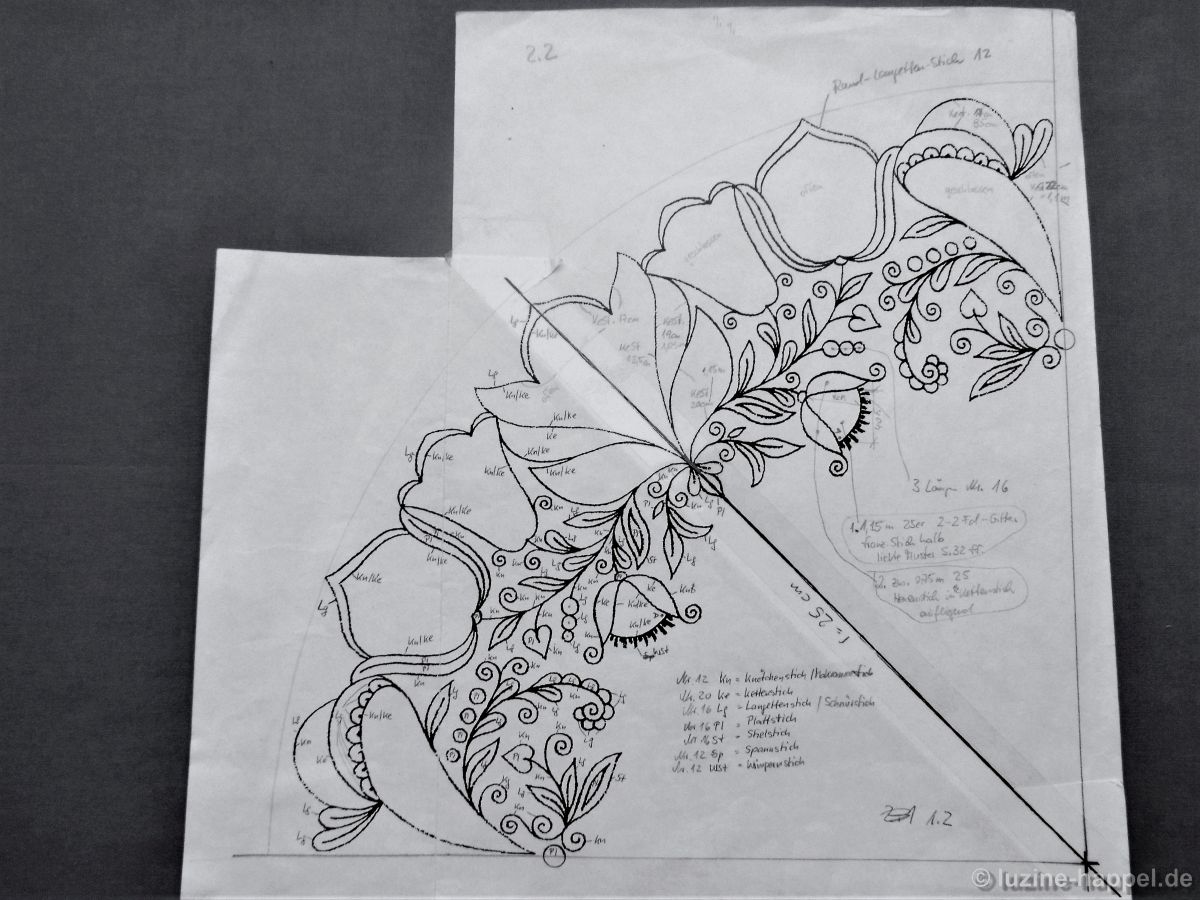
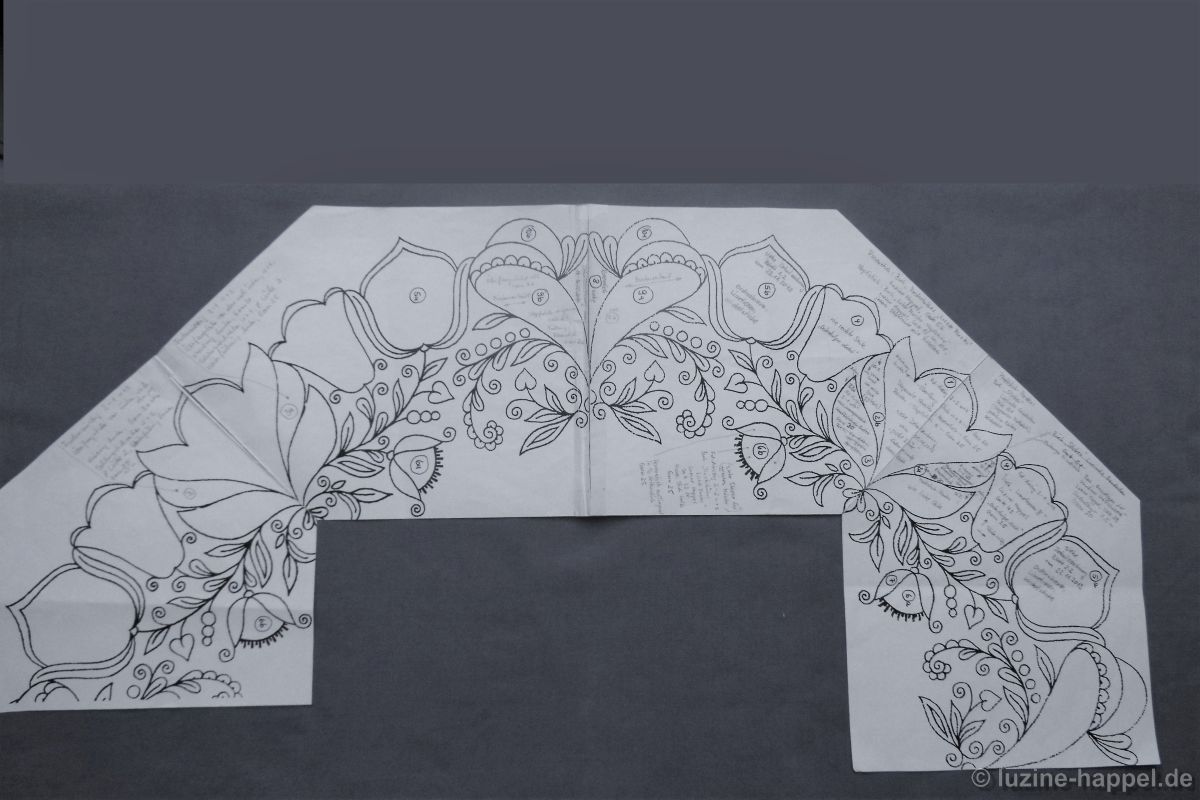
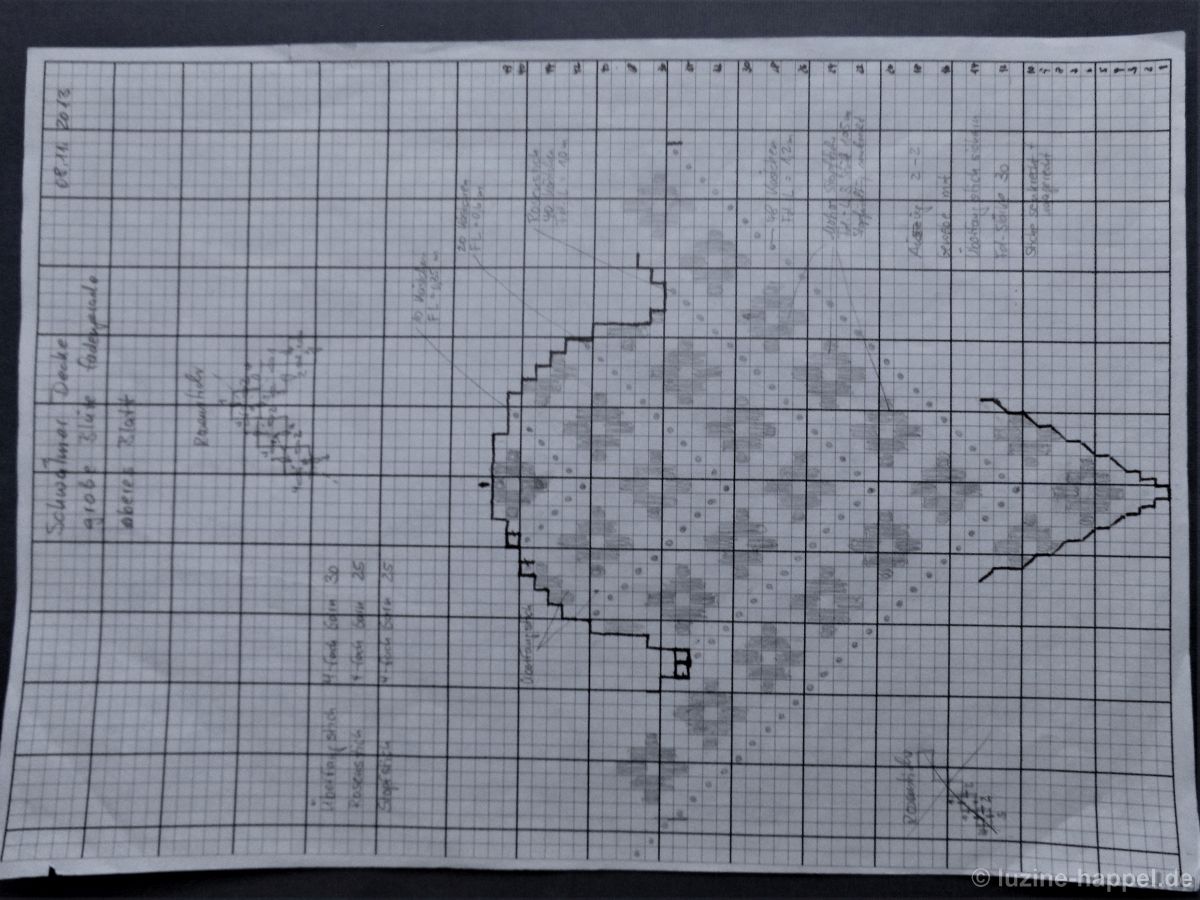
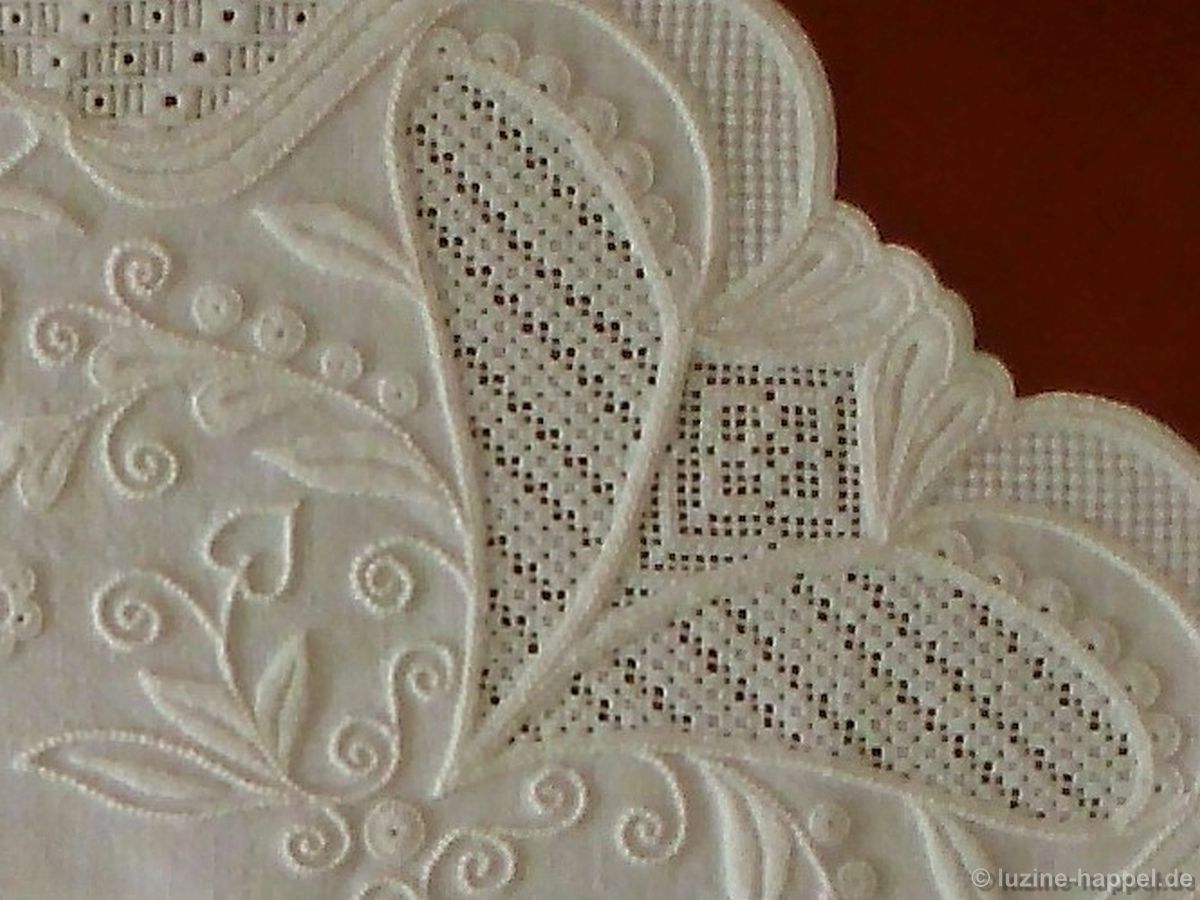
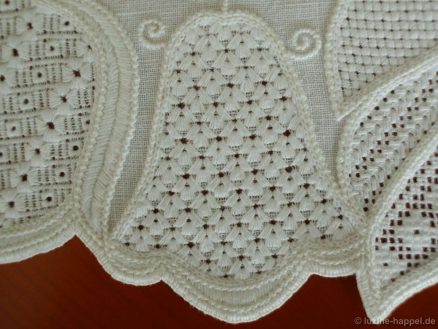
1/8 of the border embroidery
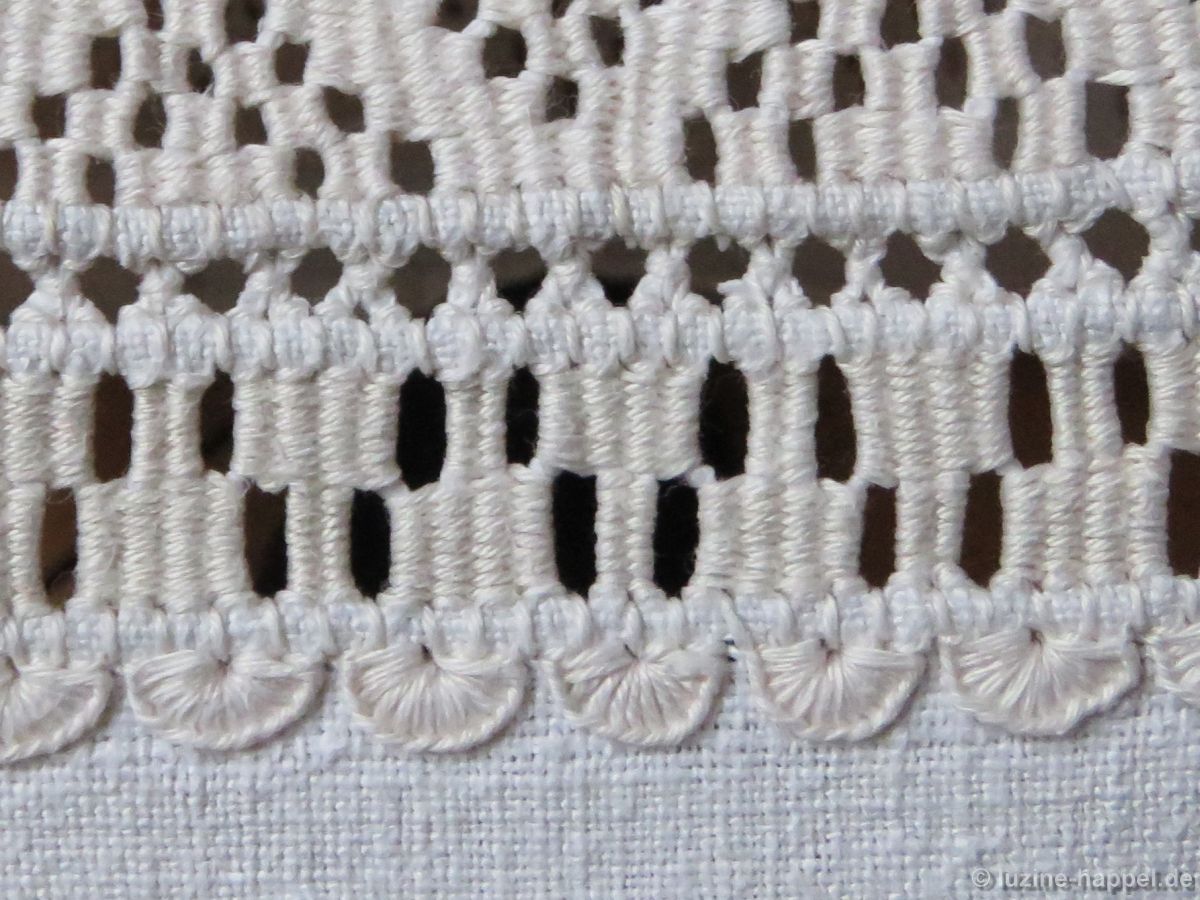
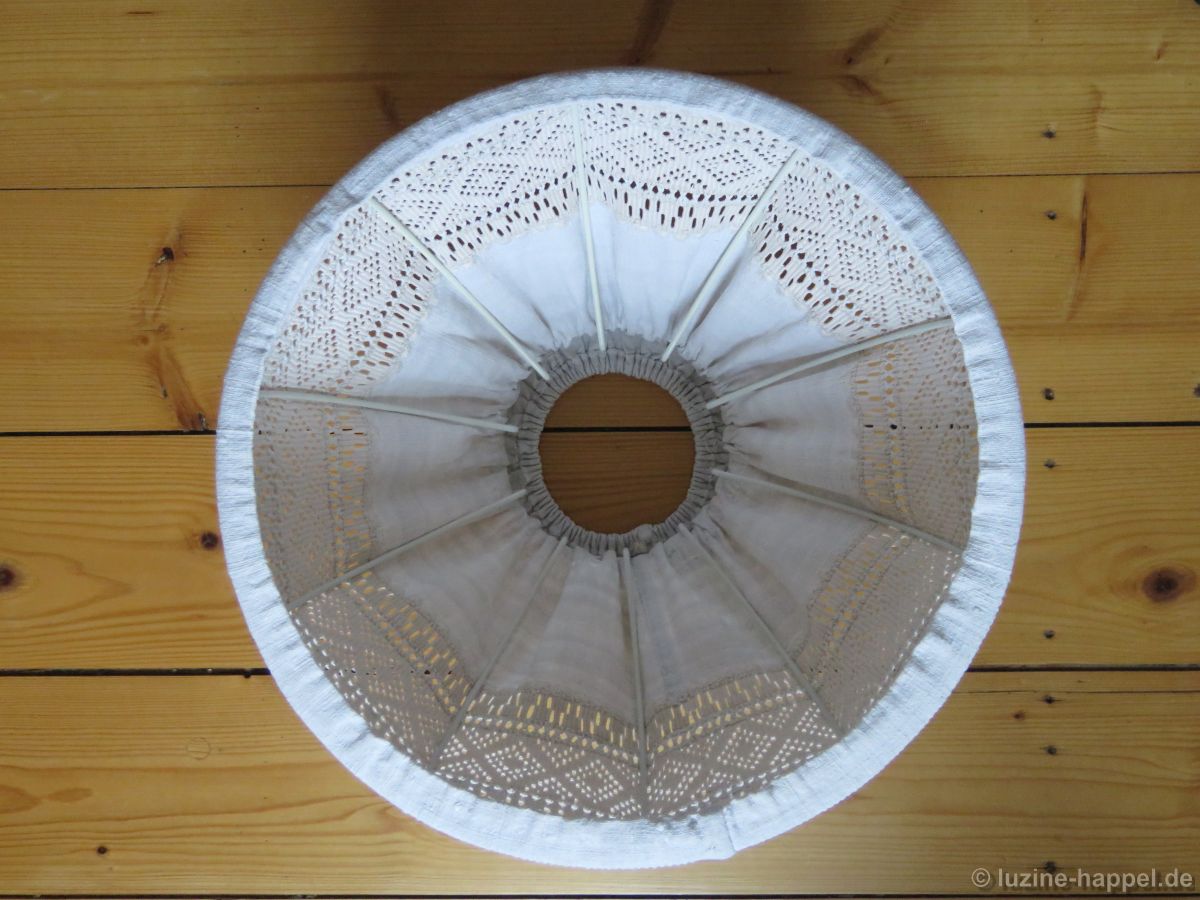
Border width approx. 20 cm


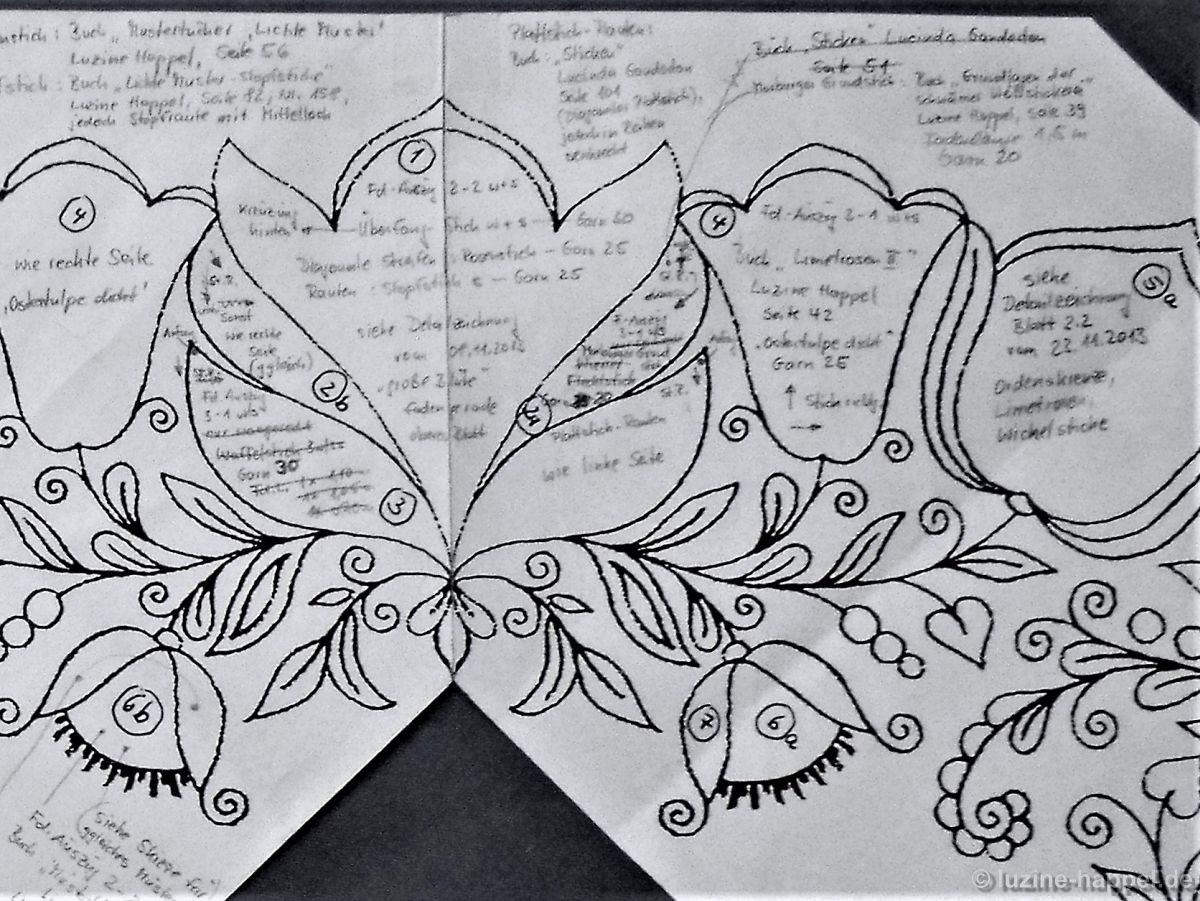
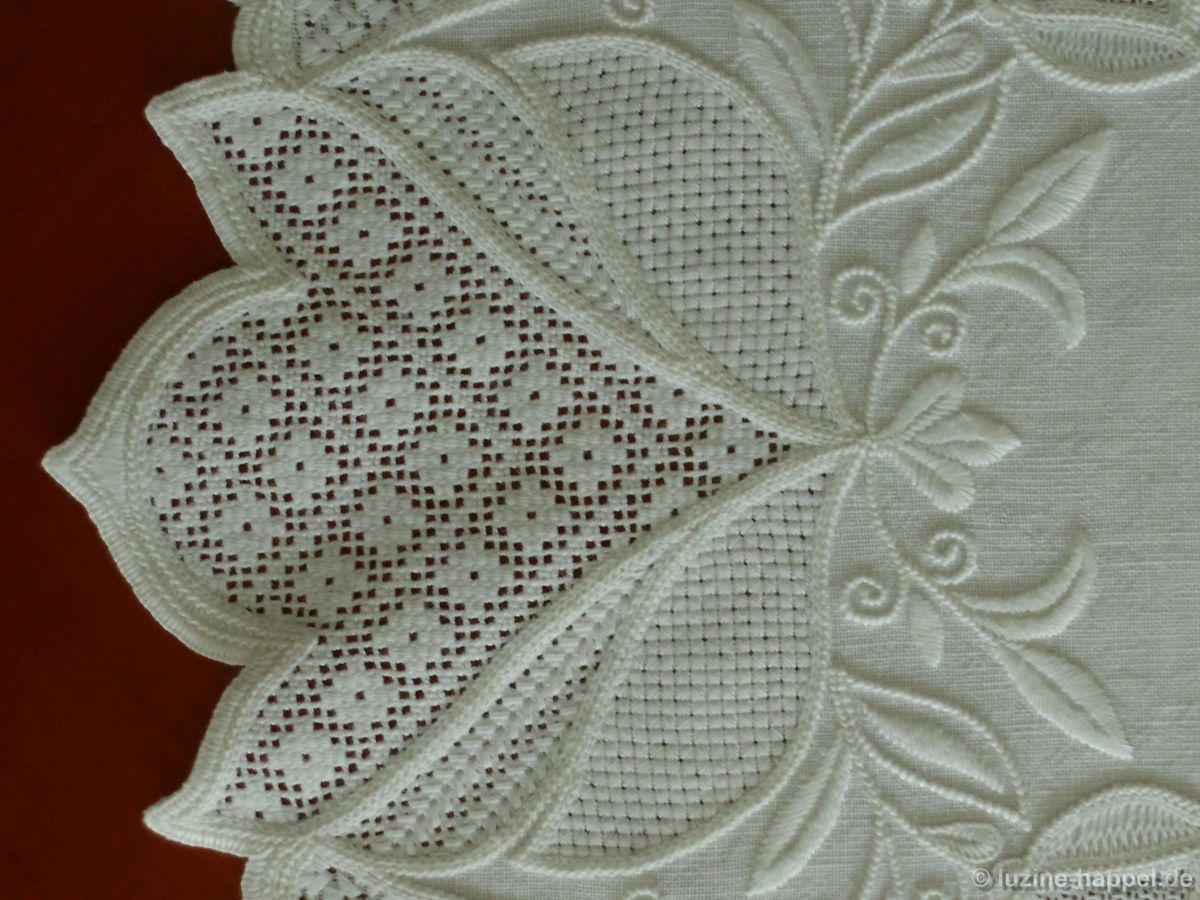
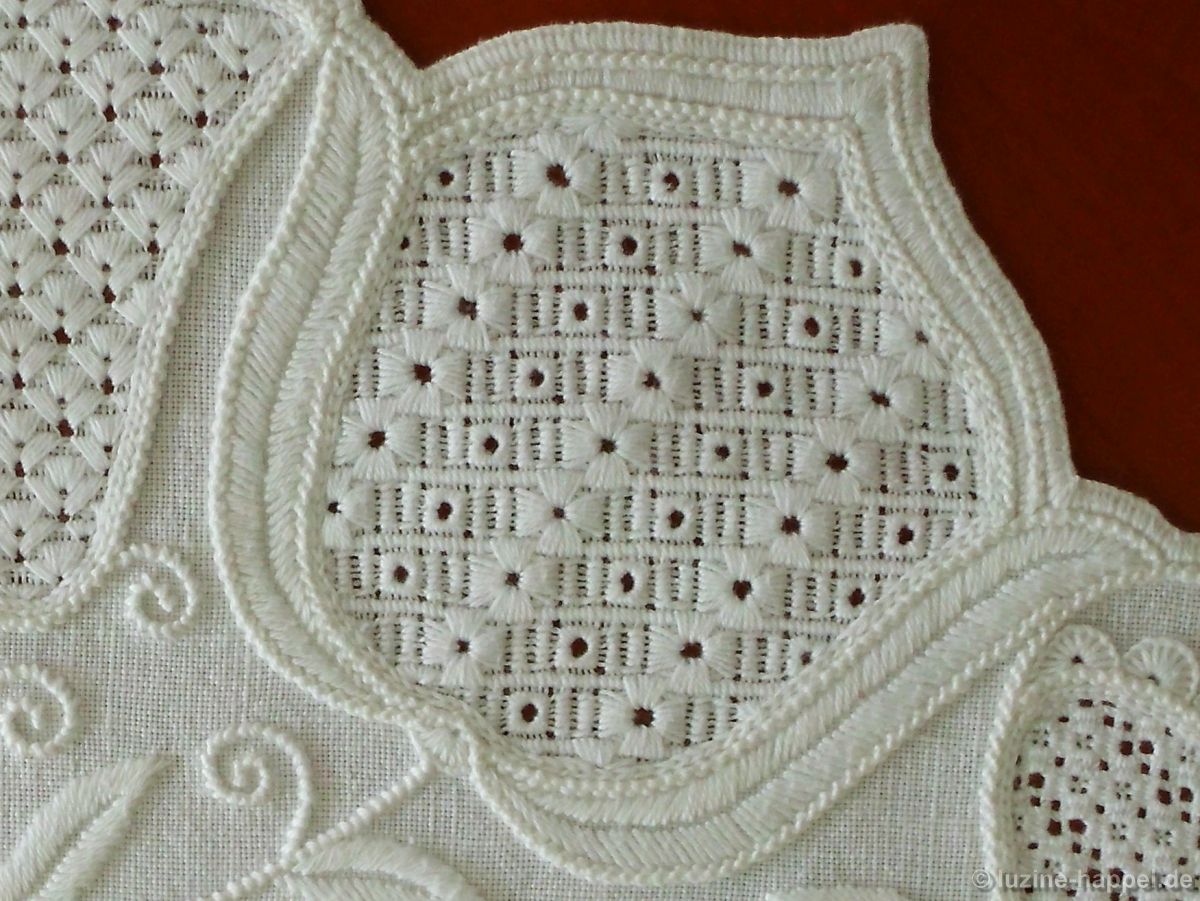
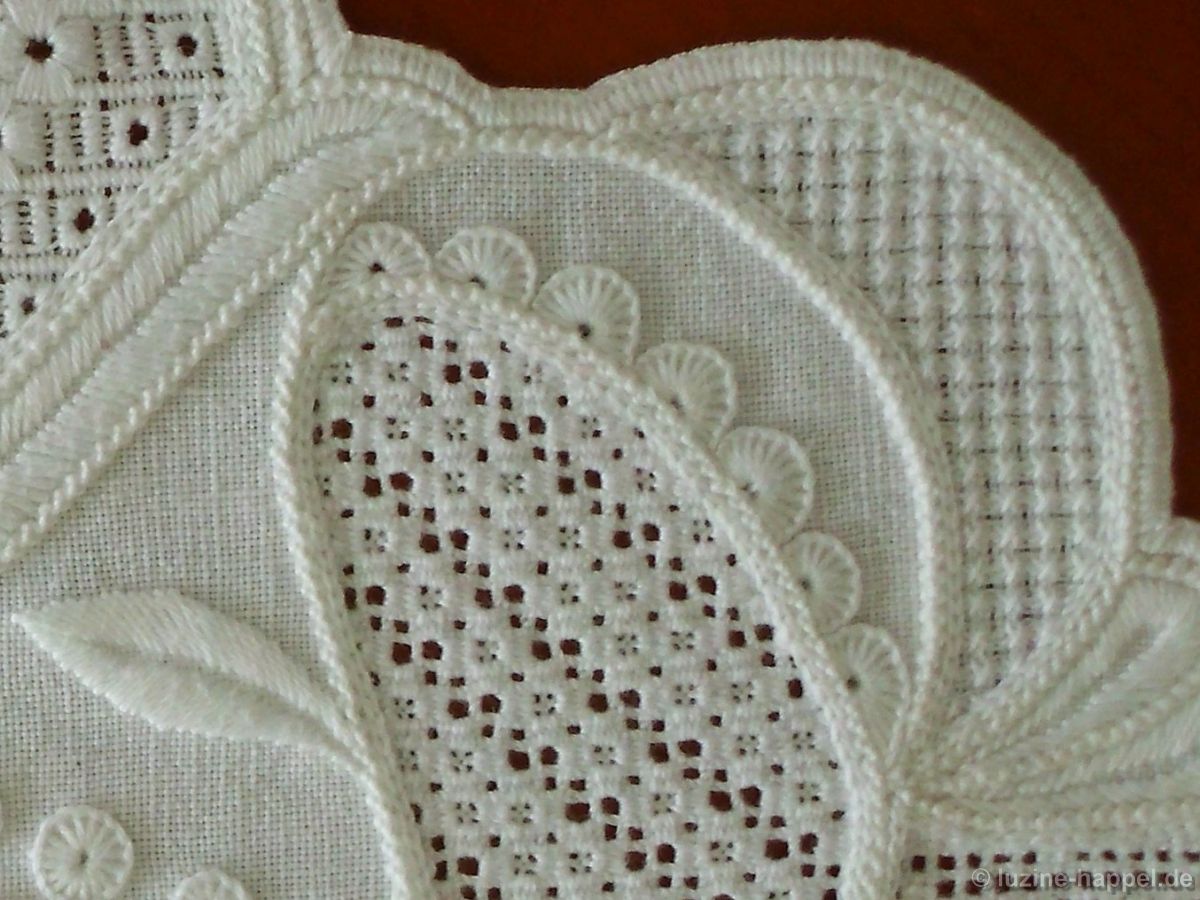
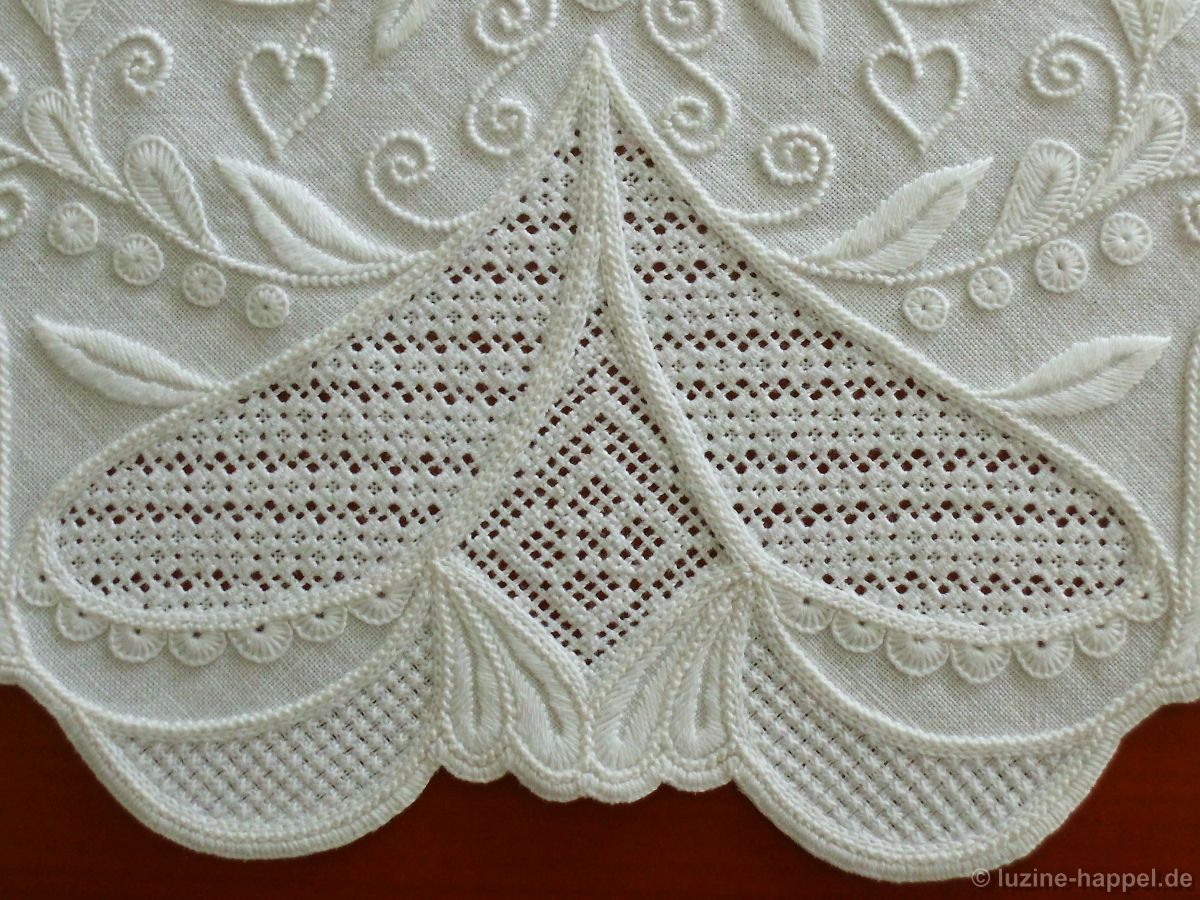
Details 1, 2 and 3: large flower (on the straight of grain)

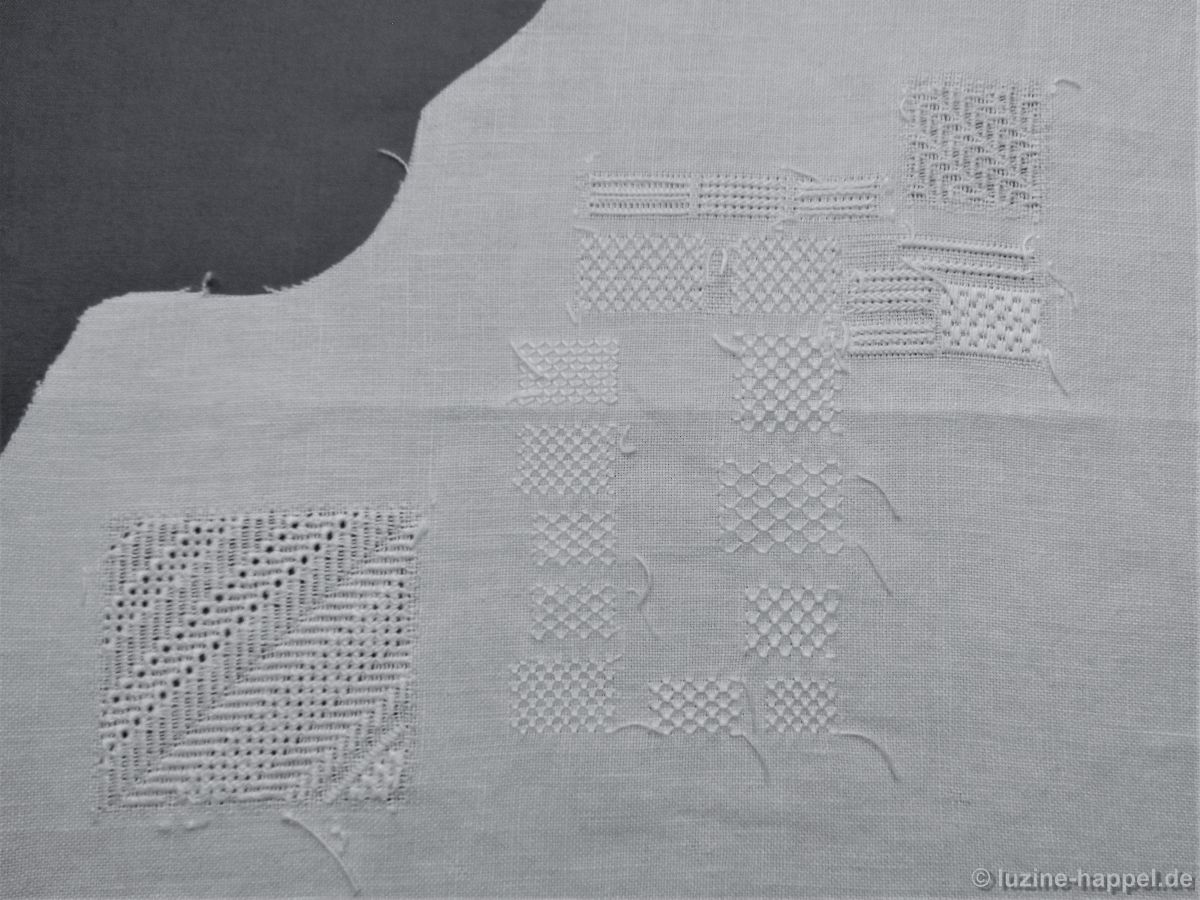
flower center: thread withdrawing: cut 2, leave 2, Cable stitch grid, Rose stitch diagonally (book: Openwork Pattern Samplers, page 64), needle-weaving pattern „Raute“ Nr. 126 (book: Openwork Needleweaving Patterns, page 66).

inner petals: thread withdrawing: cut 2, leave 2, Cable stitch grid, two Satin stitches over one empty squares with change of direction around the corner, thread continuation on the back, embroidered in opposite directions,

outer petals: thread withdrawing: cut 1, leave 3, Satin stitch diamonds made of 5 stitches with change of direction (book: Sticken von Lucinda Ganderton, page 101).

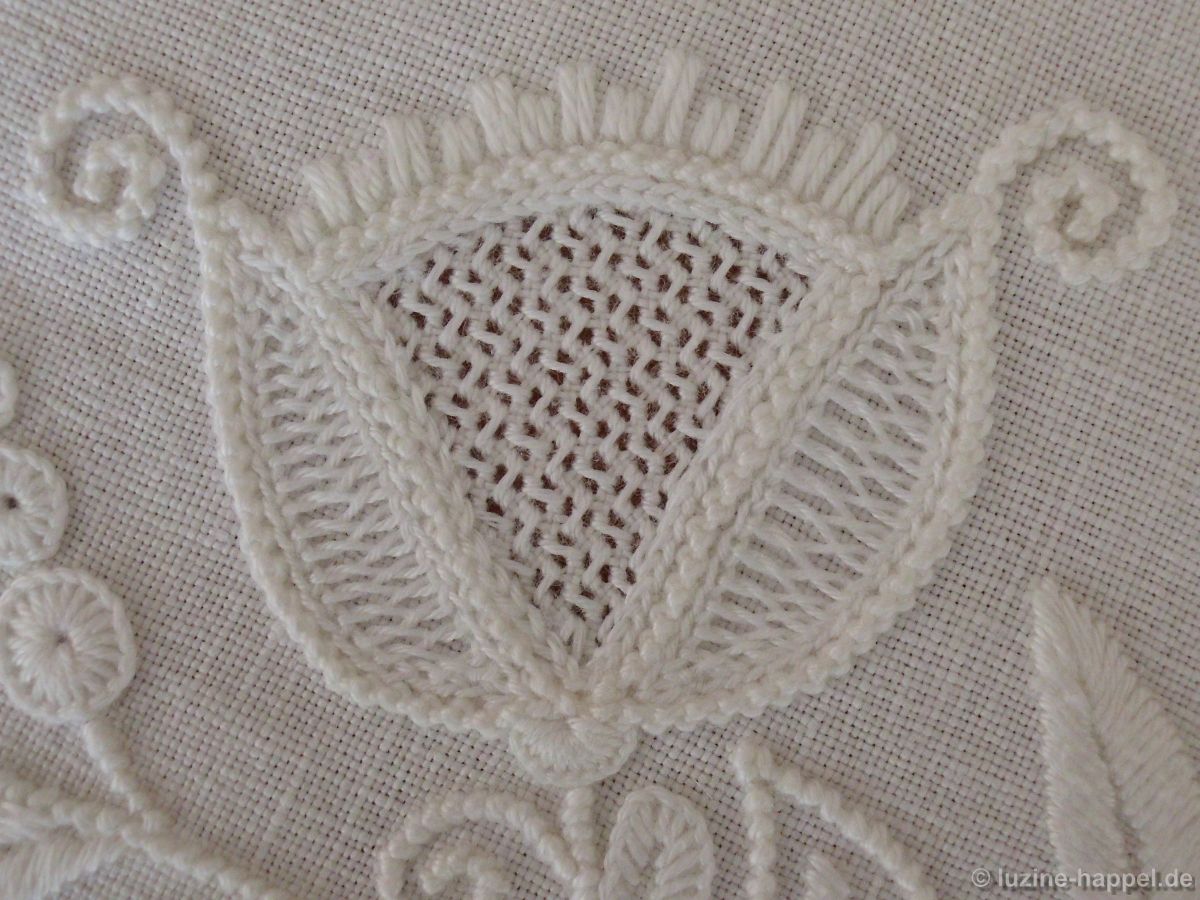
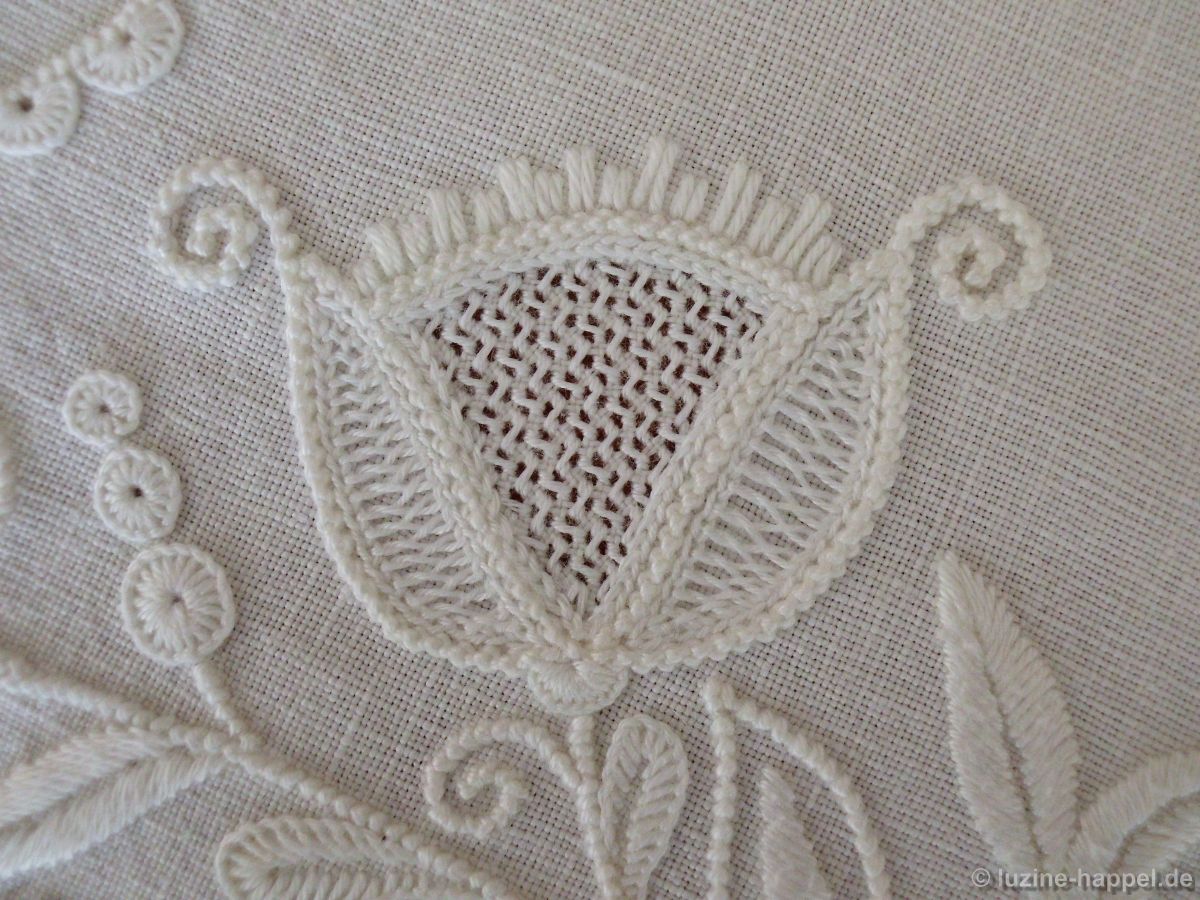
Detail 4: small tulip (on the straight of grain)
thread withdrawing: cut 1, leave 3,
double square eyelet pattern „Ostertulpe – dicht“ (book: Limetrosen II, page 42)

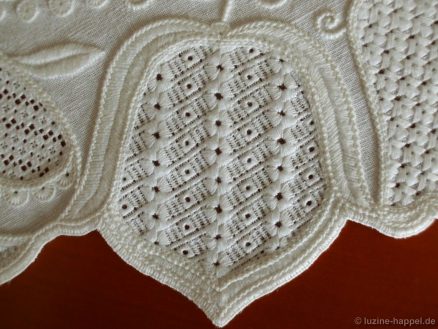
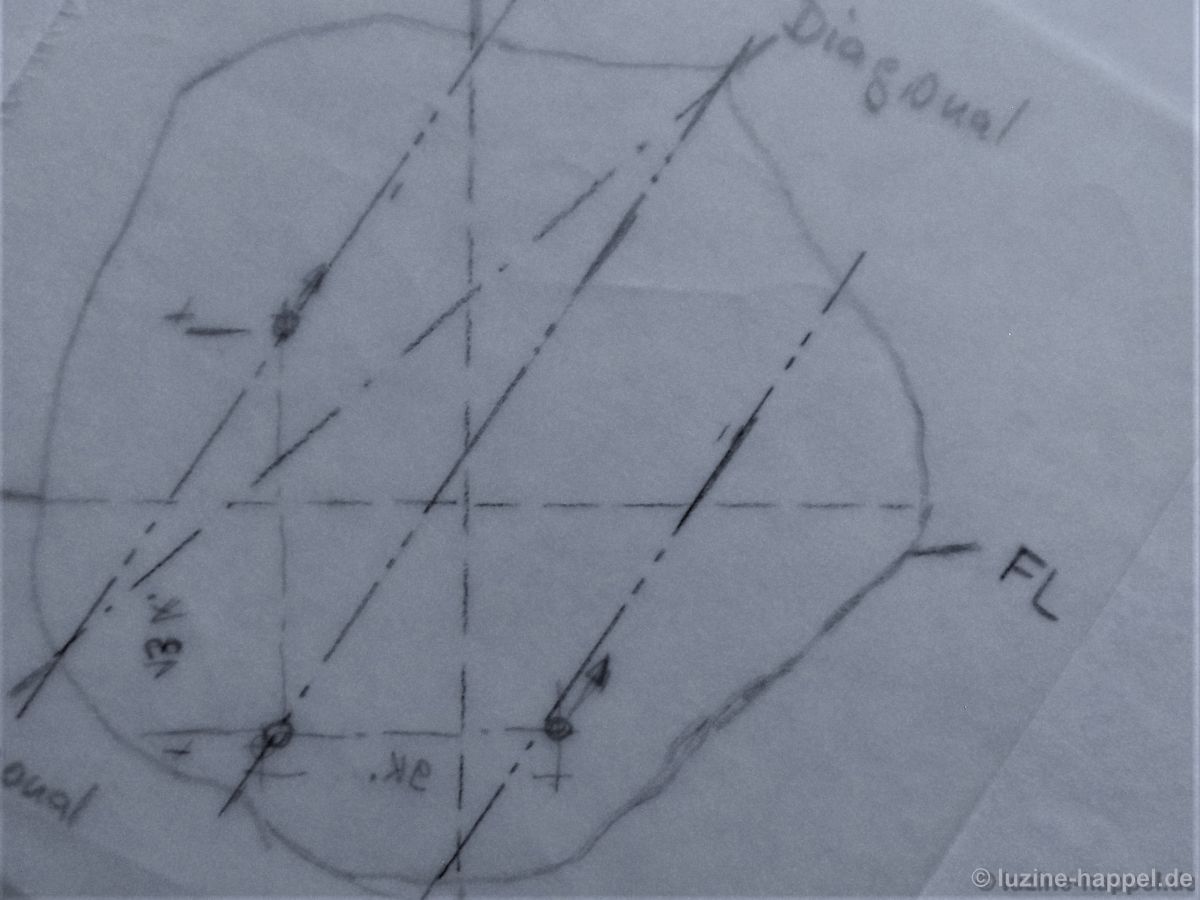
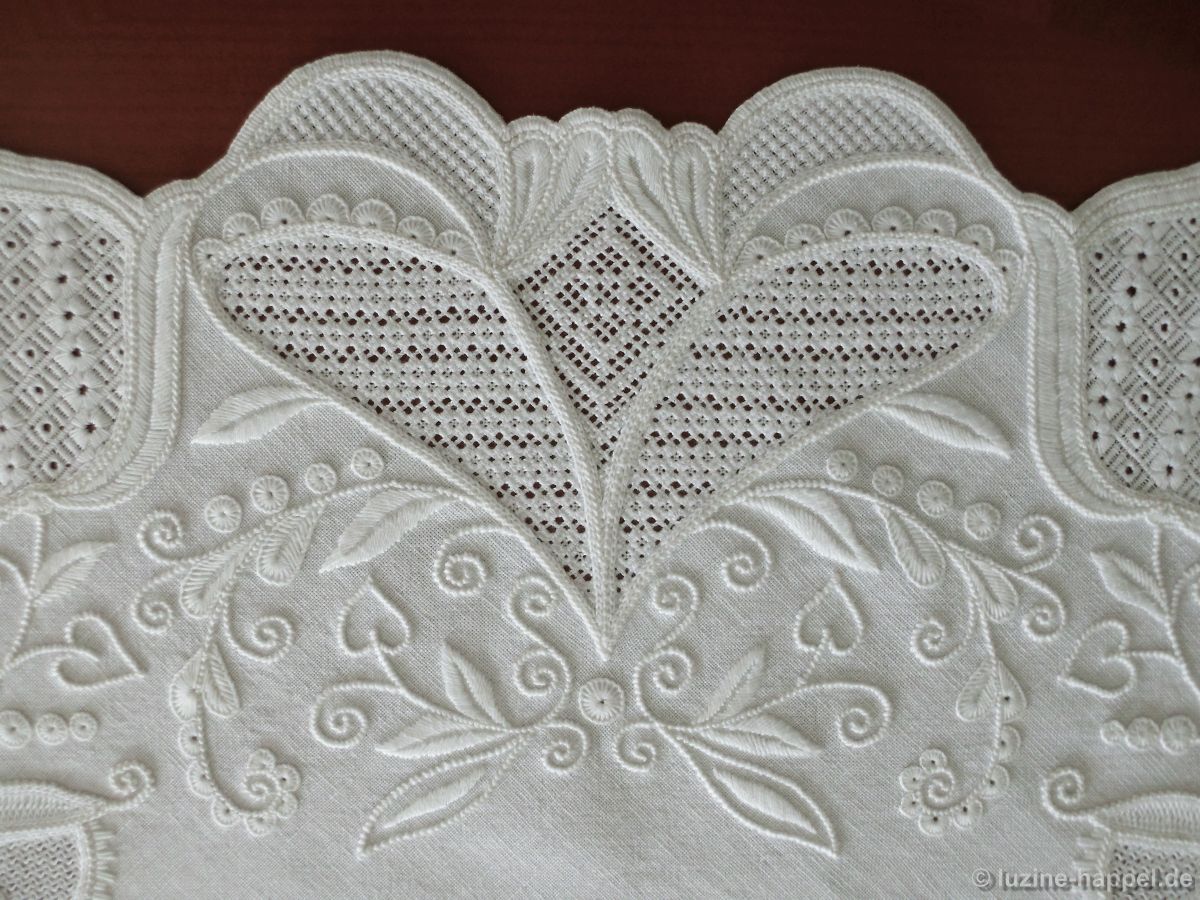
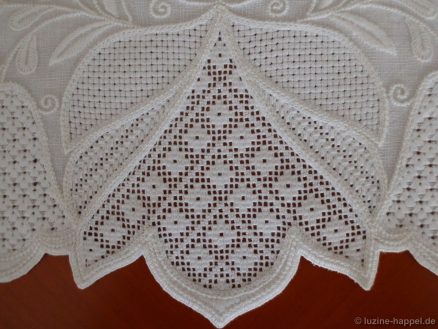
Detail 5: large tulip (inclined 22.5 degrees)
thread withdrawing: cut 1, leave 3,
Stitch combination, embroidered in mirror image in every second tulip, consisting of double square eyelet „Cross Medal – staggerd“, here single row (book: Limetrosen I, page 78), „Simple Square Eyelets“, here offset in one row (book: Limetrosen I, page 33), Satin stitch bars slanting, here with a change of direction (book: Wickelstiche I, page 9).

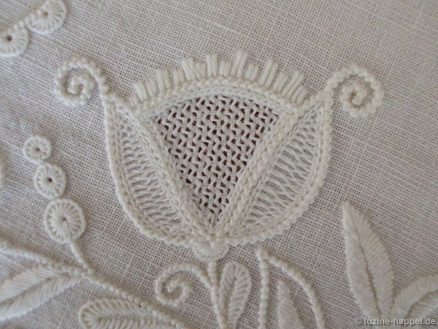
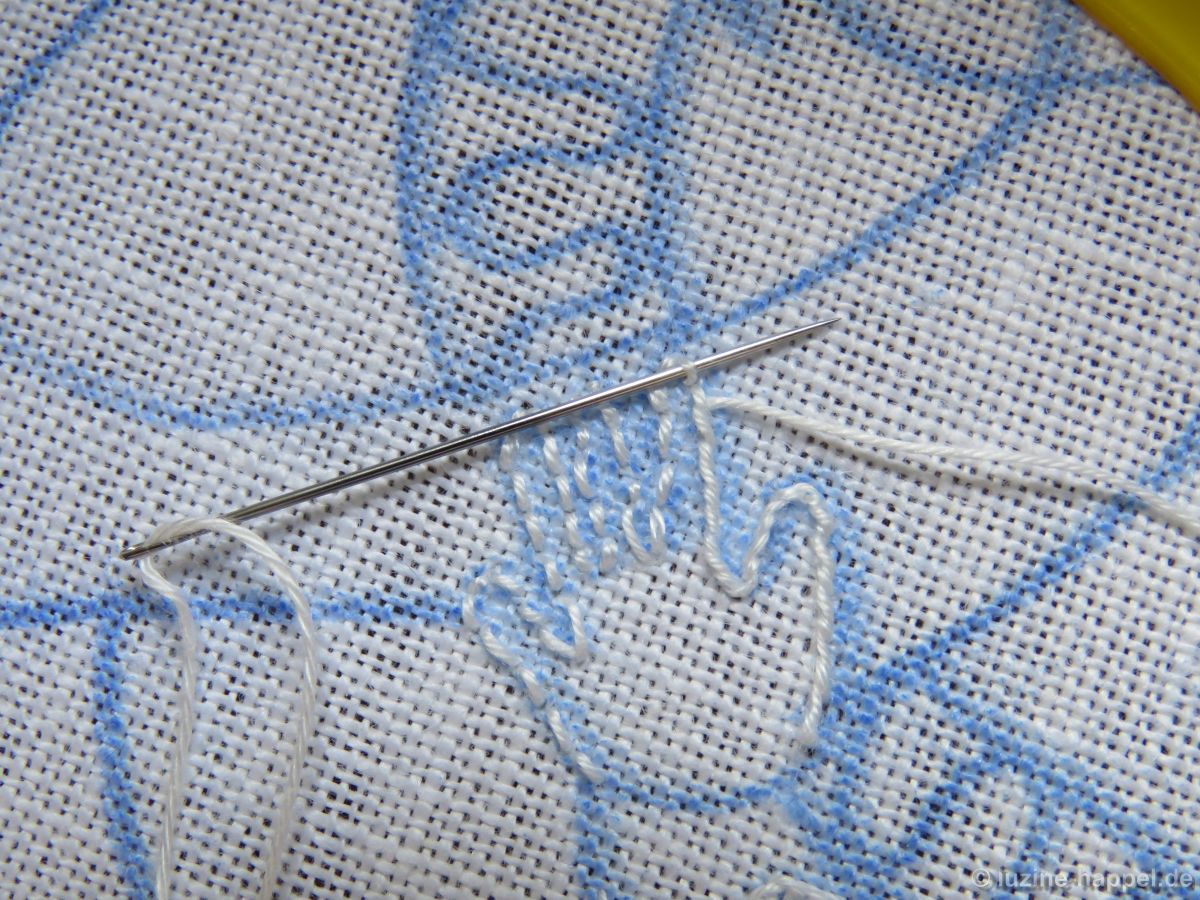
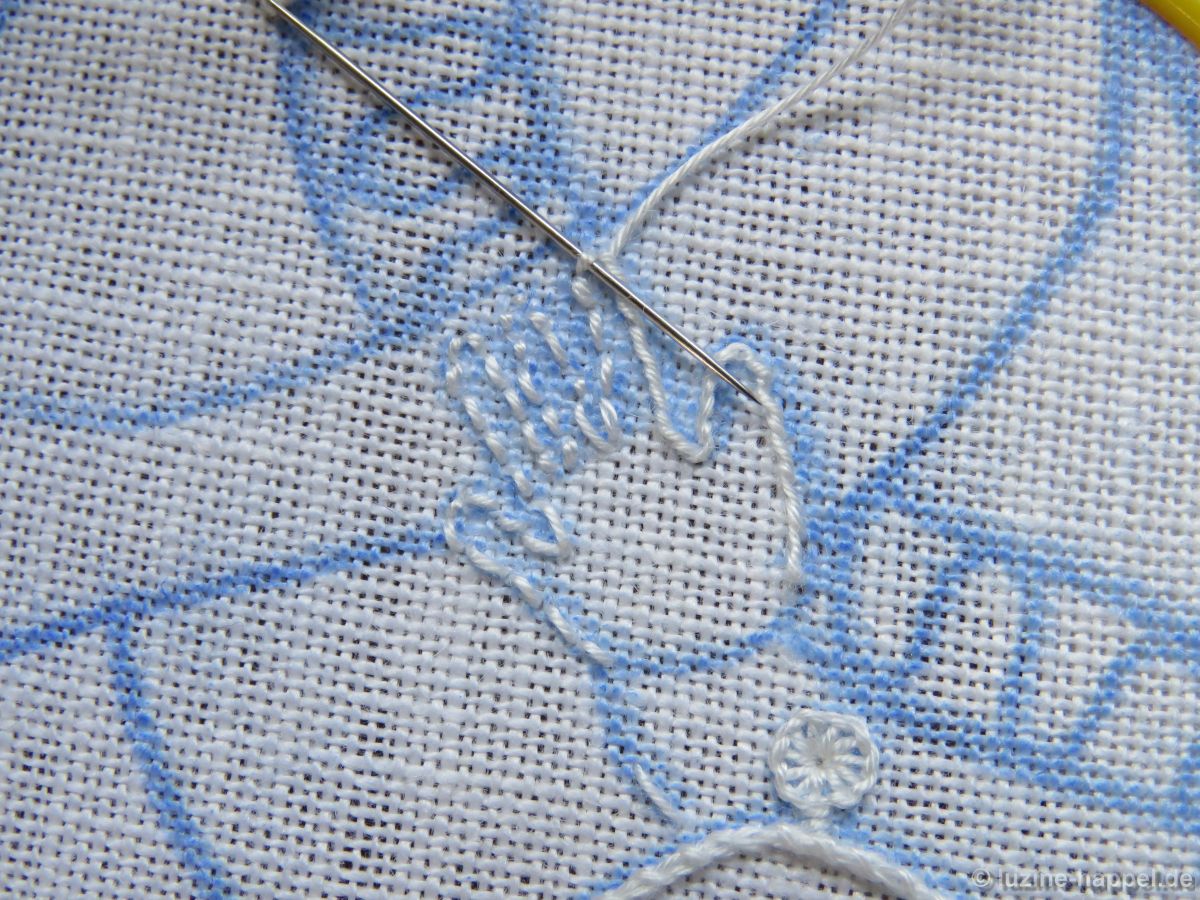
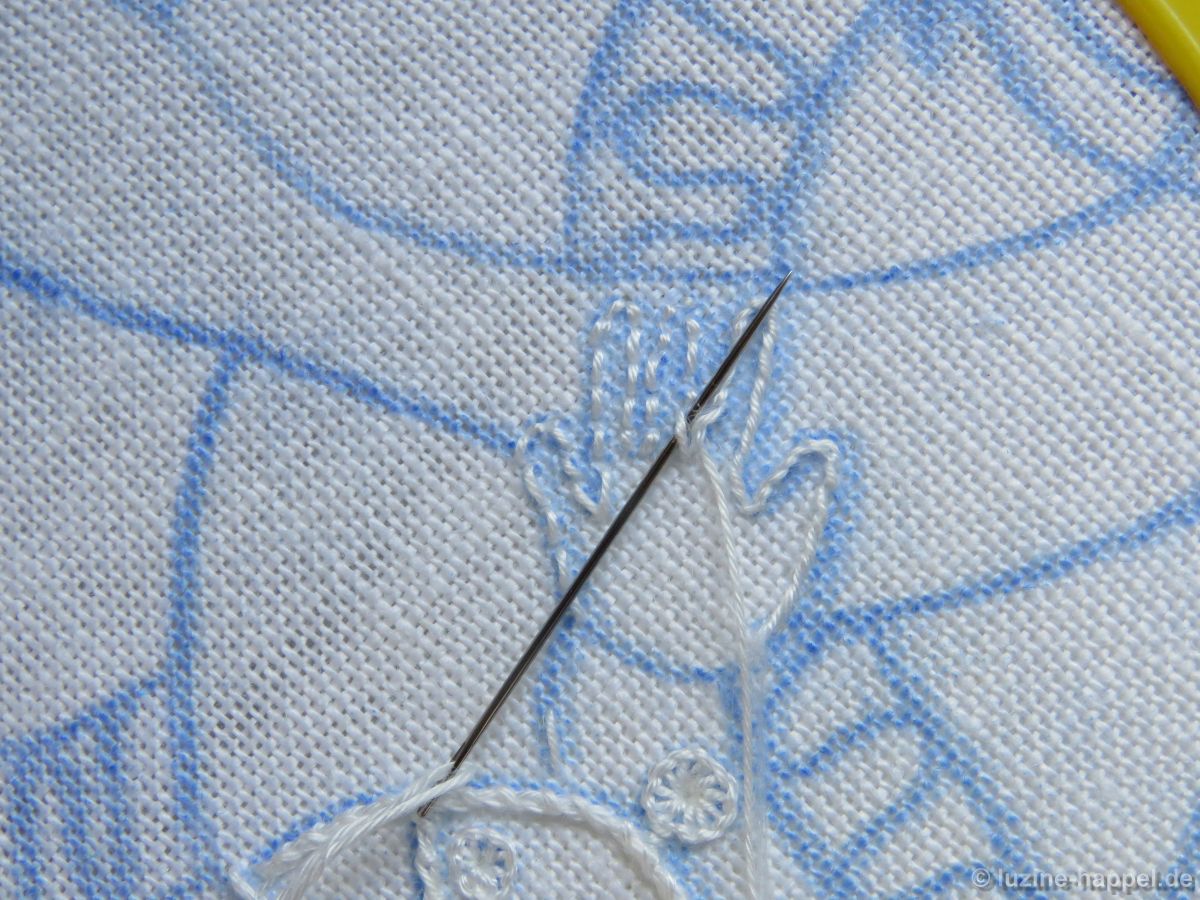
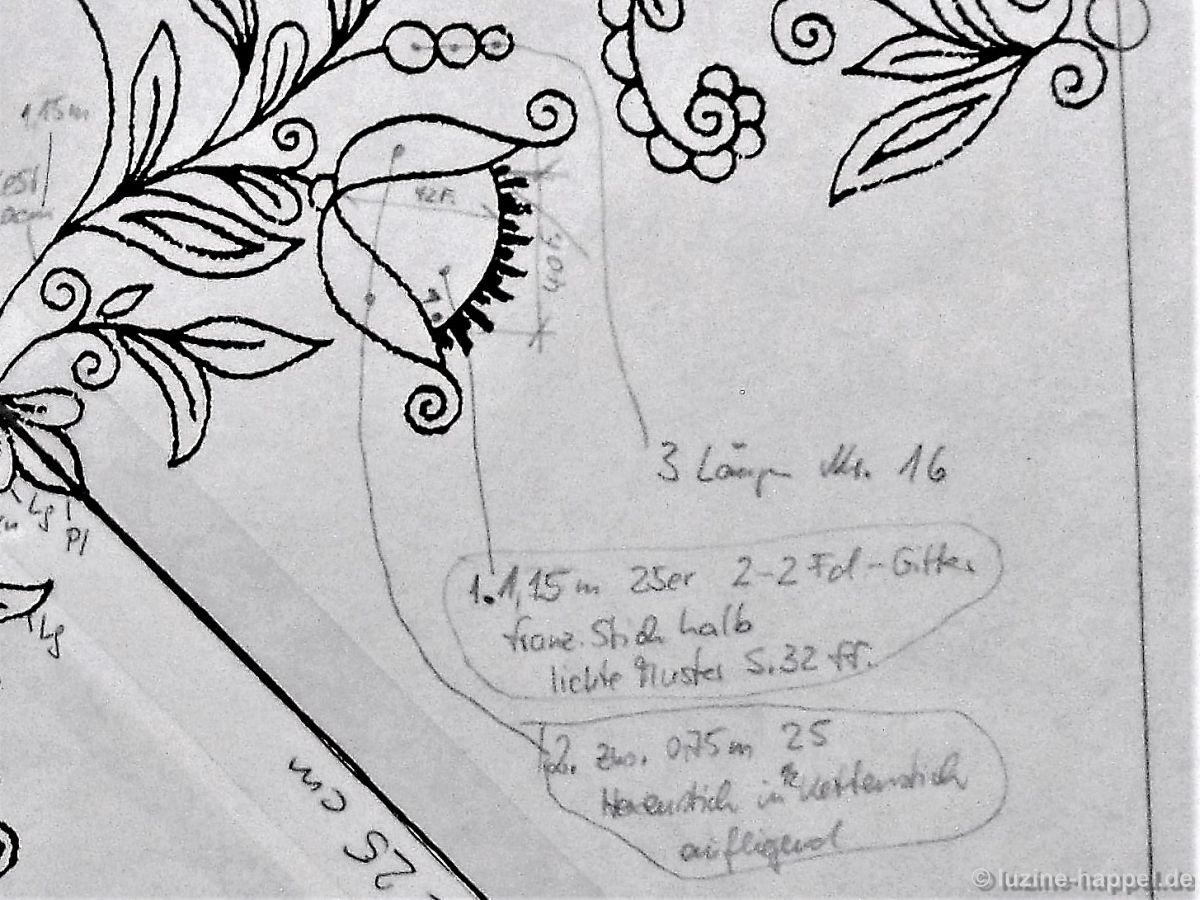
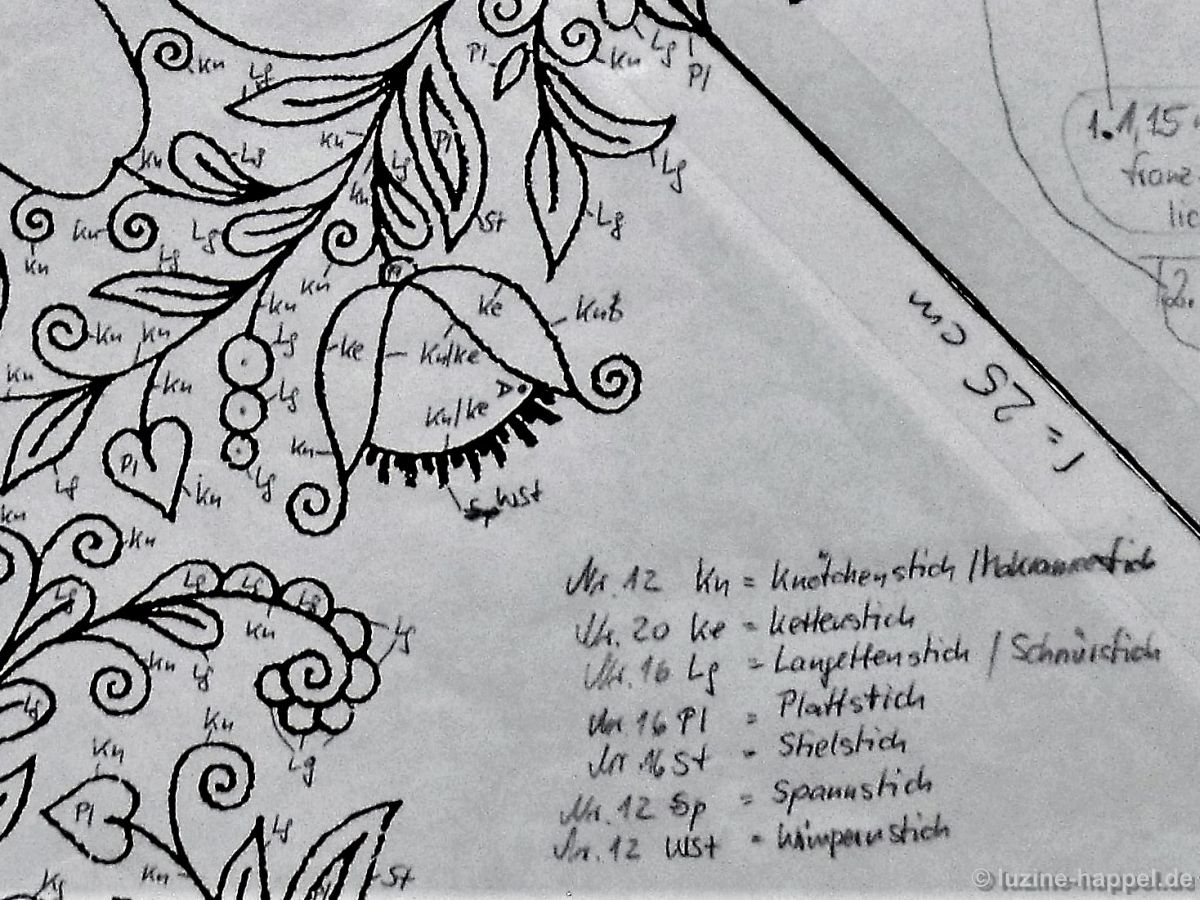
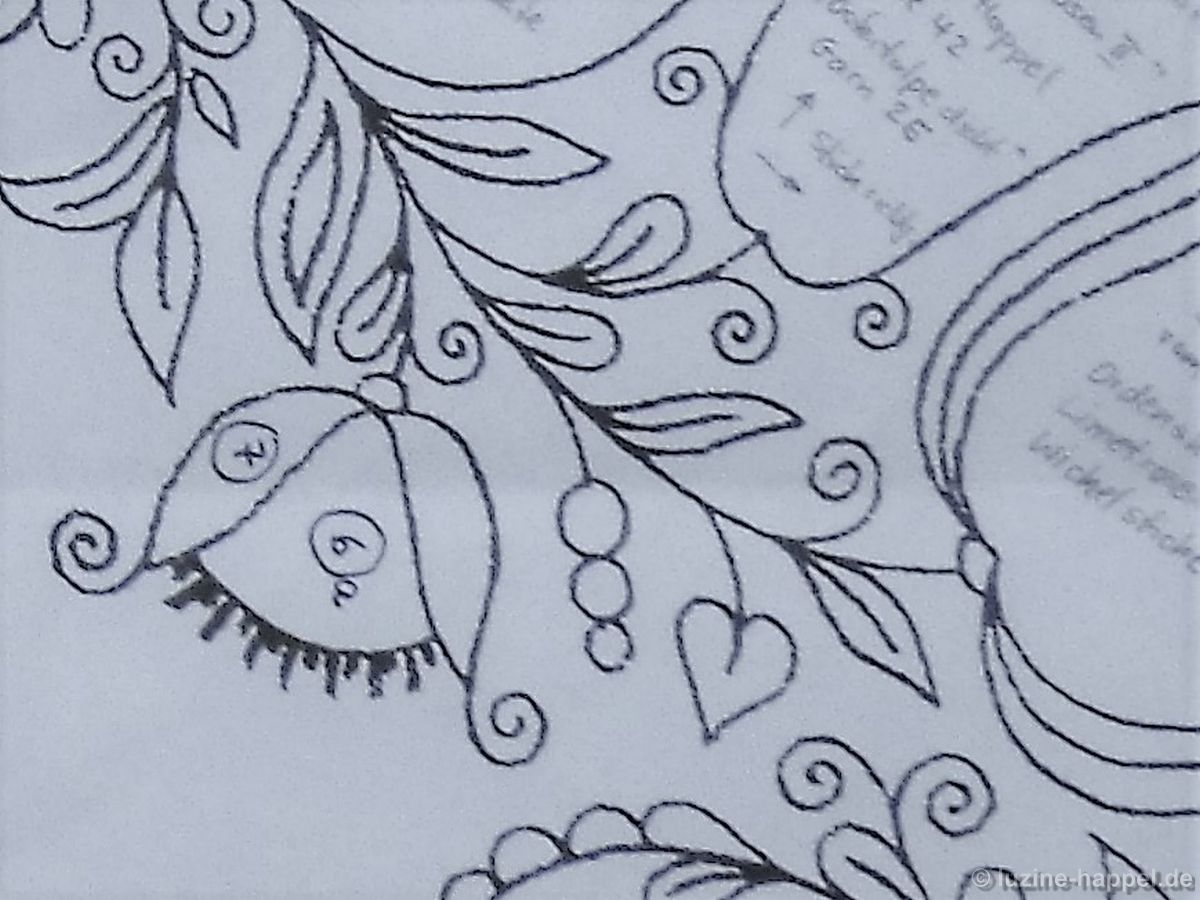
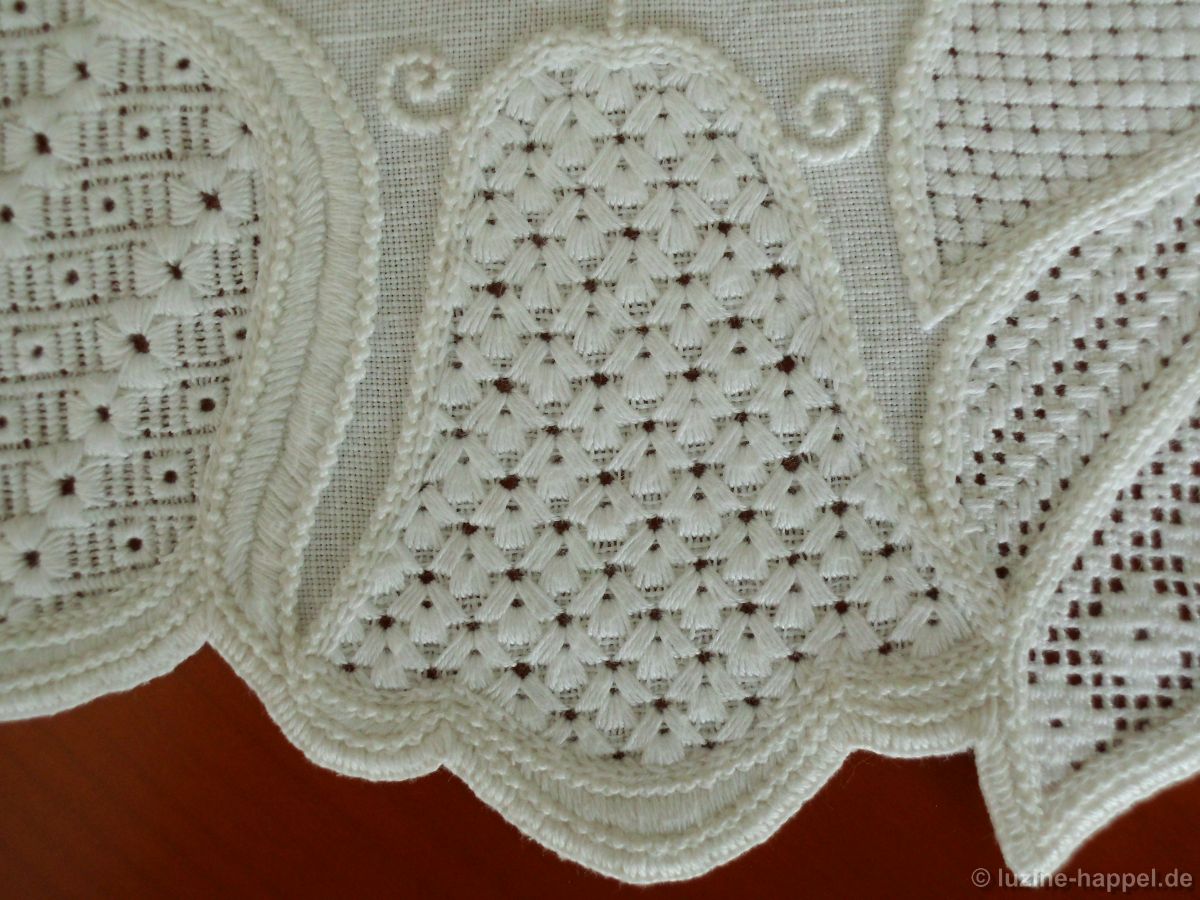
Details 6 and 7: bud (slightly inclined)

flower center: thread withdrawing: cut 2, leave 2,
Diagonal Cross Filling – French Variation/”half”, here embroidered in mirror image in every second bud, (book: Openwork Pattern Samplers, page 32),

outer petals:
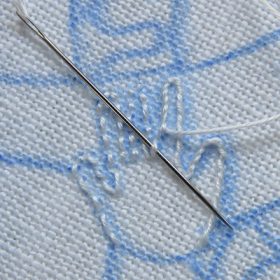
surface Herringbone stitch, hooked into the chain stitch (inspired by book: Early Schwalm Whitework).

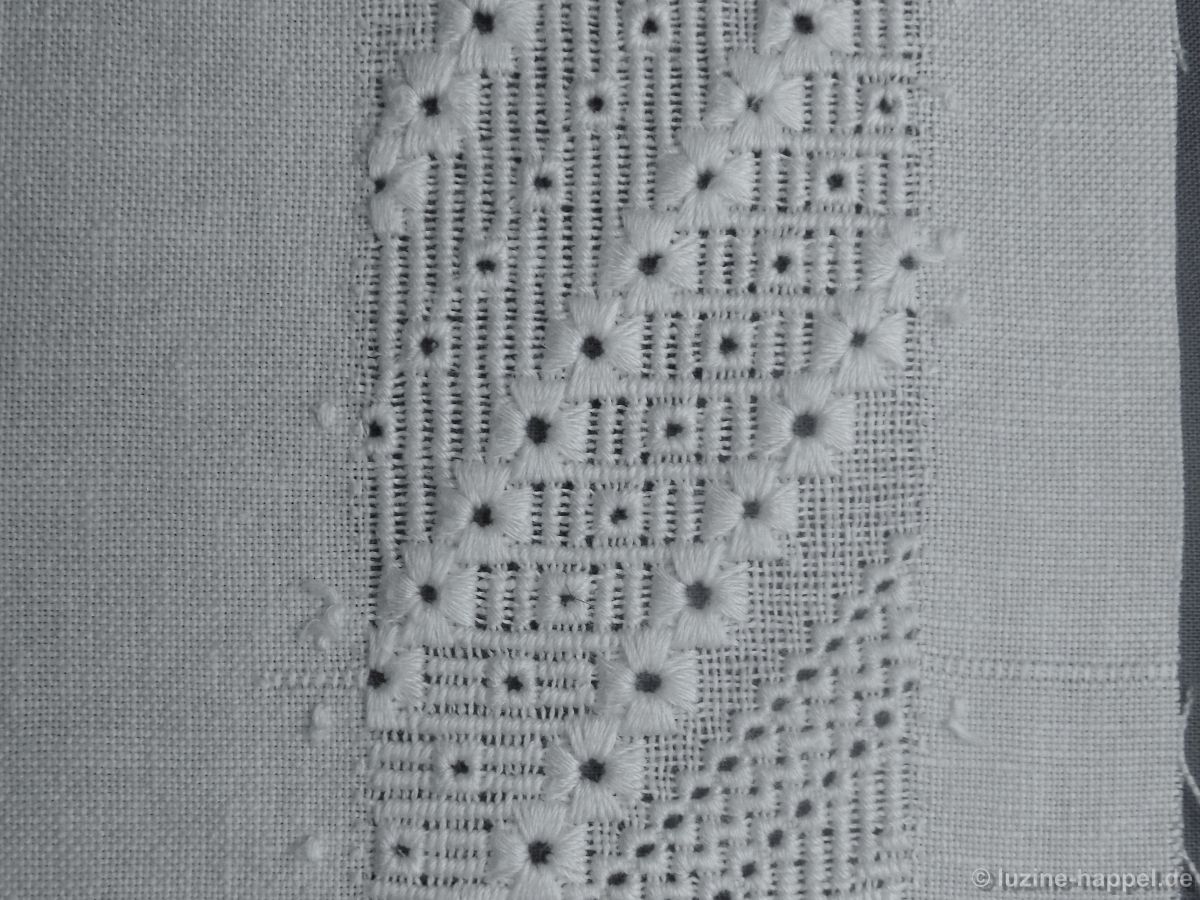
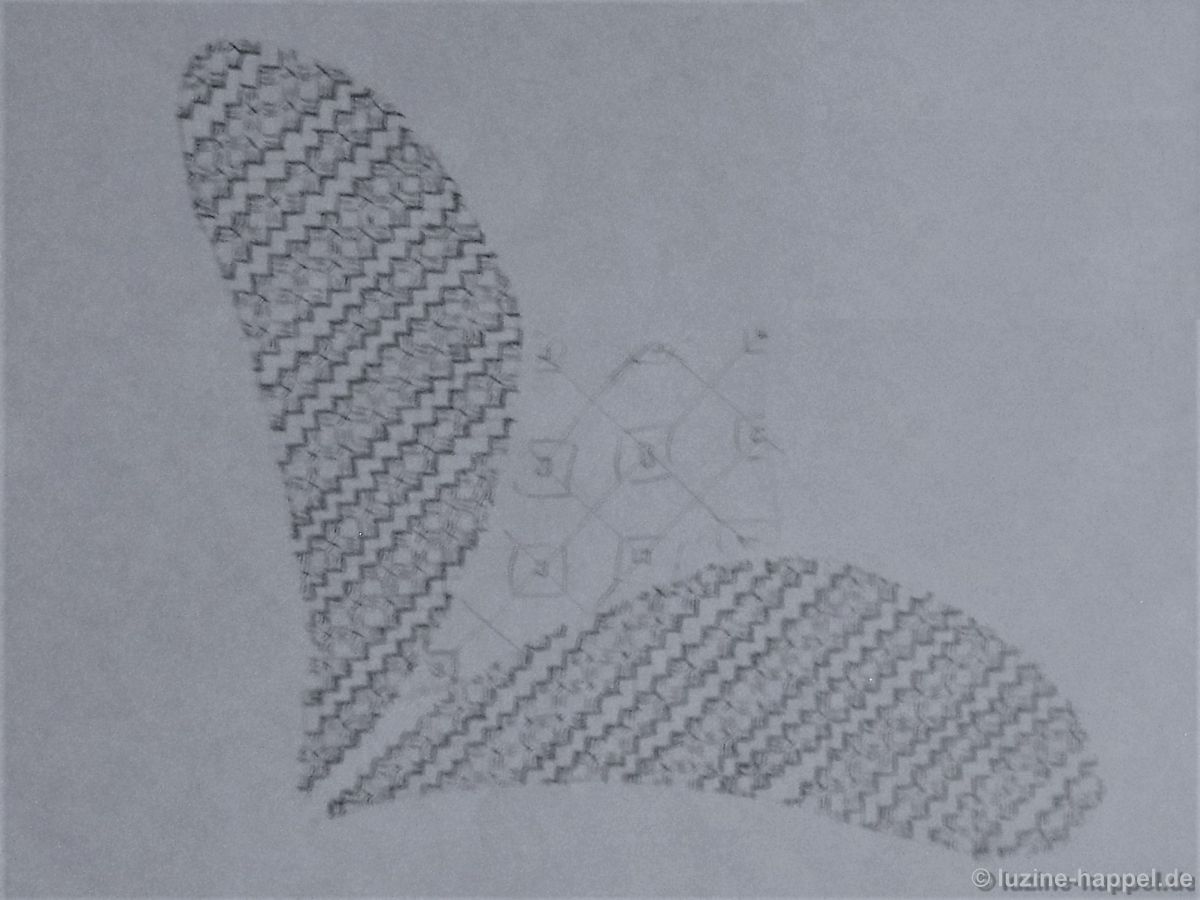
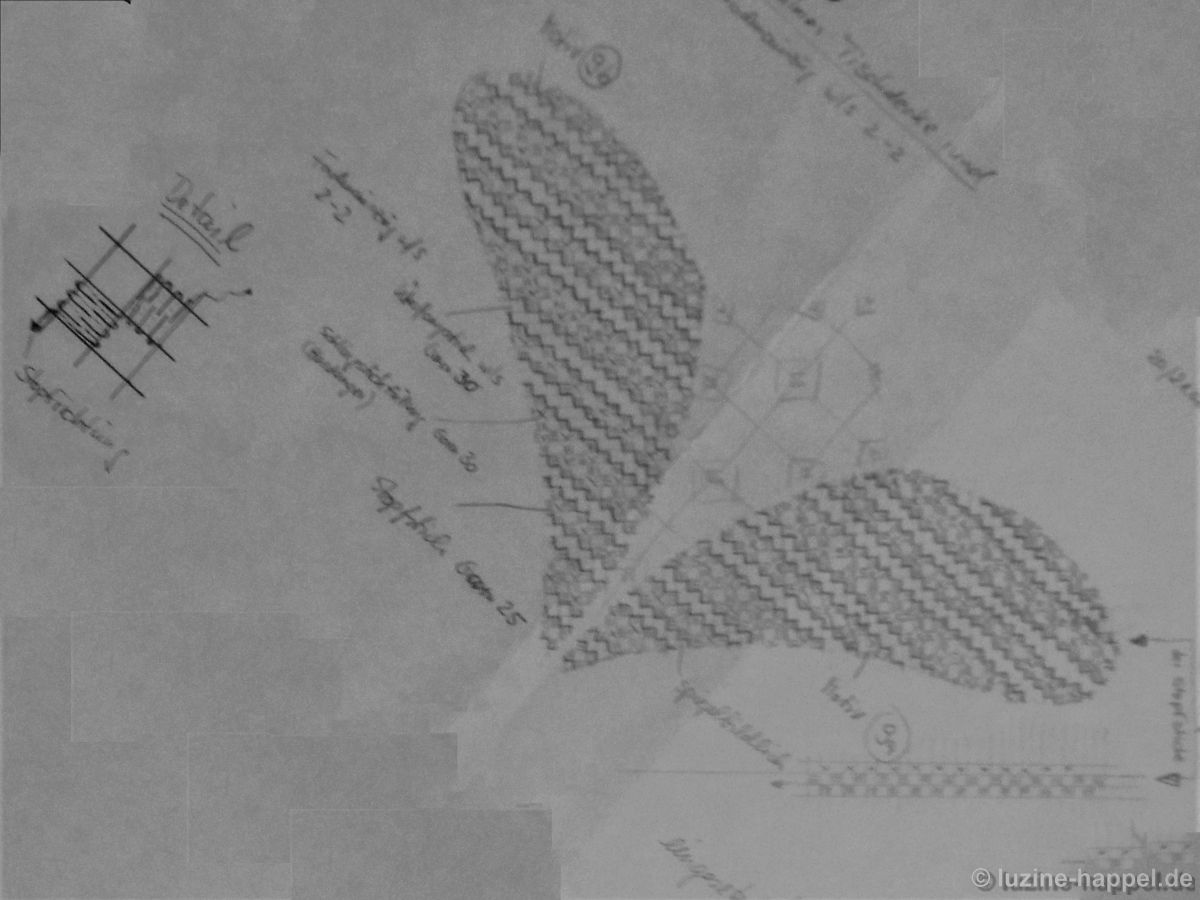
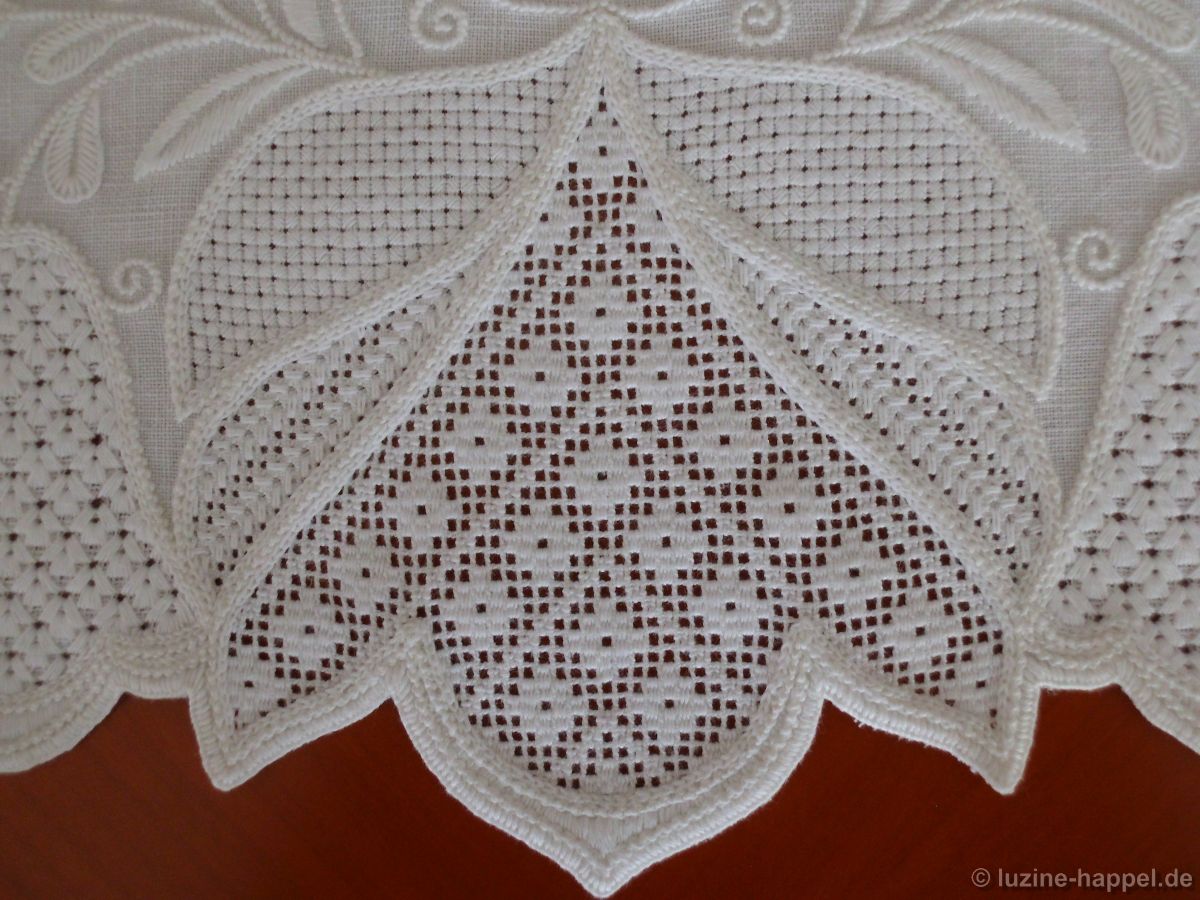
Details 8, 9 and 10: large flower (diagonal)

flower center: thread withdrawing: cut 2, leave 2,
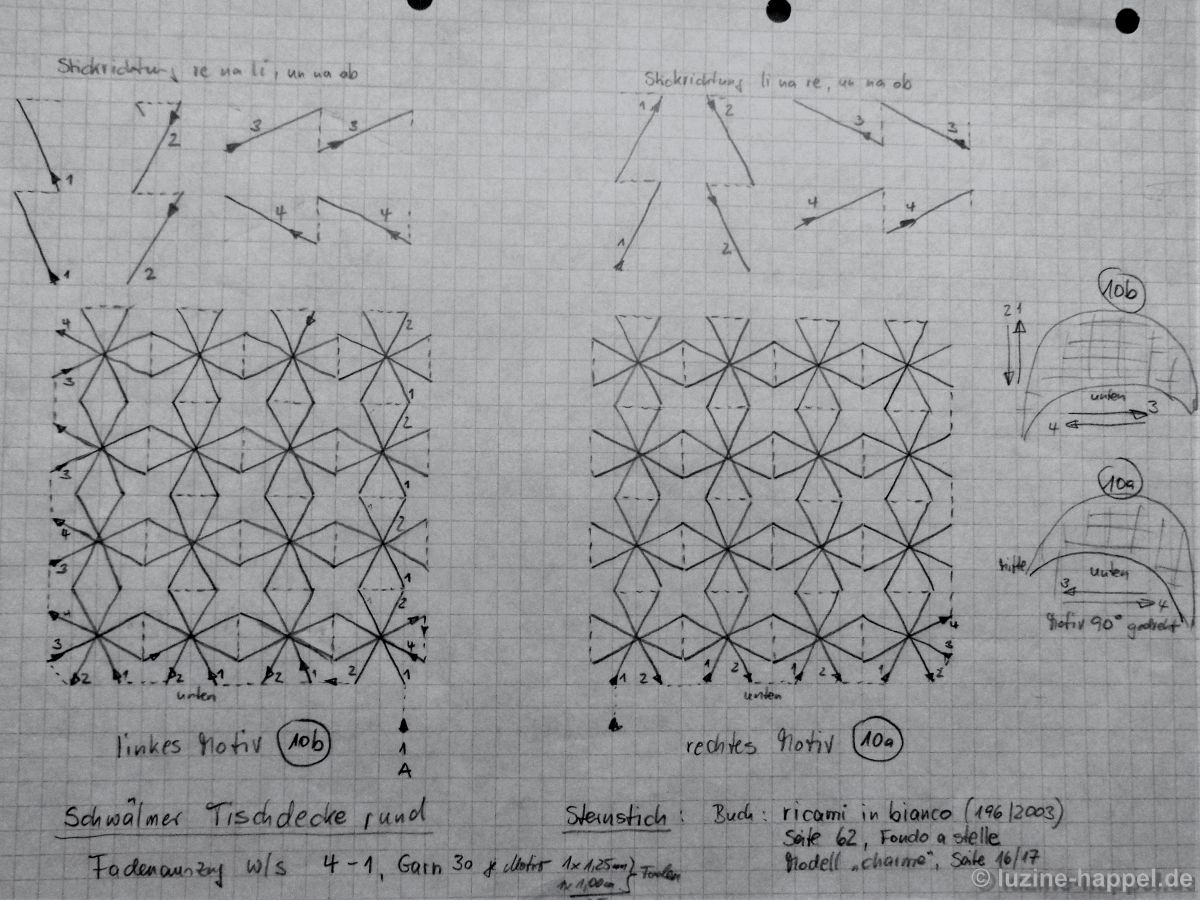
Cable stitch grid, Rose stitch vertically (book: Openwork Pattern Samplers, page 63),

Outer petals: thread withdrawing: cut 2, leave 2,
Cable stitch grid, needle-weaving pattern over 1 square, here with a change of direction, 2- and 3 rows, (book: Openwork Needleweaving Patterns, page 83) with Rose stitch filling.

upper petals: thread withdrawing: cut 1, leave 4
Star stitch in rows (book: Ricami in bianco, Casa Editrice Mani di Fata, page 62, pattern „Fondo astelle“).

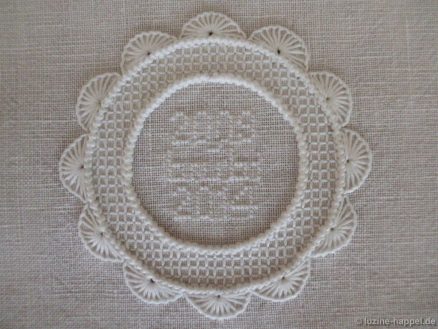
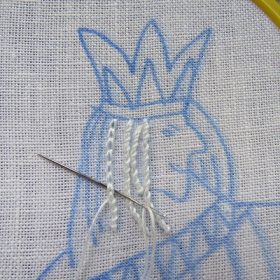
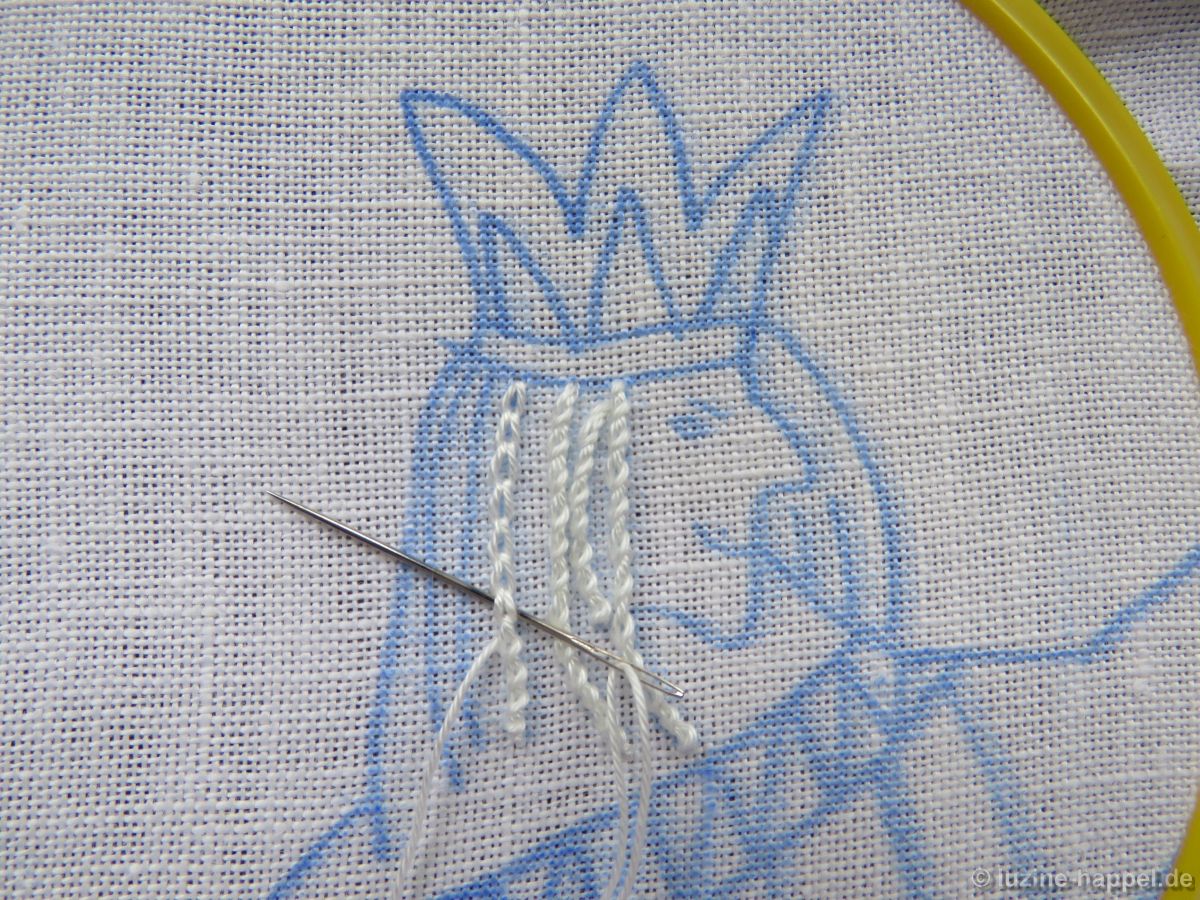
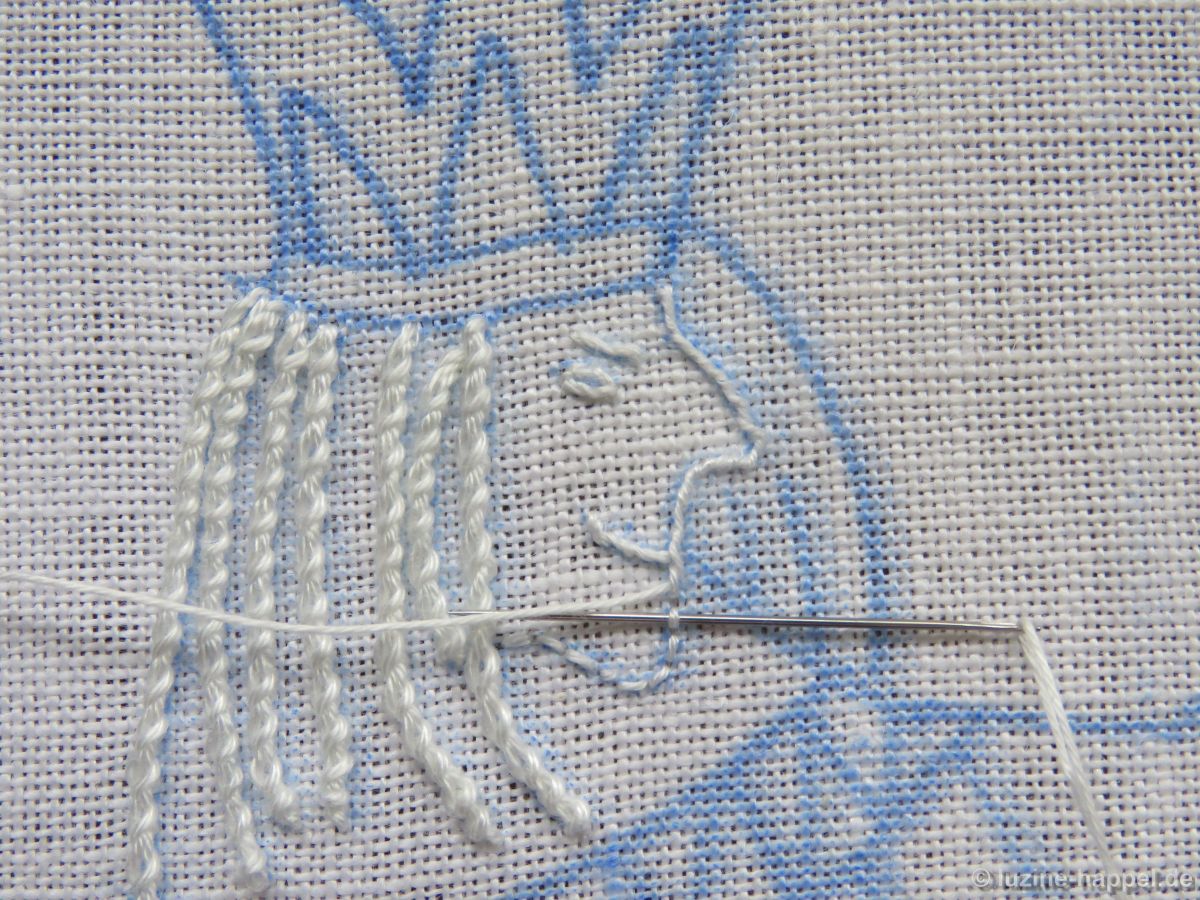
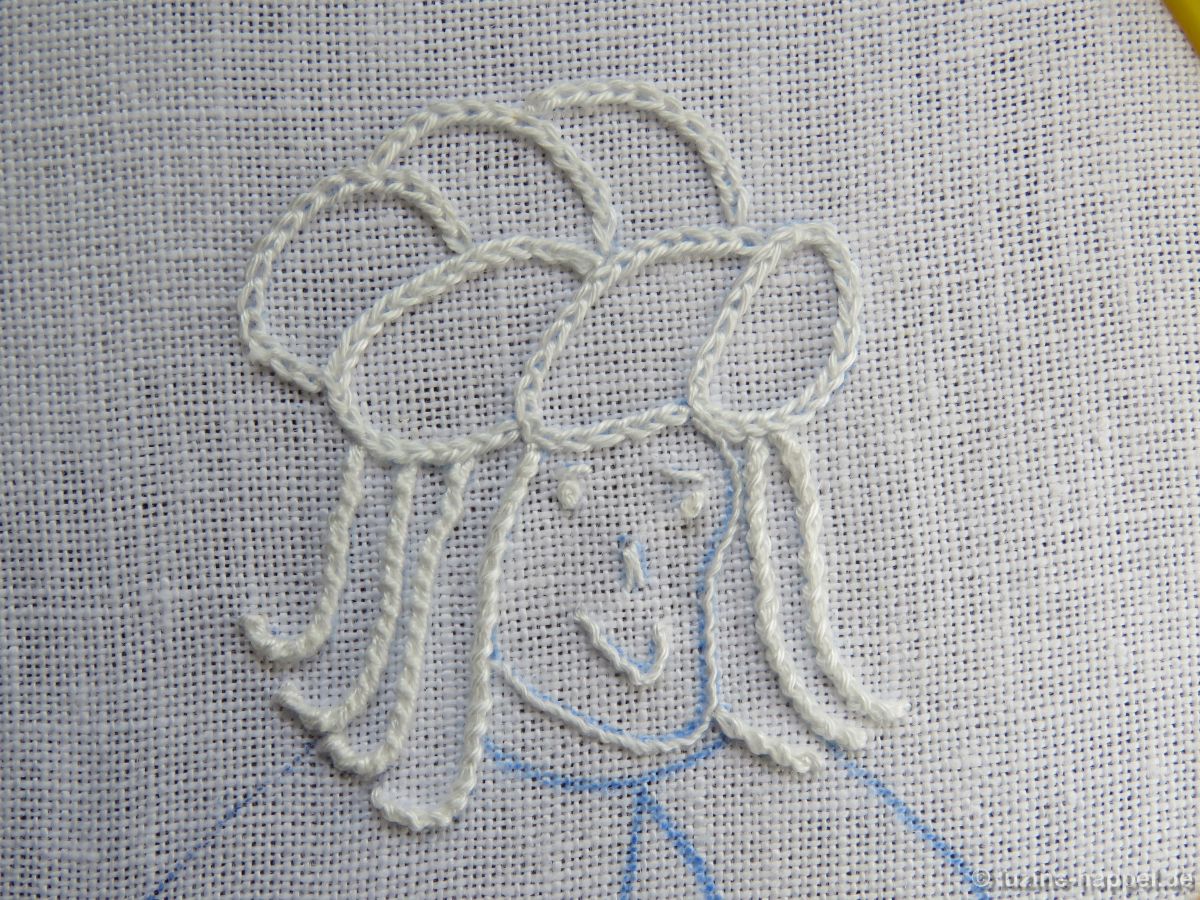
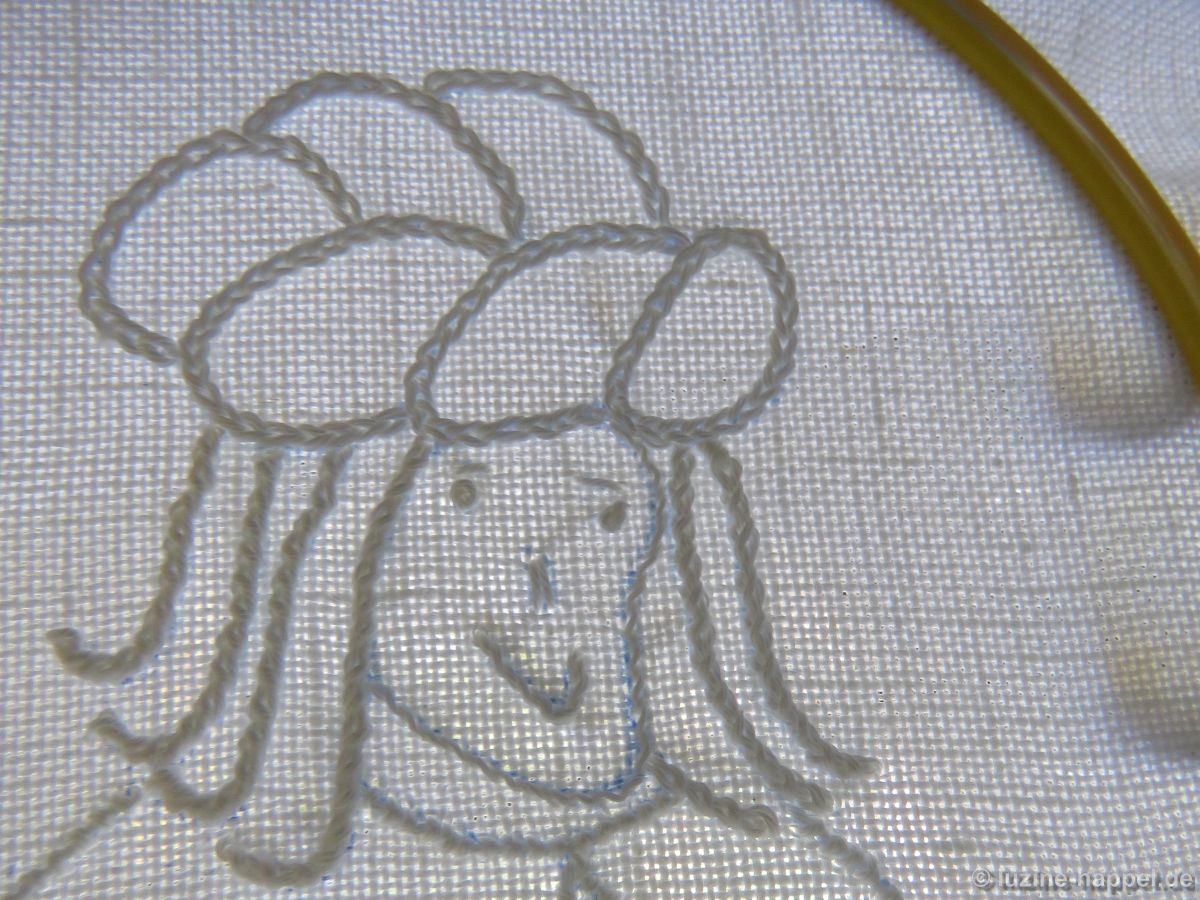
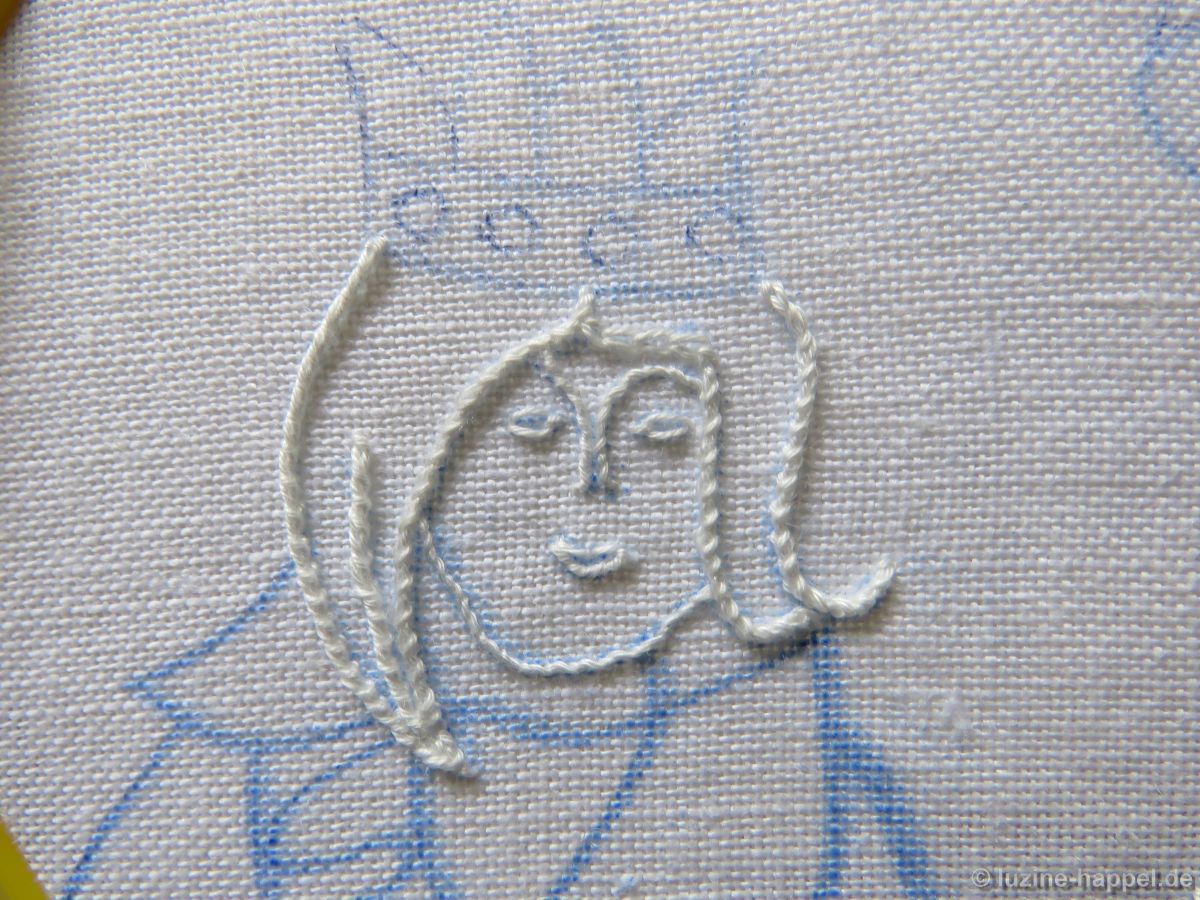
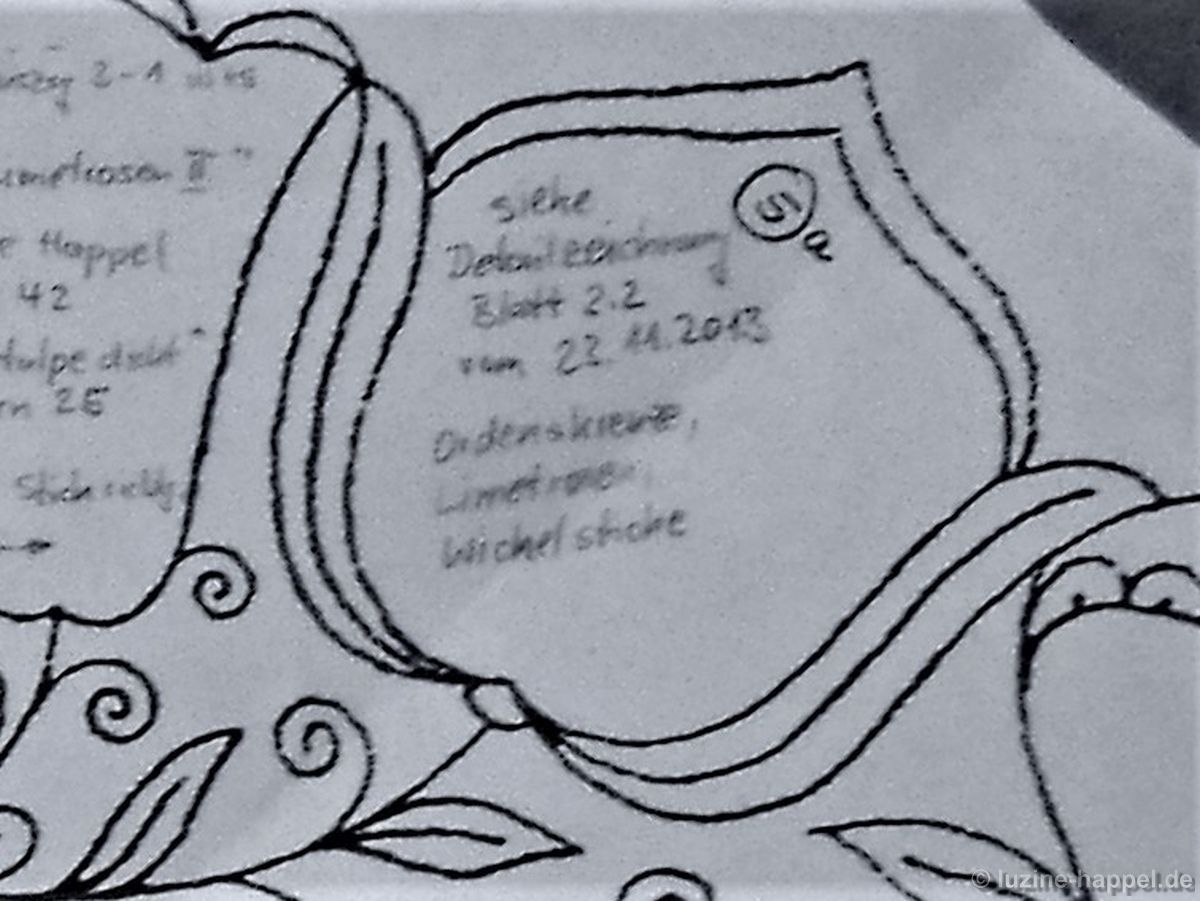
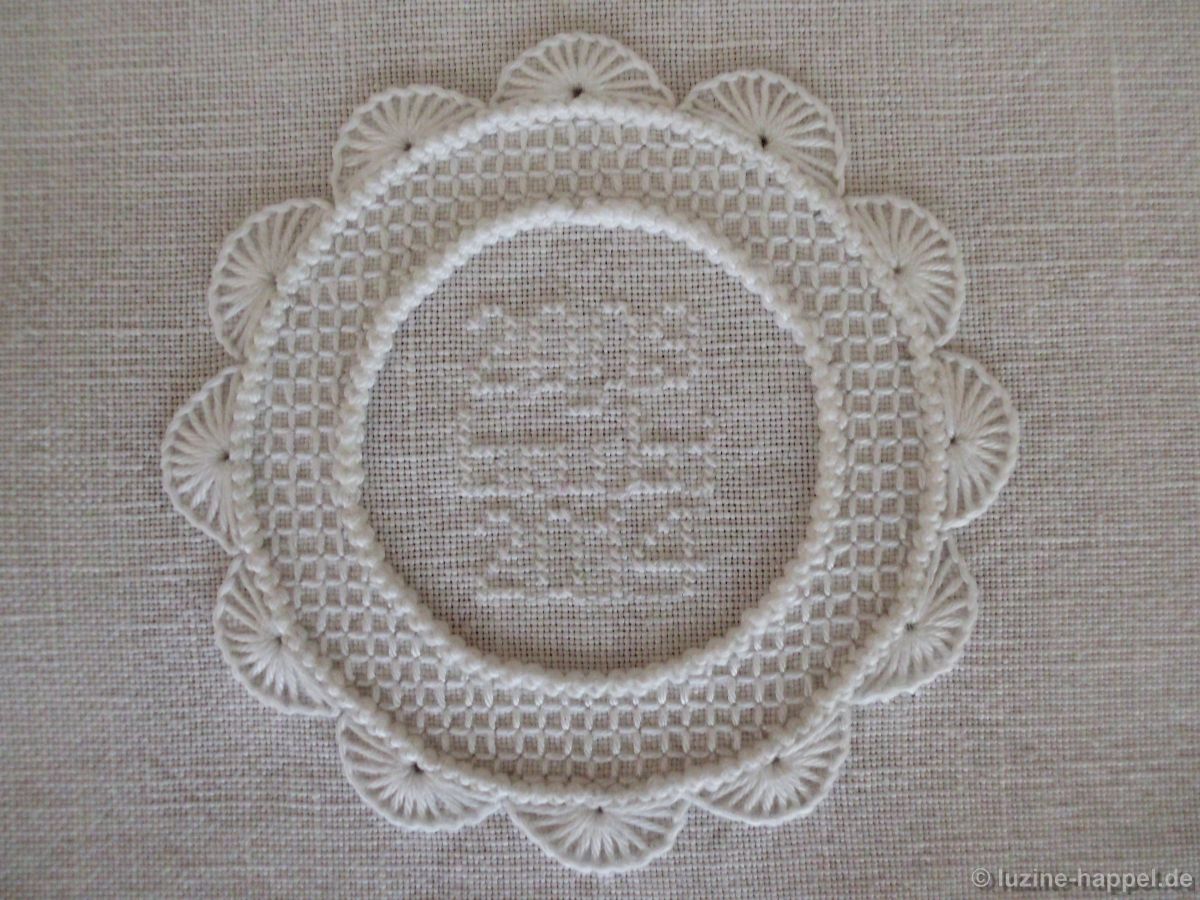
Detail 11: Crown (on the straight of grain – own design)

Circles: Macrame stitch,
Ring filling: Four-Sided stitch,
Semicircles: Blanket stitch half eyelets,
Characters: Cross stitch, text horizontally “brubi”, vertically “2009 – 2014”.

General information about embroidery realising

fabric: pure linen, 16 tpcm, Weddigen linen mill,

embroidery threads:
coton à broder:
No. 12: Makramee stitch, Coral Knot stitch, Satin stitch, Blanket stitch (border),
No. 16: Blanket stitch, Satin stitch, Stem stitch,
No. 20: Chain stitch, Blanket stitch (Detail 1),
No. 25: Rose stitch (Details 1,8, and 9), needle-weaving stitch (Detail 1 and Detail 9),
Karomuster (Detail 11), Limetrosen und Satin stitch (Detail 4 and Detail 5),
Diagonal Cross stitch – French Variation (Detail 6) and Herringbone stitch (Detail 7),
No. 30: Cable stitch grid, Rose stitch filling (Details 8, 9), Star stitch (Detail 10), Satin stitch diamonds (Detail 3),
Stranded Cotton:
1-ply: characters,
2-plies: underlay of the border.
Preparation for embroidering this tablecloth began on September 20, 2009.
Embroidery work began on October 27, 2009.
Completion of the embroidery work on November 16, 2014, 10:55 p.m.

Order of embroidery work:
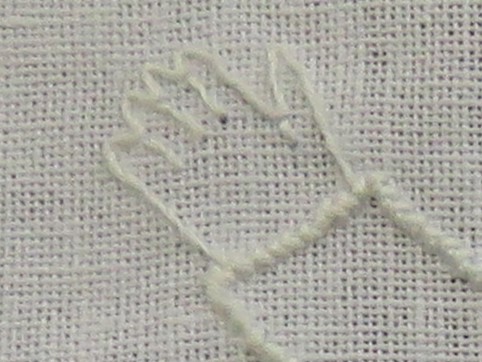
1. Flower outlines in Macrame stitch (stitch embroidered from top to bottom)
2. Stems, tendrils, hearts, leaf outlines partly in Coral Knot stitch (stitch embroidered from top to bottom),
3. Leaves, leaf fillings, flower border fillings in Satin stitch,
4. Bud awns in Satin stitch
5. Some leaves, eyelets and half eyelets in Blanket stitch,
6. Inner flower outlines for the filling patterns in Chain stitch
7. Underlay border (stitch type forgotten), border in Blanket stitch.
– at least 1 year break –
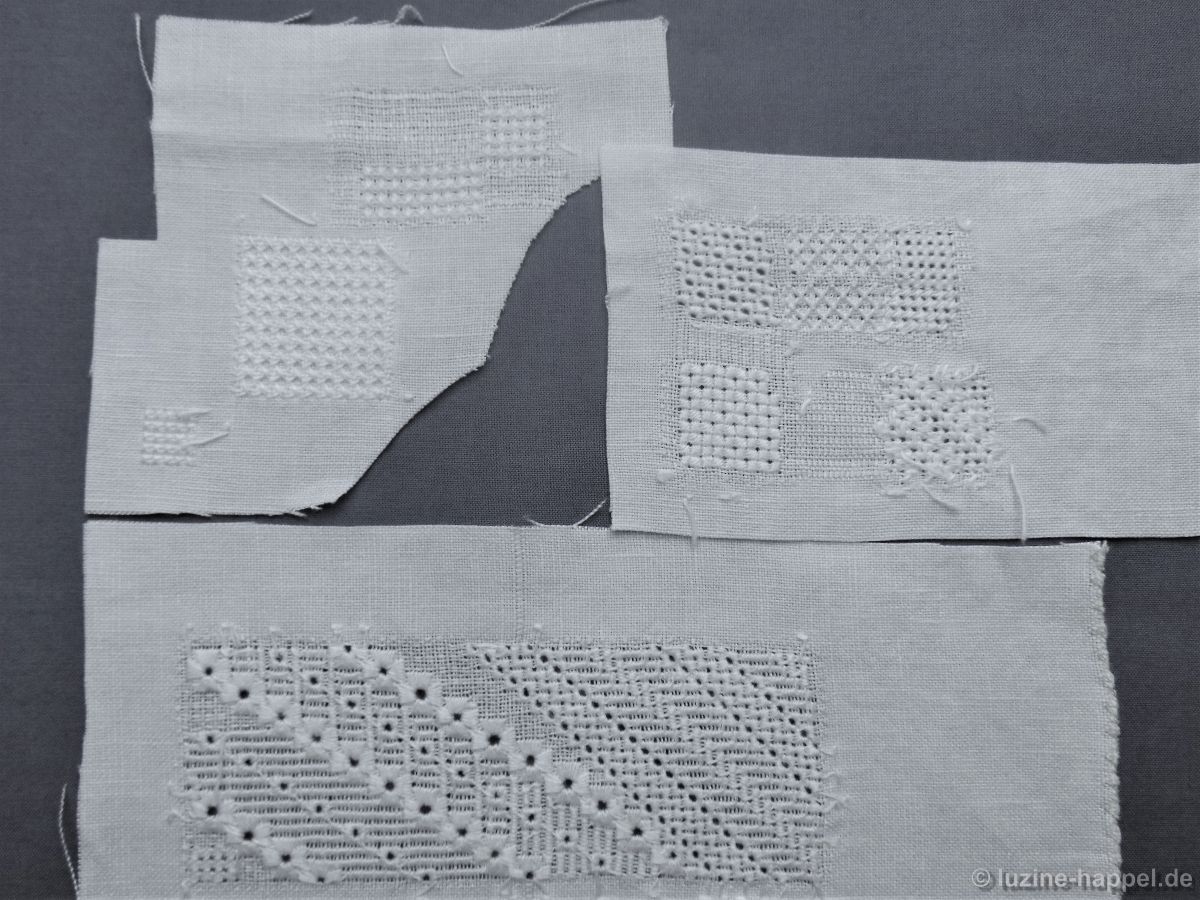
8. Select, determine, sketch, test embroider outside the wreath area, withdrawingt the threads, embroider, and partially remove them again and changing the filling patterns.

You will find out exactly how the preparatory work was done to achieve such sophisticated and first-class embroidery in the next blog post.

Stay tuned!