A Cozy for Candies

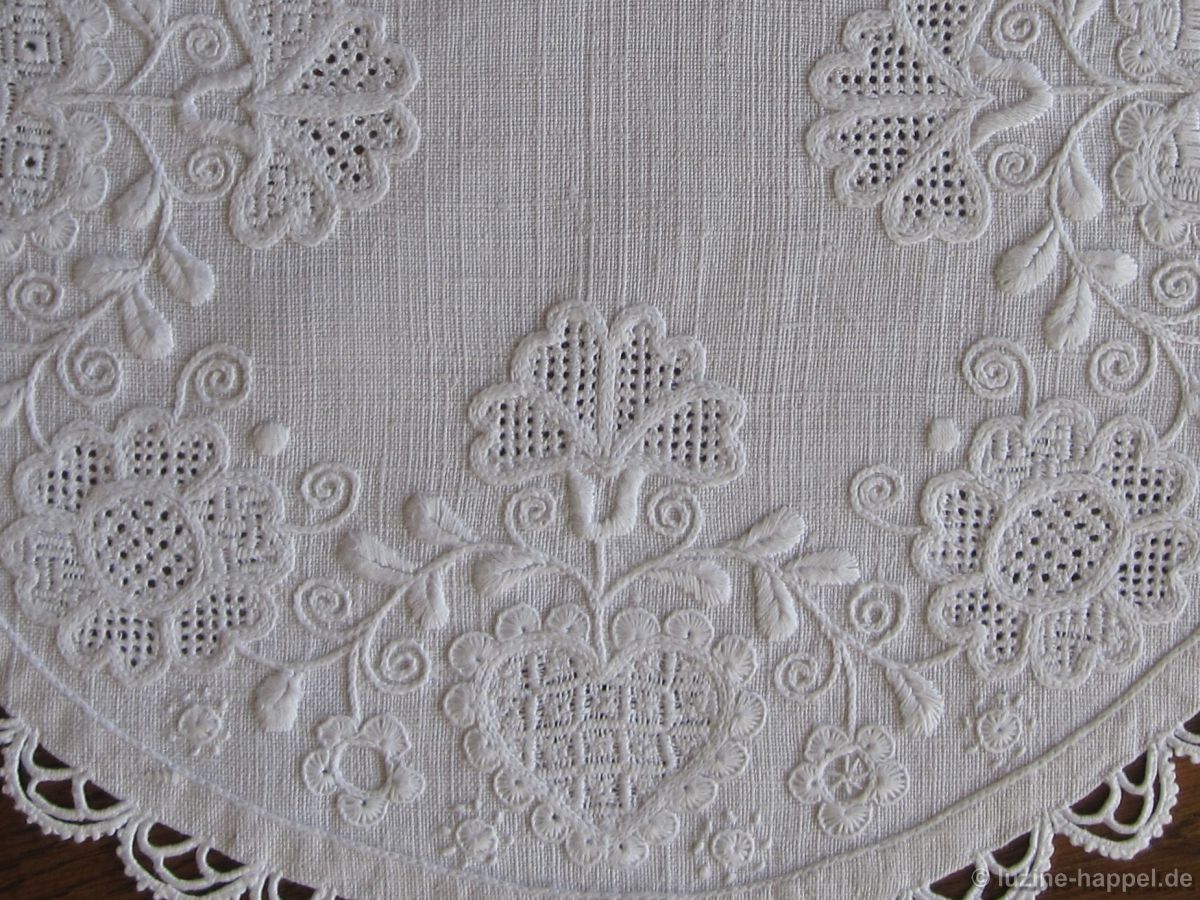
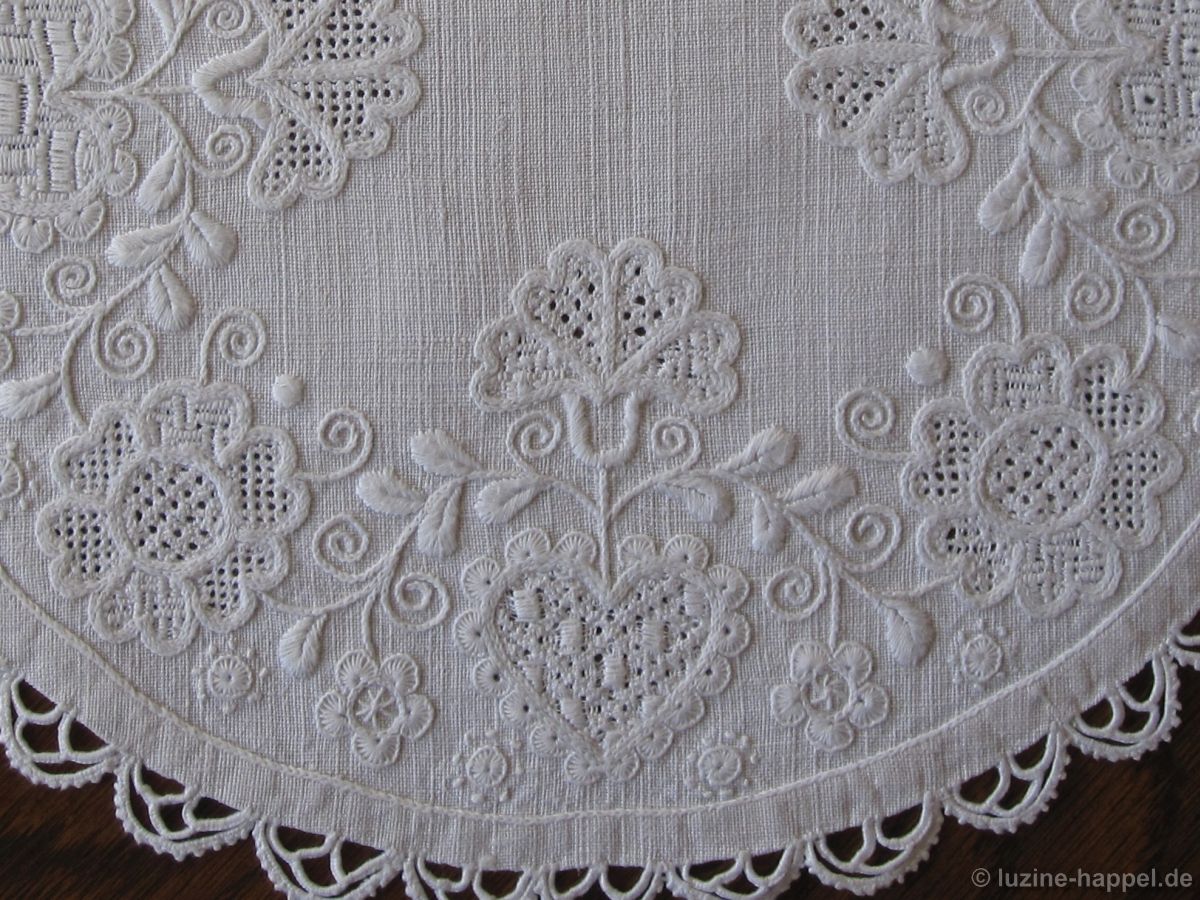
When I was young, it was common to make cozies for dinner rolls. Looking for a nice little project using needlelace, I remembered those cozies. I want to make a small one for sweets. Of course, the candy must be wrapped to be displayed in a linen cozy.

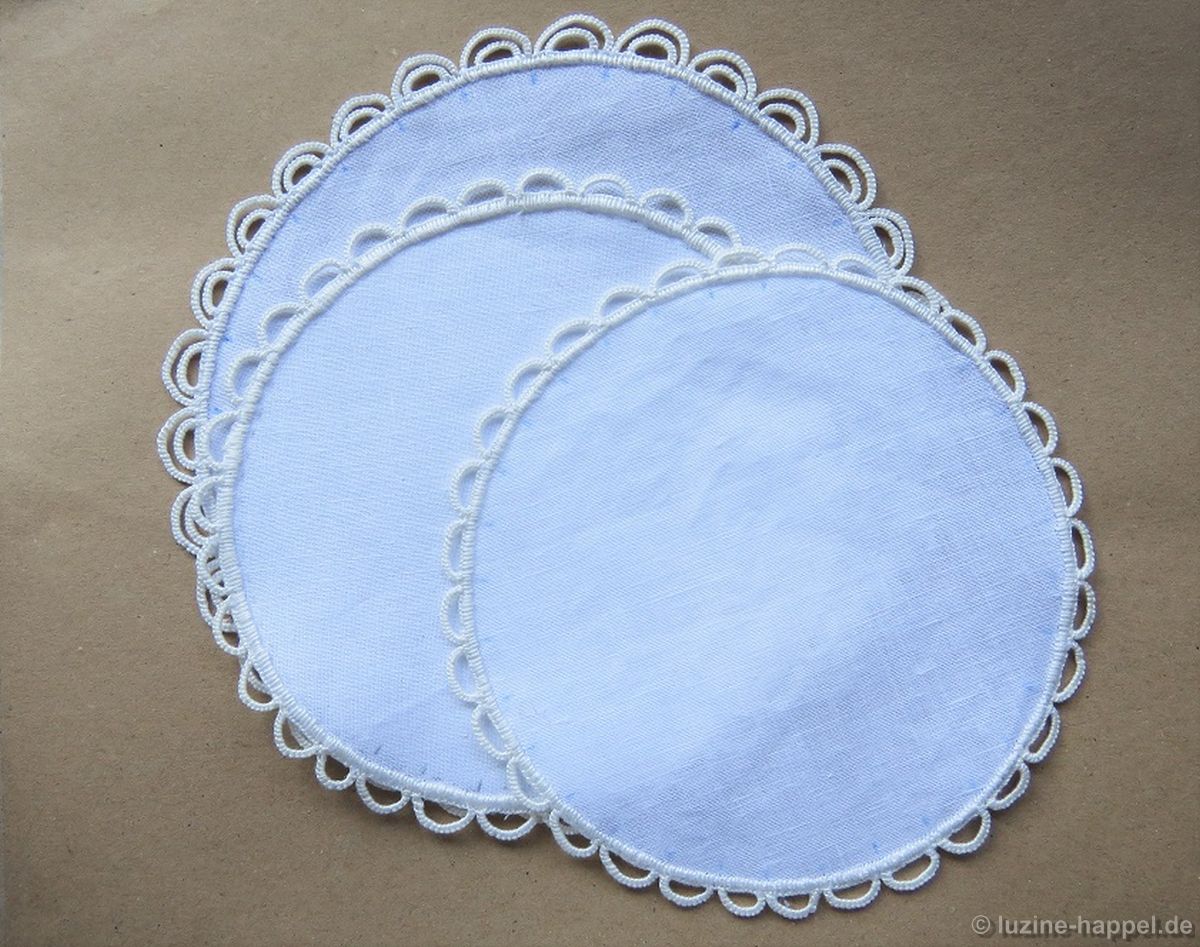
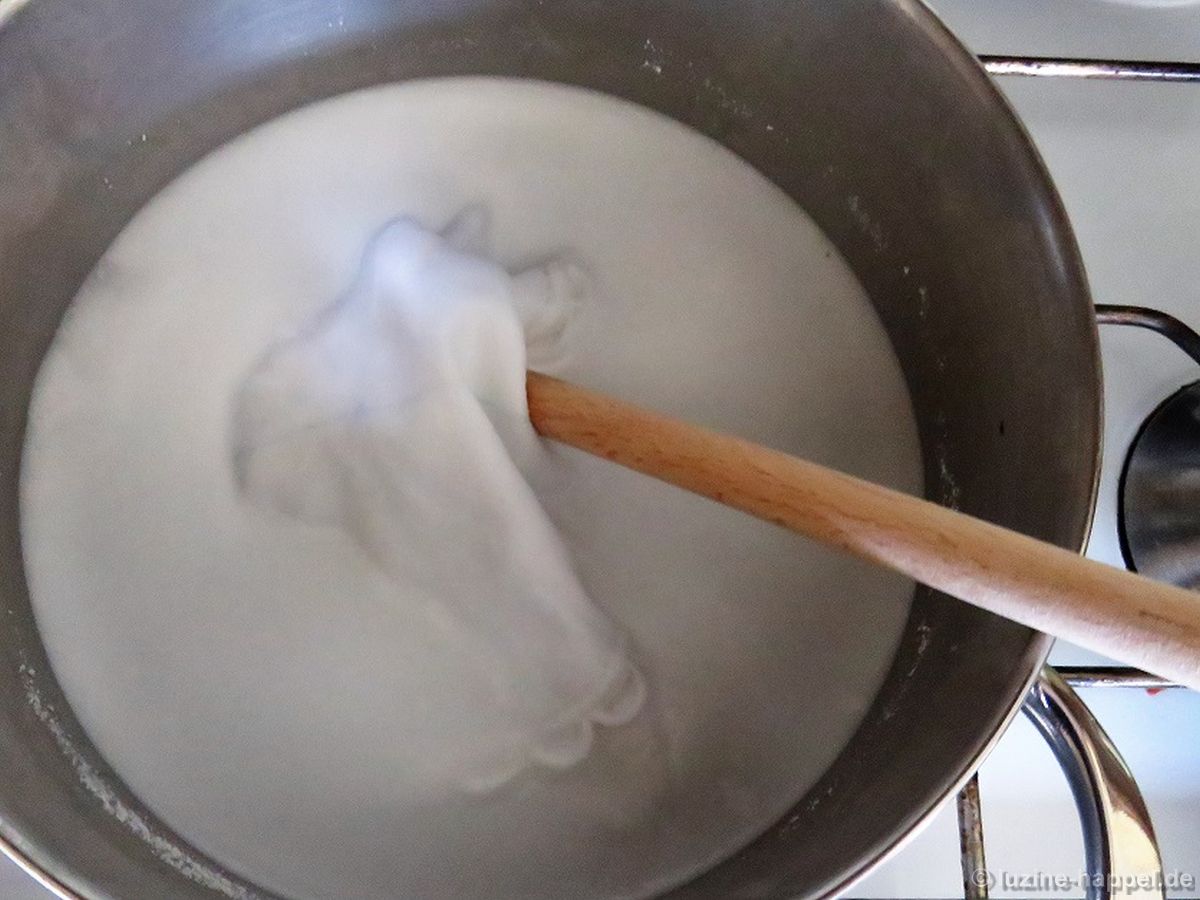
I decided to have the outside layer a little bit wider. So, using a tool (such as small plates), trace on 20/cm thread count linen – with some excess fabric between – one circle with a diameter of 18 cm and two circles each with a diameter of 16 cm. It is important that the linen is completely free of any wrinkles before drawing the circles.
cozy_1
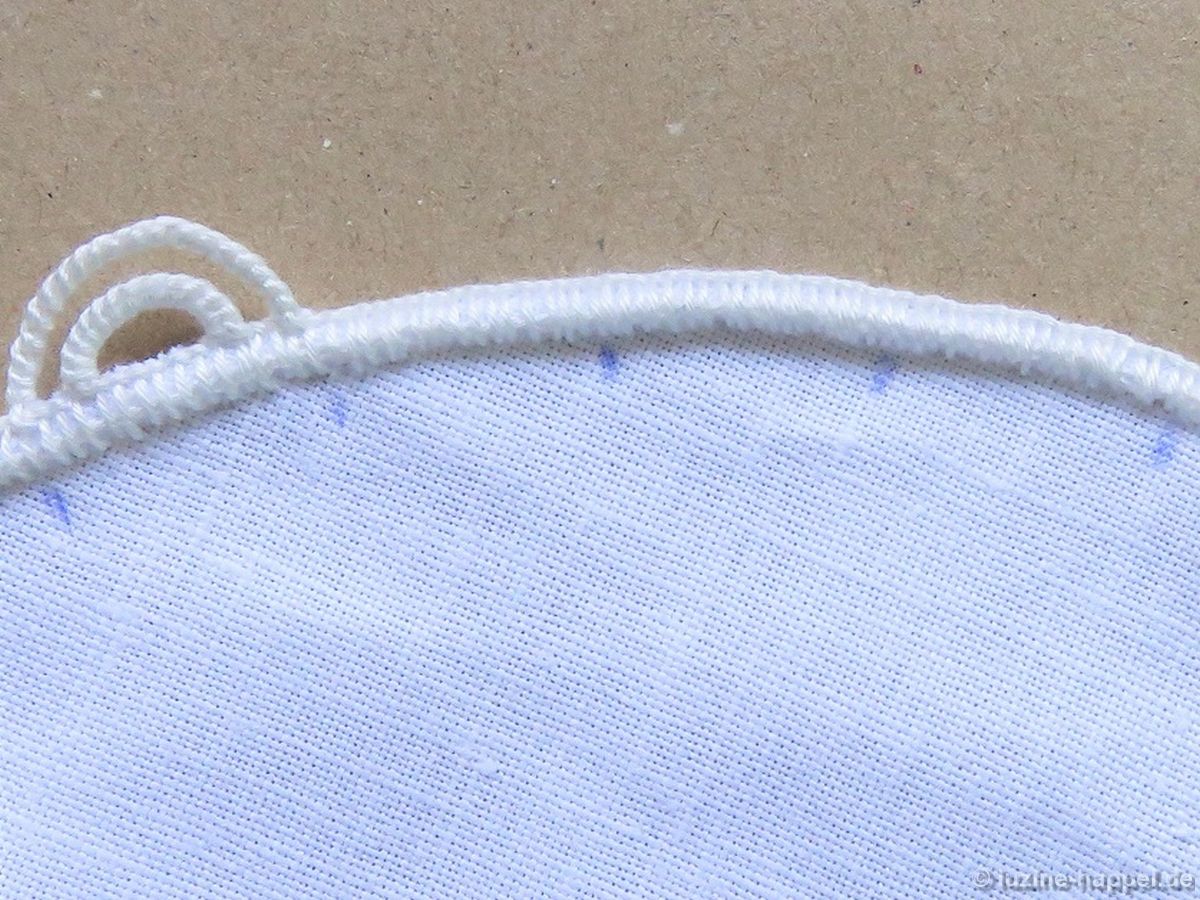
To prevent the fabric from fraying, the edges are secured. Directly inside each line, work a row of Chain stitches using coton à broder No. 30. The Chain stitches are covered with densely worked Blanket stitches using coton à broder No. 20.
cozy_2
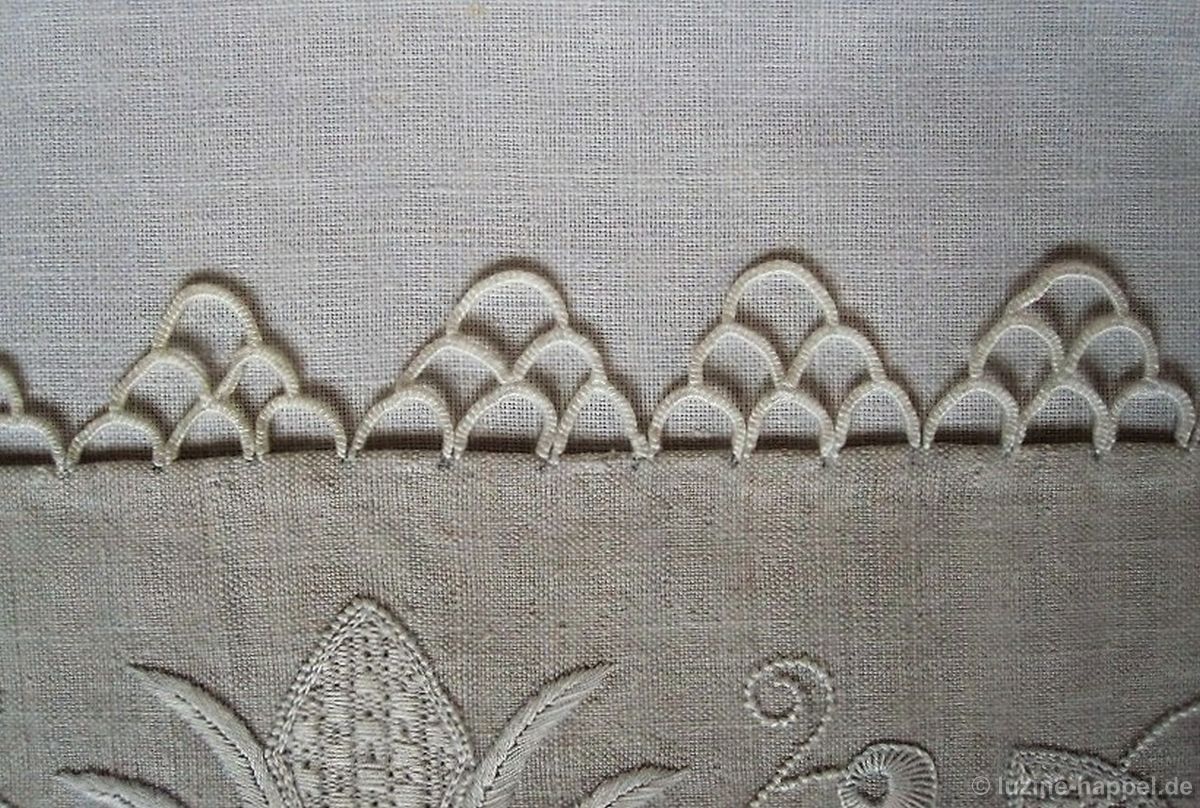
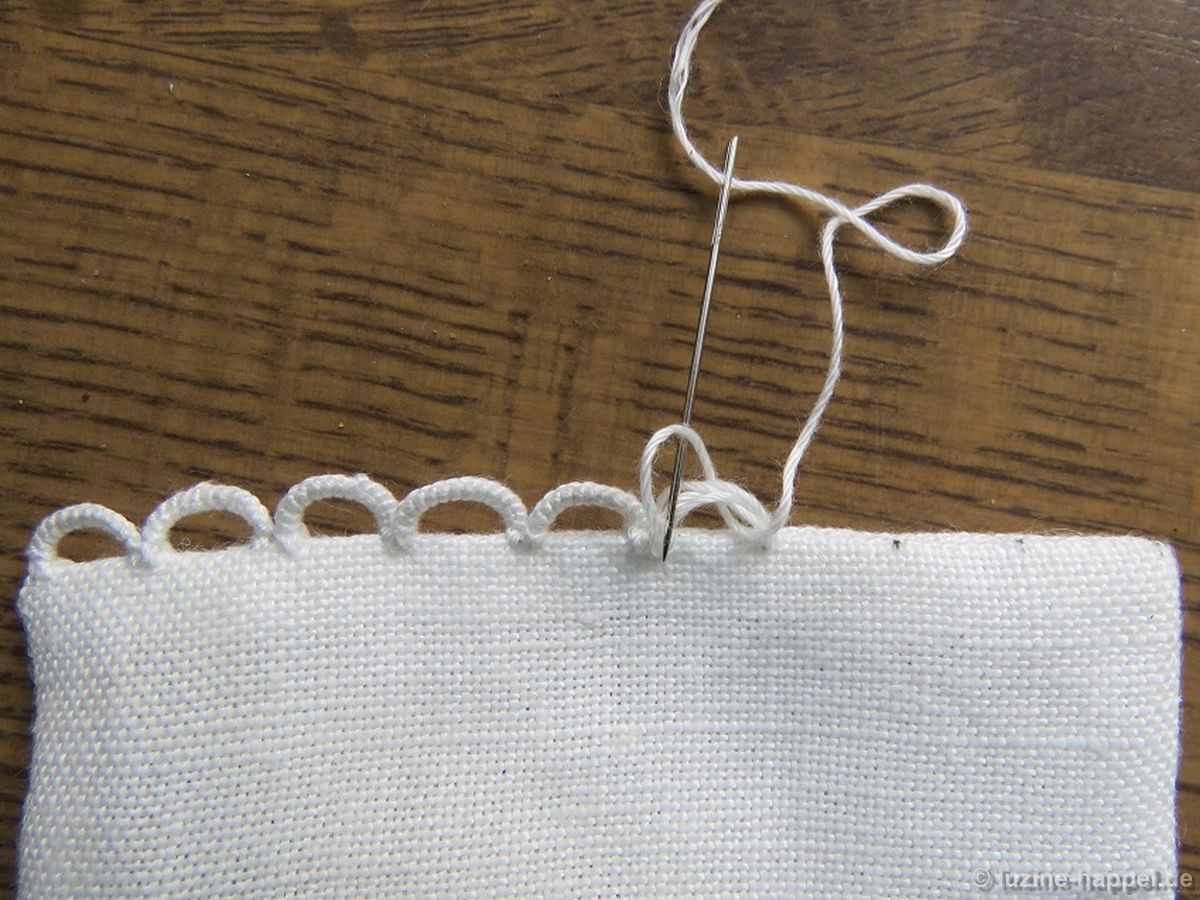
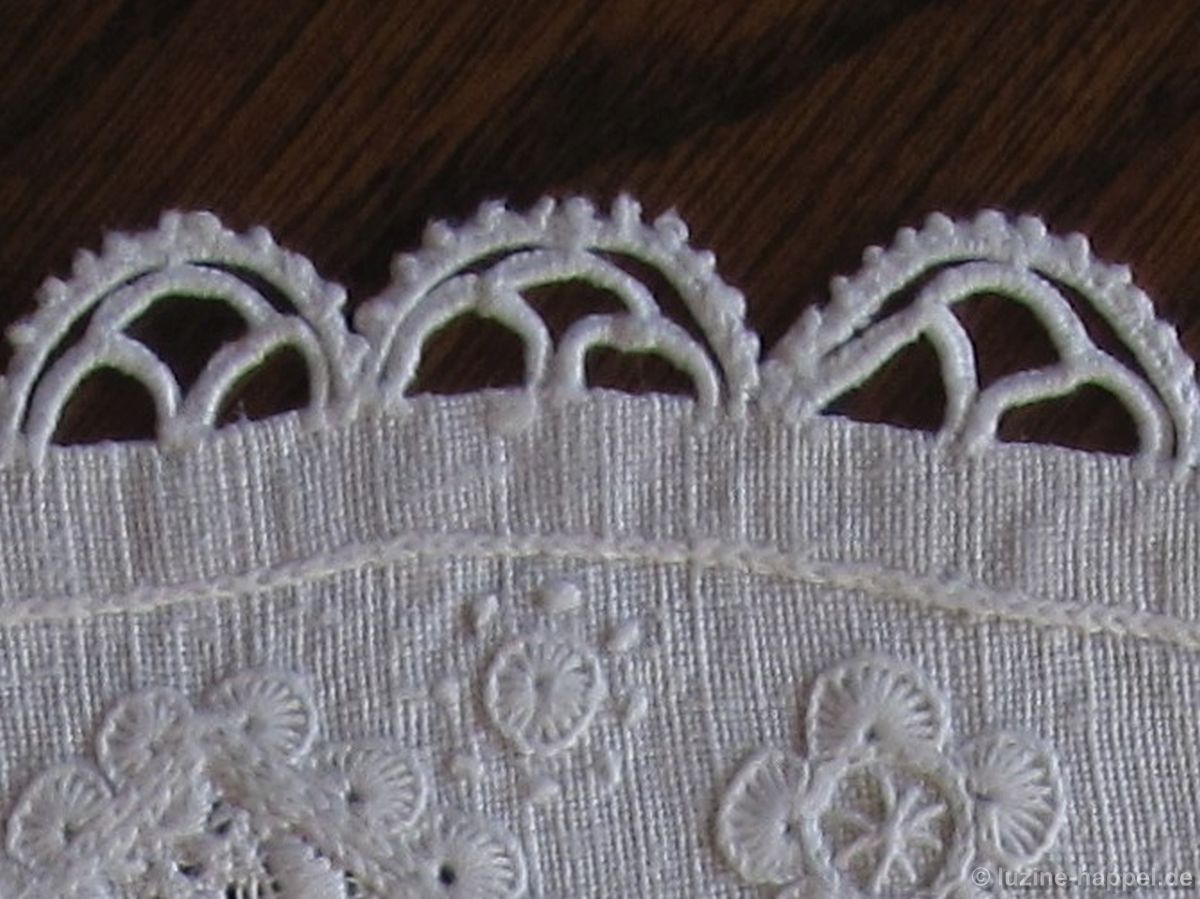
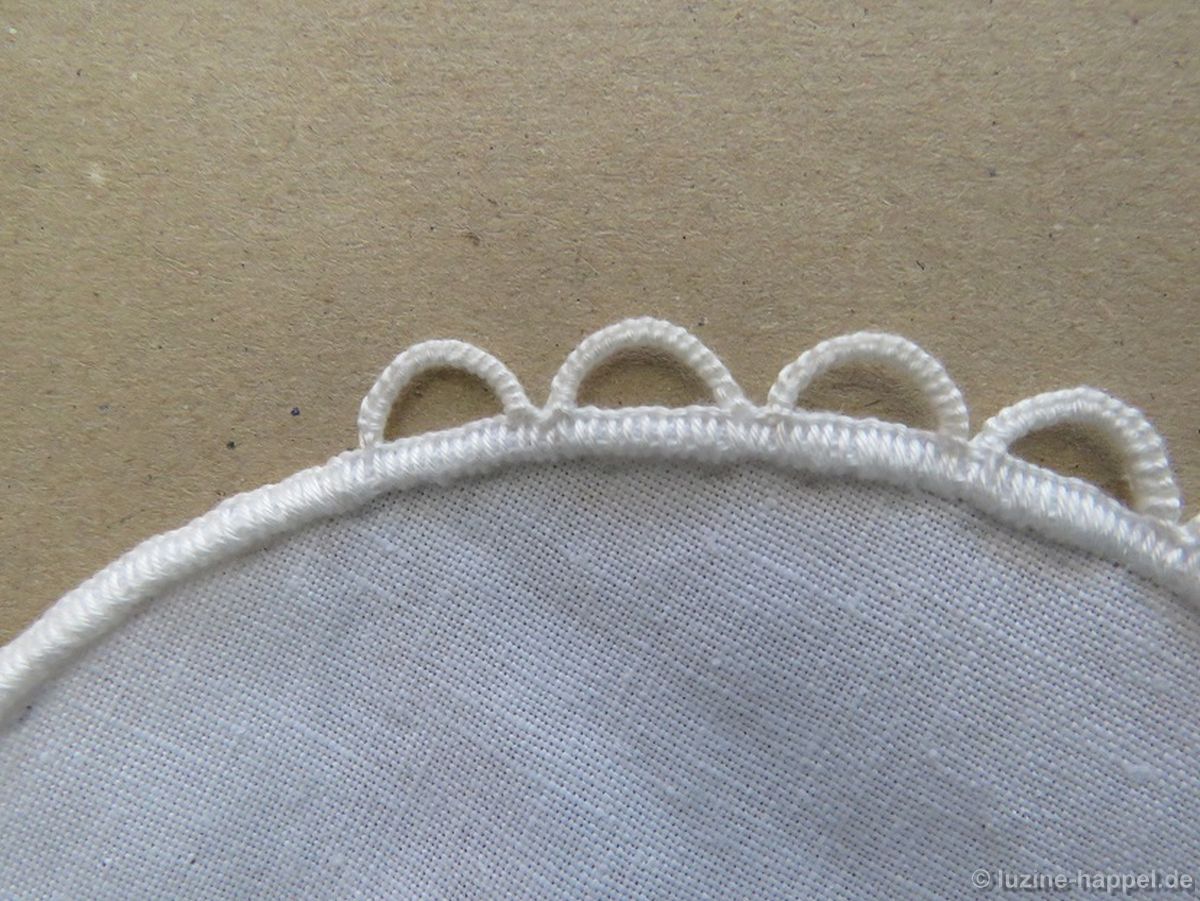
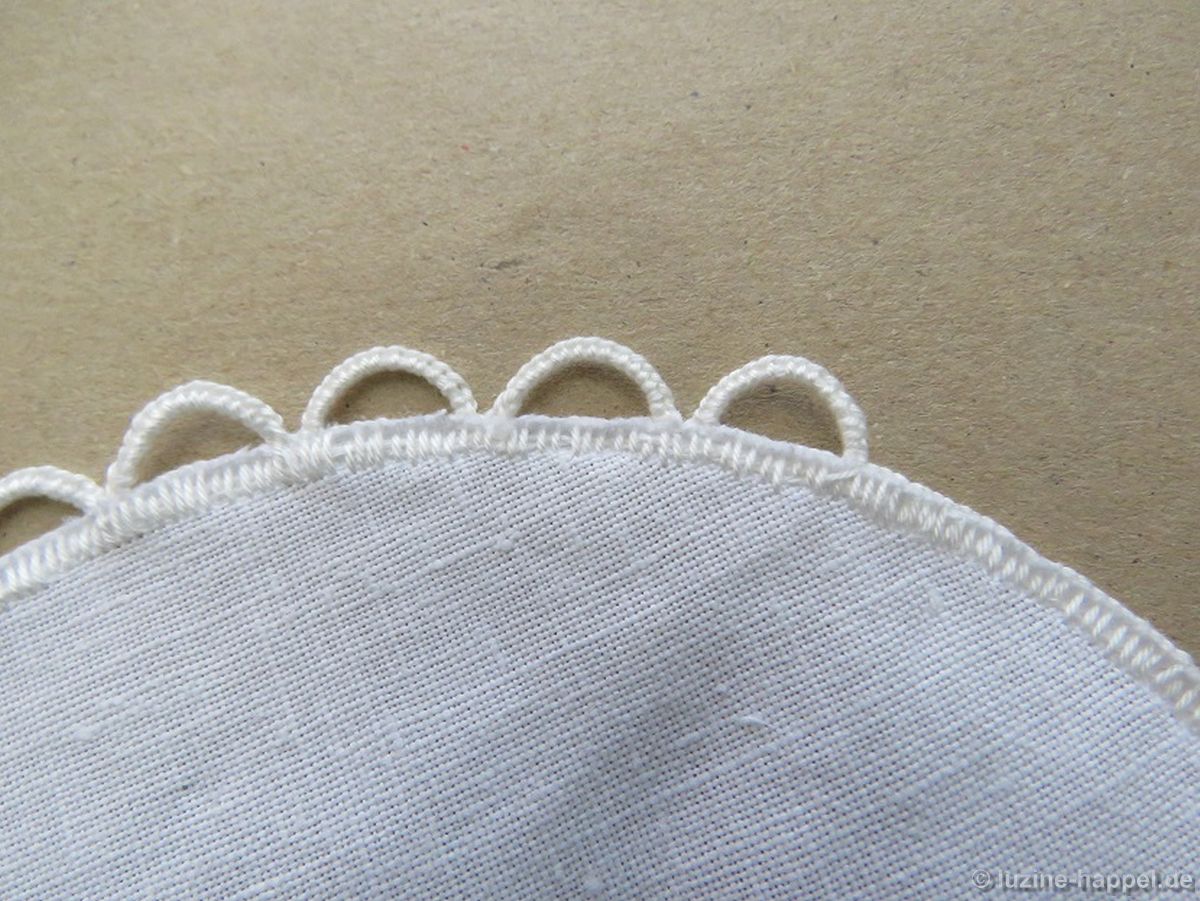
The linen is boiled, ironed, and cut. It is best to start working the needlelace (simple Buttonhole stitch scallops, using coton à broder No. 16) on one of the smaller circles, which will become the inside layer, because any unevenness will be nearly invisible later. Decide the width of the desired needlelace and mark the entire edge. For my cozy, I chose a width of 1.4 cm. To mark the scallop placements, I used a transfer pencil because its colour will easily disappear when the piece is washed. Simple Buttonhole stitch scallops are also worked on the second small circle. The outside layer’s edging should be somewhat more prominent, so double Buttonhole stitch scallops are worked on the larger circle. Here I chose a width of 2 cm.
cozy_3For more information – more patterns and detailed working instructions – please refer to my booklet Schwalm Needlelace edge decorations.
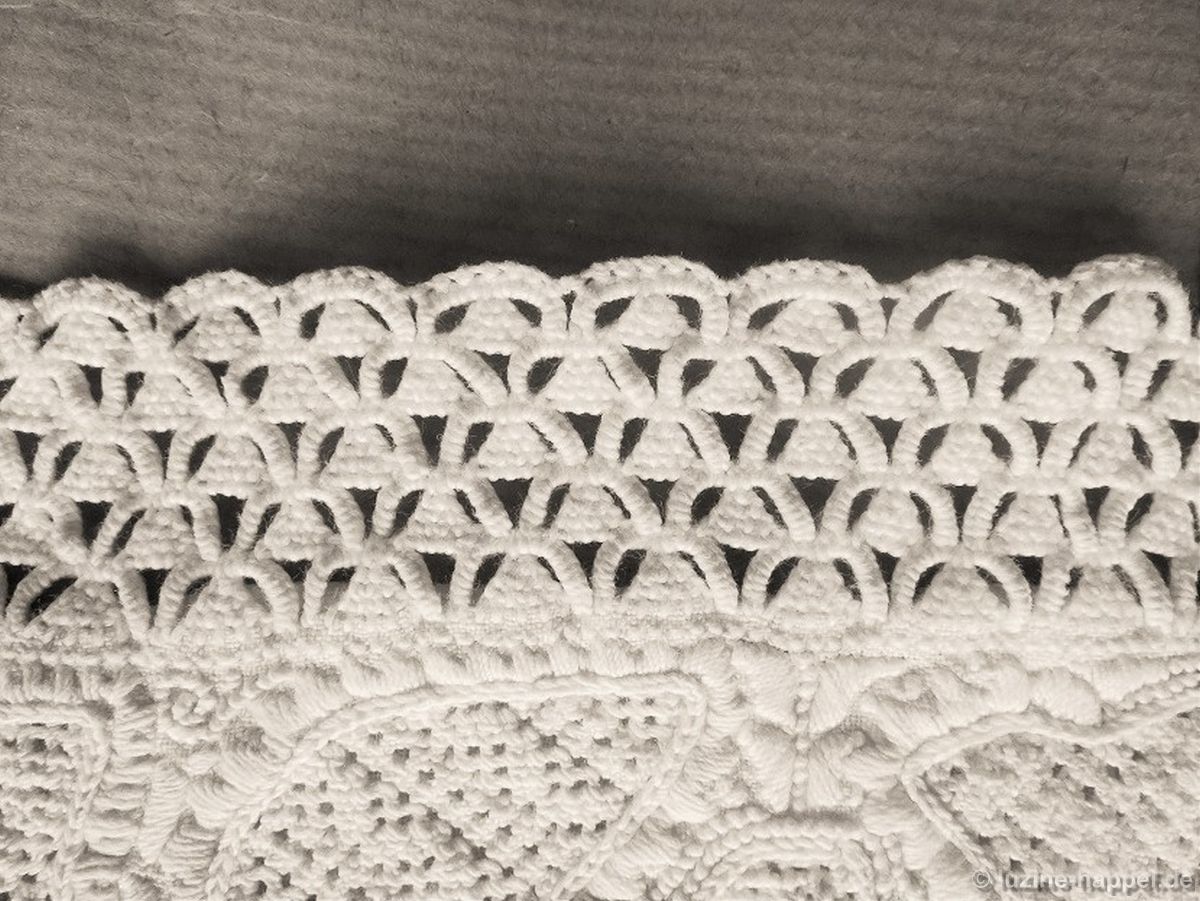
Please notice that the needlelace scallops are attached to the loops of the Blanket stitches.
cozy_4This makes the back side neat and tidy.
cozy_5When all three doilies are finished, they need to be ironed again.
cozy_6
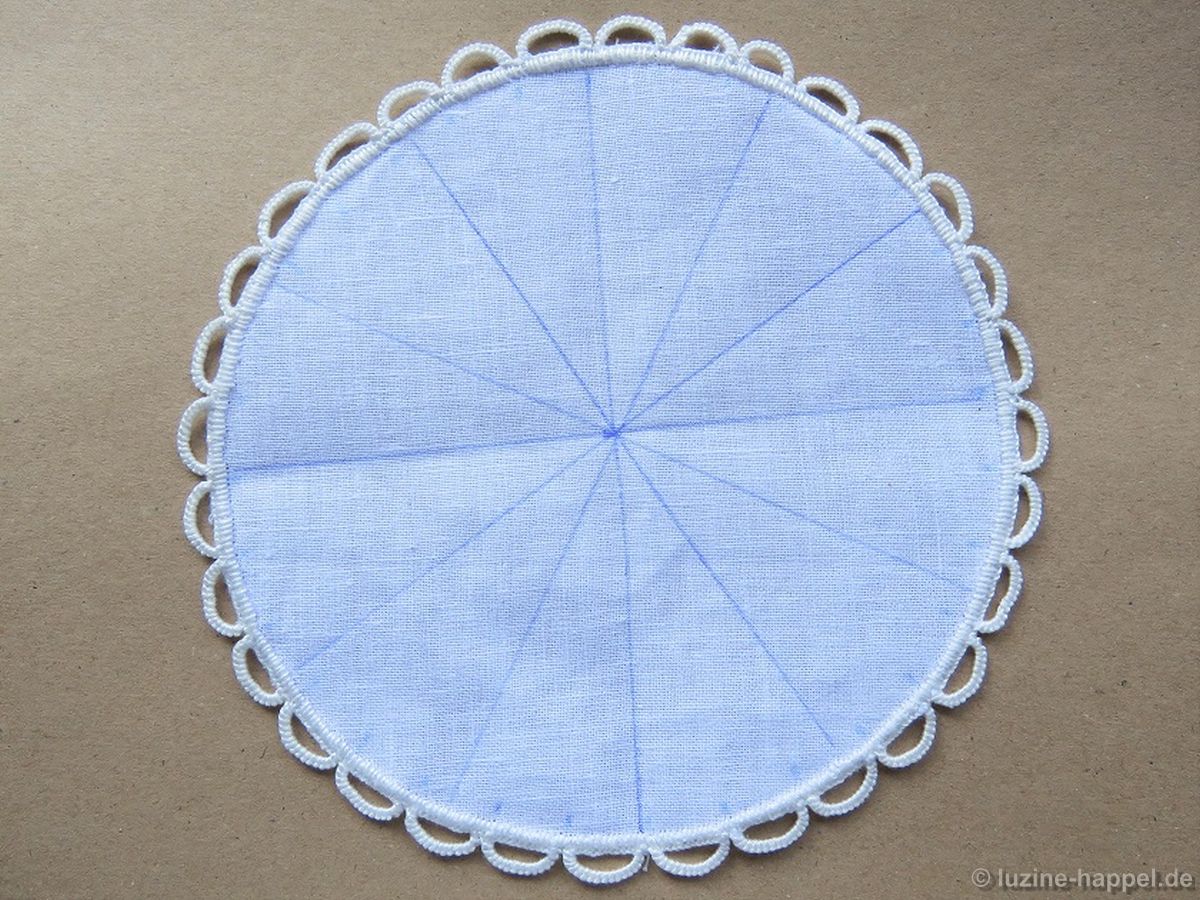
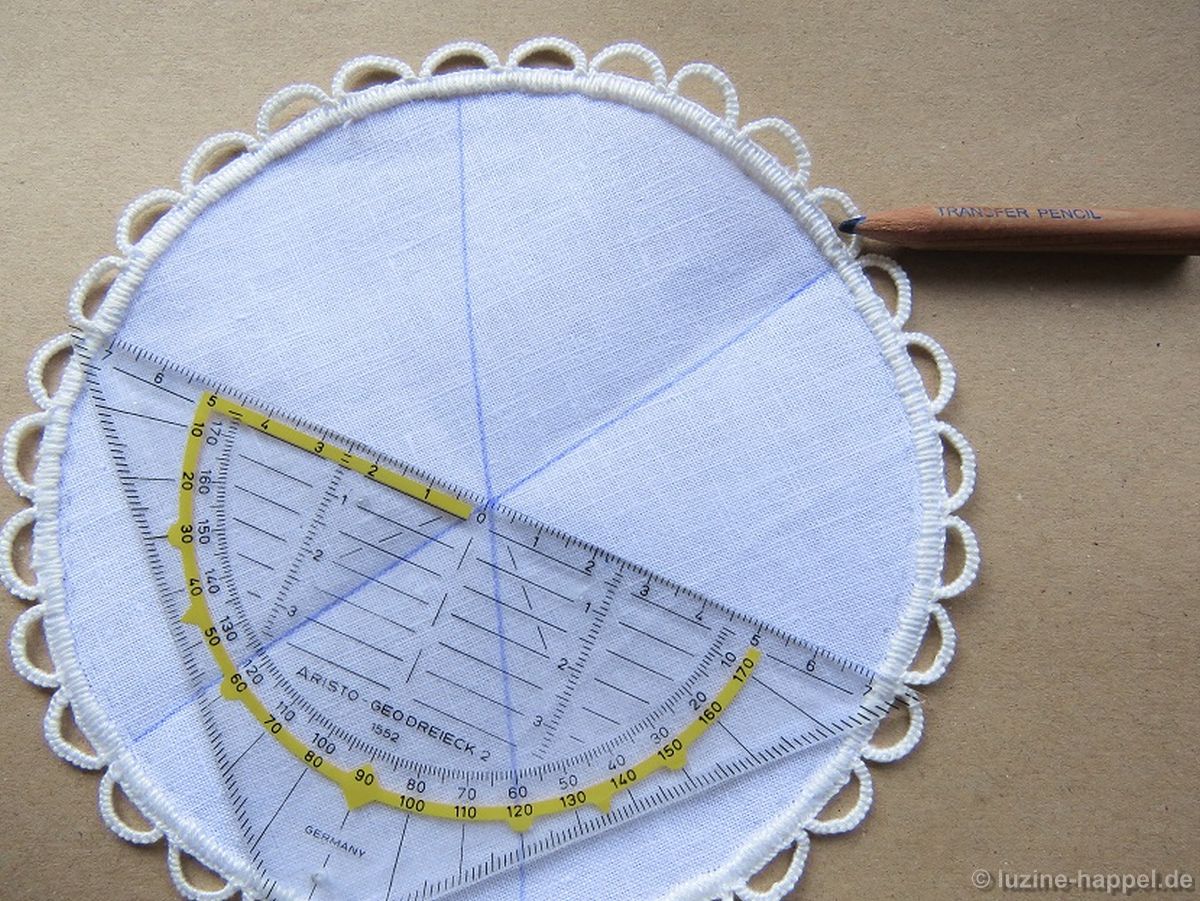
Using the transfer pencil, the middle circle is divided (marked on the right side) into 12 even sections.
cozy_7
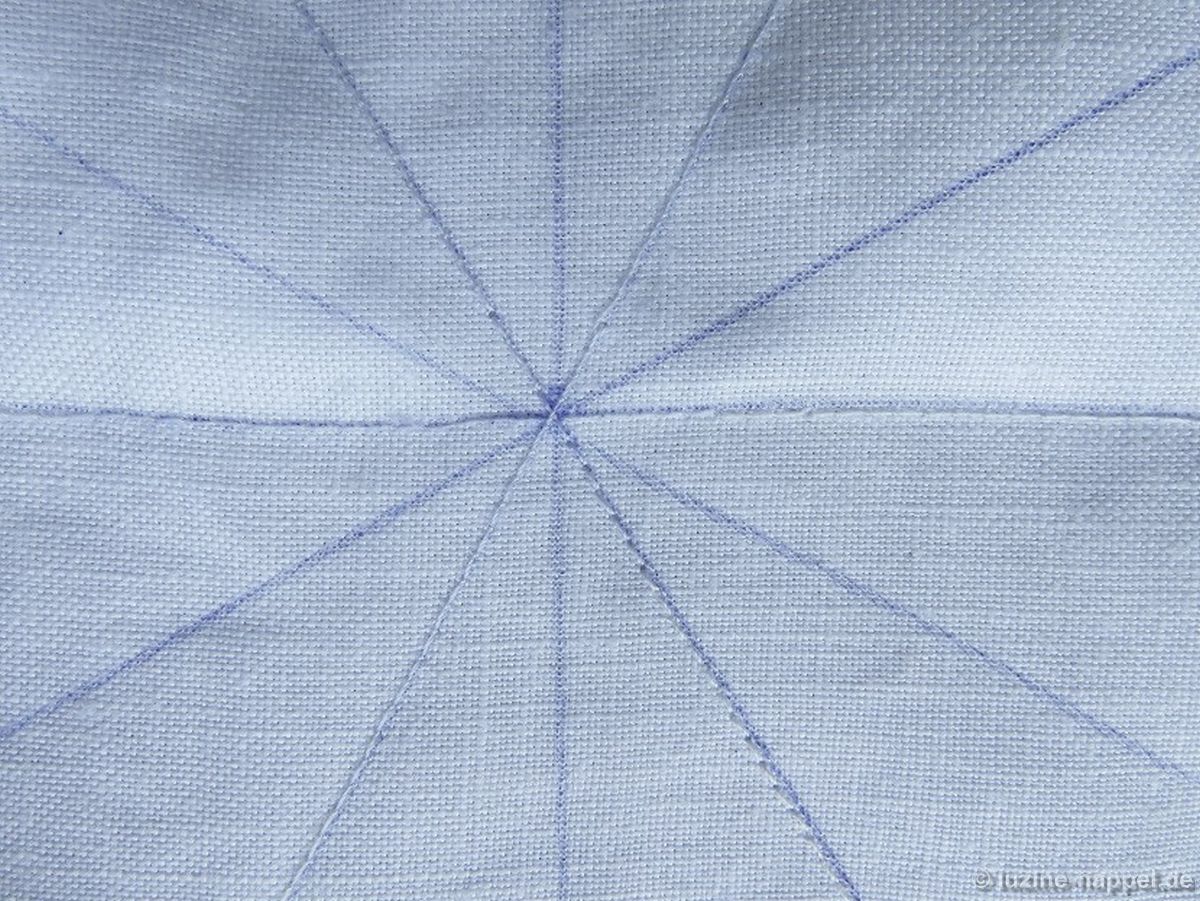
The inside circle is divided (marked on the back side) into 6 even sections.
cozy_8
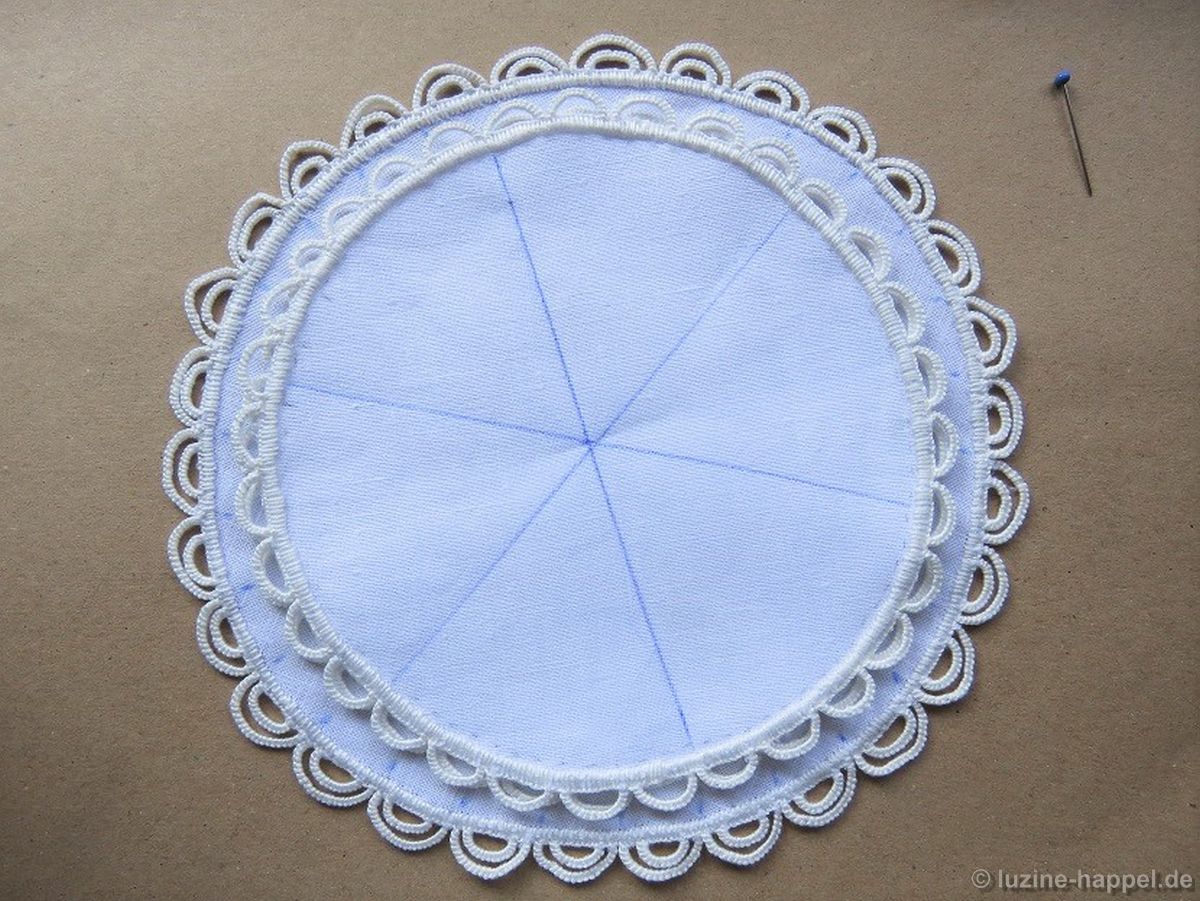
Right sides facing up, center the middle circle on top of outer circle (the larger circle). Using a sewing machine, sew these to circles together on every second line from edge to edge.
cozy_9
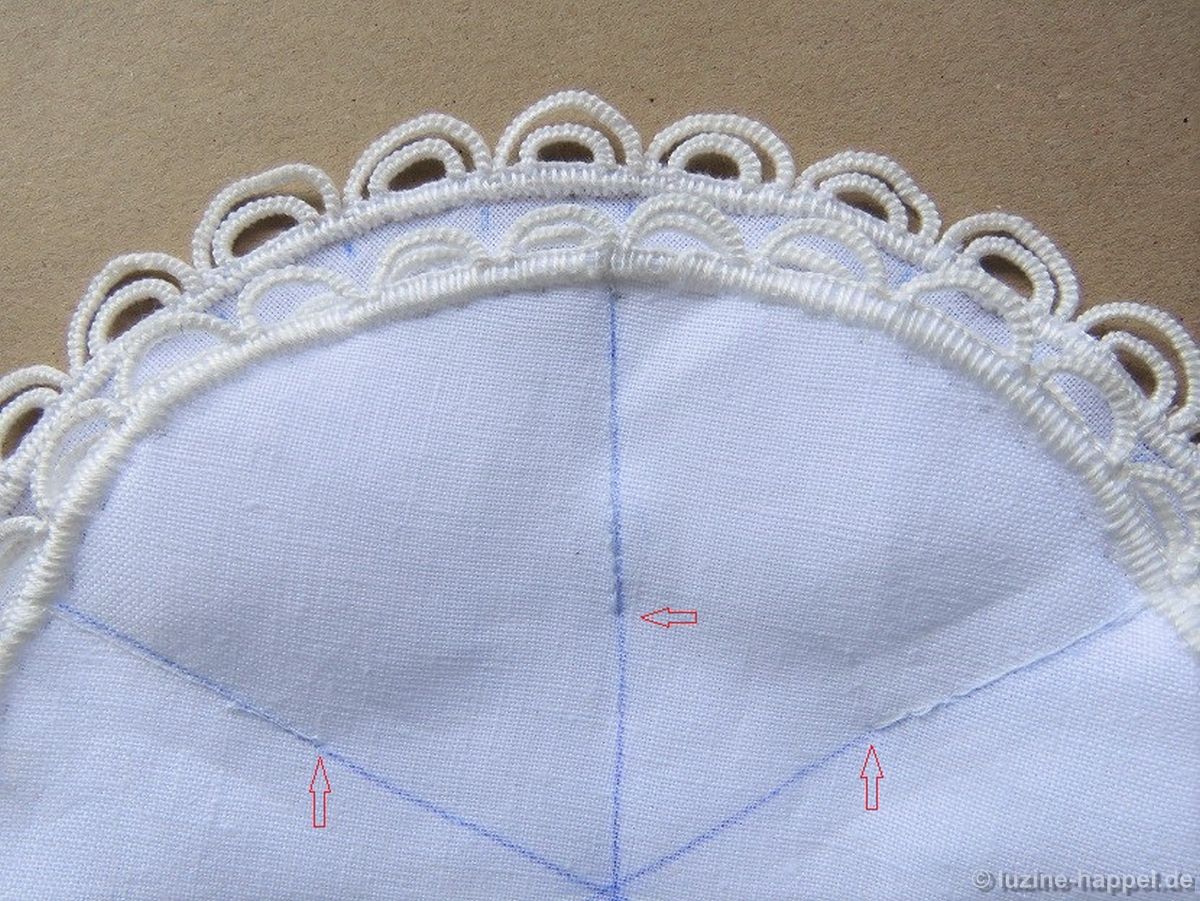
The inner circle is placed on top of the two joined circles, right sides together, so that the unstitched marks of the middle circle and the marks of the inner circle are matching.
cozy_10The middle and the inner circles are sewn together along the marked lines. Begin stitching from the outer edge inwards; you will not be able to reach all the way to the center with your sewing machine.
cozy_11The piece is gently washed again to remove all the marks.
cozy_12The piece is starched very well and ironed.

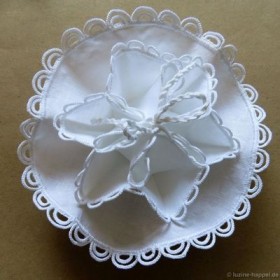
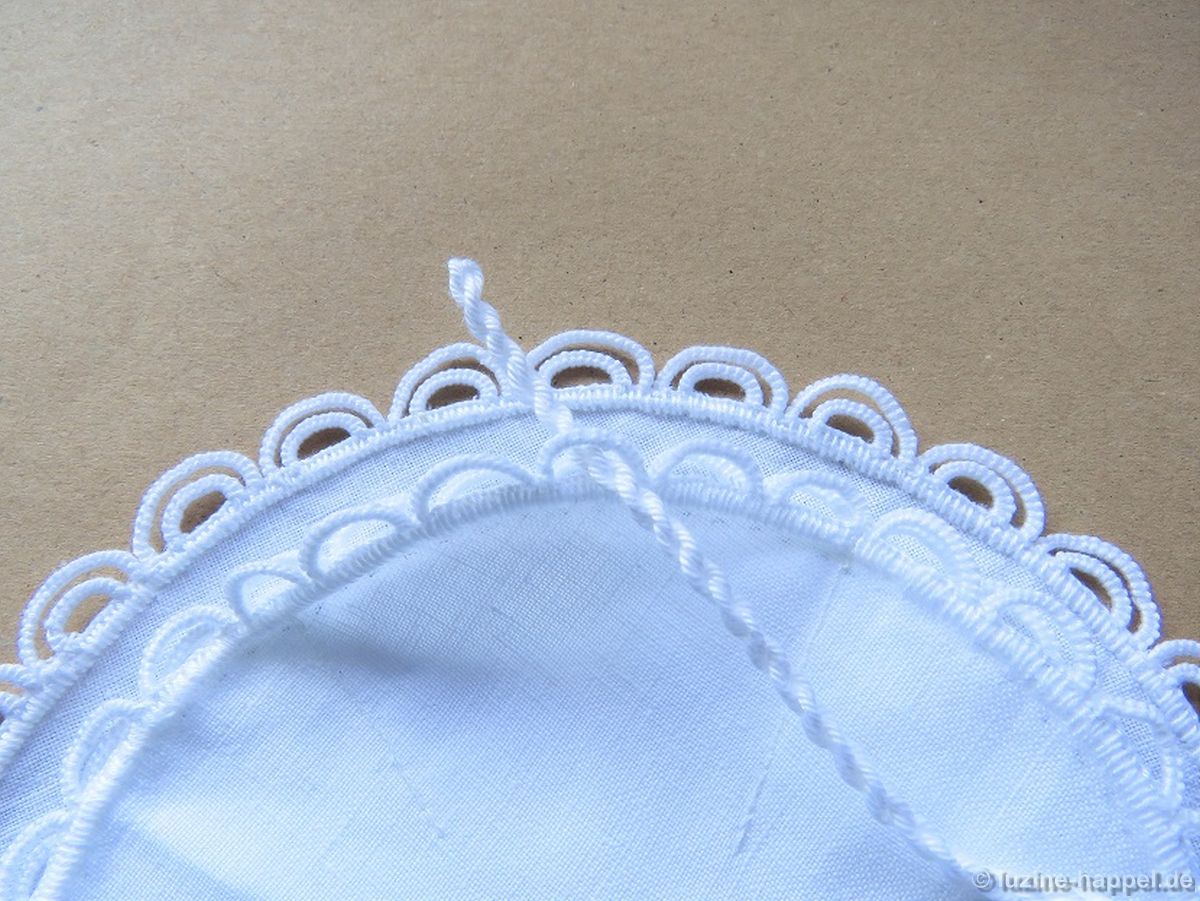
Using the twister a thin cord is made. It is threaded through the middle scallop of each section of the top layer.
cozy_13
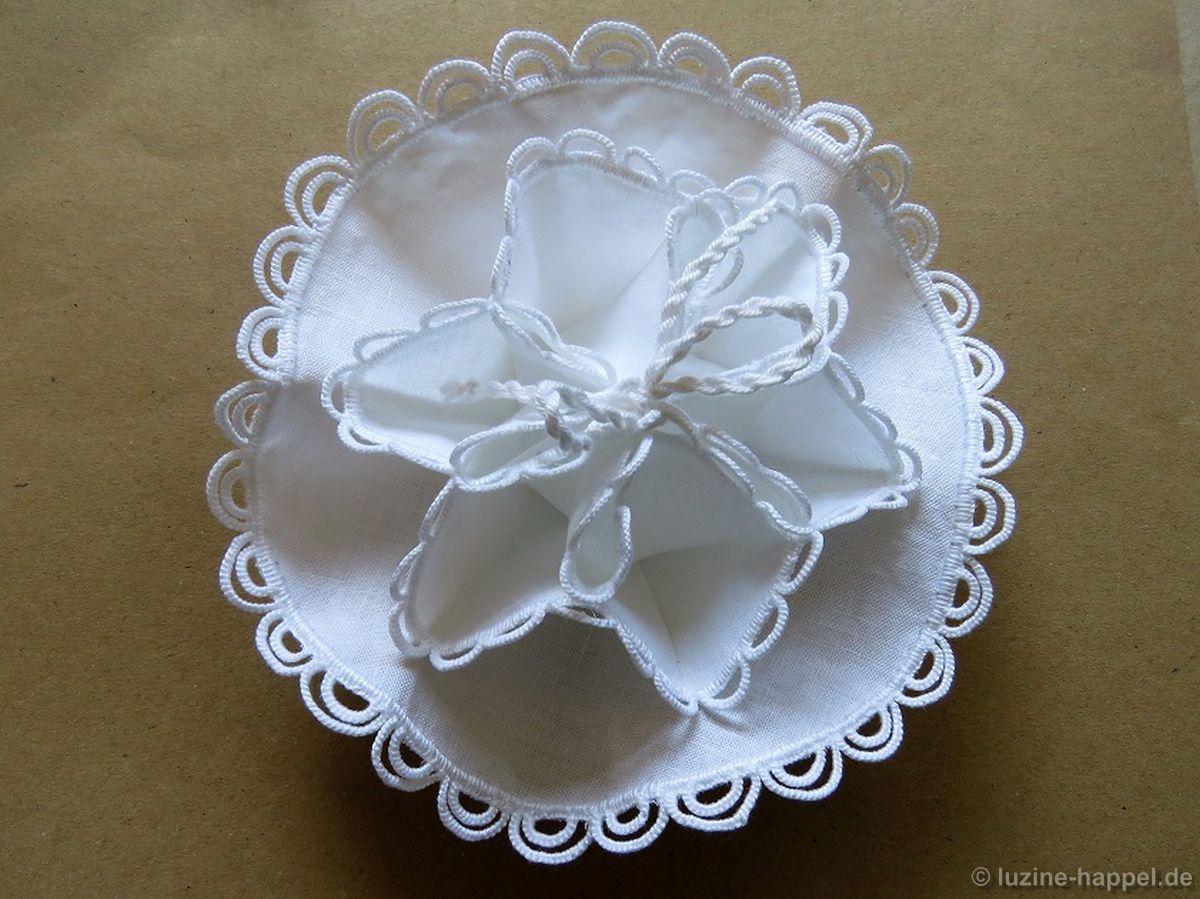
The cord is drawn and tied into a bow. (If you prefer something less obtrusive, you can use an embroidery thread, delicate ribbon, or even sew in some small snaps to draw and hold the cozy together.)
cozy_14
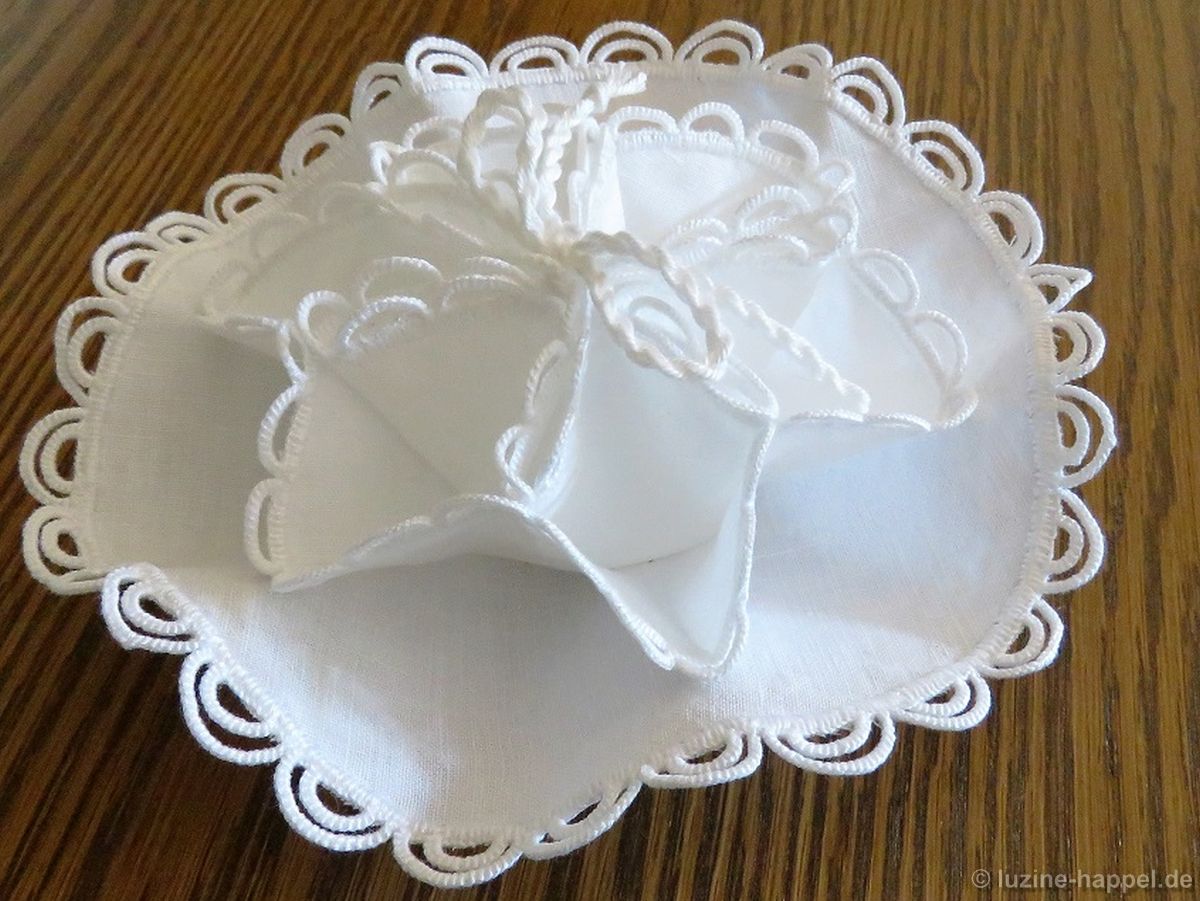
Even unfilled this project is an eye catcher.
cozy_15
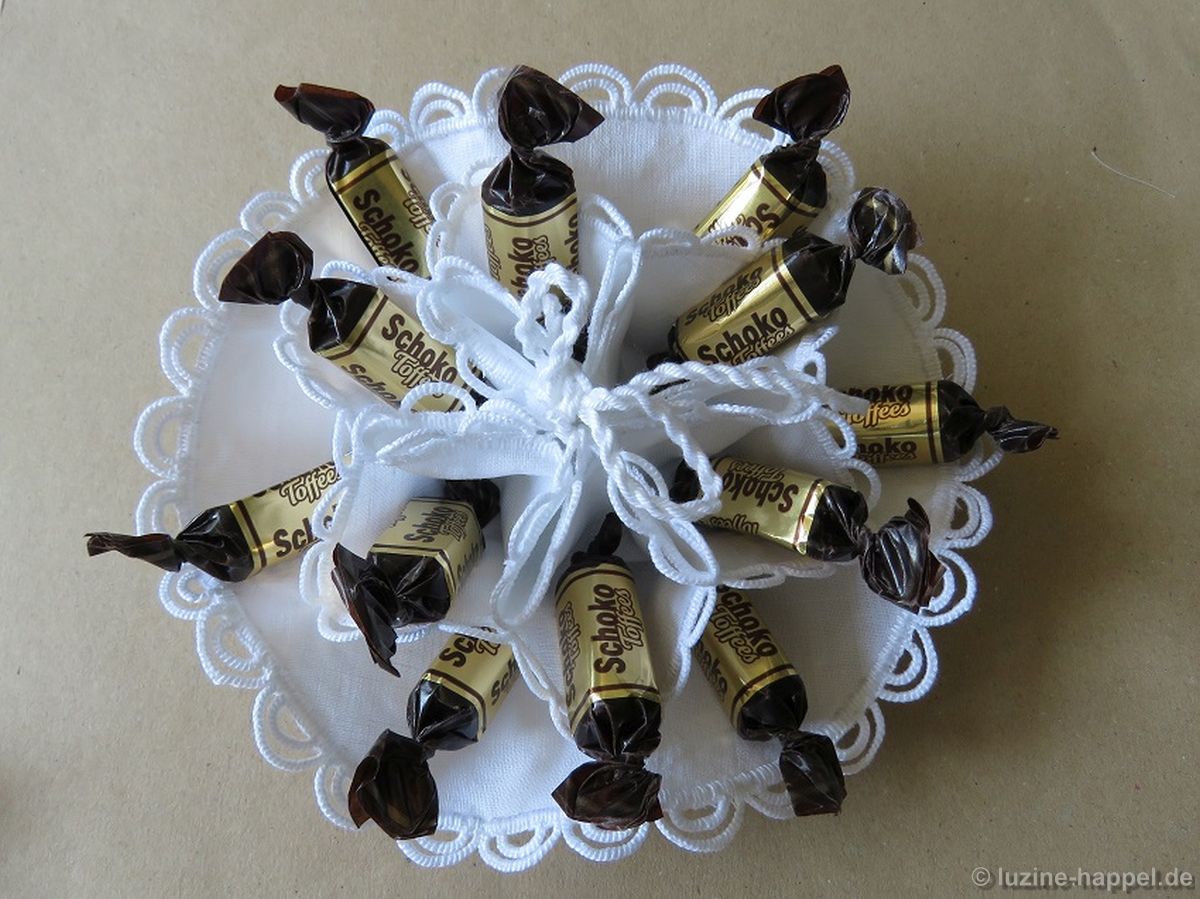
Filled with some wrapped candies it will be the star of every party table. Also it is a nice gift.
cozy_16
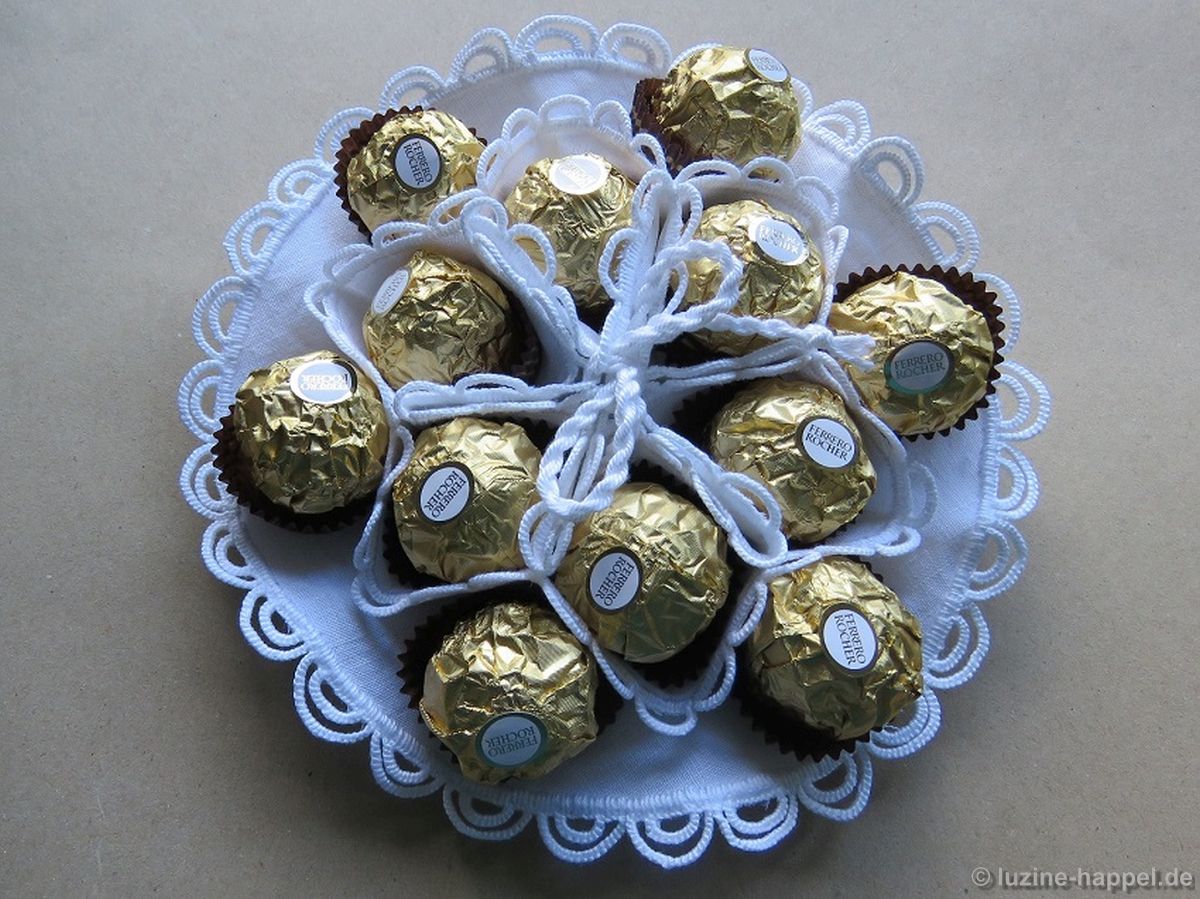
To accommodate larger sweets, like Ferrero Rocher balls, the circles should have a diameter that is approximately 2-3 cm wider. The picture below shows how the larger candies look a bit too crowded in the cozy as described in this article.
cozy_17Embroidering needlelace is really easy, and having a little project makes practicing it fun. With needlelace one can easily add extra beauty to needlework. So, please don’t be afraid – give it a try!

Schwalm Needlelace – Easily Embroidered

Many totally different Schwalm needlelace edge decorations have already been shown in many blog posts: the simple needlelace scallops stacked in the shape of a pyramid,
nadelspitze_1needlelace pyramids, and
nadelspitze_2multirow simple needlelace scallops with pyramids inside and outlined with connected picots.
nadelspitze_3Also presented was needlelace made in a double row of scallops: Two scallops were stitched side by side; a third scallop was stitched on top of the two to connect them, and a fourth scallop, which was additionally decorated with picots, spans over the trio.
nadelspitze_4Readers of my blog also saw this edging: Three rows of bound double scallops as well as one row of single scallops decorate the sleeve cuff of a traditional Schwalm bodice.
nadelspitze_5And needlelace was also seen worked on the bottom edge of a lampshade. The needlelace was made in an inverted pyramid shape (3-2-1). A row of picots borders the outside edges of the pyramids and binds them together.
nadelspitze_6And one of the blog’s many projects, a small lavender bag, featured a single row of simple needlelace scallops on its edge.
nadelspitze_7Below are two more examples of needlelace edgings: Three rows of simple needlelace scallops with pyramids inside and outlined with connected picots decorate a traditional Schwalm bodice (C).
nadelspitze_8And four-tier scallop pyramids outlined with Bullion Knot picots finish the especially beautiful contemporary Schwalm table cloth.
nadelspitze_9This selection gives you only a small glimpse into the variety of needlelace edge decorations common in the Schwalm. The booklet also includes many needlelace edgings from different centuries, including some rare examples. By combining single elements of the edgings many more needlelace patterns can be established. Unfortunately, many embroiderers shy away from working needlelace – the edgings are really very easy to embroider if one has good instructions at hand.

Here is the guidance you’ve been looking for! In this downloadable file, you will get 51 pages that include more than 200 pictures and instructions for working all the most popular Schwalm needlelace edgings. Of course, the edgings are described in great detail and illustrated with step-bystep instructions. After an introduction into the subject, needlelace scallops, needlelace pyramids, and picots are explained. Below is the table of contents:

Simple Buttonhole stitch scallops including basic layout and working notes
Double Buttonhole stitch scallops
Multirow Buttonhole stitch scallops
Simple Buttonhole stitch scallops stacked in the shape of a pyramid
Simple Blanket stitch pyramid
Supported Blanket stitch pyramid
Supported Buttonhole stitch pyramid
Wrapped Buttonhole stitch pyramid
Simple Buttonhole stitch pyramid
Pyramid inside scallops
Picots made with Bullion Knots
Picots made with Buttonhole or Blanket stitches – also called connected picots

nadelspitze_10_titel-englisch
51 pages
211 images
21,5 MB file size
text: English
25.00 EUR
download here

Of course it is also possible to get this publication as a printed booklet for the same price (25.00 EUR) plus shipping charges. This option is not shown in my online shop, so please email me with your request.

Pretty Contemporary Schwalm Table Cloth

An especially beautiful and elaborately embroidered round table cloth is the subject of this post.
The Anna Elisabeth Grein design, with its large motifs, provides areas that are perfect for the bestof-the-best traditional filling patterns.
her_1The small table cloth has a diameter of 60 cm (excluding the needlelace edging) and was worked on 16–18/cm thread count old handwoven linen. The needlelace edging was made with four-tier scallop pyramids outlined with Bullion Knot picots.
her_2Very special to this post is that I photographed the filling patterns before laundering the piece. This makes the details of the stitches extremely easy to see.
her_3In the tulip above, a combination of filling pattern No. 447 and Double Back stitches (images 1–12) was worked.
Also, inside the circle shape, another already described filling pattern, No. 473, was worked.
her_4It is going beyond the scope of a blog post to explain all the filling patterns in detail. So, I shall let the pictures speak for themselves. Enjoy a close and careful look.
her_5
her_6
her_7
her_8
her_9
her_10
her_11
her_12
her_13
her_14
her_15
her_16
her_17
her_18
her_19
her_20
her_21
her_22
her_23
her_24

A Lampshade with a Needlelace Edging

As already mentioned, needlelace, in the past, was used most often as decoration for clothes; today it is found on other items as well. In my previous post I showed a circular doily with a needlelace edging.

Now I want to show a small lampshade whose bottom edge is decorated with needlelace.
Lampe1_1The needlelace was made in an inverted pyramid shape (3-2-1). A row of picots borders the outside edges of the pyramids and binds them together.
Lampe1_2The lampshade has four wide areas and four narrow areas. Two of the wide areas – oppositely arranged – contain heart and tulip motifs, and the other two wide areas contain heart and sunflower motifs.
Lampe1_3The shapes were filled with different patterns. Same motifs got similar patterns. All heart shapes were filled with openwork filling patterns with a Cable stitch grid. Needle weaving and Rose stitches in different arrangements were worked into the grid.

Needle weaving squares with a Rose stitch in the center.

Needle weaving squares with a Rose stitch in the center.

Needle weaving in a stair-step manner and rows of Rose stitches.

Needle weaving in a stair-step manner and rows of Rose stitches.

Rows of needle weaving and Rose stitch squares.

Rows of needle weaving and Rose stitch squares.

Rose stitches in straight and zigzag lines.

Rose stitches in straight and zigzag lines.

All other shapes in the wide areas were filled with Limet patterns. In the buds, rows of Rose stitches alternate with Satin stitches worked in a stair-step manner.
Rows of Rose stitches and stair-step Satin stitches.

Rows of Rose stitches and stair-step Satin stitches.

Rose stitch grid with Satin stitch bars

Rose stitch grid with Satin stitch bars (Filling pattern 472)

Röserich filling pattern

Röserich filling pattern

on top: Rose stitch squares and Satin stitch bars on bottom: Rose stitch grid with Satin stitch bars

on top: Rose stitch squares and Satin stitch bars
on bottom: Rose stitch grid with Satin stitch bars

on top: Rose stitch squares and fourth blocks of Satin stitches on bottom: Rosen stitch rhombi

on top: Rose stitch squares and fourth blocks of Satin stitches
on bottom: Rosen stitch rhombi

The narrow areas were decorated with six motifs each, arranged from top to bottom.
Circle with a knife point outline, and filled with an openwork pattern with a Cable stitch grid. Into the grid a Rose stitch pattern was worked.

Circle with a knife point outline, and filled with an openwork pattern with a Cable stitch grid. Into the grid a Rose stitch pattern was worked.

Bud with the Limet-Filling pattern Rose stitches.

Bud with the Limet-Filling pattern Rose stitches.

Heart with a Limet-Filling pattern using Satin stitches and Rose stitches.

Heart with a Limet-Filling pattern using Satin stitches and Rose stitches.

Circle with a knife point outline and filled with an openwork pattern with a Cable stitch grid. Into the grid a Rose stitch pattern was worked.

Circle with a knife point outline and filled with an openwork pattern with a Cable stitch grid. Into the grid a Rose stitch pattern was worked.

Tulip with a Limet-Filling pattern using Rose stitches and Four-Sided stitches.

Tulip with a Limet-Filling pattern using Rose stitches and Four-Sided stitches.

Heart with a Limet-Filling pattern using Satin stitch bars and Four-Sided stitches.

Heart with a Limet-Filling pattern using Satin stitch bars and Four-Sided stitches.

A relatively small piece of fabric was embroidered to make this lampshade. By placing the motifs close together, seventeen different filling patterns could be worked; they appear especially beautiful when the light is switched on.
Lampe1_19Using linen for the lampshade creates a delightfully warm light. And the needlelace also produces a lovely effect in this illumination; the edging gives the lampshade that certain something.

Here you can find a description on how to work such a lampshade.

A Doily with a Needlelace Edging

While needlelace, in the past, was found at the edges of bodice sleeve cuffs, at the front edges of dyed to black bodice jackets, at the upper edges of the waistbands of the white aprons, and at the collars, the cuffs, and the necks of men´s shirts, today it is used most often as decoration for small oval or circular doilies and narrow heart-shaped cushions.

An oval runner with needlelace is found in my post “One Schwalm design – Two Interpretations (1)”.

Here I want to show a circular doily with a diameter of 29 cm. Along the perimeter a 1 cm hem was worked. Above the hem seam, one row of Chain stitches was worked as additional decoration.
D_056_1The needlelace was made in a double row: two scallops were placed side by side. A third scallop was stitched on top of the two to connect them. A fourth scallop spans over the trio. This scallop was additionally decorated with picots.
D_056_2The doily was elaborately embroidered. Heart, carnation, and one other bloom provided areas for a number of filling patterns. Only Limet filling patterns were used. The hearts were outlined with Blanket stitch half-eyelet scallops. Small flowers of Blanket stitches, French Knots and Satin stitches, leaves of Satin stitches and tendrils fill the remaining areas between the large motifs.

It is apparent that no Coral Knot stitches were used. Stems and tendrils were made with Chain stitches, and the shapes were outlined with double rows of Chain stitches.
D_056_3The pattern of the first heart was established with Square Eyelets, pairs of Satin stitch bars and Rose stitches. The four petals of its carnation were mirrored on the longitudinal axis and filled with two different patterns. Rose stitches created the first pattern, whereas squares of Satin stitch bars, filled with diagonally running Satin stitches, established the second pattern.

The center of the circle flower was filled with Rose stitches. The six petals were decorated mirrored. Four-Sided stitches, Cable stitches and the 2-pattern of Satin stitches were worked.
D_056_4The second heart was filled with blocks of Satin stitch bars, with alternating single and double Satin stitch bars. The petals of the corresponding carnation were filled with Four-Sided stitches.
D_056_5The third heart was filled with a pattern of Satin stitch bars and Rose stitches. The petals of the corresponding carnation were filled with alternating rows of Four-Sided stitches and Satin stitch bars.
D_056_6The fourth heart was filled with a Rose stitches grid. Into the grid double Satin stitch bars were worked. The petals of the corresponding carnation were filled in the same way as the first carnation.

This wreath design includes many narrow shapes. They were filled with different patterns that mostly turned out well. So, this doily project is a good example of filling narrow shapes differently and successfully.