Schwalm Costume – an overview

Like everything in the world the Schwalm costume also gradually changes.
The pictures we today associate with the Schwalm costumes are colourful and extravagant.
Some remember these costumes from their childhood, others from costume festivals where the Schwalm variant of the popular clothing is always an eye-catcher. Thousands of colourful postcards with idealized depictions of the Schwalm took the pictures of the costumes all over the world.
Performances by folklore groups in countries far away amazed their audiences.

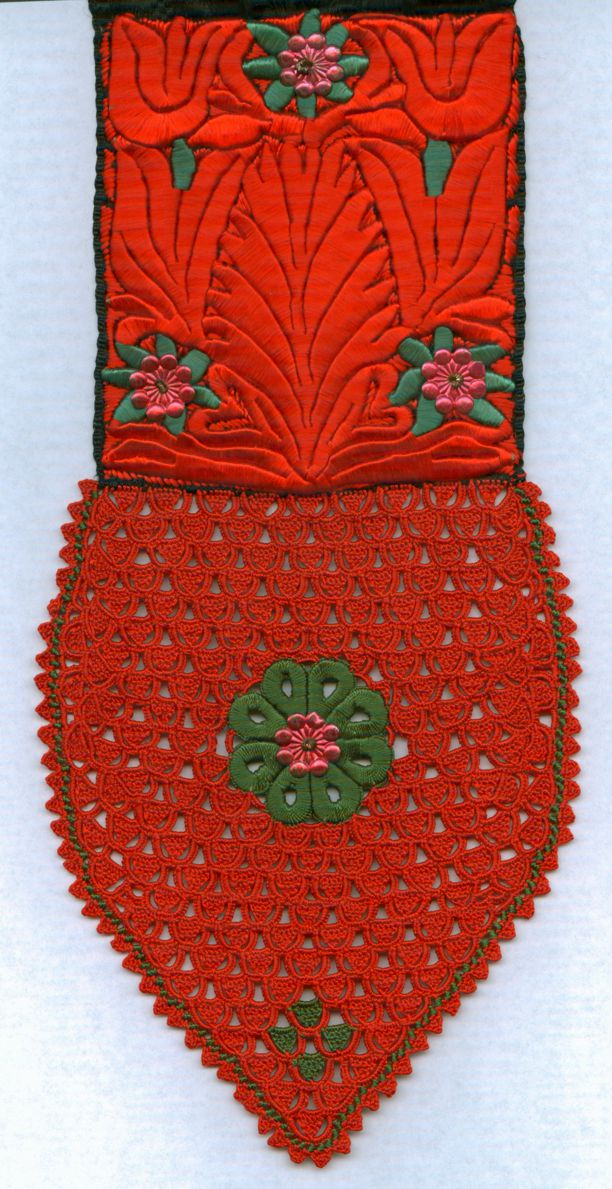
The Schwalm festive costume – also called “proud” costume – consisted of many different elements that were worn depending on the occasion. The festive costume was clothing, jewelry and business card all in one; one could see their wealth, marital status and approximate age.
Puppen in roter und blauer Schwaelmer Tracht | dolls in red and blue Schwalm costumes

The basic colours of the costumes were black and white; coloured accessories made the costumes bright and colourful. There was the “red”, the “green”, the “blue” and the “black” costume. Of course, the women´s costumes were much more distinctive than the men´s costumes, but even these had many facets.
Young girls and boys wore the “red” costume up to marriage. This means that all of the accessories were mostly red with a little green.

Rückseite der roten Mädchentracht | backside of the red girls custome
Rückseite der roten Burschentracht | backside of the red boys costume

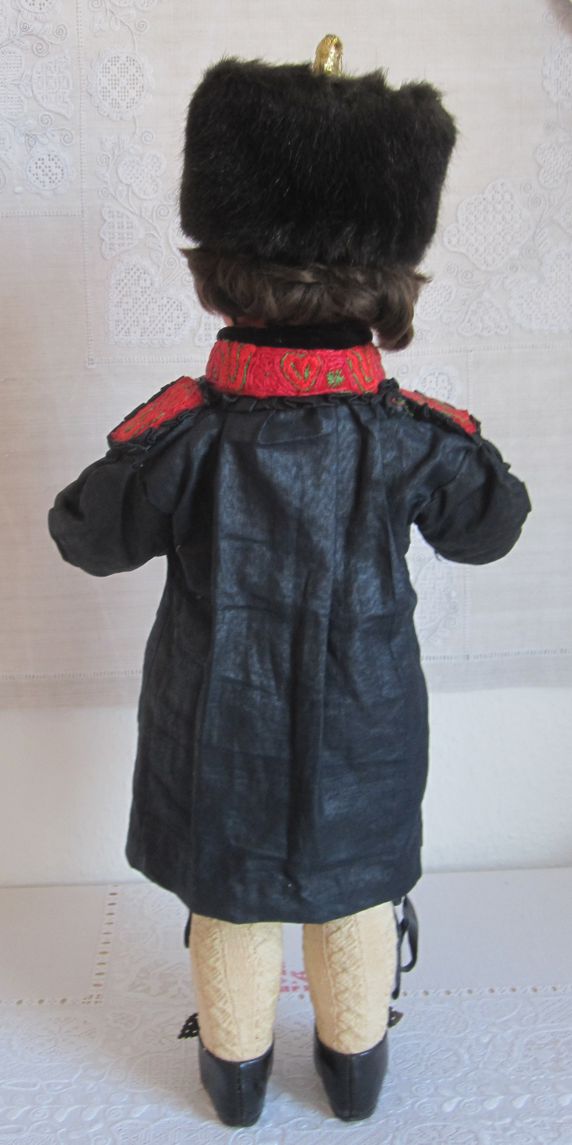
With marriage they moved to the “green” costume whose accessories were mostly green, in the beginning with some red, then with a little purple as they grew older.

At about 40 years the “green” was superseded by the “blue” costume, which means that the coloured parts were mainly purple, with a little green at first, later with black.

From about 50 years, or in mourning, the “black” costume, which no longer had any brightly coloured components, was worn. If a young woman lost her husband or a child, she had to wear mourning all her life.

Up to 12 skirts – to my knowledge, the record stands at 16 – were worn one upon the other.
Considering that one skirt alone weighs about 800 g, and the skirts were not the only pieces of clothing, it quickly becomes clear that wearing the festive costume was not an “easy” task.
5 Röcke der roten Tracht | 5 skirts of the red costume

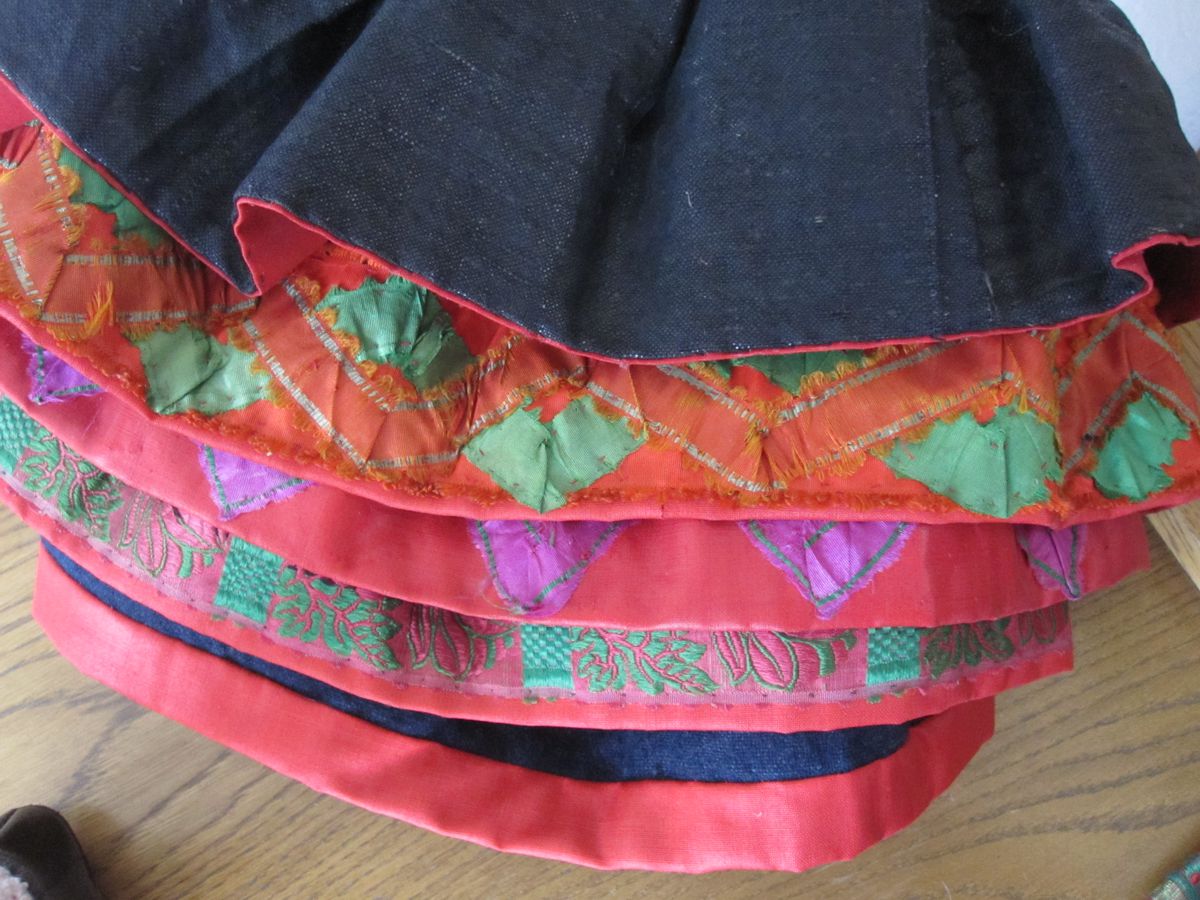
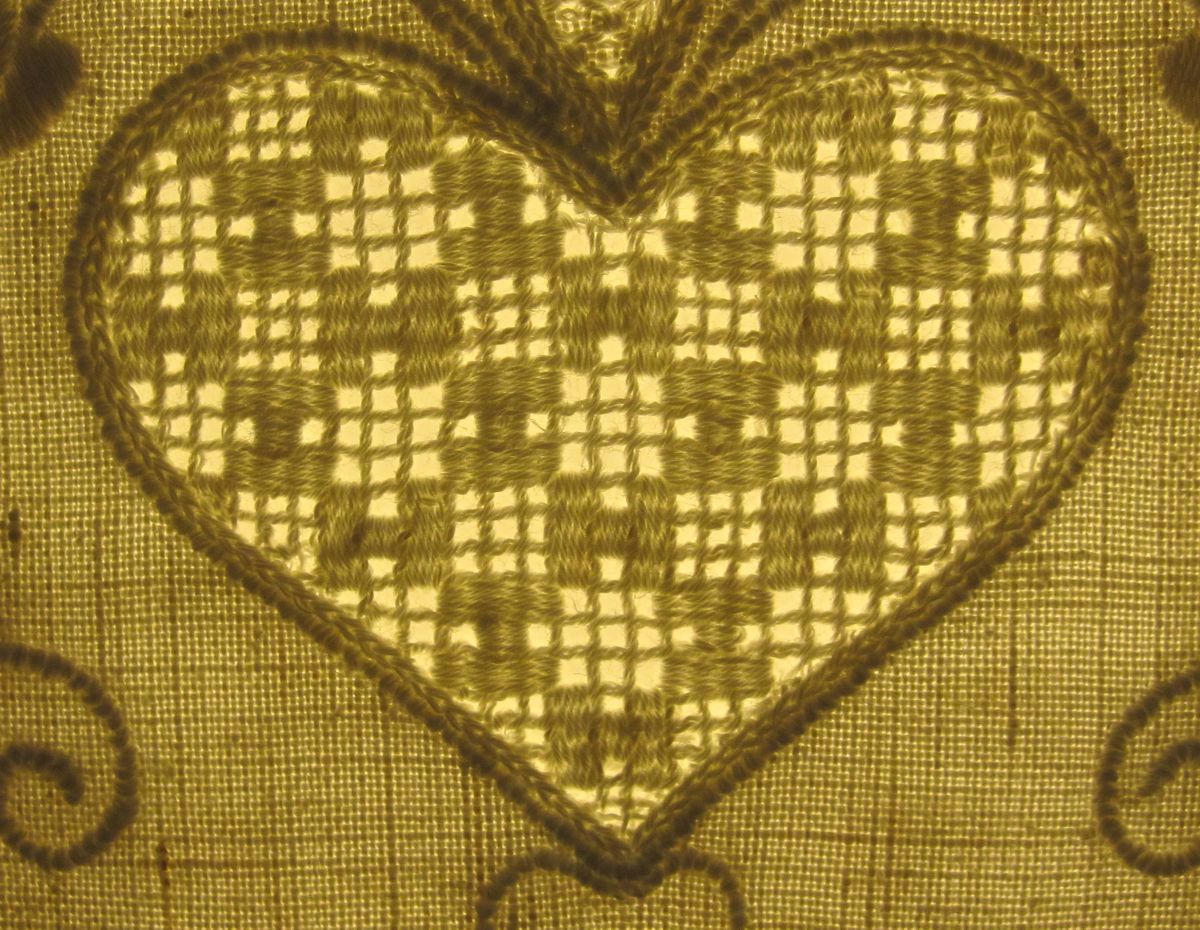
A woman’s costume was an indication of her prosperity. Indicating wealth were the number of skirts, the elaborateness of the colourful embroidery on cap bands, and the display of short or long needle laces, and elaborate whitework. Wealthier women could afford more of everything and that was displayed, of course.

rote Kappenschnur mit viel Buntstickerei und Nadelspitze | red cap band with elaborate colour embroidery and needle lace
rote Kappenschnur mit wenig Buntstickerei und ohne Nadelspitze | red cap band with less colour embroidery and without needlelace

Miederärmel mit wenig Weißstickerei und 2 Reihen Nadelspitze | bodice sleeve with less whitework and 2 rows of needlelace

Later I will present all the items of the costumes in detail. If you want to get a visual overview now, just have a look on ebay using the search term “Schwälmer”.
http://www.ebay.de/sch/i.html?_trksid=p3984.m570.l1313.TR3.TRC0.A0.Xschw%C3%A4lmer&_nkw=schw%C3%A4lmer&_sacat=0&_from=R40
There you will find many postcards with a variety of Schwalm costumes. From time to time you can also find original costume parts.
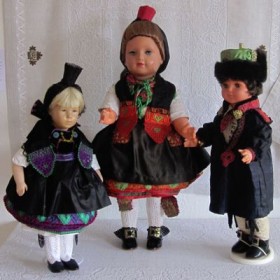
Or take a virtual look at a portion of the exhibition for costume dolls of the “Dorfmuseum Holzburg”
http://www.dorfmuseum-holzburg.de/index.php?option=com_expose&Itemid=4
The costume tailor, Erika Decker, has 52 different Schwalm costume ensembles reproduced in facsimile and presented in a dolls format.

Even on a virtual tour through the museum, you can admire some beautiful original costumes.
http://www.dorfmuseum-holzburg.de/index.php?option=com_expose&Itemid=4
And finally, today the theme costume serves as inspiration for up-and-coming fashion designers.
The students of Textile Technology and Fashion at the Elisabeth-Knipping-School in Kassel were assigned the task to design modern clothing using the costumes of northern Hesse, especially the Schwalm costume, as inspiration. The project was named “newly viewed” (Neu beTRACHTet ), and the results were presented in a fashion show in 2012.
http://www.elisabeth-knipping-schule.de/einblick/2012/modenschau2012/index.php
These modern-day interpretations can be viewed here:
http://www.hna.de/lokales/kassel/knipping-schule-modenschau-koenigs-alm-fs-2254313.html

Small Project – Slate meets Linen

A simple small heart design was ironed on to Weddigen linen, 13.5/cm thread count. Coton à broder was used in the following weights for the specific stitches: No. 16 for Coral Knot stitches, No. 20 for Blanket stitches, No. 30 for Chain stitches and the Cable stitch grid. Using Coton à broder No. 20 the shape was filled with pattern “442”. After finishing, the embroidered piece was washed (boiled), starched and ironed.
Then the heart was cut from the linen.
Das Herz wird ausgeschnitten | cut the heart - 1
A small and sharp embroidery scissors is needed. You will be cutting out the motif with the front side facing you. So that one gets a nice clean edge without damaging the embroidery, the blades of the scissors should not be held vertically. Instead, the lower blade should be held at a slight angle to the embroidery. Slowly and carefully, fabric thread after fabric thread is cut directly along the embroidered stitches without damaging them.
Das Herz wird ausgeschnitten | cut the heart - 2
Because the loops of the Blanket stitches extend a little bit past their backside stitches, the linen can
be cut directly below the loops. So the embroidered piece can be cut neatly.Das Herz wird ausgeschnitten | cut the heart - 3

If needed, such trimmed embroidery can be washed and ironed fast and easy at any time, but never ever agitated or spun!Ausgeschnittenes Herz | cut heart

I obtained some hearts made from slate (such hearts are currently available in many stores). Using a special re-movable tape for textiles, I fixed the embroidery on to the slate-hearts and decorated the finished pieces.
fertiges Projekt | finished project
The Openwork pattern is especially effective on the dark ground.
I worked some more of such hearts – with different filling patterns.
dekorierte Schieferherzen | decorated slate hearts
In groups – vertical or horizontal lines, or staggered – they are effectively decorative.

Filling Pattern – No. 443

No. 443
category: Openwork pattern with Cable stitch grid
stitches used: Needleweaving over 1, 3 and 5 squares; changing the direction
center: square
negative pattern to No. 442
Lichter Fadenauszug | thread withdrawing cut 2-leave 2
Starting in the middle, always alternate withdrawing and leaving two vertical threads. Do the same with the horizontal thread; it is best to start below the concave point of the heart (upper point). The established grid is stabilized with Single Faggot stitches – which is simply Cable stitch from the front – worked from the back side of the fabric.
Einstopfen des Musters | weaving the pattern
Starting at the concave point (the middle of the motif), the pattern (alternating rhombi with 1, 3, 5, 3 as well 1 and blocks with 3 X 3 squares) will be woven in a stair-step manner. You will notice how the direction of the weaving changes with each weaving pattern.
Reihe neben Reihe | row by row
To move from one block to the next, empty squares are left. To hold them clear and open, the working thread has to be wrapped around the bundled threads of the grid in the same direction of the Single Faggot stitches. This way the wrapping is barely visible.
If you require more detailed instructions, please refer to “Basic Principles of Schwalm Whitework” or “Openwork Needleweaving Patterns”.

Diagonal pattern rows are worked one after the other until the entire shape is filled.
fertiges Muster 443 | finished pattern 443
Washed, starched and ironed the finished pattern shows its charm.

Another 175 Needleweaving patterns can be found in my book “Openwork Needleweaving Patterns”.

Filling Pattern – No. 442 (“H” pattern)

In several of my books I showed many different filling patterns and described, in detail, the steps of working. In contrast to the surface filling patterns presented in Early Schwalm Whitework, all the numbered patterns are withdrawn thread filling patterns.

There are:
10 filling patterns in “Basic Principles of Schwalm Whitework
68 in “Limetrosen I
84 in “Wickelstiche I” (actually 85, but 1 is also listed in BPSW)
79 in “Limetrosen II
26 in “Openwork Pattern Samplers”, and finally
174 in “Openwork Needleweaving Patterns” (actually 175, but 1 is also listed in BPSW).
That makes
441 unique filling patterns in all!

But there are even more nice filling patterns (simple drawn thread, Limet, or Openwork).

In my books, excluding the Sampler book, I only presented patterns that used a single Schwalmtypical embroidery stitch. However, Schwalm Whitework gets its wealth by the innumerable ways to combine those single stitches.
Should one use Rose stitches, Needleweaving and a combination of both for Openwork patterns, the variety of stitch combinations for Limet patterns is nearly inexhaustible. Here are some possible combinations:
Rose stitches and Four-Sided stitches

  • Rose stitches and Satin stitches
  • Rose stitches, Four-Sided stitches and Satin stitches
  • Satin stitches and Four-Sided stitches
  • Satin stitches and Wave stitches
  • Satin stitches and Square stitch variation
  • Rose stitch and Single Faggot
  • Single Faggot and Diagonal Cross Filling
  • Satin Stitch and Square Eyelet
  • Rose stitch and Square Eyelet
  • Rose stitch and Satin stitch
  • Single Faggot, Diagonal Cross Filling and Rose stitch
  • Honeycomb Darning stitch and Rose stitch

And all of these combinations may be variously arranged – straight or diagonally, in diagonal steps or put together in squares or rhombi.
I think it might be possible to glean about 1000 different patterns; let me give it a stab.
Now and then I will present one more filling pattern.

Here is the first. It is an easy-to-work pattern and it is called No. 442 (“H” pattern). It would be difficult to find a real name for each pattern and so some will only be called by a number.

No. 442 (“H” pattern)
category: Openwork pattern with Cable stitch grid
stitches used: Needleweaving over 1 and 3 squares; changing the direction
center: square
positive pattern to No. 443

Lichter Fadenauszug | thread withdrawing cut 2-leave 2Starting in the middle, always alternate withdrawing and leaving two vertical threads. Do the same with the horizontal thread; it is best to start below the concave point of the heart (upper point). The established grid is stabilized with Single Faggot stitches – which is simply Cable stitch from the front – worked from the back side of the fabric.

Einstopfen des Musters | weaving the patternStarting at the concave point (the middle of the motif), the pattern will be woven in a stair-step manner. You will notice how the direction of the weaving changes with each “H”.

One diagonal pattern row is worked to the next until the entire shape is filled.

fertiges Muster 442 | finished pattern 442Washed, starched and ironed the finished pattern shows its charm.

Muster 442 auf Lampenschirm | pattern 442 on a lampshadeWorked within a wider shape, shown here in the heart-design of a lampshade, the effect of the pattern can develop better.

If you require more detailed instructions, e.g., preparing the pattern areas, withdrawing the threads, or working specific stitches, please refer to my book “Basic Principles of Schwalm Whitework”.
Another 175 Needleweaving patterns can be found in my book “Openwork Needleweaving Patterns”.

Iron-Transfer versus direct Tracing

Because I know that many people prefer tracing the design onto the fabric using water soluble pens, I also wanted to test this method for Schwalm whitework.
I taped the design onto a lightpad. Lightpads are perfect for tracing embroidery patterns onto fabric – also a table with a glass top and a lighted lamp below is suitable.
Leuchtenpaneel mit Musterblatt | LightPad with the design

I marked the lengthwise and crosswise grain lines on a piece of linen (Weddigen linen, 13.5/cm thread count), and carefully positioned this on top of the design which also had perpendicular central lines drawn. The linen, thus positioned, is then taped to the lightpad.

Using a water soluble, extra fine marking pen,
wasserlöslicher Markierstift | water erasable marking pen
extra feine Spitze | extra fine tipI started the tracing. First I used a very light touch. On the fabric, the markings appeared in light dots at an uneven distance. So I then applied a little more pressure. This time, the lines appeared clearly on the fabric – not too fine, but also not too thick. I traced the heart shape first; the result was acceptable. Then I traced the smaller half-circles. If I pressed too hard, the tip of the pen got caught between the fabric threads and the lines became uneven. Even trying to do my best, not all curves came out as I wanted. Often the pen followed the thread line and created straight instead of curved lines.

At first sight, with the design sheet and light below, the result looks acceptable.

nachgezeichnete Kontur | traced designViewed alone and without the light below, the tracing does not look so good. The curves are uneven and sometimes jagged – definitely not smoothly rounded.

Buegel-Abdruck Clover | iron-transfer print CloverFor directly comparision I here show the same design transferred by ironing.

I am able to adjust some of the unevenness by embroidering, but not all.
die Farbe wird nicht abgerieben | the colour did not fadeThe colour did not fade and it was easy to follow the lines.
After finishing the embroidery, I washed it, as the instructions direct, with clear water. At once all colour was gone; the image shows the wet piece after being held under running water for a short time.

sehr schnell und einfach auswaschbar | very easy washable

Nevertheless I boiled it for shrinking. Starched and ironed it looks nice, but a trained eye notices the unevenness.

fertige Arbeit | finished piece

Perhaps this transfer method is better suited for finer fabrics with a more even surface. Another consideration must be made for the intricate Schwalm whitework designs that include small leaves, many tendrils and the half-eyelet scallops; I would not suggest this design transfer method for such designs.

Have you experimented with these products, or others? Then please leave a comment.