Embroidered Poppy Wreath (2)

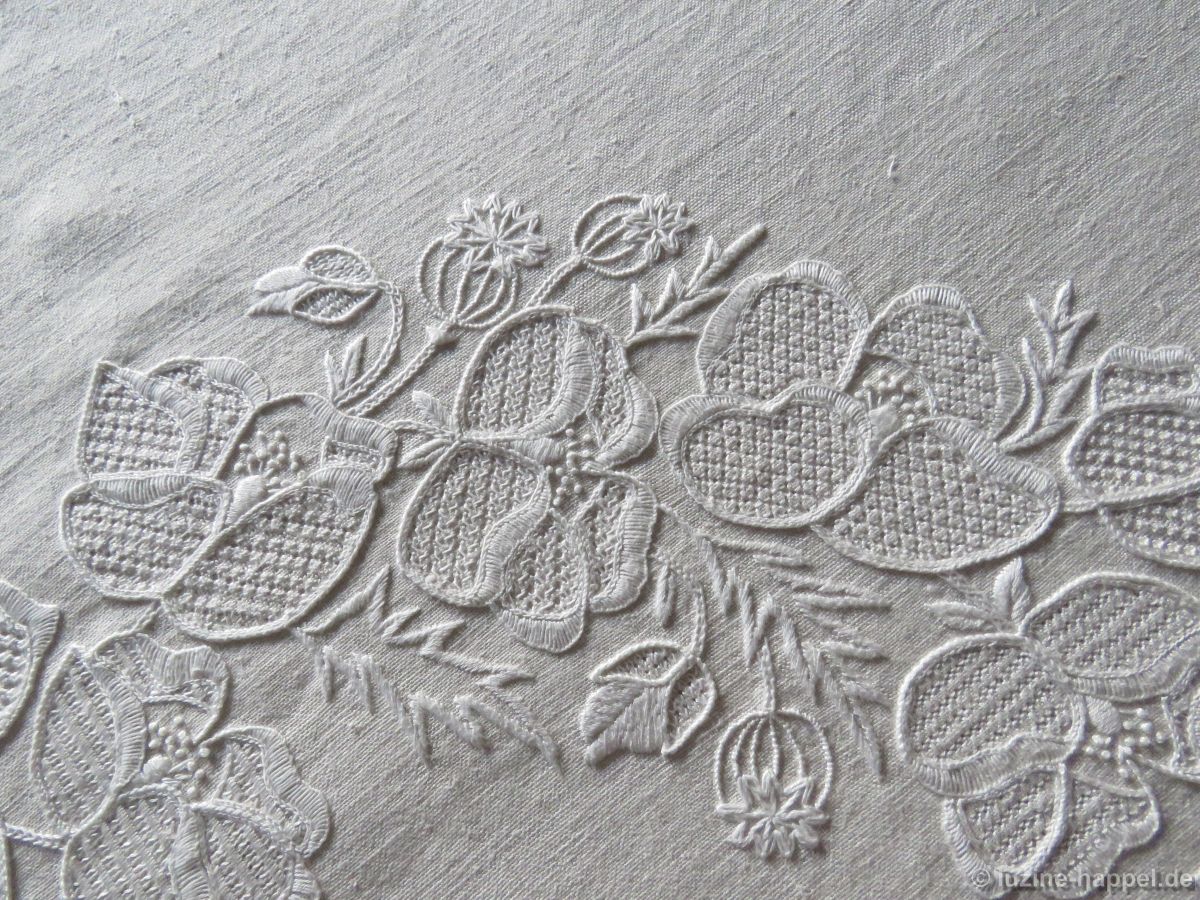
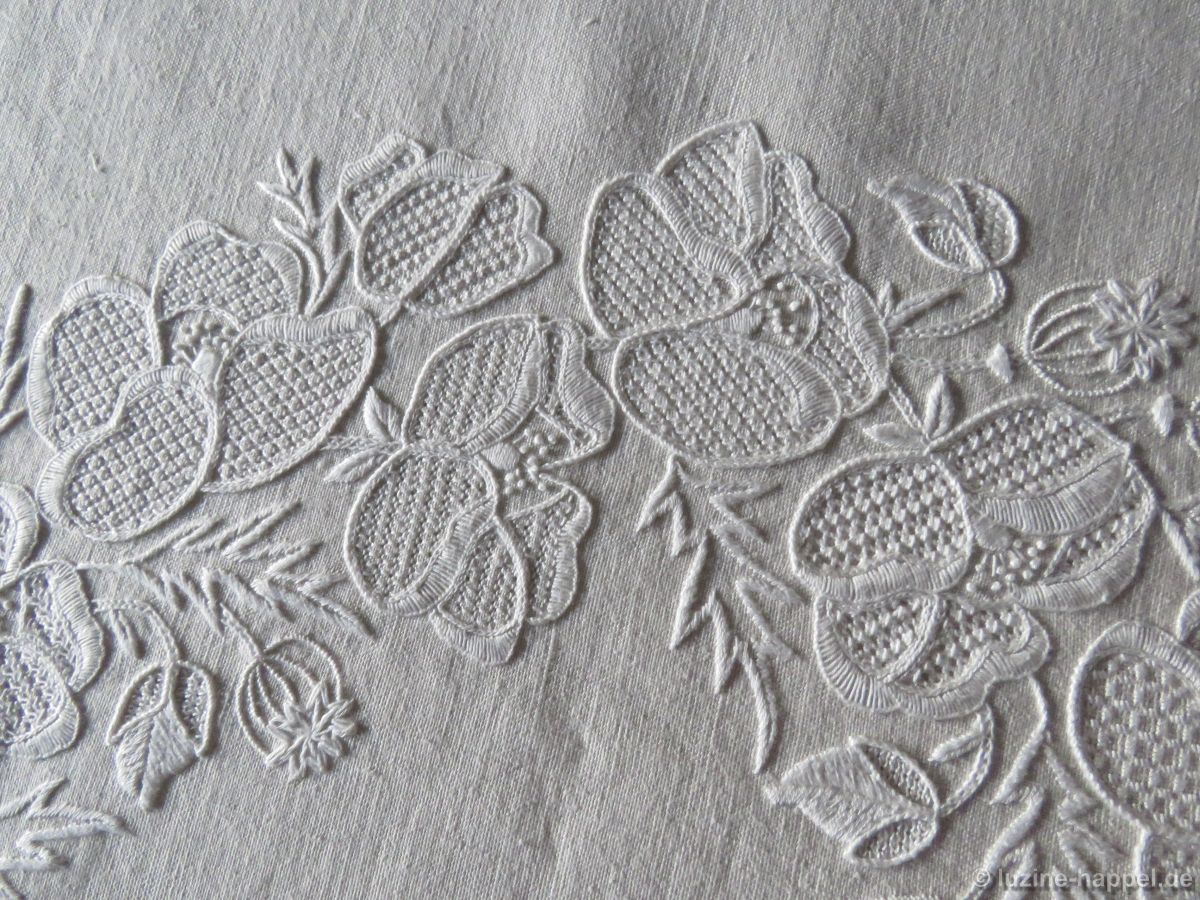
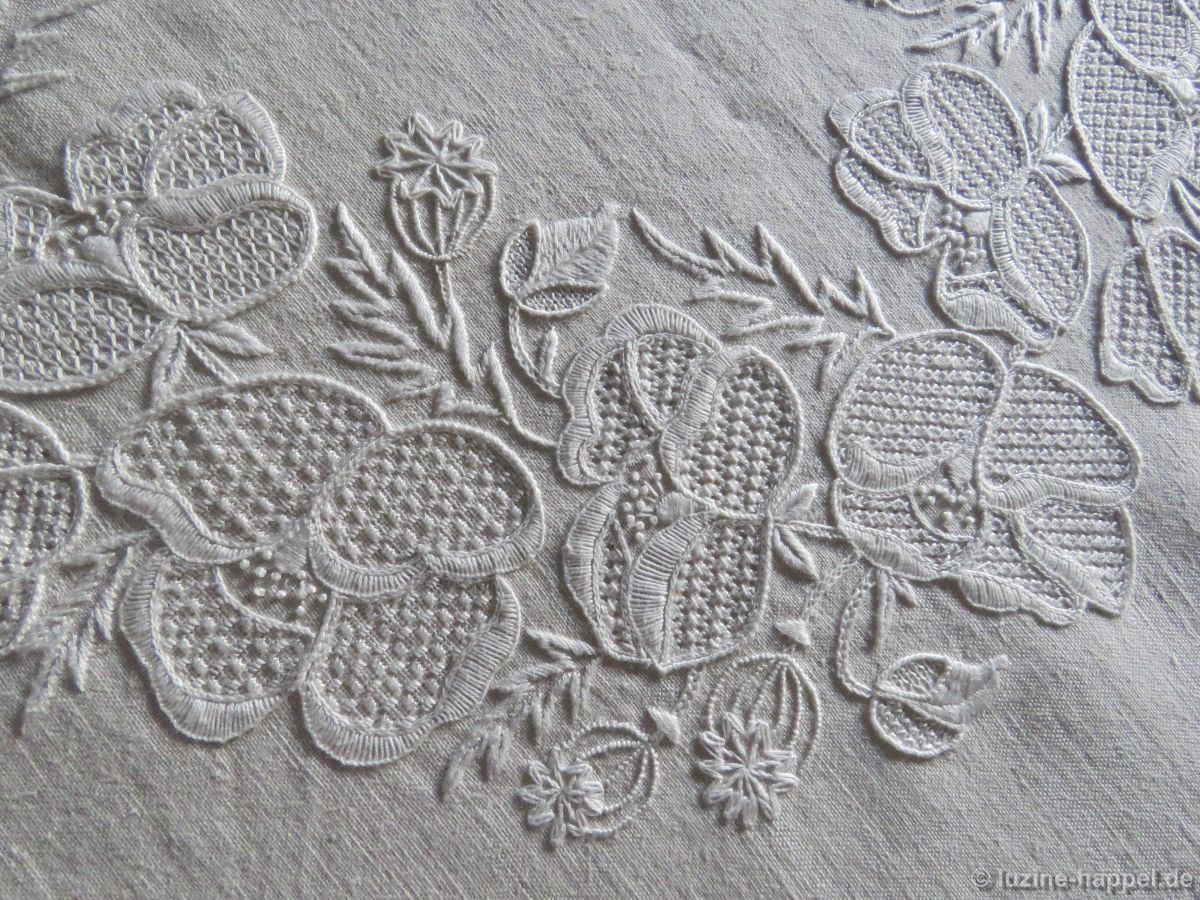
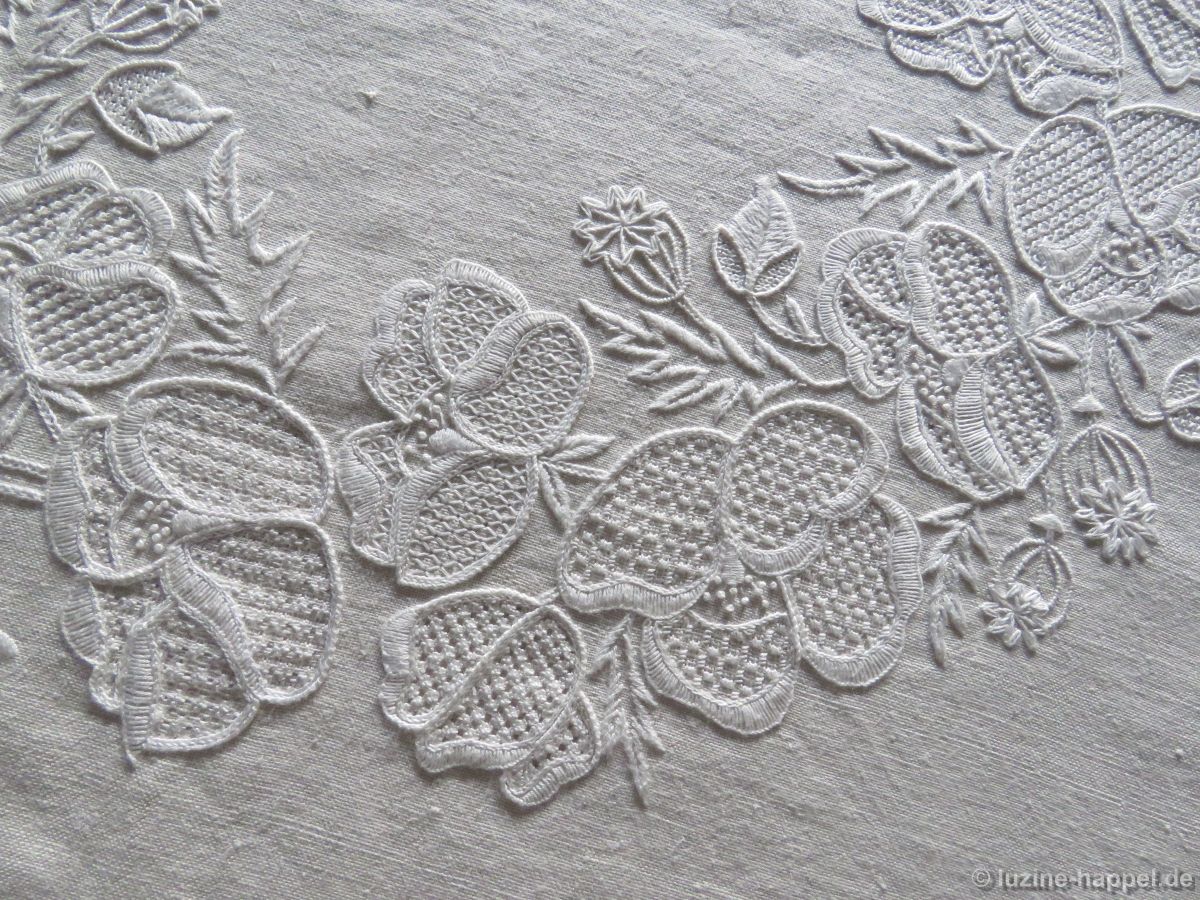
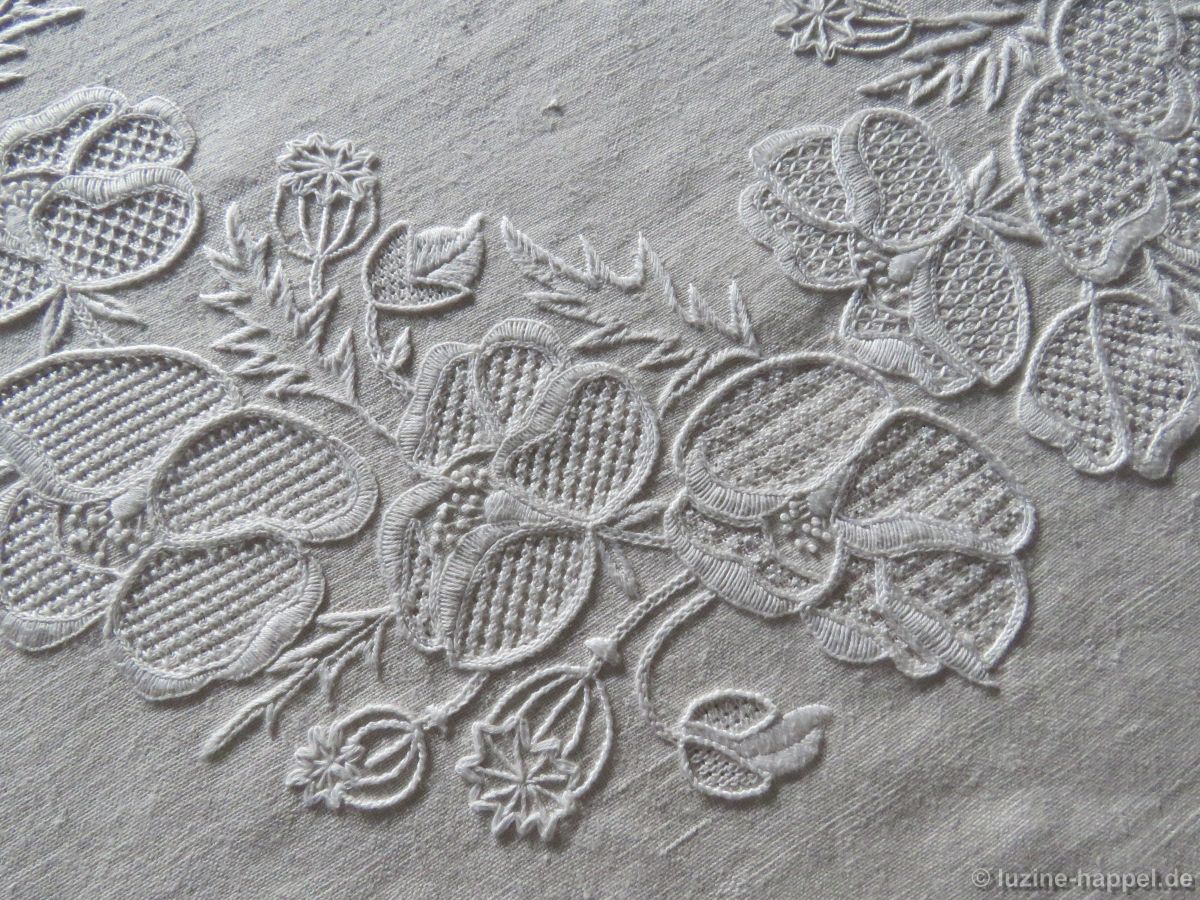
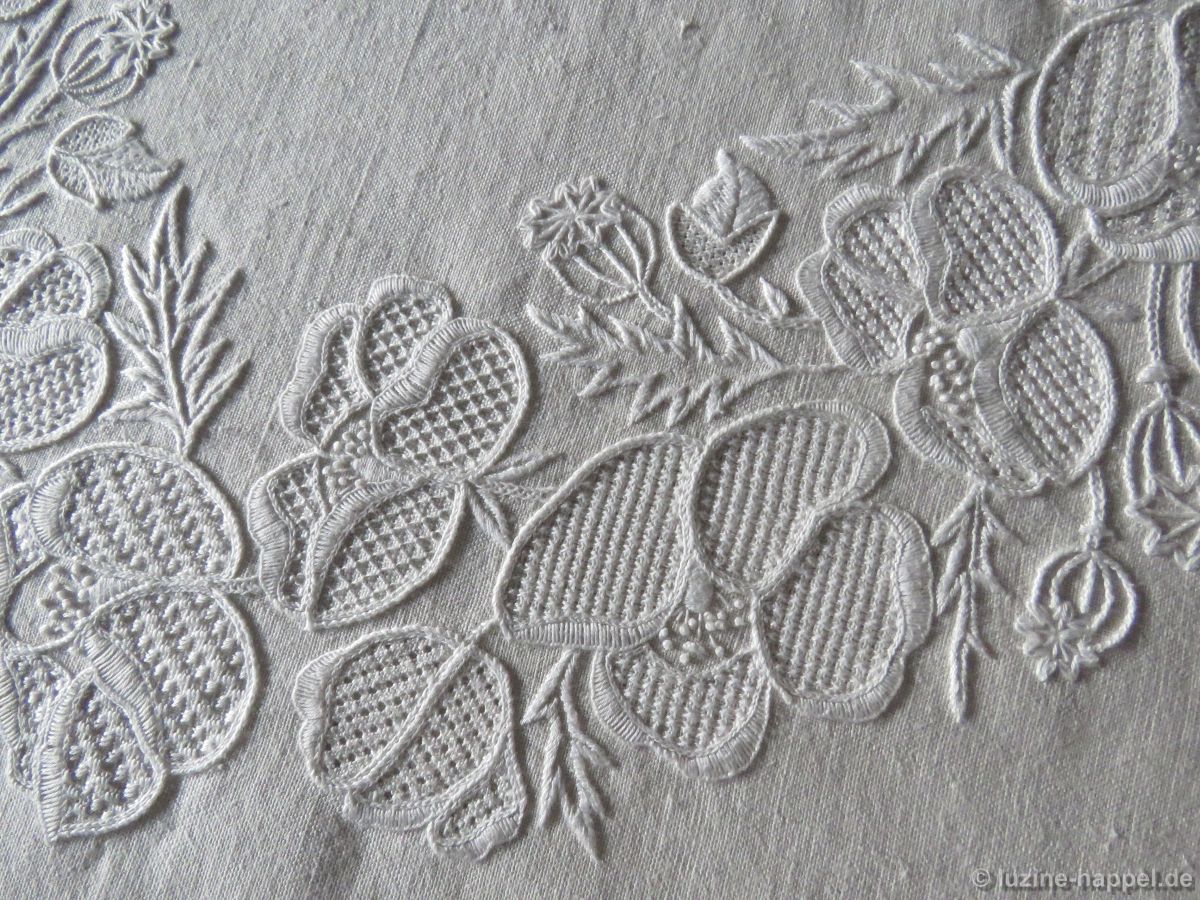
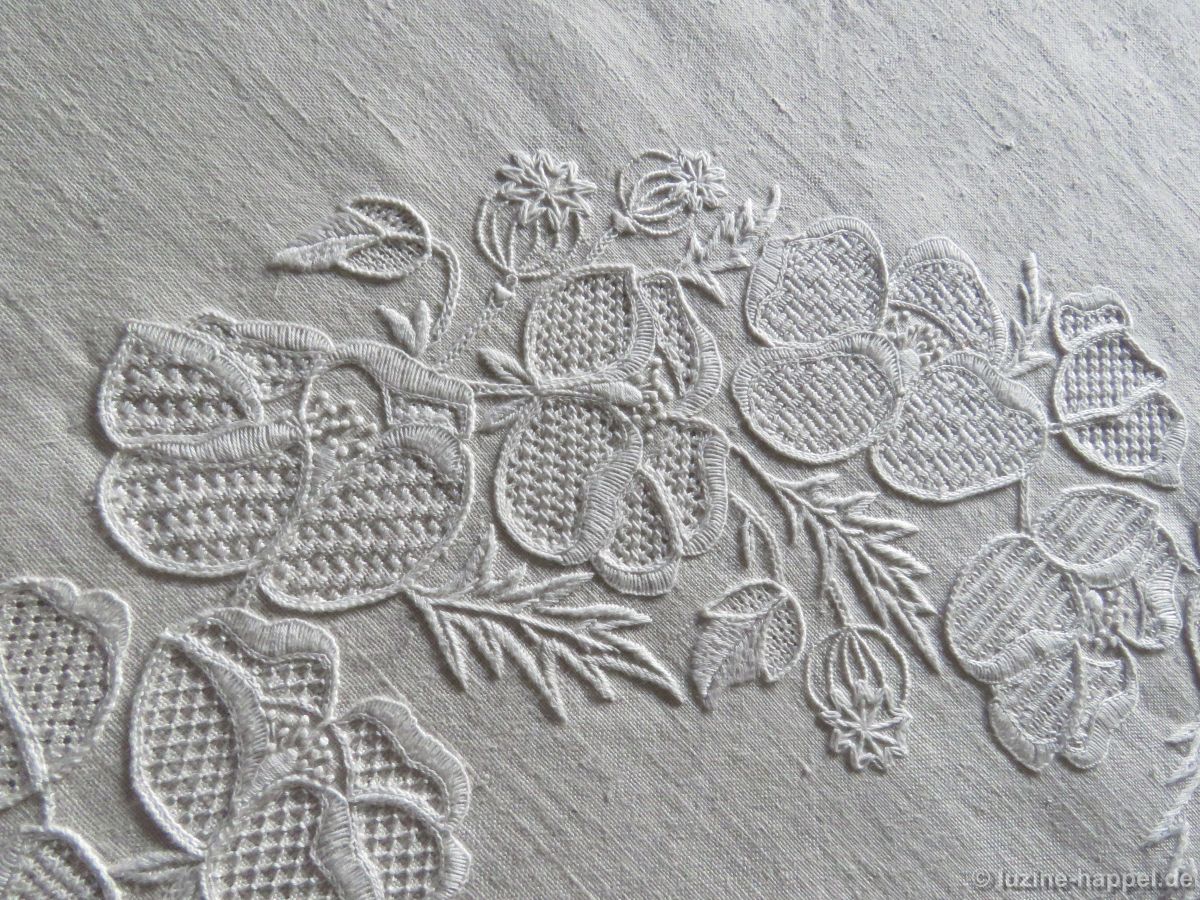
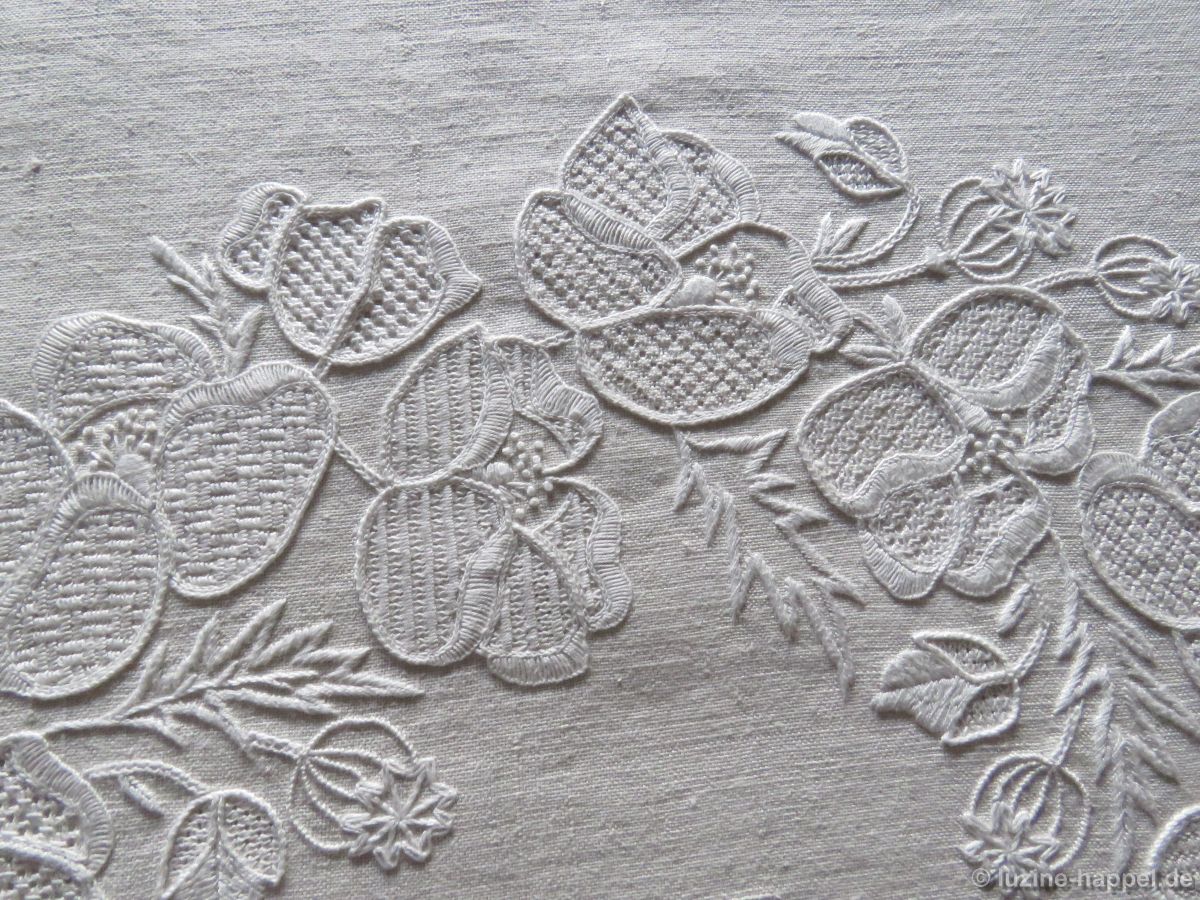
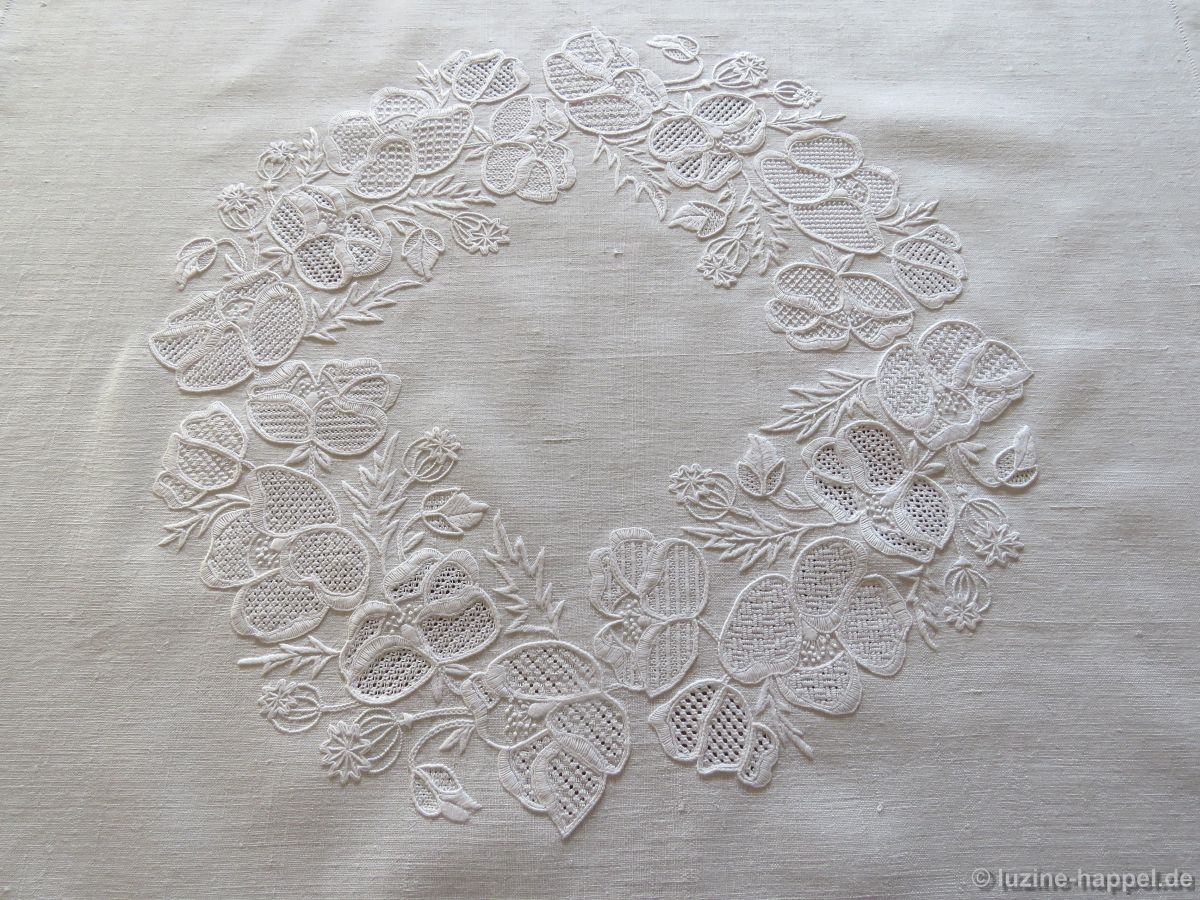
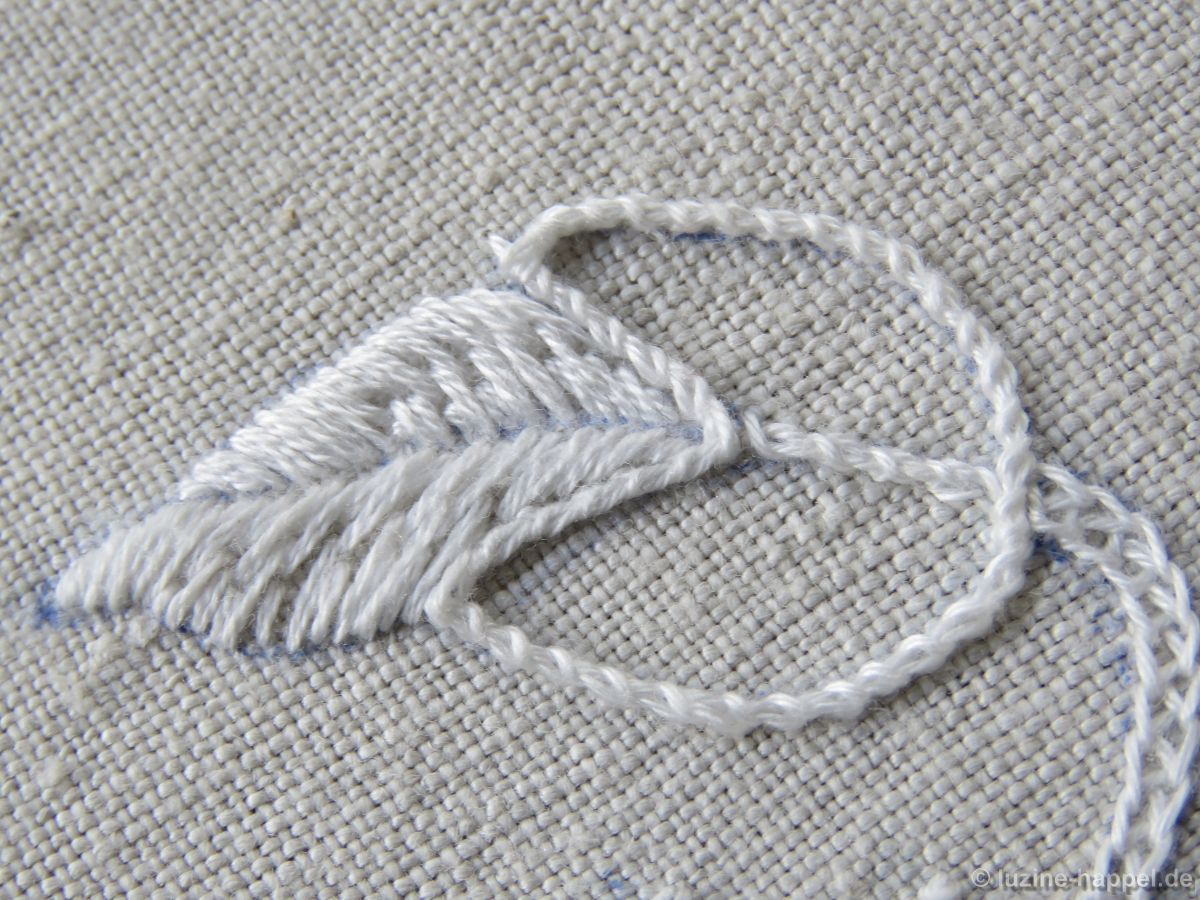
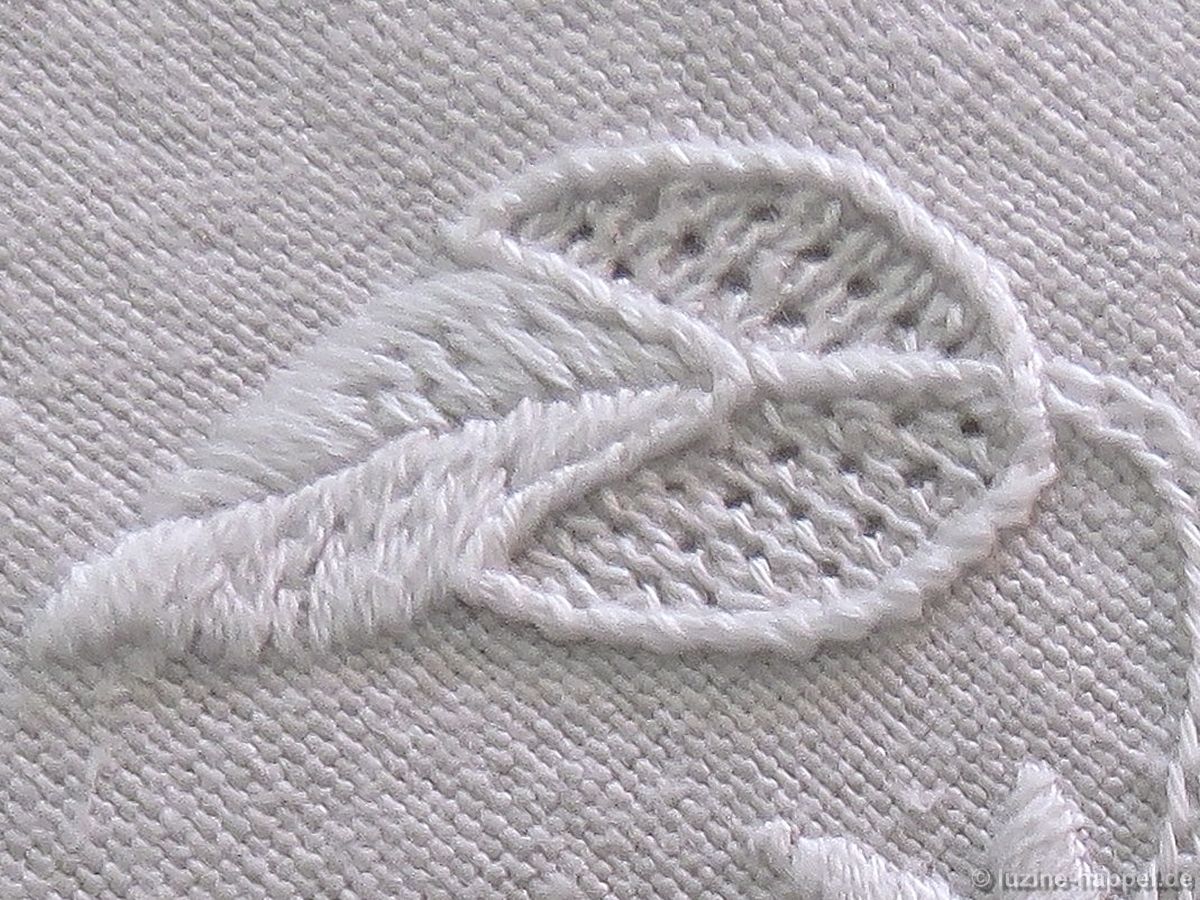
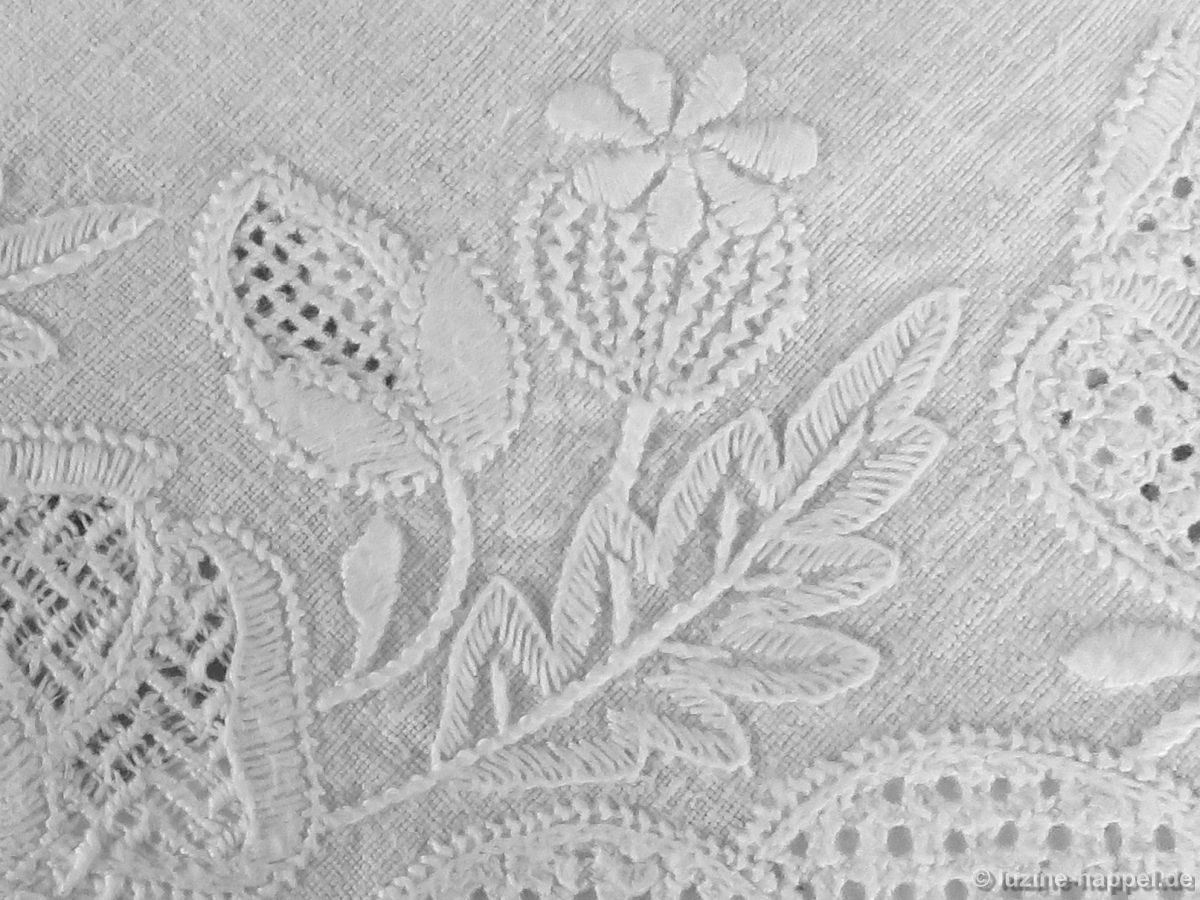
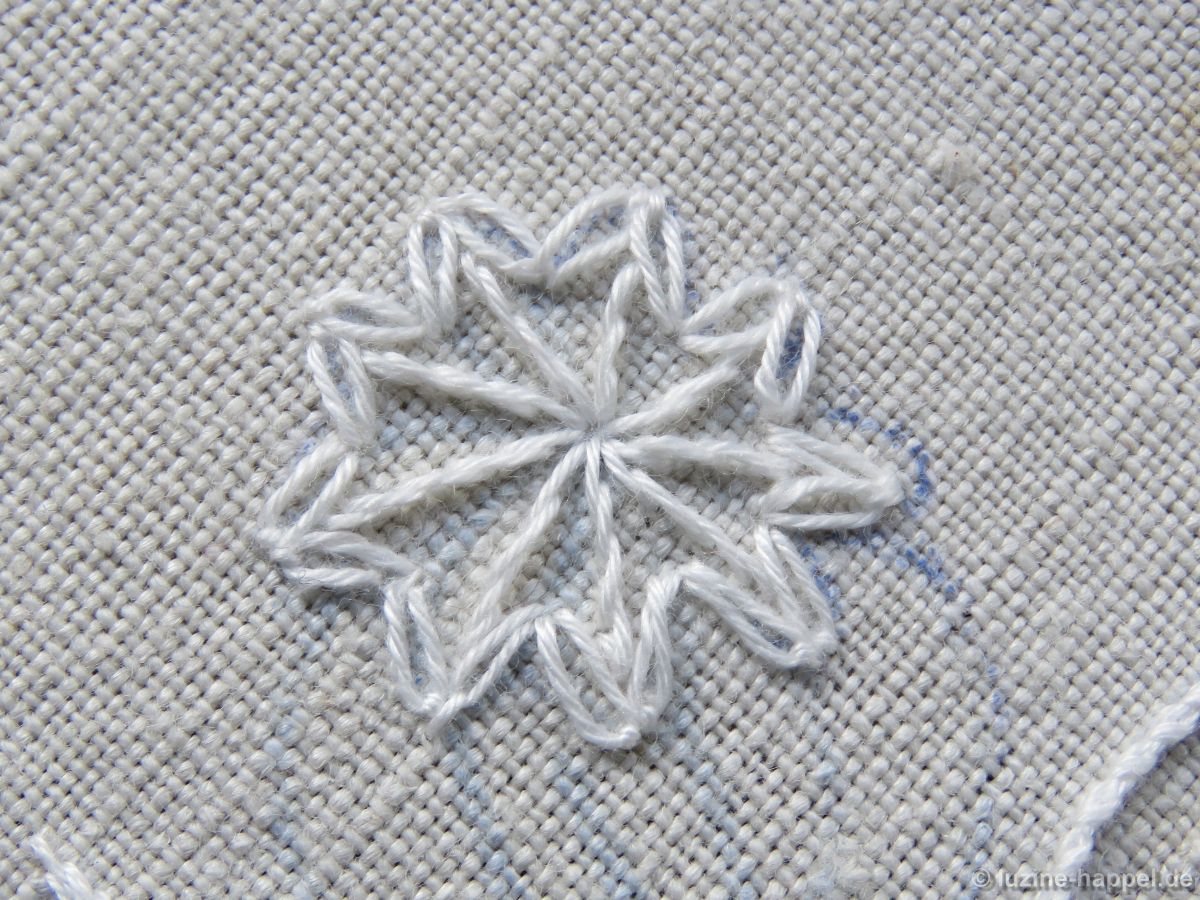
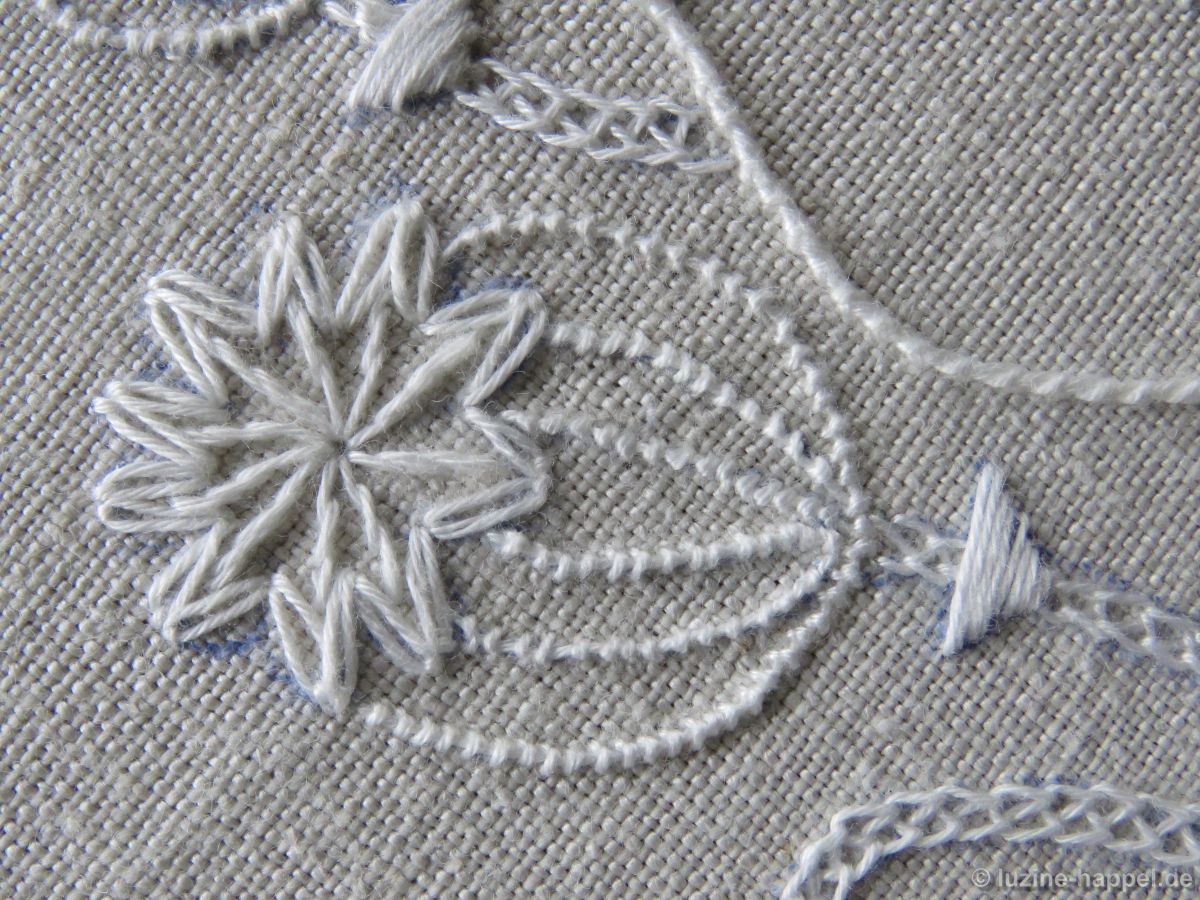
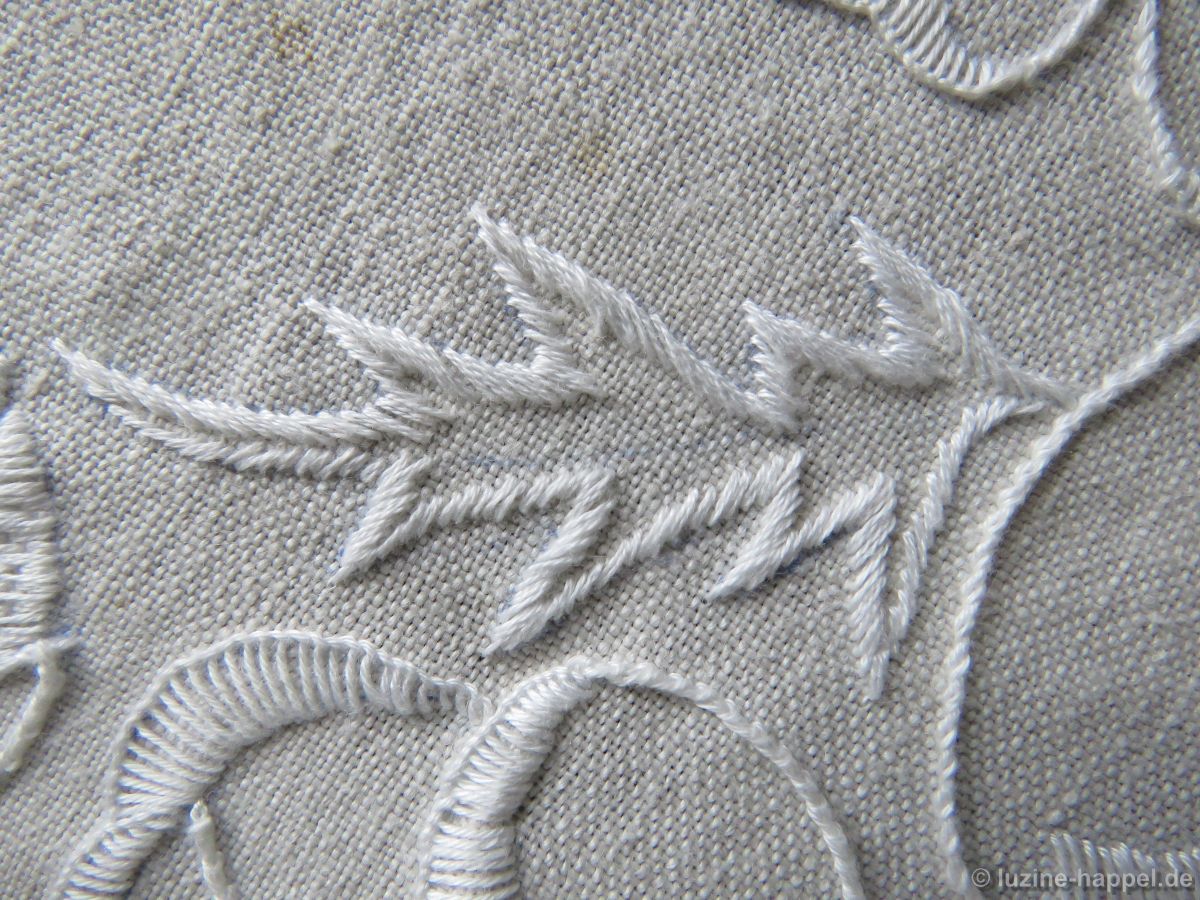
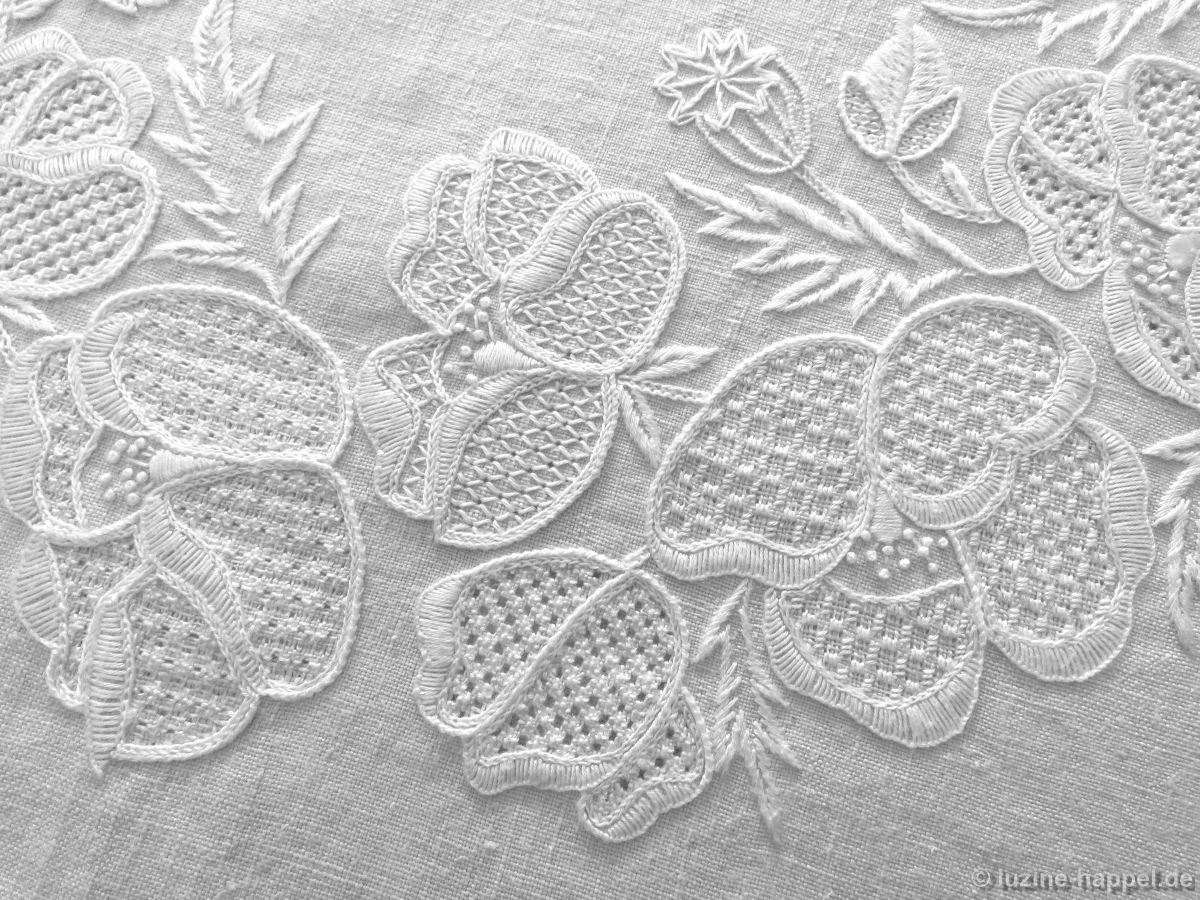
As promised, here are more pictures of the lovely, extraordinary, and striking poppy wreath.
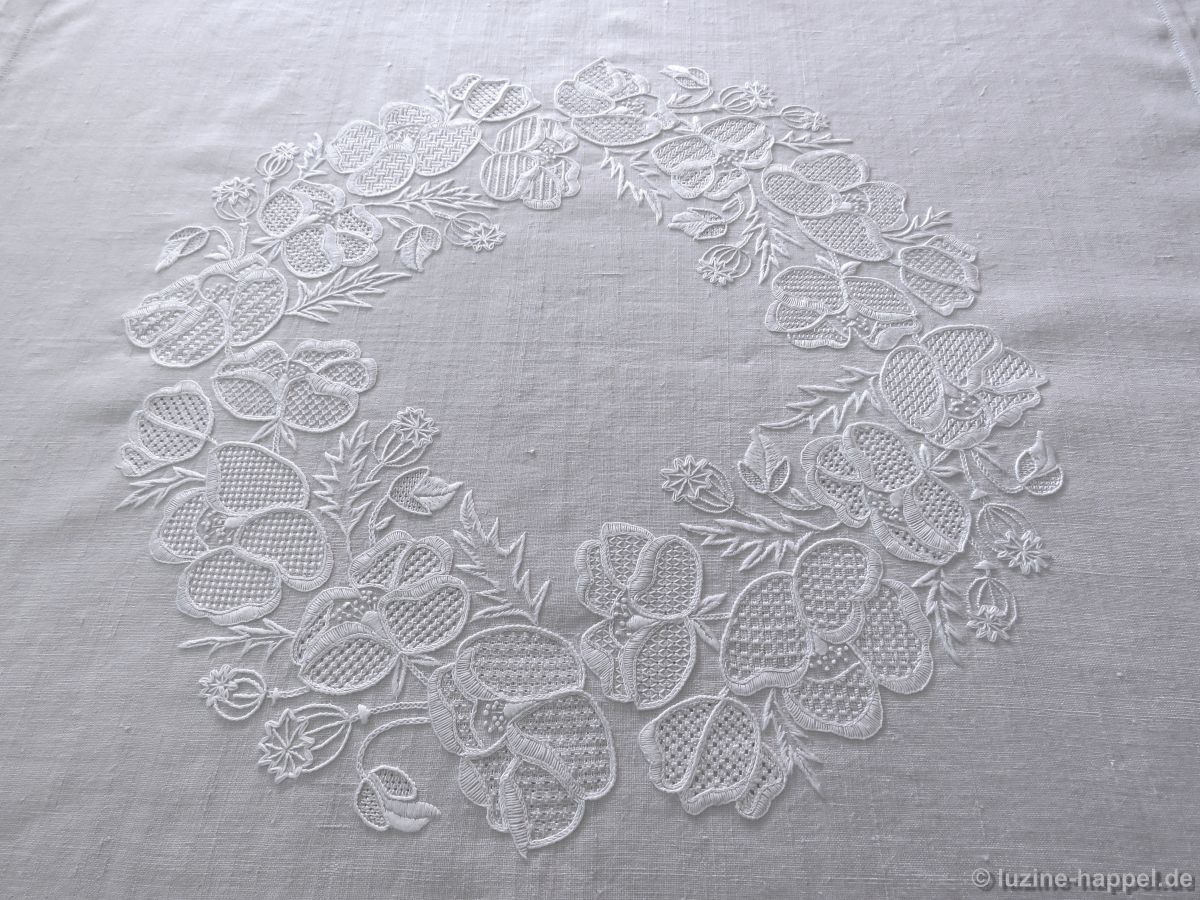
To explain the details, all the blossoms are shown moving clockwise around the circle.

From right to left
1. without thread withdrawing; Wave stitches over 4 threads in height and 6 threads in width
2. Limet thread withdrawing 3:1; filling pattern No. 543
3. Bud: simple thread withdrawing 3:1 ; Wave stitches over 4 threads in width
4. Openwork thread withdrawing 2:2; Diagonal Cross stitch
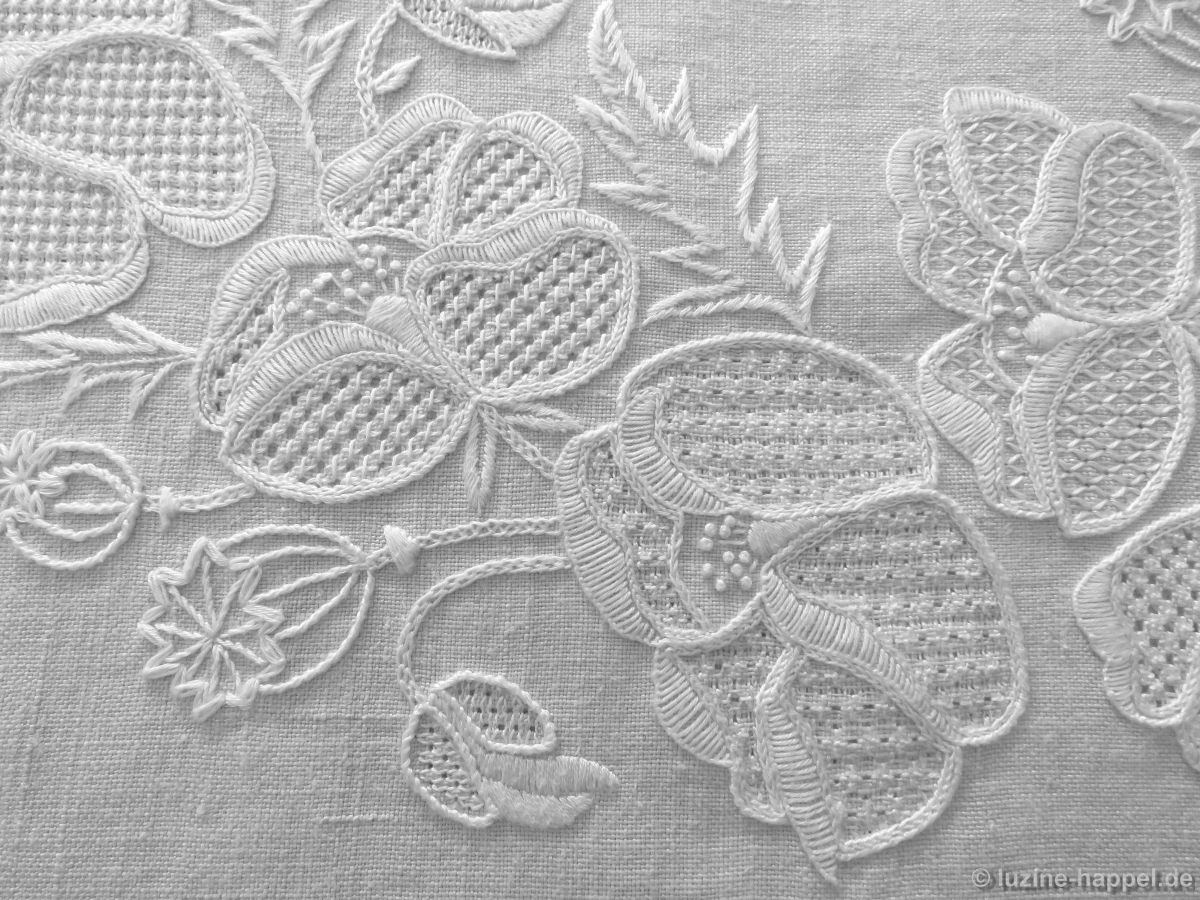
from bottom to top
5. Limet thread withdrawing 4:1; filling pattern No. 571
6. Bud: simple thread withdrawing 3:1; Wave stitches over a width of 4 threads
7. Limet thread withdrawing 3:1; Rose stitch
8. simple thread withdrawimg 3:1; Honeycomb Darning stitches over a width of 4 threads
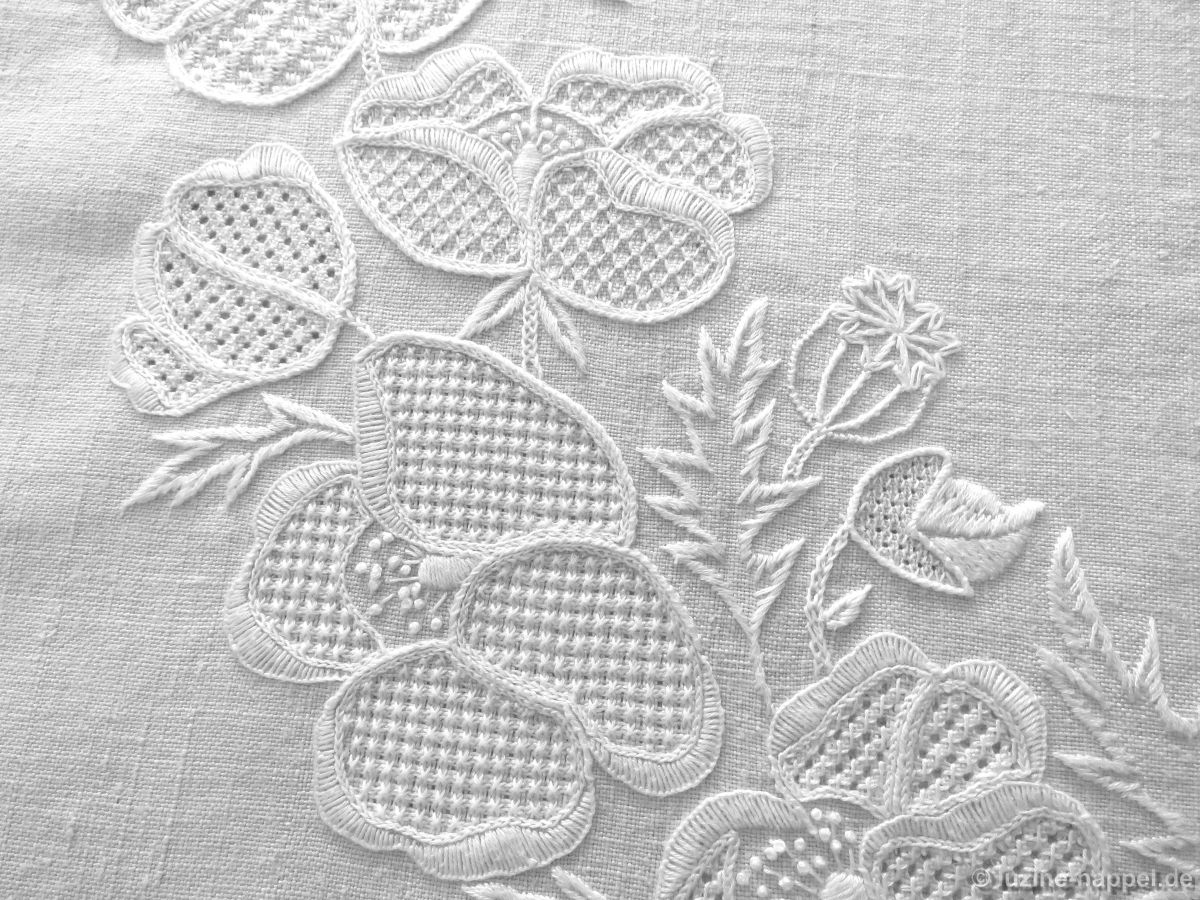
from left to right
9. Limet thread withdrawing 3:1; “Diagonal step over one plot” pattern using Satin stitches (Wickelstiche: page 22)
10. Bud: simple thread withdrawing 3:1; Wave stitches over 4 threads in width
11. Openwork thread withdrawing 2:2; alternating rows of Diagonal Cross stitch and Cable stitch
12. Bud: simple thread withdrawing 3:1; Wave stitches over 4 threads in width
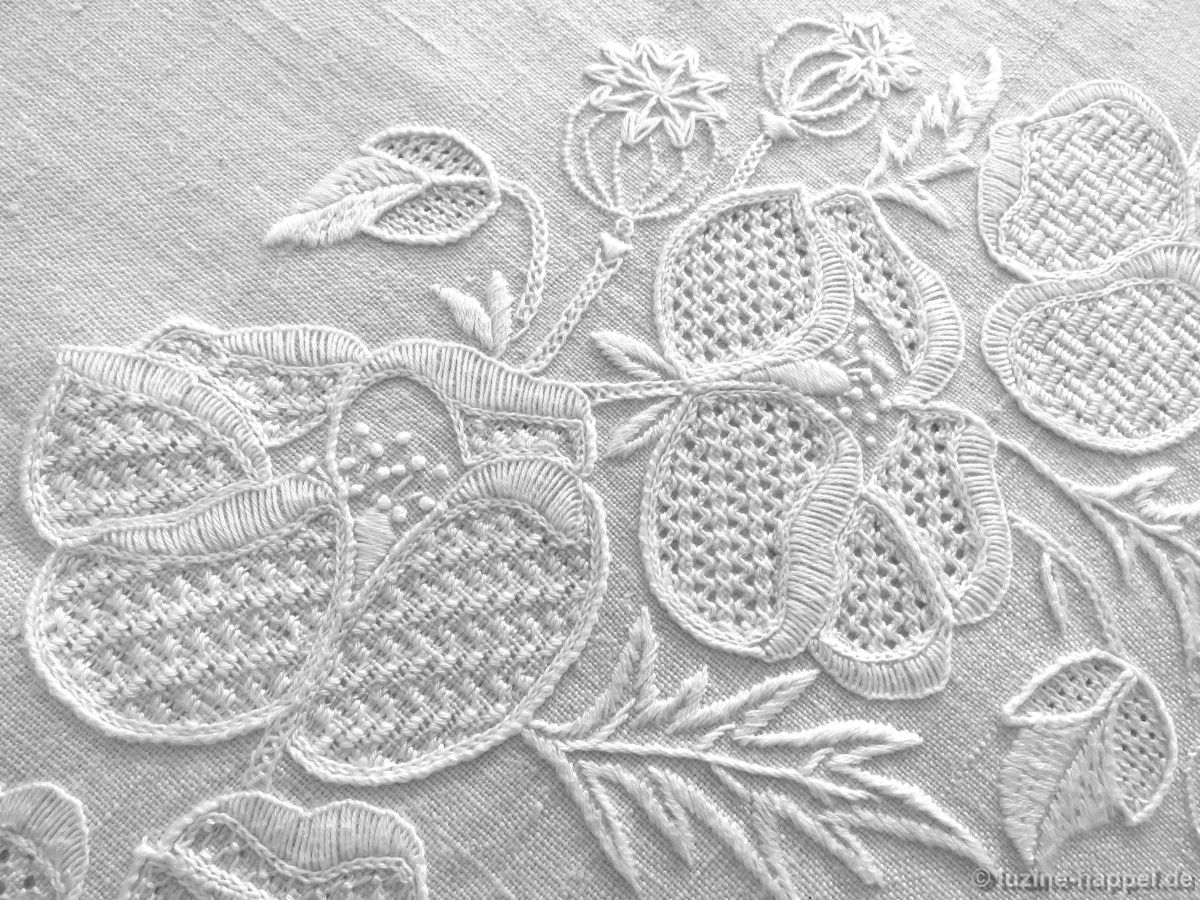
from left to right:
13. Limet thread withdrawing 3:1; Satin stitch “Two-Pattern” (Wickelstiche, page 16)
14. Openwork thread withdrawing 2:2; double Diagonal Cross stitch (Openwork Pattern Samplers)
15. Simple thread withdrawing 3:1; alternating rows of Satin stitch bars and Wave stitches
16. Limet thread withdrawing 3:1; filling pattern No. 572
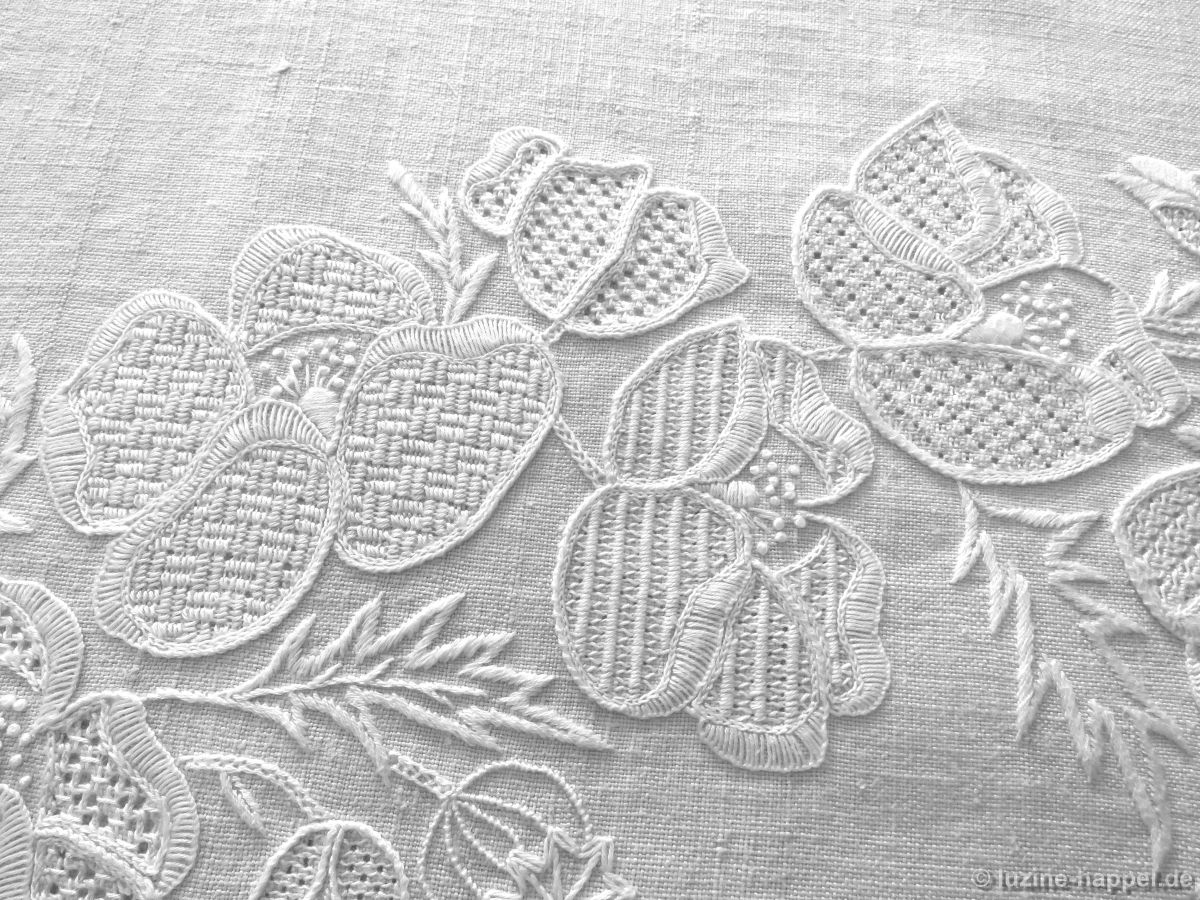
from left to right:
17. Openwork thread withdrawing 2:2; French stitch – half-stitch with gap (Openwork Pattern Samplers)
18. Bud: simple thread withdrawing 3:1; Wave stitches over a width of 2 threads
19. Limet thread withdrawing 3:1; filling pattern No. 549
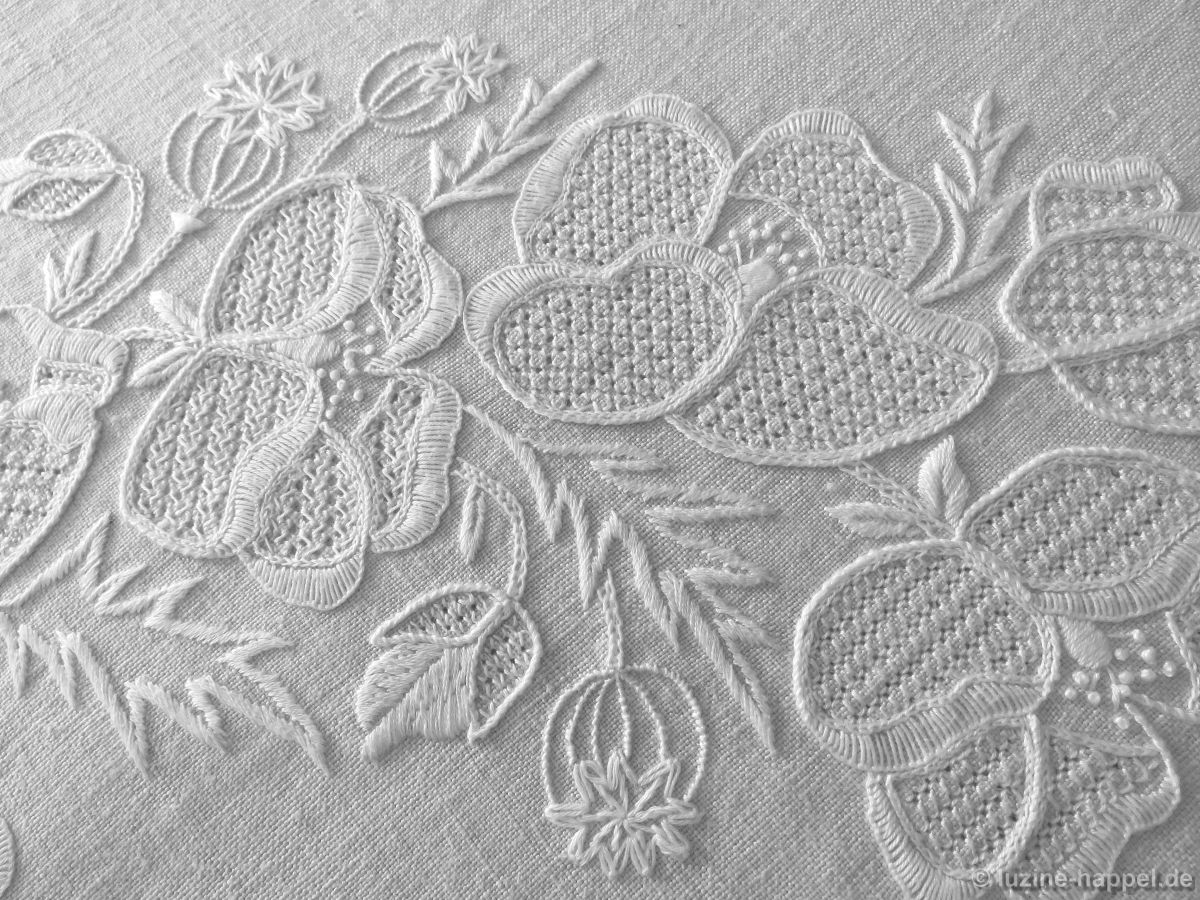
from left to right:
20. Limet thread withdrawing 3:1; Rose stitch variation
21. Simple thread withdrawing 4:2; filling pattern No. 567
22. Limet thread withdrawing 3:1; Diagonal Cross stitches
23. Bud: simple thread withdrawing 3:1; Wave stitches over 2 threads in width
24. Openwork thread withdrawing 2:2; alternating rows of double Diagonal Cross stitch and Singe Faggot stitch
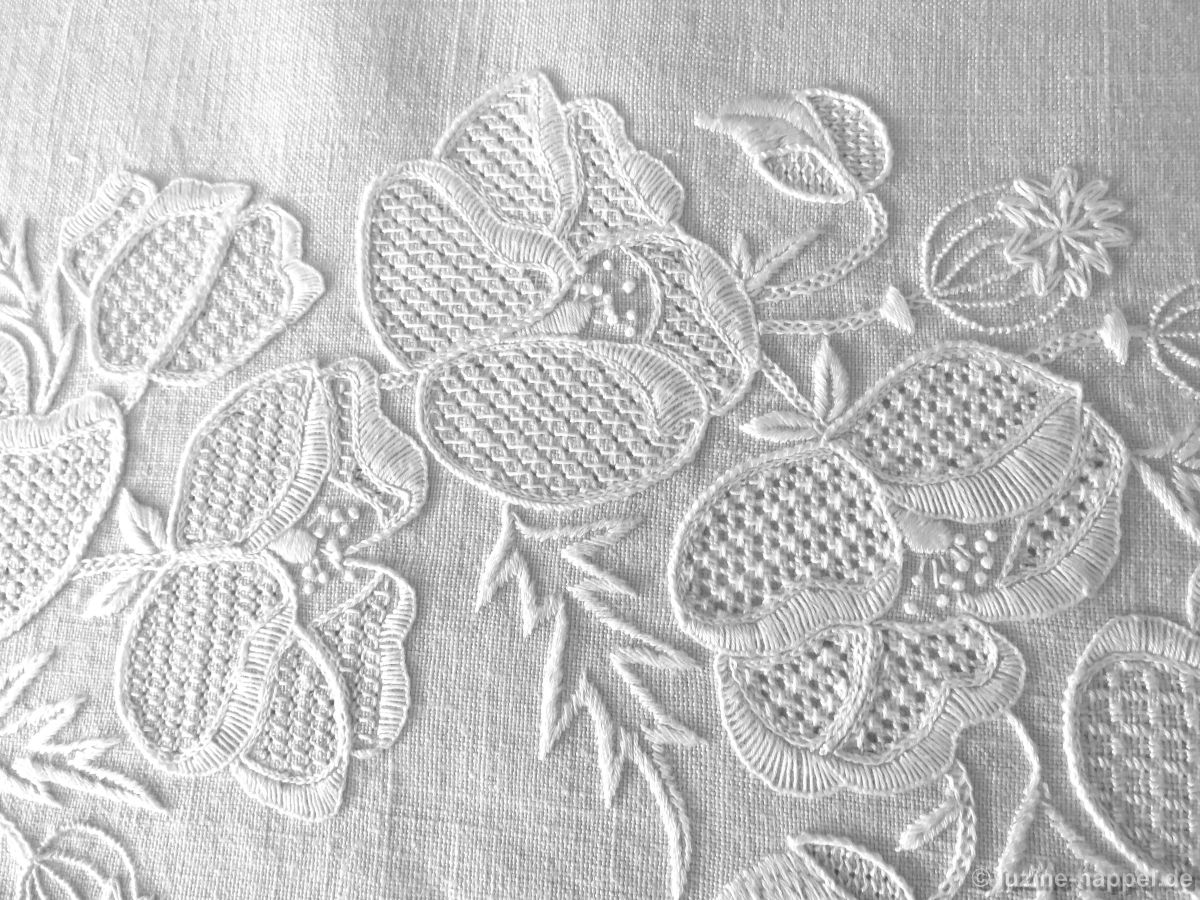
from right to left
25. Bud: simple thread withdrawing 3:1; Wave stitches over a width of 2 threads
26. Limet thread withdrawing 3:1; “Grid” Satin stitch pattern (Wickelstiche, page 37)
27. Openwork thread withdrawing 2:2; Rose stitches without a Cable stitch grid
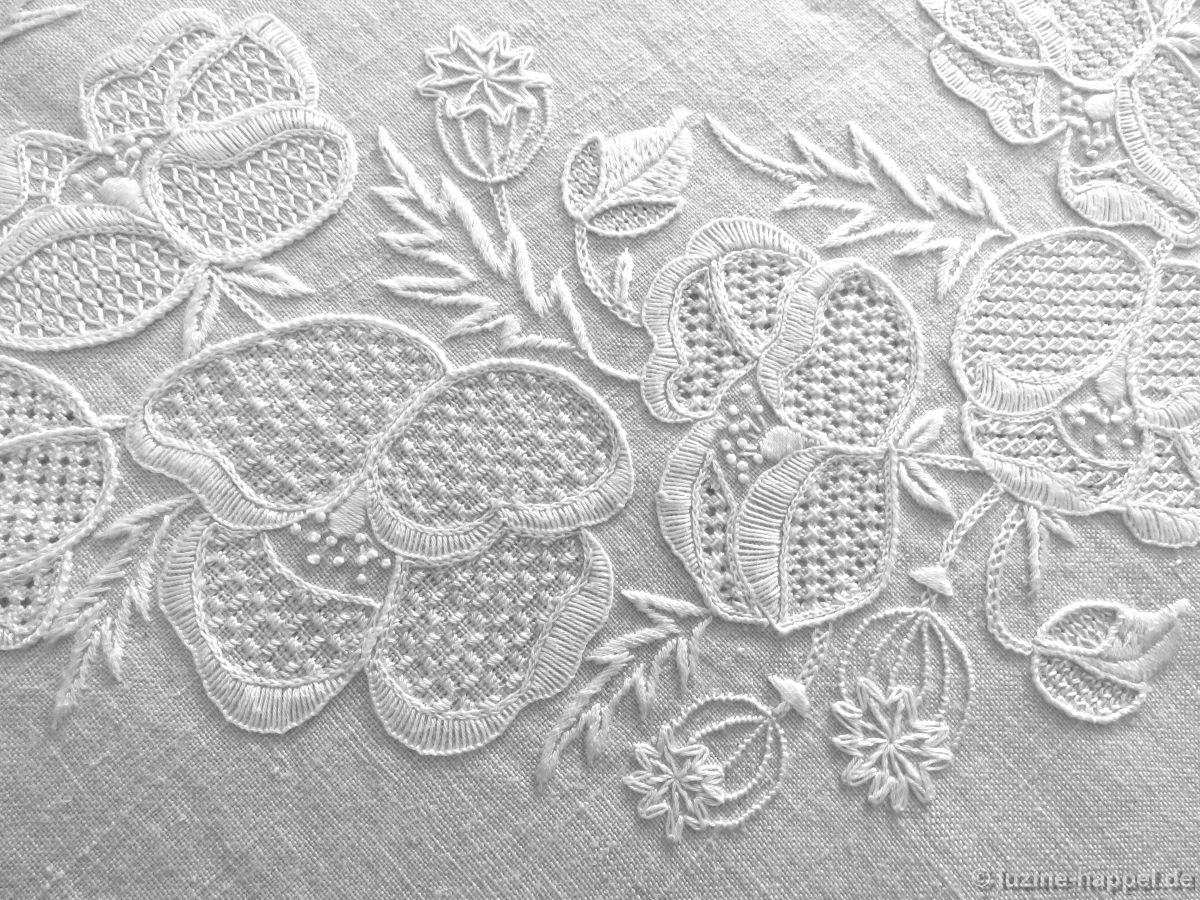
So the wreath was circled once

Here are a few more impressions:
You can download the pattern as a PDF file here:
Shop
Embroidered Poppy Wreath (1)

More than two years ago, I presented a very special wreath design in the post Poppy.

I have since stitched the design. I really like the result, even though it deviates from typical Schwalm patterns.

The wreath consists of four identical sections, each containing four wide-open poppy blossoms, three buds, three seed pods, and some leaves.

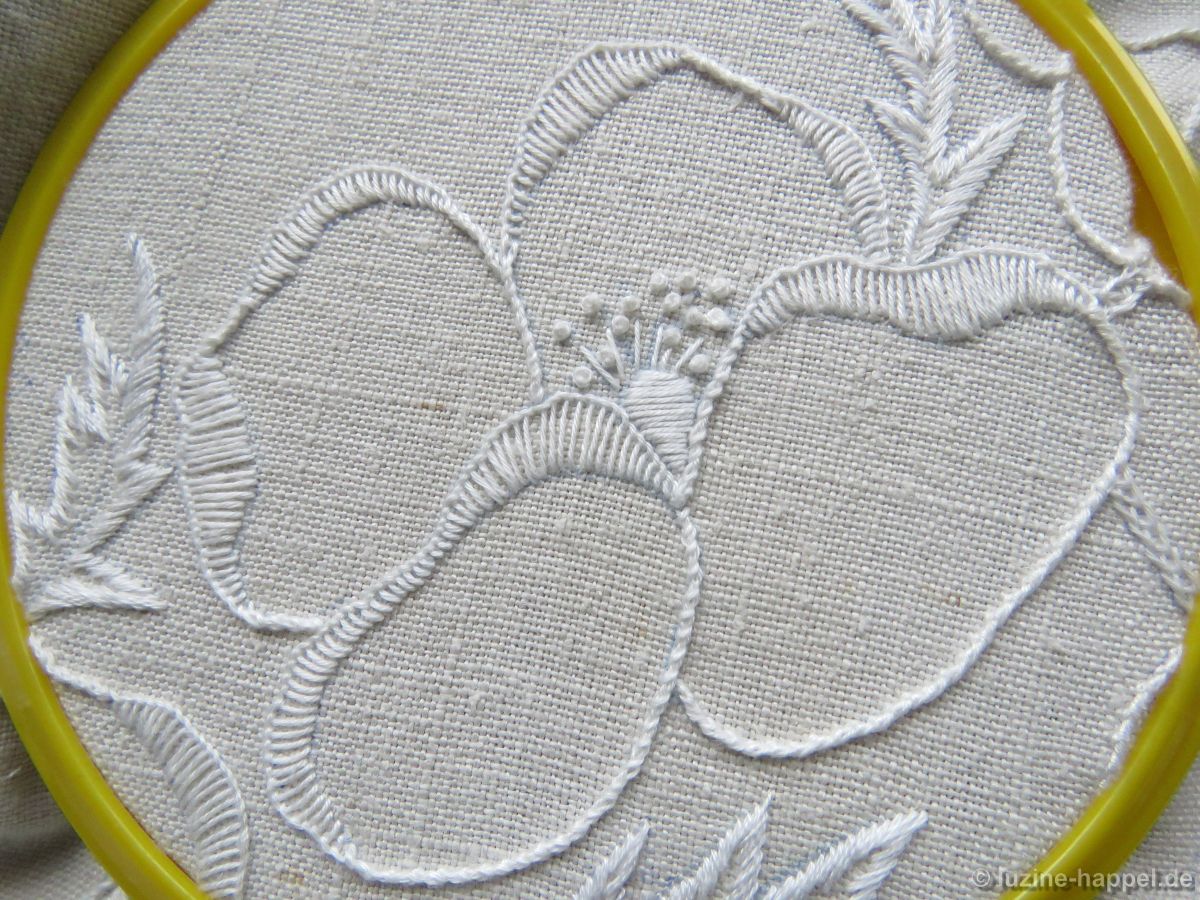
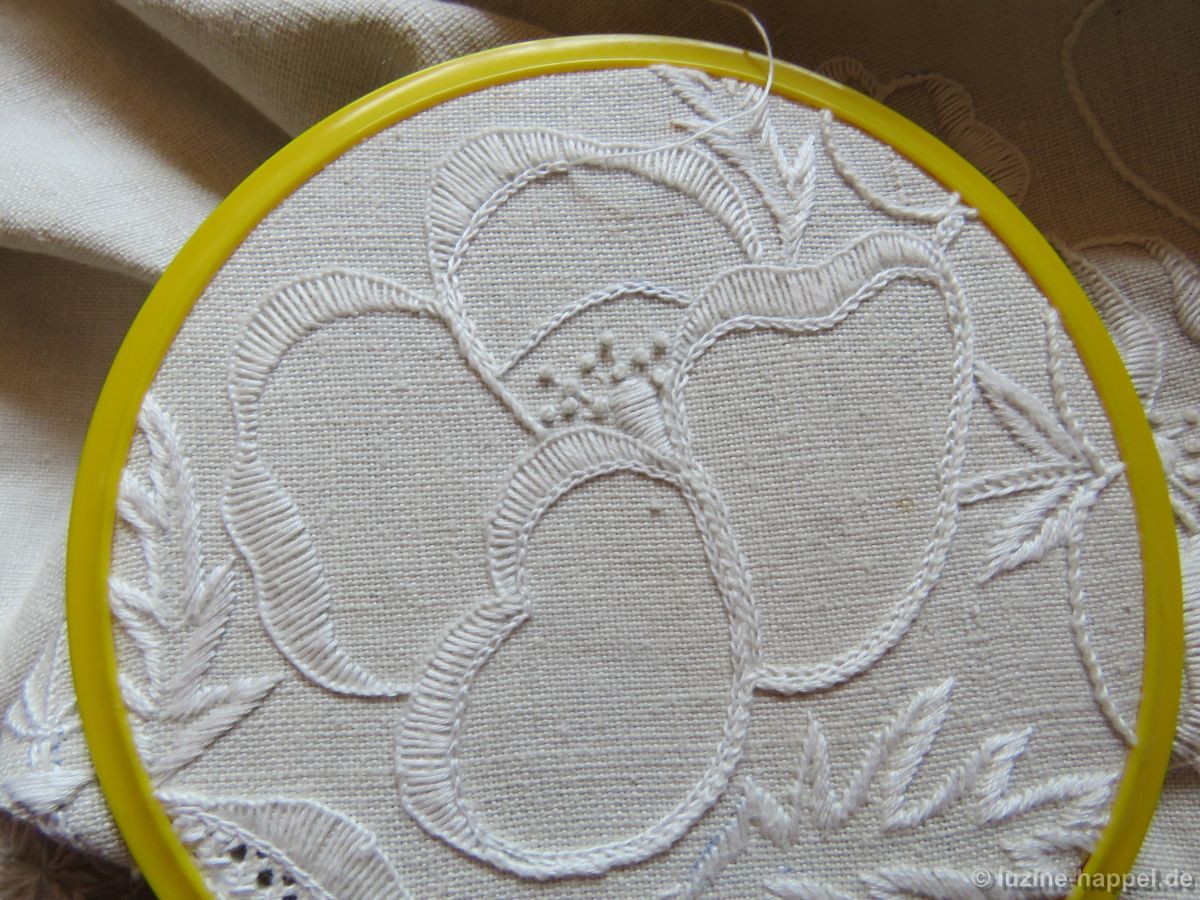
The petals of the open blossoms were embroidered with blanket stitches along the upper edges and with wrapped chain stitches along the remaining outlines.

The pistils were rendered using satin stitches, the filaments with straight stitches, and the anthers with thick French knots.

Initially, I had the idea of ​​embroidering only the petals—those without stamens—with area-filling patterns. However, that looked unfinished. A different solution was needed.

At an exhibition, I saw the completed piece by Ms. Waldmann, who had started translating her design into embroidery at the same time. She had executed several elements differently: coral knots outlining all the shapes, the loops of the chain stitches turned inward, eyelet stitches for the pistils, and bullion stitches for the stamens worked over the pattern filling the shapes.

A different solution had to be found for my project. So, I delineated the area of ​​the stamens

and embroidered only the remaining part of the petals with filling patterns.

All the petals of a single flower were embroidered with the same filling pattern, but each flower was given a different pattern.

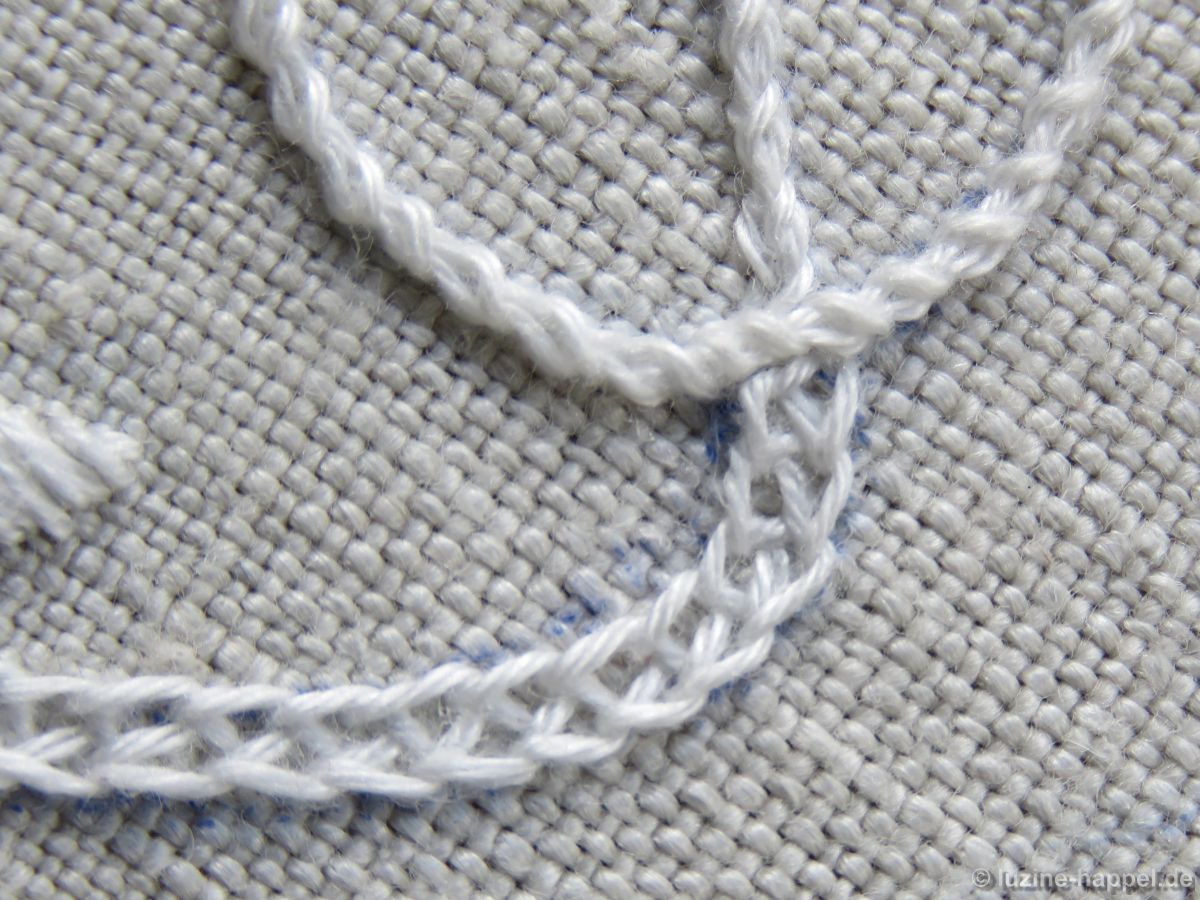
The stems were worked using crossed chain stitch.

The petals bursting from the buds were embroidered with satin stitches.

the sepals using wave stitches (simple thread withdrawing 3:1).

The next challenge was the design of the poppy capsules, and especially their lids.

Ms. Waldmann has embroidered the lids as satin-stitch blossoms and the capsules with alternating rows of coral knots and serpentine lines of herringbone stitch.

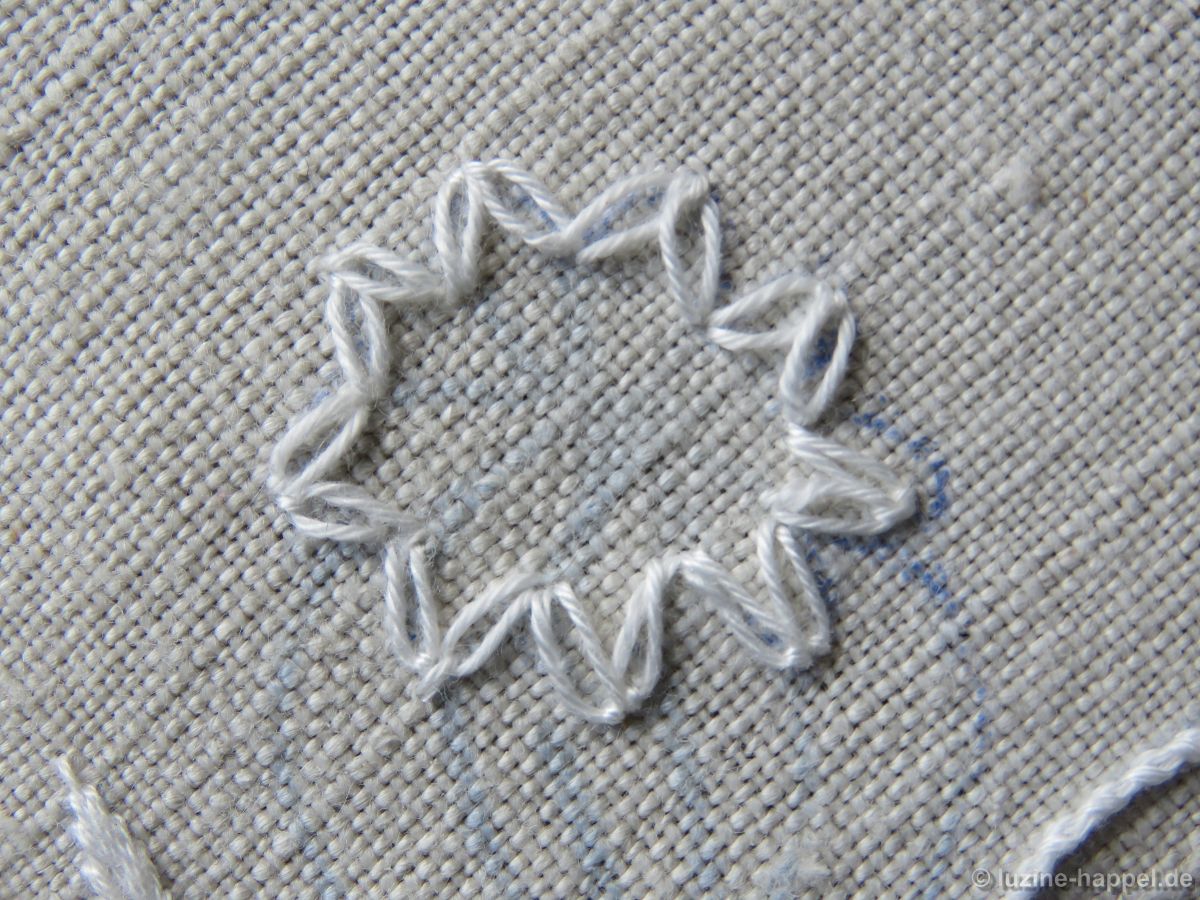
I first traced the edge of the capsule lid in a zigzag pattern using daisy stitches.

and then, working outwards from the center, arranged wide stem stitches in a star pattern, extending them to the points of the edge.

The seed pods were worked using coral knots—sometimes also wrapped chain stitches.

The edges of the leaves were embroidered with satin stitches.

The result is an unusual and attractive piece of embroidery.

You will find detailed images of the poppy wreath in a future blog post.

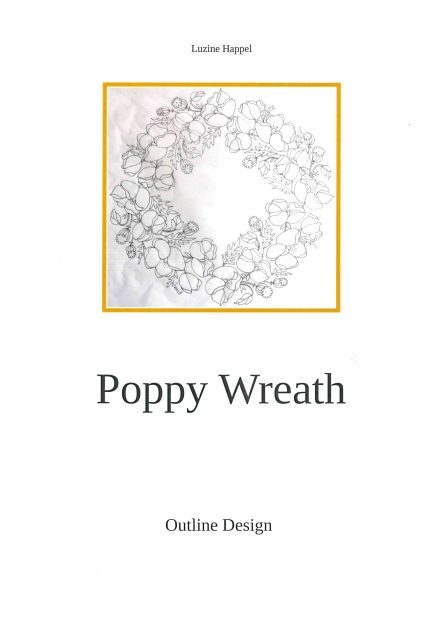
If you would like to embroider such a wreath, you can purchase the outline pattern here. The document contains the outline pattern in its original size, divided into 6 sections.


You can download this document.

Poppy Wreath
Outline Design
6 pages
Text: English
2,87 MB file size
19,00 €

Shop

Rooster and Hen

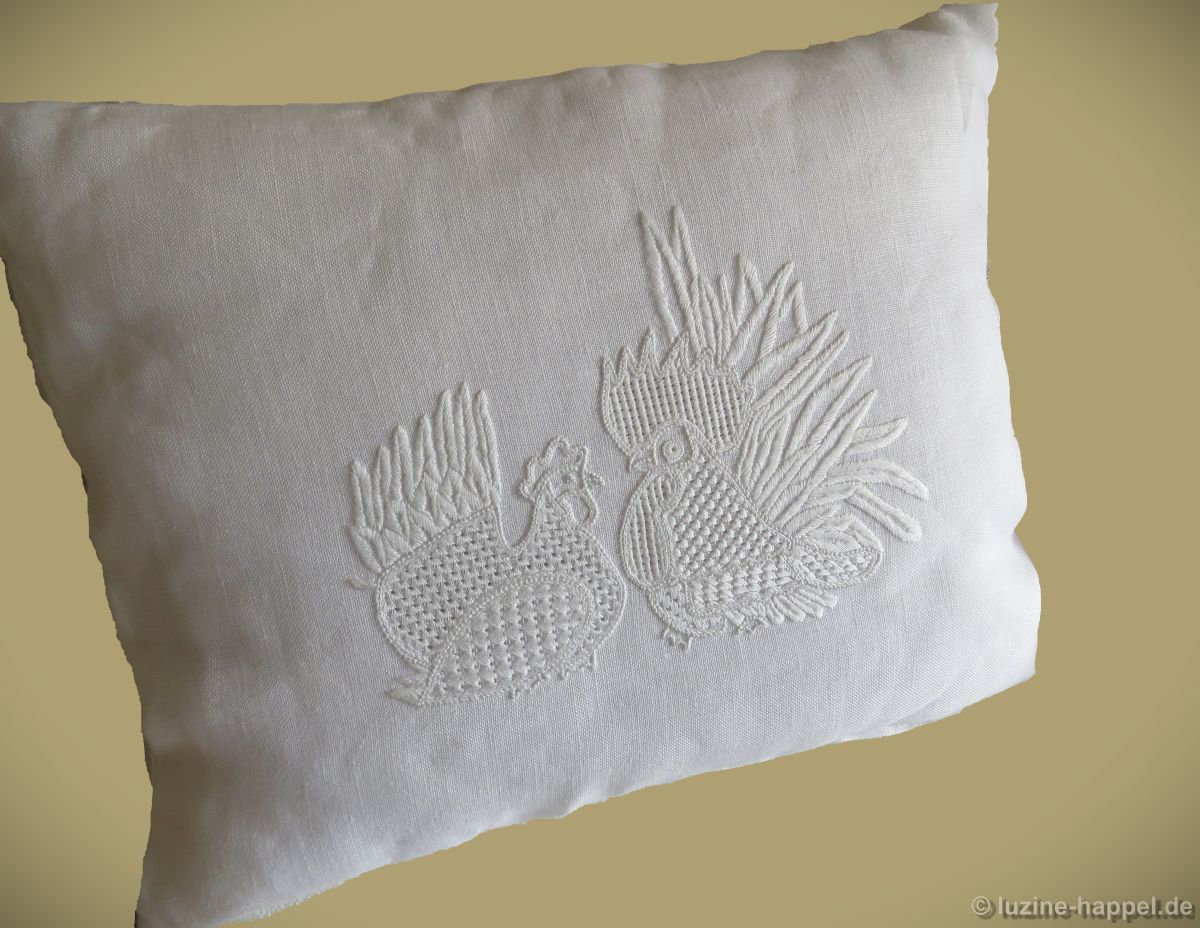
Easter is approaching, so I’ve been looking for a suitable motif. I’ve embroidered eggs and bunnies many times before. But roosters and hens are also a popular Easter theme. So here are these figures – perched on the ground in cozy togetherness.

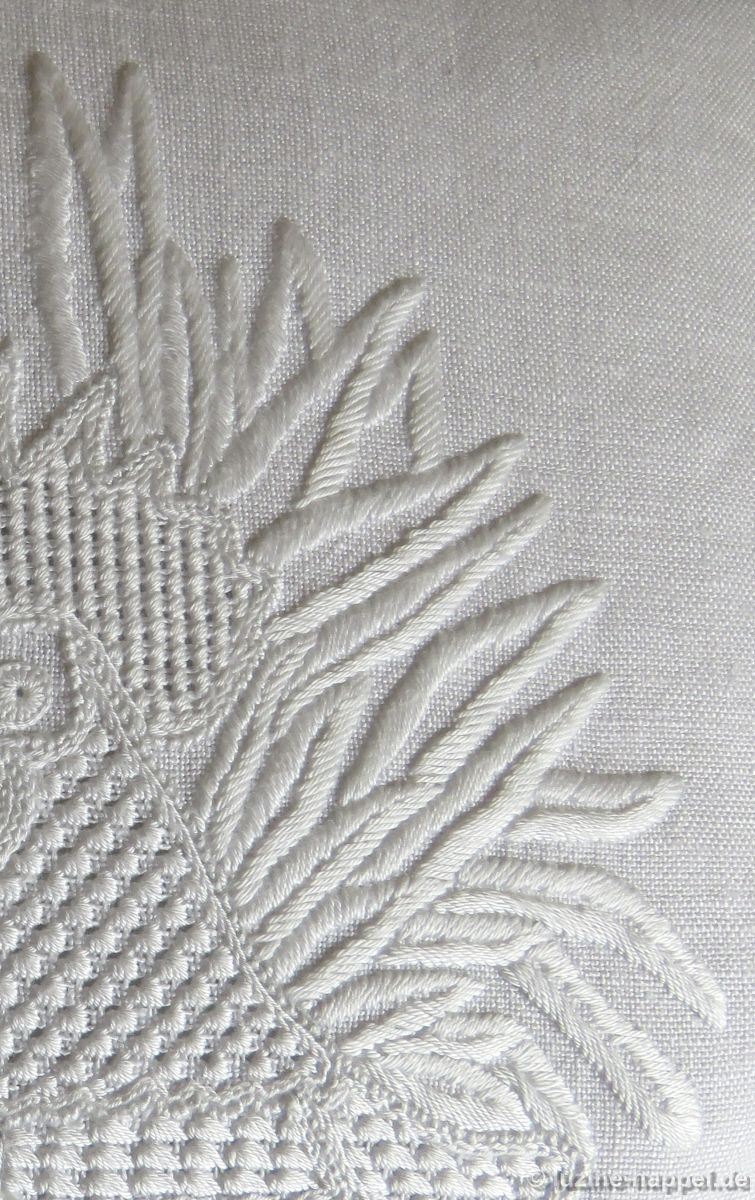
The rooster with its bushy and fluffy tail feathers

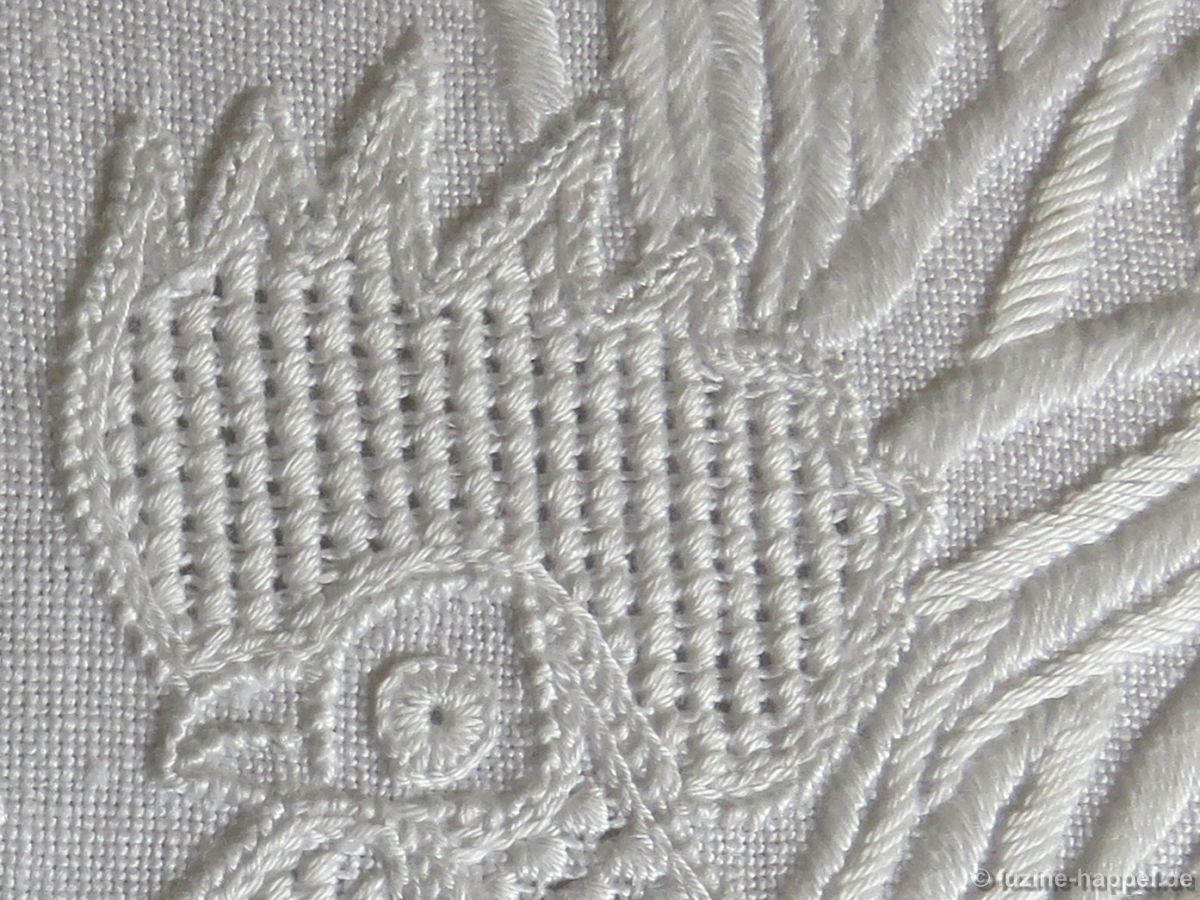
and its powerful comb and wattle

stands in stark contrast to the moderately shaped hen.

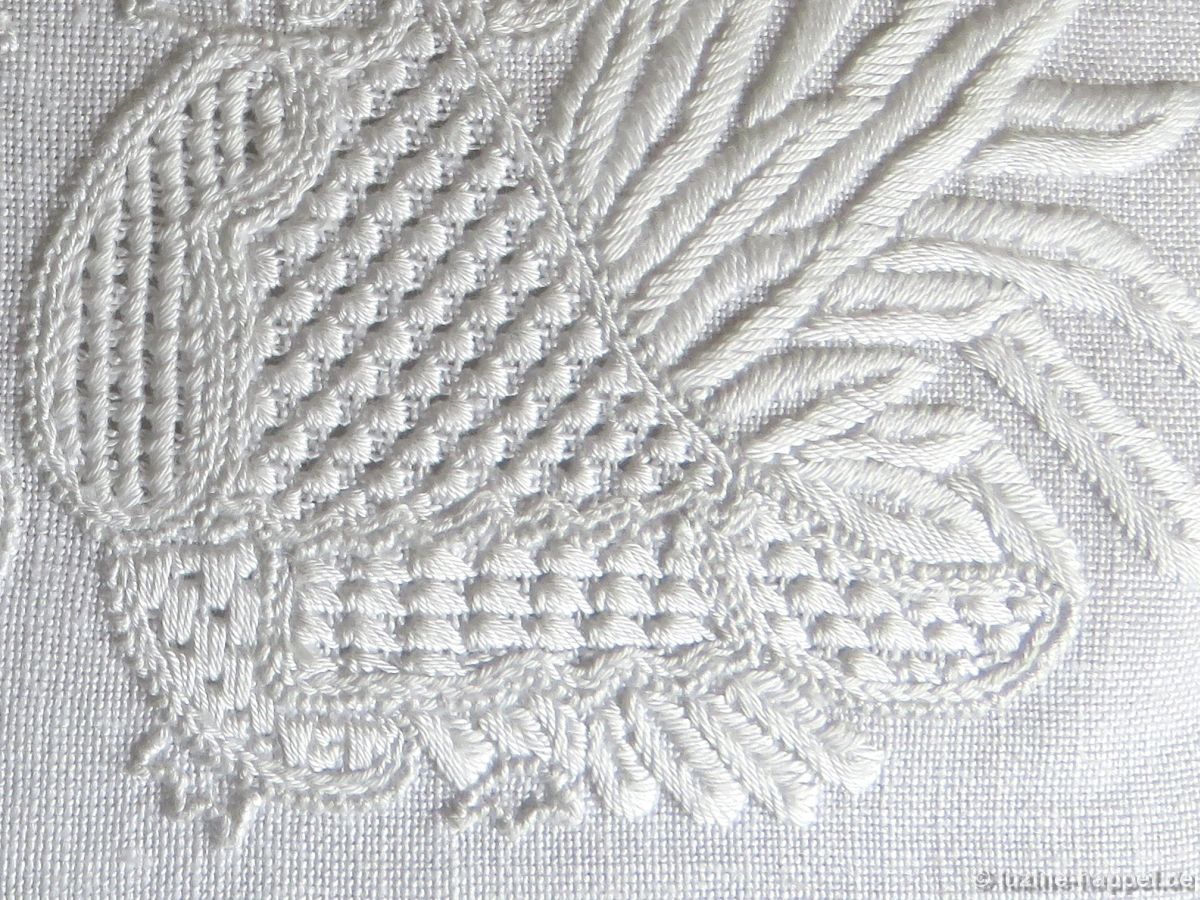
To match the striking outline design, all areas were embroidered with patterns from the books Limetrosen I and Limetrosen II. For example, the hen’s wing was decorated with the “Hare Ears” pattern (Limetrosen I, page 50) and her belly with the “Wave” pattern (Limetrosen I, page 17).

The rooster’s comb and wattles are decorated with the “Net” pattern (Limetrosen I, page 12). The neck received the “Plumage” pattern (Limetrosen I, page 15), the breast “Cascade” (Limetrosen II, page 20), the belly “Ribs to the Left” (Limetrosen II, page 9), and the wing “Feathering” (Limetrosen II, page 11).

I have this pattern on a cushion. I can also easily imagine it on a runner or a bag.

You can purchase the outline pattern (22,5 cm X 16 cm) from me as a hand-drawn PDF file for €3.00. If desired, I can also print the pattern on linen.

You can find many more ideas for Easter embroidery on my blog:
Bunnies between Daisies
Easter Greetings from Colette Bonnet
The Hare and the Hedgehog
Easter Eggs Embroidered with Schwalm Whitework Motifs (2)
Spring Greeting
Rabbits
Easter Egg 2019
A Very Special Easter Egg
Easter Decoration 2018
Embroidered Easter Egg Wreath
Hare Circle Dance
Coloured Easter Eggs
An Easter Egg Border
A Easter Egg
A Prize-Winning Easter Egg
Tablecloth for all Seasons – April: Easter Eggsr
Easter Eggs Embroidered with Schwalm Whitework Motifs

Chance Encounter

I occasionally browse through my extensive collection. And I made a delightful discovery.

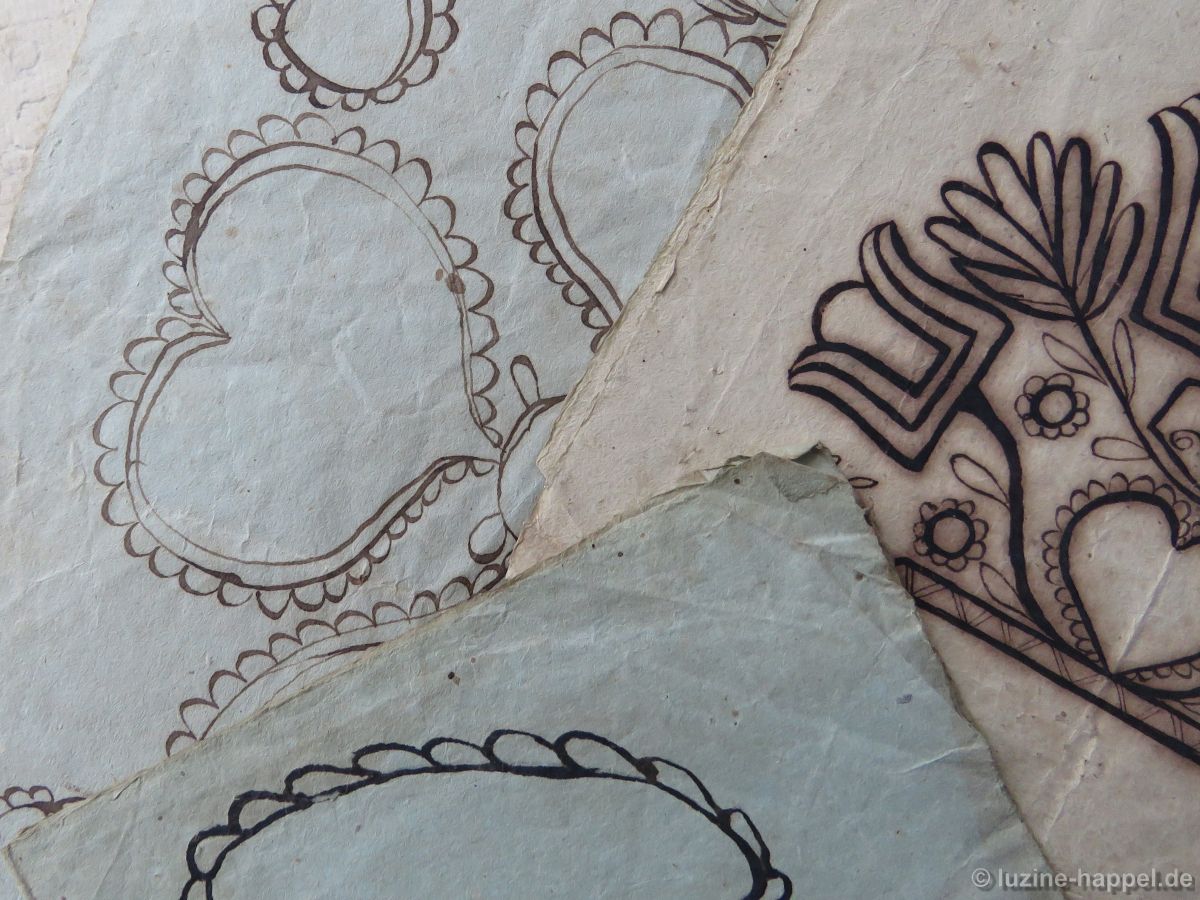
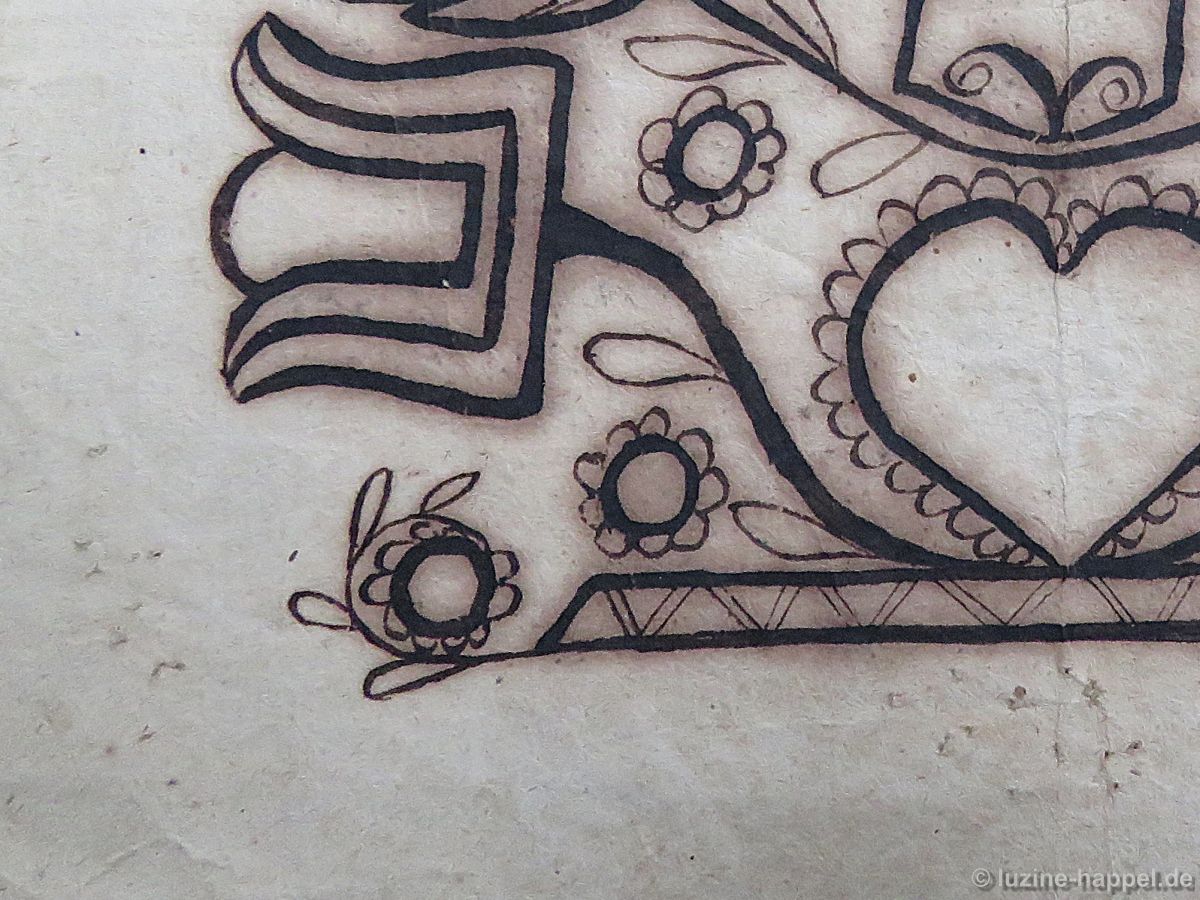
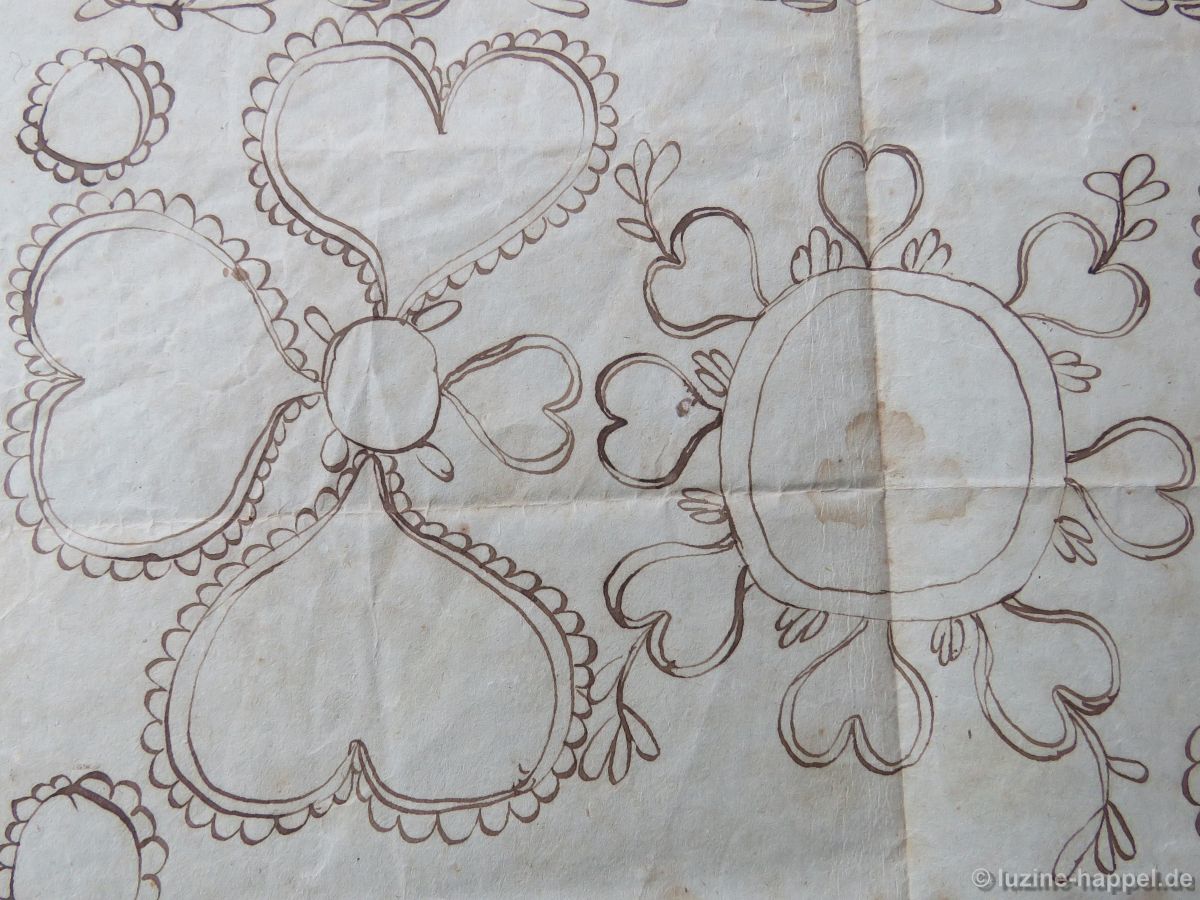
My collection includes very old outline patterns, all from the same source. Unfortunately, they are not dated, but based on similar dated patterns illustrated in Gandert/Miehe, p. 123, it can be concluded that they originated in the 1820s.

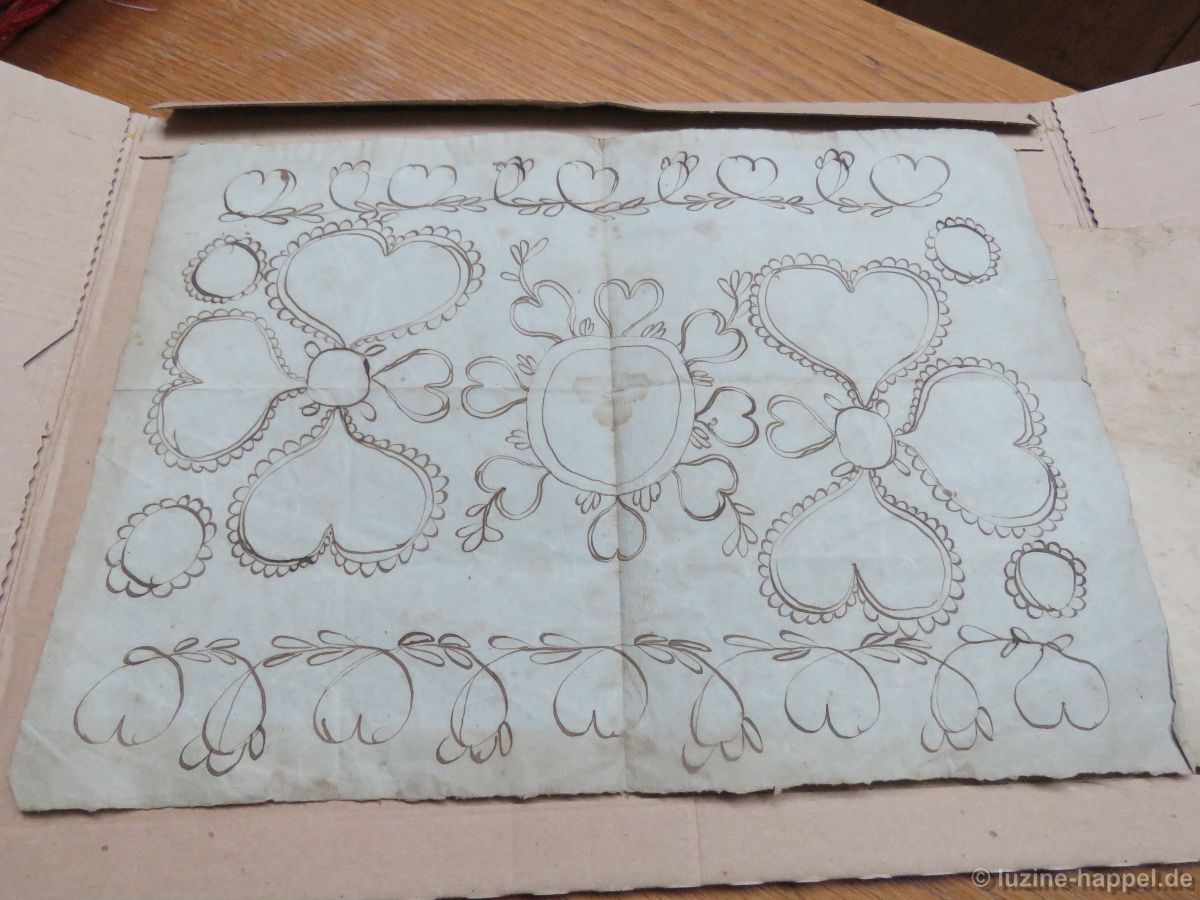
The design shown below are also among the samples.

(That it is only a sketch and not a final drawing can be seen from the undamaged paper. The final drawing samples contain many perforations because they were pinned to linen during the transfer process.)

The sketch has a central circle surrounded by eight hearts. Opposite these horizontally arranged hearts are hearts of the same size, spaced a short distance apart. These, in turn, are connected by a small circle around which three large hearts are grouped.

What could have been embroidered with such an outline pattern more than 200 years ago?

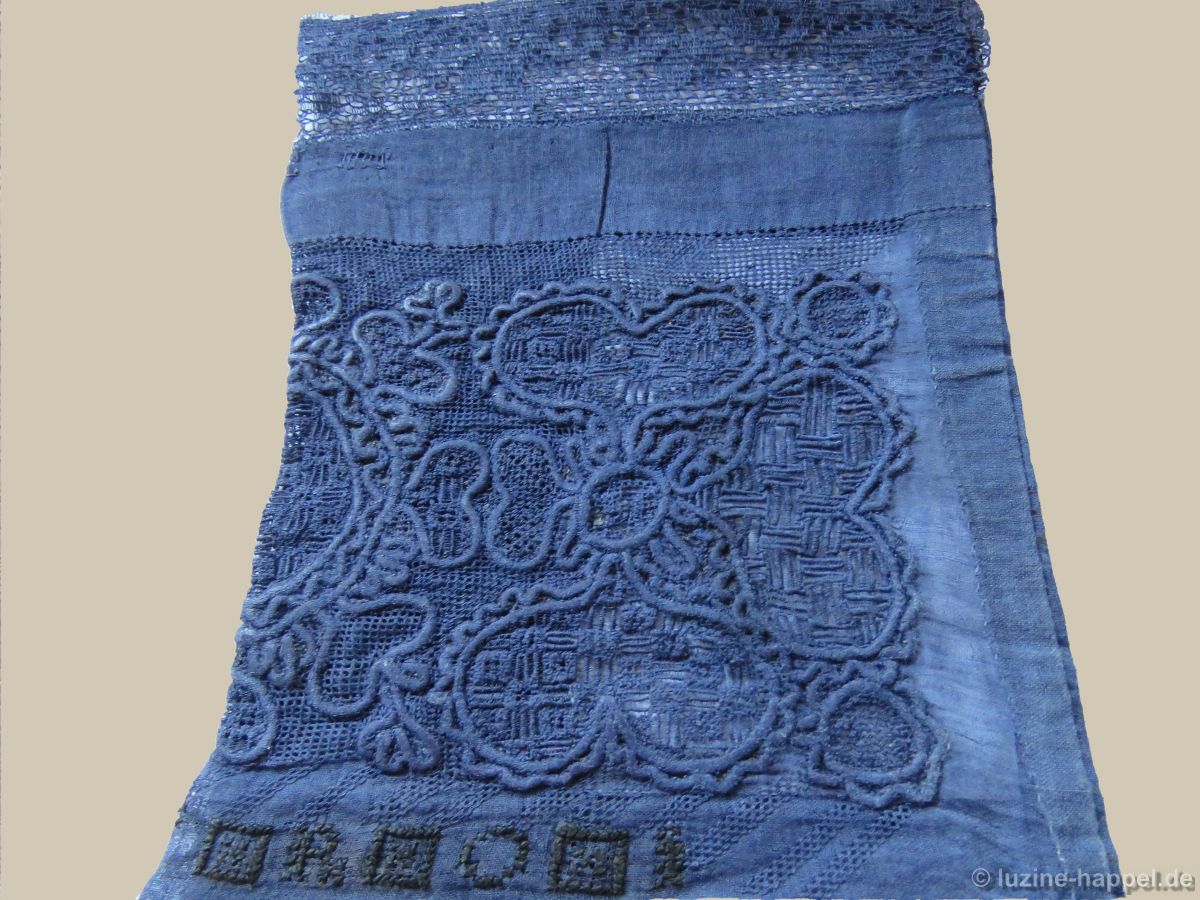
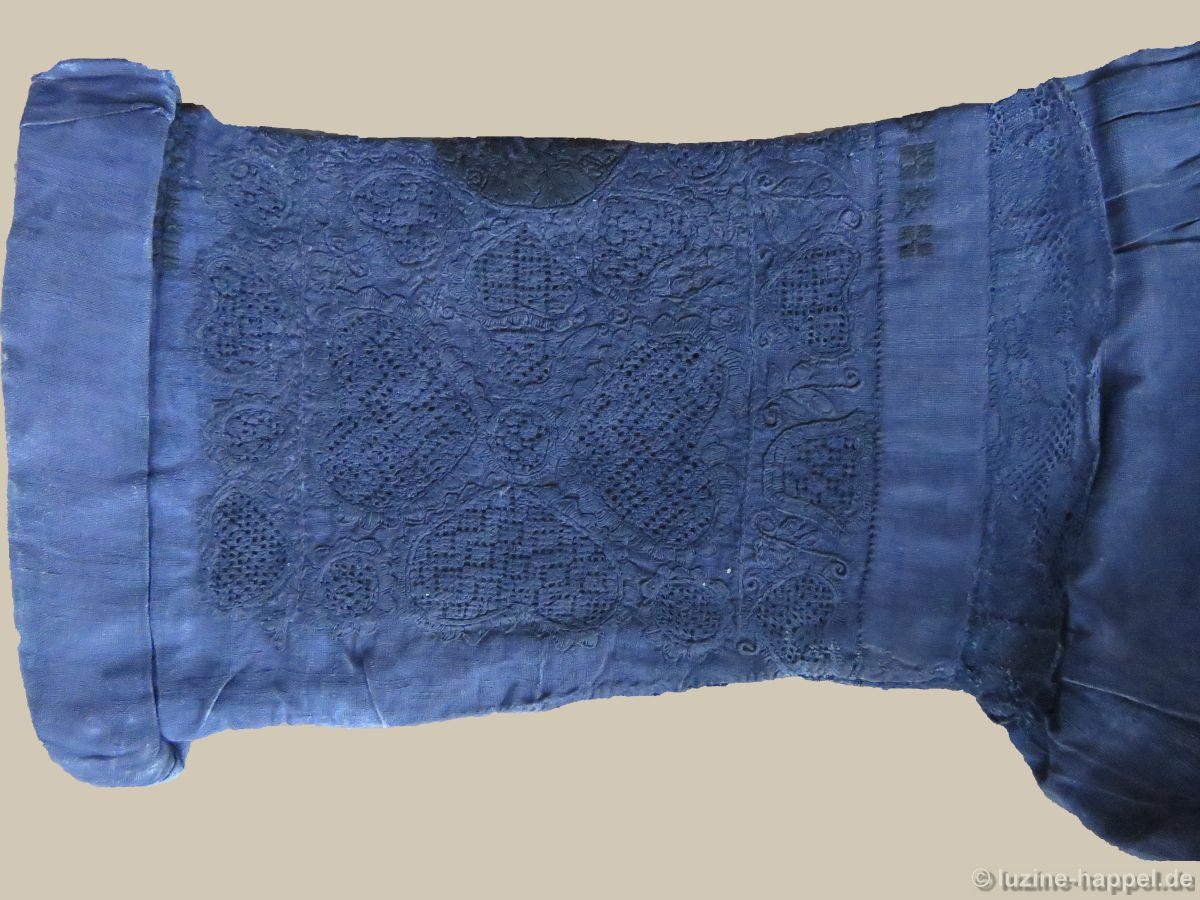
With the image of the pattern still in mind, I looked at parts of my bodice collection a short time later. I noticed the similarity in one piece – a Schwalm bodice sleeve in the style of Dresden lace.

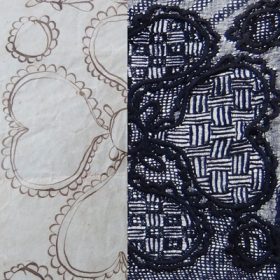
Upon closer inspection, I was able to determine that the border of the bodice sleeve is embroidered exactly according to the central part of the pattern.

I also found a match in a second piece – a blue bodice. Although the resemblance isn’t immediately obvious, it’s there nonetheless. Not only is the central border replicated, but the edge borders also show similarities.

What stages might the pieces have gone through in the past 200 years to now meet again at my place?

Now I will open the seam of each sleeve to capture the entire embroidery in a photograph. You can see this and examine it more closely in the next blog posts.

See also:
Traditional Schwalm Bodice (D) Embroidery
Schwalm Bodices (3)
Schwalm Bodices (2)
Schwalm Bodices (1)
The Filling Patterns of theTraditional Schwalm Bodice A
Traditional Schwalm Bodice (B) Embroidery
Traditional Schwalm Bodice (C) Embroidery

Winter Tree with Berry Bowl

The “Winter Tree with Berry Bowl” is a charming little seasonal motif. The design by artist Gudrun Hartwig leads from the bare autumn tree, through the fir branch-like arrangement with the star-shaped tip and other decorations, to the Christmas bird feeder.

All outlines were embroidered with slanting wide stem stitches (Early Schwalm Whitework, page 5). To emphasize the fir tree character, I chose a pattern from the book Limetrosen II (page 21).

In contrast to the dense and three-dimensional pattern, the star was first embroidered with the delicate rose stitch variant (see: Advent Calendar 2019 – No. 1 Images 3 – 5) and then covered with a spider web(Early Schwalm Whitework, page 61).

The little birds were decorated with chain and blanket stitches.

The titmouse ring was embroidered with individual chain stitches (= daisy stitches) (Early Schwalm Whitwork, page 79).

The apple was given a simple pattern with the “Close, 2-thread weaving” (Early Schwalm Whitework, page 19).

The berry bowl was filled in the lower section with “raised band stem stitch” (Early Schwalm Whitework, page 62). The edge was decorated with satin stitches.

The berries were embroidered as blanket stitch eyelets.

The “Winter Tree with Berry Bowl” also looks very appealing as a window decoration.

You can order the pattern as a PDF for €5. Slightly modified versions are also available, featuring a bird perched on the bowl instead of berries, a drawing showing only a feeding bowl, and a design showing a pecking bird instead of a berry bowl.

You can find more Christmas embroideries, designed by the artist Gudrun Hartwig, here:

Advent Calendar 2016 – No. 23 – “Tiny Fir Wreath”
Advent Calendar 2016 – No. 22 last image- „Hellebores and Star“
Fabulous Pictures in Whitework – “Mother Holle”
Adventskalender 2019 – “Christmas Wreath”
Advent Calendar 2019 – No. 24
Advent Calendar 2018 – No 6 “Garden Angel”
Advent Wreath with Balls

Merry Christmas and a Happy New Year!