
Mit einer Größe von 280 cm x 280 cm und unter Verwendung von 15 Stickgarnfarben ist innerhalb von 14 Jahren ein gestickter Quilt der Superlative entstanden.

Warum zeige ich auf meinem Blog, der sich hauptsächlich mit Schwälmer Weißstickerei beschäftigt, einen Quilt?
Damit zolle ich einer herausragenden Leistung Respekt und teile die Begeisterung an sehenswerten Handarbeiten mit anderen.
Nicht nur in der Schwalm war es früher üblich, Textilien reich mit Stickereien zu verzieren. Doch dort entstanden besonders prächtige und aufwändige Exemplare, wie man bei Besuchen der Museen in Ziegenhain und Holzburg unschwer erkennen kann.
Bettüberwürfe zum Beispiel waren Statussymbole. Man investierte sehr viel Zeit und Arbeit in die üppige und prunkvoll feine Stickerei. Man nutzte die Teile jahrzehntelang. Auch nachfolgende Generationen erfreuten sich an den luxuriösen Schätzen.
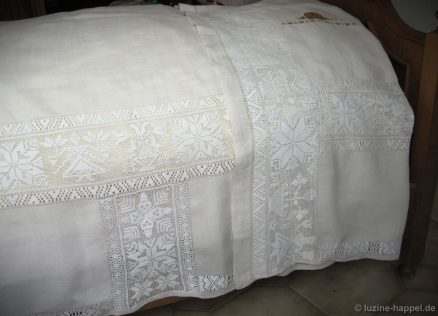
Schwälmer Bettüberwurf von 1876
Heute werden solch aufwändig handgearbeitete Stücke kaum noch hergestellt. Zu schnelllebig ist die Zeit, zu rasch ändert sich der Modegeschmack.
Noch nicht oft konnte ich daher über zeitgenössische voluminöse Stickereien berichten, die von einer einzelnen Stickerin gefertigt wurden.
Da ist das imposante, fabelhafte Mustertuch von Rosemarie Landsiedel-Eicken.
Da ist die außergewöhnliche Tagesdecke von Gertrude Vorwerk.
Da ist die traumhafte runde Schwälmer Tischdecke von brubi.
Da ist mein großes Mustertuch, das ursprünglich als Tagesdecke gedacht war und jetzt als Wandbehang fungiert.
Da ist der handgesteppte Boutis von Heather Harteneck.
Und da ist der handbestickte und hand-gequiltete Bettüberwurf für ein Kinderbett von Waltraud Kater aus Wagga Wagga in Australien.
Als ich diesen Quilt in 2017 vorgestellt habe, konnte ich auch ein Bild ihres in Arbeit befindlichen großen Bettüberwurfes zeigen.
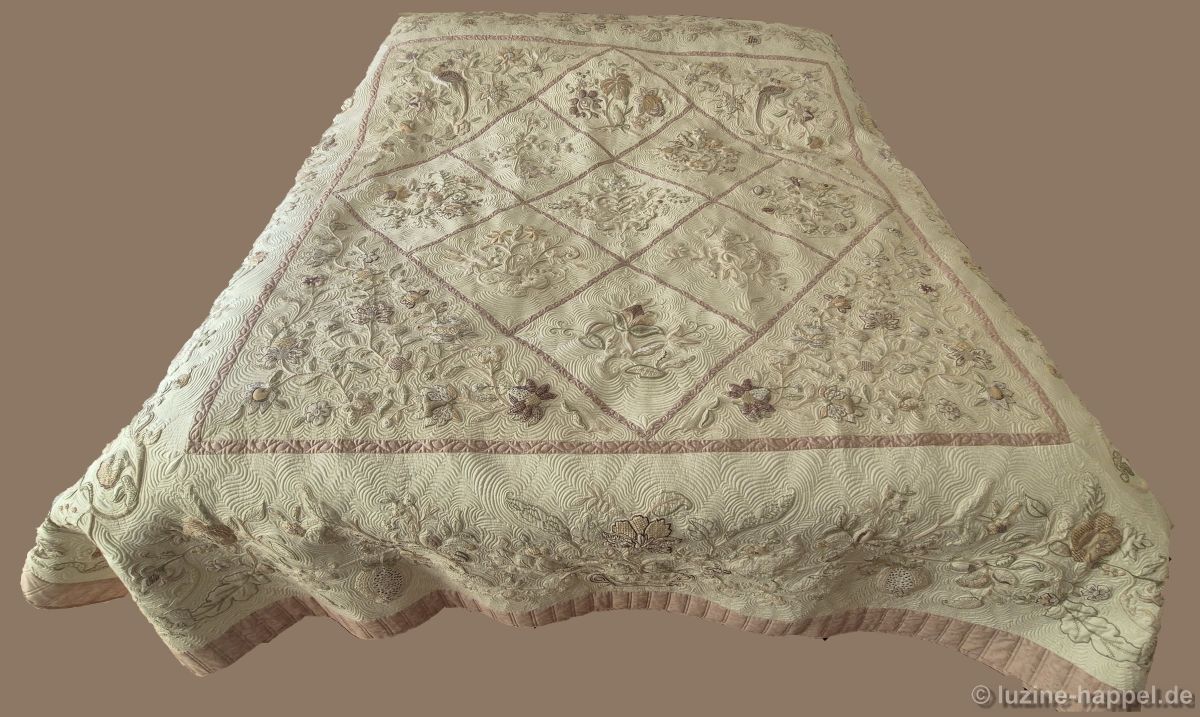
Nun ist ihr Traum von einem Quilt als Tagesdecke für das Doppelbett in Erfüllung gegangen – das Meisterwerk ist vollendet und wir dürfen einen Blick darauf werfen!
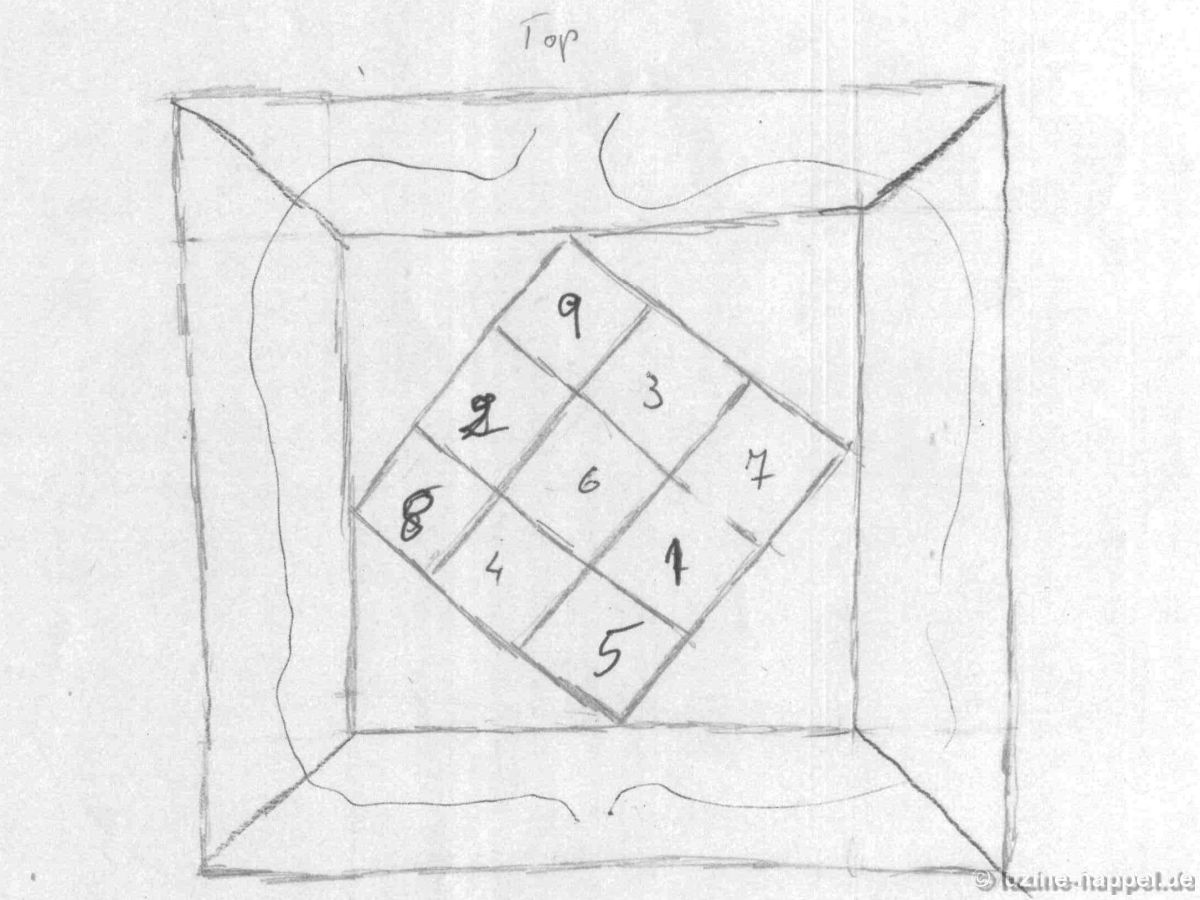
Begonnen hat sie damit im Jahr 2011. Sie fertigte eine grobe Skizze, in der sie festhielt, wie das Traumprojekt zusammengefügt werden sollte.
Da Waltraud damals keinerlei Erfahrung im Sticken hatte, hat sie zunächst einen Kursus belegt, um die erforderlichen Grundlagen zu erlernen. Dort stickte sie das erste Quadrat in der Größe von 30 cm x 30 cm.
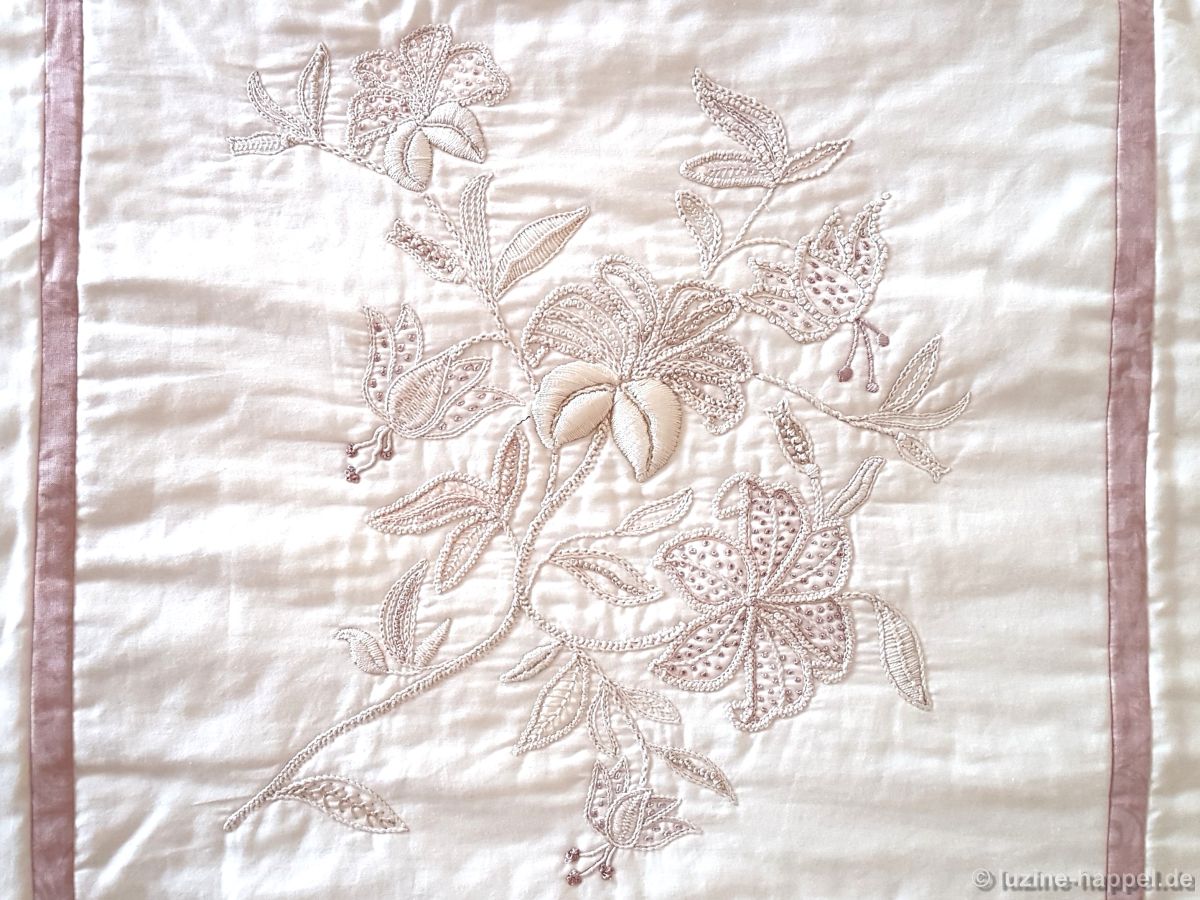
Block 1
Acht weitere Quadrate dieser Größe sollten folgen.

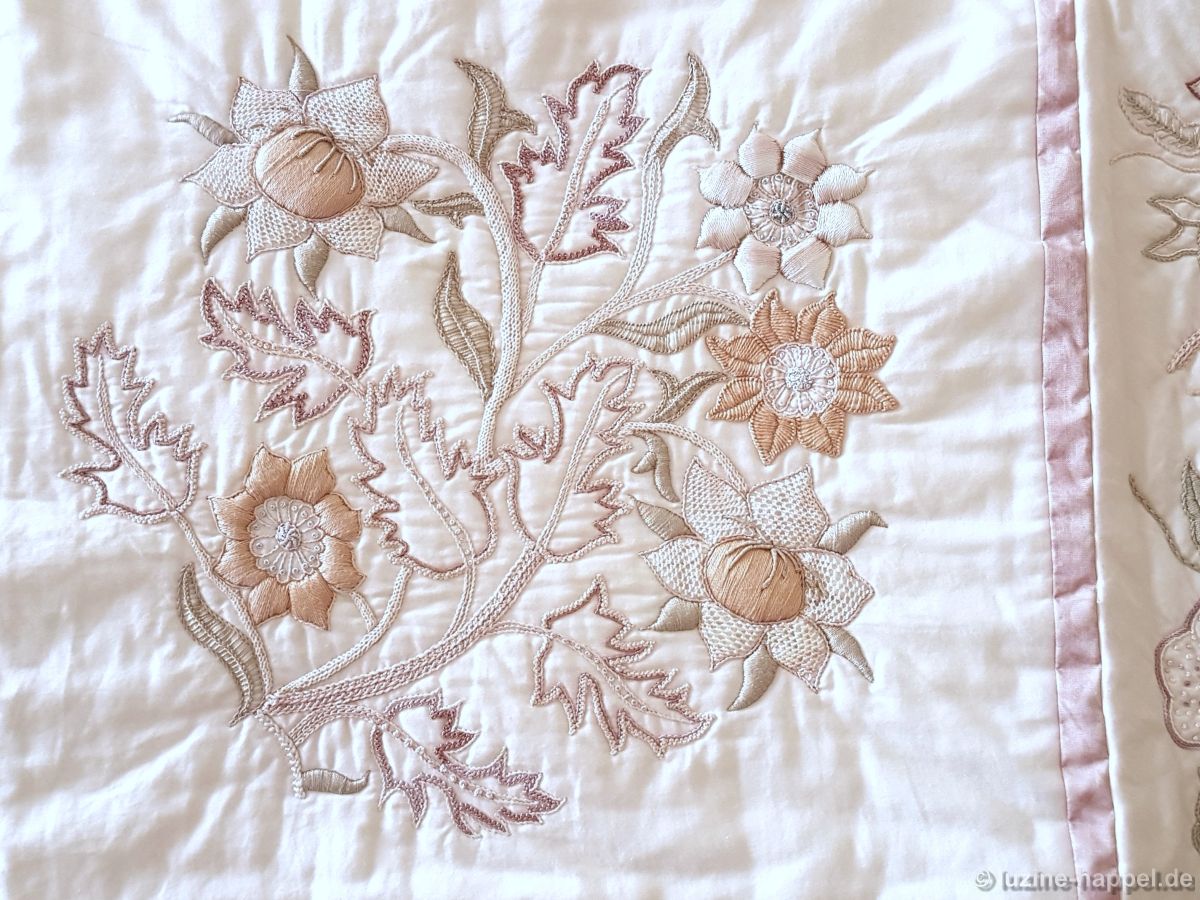
Block 2
Sie bildete sich fort und eignete sich weitere Stiche und Füllmuster durch Literatur selbständig an.
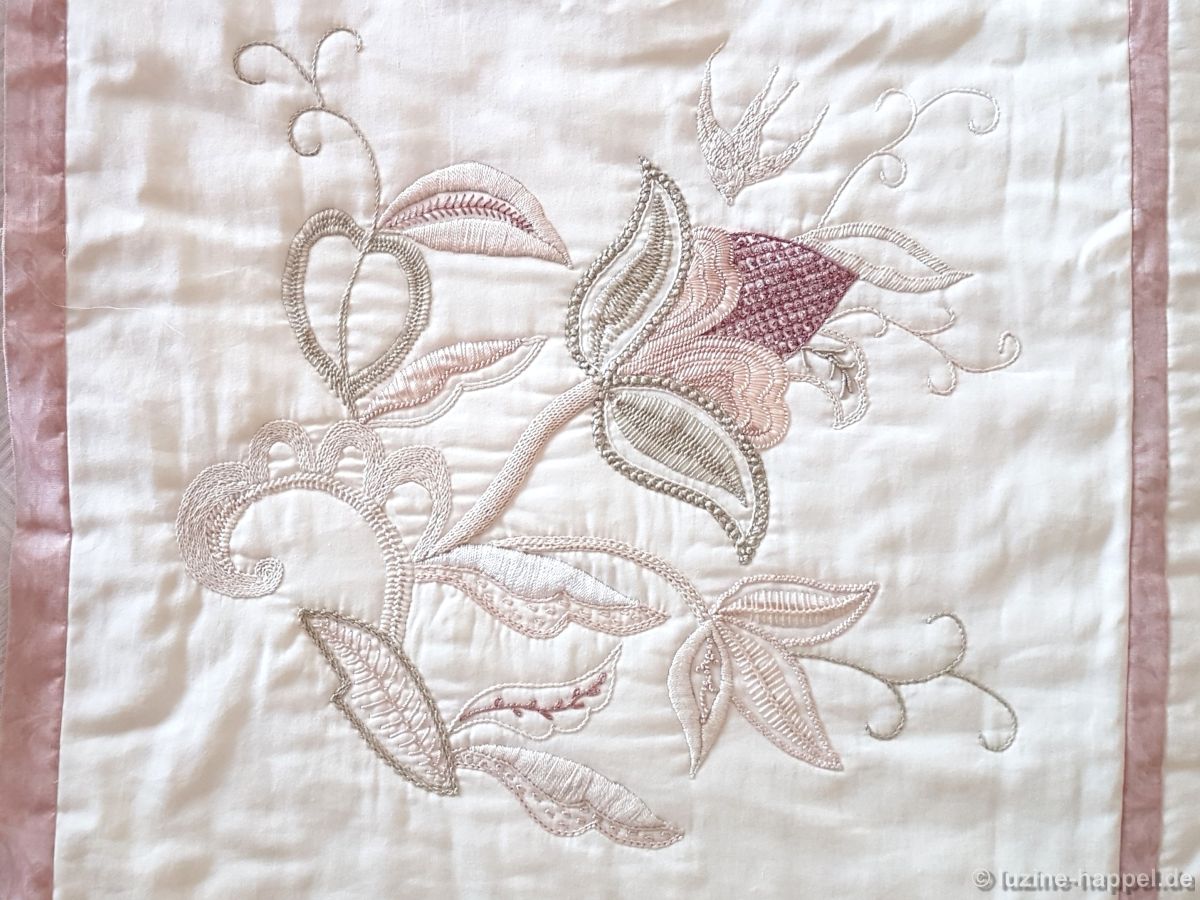
Block 3
Die Entwürfe für ihren Quilt sind aus vielen Büchern und Magazinen, von Fotos und auch Perser-Teppichen entnommen worden.

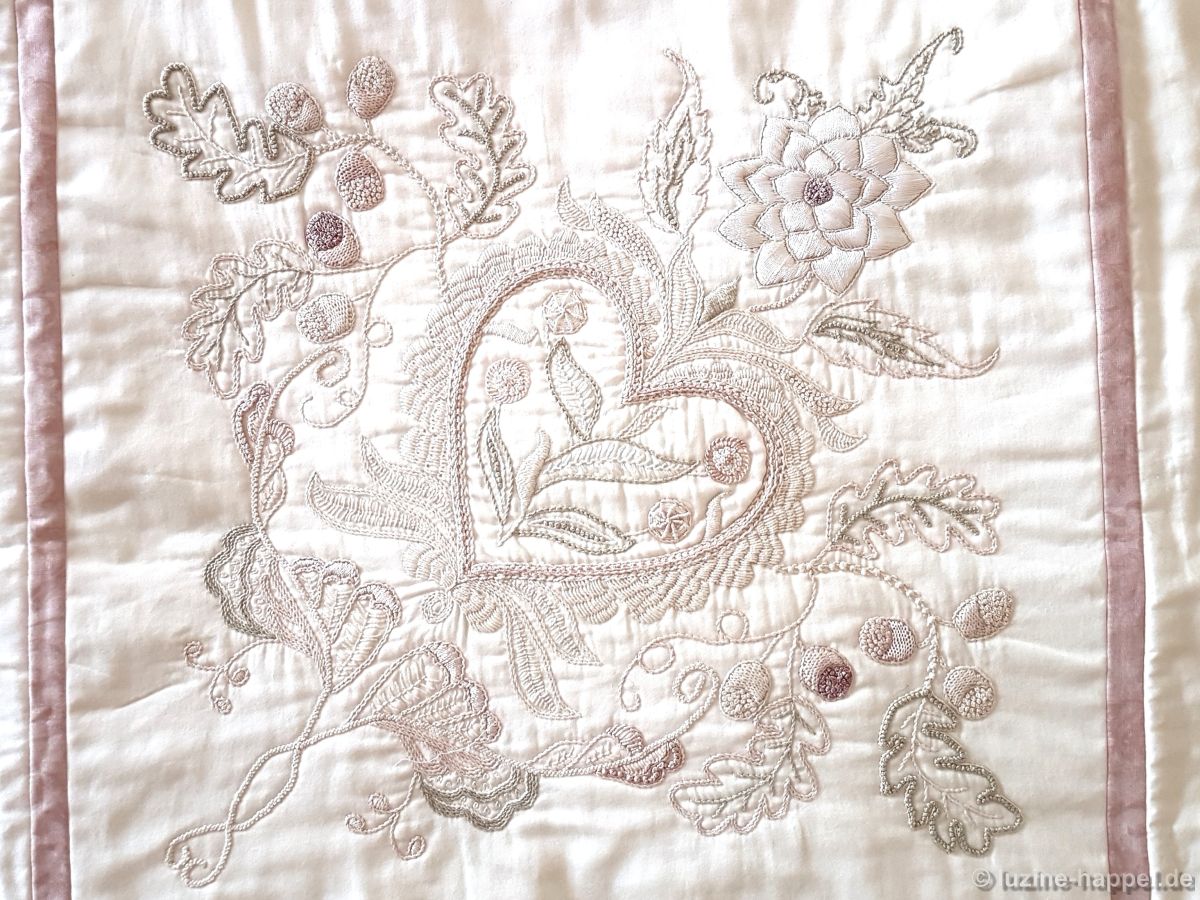
Block 4
Block 5
Block 6
Block 7

Block 8
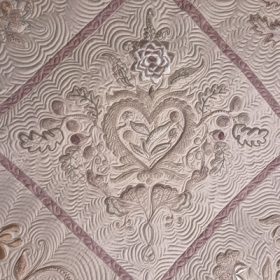
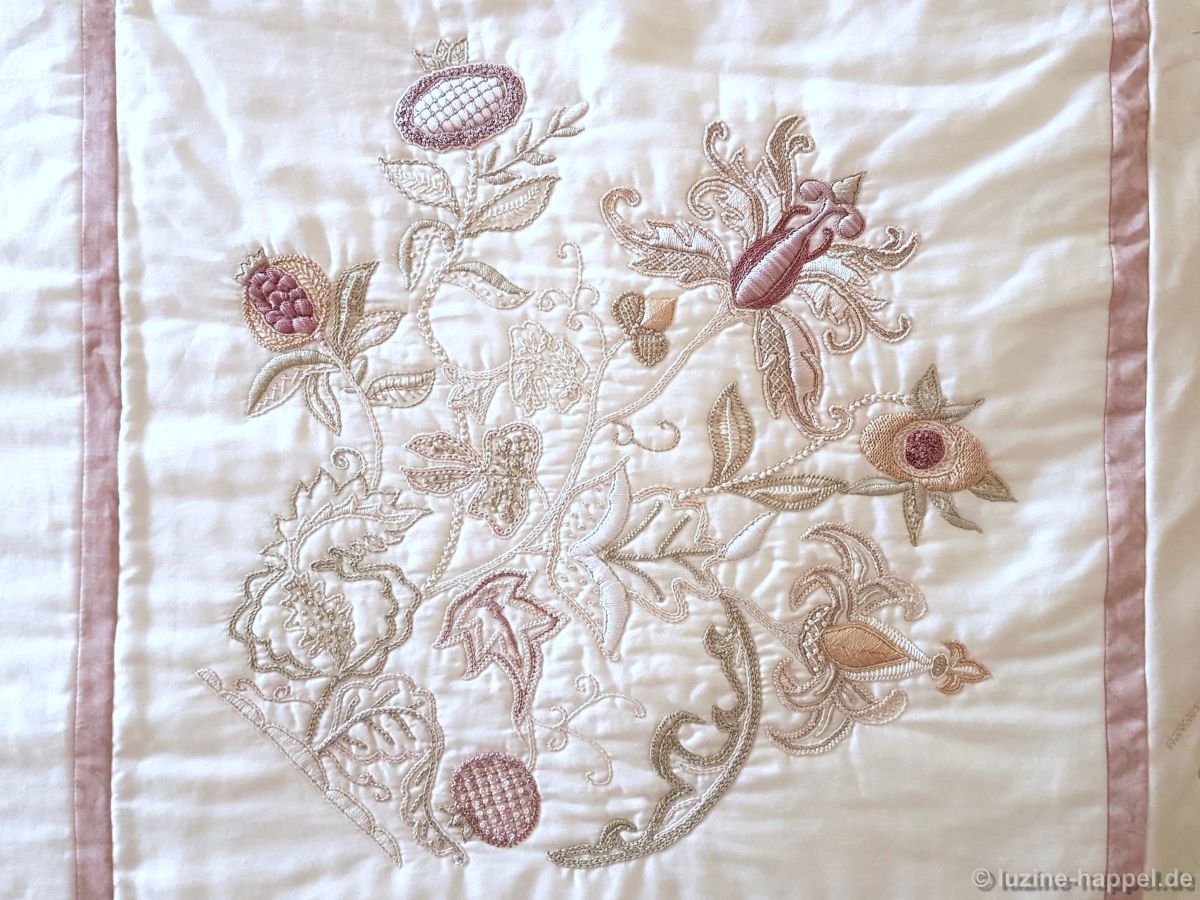
Die ersten Bilder erreichten mich 2012. Damals hatte sie das Mittelteil von der Tagesdecke für das Bett gerade fertiggestellt. Sie hat ein Muster aus einem meiner Bücher verwendet. Dabei hat sich der Stoff unter dem Muster gewölbt. Nach Abhilfe suchend, hat sie den Stoff an dieser Stelle von der Rückseite aufgeschlitzt und unterfüttert.
Block 9
Dadurch hoben sich die Blütenblätter (weinrot) plastisch ab. Diese eigentlich aus der Not geborene Technik hat sie an exponierten Stellen immer mal wieder effizient eingesetzt.

Bei der Erstellung der Muster bzw. Formen hat sich Waltraud extrem viel Mühe gemacht. Sie ist durch viele Bücher und andere Quellen gegangen. Auf der Suche nach interessanten Stichkombinationen und Füllungen halfen die folgenden Bücher:
Mountmellick Embroidery – Yette Stanton & Prue Scott
Crewel Jacobean Embroidery – Hazel Blomkamp
A Fine Tradition – Margaret Light
Early Schwalm Whitework – Luzine Happel
Auch Konturen von Deko-Stoffen und Orient-Teppichen dienten als Denkanstoß.
Sie hat jede Menge Anregungen gesammelt und dann alle Blöcke, Dreiecke und Borten nacheinander entwickelt. Dazu hat sie die Muster aus den verschiedenen Quellen mit Bleistift auf Transparentpapier kopiert und wenn nötig mit Scanner und PC auf die gewünschte Größe gebracht. Diese Vorlagen wurden zusammengeklebt, um einen 1:1 Modellentwurf für die Bettdecke zu erstellen.
Danach wurden Transparent- oder Seidenpapier und der Stoff für die einzelnen Teile des Quilts zugeschnitten und mit endgültigen Begrenzungslinien (Kanten) versehen, damit die Stoffteile später genau ausgerichtet werden konnten.
Auf die Papierzuschnitte wurden alle Konturen akkurat von den Vorlagen nachgezeichnet. Dann hat sie ihre Vorstellung von Füllmustern in die Konturen skizziert.
Das folgende Beispiel zeigt einen Teil des oben gestickt zu sehenden Blocks.

Auf diesem Weg sind auch die 3 m langen Borten entstanden, d.h. die Vorlagen sind in einem Stück 3 m lang und 50 cm breit geworden. Als vorletzter Schritt wurde die Vorlage auf den Lichtkasten gelegt und darauf der zugeschnittene Stoff. Der letzte Schritt war dann „nur noch“ das Durchzeichnen der Muster mit einem Pilot Frixion Ball auf den Stoff, denn die so entstandenen Linien können am Schluss mit Hitze (Bügeleisen oder Föhn) entfernt werden.
Die neun Quadrate des Mittelteils sind mittels schmaler altrosa-farbener Streifen zusammengesetzt, wodurch der Rhombus eine Seitenlänge von 110 cm erhielt.
Der Mittelrhombus ist von vier Dreiecken umgeben. Jeweils zwei von ihnen zeigen spiegelbildlich die gleichen Muster.
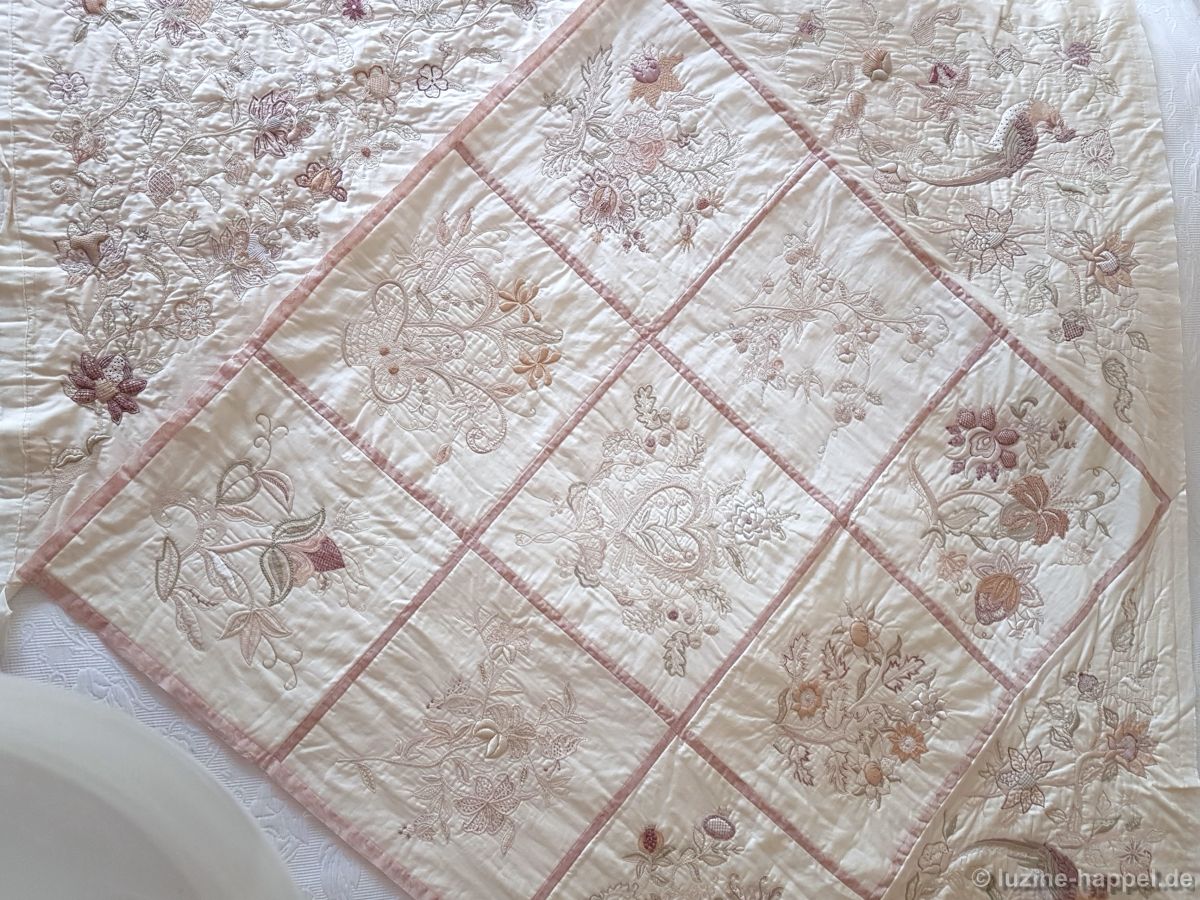
Die Dreiecke sind durch etwas breitere Streifen mit dem Rhombus verbunden.

Am Schluss sehen die unteren Dreiecke so

und die oberen Dreiecke so aus:

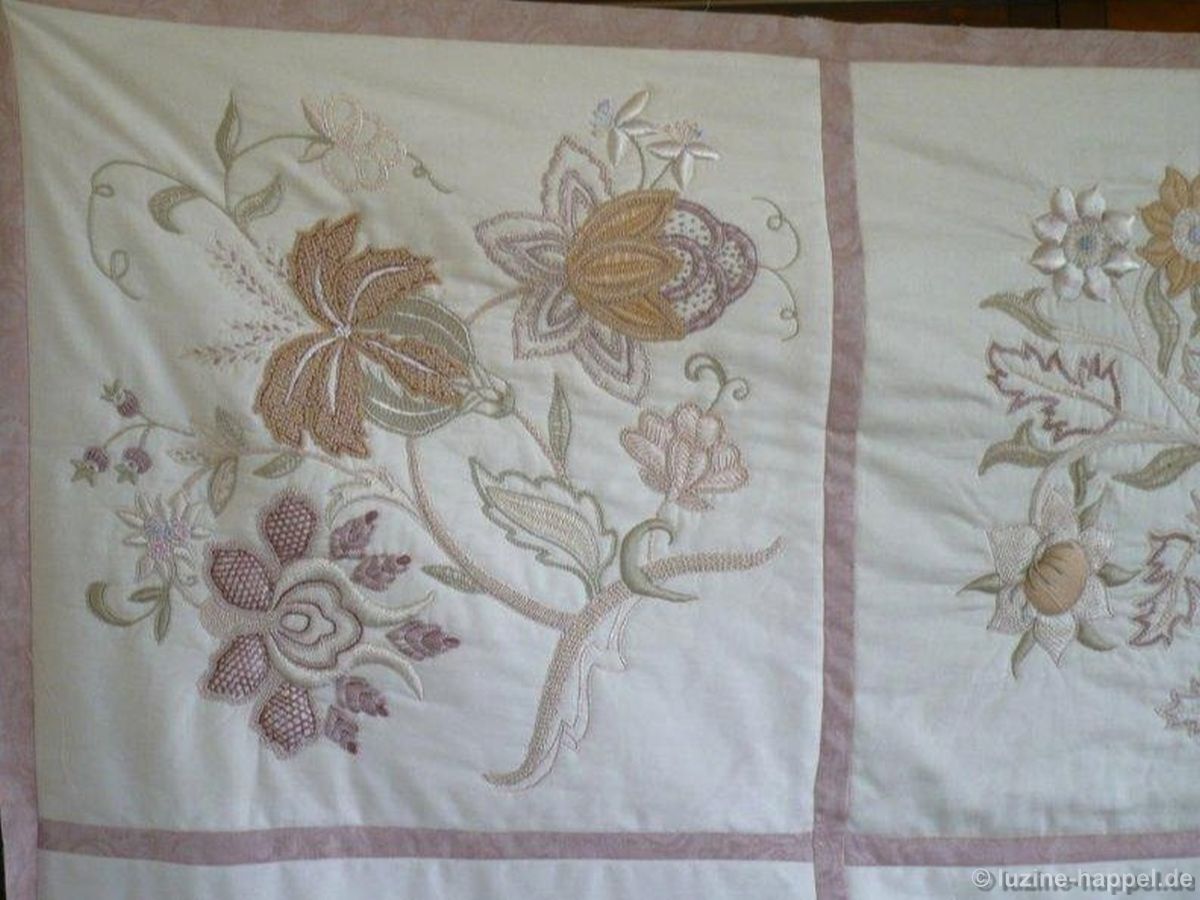
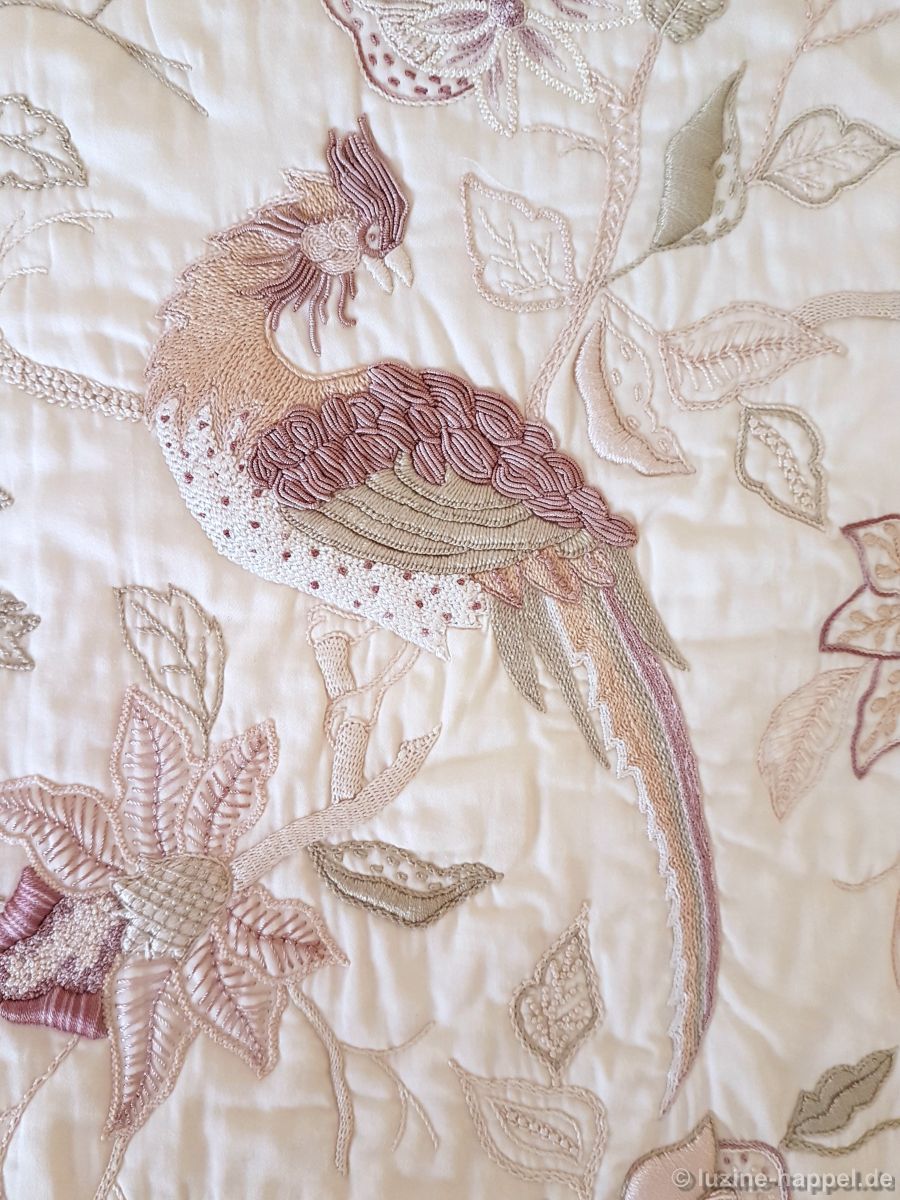
Ein paar Detailbilder lassen Einzelheiten erkennen und zeigen die Vielfalt der verwendeten Stiche. (Wenn man auf die Bilder klickt, erscheinen sie vergrößert.)


Die Fortsetzung folgt im nächsten Beitrag.

Luzine, wat prachtig en zoveel werk, het resultaat mag er zijn. Om trots op te zijn voor dit familiestuk.
Gerry, danke für die anerkennenden Worte über meinen Quilt, den Luzine so hervorragend in ihrem blog präsentiert hat.
Gerry, thank you for the appreciative words about my quilt, which Luzine presented so excellently in her blog.
Just a beautiful piece! A real Beauty!